
Create successful ePaper yourself
Turn your PDF publications into a flip-book with our unique Google optimized e-Paper software.
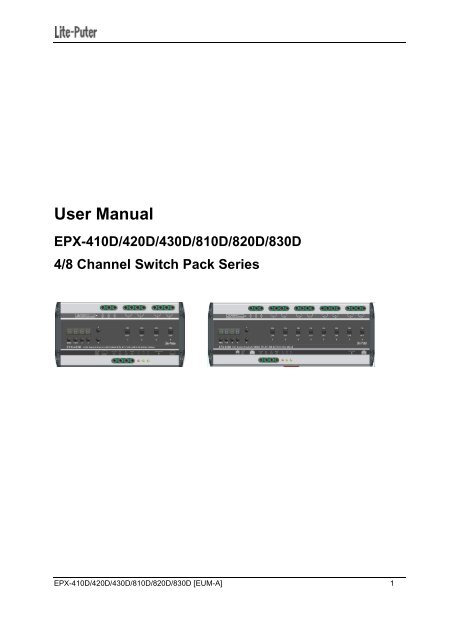
<strong>User</strong> <strong>Manual</strong><br />
EPX-410D/420D/430D/810D/820D/830D<br />
4/8 Channel Switch Pack Series<br />
EPX-410D/420D/430D/810D/820D/830D [EUM-A] 1
Index<br />
1 Before Installation .................................................................................................................................... 3<br />
2 Introductions ............................................................................................................................................ 3<br />
2-1 Features ........................................................................................................................................ 3<br />
2-2 Specifications ................................................................................................................................ 3<br />
2-3 Dimensions ................................................................................................................................... 4<br />
2-4 Functions ....................................................................................................................................... 5<br />
2-5 Wiring Diagram (One Channel) ..................................................................................................... 6<br />
3 Operations ............................................................................................................................................... 7<br />
3-1 Initialization ................................................................................................................................... 7<br />
3-2 DMX Address Setting .................................................................................................................... 7<br />
3-3 Channel Output Status .................................................................................................................. 7<br />
3-4 DMX IN Setting ............................................................................................................................. 8<br />
3-5 Delay Time Setting ........................................................................................................................ 8<br />
3-6 Channel Mode Setting .................................................................................................................. 8<br />
3-7 Channel’s Switching-on Level Setting ........................................................................................... 9<br />
3-8 Software Version Check ................................................................................................................ 9<br />
4 EDX Systems ........................................................................................................................................ 10<br />
4-0 EDX Mode ................................................................................................................................... 10<br />
4-1 ID Number Setting....................................................................................................................... 12<br />
3-2 Zone Number Setting .................................................................................................................. 12<br />
4-3 Scene Save and Recall ............................................................................................................... 13<br />
4-4 Primary/Secondary Scene and Scene Overlap ON/OFF ........................................................... 14<br />
4-5 Partition Setting ........................................................................................................................... 15<br />
4-5-1 Enable/Disable Partition Function .................................................................................... 16<br />
4-5-2 Partition Setting ................................................................................................................ 16<br />
Limited Warranty ....................................................................................................................................... 17<br />
EPX-410D/420D/430D/810D/820D/830D [EUM-A] 2
1 Before Installation<br />
1. Working environment:<br />
Temperature: 0°C - 40°C; Humidity: 20% - 80%<br />
2. Please check EDX wiring guide on <strong>Lite</strong>-<strong>Puter</strong>’s website:<br />
http://www.liteputer.com.tw/tech_guide.asp<br />
2 Introductions<br />
2-1 Features<br />
EDX and DMX-512.<br />
Din-rail mounted.<br />
4-channel dry contact for EPX-410D/ 420D/ 430D<br />
8-channel dry contact for EPX-810D/ 820D/ 830D.<br />
Each channel can be manually switched on/off individually.<br />
Fade time of each scene can be set.<br />
Up to 99 zones.<br />
Delay time setting (0.1S - 10S) for each channel to avoid current surge.<br />
Connectable to ECP series control panels.<br />
2-2 Specifications<br />
1. AC Input: AC 100 - 240V<br />
2. Output:<br />
EPX-410D: 10A per channel; EPX-420D: 20A per channel; EPX-430D: 30A per channel<br />
3. Protocol: DMX-512/EDX<br />
4. Dimensions:<br />
EPX-410D/ 420D/ 430D -- 162(W) x 90(H) x 61.55(D) mm<br />
EPX-810D/ 820D/ 830D -- 234(W) x 90(H) x 61.55(D) mm<br />
5. Weight:<br />
EPX-410D/ 420D/ 430D - 0.60Kg<br />
EPX-810D/ 820D/ 830D - 0.90Kg<br />
EPX-410D/420D/430D/810D/820D/830D [EUM-A] 3
2-3 Dimensions<br />
EPX-410D/420D/430D/810D/820D/830D [EUM-A] 4
4<br />
1<br />
2-4 Functions<br />
2 3<br />
1 LED 2 【DMX】- to set DMX address<br />
3 Channel ON/OFF<br />
【FCN】- function selection, exit without saving<br />
【◄】【►】【▲】【 ▼】<br />
4 Power input 5 4-channel outputs<br />
6 EDX/DMX-512 7 EDX 12V+ indicator<br />
6<br />
8 EDX/DMX-512 signal indicator<br />
7<br />
8<br />
EPX-410D/420D/430D/810D/820D/830D [EUM-A] 5<br />
6<br />
5
2-5 Wiring Diagram (One Channel)<br />
EPX-410D/420D/430D/810D/820D/830D [EUM-A] 6
3 Operations<br />
3-1 Initialization<br />
Hold【▲】and【▼】at the same time and restart the device:<br />
The LED screen shows .<br />
Press【DMX】to initialize the device. .<br />
3-2 DMX Address Setting<br />
Standard DMX console can output 512 channels and EPX-420D can use 4 continuous channels as the<br />
output channel. The number of the first channel of these 4 continuous channels is start channel address.<br />
Press 【DMX】+【▲】or【▼】to change DMX address. For example, change DMX address from 001 to<br />
003,<br />
Note: Press【DMX】once to check the DMX address.<br />
3-3 Channel Output Status<br />
In the main screen, press【◄】 or【►】to enter channel status check.<br />
First channel is on ON mode. Second channel is on OFF mode.<br />
EPX-410D/420D/430D/810D/820D/830D [EUM-A] 7
3-4 DMX IN Setting<br />
Press【FCN】to shift to DMX IN setting, after initialization, turns d-OF. Press【▲】or【▼】 to adjust and<br />
【DMX】to confirm and back to time screen:<br />
Receive DMX signal<br />
Not receive DMX signal<br />
3-5 Delay Time Setting<br />
Delay time is the time between channels to be reacted by the control signal.<br />
For example, if delay time is set as 0.5 second, and EPX-420D received a signal to turn off all channels,<br />
EPX-420D will turn off 1st channel immediately and then turn off 2 nd channel after 0.5 second and then<br />
turn off 3 rd channel after 1 second and then turn off 4 th channel after 1.5 second.<br />
The function is to avoid large surge current if all relays activated simultaneously.<br />
STEP-1: On the main page, press【FUNC】eight times to enter delay time setting.<br />
It means the delay time is 0.0 second.<br />
STEP-2: Press【▲】or【▼】to change delay time(range from 0.0S~10S)<br />
STEP-3: Press【DMX】to save or press【FCN】to cancel.<br />
3-6 Channel Mode Setting<br />
There are two modes for channel status, shown as below:<br />
Switch Mode<br />
Fade Mode<br />
Switch Mode: only two status, 0 and 100%<br />
Fade Mode: the value can be adjusted from 0 to 100%.<br />
EPX-410D/420D/430D/810D/820D/830D [EUM-A] 8
3-7 Channel’s Switching-on Level Setting<br />
STEP-1: In the main screen, press【FUNC】to enter the switch on value setting.<br />
It means the channel will be switched on when its level is 52%.<br />
STEP-2: Press【▲】or【▼】to set the switching-on level from 10% to 90%.<br />
STEP-3: After setting, press【DMX】to save.<br />
The switching-off level is 5% lower than switching-on level. For example, if switching-on level is 90%, the<br />
switching-off level will be 85%.<br />
By default, the channel mode (refer 3-6) is switch mode. In switch mode, if you press up/down buttons or<br />
recall a scene on an ECP panel, it will instantly turn on the channels in EDX<br />
If the ECP panel also controls other dimmable loads, it might be not desirable to have some switching<br />
lamps instantly turned-on, but other dimmable loads are turned on for some time.<br />
By changing channel mode from switch to fade mode can solve this issue. If you want the switching<br />
loads to be turned on when dimmable loads are turning to 80%, you can simply change the channel<br />
mode to fade mode (3-6) and make switching-on value to 80% (3-7).<br />
In some applications, turning switching loads on instantly might be preferable. Setting channel mode as<br />
switching mode would be better.<br />
3-8 Software Version Check<br />
In the main screen, press【FCN】in succession to check the software version.<br />
EPX-410D/420D/430D/810D/820D/830D [EUM-A] 9
4 EDX Systems<br />
EDX/EPX devices can work either in DMX-512 mode or EDX mode.<br />
DMX-512 Mode: EDX/EPX devices can be controlled by DMX-512 controllers.<br />
EDX Mode: EDX/EPX devices can be recalled its stored lighting scenes by connecting to ECP scene<br />
control panels.<br />
Please refer EDX wiring guide on <strong>Lite</strong>-<strong>Puter</strong>’s website: http://www.liteputer.com.tw/tech_guide.asp<br />
4-0 EDX Mode<br />
EDX is a protocol specifically designed for architectural and environmental lighting applications.<br />
EDX/EPX dimmers/switches or devices are able to store scenes in themselves.<br />
Each EDX/EPX device or ECP panel can be specified by a zone number. The scenes stored in EDX/EPX<br />
devices can be recalled by ECP panels with the same zone number.<br />
For example, EDX/EPX devices configured as zone 1 can be controlled (recall scenes) by ECP panel<br />
configure as zone 1. EDX/EPX devices configured as zone 5 can be controlled (recall scenes) by ECP<br />
panel configure as zone 5.<br />
Figure 1: One EDX/EPX device with one ECP scene panel<br />
EPX-410D/420D/430D/810D/820D/830D [EUM-A] 10
Figure 2: Multiple EDX/EPX devices with ECP scene panels<br />
ECP scene panel 1 controls EDX/EPX device 1.<br />
ECP scene panel 2 controls EDX/EPX device 2.<br />
* If there are both DMX-512 and EDX signal present, DMX-512 signal has the highest priority.<br />
EPX-410D/420D/430D/810D/820D/830D [EUM-A] 11
4-1 ID Number Setting<br />
Each EPX/EDX series device must have a ID number. When one device’s working alone, there is no<br />
need to adjust the ID number, but when several devices’ working together, each device must have a<br />
different ID number.<br />
STEP-1 In the main screen, press【FCN】to enter ID number setting.<br />
STEP-2 Press【▲】or【▼】to change the ID number.<br />
Press 【▲】twice to change ID number from 001 to 003.<br />
STEP-3 Press【DMX】to save.<br />
3-2 Zone Number Setting<br />
Definition of zone: The device must set the zone number before use, which consists of two parts, one is<br />
the zone number and another is the start channel address.<br />
For example: There is 4 EPX-420D (16 channels in total) in the first zone, the zone number of each<br />
device should be 01-01, 01-05, 01-09, 01-13 separately.<br />
STEP-1: In the main screen, zone and start channel setting is shown as below:<br />
zone number<br />
start channel<br />
Press【▲】or【▼】to change zone number (up to 99 zone). After setting, press【DMX】to save.<br />
STEP-2: Press right button once shift to start channel setting. Press【▲】or【▼】to modify the start<br />
channel address (up to 99 channel). After setting, press【DMX】to save.<br />
For example: change channel address from 02 to 03.<br />
EPX-410D/420D/430D/810D/820D/830D [EUM-A] 12
4-3 Scene Save and Recall<br />
STEP-1: In the main screen, press【◄】 or【►】to select a channel. Here we select channel one.<br />
STEP-2: Press【▲】or【▼】to set the level of channel 1. Here we press【▲】to make the output of<br />
channel one to 100%.<br />
STEP-3: Press【◄】 or【►】to select other channel. Repeat step 2 and 3 to edit the scene.<br />
STEP-4: Press【DMX】, LED shows<br />
It means that the current scene is going to be stored in scene 01.<br />
STEP-5: Press 【▲】or【▼】to select a scene number to store the current scene.<br />
If you enabled Primary/secondary scene function (refer 4-4), you can select secondary scene to store the<br />
scene.<br />
Secondary Scene 1<br />
STEP-6: Press【DMX】to save the scene.<br />
When Primary/Secondary scene is enabled (refer 4-4), Secondary scene (SC1S~SC6S) can be edited or<br />
recalled; when Primary/Secondary scene is disabled, only primary scene (SC1~SC6) can be edited or<br />
recalled.<br />
EPX-410D/420D/430D/810D/820D/830D [EUM-A] 13
4-4 Primary/Secondary Scene and Scene Overlap ON/OFF<br />
Overlap Scene Function:<br />
On usual, when user recall a scene, the previous scene will be replaced. This function is to overlap<br />
output of SC5/SC6 to any other scene, which means the previous scene should not be replaced but<br />
appears the effect of several overlapped scenes.<br />
For example:<br />
SC2: the first channel of EPX-420D is OFF<br />
SC5: the first channel of EPX-420D is ON<br />
When overlap SC5 to SC2, the first channel is ON.<br />
Primary and Secondary Scene Function<br />
On usual, press a scene button (1-6) on the control panel, the corresponding scene will be recalled; if<br />
you press the same button once again, it will be the same scene. When this function is on, press a scene<br />
button, the corresponding scene will be recalled and press the same button again, another scene will be<br />
recalled. Press the scene button to shift the two scenes alternatively.<br />
These two scenes are recalled by the same button is the primary and secondary scene.<br />
For example:<br />
Channel 1 and 2 control curtain A, Channel 3 and 4 control curtain B.<br />
Primary scene 1 (SC1): CH1 is ON, CH2 is OFF, CH3 is ON and CH4 is OFF.<br />
Secondary scene 1S (SC1S): CH1 is OFF, CH2 is ON, CH3 is OFF and CH4 is ON.<br />
Press SC1 button, curtain A and B go up, press the button again curtain A and B go down.<br />
(The curtain can’t be stopped in the process of going up or going down.)<br />
NOTE: when the current scene is OFF, press any scene button (1-6) then the primary scene (SC1-6) will<br />
be recalled first.<br />
STEP-1: In the main screen, press 【FUNC】three times to enter function setting.<br />
A. Overlap scene/primary and secondary scene function are both off.<br />
B. Overlap scene function is ON<br />
C. Primary and secondary scene function is ON<br />
EPX-410D/420D/430D/810D/820D/830D [EUM-A] 14
STEP-2: Press【▲】or【▼】to select from Scene ON/OFF or Scene Overlap ON/OFF.<br />
STEP-3: After setting, press【DMX】to save.<br />
NOTE: After initialization, the default setting of these two functions is OFF.<br />
4-5 Partition Setting<br />
Generally, all channels on EDX/EPX devices can be only set to only 1 zone (Please refer 3-2). To<br />
make EDX/EPX devices more flexible, you can assign each channel on EDX/EPX devices to<br />
different zones by using partition function. For example, you assign channel 1 – 2 on EPX-420D to<br />
partition 1 and channel 3 – 4 on EPX-430D to partition 2. There are 2 control panels (ECP-106)<br />
connected to EPX-420D, one is set to zone 1; the other is set to zone 2. If scenes are recalled by<br />
ECP-106 of zone 1, only channel 1 – 2 on EPX-420D will change their dimming levels. If scenes are<br />
recalled by ECP-106 of zone 2, only channel 3– 4 on EPX-420D will change their dimming levels.<br />
Figure: Channel 1 and 2 on EDX/EPX device in zone 1 (channel 1 and 2 are controlled by ECP panel in<br />
zone 1)<br />
Channel 3 and 4 on EDX/EPX devices in zone 2 (channel 3 and 4 are controlled by ECP panel in zone 2)<br />
EPX-410D/420D/430D/810D/820D/830D [EUM-A] 15
4-5-1 Enable/Disable Partition Function<br />
STEP-1: Press【FCN】several times until LED shows<br />
It means partition function is disabled.<br />
Press 【▲】to turn on partition function<br />
4-5-2 Partition Setting<br />
.<br />
STEP-1: Press【FCN】several times until LED shows<br />
It means that channel 1 belongs to zone 1.<br />
STEP-2: Press 【▲】or【▼】to change the zone number which channel 1 belongs to. Here we make<br />
channel 1 belonging to zone 4 by pressing 【▲】3 times.<br />
STEP-3: Press【►】to select start channel of the zone. “0.1.” means the start channel is 1.<br />
STEP-4: Press 【▲】or【▼】to select a start channel number.<br />
STEP-5: Press【◄】twice to select channel digits. Then press 【▲】once to select channel 2.<br />
It shows that channel 2 belongs to zone 1.<br />
STEP4: Repeat step 2, 3, 4,5 to set zone number and start channel of each channel.<br />
EPX-410D/420D/430D/810D/820D/830D [EUM-A] 16
Limited Warranty<br />
1. <strong>Lite</strong>-<strong>Puter</strong> is only responsible for the product itself.<br />
2. <strong>Lite</strong>-<strong>Puter</strong> guarantees to keep <strong>Lite</strong>-<strong>Puter</strong>’s from manufacturing defects within a year since the<br />
distributing date.<br />
3. <strong>Lite</strong>-<strong>Puter</strong> does not offer on-site service. If the defects appears in <strong>Lite</strong>-<strong>Puter</strong>’s product, please deliver<br />
the product to local distributors or to Taipei headquarters.<br />
4. The warranty does not cover:<br />
a. Any fault caused by false usage, imprudence (collision, inadequate installation or adjustment,<br />
insufficient ventilation, or improper repairs)<br />
b. Force majeure factors (flooding, earthquake, thunder, volcanic eruption, tsunami or other factors<br />
beyond <strong>Lite</strong>-<strong>Puter</strong> control).<br />
c. The cost of installing, reinstalling, adjusting, repairing, or reprogramming the product.<br />
d. Other products or devices which are offered by <strong>Lite</strong>-<strong>Puter</strong> or not by <strong>Lite</strong>-<strong>Puter</strong>.<br />
5. <strong>Lite</strong>-<strong>Puter</strong> does not warrant the product will operate without interruption or being free of error.<br />
Taipei:<br />
<strong>Lite</strong>-<strong>Puter</strong> Enterprise Co., Ltd.<br />
11F, No. 189, Gangqian Rd., Neihu Dist., Taipei, Taiwan, 11494<br />
Tel. +886-2-2799-8099<br />
Fax. +886-2-2799-3828<br />
Website: www.liteputer.com.tw<br />
E-mail: sales@liteputer.com.tw<br />
Shanghai:<br />
Building B5, No. 298, Lane 3509, Hongmei S. Road, Shanghai, China, 201108<br />
Tel. +86-21-5440-8210<br />
Fax. +86-21-6497-8079<br />
Website: www.liteputer.com.cn<br />
E-mail: sales_china@liteputer.com.tw<br />
EPX-410D/420D/430D/810D/820D/830D [EUM-A] 17


![DX-404 4 CH DMX Dimmer Pack [User Manual] Lite Puter ...](https://img.yumpu.com/10320220/1/184x260/dx-404-4-ch-dmx-dimmer-pack-user-manual-lite-puter-.jpg?quality=85)

![DX-401A/DX-402A 4 CH DMX Dimmer Pack [User Manual] - Lite-Puter](https://img.yumpu.com/10320041/1/184x260/dx-401a-dx-402a-4-ch-dmx-dimmer-pack-user-manual-lite-puter.jpg?quality=85)