Die & Mould Making - CNC - Computer Numerical Control
Die & Mould Making - CNC - Computer Numerical Control
Die & Mould Making - CNC - Computer Numerical Control

You also want an ePaper? Increase the reach of your titles
YUMPU automatically turns print PDFs into web optimized ePapers that Google loves.
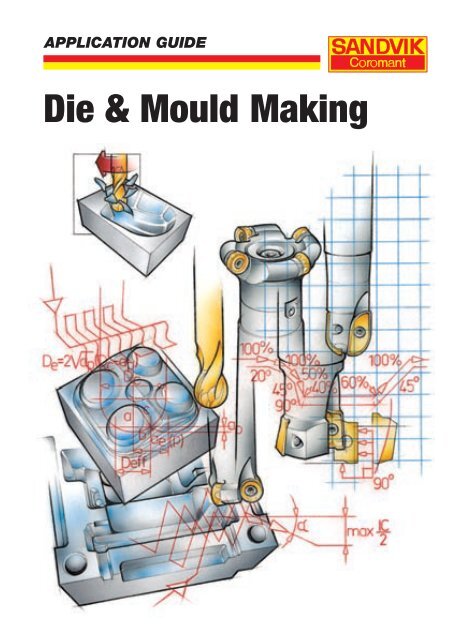
APPLICATION GUIDE<br />
<strong>Die</strong> & <strong>Mould</strong> <strong>Making</strong><br />
1
CONTENTS<br />
Introduction . . . . . . . . . . . . . . . . . . . . . . . . . . . . . . . . . . . . . . . . . . . . . . . . . . . . . . . . . . . . . . . . . . . . . . . . . . . . . . . . 2<br />
<strong>Die</strong> construction work flow . . . . . . . . . . . . . . . . . . . . . . . . . . . . . . . . . . . . . . . . . . . . . . . . . . . . . . . . . . . . . . . 3<br />
<strong>Die</strong> and mould material . . . . . . . . . . . . . . . . . . . . . . . . . . . . . . . . . . . . . . . . . . . . . . . . . . . . . . . . . . . . . . . . . . . 5<br />
Cast-iron . . . . . . . . . . . . . . . . . . . . . . . . . . . . . . . . . . . . . . . . . . . . . . . . . . . . . . . . . . . . . . . . . . . . . . . . . . . . . . . . . . . 6<br />
From quotation to a finished press tool . . . . . . . . . . . . . . . . . . . . . . . . . . . . . . . . . . . . . . . . . . . . . . . . . 13<br />
Process planning . . . . . . . . . . . . . . . . . . . . . . . . . . . . . . . . . . . . . . . . . . . . . . . . . . . . . . . . . . . . . . . . . . . . . . . . . 18<br />
The right choice of highly productive cutting tools for roughing to finishing . . . . . . . . . . 20<br />
The versatility of round inserts . . . . . . . . . . . . . . . . . . . . . . . . . . . . . . . . . . . . . . . . . . . . . . . . . . . . . . . . . . 23<br />
Application technology . . . . . . . . . . . . . . . . . . . . . . . . . . . . . . . . . . . . . . . . . . . . . . . . . . . . . . . . . . . . . . . . . . . 25<br />
Sculptured surfaces . . . . . . . . . . . . . . . . . . . . . . . . . . . . . . . . . . . . . . . . . . . . . . . . . . . . . . . . . . . . . . . . . . . . . . 32<br />
Pitch . . . . . . . . . . . . . . . . . . . . . . . . . . . . . . . . . . . . . . . . . . . . . . . . . . . . . . . . . . . . . . . . . . . . . . . . . . . . . . . . . . . . . . 33<br />
Entrance and exit of cut . . . . . . . . . . . . . . . . . . . . . . . . . . . . . . . . . . . . . . . . . . . . . . . . . . . . . . . . . . . . . . . . . 36<br />
Ramping and circular interpolation . . . . . . . . . . . . . . . . . . . . . . . . . . . . . . . . . . . . . . . . . . . . . . . . . . . . . 38<br />
Choice of holding tools . . . . . . . . . . . . . . . . . . . . . . . . . . . . . . . . . . . . . . . . . . . . . . . . . . . . . . . . . . . . . . . . . . 40<br />
Extended tools in roughing of a cavity . . . . . . . . . . . . . . . . . . . . . . . . . . . . . . . . . . . . . . . . . . . . . . . . . . 46<br />
Machining in segments . . . . . . . . . . . . . . . . . . . . . . . . . . . . . . . . . . . . . . . . . . . . . . . . . . . . . . . . . . . . . . . . . . 47<br />
Methods for machining of corners . . . . . . . . . . . . . . . . . . . . . . . . . . . . . . . . . . . . . . . . . . . . . . . . . . . . . . 48<br />
Methods for machining of a cavity . . . . . . . . . . . . . . . . . . . . . . . . . . . . . . . . . . . . . . . . . . . . . . . . . . . . . . 50<br />
HSM-High speed machining . . . . . . . . . . . . . . . . . . . . . . . . . . . . . . . . . . . . . . . . . . . . . . . . . . . . . . . . . . . . . 52<br />
Application of high speed machining . . . . . . . . . . . . . . . . . . . . . . . . . . . . . . . . . . . . . . . . . . . . . . . . . . . 60<br />
CAD/CAM and <strong>CNC</strong> structures . . . . . . . . . . . . . . . . . . . . . . . . . . . . . . . . . . . . . . . . . . . . . . . . . . . . . . . . . . . 68<br />
Cutting fluid in milling . . . . . . . . . . . . . . . . . . . . . . . . . . . . . . . . . . . . . . . . . . . . . . . . . . . . . . . . . . . . . . . . . . . 75<br />
The insert and its parameters . . . . . . . . . . . . . . . . . . . . . . . . . . . . . . . . . . . . . . . . . . . . . . . . . . . . . . . . . . . 78<br />
Coating methods . . . . . . . . . . . . . . . . . . . . . . . . . . . . . . . . . . . . . . . . . . . . . . . . . . . . . . . . . . . . . . . . . . . . . . . . . 82<br />
Choose the right grade for milling . . . . . . . . . . . . . . . . . . . . . . . . . . . . . . . . . . . . . . . . . . . . . . . . . . . . . . 84<br />
Cutting tools . . . . . . . . . . . . . . . . . . . . . . . . . . . . . . . . . . . . . . . . . . . . . . . . . . . . . . . . . . . . . . . . . . . . . . . . . . . . . . 90<br />
Drilling tools for dies and moulds . . . . . . . . . . . . . . . . . . . . . . . . . . . . . . . . . . . . . . . . . . . . . . . . . . . . . . 107<br />
CoroGrip precision power chuck . . . . . . . . . . . . . . . . . . . . . . . . . . . . . . . . . . . . . . . . . . . . . . . . . . . . . . . 116<br />
Coromant Capto . . . . . . . . . . . . . . . . . . . . . . . . . . . . . . . . . . . . . . . . . . . . . . . . . . . . . . . . . . . . . . . . . . . . . . . . 120<br />
Machining examples . . . . . . . . . . . . . . . . . . . . . . . . . . . . . . . . . . . . . . . . . . . . . . . . . . . . . . . . . . . . . . . . . . . 124<br />
Trouble shooting . . . . . . . . . . . . . . . . . . . . . . . . . . . . . . . . . . . . . . . . . . . . . . . . . . . . . . . . . . . . . . . . . . . . . . . . 165<br />
Technical data . . . . . . . . . . . . . . . . . . . . . . . . . . . . . . . . . . . . . . . . . . . . . . . . . . . . . . . . . . . . . . . . . . . . . . . . . . 170<br />
Cutting data . . . . . . . . . . . . . . . . . . . . . . . . . . . . . . . . . . . . . . . . . . . . . . . . . . . . . . . . . . . . . . . . . . . . . . . . . . . . . 171<br />
Material cross reference list . . . . . . . . . . . . . . . . . . . . . . . . . . . . . . . . . . . . . . . . . . . . . . . . . . . . . . . . . . . 183
2<br />
INTRODUCTION<br />
Within the die and<br />
mould making<br />
industry the development<br />
has been strong<br />
the last years. Machine<br />
tools and cutting tools<br />
get more and more<br />
sophisticated every<br />
day and can perform<br />
applications at a speed and accuracy not<br />
even thought of ten years ago. Today<br />
CAD/CAM is very common and to<br />
machine with so called HSM (High Speed<br />
Machining) it is a necessity.<br />
To manufacture a die or mould, many<br />
different cutting tools are involved, from<br />
deep hole drills to the smallest ball nose<br />
endmills. In this application guide the<br />
whole process of die and mould making<br />
will be explained with focus on the machining<br />
process and how to best utilise the<br />
cutting tools. However, programming of<br />
machine tools, software, workpiece materials,<br />
the function of different types of dies<br />
and mould will also be explained. First let<br />
us take a look at a simplified flowchart to<br />
see what the different stages are in the die<br />
and mould making process.
DIE CONSTRUCTION WORK FLOW<br />
1<br />
2<br />
Simplified, the die construction work flow can be explained as in<br />
the illustration below.<br />
1. Receiving - standard die parts,<br />
steel castings, planning and<br />
scheduling<br />
2. Model shop - tooling aide<br />
and checking fixtures<br />
3. CAM-room - schedule,<br />
exchange reports DNC/<strong>CNC</strong><br />
programme match, layout<br />
4. 2D-machining - shoes, pads,<br />
5. Blocking - die packs, die design<br />
6. 3D-machining -<br />
sub-assembled dies<br />
7. Polishing - standard parts<br />
and components<br />
4<br />
3<br />
5<br />
10<br />
10<br />
8<br />
8. Tryout - sheet steel material<br />
specifications check fixture.<br />
Inspection - Functional build<br />
evaluation, stable metal panel<br />
product fixture<br />
9. <strong>Die</strong> completion - die design<br />
handling devices, production<br />
requirements, inspection<br />
requirements<br />
10. Feed back - die history book,<br />
check list base<br />
11. Shipping<br />
7<br />
6<br />
10<br />
11<br />
9<br />
3
4<br />
When a tool has to be made, for instance,<br />
to a hood of a car you do not make one<br />
press tool and the material for the hood<br />
goes in on one side, gets pressed and comes<br />
out finished on the other side. It is often<br />
complicated shapes, geometries, which has<br />
to be pressed, with different radii and cavities,<br />
to close tolerances. To do this the<br />
material for the hood has to be pressed in<br />
several press tools where a small change in<br />
the shape is made each time. It is not unusual<br />
that up to 10 different steps are needed to<br />
make a complete component.<br />
There are 5 basic types of dies and moulds;<br />
pressing dies, casting dies, forging dies, injection<br />
moulds and compression moulds.<br />
Pressing dies are for cold-forming of, for<br />
instance, automobile panels with complex<br />
shapes. When producing a bonnet for a car<br />
many pressing dies are involved performing<br />
different tasks from shaping to cutting and<br />
flanging the component. As mentioned<br />
earlier there can be over 10 different steps<br />
in completing a component. The dies are<br />
usually made of a number of components<br />
normally made of alloyed grey cast-iron.<br />
However, these materials are not suitable<br />
for trim dies with sharp cutting edges for<br />
cutting off excessive material after the<br />
component has been shaped. For this purpose<br />
an alloyed tool steel is used, often cast.<br />
Example of a chain of process within the<br />
automotive industry<br />
1. Blank die to cut out blanks from coiled<br />
material.<br />
2. Draw die to shape the blank.<br />
3. Trim die to cut off excessive material.<br />
4. Flange die to make the initial bend for<br />
flanges.<br />
5. Cam flange die to bend the flanges<br />
further inside.
Material properties especially influencing<br />
machinability are:<br />
• Surface hardness - to resist abrasive and<br />
adhesive wear<br />
• High content of carbides - to resist<br />
abrasive wear<br />
• Toughness/ductility - to resist chipping<br />
and breakage<br />
<strong>Die</strong>s and moulds for hot work such as die<br />
casting and forging are used for manufacturing<br />
of for instance engine blocks. These<br />
dies and moulds are exposed to a number<br />
of demanding conditions of which the<br />
following are particularly critical for the<br />
machinability of the tool material.<br />
• Hot hardness - to resist plastic deformation<br />
and erosion<br />
• Temperature resistance - to resist<br />
softening at high temperature<br />
• Ductility/toughness - to resist fatigue<br />
cracking<br />
• Hot yield strength - to resist heat checking<br />
<strong>Mould</strong>s for plastic materials include injection,<br />
compression, blow and extrusion<br />
moulds. Factors that influnence the machinability<br />
in a plastic mould steel are:<br />
• Hardness<br />
• Toughness/ductility<br />
• Homogenity of microstructure<br />
and hardness<br />
<strong>Die</strong> and mould material<br />
The materials described and used as reference-material<br />
in this guide are mainly<br />
from the steel manufacturer Uddeholm,<br />
with a cross reference list at the end of<br />
the chapter.<br />
A substantial proportion of production<br />
costs in the die and mould industry is<br />
involved in machining, as large volumes of<br />
metal are generally removed. The finished<br />
die/mould is also subjected to strict geometrical-<br />
and surface tolerances.<br />
Many different tool steels are used to produce<br />
dies and moulds. In forging and die<br />
casting the choice is generally hot-work<br />
tool steels that can withstand the relatively<br />
high working temperatures involved.<br />
Plastic moulds for thermoplastics and<br />
thermosets are sometimes made from coldwork<br />
tool steel. In addition, some stainless<br />
steels and grey cast iron are used for dies<br />
and moulds. Typical in-service hardness is<br />
in the range of 32 - 58 HRC for die and<br />
mould material.<br />
5
6<br />
CAST-IRON<br />
Cast-iron is an ironcarbon<br />
alloy with a<br />
carbon content of<br />
mostly 2-4% as well as<br />
other elements like<br />
silicon, manganese,<br />
phosphorus and<br />
sulphur. Corrosion<br />
and heat resistance<br />
may be improved with additions of nickel,<br />
chromium, molybdenum and copper.<br />
Good rigidity, compressive strength and<br />
fluidity for cast iron are typical properties.<br />
Ductility and strength can be improved by<br />
various treatments, which affect the microstructure.<br />
Cast-iron is specified, not by<br />
chemical analysis, but by the respective<br />
mechanical properties. This is partly due<br />
to that the cooling rate affects the cast-iron<br />
properties.<br />
Carbon is presented as carbide-cementite<br />
and as free carbon-graphite. The extents<br />
of these forms depend partly on the<br />
amount of other elements in the alloy. For<br />
instance, a high-silicon cast-iron will be<br />
made up of graphite with hardly any<br />
cementite. This is the type known as grey<br />
iron. The silicone content usually varies<br />
between 1-3%. A low amount of silicone<br />
will stabilize carbides and the cast-iron<br />
will be made up dominantly of cementite<br />
with little graphite. This is a hard but weak<br />
brittle type called white iron.
In spite of the silicone content having a<br />
decisive influence on the structure, the<br />
cooling rate of cast iron in castings is also<br />
influential. Rapid cooling may not leave<br />
enough time for grey iron to form, as the<br />
silicone has not had time to decompose the<br />
cementite into the graphite. Varying sectional<br />
thicknesses in castings affect the<br />
cooling rate, affecting the state of carbon.<br />
Thick section will solidify into grey iron<br />
while thin ones will chill into white iron.<br />
Hence chilled cast-iron. Modern casting<br />
techniques control analysis, cooling rates,<br />
etc. to provide the cast-iron components<br />
with the right graphite structure. Also to<br />
provide chilled parts where needed, for<br />
instance a wear face on a component.<br />
Manganese strengthens and toughens castiron<br />
and is usually present in amounts of<br />
0.5-1%.<br />
For this reason, a thin or tapered section<br />
will tend to be more white iron because of<br />
the cooling effect in the mould. Also the<br />
surface skin of the casting is often harder,<br />
white iron while underneath is grey iron.<br />
The basic structural consituents of the<br />
different types of cast-iron are ferritic,<br />
pearlitic or a mixture of these.<br />
Types of cast-iron with ferritic matrix<br />
and little or no pearlite are easy to machine.<br />
They have low strength and normally a<br />
hardness of less than 150 Brinell. Because<br />
of the softness and high ductility of ferrite<br />
these types of cast-iron can be ”sticky”<br />
and result in built-up edge forming at<br />
low cutting data, but this can be avoided<br />
by increasing the cutting speed, if the<br />
operation permits.<br />
Types of cast-iron with ferritic/pearlitic or<br />
pearlitic matrix range from about 150 HB<br />
with relatively low strength to highstrength,<br />
hard cast-irons of 280-300 HB<br />
where pearlitic matrix dominates.<br />
Pearlite has a stronger, harder and less<br />
ductile structure than ferrite, its strength<br />
and hardness depending on whether it has<br />
rough or fine lamellar. The more fine-grained<br />
and more fine lamellar the pearlite, the<br />
higher strength and hardness. This means<br />
it has smaller carbides with less abrasive<br />
wear but is more toughness demanding due<br />
to smearing and built up edge formation.<br />
Carbides are extremely hard constituents<br />
whether they are of pure cementite or<br />
contain alloying material. In thin plates, as<br />
in pearlite, cementite can be machined, but<br />
in larger particles which separate the constituents<br />
they drastically reduce the machinability.<br />
Carbides often occur in thin sections,<br />
projecting parts or corners of castings<br />
due to the rapid solidification, giving<br />
a finer structure, of these parts.<br />
7
8<br />
Hardness of cast iron-is often measured in<br />
Brinell. It is an indication of machinability,<br />
which deteriorates with increasing Brinell<br />
hardness. But the hardness value is an<br />
unreliable measurement of machinability<br />
when there are two factors that the value<br />
does not show.<br />
In most machining operations it is the hard<br />
parts at the edges and corners of components<br />
which cause problems when machining.<br />
The Brinell test cannot be carried out<br />
on edges and corners and therefore the<br />
high hardness in these parts is not discovered<br />
before machining is undertaken.<br />
A Brinell test says nothing about the castiron’s<br />
abrasive hardness which is the difference<br />
between the hardness on the basic<br />
structure and the hardness of the constituent<br />
e.g. a particle of carbide.<br />
Abrasive hardness due to sand inclusions<br />
and free carbides is very negative for<br />
machinability. A cast-iron of 200 HB and<br />
with a number of free carbides is more difficult<br />
to machine than a cast-iron of 200<br />
HB and a 100% pearlitic structure with no<br />
free carbides.<br />
Alloy additives in cast-iron affect machinability<br />
in as much as they form or prevent<br />
the forming of carbides, affect strength and<br />
/or hardness. The structure within the castiron<br />
is affected by the alloying material<br />
which, depending on its individual character,<br />
can be divided into two groups.<br />
1. Carbide forming: Chromium (Cr),<br />
cobalt (Co), manganese (Mr), vanadium (V).<br />
2. Graphitizing elements: Silicone (Si),<br />
nickel (Ni), aluminium (Al), copper (Cu),<br />
titanium (Ti).
Grey cast-iron<br />
There is a large range of grey cast-irons<br />
with varying tensile strengths. The silicon<br />
content/sectional area combinations form<br />
various structures of which the low-silicon,<br />
fine graphite and pearlite make the<br />
strongest and toughest material. Tensile<br />
strength varies considerably throughout<br />
the range. A coarse graphite structure<br />
means a weaker type. A typical cast-iron,<br />
where metal cutting is involved, often has<br />
a silicon content of around 2%. Common<br />
are the austenitic types.<br />
Nodular cast-iron (SG)<br />
The graphite is contained as round nodules.<br />
Magnesium especially is used to deposit<br />
the gobules and added to become a magnesium-nickel<br />
alloy. Tensile strength, toughness<br />
and ductility are considerably improved.<br />
Ferritic, pearlitic and martensitic<br />
types with various tensile strengths occur.<br />
The SG cast-iron is also a graphite structure<br />
with properties in-between that of grey<br />
and nodular cast-iron. The graphite flakes<br />
are compacted into short ones with round<br />
ends through the addition of titanium and<br />
other treatment.<br />
Malleable cast-iron<br />
When white iron is heat treated in a particular<br />
way, ferritic, pearlitic or martensitic<br />
malleable cast-iron is formed. The heat<br />
treatments may turn the cementite into<br />
spherical carbon particles or remove the<br />
carbides. The cast-iron product is malleable,<br />
ductile and very strong. The silicon<br />
content is low. Three categories occur:<br />
ferritic, pearlitic and martensitic and they<br />
may also be categorized as Blackheart,<br />
Whiteheart and pearlitic.<br />
Alloyed cast-iron<br />
These are cast-irons containing larger<br />
amounts of alloying elements and, generally,<br />
these have similar effects on properties of<br />
cast-iron as they do on steel. Alloying elements<br />
are used to improve properties by<br />
affecting structures. Nickel, chromium,<br />
molybdenum, vanadium and copper are<br />
common ones. The graphite-free white<br />
cast-iron is extremely wear resistant while<br />
the graphite-containing cast-iron is also<br />
known as heat resistant ductile cast-iron.<br />
Corrosion resistance is also improved in<br />
some types. Toughness, hardness and heat<br />
resistance are typically improved.<br />
The main difference in these types is the<br />
form in which carbon, mainly graphite<br />
occurs.<br />
The general relative machinability of the<br />
four main kinds of cast-iron is indicated in<br />
a diagram where (A) is grey cast-iron, (B)<br />
malleable, (C) S.G. iron and (D) chilled,<br />
white cast-iron.<br />
100<br />
90<br />
80<br />
70<br />
60<br />
50<br />
40<br />
30<br />
20<br />
10<br />
0<br />
A B C D<br />
Relative machinability<br />
9
10<br />
Machinability of cast-iron<br />
When establishing machinability characteristics<br />
of cast-iron grades, it is often useful<br />
to note the analysis and structure:<br />
• Reduced carbon content results in lower<br />
machinability since less fracture-indicating<br />
graphite can be formed.<br />
• Ferritic cast-iron with an increased silicon<br />
content is stronger and less ductile<br />
and tends to give less build-up edge.<br />
• Increased pearlitic content in the matrix<br />
results in higher strength and hardness<br />
and decreased machinability.<br />
• The more fine lamellar and fine-grained<br />
the pearlite is, the lower is the machinability.<br />
• The presence of about 5% of free carbides<br />
in the matrix decreases machinability<br />
substantially.<br />
• The effects of free carbides with respect<br />
to machinability is more negative in<br />
cast-iron with pearlitic matrix, because<br />
the pearlite ”anchors” the carbide particles<br />
in the matrix. This means that it is<br />
necessary for the insert edge to cut<br />
through the hardest particles instead of,<br />
as can be done with a ferritic structure,<br />
”pulling” out or pushing into the soft<br />
ferrite.<br />
• The top of the casting can have a somewhat<br />
lower machinability due to impurities<br />
such as slag, casting sand etc.<br />
which float up and concentrate in this<br />
surface area.<br />
Generally it can be said that: the higher the<br />
hardness and strength that a type of cast-iron<br />
has, the lower is the machinability and the<br />
shorter the tool-life that can be expected<br />
from inserts and tools.<br />
Machinability of most types of cast-iron<br />
involved in metal cutting production is<br />
generally good. The rating is highly related<br />
to the structure where the harder pearlitic<br />
cast-irons are somewhat more demanding<br />
to machine. Graphite flake cast-iron and<br />
malleable cast-iron have excellent machining<br />
properties while SG cast-iron is not<br />
quite as good.<br />
The main wear types encountered when<br />
machining cast-iron are abrasion, adhesion<br />
and diffusion wear. The abrasion is produced<br />
mainly by the carbides, sand inclusions<br />
and harder chill skins. Adhesion wear with<br />
built-up edge formation takes place at<br />
lower machining temperatures and cutting<br />
speeds. This is the ferrite part of cast-iron<br />
which is most easily welded onto the<br />
insert but which can be counteracted by<br />
increasing speed and temperature. On the<br />
other hand, diffusion wear is temperature<br />
related and occurs at high cutting speeds,<br />
especially with the higher strength cast-iron<br />
grades. These grades have a greater deformation<br />
resistance, leading to higher temperature.<br />
This type of wear is related to the<br />
reaction between cast-iron and tool and<br />
has led to some cast-iron machining being<br />
carried out at high speeds with ceramic<br />
tools, achieving good surface finish.
Typical tool properties needed, generally,<br />
to machine cast-iron are high hot-hardness<br />
and chemical stability but, depending upon<br />
the operation, workpieces and machining<br />
conditions, toughness, thermal shock resistance<br />
and strength are needed from the<br />
cutting edge. Ceramic grades are used to<br />
machine cast-iron along with cemented<br />
carbide.<br />
Obtaining satisfactory results in machining<br />
cast-iron is dependent on how the cutting<br />
edge wear develops: rapid blunting will<br />
mean premature edge breakdown through<br />
thermal cracks and chipping and poor<br />
results by way of workpiece frittering,<br />
poor surface finish, excessive waviness, etc.<br />
Well developed flank wear, maintaining a<br />
balanced, sharp edge, is generally to be<br />
strived for.<br />
11
12<br />
Materiel<br />
type<br />
Grey<br />
Cast-iron<br />
Alloyed<br />
grey-iron<br />
Alloyed<br />
grey-iron<br />
Nodular<br />
cast-iron<br />
Nodular<br />
cast-iron<br />
Hardness<br />
HB<br />
150-200<br />
220-260<br />
210-240<br />
200-260<br />
230-300<br />
Area of<br />
use<br />
Frames<br />
<strong>Die</strong>s<br />
<strong>Die</strong>s<br />
<strong>Die</strong>s&<br />
stamps<br />
<strong>Die</strong>s&<br />
stamps<br />
Japan<br />
JIS<br />
FC250<br />
FC300<br />
FC350<br />
Not<br />
available<br />
Not<br />
available<br />
FCD450<br />
FCD550<br />
FCD600<br />
FCD800<br />
France<br />
ANFOR<br />
Ft25<br />
Mn450<br />
Mn450<br />
FGS400<br />
FGS600<br />
Italy<br />
UNI<br />
G25<br />
GNM45<br />
GNM45<br />
GS370-17<br />
GS600<br />
Brazil<br />
GG25<br />
GG26<br />
GG26<br />
GGG60<br />
GGG60<br />
Materiel<br />
type<br />
Grey<br />
Cast-iron<br />
Alloyed<br />
grey-iron<br />
Alloyed<br />
grey-iron<br />
Nodular<br />
cast-iron<br />
Nodular<br />
cast-iron<br />
Hardness<br />
HB<br />
150-200<br />
220-260<br />
210-240<br />
200-260<br />
230-300<br />
Area of<br />
use<br />
Frames<br />
<strong>Die</strong>s<br />
<strong>Die</strong>s<br />
<strong>Die</strong>s&<br />
stamps<br />
<strong>Die</strong>s&<br />
stamps<br />
CMC<br />
Coromant<br />
08.1/2<br />
07.2<br />
07.2<br />
09.1<br />
09.2<br />
Sweden<br />
SS<br />
0125<br />
0852<br />
0852<br />
0717-12<br />
0732-3<br />
Germany<br />
DIN<br />
GG25<br />
GG26<br />
GG26<br />
GGG60<br />
GGG60<br />
USA<br />
ASTM<br />
A48<br />
Class 40B<br />
-<br />
-<br />
-<br />
A536<br />
Grade 80-55-06<br />
UK<br />
BS<br />
BS1452<br />
G150<br />
G250 +<br />
Cr % Mo<br />
BS1452<br />
G250<br />
BS2989<br />
600/3<br />
BS2989<br />
700/2
FROM QUOTATION TO A FINISHED PRESS TOOL<br />
Finding good solutions<br />
with little material<br />
First of all the die and<br />
mouldmaker has to do<br />
a quotation on the<br />
job, which can be hard<br />
many times since the<br />
blueprints from the<br />
customer often is<br />
pretty rough outlined due to their own<br />
ongoing development of the product.<br />
Often the tool maker receive CAD drawings<br />
of the finished component, which looks<br />
far from the different tools that has to be<br />
manufactured to produce the component.<br />
This phenomenon has much to do with<br />
the integration of computers within the<br />
manufacturing and the companies ever<br />
shortened lead times on products.<br />
There are often complicated shapes and<br />
geometries with deep cavities and radii,<br />
which has to be pressed to close tolerances.<br />
To be able to create these shapes several<br />
different press tools has to be manufactured.<br />
If one company can come up with a<br />
smart solution that has fewer steps in the<br />
pressing process they have a clear advantage.<br />
If the component to be machined is very<br />
large, a model of foamed plastic (styrofoam)<br />
is made with the shape of the component.<br />
The model of foamed plastic is then packed<br />
in sand and chill cast. When the melted<br />
metal is poured into the casting mould the<br />
foamed plastic evaporates and you will get<br />
a blank with an optimised shape to have as<br />
little material to remove as possible to the<br />
finished shape of the component. About<br />
10 mm and sometimes even less stock is<br />
left to the final shape of the die, which saves<br />
a lot of time as much rough machining is<br />
eliminated.<br />
A model of foamed plastic, which is close to the shape of the component to save time in rough machining<br />
13
14<br />
The next step is to start up the machining<br />
of the component. Usually this is done<br />
directly on the optimized blank of the<br />
tool. However, sometimes the customer or<br />
the tool manufacturer himself wants to<br />
make a prototype of the tool to see that<br />
everything is correct before starting to cut<br />
chips out of the optimized blank. Which is<br />
both expensive and can take a long time to<br />
produce.<br />
The prototype is normally machined in<br />
aluminium or kirkzite. Only half the tool<br />
is machined, the lower part, and is then<br />
put up in a Quintus press. This type of<br />
press has a rubber stamp working as the<br />
upper part of the press tool, which press<br />
down on the sheet metal which forms after<br />
the prototype tool half. Instead of a rubber<br />
stamp there are also press techniques where<br />
liquid is used to press the sheet metal over<br />
the prototype tool. These procedures are<br />
often used within the automotive industry<br />
in order to produce several prototype<br />
components to crash test to see if any<br />
changes has to be made to the component.<br />
There are several advantages with this type<br />
of prototype methods when it is used in<br />
low volume part production:<br />
• Only a single rigid tool half is required<br />
to form, trim and flange a part.<br />
• Tool cost reductions of up to 90%.<br />
• Reduction in project lead-time.<br />
• Reduction in storage space for tools.<br />
• Increased design and material<br />
possibilities.<br />
• The single tool half can easily be<br />
modified to accommodate part design<br />
changes.<br />
• No matching or fixing of tool-halves.<br />
• Several different parts can be formed in<br />
one press cycle.<br />
• Prototype tools can often be used in<br />
series production tools.
However, it is also very common that both<br />
halves of a tool is machined as the only<br />
difference is that it is made of aluminium.<br />
Which is easy to machine and cheaper than<br />
the real tool steel.<br />
While the blank is being cast the machining<br />
strategy and the tool paths are being<br />
decided with the help of CAM equipment<br />
at the programming department. When the<br />
blank arrives the <strong>CNC</strong>-programme should<br />
be out by the machine tool in the workshop.<br />
In some work shops the machine<br />
tools are connected to a CAM work-station,<br />
which enables the machinist to make<br />
changes in the programme if he realises<br />
that there is too much material to remove<br />
in certain places or another tool might be<br />
more suitable.<br />
The machinist can, in fact, decide the<br />
whole milling strategy by the machine in a<br />
WOP-station (Workshop Oriented<br />
Programming).<br />
The machining is often structured to perform<br />
the roughing and restmilling operations<br />
during the day shift, while attended<br />
by a machinist. The time consuming finishing<br />
operations are often done unmanned<br />
during the nights and week ends. When<br />
doing this it is important with a good<br />
monitoring system on the machine to<br />
prevent that the component gets damaged<br />
if a cutting tool breaks. If a good tool wear<br />
analysis has been made and the tool life<br />
has been established, automatic tool changes<br />
can be made to utilize the machine tool even<br />
further. However, this calls for very accurate<br />
tool settings especially in the Z-axis to<br />
get as small mismatch as possible.<br />
15
The die for a cutting tool after manual polishing A pressed and Spotted Workpiece<br />
When the machining is finished the die or<br />
mould has to be ground, stoned or polished<br />
manually, depending on the surface requirements.<br />
At this stage much time and money<br />
can be saved if more efforts and consideration<br />
has been put down on the previous<br />
machining operations.<br />
When the press tool is thought to be finished<br />
the two halves must be fitted, trimmed,<br />
together. This is done by spotting, the surface<br />
of one of the halves is covered with<br />
ink, then a component is test pressed in<br />
the tool. If there is a clean spot somewhere<br />
on the sheet metal there might, for instance,<br />
be a radius which is wrong and need some<br />
additional polishing done to it. You also<br />
check that there is an even sheet metal<br />
column all over the test piece. This spotting-work<br />
is time consuming and if there<br />
is a tool, e. g. 3000 mm x 1500 mm and it<br />
shows that there is a corner 0.1 mm lower<br />
than everywhere else, the whole surface<br />
has to be ground and polished down 0.1<br />
mm, which is a very extensive job.<br />
17
18<br />
PROCESS PLANNING<br />
The larger the component<br />
and the more<br />
complicated the more<br />
important the process<br />
planning becomes. It<br />
is very important to<br />
have an open minded<br />
approach in terms of<br />
machining methods<br />
and cutting tools. In many cases it might<br />
be very valuable to have an external speaking<br />
partner who has experiences from<br />
many different application areas and can<br />
provide a different perspective and offer<br />
some new ideas.<br />
An open minded approach to the<br />
choice of methods, tool paths, milling<br />
and holding tools<br />
In todays world it is a necessity to be<br />
competitive in order to survive. One of<br />
the main instruments or tools for this is<br />
computerised production. For the <strong>Die</strong> &<br />
<strong>Mould</strong> industry it is a question of investing<br />
in advanced production equipment<br />
and CAD/CAM systems.<br />
But even if doing so it is of highest importance<br />
to use the CAM-softwares to their<br />
full potential.<br />
In many cases the power of tradition in<br />
the programming work is very strong. The<br />
traditional and easiest way to program tool<br />
paths for a cavity is to use the old copy<br />
milling technique, with many entrances<br />
and exits into the material. This technique<br />
is actually linked to the old types of copy<br />
milling machines with their stylus that<br />
followed the model.
This often means that very versatile and<br />
powerful softwares, machine and cutting<br />
tools are used in a very limited way.<br />
Modern CAD/CAM-systems can be used<br />
in much better ways if old thinking, traditional<br />
tooling and production habits are<br />
abandoned.<br />
If instead using new ways of thinking and<br />
approaching an application, there will be a<br />
lot of wins and savings in the end.<br />
If using a programming technique in<br />
which the main ingredients are to ”slice<br />
off” material with a constant Z-value,<br />
using contouring tool paths in combination<br />
with down milling the result will be:<br />
• a considerably shorter machining time<br />
• better machine and tool utilisation<br />
• improved geometrical quality of the<br />
machined die or mould<br />
• less manual polishing and try out time<br />
In combination with modern holding and<br />
cutting tools it has been proven many<br />
times that this concept can cut the total<br />
production cost considerably.<br />
Initially a new and more detailed programming<br />
work is more difficult and usually<br />
takes somewhat longer time. The question<br />
that should be asked is, ”Where is the cost<br />
per hour highest? In the process planning<br />
department, at a workstation, or in the<br />
machine tool”?<br />
The answer is quite clear as the machine<br />
cost per hour often is at least 2-3 times<br />
that of a workstation.<br />
After getting familiar with the new way of<br />
thinking/programming the programming<br />
work will also become more of a routine<br />
and be done faster. If it still should take<br />
somewhat longer time than programming<br />
the copy milling tool paths, it will be made<br />
up, by far, in the following production.<br />
However, experience shows that in the<br />
long run, a more advanced and favourable<br />
programming of the tool paths can be<br />
done faster than with conventional<br />
programming.<br />
19
20<br />
THE RIGHT CHOICE OF HIGHLY PRODUCTIVE<br />
CUTTING TOOLS FOR ROUGHING TO FINISHING<br />
First of all:<br />
• Study the geometry<br />
of the die or mould<br />
carefully.<br />
• Define minimum<br />
radii demands and<br />
maximum cavity depth.<br />
• Estimate roughly the amount of material<br />
to be removed. It is important to understand<br />
that roughing and semi-finishing of a<br />
big sized die or mould is performed far<br />
more efficiently and productively with<br />
conventional methods and tooling. Also<br />
for big sized dies and moulds. This is due<br />
to the fact that the material removal rate in<br />
HSM is much lower than in conventional<br />
machining. With exception for machining<br />
of aluminium and non-ferrous materials.<br />
However the finishing is always more<br />
productive with HSM.<br />
• The preparation (milled and parallel<br />
surfaces) and the fixturing of the workpiece<br />
is of great importance. This is always one<br />
classic source for vibrations. If performing<br />
HSM this point is extra important. When<br />
performing HSM or also in conventional<br />
machining with high demands on geometrical<br />
accuracy of the die or mould, the strategy<br />
should always be to perform roughing,<br />
semi-finishing, finishing and super-finishing<br />
in dedicated machines. The reasons for this<br />
are quite obvious - it is absolutely impossible<br />
to keep a good geometrical accuracy<br />
on a machine tool that is used for all types<br />
of operations and workloads.<br />
The guide ways,<br />
ball screws and<br />
spindle bearings<br />
will be exposed<br />
to bigger stresses<br />
and workloads<br />
when roughing for<br />
instance. This will of course have a big<br />
impact on the surface finish and geometrical<br />
accuracy of the dies or moulds that are being<br />
finish machined in that machine tool. It will<br />
result in a need of more manual polishing<br />
and longer try out times. And if remembering<br />
that today’s target should be to<br />
reduce the manual polishing, then the strategy<br />
to use the same machine tools for<br />
roughing to finishing points in totally<br />
wrong direction. The normal time to<br />
manually polish, for instance, a tool for a<br />
large bonnet is roughly 350-400 hours.<br />
If this time can be reduced by good machining<br />
it not only reduces the cost, but also<br />
enhance the geometrical accuracy of the<br />
tool. A machine tool machines pretty much<br />
exactly what it is programmed for and therefore<br />
the geometrical accuracy will be better<br />
the more the die or mold can be machined.<br />
However, when there is extensive manual<br />
finishing the geometrical accuracy will not<br />
be as good because of many factors such as<br />
how much pressure and the method of polishing<br />
a person uses to mention two of them.
If adding, totally, some 50 hours on advanced<br />
programming (minor part) and finishing<br />
in an accurate machine tool, the polishing<br />
can often be reduced down to 100-150<br />
hours, or sometimes even less. There will<br />
also be other considerable benefits by<br />
machining to more accurate tolerances and<br />
surface structure/finish. One is that the<br />
improved geometrical accuracy gives less<br />
try out times. Which means shorter lead<br />
times. Another is that, for instance, a pressing<br />
tool will get a longer tool life and that<br />
the competitiveness will increase via higher<br />
component quality. Which is of highest<br />
importance in today’s competition.<br />
A human being can not compete, no matter<br />
how skilled, with a computerised tool<br />
path when it comes to precision. Different<br />
persons use different pressures when doing<br />
stoning and polishing, resulting most often<br />
in too big dimensional deviations. It is also<br />
difficult to find and recruit skilled, experienced<br />
labour in this field. If talking about<br />
HSM applications it is absolutely possible,<br />
with an advanced and adapted programming<br />
strategy, dedicated machine tools<br />
and holding and cutting tools, to eliminate<br />
manual polishing even up to 100%. If<br />
using the strategy to do roughing and finishing<br />
in separate machines it can be a good<br />
solution to use fixturing plates. The die or<br />
mould can then be located in an accurate<br />
way. If doing 5-sided machining it is often<br />
necessary to use fixturing plates with<br />
clamping from beneath. Both the plate and<br />
the blank must be located with cylindrical<br />
guide pins.<br />
The machining process should be divided<br />
into at least three operation types; roughing,<br />
semi-finishing and finishing, some times<br />
even super-finishing (mostly HSM applications).<br />
Restmilling operations are of course<br />
included in semi-finishing and finishing<br />
operations.<br />
Each of these operations should be performed<br />
with dedicated and optimised<br />
cutting tool types.<br />
In conventional die & mould making it<br />
generally means:<br />
Roughing: Round insert cutters, end mills<br />
with big corner radii<br />
Semi-finishing: Round insert cutters,<br />
toroid cutters, ball nose endmills<br />
Finishing: Round insert cutters (where<br />
possible), toroid cutters, ball nose endmills<br />
(mainly)<br />
Restmilling: Ball nose endmills, endmills,<br />
toroid and round insert cutters<br />
21
22<br />
In high speed machining applications it<br />
may look the same. Especially for bigger<br />
sized dies or moulds. In smaller sizes, max<br />
400 X 400 X 100 (l,w,h), and in hardened<br />
tool steel, ball nose end mills (mainly solid<br />
carbide) are usually first choice for all<br />
operations. But, it is definitely possible to<br />
compete in productivity also by using<br />
inserted tools with specific properties.<br />
Such as round insert<br />
cutters, toroid cutters<br />
and ball nose<br />
end mills. Each<br />
case has to be individually<br />
analysed...<br />
To reach maximum<br />
productivity it is<br />
also important to<br />
adapt the size of<br />
the milling cutters<br />
and the inserts to<br />
a certain die or<br />
mould and to<br />
each specific operation. The main target is<br />
to create an evenly distributed working<br />
allowance (stock) for each tool and in each<br />
operation. This means that it is most often<br />
more favourable to use different diameters<br />
on cutters, from bigger to smaller, especially<br />
in roughing and semi-finishing. Instead of<br />
using only one diameter throughout each<br />
operation. The ambition should always be<br />
to come as close as possible to the final<br />
shape of the die or mould in each operation.<br />
An evenly distributed stock for each tool<br />
will also guarantee a constant and high<br />
productivity. The cutting speed and feed<br />
rate will be on constant high levels when<br />
the ae/ap is constant. There will be less<br />
mechanical variations and work load on<br />
the cutting edge. Which in turn gives less<br />
heat generation, fatigue and an improved<br />
tool life.<br />
A constant stock also<br />
enables for higher cutting<br />
speed and feed together<br />
with a very secure cutting<br />
process. Some semi-finishing<br />
operations and<br />
practically all finishing<br />
operations can be performed<br />
unmanned or partially<br />
manned. A constant<br />
stock is of course also<br />
one of the real basic<br />
criterias for HSM.<br />
Another positive effect of a constant stock<br />
is that the impact on the machine tool -<br />
guide ways, ball screws and spindle bearings<br />
will be less negative. It is also and<br />
always, very important to adapt the size<br />
and type of milling cutters to the size of<br />
the machine tool.
THE VERSATILITY OF ROUND INSERT CUTTERS<br />
If the rough milling of<br />
a cavity is done with a<br />
square shoulder cutter<br />
much stair-case shaped<br />
stock has to be removed<br />
in semi-finishing.<br />
This of course creates<br />
varying cutting forces<br />
and tool deflection.<br />
The result is an uneven stock for finishing,<br />
which will influence the geometrical accuracy<br />
of the die or mould.<br />
“Stair case<br />
shaped” stock<br />
Smooth<br />
transitionslittle<br />
stock<br />
Stock to be<br />
removed<br />
If a square shoulder cutter with triangular<br />
inserts is used it will have relatively weak<br />
corner cross sections, creating an unpredictable<br />
machining behaviour. Triangular<br />
or rhombic inserts also creates big radial<br />
cutting forces and due to the number of<br />
cutting edges they are less economical<br />
alternatives in these operations.<br />
On the other hand if round inserts, which<br />
allows milling in all materials and in all<br />
directions, are used this will give smooth<br />
transitions between the passes and also<br />
leaves less and more even stock for the<br />
semi-finishing. Resulting in a better die<br />
or mould quality. Among the features of<br />
round inserts is that they create a variable<br />
chip thickness. This allows for higher feed<br />
rates compared with most other insert<br />
shapes. The cutting action of round inserts<br />
is also very smooth as the entering angle<br />
successively alters from nearly zero (very<br />
shallow cuts) to 90 degrees. At maximum<br />
depth of cut the entering angle is 45 degrees<br />
and when copying with the periphery the<br />
angle is 90 degrees. This also explains the<br />
strength of round inserts - the work-load<br />
is built up successively.<br />
Square shoulder<br />
cutter, 90°<br />
Much material<br />
remaining<br />
after roughing<br />
Stock to be<br />
removed<br />
23
24<br />
Round inserts should always be regarded as<br />
first choice for roughing and medium<br />
roughing operations. In 5-axis machining<br />
round inserts fit in very well and have<br />
practically no limitations. With good programming<br />
round insert cutters and toroid<br />
cutters can replace ball nose end mills to a<br />
very big extent. The productivity increase<br />
most often ranges between 5-10 times<br />
(compared with ball nose end mills).<br />
Round insert cutters with small run-outs<br />
can in combination with ground, positive<br />
and light cutting geometries also be<br />
used in semi-finishing and some finishing<br />
operations.<br />
Round insert cutter<br />
Less<br />
material<br />
remaining<br />
after roughing<br />
Combination<br />
of milling directions
APPLICATION TECHNOLOGY<br />
This is very much a<br />
question about optimising<br />
cutting data,<br />
grades and geometries<br />
in relation to the specific<br />
type of material,<br />
operation and productivity<br />
and security<br />
demands.<br />
It is always important to base calculations<br />
of effective cutting speed on the true or<br />
effective diameter in cut. If not doing this,<br />
there will be severe miscalculations of the<br />
feed rate as it is dependent on the rpm for<br />
a certain cutting speed.<br />
If using the nominal diameter value of the<br />
tool, when calculating cutting speed, the<br />
effective or true cutting speed will be<br />
much lower if the depth of cut is shallow.<br />
This is valid for tools such as, round insert<br />
cutters (especially in the small diameter<br />
range), ball nose end mills and end mills<br />
with big corner radii. The feed rate will of<br />
course also be much lower and the productivity<br />
severely hampered.<br />
Most important is that the cutting conditions<br />
for the tool will be much under its<br />
capacity and recommended application<br />
range. Often this leads to premature frittering<br />
and chipping of the cutting edge due<br />
to too low cutting speed and heat in the<br />
cutting zone.<br />
°C<br />
1000<br />
800<br />
600<br />
400<br />
0<br />
TiAIN TiCN TiN Uncoated<br />
When doing finishing or super-finishing<br />
with high cutting speed in hardened tool<br />
steel it is important to choose tools that<br />
have a coating with high hot hardness.<br />
Such as TiAlN, for instance.<br />
One main parameter to observe when finishing<br />
or super-finishing in hardened tool<br />
steel with HSM is to take shallow cuts.<br />
The depth of cut should not exceed 0,2/0,2<br />
mm (ae/ap). This is to avoid excessive<br />
deflection of the holding/ cutting tool and<br />
to keep a high tolerance level and geometrical<br />
accuracy on the machined die or<br />
mould.<br />
Choose very stiff holding and cutting<br />
tools. When using solid carbide it is<br />
important to use tools with a maximum<br />
core diameter (big bending stiffness).<br />
25
26<br />
ap/ae ≤ 0,2 mm<br />
When using inserted ball nose end mills,<br />
for instance, it is favourable to use tools<br />
with shanks made of heavy metal (big bending<br />
stiffness). Especially if the ratio overhang/diameter<br />
is large.<br />
Another application parameter of importance<br />
is to try to use down milling tool<br />
paths as much as possible. It is, nearly<br />
always, more favourable to do down milling<br />
than up milling. When the cutting edge goes<br />
into cut in down milling the chip thickness<br />
has its maximum value. And in up milling,<br />
it has its minimum value. The tool life is<br />
generally shorter in up milling than in<br />
down-milling due to the fact that there is<br />
considerably more heat generated in up-,<br />
than in down milling. When the chip thickness<br />
in up milling increases from zero to<br />
maximum the excessive heat is generated<br />
as the cutting edge is exposed to a higher<br />
friction than in down milling. The radial<br />
forces are also considerably higher in up<br />
milling, which affects the spindle bearings<br />
negatively.<br />
In down milling the cutting edge is mainly<br />
exposed to compressive stresses, which are<br />
much more favourable for the properties<br />
of cemented or solid carbide compared with<br />
the tensile stresses developed in up milling.<br />
D U<br />
Vƒ Vƒ<br />
D U<br />
Vƒ<br />
Vƒ
When doing side milling (finishing) with<br />
solid carbide, especially in hardened<br />
materials, up milling is first choice. It is<br />
then easier to get a better tolerance on the<br />
straightness of the wall and also a better<br />
90 degree corner. The mismatch between<br />
different axial passes will also be less, if none.<br />
This is mainly due to the direction of<br />
the cutting forces. If having a very sharp<br />
cutting edge being in cut the cutting<br />
forces tend to ”pull” or ”suck” the cutter<br />
towards the material.<br />
Up milling can be favourable when having<br />
old manual milling machines with large<br />
play in the lead screw, because a ”counter<br />
pressure” is created which stabilizes the<br />
machining.<br />
The best way to ensure down milling tool<br />
paths in cavity milling is to use contouring<br />
type of tool paths. Contouring with the<br />
periphery of the milling cutter (for instance<br />
a ball nose end mill) often results in a<br />
higher productivity, due to more teeth<br />
effectively in cut on a larger tool diameter.<br />
If the spindle speed is limited in the<br />
machine, contouring will help keeping up<br />
the cutting speed. This type of tool paths<br />
also creates less quick changes in work<br />
load and direction. This is of specific<br />
importance in HSM applications and hardened<br />
materials as the cutting speed and<br />
feed are high and the cutting edge and process<br />
is more vulnerable to any changes that<br />
can create differences in deflection and<br />
create vibrations. And ultimately total tool<br />
breakdown.<br />
Downmilling<br />
Bending<br />
Upmilling<br />
Downmilling<br />
Roughing<br />
Finishing<br />
Roughing<br />
- 0.02 mm<br />
0.06 mm<br />
Up-milling<br />
Finishing<br />
0.00 mm<br />
0.05 mm<br />
27
28<br />
L<br />
F<br />
<br />
L = overhang; d = diameter ; F = radial force<br />
E, π = constants; k = all constants etc. put together<br />
=<br />
l =<br />
F x L 3<br />
3 x E x I<br />
π x d 4<br />
64<br />
⇒ = k x<br />
F x L3<br />
d 4<br />
64<br />
k = 3 x π x E<br />
⇒ 20 % Overhang reduction reduce tool deflection by 50 %<br />
⇒ 20 % Increased D (Ø10 ⇒ Ø12mm) Reduce Tool Deflection By 50<br />
Solid Carbide Endmills - Finishing/Deflection<br />
Relative importance<br />
1 2 3 4 5 6<br />
Parameters<br />
1 Upmilling<br />
2 Low feed/tooth<br />
3 Small radial doc<br />
4 Low number of teeth<br />
5 Material hardness<br />
6 Short outstick<br />
Endmills with a higher helix angle have less radial forces and usually run smoother. Endmills with<br />
a higher helix angle has more axial forces and the risk of being pulled out from the collet is greater.
Copy milling and plunging operations<br />
along steep walls should be avoided as<br />
much as possible! When plunging, the chip<br />
thickness is large at a low cutting speed.<br />
Risk for frittering of the centre. Especially<br />
when the cutter hits the bottom area. If the<br />
control has no, or a poor, look ahead function<br />
the deceleration will not be fast enough<br />
and there will most likely be damages on<br />
the centre.<br />
Large chip thickness at very low vc<br />
It is somewhat better for the cutting process<br />
to do up-copying along steep walls as<br />
the chip thickness has its maximum at a<br />
more favourable cutting speed.<br />
Max chip thickness att recommended vc<br />
29
30<br />
But, there will be a big contact length<br />
when the cutter hits the wall, with risk for<br />
vibration, deflection or even tool breakage<br />
if the feed speed does not decelerate fast<br />
enough. There is also a risk of pulling out<br />
the cutter from the holder due to the<br />
direction of the cutting forces.<br />
The most critical area when using ball nose<br />
end mills is the centre portion. Here the<br />
cutting speed is zero, which is very disadvantageous<br />
for the cutting process. Chip<br />
evacuation in the centre is also more critical<br />
due to the small space at the chisel<br />
edge. Avoid using the centre portion of a<br />
ball nose end mill as much as possible. Tilt<br />
the spindle or the workpiece 10 to 15<br />
degrees to get ideal cutting conditions.<br />
Sometimes this also gives the possibility to<br />
use shorter (and other type of) tools.
For a good tool life it is also more favourable<br />
in a milling process to stay in cut<br />
continuously and as long as possible. All<br />
milling operations have an interrupted or<br />
intermittent character due to the usage of<br />
multi-teeth tools.<br />
The tool life will be considerably shorter<br />
if the tool has many entrances and exits in<br />
the material. Which adds the amount of<br />
thermal stresses and fatigue in the cutting<br />
edge. It is more favourable for modern<br />
cemented carbide to have an even and high<br />
temperature in the cutting zone than to<br />
have large fluctuations.<br />
Usage of coolant also adds temperature<br />
differences and is in general harmful for<br />
milling operations. This will be treated<br />
more in detail in another chapter.<br />
Copy milling tool paths are often a mix of<br />
up-, and down milling (zig-zag) and gives<br />
a lot of engagements and disengagements<br />
in cut. This is, as mentioned above, not<br />
favourable for any milling cutter, but also<br />
harmful for the quality of the die or<br />
mould. Each entrance means that the tool<br />
will deflect and there will be an elevated<br />
mark on the surface. This is also valid<br />
when the tool exits. Then the cutting forces<br />
and the bending of the tool will decrease<br />
and there will be a slight undercutting of<br />
material in the exit portion. These factors<br />
also speak for contouring and down milling<br />
tool paths as the preferred choice.<br />
31
32<br />
SCULPTURED SURFACES<br />
In finishing and superfinishing,<br />
especially in<br />
HSM applications, the<br />
target is to reach a<br />
good geometrical and<br />
dimensional accuracy<br />
and reduce or even<br />
eliminate all manual<br />
polishing.<br />
Spinle speed n = 12000 rpm, cutter diameter = 6 mm<br />
ƒz/ae<br />
Feed v f<br />
Cusp/h<br />
Time (min)<br />
h<br />
0.05<br />
F1200<br />
h0.0001<br />
10<br />
ae<br />
0.075<br />
F1800<br />
h0.0002<br />
4.44<br />
R<br />
0.1<br />
F2400<br />
h0.0004<br />
2.50<br />
In many cases it is favourable to choose<br />
the feed per tooth, fz, identical with the<br />
radial depth of cut, ae (ƒz = ae).<br />
This gives following advantages:<br />
• very smooth surface finish in all directions<br />
• very competitive, short machining time<br />
• very easy to polish this symmetrical<br />
surface texture, self detecting character<br />
via peaks and valleys<br />
• increased accuracy and bearing resistance<br />
on surface gives longer tool life on die<br />
or mould<br />
• minimum cusp or scallop height decides<br />
values on ƒz/ae/R<br />
0.15<br />
F3600<br />
h0.0009<br />
1.11<br />
0.2<br />
F4800<br />
h0.002<br />
0.62<br />
h = R - √2R2 -ae 2<br />
4<br />
0.25<br />
F6000<br />
h0.003<br />
0.40<br />
R = radius of cutter h = cusp height<br />
h = ae 2 l (8 x R) Feed = Rpm x ƒz x z<br />
or h ~ ae2<br />
8R
PITCH<br />
A<br />
B<br />
A milling cutter, being<br />
a multi-edge tool, can<br />
have a variable number<br />
of teeth (z) and there<br />
are certain factors that<br />
help to determine the<br />
number for the type<br />
of operation. The<br />
material and size of<br />
U<br />
workpiece, stability, finish and the power<br />
available are the more machine orientated<br />
factors while the tool related include sufficient<br />
feed per tooth, at least two cutting<br />
edges engaged in cut simultaneously and<br />
that the chip capacity of the tool is ample.<br />
The pitch (u) of a milling cutter is the distance between a<br />
point on the edge to the same point on the next edge.<br />
Milling cutters are classified into coarse, close or extra-close<br />
pitch cutters and most cutters have these three options.<br />
(A) Close pitch means more teeth and moderate chip pockets<br />
and permit high metal-removal rate. Normally used for castiron<br />
and for medium duty machining operations in steel<br />
Close pitch is the first choice for general purpose milling and<br />
is recommended for mixed production.<br />
(B) Coarse pitch means fewer teeth on the cutter periphery<br />
and large chip pockets. Coarse pitch is often used for roughing<br />
to finishing of steel and where vibration tendencies are a<br />
threat to the result of the operation.<br />
Coarse pitch is the true problem solver and is the first choice<br />
for milling with long overhang, low powered machines or<br />
other applications where cutting forces must be minimized.<br />
33
34<br />
C<br />
(C) Extra-close pitch cutters have small chip pockets and<br />
permits very high table feeds. These cutters are suitable for<br />
machining interrupted cast-iron surfaces, roughing cast-iron<br />
and small depth of cut in steel. Also in materials where the<br />
cutting speed has to be kept low, for instance in titanium.<br />
Extra close pitch is the first choice for cast iron.<br />
The milling cutters can have either even or differential pitch.<br />
The latter means unequal spacing of teeth round the<br />
cutter and is a very effective means of coming to terms with<br />
problems of vibrations.
When there is a problem with vibration it<br />
is recommended that a milling cutter with<br />
as coarse pitch as possible is used, so that<br />
fewer inserts give less opportunities for<br />
vibration to arise. You can also remove<br />
every second insert in the milling cutter so<br />
that there are fewer inserts in cut. In full<br />
slot milling you can take out so many of<br />
the inserts that only two remain. However,<br />
this means that the cutter being used must<br />
have an even number of teeth, 4, 6, 8, 10 etc.<br />
With only two inserts in the milling cutter,<br />
the feed can be increased and the depth of<br />
cut can usually be increased several times.<br />
The surface finish will also be very good.<br />
A surface finish of Ra 0.24 in hardened<br />
steel with a hardness of 300 HB has been<br />
measured after machining with a milling<br />
cutter with an overhang of 500 mm. In<br />
order to protect the insert seats, the inserts<br />
sitting in the seats which are not being in<br />
cut can be ground down and allowed to<br />
remain in the cutter as dummy inserts.<br />
A B C<br />
Positioning and length of cut<br />
The length of cut is affected by the positioning<br />
of the milling cutter. Tool-life is<br />
often related to the length of cut which<br />
the cutting edge must undergo. A milling<br />
cutter which is positioned in the centre of<br />
the workpiece gives a shorter length of<br />
cut, while the arc which is in cut will be<br />
longer if the cutter is moved away from<br />
the centre line (B) in either direction.<br />
Bearing in mind how the cutting forces act,<br />
a compromise must be reached. The direction<br />
of the radial cutting forces (A) will<br />
vary when the insert edges go into and out<br />
of cut and play in the machine spindle can<br />
give rise to vibration and lead to insert<br />
breakage.<br />
By moving the milling cutter off the centre,<br />
B and C, a more constant and favourable<br />
direction of the cutting forces will be<br />
obtained. With the cutter positioned close<br />
to the centre line the largest average chip<br />
thickness is obtained. With a large facemill<br />
it can be advantageous to move it more off<br />
centre. In general, when facemilling, the<br />
cutter diameter should be 20-25% larger<br />
than the cutting width.<br />
<br />
35
36<br />
ENTRANCE AND EXIT OF CUT<br />
Every time a cutter<br />
goes into cut, the inserts<br />
are subjected to<br />
a large or small shock<br />
load depending on<br />
material, chip cross<br />
section and the type of<br />
cut. The initial contact<br />
between the cutting<br />
edge and workpiece may be very unfavourable<br />
depending on where the edge of the<br />
insert has to take the first shock. Because<br />
of the wide variety of possible types of<br />
cut, only the effects of the cutter position<br />
on the cut will be considered here.<br />
Where the centre of the cutter is positioned<br />
outside the workpiece (A) an unfavourable<br />
contact between the edge of the insert and<br />
the workpiece results.<br />
Where the centre of the cutter is positioned<br />
inside the workpiece (B) the most favourable<br />
type of cut results.<br />
B<br />
+ -<br />
A<br />
The most dangerous situation however, is<br />
when the insert goes out of cut leaving the<br />
contact with the workpiece. The cemented<br />
carbide inserts are made to withstand compressive<br />
stresses which occur every time an<br />
insert goes into cut (down milling). On the<br />
other hand, when an insert leaves the workpiece<br />
when hard in cut (up milling) it will<br />
be affected by tensile stresses which are<br />
destructive for the insert which has low<br />
strength against this type of stress. The<br />
result will often end in rapid insert failure.<br />
-<br />
+<br />
-
The basic action to take when there is a problem with vibration<br />
is to reduce the cutting forces. This can be done by using the<br />
correct tools and cutting data.<br />
Choose milling cutters with a coarse and differential pitch.<br />
Choose positive insert geometries.<br />
Use as small milling cutter as possible. This is particularly important<br />
when milling with tuned adaptors.<br />
Small edge rounding (ER). Go from a thick coating to a thin one, if<br />
necessary use uncoated inserts.<br />
Use a large feed per tooth, reduce the rotational speed and maintain<br />
the table feed (= larger feed/tooth). Or maintain the rotational speed and<br />
increase the table feed (and feed/tooth). Do not reduce the feed per tooth.<br />
Reduce the radial and axial cutting depths.<br />
Choose a stable tool holder such as Coromant Capto. Use the largest<br />
possible adapter size to achieve the best stability. Use tapered extensions<br />
for the best rigidity.<br />
With long overhangs, use tuned adaptors in combination with coarse<br />
and differential pitch milling cutters. Position the milling cutter as close<br />
to the tuned adapter as possible.<br />
Position the milling cutter off centre of the workpiece, which leads to<br />
a more favourable direction of the cutting forces.<br />
Start with normal feed and cutting speeds. If vibration arises try introducing<br />
these measures gradually, as previously described:<br />
a) increase the feed and keep the same rpm<br />
b) decrease the rpm and keep the same feed<br />
c) reduce the axial or/and radial depth of cut<br />
d) try to reposition the cutter<br />
37
38<br />
RAMPING AND CIRCULAR INTERPOLATION<br />
Axial feed capability<br />
is an advantage in<br />
many operations.<br />
Holes, cavities as well<br />
as contours can be<br />
efficiently machined.<br />
Facemilling cutters<br />
with round inserts are<br />
strong and have big<br />
clearance to the cutter body.<br />
Those lend themselves to drill/mill operations<br />
of various kinds. Ramping at high<br />
feed rates and the ability to reach far into<br />
workpieces make round insert cutters a<br />
good tool for complicated forms. For<br />
instance, profile milling in five-axis machines<br />
and roughing in three-axis machines.<br />
Ramping is an efficient way to approach<br />
the workpiece when machining pockets<br />
and for larger holes circular interpolation<br />
is much more power efficient and flexible<br />
than using a large boring tool. Problems<br />
with chip control is often eliminated as well.<br />
When ramping, the operation should be<br />
started around the centre, machining<br />
outwards in the cavity to facilitate chip<br />
evacuation and clearance. As milling cutters<br />
has limitations in the axial depth of<br />
cut and varies depending on the diamater,<br />
the ramping angle for different sizes of<br />
cutters should be checked.<br />
The ramping angle is dependent upon the<br />
diameter of the cutters used, clearance to<br />
the cutter body, insert size and depth of
cut. A 32 mm CoroMill 200 cutter with<br />
12 mm inserts and a cutting depth of 6 mm<br />
can ramp at an angle of 13 degrees. Whilst<br />
an 80 mm cutter manages 3.5 degrees. The<br />
amount of clearance also depends upon the<br />
diameter of the cutter.<br />
Often used within die & mould making is<br />
when the tool is fed in a spiral shaped path<br />
in the axial direction of the spindle, while<br />
the workpiece is fixed. This is most common<br />
when boring and have several advantages<br />
when machining holes with large diameters.<br />
First of all the large diameter can<br />
be machined with one and the same tool,<br />
secondly chip breaking and evacuation is<br />
usually not a problem when machining<br />
this way, much because of the smaller diameter<br />
of the tool compared to the diameter<br />
of the hole to be machined and third, the<br />
risk of vibration is small.<br />
It is recommended that the diameter of the<br />
hole to be machined is twice the diameter<br />
of the cutter. Remember to check maximum<br />
ramping angle for the cutter when using<br />
circular interpolation as well.<br />
These methods are favourable for weak<br />
machine spindles and when using long<br />
overhangs, since the cutting forces are<br />
mainly in the axial direction.<br />
39
40<br />
CHOICE OF HOLDING TOOLS<br />
One of the main criteria<br />
when choosing both<br />
holding and cutting<br />
tools is to have as<br />
small run-out as possible.<br />
The smaller the<br />
run-out is, the more<br />
even the workload<br />
will be on each insert<br />
in a milling cutter. (Zero run-out would of<br />
course theoretically give the best tool life<br />
and the best surface texture and finish).<br />
In HSM applications the size of run-out is<br />
specifically crucial. The TIR (Total Indicator<br />
Readout) should be maximum 10<br />
microns at the cutting edge. A good rule of<br />
thumb is: ”For each 10 microns in added<br />
run out - 50% less tool life!<br />
Balancing adds some steps to the process<br />
and typically involves:<br />
• Measuring the unbalance of a tool/<br />
toolholder assembly.<br />
• Reducing the unbalance by altering the<br />
tool, machining it to remove mass or by<br />
moving counterweights on toolholders.<br />
• Often the procedure has to be repeated,<br />
involving checking the tool again, refining<br />
the previous adjustments until the<br />
balance target is achieved.<br />
Tool balancing leaves several sources of<br />
process instability untouched. One of these<br />
is error in the fit between toolholder and<br />
spindle interface. The reason is that there<br />
is often a measurable play in this clamp,<br />
and there may also be a chip or dirt inside<br />
the taper. The taper will not likely line up<br />
the same way every time. The presence of<br />
any such contamination would create<br />
unbalance even if the tool, toolholder, and<br />
spindle were perfect in every other way.<br />
To balance tools is an additional cost to<br />
the machining process and it should be<br />
analysed in each case if cost reduction<br />
gained by balancing is viable. Sometimes,<br />
however, there is no alternative to get the<br />
required quality.
The aluminium workpiece in the picture illustrates tool balancing affecting surface<br />
finish. The balanceable toolholder used to machine both halves of the surface was<br />
set to two unbalance values, 100 gmm and 1.4 gmm. The more balanced tool produced<br />
the smoother surface. Conditions of the two cuts were otherwise identical:<br />
12000 rpm, 5486 mm/min feed rate, 3.5 mm depth- and 19 mm width of cut, using<br />
a toolholder with a combined mass of 1.49 kg.<br />
Balancing tools to G-class targets, as defined by ISO 1940-1, may demand holding<br />
the force from unbalance far less than the cutting force the machine will see anyway.<br />
In reality, an endmill run at 20000 rpm may not need to be balanced to any better<br />
than 20 gmm, and 5 gmm is generally appropriate for much higher speeds. The diagram<br />
refers to unbalance force relating to tool and adaptor weight of 1 kg. Field A<br />
shows the approximate cutting force on a 10 mm diameter solid endmill.<br />
The balance equations contain:<br />
F: force from unbalance (Newton)<br />
G: G-class value, which has units of mm/sec<br />
m: tool mass in kg<br />
n: spindle speed in rpm<br />
u: unbalance in gmm<br />
r<br />
CG<br />
e<br />
m<br />
m<br />
mtool<br />
F (N)<br />
400<br />
300<br />
200<br />
100<br />
9549 x G<br />
u = m x (gmm)<br />
n<br />
F = u ( n ) 2 (N)<br />
9549<br />
A<br />
20g - mm<br />
5g - mm<br />
0 20 000<br />
ISO G6.3<br />
ISO G2.5<br />
40 000<br />
n (rpm)<br />
41
42<br />
However, much can be done by just<br />
aiming for good balance through proper<br />
tool selection, and here are some points<br />
to think of when selecting tools:<br />
• Buy quality tools and toolholders.<br />
Look for toolholders that have been<br />
premachined to remove unbalance.<br />
• Favour tools that are short and as<br />
lightweight as possible.<br />
• Regularly inspect tools and toolholders<br />
for fatigue cracks and signs of distortion.<br />
The tool unbalance that the process can<br />
accept is determined by aspects of the process<br />
itself. These include the cutting forces<br />
in the cut, the balance condition of the<br />
machine, and the extent to which these<br />
two affect each other. Trial and error is<br />
the best way to find the unbalance target.<br />
Run the intended operation several times<br />
to a variety of different values, for instance<br />
from 20 gmm and below. After each run,<br />
Angular error<br />
Unbalance<br />
Balance class<br />
TIR<br />
Parallel error<br />
Unbalance<br />
Balance class<br />
TIR<br />
Coromant Capto C5<br />
Up to 0.9 gmm<br />
up to G1.5<br />
up to 3.5 µm<br />
Coromant Capto C5<br />
Up to 2.6 gmm<br />
up to G4.4<br />
up to 4.2 µm<br />
n = 20 000 rpm, weight of adapter and toll m = 1.2 kg<br />
upgrade to a more balanced tool and repeat.<br />
The optimal balance is the point beyond<br />
which further improvements in tool balance<br />
fail to improve the accuracy or surface<br />
finish of the workpiece, or the point in<br />
which the process can easily hold the specific<br />
workpiece tolerances.<br />
The key is to stay focused on the process<br />
and not aim for a G value or other arbitrary<br />
balance target. The aim should be to achieve<br />
the most effective process as possible. This<br />
involves weighing the costs of the tool<br />
balancing and the benefit it can deliver,<br />
and strike the right balance between them.<br />
At high speed, the centrifugal force might<br />
be strong enough to make the spindle bore<br />
grow slightly. This has a negative effect on<br />
some V-flange tools which contact the<br />
spindle bore only in the radial plane.<br />
Spindle growth can cause the tool to be<br />
HSK 50 A<br />
up to 3.3 ggm<br />
up to G5.6<br />
up to 13.4 µm<br />
HSK 50 from A<br />
up to 9.6 ggm<br />
up to G516.8<br />
up to 16 µm
Vibration severity [mm/s]<br />
4.0<br />
3.0<br />
2.0<br />
1.0<br />
0.0<br />
Unbalance vs Vibration severity at bearing<br />
0 5000 10000 15000<br />
Rotational speed n [rpm]<br />
drawn up into the spindle by the constant<br />
pull of the drawbar. This can lead to a<br />
stuck tool or dimensional inaccuracy in<br />
the Z-axis.<br />
Tools with contact both in the spindle bore<br />
and face, radial and axial contact, simultaneous<br />
fit tools are more suited for<br />
machining at high speeds. When the spindle<br />
begins to grow, the face contact prevents<br />
Spindle IBAG 170.2 Tool weight 1.2 kg<br />
160 gmm<br />
80 gmm<br />
40 gmm<br />
20 gmm<br />
10 gmm<br />
44<br />
Surface contact of spindle interface at high spindle speed<br />
Spindle speed<br />
0<br />
20000<br />
25000<br />
30000<br />
35000<br />
40000<br />
Inner taper<br />
Tp 2<br />
ISO40<br />
100%<br />
100%<br />
37%<br />
31%<br />
26%<br />
26%<br />
D1<br />
Le<br />
De<br />
HSK 50A<br />
100%<br />
95%<br />
91%<br />
83%<br />
72%<br />
67%<br />
Taper contact surface<br />
Face contact<br />
surface<br />
External taper<br />
Face contact surface<br />
Li Length of taper<br />
Length of taper<br />
The roundness and concentricity are the<br />
most crucial factors for toolholders and<br />
not the tolerance class (AT).<br />
Taper diameter<br />
tolerance area<br />
Tolerance for roundness<br />
Nominal<br />
taper<br />
Cross section<br />
tolerance area<br />
for roundness<br />
Nominal<br />
taper angle<br />
<br />
d<br />
min<br />
Coromant Capto<br />
C5<br />
100%<br />
100%<br />
99%<br />
95%<br />
91%<br />
84%<br />
Manufactured angle<br />
of the taper<br />
<br />
2<br />
Nominal taper<br />
max<br />
Taper interface angle<br />
L<br />
2<br />
AT<br />
D
When planning for HSM one should strive<br />
to build tools using a holder cutter combination<br />
that is symmetrical. There are<br />
some different tool systems which can be<br />
used. However, a shrink fit system where<br />
the toolholder is heated up and the bore<br />
expands and then clamps the tool when<br />
cooling down is considered to be one of<br />
the best and most reliable for HSM. First<br />
because it provides very low run-out,<br />
secondly the coupling can transmit a high<br />
torque, thirdly it is easy to build customized<br />
tools and tool assemblies and finally it<br />
gives high total stiffness in the assembly.<br />
45
46<br />
EXTENDED TOOLS IN ROUGHING OF A CAVITY<br />
To maintain maximum<br />
productivity when<br />
roughing a cavity it is<br />
important to choose a<br />
series of extensions<br />
for the cutter. It is a<br />
very bad compromise<br />
to start with the longest<br />
extension, as the<br />
productivity will be very low.<br />
It is recommended to change to extended<br />
tools at pre-determined positions in the<br />
program. The geometry of the die or mould<br />
decides where to change.<br />
Cutting data should also be adapted to<br />
each tool length to keep up maximum<br />
productivity.<br />
When the total tool length, from the gauge<br />
line to the lowest point on the cutting<br />
edge, exceeds 4-5 times the diameter at the<br />
gauge line, tuned, tapered bars should be<br />
used. Or, if the bending stiffness must be<br />
radically increased, extensions made of<br />
heavy metal should be used.<br />
When using extended tools it is important<br />
to choose biggest possible diameter on the<br />
extensions and adaptors relatively to the<br />
cutter diameter. Every millimeter is important<br />
for maximum rigidity, stiffness and<br />
productivity. It is not necessary to have more<br />
than 1 mm radially in difference between<br />
holding and cutting tool. The easiest way<br />
to achieve this is to use oversized cutters.<br />
Modular tools increases the flexibility and<br />
the number of tool combination<br />
possibilities.
MACHINING IN SEGMENTS<br />
When machining huge<br />
press dies it is often<br />
necessary to index the<br />
inserts several times.<br />
Instead of doing this<br />
manually and interrupting<br />
the cutting<br />
process, this can be<br />
done in an organised<br />
way if precautions are taken in the process<br />
planning and programming.<br />
Based on experience, or other information,<br />
the amount of material, or the surface to<br />
machine, can be split up in portions or<br />
segments. The segments can be chosen<br />
according to natural boundaries or be<br />
based on certain radii sizes in the die or<br />
mould. What is important is that each segment<br />
can be machined with one set of<br />
insert edges or solid carbide edges, plus a<br />
safety margin, before being changed to<br />
next tool in that specific family of replacement<br />
tools.<br />
This technique enables full usage of the<br />
ATC (Automatic Tool Changer) and replacement<br />
tools (sister tools).<br />
The technique can be used for roughing to<br />
finishing. Today’s touch probes or laser<br />
measuring equipment gives very precise<br />
measuring of tool diameter and length and<br />
a matching (of surfaces) lower than 10<br />
microns. It also gives several benefits such as:<br />
• Better machine tool utilisation- less<br />
interruptions, less manual tool changing<br />
• Higher productivity-easier to optimise<br />
cutting data<br />
• Better cost efficiency-optimisation vs<br />
real machine tool cost per hour<br />
• Higher die or mould geometrical<br />
accuracy-the finishing tools can be<br />
changed before getting excessive wear<br />
47
48<br />
METHODS FOR MACHINING OF CORNERS<br />
The traditional way of<br />
machining a corner is<br />
to use linear movements<br />
(G1) with noncontinuous<br />
transitions<br />
in the corner. Which<br />
means that when the<br />
cutter comes to the<br />
corner it has to be slowed<br />
down because of dynamic limitations<br />
of the linear axes. And there will even be a<br />
very short stop before the motors can<br />
change the feed direction. As the spindle<br />
speed is the same, the situation creates a<br />
lot of excessive friction and heat. If for<br />
instance aluminium or other light alloys<br />
are machined they can get burning marks<br />
or even start to burn due to this heat. The<br />
surface finish will deteriorate optically and<br />
in some materials even structurally, even<br />
beyond the tolerance demands.<br />
In traditional machining of corners the tool<br />
radius is identical with the corner radius.<br />
Which gives maximum contact length and<br />
deflection (often one quadrant).<br />
The most typical result is vibrations, the<br />
bigger the longer the tool, or total tool<br />
overhang is. The wobbling cutting forces<br />
often also creates undercutting of the corner.<br />
Stock<br />
to remove<br />
There is of course also a risk for frittering<br />
of edges or total tool break down.<br />
Some solutions on this problem are:<br />
• Use a cutter with a smaller radius to<br />
produce the desired corner radius on the<br />
die or mould. Use circular interpolation<br />
(G2, G3) to produce the corner. This<br />
movement type does not create any definite<br />
stop at block borders. Which means that<br />
the movement gives smooth continuous<br />
transitions and there is only a small chance<br />
that a vibration should start.<br />
• Another solution is to produce a bigger<br />
corner radius, via circular interpolation,<br />
than stated in the drawing. This can be<br />
favourable sometimes as it allowes to use<br />
a bigger cutter diameter in roughing to<br />
keep up maximum productivity.
• The remaining stock in the corner can<br />
then be machined via restmilling (rest =<br />
remaining stock) with a smaller cutter<br />
radius and circular interpolation. The restmilling<br />
of corners can also be performed<br />
by axial milling. It is important to use a<br />
good programming technique with a smooth<br />
approach and exit. It is very important to<br />
perform the restmilling of corners before<br />
or as a semi-finishing operation - gives<br />
even stock and high productivity in finishing.<br />
If the cavity is deep (long overhang)<br />
the ap/ae should be kept low to avoid<br />
deflection and vibration (ap/ae appr. 0,1-<br />
0,2 mm in HSM applications in hardened<br />
tool steel).<br />
Ø8<br />
R10<br />
If consequently using a programming<br />
technique based on circular interpolation<br />
(or NURBS-interpolation), which gives<br />
both continuos tool paths and commands<br />
of feed and speed rates, it is possible to<br />
drive the mechanic functions of a machine<br />
tool to much higher speeds, accelerations<br />
and decelerations.<br />
This can result in productivity gains<br />
ranging between 20-50%!<br />
R4<br />
49
50<br />
METHODS FOR MACHINING OF A CAVITY<br />
A. Pre-drilling of a<br />
starting hole. Corners<br />
can be pre-drilled as<br />
well. Not recommendable<br />
method as one<br />
extra tool is needed.<br />
Which also adds more<br />
unproductive positioning<br />
and tool changing<br />
time. The extra tool also blocks one<br />
position in the tool magazine. From a cutting<br />
point of view the variations in cutting<br />
forces and temperature when the cutter<br />
breaks through the pre-drilled holes in the<br />
corners is negative. The re-cutting of chips<br />
also increases when using pre-drilled holes.<br />
B. If using a ball nose end mill, inserted or<br />
solid carbide, it is common to use a peckdrilling<br />
cycle to reach a full axial depth of<br />
cut and then mill the first layer of the cavity.<br />
This is then repeated until the cavity is<br />
finished. The drawback with this start is<br />
chip evacuation problems in the centre of<br />
the end mill. Better than using a peck-drilling<br />
cycle is to reach the full axial depth of<br />
cut via circular interpolation in helix. Important<br />
also then to help evacuate the chips.<br />
C. One of the best methods is to do linear<br />
ramping in X/Y and Z to reach a full axial<br />
depth of cut. Note that if choosing the<br />
right starting point, there will be no need<br />
of milling away stock from the ramping<br />
part. The ramping can start from in to out<br />
or from out to in depending on the geometry<br />
of the die or mould. The main criteria<br />
is how to get rid of the chips in the best<br />
way. Down milling should be practised in<br />
A<br />
B<br />
Peck-drilling cycle with<br />
a short delay between<br />
each down-feed to<br />
evacuate chips.<br />
1<br />
2<br />
3<br />
4<br />
5<br />
Required<br />
depth of cut<br />
for machining<br />
the first layer.
C D<br />
a continuous cutting. When taking a new<br />
radial depth of cut it is important to<br />
approach with a ramping movement or,<br />
better, with a smooth circular interpolation.<br />
In HSM applications this is crucial.<br />
D. If using round insert cutters or end<br />
mills with a ramping capacity the most<br />
favourable method is to take the first axial<br />
depth of cut via circular interpolation in<br />
helix and follow the advice given in the<br />
previous point.<br />
51
52<br />
HSM - HIGH SPEED MACHINING
There are a lot of<br />
questions about HSM<br />
today and many different,<br />
more or less<br />
complicated, definitions<br />
can be seen frequently.<br />
Here the<br />
matter will be discussed<br />
in an easy fashion<br />
and from a practical point of view.<br />
Historical background<br />
The term High Speed Machining (HSM)<br />
commonly refers to end milling at high<br />
rotational speeds and high surface feeds.<br />
For instance, the routing of pockets in aluminum<br />
airframe sections with a very high<br />
material removal rate. Over the past 60<br />
years, HSM has been applied to a wide<br />
range of metallic and non-metallic workpiece<br />
materials, including the production<br />
of components with specific surface topography<br />
requirements and machining of<br />
materials with a hardness of 50 HRC and<br />
above. With most steel components hardened<br />
to approximately 32-42 HRC, machining<br />
options currently include:<br />
• rough machining and semi-finishing of<br />
the material in its soft (annealed) condition<br />
• heat treatment to achieve the final required<br />
hardness (
54<br />
Chip removal temperatur °<br />
°C<br />
1600<br />
1200<br />
800<br />
400<br />
Machinable<br />
Machinable<br />
0<br />
0 600 1200 1800 2400 3000<br />
Conventional machining area<br />
Cutting speed vc<br />
Chip removal temperature as a result of the cutting speed<br />
Main economical and technical<br />
factors for the development of HSM<br />
Survival - the ever increasing competition<br />
on the marketplace is setting new standards<br />
all the time. The demands on time<br />
and cost efficiency is getting higher and<br />
higher. This has forced the development of<br />
new processes and production techniques<br />
to take place. HSM provides hope and<br />
solutions...<br />
Materials - the development of new, more<br />
difficult to machine materials has underlined<br />
the necessity to find new machining solutions.<br />
The aerospace industry has its heat<br />
resistant and stainless steel alloys. The<br />
automotive industry has different bimetal<br />
compositions, Compact Graphite Iron and<br />
an ever increasing volume of aluminum.<br />
The die and mold industry mainly has to<br />
face the problem to machine high hardened<br />
tool steels. From roughing to finishing.<br />
Steel<br />
Cast Iron<br />
Iron<br />
carbon alloys<br />
Tungsten Carbide 900°<br />
Stellite 850°C<br />
Non-ferrous metals<br />
High speed 650°C<br />
Carbon steel 450°C<br />
Quality - the demand on higher component<br />
or product quality is a result of the<br />
hard competition. HSM offers, if applied<br />
correctly, solutions in this area. Substitution<br />
of manual finishing is one example.<br />
Especially important on dies or moulds or<br />
components with a complex 3D geometry.<br />
Processes - the demands on shorter through<br />
- put times via fewer set-ups and simplified<br />
flows (logistics) can be solved to a<br />
big extent via HSM. A typical target within<br />
the die and mould industry is to make a<br />
complete machining of fully hardened<br />
small sized tools in one set-up. Costly and<br />
time consuming EDM-processes can also<br />
be reduced or eliminated via HSM.<br />
Design & development - one of the main<br />
tools in today’s competition is to sell products<br />
on the value of novelty. The average<br />
product life cycle on cars is today 4 years,
computers and accessories 1,5 years, hand<br />
phones 3 months... One of the prerequisites<br />
of this development of fast design changes<br />
and rapid product development time is the<br />
HSM technique.<br />
Complex products - there is an increase<br />
of multifunctional surfaces on components.<br />
Such as new design of turbine blades<br />
giving new and optimised functions and<br />
features. Earlier design allowed polishing<br />
by hand or with robots (manipulators).<br />
The turbine blades with the new, more<br />
sophisticated design has to be finished via<br />
machining and preferably by HSM.<br />
There are also more and more examples of<br />
thin walled workpieces that has to be<br />
machined (medical equipment, electronics,<br />
defence products, computer parts).<br />
Production equipment - the strong development<br />
of cutting materials, holding<br />
tools, machine tools, controls and especially<br />
CAD/CAM features and equipment has<br />
opened possibilities that must be met with<br />
new production methods and techniques.<br />
The original definition of HSM<br />
Salomons theory, “Machining with high<br />
cutting speeds...“ on which he got a German<br />
patent 1931, assumes that “at a certain cutting<br />
speed (5-10 times higher than in conventional<br />
machining), the chip removal<br />
temperature at the cutting edge will start<br />
to decrease...“.<br />
Giving the conclusion: ...“seem to give<br />
a chance to improve productivity in<br />
machining with conventional tools at high<br />
cutting speeds...“<br />
Modern research has unfortunately not been<br />
able to verify this theory to its full extent.<br />
There is a relative decrease of the temperature<br />
at the cutting edge that starts at certain<br />
cutting speeds for different materials. The<br />
decrease is small for steel and cast iron.<br />
And bigger for aluminum and other nonferrous<br />
metals. The definition of HSM<br />
must be based on other factors.<br />
What is today’s definition of HSM?<br />
The discussion about high speed machining<br />
is to some extent characterised by confusion.<br />
There are many opinions, many myths and<br />
many different ways to define HSM.<br />
Looking upon a few of these definitions<br />
HSM is said to be:<br />
• High Cutting Speed (v c) Machining...<br />
• High Spindle Speed (n) Machining...<br />
• High Feed (v f) Machining...<br />
• High Speed and Feed Machining...<br />
• High Productive Machining...<br />
55
56<br />
On following pages the parameters that<br />
influence the machining process and<br />
having connections with HSM will be<br />
discussed. It is important to describe HSM<br />
from a practical point of view and we also<br />
want to give as many practical guidelines<br />
for the application of HSM as possible.<br />
True cutting speed<br />
As cutting speed is dependent on both<br />
spindle speed and the diameter of the tool,<br />
HSM should be defined as “true cutting<br />
speed“ above a certain level. The linear<br />
dependence between cutting speed and<br />
De = 2 √ap (Dc - ap)<br />
Effective cutting speed (ve)<br />
ve = π x n x D e m/min<br />
1000<br />
feed rate results in “high feeds with high<br />
speeds“. The feed will become even higher<br />
if a smaller cutter diameter is chosen, provided<br />
that the feed per tooth and the number<br />
of teeth is unchanged. To compensate for a<br />
smaller diameter the rpm must be increased<br />
to keep the same cutting speed...and the<br />
increased rpm gives a higher vf.<br />
Vf = fz x n x zn [mm/min]<br />
Formula for feed speed.<br />
Shallow cuts<br />
Very typical and necessary for HSM applications<br />
is that the depths of cut, ae and ap<br />
and the average chip thickness, hm, are<br />
much lower compared with conventional<br />
machining. The material removal rate, Q,<br />
is consequently and considerably smaller<br />
than in conventional machining. With the<br />
exception when machining in aluminium,<br />
other non- ferrous materials, in finishing<br />
and superfinishing operations in all types<br />
of materials.<br />
Q =<br />
ap x ae x vf [cm 3 /min]<br />
1000<br />
Formula for material removal rate.<br />
Characteristics of today’s<br />
HSM in hardened tool steel<br />
Within the die & mould area the maximum<br />
economical workpiece size for roughing to<br />
finishing with HSM is approximately 400<br />
X 400 X 150 (l, w, h). The maximum size<br />
is related to the relatively low material<br />
removal rate in HSM. And of course also to<br />
the dynamics and size of the machine tool.<br />
Most dies or moulds have a considerably<br />
smaller size, than mentioned above, in<br />
complete machining (single set-up).<br />
Typical operations performed are, roughing,<br />
semi-finishing, finishing and in many cases<br />
super-finishing. Restmilling of corners and
adii should always be done to create constant<br />
stock for the following operation and<br />
tool. In many cases 3-4 tool types are used.<br />
The common diameter range is from 1 - 20<br />
mm. The cutting material is in 80 to 90%<br />
of the cases solid carbide end mills or ball<br />
nose end mills. End mills with big corner<br />
radii are often used. The solid carbide<br />
tools have reinforced cutting edges and<br />
neutral or negative rakes (mainly for materials<br />
above 54 HRC). One typical and<br />
important design feature is a thick core for<br />
maximum bending stiffness.<br />
It is also favourable to use ball nose end<br />
mills with a short cutting edge and contact<br />
length. Another design feature of importance<br />
is an undercutting capability, which is<br />
necessary when machining along steep walls<br />
with a small clearance. It is also possible to<br />
use smaller sized cutting tools with indexable<br />
inserts. Especially for roughing and<br />
semi-finishing. These should have maximum<br />
shank stability and bending stiffness. A<br />
tapered shank improves the rigidity. And<br />
so does also shanks made of heavy metal.<br />
57
58<br />
Typical workpieces for HSM, forging die for an<br />
automotive component, moulds for a plastic<br />
bottle and a headphone.<br />
The geometry of the die or mould could<br />
preferably be shallow and not too complex.<br />
Some geometrical shapes are also more<br />
suited for high productive HSM. The more<br />
possibilities there are to adapt contouring<br />
tool paths in combination with downmilling,<br />
the better the result will be.<br />
One main parameter to observe when finishing<br />
or super-finishing in hardened tool<br />
steel with HSM is to take shallow cuts.<br />
The depth of cut should not exceed 0,2/0,2<br />
mm (ae/ap). This is to avoid excessive<br />
deflection of the holding/cutting tool and<br />
to keep a high tolerance level and geometrical<br />
accuracy on the machined die or<br />
mould. An evenly distributed stock for<br />
each tool will also guarantee a constant and<br />
high productivity. The cutting speed and<br />
feed rate will be on constant high levels<br />
when the ae/ap is constant. There will be<br />
less mechanical variations and work load<br />
on the cutting edge plus an improved tool<br />
life.<br />
Cutting data<br />
Typical cutting data for solid carbide end<br />
mills with a TiC,N or TiAlN-coating in<br />
hardened steel: (HRC 54-58)<br />
Roughing<br />
True vc: 100 m/min, ap: 6-8% of the cutter<br />
diameter, ae: 35-40% of the cutter diameter,<br />
ƒz: 0,05-0,1 mm/z<br />
Semi-finishing<br />
True v c: 150-200 m/min, ap: 3-4% of the<br />
cutter diameter, ae: 20-40% of the cutter<br />
diameter, ƒz: 0,05-0,15 mm/z<br />
Finishing and super-finishing<br />
True vc: 200-250 m/min, ap: 0,1-0,2 mm,
ae: 0,1-0,2 mm, fz: 0,02-0,2 mm/z<br />
The values are of course dependent of outstick,<br />
overhang, stability in the application,<br />
cutter diameters, material hardness etc.<br />
They should be looked upon as typical<br />
and realistic values. In the discussion about<br />
HSM applications one can sometimes see<br />
that extremely high and unrealistic values<br />
for cutting speed is referred to. In these<br />
cases vc has probably been calculated on<br />
the nominal diameter of the cutter. Not<br />
HSM Cutting Data by Experience<br />
Material Hardness Conv. v c HSM v e, R HSM v e, F<br />
Steel 01.2 150 HB 400
60<br />
THE APPLICATION OF HIGH SPEED MACHINING<br />
Main application<br />
areas for HSM<br />
Milling of cavities.<br />
As have been discussed<br />
earlier, it is possible to<br />
apply HSM-technology<br />
(High Speed<br />
Machining) in<br />
qualified, highalloy<br />
tool steels up to 60-63 HRc.<br />
When milling cavities in such hard<br />
materials, it is crucial to select adequate<br />
cutting and holding tools for each specific<br />
operation; roughing, semi-finishing and<br />
finishing. To have success, it is also very<br />
important to use optimised tool paths,<br />
cutting data and cutting strategies. These<br />
things will be discussed in detail in coming<br />
chapters.<br />
<strong>Die</strong> casting dies. This is an area where<br />
HSM can be utilised in a productive way<br />
as most die casting dies are made of demanding<br />
tool steels and have a moderate<br />
or small size.<br />
Forging dies. Most forging dies are suitable<br />
for HSM due to the shallow geometry that<br />
many of them have. Short tools always<br />
results in higher productivity due to less<br />
bending (better stability). Maintenance of<br />
forging dies (sinking of the geometry) is a<br />
very demanding operation as the surface is<br />
very hard and often also has cracks.
Injection moulds and blow moulds are<br />
also suitable for HSM, especially because<br />
of their (most often) small size. Which<br />
makes it economical to perform all operations<br />
(from roughing to finishing) in one<br />
set up. Many of these moulds have relatively<br />
deep cavities. Which calls for a very<br />
good planning of approach, retract and<br />
overall tool paths. Often long and slender<br />
shanks/extensions in combination with<br />
light cutting tools are used.<br />
Milling of electrodes in graphite and<br />
copper. An excellent area for HSM.<br />
Graphite can be machined in a productive<br />
way with TiCN-, or diamond coated solid<br />
carbide endmills. The trend is that the<br />
manufacturing of electrodes and employment<br />
of EDM is steadily decreasing while<br />
material removal with HSM is increasing.<br />
Modelling and prototyping of dies and<br />
moulds. One of the earliest areas for<br />
HSM. Easy to machine materials, such as<br />
non-ferrous, aluminium, kirkzite et cetera.<br />
The cutting speeds are often as high as<br />
1500-5000 m/min and the feeds are<br />
consequently also very high.<br />
61
62<br />
HSM is also very often used in<br />
direct production of -<br />
• Small batch components<br />
• Prototypes and pre-series in<br />
Al, Ti, Cu for the Aerospace<br />
industry, Electric/Electronic<br />
industry, Medical industry<br />
Defence industry<br />
• Aircraft components, especially<br />
frame sections but also<br />
engine parts<br />
• Automotive components, GCI<br />
and Al<br />
• Cutting and holding tools<br />
(through hardened cutter<br />
bodies)<br />
Targets for HSM of dies and moulds<br />
One of the main targets with HSM is to<br />
cut production costs via higher productivity.<br />
Mainly in finishing operations and often in<br />
hardened tool steel.<br />
Another target is to increase the overall<br />
competitiveness through shorter lead and<br />
delivery times. The main factors, which<br />
enables this are:<br />
• production of dies or moulds in<br />
(a few or) a single set-up<br />
• improvement of the geometrical accuracy<br />
of the die or mould via machining,<br />
which in turn will decrease the manual<br />
labour and try-out time<br />
• increase of the machine tool and workshop<br />
utilisation via process planning<br />
with the help of a CAM-system and<br />
workshop oriented programming<br />
Advantages with HSM<br />
Cutting tool and workpiece temperature<br />
are kept low. Which gives a prolonged tool<br />
life in many cases. In HSM applications, on<br />
the other hand, the cuts are shallow and the<br />
engagement time for the cutting edge is extremely<br />
short. It can be said that the feed<br />
is faster than the time for heat propagation.<br />
Top picture HSM, feed faster than heat<br />
propagation. Lower picture, conventional<br />
milling, time for heat propagation.<br />
Low cutting force gives a small and<br />
consistent tool deflection. This, in combination<br />
with a constant stock for each<br />
operation and tool, is one of the prerequisites<br />
for a highly productive and safe process.<br />
As the depths of cut are typically shallow<br />
in HSM, the radial forces on the tool and<br />
spindle are low. This saves spindle bearings,<br />
guide-ways & ball screws. HSM and axial<br />
milling is also a good combination as the
Fc [N]<br />
2500<br />
2000<br />
1500<br />
1000<br />
500<br />
0<br />
0 500 1000 1500 2000 2500 3000<br />
V c [m/min]<br />
Cutting force (Fc) vs cutting speed (vc) for a<br />
constant cutting power of 10 kW<br />
impact on the spindle bearings is small and<br />
the method also allows longer tools with<br />
less risk for vibrations.<br />
Productive cutting process in small sized<br />
components. Roughing, semi-finishing and<br />
finishing is economical to perform when<br />
the total material removal is relatively low.<br />
Productivity in general finishing and<br />
possibility to achieve extremely good<br />
surface finish. Often as low as Ra ~ 0,2<br />
microns.<br />
Machining of very thin walls is possible.<br />
As an example the wall thickness can be<br />
0,2 mm and have a height of 20 mm if utilising<br />
the method shown in the figure.<br />
Downmilling tool paths to be used. The<br />
contact time, between edge and work<br />
piece, must be extremely short to avoid<br />
vibrations and deflection of the wall. The<br />
microgeometry of the cutter must be very<br />
positive and the edges very sharp.<br />
kc1 [N/mm2 ]<br />
800<br />
700<br />
600<br />
500<br />
0 500 1000 1500 2000 2500 3000<br />
V c [m/min]<br />
Cutting speed vs specific cutting force in<br />
aluminium 7050<br />
The impulse law<br />
Fc x tengage = mwall x ∆vwall<br />
Time of engagement is reduced with HSM<br />
<br />
Impulse is reduced<br />
<br />
Deflection is reduced<br />
63
64<br />
Geometrical accuracy of dies and moulds<br />
gives easier and quicker assembly. No<br />
human being, no matter how skilled, can<br />
compete with a CAM/<strong>CNC</strong>-produced surface<br />
texture and geometry. If some more<br />
hours are spent on machining, the time<br />
consuming manual polishing work can be<br />
cut down dramatically. Often with as<br />
much as 60-100%!<br />
Reduction of production processes as hardening,<br />
electrode milling and EDM can be<br />
minimised. Which gives lower investment<br />
costs and simplifies the logistics. Less floor<br />
space is also needed with fewer EDMequipment.<br />
HSM can give a dimensional<br />
tolerance of 0,02 mm, while the tolerance<br />
with EDM is 0,1-0,2 mm. The durability,<br />
tool life, of the hardened die or mould can<br />
= Manual finishing<br />
sometimes be increased when EDM is<br />
replaced with machining. EDM can, if<br />
incorrectly performed, generate a thin, rehardened<br />
layer directly under the melted<br />
top layer. The re-hardened layer can be up<br />
to ~20 microns thick and have a hardness<br />
of up to 1000 Hv. As this layer is considerably<br />
harder than the matrix it must be<br />
removed. This is often a time consuming<br />
and difficult polishing work. EDM can also<br />
induce vertical fatigue cracks in the melted<br />
and resolidified top layer. These cracks can,<br />
during unfavourable conditions, even lead<br />
to a total breakage of a tool section.<br />
Design changes can be made very fast via<br />
CAD/CAM. Especially in cases where there<br />
is no need of producing new electrodes.<br />
EDM<br />
A) Traditional process. Non-hardened (soft) blank (1), roughing (2) and semi-finishing (3). Hardening to the final service condition<br />
(4). EDM process - machining of electrodes and EDM of small radii and corners at big depths (5). Finishing of parts of the<br />
cavity with good accessability (6). Manual finishing (7).<br />
B) Same process as (A) where the EDM-process has been replaced by finish machining of the entire cavity with HSM (5).<br />
Reduction of one process step.<br />
C) The blank is hardened to the final service condition (1), roughing (2), semi-finishing (3) and finishing (4). HSM most often<br />
applied in all operations (especially in small sized tools). Reduction of two process steps. Normal time reduction compared with<br />
process (A) by approximately 30-50%.
m = 0.015 kg<br />
v = 84 m/s<br />
n = 40,000 rpm<br />
E = 53 Nm<br />
ø40<br />
An example of the consequences of breakage at high speed machining is<br />
that of an insert breaking loose from a 40 mm diameter end mill at a spindle<br />
speed of 40.000 rpm. The ejected insert, with a mass of 0.015 kg, will fly off<br />
at a speed of 84 m/s, which is an energy level of 53 Nm - equivalent to the<br />
bullet from a pistol and requiring armour plated glass.<br />
Some disadvantages with HSM<br />
• The higher acceleration and deceleration<br />
rates, spindle start and stop give a relatively<br />
faster wear of guide ways, ball<br />
screws and spindle bearings. Which<br />
often leads to higher maintenance costs…<br />
• Specific process knowledge, programming<br />
equipment and interface for fast<br />
data transfer needed.<br />
• It can be difficult to find and recruit<br />
advanced staff.<br />
• Considerable length of “trial and error”<br />
period.<br />
• Emergency stop is practically unnecessary!<br />
Human mistakes, hard-, or software<br />
errors give big consequences!<br />
• Good work and process planning necessary<br />
- “feed the hungry machine...”<br />
• Safety precautions are necessary: Use<br />
machines with safety enclosing -<br />
bullet proof covers! Avoid long overhangs<br />
on tools. Do not use “heavy”<br />
tools and adaptors. Check tools,<br />
adapters and screws regularly for<br />
fatigue cracks. Use only tools with<br />
posted maximum spindle speed. Do<br />
not use solid tools of HSS!<br />
65
66<br />
Some typical demands on the machine tool and the data transfer in HSM<br />
(ISO/BT40 or comparable size, 3-axis)<br />
• Spindle speed range < = 40 000 rpm<br />
• Spindle power > 22 kW<br />
• Programmable feed rate<br />
40-60 m/min<br />
• Rapid traverse < 90 m/min<br />
• Axis dec./acceleration > 1 g<br />
(faster w. linear motors)<br />
• Block processing speed 1-20 ms<br />
• Data flow via Ethernet<br />
250 Kbit/s (1 ms)<br />
• Increments (linear) 5-20 microns<br />
Some specific demands on cutting<br />
tools made of solid carbide<br />
• High precision grinding giving run-out<br />
lower than 3 microns<br />
• Shortest possible protrusion and<br />
overhang, maximum stiffness, and thick<br />
core for lowest possible deflection<br />
• Short edge and contact length for lowest<br />
possible vibration risk, low cutting forces<br />
and deflection<br />
• Oversized and tapered shanks, especially<br />
important on small diameters<br />
• Micro grain substrate, TiAlN-coating<br />
for higher wear resistance/hot hardness<br />
• Holes for air blast or coolant<br />
• Adapted, strong micro geometry for<br />
HSM of hardened steel<br />
• Symmetrical tools, preferably balanced<br />
by design<br />
• Or circular interpolation via<br />
NURBS (no linear increments)<br />
• High thermal stability and rigidity<br />
in spindle - higher pretension and<br />
cooling of spindle bearings<br />
• Air blast/coolant through spindle<br />
• Rigid machine frame with high vibration<br />
absorbing capacity<br />
• Different error compensations -<br />
temperature, quadrant, ball screw<br />
are the most important<br />
• Advanced look ahead function in<br />
the <strong>CNC</strong><br />
Specific demands on cutters<br />
with indexable inserts<br />
• Balanced by design<br />
• High precision regarding run-out, both<br />
on tip seats and on inserts, maximum<br />
10 microns totally...<br />
• Adapted grades and geometries for<br />
HSM in hardened steel<br />
• Good clearance on cutter bodies to<br />
avoid rubbing when tool deflection<br />
(cutting forces) disappears<br />
• Holes for air blast or coolant<br />
• Marking of maximum allowed rpm<br />
directly on cutter bodies.
Profile depth<br />
Surface with (red line) and without (blue line) run-out.<br />
Tool-life<br />
[%]<br />
100<br />
80<br />
60<br />
40<br />
20<br />
Run outs influence on surface quality<br />
Exempel: Two edge cutter. Profile depth Rz =<br />
0<br />
0 20 40 60 80 100<br />
TIR [%]<br />
Tool life as a function of TIR % of chip thickness<br />
ƒz 2<br />
4 x Dc<br />
Run outs influence on surface quality<br />
ƒ z<br />
67
68<br />
CAD/CAM and <strong>CNC</strong> structures<br />
HSM processes has underlined the necessity to develop both the CAM-, and<br />
<strong>CNC</strong>-technology radically. HSM is not simply a question of controlling and driving<br />
the axes and turning the spindles faster. HSM applications creates a need of much<br />
faster data communication between different units in the process chain. There are<br />
also specific conditions for the cutting process in HSM applications that conventional<br />
<strong>CNC</strong>s can not handle.<br />
The typical structure for generating data and perform the cutting and measuring<br />
process may look like this:<br />
CAD<br />
CAM<br />
PP<br />
<strong>CNC</strong><br />
CAQ<br />
Workpiece geometry. CAD - creation/design of a<br />
geometrical 3D model based on advanced<br />
mathematical calculations (Bezier curves or NURBS)<br />
Generic tool path. Creation of CAM - files representing tool<br />
paths, methods of approach, tool and cutting data et cetera<br />
NC program. Generation of a part program (NC-program) via<br />
post-processing of CAM - files to a specific type of control<br />
Workpiece. Machining of the component, die or mould etc.<br />
via commands from a <strong>CNC</strong><br />
Measuring data. Registration and feedback of measuring<br />
data, CAQ, <strong>Computer</strong> Aided Quality assurance<br />
Re-design, re-engineering or direct tool compensations due to tool wear or change<br />
of tools etc.. New loop begins.<br />
This type of process structure is characterised by specific configuration of data for<br />
each computer. The communication of data between each computer in this chain<br />
has to be adapted and translated. And the communication is always of one way-type.<br />
There are often several types of interfaces without a common standard.
CAD<br />
geometry principle<br />
e.g. NURBS<br />
CAD<br />
geometry principle<br />
standard<br />
P 0, G 0<br />
G01<br />
G03<br />
Problem areas<br />
The main problem is that a conventional<br />
control (<strong>CNC</strong>) does not understand the<br />
advanced geometrical information from the<br />
CAD/CAM systems without a translation<br />
and simplification of the geometry data.<br />
This simplification means that the higher<br />
level geometry (complex curves) from the<br />
CAD/CAM is transformed to tool paths<br />
via primitive approximations of the tool<br />
paths, based on straight lines between<br />
points within a certain tolerance band.<br />
Instead of a smooth curve line geometry<br />
there will be a linearised tool path. In<br />
order to avoid visible facets, vibration<br />
marks and to keep the surface finish on a<br />
high level on the component the resolution<br />
has to be very high. The smaller the tolerance<br />
band is (typical values for the distance<br />
between two points range from 2 to 20<br />
P 1, G 1<br />
P 0<br />
P 0<br />
K<br />
P 2, G 2<br />
M<br />
P 1<br />
P 1<br />
P 3, G 3<br />
microns), the bigger the number of NCblocks<br />
will be. This is also true for the<br />
speeds - the higher cutting and surface<br />
speed the bigger the number of NC-blocks.<br />
This has today resulted in limitations of<br />
some HSM applications as the block cycle<br />
times have reached levels close to 1 msec.<br />
Such short block cycle times requires a<br />
very huge data transfer capacity. Which<br />
will create bottle necks for the entire process<br />
by overloading factory networks and<br />
also demand large <strong>CNC</strong>-memory and high<br />
computing power.<br />
If one NC-block typically consists of 250<br />
bits and if the block cycle time ranges<br />
between 1 - 5 msec the <strong>CNC</strong> has to handle<br />
between 250 000 to 50 000 bits/sec!<br />
69
70<br />
P 1<br />
P 2<br />
Original contour<br />
Linearized tool path<br />
Tolerance band<br />
Chord error<br />
P 3<br />
New NURBS-based technology<br />
The recently developed solution on the<br />
above problems is based on what could be<br />
called ”machine independent NC-programming”.<br />
This integration of CAD ⇒ CAM ⇒ <strong>CNC</strong><br />
implys that the programming of the <strong>CNC</strong><br />
considers a generic machine tool that<br />
understands all geometrical commands<br />
coming from the NC-programming. The<br />
technique is based on the <strong>CNC</strong> automatically<br />
adapting the specific axle and cutter<br />
configuration for each specific machine<br />
tool and set-up.<br />
This includes, for instance, corrections of<br />
displacements of workpieces (on the<br />
machine table) without any changes in the<br />
NC-program. This is possible as the NCprogram<br />
is relative to different deviations<br />
from the real situation.<br />
1/Size<br />
Tolerance band<br />
Tool Path<br />
velocity<br />
Number of NC blocks/sec.<br />
Tool paths based on straight lines have non<br />
continuous transitions. For the <strong>CNC</strong> this<br />
means very big jumps in velocity between<br />
different directions of the machine axes.<br />
The only way the <strong>CNC</strong> can handle this is<br />
by slowing down the speed of the axes in<br />
the ”change of direction situation”, for<br />
instance in a corner. This means a severe<br />
loss of productivity.<br />
A NURBS is built up by three parameters.<br />
These are poles, weights and knots. As<br />
NURBS are based on non-linear movements<br />
the tool paths will have continuous<br />
transitions and it is possible to keep much<br />
higher acceleration, deceleration and interpolation<br />
speeds. The productivity increase<br />
can be as much as 20-50%. The smoother<br />
movement of the mechanics also results in<br />
better surface finish, dimensional and geometrical<br />
accuracy.
Pol1<br />
CAM machine-independent<br />
machine-specific<br />
Postprocessor<br />
Vpathmax1<br />
P1<br />
<strong>CNC</strong> <strong>Control</strong>l<br />
P 2<br />
P3<br />
P4<br />
Pol2<br />
Vpathmax2<br />
P 5<br />
P 6<br />
<strong>Control</strong> polygon<br />
P7<br />
Vpathmax1<br />
Pol3<br />
Vpathmax2<br />
CAM machine-independent<br />
<strong>CNC</strong> <strong>Control</strong><br />
Vpath<br />
P2 P3 P4 P5 P6 P7<br />
Vpath<br />
Time<br />
Time<br />
71
72<br />
P1, G1<br />
P0, G0<br />
P4, G4<br />
P2, G2<br />
P3, G3<br />
P¡ = (P0, P1, P2, P3)<br />
G¡ = (G0, G1, G2, G3)<br />
K¡ = (K0, K1, K2, K3, K4, K5, K6, K7, K8)<br />
Conventional <strong>CNC</strong>-technology does not<br />
know anything about cutting conditions.<br />
<strong>CNC</strong>s strictly care only about geometry.<br />
Today’s NC-programs contains constant<br />
values for surface and spindle speed.<br />
Within one NC-block the <strong>CNC</strong> can only<br />
interpolate one constant value. This gives<br />
a ”step-function” for the changes of feed<br />
rate and spindle speed.<br />
These quick and big alterations are also<br />
creating fluctuating cutting forces and bending<br />
of the cutting tool, which gives a big<br />
negative impact on the cutting conditions<br />
and the quality of the workpiece. These<br />
problems can however be solved if NURBSinterpolation<br />
is applied also for technological<br />
commands. Surface and spindle<br />
speed can be programmed with the help<br />
of NURBS, which give a very smooth and<br />
favourable change of cutting conditions.<br />
P(u)<br />
P11, G12,P13…<br />
P21, G22,P23…<br />
P13, G13<br />
Pu,v =<br />
P31, G32,P33…⎬<br />
. . .<br />
P12, G12<br />
. . .<br />
P11, G11 . . .<br />
⎫<br />
⎭<br />
P21, G21<br />
P31, G31<br />
P41, G41<br />
P(v)<br />
Gu,v =<br />
Ku,v =<br />
G11, G12,G13…<br />
G21, G22,G23…<br />
G31,<br />
.<br />
G32,G33…<br />
.<br />
.<br />
.<br />
. .<br />
.<br />
K11, K12,K13…<br />
K21, K22,K23…<br />
K31,<br />
.<br />
K32,K33…<br />
.<br />
.<br />
.<br />
. .<br />
.<br />
⎫<br />
⎬<br />
⎭<br />
⎫<br />
⎬<br />
⎭<br />
Constant cutting conditions mean successively<br />
changing loads on the cutting tools<br />
and are as important as constant amount<br />
of stock to remove for each tool in HSM<br />
applications.<br />
NURBS-technology represents a high density<br />
of NC-data compared to linear programming.<br />
One NURBS-block represents,<br />
at a given tolerance, a big number of conventional<br />
NC-blocks. This means that the<br />
problems with the high data communication<br />
capacity and the necessity of short block<br />
cycle time are solved to a big extent.<br />
⎫<br />
⎬<br />
⎭<br />
⎫<br />
⎬<br />
⎭<br />
⎫<br />
⎬<br />
⎭
Programmed feedrate F<br />
Programmed feedrate F<br />
F 6<br />
F 5<br />
F 4<br />
F 3<br />
F 2<br />
F 1<br />
NC-Blocks<br />
Conventional, Progamming<br />
NURBS-based, Programming and Interpolation<br />
• Dramatic changes of cutting conditions<br />
• Waste of machine productivity<br />
• High tool wear<br />
• Limited part quality<br />
Programmed<br />
spindle revolution S<br />
Programmed spindle Revolution S<br />
NC-Blocks<br />
NC-Blocks NC-Blocks<br />
S 4<br />
S 3<br />
S 2<br />
S 1<br />
73
74<br />
Look Ahead Function<br />
In HSM applications the execution time of a<br />
NC-block can sometimes be as low as 1 ms.<br />
This is a much shorter time than the reaction<br />
time of the different machine tool functions<br />
- mechanical, hydraulic and electronic.<br />
In HSM it is absolutely essential to have a<br />
look ahead function with much built in<br />
geometrical intelligence. If there is only a<br />
conventional look ahead, that can read a<br />
few blocks in advance, the <strong>CNC</strong> has to<br />
slow down and drive the axes at such low<br />
surface speed so that all changes in the<br />
feed rate can be controlled. This makes of<br />
course no HSM applications possible.<br />
An advanced look ahead function must read<br />
and check hundreds of blocks in advance<br />
in real time and identify/define those cases<br />
where the surface speed has to be changed<br />
or where other actions must be taken.<br />
An advanced look ahead analyses the geometry<br />
during operation and optimises the<br />
surface speed according to changes in the<br />
curvature. It also controls that the tool<br />
path is within the allowed tolerance band.<br />
A look ahead function is a basic software<br />
function in all controls used for HSM. The<br />
design, the usefulness and versatility can<br />
differ much depending on concept.<br />
The upper pass on the component is machined with a machine control without sufficient look ahead<br />
function and it clearly shows that the corners have been cut, compared with the lower pass machined<br />
with sufficient look ahead function
Cutting fluid in milling<br />
Modern cemented carbides, especially coated<br />
carbides, do not normally require cutting<br />
fluid during machining. GC grades perform<br />
better as regards to tool life and reliability<br />
when used in a dry milling environment.<br />
This is even more valid for cermets, ceramics,<br />
cubic boron nitride and diamond.<br />
Today’s high cutting speeds results in a<br />
very hot cutting zone. The cutting action<br />
takes place with the formation of a flow<br />
zone, between the tool and the workpiece,<br />
with temperatures of around 1000 degrees<br />
C or more.<br />
Any cutting fluid that comes in the vicinity<br />
of the engaged cutting edges will instantaneously<br />
be converted to steam and have<br />
virtually no cooling effect at all.<br />
The effect of cutting fluid in milling is<br />
only emphasising the temperature variations<br />
that take place with the inserts going<br />
in and out of cut. In dry machining variations<br />
do take place but within the scope of<br />
what the grade has been developed for<br />
(maximum utilisation). Adding cutting<br />
fluid will increase variations by cooling the<br />
cutting edge while being out of cut. These<br />
variations or thermal shocks lead to cyclic<br />
stresses and thermal cracking. This of<br />
course will result in a premature ending of<br />
the tool life. The hotter the machining<br />
zone is, the more unsuitable it is to use<br />
cutting fluid. Modern carbide grades, cermets,<br />
ceramics and CBN are designed to<br />
withstand constant, high cutting speeds<br />
and temperatures.<br />
When using coated milling grades the<br />
thickness of the coating layer plays an<br />
important role. A comparison can be made<br />
to the difference in pouring boiling water<br />
simultaneously into a thick-wall and a thinwall<br />
glass to see which cracks, and that of<br />
inserts with thin and thick coatings, with<br />
the application of cutting fluid in milling.<br />
A thin wall or a thin coating lead to less<br />
thermal tensions and stress. Therefore, the<br />
glass with thick walls will crack due to the<br />
large temperature variations between the<br />
hot inside and the cold outside. The same<br />
theory goes for an insert with a thick coating.<br />
Tool life differences of up to 40%,<br />
and in some specific cases even more, are<br />
not unusual, to the advantage of dry milling.<br />
If machining in sticky materials, such as<br />
low carbon steel and stainless steel, has to<br />
take place at speeds where built-up edges<br />
are formed, certain precautions need to be<br />
taken. The temperature in the cutting zone<br />
should be either above or below the unsuitable<br />
area where built-up edge appears.<br />
Achieving the flow-zone at higher temperatures<br />
eliminates the problem. No, or<br />
very small built-up edge is formed. In the<br />
low cutting speed area where the temperature<br />
in the cutting zone is lower, cutting<br />
fluid may be applied with less harmful<br />
results for the tool life.<br />
75
76<br />
There are a few exceptions when the use<br />
of cutting fluid could be “defended” to<br />
certain extents:<br />
• Machining of heat resistant alloys is<br />
generally done with low cutting speeds.<br />
In some operations it is of importance<br />
to use coolant for lubrication and to<br />
cool down the component. Specifically<br />
in deep slotting operations.<br />
• Finishing of stainless steel and aluminium<br />
to prevent smearing of small particles<br />
into the surface texture. In this case the<br />
coolant has a lubricating effect and to<br />
some extent it also helps evacuating the<br />
tiny particles.<br />
• Machining of thin walled components<br />
to prevent geometrical distortion.<br />
• When machining in cast iron and nodular<br />
cast iron the coolant collects the material<br />
dust. (The dust can also be collected<br />
with equipment for vacuum cleaning).<br />
• Flush pallets, components and machine<br />
parts free from swarf. (Can also be done<br />
with traditional methods or be eliminated<br />
via design changes).<br />
• Prevent components and vital machine<br />
parts from corrosion.<br />
If milling has to be performed wet, coolant<br />
should be applied copiously and a cemented<br />
carbide grade should be used which is<br />
recommended for use in wet as well as in<br />
dry conditions. It can either be a modern<br />
grade with a tough substrate having multilayer<br />
coatings. Or a somewhat harder,<br />
micro-grain carbide with a thin PVD<br />
coated TiN layer.<br />
Essential savings can be<br />
done via dry machining:<br />
• Increases in productivity as per above.<br />
• Production costs lowered. The cost of<br />
coolant and the disposal of it represent<br />
15-20% of the total production costs!<br />
This could be compared to that of cutting<br />
tools, amounting to 4-6% of the production<br />
costs.<br />
• Environmental and health aspects. A<br />
cleaner and healthier workshop with<br />
bacteria formation and bad smells<br />
eliminated.<br />
• No need of maintenance of the coolant<br />
tanks and system. It is usually necessary<br />
to make regular stoppages to clean out<br />
machines and coolant equipment.<br />
• Normally a better chip forming takes<br />
place in dry machining.<br />
Cutting fluid in HSM<br />
In conventional machining, when there is<br />
much time for heat propagation, it can<br />
sometimes be necessary to use coolant to<br />
prevent excessive heat from being conducted<br />
into; the workpiece, cutting and<br />
holding tool and eventually into the<br />
machine spindle. The effects on the application<br />
may be that the tool and the workpiece<br />
will extend somewhat and tolerances<br />
can be in danger.<br />
This problem can be solved in different<br />
ways. As have been discussed earlier, it is<br />
much more favourable for the die or mould<br />
accuracy to split roughing and finishing<br />
into separate machine tools. The heat conducted<br />
into the workpiece or the spindle<br />
in finishing can be neglected. Another<br />
solution is to use a cutting material that<br />
does not conduct heat, such as cermet. In<br />
this case the main portion of the heat goes<br />
out with the chips, even in conventional<br />
machining.<br />
It may sound trivial, but one of the main<br />
factors for success in HSM applications is<br />
the total evacuation of chips from the cutting<br />
zone. Avoiding recutting of chips when<br />
working in hardened steel is absolutely<br />
essential for a predictable tool life of the<br />
cutting edges and for a good process security.
The best way to ensure a perfect chip evacuation<br />
is to use compressed air. It should be<br />
well directed to the cutting zone. Absolutely<br />
best is if the machine tool has an option for<br />
air through the spindle.<br />
The second best is to have oil mist under<br />
high pressure directed to the cutting zone,<br />
preferably through the spindle.<br />
Third comes coolant with high pressure<br />
(approximately 70 bar or more) and good<br />
flow. Preferably also through the spindle.<br />
The worst case is ordinary, external coolant<br />
supply, with low pressure and flow.<br />
If using cemented carbide or solid carbide the difference in tool life<br />
between the first and the last alternative may be as much as 50% .<br />
If using cermet, ceramic or cubic boron<br />
nitride coolant should not be an option at all.<br />
77
78<br />
THE INSERT AND ITS PARAMETERS<br />
There are a wide range<br />
of different parameters<br />
that make up an insert<br />
for different conditions<br />
and workipece materials,<br />
different substrates<br />
with different grain<br />
sizes, different coatings,<br />
different angles<br />
and shapes, to mention a few. Let us take a<br />
short look at the most important ones.<br />
Macro-geometry<br />
The macro-geometry decides the type of<br />
rake-angle (), which determines if it is a<br />
geometry for roughing or if it is a geometry<br />
for light cutting. How this effects some of<br />
the cutting parameters is shown in the table.<br />
If there is a light cutting geometry there is<br />
a large rake angle resulting in a sharper<br />
cutting edge (1). This cutting edge is not as<br />
1<br />
2<br />
strong as an insert with a smaller rake<br />
angle, such as a geometry for roughing (2).<br />
Due to this the feed per tooth has to be<br />
kept low in comparison (3). However, the<br />
sharp cutting edge is favourable in terms<br />
of cutting forces which will be low and<br />
machines with limited effect can be used<br />
(4). The temperature (5) will also be low<br />
due to the light cutting action which often<br />
is an advantage.<br />
Micro-geometry<br />
The edge rounding (ER), size and angle of<br />
the negative chamfer is decided by the<br />
micro-geometry. With larger (ER) or negative<br />
chamfer the stronger the cutting edge<br />
becomes and resulting in a possibility to<br />
use high feed rates. Large ER and negative<br />
chamfer will also produce higher cutting<br />
forces and higher temperature, which may<br />
cause plastic deformation of the cutting<br />
edge. If a component with thin walls or<br />
≠ 3 f f z z<br />
4<br />
5
light cutting action is needed small ER and<br />
negative chamfer should be used.<br />
Some examples of ER and negative chamfer<br />
for different materials:<br />
Steel geometries usually have large ER and<br />
negative chamfers to produce a strong cutting<br />
edge capable of withstanding any<br />
shock impacts when machining steel.<br />
Stainless steel is a work-hardening material<br />
and if an insert with large ER and negative<br />
chamfer, such as one for steel milling<br />
which produces high tempratures, is used<br />
the workpiece material usually work-hardens<br />
and becomes more difficult to machine<br />
when it is time for the second pass.<br />
Sharp geometries with small ER and negative<br />
chamfer are therefore used to get a<br />
light cutting action.<br />
b<br />
ISO<br />
P<br />
M<br />
K<br />
ER<br />
γ<br />
When rough machining cast-iron, strong<br />
cutting edges are needed to cope with large<br />
depths of cut and sand inclusions. This<br />
calls for large ER and negative chamfer.<br />
On the other hand when finishing in castiron,<br />
e.g. an engine block, the planeness<br />
and surface finish is vital. Cast-iron also<br />
has a tendency of frittering and therefore a<br />
sharp cutting edge with a small ER and<br />
negative chamfer is needed.<br />
The chart (page 98) shows how different<br />
parameters affects the inserts wear resistance<br />
to different types of wear mechanisms,<br />
in terms of substrate content and<br />
micro-geometry.<br />
A wolfram-carbide based insert, usually a<br />
P-grade is favourable in terms of withstanding<br />
abrasion-wear, although, it has little<br />
diffusion- and oxidation-wear resistance.<br />
P30<br />
b ⇒ f z min<br />
P20<br />
79
80<br />
Furthermore it is good in terms of fatiguewear,<br />
but the high content of WC is negative<br />
when it comes to adhesion-wear. To<br />
prevent plastic-deformation, a high content<br />
of WC is favourable but not in terms<br />
of chipping.<br />
High content of cobalt, which is a binding<br />
material in carbide inserts, have some<br />
negative effects on the wear resistance of<br />
inserts. Abrasion-, diffusion- and oxidation-wear<br />
mechanisms are negatively affected<br />
by a high content of Co. Fatigue- and<br />
adhesion-wear plus chipping tendencies<br />
are enhanced by cobalt, while plasticdeformation<br />
tends to occur more easily<br />
with cobalt as binding material.<br />
WC<br />
Co<br />
γ<br />
HV3<br />
Size<br />
WC<br />
1. Abrasion wear<br />
2. Fatique wear (static or dynamic)<br />
3. Adhesion wear<br />
The so called g-phase TaC + TiC + NbC<br />
also affects the wear resistance of the insert<br />
in certain ways. Modern insert grades have<br />
little or no g-phase at all. However, gphase<br />
is positive in terms of preventing<br />
abrasion-, diffusion-, oxidation-, adhesionwear<br />
and plastic-deformation. While it is<br />
negative for prevention of fatigue and<br />
chipping.<br />
A high proportion of hard particles makes<br />
the cemented carbide more wear resistant<br />
in that the hardness, HV, and compressive<br />
strength is greater. A high content of binding<br />
material Co, makes the insert more<br />
tough. High hardness is positive for most<br />
wear mechanisms discussed earlier except<br />
for fatigue wear and chipping. The hardness<br />
has little effect either way in terms of<br />
oxidation wear.<br />
4. Plastic deformation<br />
5. Chipping/fracture<br />
6. Possibility to make a scharp edge<br />
1 2 3 4 5 6<br />
+ o - + - o<br />
- -/+ -/+ - + o<br />
+ - + + - o<br />
+ - - + - o<br />
- -/+ - - + -
The last parameter to be discussed is the<br />
size of the WC grains in the insert substrate.<br />
By adjusting the size of the grains in the<br />
substrate, many different features can be<br />
accomplished even though within the same<br />
insert grade. This affects the hardness and<br />
wear resistance as well as strength and<br />
toughness. Generally, small grains means<br />
higher hardness, coarse grains more toughness.<br />
This means that cemented carbide is<br />
not brittle, but has a broad range of possibilities<br />
within machining. The insert in the<br />
wear mechanism example is an insert with<br />
coarse grains. The positive aspects with<br />
coarse grains is, as mentioned earlier,<br />
toughness and therefore favourable to prevent<br />
fatigue- and chipping. The coarse<br />
grains has negative effect on the rest of<br />
the wear mechanisms featured except<br />
for oxidation wear where it makes no<br />
difference either way.<br />
81
82<br />
COATING METHODS<br />
PVD<br />
PVD (Physical Vapour<br />
Deposition) is a well<br />
established coating<br />
technique used mainly<br />
for coating of high<br />
speed steel, but is also<br />
good for coating of<br />
cemented carbide,<br />
where a sharp cutting edge is needed.<br />
The process is based on that the coating<br />
material is moved from a material source<br />
to the substrate through either vapourization<br />
or sputtering. There are several variants of<br />
these processes as they are used widely by<br />
high speed steel suppliers. The PVD process<br />
takes place in temperatures around 500<br />
degrees C. For instance, titanium is ionized<br />
with a focused electric beam as energy<br />
source, to form a plasma stream. Along<br />
with nitrogen this is coated on the insert.<br />
Normally, a PVD coating is thinner than a<br />
comparable CVD coating. With the CVD<br />
process a thicker coating means improved<br />
wear resistance, especially with aluminium<br />
oxide, up to a thickness of 12 micrones.<br />
CVD<br />
CVD (Chemical Vapour Deposition) is a<br />
more modern type of coating technique<br />
enabling multi layer coating and different<br />
layer thickness from 2-12 microns.<br />
CVD PVD
Basically, CVD coating is done through<br />
chemical reactions of different gases. In the<br />
case of coating with titanium carbide; hydrogen,<br />
titanium chloride and methane.<br />
Inserts are heated to about 1000 degrees C.<br />
Like sintering this is a carefully controlled<br />
process where the carbon content, either<br />
free or as h-phase, has to be monitored<br />
through an extra carburization stage, before<br />
coating. Aluminium oxide coating carried<br />
out in a similar way as is titanium nitride<br />
coating using other gases, aluminiumchloride<br />
or nitrogen gas, respectively. The<br />
CVD process is well adapted to apply<br />
multi layered coatings as the process is<br />
relatively easy to regulate as regards to<br />
PVD<br />
CVD<br />
MT-CVD<br />
TiAlN<br />
Ti(C,N)<br />
Al 2O 3<br />
TiN<br />
1. Abrasion wear<br />
2. Fatique wear (static or dynamic)<br />
3. Adhesion wear<br />
various gases. Different types of coating<br />
can be performed in the same equipment.<br />
In the table you can see how different<br />
types of coating methods are affecting the<br />
insert positive (+) or negative (-) in terms<br />
of withstanding different types of wear.<br />
Also shown is how the various types of<br />
coating can cope with the wear-mechanisms;<br />
TiAlN (Titian Aluminium Nitride),<br />
TiCN) (Titanium Carbo Nitride), Al2O3<br />
(Aluminium Oxide), TiN (Titanium<br />
Nitride).<br />
1 2 3 4 5 6<br />
- + + - + +<br />
+ o o + o -<br />
+ o o + o -<br />
+ o + + - o<br />
+ o o o o o<br />
++ - +* + - -<br />
o o o o o o<br />
* Polished<br />
4. Plastic deformation<br />
5. Chipping/fracture<br />
6. Possibility to make a scharp edge<br />
83
84<br />
Choose the right grade for milling<br />
Since steel is the most<br />
common material to<br />
be machined within<br />
the die and mould<br />
area, the Coromant<br />
grades optimized for<br />
steel milling will be<br />
explained a little bit<br />
more in detail.<br />
For the milling operation that need a very<br />
strong cutting edge, where toughness<br />
demands are highest, the GC4040 grade<br />
(P30-P50) provides a new combination of<br />
toughness and wear resistance. A product<br />
of modern coating technology, the grade<br />
copes with the most demanding machining<br />
conditions. The objective has been to achieve<br />
high edge security primarily at low to<br />
moderate cutting speeds - yet some 25%<br />
higher than its predecessor.<br />
GC4040 is an insert grade that will not need<br />
for operators to stand next to the stop<br />
button or continually stop the cutter<br />
worrying about the cutting edges for chipping<br />
tendencies. If applied correctly, it<br />
copes with strength-demanding steel milling,<br />
unstable conditions, vibration tendencies,<br />
varying workpiece materials and when the<br />
insert is subjected to high cutting forces.<br />
The 90 degree entering angle in milling<br />
leaves insert corners very susceptible to<br />
high machining stresses. Not only radial<br />
forces are high, the entry and exit shockforces<br />
are often severe. To improve the<br />
edge security, ensuring a long predictable<br />
tool-life, GC4040 is ideal. For the CoroMill<br />
290 square shoulder facemill the grade<br />
offers improvement in performance and<br />
reliability. Also for very demanding operations,<br />
such as die and mould making, the<br />
grade means very high edge strength for<br />
round insert cutters, such as CoroMill 200.<br />
GC4040 can be applied to perform sharp<br />
light cuts as well as high feed roughing<br />
operations and is suitable for use with all<br />
three insert geometries L, M and H. With<br />
or without coolant operations (see cutting<br />
fluid in milling page 95). Also suitable for<br />
castings and forgings, the grade offers new<br />
possibilities for small batch production to<br />
be performed in a productive and very<br />
reliable way.<br />
Allround performance<br />
GC 4030 is more of a general purpose grade,<br />
complementary to 4040. In fact, where 4040<br />
optimizes an area characterized by the<br />
highest strength demands, 4030 optimises<br />
milling of harder steels at higher cutting<br />
speeds and when low feed rates are involved.<br />
There is also a large steel milling application<br />
area, where toughness to a varying<br />
extent is needed, and where both insert<br />
grades can be selected.<br />
GC4030 is capable of higher cutting speeds,<br />
offering a higher degree of wear resistance<br />
for operations that are not extreme toughness<br />
demanding.<br />
This grade is also a product of advanced<br />
coating technology, having a harder insert<br />
substrate than 4040 but a similar aluminium<br />
oxide coating. GC4030 is especially suitable<br />
as a general, basic grade for use with 45<br />
degree entering angle, such as in CoroMill<br />
245, but also for round insert milling<br />
with CoroMill 200. Dry and wet milling<br />
is possible.
GC4030 is also capable of milling harder<br />
steel types as it has good resistance to<br />
thermal cracking. These inserts are excellent<br />
for milling large workpieces, requiring<br />
long cutting edge engagement times.<br />
Maintaining high cutting edge security, it<br />
provides long, predictable tool-life and<br />
generates good surface finish.<br />
GC4020<br />
GC4020 is the High Speed Machining grade<br />
for good conditions and maximum productivity.<br />
This grade can be applied in hard<br />
and more difficult to machine materials<br />
that are becoming more and more common<br />
in die and mould making applications,<br />
especially when using HSM technology.<br />
This means that the inserts in grade GC4020<br />
will add the possibility to machine at very<br />
high temperatures that occurs when milling<br />
hardened steel, up to HRC60, or when<br />
very high cutting speeds in general steels<br />
are used for max productivity.<br />
The application area for this grade is<br />
roughing to semifinishing milling in steels<br />
at fairly good conditions when highest<br />
possible chip removal rate is desired. Inserts<br />
in grade GC4020 need to be run at high<br />
temperature e g at elevated speeds and/or<br />
in hardened condition up to HRC60, as<br />
mentioned previously.<br />
Wear resistance<br />
If possible, try to avoid using coolant when<br />
milling. Usage of coolant will shorten the<br />
tool-life and increase the tendency for<br />
chipping or breakage of the inserts compared<br />
to dry milling. Usage of coolant gives increased<br />
fluctuation of temperatures, which<br />
in turn leads to a larger number of thermal<br />
cracks. For a grade like GC 4020 it’s important<br />
to avoid coolant in order to get the<br />
right cutting temperature and to limit the<br />
number of thermal cracks.<br />
High wear resistance<br />
GC3040 is an odd insert grade in this<br />
context as it was primarily developed for<br />
nodular cast iron and high tensile iron<br />
milling. However, the grade has proven to<br />
be such a good performer in steel through<br />
its high wear resistance, high temperature<br />
capability and chemical inertness, that it<br />
has been included in the range of inserts<br />
that are dedicated to optimizing steel milling.<br />
Basic grades for ISO P milling Basic grades for ISO K milling<br />
CT 530<br />
Finishing - Dry!<br />
Sharp edges!<br />
1025<br />
Max wear resistance!<br />
4020<br />
3040<br />
4030<br />
All round with high<br />
wear resistance!<br />
4040<br />
Optimal security at a<br />
wide feed range!<br />
Wear resistance<br />
R a & high v c<br />
CB50<br />
Milling of grey Cl<br />
at high speeds<br />
CC 690 3020<br />
First choice in gray<br />
cast iron<br />
H13A<br />
Milling of<br />
ferritiic NCI<br />
Toughness demanding<br />
operations Perlitic nodular<br />
Cl, wet milling, vibrations<br />
3040<br />
Toughness Toughness<br />
85
86<br />
GC3040 has specially adapted aluminium<br />
oxide coating to mill at high cutting speeds<br />
and stand up to the high temperatures of<br />
milling harder steels.<br />
Sharp cutting edge<br />
GC1025 is a specialist insert grade for light<br />
milling in steels such as SS1672, SS2041<br />
and UHB steel grades Orvar and Impax<br />
high hard to mention a few. This is mainly<br />
a finishing grade which is combined with<br />
geometries to give a sharp cutting edge.<br />
Based on fine grain cemented carbide substrate,<br />
it is PVD coated and can be used in<br />
periphery ground indexable inserts.<br />
The sharp cutting edge means that it makes<br />
satisfactory insert engagement into material<br />
also at lower feed rates and minimizes vibration<br />
tendencies in weak workpieces. It is<br />
also good at milling sticky, low carbon steels<br />
as well as super alloy materials.<br />
High surface finish<br />
CT530 is a cermet grade capable of generating<br />
mirror finishes (P05-P30). This is a<br />
light milling finishing insert, for small cutting<br />
depths but with a wide cutting speed<br />
range. It provides the advantageous long<br />
Cavity Milling in Orvar Supreme 41 HRC<br />
tool life [min]<br />
140<br />
120<br />
100<br />
80<br />
60<br />
40<br />
20<br />
GC 4020<br />
GC 4030<br />
0<br />
100 150 200 250 300<br />
cutting speed [m|min]<br />
tool-life with consistent cutting edge performance<br />
of titanium-based cemented carbide.<br />
It has very high resistance to plastic<br />
deformation and built-up edge formation<br />
and has an added suitable application area<br />
in the form of wiper insert. Most suitable<br />
for dry conditions, this is an insert for<br />
high surface finish and accuracy demands.<br />
If round inserts in grade CT530 is combined<br />
with a strong geometry it is also good for<br />
large ap/ae and intermittent machinging.<br />
The application decides the insert<br />
When choosing grade the application<br />
must be looked upon as a whole and not<br />
just the workpiece material. In the examples<br />
it is shown what parameters should be<br />
considered.<br />
The workpiece (mould) and workpiece<br />
material is the same for all examples. But<br />
to get the best result for each machining<br />
operation, different grades and geometries<br />
has to be used.
Start values for cutting speed (m/min) at different max chip thickness hex (mm)<br />
for ISO P steel milling. (ae= 100 mm with cutter diameter 125 mm)<br />
Material<br />
CMC<br />
01.1<br />
01.2<br />
01.3<br />
01.4<br />
01.5<br />
02.1<br />
02.2<br />
03.11<br />
03.13<br />
03.21<br />
03.22<br />
06.1<br />
06.2<br />
06.3<br />
Material<br />
CMC<br />
01.1<br />
01.2<br />
01.3<br />
01.4<br />
01.5<br />
02.1<br />
02.2<br />
03.11<br />
03.13<br />
03.21<br />
03.22<br />
06.1<br />
06.2<br />
06.3<br />
Specific<br />
cutting<br />
force<br />
kc 1<br />
1500<br />
1600<br />
1700<br />
1800<br />
2000<br />
1700<br />
2000<br />
1950<br />
2150<br />
2900<br />
3100<br />
1400<br />
1600<br />
1950<br />
Specific<br />
cutting<br />
force<br />
kc 1<br />
1500<br />
1600<br />
1700<br />
1800<br />
2000<br />
1700<br />
2000<br />
1950<br />
2150<br />
2900<br />
3100<br />
1400<br />
1600<br />
1950<br />
Hardness<br />
HB<br />
125<br />
150<br />
170<br />
210<br />
300<br />
175<br />
330<br />
200<br />
200<br />
300<br />
380<br />
150<br />
200<br />
200<br />
Hardness<br />
HB<br />
125<br />
150<br />
170<br />
210<br />
300<br />
175<br />
330<br />
200<br />
200<br />
300<br />
380<br />
150<br />
200<br />
200<br />
Dark grey area = hex value<br />
0.05<br />
463<br />
427<br />
399<br />
349<br />
258<br />
334<br />
198<br />
253<br />
209<br />
181<br />
115<br />
341<br />
271<br />
198<br />
0.1<br />
356<br />
328<br />
306<br />
268<br />
199<br />
256<br />
153<br />
194<br />
161<br />
139<br />
88<br />
262<br />
208<br />
153<br />
0.2<br />
292<br />
269<br />
252<br />
220<br />
163<br />
210<br />
125<br />
159<br />
132<br />
114<br />
72<br />
215<br />
171<br />
125<br />
CT530 GC4020<br />
0.15<br />
380<br />
351<br />
328<br />
287<br />
212<br />
274<br />
163<br />
208<br />
172<br />
149<br />
95<br />
280<br />
223<br />
163<br />
0.3<br />
240<br />
221<br />
207<br />
181<br />
134<br />
173<br />
103<br />
131<br />
109<br />
94<br />
59<br />
177<br />
140<br />
103<br />
0.25<br />
312<br />
288<br />
269<br />
235<br />
174<br />
225<br />
134<br />
171<br />
141<br />
122<br />
78<br />
230<br />
183<br />
134<br />
0.1<br />
302<br />
278<br />
260<br />
228<br />
169<br />
218<br />
130<br />
165<br />
136<br />
118<br />
75<br />
223<br />
177<br />
130<br />
0.2<br />
248<br />
229<br />
214<br />
188<br />
139<br />
179<br />
107<br />
136<br />
112<br />
97<br />
61<br />
183<br />
145<br />
107<br />
0.1<br />
481<br />
442<br />
414<br />
362<br />
268<br />
346<br />
206<br />
300<br />
218<br />
187<br />
118<br />
353<br />
280<br />
206<br />
0.4<br />
170<br />
154<br />
144<br />
127<br />
94<br />
121<br />
72<br />
91<br />
76<br />
66<br />
41<br />
123<br />
98<br />
72<br />
0.2<br />
395<br />
363<br />
340<br />
298<br />
220<br />
284<br />
169<br />
246<br />
179<br />
154<br />
97<br />
290<br />
230<br />
169<br />
GC4030 GC4040 GC1025<br />
0.05<br />
334<br />
307<br />
287<br />
252<br />
187<br />
240<br />
143<br />
182<br />
150<br />
131<br />
82<br />
246<br />
195<br />
143<br />
0.1<br />
302<br />
278<br />
260<br />
228<br />
169<br />
218<br />
130<br />
165<br />
136<br />
118<br />
75<br />
223<br />
177<br />
130<br />
0.3<br />
324<br />
298<br />
279<br />
244<br />
181<br />
233<br />
139<br />
202<br />
147<br />
126<br />
80<br />
238<br />
189<br />
139<br />
0.2<br />
248<br />
229<br />
214<br />
188<br />
139<br />
179<br />
107<br />
134<br />
112<br />
97<br />
61<br />
183<br />
145<br />
107<br />
87
88<br />
For operation one which is facemilling<br />
of the component a<br />
CoroMill 200 round insert cutter<br />
or a CoroMill 245 facemilling cutter<br />
can be used. Here the machining<br />
condition is good, no adaptors<br />
and long tools are needed. No<br />
consideration of recutting of chips<br />
has to be taken and high cutting<br />
speed can be used. Taking into<br />
account the stable and good condition<br />
of the operation an insert<br />
grade with a sharp geometry and<br />
a wear resistant grade should be<br />
used. The choice would be a grade<br />
for the P20 area.<br />
In the second operation the conditions<br />
are getting a little bit more<br />
unfavourable with a longer tool,<br />
which might mean a tendency for<br />
vibrations and recutting of chips.<br />
However, the stability and recutting<br />
of chips is not considered to<br />
have a great effect on the machining<br />
in this case and therefore<br />
medium cutting speed can be used.<br />
Here an allround geometry could<br />
be used with a slightly tougher<br />
grade than the first operation, preferably<br />
within the P30 area.
The third operation is machining<br />
deep into the cavity before semifinishing<br />
with a ball nose endmill.<br />
The tool overhang is considerable,<br />
with a big risk of vibration occuring.<br />
Recutting of chips and sudden<br />
changes in feed direction, leading<br />
to a high variation in cutting forces.<br />
Low cutting speed has to be used<br />
to counteract the vibration and<br />
keep deflection of the tool as low<br />
as possible. An insert with strong<br />
geometry is called for in this case<br />
and a grade suitable for the P40<br />
area. The cutting edge can at the<br />
same time not be too dull, a geometry<br />
for medium machining would be<br />
preferred instead of a geometry for<br />
roughing.<br />
For these three operations the workpiece material is the same and the same cutter type,<br />
e.g. a CoroMill 200 cutter can be used. But to get the best machining result three different<br />
grades and insert geometries are used. The conclusion is that the operation as a whole<br />
must be examined and not just the workpiece material.<br />
89
90<br />
CUTTING TOOLS<br />
CoroMill 245<br />
Facemilling is one of<br />
the most common<br />
milling applications<br />
and can be performed<br />
with a wide range of<br />
different tools.<br />
Facemilling cutters<br />
with 45° or 75° entering<br />
angle, square shoulder milling cutters<br />
with 90° entering angle, round insert milling<br />
cutters or even side and face milling cutters.<br />
The most optimized of these cutters in<br />
terms of ranging from roughing to<br />
finishing with the best result and highest<br />
productivity is the 45° degree milling<br />
cutter. The CoroMill 245 cutter with 45°<br />
entering angle performs many facemilling<br />
operations better than any other tool.<br />
The cutter body is produced from hardened<br />
tool steel with a hardness of 45 HRc and<br />
all machining is done after hardening. This<br />
gives the cutter high precision because of<br />
no increase in run-out by local hardening.<br />
Furthermore it gives the cutter an even<br />
hardness with no soft zones from local<br />
hardening.<br />
The 245 cutter programme for facemilling<br />
using a series of 12 mm square inserts<br />
covering a wide application area, from<br />
light to tough conditions. The inserts,<br />
supported by a rigid shim protected cutter<br />
body, can take depth of cut up to 6 mm.<br />
The cutter is capable of producing an<br />
excellent surface quality during a long tool<br />
life, also when used at high removal rates.<br />
Many operations can be fully finished in<br />
one pass. The main advantage of 45° entering<br />
angle is the reduced chip thickness,<br />
which allows the feed per tooth (ƒz) to be<br />
substantially increased. The 45° entering<br />
angle also gives the most favourable direction<br />
of cutting forces when machining<br />
with extended tools. Furthermore, it gives<br />
less risk of edge frittering of the workpiece.
A 3 mm thick carbide shim supports the<br />
insert and protects the insert seat in case of<br />
overloading the insert. The screw mounted<br />
square inserts are self locating when positioned<br />
into the insert seat. The clear-shear<br />
geometry of the insert seats and the combination<br />
of highly positive in the axial<br />
direction and negative in the radial is of<br />
distinct advantage particularly with large<br />
depths of cut. High removal rates are easily<br />
achieved with this geometry and unfavourable<br />
positioning of the cutter becomes<br />
less critical.<br />
The series of extra positive insert geometries<br />
cover all appropriate feed ranges<br />
required for extreme light operations as<br />
well as for the heavy ones. Wide parallel<br />
lands generate good surface finish even<br />
at high feed rates.<br />
L M H<br />
To further increase the surface finish<br />
or increase the feed rate with maintained<br />
surface finish the solution is to use wiper<br />
inserts. These provide a much larger flat<br />
length. The flat is located just below the<br />
ordinary parallel land of the other inserts<br />
and wipes the surface smooth, it is a finishing<br />
cutting edge that has been added to<br />
the cutter. The flat is dimensioned to cover<br />
the feed per revolution. The wiper flat insert<br />
produces good surface textures even<br />
under unfavourable conditions and are<br />
often used in short chipping materials such<br />
as grey cast-iron. Wiper inserts are also often<br />
used in aluminium alloys, in which the<br />
demands on surface finish often are high.<br />
91
92<br />
CoroMill® 245 wiper insert<br />
- principal function<br />
Surface<br />
roughness without<br />
wiper insert with<br />
wiper insert<br />
f n = feed/revolution<br />
b s2<br />
f n1 = b s1<br />
f n2 = b s2<br />
b s1<br />
Maximum rpm and cutting speed Vc<br />
Diameter mm<br />
Max n rpm<br />
Max V c m/min<br />
32<br />
29000<br />
2915<br />
40<br />
18250<br />
2890<br />
Feed<br />
50<br />
16250<br />
2985<br />
The CoroMilll 245 wiper insert has an<br />
8.2 mm land which allows the feed per<br />
revolution to be increased by up to four<br />
times the normal feed, with good surface<br />
quality maintained. Especially for large<br />
diameter cutters which can fully utilize<br />
the combination of wiper- and milling<br />
inserts. Normally it is sufficient to use<br />
only one wiper insert in a cutter.<br />
The CoroMill 245 is optimized for<br />
facemilling applications and to machine<br />
any material, type of workpiece in any<br />
machine tool.<br />
63<br />
14400<br />
3365<br />
80<br />
12700<br />
3520<br />
100<br />
11300<br />
3770<br />
125<br />
10100<br />
4320
CoroMill 200<br />
Round insert cutters can perform a wide<br />
variety of milling operations. The reason<br />
for round inserts being the strongest type<br />
of insert is that the entering and exit angles<br />
varies, as well as the chip cross section<br />
varies depending on the depth of cut. This<br />
type of cutter has the strongest inserts and<br />
is therefore suited for medium and rough<br />
machining. This means that it is easy to<br />
achieve high productivity with this type<br />
of cutter, and inspite of the high metal<br />
removal rates round insert cutters often<br />
have the best tool-life.<br />
The CoroMill 200 facemilling cutter is a<br />
very versatile tool. It is a good choice for<br />
general milling as well as for die- and<br />
mouldmaking and should be first choice<br />
for roughing and medium operations.<br />
The application areas are many for the<br />
CoroMill 200; facemilling, endmilling,<br />
pocketing, contouring and multi-axis<br />
milling are applications that the 200 cutter<br />
is well suited for. Lets consider the benefits<br />
with a round inset cutter for each of these<br />
application areas.<br />
93
94<br />
Facing<br />
In normal facemilling applications round<br />
inserts for the most part provide more<br />
effective cutting edges per insert than<br />
other insert shapes. Round inserts provide<br />
a chip thinning effect which allows higher<br />
feed rates compared to 90 or even 45<br />
degree cutters. It should also be the first<br />
choice for hardened and heat resistant<br />
materials. The combination of curved cutting<br />
edge, negative rake and thickness of<br />
the insert makes it well suited for milling<br />
in such materials.<br />
Contouring, pocketing<br />
The CoroMill 200 insert geometries are<br />
well suited for the typical stamping die<br />
set-up where there are extended overhangs,<br />
chatter and recutting of chips. The<br />
large cutter body clearance allows ramping<br />
and plunging.<br />
Multi-axis machining<br />
The new generation of <strong>CNC</strong>-machines are<br />
often supplied with multi-axis capability,<br />
both in programming and set-up.<br />
Therefore the need for tools with multiaxis<br />
capability. The 200 cutter has more<br />
versatility and a wider range of possible<br />
movements than any other milling cutter.<br />
This makes the cutter ideal for curved surface<br />
machining, both concave and convex.<br />
Plus the capability to perform circular<br />
interpolation in 2- or 3 axes.
Cutter body<br />
The CoroMill 200 has been robustly designed<br />
to cope with high metal removal rates<br />
and difficult materials in a safe way. The<br />
large and open chip pockets manages large<br />
amounts of chipflow. Even though the<br />
capability of very heavy machining, the<br />
safety has not been compromised with.<br />
The shim protected insert seat efficiently<br />
protects the cutter body in case of a tool<br />
overload. The cutters are available in diameters<br />
from Ø 25 mm up to Ø 160 mm<br />
with coarse, close or extra close differential<br />
pitch with insert sizes 10, 12, 16 or 20 mm<br />
inserts as standard.<br />
Inserts<br />
Round inserts means strength and ability<br />
to machine pockets with high productivity.<br />
M<br />
L<br />
H<br />
These milling cutters have often required<br />
powerful machines and provided insufficient<br />
accuracy. The development towards<br />
positive insert geometries has vastly broadened<br />
the application area for round<br />
inserts. The extra positive geometry has an<br />
advantageous effect on heat development,<br />
vibration tendencies and power requirements.<br />
These inserts have a sharp cutting<br />
edge and positive top rake angle which<br />
enables good chip forming ability and a<br />
smooth cutting action.<br />
The different geometries provide extra<br />
safety for the respective applications.<br />
Geometry L for light operations is an<br />
extra positive geometry for machining in<br />
all materials. The L geometry also creates<br />
low cutting forces and can be used for<br />
weak workpieces and machine tools, when<br />
vibrations occur. Ground RCHT insert for<br />
CoroMill 200 cutters are also suitable for<br />
finishing operations.<br />
Geometry M for medium operations is the<br />
positive geometry for all-round use and<br />
basic insert for most materials. Suitable for<br />
small to medium size machines and optimized<br />
performance in soft and stainless<br />
steel. It can also be used in hardened steel<br />
with lower feed rate.<br />
Geometry H for heavy operations with<br />
reinforced cutting edge for safe production.<br />
This insert is reliable in operations when<br />
recutting of chips occur and offers highest<br />
possible feed rate. Power consumption of<br />
the H geometry is slightly higher, approximately,<br />
10% higher compared with geometry<br />
M.<br />
95
96<br />
The facets which all CoroMill 200 inserts<br />
have provide distinctive indexing up to<br />
eight times which makes it easy to get a<br />
Fräser-Ø<br />
25/25,4* mm<br />
32/31,75* mm<br />
40/38,1* mm<br />
50/50,8* mm<br />
63/63,5* mm<br />
80/76,2* mm<br />
100/101,6* mm<br />
125/127* mm<br />
160/152,4* mm<br />
200/203,2* mm<br />
250/254* mm<br />
iC 09*<br />
37500<br />
31600<br />
27900<br />
23200<br />
20300<br />
18200<br />
15500<br />
13700<br />
12500<br />
10700<br />
9500<br />
iC 10<br />
37500<br />
30900<br />
26500<br />
22900<br />
19900<br />
17300<br />
15300<br />
13500<br />
11800<br />
10500<br />
9300<br />
iC 12<br />
32100<br />
25900<br />
21900<br />
18800<br />
16200<br />
14000<br />
12300<br />
10900<br />
9500<br />
8400<br />
7500<br />
controlled indexing. The centre screw<br />
mounting of the inserts facilitates trouble<br />
free chip flow and easy mounting.<br />
iC 13*<br />
32300<br />
26400<br />
22800<br />
18600<br />
16100<br />
14400<br />
12200<br />
10700<br />
9700<br />
8300<br />
7400<br />
iC 16<br />
-<br />
26200<br />
21400<br />
18000<br />
15300<br />
13100<br />
11400<br />
10000<br />
8700<br />
7700<br />
6800<br />
iC 19*<br />
-<br />
-<br />
24600<br />
19100<br />
16100<br />
14200<br />
11800<br />
10300<br />
9300<br />
7900<br />
7000<br />
iC 20<br />
-<br />
-<br />
18400<br />
15000<br />
12500<br />
10600<br />
9200<br />
8000<br />
6900<br />
6100<br />
5400
CoroMill 390<br />
CoroMill 390 is a high positive endmilling,<br />
square shoulder and facemilling concept<br />
that produces, among other things, true 90<br />
degree component shoulders. The concept<br />
has been developed to meet customer<br />
demands on all endmilling operations<br />
within both the roughing and finishing<br />
areas. The main focus being on precision,<br />
component quality, productivity, versatility<br />
and easy handling.<br />
The CoroMill 390 cutter bodies are produced<br />
from hardened steel with all machining<br />
carried out after the hardening process.<br />
This method provides the following<br />
advantages;<br />
• no increase in insert run-out from local<br />
hardening<br />
• increased fatigue strength<br />
This in its turn lead to<br />
• Highest precision; longer tool life and<br />
better surface quality and dimensionel<br />
tolerances<br />
• Longer life of the cutter body<br />
One of the CoroMill 390 features is related<br />
to the inserts main cutting edge which<br />
is not straight. The main cutting edges has<br />
a helical shape in the axial direction and a<br />
convex configuration in the radial. Each<br />
cutter diameter has optimised axial and<br />
radial rake angles to ensure 90 degree<br />
shoulder is produced. From this design the<br />
concept produces a shoulder in the workpiece<br />
with minimum mismatch even after<br />
several axial passes.<br />
The cutter comes with two insert sizes 11 mm<br />
and 17 mm. The 11 mm insert cutter are<br />
available in diameters ranging from 16 mm<br />
to 63 mm and the cutters with 17 mm<br />
inserts have a diameter range of 25 to 80<br />
mm. Four insert geometries are available<br />
for the 390 cutter: E-L is a precision<br />
ground geometry for light operations and<br />
the L-geometry, also for light operations.<br />
The M-geometry is for general purpose<br />
operations and the H-geometry for<br />
demanding applications.<br />
The maximum recommended rpm and<br />
cutting speed vc should be taken in<br />
consideration when using the cutter, as<br />
shown in the table.<br />
97
98<br />
Maximum RPM Coromant Capto<br />
Max RPM<br />
Max Vc m/min<br />
Max RPM<br />
Max Vc m/min<br />
16<br />
C4<br />
39 000<br />
1959<br />
Square shoulder facemills<br />
Diameter/Coromant Capto size<br />
20<br />
C4<br />
34600<br />
2173<br />
25<br />
C4<br />
36500<br />
2865<br />
32<br />
C4<br />
31000<br />
3115<br />
32<br />
C5<br />
28000<br />
2813<br />
Size - 11 insert Size - 17 insert<br />
40<br />
27000<br />
3391<br />
50<br />
23700<br />
3721<br />
63<br />
20700<br />
4095<br />
80<br />
18200<br />
4572<br />
40<br />
21900<br />
2751<br />
50<br />
19000<br />
2983<br />
63<br />
16500<br />
3264<br />
40<br />
C4/C5<br />
27000<br />
3391<br />
80<br />
14400<br />
3617
CoroMill 290<br />
Traditionally square shoulder milling has<br />
been performed by endmills or dedicated<br />
square shoulder cutters. The reasons for<br />
that has varied. One of them has been that<br />
facemilling cutters were not able to machine<br />
90° corners, which is often the case when<br />
square shoulder milling.<br />
The complete CoroMill 290 programme<br />
covers the majority of square shoulder<br />
applications in many modern machining<br />
centres. The cutter is available in a wide<br />
programme, comprising coarse and close<br />
as well as extra-close pitched cutters in<br />
insert size, 12 mm.<br />
The main characteristic of Coromill 290 is<br />
the advanced insert geometry and inserts<br />
with four cutting edges mounted in shim<br />
protected pockets offering highest possible<br />
security, combined with low cutting forces.<br />
Inserts with advanced chip forming geometries<br />
have the ideal balance between low<br />
cutting forces and high edge security.<br />
- M is the positive all-round geometry,<br />
covering the majority of square shoulder<br />
applications under varying conditions.<br />
- L is the light cutting geometry, designed<br />
for machining with low powered<br />
machines, fragile workpieces, unstable<br />
clamping and for materials requiring a<br />
sharper cutting edge.<br />
- H is the tough geometry for highest<br />
possible edge security. Inserts with large<br />
parallel land perform exellent surface<br />
finish even at high feed rates. Inserts<br />
with 2.0 mm corner radius give the<br />
highest edge security in roughing or<br />
medium operations, or when machining<br />
under unstable conditions.<br />
99
100<br />
These inserts not only provide a sharper,<br />
positive cutting edge, they also have chipforming<br />
ability and have carefully designed<br />
transitions between various parts of the<br />
geometry, adding micro strength to the<br />
cutting edge. The design of the chipformer<br />
reduces contact between chip and edge and<br />
curls the chip, making it more manageable<br />
and carrying away more heat from the<br />
cutting area.<br />
All the inserts have a 1.6 or 2.1 mm parallel<br />
land which increases the capability of<br />
producing better surface finish compared<br />
to an insert with only corner radius. To<br />
obtain the best surface finish the cutting<br />
data should be selected, whenever possible,<br />
to give a feed per revolution (ƒn) less<br />
than the length of the parallel land.<br />
A rule of thumb is to use 70% of the<br />
parallel land in feed per revolution.<br />
Maximum recommended rpm<br />
Diameter mm<br />
40<br />
50<br />
63<br />
80<br />
100<br />
125<br />
160<br />
200<br />
250<br />
290-12<br />
21600<br />
18400<br />
15900<br />
13700<br />
12000<br />
10600<br />
9250<br />
8200<br />
7300
BALL NOSE ENDMILL R216<br />
The ball nose endmill 216 is a strong and<br />
robust endmill concept. Each cutter body<br />
has two effective inserts and each diameter<br />
uses the same insert type in both the centre<br />
and periphery insert seats. The insert<br />
design gives two cutting edges per insert<br />
and the concept is aimed at roughing and<br />
semi-finishing of curved surfaces in machining<br />
centres, <strong>CNC</strong> milling machines and<br />
Cutter body and insert details<br />
Diameter D3<br />
Max. depth of cut, ap<br />
Protection insert ap<br />
Radial rake angle<br />
Axial rake angle<br />
12<br />
10,8<br />
-<br />
0<br />
-10<br />
16<br />
14,4<br />
-<br />
0<br />
-10<br />
20<br />
17,9<br />
-<br />
0<br />
-10<br />
copy milling machines for die and mould<br />
making, aerospace, automotive to name a<br />
few. It is possible to feed the tool in all<br />
directions.<br />
There are individual insert sizes for each<br />
cutter diameter and the insert design permits<br />
use of the same insert type in the periphery<br />
as well as in the centre insert pocket.<br />
12<br />
25<br />
22,3<br />
-<br />
0<br />
-10<br />
16<br />
20<br />
30<br />
26,9<br />
42<br />
0<br />
-10<br />
25<br />
30<br />
32<br />
28,6<br />
-<br />
0<br />
-10<br />
40<br />
35<br />
65<br />
0<br />
-10<br />
12 16 20 25 30 32 40 50<br />
0,05 0,08 0,10 0,12 0,15 0,15 0,20 0,25<br />
Start values - feed/tooth<br />
32<br />
40<br />
50<br />
50<br />
44<br />
74<br />
0<br />
-10<br />
101
102<br />
The unique insert geometry makes it possible<br />
to drill with the ball nose cutter.<br />
However, deviations on the workpiece<br />
may occur at the centre of the cutter.<br />
R<br />
6<br />
8<br />
10<br />
12,5<br />
15<br />
16<br />
20<br />
25<br />
A<br />
1.4<br />
1.7<br />
2.2<br />
3.0<br />
3.9<br />
3.5<br />
3.6<br />
3.8<br />
B<br />
0.07<br />
0.09<br />
0.12<br />
0.18<br />
0.20<br />
0.22<br />
0.24<br />
0.26<br />
The larger diameters of the cutter are also<br />
available with a shank protection insert for<br />
performing heavy duty copy milling.<br />
Diameter 30 mm with one insert and diameters<br />
40 and 50 mm with two inserts.
SOLID CARBIDE ENDMILLS<br />
Especially in finishing the demand is high<br />
for small high performing solid endmills,<br />
both 90 degree and ball nose. Well in line<br />
with the modern machining demands there<br />
are several different solid carbide endmills<br />
for both general and HSM machining available,<br />
in several different grades. Some of<br />
the cutters are specially designed for HSM<br />
and for machining of hardened material up<br />
to 63 Hrc.<br />
1020 (TiC,N) is the allround grade most<br />
suitable for general endmilling in most<br />
materials. It is reliable and the wear process<br />
is even and predictable.<br />
1010 (TiAIN) is very suitable for machining<br />
of hardened tool steel. The high heat resistance<br />
capability makes it suitable for dry<br />
machining and allows short machining<br />
times and long toollife, demands when<br />
machining big moulds. For best use of<br />
grade 1010 special geometries are required.<br />
The substrate for both grades is H10F, a<br />
micro grain grade. The toughness behaviour<br />
is very good, which is important in<br />
order to avoid tool breakage and chipping,<br />
particularly on sensitive corners. Most of<br />
the multi fluted endmills have strengthened<br />
corner geometries for maximum security.<br />
On some of the 1010 cutters there are<br />
helix reduction over the corners and this is<br />
to strengthen the cutting edge and prevent<br />
chipping especially when machining hardened<br />
material. The helix reduction also<br />
allows tougher cutting data to be used.<br />
103
104<br />
OVERVIEW OF TOOLS AND OPERATION GUIDELINES<br />
Recommended Application<br />
endmill<br />
R215.36L Finishing - sidemilling ae < 0.05 - 0.1 x Dc<br />
60 degree helix and six cutting edges.<br />
Radial depth of cut max 10% of the diameter Dc.<br />
Non drilling version<br />
R215.3x-H 30 degree helix and the number of edges equal to the<br />
diameter in mm.<br />
Radial depth of cut max 5% of the diameter.<br />
Non drilling version.<br />
R216.34-N Semi - sidemilling ae < 0.25 x Dc<br />
R216.33-N Three and four edge endmills with 30- and 45 degree helix.<br />
R216.33-N Recommended for side milling in mixed production.<br />
R216.34-N Choose 45 degree helix for smoothest action and best<br />
surface finish<br />
Two edge version recommended for long chipping material.<br />
All versions with drilling capability.
R216.32-N<br />
R216.32-N<br />
R216.33-N<br />
R216.33-N<br />
R216.33-P<br />
R216.34-N<br />
R216.34-N<br />
R216.42-N<br />
Roughing - slotting ap and ae < 0.5 x Dc<br />
Two and three edge short version provide good stability<br />
lowest deflection - also undersized tools are available for<br />
key slot milling.<br />
For deep slots two edge versions are recommended or<br />
alternatively create several passes.<br />
45° degree helix for smooth action and to help<br />
chip evacuation.<br />
Recommended for stainles steel.<br />
For heavier copy milling, two edge ball nose endmills are<br />
recommended.<br />
All versions have drilling capability.<br />
105
106<br />
R216.44-L<br />
R216.42-L<br />
R216.42-L<br />
R216.42-L<br />
R216.42-L<br />
R216.42-L<br />
R216.42-L<br />
R216.42-L<br />
R216.42-L<br />
Copy milling/High speed milling (HSM)<br />
Two and four edge ball nose endmills for finish<br />
milling of deep dies and moulds.<br />
Recommended for all materials.<br />
Two and four edge spherical ball nose endmills for<br />
steep die cavities providing accessibility and a reduced<br />
contact length.<br />
Recommended for depth of cut in finishing - ap/ae =<br />
0.1- 0.2 mm.<br />
Preferably use downmilling and pulling feed direction.<br />
Ball nose and radius versions with rigid shanks, short<br />
cutting length and optimised geometry for reliable semifinishing<br />
at high speeds (HSM).<br />
All tools are centre cutting, however, not recommended<br />
for drilling. Recommended operations are circular interpolation<br />
and light ramping.<br />
Tools are designed for dry milling.<br />
Always use tool holders with as low radial runout<br />
as possible; CoroGrip, shrink fit, Coromant Capto,<br />
precision ground collet chucks, precision chucks.<br />
The radial runout should not exceed 10 m. Use the<br />
strongest possible tools with high stiffness and big<br />
core diameter. Try to minimise the tool overhang.
DRILLING TOOLS FOR DIES AND MOULDS<br />
In many dies and<br />
moulds there are several<br />
holes to be machined<br />
such as; hole for<br />
location pins, - mounting<br />
screws, threaded<br />
holes and holes for<br />
cooling and warming<br />
up. To successfully<br />
machine these holes the right kind of drill<br />
and drilling method has to be applied, ranging<br />
from twisted HSS drills to STS and<br />
Ejector drills for deep hole drilling.<br />
Ejector<br />
STS<br />
107
108<br />
Short hole drilling<br />
Generally, short hole drilling is referred<br />
to when machining holes with a relatively<br />
small hole-depth and drill-diameter ratio.<br />
At drill diameters up to 30 mm the hole<br />
depth can be 5-6 x D, while up to 60 mm<br />
it is 4 x D and above 2,5 x D usually is the<br />
limitation. Todays drills can keep close<br />
tolerances, down to IT-10.<br />
There are some different alternatives to<br />
choose from when deciding what type of<br />
drill that should be used for an application;<br />
HSS drills, HSS drills tipped with cemented<br />
carbide, solid carbide drills, twisted or<br />
straight flute drills with indexable inserts.<br />
When choosing the type of drill, the first<br />
question is whether to use a regrindableor<br />
indexable insert drill? Since indexable<br />
insert drills do not cover the smallest diameters<br />
it is only regrindable drills which<br />
can be used for small hole applications.<br />
Under all circumstances it is good to start<br />
looking at the hole diameter and required<br />
length of the hole, to narrow down the<br />
selection of tools.
Small hole diameters<br />
Regrindable drills with Delta geometry is<br />
available in two different versions overlapping<br />
one another; Delta, and Delta C.<br />
In the diameter range covered by<br />
Delta C, workpiece material in relation<br />
to machine tool capacity will be the determining<br />
factor regarding which drill to use.<br />
If the machine tool capacity is good and<br />
the possibility to use high spindle speed is<br />
available the qualities of the cemented<br />
carbide at the Delta C drill should be<br />
utilised. However, if the spindle speed is<br />
not high enough the capacity of the Delta<br />
C drill can not be utilised because cemented<br />
Carbide needs sufficient cutting speed to<br />
work at its best.<br />
109
110<br />
Medium sized hole diameters<br />
The diameter range considered as medium<br />
sized is where the Coromant U-drill and<br />
Delta drill overlap each other. At high<br />
demands on close tolerances or when the<br />
depth of the hole limits the use of the<br />
U-drill (indexable insert drill), the Delta<br />
drill is the only alternative.<br />
On the other hand, when the initial penetration<br />
surface is not flat, if the hole is<br />
pre-drilled, or if cross-drilling must be<br />
done, then the indexable insert drill is<br />
the only option. These drills will provide<br />
the lowest cost per machined component,<br />
since they have exchangeable inserts. This<br />
cost advantage is particularly beneficial<br />
when machining large series.<br />
We will not discuss larger short hole drills<br />
such as trepanning drills as these sizes of<br />
holes can easily be made by circular interpolation<br />
with a round insert milling<br />
cutter or an endmill. Using a milling cutter<br />
to machine the holes within the medium<br />
sized diameter is also an alternative which<br />
should be taken in consideration when<br />
choosing machining method.
Deep hole drilling<br />
Deep hole drilling is something which is<br />
a relatively common operation in die and<br />
mould making, for instance to machine<br />
holes for cooling or warming of the mould.<br />
There are some different ways to drill deep<br />
holes and the most common for die and<br />
mould making are gundrilling, STS and<br />
ejector drilling.<br />
In the gun drilling system, the cutting fluid<br />
is supplied internally through the tool and<br />
the chips are removed through a V-shaped<br />
groove in the shaft. Conventional machines<br />
with sufficiently high spindle speed, coolant<br />
supply (flow and pressure) and a suitable<br />
range of feeds can be modified for gun<br />
drilling. However, the best results are<br />
obtained with special gun drilling machines.<br />
A B C<br />
E<br />
These should be equipped with a drill<br />
bushing (A), a splash guard (B), an oil supply<br />
unit (D) and, generally, it is necessary<br />
to support the workpiece with a steady rest<br />
C. In addition, it is necessary to have a tank<br />
which provides efficient filtering and cooling<br />
(E), plus a pump (F) with sufficient capacity<br />
in terms of both pressure and volume.<br />
The gun drill is the only drill which can<br />
be used with the gun drilling system. Gun<br />
drilling is primarily used when precisiondrilling<br />
of small holes has to be performed.<br />
It can cope with hole depths up to 100 x<br />
the drill diameter. If additional steady rests<br />
are used, it is possible to drill up to 200 x<br />
the drill diameter, provided the capacity of<br />
the pump is sufficient.<br />
D<br />
F<br />
F<br />
111
112<br />
One clear advantage with gun drilling is<br />
the high quality of the hole achieved,<br />
which is crucial for cooling channels in a<br />
tool. If the quality of the cooling channels<br />
is not good enough the channels can easily<br />
be put out of order due to corrosion.<br />
It is also important that the tolerance of<br />
the pre-drilled guidance hole is kept close<br />
to get a good result with the gun drill.<br />
The Ejector system has twin drill tubes.<br />
The cutting fluid is pumped in between<br />
the inner and the outer tubes. The major<br />
portion of the cutting fluid is led forward<br />
to the drill head while the remainder is<br />
forced through a groove in the rear section<br />
of the inner tube. The negative pressure<br />
which arises in the front section of the<br />
inner tube means that the cutting fluid at<br />
the drill head is sucked out through the<br />
inner tube together with the chips.<br />
The Ejector system is self-contained and<br />
can be adapted quite easily for most conventional<br />
machines, machining centres, NC<br />
and <strong>CNC</strong> lathes. The machine should be<br />
equipped with a drill bushing (A), inner<br />
and outer tubes (B), a vibration damper C<br />
plus a connector with a collet and a sealing<br />
sleeve (D). In addition, it is necessary to have<br />
a tank with efficient filtering (E) and cooling<br />
(F), plus a pump (G) with sufficient capacity<br />
in terms of both pressure and volume.<br />
The drill head is screwed firmly onto the<br />
outer tube, which has a four-start square<br />
thread. If the support pads are not in contact<br />
with the drill bushing another thread<br />
start can be used. The thread starts have a<br />
4 x 90 degree positioning.
Connectors are available for both rotating<br />
and non-rotating drills. The connector for<br />
a non-rotating drill (1), which is the most<br />
common application, has no rotation parts.<br />
For rotation drills, a connector is used<br />
with a mounted and sealed housing around<br />
the spindle (2). The outer and inner tubes<br />
are attached to the connector by a collet. A<br />
sealing sleeve is also used here at the<br />
1<br />
A<br />
B C D<br />
E F<br />
G<br />
entrance for the cutting fluid. The collet<br />
and the sealing sleeve must be changed for<br />
different diameter ranges.<br />
Because the cutting fluid is pumped into<br />
the space between the inner and outer tubes,<br />
no seals are required between the workpiece<br />
and the drill bushing. Therefore, the<br />
system is often used with workpieces where<br />
113
114<br />
2<br />
sealing problem could arise. This feature<br />
also makes the Ejector system very suitable<br />
for use with interrupted drilling.<br />
The Ejector system can cope with hole<br />
depths of up to 100 x the hole diameter when<br />
drilling horizontally and approximately 50<br />
x the hole diameter when drilling vertically.<br />
In the STS drilling system, the cutting<br />
fluid is forced in between the drill tube<br />
and the walls of the hole. The cutting fluid<br />
should have sufficient pressure and flow to<br />
remove the chips efficiently through the<br />
tool and drill tube.<br />
Only special deep hole drilling machines<br />
are used for STS drilling. The machine<br />
should be equipped with an oil pressure<br />
head with a drill bushing and seals (A), a<br />
drill tube (B), a vibration damper C and a<br />
connecting chuck (D). In addition, it is<br />
necessary to have a tank which gives efficient<br />
filtering (E) and cooling (F), plus a<br />
pump (G) with sufficient capacity in terms<br />
of both pressure and volume.<br />
The high cutting fluid pressure and flow<br />
makes the system suitable for use where<br />
material with poor chip breaking capacity is<br />
to be machined. Hole depths of up to 100 x<br />
the hole diameter can be drilled with STS.
A<br />
E F<br />
G<br />
B<br />
C<br />
D<br />
115
116<br />
CoroGrip PRECISION-POWER CHUCK<br />
CoroGrip is a holding<br />
system that covers all<br />
applications from<br />
super-finishing to<br />
heavy roughing. One<br />
holder can clamp all<br />
types of tools from<br />
facemills to drills with<br />
both cylindrical,<br />
Whistle notch or Weldon shanks. Standard<br />
collets such as collets for HydroGrip,<br />
BIG, Nikken, NT etc., can also be used in<br />
the CoroGrip holders.<br />
The bore and shank (taper) on CoroGrip<br />
holders are ground to very close tolerances,<br />
which enables very small run-out, only<br />
0.002 - 0.006 mm at 4 x D. The symmetrical<br />
clamping force in the system keeps the low<br />
run-out for a very long time. The rigid<br />
design of the holders also keeps the low<br />
run-out in roughing operations.<br />
D<br />
A<br />
C<br />
B<br />
It is possible to clamp Weldon/Whistle<br />
notch shanks directly in the holder and<br />
also clamp the shanks half way into the<br />
holder. The clamping force in the<br />
CoroGrip holders is extremely high and<br />
its balanced design makes it perfect for<br />
high speed machining (
It takes less than 20 seconds to change a tool.<br />
Two different pumps can be used when changing tools in a CoroGrip holder;<br />
one manual hydraulic pump that is portable and one stationary air-driven pump,<br />
which is activated by a foot-pedal.<br />
To connect the pump to the holder an ergonomically designed handle is used.<br />
Clamping or unclamping the tool is done by a switch without removing the<br />
handle from the holder. When using the manual pump one hand is always free<br />
for holding the tool and when using the air-driven pump both hands are free.<br />
The same handle is used for all types and sizes of CoroGrip holders.<br />
117
118<br />
The picture shows how easy it is to pre-set the tool with the CoroGrip concept.<br />
Without any setting screw, you can very easy adjust the length of the tool to a<br />
rquired measure. Depending on the accuracy of the optical reader, you can set the<br />
tool within +/- 3-5 microns.<br />
If the pneumatic pump is used both hands are free to hold and adjust the tool.<br />
When it is in exactly right position the foot-pedal is pressed and the tool is fixed.<br />
Only the outer sleeve is moving when clamping and unclamping and there are no<br />
forces on the pre-setting fixture. This means that all tool changes can be made in<br />
the pre-setter and there is no need of a rigid mounting fixture, which is the case if<br />
power chucks or outer holders where keys are used for clamping.
Transmission torque comparison [Nm]<br />
Shank diameter<br />
12 mm<br />
20 mm<br />
25 mm<br />
32 mm<br />
[Torque Nm]<br />
72<br />
50<br />
93<br />
243<br />
181<br />
440<br />
421<br />
365<br />
804<br />
---<br />
651<br />
1512<br />
Type of holder<br />
Shrink fit<br />
HydroGrip<br />
CoroGrip<br />
Shrink fit<br />
HydroGrip<br />
CoroGrip<br />
Shrink fit<br />
HydroGrip<br />
CoroGrip<br />
Shrink fit<br />
HydroGrip<br />
CoroGrip<br />
119
120<br />
COROMANT CAPTO<br />
Extended tools for<br />
machining centres are<br />
frequently required to<br />
be able to reach the<br />
surfaces to be machined.<br />
With Coromant<br />
Capto it is possible to<br />
build an assembly<br />
with long and short<br />
basic holders, extensions and reductions,<br />
so the right length can be achieved. It is<br />
very important to use shortest possible<br />
tool overhang in milling operations. Many<br />
times a small difference in length can be<br />
the difference in working with a good (or<br />
medium productivity) or not working at all.<br />
- With modular tools it is always possible<br />
to use optimal tool assemblies and<br />
cutting data for best productivity!<br />
If solid tools are used, they are often<br />
too short or too long. In many cases<br />
special solid tools have to be used, which<br />
is expensive and also requires long<br />
delivery times.<br />
- Modular tools are built together in<br />
minutes!<br />
A special tool with Coromant Capto<br />
coupling can also be used in other machines<br />
with different spindles. Only a new<br />
standard basic holder is required.<br />
To avoid vibration in a milling or boring<br />
operation a rigid clamping is required. It is<br />
mainly the bending moment that is critical,<br />
and the most important factor for taking<br />
up high bending moment is the clamping<br />
force. Coromant Capto uses centre bolt<br />
clamping, which is the strongest and cheapest<br />
way to clamp. Normally the clamping<br />
force is double compared with any side<br />
locking (front clamping) mechanisms.<br />
Normally more than 100% productivity<br />
increase can be achieved with centre bolt<br />
clamping.
HSK is a spindle interface and not a<br />
modular coupling and should not be<br />
mistaken for a modular tool system. The<br />
clamping force is not as great as that produced<br />
by Coromant Capto with centre<br />
bolt clamping, which is mainly required<br />
for milling and boring operations. HSK<br />
extensions can, however, be used for light<br />
drilling and reaming operations, where<br />
there are low radial forces.<br />
Minimum run-out and<br />
guaranteed centre height<br />
Press fit and torque loads spread symmetrically<br />
around the coupling, without<br />
load peaks, are the reasons for the outstanding<br />
minimum run-out and centre-height<br />
characteristics.<br />
Compare conventional couplings using<br />
one or two keys to transfer torque. There<br />
will always be a certain amount of play in<br />
the coupling which can cause any of the<br />
following situations:<br />
• Asymmetric load situation with high<br />
load peak on the key. Causes high surface<br />
pressure and shorter tool-life, as well as<br />
higher run-out.<br />
121
122<br />
The coupling has the best stability characteristics<br />
on the market, as a result of:<br />
No pins, keys etc. The polygon shape<br />
transmits torque (T) without any loose<br />
parts such as pins or keys.<br />
No play in the coupling. The tight press<br />
fit guarantees that there is no play in the<br />
coupling.<br />
Symmetrical loads. Torque load is spread<br />
symmetrically on the polygon without<br />
peaks irrespective of rotation. Thereby the<br />
coupling is self-centring. It also guarantees<br />
long life of the coupling.<br />
Two face contact/high clamping force.<br />
Due to the combination of press fit and<br />
high clamping force the coupling gets a<br />
two-face contact. A large surface contact<br />
Two face<br />
contact<br />
area around the polygon and on the flange<br />
transmits the cutting force F. No load<br />
peaks. Axial positioning of the cutting<br />
edge will remain constant despite high<br />
axial cutting forces.
Comparison between holders for clamping of shaft tools<br />
Type of<br />
operation<br />
Transmission<br />
torque<br />
Accuracy<br />
TIR 4 x D<br />
[mm]<br />
Suitable for<br />
high speed<br />
Maintenance<br />
Possibility to<br />
use collets<br />
Weldon/<br />
whistle-notch<br />
holder<br />
Heavy<br />
roughingsemi<br />
finishing<br />
+++<br />
0.01-0.02<br />
+<br />
None required<br />
No<br />
Collet chuck<br />
Din 6499<br />
Roughing -<br />
Semi finishing<br />
++<br />
0.01-0.03<br />
+<br />
Cleaning and<br />
changing<br />
collets<br />
Yes<br />
Power<br />
chuck<br />
Heavy roughing-finishing<br />
++<br />
0.003-0.010<br />
++<br />
Cleaning and<br />
changing<br />
spare parts<br />
Yes<br />
HydroGrip<br />
Hydraulic<br />
chuck<br />
Finishing<br />
+<br />
0.003-0.008<br />
++<br />
Non required<br />
Yes<br />
Shrink fit<br />
holder<br />
Heavy roughing-finishing<br />
+++<br />
0.003-0.006<br />
+++<br />
None required<br />
No<br />
CoroGrip<br />
Hydromechanical<br />
Heavy roughing<br />
-finishing<br />
+++<br />
0.003-0.006<br />
+++<br />
None required<br />
Yes<br />
123
124<br />
ROUGHING RECOMMENDED METHOD<br />
Roughing of cavity; downmilling, leaves 1 mm in stock<br />
Cutting tool<br />
Insert<br />
Cutter diameter [ø]<br />
Number of teeth [z]<br />
Depth of cut [ap ]<br />
Depth of cut [ae ]<br />
Cutting speed [Vc ]<br />
Spindle speed [n]<br />
Feed per tooth [ƒz ]<br />
Table feed [Vf ]<br />
Time [min, sec]<br />
CoroMill R200-068Q27-12L<br />
RCKT 1204MO-PM GC4030<br />
80 MM<br />
4<br />
4 mm<br />
65% x Dc<br />
250 m/min<br />
995 rpm<br />
0.4 mm/tooth<br />
1592 mm/min<br />
6 00
ROUGHING OF CAVITY<br />
RECOMMENDED METHOD<br />
3 axis ramping, contouring, downmilling, leaves 1 mm in stock<br />
Cutting tool<br />
Insert<br />
Cutter diameter [ø]<br />
Number of teeth [z]<br />
Depth of cut [ap ]<br />
Depth of cut [ae ]<br />
Cutting speed [Vc ]<br />
Spindle speed [n]<br />
Feed per tooth [ƒz ]<br />
Table feed [Vf ]<br />
Time [min, sec]<br />
CoroMill R200-040Q22-12M<br />
RCKT 1204MO-PM GC4030<br />
52 MM<br />
4<br />
4 mm<br />
65% x Dc<br />
180 m/min<br />
1102 rpm<br />
0.33 mm/tooth<br />
1469 mm/min<br />
1 57<br />
125
126<br />
ROUGHING OF CAVITY<br />
RECOMMENDED METHOD<br />
Restmilling<br />
Cutting tool<br />
Insert<br />
Cutter diameter [ø]<br />
Number of teeth [z]<br />
Depth of cut [ap ]<br />
Depth of cut [ae ]<br />
Cutting speed [Vc ]<br />
Spindle speed [n]<br />
Feed per tooth [ƒz ]<br />
Table feed [Vf ]<br />
Time [min, sec]<br />
CoroMill R200-020A25-12H<br />
RCKT 1204MO-WM CT530<br />
32 mm<br />
3<br />
2-5 mm<br />
SEMI-FINISHING<br />
RECOMMENDED METHOD<br />
Contouring, downmilling, leaving 0.2 mm in stock<br />
Cutting tool<br />
Insert<br />
Cutter diameter [ø]<br />
Number of teeth [z]<br />
Depth of cut [ap ]<br />
Depth of cut [ae ]<br />
Cutting speed [Vc ]<br />
Spindle speed [n]<br />
Feed per tooth [ƒz ]<br />
Table feed [Vf ]<br />
Time [min, sec]<br />
CoroMill R200-051Q22-12H<br />
RCKT 1204MO-WM CT530<br />
63 mm<br />
5<br />
1 mm<br />
0.8 mm<br />
600 m/min<br />
3032 rpm<br />
0.36 mm/tooth<br />
5457 mm/min<br />
7 30<br />
127
128<br />
SEMI-FINISHING<br />
RECOMMENDED METHOD<br />
Contouring, downmilling, leaving 0.2 mm in stock<br />
Cutting tool<br />
Insert<br />
Cutter diameter [ø]<br />
Number of teeth [z]<br />
Depth of cut [ap ]<br />
Depth of cut [ae ]<br />
Cutting speed [Vc ]<br />
Spindle speed [n]<br />
Feed per tooth [ƒz ]<br />
Table feed [Vf ]<br />
Time [min, sec]<br />
CoroMill R200-020A25-12H<br />
RCKT 1204MO-WM CT530<br />
32 mm<br />
3<br />
1 mm<br />
0.8 mm<br />
500 m/min<br />
4974 rpm<br />
0.16 mm/tooth<br />
2400 mm/min<br />
1 19
ROUGHING<br />
COMMON METHOD<br />
Roughing of cavity; drilling starting hole<br />
Cutting tool<br />
Insert<br />
Drill diameter [ø]<br />
Number of teeth [z]<br />
Depth of cut [ap ]<br />
Depth of cut [ae ]<br />
Cutting speed [Vc ]<br />
Spindle speed [n]<br />
Feed per tooth [ƒz ]<br />
Table feed [Vf ]<br />
Time [min, sec]<br />
Coromant U-drill R416.2-0500L40-21<br />
WCMX 080412R-53 GC4025 (P)<br />
WCMX 080412R-53 GC 1020 (C)<br />
50 mm<br />
2<br />
84 mm<br />
~ Dc mm<br />
150 m/min<br />
955 rpm<br />
0.15 mm/tooth<br />
143 mm/min<br />
0 35<br />
129
130<br />
ROUGHING<br />
COMMON METHOD<br />
Roughing of cavity; contouring, constant Z-value,<br />
downmilling, leaving 1 mm in stock<br />
Cutting tool<br />
Insert<br />
Cutter diameter [ø]<br />
Number of teeth [z]<br />
Depth of cut [ap ]<br />
Depth of cut [ae ]<br />
Cutting speed [Vc ]<br />
Spindle speed [n]<br />
Feed per tooth [ƒz ]<br />
Table feed [Vf ]<br />
Time [min, sec]<br />
CoroMill R290-050Q27-12M<br />
R-290.90-12T320M-PM GC4030<br />
50 mm<br />
4<br />
5 mm<br />
65 % x Dc 200 m/min<br />
1273 rpm<br />
0.25 mm/tooth<br />
1273 mm/min<br />
7 43
ROUGHING<br />
COMMON METHOD<br />
Roughing of cavity; contouring, downmilling,<br />
constant Z-value, leaving 1 mm in stock<br />
Cutting tool<br />
Insert<br />
Cutter diameter [ø]<br />
Number of teeth [z]<br />
Depth of cut [ap ]<br />
Depth of cut [ae ]<br />
Cutting speed [Vc ]<br />
Spindle speed [n]<br />
Feed per tooth [ƒz ]<br />
Table feed [Vf ]<br />
Time [min, sec]<br />
Ballnose endmill R216-32B32-070<br />
R-216-32 06 M-M GC1025<br />
32 mm<br />
2<br />
6 mm<br />
6 mm<br />
200 m/min<br />
1989 rpm<br />
0.25 mm/tooth<br />
995 mm/min<br />
6 00<br />
131
132<br />
ROUGHING<br />
COMMON METHOD<br />
Roughing of cavity; restmilling, copymilling, up- and downmilling (zigzag),<br />
leaving 1 mm in stock<br />
Cutting tool<br />
Insert<br />
Cutter diameter [ø]<br />
Number of teeth [z]<br />
Depth of cut [ap ]<br />
Depth of cut [ae ]<br />
Cutting speed [Vc ]<br />
Spindle speed [n]<br />
Feed per tooth [ƒz ]<br />
Table feed [Vf ]<br />
Time [min, sec]<br />
Ballnose endmill R216-25B325-60<br />
R-216-25 04 M-M GC1025<br />
25 mm<br />
2<br />
1 mm<br />
1 mm<br />
300 m/min<br />
3820 rpm<br />
0.20 mm/tooth<br />
1528 mm/min<br />
3 35
SEMI-FINISHING<br />
COMMON METHOD<br />
Contouring, downmilling, leaving 0.2 mm in stock<br />
Cutting tool<br />
Insert<br />
Cutter diameter [ø]<br />
Number of teeth [z]<br />
Depth of cut [ap ]<br />
Depth of cut [ae ]<br />
Cutting speed [Vc ]<br />
Spindle speed [n]<br />
Feed per tooth [ƒz ]<br />
Table feed [Vf ]<br />
Time [min, sec]<br />
Ballnose endmill R216-25A25-055<br />
R-216-20 T3 M-M CT530<br />
20 mm<br />
2<br />
1.5 mm<br />
0.8 mm<br />
400 m/min<br />
6367 rpm<br />
0.30 mm/tooth<br />
3820 mm/min<br />
7 46<br />
133
134<br />
SEMI-FINISHING-<br />
COMMON METHOD<br />
Contouring, downmilling, leaving 0.2 mm in stock<br />
Cutting tool<br />
Insert<br />
Cutter diameter [ø]<br />
Number of teeth [z]<br />
Depth of cut [ap ]<br />
Depth of cut [ae ]<br />
Cutting speed [Vc ]<br />
Spindle speed [n]<br />
Feed per tooth [ƒz ]<br />
Table feed [Vf ]<br />
Time [min, sec]<br />
Ballnose endmill R216-20A25-055<br />
R216-20 T3 M-M CT530<br />
20 mm<br />
2<br />
1.5 mm<br />
0.8 mm<br />
400 m/min<br />
6367 rpm<br />
0.30 mm/tooth<br />
3820 mm/min<br />
6 44
FINISHING BOTH METHODS<br />
Contouring, up- and downmilling<br />
Cutting tool<br />
Insert<br />
Cutter diameter [ø]<br />
Number of teeth [z]<br />
Depth of cut [ap ]<br />
Depth of cut [ae ]<br />
Cutting speed [Vc ]<br />
Spindle speed [n]<br />
Feed per tooth [ƒz ]<br />
Table feed [Vf ]<br />
Time [min, sec]<br />
Carbide endmill R216.64-12030-<br />
AK 13L GC1010<br />
-------------<br />
12 mm<br />
4<br />
0.2 mm<br />
0.2 mm<br />
302 m/min<br />
8000 rpm<br />
0.075 mm/tooth<br />
2400 mm/min<br />
1 08 32<br />
135
136<br />
Recommended method<br />
Roughing:<br />
CoroMill 200 - PM 4030<br />
ap/ae = 4/26; vc/v f = 180/1592 T 6´ 00”<br />
CoroMill 200 - PM 4030<br />
ap/ae = 4/26; vc/v f = 180/1469 T 1´ 57”<br />
CoroMill 200 - WM 530<br />
ap/ae = 2-5/
MACHINING EXAMPLE<br />
Machining of thin walls in aluminium<br />
Roughing Finishing<br />
Tool: Solid carbide Solid carbide<br />
Tool diameter: 10 mm 8 mm<br />
Grade: GC1020 GC 1020<br />
Number of teeth [z]: 2 4<br />
Cutting speed [Vc]: 628 m/min 603 m/min<br />
Spindle speed [n]: 20000 rpm 24000 rpm<br />
Table feed [vƒ]: 4800 mm/min 9600 mm/min<br />
Feed per tooth [ƒz]: 0.12 mm/tooth 0.1 mm/tooth<br />
Depth of cut [ap]: 5 mm 2 mm<br />
Depth of cut [ae]: 6-10 mm 0.9 mm<br />
The wall thickness is 0.2, 0.3 and 0.4 mm and the height is 20 mm. The<br />
machining is performed by down milling and the first cut on one side is<br />
1 mm in axial depth of cut. The following cuts are 2 mm on each side until<br />
the whole 20 mm is machined. The sequence is also explained more in<br />
detail in the HSM chapter in this guide.<br />
137
138<br />
MACHINING EXAMPLE<br />
Improved machining of bumper mould<br />
Finishing operation of a bumper mould where the tool length of 550 mm<br />
is an instability factor. The machine used is an Okuma V-MC/MCVA-2<br />
with an ISO 50 taper. The material is unalloyed steel.<br />
Old method New method<br />
Tool: Ballnose endmill CoroMill 200<br />
Tool diameter: 30 mm 63 mm<br />
Insert: HC844 (P30+Tin) GC1025-PL<br />
Number of inserts [z]: 2 4<br />
Cutting speed [V c]: 217m/min 593 m/min<br />
Spindle speed [n]: 2300 rpm 3000 rpm<br />
Table feed [vf]: 2500 mm/min 3000 mm/min<br />
Feed per tooth [fz]: 0.54 mm/tooth 0.25/1.0 mm/tooth<br />
Depth of cut [ap]: 1.0 mm 0.2 mm<br />
Depth of cut [ae]: 1.0 mm 0.2 mm<br />
Machining time: 50 hours/comp 4 hours/comp<br />
Machining time reduced more than 12 times.<br />
550
MACHINING EXAMPLE<br />
Roughing of cavity in mould for<br />
bottles in high alloyed steel<br />
Tool: CoroMill R200-015A20-10H<br />
Tool diameter: 25 mm<br />
Insert: RCKT-10T3MO-KH3040<br />
Number of inserts [z]: 3<br />
Cutting speed [V c]: 160 m/min<br />
Spindle speed [n]: 2000<br />
Table feed [vf]: 1500 mm/min<br />
Feed per tooth [fz]: 0.25 mm/tooth<br />
Depth of cut [ap]: 0.8 mm<br />
Depth of cut [ae]: 0.8 mm<br />
Tool-life: 2.5 hours<br />
Machine tool: YASDA, ISO50<br />
139
140<br />
MACHINING EXAMPLE<br />
Improved machining for roughing<br />
of grey cast-iron stamping die<br />
3200<br />
Old method New method<br />
Tool: 75 facemilling cutter CoroMill 200,special<br />
Tool diameter: 160 mm 180 mm<br />
Insert: H 13 A RCKT-2006-MO-KH,3040<br />
Number of inserts [z]: 10<br />
Cutting speed [V c]: 100 m/min 102 m/min<br />
Spindle speed [n]: 210 rpm 160 rpm<br />
Table feed [vf]: 800 mm/min 1200 mm/min<br />
Feed per tooth [fz]: 0.35 mm/tooth 0.74 mm/tooth<br />
Tool-life: Unpredictable due 162 min<br />
to frequent insert failure<br />
The component machined in the example had a lot of sand inclusions and<br />
due to all the cast holes in the component the cutting forces were very unfavourable.<br />
The entering and exit angles of the inserts was often close to zero<br />
and therefore it was a constant shifting between conventional- and climbmilling<br />
where the cut was interrupted. These combined factors call for a<br />
rigid milling cutter with strong inserts and as the cutting data in the test<br />
shows the round insert cutter is clearly the best choice.<br />
2100
MACHINING EXAMPLE<br />
Roughing of pressing die for trucks in tool steel,<br />
IMPAX, machine tool OKUMA MCV-A, 30kW<br />
Tool: CoroMill R200-40Q22-12L<br />
Tool diameter: 44 mm<br />
Insert: RCKT-1204MO-WM530<br />
Number of inserts [z]: 3<br />
Cutting speed [V c]: 295 m/min<br />
Spindle speed [n]: 1809 rpm<br />
Table feed [vf]: 1628 mm/min<br />
Feed per tooth [fz]: 0.30 mm/tooth<br />
Depth of cut [ap]: 2.5 mm<br />
Depth of cut [ae]: 2-4 mm<br />
Tool-life: 50 min<br />
Rough contouring, downmilling and constant Z-value.<br />
141
142<br />
MACHINING EXAMPLE<br />
Finishing of mould for plastic bin in low<br />
alloy steel with a hardness of 29 HRC<br />
Tool: CoroMill R200-028A32-12M<br />
Tool diameter: 40 mm<br />
Insert: RCKT 1204MO-PM,4040<br />
Number of inserts [z]: 3<br />
Cutting speed [Vc]: 250 m/min<br />
Spindle speed [n]: 2000 rpm<br />
Table feed [vf]: 2000 mm/min<br />
Feed per tooth [fz]: 0.30 mm/tooth<br />
Depth of cut [ap]: 0.5 mm<br />
Depth of cut [ae]: 0.5 mm<br />
The total length of the tool is 400 mm, the component is machined in<br />
three passes without the cutting data being changed to get the surface<br />
finish required. The two last passes are spring cuts.
MACHINING EXAMPLE<br />
Roughing of die for outer roof to<br />
passenger cars in nodular cast-iron<br />
2500<br />
1500<br />
Tool: BNE R216-32B32-070<br />
Tool diameter: 32 mm<br />
Insert: R216-3206M-M,4040<br />
Number of inserts [z]: 2<br />
Cutting speed [V c]: 201 m/min<br />
Spindle speed [n]: 20000<br />
Table feed [vf]: 1000-2000 mm/min<br />
Feed per tooth [fz]: 0.25-0.5 mm/tooth<br />
Depth of cut [ap]: 10-18 mm<br />
Depth of cut [ae]: 4-8 mm<br />
Tool-life: 1.5 hours<br />
Machine tool: SHIN NIPPON KOKI HF-5, ISO50, 40kW<br />
143
144<br />
MACHINING EXAMPLE<br />
Roughing, semi-finishing and<br />
finishing of cavity in material 2606<br />
with a hardness of 46 HRC<br />
100<br />
Roughing Semi-finishing<br />
Tool: BNE R216-25B25-060 BNE R216-20B25-050<br />
Tool diameter: 25 mm 20 mm<br />
Insert: BNE R216-2504M-M,1025 R216-20T3M-M,530<br />
Number of inserts [z]: 2 2<br />
Cutting speed [Vc]: 120 m/min 200 m/min<br />
Table feed [vf]: 600 mm/min 2000 mm/min<br />
Depth of cut [ap]: 3 mm 0.8 mm<br />
Depth of cut [ae]: 10 mm 0.05 mm<br />
Machining time: 31.5 min 5.1 min<br />
Finishing<br />
Tool: BNE R216,44-12030 -AK26L<br />
Tool diameter: 12 mm<br />
Number of inserts [z] 4<br />
Grade: GC1020<br />
Cutting speed [Vc]: 400 m/min<br />
Table feed [vf]: 4800 mm/min<br />
Depth of cut [ap]: 0.3 mm<br />
Depth of cut [ae]: 0.002 mm<br />
Machining time: 19 min<br />
Previously the machining time for this operation was 2 hours and only solid<br />
carbide endmills in small diameters were used. With ball nose endmill with<br />
indexable inserts and one solid carbide endmill the operation was performed<br />
in 55.6 min. None of the tools showed any significant tool wear.<br />
100<br />
40
MACHINING EXAMPLE<br />
Roughing of pressing die for trucks in tool steel,<br />
IMPAX, machine tool OKUMA MCV-A, 30kW<br />
Tool: R216-20B25-070<br />
Tool diameter: 20 mm<br />
Insert: R216-20T3M-M,1025<br />
Number of inserts [z]: 2<br />
Cutting speed [Vc]: 200 m/min<br />
Spindle speed [n]: 3183 rpm<br />
Table feed [vf]: 1592 mm/min<br />
Feed per tooth [fz]: 0.25 mm/tooth<br />
Depth of cut [ap]: 0.5-3.5 mm<br />
Depth of cut [ae]: 2 mm<br />
Tool-life: 40 min<br />
Rough milling of bottom surface, mixed up- and downmilling. Too low cutting<br />
speed was used in this case, however no visible wear on the inserts.<br />
145
146<br />
MACHINING EXAMPLE<br />
Finishing of forging die in tool steel<br />
with a hardness of 35 HRC<br />
Tool: BNE R216-20B25-50<br />
Tool diameter: 20 mm<br />
Insert: R216-20T3M-M,1025<br />
Number of inserts [z]: 2<br />
Cutting speed [Vc]: 138 m/min<br />
Spindle speed [n]: 2200 rpm<br />
Table feed [vf]: 1550 mm/min<br />
Feed per tooth [fz]: 0.5 mm/tooth<br />
Depth of cut [ap]: 2 mm<br />
Depth of cut [ae]: 0.5 mm
MACHINING EXAMPLE<br />
Semi-finishing of pressing die for trucks in<br />
tool steel, IMPAX, machine tool OKUMA MCV-A 30 kW<br />
Tool: BNE R216-25B25-080<br />
Tool diameter: 25 mm<br />
Insert: R216-2504M-M, 1025<br />
Number of inserts [z]: 2<br />
Cutting speed [Vc]: 300 m/min<br />
Spindle speed [n]: 3820 rpm<br />
Table feed [vf]: 2292 mm/min<br />
Feed per tooth [fz]: 0.30 mm/tooth<br />
Depth of cut [ap]: 0.5-3.5 mm<br />
Depth of cut [ae]: 1 mm<br />
Tool-life: 2.5 hours<br />
Contouring, up- and downmilling, no visible wear on the inserts.<br />
147
148<br />
MACHINING EXAMPLE<br />
Finishing of mould for bottles in tool steel (RAMAX)<br />
150<br />
70<br />
Tool: BNE R216.42-08030AK16L<br />
Tool diameter: 8 mm<br />
Number of inserts [z): 2<br />
Grade: GC1010<br />
Cutting speed [Vc]: 220 m/min<br />
Spindle speed [n]: 11700<br />
Table feed [vf]: 4200 mm/min<br />
Feed per tooth [fz]: 0.18 mm/tooth<br />
Depth of cut [ap]: 0.1 mm<br />
Depth of cut [ae]: 0.14 mm<br />
Tool-life: 34 pieces<br />
Machine tool: YASDA, ISO40
MACHINING EXAMPLE<br />
Semi-finishing and finishing of mould<br />
for electro-spindle in high alloy steel<br />
Semi-finishing Finishing<br />
Tool: BNE R216,42-08030AK16L BNE R216,42-06030AK10L<br />
Tool diameter: 8 mm 6 mm<br />
Number of inerts [z]: 2 2<br />
Grade: GC1010 GC1010<br />
Cutting speed [Vc]: 276 m/min 370 m/min<br />
Spindle speed [n]: 11000rpm 20000 rpm<br />
Table feed [vf]: 1400 mm/min 1600 mm/min<br />
Feed per tooth [fz]: 0.06 mm/tooth 0.04 mm/tooth<br />
Depth of cut [ap]: 0.3 mm 0.2 mm<br />
Depth of cut [ae]: 0.5 mm 0.2 mm<br />
Tool-life: 250 min 600 min<br />
Machine tool: Mori Seiki, ISO30<br />
* BNE = Ball Nose Endmill<br />
Finishing<br />
Finishing<br />
Semi-finishing<br />
149
150<br />
MACHINING EXAMPLE<br />
Semi-finishing and finishing of die for<br />
beer mug in high alloy steel<br />
x<br />
Semi-finishing Finishing<br />
Tool: BNE R216.44-08030-19L BNE R216.42-06030AK10L<br />
Tool diameter: 8 mm 6 mm<br />
Number of inserts [z]: 4 2<br />
Grade: GC1010 GC1010<br />
Cutting speed [Vc]: 250 m/min 320 m/min<br />
Spindle speed [n]: 10000rpm 17200 rpm<br />
Table feed [vf]: 2000-2500 mm/min 3000 mm/min<br />
Feed per tooth [fz]: 0.05-0.07 mm/tooth 0.07 mm/tooth<br />
Depth of cut [ap]: 0.2 mm 0.1 mm<br />
Depth of cut [ae]: 0.2 mm 0.1 mm<br />
Tool-life: 1080 min 600 min<br />
Machine tool: Mori Seiki, ISO30<br />
* BNE = Ball Nose Endmill<br />
x
MACHINING EXAMPLE<br />
Slotmilling of inserts for moulds in<br />
CALMAX whith a hardness of 56-58 HRC<br />
Tool: BNE R216,33-02045-ACO6P<br />
Tool diameter: 12 mm<br />
Number of inserts [z]: 3<br />
Grade: GC1020<br />
Cutting speed [V c]: 220 m/min<br />
Spindle speed [n]: 15000<br />
Table feed [v f]: 1500 mm/min<br />
Feed per tooth [fz]: 0.03 mm/tooth<br />
Depth of cut [a p]: 0,04 mm<br />
Depth of cut [a e]: 2 mm<br />
Tool-life: Not established 160 pieces without wear<br />
Machine tool: Deckel Maho DMU 50V<br />
Previously the application was performed by spark erosion and the<br />
machining time was 1.5 hours per component. With HSM the machining<br />
time per component is 5 min. The slot is machined in 48 passes.<br />
151
152<br />
MACHINING EXAMPLE<br />
Machining of moulds for ventilation, mounted<br />
in the dashboard in cars. The workpiece material<br />
is low alloy steel with a hardness of 50-52 HRC<br />
Tool: BNE R216.42-04030-AKO5L<br />
Tool diameter: 4 mm<br />
Grade: GC1010<br />
Cutting speed [V c]: 150 m/min<br />
Spindle speed [n]: 12000<br />
Table feed [v f]: 1200 mm/min<br />
Feed per tooth [fz]: 0.05 mm/tooth<br />
Depth of cut [a p]: 0.1 mm<br />
Depth of cut [a e]: 0.1 mm<br />
Tool-life: 15-18 hours<br />
Machine tool: MIKRON VCP 710<br />
There are eight moulds in each set and with the EDM method previously<br />
used it took 100 hours to produce a set, with the HSM machine this time<br />
has been reduced to 40 hours.
MACHINING EXAMPLE<br />
Semi-finishing of thermoplastic mould<br />
Tool: CoroMill 390<br />
R390-025B25-11M<br />
Tool diameter: 25 mm<br />
Insert: R390-11T308M-PM,1025<br />
Number of inserts [z]: 3<br />
Cutting speed [V c]: 162 m/min<br />
Spindle speed [n]: 2068 rpm<br />
Table feed [v f]: 3050 mm/min<br />
Feed per tooth [f z]: 0,49 mm/tooth<br />
Depth of cut [a p]: 0.5 mm<br />
Depth of cut [a e]: 25 mm<br />
Tool-life: 1.5 hours<br />
153
154<br />
MACHINING EXAMPLE<br />
Rough machining of moulds to the rear<br />
section of the fenders for trucks<br />
Tool: CoroMill 390<br />
R390-040B32-11M<br />
Tool diameter: 40 mm<br />
Insert: R390-11T308M-PM,1025<br />
Number of inserts [z]: 4<br />
Cutting speed [V c]: 143 m/min<br />
Spindle speed [n]: 1140 rpm<br />
Table feed [v f]: 780 mm/min<br />
Feed per tooth [f z]: 0.17 mm/tooth<br />
Depth of cut [a p]: 16 mm<br />
Depth of cut [a e]: 3 mm<br />
Tool-life: 45 min/edge<br />
Only downmilling is used in this application, when up-milling was used the<br />
tool-life was reduced by 50%.
MACHINING EXAMPLE<br />
Slotmilling of die in P20 steel<br />
exempel 18<br />
Tool: CoroMill 390<br />
R390-020B20-11M<br />
Tool diameter: 20 mm<br />
Insert: R390-11T308M-PM,1025<br />
Number of inserts [z]: 3<br />
Cutting speed [V c]: 185 m/min<br />
Spindle speed [n]: 3000 rpm<br />
Table feed [v f]: 1829 mm/min<br />
Feed per tooth [f z]: 0,2 mm/tooth<br />
Depth of cut [a p]: 3 mm<br />
Depth of cut [a e]: 20 mm<br />
155
156<br />
MACHINING EXAMPLE<br />
Facemilling of mould for doors in forged non-alloy steel<br />
Tool: CoroMill 245<br />
R245-125Q40-12L<br />
Tool diameter: 125 mm<br />
Insert: R245-12T3E-PL,4030<br />
Number of inserts [z]: 6<br />
Cutting speed [V c]: 270 m/min<br />
Table feed [v f]: 965 mm/min<br />
Feed per tooth [f z]: 0.19 mm/tooth<br />
Depth of cut [a p]: 2 mm<br />
Depth of cut [a e]: 95 mm<br />
Tool-life: 2 components
MACHINING EXAMPLE<br />
Facemilling of pressing die in cast-iron<br />
Tool: CoroMill 245<br />
R245-160Q40-12L<br />
Tool diameter: 160 mm<br />
Insert: R245-12T3M-KM,3020<br />
Number of inserts [z]: 7<br />
Cutting speed [V c]: 221 m/min<br />
Spindle speed [n]: 440 rpm<br />
Table feed [v f]: 700 mm/min<br />
Feed per tooth [f z]: 0,23 mm/tooth<br />
Depth of cut [a p]: 5 mm<br />
Depth of cut [a e]: 120 mm<br />
157
158<br />
MACHINING EXAMPLE<br />
Rough facemilling of die in P20 steel<br />
ex 21<br />
Tool: CoroMill 245<br />
R245-160Q40-12M<br />
Tool diameter: 152 mm<br />
Insert: R245-12T3M-PH,4040<br />
Number of inserts [z]: 10<br />
Cutting speed [V c]: 110 m/min<br />
Spindle speed [n]: 500 rpm<br />
Table feed [v f]: 914 mm/min<br />
Feed per tooth [f z]: 0,18 mm/tooth<br />
Depth of cut [a p]: 5 mm<br />
Depth of cut [a e]: 106 mm
MACHINING EXAMPLE<br />
Drilling through holes for guide pins<br />
in 30 mm thick plates for mould bases<br />
in low carbon steel<br />
Tool: Coromant U<br />
R416.2-0165L20-31<br />
Tool diameter: 16.5 mm<br />
Insert: LCMX 020204C-53<br />
Cutting speed [V c]: 62 m/min<br />
Spindle speed [n]: 1200 rpm<br />
Feed [v n]: 0.1 mm/rev<br />
Depth of cut [a p]: 30 mm<br />
Depth of cut [a e]: 16,5 mm<br />
159
160<br />
MACHINING EXAMPLE<br />
Drilling holes in mould bases in non-alloy steel<br />
Tool: Coromant U<br />
R416.2-0260L32-41<br />
Tool diameter: 26 mm<br />
Insert: WCMX 05 0308R-53,1020 (centre)<br />
WCMX 05 0308R-53,3040 (periphery)<br />
Cutting speed [Vc]: 150 m/min<br />
Spindle speed [n]: 1850 rpm<br />
Feed [f n]: 0.10 mm/rev<br />
Depth of cut [a p]: 102 mm<br />
Depth of cut [a e]: 26 mm<br />
The reason for using two different insert grades is the difference in cutting<br />
speed between the centre and the periphery of the drill. The GC 1020<br />
grade have good wear resistance and toughness at low to moderate<br />
cutting speeds. While the GC4025 grade has good wear resistance and<br />
edge security at high cutting speed.
MACHINING EXAMPLE<br />
Drilling of holes for guide pins in<br />
mould bases in non-alloy steel<br />
Tool: Coromant U R416.0240L 25-41<br />
Tool diameter: 24 mm<br />
Insert: LCMX 04 0308-53.1020<br />
Cutting speed [V c]: 113 m/min<br />
Spindle speed [n]: 1499 rpm<br />
Feed [f n]: 0,12 mm/rev<br />
Previously high speed steel drills were used for this application and when<br />
changed to the Coromant U drill the feed has been increased by 360%<br />
and the cutting speed by 514 %. The U drill has also been equipped with<br />
an adaptor to facilitate internal cutting fluid. Which is of great importance<br />
for chip evacuation when drilling.<br />
161
162<br />
MACHINING EXAMPLE<br />
Deep hole drilling of mould base, change of method from<br />
Gun drilling to STS, resulting in significant savings. The<br />
workpiece material is low alloy steel with a hardness of 300 HB<br />
New method Old method<br />
Tool: Sandvik Coromant Gun drill<br />
Single Tube System<br />
420.6-0224 DO.093<br />
Tool diameter: 23.8 mm 23.8 mm<br />
Insert: 67 TIN/TIC,N C4<br />
Cutting speed [V c]: 60 m/min 62 m/min<br />
Table feed [vf]: 165 mm/min 38 mm/min<br />
Depth of hole: 401.6 mm 401.6 mm<br />
Machining time/comp: 5.25 hours 22.75 hours<br />
The change to STS drilling in this case resulted in a saving of 1050 US<br />
dollar per componet.
MACHINING EXAMPLE<br />
Deep hole drilling (cross hole drilling) change of<br />
drilling method from Gun drilling to STS-drilling<br />
New method Old method<br />
Tool: Sandvik Coromant Gun drill<br />
Single Tube System<br />
420.6-0513 D1.156<br />
Tool diameter: 29.4 mm 29.4 mm<br />
Insert: 67 TIN/TIC,N C4<br />
(cross hole adapter)<br />
Cutting speed [Vc]: 55 m/min 62 m/min<br />
Table feed [v f ]: 122 mm/min 31.8 mm/min<br />
Depth of hole: 762 mm (1 cross) 762 mm (1 cross)<br />
Machining time/comp: 8.1 hours 31.18 hours<br />
The change to STS drilling in this case resulted in a saving of 1269 US<br />
dollar per componet. The saving is calculated on cross hole only.<br />
163
164<br />
MACHINING EXAMPLE<br />
Deep hole drilling of waterlines in moulds, change of<br />
drilling method from Gun drilling to STS drilling. Workpiece<br />
material; low alloy steel with a hardness of 350 HB<br />
914<br />
New method Old method<br />
Tool: Sandvik Coromant Gun drill<br />
Single Tube System<br />
420.6-0514<br />
Tool diameter: 29.4 mm 29.4 mm<br />
Insert: 70 70<br />
Cutting speed [Vc]: 62 m/min 62 m/min<br />
Table feed [v f ]: 139.7 mm/min 25.4 mm/min<br />
Depth of hole: 914 mm (1 cross) 914 mm (1 cross)<br />
Machining time/comp: 3.3 hours 18 hours<br />
The change to STS drilling in this case resulted in a saving of 882 US<br />
dollar per component.
TROUBLE SHOOTING<br />
Problem: The machining results are affected by vibration<br />
Cause<br />
Weak clamping<br />
Axially weak workpiece<br />
Action<br />
Establish the direction of the cutting<br />
forces and position the material<br />
support accordingly.<br />
Try to improve the clamping generally.<br />
Reduce the cutting forces by reducing<br />
the radial and axial cutting depth.<br />
Choose a milling cutter with a coarse<br />
pitch and positive design.<br />
Choose positive inserts with a small<br />
corner radius and small parallel flats.<br />
Where possible, choose an insert<br />
grade with a thin coating and a sharp<br />
cutting edge. If necessary, choose an<br />
uncoated insert grade.<br />
Avoid machining where the workpiece<br />
has poor support against cutting<br />
forces.<br />
The first choice is a square shoulder<br />
cutter with positive inserts.<br />
Choose an L-geometry with a sharp<br />
cutting edge and a large clearance<br />
angle which produces low cutting<br />
forces.<br />
Try to reduce the axial cutting forces<br />
by reducing the axial cutting depth,<br />
as well as using positive inserts with<br />
a small corner radius, small parallel<br />
lands and sharp cutting edges.<br />
165
166<br />
Problem: The machining results are affected by vibration<br />
Cause<br />
Large overhang either on the<br />
spindle or the tool<br />
Square shoulder milling with<br />
a radially weak spindle<br />
Uneven table feed.<br />
Action<br />
Always use a coarse and a differentially<br />
pitched milling cutter.<br />
Balance the cutting forces axially<br />
and radially. Use a 45 degree entering<br />
angle, large corner radius or round<br />
inserts.<br />
Use maximum sized extensions,<br />
tapered if possible and/or tuned.<br />
Use heavy metal shanks.<br />
Use inserts with a light cutting<br />
geometry.<br />
Try to reduce the overhang, every<br />
millimetre counts!<br />
Reduce rpm but not feed/tooth.<br />
Reduce ap/ae if necessary.<br />
Choose the smallest possible milling<br />
cutter diameter in order to obtain the<br />
most favourable entering angle. The<br />
smaller diameter the milling cutter has<br />
the smaller the radial cutting forces<br />
will be.<br />
Choose positive and light cutting<br />
geometries.<br />
Try up milling.<br />
Try up milling.<br />
Look at the possibility of adjusting the<br />
feed screw on conventional machines.<br />
Adjust the lock screw or replace the<br />
ball screw on <strong>CNC</strong>-machines.
TROUBLE SHOOTING - SOLID CARBIDE ENDMILLS<br />
Problem<br />
Vibrations<br />
The most common problems<br />
• High noise<br />
• Uneven wear and chipping<br />
• Corner damage<br />
• Short toollife<br />
• Bad surface finish<br />
Chip jamming<br />
Critical in full slotting especially in long<br />
chipping materials. Can cause corner<br />
damage, edge chipping and breakage.<br />
Recutting of chips reduces toollife.<br />
Unacceptable workpiece/surface<br />
Geometrical and dimensional tolerances<br />
Surface finish and burr generation<br />
Tool breakage or chipping<br />
Often caused by overloading of tool or<br />
chip jamming.<br />
Smearing and build up edge<br />
Especially austenitic materials, titanium<br />
and aluminum<br />
High wear<br />
Mostly due to unfavourable cutting conditions<br />
or very abrasive materials<br />
Possible solution<br />
- Reduce tool run-out max 0,02mm<br />
(HSM max. 0.01)<br />
- Minimize tool outstick!! 20% outstick<br />
reduction reduces the tool deflection<br />
by 50%!!<br />
- Improve stability in clamping<br />
- If possible use larger tool diameter<br />
- Use a tool with less teeth<br />
- Divide cutting depth in several steps<br />
and increase ƒ z<br />
- Use a tool with high helix<br />
- Increase ƒ z<br />
- Reduce V c<br />
- Use 2 or maximum 3-fluted tools<br />
- Divide cutting depth into several passes<br />
- Try high helix tools<br />
- Use well directed compressed air to<br />
evacuate chips<br />
- Reduce ƒ z<br />
- Use upmilling in finishing<br />
- Reduce radial depth of cut<br />
- Reduce tool outstick<br />
- In finish-copying in steep pockets use<br />
BNE with spherical design to reduce<br />
deflection.<br />
- Check runout in holder<br />
- Avoid Vibrations<br />
- Reduce fz and/or increase v c<br />
- Check wear on the tool<br />
- Reduce cutting depth<br />
- Reduce tool outstick<br />
- Use largest possible tool diameter<br />
- Avoid Chip jamming<br />
- Reduce ƒ z<br />
- Evacuate chips to avoid recutting!<br />
- Use coolant or oilmist<br />
- Increase vc<br />
- Use downmilling<br />
- Increase fz<br />
- Check recommended cutting data<br />
- Avoid Vibrations<br />
- Avoid recutting of chips<br />
167
168<br />
FLANK WEAR<br />
Tool wear<br />
Rapid flank wear<br />
causing poor suface<br />
texture or inconsistency<br />
in tolerance.<br />
Tool wear<br />
Plastic deformation of<br />
edge, depression or<br />
flank impression, leading<br />
to poor chip control poor<br />
surface finish and insert<br />
breakage.<br />
Possible cause<br />
Cutting speed too<br />
high or insufficient<br />
wear resistance.<br />
PLASTIC DEFORMATION<br />
Possible cause<br />
Cutting temperature<br />
and pressure too high.<br />
TROUBLE SHOOTING<br />
Tool Wear<br />
Possible remedy<br />
Select a more wear resistant<br />
grade.<br />
For work-hardening<br />
materials, select a<br />
smaller entering angle.<br />
Reduce cutting speed<br />
when machining heat<br />
resistant material.<br />
CRATER WEAR<br />
Tool wear<br />
Excessive crater wear<br />
causing a weakened<br />
edge and poor<br />
surface finish.<br />
BUILT-UP EDGE<br />
Possible cause<br />
Excessive cutting<br />
temperatures and<br />
pressure on the top<br />
face of inserts.<br />
Possible remedy<br />
First, reduce cutting<br />
speed to obtain a lower<br />
temperature and<br />
secondly, the feed.<br />
Select a more wear<br />
resistant grade.<br />
Select a positive insert<br />
geometry<br />
Possible remedy Tool wear<br />
Possible cause Possible remedy<br />
Select a more wear resistant<br />
grade, which<br />
is harder.<br />
• Reduce cutting speed.<br />
• Reduce feed.<br />
Built-up edge causing<br />
poor surface finish and<br />
cutting edge chipping,<br />
when the BUE is torn<br />
away.<br />
Cutting zone temperature<br />
is too low.<br />
Negative cutting<br />
geometry.<br />
Very sticky material,<br />
such as low-carbon<br />
steel, stainless steels<br />
and aluminium.<br />
Increase cutting speed.<br />
Change to a more<br />
suitable coated grade.<br />
Select a positive<br />
geometry insert.
THERMAL CRACKS<br />
Tool wear<br />
Possible cause Possible remedy<br />
Small cracks perpen- Excessive temperature Select a tougher insert<br />
dicular to the cutting variations.<br />
grade.<br />
edge causing chipping<br />
and poor surface finish.<br />
Intermittent machining.<br />
Varying coolant<br />
supply.<br />
Coolant should be<br />
applied copiously or<br />
not at all.<br />
EDGE FRACTURE<br />
CHIPPING<br />
Tool wear<br />
Possible cause Possible remedy<br />
Small cutting edge Cutting edge too brittle. Select tougher grade.<br />
chipping leading to poor<br />
surface texture and<br />
excessive flank wear.<br />
Insert edge too weak.<br />
Built-up edge has been<br />
formed.<br />
Select an insert<br />
with a stronger<br />
cutting edge.<br />
Increase cutting<br />
speed. Select a<br />
positive geometry.<br />
Reduce feed at<br />
beginning of cut.<br />
Improve stability.<br />
NOTCH WEAR<br />
Tool wear<br />
Possible cause Possible remedy Tool wear<br />
Possible cause Possible remedy<br />
Damages not only the Excessive tool wear. Reduce feed and/or Notch wear causing poor Cutting speed too high Select a more wear resi-<br />
insert but can also ruin Grade and geometry too depth of cut.<br />
surface texture and risk or insufficient wear resistant grade.<br />
the shim and workpiece. weak.<br />
Select a stronger<br />
of edge breakage. stance.<br />
For work-hardening<br />
Excessive load on the geometry, preferably a<br />
materials, select a<br />
insert.<br />
single sided insert.<br />
smaller entering angle.<br />
Built-up edge has been Select a thicker/larger<br />
Reduce cutting speed<br />
formed.<br />
insert and tougher grade.<br />
when machining heat<br />
Improve stability.<br />
resistant material.<br />
169
170<br />
TECHNICAL DATA<br />
Metal Cutting terminology and units<br />
Designations according to ISO Unit<br />
ae = Radial depth of cut mm<br />
ap = Axial depth of cut mm<br />
ar = Radial depth of cut<br />
for side and facemills mm<br />
De = Diameter of tool at<br />
a given depth of cut mm<br />
Dc = Diameter of tool mm<br />
Dm = Machined diameter -<br />
turning mm<br />
fn = Feed per revolution mm/rev<br />
fz = Feed per tooth mm/z<br />
hm = Average chip thickness mm<br />
kc = Specific cutting force N/mm 2<br />
lm = Machined length mm<br />
n = Spindle speed<br />
(Revolutions per minute) RPM<br />
Mc = Torqe Nm<br />
Pc = Net power kW<br />
Q = Metal removal rate cm3 /min<br />
Vc = Cutting speed m/min<br />
Vf = Feed per minute mm/min<br />
Zc = Number of effective<br />
teeth in tool pieces<br />
Zn = Number of teeth in tool pieces<br />
mt = Efficiency<br />
Metal Cutting formulas<br />
Effective cutting<br />
speed V e (m/min)<br />
Cutting speed,<br />
Vc (m/min)<br />
Revolutions per<br />
minute, n (rev/min)<br />
Feed per minute,<br />
v f (mm/min)<br />
Feed per tooth,<br />
f z (mm/tooth)<br />
Cutting time,<br />
T c (min)<br />
Metal removal<br />
rate, Q (cm 3 /min)<br />
Net power<br />
at spindle,<br />
P c (kW)<br />
Torque at<br />
spindle, Mc<br />
(Nm)<br />
Average<br />
chip thickness<br />
(mm) when,<br />
a e/D c ≥ 0,1<br />
Specific cutting<br />
force (N/mm 2 )<br />
Approximate<br />
power consumption<br />
(for K-value see<br />
page 189)<br />
Ve = x De x n<br />
1000<br />
Vc = x Dc x n<br />
1000<br />
n =<br />
1000 x Vc<br />
x Dc<br />
vf = f z x n x z n<br />
fz = Vf<br />
(z n x n)<br />
Tc = lm<br />
v f<br />
Q = ap x ae x vf<br />
1000<br />
Pc = ap x ae x Vf x kc<br />
60 x 10 6 x <br />
Mc = ƒ n x Dc 2 x kc<br />
4000<br />
hm = sin r x 180 x ae x fz<br />
x Dc x arcsin ( ae )<br />
Dc<br />
kc = kc1 x hm -mc<br />
Pc = ap x ae x Vf x K<br />
100 000
CONSTANT K FOR USE IN POWER<br />
REQUIREMENT CALCULATION 1)<br />
ISO<br />
P<br />
M<br />
S<br />
H<br />
K<br />
N<br />
CMC<br />
No.<br />
Description<br />
ae/Dc=0,8 ae/Dc=0,4 ae/Dc=0,2 Steel<br />
fz=0,1 fz=0,2 fz=0,4 fz=0,1 fz=0,2 fz=0,4 fz=0,1 fz=0,2 fz=0,4 01.1<br />
01.2<br />
01.3<br />
01.4<br />
01.5<br />
Unalloyed<br />
C = 0,10–0,25%<br />
C = 0,25–0,55%<br />
C = 0,55–0,80%<br />
5.7<br />
6.1<br />
6.5<br />
6.9<br />
7.6<br />
4.8<br />
5.1<br />
5.4<br />
5.8<br />
6.4<br />
4.0<br />
4.3<br />
4.6<br />
4.8<br />
5.4<br />
6.2<br />
6.6<br />
7.1<br />
7.5<br />
8.3<br />
5.2<br />
5.6<br />
5.9<br />
6.3<br />
7.0<br />
4.4<br />
4.7<br />
5.0<br />
5.3<br />
5.9<br />
6.8<br />
7.2<br />
7.7<br />
8.2<br />
9.1<br />
5.7<br />
6.1<br />
6.5<br />
6.9<br />
7.6<br />
4.8<br />
5.1<br />
5.4<br />
5.8<br />
6.4<br />
02.1<br />
02.2<br />
Low-alloy<br />
(alloying elements ≤5%)<br />
Non-hardened<br />
Hardened and tempered<br />
6.5<br />
7.6<br />
5.4<br />
6.4<br />
4.6<br />
5.4<br />
7.1<br />
8.3<br />
5.9<br />
7.0<br />
5.0<br />
5.9<br />
7.7<br />
9.1<br />
6.5<br />
7.6<br />
5.4<br />
6.4<br />
03.11<br />
03.13<br />
03.21<br />
03.22<br />
High-alloy<br />
(alloying elements ≤5%)<br />
Annealed<br />
Hardened tool steel<br />
7.4<br />
8.2<br />
11.0<br />
11.8<br />
6.2<br />
6.9<br />
9.3<br />
9.9<br />
5.3<br />
5.8<br />
7.8<br />
8.4<br />
8.1<br />
8.9<br />
12.0<br />
12.9<br />
6.8<br />
7.5<br />
10.1<br />
10.8<br />
5.7<br />
6.3<br />
8.5<br />
9.1<br />
8.8<br />
9.7<br />
13.1<br />
14.0<br />
7.4<br />
8.2<br />
11.0<br />
11.8<br />
6.2<br />
6.9<br />
9.3<br />
9.9<br />
06.1<br />
06.2<br />
06.3<br />
Castings<br />
Stainless steel<br />
Unalloyed<br />
Low-alloy, alloying elements ≤5%<br />
High-alloy, alloying elements >5%<br />
5.3<br />
6.1<br />
7.4<br />
4.5<br />
5.1<br />
6.2<br />
3.8<br />
4.3<br />
5.3<br />
5.8<br />
6.6<br />
8.1<br />
4.9<br />
5.6<br />
6.8<br />
4.1<br />
4.7<br />
5.7<br />
6.3<br />
7.2<br />
8.8<br />
5.3<br />
6.1<br />
7.4<br />
4.5<br />
5.1<br />
6.2<br />
05.11<br />
05.12<br />
05.13<br />
Ferritic/Martensitic<br />
Non-hardened<br />
PH-hardened<br />
Hardened<br />
6.2<br />
9.7<br />
8.0<br />
5.4<br />
8.4<br />
6.9<br />
4.7<br />
7.2<br />
5.9<br />
6.7<br />
10.4<br />
8.6<br />
5.8<br />
9.0<br />
7.4<br />
5.0<br />
7.8<br />
6.4<br />
7.2<br />
11.2<br />
9.2<br />
6.2<br />
9.7<br />
8.0<br />
5.4<br />
8.4<br />
6.9<br />
05.21<br />
05.22<br />
Austenitic<br />
Non-hardened<br />
PH-hardened<br />
6.9<br />
9.7<br />
6.0<br />
8.4<br />
5.2<br />
7.2<br />
7.4<br />
10.4<br />
6.4<br />
9.0<br />
5.6<br />
7.8<br />
8.0<br />
11.2<br />
6.9<br />
9.7<br />
6.0<br />
8.4<br />
05.51<br />
05.52<br />
Austenitic-Ferritic<br />
(Duplex)<br />
Stainless steel – cast<br />
Non-weldable ≥0,05%C<br />
Weldable
172<br />
FACEMILLING, SQUARE SHOULDER FACEMILLING<br />
AND SLOTTING WITH SIDE AND FACEMILLING<br />
ISO<br />
01.1 P 01.2<br />
01.3<br />
01.4<br />
01.5<br />
02.1<br />
02.2<br />
02.2<br />
ISO<br />
M<br />
-S<br />
CMC<br />
No.<br />
03.11<br />
03.13<br />
03.21<br />
03.22<br />
06.1<br />
06.2<br />
06.3<br />
CMC<br />
No.<br />
05.11<br />
05.12<br />
05.13<br />
05.21<br />
05.22<br />
05.51<br />
05.52<br />
15.11<br />
15.12<br />
15.13<br />
15.21<br />
15.22<br />
15.51<br />
15.52<br />
CMC<br />
No.<br />
20.11<br />
20.12<br />
20.21<br />
20.22<br />
20.24<br />
20.31<br />
20.32<br />
20.33<br />
23.1<br />
23.21<br />
23.22<br />
Material<br />
Steel<br />
Unalloyed<br />
Low-alloy<br />
(alloying elements ≤ 5%)<br />
High-alloy<br />
(alloying elements >5%)<br />
Castings<br />
Material<br />
Stainless steel<br />
Ferritic/martensitic<br />
Austenitic<br />
Austenitic-ferritic<br />
(Duplex)<br />
Stainless steel – Cast<br />
Ferritic/martensitic<br />
Austenitic<br />
Austenitic-ferritic (Duplex)<br />
Material<br />
Heat resistant super alloys<br />
Iron base<br />
Nickel base<br />
Cobalt base<br />
Titanium alloys 1)<br />
C = 0,10 – 0,25%<br />
C = 0,25 – 0,55%<br />
C = 0,55 – 0,80%<br />
Unalloyed<br />
Low-alloy (alloying elements ≤ 5%)<br />
High-alloy, alloying elements >5%)<br />
Non-hardened<br />
PH-hardened<br />
Non-weldable ≥ 0,05%C<br />
Weldable
Basic grades<br />
4040 1025 3040 530 SM30<br />
Feed/tooth (fz , mm/tooth) or max chip thickness (hex, mm)<br />
0,1– 0,2– 0,4 0,05– 0,1– 0,2 0,05– 0,1– 0,2 0,1– 0,2– 0,4 0,1– 0,2– 0,4<br />
Cutting speed, vc m/min<br />
305– 225– 170 340– 305– 255<br />
275– 225– 155 305– 275– 225<br />
260– 215– 145 285– 260– 215<br />
225– 185– 125 250– 225– 185<br />
165– 135– 95 185– 165– 135<br />
215– 175– 120 235– 215– 175<br />
155– 125– 85 165– 155– 125<br />
125– 100– 65 135– 125– 100<br />
165– 135– 90 180– 165– 135<br />
135– 110– 75 150– 135– 110<br />
115– 95– 65 130– 115– 95<br />
75– 60– 41 80– 75– 60<br />
220– 180– 120 245– 220– 180<br />
175– 145– 95 195– 175– 145<br />
125– 105– 70 140– 125– 105<br />
385– 315– 260 425– 385– 350<br />
350– 285– 235 385– 350– 315<br />
330– 270– 220 365– 325– 295<br />
285– 235– 195 315– 285– 260<br />
215– 175– 145 235– 210– 195<br />
275– 225– 185 300– 275– 245<br />
190– 155– 130 210– 190– 175<br />
155– 125– 105 170– 155– 140<br />
205– 170– 145 225– 205– 185<br />
170– 140– 115 185– 170– 155<br />
145– 120– 100 165– 150– 135<br />
95– 75– 65 105– 95– 85<br />
275– 225– 185 305– 275– 250<br />
220– 180– 145 245– 220– 200<br />
160– 135– 110 175– 160– 145<br />
Basic grades<br />
4040 1025 530 4030<br />
Feed/tooth (fz , mm/tooth) or max chip thickness (hex, mm)<br />
0,1– 0,2– 0,4 0,1– 0,15– 0,2 0,1– 0,15– 0,2 0,1– 0,2– 0,3<br />
Cutting speed, vc m/min<br />
200– 160– 105<br />
115– 90– 55<br />
115– 95– 60<br />
210– 185– 165<br />
120– 105– 95<br />
125– 110– 100<br />
185– 145–<br />
110– 85–<br />
95<br />
55<br />
195– 175– 155<br />
115– 105– 90<br />
180– 145–<br />
160– 125–<br />
95<br />
85<br />
190– 170– 155<br />
170– 150– 135<br />
180– 145–<br />
90– 70–<br />
100– 80–<br />
95<br />
46<br />
50<br />
190– 170– 150<br />
95– 85– 75<br />
105– 95– 85<br />
180– 145–<br />
90– 75–<br />
95<br />
46<br />
190– 170– 150<br />
95– 85– 75<br />
135– 105–<br />
135– 105–<br />
65<br />
65<br />
135– 125– 110<br />
140– 125– 115<br />
285– 255– 225<br />
165– 145– 130<br />
170– 155– 135<br />
245– 195– 115<br />
140– 115– 90<br />
145– 115– 95<br />
265– 235– 215<br />
155– 140– 125<br />
–<br />
–<br />
– –<br />
–<br />
260– 235– 205<br />
230– 205– 185<br />
–<br />
–<br />
–<br />
–<br />
–<br />
–<br />
255– 230– 205<br />
125– 115– 105<br />
145– 125– 115<br />
255– 180– 145<br />
110– 90– 70<br />
125– 100– 80<br />
255– 230– 205<br />
125– 115– 105<br />
–<br />
–<br />
–<br />
–<br />
–<br />
–<br />
190– 170– 150<br />
195– 175– 155<br />
–<br />
–<br />
–<br />
–<br />
–<br />
–<br />
Basic grades<br />
H13A<br />
Feed/tooth (fz , mm/tooth) or max chip thickness (hex, mm)<br />
0,1– 0,15– 0,2<br />
Cutting speed, vc m/min<br />
60–<br />
44–<br />
55–<br />
41–<br />
50<br />
38<br />
55–<br />
35–<br />
44–<br />
55–<br />
33–<br />
41–<br />
49<br />
30<br />
38<br />
23–<br />
17–<br />
16–<br />
21–<br />
15–<br />
14–<br />
18<br />
13<br />
13<br />
125– 115– 105<br />
65– 60– 55<br />
55– 49– 46<br />
265–<br />
235–<br />
225–<br />
195–<br />
145–<br />
225– 165<br />
205– 150<br />
195– 145<br />
165– 125<br />
125– 90<br />
185–<br />
130–<br />
105–<br />
160– 115<br />
115– 85<br />
90– 65<br />
140–<br />
115–<br />
105–<br />
65–<br />
120–<br />
100–<br />
85–<br />
55–<br />
85<br />
75<br />
65<br />
41<br />
190–<br />
150–<br />
110–<br />
165– 120<br />
130– 95<br />
95– 70<br />
173
174<br />
ISO<br />
K<br />
-H<br />
-N<br />
CMC<br />
No.<br />
07.1<br />
07.2<br />
08.1<br />
08.2<br />
09.1<br />
09.2<br />
CMC<br />
No.<br />
04.1<br />
30.11<br />
30.12<br />
30.21<br />
30.22<br />
30.3<br />
30.41<br />
30.42<br />
33.1<br />
33.2<br />
33.3<br />
Material<br />
Malleable cast iron<br />
Grey cast iron<br />
Nodular cast iron<br />
Material<br />
Extra hard steel<br />
10.1 Chilled cast iron<br />
CMC<br />
No<br />
Material<br />
100 mm 125 mm<br />
Ferritic (short chipping)<br />
Pearlitic (long chipping)<br />
Low tensile strength<br />
High tensile strength<br />
Ferritic<br />
Pearlitic<br />
Hardened and tempered<br />
Cast or cast and aged<br />
Specific<br />
cutting<br />
force<br />
k c 1<br />
Hardness<br />
Brinell<br />
N/mm 2 HB mc<br />
800 130 0,28<br />
900 230 0,28<br />
900 180 0,28<br />
1100 245 0,28<br />
900 160 0,28<br />
1350 250 0,28<br />
Specific<br />
cutting<br />
force<br />
k c 1<br />
N/mm 2 HB mc<br />
4200 59 HRC 0,25<br />
2200 400 0,28<br />
Specific<br />
cutting<br />
force<br />
k c 1<br />
Hardness<br />
Brinell<br />
Hardness<br />
Brinell<br />
N/mm 2 HB mc<br />
400 60<br />
650 100<br />
600<br />
700<br />
75<br />
90<br />
0,25<br />
0,25<br />
350 30<br />
700<br />
700<br />
130<br />
130<br />
550<br />
550<br />
1350<br />
110<br />
90<br />
100<br />
0,25<br />
0,25<br />
BASIC GRADES<br />
3020 3040<br />
Feed, fz or hex 0,1– 0,2– 0,3 0,1– 0,2– 0,4<br />
Cutting speed, v c m/min<br />
265– 215– 180<br />
220– 180– 145<br />
240– 195– 135<br />
195– 165– 110<br />
290– 235– 195<br />
235– 190– 155<br />
260– 215– 145<br />
210– 170– 115<br />
180– 145– 125<br />
165– 135– 115<br />
BASIC GRADES<br />
165– 135–<br />
150– 125–<br />
90<br />
85<br />
4020<br />
Feed, fz or hex 3040<br />
0,07– 0,1– 0,12 0,07– 0,12– 0,2<br />
Cutting speed, v c m/min<br />
65– 55– 48 47– 41– 33<br />
125– 110– 90 90– 75– 65<br />
BASIC GRADES<br />
H10 CD10<br />
Feed, fz or hex 0,1– 0,15– 0,2 0,1– 0,15– 0,2<br />
Cutting speed, v c m/min<br />
935– 870– 805 1875– 1740– 1615<br />
845– 785– 725 1695– 1565– 1455<br />
940– 870– 805<br />
845– 785– 725<br />
1880– 1745– 1615<br />
1695– 1570– 1455<br />
945– 875– 810 1890– 1755– 1625<br />
375– 350– 325<br />
285– 265– 245<br />
755– 700– 645<br />
565– 525– 485<br />
470– 435– 405<br />
470– 435– 405<br />
325– 305– 285<br />
945– 875– 810<br />
940– 875– 805<br />
655– 610– 565
BASIC GRADES<br />
4030 4040 H13A 690 CB50<br />
Feed/tooth (fz , mm/tooth) or max chip thickness (hex, mm)<br />
0,1– 0,2– 0,4 0,1– 0,2– 0,4 0,1– 0,2– 0,4 0,1– 0,2– 0,3 0,1– 0,15– 0,2<br />
Cutting speed, vc m/min<br />
215– 175– 115<br />
175– 145– 95<br />
195– 160– 105<br />
160– 130– 85<br />
230– 190– 125<br />
185– 155– 105<br />
215– 175– 115<br />
170– 135– 95<br />
145– 120–<br />
135– 110–<br />
80<br />
75<br />
135– 105–<br />
125– 100–<br />
75<br />
65<br />
BASIC GRADES<br />
1025 530 CB50<br />
Feed/tooth (fz , mm/tooth) or max chip thickness (hex, mm)<br />
0,07– 0,1– 0,12 0,07– 0,1– 0,12 0,07– 0,12– 0,2<br />
Cutting speed, v c m/min<br />
41– 37– 35 80– 55– 70<br />
75– 70– 65 155– 140– 135<br />
BASIC GRADES<br />
530 H13A 1025<br />
120– 105– 75 545– 445– 365<br />
95– 85– 65 455– 370– 305<br />
130– 110– 85 595– 485– 400<br />
105– 90– 65 475– 395– 325<br />
80– 70– 50 375– 305– 255<br />
75– 65– 48 345– 285– 235<br />
160– 140– 115<br />
305– 265– 215<br />
Feed/tooth (fz , mm/tooth) or max chip thickness (hex, mm)<br />
0,1– 0,15– 0,2 0,1– 0,15– 0,2 0,1– 0,15– 0,2<br />
Cutting speed, v c m/min<br />
1035– 955– 885 750– 695– 645 985– 915– 845<br />
930– 865– 800 675– 625– 580 885– 825– 765<br />
1035– 955– 885 750– 695– 645<br />
930– 865– 800 675– 625– 580<br />
1040– 965– 895 755– 700– 650<br />
415– 385– 355 300– 280– 260<br />
310– 285– 265 225– 210– 195<br />
515– 480– 445 375– 350– 325<br />
515– 480– 445 375– 345– 325<br />
365– 335– 310 265– 245– 225<br />
985– 915– 845<br />
890– 825– 765<br />
995– 920– 855<br />
395– 365– 340<br />
295– 275– 255<br />
5495– 455– 425<br />
495– 455– 425<br />
345– 320– 295<br />
– –<br />
– –<br />
845– 725– 365<br />
675– 575– 305<br />
– –<br />
495– 420– 360<br />
175
176<br />
ENDMILLING<br />
ISO<br />
01.1 P 01.2<br />
01.3<br />
01.4<br />
01.5<br />
02.1<br />
02.2<br />
02.2<br />
ISO<br />
03.11<br />
03.13<br />
03.21<br />
03.22<br />
06.1<br />
06.2<br />
06.3<br />
05.11 M 05.12<br />
05.13<br />
05.21<br />
05.22<br />
-S<br />
CMC<br />
No.<br />
CMC<br />
No.<br />
05.51<br />
05.52<br />
15.11<br />
15.12<br />
15.13<br />
15.21<br />
15.22<br />
15.51<br />
15.52<br />
CMC<br />
No.<br />
20.11<br />
20.12<br />
20.21<br />
20.22<br />
20.24<br />
20.31<br />
20.32<br />
20.33<br />
23.1<br />
23.21<br />
23.22<br />
Material<br />
Steel<br />
Unalloyed<br />
Low-alloy<br />
(alloying elements ≤ 5%)<br />
High-alloy<br />
(alloying elements >5%)<br />
Castings<br />
Material<br />
Stainless steel<br />
Ferritic/martensitic<br />
Austenitic<br />
Austenitic-ferritic<br />
(Duplex)<br />
Stainless steel – Cast<br />
Austenitic<br />
Austenitic-ferritic (Duplex)<br />
Material<br />
Heat resistant super alloys<br />
Iron base<br />
Nickel base<br />
Cobalt base<br />
Titanium alloys 1)<br />
10 mm<br />
C = 0,10 – 0,25%<br />
C=0,25–0,55%<br />
C=0,55–0,80%<br />
Non-hardened<br />
Hardened and tempered<br />
Annealed<br />
Hardened tool steel<br />
Unalloyed<br />
Low-alloy (alloying elements ≤ 5%)<br />
High-alloy, alloying elements >5%)<br />
Non-hardened<br />
PH-hardened<br />
Hardened<br />
Non-hardened<br />
PH-hardened<br />
Hardened<br />
Austenitic<br />
PH-hardened<br />
25 mm<br />
Commercial pure (99,5% Ti)<br />
α, near α and α+β alloys, annealed<br />
α+β alloys in aged cond., β alloys, annealed<br />
or aged<br />
1) 45–60° entering angle, positive cutting geometry and coolant should be used.<br />
2) Rm = ultimate tensile strength measured in MPa.<br />
Non-hardened<br />
PH-hardened<br />
Non-weldable ≥ 0,05%C<br />
Weldable
Basic grades<br />
4040 1025 3040 530 SM30<br />
Feed/tooth (fz , mm/tooth) or max chip thickness (hex, mm)Feed, fn mm/r<br />
0,05– 0,1– 0,15 0,05– 0,15– 0,25 0,05– 0,1– 0,15 0,05– 0,11– 0,2 0,08–0,15–0,25<br />
Cutting speed, vc m/min<br />
365– 350– 335 365– 350– 335<br />
330– 315– 305 330– 315– 305<br />
310– 295– 285 310– 295– 285<br />
275– 260– 250 275– 260– 250<br />
200– 195– 185 200– 195– 185<br />
255– 245– 235 255– 245– 235<br />
180– 175– 165 180– 175– 165<br />
145– 140– 135 145– 140– 135<br />
195– 185– 175 195– 185– 175<br />
160– 155– 145 160– 155– 145<br />
140– 135– 130 140– 135– 130<br />
85– 85– 80 85– 85– 80<br />
265– 250– 240 265– 250– 240<br />
205– 200– 190 205– 200– 190<br />
155– 145– 140 155– 145– 140<br />
465– 350– 335<br />
415– 315– 305<br />
395– 295– 285<br />
345– 260– 245<br />
255– 195– 185<br />
510– 495– 475<br />
460– 450– 430<br />
435– 425– 405<br />
375– 370– 355<br />
275– 275– 260<br />
325– 245– 235<br />
225– 175– 165<br />
185– 140– 135<br />
355– 350– 335<br />
250– 255– 235<br />
205– 195– 190<br />
245– 185– 175<br />
205– 155– 145<br />
175– 135– 130<br />
110– 85– 80<br />
270– 265– 255<br />
225– 220– 210<br />
195– 190– 185<br />
125– 120– 115<br />
330– 250– 240<br />
265– 200– 190<br />
195– 145– 140<br />
365– 355– 340<br />
290– 285– 275<br />
215– 205– 195<br />
Basic grades<br />
4040 1025 530 4030<br />
Feed/tooth (fz , mm/tooth) or max chip thickness (hex, mm)<br />
0,05– 0,12– 0,2 0,05– 0,12– 0,2 0,05– 0,1– 0,15 0,05– 0,1– 0,15<br />
Cutting speed, vc m/min<br />
245– 235– 225<br />
135– 135– 125<br />
145– 140– 135<br />
255– 245– 235<br />
145– 140– 135<br />
150– 145– 140<br />
225– 220– 210<br />
135– 125– 125<br />
235– 230– 220<br />
140– 135– 130<br />
220– 215– 205<br />
195– 190– 185<br />
235– 225– 215<br />
205– 200– 190<br />
220– 215– 205<br />
110– 105– 100<br />
125– 115– 115<br />
230– 225– 215<br />
115– 110– 105<br />
125– 125– 115<br />
220– 215– 205<br />
110– 105– 105<br />
230– 225– 215<br />
115– 110– 105<br />
165– 155– 150<br />
165– 160– 155<br />
170– 165– 155<br />
175– 165– 160<br />
350– 340– 335<br />
195– 195– 185<br />
210– 200– 195<br />
305– 295– 285<br />
170– 165– 165<br />
175– 175– 170<br />
325– 315– 310<br />
190– 185– 180<br />
–<br />
–<br />
–<br />
–<br />
315– 310– 300<br />
280– 275– 265<br />
–<br />
–<br />
–<br />
–<br />
315– 305– 300<br />
155– 155– 145<br />
175– 170– 165<br />
275– 265– 260<br />
135– 345– 130<br />
150– 145– 145<br />
315– 305– 300<br />
155– 155– 150 –<br />
–<br />
–<br />
230– 225– 220<br />
235– 230– 225<br />
–<br />
–<br />
–<br />
–<br />
Basic grades<br />
H13A<br />
Feed/tooth (fz , mm/tooth) or max chip thickness (hex, mm)<br />
0,05– 0,1– 0,15<br />
Cutting speed, vc m/min<br />
65–<br />
50–<br />
65–<br />
49–<br />
65<br />
48<br />
65–<br />
40–<br />
50–<br />
65–<br />
40–<br />
49–<br />
65<br />
39<br />
49<br />
28–<br />
20–<br />
20–<br />
28–<br />
20–<br />
19–<br />
27<br />
19<br />
19<br />
145– 140– 135<br />
75– 75– 70<br />
60– 55– 55<br />
300– 295– 285<br />
270– 265– 255<br />
255– 245– 240<br />
225– 215– 210<br />
165– 160– 155<br />
210– 205– 195<br />
145– 145– 140<br />
120– 115– 115<br />
160– 155– 150<br />
135– 130– 125<br />
115– 115– 110<br />
75– 70– 65<br />
215– 210– 205<br />
170– 165– 160<br />
125– 125– 115<br />
177
178<br />
ISO<br />
K<br />
-H<br />
-N<br />
CMC<br />
No.<br />
07.1<br />
07.2<br />
08.1<br />
08.2<br />
09.1<br />
09.2<br />
CMC<br />
No.<br />
04.1<br />
10.1<br />
CMC<br />
No<br />
Material<br />
Material<br />
Chilled cast iron<br />
Material<br />
30.11 Aluminium alloys<br />
30.12<br />
30.21<br />
30.22<br />
30.3<br />
30.41<br />
30.42<br />
33.1<br />
33.2<br />
33.3<br />
Malleable cast iron<br />
Grey cast iron<br />
Nodular cst iron<br />
Extra hard steel<br />
Hard steel<br />
Aluminium alloys<br />
Aluminium alloys<br />
Copper and copper<br />
alloys<br />
10 mm<br />
Ferritic (short chipping)<br />
Pearlitic (long chipping)<br />
Low tensile strength<br />
High tensile strength<br />
Ferritic<br />
Pearlitic<br />
Hardened and tempered<br />
Hardened and tempered<br />
Cast or cast and aged<br />
Wrought or wrought and coldworked,<br />
non-aging<br />
Wrought or wrought and aged<br />
Cast, non-aging<br />
Cast or cast and aged<br />
Cast, 13–15% Si<br />
Cast, 16–22% Si<br />
25 mm<br />
Free cutting alloys, ≥1% Pb<br />
Brass, leaded bronzes, ≤1% Pb<br />
Bronze and non-leadad copper incl.<br />
electrolytic copper<br />
Specific<br />
cutting<br />
force<br />
k c 1<br />
Specific<br />
cutting<br />
force<br />
k c 1<br />
Specific<br />
cutting<br />
force<br />
k c 1<br />
Hardness<br />
Brinell<br />
N/mm 2 HB mc<br />
800 130 0,28<br />
900 230 0,28<br />
900 180 0,28<br />
1100 245 0,28<br />
900 160 0,28<br />
1350 250 0,28<br />
Hardness<br />
Brinell<br />
N/mm 2 HB mc<br />
4200 59 HRC 0,25<br />
2200 400 0,28<br />
Hardness<br />
Brinell<br />
N/mm 2 HB mc<br />
400 60<br />
650 100<br />
600<br />
700<br />
75<br />
90<br />
0,25<br />
0,25<br />
350 30<br />
700<br />
700<br />
130<br />
130<br />
550<br />
550<br />
1350<br />
110<br />
90<br />
100<br />
0,25<br />
0,25<br />
BASIC GRADES<br />
3040 4030<br />
Feed, fz or hex 0,1– 0,2– 0,3 0,1– 0,2– 0,3<br />
Cutting speed, v c m/min<br />
280– 265– 255<br />
230– 220– 210<br />
245– 235– 225<br />
205– 195– 185<br />
305– 290– 275<br />
245– 235– 225<br />
270– 255– 245<br />
215– 205– 195<br />
190– 185– 175 170– 165– 155<br />
175– 170– 160 155– 150– 145<br />
BASIC GRADES<br />
4020<br />
Feed, fz or hex 3040<br />
0,07– 0,1– 0,12 0,07– 0,1– 0,12<br />
Cutting speed, v c m/min<br />
95– 90– 90 55– 55– 55<br />
175– 175– 175<br />
BASIC GRADES<br />
105– 100– 100<br />
H10F<br />
Feed, fz or hex H13A<br />
0,05– 0,1– 0,15 0,05– 0,1– 0,15<br />
Cutting speed, v c m/min<br />
1075– 1055– 1035 860– 845– 830<br />
965– 955– 935 775– 760– 745<br />
1075– 1065– 1040<br />
970– 955– 935<br />
860– 845– 830<br />
775– 765– 750<br />
1085– 1065– 1045 865– 850– 835<br />
435– 425– 415<br />
325– 315– 315<br />
345– 340– 335<br />
260– 255– 250<br />
540– 530– 520<br />
535– 530– 520<br />
375– 370– 365<br />
430– 425– 415<br />
430– 425– 415<br />
300– 295– 290
BASIC GRADES<br />
4040 H13A<br />
Feed/tooth (fz , mm/tooth) or max chip thickness (hex, mm)<br />
0,1– 0,2– 0,3 0,05– 0,15– 0,25<br />
Cutting speed, vc m/min<br />
225– 215– 205<br />
185– 175– 170<br />
135– 135– 125<br />
115– 110– 105<br />
245– 235– 225<br />
195– 185– 180<br />
150– 145– 140<br />
120– 115– 110<br />
155– 145– 140<br />
145– 135– 130<br />
95–<br />
85–<br />
90–<br />
85–<br />
85<br />
80<br />
BASIC GRADES<br />
1025<br />
Feed/tooth (fz , mm/tooth) or max chip thickness (hex, mm)<br />
0,07- 0,1- 0,12<br />
Cutting speed, v c m/min<br />
47– 46– 46<br />
90– 85– 85<br />
BASIC GRADES<br />
530 1025<br />
Feed/tooth (fz , mm/tooth) or max chip thickness (hex, mm)<br />
0,05– 0,1– 0,15 0,05– 0,1– 0,15<br />
Cutting speed, v c m/min<br />
1185– 1165– 1145 1125– 1110– 1090<br />
1165– 1045– 1030 1025– 1000– 985<br />
1185– 1165– 1145<br />
1165– 1045– 1030<br />
1130– 1110– 1090<br />
1015– 1000– 985<br />
1190– 1170– 1150 1135– 1115– 1095<br />
475– 465– 460<br />
355– 350– 345<br />
455– 445– 435<br />
340– 335– 330<br />
595– 585– 575 565– 555– 545<br />
595– 585– 575 565– 555– 545<br />
415– 405– 400 395– 385– 380<br />
179
180<br />
SOLID ENDMILLS<br />
General purpose milling with grades GC1010 and GC1020<br />
R216.32-...N 1020<br />
R216.33-...N 1020<br />
R216.34-...N 1020<br />
Materials<br />
R216.33-...P 1020<br />
R216.35-...N 1020<br />
R215.36-...L 1020<br />
ISO<br />
CMC<br />
No<br />
HB<br />
R215.3X-...H 1010<br />
a p = D c<br />
a e ≤ 0,1 × D c<br />
P 01.1<br />
01.2<br />
02.1<br />
02.2<br />
03.11<br />
125<br />
150<br />
175<br />
330<br />
200<br />
200–350<br />
180–250<br />
140–240<br />
120–200<br />
140–190<br />
125–220<br />
120–190<br />
90–160<br />
80–120<br />
90–130<br />
M 05.111) 05.21<br />
200 90–160 40– 90<br />
1) 05.51<br />
200 80–120 50– 90<br />
1) Unalloyed steel<br />
Low alloy steel<br />
High alloy steel<br />
Dc mm<br />
2<br />
3<br />
Feed/tooth<br />
fz mm/z<br />
0,01–0,02<br />
0,01–0,02<br />
Stainless steel<br />
230 60– 90<br />
4<br />
5<br />
6<br />
0,02–0,04<br />
0,03–0,06<br />
0,03–0,07<br />
40– 60<br />
20.22<br />
23.22<br />
Heat resistant alloys<br />
Titanium alloys<br />
350<br />
350<br />
40– 50<br />
50– 80<br />
7<br />
8<br />
0,04–0,08<br />
0,05–0,09<br />
20– 30<br />
50– 60<br />
K 04<br />
04<br />
07.1<br />
07.2<br />
09.1<br />
09.2<br />
08.1<br />
30.22<br />
Hard steel<br />
Malleable cast iron<br />
Nodular SG iron<br />
Cast iron<br />
Aluminium alloys (cast)<br />
HRC55 40– 70<br />
HRC63 30– 50<br />
130 170–250<br />
230 130–190<br />
160 200–300<br />
250 150–200<br />
180 150–220<br />
90 1000<br />
9<br />
10<br />
12<br />
14<br />
16<br />
18<br />
20<br />
25<br />
0,07–0,10<br />
0,07–0,12<br />
0,08–0,13<br />
0,08–0,14<br />
0,09–0,15<br />
0,10–0,16<br />
0,10–0,16<br />
0,10–0,16<br />
30– 50<br />
-<br />
130–190<br />
100–130<br />
130–190<br />
100–140<br />
100–150<br />
1000<br />
Calculations<br />
1) For ramping and drilling<br />
in stainless steel<br />
0,8 × vc 0,15 × vf D c<br />
Finishing<br />
Cutting speed<br />
v c m/min<br />
v f<br />
n<br />
0,25 × v f<br />
a e<br />
Only for hardened steel 55–63 HRC.<br />
Max a e = 0,05 x D c .<br />
Reduce f z to 40%.<br />
Roughing – slotting<br />
Cutting speed<br />
v c m/min<br />
Table feed<br />
v f = f z × n × z n<br />
Cutting speed<br />
v c = n × π × D c<br />
1000<br />
Spindle speed<br />
n = v c × 1000<br />
π× D c<br />
a p × a e = 0,5 × D c<br />
D c<br />
mm<br />
mm/min<br />
2 0,005–0,015<br />
3 0,01–0,02<br />
4 0,015–0,03<br />
5 0,02–0,03<br />
6 0,02–0,04<br />
7 0,02–0,04<br />
8 0,03–0,045<br />
9 0,03–0,045<br />
10 0,035–0,05<br />
12 0,035–0,06<br />
14 0,04–0,07<br />
16 0,05–0,08<br />
18 0,06–0,08<br />
20 0,06–0,08<br />
25 0,06–0,09<br />
m/min<br />
rpm<br />
Feed/tooth<br />
f z mm/z
SOLID ENDMILLS<br />
High speed machining (HSM) with grade GC1010<br />
R216.22-...L 1010<br />
R216.24-...L 1010<br />
Materials<br />
ISO<br />
CMC<br />
No<br />
HB<br />
P 01.1<br />
01.2<br />
Unalloyed steel<br />
125<br />
150<br />
300–500<br />
250–450<br />
02.1<br />
02.2<br />
Low alloy steel<br />
175<br />
330<br />
200–400<br />
180–330<br />
03.11 High alloy steel<br />
200 200–330<br />
M 05.11 200 150–200<br />
05.21 Stainless steel<br />
200 120–170<br />
05.51 230 100–150<br />
20.22 Heat resistant alloys 350 40– 70<br />
23.22 Titanium alloys<br />
350 70–120<br />
K 04<br />
04<br />
Hard steel<br />
HRC55 150–250<br />
HRC63 90–150<br />
07.1<br />
07.2<br />
Malleable cast iron<br />
130<br />
230<br />
200–450<br />
300–450<br />
09.1<br />
09.2<br />
08.1<br />
Nodular SG iron<br />
Cast iron<br />
160<br />
250<br />
180<br />
400–500<br />
200–350<br />
300–500<br />
30.22 Aluminium alloys (cast) 90 1000<br />
Calculations<br />
D c<br />
Cutting speed<br />
v c m/min<br />
v f<br />
n<br />
a e<br />
≤ 0,1 × D c<br />
D c<br />
a p ≤ 0,1 × D c<br />
a e < 0,3 × D c<br />
Feed/tooth<br />
Dc mm fz mm/z<br />
3 0,03–0,04<br />
4 0,04–0,07<br />
5 0,05–0,09<br />
6 0,05–0,10<br />
8 0,06–0,11<br />
10 0,07–0,12<br />
12 0,08–0,13<br />
16 0,09–0,16<br />
Table feed<br />
v f = f z × n × z n<br />
Cutting speed<br />
v c = n × π × D c<br />
1000<br />
Spindle speed<br />
n = v c × 1000<br />
π× D c<br />
mm/min<br />
m/min<br />
rpm<br />
181
182<br />
SOLID ENDMILLS<br />
Copy milling – high speed machining (HSM), grades GC1010 and GC1020<br />
R216.42-...L 1010<br />
R216.42-...H 1010<br />
R216.62-...L 1010<br />
Materials<br />
ISO<br />
CMC<br />
No<br />
HB<br />
R216.64-...L 100<br />
R216.42-...L 1010<br />
R216.44-...L 1010<br />
Effective<br />
cutting speed<br />
v c m/min<br />
P 01.1<br />
01.2<br />
Unalloyed steel<br />
125<br />
150<br />
300–500<br />
250–450<br />
240–400<br />
200–360<br />
02.1<br />
02.2<br />
Low alloy steel<br />
175<br />
330<br />
200–400<br />
180–330<br />
160–320<br />
140–260<br />
03.11 High alloy steel<br />
200 200–330 160–260<br />
M 05.11 200 150–200 120–160<br />
05.21 Stainless steel<br />
200 120–170 100–140<br />
05.51 230 100–150 80–120<br />
20.22 Heat resistant alloys 350 40– 70 30– 60<br />
23.22 Titanium alloys<br />
350 70–120 50– 90<br />
K 04<br />
04<br />
Hard steel<br />
HRC55 150–250<br />
HRC63 90–150<br />
120–200<br />
70–120<br />
07.1<br />
07.2<br />
Malleable cast iron<br />
130<br />
230<br />
200–450<br />
300–450<br />
160–360<br />
240–360<br />
09.1<br />
09.2<br />
08.1<br />
Nodular SG iron<br />
Cast iron<br />
160<br />
250<br />
180<br />
400–500<br />
200–350<br />
300–500<br />
320–400<br />
160–280<br />
240–400<br />
30.22 Aluminium alloys (cast) 90 1000 800<br />
Calculations<br />
Coromant<br />
grade<br />
GC1010<br />
v e<br />
D c<br />
D e<br />
Coromant<br />
grade<br />
GC1020<br />
Effective<br />
cutting speed<br />
v c m/min<br />
a p<br />
R216.42-...N 1020<br />
R216.44-...L 1020<br />
a p ≤ 0,05 × D c<br />
Dc mm<br />
Feed per tooth<br />
fz mm/z<br />
2 0,015–0,020<br />
3 0,03 –0,04<br />
4 0,04 –0,07<br />
5 0,05 –0,09<br />
6 0,05 –0,10<br />
7 0,06 –0,10<br />
8 0,06 –0,11<br />
9 0,06 –0,12<br />
10 0,07 –0,12<br />
12 0,08 –0,13<br />
14 0,08 –0,15<br />
16 0,09 –0,16<br />
18 0,09 –0,16<br />
20 0,09 –0,16<br />
Table feed<br />
v f = f z × n × z n<br />
v e = n × π × D e<br />
1000<br />
n = v e × 1000<br />
π× D c<br />
D e = 2 √ a p(D c – a p)<br />
mm/min<br />
Resultant cutting speed<br />
Spindle speed<br />
m/min<br />
rpm<br />
Effective cutting diameter
MATERIAL CROSS REFERENCE LIST<br />
ISO<br />
P<br />
Coromant<br />
Material<br />
Classification<br />
(CMC)<br />
Country<br />
Great Britain<br />
Standard<br />
Sweden USA Germany France Italy Spain Japan<br />
BS EN SS AISI/SAE W.-nr. DIN AFNOR UNI UNF JIS<br />
Structural and constructional steel<br />
01.1 080M15 - 1350 1015 1.0401 C15 CC12 C15C16 F.111 -<br />
01.1 050A20 2C 1450 1020 1.0402 C22 CC20 C20C21 F.112 -<br />
01.2 060A35 - 1550 1035 1.0501 C35 CC35 C35 F.113 -<br />
01.2 080M46 - 1650 1045 1.0503 C45 CC45 C45 F.114 -<br />
01.3 070M55 - 1655 1055 1.0535 C55 - C55 - -<br />
01.3 080A62 43D - 1060 1.0601 C60 CC55 C60 - -<br />
01.1 230M07 - 1912 1213 1.0715 9SMn28 S250 CF9SMn28 11SMn28 SUM22<br />
01.1 - - 1914 12L13 1.0718 9SMnPb28 S250Pb CF9SMnPb28 11SMnPb28 SUM22L<br />
01.1 - - - - 1.0722 10SPb20 10PbF2 CF10SPb20 10SPb20 -<br />
01.2 212M36 8M 1957 1140 1.0726 35S20 35MF4 - F210G -<br />
01.1 240M07 1B - 1215 1.0736 9SMn36 S 300 CF9SMn36 12SMn35 -<br />
01.1 - - 1926 12L14 1.0737 9SMnPb36 S300Pb CF9SMnPb36 12SMnP35 -<br />
02.1/02.2 250A53 45 2085 9255 1.0904 55Si7 55S7 55Si8 56Si7 -<br />
02.1/02.2 - - - 9262 1.0961 60SiCr7 60SC7 60SiCr8 60SiCr8 -<br />
01.1 080M15 32C 1370 1015 1.1141 Ck15 XC12 C16 C15K S15C<br />
01.2 150M36 15 - 1039 1.1157 40Mn4 35M5 - - -<br />
01.1 - - – 1025 1.1158 Ck25 - - - S25C<br />
01.2 – – 2120 1335 1.1167 36MN5 40M5 – 36Mn5 SMn438(H)<br />
01.2 150M28 14A - 1330 1.1170 28Mn6 20M5 C28Mn - SCMn1<br />
01.2 060A35 - 1572 1035 1.1183 Cf35 XC38TS C36 - S35C<br />
01.2 080M46 - 1672 1045 1.1191 Ck45 XC42 C45 C45K S45C<br />
01.3 070M55 - - 1055 1.1203 Ck55 XC55 C50 C55K S55C<br />
01.2 060A52 - 1674 1050 1.1213 Cf53 XC48TS C53 - S50C<br />
01.3 080A62 43D 1678 1060 1.1221 Ck60 XC60 C60 - S58C<br />
06.33 Z120M12 - - - 1.3401 G-X120Mn12 Z120M12 XG120Mn12 X120Mn12 SCMnH/1<br />
02.1/02.2 534A99 31 2258 52100 1.3505 100Cr6 100C6 100Cr6 F.131 SUJ2<br />
02.1/02.2 1501-240 - 2912 ASTM A204Gr.A 1.5415 15Mo3 15D3 16Mo3KW 16Mo3 -<br />
02.1/02.2 1503-245-420 - - 4520 1.5423 16Mo5 - 16Mo5 16Mo5 -<br />
02.1/02.2 - - - ASTM A350LF5 1.5622 14Ni6 16N6 14Ni6 15Ni6 -<br />
03.11 1501-509;510 - - ASTM A353 1.5662 X8Ni9 - X10Ni9 XBNi09 -<br />
03.11 - - - 2515 1.5680 12Ni19 Z18N5 - - -<br />
02.2 640A35 111A - 3135 1.5710 36NiCr6 35NC6 - - SNC236<br />
02.1/02.2 - - - 3415 1.5732 14NiCr10 14NC11 16NiCr11 15NiCr11 SNC415(H)<br />
02.1/02.2 655M13; 36A - 3415;3310 1.5752 14NiCr14 12NC15 - - SNC815(H)<br />
655A12<br />
02.1/02.2 816M40 110 - 9840 1.6511 36CrNiMo4 40NCD3 38NiCrMo4(KB) 35NiCrMo4 -<br />
02.1/02.2 805M20 362 2506 8620 1.6523 21NiCrMo2 20NCD2 20NiCrMo2 20NiCrMo2 SNCM220(H)<br />
02.1/02.2 311-Type 7 - - 8740 1.6546 40NiCrMo22 - 40NiCrMo2(KB) 40NiCrMo2 SNCM240<br />
02.1/02.2 817M40 24 2541 4340 1.6582 35CrNiMo6 35NCD6 35NiCrMo6(KB) - -<br />
02.1/02.2 820A16 - - - 1.6587 17CrNiMo6 18NCD6 - 14NiCrMo13 -<br />
03.11 832M13 36C - - 1.6657 14NiCrMo134 - 15NiCrMo13 14NiCrMo131 -<br />
02.1/02.2 523M15 - - 5015 1.7015 15Cr3 12C3 - - SCr415(H)<br />
02.1/02.2 530A32 18B - 5132 1.7033 34Cr4 32C4 34Cr4(KB) 35Cr4 SCr430(H)<br />
02.1/02.2 530M40 18 - 5140 1.7035 41Cr4 42C4 41Cr4 42Cr4 SCr440(H)<br />
02.1/02.2 - - 2245 5140 1.7045 42Cr4 - - 42Cr4 SCr440<br />
02.1/02.2 (527M20) - 2511 5115 1.7131 16MnCr5 16MC5 16MnCr5 16MnCr5 -<br />
02.1/02.2 527A60 48 - 5155 1.7176 55Cr3 55C3 - - SUP9(A)<br />
02.1/02.2 1717CDS110 - 2225 4130 1.7218 25CrMo4 25CD4 25CrMo4(KB) 55Cr3 SCM420;SCM430<br />
AM26CrMo4<br />
02.1/02.2 708A37 19B 2234 4137;4135 1.7220 34CrMo4 35CD4 35CrMo4 34CrMo4 SCM432;SCCRM3<br />
02.1/02.2 708M40 19A 2244 4140;4142 1.7223 41CrMo4 42CD4TS 41CrMo4 42CrMo4 SCM 440<br />
02.1/02.2 708M40 19A 2244 4140 1.7225 42CrMo4 42CD4 42CrMo4 42CrMo4 SCM440(H)<br />
02.1/02.2 - - 2216 - 1.7262 15CrMo5 12CD4 - 12CrMo4 SCM415(H)<br />
02.1/02.2 1501-620Gr27 - - ASTM A182 1.7335 13CrMo4 4 15CD3.5 14CrMo4 5 14CrMo45 -<br />
F11;F12 15CD4.5<br />
02.1/02.2 722M24 40B 2240 - 1.7361 32CrMo12 30CD12 32CrMo12 F.124.A -<br />
02.1/02.2 1501-622 - 2218 ASTM A182 1.7380 10CrMo9 10 12CD9, 10 12CrMo9, 10 TU.H -<br />
Gr.31;45 - F.22 - - -<br />
02.1/02.2 1503-660-440 - - - 1.7715 14MoV6 3 - - 13MoCrV6 -<br />
02.1/02.2 735A50 47 2230 6150 1.8159 50CrV4 50CV4 50CrV4 51CrV4 SUP10<br />
02.1/02.2 905M39 41B 2940 - 1.8509 41CrAlMo7 40CAD6, 12 41CrAlMo7 41CrAlMo7 -<br />
02.1/02.2 897M39 40C - - 1.8523 39CrMoV13 9 - 36CrMoV12 - -<br />
Tool steel<br />
02.1/02.2 BL3 - - L3 1.2067 100Cr6 Y100C6 - 100Cr6 -<br />
03.11 BD3 - - D3 1.2080 X210Cr12 Z200C12 X210Cr13KU X210Cr12 SKD1<br />
X250Cr12KU<br />
03.11 BH13 - 2242 H13 1.2344 X40CrMoV5 1 Z40CDV5 X35CrMoV05KU X40CrMoV5 SKD61<br />
X40CrMoV511KU<br />
03.11 BA2 - 2260 A2 1.2363 X100CrMoV5 1 Z100CDV5 X100CrMoV51KU X100CrMoV5 SKD12<br />
02.1/02.2 - - 2140 - 1.2419 105WCr6 105WC13 10WCr6 105WCr5 SKS31<br />
107WCr5KU SKS2, SKS3<br />
<br />
183
184<br />
<br />
ISO<br />
P<br />
M<br />
*) Duplex stainless steel.<br />
Coromant Country<br />
Material<br />
Classifi-<br />
Great Britain Sweden USA Germany France Italy Spain Japan<br />
cation<br />
(CMC)<br />
Standard<br />
BS EN SS AISI/SAE W.-nr. DIN AFNOR UNI UNF JIS<br />
03.11 - - 2312 - 1.2436 X210CrW12 - X215CrW12 1KU X210CrW12 SKD2<br />
03.11 BS1 - 2710 S1 1.2542 45WCrV7 - 45WCrV8KU 45WCrSi8 -<br />
03.11 BH21 - - H21 1.2581 X30WCrV9 3 Z30WCV9 X28W09KU X30WCrV9 SKD5<br />
X30WCrV9 3KU X30WCrV9 3KU<br />
03.11 - - 2310 - 1.2601 X165CrMo<br />
V 12<br />
- X165CrMoW12KU X160CrMoV12 -<br />
03.11 401S45 52 - HW3 1.4718 X45GrSi93 Z45CS9 X45GrSi8 F322 SUH1<br />
02.1/02.2 - - - L6 1.2713 55NiCrMoV6 55NCDV7 - F.520.S SKT4<br />
Stainless and heat resistant materials<br />
05.11/15.11 403S17 - 2301 403 1.4000 X7Cr13 Z6C13 X6Cr13 F.3110 SUS403<br />
1.4001 X7Cr14 - - F.8401 -<br />
05.11/15.11 430S15 60 2320 430 1.4016 X8Cr17 Z8C17 X8Cr17 F3113 SUS430<br />
05.11/15.11 410S21 56A 2302 410 1.4006 X10Cr13 Z10C14 X12Cr13 F.3401 SUS410<br />
05.11/15.11 430S17 60 2320 430 - X8Cr17 Z8C17 X8Cr17 F.3113 SUS430<br />
05.11/15.11 420S45 56D 2304 - 1.4034 X46Cr13 Z40CM<br />
Z38C13M<br />
X40Cr14 F.3405 SUS420J2<br />
05.11/15.11 405S17 - - 405 1.4002 - Z8CA12 X6CrAl13 - -<br />
05.11/15.11 420S37 - 2303 420 1.4021 - Z20C13 X20Cr13 - -<br />
05.11/15.11 431S29 57 2321 431 1.4057 X22CrNi17 Z15CNi6.02 X16CrNi16 F.3427 SUS431<br />
05.11/15.11 - - 2383 430F 1.4104 X12CrMoS17 Z10CF17 X10CrS17 F.3117 SUS430F<br />
05.11/15.11 434S17 - 2325 434 1.4113 X6CrMo17 Z8CD17.01 X8CrMo17 - SUS434<br />
05.11/15.11 425C11 - - - 1.4313 X5CrNi13 4 Z4CND13.4M - - SCS5<br />
05.11/15.11 403S17 - - 405 1.4724 X10CrA113 Z10C13 X10CrA112 F.311 SUS405<br />
05.11/15.11 430S15 60 - 430 1.4742 X10CrA118 Z10CAS18 X8Cr17 F.3113 SUS430<br />
05.11/15.11 443S65 59 - HNV6 1.4747 X80CrNiSi20 Z80CSN20.02 X80CrSiNi20 F.320B SUH4<br />
05.11/15.11 - - 2322 446 1.4762 X10CrA124 Z10CAS24 X16Cr26 - SUH446<br />
05.11/15.11 349S54 - - EV8 1.4871 X53CrMnNiN Z52CMN21.09 X53CrMnNiN - SUH35, SUH36<br />
21 9 21 9<br />
05.12/15.12 - - - 630 1.4542/1.4548 - Z7CNU17-04 - - -<br />
05.21/15.21 304S11 - 2352 304L 1.4306 - Z2CN18-10 X2CrNi18 11 - -<br />
05.21/15.21 304S31 58E 2332/2333 304 1.4350 X5CrNi189 Z6CN18.09 X5CrNi18 10 F.3551<br />
F.3541<br />
F.3504<br />
SUS304<br />
05.21/15.21 303S21 58M 2346 303 1.4305 X12CrNiS18 8 Z10CNF 18.09 X10CrNiS 18.09 F.3508 SUS303<br />
05.21/15.21 304S15 58E 2332 304 1.4301 X5CrNi189 Z6CN18.09 X5CrNi18 10 F.3551 SUS304<br />
304C12 2333 Z3CN19.10 - - SUS304L<br />
05.21/15.21 304S12 - 2352 304L 1.4306 X2CrNi18 9 Z2CrNi18 10 X2CrNi18 11 F.3503 SCS19<br />
05.21/15.21 - - 2331 301 1.4310 X12CrNi17 7 Z12CN17.07 X12CrNi17 07 F.3517 SUS301<br />
05.21/15.21 304S62 - 2371 304LN 1.4311 X2CrNiN<br />
18 10<br />
Z2CN18.10 - - SUS304LN<br />
05.21/15.21 316S16 58J 2347 316 1.4401 X5CrNiMo<br />
18 10<br />
Z6CND17.11 X5CrNiMo17 12 F.3543 SUS316<br />
05.21/15.21 - - 2375 316LN 1.4429 X2CrNiMoN<br />
18 13<br />
Z2CND17.13 - - SUS316LN<br />
05.21/15.21 316S13 2348 316L 1.4404 - Z2CND17-12 X2CrNiMo1712 - -<br />
05.21/15.21 316S13 - 2353 316L 1.4435 X2CrNiMo Z2CND17.12 X2CrNiMo17 12 - SCS16<br />
18 12 - - - SUS316L<br />
05.21/15.21 316S33 - 2343/2347 316 1.4436 - Z6CND18-12-03 X8CrNiMo1713 - -<br />
05.21/15.21 317S12 - 2367 317L 1.4438 X2CrNiMo<br />
18 16<br />
Z2CND19.15 X2CrNiMo18 16 - SUS317L<br />
05.51/15.51 *) - - - S31500 1.4417 X2CrNiMoSi<br />
19 5<br />
- - - -<br />
05.51/15.51 *) - - 2324 S32900 - X8CrNiMo<br />
27 5<br />
- - - -<br />
05.52/15.52 *) - - 2327 S32304 - X2CrNiN<br />
23 4<br />
Z2CN23-04AZ - - -<br />
05.52/15.52 *) - - 2328 - - - - - - -<br />
05.52/15.52 *) - - 2377 S31803 - X2CrNiMoN<br />
22 53<br />
Z2CND22-05-03 - - -<br />
05.21/15.21 321S12 58B 2337 321 1.4541 X10CrNiTi Z6CNT18.10 X6CrNiTi18 11 F.3553 SUS321<br />
18 9 F.3523<br />
05.21/15.21 347S17 58F 2338 347 1.4550 X10CrNiNb Z6CNNb18.10 X6CrNiNb18 11 F.3552 SUS347<br />
18 9 F.3524<br />
05.21/15.21 320S17 58J 2350 316Ti 1.4571 X10CrNiMoTi Z6NDT17.12 X6CrNiMoTi17 12 F.3535 -<br />
18 10 17 12<br />
05.21/15.21 - - - 318 1.4583 X10CrNi Z6CNDNb X6CrNiMoNb - -<br />
MoNb 18 12 17 13B 17 13<br />
05.21/15.21 309S24 - - 309 1.4828 X15CrNiSi<br />
20 12<br />
Z15CNS20.12 - - SUH309<br />
05.21/15.21 310S24 - 2361 310S 1.4845 X12CrNi25 21 Z12CN25 20 X6CrNi25 20 F.331 SUH310<br />
05.22/15.22 316S111 - - 17-7PH 1.4568/1.4504 - Z8CNA17-07 X2CrNiMo1712 - -<br />
05.23/15.23<br />
05.23/15.23<br />
-<br />
-<br />
-<br />
-<br />
2584<br />
2378<br />
NO8028<br />
S31254<br />
1.4563<br />
-<br />
-<br />
-<br />
Z1NCDU31-27-03 -<br />
Z1CNDU20-18-06AZ -<br />
-<br />
-<br />
-<br />
-
ISO<br />
Coromant<br />
Material<br />
Classifi-<br />
Country<br />
Great Britain<br />
Sweden USA Germany France Italy Spain Japan<br />
cation<br />
(CMC)<br />
Standard<br />
BS EN SS AISI/SAE W.-nr. DIN AFNOR UNI UNF JIS<br />
M -S<br />
20.11<br />
20.11<br />
-<br />
330C11<br />
-<br />
-<br />
-<br />
-<br />
330<br />
-<br />
1.4864<br />
1.4865<br />
X12NiCrSi<br />
36 16<br />
G-X40NiCrSi<br />
Z12NCS35.16<br />
-<br />
-<br />
-<br />
XG50NiCr<br />
-<br />
-<br />
SUH330<br />
SCH15<br />
38 18 39 19<br />
20.21 - - - 5390A 2.4603 - NC22FeD - -<br />
20.21 - - - 5666 2.4856 NiCr22Mo9Nb NC22FeDNB - -<br />
20.21 HR5,203-4 - - - 2.4630 NiCr20Ti NC20T - -<br />
20.22 - - - 5660 LW2.4662 NiFe35Cr14MoTi ZSNCDT42 - -<br />
20.22 3146-3 - - 5391 LW2 4670 S-NiCr13A16MoNb NC12AD - -<br />
20.22 HR8 - - 5383 LW2.4668 NiCr19Fe19NbMo NC19eNB - -<br />
20.22 3072-76 - - 4676 2.4375 NiCu30Al - - -<br />
20.22 Hr401,601 - - - 2.4631 NiCr20TiAk NC20TA - -<br />
20.22 - - - AMS 5399 2.4973 NiCr19Co11MoTi NC19KDT - -<br />
20.22 - - - AMS 5544 LW2.4668 NiCr19Fe19NbMo NC20K14 - -<br />
20.24 - - - AMS 5397 LW2 4674 NiCo15Cr10MoAlTi - - -<br />
20.32 - - - 5537C LW2.4964 CoCr20W15Ni KC20WN - -<br />
- - - AMS 5772 - CoCr22W14Ni KC22WN - -<br />
23.22 TA14/17 - - AMS R54520 - TiAl5Sn2.5 T-A5E - -<br />
23.22 TA10-13/TA28 - - AMS R56400 - TiAl6V4 T-A6V - -<br />
23.22 TA11 - - AMS R56401 - TiAl6V4ELI - - -<br />
23.22 - - - - - TiAl4Mo4Sn4Si0.5 - - -<br />
➤<br />
K<br />
Grey cast iron<br />
ASTM<br />
A48-76<br />
08.1 01 00<br />
08.1 01 10 No 20 B GG 10 Ft 10 D<br />
08.1 Grade 150 01 15 No 25 B GG 15 Ft 15 D<br />
08.1 Grade 220 01 20 No 30 B GG 20 Ft 20 D<br />
08.2 Grade 260 01 25 No 35 B<br />
No 40 B<br />
GG 25 Ft 25 D<br />
08.2 Grade 300 01 30 No 45 B GG 30 Ft 30 D<br />
08.2 Grade 350 01 35 No 50 B GG 35 Ft 35 D<br />
08.2 Grade 400 01 40 No 55 B GG 40 Ft 40 D<br />
Nodular cast iron<br />
2789;1973 A536-72 NF A32-201<br />
09.1 SNG 420/12 07 17-02 60-40-18 GGG 40 FCS 400-12<br />
09.1 SNG 370/17 07 17-12 - GGG 40.3 FGS 370-17<br />
09.1 - 07 17-15 - GGG 35.3 -<br />
09.1 SNG 500/7 07 27-02 80-55-06 GGG 50 FGS 500-7<br />
09.2 SNG 600/3 07 32-03 - GGG 60 FGS 600-3<br />
09.2 SNG 700/2 07 37-01 100-70-03 GGG 70 FGS 700-2<br />
Malleable cast iron<br />
ASTM<br />
A47-74<br />
A 220-76 2)<br />
07.1 8 290/6 08 14 - MN 32-8<br />
07.1 B 340/12 08 15 32510 GTS-35 MN 35-10<br />
07.2 P 440/7 08 52 40010 GTS-45<br />
07.2 P 510/4 08 54 50005 GTS-55 MP 50-5<br />
P 570/3 08 58 70003 GTS-65 MP 60-3<br />
Aluminium alloys, cast<br />
30.21/30.22 LM25 4244 356.1<br />
4247 A413.0 GD-AlSi12<br />
LM24 4250 A380.1 GD-AlSi8Cu3<br />
LM20 4260 A413.1 G-AlSi12(Cu)<br />
LM6 4261 A413.2 G-AlSi12<br />
LM9 4253 A360.2 G-AlSi10Mg(Cu)<br />
185
186<br />
NOTES<br />
. . . . . . . . . . . . . . . . . . . . . . . . . . . . . . . . . . . . . . . . . . . . . . . . . . . . . . . . . . . . . . . . . . . . . . .<br />
. . . . . . . . . . . . . . . . . . . . . . . . . . . . . . . . . . . . . . . . . . . . . . . . . . . . . . . . . . . . . . . . . . . . . . .<br />
. . . . . . . . . . . . . . . . . . . . . . . . . . . . . . . . . . . . . . . . . . . . . . . . . . . . . . . . . . . . . . . . . . . . . . . . . . . . . . . . . . . . . . . . . . . . . .<br />
. . . . . . . . . . . . . . . . . . . . . . . . . . . . . . . . . . . . . . . . . . . . . . . . . . . . . . . . . . . . . . . . . . . . . . . . . . . . . . . . . . . . . . . . . . . . . .<br />
. . . . . . . . . . . . . . . . . . . . . . . . . . . . . . . . . . . . . . . . . . . . . . . . . . . . . . . . . . . . . . . . . . . . . . . . . . . . . . . . . . . . . . . . . . . . . .<br />
. . . . . . . . . . . . . . . . . . . . . . . . . . . . . . . . . . . . . . . . . . . . . . . . . . . . . . . . . . . . . . . . . . . . . . . . . . . . . . . . . . . . . . . . . . . . . .<br />
. . . . . . . . . . . . . . . . . . . . . . . . . . . . . . . . . . . . . . . . . . . . . . . . . . . . . . . . . . . . . . . . . . . . . . . . . . . . . . . . . . . . . . . . . . . . . .<br />
. . . . . . . . . . . . . . . . . . . . . . . . . . . . . . . . . . . . . . . . . . . . . . . . . . . . . . . . . . . . . . . . . . . . . . . . . . . . . . . . . . . . . . . . . . . . . .<br />
. . . . . . . . . . . . . . . . . . . . . . . . . . . . . . . . . . . . . . . . . . . . . . . . . . . . . . . . . . . . . . . . . . . . . . . . . . . . . . . . . . . . . . . . . . . . . .<br />
. . . . . . . . . . . . . . . . . . . . . . . . . . . . . . . . . . . . . . . . . . . . . . . . . . . . . . . . . . . . . . . . . . . . . . . . . . . . . . . . . . . . . . . . . . . . . .<br />
. . . . . . . . . . . . . . . . . . . . . . . . . . . . . . . . . . . . . . . . . . . . . . . . . . . . . . . . . . . . . . . . . . . . . . . . . . . . . . . . . . . . . . . . . . . . . .<br />
. . . . . . . . . . . . . . . . . . . . . . . . . . . . . . . . . . . . . . . . . . . . . . . . . . . . . . . . . . . . . . . . . . . . . . . . . . . . . . . . . . . . . . . . . . . . . .<br />
. . . . . . . . . . . . . . . . . . . . . . . . . . . . . . . . . . . . . . . . . . . . . . . . . . . . . . . . . . . . . . . . . . . . . . . . . . . . . . . . . . . . . . . . . . . . . .<br />
. . . . . . . . . . . . . . . . . . . . . . . . . . . . . . . . . . . . . . . . . . . . . . . . . . . . . . . . . . . . . . . . . . . . . . . . . . . . . . . . . . . . . . . . . . . . . .<br />
. . . . . . . . . . . . . . . . . . . . . . . . . . . . . . . . . . . . . . . . . . . . . . . . . . . . . . . . . . . . . . . . . . . . . . . . . . . . . . . . . . . . . . . . . . . . . .<br />
. . . . . . . . . . . . . . . . . . . . . . . . . . . . . . . . . . . . . . . . . . . . . . . . . . . . . . . . . . . . . . . . . . . . . . . . . . . . . . . . . . . . . . . . . . . . . .<br />
. . . . . . . . . . . . . . . . . . . . . . . . . . . . . . . . . . . . . . . . . . . . . . . . . . . . . . . . . . . . . . . . . . . . . . . . . . . . . . . . . . . . . . . . . . . . . .<br />
. . . . . . . . . . . . . . . . . . . . . . . . . . . . . . . . . . . . . . . . . . . . . . . . . . . . . . . . . . . . . . . . . . . . . . . . . . . . . . . . . . . . . . . . . . . . . .<br />
. . . . . . . . . . . . . . . . . . . . . . . . . . . . . . . . . . . . . . . . . . . . . . . . . . . . . . . . . . . . . . . . . . . . . . . . . . . . . . . . . . . . . . . . . . . . . .<br />
. . . . . . . . . . . . . . . . . . . . . . . . . . . . . . . . . . . . . . . . . . . . . . . . . . . . . . . . . . . . . . . . . . . . . . . . . . . . . . . . . . . . . . . . . . . . . .<br />
. . . . . . . . . . . . . . . . . . . . . . . . . . . . . . . . . . . . . . . . . . . . . . . . . . . . . . . . . . . . . . . . . . . . . . . . . . . . . . . . . . . . . . . . . . . . . .<br />
. . . . . . . . . . . . . . . . . . . . . . . . . . . . . . . . . . . . . . . . . . . . . . . . . . . . . . . . . . . . . . . . . . . . . . . . . . . . . . . . . . . . . . . . . . . . . .
. . . . . . . . . . . . . . . . . . . . . . . . . . . . . . . . . . . . . . . . . . . . . . . . . . . . . . . . . . . . . . . . . . . . . . . . . . . . . . . . . . . . . . . . . . . . . .<br />
. . . . . . . . . . . . . . . . . . . . . . . . . . . . . . . . . . . . . . . . . . . . . . . . . . . . . . . . . . . . . . . . . . . . . . . . . . . . . . . . . . . . . . . . . . . . . .<br />
. . . . . . . . . . . . . . . . . . . . . . . . . . . . . . . . . . . . . . . . . . . . . . . . . . . . . . . . . . . . . . . . . . . . . . . . . . . . . . . . . . . . . . . . . . . . . .<br />
. . . . . . . . . . . . . . . . . . . . . . . . . . . . . . . . . . . . . . . . . . . . . . . . . . . . . . . . . . . . . . . . . . . . . . . . . . . . . . . . . . . . . . . . . . . . . .<br />
. . . . . . . . . . . . . . . . . . . . . . . . . . . . . . . . . . . . . . . . . . . . . . . . . . . . . . . . . . . . . . . . . . . . . . . . . . . . . . . . . . . . . . . . . . . . . .<br />
. . . . . . . . . . . . . . . . . . . . . . . . . . . . . . . . . . . . . . . . . . . . . . . . . . . . . . . . . . . . . . . . . . . . . . . . . . . . . . . . . . . . . . . . . . . . . .<br />
. . . . . . . . . . . . . . . . . . . . . . . . . . . . . . . . . . . . . . . . . . . . . . . . . . . . . . . . . . . . . . . . . . . . . . . . . . . . . . . . . . . . . . . . . . . . . .<br />
. . . . . . . . . . . . . . . . . . . . . . . . . . . . . . . . . . . . . . . . . . . . . . . . . . . . . . . . . . . . . . . . . . . . . . . . . . . . . . . . . . . . . . . . . . . . . .<br />
. . . . . . . . . . . . . . . . . . . . . . . . . . . . . . . . . . . . . . . . . . . . . . . . . . . . . . . . . . . . . . . . . . . . . . . . . . . . . . . . . . . . . . . . . . . . . .<br />
. . . . . . . . . . . . . . . . . . . . . . . . . . . . . . . . . . . . . . . . . . . . . . . . . . . . . . . . . . . . . . . . . . . . . . . . . . . . . . . . . . . . . . . . . . . . . .<br />
. . . . . . . . . . . . . . . . . . . . . . . . . . . . . . . . . . . . . . . . . . . . . . . . . . . . . . . . . . . . . . . . . . . . . . . . . . . . . . . . . . . . . . . . . . . . . .<br />
. . . . . . . . . . . . . . . . . . . . . . . . . . . . . . . . . . . . . . . . . . . . . . . . . . . . . . . . . . . . . . . . . . . . . . . . . . . . . . . . . . . . . . . . . . . . . .<br />
. . . . . . . . . . . . . . . . . . . . . . . . . . . . . . . . . . . . . . . . . . . . . . . . . . . . . . . . . . . . . . . . . . . . . . . . . . . . . . . . . . . . . . . . . . . . . .<br />
. . . . . . . . . . . . . . . . . . . . . . . . . . . . . . . . . . . . . . . . . . . . . . . . . . . . . . . . . . . . . . . . . . . . . . . . . . . . . . . . . . . . . . . . . . . . . .<br />
. . . . . . . . . . . . . . . . . . . . . . . . . . . . . . . . . . . . . . . . . . . . . . . . . . . . . . . . . . . . . . . . . . . . . . . . . . . . . . . . . . . . . . . . . . . . . .<br />
. . . . . . . . . . . . . . . . . . . . . . . . . . . . . . . . . . . . . . . . . . . . . . . . . . . . . . . . . . . . . . . . . . . . . . . . . . . . . . . . . . . . . . . . . . . . . .<br />
. . . . . . . . . . . . . . . . . . . . . . . . . . . . . . . . . . . . . . . . . . . . . . . . . . . . . . . . . . . . . . . . . . . . . . . . . . . . . . . . . . . . . . . . . . . . . .<br />
. . . . . . . . . . . . . . . . . . . . . . . . . . . . . . . . . . . . . . . . . . . . . . . . . . . . . . . . . . . . . . . . . . . . . . . . . . . . . . . . . . . . . . . . . . . . . .<br />
. . . . . . . . . . . . . . . . . . . . . . . . . . . . . . . . . . . . . . . . . . . . . . . . . . . . . . . . . . . . . . . . . . . . . . . . . . . . . . . . . . . . . . . . . . . . . .<br />
. . . . . . . . . . . . . . . . . . . . . . . . . . . . . . . . . . . . . . . . . . . . . . . . . . . . . . . . . . . . . . . . . . . . . . . . . . . . . . . . . . . . . . . . . . . . . .<br />
. . . . . . . . . . . . . . . . . . . . . . . . . . . . . . . . . . . . . . . . . . . . . . . . . . . . . . . . . . . . . . . . . . . . . . . . . . . . . . . . . . . . . . . . . . . . . .<br />
. . . . . . . . . . . . . . . . . . . . . . . . . . . . . . . . . . . . . . . . . . . . . . . . . . . . . . . . . . . . . . . . . . . . . . . . . . . . . . . . . . . . . . . . . . . . . .<br />
. . . . . . . . . . . . . . . . . . . . . . . . . . . . . . . . . . . . . . . . . . . . . . . . . . . . . . . . . . . . . . . . . . . . . . . . . . . . . . . . . . . . . . . . . . . . . .<br />
. . . . . . . . . . . . . . . . . . . . . . . . . . . . . . . . . . . . . . . . . . . . . . . . . . . . . . . . . . . . . . . . . . . . . . . . . . . . . . . . . . . . . . . . . . . . . .<br />
. . . . . . . . . . . . . . . . . . . . . . . . . . . . . . . . . . . . . . . . . . . . . . . . . . . . . . . . . . . . . . . . . . . . . . . . . . . . . . . . . . . . . . . . . . . . . .<br />
. . . . . . . . . . . . . . . . . . . . . . . . . . . . . . . . . . . . . . . . . . . . . . . . . . . . . . . . . . . . . . . . . . . . . . . . . . . . . . . . . . . . . . . . . . . . . .<br />
187
188<br />
. . . . . . . . . . . . . . . . . . . . . . . . . . . . . . . . . . . . . . . . . . . . . . . . . . . . . . . . . . . . . . . . . . . . . . . . . . . . . . . . . . . . . . . . . . . . . .<br />
. . . . . . . . . . . . . . . . . . . . . . . . . . . . . . . . . . . . . . . . . . . . . . . . . . . . . . . . . . . . . . . . . . . . . . . . . . . . . . . . . . . . . . . . . . . . . .<br />
. . . . . . . . . . . . . . . . . . . . . . . . . . . . . . . . . . . . . . . . . . . . . . . . . . . . . . . . . . . . . . . . . . . . . . . . . . . . . . . . . . . . . . . . . . . . . .<br />
. . . . . . . . . . . . . . . . . . . . . . . . . . . . . . . . . . . . . . . . . . . . . . . . . . . . . . . . . . . . . . . . . . . . . . . . . . . . . . . . . . . . . . . . . . . . . .<br />
. . . . . . . . . . . . . . . . . . . . . . . . . . . . . . . . . . . . . . . . . . . . . . . . . . . . . . . . . . . . . . . . . . . . . . . . . . . . . . . . . . . . . . . . . . . . . .<br />
. . . . . . . . . . . . . . . . . . . . . . . . . . . . . . . . . . . . . . . . . . . . . . . . . . . . . . . . . . . . . . . . . . . . . . . . . . . . . . . . . . . . . . . . . . . . . .<br />
. . . . . . . . . . . . . . . . . . . . . . . . . . . . . . . . . . . . . . . . . . . . . . . . . . . . . . . . . . . . . . . . . . . . . . . . . . . . . . . . . . . . . . . . . . . . . .<br />
. . . . . . . . . . . . . . . . . . . . . . . . . . . . . . . . . . . . . . . . . . . . . . . . . . . . . . . . . . . . . . . . . . . . . . . . . . . . . . . . . . . . . . . . . . . . . .<br />
. . . . . . . . . . . . . . . . . . . . . . . . . . . . . . . . . . . . . . . . . . . . . . . . . . . . . . . . . . . . . . . . . . . . . . . . . . . . . . . . . . . . . . . . . . . . . .<br />
. . . . . . . . . . . . . . . . . . . . . . . . . . . . . . . . . . . . . . . . . . . . . . . . . . . . . . . . . . . . . . . . . . . . . . . . . . . . . . . . . . . . . . . . . . . . . .<br />
. . . . . . . . . . . . . . . . . . . . . . . . . . . . . . . . . . . . . . . . . . . . . . . . . . . . . . . . . . . . . . . . . . . . . . . . . . . . . . . . . . . . . . . . . . . . . .<br />
. . . . . . . . . . . . . . . . . . . . . . . . . . . . . . . . . . . . . . . . . . . . . . . . . . . . . . . . . . . . . . . . . . . . . . . . . . . . . . . . . . . . . . . . . . . . . .<br />
. . . . . . . . . . . . . . . . . . . . . . . . . . . . . . . . . . . . . . . . . . . . . . . . . . . . . . . . . . . . . . . . . . . . . . . . . . . . . . . . . . . . . . . . . . . . . .<br />
. . . . . . . . . . . . . . . . . . . . . . . . . . . . . . . . . . . . . . . . . . . . . . . . . . . . . . . . . . . . . . . . . . . . . . . . . . . . . . . . . . . . . . . . . . . . . .<br />
. . . . . . . . . . . . . . . . . . . . . . . . . . . . . . . . . . . . . . . . . . . . . . . . . . . . . . . . . . . . . . . . . . . . . . . . . . . . . . . . . . . . . . . . . . . . . .<br />
. . . . . . . . . . . . . . . . . . . . . . . . . . . . . . . . . . . . . . . . . . . . . . . . . . . . . . . . . . . . . . . . . . . . . . . . . . . . . . . . . . . . . . . . . . . . . .<br />
. . . . . . . . . . . . . . . . . . . . . . . . . . . . . . . . . . . . . . . . . . . . . . . . . . . . . . . . . . . . . . . . . . . . . . . . . . . . . . . . . . . . . . . . . . . . . .<br />
. . . . . . . . . . . . . . . . . . . . . . . . . . . . . . . . . . . . . . . . . . . . . . . . . . . . . . . . . . . . . . . . . . . . . . . . . . . . . . . . . . . . . . . . . . . . . .<br />
. . . . . . . . . . . . . . . . . . . . . . . . . . . . . . . . . . . . . . . . . . . . . . . . . . . . . . . . . . . . . . . . . . . . . . . . . . . . . . . . . . . . . . . . . . . . . .<br />
. . . . . . . . . . . . . . . . . . . . . . . . . . . . . . . . . . . . . . . . . . . . . . . . . . . . . . . . . . . . . . . . . . . . . . . . . . . . . . . . . . . . . . . . . . . . . .<br />
. . . . . . . . . . . . . . . . . . . . . . . . . . . . . . . . . . . . . . . . . . . . . . . . . . . . . . . . . . . . . . . . . . . . . . . . . . . . . . . . . . . . . . . . . . . . . .<br />
. . . . . . . . . . . . . . . . . . . . . . . . . . . . . . . . . . . . . . . . . . . . . . . . . . . . . . . . . . . . . . . . . . . . . . . . . . . . . . . . . . . . . . . . . . . . . .<br />
. . . . . . . . . . . . . . . . . . . . . . . . . . . . . . . . . . . . . . . . . . . . . . . . . . . . . . . . . . . . . . . . . . . . . . . . . . . . . . . . . . . . . . . . . . . . . .<br />
. . . . . . . . . . . . . . . . . . . . . . . . . . . . . . . . . . . . . . . . . . . . . . . . . . . . . . . . . . . . . . . . . . . . . . . . . . . . . . . . . . . . . . . . . . . . . .<br />
. . . . . . . . . . . . . . . . . . . . . . . . . . . . . . . . . . . . . . . . . . . . . . . . . . . . . . . . . . . . . . . . . . . . . . . . . . . . . . . . . . . . . . . . . . . . . .<br />
. . . . . . . . . . . . . . . . . . . . . . . . . . . . . . . . . . . . . . . . . . . . . . . . . . . . . . . . . . . . . . . . . . . . . . . . . . . . . . . . . . . . . . . . . . . . . .