Microsoft Office Project 2007 Step by Step eBook - Cdn.oreilly.com
Microsoft Office Project 2007 Step by Step eBook - Cdn.oreilly.com
Microsoft Office Project 2007 Step by Step eBook - Cdn.oreilly.com

You also want an ePaper? Increase the reach of your titles
YUMPU automatically turns print PDFs into web optimized ePapers that Google loves.
Save<br />
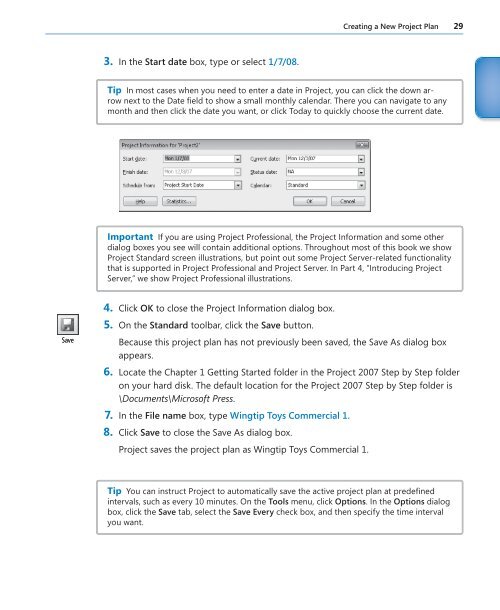
3. In the Start date box, type or select 1/7/08.<br />
Tip In most cases when you need to enter a date in <strong>Project</strong>, you can click the down arrow<br />
next to the Date fi eld to show a small monthly calendar. There you can navigate to any<br />
month and then click the date you want, or click Today to quickly choose the current date.<br />
Important If you are using <strong>Project</strong> Professional, the <strong>Project</strong> Information and some other<br />
dialog boxes you see will contain additional options. Throughout most of this book we show<br />
<strong>Project</strong> Standard screen illustrations, but point out some <strong>Project</strong> Server-related functionality<br />
that is supported in <strong>Project</strong> Professional and <strong>Project</strong> Server. In Part 4, “Introducing <strong>Project</strong><br />
Server,” we show <strong>Project</strong> Professional illustrations.<br />
4. Click OK to close the <strong>Project</strong> Information dialog box.<br />
5. On the Standard toolbar, click the Save button.<br />
Because this project plan has not previously been saved, the Save As dialog box<br />
appears.<br />
6. Locate the Chapter 1 Getting Started folder in the <strong>Project</strong> <strong>2007</strong> <strong>Step</strong> <strong>by</strong> <strong>Step</strong> folder<br />
on your hard disk. The default location for the <strong>Project</strong> <strong>2007</strong> <strong>Step</strong> <strong>by</strong> <strong>Step</strong> folder is<br />
\Documents\<strong>Microsoft</strong> Press.<br />
7. In the File name box, type Wingtip Toys Commercial 1.<br />
8. Click Save to close the Save As dialog box.<br />
<strong>Project</strong> saves the project plan as Wingtip Toys Commercial 1.<br />
Creating a New <strong>Project</strong> Plan 29<br />
Tip You can instruct <strong>Project</strong> to automatically save the active project plan at predefi ned<br />
intervals, such as every 10 minutes. On the Tools menu, click Options. In the Options dialog<br />
box, click the Save tab, select the Save Every check box, and then specify the time interval<br />
you want.