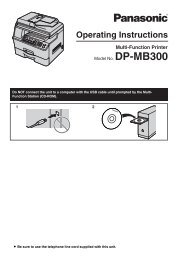
Operating Instructions - Panasonic Business
Operating Instructions - Panasonic Business
Operating Instructions - Panasonic Business

Create successful ePaper yourself
Turn your PDF publications into a flip-book with our unique Google optimized e-Paper software.
58<br />
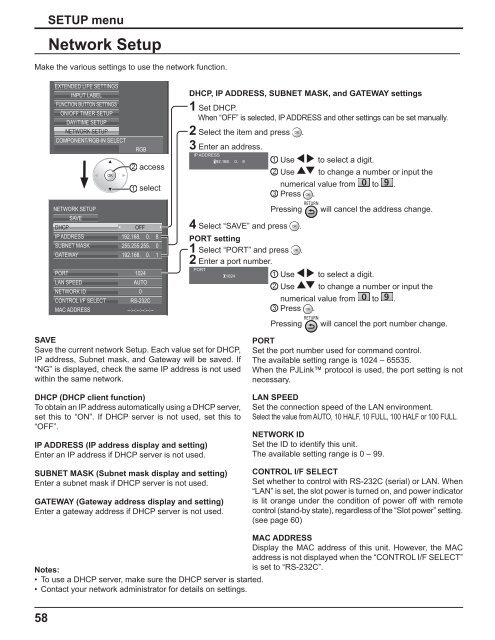
SETUP menu<br />
Network Setup<br />
Make the various settings to use the network function.<br />
EXTENDED LIFE SETTINGS<br />
INPUT LABEL<br />
FUNCTION BUTTON SETTINGS<br />
ON/OFF TIMER SETUP<br />
DAY/TIME SETUP<br />
NETWORK SETUP<br />
COMPONENT/RGB-IN SELECT<br />
NETWORK SETUP<br />
SAVE<br />
DHCP<br />
IP ADDRESS<br />
SUBNET MASK<br />
GATEWAY<br />
PORT<br />
LAN SPEED<br />
NETWORK ID<br />
CONTROL I/F SELECT<br />
MAC ADDRESS<br />
RGB<br />
2 access<br />
1 select<br />
OFF<br />
192.168. 0. 8<br />
255.255.255. 0<br />
192.168. 0. 1<br />
1024<br />
AUTO<br />
0<br />
RS-232C<br />
--:--:--:--:--:--<br />
DHCP, IP ADDRESS, SUBNET MASK, and GATEWAY settings<br />
1 Set DHCP.<br />
When “OFF” is selected, IP ADDRESS and other settings can be set manually.<br />
2 Select the item and press .<br />
3 Enter an address.<br />
IP ADDRESS<br />
I192.168. 0. 8<br />
4 Select “SAVE” and press .<br />
PORT setting<br />
1 Select “PORT” and press<br />
2 Enter a port number.<br />
.<br />
PORT<br />
I01024<br />
SAVE<br />
Save the current network Setup. Each value set for DHCP,<br />
IP address, Subnet mask, and Gateway will be saved. If<br />
“NG” is displayed, check the same IP address is not used<br />
within the same network.<br />
DHCP (DHCP client function)<br />
To obtain an IP address automatically using a DHCP server,<br />
set this to “ON”. If DHCP server is not used, set this to<br />
“OFF”.<br />
IP ADDRESS (IP address display and setting)<br />
Enter an IP address if DHCP server is not used.<br />
SUBNET MASK (Subnet mask display and setting)<br />
Enter a subnet mask if DHCP server is not used.<br />
GATEWAY (Gateway address display and setting)<br />
Enter a gateway address if DHCP server is not used.<br />
1 Use to select a digit.<br />
2 Use to change a number or input the<br />
numerical value from to .<br />
3 Press .<br />
Pressing will cancel the address change.<br />
1 Use to select a digit.<br />
2 Use to change a number or input the<br />
numerical value from to .<br />
3 Press .<br />
Pressing will cancel the port number change.<br />
PORT<br />
Set the port number used for command control.<br />
The available setting range is 1024 – 65535.<br />
When the PJLink protocol is used, the port setting is not<br />
necessary.<br />
LAN SPEED<br />
Set the connection speed of the LAN environment.<br />
Select the value from AUTO, 10 HALF, 10 FULL, 100 HALF or 100 FULL.<br />
NETWORK ID<br />
Set the ID to identify this unit.<br />
The available setting range is 0 – 99.<br />
CONTROL I/F SELECT<br />
Set whether to control with RS-232C (serial) or LAN. When<br />
“LAN” is set, the slot power is turned on, and power indicator<br />
is lit orange under the condition of power off with remote<br />
control (stand-by state), regardless of the “Slot power” setting.<br />
(see page 60)<br />
MAC ADDRESS<br />
Display the MAC address of this unit. However, the MAC<br />
address is not displayed when the “CONTROL I/F SELECT”<br />
Notes:<br />
is set to “RS-232C”.<br />
• To use a DHCP server, make sure the DHCP server is started.<br />
• Contact your network administrator for details on settings.