#6750, FREEZER MILLS - Wolf Laboratories
#6750, FREEZER MILLS - Wolf Laboratories
#6750, FREEZER MILLS - Wolf Laboratories

Create successful ePaper yourself
Turn your PDF publications into a flip-book with our unique Google optimized e-Paper software.
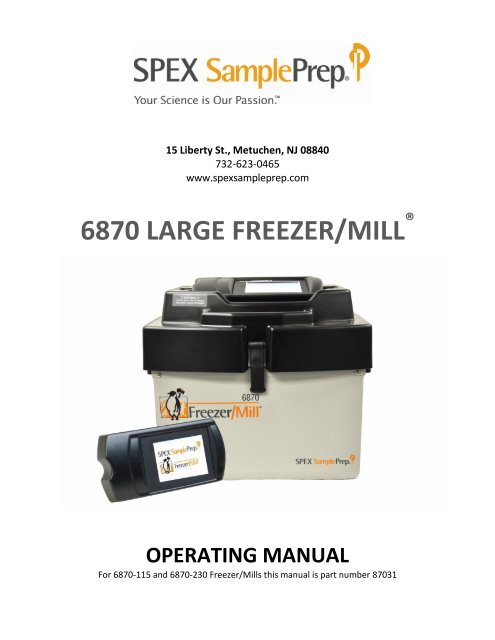
15 Liberty St., Metuchen, NJ 08840<br />
732-623-0465<br />
www.spexsampleprep.com<br />
6870 LARGE <strong>FREEZER</strong>/MILL ®<br />
OPERATING MANUAL<br />
For 6870-115 and 6870-230 Freezer/Mills this manual is part number 87031
6870 Freezer/Mill<br />
Copyright 2012 by SPEX SamplePrep LLC<br />
All rights reserved. No part of the work may be reproduced or transmitted in any form or by<br />
any means, electronic or mechanical; including photocopying and recording, except as may be<br />
expressly permitted by the 1976 Copyright Act or in writing from the publisher. Requests for<br />
permission should be addressed in writing to SPEX SamplePrep LLC, 15 Liberty Street,<br />
Metuchen, NJ 08840.<br />
Page 2 of 36 SPEX SamplePrep LLC March 2012
TABLE OF CONTENTS<br />
6870 Freezer/Mill<br />
SECTION DESCRIPTION PAGE<br />
1.0 Introduction ........................................................................................................................ 4<br />
2.0 Specifications ...................................................................................................................... 5<br />
3.0 Unpacking ........................................................................................................................... 6<br />
4.0 Setting Up ............................................................................................................................ 8<br />
4.1 Electrical Hookup ............................................................................................................... 8<br />
4.2 Power Switch and Control Panel ....................................................................................... 8<br />
4.3 Lid, Coil Assembly and Gate, LN Sensor ............................................................................. 9<br />
4.4 Grinding Vial Sizes, Adapters, and Vial Openers ............................................................ 10<br />
5.0 Touch Screen Displays ...................................................................................................... 11<br />
5.1 Logo Screen ....................................................................................................................... 11<br />
5.2 Current Settings Screen .................................................................................................... 11<br />
5.3 Run Screen ........................................................................................................................ 12<br />
5.4 Settings Screen .................................................................................................................. 15<br />
5.5 Store/Recall Screens ......................................................................................................... 17<br />
6.0 Operation .......................................................................................................................... 19<br />
6.1 Adding Liquid Nitrogen Coolant ....................................................................................... 19<br />
6.2 Loading Samples into Freezer/Mill Vials .......................................................................... 20<br />
6.3 Loading Vials into the Freezer/Mill................................................................................... 22<br />
6.4 Removing Vials from the Freezer/Mill.............................................................................. 22<br />
6.5 Opening, Emptying, and Cleaning Freezer/Mill Vials ....................................................... 23<br />
6.6 Checking the Liquid Nitrogen Level .................................................................................. 25<br />
7.0 6820 Auto-Fill System ....................................................................................................... 26<br />
7.1 Description ........................................................................................................................ 26<br />
7.2 Liquid Nitrogen Connection .............................................................................................. 26<br />
7.3 Operation .......................................................................................................................... 26<br />
8.0 Optional 6814 Auto-Extractor .......................................................................................... 29<br />
9.0 Maintenance ..................................................................................................................... 29<br />
10.0 Accessories for the 6870 Freezer/Mill .............................................................................. 30<br />
11.0 Trouble-Shooting Guide .................................................................................................... 33<br />
12.0 Warranty ........................................................................................................................... 35<br />
12.1 Product Specifications ...................................................................................................... 35<br />
12.2 To Arrange a Return Shipment ......................................................................................... 35<br />
13.0 Contact Us ......................................................................................................................... 36<br />
Page 3 of 36 SPEX SamplePrep LLC March 2012
1.0 INTRODUCTION<br />
6870 Freezer/Mill<br />
SPEX SamplePrep Freezer/Mills are cryogenic laboratory mills that cool samples to cryogenic<br />
temperatures, and pulverize them by magnetically shuttling a steel impactor back and forth<br />
against two stationary end-plugs. Since the vial is closed, the integrity of its contents is<br />
maintained: hazardous or critical samples are easily controlled, cleanup is simplified, and crosssample<br />
contamination is eliminated. Because the vial is immersed in liquid nitrogen throughout<br />
the grinding cycle, the sample is kept at cryogenic temperatures and its key aspects preserved.<br />
These features have made SPEX SamplePrep Freezer/Mills the most effective cryogenic mills in<br />
the world. They are the “mills of last resort” for many normally ungrindable samples, or<br />
samples whose composition or structure is altered by the heat generated by conventional<br />
grinding.<br />
NOTE: Please do not operate the 6870 Freezer/Mill until you have read these instructions and<br />
are familiar with its controls and operation. The Freezer/Mill is different in its<br />
principles and operation from any other laboratory mill.<br />
OPERATING CONDITIONS: Do not set up the 6870 Freezer/Mill in an insulated or confined<br />
space. The Freezer/Mill should be run on an open countertop, in ambient air. If the entire mill is<br />
chilled during operation, components such as the gas cylinders, controller, and display screen<br />
can fail. This damage is not covered by the Freezer/Mill warranty. During operation, water<br />
vapor in the air will condense on parts of the unit. For this reason, it is important not to place<br />
any moisture sensitive equipment near the Freezer/Mill.<br />
VERY IMPORTANT: Liquid nitrogen not only makes samples brittle through severe chilling,<br />
making them “grindable,” but also cools the magnetic coil which powers the 6870 Freezer/Mill.<br />
If the mill is operated without liquid nitrogen for a period of about one minute, the coil will<br />
become very hot and may sustain permanent damage. The 6870 Freezer/Mill has a liquid<br />
nitrogen sensor that should shut down the mill when the liquid nitrogen gets too low to cool the<br />
coil. Nevertheless the nitrogen level should be visually checked during extended runs as well as<br />
topped off before every run. The Freezer/Mill warranty does not cover damage to the coil<br />
caused by operating the mill with little or no liquid nitrogen.<br />
SAFETY: Liquid nitrogen can be hazardous. Its boiling point is -195.8 o<br />
C. When working with<br />
liquid nitrogen directly or indirectly, cryogenic gloves must be worn to protect hands. Be careful<br />
not to splash liquid nitrogen onto clothes or unprotected skin. Always use cryogenic gloves<br />
when handling very cold objects or materials: sample vials, the nitrogen tank valve or hose,<br />
chilled Freezer/Mill components, etc. Safety goggles are also recommended to protect eyes.<br />
Do not attempt to operate the 6870 Freezer/Mill without liquid nitrogen. Make sure that all<br />
users of the 6870 are trained in the usage and handling of liquid nitrogen. Additional<br />
information on liquid nitrogen safety can be found on websites such as<br />
http://engineering.dartmouth.edu/microengineering/ln2.html.<br />
CAUTION: Do not attempt to operate the 6870 Freezer/Mill without liquid nitrogen.<br />
Page 4 of 36 SPEX SamplePrep LLC March 2012
2.0 6870 <strong>FREEZER</strong>/MILL SPECIFICATIONS<br />
6870 Freezer/Mill<br />
Type of Mill: Cryogenic impact mill<br />
Grinding Mechanism: Steel impactor driven by dual electromagnets<br />
Coolant: Liquid nitrogen (LN)<br />
Dimensions: 20½ in. (52 cm) x 21½ in. (55 cm) x 18 in. (46 cm)<br />
Weight: (empty, without vial or coolant) approx. 44 lbs. (20 Kg)<br />
Grinding Vials: One Large Vial (6801), one Mid-Size Vial (6871, 6881, 6885), one to<br />
four Small Vials (6751, 6751/52, 6761, 6771) or one Microvial sets<br />
(6753).<br />
Typical Vial Capacity: Small Vials: actual volume with impactor, approx. 25 ml. Typical<br />
sample weights: 2 grams for biological samples, 1 gram for polymers.<br />
6753 Microvial Set: 100 - 500 mg per individual 6753V Microvial,<br />
depending on sample.<br />
Mid-Size Vials: up to 5 times the sample capacity of Small Vials.<br />
Large Vials: Approximately twice the sample capacity of Mid-Size<br />
Vials, or up to 10 times that of Small Vials.<br />
Actual performance of any vial/sample combination depends on<br />
sample properties, cooling time, grinding time, desired outcome, etc.<br />
Effective capacity for a given sample is determined by trial.<br />
Overfilling a vial greatly reduces its efficiency. Actual performance of<br />
any vial/sample combination depends on sample properties, cooling<br />
time, grinding time, desired outcome, etc.<br />
Typical Liquid Nitrogen 10-15 liters for initial cool-down and filling of the tub.<br />
Consumption: 4-6 liters for each hour of operation<br />
Actual LN consumption can vary.<br />
Electrical Specifications: CE Approved. Available as 115V/60HZ or 230/50HZ.<br />
Fuses: Two 15-amp slow-blow fuses in AC Input module.<br />
25-amp slow-blow fuse on driver board.<br />
Power Cord: 115V/60HZ version: 3-prong grounded plug supplied.<br />
230V/50HZ version: 2-prong European plug supplied.<br />
Operator is responsible for supplying alternate line cord/plug if<br />
required.<br />
Safety Features: Lid Interlock prevents mill from running if lid is not latched shut.<br />
Liquid nitrogen sensor shuts down mill if LN level is too low.<br />
NOTE: The sensor can shut down the mill during a run, so the liquid nitrogen level should be<br />
visually checked during extended runs as well as before every run. The Freezer/Mill<br />
warranty does not cover damage to the coil caused by operating the mill with little or<br />
no liquid nitrogen.<br />
Page 5 of 36 SPEX SamplePrep LLC March 2012
3.0 UNPACKING<br />
6870 Freezer/Mill<br />
Inspect the exterior of the packing box and report any visible damage to the carrier. Remove all<br />
packing documents from the exterior of the box, and save them for your records. Open the top<br />
of the shipping box. Remove the packing material and accessories, and gently remove the<br />
Freezer/Mill. Visually check the mill for any damage that may have occurred during shipping.<br />
Unlatch the lid and inspect the interior of the tub, ensuring that it is free of any packing<br />
material. Check the packing list to see that there are no parts missing, and inspect the<br />
accessories. If everything seems to be in proper order, we recommend you store the packaging<br />
materials, in case there you ever need to return the unit for warranty service or repair.<br />
Grinding vials must be purchased separately and are available in three sizes: large, mid-size, and<br />
small. Each new 6870 Freezer/Mill includes an Accessory Package to match your choice of vials,<br />
either the 6870L for large vials or the 6870S for small vials. Both include an extractor for<br />
removing end plugs from cold vials, and a vial rack; the 6870S also includes an adapter for<br />
running up to four vials in the 6870. A 6870M Accessory Package is available for mid-size vials,<br />
but must be used in conjunction with the 6870L. The full range of grinding vials and accessories<br />
for the 6870 Freezer/Mill is described in our catalog (Handbook of Sample Preparation and<br />
Handling) and on our website (www.spexsampleprep.com).<br />
Figure 1 - 6870 Freezer/Mill, Front View<br />
Page 6 of 36 SPEX SamplePrep LLC March 2012
3.0 UNPACKING (Cont’d)<br />
Figure 2 - 6870 Freezer/Mill, Rear View<br />
6870 Freezer/Mill<br />
Page 7 of 36 SPEX SamplePrep LLC March 2012
4.0 SETTING UP<br />
6870 Freezer/Mill<br />
The 6870 Freezer/Mill weighs 44 pounds (20 Kg) empty. The lid opens from the front and the<br />
lid latch is in the center. The AC Input module is on the back of the cabinet, and includes the<br />
power switch and fuse tray. The fuse tray can be opened with small screwdriver or knife-blade.<br />
Also on the back of the cabinet is the vent from the liquid nitrogen tub. There are gas cylinders<br />
on both sides of the cabinet to control the movement of the lid. The control panel is on top of<br />
the lid, and can be detached for remote operation. It is connected to the lid by an RJ45<br />
(“Ethernet”) cord.<br />
4.1 Electrical Hookup<br />
Plug the electrical cord into the inlet on the back of the Freezer/Mill cabinet, and then into a<br />
standard 3-prong grounded electrical outlet. A fused 20-amp circuit is recommended for the<br />
115V/60 HZ version. For the 230V/50HZ version, make sure the cord and plug conform to local<br />
electrical codes. The 230V/50HZ 6750 Freezer/Mill is supplied with a standard European<br />
2-prong plug with cord.<br />
The fuses are next to the electrical cord inlet, under a cover. To replace a fuse, first remove the<br />
electrical cord from the inlet. Use a small screwdriver to pry open the fuse cover. There are<br />
two individual fuse holders, each with a protruding tab. Push the tab sideways and that fuse<br />
holder will pop part way out, and can be removed with the fingers. Never use pliers or force to<br />
remove a fuse holder. Be sure to replace both fuses.<br />
4.2 Power Switch and Control Panel<br />
Electric power to the Freezer/Mill is controlled by the rocker switch on the inlet module. It is<br />
marked with two numerical symbols,) for “off” and I for “on.” Press the on (I) side of the switch<br />
to turn the power on, or press the off (0) side of the switch to turn the power off. When<br />
power to the mill is on, the control panel display will light up.<br />
The control panel is a touch-screen, activated by a fingertip or stylus. The Freezer/Mill is<br />
programmed and operated through this control panel, whose successive screens are described<br />
and illustrated in Section 5.0. Programmable parameters include precooling time, grinding<br />
time, cooling time between grinding periods, the number of grinding periods, and the rate of<br />
grinding. The control display also warns if the lid is not fully closed, or if there is not enough<br />
liquid nitrogen in the tub.<br />
The viewing angle of the controller on the 6770 can be adjusted to minimize glare. The unit is<br />
shipped with the controller in the lowest position. To adjust the viewing angle, simply grasp the<br />
back of the controller box and gently pull forward until the desired angle is reached, as shown<br />
in Figure 3. If it ever becomes necessary to send the unit back to SPEX SamplePrep for service,<br />
be sure to return the controller to its lowest position before packing the unit for shipping.<br />
Page 8 of 36 SPEX SamplePrep LLC March 2012
4.2 Power Switch and Control Panel (Cont’d)<br />
Figure 3 - Adjusting the Viewing Angle of the Controller<br />
4.3 Lid, Coil Assembly and Gate, LN Sensor<br />
Grasp controller from the rear and<br />
gently pull forward to adjust<br />
viewing angle<br />
6870 Freezer/Mill<br />
The lid of the 6870 Freezer/Mill supports the coil (dual electromagnet assembly) and coil<br />
housing. To open the lid, hold the lid down with one hand, and with the other pull the upper<br />
end of the latch toward you. The lower end of the latch should disengage from the cabinet.<br />
Release the lid and it should be pushed up by the gas cylinders, which also keep the lid raised<br />
when open. The lid must be open for insertion and removal of vials. Liquid nitrogen (LN) is<br />
added with the lid open, unless the 6870 is equipped with the 6820 Auto-Fill System.<br />
The lid must be shut and latched for the Freezer/Mill to run. Push the lid down, hold it down<br />
while engaging the latch, and then lock the latch by pushing its top end toward the cabinet.<br />
A vial is inserted into the circular hole on the right side of the coil housing. The coil gate keeps<br />
the vial or vials in place during grinding, but must be lowered to insert or remove vials. Do not<br />
run the 6870 Freezer/Mill without a loaded vial in the coil.<br />
The coil gate (Figure 1) holds the vial or vials in the coil during grinding. To lock a vial in place,<br />
loosen (unscrew) the coil gate handle a turn or two, and position it so the handle passes<br />
through the slot in the coil gate when the gate is raised. Tighten the coil gate handle against<br />
the gate, so the gate contacts the vial snugly, but do not overtighten the gate as this can crack<br />
the plastic center section of the vial. When the coil gate handle is properly tightened, fold it<br />
down to lock the gate during grinding. Always use the proper Adapters for Mid-Size and Small<br />
Page 9 of 36 SPEX SamplePrep LLC March 2012
4.3 Lid, Coil Assembly and Gate, LN Sensor (Cont’d)<br />
6870 Freezer/Mill<br />
vials (see Section 4.4), and always wear gloves when touching a chilled vial or any part of the<br />
chilled coil housing!<br />
The LN sensor is located behind a shield on the back wall of the LN tub. If there is not enough<br />
liquid nitrogen in the tub to start the mill, when RUN is touched the RUN screen (Section 5.3)<br />
will display STATUS: LOW LN LEVEL. If the LN runs low during a grinding program the same<br />
message will appear and the program will stop. To continue running, fill the tub with liquid<br />
nitrogen to the fill mark. When RUN is pressed, the grinding program will begin where it left<br />
off.<br />
NOTE: To keep a run from being interrupted by the liquid nitrogen (LN) sensor, the LN level<br />
should be visually checked from time to time during extended runs, as well as before<br />
every run. The 6870 Freezer/Mill can run low on LN during extended runs, so should be<br />
checked after each 30 minutes of grinding time, and the LN topped off if necessary.<br />
The Freezer/Mill warranty does not cover damage to the coil caused by operating the<br />
mill with little or no liquid nitrogen.<br />
4.4 Grinding Vial Sizes, Adapters, and Vial Openers<br />
Large vials (6801, 6871) are run one at a time in the 6870 Freezer/Mill, without any adapter.<br />
Large vials are opened using the 6804 Extractor/Vial Opener, which is part of the 6870L<br />
Accessory Package.<br />
Mid-Size vials (6881, 6883, 6885) are run one at a time, but the 6886 Mid-Size Adapter must be<br />
placed in the coil first, to center and align any Mid-Size vial. Mid-Size vials can be opened by<br />
the 6804 Extractor/Vial Opener, but only by installing the 6884 Mid-Size Vial Adapter for the<br />
6804. The 6884 and 6886 Adapters comprise the 6870M Accessory Package.<br />
Most Small vials (6751, 6761, 6771) can be run one, two, three, or four at a time in the 6870<br />
Freezer/Mill. However, they must be used in conjunction with the 6806 Multi-Vial Adapter, an<br />
X-shaped insert for the coil. The 6806 Adapter keeps the vials parallel to each other and the<br />
coil, so each impactor moves back and forth in line with the magnetic field. Also, if a small vial<br />
were to be positioned diagonally inside the coil, the gate could not be properly tightened<br />
against the vial, and an end plug might work its way out of the vial during grinding. When<br />
running Small vials, make sure the coil gate contacts the end plug of every vial. If the gate<br />
needs adjustment to do this, the bottom or pivot end of the gate can be moved toward or away<br />
from the coil housing by turning the gate clockwise or counterclockwise on its mounting bolt.<br />
Unlike other Small vials, the 6753 Microvial Set is run one at a time with the 6806 Adapter.<br />
Each 6753 set includes three 6753V Microvials. If more than one 6753 Microvial Set is placed in<br />
a 6870 Freezer/Mill, some of the individual Microvials will be shielded from the magnetic field,<br />
and grinding in those vials can be ineffective.<br />
Page 10 of 36 SPEX SamplePrep LLC March 2012
5.0 TOUCHSCREEN DISPLAYS<br />
6870 Freezer/Mill<br />
The 6870 Freezer/Mill is programmed and operated through a series of touchscreen displays.<br />
Transition between screens, and all programming and operating commands, are done by<br />
touching the screen with a fingertip or stylus. Do not use a sharp point as this can damage or<br />
deface the screen.<br />
5.1 Logo Screen<br />
When the power is switched on at the back of the mill, the LOGO screen appears during startup.<br />
This shows the SPEX SamplePrep and Freezer/Mill logos and a brief animated<br />
representation of the Freezer/Mill penguin is displayed. After the animation is complete, the<br />
display will switch to the CURRENT SETTINGS screen.<br />
5.2 Current Settings Screen<br />
The CURRENT SETTINGS screen displays whatever program is currently set up to run. Figure 4<br />
shows a typical program, as displayed for the 6870.<br />
Figure 4 - Current Settings Screen<br />
If a loaded vial is locked into the 6870 and the mill is run with these setting, the following<br />
sequence of events occurs:<br />
1. Precool - the coil is inactive while the vial cools in liquid nitrogen for 10 minutes.<br />
2. First cycle - the coil is activated and the impactor grinds for 2 minutes at a rate of 10<br />
cycles per second (20 impacts per second).<br />
3. Cool time - the coil is inactive for 2 minutes while it and the sample cool back down.<br />
4. Second cycle - the coil is activated and the sample is ground for another 2 minutes.<br />
5. Cool time - the coil is inactive for 2 minutes, as in step 3.<br />
Page 11 of 36 SPEX SamplePrep LLC March 2012
5.2 Current Settings Screen (Cont’d)<br />
6870 Freezer/Mill<br />
6. Third cycle – the coil is activated for the final 2-minute cycle. When it is done, the<br />
program is over and the sample has been ground for a total of 6 minutes.<br />
To run the program displayed on the CURRENT SETTINGS screen, touch RUN SCREEN. The<br />
display switches to the RUN screen, from which the mill can be started, stopped, or paused in<br />
the middle of a grinding program. (To change the settings, touch RETURN on the RUN screen to<br />
return to the CURRENT SETTINGS screen. Touch SETTINGS to go to the SETTINGS screen, and<br />
see Section 5.4 for instructions.)<br />
5.3 Run Screen<br />
In the RUN screen, the STATUS line displays the stage of the program. Before a run, this field<br />
displays STATUS: STANDBY, as shown in Figure 5, below. In a typical program, the sequence in<br />
the STATUS field is: PRECOOL, GRINDING, COOL DOWN, GRINDING, etc., to the end of the<br />
program, which is displayed as STATUS: RUN COMPLETE for 3 seconds, followed by STATUS:<br />
STANDBY .<br />
Figure 5 - Run Screen prior to grinding<br />
5.3.1 Starting a Programmed Run<br />
To start the Freezer/Mill, press RUN to begin operation. Before doing this, fill the tub with<br />
liquid nitrogen to within two inches of the tub rim (Section 6.1), place a loaded vial in the coil,<br />
slowly lower the lid and latch it down. If there is not enough liquid nitrogen (LN) in the mill, the<br />
STATUS line on the STATUS screen will display STATUS: LOW LN LEVEL.<br />
If the lid is not down and latched, the STATUS line will display STATUS: LID OPEN. If the mill is<br />
filled with LN, and the lid is latched down, the STATUS line will display PRECOOL, marking the<br />
beginning of the grinding program.<br />
Page 12 of 36 SPEX SamplePrep LLC March 2012
5.3 Run Screen (Cont’d)<br />
6870 Freezer/Mill<br />
During the PRECOOL stage the TIME REMAINING line counts down the time for that stage in<br />
1-second increments.<br />
After the PRECOOL stage comes the first GRINDING stage, and the screen displays STATUS:<br />
GRINDING. The TIME REMAINING line will display the time left in that grinding stage. If there<br />
are 3 grinding periods, during the first one the CYCLES REMAINING line will display 3 OF 3,<br />
during the second the CYCLES REMAINING line will display 2 of 3, etc. In every stage the TIME<br />
REMAINING line will count down the time left in that stage in 1-second increments.<br />
If the program on the CURRENT SETTINGS screen shown in Figure 5 were being run and 15<br />
seconds of the second grinding period had elapsed, the STATUS screen would appear as in<br />
Figure 6.<br />
Figure 6 - Run Screen during grinding<br />
Between any two grinding periods is the COOL DOWN stage, displayed as STATUS: COOL<br />
DOWN.<br />
When the grinding program is complete, the RUN screen will display STATUS: RUN COMPLETE<br />
for approximately 3 seconds, then will revert to STANDBY. TIME REMAINING will display 0:00,<br />
and (in the case of the program displayed in Figure 4) CYCLES REMAINING will display 0 of 3.<br />
Page 13 of 36 SPEX SamplePrep LLC March 2012
5.3 Run Screen (Cont’d)<br />
6870 Freezer/Mill<br />
5.3.2 Adjusting the Grinding Rate<br />
While in the RUN screen, the only parameter that can be modified is the RATE. It is adjusted by<br />
touching the up and down arrows next to the rate field. Touching the up arrow increases the<br />
rate 1 cps at a time, while touching the down arrow decreases the rate 1 cps. Continue tapping<br />
or holding the up or down arrow until the desired rate is reached.<br />
Rate is the number of back-and-forth cycles per second of the impactor. Since the impactor<br />
strikes both ends of the vial, a rate of 10 represents 20 impacts per second. The factory default<br />
setting for the rate is 10. The maximum grinding rate is 15 cps; the minimum is 5 cps.<br />
5.3.3 Stopping or Pausing a Run<br />
To stop a program, touch STOP. The program will end. If RUN is pressed the entire program<br />
will start over.<br />
To pause during a grinding program, touch PAUSE. The RUN screen will hold the settings at that<br />
moment (elapsed time, cycle, etc.), and the PAUSE button turn yellow. To resume the<br />
program, touch RUN. This will restart the program at the point at which it was paused.<br />
Alternatively, pressing STOP will end the program.<br />
To change parameters (precool time, grinding time, cool down time, cycles), touch RETURN to<br />
go back to the CURRENT SETTINGS screen, and then touch SETTINGS to go to the SETTINGS<br />
screen (Section 5.4).<br />
Page 14 of 36 SPEX SamplePrep LLC March 2012
5.4 Settings Screen<br />
6870 Freezer/Mill<br />
To change any of the settings, touch SETTINGS on the CURRENT SETTINGS screen. This will<br />
bring up the SETTINGS screen (Figure 7) and allow the user to change the settings.<br />
Touch to activate<br />
Figure 7 - Settings Screen with default settings<br />
To change any setting, touch the appropriate button to activate the field: CYCLES, PRECOOL,<br />
RUN, COOL, OR RATE. The button will change from gray to yellow, indicating that the field is<br />
active. For CYCLES, PRECOOL, COOL, and RATE touch the up or down arrows to adjust the<br />
setting. The changes will appear in the small field above the arrows (Figure 8). Once the<br />
desired setting has been reached, touch the setting name again to accept and transfer the<br />
setting to the field to the right of the setting button. This will deactivate that setting button,<br />
changing it from yellow back to gray. Alternatively, simply touching the button for the next<br />
setting to be modified will transfer the setting and activate the next button selected (Figure 9).<br />
Active buttons appear in yellow; inactive buttons are gray.<br />
To adjust the run time, touch RUN to activate, then touch MIN and use the arrows to set the<br />
desired minutes. Grind times can be also adjusted in 10 second increments using the SEC<br />
button. Touch SEC to activate and use the arrows to adjust the seconds.<br />
NOTE: New settings must be accepted by deactivating the corresponding setting name before<br />
returning to the CURRENT SETTINGS screen.<br />
Page 15 of 36 SPEX SamplePrep LLC March 2012
5.4 Settings Screen (Cont’d)<br />
Touch CYCLES again<br />
to accept new<br />
setting. Or touch the<br />
next setting to be<br />
modified.<br />
Figure 8 - Settings Screen: CYCLES activated<br />
Figure 9 - Settings Screen: new Cycles setting accepted<br />
6870 Freezer/Mill<br />
To run a program with the new settings, touch RETURN to return to the CURRENT SETTINGS<br />
screen. Then touch RUN SCREEN to go to the RUN screen, and touch RUN.<br />
To store the new program or to recall a stored program, touch STO/RCL to go to the first of two<br />
STORE/RECALL screens.<br />
Page 16 of 36 SPEX SamplePrep LLC March 2012<br />
The new value appears<br />
in this field as the<br />
setting is adjusted up or<br />
down.<br />
Use arrows to adjust<br />
number of cycles.
5.5 Store/Recall Screens<br />
6870 Freezer/Mill<br />
The STORE/RECALL screen is shown in Figure 10. In this example, only Preset Program 0 has<br />
been stored and named. Once Preset Programs 0-4 have been stored, additional programs can<br />
be stored by touching MORE. This brings up a second STORE/RECALL screen, where Preset<br />
Programs 5-9 can be stored. To return from the second STORE/RECALL screen to the first,<br />
touch RETURN. To exit from the first STORE/RECALL screen, touch RETURN to go back to the<br />
CURRENT SETTINGS screen.<br />
A stored program retains the settings for number of cycles, precool time, run time, and cool<br />
time between cycles. Be sure to adjust the rate to the desired setting whenever recalling a<br />
stored program.<br />
Figure 10 - Store/Recall Screen<br />
5.5.1 Storing a new program<br />
To store the program in the SETTINGS screen as Preset Program 1, touch Store to the left of<br />
PRESET 1. To label this program, touch Label. This will bring up the KEYBOARD screen, a<br />
simplified version of the standard keyboard on a computer. In addition to number and letter<br />
keys, this keyboard has two symbol keys (#, %) and six function keys (SHIFT, SPACE, BACK,<br />
CLEAR, ENTER, and CANCEL).<br />
As the letters/numbers are touched, they appear above the keyboard in a mini-screen with a<br />
centered cursor.<br />
The SHIFT key allows the user to shift back and forth from upper case to lower case. The<br />
default is upper case. Touch SHIFT to switch to lower case. Then touch ENTER to revert to<br />
upper case.<br />
Page 17 of 36 SPEX SamplePrep LLC March 2012
5.5 Store/Recall Screens (Cont’d)<br />
6870 Freezer/Mill<br />
Touching the SPACE key advances the cursor one space. Touching the BACK key sends the<br />
cursor back one space. The CLEAR key clears whatever has been entered on the mini-screen.<br />
Touch ENTER to save the label shown in the mini-screen and return to the STORE/RECALL<br />
screen. The label will appear as the name of the program on the STORE/RECALL screen.<br />
The CANCEL key does not change anything on the screen, but returns the display to the<br />
STORE/RECALL screen.<br />
To run the newly saved program, touch RETURN to go back to the SETTINGS screen. Review the<br />
settings, touch RETURN to go back to the CURRENT SETTINGS screen. Touch RUN SCREEN to<br />
go to the RUN screen and then touch RUN.<br />
5.5.2 Recalling a program<br />
In the STORE/RECALL screen, touch Recall next to the desired preset program. Touch RETURN<br />
to see the settings for that program displayed in the SETTINGS screen.<br />
To run the recalled program, touch RETURN to go to the CURRENT SETTINGS screen. Touch<br />
RUN SCREEN to go to the RUN screen, and then touch RUN.<br />
Page 18 of 36 SPEX SamplePrep LLC March 2012
6.0 OPERATION<br />
6.1 Adding Liquid Nitrogen Coolant<br />
6870 Freezer/Mill<br />
Liquid nitrogen is added to the 6870 Freezer/Mill with the lid open. The 6870 should be filled<br />
until the LN level reaches approximately 2 inches (5.1 cm) below the lip of the tub. If the liquid<br />
nitrogen is above this level when the lid is closed, LN can splash outside the tub. Always close<br />
the lid slowly to avoid splashing.<br />
Liquid nitrogen will most likely be available either in a large tank with a flexible steel hose, or in<br />
smaller Dewar flasks. The 6870 Freezer/Mill typically consumes 10 to 15 liters of LN during<br />
initial cool-down, and another 4 to 6 liters per hour, depending on use.<br />
Unlatch the lid and the gas cylinders will push it open. To unlock the latch, press down on the<br />
lid and pull the top of the latch forward and down. Disengage the bottom of the latch and the<br />
lid can be opened. The coil mechanism is attached to the lid and will rise with it. The coil gate<br />
is on the right side of the coil housing. To lower the coil gate to insert a loaded vial for grinding,<br />
lift the coil gate handle to the horizontal position and twist to align with the slot in the coil gate.<br />
Then pull the coil gate to the right to open.<br />
Note that there are three different sizes of vial that can be run in the 6870 Freezer/Mill: Large,<br />
Mid-Size, and Small. Mid-Size vials must be run with a 6886 Adapter in the coil, and Small vials<br />
must be run with a 6806 Adapter in the coil. Large vials do not need an Adapter. See Section<br />
4.4 for details.<br />
With the vial or vials (and adapter) in place, loosen the coil gate handle a turn or two<br />
counterclockwise, align the handle with the slot, close the gate, and turn the handle clockwise<br />
until the gate is in snug contact with the vial or vials. To lock the gate, fold down the gate<br />
handle against the gate. Do not overtighten the gate, as this can crack the vial’s center<br />
section.<br />
If the Freezer/Mill tub is empty, pour liquid nitrogen (LN) into the tub until it is approximately<br />
on third full. Initially LN will boil off vigorously, but as the tub cools the boiling will subside.<br />
Add more LN gradually, to avoid splashing and boiling over, until the LN level is approximately 2<br />
inches below the rim of the tub. When boiling is subdued, push the lid down gently until the<br />
bottom of the latch can be engaged. Pause if splashing becomes excessive. When the vapor<br />
stream has subsided, open the lid again and top off the liquid nitrogen in the tub, filling it to the<br />
mark on the inside wall of the tub. Insert a loaded vial or vials into the coil (if this has not<br />
already been done), and tighten and lock the coil gate.<br />
Shut the Freezer/Mill’s lid, engage the latch as before, and lock the lid shut by pushing the top<br />
of the latch toward the lid. When the lid is closed and latched, further nitrogen boiling will be<br />
visible as a stream of condensed water vapor (“fog”) from the vent in the rear of the<br />
Freezer/Mill; this is normal. A grinding program can now be run, as outlined in Section 5.3.<br />
Page 19 of 36 SPEX SamplePrep LLC March 2012
6.2 Loading Samples into Freezer/Mill Vials<br />
6870 Freezer/Mill<br />
6.2.1 Introduction and General Recommendations<br />
Start by choosing a sample that is typical of those to be ground on a regular basis. As a rule of<br />
thumb, the sample pieces should be small enough to circulate inside the vial as the impactor<br />
moves back and forth, and should take up no more than ⅓ to ½ the volume of the vial, with the<br />
impactor in the vial. Typical sample sizes for the different sizes of Freezer/Mill vials are shown<br />
below in Table 1.<br />
Sample Large Vial<br />
6801<br />
Table 1 - Typical Sample Sizes<br />
Mid-Size Vial<br />
6870, 6881, 6885<br />
Small Vial<br />
6751, 6751/52,<br />
6761, 6771<br />
Microvial<br />
6753<br />
Plant tissue, bone,<br />
muscle, etc.<br />
20-50 g 5-20 g 2-5 g 100-300 mg<br />
Polymer pellet 10-20 g 2-10 g 1-2 g 50-100 mg<br />
In practice, the optimum parameters (sample weight and size, precooling time, grinding times<br />
and number of cycles, impactor rate, etc.) are customized to match particular samples. Your<br />
own procedure for your own materials should be determined by trials; in practice almost no<br />
two materials grind alike. Avoid overfilling vials as this greatly reduces grinding efficiency.<br />
If at first the sample doesn’t grind as intended, try these strategies:<br />
Reduce the overall weight of the sample. (Some fibers and thin films may grind best in<br />
the Small vial with a sample weight of 100-200 mg.)<br />
Reduce the size of the individual pieces to ¼ or 1/8 inch (6 to 3 mm).<br />
Increase the precooling time. (20 minutes of precooling is about the maximum<br />
necessary for most samples to reach LN temperatures.)<br />
Grind longer. (30 minutes of actual grinding time is the maximum recommended for<br />
one run, due to the LN capacity of the tub, but you can top off the LN and repeat the run<br />
if necessary.)<br />
CAUTION: When handling chilled samples or vials, or touching parts of the Freezer/Mill that<br />
have been chilled by LN, always wear protective gloves.<br />
Page 20 of 36 SPEX SamplePrep LLC March 2012
6.2 Loading Samples into Freezer/Mill Vials (Cont’d)<br />
6870 Freezer/Mill<br />
6.2.2 Size of Sample Pieces<br />
The size of sample pieces is important. For uniform results in Small Vials, most samples should<br />
be cut into pieces smaller than ¼ inch (6 mm). Very tough samples such as fresh bone should<br />
be cut smaller, down to ⅛ inch (3 mm). Samples can be cut proportionately larger for Mid-Size<br />
and Large Vials. In any case, the size of the pieces should be controlled, and consistent from<br />
sample to sample. There are several reasons for this:<br />
The more irregular the size of the sample pieces, the more difficult it is to predict the<br />
results. Uniform procedures work better with uniform samples.<br />
Thin fibers and films in particular can be very difficult to cryogrind unless they are cut<br />
into small pieces first. Wads of long fibers and crumpled balls of film take up extra room<br />
and can be elastic, even at LN temperatures.<br />
Tough samples in large pieces can be very difficult to grind, and in rare cases may<br />
damage the vial. A large, wedge-shaped piece of bone or a tough polymer can act as a<br />
wedge to push a moving impactor through the side of the polycarbonate tube.<br />
6.2.3 Loading a Sample into a Vial at Room Temperature<br />
Most Freezer/Mill samples do not have to be kept cold all the time, and can be loaded at room<br />
temperature. To load a vial, first assemble it halfway by pushing an end-plug into a center<br />
cylinder. Add the sample and impactor to the vial, and close it with the other end-plug. Shake<br />
the vial to make sure the impactor has room to move back and forth.<br />
6.2.4 Loading a Cold Sample into a Vial and Keeping it Cold<br />
Some samples must be kept cold, such as plant or animal tissue being prepared for RNA<br />
extraction. When a sample is cold, and must be kept cold throughout the grinding process, the<br />
loading procedure is more elaborate.<br />
Assemble a center cylinder and end-plug, as in 6.2.3, then chill the end-plug and about an inch<br />
of the cylinder in a shallow liquid nitrogen bath. The vial racks with the 6870L and 6870S<br />
Accessory Packs can be placed in an insulated container to hold the vials upright during chilling.<br />
At the same time, chill an impactor separately. As soon as the submerged end of the vial is<br />
chilled, drop in the cold sample and then the chilled impactor. (Always wear insulated gloves<br />
when handling chilled vial components directly!) Now carefully insert the other end-plug, still<br />
warm, into the warm end of the cylinder. The vial can now be carefully placed in the mill, or<br />
submerged in a liquid nitrogen bath outside the mill, as long as care is taken not to let the<br />
sample touch the warm end plug before it has cooled down.<br />
CAUTION: Never force an end plug (warm or cold) into a cold polycarbonate cylinder.<br />
Polycarbonate shrinks when chilled, and can crack if stressed. If the cylinder has<br />
cooled to the point that the end-plug fit is too tight, warm the end of the cylinder<br />
before inserting the end-plug.<br />
Page 21 of 36 SPEX SamplePrep LLC March 2012
6.2 Loading Samples into Freezer/Mill Vials (Cont’d)<br />
6870 Freezer/Mill<br />
6.2.5 Loading a Very Small Sample into a Vial and Keeping it Cold<br />
A variant of the loading technique in Section 6.2.4 can be used to grind very small samples with<br />
the open pre-chilled vial upright. Place the sample on the chilled end-plug and add a small<br />
amount of fluid such as an extraction medium or water. The frozen fluid will bulk up the sample<br />
enough so it will circulate in the vial during grinding. To speed up this process with Small-sized<br />
vials like the 6751, some users first prepare small “ice cubes” of the sample frozen together<br />
with 0.5 ml to 1 ml of fluid.<br />
6.3 Loading Vials into the Freezer/Mill<br />
Before loading a vial or vials in the 6870 Freezer/Mill, put on cryogenic gloves. Unlatch and lift<br />
the lid of the mill, and open the coil gate. If Small or Mid-Size vials are being used, make sure<br />
the proper Adapter is in the coil. Pick up the vial(s) with a gloved hand or an Extractor/Vial<br />
Opener and insert the vial(s) into the coil. Close the coil gate and tighten it against the vials(s)<br />
by turning the gate handle clockwise, but do not overtighten the gate. Lock the gate by folding<br />
down the handle.<br />
Additional vials can be placed in the precooling basket and carefully immersed in the LN tub on<br />
the right hand side (the end which faces the coil gate) with the basket handle against the tub<br />
wall. This allows additional vials to precool during the grinding process. Thus, when the next<br />
vial is to be run, the precool step can be skipped. Remove the basket from the LN with caution.<br />
Do not immerse a hand into the LN, even when wearing a protective glove. Use a pair of<br />
tongs to grasp the basket handle if it is below or near the LN level.<br />
Check the liquid nitrogen (LN) level and top it off if necessary. Gently close the Freezer/Mill lid,<br />
and latch it shut. At this point a grinding program can be run using the controls described in<br />
Section 5.<br />
6.4 Removing Vials from the Freezer/Mill<br />
At the conclusion of the grinding cycle, unlatch the lid and let the gas cylinders lift it. Do not<br />
force the lid, but allow it to rise at its own speed. If the gas cylinders are too worn or chilled to<br />
lift the lid, lift the lid gently.<br />
Remove the vial or vials from the coil, using gloves or an Extractor/Vial Opener. At this point<br />
either close the lid to conserve LN or insert another vial and begin another grinding cycle.<br />
Page 22 of 36 SPEX SamplePrep LLC March 2012
6.5 Opening, Emptying, and Cleaning Freezer/Mill Vials<br />
6870 Freezer/Mill<br />
6.5.1 Opening a Vial<br />
To open a vial, slip the open end of the appropriate Extractor/Vial Opener over a threaded endplug,<br />
align the pegs in the end-plug with the slots in the Extractor, and turn the knob clockwise<br />
until the end-plug is drawn out. If the end-plug is drawn out within a millimeter or two of the<br />
end of the center cylinder and stops, rock the Extractor gently to dislodge the end plug. Always<br />
be careful that the vial does not fall and spill its contents.<br />
If the Extractor/Vial Opener jams with the end-plug part way out, let the vial warm up before<br />
removing the end-plug. Forcing out the end-plug can damage the Extractor or break the<br />
polycarbonate center section. The best way to prevent the Extractor from jamming is to make<br />
sure both the Extractor and the threaded end-plugs are dry and clean before you use them.<br />
If the Extractor/Vial Opener jams when being threaded into a cold end plug, it is probably due<br />
to water condensing and freezing on the extractor screw. The water freezes when it contacts a<br />
cold end plug. If this happens, make a habit of wiping off the screw with a paper towel before<br />
each use. Note that the end of the screw is tooled with an “X” cut to help remove any ice that<br />
forms on the end plug, but this is not always effective. Chilled vials can also be opened easily<br />
and quickly with the 6814 Auto-Extractor, an optional motorized accessory for opening Small<br />
and Large Freezer/Mill vials.<br />
On rare occasions an end-plug will stick in the vial when cold, even if the Extractor screw and<br />
end plug threads are dry and clean. If this happens do not force the end plug out, as the vial<br />
and/or the Extractor may become damaged. First warm up the vial. The vial can be allowed to<br />
warm up gradually, wrapped in several layers of cloth or paper towels, or a hair-dryer or<br />
running hot water can be used to warm up the stuck end-plug more rapidly. Once the vial is<br />
warm, the stuck end-plug can be drawn out by hand or with a pair of pliers. When using pliers<br />
to extract an end-plug, rotate the end-plug and pull gently, as if unscrewing a bottle-cap.<br />
Forcibly rocking the end-plug from side to side can stress the polycarbonate tube and crack it.<br />
CAUTION: Pressure can develop inside a Freezer/Mill vial as it is warming. As pressure builds,<br />
an end plug can pop out and the sample can be lost. For this reason handle vials<br />
with care when warming them rapidly, and wrap them in toweling if they are<br />
being warmed up gradually.<br />
6.5.2 Emptying a Vial<br />
As soon as an end plug is removed from a cold vial, empty the contents of the vial into a<br />
suitable container, the quicker the better as condensation on a cold sample occurs rapidly.<br />
Often it is helpful to tap the closed end of the vial to release the ground sample. Remember<br />
that the impactor may slide out ahead of the contents or with them, and that the longer the<br />
sample is exposed to air, the more water it will acquire from condensation. Samples which<br />
were tacky, squishy, etc., at room temperature will also return to that state as they warm up,<br />
and may agglomerate.<br />
Page 23 of 36 SPEX SamplePrep LLC March 2012
6.5 Opening, Emptying, and Cleaning Freezer/Mill Vials (Cont’d.<br />
6870 Freezer/Mill<br />
The impactor will have to be separated from the sample and can be handled with gloved<br />
fingers, a strong magnet, tongs, or pliers. Tools without a good gripping surface are likely to slip<br />
off the impactor. The 6870L and 6870S Accessory Packs include a Magnetic Extractor (6791).<br />
This is a rod with a magnetic tip that can be used to remove an extractor from a vial before<br />
emptying the contents.<br />
If some condensation on a cold sample is unacceptable, either wait for the sample vial to warm<br />
up before opening and emptying it, or open and empty a chilled vial in a glove box filled with<br />
dry nitrogen gas.<br />
Small amounts of sample usually adhere to the vial’s impactor, end-plugs, and plastic cylinder.<br />
Brushing or scraping these surfaces of the vial can often recover this fraction of the sample.<br />
Again, speed is important to minimize condensation and other effects of warming.<br />
If it is necessary to recover 100% of the sample, let the vial warm up and add some water or<br />
other liquid that will not affect the polycarbonate (see Section 6.5.3). Shake the vial, empty it<br />
onto some filter paper, and rinse again if necessary to recover the entire sample.<br />
6.5.3 Cleaning the Vials<br />
Freezer/Mill vials may be superficially cleaned quickly and easily by placing them under running<br />
hot water. If the vial is cold a coating of ice will form on the steel parts, but will melt quickly as<br />
the water runs.<br />
The plastic center cylinders for all vials, and the Poly-Vial end-plugs and impactor capsules, are<br />
made of polycarbonate. While this polymer is very tough at low temperatures, it is sensitive<br />
to alcohol, acetone, and other organic solvents, and should be cleaned only with soap and<br />
water. A mild bleach solution will control organic contamination. Polycarbonate can be<br />
autoclaved, but this will weaken it.<br />
Before re-using polycarbonate parts, always inspect them for cracks or other damage. They<br />
may last for dozens or hundreds of samples, but as soon as they begin to crack they should be<br />
discarded.<br />
If sample adheres to the steel end plugs and impactor, they can be cleaned with water and soap<br />
or detergent, or with organic solvents. If they must be disinfected or cleaned of any organic<br />
residue, they can be washed with bleach or chemical cleaners or autoclaved, but should always<br />
be dried immediately after use. The steel parts in the 6751, 6801, and 6881 vials are made<br />
from 440C Stainless Steel, a so-called magnetic stainless steel, which is corrosion-resistant but<br />
will rust if left in contact with water. Surgical-grade stainless steel, which is truly rustproof, is<br />
nonmagnetic and cannot be used for Freezer/Mill end-plugs and impactors.<br />
Page 24 of 36 SPEX SamplePrep LLC March 2012
6.5 Opening, Emptying, and Cleaning Freezer/Mill Vials (Cont’d)<br />
6870 Freezer/Mill<br />
The steel parts of the chromium-free 6771, 6871, and 6883 vials can also be washed,<br />
disinfected, autoclaved, etc., but chromium-free steel is not rust-resistant and must always be<br />
dried immediately after washing. Store Cr-Free Vial parts in a sealed bag with a desiccant.<br />
Rust on steel Freezer/Mill parts can be removed by scrubbing them with steel wool or an<br />
abrasive cleanser. If rusting persists, store the parts in a sealed bag with a desiccant.<br />
6.6 Checking the Liquid Nitrogen Level<br />
Every time a vial is inserted into or remover from the Freezer/Mill, note the level of liquid<br />
nitrogen (LN) in the tub. The LN should be topped off when needed as a matter of routine. If<br />
the programmed grinding cycle includes more than twenty or thirty minutes of actual grinding<br />
time, the nitrogen level should be visually checked at about that point and more added if<br />
needed. A cumulative grinding time of more than thirty minutes per run is not recommended,<br />
as after that much grinding the LN level is close to the point where the LN sensor will shut down<br />
the mill. However, if the mill must be run for an extended time, and the LN sensor stops the<br />
grinding program, the mill can be refilled with LN and the grinding program resumed where it<br />
stopped.<br />
The 6870 Freezer/Mill can be refilled automatically with the 6820 Auto-Fill System, which adds<br />
LN to the tub when the LN level is low. The 6820 Auto-Fill System must be installed and<br />
calibrated at our factory. A 6870 Freezer/Mill that was not ordered with an Auto-Fill System<br />
must be returned to SPEX SamplePrep LLC if installation is desired.<br />
Page 25 of 36 SPEX SamplePrep LLC March 2012
7.0 6820 AUTO-FILL SYSTEM<br />
7.1 Description<br />
6870 Freezer/Mill<br />
The 6820 Auto-Fill System automatically transfers liquid nitrogen (LN) to the 6870 Freezer/Mill<br />
during operation, making hand-filling unnecessary. The Auto-Fill mechanism includes a<br />
cryogenic valve linked to LN sensors in the tub. When the LN level is low, the valve opens<br />
during PreCool or Re-Cool stages to let LN into the tub. The Auto-Fill System as supplied also<br />
includes a safety valve for the LN transfer hose.<br />
LN transfer hoses can vary with the LN supply tank or line and is therefore not included with the<br />
6820 Auto-Fill System. Four-foot and six-foot transfer hoses of standard design (part numbers<br />
6906 and 6907) can be purchased from SPEX SamplePrep, or custom transfer hoses can be<br />
designed and supplied by the user. The LN inlet is a male ½ inch JIC fitting placed low on the<br />
right side of the Freezer/Mill, so the outlet of the hose requires a female CGA295 fitting. The<br />
160 liter and 240 liter LN tanks used by many of our customers generally have a male 3/8 inch<br />
(9.5 mm) NPT outlet, so SPEX transfer hoses come with a matching female 3/8 inch NPT fitting.<br />
Excessively long transfer hoses are not recommended.<br />
LN tanks come in two types, high-pressure and low-pressure. Some LN tanks have valve<br />
systems to switch from low pressure to high pressure. Always use a low-pressure LN supply,<br />
with a delivery pressure of 20-22 psi.<br />
7.2 Liquid Nitrogen Connection<br />
Install the safety valve on the outlet of the tank or LN line, with the gooseneck tilted up and the<br />
valve outlet down (see Figure 11). Then attach the LN transfer hose to the safety valve, and the<br />
other end to the inlet on the Freezer/Mill. The safety valve should be higher than the LN inlet<br />
on the Freezer/Mill. The purpose of the safety valve is to have an outlet for nitrogen vapor in<br />
case the mill and supply tank valves are both shut, and pressure builds up inside the hose.<br />
When installing the safety valve and transfer hose, use Teflon plumber’s tape on all joints, and<br />
tighten the nuts with a wrench. If the joints leak, tighten them further and/or use more tape.<br />
Page 26 of 36 SPEX SamplePrep LLC March 2012
7.2 Liquid Nitrogen Connection (Cont’d)<br />
1/2” female JIC<br />
connects to LN supply<br />
Safety Valve<br />
1/2” female JIC<br />
LN Transfer Hose<br />
3/8” male NPT<br />
Apply Teflon tape here<br />
Figure 11 - Liquid Nitrogen Connection<br />
3/8” female NPT<br />
6870 Freezer/Mill<br />
Adapter<br />
Swivel Joint<br />
1/2” female JIC<br />
CAUTION: Be sure that the vent on the side of the 6870 (Figure 2) is not blocked in any way.<br />
During operation, liquid nitrogen vaporizes in the Freezer/Mill and pressure is<br />
relieved through this vent.<br />
Page 27 of 36 SPEX SamplePrep LLC March 2012<br />
1/2” male JIC<br />
on 6870
7.3 Operation<br />
6870 Freezer/Mill<br />
When the 6870 Freezer/Mill is set up for the first run of the day, with a loaded vial in the coil,<br />
make sure the LN valve on the supply tank or line is open. Go to the RUN screen and touch<br />
RUN. The Auto-Fill valve will open and let LN into the Freezer/Mill tub. The valve may close<br />
and open several times before the tub is full and PreCool timing starts, but this is normal. LN<br />
boils and splashes as it enters the tub and this may temporarily “fool” the upper LN sensor.<br />
However, the Auto-Fill System has a built-in pause for the LN to stabilize before measuring the<br />
LN level again. Precool countdown will not begin until the tub is full of LN.<br />
During a long run, if the lower LN sensor detects a low LN level, the LN valve will open during a<br />
re-cooling period. Again, the valve may open and close several times while the tub is filling, but<br />
during “Auto-Filling” the timer stops, and will not start again until the tub is full.<br />
At the end of a run the LN level in the tub may seem low, but this is only because the lower LN<br />
sensor has not triggered the Auto-Fill System to fill the tub with LN.<br />
The 6820 Auto-Fill System has been designed to work with typical grinding programs that<br />
involve a precooling period and repeated short grinding and recooling periods. If you want to<br />
use the 6870 Freezer/Mill in a different way – for example, by having a single long period of<br />
continuous grinding – please call us first to make sure your plans and the Freezer/Mill are<br />
compatible. The lower LN sensor will not trigger the Auto-Fill System to add LN during a<br />
grinding period, just during precooling before grinding, and during the re-cooling periods<br />
between grinding periods.<br />
Page 28 of 36 SPEX SamplePrep LLC March 2012
6870 Freezer/Mill<br />
8.0 OPTIONAL 6814 AUTO-EXTRACTOR (see our catalog or website, www.spexsampleprep.com)<br />
The 6814 AutoExtractor is a motorized electrical accessory for quick and safe removal of chilled<br />
end-plugs from Freezer/Mill vials. It can open both Large-Size and Small-Size Vials but cannot<br />
be adapted for Mid-Size Freezer/Mill vials or individual 6753V Microvials. Out of the box, the<br />
AutoExtractor is set up for Large Vials, but it includes an easily installed insert for handling Small<br />
Vials.<br />
The AutoExtractor is a motorized version of the manual 6804 and 6754 Extractors. The endplug<br />
of a chilled vial is placed in the bell of the extractor, with the locating pins lined up with<br />
slots in the bell. Then a rocker switch is pressed up to start the extractor screw, which winches<br />
out the end-plug. When the vial is opened, pressing the rocker switch down and reversing the<br />
screw can retrieve the end-plug. The 6814 AutoExtractor takes the “wrist work” out of opening<br />
Freezer/Mill vials and is recommended for labs with high sample throughput.<br />
9.0 MAINTENANCE<br />
The 6870 Freezer/Mill has been designed to provide trouble-free operation over a long period<br />
of time. To assure proper performance, perhaps the most important factor is cleanliness.<br />
When the unit is at room temperature, any spilled powders or liquids should be wiped up<br />
immediately. The internal tub should be wiped clean with a damp cotton cloth after every use.<br />
This should prevent the buildup of any powders, mold/mildew, or unsightly gunk over the life of<br />
the unit.<br />
If any sample powders or liquids are spilled inside the unit during a sample run, wait until<br />
Freezer/Mill use is finished for the day and the mill has warmed up to room temperature before<br />
attempting to clean it. Once the unit has attained room temperature, wipe down the unit as<br />
indicated previously. After every period of use, the mill will be wet with condensation since the<br />
Freezer/Mill will pick up moisture as long as it is cold.<br />
To maintain the exterior of the unit, first disconnect the Freezer/Mill. Then an occasional<br />
spraying and wiping down with a mild window cleaner or similar product will be sufficient.<br />
In the rare case that the 6870 Freezer/Mill requires service, please call SPEX SamplePrep<br />
Customer Service for assistance.<br />
Page 29 of 36 SPEX SamplePrep LLC March 2012
6870 Freezer/Mill<br />
10.0 ACCESSORIES FOR THE 6870<br />
(Available for purchase at additional cost)<br />
A partial list of available accessories is shown here. For a complete listing, please visit our<br />
website (www.spexsampleprep.com) or contact us for the SPEX SamplePrep Handbook of<br />
Sample Preparation and Handling.<br />
6751 Small Grinding Vial Set<br />
Set contains everything necessary to make one complete Grinding Vial plus three spare Polycarbonate Center<br />
Cylinders. Includes 6751P Stainless Steel Impactor, 6751E two Stainless Steel End-Plugs, and 6751C4 four<br />
Polycarbonate Center Cylinders . Sample capacity 0.5 – 4.0 mL.<br />
6753 Microvial Set<br />
Set contains three Microvials contained in a Vial Holder to allow simultaneous sample processing. Each 6753V<br />
Microvial includes a pair of Stainless Steel End-Plugs, one Stainless Steel Impactor, and one Stainless Steel Center<br />
Cylinder. Microvial Holder consists of one perforated Polycarbonate Center Cylinder and a pair of 6751E Small<br />
Stainless Steel End-Plugs. Sample capacity 0.1 - 0.5 mL in each Microvial..<br />
6753C Microvial Sample Extraction Tool<br />
Sample Extraction Tool for removing ground samples from 6753V Microvials. To use, simply insert the Extraction<br />
Tool into an individual Vial, then push it through to clear sample from the Cylinder.<br />
6754 Small Extractor/Vial Opener<br />
Used to remove the End-Plugs from the Center Cylinders of Small Grinding Vials. Particularly useful for opening<br />
cold grinding vials immediately after removal from the Freezer/Mill. Compatible with: 6751 Small Grinding Vial<br />
Set, 6761 Small Poly-Vial Set, 6771 Small Cr-Free Grinding Vial Set, and 6871 Small Stainless Steel Grinding Vial.<br />
Also compatible with the Vial Holder used in the 6753 Microvial Set.<br />
6755 Vial Rack for Small Grinding Vials<br />
Vial Rack holds up to sixteen Small Grinding Vials for storage and handling. Durable glass-reinforced acetal<br />
construction.<br />
6761 Small Poly-Vial Set<br />
Small Poly-Vial Set contains everything necessary to make one complete Grinding Vial plus three spare<br />
Polycarbonate Center Cylinders. Includes one 6761P Small Polycarbonate Encapsulated Impactor, two 6761E Small<br />
PC End-Plugs, and one pack of 6751C4 Small PC Center Cylinders. Sample capacity 0.5 – 4.0 mL.<br />
6771 Small Cr-Free Grinding Vial Set<br />
Small Cr-Free Grinding Vial Set contains everything necessary to make one complete Grinding Vial plus three spare<br />
Polycarbonate Center Cylinders.Includes one 6771P Small Cr-Free Steel Impactor, two 6771E Small Cr-Free Steel<br />
End-Plugs, and one pack of 6751C4 Small Polycarbonate Center Cylinders. Sample capacity 0.5 – 4.0 mL.<br />
6781S Small Stainless Steel Vial Set<br />
Small Stainless Steel Set contains everything necessary to make one complete Grinding Vial. O-rings on End-Plugs<br />
seal Vial during grinding. Includes 6751P Stainless Steel Impactor, Stainless Steel End-Plugs, Stainless Steel Center<br />
Cylinder, and pack of 100 Neoprene O-rings.<br />
6801 Large Grinding Vial Set<br />
Contains everything necessary to make one complete Grinding Vial plus three spare Polycarbonate Center<br />
Cylinders. Includes one 6801P Large Stainless Steel Impactor, two 6801E Large Stainless Steel End-Plugs, and one<br />
pack of 6801C4 Large Polycarbonate Center Cylinders. Sample capacity up to 50 mL.<br />
Page 30 of 36 SPEX SamplePrep LLC March 2012
10.0 ACCESSORIES FOR THE 6870 (Cont’d)<br />
6802 Large Stainless Steel Center Cylinder<br />
Alternative Stainless Steel Center Cylinder for 6801 Large Grinding Vial Set.<br />
6870 Freezer/Mill<br />
6804 Large Extractor/Vial Opener<br />
Used to remove the end-plugs from the Center Cylinders of Large and Mid-Size Grinding Vials. Particularly useful<br />
for opening cold Grinding Vials immediately after removal from the Freezer/Mill. Compatible with the following<br />
Large Grinding Vials: 6801 Large Grinding Vial Set and 6871 Large Cr-Free Grinding Vial Set. Also compatible with<br />
the following Mid-Size Vials when used in conjunction with the 6884 Mid-Size Grinding Vial Adapter: 6881 Mid-Size<br />
Grinding Vial Set, 6883 Mid-Size Cr-Free Grinding Vial Set, and 6885 Mid-Size Poly-Vial Set.<br />
6805 Vial Rack for Large Grinding Vials<br />
Vial Rack holds up to six Large Grinding Vials for storage and handling. Durable epoxy-coated steel construction.<br />
6806 Multi-Vial Adaptor<br />
Polycarbonate Insert that is placed inside the 6870 grinding coil to separate and align Small Vials during grinding.<br />
Enables multiple sample processing for high-throughput applications. Holds up to four small vials.<br />
6814-115 and 6814-230 AutoExtractor®<br />
An electrically powered version of the 6754 Small Extractor/Vial Opener and 6804 Large Extractor/Vial Opener. Not<br />
adaptable for Mid-Size Vial Sets. Particularly useful for opening cold Grinding Vials immediately after removal from<br />
the Freezer/Mill. Electrically powered in 115V or 230V to increase throughput and reduce operator effort.<br />
6870S Small Grinding Vial Accessory Package<br />
Small Grinding Vial Accessory Package contains everything necessary to run Small Grinding Vials in the 6870.<br />
Includes one 6754 Small Extractor/Vial Opener, one 6755 Vial Rack for Small Grinding Vials, and one 6806 Multi-<br />
Vial Adapter.<br />
6870M Mid-Size Grinding Vial Accessory Package<br />
Mid-Size Grinding Vial Accessory Package contains everything necessary to run Mid-Size Grinding Vials in the 6870.<br />
Includes one 6884 Mid-Size Grinding Vial Adapter for Large Extractor/Vial Opener and one 6886 Mid-Size Vial<br />
Adapter.<br />
6870L Large Grinding Vial Accessory Package<br />
Large Grinding Vial Accessory Package contains everything necessary to run Large Grinding Vials in the 6870.<br />
Includes 6804 Large Extractor/Vial Opener and 6805 Vial Rack for Large Grinding Vials.<br />
6871 Large Cr-Free Grinding Vial Set<br />
Large Cr-Free Grinding Vial Set contains everything necessary to make one complete Grinding Vial plus three spare<br />
Polycarbonate Center Cylinders. Includes one 6871P Large Cr-Free Steel Impactor, two 6871E Large Cr-Free Steel<br />
End-Plugs, and one pack of 6801C4 Large Polycarbonate Center Cylinders. Sample capacity up to 50 mL.<br />
6881 Mid-Size Grinding Vial Set<br />
Mid-Size Grinding Vial Set contains everything necessary to make one complete Grinding Vial plus three spare<br />
Polycarbonate Center Cylinders. Includes one 6881P Mid-Size Stainless Steel Impactor, two 6881E Mid-Size<br />
Stainless Steel End-Plugs, and one pack of 6881C4 Mid-Size Polycarbonate Center Cylinders. Requires 6886 Mid-<br />
Size Grinding Vial Adapter. Sample capacity 3-25 mL.<br />
Page 31 of 36 SPEX SamplePrep LLC March 2012
10.0 ACCESSORIES FOR THE 6870 (Cont’d)<br />
6870 Freezer/Mill<br />
6883 Mid-Size Cr-Free Grinding Vial Set<br />
Mid-Size Cr-Free Grinding Vial Set contains everything necessary to make one complete Grinding Vial plus three<br />
spare Polycarbonate Center Cylinders. Includes one 6883P Mid-Size Cr-Free Steel Impactor, two 6883E Mid-Size Cr-<br />
Free Steel End-Plugs, and one pack of 6811C4 Mid-Size Polycarbonate Center Cylinders. Requires 6886 Mid-Size<br />
Grinding Vial Adapter for grinding in the 6870 and 6884 Mid-Size Grinding Vial Adapter for Large Extractor/Vial<br />
Opener.<br />
6884 Mid-Size Grinding Vial Adapter for Large Extractor/Vial Opener<br />
Adapts 6804 Large Extractor/Vial Opener for use with Mid-Size Grinding Vials. Compatible with all Mid-Size<br />
Grinding Vials.<br />
6885 Mid-Size Poly-Vial Set<br />
Mid-Size Poly-Vial contains everything necessary to make one complete Grinding Vial plus three spare<br />
Polycarbonate Center Cylinders. Includes one 6885P Mid-Size Polycarbonate Encapsulated Impactor, two 6885E<br />
Mid-Size Polycarbonate End-Plugs, and one pack of 6811C4 Mid-Size Polycarbonate Center Cylinders. Requires<br />
6886 Mid-Size Grinding Vial Adapter for grinding in the 6870 and 6884 Mid-Size Grinding Vial Adapter for Large<br />
Extractor/Vial Opener.<br />
6886 Mid-Size Grinding Vial Adapter<br />
Polycarbonate Insert that is placed inside the 6870 grinding coil to position and align Mid-Size Grinding Vials.<br />
Holds One Mid-Size Vial.<br />
6900S Cryogenic Gloves, Size Small<br />
Cryogenic gloves to protect hands and arms from liquid nitrogen exposure. Highly recommended when operating<br />
the 6770 Freezer/Mill®, 6870 Large Freezer/Mill®, and 6970EFM. Size - Small. Sold in pairs.<br />
6900M Cryogenic Gloves, Size Medium<br />
Cryogenic gloves to protect hands and arms from liquid nitrogen exposure. Highly recommended when operating<br />
the 6770 Freezer/Mill®, 6870 Large Freezer/Mill®, and 6970EFM. Size - Medium. Sold in pairs.<br />
6900L Cryogenic Gloves, Size Large<br />
Cryogenic gloves to protect hands and arms from liquid nitrogen exposure. Highly recommended when operating<br />
the 6770 Freezer/Mill®, 6870 Large Freezer/Mill®, and 6970EFM. Size - Large. Sold in pairs<br />
6900XL Cryogenic Gloves, Size Extra Large<br />
Cryogenic gloves to protect hands and arms from liquid nitrogen exposure. Highly recommended when operating<br />
the 6770 Freezer/Mill®, 6870 Large Freezer/Mill®, and 6970EFM. Size – Extra Large. Sold in pairs.<br />
6906 Short Cryogenic Transfer Hose<br />
4 ft. (1.2 m) long flexible stainless steel hose suitable for transferring liquid nitrogen directly into the 6770<br />
Freezer/Mill®, 6870 Large Freezer/Mill, and 6970EFM. Fitted with a 3/8 in. (9.5 mm) NPT male fitting on one end<br />
and a CGA295 female fitting on the other end.<br />
6907 Long Cryogenic Transfer Hose<br />
6 ft. (1.8 m) long flexible stainless steel hose suitable for transferring liquid nitrogen directly into the 6770<br />
Freezer/Mill®, 6870 Large Freezer/Mill®, and 6970EFM. Fitted with a 3/8 in. (9.5 mm) NPT male fitting on one end<br />
and a CGA295 female fitting on the other end.<br />
Page 32 of 36 SPEX SamplePrep LLC March 2012
11.0 TROUBLE-SHOOTING GUIDE<br />
6870 Freezer/Mill<br />
PROBLEM POSSIBLE CAUSE POSSIBLE SOLUTION<br />
No Power<br />
Make sure power cord is<br />
plugged into outlet and inlet.<br />
The unit does not turn on.<br />
Status Screen displays<br />
“STATUS: LID UP”.<br />
Status Screen displays<br />
“STATUS: LOW LN LEVEL”.<br />
Impactor doesn’t shuttle<br />
back and forth.<br />
No Power<br />
Blown fuse<br />
Blows fuses repeatedly<br />
Safety interlock switch not<br />
engaged.<br />
Lid is not closed completely.<br />
Liquid nitrogen sensor senses<br />
inadequate liquid nitrogen<br />
level.<br />
Impactor is magnetized.<br />
Too much sample in the vial<br />
or sample pieces are too<br />
large.<br />
End plug/tube joint too tight<br />
Check outlet for power and<br />
correct as required.<br />
Replace fuses.<br />
Electrical short. Return to<br />
Factory for repair.<br />
Close the lid and latch,<br />
Push the lid closed and latch<br />
into place.<br />
Pour more liquid nitrogen into<br />
the tub.<br />
Coil gets very warm. Low liquid nitrogen levels. Pour more liquid nitrogen into<br />
the tub.<br />
Water in vial has frozen Remove vial and replace vial<br />
impactor.<br />
and contents with a dry unit<br />
or tap ends of the vial on<br />
counter to free impactor.<br />
Flanged end plug doesn’t<br />
come off the cold vial.<br />
Blunt end plug doesn’t come<br />
off room temperature vial.<br />
when very cold.<br />
Remove impactor, turn endfor-end,<br />
or demagnetize<br />
impactor and reinsert.<br />
Remove some sample from<br />
the vial and start again.<br />
Allow vial to warm up.<br />
Hard to grip. Warm vial under hot water.<br />
Use wide-jaw pliers if<br />
necessary.<br />
Page 33 of 36 SPEX SamplePrep LLC March 2012
11.0 TROUBLE-SHOOTING GUIDE (Cont’d)<br />
Plastic center cylinder cracks.<br />
6870 Freezer/Mill<br />
PROBLEM POSSIBLE CAUSE POSSIBLE SOLUTION<br />
Extractor jams.<br />
Water on extractor screws or<br />
bell.<br />
Dry extractor before each use.<br />
Ice in threaded hole in end plug. Dry end plug thoroughly<br />
before using.<br />
Cylinder cleaned with alcohol or Use bleach, detergent, and<br />
other organic solvent.<br />
water to clean cylinders.<br />
Vial assembled when chilled.<br />
Sample piece acts as wedge.<br />
Never force end plugs into<br />
cold cylinder.<br />
Reduce size of sample pieces.<br />
Make sure there are not<br />
sample particles on cylinder<br />
ends.<br />
Page 34 of 36 SPEX SamplePrep LLC March 2012
12.0 WARRANTY<br />
6870 Freezer/Mill<br />
SPEX SamplePrep LLC guarantees its products and new equipment against defects in materials<br />
or workmanship for one year from the date of original shipment. Repairs, replacements, or<br />
parts are guaranteed for 30 days or for the remaining original warranty period (whichever is<br />
greater) for the item that was repaired or replaced. Items not produced by SPEX SamplePrep<br />
LLC carry the manufacturer’s warranty only. 6870 Freezer/Mill wear parts include the coil.<br />
The customer pays return freight for warranty claims. If the warranty claim is valid, SPEX will<br />
pay return freight to the customer. However, SPEX SamplePrep reserves the right to judge<br />
whether a malfunction during the warranty period is due to defects in materials or<br />
workmanship, or to wear, negligence, or misuse.<br />
12.1 Product Specifications<br />
Every effort has been made to provide complete and accurate product operating information in<br />
this manual. However, since specifications are subject to change without notice, changes may<br />
be made from time to time to improve the performance of the product. Therefore, slight<br />
changes that are not reflected in the current illustrations should be considered minor and<br />
inconsequential for the purposes of this operating manual.<br />
12.2 To Arrange a Return Shipment<br />
We want you to be happy with whatever you purchase from SPEX SamplePrep. Please bring any<br />
problem to our attention, but please DO NOT RETURN any item before contacting us for a<br />
Return Authorization Number and instructions. Unauthorized returns will be refused. Cost for<br />
all return transportation is the responsibility of the customer. Credit for returned merchandise<br />
will be issued only after goods have been received and inspected. Returned goods are subject<br />
to a 25% restocking charge up to a maximum of $200.00.<br />
Page 35 of 36 SPEX SamplePrep LLC March 2012
13.0 CONTACT US<br />
Within the United States, write, telephone, or e-mail us at:<br />
SPEX SamplePrep LLC<br />
15 Liberty St.<br />
Metuchen, New Jersey 08840<br />
Tel.: 732-623-0465<br />
Fax: 732-906-2492<br />
Website: www.spexsampleprep.com<br />
E-mail: sampleprep@spexcsp.com<br />
In Europe, please contact our European Headquarters at:<br />
SPEX CertiPrep Ltd<br />
2 Dalston Gardens<br />
Stanmore<br />
Middlesex HA7 1BQ<br />
United Kingdom<br />
Tel: +44 (0) 208 204 6656<br />
Fax: +44 (0) 208 204 6654<br />
Website: www.spexcertiprep.co.uk<br />
6870 Freezer/Mill<br />
Outside the United States and Europe, contact the SPEX SamplePrep representative from whom<br />
you purchased your equipment. A list of our current representatives is on our website,<br />
www.spexsampleprep.com.<br />
Page 36 of 36 SPEX SamplePrep LLC March 2012