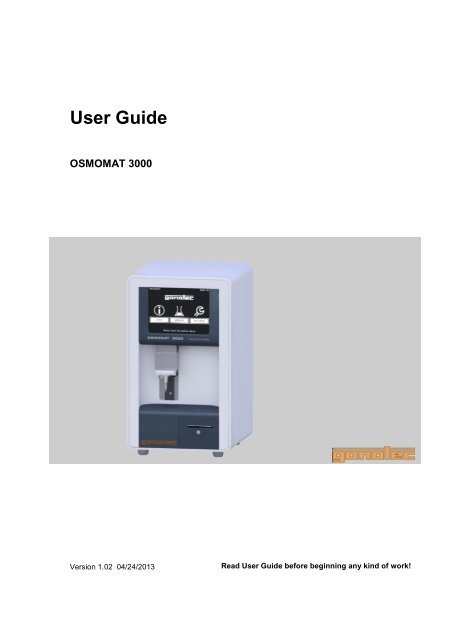
User Guide
User Guide
User Guide

You also want an ePaper? Increase the reach of your titles
YUMPU automatically turns print PDFs into web optimized ePapers that Google loves.
2/12/2013<br />
<strong>User</strong> <strong>Guide</strong><br />
OSMOMAT 3000<br />
Version 1.02 04/24/2013<br />
Read <strong>User</strong> <strong>Guide</strong> before beginning any kind of work!
Gonotec GmbH<br />
GSG-Hof Reuchlinstr.10-11<br />
D-10553 Berlin<br />
Original Device Documentation<br />
Phone: (030) 7809 588-0<br />
Fax: (030) 7809 588-88<br />
E-mail: contact@gonotec.com<br />
Web: http://www.gonotec.com<br />
© 2013<br />
2 Version 1.02 04/24/2013
OSMOMAT 3000<br />
Overview of the OSMOMAT 3000<br />
This manual allows for the safe and efficient operation of the OSMO-<br />
MAT 3000 (hereafter "device"). This manual is part of the device and<br />
must be stored in the immediate vicinity of the device and be easily<br />
accessible to personnel at any time.<br />
Personnel must carefully read and understand this manual before<br />
beginning any kind of work. Compliance with the safety notices and<br />
instructions in this manual is the basis for a safe work environment. In<br />
addition, local accident prevention regulations and general safety provisions<br />
for the intended use of the device must be followed.<br />
Figures in this manual are included for basic understanding and may<br />
differ from the actual application.<br />
Other applicable documents<br />
In addition to this manual, the documents included with the device<br />
documentation apply. The warnings– in particular safety notices – in<br />
this documentation must be observed!<br />
Copyright<br />
The contents of this manual are protected by copyright. Their use is<br />
permitted in connection with the use of this device. Any use beyond<br />
this scope is not permitted without prior written authorization from<br />
Gonotec GmbH.<br />
Manufacturer contact info<br />
address Gonotec GmbH<br />
GSG-Hof Reuchlinstr.10-11<br />
D-10553 Berlin<br />
Phone (030) 7809 588-0<br />
Toll-free support hotline: 0800-7846027<br />
(Germany only)<br />
Fax (030) 7809 588-88<br />
E-mail contact@gonotec.com<br />
Web http://www.gonotec.com<br />
Version 1.02 04/24/2013 3
OSMOMAT 3000<br />
Overview of the OSMOMAT 3000<br />
4 Version 1.02 04/24/2013
Table of Contents<br />
OSMOMAT 3000<br />
Overview of the OSMOMAT 3000<br />
Table of Contents .......................................................................... 5<br />
1 Overview of the OSMOMAT 3000 ......................................... 8<br />
2 Safety .................................................................................... 12<br />
2.1 Explanation of symbols ................................................ 12<br />
2.2 Intended use ................................................................ 14<br />
2.3 Additional hazards ....................................................... 14<br />
2.3.1 Hazards due to electrical current ................. 14<br />
2.3.2 Risk of infection ............................................ 15<br />
2.3.3 Risk of injury ................................................. 15<br />
2.3.4 Risks of device damage ............................... 16<br />
2.3.5 Reproducibility of the measurement ............. 17<br />
2.4 Operator responsibilities .............................................. 18<br />
2.5 Personnel requirements ............................................... 20<br />
2.6 Personal safety gear .................................................... 21<br />
2.7 Environmental protection ............................................. 21<br />
3 Design and function............................................................. 22<br />
3.1 Device overview ........................................................... 22<br />
3.2 Measuring method basics ............................................ 26<br />
3.3 Measurement equipment ............................................. 27<br />
3.4 Touchscreen ................................................................ 30<br />
3.5 Printer .......................................................................... 32<br />
3.6 Connections and interfaces ......................................... 33<br />
3.6.1 Interface configuration .................................. 34<br />
3.6.2 Transfer protocol .......................................... 35<br />
4 Delivery, packaging, and storage ....................................... 36<br />
4.1 Packaging .................................................................... 37<br />
4.2 Device storage ............................................................. 39<br />
4.3 Unpack device ............................................................. 39<br />
5 Installation ............................................................................ 40<br />
5.1 Transport device inside lab .......................................... 40<br />
5.2 Install device ................................................................ 41<br />
5.3 Connect device ............................................................ 42<br />
6 Setup ..................................................................................... 43<br />
7 Operation .............................................................................. 46<br />
7.1 Power up device .......................................................... 47<br />
Version 1.02 04/24/2013 5
OSMOMAT 3000<br />
Overview of the OSMOMAT 3000<br />
6 Version 1.02 04/24/2013<br />
7.2 Measure individual samples .........................................48<br />
7.3 Perform series measurement .......................................52<br />
7.4 Calibrate device ...........................................................56<br />
7.5 Modify user preferences ..............................................62<br />
7.6 Power down device ......................................................65<br />
8 Troubleshooting ...................................................................66<br />
8.1 Safety notices ...............................................................66<br />
8.2 Notes regarding errors .................................................67<br />
8.3 Error table ....................................................................68<br />
8.4 Resolve errors ..............................................................72<br />
8.4.1 Replace initiation needle ..............................72<br />
8.4.2 Replace the thermistor probe .......................76<br />
8.4.3 Replace fine-wire fuses ................................83<br />
8.4.4 Clean cooling clamp .....................................84<br />
8.4.5 Replace printer paper (Option D only) ..........84<br />
8.4.6 Replace printer ribbon (Option D only) .........86<br />
9 Servicing ...............................................................................88<br />
9.1 Safety notices ...............................................................88<br />
9.1 Service table ................................................................89<br />
9.2 Preliminary steps ..........................................................89<br />
9.3 Lubricate elevator .........................................................94<br />
9.4 Perform visual inspection of device .............................96<br />
9.5 Check reproducibility of measurements .......................97<br />
9.5.1 Sample test protocol measurement check ...97<br />
10 Disposal.................................................................................98<br />
11 Specifications .......................................................................99<br />
11.1 Dimensions ..................................................................99<br />
11.2 Performance parameters .............................................99<br />
11.3 Operating conditions ....................................................99<br />
11.4 Calibration standard ...................................................100<br />
11.5 Connection ratings .....................................................100<br />
11.6 Options 101<br />
11.7 Nameplate ..................................................................102<br />
12 Index ....................................................................................103<br />
Appendix .....................................................................................106<br />
Returning the device ............................................................106<br />
Limited Warranty ..................................................................108<br />
Classification of the IVD .......................................................109
OSMOMAT 3000<br />
Overview of the OSMOMAT 3000<br />
EC Compliance Statement—OSMOMAT ® 3000.................. 109<br />
Provisions of Certification .................................................... 109<br />
Consumables ....................................................................... 110<br />
Accessories and Replacement Parts ................................... 110<br />
Before Calling Gonotec ........................................................ 111<br />
Version 1.02 04/24/2013 7
OSMOMAT 3000<br />
Overview of the OSMOMAT 3000<br />
1 Overview of the OSMOMAT 3000<br />
8 Version 1.02 04/24/2013<br />
This device is an in-vitro diagnostic product which measures the osmolality<br />
of a sample. For details about the measuring method,<br />
see page 26.<br />
Fig. 1: Device overview—front<br />
1 Touchscreen, page 30<br />
2 Upper cooling system (behind movable elevator cover), page 28<br />
3 Thermistor probe with measuring vessel, page 29<br />
4 Lower cooling system, page 29<br />
5 Elevator<br />
6 Printer (Option D), page 32
Device, rear<br />
Fig. 2: Device overview—rear<br />
1 Interfaces, page 33<br />
2 Fine-wire fuses<br />
3 On/Off switch<br />
4 Power cord connection<br />
5 Fan outlet<br />
OSMOMAT 3000<br />
Overview of the OSMOMAT 3000<br />
Version 1.02 04/24/2013 9
OSMOMAT 3000<br />
Overview of the OSMOMAT 3000<br />
Consumables<br />
Fig. 3: Overview of consumables<br />
10 Version 1.02 04/24/2013<br />
NOTE!<br />
Risk of falsified measurement results!<br />
When using accessories and/or consumables made by<br />
manufacturers other than Gonotec GmbH, the reproducibility<br />
of the measurement results cannot be guaranteed.<br />
- Always use the accessories and consumables supplied<br />
by Gonotec GmbH.<br />
- Order used-up consumables, in particular measuring<br />
vessels, from Gonotec GmbH (see page 2 for contact<br />
information).<br />
1 Measuring vessels, 100 pc.<br />
2 Calibration standard, 10 pc., 1ml each, concentration<br />
300 mOsmol/kg<br />
3 Printer paper, 1 roll (Option D only)
Accessories<br />
Fig. 4: Overview of accessories<br />
1 Power cord<br />
2 RS-232 cable<br />
3 USB cable for connection to PC (slave)<br />
4 Adjustment tool<br />
OSMOMAT 3000<br />
Overview of the OSMOMAT 3000<br />
5 2 fine-wire fuses, 1 A<br />
6 Ampoule opener<br />
7 Blow-out device for removing condensate<br />
(Pasteur pipette)<br />
Version 1.02 04/24/2013 11
OSMOMAT 3000<br />
Safety<br />
2 Safety<br />
2.1 Explanation of symbols<br />
Safety notices<br />
12 Version 1.02 04/24/2013<br />
The safety notices in this manual are identified by symbols. The safety<br />
notices are preceded by signal words indicating the degree of hazard.<br />
DANGER!<br />
This combination of symbol and signal word indicates an<br />
immediate dangerous situation that will result in death or<br />
serious injury if not avoided.<br />
WARNING!<br />
This combination of symbol and signal word indicates a<br />
potentially dangerous situation that may result in death<br />
or serious injury if not avoided.<br />
CAUTION!<br />
This combination of symbol and signal word indicates a<br />
potentially dangerous situation that may result in minor<br />
or light injury if not avoided.<br />
NOTE!<br />
This combination of symbol and signal word indicates a<br />
potentially dangerous situation that may result in property<br />
damage if not avoided.<br />
NOTE!<br />
This combination of symbol and signal word indicates<br />
potential environmental hazards.
Special safety notices<br />
Safety notices in instructions<br />
Additional identifiers<br />
OSMOMAT 3000<br />
Safety<br />
Safety notices use the following symbols to indicate special hazards:<br />
DANGER!<br />
This combination of symbol and signal word indicates an<br />
immediate dangerous situation due to electrical current.<br />
Failure to observe a warning identified this way will result<br />
in serious or deadly injury.<br />
Safety notices can apply to specific, individual instructions. These<br />
safety notices are embedded in the instruction to avoid interrupting the<br />
flow of reading while performing the operation. They use the signal<br />
words described above.<br />
Example:<br />
1. Loosen screw.<br />
2.<br />
CAUTION!<br />
Pinch hazard on cover!<br />
Use care when closing cover.<br />
3. Tighten screw.<br />
To highlight instructions, results, lists, references, and other elements,<br />
the following identifiers are used in this manual:<br />
Identification Explanation<br />
1, 2, 3 ...<br />
Step-by-step instructions<br />
Results of action steps<br />
References to sections in this manual and<br />
other applicable documents<br />
Unordered lists<br />
[Button] Controls (such as buttons or switches),<br />
display elements (such as indicator lamps)<br />
"Display" Screen elements (such as buttons, function<br />
key assignments)<br />
Version 1.02 04/24/2013 13
OSMOMAT 3000<br />
Safety<br />
2.2 Intended use<br />
Intended use<br />
2.3 Additional hazards<br />
2.3.1 Hazards due to electrical current<br />
Electrical current<br />
14 Version 1.02 04/24/2013<br />
The OSMOMAT 3000 device is a non-invasive in-vitro diagnostic<br />
product used to determine the osmolality of aqueous solutions.<br />
Only use the device to measure aqueous solutions.<br />
Never measure organic, saturated, or highly viscous solutions.<br />
Never administer measured samples to humans by infusion or<br />
injection.<br />
Never use calibration standards as cleaning solutions, e.g. for<br />
contact lenses.<br />
Only use accessories and consumables supplied by Gonotec<br />
GmbH for measurements.<br />
Accessories and consumables on page 24<br />
DANGER!<br />
Risk of death due to electrical current on device!<br />
Class I devices must be connected to a power socket<br />
with protective ground wire.<br />
If the power or device connector is used as a separation<br />
device, the connector must be easily accessible at all<br />
times.<br />
Remove the power plug from the power socket to safely<br />
disconnect the device from mains voltage.<br />
Contact with energized parts of the device results in immediate<br />
risk of death due to electric shock. Damage to<br />
the insulation of individual components can cause risk of<br />
death.<br />
- Only have qualified personnel perform repair and<br />
maintenance work on the device.<br />
- If the insulation is damaged, immediately disconnect<br />
the power plug and schedule a repair.<br />
- Always route the power cord so it is not subject to<br />
stress and cannot be bent, pinched, or rolled over<br />
and is not exposed to liquids or heat.<br />
- Keep energized parts away from liquids. Otherwise,<br />
shorts may occur.
2.3.2 Risk of infection<br />
Risk of infection<br />
2.3.3 Risk of injury<br />
Risk of injury<br />
OSMOMAT 3000<br />
Safety<br />
WARNING!<br />
Risk of infection due to sample residue and in case<br />
of inadequate hygiene, disinfectant cleaning, and<br />
sterilization procedures!<br />
Exposure to sample residue in non-cleaned, nonsterilized,<br />
or non-disinfected components results in an<br />
elevated risk of infection.<br />
- Wear lab gloves during any kind of work.<br />
- Observe all local regulations regarding hygiene, disinfectant<br />
cleaning, and sterilization.<br />
We recommend using detergents such as Mikrozid ® AF<br />
Liquid, Bacillol ® plus 3%, or Korsolex ® plus 4% commonly<br />
found in clinical-chemical labs to clean and decontaminate<br />
the device.<br />
CAUTION!<br />
Risk of injury from initiation needle!<br />
When installing and removing the initiation needle and<br />
the thermistor probe, the tip of the initiation needle is exposed.<br />
Movement of the initiation needle can cause<br />
needle puncture injuries.<br />
- Always keep your hands and fingers clear from the<br />
area underneath the initiation needle.<br />
Version 1.02 04/24/2013 15
OSMOMAT 3000<br />
Safety<br />
2.3.4 Risks of device damage<br />
Exposure to liquids and moisture<br />
Fan<br />
Shock<br />
ESD<br />
16 Version 1.02 04/24/2013<br />
NOTE!<br />
Device damage due to exposure to liquids and moisture!<br />
Exposure to liquids and moisture can cause damage to<br />
the electrical components of the device, e.g. due to a<br />
short.<br />
- Install the device on a dry workplace.<br />
- Always use a moistened wipe to disinfect the device,<br />
but never a wet wipe.<br />
- Never use the device outdoors.<br />
NOTE!<br />
Device damage due to insufficient air circulation!<br />
Obstruction of the fan outlet at the rear of the device can<br />
cause damage to the device.<br />
- Always keep the fan outlet clear.<br />
NOTE!<br />
Risk of property damage due to exposure of the device<br />
to strong shock!<br />
The device includes precision-engineered components<br />
which can be decalibrated and/or damaged in case of<br />
exposure of the device to strong shock.<br />
- Always install the device on a non-vibrating surface.<br />
NOTE!<br />
Risk of property damage due to ESD of the device!<br />
Electrostatic discharge (ESD) can occur when working<br />
on the open device.<br />
- Take ESD precautions.
2.3.5 Reproducibility of the measurement<br />
Incorrect measuring vessels<br />
Improper handling of the calibration<br />
standard<br />
Shock<br />
OSMOMAT 3000<br />
Safety<br />
NOTE!<br />
Risk of non-reproducibility of measurement due to<br />
incorrect measuring vessels!<br />
Repeated use of the measuring vessels and use of incorrect<br />
consumables cannot guarantee reproducible<br />
measurement results.<br />
- Always use a clean and unused measuring vessel for<br />
every measurement.<br />
- Only use measuring vessels supplied by Gonotec<br />
GmbH.<br />
- Never use centrifugal measuring vessels.<br />
NOTE!<br />
Risk of non-reproducibility of measurement due to<br />
improper handling of calibration standards!<br />
Improper handling and storage of the calibration standards<br />
included with the delivery negatively affects the<br />
measurement accuracy of the device.<br />
- Always observe the stability of the calibration standards<br />
after opening the ampoule (0.5h at<br />
22°C ambient temperature).<br />
- Never use opened ampoules twice or mix them together.<br />
- Never freeze opened ampoules.<br />
- Do not use the calibration standards past their expiration<br />
date.<br />
NOTE!<br />
Increased risk of incorrect measurements!<br />
The device includes precision-engineered components<br />
which can be decalibrated and/or damaged in case of<br />
exposure of the device to strong shock. This can cause a<br />
higher risk of incorrect measurements (spontaneous<br />
crystallization).<br />
- Always install the device on a non-vibrating surface.<br />
Version 1.02 04/24/2013 17
OSMOMAT 3000<br />
Safety<br />
2.4 Operator responsibilities<br />
18 Version 1.02 04/24/2013<br />
The operator of the device must fulfill the responsibilities according to<br />
Germany’s Medical Devices Operator Ordinance listed in this manual.<br />
In addition, the operator is responsible for learning about<br />
and complying with all local laws and associated standards<br />
and guidelines applicable at the time the device is<br />
used.<br />
The device is used for medical-pharmaceutical applications. Therefore,<br />
the operator is subject to the legal responsibilities regarding work<br />
safety.<br />
In particular, the following applies:<br />
The operator has to learn about the applicable work safety<br />
regulations and determine additional risks resulting from the<br />
specific working conditions at the location the device is used by<br />
means of a risk assessment. These must be implemented by<br />
means of operating instructions for the device.<br />
The operator has to learn about the applicable hygiene regulations<br />
resulting from the samples at the location the device is used.<br />
These must be implemented by means of operating instructions for<br />
the device.<br />
During the entire operating time of the device, the operator has to<br />
verify that the operating instructions created by him/her meet the<br />
current body of regulations and update them if necessary.<br />
The operator has to determine and lay down the specific<br />
responsibilities for installation, operation, troubleshooting,<br />
servicing, disinfection, and cleaning.<br />
The operator has to make sure that all personnel working with the<br />
device have read and understood this manual. In addition, s/he has<br />
to provide regular training for personnel and educate them about<br />
risks.<br />
The operator has to equip personnel with the required safety gear<br />
and issue mandatory instructions for wearing the required safety<br />
gear.<br />
The operator has to make sure that the service intervals specified<br />
in this manual are observed.<br />
The operator has to make sure that consumables are available in<br />
sufficient quantities.
Inventory<br />
OSMOMAT 3000<br />
Safety<br />
The operator has to maintain an inventory according to Germany’s<br />
Medical Devices Operator Ordinance:<br />
The following information has to be maintained in the inventory:<br />
name, product type, serial number, and year the device was<br />
purchased,<br />
address of Gonotec GmbH<br />
organization-specific ID, if applicable<br />
location of operator<br />
schedule of safety inspections<br />
Store CE-certificate together with inventory.<br />
Store inventory so it is accessible to personnel in charge of<br />
operating the device at all times.<br />
Make documentation available to the responsible authority upon<br />
demand.<br />
Version 1.02 04/24/2013 19
OSMOMAT 3000<br />
Safety<br />
2.5 Personnel requirements<br />
20 Version 1.02 04/24/2013<br />
WARNING!<br />
Risk of injury due to inadequately qualified personnel!<br />
Work performed on the device by unqualified personnel<br />
or the presence of unqualified personnel in the hazard<br />
zone of the device creates risks that can result in serious<br />
injury and substantial property damage.<br />
- Only have qualified personnel perform any kind of<br />
activity.<br />
This manual specifies the following personnel qualifications for the<br />
different task areas:<br />
<strong>User</strong><br />
Based on his or her expert medical and/or pharmaceutical training,<br />
knowledge, and experience, the user is capable of safely executing<br />
the tasks assigned to him or her.<br />
The user is not authorized to perform any start-up activities.<br />
The user is capable of independently detecting, evaluating, and avoiding<br />
possible risks.<br />
The user has the expert knowledge for the intended use of the device<br />
and observes all hygiene regulations for rooms used for medical purposes<br />
and the use of medical products.<br />
The user knows the contents of all applicable regulations, guidelines,<br />
and standards required by law for the safe use of the device and is<br />
capable of meeting the requirements stipulated therein.<br />
Lab supervisor<br />
The lab supervisor coordinates and monitors the technical procedures<br />
at the installation site of the device.<br />
Based on his or her professional training and many years of professional<br />
experience with medical devices, the lab supervisor is capable<br />
of performing the start-up tasks delegated to him or her by the manufacturer.<br />
Service technician<br />
Based on his or her professional training in the area of mechanical<br />
and electrical engineering, the service technician is capable of performing<br />
the tasks related to troubleshooting and servicing delegated to<br />
him or her by the manufacturer.
2.6 Personal safety gear<br />
OSMOMAT 3000<br />
Safety<br />
While performing the different tasks on and with the device, personnel<br />
must wear the personal safety gear referenced explicitly in the various<br />
sections of this manual.<br />
Description of personal safety gear The personal safety gear is explained below:<br />
2.7 Environmental protection<br />
Electronic components<br />
Sodium chloride<br />
Disposable lab gloves<br />
Disposable lab gloves protect the hands from touching sample residue.<br />
NOTE!<br />
Danger to environment due to incorrect handling of handling<br />
of environmentally hazardous substances!<br />
Incorrect handling of environmentally hazardous substances, in<br />
particular incorrect disposal, can result in significant harm to<br />
the environment.<br />
- Always observe the warnings regarding the handling of environmentally<br />
hazardous substances and their disposal below.<br />
- If environmentally hazardous substances are inadvertently<br />
released into the environment, immediately initiate suitable<br />
actions. If in doubt, notify the responsible local authority<br />
about the damage and inquire about suitable actions to be<br />
initiated.<br />
- If environmentally hazardous substances are inadvertently<br />
released into the environment, immediately initiate suitable<br />
actions. If in doubt, notify the responsible authority<br />
about the damage and inquire about suitable actions<br />
to be initiated.<br />
The following environmentally hazardous substances are used:<br />
Electrical components can contain poisonous substances. These must<br />
not be released into the environment. Therefore, a specialist disposal<br />
firm must be tasked with disposal.<br />
The calibration standards contain sodium chloride. Sodium chloride is<br />
mildly hazardous to water and must not be released into the environment.<br />
Version 1.02 04/24/2013 21
OSMOMAT 3000<br />
Design and function<br />
3 Design and function<br />
3.1 Device overview<br />
22 Version 1.02 04/24/2013<br />
This device is an in-vitro diagnostic product which measures the osmolality<br />
of a sample. For details about the measuring method,<br />
see page 26.<br />
Fig. 5: Device overview—front<br />
1 Touchscreen, page 30<br />
2 Upper cooling system (behind movable elevator cover), page 28<br />
3 Thermistor probe with measuring vessel, page 29<br />
4 Lower cooling system, page 29<br />
5 Elevator<br />
6 Printer (Option D), page 32
Device, rear<br />
Fig. 6: Device overview—rear<br />
1 Interfaces, page 33<br />
2 Fine-wire fuses<br />
3 On/Off switch<br />
4 Power cord connection<br />
5 Fan outlet<br />
OSMOMAT 3000<br />
Design and function<br />
Version 1.02 04/24/2013 23
OSMOMAT 3000<br />
Design and function<br />
Consumables<br />
Fig. 7: Overview of consumables<br />
24 Version 1.02 04/24/2013<br />
NOTE!<br />
Risk of falsified measurement results!<br />
When using accessories and/or consumables made by<br />
manufacturers other than Gonotec GmbH, the reproducibility<br />
of the measurement results cannot be guaranteed.<br />
- Always use the accessories and consumables supplied<br />
by Gonotec GmbH.<br />
- Re-order consumables, in particular measuring vessels,<br />
from Gonotec GmbH (see page 2 for contact information).<br />
1 Measuring vessels, 100 pc.<br />
2 Calibration standard, 10 pc., 1ml each, concentration<br />
300 mOsmol/kg<br />
3 Printer paper, 1 roll
Accessories<br />
Fig. 8: Overview of accessories<br />
1 Power cord<br />
2 RS-232 cable<br />
3 USB cable for printer connection (slave)<br />
4 Adjustment tool<br />
5 2 fine-wire fuses, 1 A<br />
6 Ampoule opener<br />
OSMOMAT 3000<br />
Design and function<br />
7 Blow-out device for removing condensate<br />
(Pasteur pipette)<br />
Version 1.02 04/24/2013 25
OSMOMAT 3000<br />
Design and function<br />
3.2 Measuring method basics<br />
Osmolality<br />
Freezing point depression<br />
Cosm = ΔT / K<br />
26 Version 1.02 04/24/2013<br />
The device measures the total osmolality of any aqueous solution.<br />
The total osmolality indicates the concentration of all osmotically active<br />
substances (such as salts, dextrose, proteins) per kilogram of<br />
water.<br />
The osmolality is specified in mOsmol/kg.<br />
The device determines the total osmolality of the sample solution<br />
based on the freezing point depression. The implemented measuring<br />
method is a relative measuring method.<br />
The freezing points of distilled water and an aqueous solution are<br />
measured and compared. The osmolality of any solution is determined<br />
using a linear function defined by 2- or 3-point calibration.<br />
The freezing point of a solution is depressed by adding soluble or<br />
mixable substances.<br />
The freezing points of pure water and a solution are measured and<br />
compared. Whereas water has a freezing point of 0°C, a solution with<br />
a saline concentration of 1 osmol/kg has a freezing point of -1.858°C.<br />
That means that one mol of a given non-dissociated substance<br />
(6.023 x 10 23 parts diluted in one kilogram of water) lowers the freezing<br />
point of a solution by 1.858°C.<br />
The following definitions are used in calculating osmolality:<br />
Cosm = osmolality [osmol/kg]<br />
T = freezing point depression [°C]<br />
K = 1.858°C kg/osmol freezing point constant
3.3 Measurement equipment<br />
Fig. 9: Overview of measurement equipment<br />
1 Elevator<br />
2 Upper cooling system (behind movable elevator<br />
cover)<br />
3 Handle for lowering the thermistor probe<br />
4 Thermistor probe<br />
5 Lower cooling system<br />
6 Measuring vessel<br />
7 Cover<br />
OSMOMAT 3000<br />
Design and function<br />
The sample is pipetted into the measuring vessel (fig. 9/7). The<br />
measuring vessel is placed on the thermistor probe (fig. 9/4) and lowered<br />
into the lower cooling system (fig. 9/5). The lower cooling system<br />
cools the sample down to a defined temperature.<br />
The defined crystallization of the sample is triggered using ice crystals<br />
produced in the upper cooling system (fig. 9/2).<br />
Based on the freezing point [°C] and the freezing point constant, the<br />
device determines the osmolality of the sample. The value is shown<br />
on the touchscreen.<br />
NOTE!<br />
Risk of incorrect measurement resulting from the<br />
presence of air bubbles in the sample!<br />
The sample must be pipetted without air bubbles.<br />
Version 1.02 04/24/2013 27
OSMOMAT 3000<br />
Design and function<br />
Upper cooling system<br />
28 Version 1.02 04/24/2013<br />
Fig. 10: Upper cooling system<br />
1 Initiation needle<br />
2 Cooling nipple<br />
The initiation needle (fig. 10/1) of the upper cooling system "inoculates"<br />
the sample with ice crystals ("crystallization"). This causes the<br />
sample to freeze and heat up to its freezing point.<br />
WARNING!<br />
Risk of infection from sample residue!<br />
The initiation needle is immersed into the sample during<br />
measurements. Contact with the initiation needle increases<br />
the risk of infection.<br />
- Wear lab gloves during any kind of work.
Thermistor probe<br />
Fig. 11: Thermistor probe<br />
Lower cooling system<br />
1 Thermistor probe<br />
2 Thermistor<br />
OSMOMAT 3000<br />
Design and function<br />
The thermistor probe (fig. 11/1) measures the current temperature of<br />
the sample via the thermistor (fig. 11/2). After crystallization has been<br />
triggered, the thermistor probe measures the freezing point of the<br />
sample.<br />
NOTE!<br />
Sensitive component!<br />
The thermistor of the thermistor probe is a sensitive<br />
component and must be protected from external influences<br />
such as dust or friction.<br />
- When performing any kind of work on the device,<br />
place a measuring vessel on the thermistor probe.<br />
- At the end of the work on the device, place a measuring<br />
vessel on the thermistor probe for protection.<br />
The lower cooling system quickly cools the sample down to a defined<br />
temperature. This temperature is below the freezing point. The quick<br />
cooling down of the sample causes the sample to remain in the liquid<br />
state until the defined crystallization is triggered.<br />
Version 1.02 04/24/2013 29
OSMOMAT 3000<br />
Design and function<br />
3.4 Touchscreen<br />
30 Version 1.02 04/24/2013<br />
Fig. 12: Overview of touchscreen<br />
The device is controlled using the touchscreen (fig. 12/1)<br />
NOTE!<br />
Property damage due to incorrect operation!<br />
The touchscreen can be damaged by sharp or hard objects<br />
or excessive pressure force.<br />
- Only operate the touchscreen using fingers or a touch<br />
pen.<br />
- Only tap the touchscreen (do not press).
Enter values<br />
Fig. 13: Enter values<br />
Some menus are password-protected.<br />
OSMOMAT 3000<br />
Design and function<br />
Access to these menus is limited to the lab supervisor or<br />
authorized service personnel/Gonotec.<br />
1. To enter values, tap the corresponding entry field in the opened<br />
menu.<br />
This opens an on-screen keyboard.<br />
2. Enter the value.<br />
To close the on-screen keyboard without saving the<br />
entered value, tap [Cancel].<br />
3. To save the value, tap .<br />
The newly entered value overwrites the previous value.<br />
Version 1.02 04/24/2013 31
OSMOMAT 3000<br />
Design and function<br />
3.5 Printer<br />
Fig. 14: Overview of printer<br />
32 Version 1.02 04/24/2013<br />
With built-in printer (only Option D)<br />
1 Opening for printer paper<br />
2 Printer pull-out handle<br />
The printer is used to print the measurement results. Rolls of printer<br />
paper are included with the delivery.<br />
Change printer paper<br />
Change the printer paper when a red stripe appears on<br />
the printer paper ( chapter 8.4.5 "Replace printer paper<br />
(Option D only)" on page 84).
3.6 Connections and interfaces<br />
Fig. 15: Connections and interfaces<br />
1 COM1 - only for connecting the barcode reader<br />
(Option BC)<br />
2 COM2 interface (RS-232 output)<br />
3 USB connector<br />
OSMOMAT 3000<br />
Design and function<br />
The following connections and interfaces are located at the rear of the<br />
device:<br />
4 Fuse insert<br />
5 On/Off switch<br />
6 Power plug connection<br />
Version 1.02 04/24/2013 33
OSMOMAT 3000<br />
Design and function<br />
3.6.1 Interface configuration<br />
COM1 data port<br />
COM2 or USB data port<br />
Fig. 16: Set protocol port<br />
USB port driver<br />
34 Version 1.02 04/24/2013<br />
The upper COM1 (RS232) serial data port is used to connect a barcode<br />
reader. The barcode reader is configured at the factory and can be<br />
purchased from Gonotec GmbH or your authorized distributor.<br />
WARNING!<br />
Incompatible barcode reader!<br />
The use of a barcode reader other than the barcode<br />
reader supplied by Gonotec GmbH is not recommended<br />
because potential incompatibilities cannot be ruled out.<br />
WARNING!<br />
To protect life and equipment:<br />
Devices and accessories connected to the RS232 or<br />
USB connectors must meet the applicable safety<br />
standards for medical lab equipment.<br />
The device can output the recorded measurement results via the COM2<br />
(RS232) serial data port in the middle or the USB port.<br />
To select the data port, select Log Port from the Settings menu item.<br />
The following screen lets you select between COM2 and USB.<br />
A software driver is required to use the USB port.<br />
There are two methods for installing the driver:<br />
- Automatic: Connect the device to the PC using the USB cable<br />
and switch on the device. The operating system of the PC detects<br />
the interface, automatically installs the required software<br />
driver and notifies the user that installation was successful. The<br />
USB port can now be used as an additional COM interface.<br />
- Manual: The PC does not automatically detect the device or<br />
the operating system is missing the required software driver.<br />
In this case, please follow the instructions on the included CD.<br />
It includes both the installation instructions for the corresponding<br />
Windows operating system and the software driver itself.
3.6.2 Transfer protocol<br />
Output format:<br />
Baud rate:<br />
Data format:<br />
Contents of data<br />
output:<br />
ASCII<br />
OSMOMAT 3000<br />
Design and function<br />
The comma sign (ASCII 0x2C ",") to separate data columns and the<br />
carriage return sign (ASCII 0x0d ) sign to separate lines.<br />
Transmission speed: 9600 bps.<br />
8 data bits<br />
no parity<br />
1 stop bit is sent.<br />
Prior to every data output, the system places a header at the beginning of a charge<br />
and in front of every sample measured individually:<br />
charge, sample, date, time, value, device, device-no<br />
The output below follows every successful measurement:<br />
,,,,,,<br />
The charge number (alphanumeric) or a minus sign "-" if no charge is<br />
running.<br />
The sample number (alphanumeric).<br />
The date of the measurement in German notation "mm/dd/yyyy".<br />
mm month, two-digit [01..12]<br />
dd day, two-digit [1..31]<br />
yyyy year, four-digit [2010]<br />
The time of the measurement in German notation "HH:MM".<br />
HH hour [00..23]<br />
MM minute [00..59]<br />
The measurement value without decimal places (in mmol/l).<br />
Alphanumeric device name (such as "OSMOMAT 3000").<br />
The device number (alphanumeric).<br />
Version 1.02 04/24/2013 35
OSMOMAT 3000<br />
Delivery, packaging, and storage<br />
4 Delivery, packaging, and storage<br />
Delivery condition<br />
Fig. 17: Delivery condition<br />
36 Version 1.02 04/24/2013<br />
1 package containing the following components:<br />
Device with protective sleeve (fig. 17/1)<br />
Accessories (fig. 17/2–8):<br />
Blow-out device (Pasteur pipette) (fig. 17/3)<br />
Adjustment tool (fig. 17/8)<br />
1 package of 2 1A fine-wire fuses (fig. 17/6)<br />
Ampoule opener (fig. 17/4)<br />
USB cable (fig. 17/5)<br />
RS232 cable (fig. 17/7)<br />
Power cord (fig. 17/2)<br />
Consumables (fig. 17/9-11)<br />
Printer paper (fig. 17/9) (Option D only)<br />
Measuring vessels, 100 pc. (fig. 17/10)<br />
Calibration standard 300mOsmol/kg, 1 package of<br />
10 ampoules/1ml each (fig. 17/11)<br />
1 user guide<br />
Check the delivery for completeness and transport damage immediately<br />
following receipt.<br />
Proceed as follows in case of externally visible transport damage:<br />
Reject delivery or accept delivery only conditionally.<br />
Note the extent of damage on the transport documents or the<br />
delivery note of the carrier.<br />
Notify Gonotec GmbH and initiate a complaint.<br />
File a complaint about every defect as soon as it is detected.<br />
Claims for damages can only be filed within applicable<br />
complaint deadlines.
4.1 Packaging<br />
About the packaging<br />
Handling of packaging materials<br />
Symbols on packaging<br />
Fragile<br />
Protect from liquid<br />
OSMOMAT 3000<br />
Delivery, packaging, and storage<br />
The package is packaged according to the expected transport conditions.<br />
Only environmentally friendly materials were used for the packaging.<br />
The packaging is intended to protect the device from transport damage<br />
and other damage until the time of installation. Therefore, do not<br />
destroy the packaging and do not remove it until just before installation.<br />
The packaging is multi-use and ensures a hygienic and safe method<br />
of transportation. Keep the packaging for possible return of the device<br />
for repairs. This will save you the time and money needed to find<br />
equally suitable packaging.<br />
If disposing of the packaging material, observe the following:<br />
NOTE!<br />
Danger to environment due to improper disposal!<br />
Packaging materials are valuable resources and can be<br />
re-used or recycled in many cases. Improper disposal of<br />
packaging materials can cause dangers to the environment.<br />
- Be aware of the environment when disposing of the<br />
packaging material.<br />
- Observe applicable local disposal regulations. If necessary,<br />
task a specialist firm with disposal.<br />
The symbols on the packaging of the device and calibration standard<br />
are explained below:<br />
Indicates packages with fragile or sensitive contents.<br />
Handle the package with care, do not drop, and do not expose to<br />
shock.<br />
Protect packages from liquid and keep dry.<br />
Version 1.02 04/24/2013 37
OSMOMAT 3000<br />
Delivery, packaging, and storage<br />
Package orientation<br />
No disposal via municipal waste<br />
Package recycling<br />
Conformity<br />
In vitro diagnostic product<br />
Item number<br />
Batch ID<br />
Expiration date<br />
38 Version 1.02 04/24/2013<br />
The arrow tips of the symbol point to the top of the package. They<br />
must point up at all times to prevent damage to the contents.<br />
Indicates that disposal of the device via municipal waste is prohibited.<br />
Disposal of the decommissioned device should be via electronics and<br />
metal recycling. In addition, decommissioned devices can be returned<br />
to the manufacturer for disposal.<br />
Indicates that the packaging can be recycled.<br />
This product meets the requirements of EEC Directive 98/79 relating<br />
to in-vitro diagnostics.<br />
In-vitro diagnostic product.<br />
Item number<br />
Batch ID of the calibration standard<br />
Expiration date (month, year). Date until which the calibration standard<br />
fulfills its original function if stored properly.
4.2 Device storage<br />
4.3 Unpack device<br />
OSMOMAT 3000<br />
Delivery, packaging, and storage<br />
Store the device under the following conditions:<br />
Do not store outside.<br />
Store under dry and dust-free conditions.<br />
Do not expose to aggressive media.<br />
Protect from sunlight.<br />
Protect the thermistor probe using a measuring vessel.<br />
Avoid mechanical shock.<br />
Storage temperature: -10°C to 60°C.<br />
Relative humidity (non-condensing): 5-90%.<br />
If stored for more than 3 months, regularly inspect all parts and<br />
packaging for general integrity.<br />
1. Carefully open cardboard box using a knife.<br />
2. Remove device from packaging and place in a suitable location.<br />
3. Keep packaging for possible later return.<br />
Version 1.02 04/24/2013 39
OSMOMAT 3000<br />
Installation<br />
5 Installation<br />
5.1 Transport device inside lab<br />
Fig. 18: Position measuring vessel<br />
Fig. 19: Position transport safety device<br />
Fig. 20: Device with protective sleeve<br />
40 Version 1.02 04/24/2013<br />
Personnel: <strong>User</strong><br />
Safety gear: Disposable lab gloves<br />
1. Power down device using on/off switch on rear side and disconnect<br />
power plug.<br />
2. Position a measuring vessel (fig. 18/1) on the thermistor probe.<br />
The measuring vessel is securely attached to the<br />
thermistor probe when it clicks into place.<br />
3. Tilt transport safety device for thermistor probe and carefully slide<br />
behind the thermistor probe (fig. 19).<br />
4. Pull protective sleeve (fig. 20/1) included with the delivery over<br />
device.<br />
5. Lift up device (6.5kg) and carry to installation site.
5.2 Install device<br />
Fig. 21: Fan outlet (1)<br />
Fig. 22: Remove protective sleeve<br />
Personnel: <strong>User</strong><br />
Safety gear: Disposable lab gloves<br />
1.<br />
NOTE!<br />
Risk of property damage!<br />
Only install device indoors.<br />
Install device at installation site.<br />
NOTE!<br />
Risk of incorrect measurements<br />
OSMOMAT 3000<br />
Installation<br />
Select site based on the following criteria:<br />
- free of vibrations<br />
- no direct heat exposure (sun, electric heater,<br />
etc.)<br />
- no strong air flows<br />
- free of dust and dirt<br />
Keep fan outlet (fig. 21/1) clear.<br />
Keep fan outlet openings underneath device clear.<br />
2. Remove protective sleeve from device (fig. 22/1).<br />
Version 1.02 04/24/2013 41
OSMOMAT 3000<br />
Installation<br />
Fig. 23: Transport safety device<br />
Fig. 24: Remove transport safety device<br />
5.3 Connect device<br />
42 Version 1.02 04/24/2013<br />
3. Remove transport safety device (fig. 23/1) from thermistor probe.<br />
Proceed as follows:<br />
4. Carefully pull transport safety device down and pull forward to<br />
remove.<br />
Personnel: Lab supervisor<br />
1. Connect power plug to device.<br />
2. Connect power cord to a properly grounded power socket.<br />
3. Connect a PC via RS232 or USB (if applicable).<br />
4. Connect a barcode reader (option, if applicable).
6 Setup<br />
Check printer (Option D)<br />
Check free movement of initiation<br />
needle<br />
Personnel: Lab supervisor<br />
OSMOMAT 3000<br />
Setup<br />
1. Complete all activities for installation and connection of the device.<br />
2. Verify that the connections at the rear side of the device are secure.<br />
3. Check the elevator for ease of movement.<br />
If necessary, grease the elevator guide ( chapter 9.3 "Lubricate<br />
elevator" on page 94).<br />
4. Power up device on rear side using on/off switch.<br />
Fig. 25: Paper roll feed direction<br />
Correct feed direction<br />
Incorrect feed direction<br />
5. Check feed direction of paper roll. Open the printer and compare<br />
the feed direction of the paper roll with the feed direction shown in<br />
fig. 25.<br />
6. Check initiation needle for free movement.<br />
Open the "Adjust Needle" menu (Start menu Settings Lab<br />
Options Adjust Needle).<br />
Version 1.02 04/24/2013 43
OSMOMAT 3000<br />
Setup<br />
Fig. 26: "Adjust Needle" menu<br />
Set calibration procedure<br />
Fig. 27: "Lab Options" menu<br />
Configure calibration interval<br />
Fig. 28: Configure calibration interval<br />
44 Version 1.02 04/24/2013<br />
7.<br />
CAUTION!<br />
Risk of injury from initiation needle!<br />
The tip of the initiation needle is exposed. Movement<br />
of the initiation needle can cause needle puncture<br />
injuries.<br />
- Always keep your hands and fingers clear from<br />
the area underneath the initiation needle.<br />
Tap "Move Needle" and ensure that the initiation needle moves<br />
freely.<br />
Tap "Quit" to complete the check.<br />
8. Open the menu for configuring the lab options.<br />
In the Start menu, tap Settings Lab Options.<br />
The menu can be protected with a lab supervisor<br />
password.<br />
To configure the calibration interval, tap "Cal.-Period".<br />
To select the calibration standards you are using, tap "Cal.-<br />
Standards".<br />
To set up the calibration method, tap "QA Preset".<br />
9. Select a calibration interval.<br />
When selecting "Manual," the device does not prompt you for<br />
calibration (not recommended).
Select calibration standards<br />
Fig. 29: Select calibration standards<br />
Set up calibration method<br />
Fig. 30: Set up calibration method<br />
OSMOMAT 3000<br />
Setup<br />
10. Specify the allowed calibration points (Unit mOsmol/kg). They<br />
should be close to the expected measurement values.<br />
11. Select the calibration method:<br />
"2-Point": Select 2-point calibration<br />
"3-Point": Select 3-point calibration<br />
12. Select the number of measurements to be performed for each<br />
calibration medium (distilled water and calibration standard).<br />
The system calculates the calibration points from the mean value<br />
of these measurements.<br />
The number of measurements for each calibration<br />
point does not affect the linearity or reproducibility<br />
of the measurement system.<br />
They are only used to arrive at the mean value.<br />
Version 1.02 04/24/2013 45
OSMOMAT 3000<br />
Operation<br />
7 Operation<br />
Electrical current<br />
Risk of infection<br />
46 Version 1.02 04/24/2013<br />
DANGER!<br />
Risk of death due to electrical current on device!<br />
Contact with energized parts of the device results in immediate<br />
risk of death due to electric shock. Damage to<br />
the insulation of individual components can cause risk of<br />
death.<br />
- Only have qualified personnel perform repair and<br />
maintenance work on the device.<br />
- If the insulation is damaged, immediately disconnect<br />
the power plug and schedule a repair.<br />
- Always route the power cord so it is not subject to<br />
stress and cannot be bent, pinched, or rolled over<br />
and is not exposed to liquids or heat.<br />
- Ensure easy access to the power socket at all times.<br />
- Keep energized parts away from liquids. Otherwise,<br />
shorts may occur.<br />
WARNING!<br />
Risk of infection due to sample residue and in case<br />
of inadequate hygiene, disinfectant cleaning, and<br />
sterilization procedures!<br />
Exposure to sample residue in non-cleaned, nonsterilized,<br />
or non-disinfected components results in an<br />
elevated risk of infection.<br />
- Wear lab gloves during any kind of work.<br />
- Observe all local regulations regarding hygiene, disinfectant<br />
cleaning, and sterilization.
7.1 Power up device<br />
Fig. 31: Power up device<br />
Personnel: <strong>User</strong><br />
Safety gear: Disposable lab gloves<br />
OSMOMAT 3000<br />
Operation<br />
1. Power up device on rear side using on/off switch (fig. 31/1).<br />
Version 1.02 04/24/2013 47
OSMOMAT 3000<br />
Operation<br />
7.2 Measure individual samples<br />
Fig. 32: Clean thermistor probe<br />
48 Version 1.02 04/24/2013<br />
Personnel: <strong>User</strong><br />
Safety gear: Disposable lab gloves<br />
Materials: Soft paper towel<br />
Pipette<br />
Measuring vessel<br />
Sample<br />
NOTE!<br />
Risk of non-reproducibility of measurement due to<br />
incorrect measuring vessels!<br />
Repeated use of the measuring vessels and use of incorrect<br />
consumables cannot guarantee reproducible<br />
measurement results.<br />
- Always use a clean and unused measuring vessel for<br />
every measurement.<br />
- Only use measuring vessels supplied by Gonotec<br />
GmbH.<br />
- Never use centrifugal measuring vessels.<br />
NOTE!<br />
Risk of incorrect measurement resulting from the<br />
presence of air bubbles in the sample!<br />
The sample must be pipetted without air bubbles.<br />
1. Clean thermistor probe (fig. 32/1) using a soft paper towel.
Fig. 33: Start menu<br />
Fig. 34: Ice formation<br />
Fig. 35: Calibrate device<br />
Fig. 36: Device is ready for measurement<br />
2. Tap "Measure" on the Start menu (Fig. 33).<br />
OSMOMAT 3000<br />
Operation<br />
If the operating time of the device is less than 3 minutes, the<br />
menu for ice formation is displayed.<br />
3. Wait until ice forms on the initiation needle (Fig. 34).<br />
After successful ice formation, the menu for calibration or the<br />
measurement menu is displayed (depending on the configured<br />
calibration interval).<br />
4. If necessary, calibrate device (Fig. 35).<br />
chapter 7.4 "Calibrate device" on page 56<br />
Calibration cannot be canceled.<br />
The calibration interval is defined by the lab supervisor.<br />
The device is ready.<br />
5. Tap "Measure" (Fig. 36).<br />
The measurement menu opens.<br />
Version 1.02 04/24/2013 49
OSMOMAT 3000<br />
Operation<br />
Fig. 37: Pipette sample<br />
Fig. 38: Position measuring vessel<br />
Fig. 39: Measurement menu<br />
50 Version 1.02 04/24/2013<br />
6. Pipette a sample volume of 50µl into an unused and clean measuring<br />
vessel (Fig. 37).<br />
NOTE!<br />
Risk of incorrect measurement resulting from the<br />
presence of air bubbles in the sample!<br />
The sample must be pipetted without air bubbles.<br />
7. Position measuring vessel on thermistor probe with cover facing<br />
front (Fig. 38/1).<br />
8. Option D only:<br />
The measuring vessel is securely attached to the<br />
thermistor probe when it clicks into place.<br />
Tap "Printer On" on the measurement menu (Fig. 39/1) to output<br />
the measurement results to a printer. Make sure that the printer is<br />
ready.<br />
9. To start the measurement, tap "Single Sample" (Fig. 39/2).<br />
If necessary, enter the sample ID using the virtual keyboard.<br />
The sample ID can be pre-defined in the user preferences.<br />
In this case, the system assigns the sample<br />
ID automatically ( page 63)
Fig. 40: Move elevator down<br />
Fig. 41: Measurement result<br />
Fig. 42: Clean thermistor probe<br />
10. Move elevator (Fig. 40/1) down.<br />
OSMOMAT 3000<br />
Operation<br />
Moving the elevator up during the measurement will<br />
abort the measurement.<br />
The sample measurement is performed automatically. Pay<br />
attention to the displays on the touchscreen.<br />
The measurement result displays on the touchscreen (Fig.<br />
41/1) and, if applicable, prints (Fig. 41/2) (Option D).<br />
11. Move elevator up.<br />
Reproducibility:<br />
+/- 2 digits in the measurement range [0..400]<br />
mOsmol/kg<br />
+/- 0.5% in the measurement range [400..1500]<br />
mOsmol/kg<br />
+/- 1.0% starting with 1500 mOsmol/kg<br />
Moving the elevator up during the measurement will<br />
abort the measurement.<br />
12. Remove measuring vessel from thermistor probe.<br />
Dispose of measuring vessel and sample according to local regulations.<br />
13. Clean thermistor probe (Fig. 42/1) using a soft paper towel.<br />
NOTE!<br />
Risk of carryover!<br />
Failure to clean the thermistor probe immediately<br />
following measurement can result in carryover<br />
and incorrect measurement results.<br />
Version 1.02 04/24/2013 51
OSMOMAT 3000<br />
Operation<br />
7.3 Perform series measurement<br />
Fig. 43: Clean thermistor probe<br />
Fig. 44: Start menu<br />
52 Version 1.02 04/24/2013<br />
Personnel: <strong>User</strong><br />
Safety gear: Disposable lab gloves<br />
Materials: Soft paper towel<br />
Pipette<br />
Measuring vessel<br />
Samples<br />
NOTE!<br />
Risk of non-reproducibility of measurement due to<br />
incorrect measuring vessels!<br />
Repeated use of the measuring vessels and use of incorrect<br />
consumables cannot guarantee reproducible measurement<br />
results.<br />
- Always use a clean and unused measuring vessel for<br />
every measurement.<br />
- Only use measuring vessels supplied by Gonotec<br />
GmbH.<br />
- Never use centrifugal measuring vessels.<br />
NOTE!<br />
Risk of incorrect measurement resulting from the<br />
presence of air bubbles in the sample!<br />
The sample must be pipetted without air bubbles.<br />
1. Clean thermistor probe (fig. 43/1) using a soft paper towel.<br />
2. Tap "Measure" on the Start menu (Fig. 44).<br />
If the operating time of the device is less than 3 minutes, the<br />
menu for ice formation is displayed.
Fig. 45: Ice formation<br />
Fig. 46: Calibrate device<br />
Fig. 47: Device is ready for measurement<br />
Fig. 48: Measurement menu<br />
3. Wait until ice forms on the initiation needle (Fig. 45).<br />
OSMOMAT 3000<br />
Operation<br />
After successful ice formation, the menu for device calibration<br />
or the measurement menu is displayed (depending on the<br />
configured calibration interval).<br />
4. If necessary, calibrate device (Fig. 46).<br />
chapter 7.4 "Calibrate device" on page 56<br />
Calibration cannot be canceled.<br />
The calibration interval is defined by the lab supervisor.<br />
The device is ready.<br />
5. Tap "Measure" (Fig. 47).<br />
The measurement menu opens.<br />
6. Option D only:<br />
Tap "Printer On" on the measurement menu ( Fig. 48/1) to output<br />
the measurement results to a printer.<br />
Make sure that the printer is ready.<br />
7. To start a series measurement, tap "Begin Charge" (Fig. 48/2).<br />
8. Enter the charge ID.<br />
The charge ID can be pre-defined in the user preferences.<br />
In this case, the system assigns the<br />
charge ID automatically ( page 63)<br />
Version 1.02 04/24/2013 53
OSMOMAT 3000<br />
Operation<br />
Fig. 49: Pipette sample<br />
Fig. 50: Position measuring vessel<br />
Fig. 51: Move elevator down<br />
54 Version 1.02 04/24/2013<br />
9. Pipette a sample volume of 50µl into an unused and clean measuring<br />
vessel (Fig. 49).<br />
NOTE!<br />
Risk of incorrect measurement resulting from the<br />
presence of air bubbles in the sample!<br />
The sample must be pipetted without air bubbles.<br />
10. Position measuring vessel on thermistor probe with cover facing<br />
front (Fig. 50/1).<br />
The measuring vessel is securely attached to the<br />
thermistor probe when it clicks into place.<br />
11. Move elevator (Fig. 51/1) down.<br />
Moving the elevator up during the measurement will<br />
abort the measurement.<br />
The sample measurement is performed automatically. Pay<br />
attention to the displays on the touchscreen.<br />
The touchscreen shows the measurement result for the current<br />
sample.<br />
Option D:<br />
The measurement result prints.<br />
Reproducibility:<br />
+/- 2 digits in the measurement range [0..400]<br />
mOsmol/kg<br />
+/- 0.5% in the measurement range [400..1500]<br />
mOsmol/kg<br />
+/- 1.0% starting with 1500 mOsmol/kg
Fig. 52: Clean thermistor probe<br />
12. Move elevator up.<br />
OSMOMAT 3000<br />
Operation<br />
Moving the elevator up during the measurement will<br />
abort the measurement.<br />
13. Remove measuring vessel from thermistor probe.<br />
Dispose of measuring vessel and sample according to local regulations.<br />
14. Clean thermistor probe (Fig. 42/1) using a soft paper towel.<br />
NOTE!<br />
Risk of carryover!<br />
Failure to clean the thermistor probe immediately<br />
following measurement can result in carryover<br />
and incorrect measurement results.<br />
15. Start the measurement of the new sample by repeating the work<br />
steps starting with step 9.<br />
To complete the series measurement, tap "End Charge".<br />
Option D:<br />
Completing the series measurement also completes the printing<br />
operation.<br />
Version 1.02 04/24/2013 55
OSMOMAT 3000<br />
Operation<br />
7.4 Calibrate device<br />
Calibration methods<br />
Calibrate device<br />
56 Version 1.02 04/24/2013<br />
Depending on the pre-defined calibration interval, the menu for calibrating<br />
the device opens automatically. The device is calibrated using<br />
one of the following calibration methods:<br />
2-point calibration: Calibration using distilled water and a<br />
calibration standard or<br />
3-point calibration: Calibration using distilled water and 2<br />
calibration standards<br />
2-point calibration means that the device is calibrated using distilled<br />
water (zero point calibration) and one calibration standard.<br />
3-point calibration means that the device is calibrated using distilled<br />
water (zero point calibration) and 2 calibration standards.<br />
The calibration method, the calibration standards used for calibration,<br />
and the calibration interval are defined by the lab supervisor during<br />
start-up ( chapter 6 "Setup" on page 43).<br />
Personnel: <strong>User</strong><br />
Safety gear: Disposable lab gloves<br />
Materials: Soft paper towel<br />
Pipette<br />
Distilled Water<br />
Calibration standard (e.g. 300 mOsmol/kg)<br />
Ampoule opener<br />
Measuring vessels<br />
NOTE!<br />
Risk of non-reproducibility of measurement due to<br />
incorrect measuring vessels!<br />
Repeated use of the measuring vessels and use of incorrect<br />
consumables cannot guarantee reproducible<br />
measurement results.<br />
- Always use a clean and unused measuring vessel for<br />
every measurement.<br />
- Only use measuring vessels supplied by Gonotec<br />
GmbH.<br />
- Never use centrifugal measuring vessels.
Fig. 53: Clean thermistor probe<br />
Fig. 54: Perform zero point calibration<br />
Fig. 55: Pipette distilled water<br />
Fig. 56: Position measuring vessel<br />
OSMOMAT 3000<br />
Operation<br />
1. Clean thermistor probe (fig. 53/1) using a soft paper towel.<br />
2. Follow the instructions on the touchscreen.<br />
3. Pipette a distilled water volume of 50µl into an unused and clean<br />
measuring vessel (Fig. 55).<br />
NOTE!<br />
Risk of incorrect measurement resulting from the<br />
presence of air bubbles in the sample!<br />
The sample must be pipetted without air bubbles.<br />
4. Position measuring vessel on thermistor probe with cover facing<br />
front (Fig. 56/1).<br />
The measuring vessel is securely attached to the<br />
thermistor probe when it clicks into place.<br />
Version 1.02 04/24/2013 57
OSMOMAT 3000<br />
Operation<br />
Perform zero point calibration<br />
Fig. 57: Move elevator down<br />
Fig. 58: Calibrate device using calibration<br />
standard<br />
58 Version 1.02 04/24/2013<br />
5. Move elevator (Fig. 57/1) down.<br />
Zero point calibration starts automatically.<br />
Zero point calibration is performed automatically. Pay attention<br />
to the displays on the touchscreen.<br />
6. Move elevator up.<br />
7. Remove measuring vessel from thermistor probe.<br />
Dispose of measuring vessel and sample according to local regulations.<br />
8. Clean thermistor probe (Fig. 53/1) using a soft paper towel.<br />
NOTE!<br />
Risk of carryover!<br />
Failure to clean the thermistor probe immediately<br />
following measurement can result in carryover<br />
and incorrect measurement results.<br />
9. Following successful zero point measurement, tap "1.Standard to<br />
start calibration using the first calibration standard.<br />
Successful calibration means that it was possible to<br />
measure the sample without errors.<br />
This is not a plausibility check, which is not performed<br />
until the entire calibration sequence is completed in<br />
measurement mode ( page 97).
Calibrate device using calibration<br />
standard<br />
Fig. 59: Select calibration standard<br />
Fig. 60: Open ampoule<br />
OSMOMAT 3000<br />
Operation<br />
NOTE!<br />
Risk of non-reproducibility of measurement due to<br />
improper handling of calibration standards!<br />
Improper handling and storage of the calibration standards<br />
included with the delivery negatively affects the<br />
measurement accuracy of the device.<br />
- Always observe the stability of the calibration standards<br />
(0.5h at 22°C ambient temperature).<br />
- Never use opened ampoules twice or mix them together.<br />
- Never freeze opened ampoules.<br />
- Do not use the calibration standards past their expiration<br />
date.<br />
10. Select the calibration standard using the "" arrow<br />
keys.<br />
11.<br />
WARNING!<br />
Risk of injury at ampoule breaking points!<br />
Use the ampoule opener (fig. 60/2) to open the ampoules containing<br />
the calibration standards (fig. 60/1).<br />
Version 1.02 04/24/2013 59
OSMOMAT 3000<br />
Operation<br />
Fig. 61: Pipette calibration standard<br />
Fig. 62: Move elevator down<br />
60 Version 1.02 04/24/2013<br />
12. Pipette a calibration standard volume of 50µl into an unused<br />
measuring vessel (fig. 61).<br />
NOTE!<br />
Risk of incorrect measurement resulting from<br />
the presence of air bubbles in the sample!<br />
The sample must be pipetted without air<br />
bubbles.<br />
13. Position Measuring vessel on thermistor probe with cover facing<br />
front.<br />
The measuring vessel is securely attached to the<br />
thermistor probe when it clicks into place.<br />
14. Move elevator (Fig. 62/1) down.<br />
Calibration starts automatically.<br />
Calibration using the calibration standard is performed automatically.<br />
Pay attention to the displays on the touchscreen.<br />
15. Move elevator up.<br />
16. Remove measuring vessel from thermistor probe.<br />
Dispose of measuring vessel and sample according to local regulations.<br />
17. Clean thermistor probe (Fig. 62/1) using a soft paper towel.<br />
NOTE!<br />
Risk of carryover!<br />
Failure to clean the thermistor probe immediately<br />
following measurement can result in carryover<br />
and incorrect measurement results.
Fig. 63: Second calibration standard<br />
Fig. 64: Calibration results<br />
OSMOMAT 3000<br />
Operation<br />
For a 3-point calibration, repeat steps 9 through 17 using another<br />
calibration standard.<br />
The calibration results (Fig. 64) display following successful<br />
calibration of the device. The calculated osmolalities are mean<br />
values of the individual measurements.<br />
This is the result of a 3-point calibration.<br />
18. Verify the calibration results.<br />
If necessary, tap the individual measurement values to ignore<br />
them during mean value calculation.<br />
Reproducibility:<br />
+/- 2 digits in the measurement range [0..400]<br />
mOsmol/kg<br />
+/- 0.5% in the measurement range [400..1500]<br />
mOsmol/kg<br />
+/- 1.0% starting with 1500 mOsmol/kg<br />
19. Tap "Apply" to complete the calibration.<br />
The device is now calibrated.<br />
20. Verify reproducibility ( page 97)<br />
or continue with your measurements ( sample measurement on<br />
page 49, series measurement on page 53).<br />
Version 1.02 04/24/2013 61
OSMOMAT 3000<br />
Operation<br />
7.5 Modify user preferences<br />
Overview<br />
Fig. 65: Overview of user preferences<br />
Configure language<br />
Fig. 66: Configure language<br />
Configure screen contrast<br />
Fig. 67: Configure screen contrast<br />
62 Version 1.02 04/24/2013<br />
Tapping "Settings" on the Start menu opens the "Settings" menu.<br />
The "Settings" menu lets the user configure the following settings:<br />
"Language": Configure language<br />
"Display": Configure screen contrast<br />
"Screen Saver": Configure screen saver<br />
"Printer": Activate paper feed (Option D only)<br />
"ID Management": Configure ID for sample and series<br />
measurement<br />
"Log-Port": Configure interfaces for data transfer<br />
1. Tap "English".<br />
The "Lab Options" option is protected with the lab supervisor<br />
password.<br />
The "Service" option is protected with the service password.<br />
Modifications have to be requested by contacting<br />
the manufacturer.<br />
The system language is English.<br />
2. Tap "Deutsch".<br />
The system language is German.<br />
1. Tap ">>" to increase contrast.<br />
Tap "
Configure screen saver<br />
Fig. 68: Configure screen saver<br />
Activate paper feed<br />
Fig. 69: Activate paper feed<br />
Configure sample ID<br />
Fig. 70: Configure sample ID<br />
OSMOMAT 3000<br />
Operation<br />
1. Select the duration after which the system activates the screen<br />
saver.<br />
Tapping "OFF" will never activate the screen saver.<br />
1. Option D only:<br />
Tap "Paper Feed".<br />
The paper feed of the printer is activated briefly.<br />
Tap "Quit" to exit the menu.<br />
1. Select the settings for the IDs for series measurements ("Charge<br />
ID") and individual samples ("Sample ID"). The following options<br />
are available:<br />
automatic: The samples and the charge IDs are assigned<br />
running numbers automatically. The counter resets daily. The<br />
counter for the individual samples in a series measurement<br />
resets when starting a new series measurement.<br />
numeric: Numeric IDs are assigned manually. During<br />
measurements, the system prompts the user to enter the<br />
numeric ID of the sample or charge using the virtual keyboard.<br />
alphanumeric: Alphanumeric IDs are assigned manually.<br />
During measurements, the system prompts the user to enter<br />
the alphanumeric ID of the sample or charge using the virtual<br />
keyboard.<br />
Version 1.02 04/24/2013 63
OSMOMAT 3000<br />
Operation<br />
Set protocol port<br />
Fig. 71: Set protocol port<br />
64 Version 1.02 04/24/2013<br />
1. Select the interface for data transfer to the PC.<br />
To test the data transfer to the PC, press "Send Test String".
7.6 Power down device<br />
Fig. 72: Power down device<br />
Fig. 73: Position measuring vessel<br />
Fig. 74: Device with protective sleeve<br />
Personnel: <strong>User</strong><br />
Safety gear: Disposable lab gloves<br />
OSMOMAT 3000<br />
Operation<br />
1. Power down device using on/off switch on rear side (fig. 72/1)<br />
and disconnect power plug.<br />
2. Position a measuring vessel (Fig. 73/1) on the thermistor probe.<br />
The measuring vessel is securely attached to the<br />
thermistor probe when it clicks into place.<br />
3. Disinfect device if powered down for an extended period of time.<br />
Wipe device using a wipe moistened with disinfectant.<br />
4. Pull protective sleeve (Fig. 74/1) included with the delivery over<br />
device.<br />
Version 1.02 04/24/2013 65
OSMOMAT 3000<br />
Troubleshooting<br />
8 Troubleshooting<br />
8.1 Safety notices<br />
Electrical current<br />
Risk of infection<br />
Risk of injury<br />
66 Version 1.02 04/24/2013<br />
DANGER!<br />
Risk of death due to electrical current on device!<br />
Contact with energized parts of the device results in immediate<br />
risk of death due to electric shock. Damage to<br />
the insulation of individual components can cause risk of<br />
death.<br />
- Only have qualified personnel perform repair and<br />
maintenance work on the device.<br />
- If the insulation is damaged, immediately switch off<br />
the voltage supply and schedule a repair.<br />
- Always route the power cord so it is not subject to<br />
stress and cannot be bent, pinched, or rolled over<br />
and is not exposed to liquids or heat.<br />
- Ensure easy access to the power socket at all times.<br />
- Keep energized parts away from liquids. Otherwise,<br />
shorts may occur.<br />
WARNING!<br />
Risk of injury due to sample residue and in case of<br />
inadequate hygiene, disinfectant cleaning, and sterilization<br />
procedures!<br />
Exposure to sample residue in non-cleaned, nonsterilized,<br />
or non-disinfected components results in an<br />
elevated risk of infection.<br />
- Wear lab gloves during any kind of work.<br />
- Observe all local regulations regarding hygiene, disinfectant<br />
cleaning, and sterilization.<br />
CAUTION!<br />
Risk of injury from initiation needle!<br />
When installing and removing the initiation needle and<br />
the thermistor probe, the tip of the initiation needle is exposed.<br />
Movement of the initiation needle can cause<br />
needle puncture injuries.<br />
- Always keep your hands and fingers clear from the<br />
area underneath the initiation needle.
8.2 Notes regarding errors<br />
Fig. 75: Contact Gonotec<br />
OSMOMAT 3000<br />
Troubleshooting<br />
In case of errors that cannot be resolved using the error table on<br />
page 68, contact the manufacturer.<br />
Please be prepared when contacting the manufacturer as follows:<br />
1 Use a telephone located close to the device.<br />
2 Power up device.<br />
NOTE!<br />
Danger in case of continuous acoustic alarm!<br />
In case of continuous acoustic alarm, the electronics<br />
components of the device can be damaged.<br />
Power down device again.<br />
3 Note down the serial number of the device. To find the serial<br />
number, select Start menu Info.<br />
4 Have the device documentation available.<br />
Contact info:<br />
Gonotec GmbH<br />
GSG-Hof Reuchlinstr.10-11<br />
D-10553 Berlin<br />
Phone: (030) 7809 588-0<br />
Fax: (030) 7809 588-88<br />
E-mail: contact@gonotec.com<br />
Web: http://www.gonotec.com<br />
Version 1.02 04/24/2013 67
OSMOMAT 3000<br />
Troubleshooting<br />
8.3 Error table<br />
68 Version 1.02 04/24/2013<br />
Errors marked * are shown as an error message on the<br />
touchscreen.<br />
Error description Possible Cause Remedy Personnel<br />
Elevator gets stuck or<br />
makes squeaking<br />
noises when lowered<br />
Lower cooling system<br />
does not cool sample<br />
Gear motor of initiation<br />
needle turns<br />
without stopping<br />
or<br />
does not turn one full<br />
revolution<br />
No or poor ice crystal<br />
formation in upper<br />
cooling system<br />
Mechanical wear Lubricate the elevator guide using<br />
silicone spray ( page 95)<br />
Blockage from foreign<br />
objects<br />
Check openings and remove foreign<br />
objects<br />
<strong>User</strong><br />
<strong>User</strong><br />
Mechanical wear Clean cooling clamp ( page 84) Service<br />
technician<br />
Fan is defective or ob- Check if fan is operational and restructedplace<br />
if necessary ( service manual)<br />
Peltier element is defective<br />
Light barrier on gear<br />
motor disk is defective<br />
Light barrier on gear<br />
motor disk is misaligned<br />
Gear motor disk misaligned<br />
or loose<br />
Peltier element defective<br />
Cable connection between<br />
cooling system<br />
and PCB defective<br />
Replace lower cooling system<br />
( service manual)<br />
Replace light barrier ( service<br />
manual)<br />
Adjust light barrier<br />
Adjust/tighten gear motor disk<br />
Replace upper cooling system<br />
( service manual)<br />
Cooling nipple dirty Clean cooling nipple using a fiberglass<br />
pin ( page 96)<br />
Remove any droplets from opening<br />
using blow-out device.<br />
Service<br />
technician<br />
Service<br />
technician<br />
<strong>User</strong>
Measurement procedure<br />
takes longer<br />
than usual<br />
Spontaneous crystallization<br />
*<br />
Incorrect measurement<br />
results<br />
Error in rotation of gear<br />
motor disk (initiation<br />
needle drive)<br />
OSMOMAT 3000<br />
Troubleshooting<br />
Align initiation needle ( page 73) Service<br />
technician<br />
Correct length of initiation needle<br />
( page 74)<br />
Check if light barrier is located<br />
properly and replace if necessary<br />
( service manual)<br />
Tighten gear motor disk<br />
Ambient air too dry Clean cooling nipple using a fiberglass<br />
pin ( page 96)<br />
Fan is defective or obstructed<br />
Peltier element is defective<br />
Sample not prepared<br />
correctly<br />
Thermistor probe not<br />
aligned correctly<br />
Elevator moved up by<br />
user<br />
Lower cooling system<br />
not aligned correctly<br />
Incorrect measuring<br />
vessel used<br />
Measuring vessel reused<br />
Measuring vessel not<br />
positioned correctly<br />
Thermistor probe defective<br />
Check if fan is operational and remove<br />
any foreign objects<br />
Replace fan ( service manual)<br />
Replace lower cooling system<br />
( service manual)<br />
Use sample according to performance<br />
data of device ( page 14)<br />
<strong>User</strong><br />
Service<br />
technician<br />
<strong>User</strong><br />
Align thermistor probe ( page 80) Service<br />
technician<br />
Leave the elevator in the lowered<br />
position during the measurement<br />
procedure<br />
Align lower cooling system<br />
( service manual)<br />
Only use measuring vessels of the<br />
correct type supplied by Gonotec<br />
GmbH<br />
<strong>User</strong><br />
Service<br />
technician<br />
<strong>User</strong><br />
Use measuring vessels only once. <strong>User</strong><br />
Position measuring vessel with cover<br />
pointing forward<br />
When the measuring vessel clicks<br />
into place, it is securely positioned<br />
on the thermistor probe.<br />
Replace thermistor probe<br />
( page 76)<br />
Thermistor probe not Align thermistor probe ( page 80)<br />
<strong>User</strong><br />
Service<br />
technician<br />
Version 1.02 04/24/2013 69
OSMOMAT 3000<br />
Troubleshooting<br />
Measuring vessel fits<br />
too loosely on thermistor<br />
probe<br />
No crystallization *<br />
(see also: No or poor<br />
ice crystal formation<br />
in upper cooling system)<br />
70 Version 1.02 04/24/2013<br />
centered<br />
Incorrect measuring<br />
vessel used<br />
Measuring vessel reused<br />
Measuring vessel not<br />
positioned correctly<br />
Thermistor probe damaged<br />
Initiation needle too<br />
long or too short<br />
Initiation needle not<br />
deburred<br />
Only use measuring vessels supplied<br />
by Gonotec GmbH<br />
Position measuring vessel with cover<br />
facing forward<br />
When the measuring vessel clicks<br />
into place, it is securely positioned<br />
on the thermistor probe.<br />
Replace thermistor probe<br />
( page 76)<br />
Adjust initiation needle to correct<br />
length ( page 74)<br />
Debur initiation needle using fine<br />
sandpaper<br />
Initiation needle bent Manually bend initiation needle so<br />
that it is vertical, replace if necessary<br />
( page 73)<br />
Initiation needle does<br />
not move<br />
Initiation needle disengaged<br />
from gear motor<br />
or stuck<br />
Verify free movement of initiation<br />
needle ( page 75)<br />
Fan malfunction Fan is obstructed Check if fan is operational and remove<br />
any foreign objects<br />
Fan makes loud<br />
noise<br />
Continuous audible<br />
warning signal<br />
Fine-wire fuses trip<br />
when powering up<br />
device<br />
Fan is defective Replace fan ( service manual)<br />
Fan is obstructed Check if fan is operational and remove<br />
any foreign objects<br />
Needle bar disengaged<br />
from gear motor or<br />
stuck<br />
Gear motor slider misaligned<br />
Device voltage does not<br />
match power grid voltage<br />
Verify free movement of initiation<br />
needle ( page 75)<br />
see also: Gear motor of initiation<br />
needle turns without stopping or<br />
does not turn one full revolution.<br />
<strong>User</strong><br />
<strong>User</strong><br />
Service<br />
technician<br />
Service<br />
technician<br />
Service<br />
technician<br />
Service<br />
technician<br />
Check device voltage setting Service<br />
technician
Device cannot be<br />
powered up<br />
Power supply not correctly<br />
plugged into<br />
power socket<br />
Connect power supply to a power<br />
socket<br />
Power socket is dead Connect device to a live power<br />
socket<br />
Power cord is damaged Replace power cord<br />
Fuses are burned out Replace fuses ( page 83)<br />
OSMOMAT 3000<br />
Troubleshooting<br />
Printer does not print Paper roll is used up Replace paper roll ( page 84) <strong>User</strong><br />
Measurement procedure<br />
aborted by user*<br />
Incorrect PIN entered*<br />
Attempt to change lab<br />
supervisor password<br />
failed*<br />
Ribbon is empty Replace ribbon<br />
( page 86)<br />
<strong>User</strong> moved elevator up<br />
during measurement<br />
Repeat measurement <strong>User</strong><br />
Service<br />
technician<br />
Incorrect PIN entered Re-enter PIN or cancel operation Lab supervisor<br />
Repeat password entry<br />
does not match first<br />
entry<br />
Change password again Lab supervisor<br />
Unexpected errors* Internal system errors Contact Gonotec GmbH <strong>User</strong><br />
Version 1.02 04/24/2013 71
OSMOMAT 3000<br />
Troubleshooting<br />
8.4 Resolve errors<br />
8.4.1 Replace initiation needle<br />
Fig. 76: Position of initiation needle and<br />
details<br />
1 Initiation needle<br />
72 Version 1.02 04/24/2013<br />
Personnel: Service technician<br />
Safety gear: Disposable lab gloves<br />
Materials: Allen key SW 2.5<br />
Precision key file<br />
Wire cutter<br />
WARNING!<br />
Risk of infection from sample residue!<br />
The initiation needle is immersed into the sample during<br />
measurements. Contact with the initiation needle increases<br />
the risk of infection.<br />
- Wear lab gloves during any kind of work.<br />
DANGER!<br />
Risk of death due to electrical current!<br />
1. Power down device using on/off switch on rear side and disconnect<br />
power plug.<br />
2. Remove device front panel ( on page 89).
Fig. 77: Remove mounting screw<br />
Fig. 78: Remove initiation needle<br />
Fig. 80: Straighten initiation needle<br />
OSMOMAT 3000<br />
Troubleshooting<br />
3. Remove mounting screw (fig. 77/1) of initiation needle while holding<br />
initiation needle in place.<br />
4.<br />
The mounting screw has a coating of locking paint.<br />
Loose washer between initiation needle and<br />
gear motor disk!<br />
Remove initiation needle from gear motor disk. Hold washer<br />
(fig. 78/1) of mounting screw in place.<br />
Fig. 79: Initiation needle components<br />
5. Remove guide tube (fig. 79/1) and fasteners (fig. 79/3) of initiation<br />
needle (fig. 79/2).<br />
6. Make sure that the new initiation needle is as straight as possible<br />
(fig. 80/1+2).<br />
7.<br />
1 - Incorrect orientation<br />
2 - Correct orientation<br />
If necessary, bend initiation needle so it is straight (fig. 80/3).<br />
Shorten initiation needle to correct length.<br />
Proceed as follows.<br />
Version 1.02 04/24/2013 73
OSMOMAT 3000<br />
Troubleshooting<br />
Fig. 81: Adjust length of initiation needle<br />
Fig. 82: Install initiation needle<br />
1 Mounting screw<br />
2 Washer<br />
3 Fastening tube<br />
74 Version 1.02 04/24/2013<br />
8. Align gear motor swipe vertically with upper dead center<br />
(fig. 81/1).<br />
The set screw of the gear motor swipe points down.<br />
9. Move initiation needle through guide tube in upper cooling system<br />
(fig. 81/2) onto cooling nipple (fig. 81/3).<br />
10. Bolt new initiation needle to gear motor disk.<br />
11. Align initiation needle with gear motor swipe and cooling nipple.<br />
The needle end should be located approx. 2mm below the lower<br />
edge of the cooling nipple (d=2mm). (Fig. 81/3).<br />
12. If the needle is too long, use a permanent marker to mark the<br />
correct length and remove the needle bar again.<br />
13. Trim excess wire using side cutters and debur needle tip using<br />
precision key file.<br />
4 Initiation needle<br />
5 Washer<br />
6 <strong>Guide</strong> tube
Check free movement of initiation<br />
needle<br />
Fig. 83: Check free movement of initiation<br />
needle<br />
Fig. 84: Move needle<br />
OSMOMAT 3000<br />
Troubleshooting<br />
14. Fit initiation needle to gear motor disk. Assemble fasteners as follows:<br />
1 - Push washer (fig. 82/2) and fastening tube (/3) onto mounting<br />
screw (fig. 82/1).<br />
2 - Push mounting screw with washer and fastening screw through<br />
head of initiation needle (fig. 82/4).<br />
3 - Secure washer (fig. 82/5) to mounting screw.<br />
4 - Push guide tube (fig. 82/6) onto initiation needle.<br />
15. Secure initiation needle to gear motor disk (fig. 77) using mounting<br />
screw (fig. 82/1).<br />
16. Turn gear motor disk with attached initiation needle clockwise to<br />
check initiation needle for free movement.<br />
If needle gets jammed, detach needle and check if it is bent.<br />
(Fig. Fig. 80).<br />
17. Install device front panel ( on page 93).<br />
18. Power up device on rear side using on/off switch.<br />
19. Verify free movement of initiation needle automatically.<br />
Open the menu for adjusting the initiation needle (Settings Lab<br />
Options Adjust Needle).<br />
CAUTION!<br />
Risk of injury from initiation needle!<br />
The tip of the initiation needle is exposed. Movement of the<br />
initiation needle can cause needle puncture injuries.<br />
- Always keep your hands and fingers clear from the area<br />
underneath the initiation needle.<br />
20. Tap "Move Needle" to test the free movement.<br />
The initiation needle turns by one revolution.<br />
Tap "Quit" to exit the menu.<br />
Version 1.02 04/24/2013 75
OSMOMAT 3000<br />
Troubleshooting<br />
8.4.2 Replace the thermistor probe<br />
Remove elevator cover<br />
Fig. 85: Position measuring vessel<br />
76 Version 1.02 04/24/2013<br />
Personnel: Service technician<br />
Safety gear: Disposable lab gloves<br />
Materials: Allen key SW 2<br />
Adjustment tool<br />
Tweezers<br />
WARNING!<br />
Risk of injury in case of inadequate hygiene, disinfectant<br />
cleaning, and sterilization procedures!<br />
Contact with the thermistor probe and initiation needle<br />
increases the risk of infection due to sample residue.<br />
- Wear lab gloves during any kind of work.<br />
DANGER!<br />
Risk of death due to electrical current!<br />
1. Power down device using on/off switch on rear side and disconnect<br />
power plug.<br />
2. To protect thermistor, cover thermistor probe with a measuring<br />
vessel. The cover of the measuring vessel must point forward.<br />
NOTE!<br />
Risk of thermistor damage due to loose position<br />
of measuring vessel!<br />
Resistance is felt when sliding on measuring vessel.<br />
When the measuring vessel clicks into place, it is<br />
securely positioned on the thermistor probe.
Fig. 86: Move elevator down<br />
Fig. 87: Move elevator cover up<br />
Fig. 88: Remove mounting screws<br />
Fig. 89: Remove elevator cover<br />
3. Move elevator down using handle (fig. 86/1).<br />
4. Move elevator cover (fig. 87/1) up.<br />
OSMOMAT 3000<br />
Troubleshooting<br />
5. Remove the 2 mounting screws (fig. 88/2) using Allen key (SW<br />
2).<br />
6. Remove the complete elevator cover (fig. 89/1).<br />
Version 1.02 04/24/2013 77
OSMOMAT 3000<br />
Troubleshooting<br />
Fig. 90: Pull connector<br />
Fig. 91: Remove mounting screws<br />
Fig. 92: Remove thermistor probe<br />
78 Version 1.02 04/24/2013<br />
7. Pull connector of thermistor probe (fig. 90/1).<br />
8. Move elevator up and remove the 2 mounting screws (fig. 91/1)<br />
using Allen key (SW 2).<br />
9. Remove thermistor probe with mounting plate toward the front<br />
(fig. 92) while holding guide tube of initiation needle (fig. 92/1) in<br />
place.<br />
10. If necessary, clean cooling nipple.
Fig. 93: Remove mounting plate<br />
1 Mounting plate<br />
2 Mounting screws<br />
Fig. 94: New thermistor probe with data<br />
sheet<br />
OSMOMAT 3000<br />
Troubleshooting<br />
11. Use Allen key (SW 2) to remove thermistor probe from mounting<br />
plate (fig. 93).<br />
12. Fit new thermistor probe to mounting plate (fig. 93).<br />
Keep the data sheet affixed to the thermistor probe (fig. 94/2) in<br />
the vicinity of the device.<br />
To protect thermistor, cover thermistor probe with a measuring<br />
vessel (fig. 94/1). The cover of the measuring vessel must point<br />
forward.<br />
NOTE!<br />
Risk of thermistor damage due to loose position<br />
of measuring vessel!<br />
Resistance is felt when sliding on measuring vessel.<br />
When the measuring vessel clicks into place, it is<br />
securely positioned on the thermistor probe.<br />
13. Push guide tube onto initiation needle and pass needle through<br />
stainless steel tube of mounting plate (fig. 92).<br />
Version 1.02 04/24/2013 79
OSMOMAT 3000<br />
Troubleshooting<br />
Align the thermistor probe<br />
Fig. 95: Install adjustment tool<br />
Fig. 96: Align the thermistor probe<br />
Install elevator cover<br />
80 Version 1.02 04/24/2013<br />
lower cooling sys-<br />
Fig. 97:<br />
tem<br />
Thermistor probe Z axis<br />
14. Tighten the 2 mounting screws only lightly.<br />
The thermistor probe must be aligned using the adjustment tool.<br />
15. Install adjustment tool (Fig. 95/1) in opening of lower cooling system<br />
using tweezers.<br />
16. Remove measuring vessel from thermistor probe.<br />
17. Align thermistor probe (Fig. 96). Proceed as follows:<br />
Push thermistor probe just beyond adjustment tool.<br />
18. Position thermistor probe on its XYZ axis so that thermistor is<br />
perpendicular to center of hole of adjustment tool (Fig. 97 / Fig.<br />
98).<br />
19. Tighten the 2 mounting screws on the aligned thermistor probe.<br />
Thermistor Z axis ( )<br />
Mounting screws<br />
Fig. 98: Thermistor probe XY axis<br />
Adjustment<br />
tool
Fig. 99: Elevator cover with correct cable routing<br />
1 Cable<br />
2 Cable guide on thermistor probe<br />
Fig. 100: Remove mounting screws<br />
20.<br />
Correct cable routing<br />
Incorrect cable routing<br />
NOTE!<br />
Risk of cable break!<br />
OSMOMAT 3000<br />
Troubleshooting<br />
Place cable (fig. 99/1) on thermistor probe in cable guide<br />
(fig. 99/2) and install elevator cover on device.<br />
21. Bolt elevator cover to elevator using the 2 mounting screws<br />
(fig. 100/1).<br />
The thermistor probe is now installed.<br />
Version 1.02 04/24/2013 81
OSMOMAT 3000<br />
Troubleshooting<br />
Clean cooling nipple<br />
Fig. 101: Clean cooling nipple<br />
Fig. 102: Calibrate thermistor probe<br />
82 Version 1.02 04/24/2013<br />
22. Clean cooling nipple (fig. 101/1) using a fiberglass pin. For this<br />
purpose, move elevator cover up.<br />
23. Power up device on rear side using on/off switch.<br />
24. Calibrate the new thermistor probe.<br />
For this purpose, open the Replace Probe menu (Start menu <br />
Settings Lab Options Replace Probe).<br />
25. Copy the values from the included data sheet to the fields and tap<br />
"OK".<br />
The system starts the device calibration.<br />
Calibrate the device ( page 56).
8.4.3 Replace fine-wire fuses<br />
Fig. 103: Open fine-wire fuse cover<br />
Fig. 104: Remove finewire<br />
fuses<br />
Fig. 105: Install fine-wire fuses<br />
Safety gear: Disposable lab gloves<br />
Materials: Flat blade screwdriver<br />
Fine-wire fuses (1A)<br />
DANGER!<br />
Risk of death due to electrical current!<br />
OSMOMAT 3000<br />
Troubleshooting<br />
1. Power down device using on/off switch on rear side and disconnect<br />
power plug.<br />
2. Open cover (fig. 103/1) using a flat blade screwdriver.<br />
3. Remove fine-wire fuse attachment.<br />
4. Remove fine-wire fuses (fig. 104/1) from attachment.<br />
NOTE!<br />
Risk of property damage!<br />
The unit has two-phase protection. Use only the following<br />
fuses:<br />
HBC fuses with a switching capacity of 1500A<br />
5. Push the fine-wire fuses included with the delivery into the attachment<br />
(fig. 105).<br />
Version 1.02 04/24/2013 83
OSMOMAT 3000<br />
Troubleshooting<br />
8.4.4 Clean cooling clamp<br />
Fig. 106: Clean cooling clamp<br />
8.4.5 Replace printer paper (Option D only)<br />
Fig. 107: Printer (pulled out)<br />
1 Paper roll<br />
2 Ribbon<br />
84 Version 1.02 04/24/2013<br />
Personnel: Service technician<br />
Safety gear: Disposable lab gloves<br />
Materials: Fine sandpaper<br />
1. Power down device on rear side using on/off switch.<br />
2. Remove device front panel ( on page 89).<br />
3. Clean cooling clamp (fig. 106/1) on lower cooling system using<br />
sandpaper.<br />
4. Install device front panel ( on page 93).<br />
Personnel: <strong>User</strong><br />
Safety gear: Disposable lab gloves<br />
Materials: 1 Paper roll<br />
1. Power down device on rear side using on/off switch.
Fig. 108: Pull out printer<br />
Fig. 109: Turn knurled screw<br />
Fig. 110: Install paper roll<br />
2. Pull out printer (fig. 108/1).<br />
3. Turn knurled screw (fig. 109/1) counter-clockwise.<br />
4. Remove empty paper roll from holder and dispose.<br />
OSMOMAT 3000<br />
Troubleshooting<br />
5. Cut off beginning of new paper roll (fig. 110/1) and push onto<br />
holder.<br />
Pay attention to correct feed direction of paper (fig. 110/2).<br />
6. Position knurled screw (fig. 109/1) and tighten by turning clockwise.<br />
7. Power up device on rear side using on/off switch.<br />
Version 1.02 04/24/2013 85
OSMOMAT 3000<br />
Troubleshooting<br />
Fig. 111: Activate paper feed<br />
Fig. 112: Paper feed<br />
86 Version 1.02 04/24/2013<br />
8. On the Start menu, select Settings Printer.<br />
Tap "Paper Feed".<br />
8.4.6 Replace printer ribbon (Option D only)<br />
Fig. 113: Printer (pulled out)<br />
1 Paper roll<br />
2 Ribbon<br />
The paper feed of the printer is activated briefly. (Fig. 112).<br />
Tap "Quit" to exit the menu.<br />
9. Replace printer cover and push printer into casing.<br />
Personnel: <strong>User</strong><br />
Safety gear: Disposable lab gloves<br />
Materials: 1 Ribbon<br />
1. Power down device on rear side using on/off switch.
Fig. 114: Pull out printer<br />
Fig. 115: Remove printer cover<br />
Fig. 116: Push out ribbon<br />
Fig. 117: Feed printer paper<br />
2. Pull out printer (fig. 114/1).<br />
3. Remove printer cover (fig. 115/1).<br />
OSMOMAT 3000<br />
Troubleshooting<br />
4. Push on Push marking on front side of ribbon (fig. 116).<br />
The ribbon is released.<br />
5. Remove the released ribbon.<br />
6. Feed printer paper through ribbon (fig. 117).<br />
7. Press ribbon onto device.<br />
The ribbon snaps into place.<br />
8. Tighten ribbon by turning knob clockwise.<br />
9. Replace printer cover and push printer into casing.<br />
Version 1.02 04/24/2013 87
OSMOMAT 3000<br />
Servicing<br />
9 Servicing<br />
9.1 Safety notices<br />
Electrical current<br />
Risk of infection<br />
88 Version 1.02 04/24/2013<br />
DANGER!<br />
Risk of death due to electrical current on device!<br />
Contact with energized parts of the device results in immediate<br />
risk of death due to electric shock. Damage to<br />
the insulation of individual components can cause risk of<br />
death.<br />
- Only have qualified personnel perform repair and<br />
maintenance work on the device.<br />
- If the insulation is damaged, immediately switch off<br />
the voltage supply and schedule a repair.<br />
- Always route the power cord so it is not subject to<br />
stress and cannot be bent, pinched, or rolled over<br />
and is not exposed to liquids or heat.<br />
- Ensure easy access to the power socket at all times.<br />
- Keep energized parts away from liquids. Otherwise,<br />
shorts may occur.<br />
WARNING!<br />
Risk of infection due to sample residue and in case<br />
of inadequate hygiene, disinfectant cleaning, and<br />
sterilization procedures!<br />
Exposure to sample residue in non-cleaned, nonsterilized,<br />
or non-disinfected components results in an<br />
elevated risk of infection.<br />
- Wear lab gloves during any kind of work.<br />
- Observe all local regulations regarding hygiene, disinfectant<br />
cleaning, and sterilization.<br />
We recommend using detergents such as Mikrozid ® AF<br />
Liquid, Bacillol ® plus 3%, or Korsolex ® plus 4% commonly<br />
found in clinical-chemical labs to clean and decontaminate<br />
the device.
9.1 Service table<br />
OSMOMAT 3000<br />
Servicing<br />
The following sections describe the service activities required to ensure<br />
device operation under optimum, error-free conditions.<br />
If regular checks show excess wear, shorten the required service intervals<br />
based on actual signs of wear. If you have questions regarding<br />
service activities and intervals, contact the manufacturer (for contact<br />
information, see page 2).<br />
Interval Service activity Personnel<br />
monthly Check elevator support for ease of movement and lubricate if necessary<br />
chapter 9.3 "Lubricate elevator" on page 94<br />
Perform visual inspection of device<br />
chapter 9.4 "Perform visual inspection of device" on page 96<br />
Check reproducibility of measurements<br />
chapter 9.5.1 on page 97<br />
9.2 Preliminary steps<br />
Remove device front panel<br />
Personnel: Service technician<br />
Safety gear: Disposable lab gloves<br />
Materials: Allen key SW 2<br />
1. Power down device on rear side using on/off switch.<br />
<strong>User</strong><br />
<strong>User</strong><br />
Lab supervisor<br />
Version 1.02 04/24/2013 89
OSMOMAT 3000<br />
Servicing<br />
Fig. 118: Position measuring vessel<br />
Fig. 119: Move elevator down<br />
Fig. 120: Move elevator cover up<br />
90 Version 1.02 04/24/2013<br />
2. To protect thermistor, cover thermistor probe with a measuring<br />
vessel (fig. 118/1). The cover of the measuring vessel must point<br />
forward.<br />
NOTE!<br />
Risk of thermistor damage due to loose position<br />
of measuring vessel!<br />
Resistance is felt when sliding on measuring vessel.<br />
When the measuring vessel clicks into place, it is<br />
securely positioned on the thermistor probe.<br />
3. Move elevator (fig. 119/1) down.<br />
4. Move elevator cover (fig. 120/1) up.
Fig. 121: Remove mounting screws<br />
Fig. 122: Remove elevator cover<br />
Fig. 123: Pull out printer<br />
Fig. 124: Remove printer cover<br />
OSMOMAT 3000<br />
Servicing<br />
5. Remove the 2 mounting screws (fig. 121/1) using Allen key (SW<br />
2).<br />
6. Remove complete elevator cover (fig. 122/1).<br />
7. Pull out printer (fig. 123/1) from device.<br />
8. Remove printer cover (fig. 124/1) by pulling up.<br />
9. Push printer back into device.<br />
Version 1.02 04/24/2013 91
OSMOMAT 3000<br />
Servicing<br />
Fig. 125: Remove device front panel<br />
Fig. 126: Device front panel open<br />
92 Version 1.02 04/24/2013<br />
10. Remove device front panel by pulling forward (fig. 125). The device<br />
front panel is secured to the housing by magnets.<br />
NOTE!<br />
Risk of damage to cables and connectors!<br />
11. Carefully place device front panel on its right side (fig. 126).<br />
The device front panel is now removed.
Install device front panel<br />
Fig. 127: Install device front panel<br />
Fig. 128: Elevator cover with correct cable routing<br />
1 Cable<br />
2 Cable guide on thermistor probe<br />
Personnel: Service technician<br />
Safety gear: Disposable lab gloves<br />
Materials: Allen key SW 2<br />
OSMOMAT 3000<br />
Servicing<br />
1. Install device front panel on device and push into place (fig. 127).<br />
2. Pull out printer from device using handle.<br />
3. Install printer cover on printer and push down.<br />
The printer cover is now secured.<br />
4. Push printer back into device.<br />
5.<br />
Correct cable routing<br />
Incorrect cable routing<br />
NOTE!<br />
Risk of cable break!<br />
Route cables on thermistor probe through cable guide (fig. 128/2)<br />
and install elevator cover on device.<br />
Pay attention to correct cable routing.<br />
Version 1.02 04/24/2013 93
OSMOMAT 3000<br />
Servicing<br />
Fig. 129: Tighten mounting screws<br />
9.3 Lubricate elevator<br />
Fig. 130: Location of elevator guide<br />
Lubricate elevator guide<br />
94 Version 1.02 04/24/2013<br />
6. Bolt elevator cover to elevator using the 2 mounting screws<br />
(fig. 129/1).<br />
The device front panel is now installed.<br />
Personnel: <strong>User</strong><br />
Safety gear: Disposable lab gloves<br />
Materials: Silicone spray<br />
NOTE!<br />
Risk of property damage due to wrong lubricant!<br />
The use of lubricating grease can damage the elevator<br />
guide.<br />
- Only use silicone spray as lubricant.<br />
1. Power down device on rear side using on/off switch.<br />
2. Remove device front panel ( on page 89).
Fig. 131: Lubricate elevator guide<br />
OSMOMAT 3000<br />
Servicing<br />
3. Lubricate elevator guide on left (fig. 131/A) and right side<br />
(fig. 131/B) of ball bearing using silicone spray.<br />
Tip<br />
The left ball bearing of the elevator guide is not<br />
easily accessible.<br />
Therefore, lubricate the upper section (fig. 131/A) on<br />
the left side of the elevator guide and move the elevator<br />
up and down multiple times.<br />
4. Install device front panel ( on page 93).<br />
Version 1.02 04/24/2013 95
OSMOMAT 3000<br />
Servicing<br />
9.4 Perform visual inspection of device<br />
Fig. 132: Inspect device for foreign objects<br />
Fig. 133: Clean cooling nipple<br />
96 Version 1.02 04/24/2013<br />
Personnel: <strong>User</strong><br />
Safety gear: Disposable lab gloves<br />
Materials: Fiberglass pin<br />
Soft cloth<br />
Tweezers<br />
1. Verify that the cables at the rear side of the device are secure<br />
and none of them are broken.<br />
In case of cable breaks, replace the cable.<br />
2. Check if foreign objects, such as measuring vessels, are located<br />
in the openings of the device (fig. 132/1+2).<br />
Remove any foreign objects using tweezers.<br />
3. Clean cooling nipple (fig. 133/1) using fiberglass pin. For this<br />
purpose, move elevator cover up.<br />
4. Wipe off dirt and dust from housing using a soft cloth.
9.5 Check reproducibility of measurements<br />
OSMOMAT 3000<br />
Servicing<br />
The purpose of the measurement check is to verify the specified performance limits of the device.<br />
9.5.1 Sample test protocol measurement check<br />
Measurement check: Calibration/verification<br />
CAL / mOsmol/kg<br />
Sample / mOsmol/kg<br />
ZERO CAL1 CAL2 REF1 REF2<br />
Pure water ................... ................... ................... ...................<br />
Sample 1 ................... ................... ................... ................... ...................<br />
Sample 2 ................... ................... ................... ................... ...................<br />
Sample 3 ................... ................... ................... ................... ...................<br />
Sample 4 ................... ................... ................... ................... ...................<br />
Sample 5 ................... ................... ................... ................... ...................<br />
Sample 6 ................... ................... ................... ................... ...................<br />
Sample 7 ................... ................... ................... ................... ...................<br />
Sample 8 ................... ................... ................... ................... ...................<br />
Sample 9 ................... ................... ................... ................... ...................<br />
Sample 10 ................... ................... ................... ................... ...................<br />
Statistics<br />
Mean value ................... ................... ................... ................... ...................<br />
Variation ................... ................... ................... ................... ...................<br />
Expected value ................... ................... ................... ................... ...................<br />
Expected value met?<br />
(yes/no) ................... ................... ................... ................... ...................<br />
Thermistor no. .............................<br />
Is the osmolality within limits? yes no<br />
Responsible: ………………………(Name) ……………..(Date)<br />
Note: ……………………………............................................................................................................<br />
Fig. 134: Sample test protocol measurement check<br />
Reproducibility:<br />
+/- 2 digits in the measurement range [0..400] mOsmol/kg<br />
+/- 0.5% in the measurement range [400..1500] mOsmol/kg<br />
+/- 1.0% starting with 1500 mOsmol/kg<br />
Version 1.02 04/24/2013 97
OSMOMAT 3000<br />
Disposal<br />
10 Disposal<br />
Separation of consumables<br />
Scrapping of device<br />
98 Version 1.02 04/24/2013<br />
After its useful life, the device must be disposed of under environmentally<br />
conscious considerations.<br />
WARNING!<br />
Risk of death due to exposure to biohazards!<br />
Improper disposal causes a risk of exposure to biohazards.<br />
The resulting risk of infection can lead to serious<br />
illness including death.<br />
- Dispose of disposable accessories and other contaminated<br />
products according to the requirements for the<br />
disposal of biohazards.<br />
NOTE!<br />
Harm to environment due to improper disposal!<br />
Electronic scrap and electronics assemblies are to be<br />
treated as hazardous waste and can cause harm to the<br />
environment in case of improper disposal.<br />
- Always task certified specialist firms with the disposal<br />
of the device.<br />
For scrapping, clean device and observe applicable work safety and<br />
environmental regulations for disposal.<br />
Power down device and disconnect power plug.<br />
Return the device to the manufacturer or a certified disposal firm.<br />
Do not dispose of the device through municipal waste.<br />
Immediately before returning the medical product to the<br />
manufacturer, make sure that the device meets strict hygienic<br />
conditions. If necessary, disinfect device.
11 Specifications<br />
11.1 Dimensions<br />
11.2 Performance parameters<br />
OSMOMAT 3000<br />
Specifications<br />
Specification Value Unit<br />
Weight 6.5 kg<br />
Width 205 mm<br />
Depth 220 mm<br />
Height 360 mm<br />
Analytic sensitivity and specificity Specification Value Unit<br />
Measuring range [0... 3000] mOsmol/kg<br />
Resolution (across entire measuring<br />
range)<br />
1 mOsmol/kg<br />
Measurement display 4.5 digits<br />
Reproducibility Specification Value Unit<br />
11.3 Operating conditions<br />
Reproducibility ≤ ± 2 digits<br />
[0..400]<br />
≤ ± 0.5%<br />
digits<br />
[400..1500]<br />
≤ ± 1.0%<br />
[1500..]<br />
mOsmol/kg<br />
mOsmol/kg<br />
mOsmol/kg<br />
Environment Specification Value Unit<br />
Temperature range 10-35 °C<br />
Relative humidity 10–90 (noncondensing)<br />
Maximal operating altitude 2000 m<br />
Useful life Specification Value Unit<br />
%<br />
Version 1.02 04/24/2013 99
OSMOMAT 3000<br />
Specifications<br />
11.4 Calibration standard<br />
Calibration standard 300 mOsmol/kg<br />
Properties<br />
Storage and shelf life<br />
11.5 Connection ratings<br />
100 Version 1.02 04/24/2013<br />
Useful life 10 Years<br />
Composition Value<br />
Sodium chloride 9.463 kg<br />
Water (for injection purposes as bulk) ad 1000 l<br />
Specifications Value<br />
Container Clear glass OPC<br />
ampoules<br />
Poison class F<br />
Water hazard class 1<br />
Disposal According to good<br />
lab practice<br />
(GLP)/national<br />
regulations<br />
Specifications Value<br />
Storage class 10 – 13<br />
Temperature range 5°C – 45°C<br />
Stability<br />
(at 22°C ambient temperature)<br />
0.5 hours<br />
Shelf life Listed on packaging<br />
Electrical Specification Value Unit
OSMOMAT 3000<br />
Specifications<br />
Power cord Detachable<br />
power supply<br />
cable<br />
Power connection 100-240 VAC<br />
Frequency 50-60 Hz<br />
Power consumption, max. 80 VA<br />
Fuse (HBC 1500A) T 1.0 A<br />
Memory Backup<br />
(UL: MH 13654 (N) )<br />
10<br />
years useful<br />
life<br />
Protection class IP21<br />
Protection type I<br />
Degree of contamination 2<br />
Interfaces Specification Value<br />
11.6 Options<br />
Printer (D)<br />
Barcode (BC)<br />
Serial port 2 x RS232 (one RS232 reserved for<br />
barcode reader)<br />
1 x USB<br />
Specification Value<br />
Printer Alphanumeric dot matrix printer, 5x7<br />
matrix, date, time and sample information<br />
on each measurement<br />
Number of digits 16 characters per row<br />
Paper Normal paper, 43mm wide<br />
Print modes single print, batch printing<br />
Specification Value<br />
Barcode reader<br />
Error message in plain text<br />
Version 1.02 04/24/2013 101
OSMOMAT 3000<br />
Specifications<br />
11.7 Nameplate<br />
Fig. 135: Nameplate<br />
102 Version 1.02 04/24/2013<br />
The nameplate is located at the rear of the device.
12 Index<br />
2<br />
2-point calibration ................................................ 56<br />
3<br />
3-point calibration ................................................ 56<br />
A<br />
Accessories ........................................................... 25<br />
Activate paper feed ................................................ 63<br />
C<br />
Calibration interval ........................................ 43, 56<br />
Calibration methods ............................................ 56<br />
Calibration standard<br />
Calibrate Device ................................................. 56<br />
Composition ..................................................... 100<br />
Handling ............................................................. 17<br />
Properties ......................................................... 100<br />
Clean cooling clamp ............................................ 84<br />
Configure batch ID ................................................. 63<br />
Configure language ............................................... 62<br />
Configure sample ID .............................................. 63<br />
Configure screen contrast...................................... 62<br />
Configure screen saver.......................................... 63<br />
Connection ratings .................................... 100, 101<br />
Consumables ......................................................... 24<br />
Cryst-needle<br />
Adjust ................................................................. 72<br />
Free movement .................................................. 72<br />
Replace .............................................................. 72<br />
Customer service ......................................................3<br />
D<br />
Delivery condition .................................................. 36<br />
Device<br />
OSMOMAT 3000<br />
Index<br />
Calibrate ............................................................. 56<br />
Connect .............................................................. 42<br />
Disposal .............................................................. 98<br />
Install .................................................................. 41<br />
In-vitro diagnostic product .................................... 8<br />
Overview ......................................................... 8, 22<br />
Power up ............................................................ 47<br />
Reproducibility .................................................... 99<br />
Sensitivity and specificity .................................... 99<br />
Setup .................................................................. 43<br />
Transport ............................................................ 40<br />
Unpack ............................................................... 39<br />
Visual inspection................................................. 96<br />
Dimensions ........................................................... 99<br />
Disposal ................................................................ 98<br />
E<br />
Electrical current .................................. 14, 46, 66, 88<br />
Elevator ............................................................. 8, 22<br />
Lubricate ............................................................. 94<br />
Enter values ........................................................... 31<br />
Environmental protection<br />
Electronic components ....................................... 21<br />
Sodium bicarbonate ........................................... 21<br />
Error table .............................................................. 68<br />
ESD ........................................................................ 16<br />
Exposure to liquids and moisture ........................... 16<br />
F<br />
Fan ......................................................................... 16<br />
Freezing point depression .................................. 26<br />
Version 1.02 04/24/2013 103
H<br />
OSMOMAT 3000<br />
Hazards<br />
I<br />
Electrical current ............................... 14, 46, 66, 88<br />
Incorrect measurements ...................................... 17<br />
Intended use ........................................................... 14<br />
Inventory ............................................................... 19<br />
L<br />
Lower cooling system ................................ 8, 22, 29<br />
M<br />
Manufacturer address .............................................. 3<br />
Measuring vessel<br />
Correct positioning .............................................. 48<br />
Measuring vessels<br />
Incorrect .............................................................. 17<br />
Measurements<br />
N<br />
Basics ................................................................. 26<br />
Nameplate ............................................................ 102<br />
Needle puncture injury ........................................... 15<br />
O<br />
On/Off switch .............................................. 9, 23, 33<br />
Operating conditions ........................................... 99<br />
Operator ................................................................. 18<br />
Osmolality ......................................................... 8, 26<br />
P<br />
Packaging .............................................................. 37<br />
Handling of packaging materials......................... 37<br />
Symbols on packaging ........................................ 37<br />
Perform series measurement .............................. 52<br />
Performance data ................................................. 99<br />
Personnel ............................................................... 20<br />
Power up ............................................................... 47<br />
104 Version 1.02 04/24/2013<br />
Printer .............................................................. 32, 63<br />
Connection ......................................................... 33<br />
Printer ink ........................................................... 86<br />
Printer paper ...................................................... 84<br />
Printer paper .......................................................... 32<br />
R<br />
Remove/install device front panel .......................... 89<br />
Replace microfuses ............................................. 83<br />
Replace printer ink .............................................. 86<br />
Replace printer paper .......................................... 84<br />
Reproducibility ....................................................... 17<br />
Risk of infection ..................................................... 15<br />
Risks<br />
S<br />
ESD .................................................................... 16<br />
Exposure to liquids and moisture ....................... 16<br />
Improper handling of calibration standard.......... 17<br />
Incorrect Measuring vessels .............................. 17<br />
Infection .............................................................. 15<br />
Insufficient air circulation .................................... 16<br />
Needle puncture injury ....................................... 15<br />
Shock ................................................................. 17<br />
Shock ................................................................. 16<br />
Safety gear ........................................................... 21<br />
Samples<br />
Measure ............................................................. 48<br />
Series measurement .......................................... 52<br />
Scrapping<br />
Device ................................................................ 98<br />
Separation<br />
Consumables ..................................................... 98<br />
Serial number ....................................................... 43<br />
Service ......................................................................3<br />
Service table .......................................................... 89<br />
Shock ..................................................................... 16<br />
Storage.................................................................. 39<br />
Symbols<br />
In this manual ..................................................... 12
T<br />
Temperature sensor<br />
Replace .............................................................. 76<br />
Thermistor .............................................................. 29<br />
thermistor probe ..................................................... 29<br />
Touchscreen .................................................... 8, 30<br />
Enter values ....................................................... 31<br />
Operation ........................................................... 30<br />
OSMOMAT 3000<br />
Transport inspection .............................................. 36<br />
U<br />
Upper cooling system ............................... 8, 22, 28<br />
<strong>User</strong> preferences.................................................... 62<br />
Z<br />
Zero point calibration .......................................... 56<br />
Version 1.02 04/24/2013 105
OSMOMAT 3000<br />
Appendix<br />
Appendix<br />
Returning the device<br />
Fig. 136: Position measuring vessel<br />
Fig. 137: "Lab Option" menu<br />
106 Version 1.02 04/24/2013<br />
When returning the device for repairs or a refund, please note the following.<br />
Personnel: <strong>User</strong><br />
Safety gear: Disposable lab gloves<br />
1. Power down device using on/off switch on rear side and disconnect<br />
power plug.<br />
2. Call or write to request a free return order for equipment that is being<br />
returned for warranty repair or credit.<br />
You may also request a return order for equipment that is being returned<br />
for non-warranty repair,<br />
but you will be liable for the cost of the return order.<br />
3. Clean and disinfect the equipment before returning it to us.<br />
We will charge a processing fee for cleaning and disinfecting<br />
contaminated equipment.<br />
Equipment that is strongly contaminated will not be<br />
processed by us and will be returned at the customer’s<br />
expense.<br />
4. Position a measuring vessel (Fig. 137/1) on the thermistor probe.<br />
The measuring vessel is securely attached to the<br />
thermistor probe when it clicks into place.<br />
5. Move initiation needle to transport position.<br />
Open the menu for configuring the lab options.<br />
In the Start menu, tap<br />
Settings Lab Options Safe Transport.<br />
The menu may be protected with a lab supervisor<br />
password.
Fig. 138: "Safe Transport" menu<br />
Fig. 139: Position transport safety device<br />
Fig. 140: Device with protective sleeve<br />
6. Tap Park Needle.<br />
Tap Quit to exit the menu.<br />
WARNING!<br />
Risk of infection from sample residue!<br />
OSMOMAT 3000<br />
Appendix<br />
The initiation needle is immersed into the sample during<br />
measurements. Contact with the initiation needle increases<br />
the risk of infection.<br />
- Wear lab gloves during any kind of work.<br />
7. Tilt transport safety device for thermistor probe and carefully slide<br />
behind the thermistor probe (Fig. 139).<br />
8. Pull protective sleeve<br />
(Fig. 140/1) included with the delivery over device.<br />
9. Enclose written information explaining the reason for returning the equipment.<br />
10. If the equipment is being returned for credit, you must include all accessories<br />
(power cord, data transfer cable, software disks, manuals, etc.).<br />
11. Return the equipment in its original packaging. If you no longer have the<br />
original packaging, you may purchase replacement packaging from<br />
Gonotec.<br />
12. Do you have a high sample volume and/or cannot afford downtime?<br />
During repairs, we will provide you with a temporary unit<br />
at no cost. Transport costs are only incurred outside the<br />
warranty period<br />
Version 1.02 04/24/2013 107
OSMOMAT 3000<br />
Appendix<br />
Limited Warranty<br />
Duration of<br />
Gonotec product Limited Warranty<br />
Software 90 days<br />
Thermistor probe 180 days<br />
Osmometer 2 years<br />
A. Extension of the Limited Warranty<br />
1. Gonotec guarantees the end user that Gonotec products<br />
shall be<br />
free from manufacturing and material defects<br />
for the above periods of validity from the purchase date.<br />
The end user must provide proof of the purchase date.<br />
2. For software products, Gonotec’s limited warranty applies<br />
only to the non-execution of programming instructions.<br />
Gonotec does not guarantee that the operation of a product<br />
will proceed without errors or interruptions.<br />
3. Gonotec’s limited warranty applies only to defects that<br />
arise during normal operation of the product. It does not<br />
apply under the following conditions:<br />
a. Inadequate servicing or improper modification;<br />
b. Use of software, interfaces, print media or accessories<br />
not supported or supplied by Gonotec; or<br />
c. Use of the equipment in a manner not covered by the<br />
product specifications.<br />
4. For Gonotec osmometers, the use of measuring vessels<br />
of manufacturers other than those of the measuring vessels<br />
supplied by Gonotec does not void the customer’s<br />
warranty claims or any customer support contracts between<br />
Gonotec and the customer.<br />
If, however, the use of measuring vessels from third-party<br />
providers or the cleaning of recycled measuring vessels<br />
results in malfunctions or damage to the osmometer or<br />
thermistor probe, Gonotec shall assess the normal fees<br />
for the time and material required to repair such malfunctions<br />
or damage.<br />
5. If Gonotec is notified within the warranty period of a defect<br />
in a software product, in media or in a thermistor probe<br />
and if the Gonotec warranty applies to the defect,<br />
Gonotec shall replace the defective product. If Gonotec is<br />
notified within the warranty period of a defect in a hardware<br />
product and if the Gonotec warranty applies to the<br />
defect, Gonotec shall repair or replace the defective product<br />
at its discretion.<br />
6. If Gonotec is unable to repair or replace a defective<br />
product to which the Gonotec warranty applies, Gonotec<br />
shall refund the purchase price of the product within a<br />
reasonable period following notification of the respective<br />
defect.<br />
7. Gonotec is not obligated to repair or replace a product or<br />
refund its purchase price until the customer returns the<br />
defective product<br />
to Gonotec.<br />
8. Replacement products may be new or almost new, as<br />
long as their functionality is at least that of the replaced<br />
product.<br />
9. The Gonotec limited warranty is applicable in all countries<br />
in which Gonotec sells the applicable product. The following<br />
countries and regions are exceptions: All countries<br />
outside the EU. In these countries, the warranty is only<br />
valid in the country in which the product was purchased.<br />
Contracts for additional warranty services, such as on-site<br />
service, may be available from an authorized Gonotec<br />
sales partner.<br />
108 Version 1.02 04/24/2013<br />
B. Limitation of the Warranty<br />
1. TO THE EXTENT PERMISSIBLE UNDER THE APPLICA-<br />
BLE LOCAL LAWS, NEITHER GONOTEC NOR ITS SUP-<br />
PLIERS SHALL ASSUME ANY ADDITIONAL WARRANTY<br />
SERVICES OR ACCEPT ANY OTHER CONDITIONS,<br />
EXPRESS OR IMPLIED, WITH REGARD TO THE<br />
GONOTEC PRODUCTS.<br />
C. Limitations of Liability<br />
1. To the extent permissible under the applicable local laws,<br />
the legal remedies named here shall be the sole and exclusive<br />
legal remedies available to the customer.<br />
2. TO THE EXTENT PERMISSIBLE UNDER THE APPLICA-<br />
BLE LOCAL LAWS AND WITH THE EXCEPTION OF THE<br />
OBLIGATIONS EXPRESSLY NAMED HERE, NEITHER<br />
GONOTEC NOR ITS SUPPLIERS SHALL BE LIABLE<br />
FOR DIRECT OR INDIRECT, SPECIFIC, INCIDENTAL<br />
OR CONSEQUENTIAL LOSSES, WHETHER BASED ON<br />
A CONTRACT, A TORTIOUS ACT OR ANOTHER LEGAL<br />
THEORY, AND NOTWITHSTANDING PRIOR NOTIFICA-<br />
TION OF THE POSSIBILITY OF SUCH A LOSS.<br />
D. Respective Jurisdiction<br />
1. This warranty statement guarantees the customer<br />
certain legal claims. The customer may have other legal<br />
claims that go beyond those outlined here.<br />
Such claims vary by state in the US, by province in Canada<br />
and by nation elsewhere in the world.<br />
2. Elements of this warranty statement that conflict with local<br />
laws can be regarded as amended to comply with the applicable<br />
laws. For this reason, certain warranty exclusions<br />
and restrictions outlined here may be of no relevance to<br />
the customer. In some states of the US, in some Canadian<br />
provinces and in some countries outside North America, for<br />
example, the following national laws apply:<br />
d. Exclusion of the fact that the warranty exclusions and<br />
restrictions named here restrict the legal rights of a customer<br />
(for example: Great Britain)<br />
e. Restriction of the possibilities for manufacturers to enforce<br />
such warranty exclusions and restrictions<br />
f. Granting of additional warranty claims for the customer,<br />
fixing of the validity period for implied warranty services<br />
that the manufacturer may not exclude, or nonadmission<br />
of restrictions relating to the validity period for<br />
implied warranty services<br />
3. THE FOLLOWING APPLIES TO CONSUMER TRANSAC-<br />
TIONS IN AUSTRALIA AND NEW ZEALAND: THE CON-<br />
DITIONS OF THIS WARRANTY STATEMENT NEITHER<br />
EXCLUDE<br />
LEGAL RIGHTS APPLICABLE TO THE SALE OF<br />
GONOTEC PRODUCTS TO SUCH CUSTOMERS NOR<br />
REPRESENT A RESTRICTION OR AMENDMENT OF<br />
SUCH RIGHTS, BUT INSTEAD REPRESENT A SUP-<br />
PLEMENT TO THESE RIGHTS, EXCEPT TO THE EX-<br />
TENT PERMISSIBLE UNDER THE LAW.
Classification of the IVD<br />
OSMOMAT 3000<br />
Appendix<br />
The OSMOMAT ® 3000 cryoscopic osmometer manufactured by Gonotec is a non-invasive in-vitro diagnostic<br />
product according to EEC Directive 93/42 (Medical Devices Law). The Osmomat ® 3000 cryoscopic osmometer is<br />
not named in Annex II, list A or B, of the Directive 98/79/EEC for in-vitro diagnostics. Compliance is declared per<br />
Annex III. Number 6 of Annex II is disregarded, since the unit’s intended use does not include personal use.<br />
EC Compliance Statement—OSMOMAT ® 3000<br />
Gonotec GmbH<br />
GSG-Hof Reuchlinstr. 10-11<br />
10553 Berlin / GERMANY<br />
We hereby declare that the OSMOMAT ® 3000 cryoscopic osmometer and its options comply with Directive<br />
98/79/EEC. Compliance is declared per Annex III of the Directive. The CE mark on the unit acknowledges<br />
this.<br />
Date: 2/1/2013<br />
Signature of managing director:<br />
Provisions of Certification<br />
CE compliance requires that the unit is installed and operated in the manner described in this manual. Any departure<br />
from the specifications or independent modifications of the unit without the express consent of Gonotec<br />
GmbH may result in a violation of CE requirements. Such actions invalidate the compliance statement and transfer<br />
responsibility to the originator of said actions.<br />
Version 1.02 04/24/2013 109
OSMOMAT 3000<br />
Appendix<br />
Consumables<br />
Item no. Item<br />
9/30/0010 Measuring vessel for OSMOMAT 3000 1,000<br />
9/30/0020 Calibration standard 300 mOsmol/kg (ampoules of 1ml each) 10<br />
9/30/0100 Calibration standard 100 mOsmol/kg (ampoules of 1ml each) 10<br />
9/30/0290<br />
Reference solution OSMOREF ® 290 mOsmol/kg (ampoules of 1ml<br />
each)<br />
10<br />
9/30/0500 Calibration standard 500 mOsmol/kg (ampoules of 1ml each) 10<br />
9/30/0850 Calibration standard 850 mOsmol/kg (ampoules of 1ml each) 10<br />
9/30/2000 Calibration standard 2000 mOsmol/kg (ampoules of 1ml each) 10<br />
9/30/1010 Printer paper roll for OSMOMAT 3000-D 8<br />
9/30/1020 Continuous loop ribbon cartridge for OSMOMAT 3000-D 1<br />
Accessories and Replacement Parts<br />
Item no. Item<br />
32.3.0010 Thermistor probe for OSMOMAT 3000 (50µl sample volume) 1<br />
32.3.2010 Thermistor probe for OSMOMAT 3000-M (15µl sample volume) 1<br />
9/30/0030 Blow-out device 10<br />
6/30/0020 Initiation needle 1<br />
9/20/0165 Data cable for RS 232 interface OSMOMAT 3000 1<br />
9/20/0166 USB cable 1<br />
30.2.0030 Adjustment tool 1<br />
9/20/0100 Power cord, 2 meters 1<br />
00.9.0106 Package with fine-wire fuses, 1,0 A Lag, 230V 10<br />
110 Version 1.02 04/24/2013<br />
Pc. /<br />
VE<br />
Pc. /<br />
VE
Before Calling Gonotec<br />
Fig. 141: Contact Gonotec<br />
1 Use a telephone located close to the device.<br />
2 Power up device.<br />
OSMOMAT 3000<br />
Appendix<br />
NOTE!<br />
Danger in case of continuous acoustic alarm!<br />
In case of continuous acoustic alarm, the electronics<br />
components of the device can be damaged.<br />
Power down device again.<br />
3 Note down the serial number of the device. To find the serial<br />
number, select Start menu Info.<br />
4 Have the device documentation available.<br />
Contact info:<br />
Gonotec GmbH<br />
GSG-Hof Reuchlinstr.10-11<br />
D-10553 Berlin<br />
Phone: (030) 7809 588-0<br />
Fax: (030) 7809 588-88<br />
E-mail: contact@gonotec.com<br />
Web: http://www.gonotec.com<br />
Version 1.02 04/24/2013 111