

Derbi servicemanual - Scootergrisen
Derbi servicemanual - Scootergrisen
Derbi servicemanual - Scootergrisen

Create successful ePaper yourself
Turn your PDF publications into a flip-book with our unique Google optimized e-Paper software.
HUNTER MODELS<br />
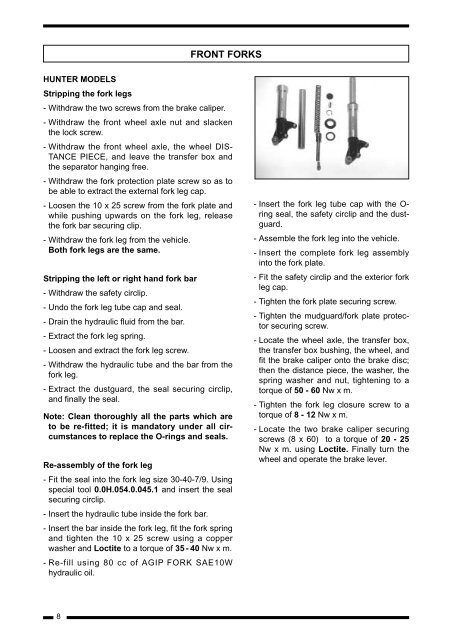
Stripping the fork legs<br />
- Withdraw the two screws from the brake caliper.<br />
- Withdraw the front wheel axle nut and slacken<br />
the lock screw.<br />
- Withdraw the front wheel axle, the wheel DIS-<br />
TANCE PIECE, and leave the transfer box and<br />
the separator hanging free.<br />
- Withdraw the fork protection plate screw so as to<br />
be able to extract the external fork leg cap.<br />
- Loosen the 10 x 25 screw from the fork plate and<br />
while pushing upwards on the fork leg, release<br />
the fork bar securing clip.<br />
- Withdraw the fork leg from the vehicle.<br />
Both fork legs are the same.<br />
Stripping the left or right hand fork bar<br />
- Withdraw the safety circlip.<br />
- Undo the fork leg tube cap and seal.<br />
- Drain the hydraulic fluid from the bar.<br />
- Extract the fork leg spring.<br />
- Loosen and extract the fork leg screw.<br />
- Withdraw the hydraulic tube and the bar from the<br />
fork leg.<br />
- Extract the dustguard, the seal securing circlip,<br />
and finally the seal.<br />
Note: Clean thoroughly all the parts which are<br />
to be re-fitted; it is mandatory under all circumstances<br />
to replace the O-rings and seals.<br />
Re-assembly of the fork leg<br />
- Fit the seal into the fork leg size 30-40-7/9. Using<br />
special tool 0.0H.054.0.045.1 and insert the seal<br />
securing circlip.<br />
- Insert the hydraulic tube inside the fork bar.<br />
- Insert the bar inside the fork leg, fit the fork spring<br />
and tighten the 10 x 25 screw using a copper<br />
washer and Loctite to a torque of 35 - 40 Nw x m.<br />
- Re-fill using 80 cc of AGIP FORK SAE10W<br />
hydraulic oil.<br />
8<br />
FRONT FORKS<br />
- Insert the fork leg tube cap with the Oring<br />
seal, the safety circlip and the dustguard.<br />
- Assemble the fork leg into the vehicle.<br />
- Insert the complete fork leg assembly<br />
into the fork plate.<br />
- Fit the safety circlip and the exterior fork<br />
leg cap.<br />
- Tighten the fork plate securing screw.<br />
- Tighten the mudguard/fork plate protector<br />
securing screw.<br />
- Locate the wheel axle, the transfer box,<br />
the transfer box bushing, the wheel, and<br />
fit the brake caliper onto the brake disc;<br />
then the distance piece, the washer, the<br />
spring washer and nut, tightening to a<br />
torque of 50 - 60 Nw x m.<br />
- Tighten the fork leg closure screw to a<br />
torque of 8 - 12 Nw x m.<br />
- Locate the two brake caliper securing<br />
screws (8 x 60) to a torque of 20 - 25<br />
Nw x m. using Loctite. Finally turn the<br />
wheel and operate the brake lever.


