
You also want an ePaper? Increase the reach of your titles
YUMPU automatically turns print PDFs into web optimized ePapers that Google loves.
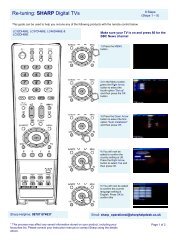
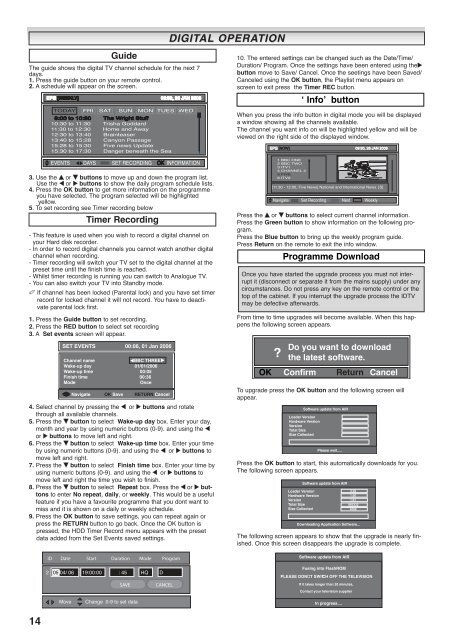
The guide shows the digital TV channel schedule for the next 7<br />
days.<br />
1. Press the guide button on your remote control.<br />
2. A schedule will appear on the screen.<br />
3. Use the e or d buttons to move up and down the program list.<br />
Use the 7 or 8 buttons to show the daily program schedule lists.<br />
4. Press the OK button to get more information on the programme<br />
you have selected. The program selected will be highlighted<br />
yellow.<br />
5. To set recording see Timer recording below<br />
- This feature is used when you wish to record a digital channel on<br />
your Hard disk recorder.<br />
- In order to record digital channels you cannot watch another digital<br />
channel when recording.<br />
- Timer recording will switch your TV set to the digital channel at the<br />
preset time until the finish time is reached.<br />
- Whilst timer recording is running you can switch to Analogue TV.<br />
- You can also switch your TV into Standby mode.<br />
✐ If channel has been locked (Parental lock) and you have set timer<br />
record for locked channel it will not record. You have to deactivate<br />
parental lock first.<br />
1. Press the Guide button to set recording.<br />
2. Press the RED button to select set recording<br />
3. A Set events screen will appear.<br />
4. Select channel by pressing the 7 or 8 buttons and rotate<br />
through all available channels.<br />
5. Press the d button to select Wake-up day box. Enter your day,<br />
month and year by using numeric buttons (0-9). and using the 7<br />
or 8 buttons to move left and right.<br />
6. Press the d button to select Wake-up time box. Enter your time<br />
by using numeric buttons (0-9). and using the 7 or 8 buttons to<br />
move left and right.<br />
7. Press the d button to select Finish time box. Enter your time by<br />
using numeric buttons (0-9). and using the 7 or 8 buttons to<br />
move left and right the time you wish to finish.<br />
8. Press the d button to select Repeat box. Press the 7 or 8 buttons<br />
to enter No repeat, daily, or weekly. This would be a useful<br />
feature if you have a favourite programme that you dont want to<br />
miss and it is shown on a daily or weekly schedule.<br />
9. Press the OK button to save settings, you can repeat again or<br />
press the RETURN button to go back. Once the OK button is<br />
pressed, the HDD Timer Record menu appears with the preset<br />
data added from the Set Events saved settings.<br />
14<br />
2<br />
Guide<br />
Timer Recording<br />
SET EVENTS 00:06, 01 Jan 2006<br />
Channel name BBC THREE<br />
Wake-up day 01/01/2006<br />
Wake-up time 00:05<br />
Finish time 00:36<br />
Mode Once<br />
Navigate OK Save RETURN Cancel<br />
ID Date Start Duration Mode Program<br />
05/04/ 06 19:00:00 : 45 HQ D<br />
Move Change 0-9 to set data<br />
SAVE CANCEL<br />
DIGITAL DIGITAL<br />
OPERATION<br />
OPERATION<br />
10. The entered settings can be changed such as the Date/Time/<br />
Duration/ Program. Once the settings have been entered using the8<br />
button move to Save/ Cancel. Once the seetings have been Saved/<br />
Canceled using the OK button, the Playlist menu appears on<br />
screen to exit press the Timer REC button.<br />
When you press the info button in digital mode you will be displayed<br />
a window showing all the channels available.<br />
The channel you want info on will be highlighted yellow and will be<br />
viewed on the right side of the displayed window.<br />
EPG [NOW] 09:30, 26 JAN 2006<br />
1 BBC ONE<br />
2 BBC TWO<br />
3 ITV1<br />
4 CHANNEL 4<br />
5 FIVE<br />
6 ITV2<br />
‘ Info’ button<br />
[11:30 - 12:00, Five News] National and International News. [S]<br />
Navigate Set Recording Next Weekly<br />
Press the e or d buttons to select current channel information.<br />
Press the Green button to show information on the following program.<br />
Press the Blue button to bring up the weekly program guide.<br />
Press Return on the remote to exit the info window.<br />
Programme Download<br />
Once you have started the upgrade process you must not interrupt<br />
it (disconnect or separate it from the mains supply) under any<br />
circumstances. Do not press any key on the remote control or the<br />
top of the cabinet. If you interrupt the upgrade process the IDTV<br />
may be defective afterwards.<br />
From time to time upgrades will become available. When this happens<br />
the following screen appears.<br />
?<br />
Do you want to download<br />
the latest software.<br />
OK Confirm<br />
Return<br />
Cancel<br />
To upgrade press the OK button and the following screen will<br />
appear.<br />
Software update from AIR<br />
Loader Version<br />
Hardware Version<br />
Version<br />
Total Size<br />
Size Collected<br />
Please wait.....<br />
Press the OK button to start, this automatically downloads for you.<br />
The following screen appears.<br />
Software update from AIR<br />
Loader Version<br />
Hardware Version<br />
Version<br />
Total Size<br />
Size Collected<br />
2.02<br />
1.00<br />
1.01<br />
883332<br />
4068<br />
Downloading Application Software...<br />
The following screen appears to show that the upgrade is nearly finished.<br />
Once this screen disappears the upgrade is complete.<br />
Software update from AIR<br />
Fusing into FlashROM<br />
PLEASE DON T SWITCH OFF THE TELEVISION<br />
If it takes longer than 20 minutes,<br />
Contact your television supplier<br />
In progress....