- Page 1 and 2: Seagate Info 7.5 Desktop User’s G
- Page 3 and 4: C O N T E N T S Chapter 1 - Introdu
- Page 5 and 6: How to modify a prompting variable
- Page 7 and 8: Displaying top and bottom values ..
- Page 9 and 10: HANDS-ON (WebAccess Desktops) .....
- Page 11 and 12: 1 Introduction What you will find i
- Page 13 and 14: Most importantly, the Info Desktop
- Page 15 and 16: Info Desktop for Outlook Info Works
- Page 17 and 18: 2 Getting to know the Info Desktop
- Page 19 and 20: File Menu commands Edit Menu comman
- Page 21 and 22: Folder Tree Opens the Info Report D
- Page 23 and 24: Stopped The scheduled object has be
- Page 25 and 26: When working offline with an offlin
- Page 27 and 28: Deleting an Info APS/APS Cluster 1
- Page 29 and 30: 8 Highlight the new offline store o
- Page 31 and 32: 3 Adding Info Objects What you will
- Page 33 and 34: HANDS-ON (Folders) How to add a fol
- Page 35 and 36: The Folder Properties dialog box ap
- Page 37 and 38: HANDS-ON (Objects) How to add a rep
- Page 39 and 40: 5 Enter the title of the query obje
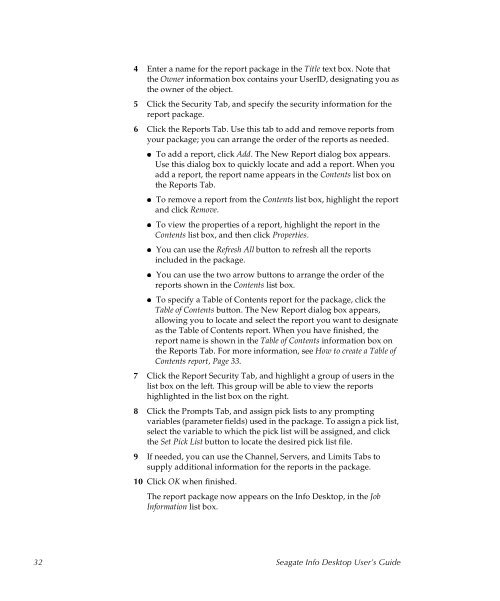
- Page 41: How to add a report package A repor
- Page 45 and 46: The Connect To Server dialog box ap
- Page 47 and 48: 6 Enter the FTP address here. 7 Spe
- Page 49 and 50: How to import cubes produced in Sea
- Page 51 and 52: There are six files, the main Cube
- Page 53 and 54: How to remove an object from the In
- Page 55 and 56: The Channel Tab The Channel Tab all
- Page 57 and 58: The Limits Tab The Limits Tab allow
- Page 59 and 60: 4 Scheduling Info Objects What you
- Page 61 and 62: Info Tab Use the Info Tab to specif
- Page 63 and 64: Prompts Tab The Prompts Tab appears
- Page 65 and 66: How to specify an output format for
- Page 67 and 68: If you chose Lotus Notes, you can s
- Page 69 and 70: 8 Use these edit boxes to specify t
- Page 71 and 72: 7 Select the option you want the pr
- Page 73 and 74: NOTE: When the Select option button
- Page 75 and 76: NOTE: The appearance of the Object
- Page 77 and 78: 2 Toggle the E-mail check box on in
- Page 79 and 80: How to schedule a report generated
- Page 81 and 82: Scheduling an object with dependenc
- Page 83 and 84: The Dependency Type dialog box allo
- Page 85 and 86: 7 Toggle this check box on and clic
- Page 87 and 88: 6 Highlight the event on this list.
- Page 89 and 90: How to stop a scheduled instance Ho
- Page 91 and 92: How to modify a prompting variable
- Page 93 and 94:
How to test database connectivity b
- Page 95 and 96:
The Configure CInfo Channel dialog
- Page 97 and 98:
How to schedule a report package Yo
- Page 99 and 100:
5 Viewing Info Objects in the Works
- Page 101 and 102:
The regions are listed here as row
- Page 103 and 104:
4 Use the Field Selector to highlig
- Page 105 and 106:
The Info Worksheet window General a
- Page 107 and 108:
When dimensions are displayed like
- Page 109 and 110:
Here is an example of drilling-down
- Page 111 and 112:
Export To Excel/ Lotus Use the EXPO
- Page 113 and 114:
Data Menu commands The Data Menu co
- Page 115 and 116:
The Info Worksheet Toolbar Shortcut
- Page 117 and 118:
Specify or remove a sort. Specify o
- Page 119 and 120:
4 Highlight a view and the instance
- Page 121 and 122:
Click and drag to select consecutiv
- Page 123 and 124:
2 Toggle Field Selector Buttons on
- Page 125 and 126:
Displaying the row and column total
- Page 127 and 128:
Displaying a different top-level to
- Page 129 and 130:
The Info Worksheet is then redrawn
- Page 131 and 132:
Re-orienting the Info Worksheet Mov
- Page 133 and 134:
2 When the cursor changes to this s
- Page 135 and 136:
Search field. Here is an example of
- Page 137 and 138:
Special Selections The six buttons
- Page 139 and 140:
. This is the current selection. 3
- Page 141 and 142:
Changing the available paged fields
- Page 143 and 144:
1 Right-click on the field which th
- Page 145 and 146:
MIN (startfield:endfield) gives the
- Page 147 and 148:
Formatting the display using attrib
- Page 149 and 150:
Three ranges are created automatica
- Page 151 and 152:
How to set color attributes for the
- Page 153 and 154:
How to define a new condition 3 Hig
- Page 155 and 156:
How to manage two conditions that r
- Page 157 and 158:
1 Click on the Value
- Page 159 and 160:
2 Type the lower and upper conditio
- Page 161 and 162:
The Attribute Editor appears. 4 Cli
- Page 163 and 164:
The calculation shows the percentag
- Page 165 and 166:
cube, only on its representation wh
- Page 167 and 168:
Each chart can be fully customized
- Page 169 and 170:
How to show data in a chart You can
- Page 171 and 172:
How to show a chart in a different
- Page 173 and 174:
How to set a chart back to the defa
- Page 175 and 176:
Loading a chart template 4 Click th
- Page 177 and 178:
Hiding tick labels As you can see f
- Page 179 and 180:
How to customize chart titles and l
- Page 181 and 182:
2 Click the Text Tab. 3 Type the ap
- Page 183 and 184:
How to drill up and down hierarchie
- Page 185 and 186:
Performing multi-level sorts For an
- Page 187 and 188:
How to sort on a dimension To sort
- Page 189 and 190:
Some of the Budget values are the s
- Page 191 and 192:
Reorienting the display If you spec
- Page 193 and 194:
By default, the exclude is performe
- Page 195 and 196:
2 Select whether to exclude rows or
- Page 197 and 198:
The filter indicated above would se
- Page 199 and 200:
These values satisfy both condition
- Page 201 and 202:
Exporting data from the Info Worksh
- Page 203 and 204:
Performing the copy and paste To us
- Page 205 and 206:
How to set the printing options and
- Page 207 and 208:
Title when a Title is specified, it
- Page 209 and 210:
How do I start the Info Worksheet f
- Page 211 and 212:
Click-drag products over to region
- Page 213 and 214:
First, use the Field Selector to ch
- Page 215 and 216:
Info Worksheet Terminology Cubes st
- Page 217 and 218:
This symbol shows there are more fi
- Page 219 and 220:
Menu Bar File Menu Commands The Men
- Page 221 and 222:
How to open the Info Worksheet for
- Page 223 and 224:
NOTE: You can only resize columns f
- Page 225 and 226:
How to show or hide dimension butto
- Page 227 and 228:
1 Click-drag next to the Field Sele
- Page 229 and 230:
The display now looks like this: Se
- Page 231 and 232:
These buttons are grayed if the dim
- Page 233 and 234:
2 Highlight the fields you want fro
- Page 235 and 236:
Formatting the display The Select S
- Page 237 and 238:
Add and remove ranges and set their
- Page 239 and 240:
It may be the case that two conditi
- Page 241 and 242:
Only the selected rows and columns
- Page 243 and 244:
How to delete a range Any condition
- Page 245 and 246:
In this case, the formatting for
- Page 247 and 248:
Charting You can display the Worksh
- Page 249 and 250:
How to show data in a chart You can
- Page 251 and 252:
How to show your chart in a differe
- Page 253 and 254:
How to customize the chart titles Y
- Page 255 and 256:
In this example, the bars in the ch
- Page 257 and 258:
Changing the positions of the axis
- Page 259 and 260:
Hiding axis labels 2 Uncheck this o
- Page 261 and 262:
2 Check this option and type in a v
- Page 263 and 264:
Each field value is now shown on th
- Page 265 and 266:
Customizing the chart legend 2 Chec
- Page 267 and 268:
Performing multi-level sorts Whenas
- Page 269 and 270:
The products are now sorted into as
- Page 271 and 272:
To remove all specified sorts You c
- Page 273 and 274:
Here is the exclude symbol. Only re
- Page 275 and 276:
6 Integrated Desktops What you will
- Page 277 and 278:
Info Desktop for HTML Info Desktop
- Page 279 and 280:
Job Information Tabs In the right f
- Page 281 and 282:
Stops a scheduled job from running.
- Page 283 and 284:
Info Desktop for HTML Open your web
- Page 285 and 286:
How to schedule an object for immed
- Page 287 and 288:
How to schedule an object for recur
- Page 289 and 290:
How to specify an output destinatio
- Page 291 and 292:
Info Desktop for Java How to hold a
- Page 293 and 294:
How to delete a report instance How
- Page 295 and 296:
How to view the properties of an in
- Page 297 and 298:
View Window Use the View Window sec
- Page 299 and 300:
Refresh Use the Refresh option in t
- Page 301 and 302:
If you have not yet subscribed to y
- Page 303 and 304:
The Info Channel main page appears.
- Page 305 and 306:
3 In the Use Folder Named text box,
- Page 307 and 308:
How to navigate the Info Desktop fo
- Page 309 and 310:
7 Info Viewers What you will find i
- Page 311 and 312:
Info Viewer for ActiveX (WebAccess)
- Page 313 and 314:
Info Viewer for HTML (WebAccess) Th
- Page 315 and 316:
Info Viewer (Info Desktop) The Info
- Page 317 and 318:
8 Prompting Variable Pick Lists Wha
- Page 319 and 320:
1 Open any text editor. 2 Type the
- Page 321 and 322:
3 Click the Prompts Tab. 4 Highligh
- Page 323 and 324:
I N D E X Symbols % of Column Total
- Page 325 and 326:
display changing Info Worksheet for
- Page 327 and 328:
Job Information list box ....... 12
- Page 329 and 330:
scheduling for immediate processing
- Page 331 and 332:
seamless object creation ..........
- Page 333:
W WebAccess customizing the desktop


