

arcmaster 400 s - Victor Technologies
arcmaster 400 s - Victor Technologies
arcmaster 400 s - Victor Technologies

You also want an ePaper? Increase the reach of your titles
YUMPU automatically turns print PDFs into web optimized ePapers that Google loves.
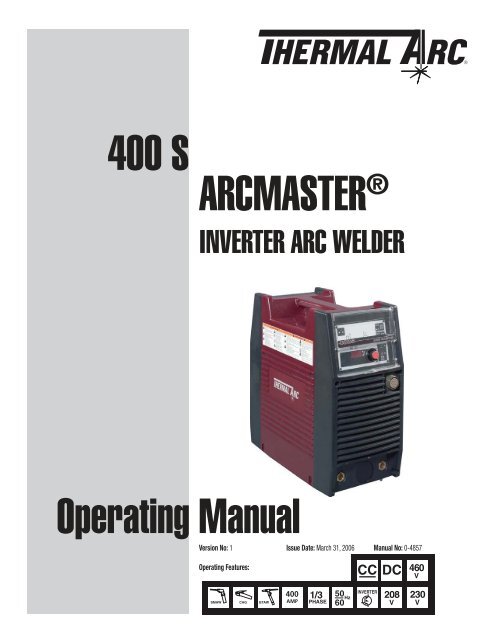
<strong>400</strong> S ARCMASTER ®<br />
INVERTER ARC WELDER<br />
Operating Manual<br />
Version No: 1 Issue Date: March 31, 2006 Manual No: 0-4857<br />
Operating Features:<br />
SMAW<br />
CAG<br />
GTAW<br />
1/3<br />
PHASE<br />
50<br />
60 Hz<br />
CC DC<br />
INVERTER<br />
208<br />
V<br />
460<br />
V<br />
230<br />
V
WE APPRECIATE YOUR BUSINESS!<br />
Congratulations on your new Thermal Arc ® product. We are proud to<br />
have you as our customer and will strive to provide you with the best<br />
service and reliability in the industry. This product is backed by our<br />
extensive warranty and world-wide service network. To locate your<br />
nearest distributor or service agency call 800-752-7621, or visit us<br />
on the web at www.ThermalArc.com.<br />
This Operating Manual has been designed to instruct you on the correct<br />
use and operation of your Thermal Arc ® product. Your satisfaction with<br />
this product and its safe operation is our ultimate concern. Therefore,<br />
please take the time to read the entire manual, especially the Safety<br />
Precautions. They will help you to avoid potential hazards that may<br />
exist when working with this product.<br />
YOU ARE IN GOOD COMPANY!<br />
The Brand of Choice for Contractors and Fabricators Worldwide.<br />
Thermal Arc ® is a Global Brand of Arc Welding Products for Thermadyne<br />
Industries Inc. We manufacture and supply to major welding industry<br />
sectors worldwide including; Manufacturing, Construction, Mining,<br />
Automotive, Aerospace, Engineering, Rural and DIY/Hobbyist.<br />
We distinguish ourselves from our competition through marketleading,<br />
dependable products that have stood the test of time. We<br />
pride ourselves on technical innovation, competitive prices, excellent<br />
delivery, superior customer service and technical support, together<br />
with excellence in sales and marketing expertise.<br />
Above all, we are committed to develop technologically advanced<br />
products to achieve a safer working environment within the welding<br />
industry.
! WARNINGS<br />
Read and understand this entire Manual and your employer’s safety practices before installing, operating, or<br />
servicing the equipment.<br />
While the information contained in this Manual represents the Manufacturer’s best judgment, the Manufacturer<br />
assumes no liability for its use.<br />
Instruction Manual Number 0-4857 for:<br />
ArcMaster <strong>400</strong> S Inverter Welding Power Supply Part No. 10-3070<br />
Published by:<br />
Thermadyne Industries, Inc.<br />
82 Benning Street<br />
West Lebanon, New Hampshire, USA 03784<br />
(603) 298-5711<br />
www.thermalarc.com<br />
Copyright © 2006 by<br />
Thermadyne Industries, Inc.<br />
® All rights reserved.<br />
Reproduction of this work, in whole or in part, without written permission of the publisher is<br />
prohibited.<br />
The publisher does not assume and hereby disclaims any liability to any party for any loss or<br />
damage caused by any error or omission in this Manual, whether such error results from negligence,<br />
accident, or any other cause.<br />
Publication Date: March 31, 2006<br />
Record the following information for Warranty purposes:<br />
Where Purchased: _______________________________<br />
Purchase Date: _______________________________<br />
Equipment Serial #: _______________________________<br />
i
ARCMASTER <strong>400</strong> S<br />
ii<br />
Table of Contents<br />
SECTION 1:<br />
SAFETY INSTRUCTIONS AND WARNINGS .................................................. 1-1<br />
1.01 Arc Welding Hazards .................................................................................1-1<br />
1.02 Principal Safety Standards ........................................................................1-4<br />
1.03 Precautions De Securite En Soudage A L’arc ............................................1-5<br />
1.04 Dangers relatifs au soudage à l’arc ...........................................................1-5<br />
1.05 Principales Normes De Securite ...............................................................1-8<br />
SECTION 2:<br />
INTRODUCTION AND DESCRIPTION ......................................................... 2-1<br />
2.01 How To Use This Manual ..........................................................................2-1<br />
2.02 Equipment Identifi cation ...........................................................................2-1<br />
2.03 Receipt Of Equipment ...............................................................................2-1<br />
2.04 Symbol Chart ............................................................................................2-2<br />
2.05 Description ................................................................................................2-3<br />
2.06 Functional Block Diagrams ........................................................................2-3<br />
2.07 Transporting Methods ...............................................................................2-4<br />
SECTION 3:<br />
INSTALLATION RECOMMENDATIONS ........................................................ 3-1<br />
3.01 Environment ..............................................................................................3-1<br />
3.02 Location ....................................................................................................3-1<br />
3.03 Electrical Input Connections ......................................................................3-1<br />
3.04 Specifi cations ............................................................................................3-4<br />
3.05 Duty Cycle .................................................................................................3-5<br />
SECTION 4:<br />
OPERATOR CONTROLS ........................................................................ 4-1<br />
4.01 ARCMASTER <strong>400</strong> S Controls ....................................................................4-1<br />
4.02 Weld Parameter Description .....................................................................4-3<br />
4.03 Weld Parameters for ARCMASTER <strong>400</strong> S .................................................4-4<br />
4.04 Power Source Features .............................................................................4-4<br />
SECTION 5:<br />
SET-UP FOR SMAW (STICK) AND GTAW (TIG) ............................................. 5-1<br />
SECTION 6:<br />
SEQUENCE OF OPERATION .................................................................... 6-1<br />
6.01 Stick Welding ............................................................................................6-1<br />
6.02 DC LIFT TIG Welding .................................................................................6-1<br />
March 31, 2006
ARCMASTER <strong>400</strong> S<br />
SECTION 7:<br />
BASIC TIG WELDING GUIDE ................................................................... 7-1<br />
7.01 Electrode Polarity ......................................................................................7-1<br />
7.02 Tungsten Electrode Current Ranges ..........................................................7-1<br />
7.03 Tungsten Electrode Types .........................................................................7-1<br />
7.04 Guide for Selecting Filler Wire Diameter ...................................................7-1<br />
7.05 Shielding Gas Selection ............................................................................7-2<br />
7.06 TIG Welding Parameters for Low Carbon & Low Alloy Steel Pipe .............7-2<br />
SECTION 8:<br />
BASIC ARC WELDING GUIDE .................................................................. 8-1<br />
8.01 Electrode Polarity ......................................................................................8-1<br />
8.02 Effects of Stick Welding Various Materials ................................................8-1<br />
SECTION 9:<br />
ROUTINE MAINTENANCE ..................................................................... 9-1<br />
SECTION 10:<br />
BASIC TROUBLESHOOTING ..................................................................10-1<br />
10.01 TIG Welding Problems ..........................................................................10-1<br />
10.02 Stick Welding Problems ........................................................................10-3<br />
10.03 Power Source Problems .......................................................................10-4<br />
SECTION 11:<br />
VOLTAGE REDUCTION DEVICE (VRD) .......................................................11-1<br />
11.01 VRD Specifi cation .................................................................................11-1<br />
10.02 VRD Maintenance .................................................................................11-1<br />
11.03 Switching VRD On/Off ...........................................................................11-2<br />
SECTION 12:<br />
POWER SOURCE ERROR CODES ............................................................12-1<br />
APPENDIX A:<br />
INTERCONNECT DIAGRAM ................................................................... A-2<br />
Appendix B:<br />
OPTIONS AND ACCESSORIES ................................................................. B-1<br />
March 31, 2006 iii
ARCMASTER <strong>400</strong> S<br />
iv<br />
March 31, 2006
SECTION 1:<br />
SAFETY INSTRUCTIONS AND WARNINGS<br />
! WARNING<br />
ARCMASTER <strong>400</strong> S<br />
PROTECT YOURSELF AND OTHERS FROM POSSIBLE SERIOUS INJURY OR DEATH. KEEP CHILDREN AWAY. PACEMAKER WEARERS KEEP AWAY UNTIL<br />
CONSULTING YOUR DOCTOR. DO NOT LOSE THESE INSTRUCTIONS. READ OPERATING/INSTRUCTION MANUAL BEFORE INSTALLING, OPERATING<br />
OR SERVICING THIS EQUIPMENT.<br />
Welding products and welding processes can cause serious injury or death, or damage to other equipment or property, if the operator does not strictly<br />
observe all safety rules and take precautionary actions.<br />
Safe practices have developed from past experience in the use of welding and cutting. These practices must be learned through study and training before<br />
using this equipment. Some of these practices apply to equipment connected to power lines; other practices apply to engine driven equipment. Anyone<br />
not having extensive training in welding and cutting practices should not attempt to weld.<br />
Safe practices are outlined in the American National Standard Z49.1 entitled: SAFETY IN WELDING AND CUTTING. This publication<br />
and other guides to what you should learn before operating this equipment are listed at the end of these safety precautions.<br />
HAVE ALL INSTALLATION, OPERATION, MAINTENANCE, AND REPAIR WORK PERFORMED ONLY BY QUALIFIED PEOPLE.<br />
1.01 Arc Welding Hazards<br />
10. Ground the workpiece to a good electrical (earth) ground.<br />
11. Do not touch electrode while in contact with the work (ground)<br />
circuit.<br />
12. Use only well-maintained equipment. Repair or replace damaged parts<br />
at once.<br />
13. In confi ned spaces or damp locations, do not use a welder with AC<br />
WARNING<br />
output unless it is equipped with a voltage reducer. Use equipment<br />
with DC output.<br />
ELECTRIC SHOCK can kill.<br />
14. Wear a safety harness to prevent falling if working above fl oor level.<br />
15. Keep all panels and covers securely in place.<br />
Touching live electrical parts can cause fatal shocks or<br />
severe burns. The electrode and work circuit is electrically<br />
live whenever the output is on. The input power circuit and<br />
machine internal circuits are also live when power is on. In<br />
semiautomatic or automatic wire welding, the wire, wire reel,<br />
drive roll housing, and all metal parts touching the welding<br />
wire are electrically live. Incorrectly installed or improperly<br />
grounded equipment is a hazard.<br />
1. Do not touch live electrical parts.<br />
2. Wear dry, hole-free insulating gloves and body protection.<br />
3. Insulate yourself from work and ground using dry insulating mats or<br />
covers.<br />
4. Disconnect input power or stop engine before installing or servicing<br />
this equipment. Lock input power disconnect switch open, or remove<br />
line fuses so power cannot be turned on accidentally.<br />
5. Properly install and ground this equipment according to its Owner’s<br />
Manual and national, state, and local codes.<br />
6. Turn off all equipment when not in use. Disconnect power to equipment<br />
if it will be left unattended or out of service.<br />
7. Use fully insulated electrode holders. Never dip holder in water to cool it<br />
or lay it down on the ground or the work surface. Do not touch holders<br />
connected to two welding machines at the same time or touch other<br />
people with the holder or electrode.<br />
8. Do not use worn, damaged, undersized, or poorly spliced cables.<br />
9. Do not wrap cables around your body.<br />
WARNING<br />
ARC RAYS can burn eyes and skin; NOISE can damage<br />
hearing. Arc rays from the welding process produce intense<br />
heat and strong ultraviolet rays that can burn eyes and skin.<br />
Noise from some processes can damage hearing.<br />
1. Wear a welding helmet fi tted with a proper shade of fi lter (see ANSI<br />
Z49.1 listed in Safety Standards) to protect your face and eyes when<br />
welding or watching.<br />
2. Wear approved safety glasses. Side shields recommended.<br />
3. Use protective screens or barriers to protect others from fl ash and<br />
glare; warn others not to watch the arc.<br />
4. Wear protective clothing made from durable, fl ame-resistant material<br />
(wool and leather) and foot protection.<br />
5. Use approved ear plugs or ear muffs if noise level is high.<br />
March 31, 2006 1-1
ARCMASTER <strong>400</strong> S<br />
1-2<br />
WARNING<br />
FUMES AND GASES can be hazardous to your health.<br />
Welding produces fumes and gases. Breathing these fumes<br />
and gases can be hazardous to your health.<br />
1. Keep your head out of the fumes. Do not breath the fumes.<br />
2. If inside, ventilate the area and/or use exhaust at the arc to remove<br />
welding fumes and gases.<br />
3. If ventilation is poor, use an approved air-supplied respirator.<br />
4. Read the Material Safety Data Sheets (MSDSs) and the manufacturer’s<br />
instruction for metals, consumables, coatings, and cleaners.<br />
5. Work in a confi ned space only if it is well ventilated, or while wearing an<br />
air-supplied respirator. Shielding gases used for welding can displace<br />
air causing injury or death. Be sure the breathing air is safe.<br />
6. Do not weld in locations near degreasing, cleaning, or spraying<br />
operations. The heat and rays of the arc can react with vapors to form<br />
highly toxic and irritating gases.<br />
7. Do not weld on coated metals, such as galvanized, lead, or cadmium<br />
plated steel, unless the coating is removed from the weld area, the<br />
area is well ventilated, and if necessary, while wearing an air-supplied<br />
respirator. The coatings and any metals containing these elements can<br />
give off toxic fumes if welded.<br />
WARNING<br />
WELDING can cause fi re or explosion.<br />
Sparks and spatter fl y off from the welding arc. The fl ying<br />
sparks and hot metal, weld spatter, hot workpiece, and hot<br />
equipment can cause fi res and burns. Accidental contact of<br />
electrode or welding wire to metal objects can cause sparks,<br />
overheating, or fi re.<br />
1. Protect yourself and others from fl ying sparks and hot metal.<br />
2. Do not weld where fl ying sparks can strike fl ammable material.<br />
3. Remove all fl ammables within 35 ft (10.7 m) of the welding arc. If this<br />
is not possible, tightly cover them with approved covers.<br />
4. Be alert that welding sparks and hot materials from welding can easily<br />
go through small cracks and openings to adjacent areas.<br />
5. Watch for fi re, and keep a fi re extinguisher nearby.<br />
6. Be aware that welding on a ceiling, fl oor, bulkhead, or partition can<br />
cause fi re on the hidden side.<br />
7. Do not weld on closed containers such as tanks or drums.<br />
8. Connect work cable to the work as close to the welding area as practical<br />
to prevent welding current from traveling long, possibly unknown paths<br />
and causing electric shock and fi re hazards.<br />
9. Do not use welder to thaw frozen pipes.<br />
10. Remove stick electrode from holder or cut off welding wire at contact<br />
tip when not in use.<br />
WARNING<br />
FLYING SPARKS AND HOT METAL can cause injury.<br />
Chipping and grinding cause fl ying metal. As welds cool,<br />
they can throw off slag.<br />
1. Wear approved face shield or safety goggles. Side shields<br />
recommended.<br />
2. Wear proper body protection to protect skin.<br />
Eye protection filter shade selector for welding or cutting<br />
(goggles or helmet), from AWS A6.2-73.<br />
Welding or cutting Electrode S ize Filter Welding or cutting Electrode S ize Filter<br />
Torch soldering 2 Gas metal-arc<br />
Torch brazing 3 or 4 Non-ferrous base metal All 11<br />
Oxygen Cutting Ferrous base metal All 12<br />
Light Under 1 in., 25 mm 3 or 4 Gas tungsten arc welding All 12<br />
Medium 1 to 6 in., 25-150 mm 4 or 5 (TIG) All 12<br />
Heavy Over 6 in., 150 mm 5 or 6 Atomic hydrogen welding All 12<br />
Gas welding Carbon arc welding All 12<br />
Light Under 1/8 in., 3 mm 4 or 5 Plasma arc welding<br />
Medium 1/8 to 1/2 in., 3-12 mm 5 or 6 Carbon arc air gouging<br />
Heavy Over 1/2 in., 12 mm 6 or 8 Light 12<br />
Shielded metal-arc Under 5/32 in., 4 mm 10 Heavy 14<br />
5/32 to 1/4 in., 12 Plasma arc cutting<br />
Over 1/4 in., 6.4 mm 14 Light Under 300 Amp 9<br />
Medium 300 to <strong>400</strong> Amp 12<br />
Heavy Over <strong>400</strong> Amp 14<br />
March 31, 2006
WARNING<br />
CYLINDERS can explode if damaged.<br />
Shielding gas cylinders contain gas under high pressure. If<br />
damaged, a cylinder can explode. Since gas cylinders are<br />
normally part of the welding process, be sure to treat them<br />
carefully.<br />
1. Protect compressed gas cylinders from excessive heat, mechanical<br />
shocks, and arcs.<br />
2. Install and secure cylinders in an upright position by chaining them to<br />
a stationary support or equipment cylinder rack to prevent falling or<br />
tipping.<br />
3. Keep cylinders away from any welding or other electrical circuits.<br />
4. Never allow a welding electrode to touch any cylinder.<br />
5. Use only correct shielding gas cylinders, regulators, hoses, and fi ttings<br />
designed for the specifi c application; maintain them and associated<br />
parts in good condition.<br />
6. Turn face away from valve outlet when opening cylinder valve.<br />
7. Keep protective cap in place over valve except when cylinder is in use<br />
or connected for use.<br />
8. Read and follow instructions on compressed gas cylinders, associated<br />
equipment, and CGA publication P-1 listed in Safety Standards.<br />
Engines can be dangerous.<br />
! WARNING<br />
ENGINE EXHAUST GASES can kill.<br />
WARNING<br />
Engines produce harmful exhaust gases.<br />
1. Use equipment outside in open, well-ventilated areas.<br />
2. If used in a closed area, vent engine exhaust outside and away from<br />
any building air intakes.<br />
WARNING<br />
ENGINE FUEL can cause fi re or explosion.<br />
Engine fuel is highly fl ammable.<br />
1. Stop engine before checking or adding fuel.<br />
2. Do not add fuel while smoking or if unit is near any sparks or open<br />
fl ames.<br />
ARCMASTER <strong>400</strong> S<br />
3. Allow engine to cool before fueling. If possible, check and add fuel to<br />
cold engine before beginning job.<br />
4. Do not overfi ll tank — allow room for fuel to expand.<br />
5. Do not spill fuel. If fuel is spilled, clean up before starting engine.<br />
MOVING PARTS can cause injury.<br />
WARNING<br />
Moving parts, such as fans, rotors, and belts can cut fi ngers and hands<br />
and catch loose clothing.<br />
1. Keep all doors, panels, covers, and guards closed and securely<br />
in place.<br />
2. Stop engine before installing or connecting unit.<br />
3. Have only qualified people remove guards or covers for<br />
maintenance and troubleshooting as necessary.<br />
4. To prevent accidental starting during servicing, disconnect<br />
negative (-) battery cable from battery.<br />
5. Keep hands, hair, loose clothing, and tools away from moving<br />
parts.<br />
6. Reinstall panels or guards and close doors when servicing is<br />
fi nished and before starting engine.<br />
WARNING<br />
SPARKS can cause BATTERY GASES TO EXPLODE; BATTERY<br />
ACID can burn eyes and skin.<br />
Batteries contain acid and generate explosive gases.<br />
1. Always wear a face shield when working on a battery.<br />
2. Stop engine before disconnecting or connecting battery cables.<br />
3. Do not allow tools to cause sparks when working on a battery.<br />
4. Do not use welder to charge batteries or jump start vehicles.<br />
5. Observe correct polarity (+ and –) on batteries.<br />
WARNING<br />
STEAM AND PRESSURIZED HOT COOLANT can burn face,<br />
eyes, and skin.<br />
The coolant in the radiator can be very hot and under<br />
pressure.<br />
1. Do not remove radiator cap when engine is hot. Allow engine to cool.<br />
2. Wear gloves and put a rag over cap area when removing cap.<br />
3. Allow pressure to escape before completely removing cap.<br />
March 31, 2006 1-3
ARCMASTER <strong>400</strong> S<br />
1-4<br />
! WARNING<br />
This product, when used for welding or cutting, produces<br />
fumes or gases which contain chemicals know to the State of<br />
California to cause birth defects and, in some cases, cancer.<br />
(California Health & Safety code Sec. 25249.5 et seq.)<br />
NOTE<br />
Considerations About Welding And The Effects of Low<br />
Frequency Electric and Magnetic Fields<br />
The following is a quotation from the General Conclusions Section of the<br />
U.S. Congress, Offi ce of Technology Assessment, Biological Effects of Power<br />
Frequency Electric & Magnetic Fields - Background Paper, OTA-BP-E-63<br />
(Washington, DC: U.S. Government Printing Offi ce, May 1989): “...there<br />
is now a very large volume of scientifi c fi ndings based on experiments at<br />
the cellular level and from studies with animals and people which clearly<br />
establish that low frequency magnetic fi elds and interact with, and produce<br />
changes in, biological systems. While most of this work is of very high<br />
quality, the results are complex. Current scientifi c understanding does<br />
not yet allow us to interpret the evidence in a single coherent framework.<br />
Even more frustrating, it does not yet allow us to draw defi nite conclusions<br />
about questions of possible risk or to offer clear science-based advice on<br />
strategies to minimize or avoid potential risks.”<br />
To reduce magnetic fields in the workplace, use the following<br />
procedures.<br />
1. Keep cables close together by twisting or taping them.<br />
2. Arrange cables to one side and away from the operator.<br />
3. Do not coil or drape cable around the body.<br />
4. Keep welding power source and cables as far away from body<br />
as practical.<br />
ABOUT PACEMAKERS:<br />
The above procedures are among those also normally<br />
recommended for pacemaker wearers. Consult your doctor<br />
for complete information.<br />
1.02 Principal Safety Standards<br />
Safety in Welding and Cutting, ANSI Standard Z49.1, from American Welding<br />
Society, 550 N.W. LeJeune Rd., Miami, FL 33126.<br />
Safety and Health Standards, OSHA 29 CFR 1910, from Superintendent of<br />
Documents, U.S. Government Printing Offi ce, Washington, D.C. 20402.<br />
Recommended Safe Practices for the Preparation for Welding and Cutting<br />
of Containers That Have Held Hazardous Substances, American Welding<br />
Society Standard AWS F4.1, from American Welding Society, 550 N.W.<br />
LeJeune Rd., Miami, FL 33126.<br />
National Electrical Code, NFPA Standard 70, from National Fire Protection<br />
Association, Batterymarch Park, Quincy, MA 02269.<br />
Safe Handling of Compressed Gases in Cylinders, CGA Pamphlet P-1, from<br />
Compressed Gas Association, 1235 Jefferson Davis Highway, Suite 501,<br />
Arlington, VA 22202.<br />
Code for Safety in Welding and Cutting, CSA Standard W117.2, from<br />
Canadian Standards Association, Standards Sales, 178 Rexdale Boulevard,<br />
Rexdale, Ontario, Canada M9W 1R3.<br />
Safe Practices for Occupation and Educational Eye and Face Protection,<br />
ANSI Standard Z87.1, from American National Standards Institute, 1430<br />
Broadway, New York, NY 10018.<br />
Cutting and Welding Processes, NFPA Standard 51B, from<br />
National Fire Protection Association, Batterymarch Park, Quincy,<br />
MA 02269.<br />
March 31, 2006
1.03 Precautions De Securite En Soudage A L’arc<br />
! MISE EN GARDE<br />
ARCMASTER <strong>400</strong> S<br />
LE SOUDAGE A L’ARC EST DANGEREUX<br />
PROTEGEZ-VOUS, AINSI QUE LES AUTRES, CONTRE LES BLESSURES GRAVES POSSIBLES OU LA MORT. NE LAISSEZ PAS LES ENFANTS S’APPROCHER,<br />
NI LES PORTEURS DE STIMULATEUR CARDIAQUE (A MOINS QU’ILS N’AIENT CONSULTE UN MEDECIN). CONSERVEZ CES INSTRUCTIONS. LISEZ LE<br />
MANUEL D’OPERATION OU LES INSTRUCTIONS AVANT D’INSTALLER, UTILISER OU ENTRETENIR CET EQUIPEMENT.<br />
Les produits et procédés de soudage peuvent sauser des blessures graves ou la mort, de même que des dommages au reste du matériel et à la propriété,<br />
si l’utilisateur n’adhère pas strictement à toutes les règles de sécurité et ne prend pas les précautions nécessaires.<br />
En soudage et coupage, des pratiques sécuritaires se sont développées suite à l’expérience passée. Ces pratiques doivent être apprises par étude ou<br />
entraînement avant d’utiliser l’equipement. Toute personne n’ayant pas suivi un entraînement intensif en soudage et coupage ne devrait pas tenter de<br />
souder. Certaines pratiques concernent les équipements raccordés aux lignes d’alimentation alors que d’autres s’adressent aux groupes électrogènes.<br />
La norme Z49.1 de l’American National Standard, intitulée “SAFETY IN WELDING AND CUTTING” présente les pratiques sécuritaires à suivre. Ce document<br />
ainsi que d’autres guides que vous devriez connaître avant d’utiliser cet équipement sont présentés à la fi n de ces instructions de sécurité.<br />
SEULES DES PERSONNES QUALIFIEES DOIVENT FAIRE DES TRAVAUX D’INSTALLATION, DE REPARATION, D’ENTRETIEN ET D’ESSAI.<br />
1.04 Dangers relatifs au soudage à l’arc<br />
AVERTISSEMENT<br />
L’ELECTROCUTION PEUT ETRE MORTELLE.<br />
Une décharge électrique peut tuer ou brûler gravement.<br />
L’électrode et le circuit de soudage sont sous tension dès<br />
la mise en circuit. Le circuit d’alimentation et les circuits<br />
internes de l’équipement sont aussi sous tension dès la mise<br />
en marche. En soudage automatique ou semi-automatique<br />
avec fi l, ce dernier, le rouleau ou la bobine de fi l, le logement<br />
des galets d’entrainement et toutes les pièces métalliques<br />
en contact avec le fi l de soudage sont sous tension. Un<br />
équipement inadéquatement installé ou inadéquatement<br />
mis à la terre est dangereux.<br />
1. Ne touchez pas à des pièces sous tension.<br />
2. Portez des gants et des vêtements isolants, secs et non troués.<br />
3. Isolez-vous de la pièce à souder et de la mise à la terre au moyen de<br />
tapis isolants ou autres.<br />
4. Déconnectez la prise d’alimentation de l’équipement ou arrêtez<br />
le moteur avant de l’installer ou d’en faire l’entretien. Bloquez le<br />
commutateur en circuit ouvert ou enlevez les fusibles de l’alimentation<br />
afi n d’éviter une mise en marche accidentelle.<br />
5. Veuillez à installer cet équipement et à le mettre à la terre selon le<br />
manuel d’utilisation et les codes nationaux, provinciaux et locaux<br />
applicables.<br />
6. Arrêtez tout équipement après usage. Coupez l’alimentation de<br />
l’équipement s’il est hors d’usage ou inutilisé.<br />
7. N’utilisez que des porte-électrodes bien isolés. Ne jamais plonger les<br />
porte-électrodes dans l’eau pour les refroidir. Ne jamais les laisser<br />
traîner par terre ou sur les pièces à souder. Ne touchez pas aux porteélectrodes<br />
raccordés à deux sources de courant en même temps.<br />
Ne jamais toucher quelqu’un d’autre avec l’électrode ou le porteélectrode.<br />
8. N’utilisez pas de câbles électriques usés, endommagés, mal épissés<br />
ou de section trop petite.<br />
9. N’enroulez pas de câbles électriques autour de votre corps.<br />
10. N’utilisez qu’une bonne prise de masse pour la mise à la terre de la<br />
pièce à souder.<br />
11. Ne touchez pas à l’électrode lorsqu’en contact avec le circuit de<br />
soudage (terre).<br />
12. N’utilisez que des équipements en bon état. Réparez ou remplacez<br />
aussitôt les pièces endommagées.<br />
13. Dans des espaces confi nés ou mouillés, n’utilisez pas de source de<br />
courant alternatif, à moins qu’il soit muni d’un réducteur de tension.<br />
Utilisez plutôt une source de courant continu.<br />
14. Portez un harnais de sécurité si vous travaillez en hauteur.<br />
15. Fermez solidement tous les panneaux et les capots.<br />
AVERTISSEMENT<br />
LE RAYONNEMENT DE L’ARC PEUT BRÛLER LES YEUX ET LA<br />
PEAU; LE BRUIT PEUT ENDOMMAGER L’OUIE.<br />
L’arc de soudage produit une chaleur et des rayons<br />
ultraviolets intenses, susceptibles de brûler les yeux et la<br />
peau. Le bruit causé par certains procédés peut endommager<br />
l’ouïe.<br />
1. Portez une casque de soudeur avec fi ltre oculaire de nuance appropriée<br />
(consultez la norme ANSI Z49 indiquée ci-après) pour vous protéger<br />
le visage et les yeux lorsque vous soudez ou que vous observez<br />
l’exécution d’une soudure.<br />
2. Portez des lunettes de sécurité approuvées. Des écrans latéraux sont<br />
recommandés.<br />
3. Entourez l’aire de soudage de rideaux ou de cloisons pour protéger<br />
les autres des coups d’arc ou de l’éblouissement; avertissez les<br />
observateurs de ne pas regarder l’arc.<br />
March 31, 2006 1-5
ARCMASTER <strong>400</strong> S<br />
4. Portez des vêtements en matériaux ignifuges et durables (laine et cuir)<br />
et des chaussures de sécurité.<br />
5. Portez un casque antibruit ou des bouchons d’oreille approuvés lorsque<br />
le niveau de bruit est élevé.<br />
1-6<br />
AVERTISSEMENT<br />
LES VAPEURS ET LES FUMEES SONT DANGEREUSES POUR<br />
LA SANTE.<br />
Le soudage dégage des vapeurs et des fumées dangereuses<br />
à respirer.<br />
1. Eloignez la tête des fumées pour éviter de les respirer.<br />
2. A l’intérieur, assurez-vous que l’aire de soudage est bien ventilée ou<br />
que les fumées et les vapeurs sont aspirées à l’arc.<br />
3. Si la ventilation est inadequate, portez un respirateur à adduction d’air<br />
approuvé.<br />
4. Lisez les fi ches signalétiques et les consignes du fabricant relatives aux<br />
métaux, aux produits consummables, aux revêtements et aux produits<br />
nettoyants.<br />
5. Ne travaillez dans un espace confi né que s’il est bien ventilé; sinon,<br />
portez un respirateur à adduction d’air. Les gaz protecteurs de soudage<br />
peuvent déplacer l’oxygène de l’air et ainsi causer des malaises ou la<br />
mort. Assurez-vous que l’air est propre à la respiration.<br />
6. Ne soudez pas à proximité d’opérations de dégraissage, de nettoyage<br />
ou de pulvérisation. La chaleur et les rayons de l’arc peuvent réagir<br />
avec des vapeurs et former des gaz hautement toxiques et irritants.<br />
7. Ne soudez des tôles galvanisées ou plaquées au plomb ou au cadmium<br />
que si les zones à souder ont été grattées à fond, que si l’espace est<br />
Opération de coupage<br />
ou soudage<br />
Dimension d'électrode ou<br />
Epiasseur de métal ou<br />
Intensité de courant<br />
Nuance de<br />
filtre oculaire<br />
bien ventilé; si nécessaire portez un respirateur à adduction d’air.<br />
Car ces revêtements et tout métal qui contient ces éléments peuvent<br />
dégager des fumées toxiques au moment du soudage.<br />
AVERTISSEMENT<br />
LE SOUDAGE PEUT CAUSER UN INCENDIE OU UNE<br />
EXPLOSION<br />
L’arc produit des étincellies et des projections. Les particules<br />
volantes, le métal chaud, les projections de soudure et<br />
l’équipement surchauffé peuvent causer un incendie et<br />
des brûlures. Le contact accidentel de l’électrode ou du<br />
fi l-électrode avec un objet métallique peut provoquer des<br />
étincelles, un échauffement ou un incendie.<br />
1. Protégez-vous, ainsi que les autres, contre les étincelles et du métal<br />
chaud.<br />
2. Ne soudez pas dans un endroit où des particules volantes ou des<br />
projections peuvent atteindre des matériaux infl ammables.<br />
3. Enlevez toutes matières infl ammables dans un rayon de 10, 7 mètres<br />
autour de l’arc, ou couvrez-les soigneusement avec des bâches<br />
approuvées.<br />
4. Méfi ez-vous des projections brulantes de soudage susceptibles de<br />
pénétrer dans des aires adjacentes par de petites ouvertures ou<br />
fi ssures.<br />
5. Méfi ez-vous des incendies et gardez un extincteur à portée de la<br />
main.<br />
6. N’oubliez pas qu’une soudure réalisée sur un plafond, un plancher, une<br />
cloison ou une paroi peut enfl ammer l’autre côté.<br />
7. Ne soudez pas un récipient fermé, tel un réservoir ou un baril.<br />
SELECTION DES NUANCES DE FILTRES OCULAIRS POUR LA PROTECTION<br />
DES YEUX EN COUPAGE ET SOUDAGE (selon AWS á 8.2-73)<br />
Opération de coupage<br />
ou soudage<br />
Dimension d'électrode ou<br />
Epiasseur de métal ou<br />
Intensité de courant<br />
Nuance de<br />
filtre oculaire<br />
Brassage tendre<br />
au chalumeau<br />
toutes conditions 2<br />
Soudage á l'arc sous gaz<br />
avec fil plein (GMAW)<br />
Brassage fort<br />
au chalumeau<br />
toutes conditions 3 ou 4 métaux non-ferreux toutes conditions 11<br />
Oxycoupage métaux ferreux toutes conditions 12<br />
mince moins de 1 po. (25 mm) 2 ou 3<br />
Soudage á l'arc sous gaz avec<br />
électrode de tungstène (GTAW)<br />
toutes conditions 12<br />
moyen de 1 á 6 po. (25 á 150 mm) 4 ou 5<br />
Soudage á l'hydrogène<br />
atomique (AHW)<br />
toutes conditions 12<br />
épais plus de 6 po. (150 mm) 5 ou 6<br />
Soudage á l'arc avec<br />
électrode de carbone (CAW)<br />
toutes conditions 12<br />
Soudage aux gaz Soudage á l'arc Plasma (PAW) toutes dimensions 12<br />
mince moins de 1/8 po. (3 mm) 4 ou 5<br />
Gougeage Air-Arc avec<br />
électrode de carbone<br />
moyen de 1/8 á 1/2 po. (3 á 12 mm) 5 ou 6 mince 12<br />
épais<br />
Soudage á l'arc avec<br />
plus de 1/2 po. (12 mm) 6 ou 8 épais 14<br />
électrode enrobees<br />
(SMAW)<br />
moins de 5/32 po. (4 mm) 10 Coupage á l'arc Plasma (PAC)<br />
5/32 á 1/4 po. (4 á 6.4 mm) 12 mince moins de 300 amperès 9<br />
plus de 1/4 po. (6.4 mm) 14 moyen de 300 á <strong>400</strong> amperès 12<br />
épais plus de <strong>400</strong> amperès 14<br />
March 31, 2006
8. Connectez le câble de soudage le plus près possible de la zone de<br />
soudage pour empêcher le courant de suivre un long parcours inconnu,<br />
et prévenir ainsi les risques d’électrocution et d’incendie.<br />
9. Ne dégelez pas les tuyaux avec un source de courant.<br />
10. Otez l’électrode du porte-électrode ou coupez le fi l au tube-contact<br />
lorsqu’inutilisé après le soudage.<br />
11. Portez des vêtements protecteurs non huileux, tels des gants en cuir,<br />
une chemise épaisse, un pantalon revers, des bottines de sécurité et<br />
un casque.<br />
AVERTISSEMENT<br />
LES ETINCELLES ET LES PROJECTIONS BRULANTES<br />
PEUVENT CAUSER DES BLESSURES.<br />
Le piquage et le meulage produisent des particules<br />
métalliques volantes. En refroidissant, la soudure peut<br />
projeter du éclats de laitier.<br />
1. Portez un écran facial ou des lunettes protectrices approuvées. Des<br />
écrans latéraux sont recommandés.<br />
2. Portez des vêtements appropriés pour protéger la peau.<br />
AVERTISSEMENT<br />
LES BOUTEILLES ENDOMMAGEES PEUVENT EXPLOSER<br />
Les bouteilles contiennent des gaz protecteurs sous haute<br />
pression. Des bouteilles endommagées peuvent exploser.<br />
Comme les bouteilles font normalement partie du procédé<br />
de soudage, traitez-les avec soin.<br />
1. Protégez les bouteilles de gaz comprimé contre les sources de chaleur<br />
intense, les chocs et les arcs de soudage.<br />
2. Enchainez verticalement les bouteilles à un support ou à un cadre fi xe<br />
pour les empêcher de tomber ou d’être renversées.<br />
3. Eloignez les bouteilles de tout circuit électrique ou de tout soudage.<br />
4. Empêchez tout contact entre une bouteille et une électrode de<br />
soudage.<br />
5. N’utilisez que des bouteilles de gaz protecteur, des détendeurs, des<br />
boyauxs et des raccords conçus pour chaque application spécifi que;<br />
ces équipements et les pièces connexes doivent être maintenus en<br />
bon état.<br />
6. Ne placez pas le visage face à l’ouverture du robinet de la bouteille<br />
lors de son ouverture.<br />
7. Laissez en place le chapeau de bouteille sauf si en utilisation ou lorsque<br />
raccordé pour utilisation.<br />
8. Lisez et respectez les consignes relatives aux bouteilles de gaz<br />
comprimé et aux équipements connexes, ainsi que la publication P-1<br />
de la CGA, identifi ée dans la liste de documents ci-dessous.<br />
ARCMASTER <strong>400</strong> S<br />
AVERTISSEMENT<br />
LES MOTEURS PEUVENT ETRE DANGEREUX<br />
LES GAZ D’ECHAPPEMENT DES MOTEURS PEUVENT ETRE<br />
MORTELS.<br />
Les moteurs produisent des gaz d’échappement nocifs.<br />
1. Utilisez l’équipement à l’extérieur dans des aires ouvertes et bien<br />
ventilées.<br />
2. Si vous utilisez ces équipements dans un endroit confi né, les fumées<br />
d’échappement doivent être envoyées à l’extérieur, loin des prises d’air<br />
du bâtiment.<br />
AVERTISSEMENT<br />
LE CARBURANT PEUR CAUSER UN INCENDIE OU UNE<br />
EXPLOSION.<br />
Le carburant est hautement infl ammable.<br />
1. Arrêtez le moteur avant de vérifier le niveau e<br />
carburant ou de faire le plein.<br />
2. Ne faites pas le plein en fumant ou proche d’une source d’étincelles<br />
ou d’une fl amme nue.<br />
3. Si c’est possible, laissez le moteur refroidir avant de faire le plein de<br />
carburant ou d’en vérifi er le niveau au début du soudage.<br />
4. Ne faites pas le plein de carburant à ras bord: prévoyez de l’espace<br />
pour son expansion.<br />
5. Faites attention de ne pas renverser de carburant. Nettoyez tout<br />
carburant renversé avant de faire démarrer le moteur.<br />
AVERTISSEMENT<br />
DES PIECES EN MOUVEMENT PEUVENT CAUSER DES<br />
BLESSURES.<br />
Des pièces en mouvement, tels des ventilateurs, des rotors et<br />
des courroies peuvent couper doigts et mains, ou accrocher<br />
des vêtements amples.<br />
1. Assurez-vous que les portes, les panneaux, les capots et les protecteurs<br />
soient bien fermés.<br />
2. Avant d’installer ou de connecter un système, arrêtez le moteur.<br />
3. Seules des personnes qualifi ées doivent démonter des protecteurs ou<br />
des capots pour faire l’entretien ou le dépannage nécessaire.<br />
4. Pour empêcher un démarrage accidentel pendant l’entretien,<br />
débranchez le câble d’accumulateur à la borne négative.<br />
5. N’approchez pas les mains ou les cheveux de pièces en mouvement;<br />
elles peuvent aussi accrocher des vêtements amples et des outils.<br />
March 31, 2006 1-7
ARCMASTER <strong>400</strong> S<br />
6. Réinstallez les capots ou les protecteurs et fermez les portes après<br />
des travaux d’entretien et avant de faire démarrer le moteur.<br />
1-8<br />
AVERTISSEMENT<br />
DES ETINCELLES PEUVENT FAIRE EXPLOSER UN<br />
ACCUMULATEUR; L’ELECTROLYTE D’UN ACCUMU-LATEUR<br />
PEUT BRULER LA PEAU ET LES YEUX.<br />
Les accumulateurs contiennent de l’électrolyte acide et<br />
dégagent des vapeurs explosives.<br />
1. Portez toujours un écran facial en travaillant sur un accumu-lateur.<br />
2. Arrêtez le moteur avant de connecter ou de déconnecter des câbles<br />
d’accumulateur.<br />
3. N’utilisez que des outils anti-étincelles pour travailler sur un<br />
accumulateur.<br />
4. N’utilisez pas une source de courant de soudage pour charger un<br />
accumulateur ou survolter momentanément un véhicule.<br />
5. Utilisez la polarité correcte (+ et –) de l’accumulateur.<br />
AVERTISSEMENT<br />
LA VAPEUR ET LE LIQUIDE DE REFROIDISSEMENT BRULANT<br />
SOUS PRESSION PEUVENT BRULER LA PEAU ET LES YEUX.<br />
Le liquide de refroidissement d’un radiateur peut être brûlant<br />
et sous pression.<br />
1. N’ôtez pas le bouchon de radiateur tant que le moteur n’est pas<br />
refroidi.<br />
2. Mettez des gants et posez un torchon sur le bouchon pour l’ôter.<br />
3. Laissez la pression s’échapper avant d’ôter complètement le<br />
bouchon.<br />
1.05 Principales Normes De Securite<br />
Safety in Welding and Cutting, norme ANSI Z49.1, American Welding Society,<br />
550 N.W. LeJeune Rd., Miami, FL 33128.<br />
Safety and Health Standards, OSHA 29 CFR 1910, Superintendent of<br />
Documents, U.S. Government Printing Offi ce, Washington, D.C. 20402.<br />
Recommended Safe Practices for the Preparation for Welding and Cutting<br />
of Containers That Have Held Hazardous Substances, norme AWS F4.1,<br />
American Welding Society, 550 N.W. LeJeune Rd., Miami, FL 33128.<br />
National Electrical Code, norme 70 NFPA, National Fire Protection<br />
Association, Batterymarch Park, Quincy, MA 02269.<br />
Safe Handling of Compressed Gases in Cylinders, document P-1,<br />
Compressed Gas Association, 1235 Jefferson Davis Highway, Suite 501,<br />
Arlington, VA 22202.<br />
Code for Safety in Welding and Cutting, norme CSA W117.2 Association<br />
canadienne de normalisation, Standards Sales, 276 Rexdale Boulevard,<br />
Rexdale, Ontario, Canada M9W 1R3.<br />
Safe Practices for Occupation and Educational Eye and Face Protection,<br />
norme ANSI Z87.1, American National Standards Institute, 1430 Broadway,<br />
New York, NY 10018.<br />
Cutting and Welding Processes, norme 51B NFPA, National Fire Protection<br />
Association, Batterymarch Park, Quincy, MA 02269.<br />
March 31, 2006
2.01 How To Use This Manual<br />
This Owner’s Manual applies to just specifi cation or part<br />
numbers listed on page i.<br />
To ensure safe operation, read the entire manual, including<br />
the chapter on safety instructions and warnings.<br />
Throughout this manual, the words WARNING, CAUTION, and<br />
NOTE may appear. Pay particular attention to the information<br />
provided under these headings. These special annotations are<br />
easily recognized as follows:<br />
SECTION 2:<br />
INTRODUCTION AND DESCRIPTION<br />
! WARNING<br />
A WARNING gives information regarding possible<br />
personal injury.<br />
CAUTION<br />
A CAUTION refers to possible equipment<br />
damage.<br />
NOTE<br />
A NOTE offers helpful information concerning<br />
certain operating procedures.<br />
Additional copies of this manual may be purchased by<br />
contacting Thermal Arc at the address and phone number in<br />
your area listed in the inside back cover of this manual. Include<br />
the Owner’s Manual number and equipment identifi cation<br />
numbers.<br />
Electronic copies of this manual can also be downloaded at<br />
no charge in Acrobat PDF format by going to the<br />
Thermal Arc web site listed below and clicking on the<br />
Literature Library link:<br />
http://www.thermalarc.com<br />
2.02 Equipment Identifi cation<br />
ARCMASTER <strong>400</strong> S<br />
The unit’s identifi cation number (specifi cation or part number),<br />
model, and serial number usually appear on a nameplate<br />
attached to the control panel. In some cases, the nameplate<br />
may be attached to the rear panel. Equipment which does<br />
not have a control panel such as gun and cable assemblies is<br />
identifi ed only by the specifi cation or part number printed on<br />
the shipping container. Record these numbers on the bottom<br />
of page i for future reference.<br />
2.03 Receipt Of Equipment<br />
When you receive the equipment, check it against the invoice<br />
to make sure it is complete and inspect the equipment for<br />
possible damage due to shipping. If there is any damage,<br />
notify the carrier immediately to fi le a claim. Furnish complete<br />
information concerning damage claims or shipping errors to<br />
the location in your area listed in the inside back cover of<br />
this manual.<br />
Include all equipment identifi cation numbers as described<br />
above along with a full description of the parts in error.<br />
Move the equipment to the installation site before un-crating<br />
the unit. Use care to avoid damaging the equipment when<br />
using bars, hammers, etc., to un-crate the unit.<br />
March 31, 2006 2-1
ARCMASTER <strong>400</strong> S<br />
2.04 Symbol Chart<br />
Note that only some of these symbols will appear on your model.<br />
2-2<br />
115V 15A<br />
On<br />
Off<br />
Dangerous Voltage<br />
Increase/Decrease<br />
Circuit Breaker<br />
AC Auxiliary Power<br />
Fuse<br />
Amperage<br />
Voltage<br />
Hertz (cycles/sec)<br />
Frequency<br />
Negative<br />
Positive<br />
Direct Current (DC)<br />
Protective Earth<br />
(Ground)<br />
Line<br />
Line Connection<br />
Auxiliary Power<br />
Receptacle Rating-<br />
Auxiliary Power<br />
X<br />
%<br />
V<br />
Single Phase<br />
Three Phase<br />
Three Phase Static<br />
Frequency Converter-<br />
Transformer-Rectifier<br />
Remote<br />
Duty Cycle<br />
Percentage<br />
Panel/Local<br />
Shielded Metal<br />
Arc Welding (SMAW)<br />
Gas Metal Arc<br />
Welding (GMAW)<br />
Gas Tungsten Arc<br />
Welding (GTAW)<br />
Air Carbon Arc<br />
Cutting (CAC-A)<br />
Constant Current<br />
Constant Voltage<br />
Or Constant Potential<br />
High Temperature<br />
Fault Indication<br />
Arc Force<br />
Touch Start (GTAW)<br />
Variable Inductance<br />
Voltage Input<br />
t1<br />
t2<br />
t<br />
IPM<br />
t<br />
MPM<br />
Wire Feed Function<br />
Wire Feed Towards<br />
Workpiece With<br />
Output Voltage Off.<br />
Welding Gun<br />
Purging Of Gas<br />
Continuous Weld<br />
Mode<br />
Spot Weld Mode<br />
Spot Time<br />
Preflow Time<br />
Postflow Time<br />
2 Step Trigger<br />
Operation<br />
Press to initiate wirefeed and<br />
welding, release to stop.<br />
4 Step Trigger<br />
Operation<br />
Press and hold for preflow, release<br />
to start arc. Press to stop arc, and<br />
hold for preflow.<br />
Burnback Time<br />
Disturbance In<br />
Ground System<br />
Inches Per Minute<br />
Meters Per Minute<br />
Art # A-04130<br />
March 31, 2006
2.05 Description<br />
ARCMASTER <strong>400</strong> S<br />
The Thermal Arc Model ARCMASTER <strong>400</strong> S is a self contained single/three-phase DC arc welding power source with Constant<br />
Current (CC) output characteristics. This unit is equipped with a Digital Volt/Amperage Meter and lift arc starter for use with<br />
Gas Tungsten Arc Welding (GTAW) and Shielded Metal Arc Welding (SMAW) processes. The power source is totally enclosed<br />
in an impact resistant, fl ame resistant and non-conductive plastic case.<br />
(V)<br />
OCV<br />
18V<br />
160A<br />
5A <strong>400</strong>A 420A (A)<br />
25A <strong>400</strong>A (A)<br />
STICK PROCESS LIFT-TIG PROCESS<br />
Figure 1 - Model <strong>400</strong> S volt-ampere curve<br />
NOTE<br />
Volt-Ampere curves show the maximum Voltage and Amperage output capabilities of the welding power source.<br />
Curves of other settings will fall between the curves shown.<br />
2.06 Functional Block Diagrams<br />
Figure 2 illustrates the functional block diagram of the <strong>400</strong> S-power supply.<br />
Input<br />
Power<br />
Main<br />
Circuit<br />
Switch<br />
Filter<br />
Input<br />
Diode<br />
Capacitor<br />
DC Power<br />
Primary<br />
Voltage<br />
Sensor<br />
IGBT<br />
Inverter<br />
Thermal<br />
Detector<br />
To each control circuit<br />
+/-15VDC +18VDC<br />
+24VDC +5VDC<br />
Torch Control<br />
Connection<br />
(CON1)<br />
Trouble<br />
Sensing<br />
Circuit<br />
Drive<br />
Circuit<br />
Main<br />
Transformer<br />
(PCB14)<br />
Themal<br />
Sensor<br />
Circuit<br />
Primary<br />
Current<br />
Sensor<br />
Sequence<br />
Control<br />
March 31, 2006 2-3<br />
(V)<br />
OCV<br />
10V<br />
Output<br />
Diodes<br />
Thermal<br />
Detector<br />
Current<br />
Reference<br />
Adjustment<br />
circuit<br />
Adjustment &<br />
Mode select Switches<br />
Panel Circuit Board<br />
Stick Mode<br />
VRD<br />
Sensing<br />
Circuit<br />
+ -<br />
Output<br />
Inductor<br />
Fan Control<br />
Circuit<br />
Figure 2 - <strong>400</strong> S Model functional block diagram<br />
Lift Tig Mode<br />
Output Short<br />
Sensing<br />
Circuit<br />
Fan<br />
Hall Current<br />
Transformer<br />
(HCT 1)<br />
+<br />
-
ARCMASTER <strong>400</strong> S<br />
2.07 Transporting Methods<br />
These units are equipped with a handle for carrying<br />
purposes.<br />
2-4<br />
! WARNING<br />
ELECTRIC SHOCK can kill. DO NOT TOUCH<br />
live electrical parts. Disconnect input power<br />
conductors from de-energized supply line before<br />
moving the welding power source.<br />
! WARNING<br />
FALLING EQUIPMENT can cause serious personal<br />
injury and equipment damage.<br />
• Lift unit with handle on top of case.<br />
• Use handcart or similar device of adequate capacity.<br />
• If using a fork-lift vehicle, place and secure unit on a<br />
proper skid before transporting.<br />
March 31, 2006
3.01 Environment<br />
The ARCMASTER <strong>400</strong> S is designed for use in hazardous<br />
environments.<br />
Examples of environments with increased hazardous<br />
environments are -<br />
a. In locations in which freedom of movement is restricted,<br />
so that the operator is forced to perform the work in a<br />
cramped (kneeling, sitting or lying) position with physical<br />
contact with conductive parts,<br />
b. In locations which are fully or partially limited by<br />
conductive elements, and in which there is a high risk<br />
of unavoidable or accidental contact by the operator,<br />
c. In wet or damp hot locations where humidity or<br />
perspiration considerably reduces the skin resistance<br />
of the human body and the insulation properties of<br />
accessories.<br />
Environments with hazardous environments do not include<br />
places where electrically conductive parts in the near vicinity<br />
of the operator, which can cause increased hazard,<br />
have been insulated.<br />
3.02 Location<br />
Be sure to locate the welder according to the following<br />
guidelines:<br />
• In areas free from moisture and dust.<br />
• Ambient temperature between 0 degrees C to 40<br />
degrees C.<br />
• In areas free from oil, steam and corrosive gases.<br />
• In areas, not subjected to abnormal vibration or<br />
shock.<br />
• In areas not exposed to direct sunlight or rain.<br />
• Place at a distance of 12” (304.79mm) or more from<br />
walls or similar that could restrict natural airfl ow for<br />
cooling.<br />
SECTION 3:<br />
INSTALLATION RECOMMENDATIONS<br />
! WARNING<br />
Thermal Arc advises that this equipment be<br />
electrically connected by a qualifi ed electrician.<br />
3.03 Electrical Input Connections<br />
ARCMASTER <strong>400</strong> S<br />
! WARNING<br />
ELECTRIC SHOCK can kill; SIGNIFICANT DC<br />
VOLTAGE is present after removal of input<br />
power.<br />
DO NOT TOUCH live electrical parts.<br />
SHUT DOWN welding power source, disconnect input power<br />
employing lockout/tagging procedures. Lockout/tagging<br />
procedures consist of padlocking line disconnect switch in<br />
open position, removing fuses from fuse box, or shutting<br />
off and red-tagging circuit breaker or other disconnecting<br />
device.<br />
• Electrical Input Requirements<br />
Operate the welding power source from a single/three-phase<br />
50/60 Hz, AC power supply. The input voltage must match<br />
one of the electrical input voltages shown on the input data<br />
label on the unit nameplate. Contact the local electric utility<br />
for information about the type of electrical service available,<br />
how proper connections should be made, and inspection<br />
required.<br />
The line disconnect switch provides a safe and convenient<br />
means to completely remove all electrical power from the<br />
welding power supply whenever necessary to inspect or<br />
service the unit.<br />
NOTE<br />
These units are equipped with a three-conductor<br />
with earth power cable that is connected at the<br />
welding power source end for single and three<br />
phase electrical input power.<br />
Do not connect an input (WHITE or BLACK or RED) conductor<br />
to the ground terminal.<br />
Do not connect the ground (GREEN) conductor to an input<br />
line terminal.<br />
March 31, 2006 3-1
ARCMASTER <strong>400</strong> S<br />
Refer to fi gure 3 and:<br />
1. Connect end of ground (GREEN) conductor to a suitable ground. Use a grounding method that complies with all applicable<br />
electrical codes.<br />
2. Connect ends of line 1 (BLACK) and line 2 (WHITE) and line 3 (RED) input conductors to a de-energized line disconnect<br />
switch.<br />
3. Use Table 1 and Table 2 as a guide to select line fuses for the disconnect switch.<br />
3-2<br />
NOTE<br />
For Single-Phase operation connect the GREEN, BLACK and WHITE input conductors. Insolate the RED Conductor,<br />
it is not used for Single-phase operation.<br />
Input Voltage Fuse Size<br />
208 VAC 100 Amps<br />
230 VAC 75 Amps<br />
460 VAC 50 Amps<br />
Table 1 - Electrical Input Connections<br />
NOTE<br />
Fuse size is based on not more than 200 percent of the rated input amperage of the welding power source (Based<br />
on Article 630, National Electrical Code).<br />
Figure 3 - Electrical Input Connections<br />
March 31, 2006
ARCMASTER <strong>400</strong> S<br />
• Input Power<br />
Each unit incorporates an INRUSH circuit and input voltage sensing circuit. When the MAIN CIRCUIT BREAKER is turned on,<br />
the inrush circuit provides a pre-charging of the input capacitors. SCR’s in the Power Control Assembly (PCA) will turn on after<br />
the input capacitors have charged to full operating voltage (after approximately 5 seconds).<br />
NOTE<br />
Note the available input power. Damage to the PCA could occur if 575VAC or higher is applied.<br />
The following 208-230/460V Primary Current recommendations are required to obtain the maximum welding current and duty<br />
cycle from this welding equipment:<br />
Model<br />
ARC<br />
MASTER<br />
<strong>400</strong>S<br />
Primary Supply<br />
Lead Size<br />
8/4 AWG minimum<br />
(Factory Fitted)<br />
8/3 AWG minimum<br />
Minimum Primary<br />
Current & Duty Cycle<br />
Current Circuit Size<br />
(Vin/Amps)<br />
MIG TIG STICK<br />
208/63<br />
230/57<br />
460/29<br />
<strong>400</strong>A @<br />
25%<br />
-<br />
-<br />
-<br />
-<br />
-<br />
-<br />
3<br />
Phase<br />
1<br />
Phase<br />
208/49<br />
230/44<br />
460/22<br />
-<br />
-<br />
-<br />
<strong>400</strong>A @<br />
25%<br />
-<br />
-<br />
-<br />
208/67 - -<br />
230/61 - -<br />
460/31 - -<br />
<strong>400</strong>A @ 25%<br />
208/88 300A @ - -<br />
230/79 25% - -<br />
208/67<br />
-<br />
230/60 -<br />
208/97 - -<br />
230/87 - -<br />
300A @ -<br />
25% -<br />
300A @ 25%<br />
Table 2 – 208-230/460V Primary Current Circuit sizes to achieve maximum current<br />
• High Frequency Introduction<br />
• High Frequency Interference<br />
The importance of correct installation of high frequency Interference may be transmitted by a high frequency initiated<br />
welding equipment cannot be over-emphasized. Interference or stabilized arc-welding machine in the following ways:<br />
due to high frequency initiated or stabilized arc is almost<br />
invariably traced to improper installation. The following<br />
information is intended as a guide for personnel installing<br />
high frequency welding machines.<br />
Direct Radiation<br />
Radiation from the machine can occur if the case is metal and<br />
is not properly grounded. It can occur through apertures such<br />
as open access panels. The shielding of the high frequency<br />
! WARNING<br />
unit in the Power Source will prevent direct radiation if the<br />
equipment is properly grounded.<br />
Transmission via the Supply Lead<br />
Explosives<br />
The high frequency section of this machine has<br />
an output similar to a radio transmitter. The<br />
machine should NOT be used in the vicinity<br />
of blasting operations due to the danger of<br />
premature fi ring.<br />
Without adequate shielding and fi ltering, high frequency<br />
energy may be fed to the wiring within the installation (mains)<br />
by direct coupling. The energy is then transmitted by both<br />
radiation and conduction. Adequate shielding and fi ltering is<br />
provided in the Power Source.<br />
Radiation from Welding Leads<br />
Radiated interference from welding leads, although<br />
Computers<br />
pronounced in the vicinity of the leads, diminishes rapidly with<br />
distance. Keeping leads as short as possible will minimize<br />
It is also possible that operation close to computer this type of interference. Looping and suspending of leads<br />
installations may cause computer malfunction. should be avoided where possible.<br />
Re-radiation from Unearthed Metallic Objects<br />
A major factor contributing to interference is re-radiation<br />
from unearthed metallic objects close to the welding leads.<br />
Effective grounding of such objects will prevent re-radiation<br />
in most cases.<br />
March 31, 2006 3-3
ARCMASTER <strong>400</strong> S<br />
3.04 Specifi cations<br />
3-4<br />
Parameter<br />
Rated Output<br />
<strong>400</strong> S<br />
Amperes <strong>400</strong><br />
Volts 36<br />
Duty Cycle 25%<br />
<strong>400</strong>A / 26V @ 25%<br />
TIG 300A / 22V @ 60%<br />
Duty Cycle<br />
300A / 18V @ 100%<br />
<strong>400</strong>A / 36V @ 25%<br />
STICK 300A / 32V @ 60%<br />
200A / 28V @ 100%<br />
Output Current Range<br />
TIG<br />
STICK<br />
5 – <strong>400</strong>A<br />
Open Circuit Voltage<br />
Dimensions<br />
65V<br />
Width 8.3” (210mm)<br />
Height 16.5” (420mm)<br />
Length 17.7” (450mm)<br />
Weight 441.1 lb. 20 kg.<br />
Output @ Rated Load Three-phase Single-phase<br />
Rated Input Voltage 208-230/460V 208-230V<br />
Output Amperes <strong>400</strong>A 300A<br />
Output Volts 36V 32V<br />
Duty Cycle 25% 25%<br />
KVA 24.0kVA 20.0kVA<br />
KW<br />
Output @ No Load<br />
18.0kW 12.0kW<br />
KVA 0.5<br />
KW 0.13<br />
Amperage Draw<br />
Input Volts Three Phase @ Rated Load No Load<br />
208V 67 1.4<br />
230V 61 1.3<br />
460V<br />
Input Volts Single Phase<br />
31 0.7<br />
208V 97 2.4<br />
230V 87 2.2<br />
Thermal Arc continuously strives to produce the best product possible and therefore reserves the right to change,<br />
improve or revise the specifi cations or design of this or any product without prior notice. Such updates or changes do<br />
March 31, 2006
not entitle the buyer of equipment previously<br />
sold or shipped to the corresponding changes,<br />
updates, improvements or replacement of such<br />
items.<br />
The values specifi ed in the table above are optimal<br />
values, your values may differ. Individual equipment<br />
may differ from the above specifi cations due to in<br />
part, but not exclusively, to any one or more of the<br />
following; variations or changes in manufactured<br />
components, installation location and conditions<br />
and local power grid supply conditions.<br />
3.05 Duty Cycle<br />
The duty cycle of a welding power source is the percentage<br />
of a ten (10) minute period that it can be operated at a given<br />
output without causing overheating and damage to the unit.<br />
If the welding amperes decrease, the duty cycle increases. If<br />
the welding amperes are increased beyond the rated output,<br />
the duty cycle will decrease.<br />
! WARNING<br />
Exceeding the duty cycle ratings will cause the<br />
thermal overload protection circuit to become<br />
energized and shut down the output until the unit<br />
has cooled to normal operating temperature.<br />
CAUTION<br />
Continually exceeding the duty cycle ratings can<br />
cause damage to the welding power source and<br />
will void the manufactures warranty.<br />
NOTE<br />
Due to variations that can occur in manufactured<br />
products, claimed performance, voltages, ratings,<br />
all capacities, measurements, dimensions and<br />
weights quoted are approximate only. Achievable<br />
capacities and ratings in use and operation will<br />
depend upon correct installation, use, applications,<br />
maintenance and service.<br />
ARCMASTER <strong>400</strong> S<br />
March 31, 2006 3-5
ARCMASTER <strong>400</strong> S<br />
3-6<br />
March 31, 2006
ARCMASTER <strong>400</strong> S<br />
4-2<br />
Socket Pin Function<br />
A Torch Switch Input (24V) to energize weld current.<br />
(connect pins A & B to turn on welding current)<br />
B Torch Switch Input (0V) to energize weld current<br />
(connect pins A & B to turn on welding current)<br />
C 5k ohm (maximum) connection to 5k ohm remote control potentiometer<br />
D Zero ohm (minimum) connection to 5k ohm remote control potentiometer<br />
E Wiper arm connection to 5k ohm remote control potentiometer<br />
G Mains Earth<br />
F,H,I,J,K,L Not Used<br />
M OK to move current detect signal for robotics applications<br />
N OK to move current detect signal for robotics applications<br />
3. Positive Terminal<br />
Welding current fl ows from the Power Source via heavy<br />
duty Dinse type terminal. It is essential, however, that<br />
the male plug is inserted and turned securely to achieve<br />
a sound electrical connection.<br />
4. Negative Terminal<br />
Welding current fl ows from the Power Source via heavy<br />
duty Dinse type terminal. It is essential, however, that<br />
the male plug is inserted and turned securely to achieve<br />
a sound electrical connection.<br />
CAUTION<br />
Loose welding terminal connections can cause<br />
overheating and result in the male plug being<br />
fused in the bayonet terminal.<br />
5. ON/OFF Switch<br />
This switch connects the Primary supply voltage to the<br />
inverter when in the ON position. This enables the Power<br />
Supply.<br />
! WARNING<br />
When the welder is connected to the Primary<br />
supply voltage, the internal electrical components<br />
maybe at primary potential with respect to<br />
earth.<br />
6. Input Cable<br />
The input cable connects the Primary supply voltage to<br />
the equipment.<br />
7. SMART Logic Switch<br />
Manual slide switch mounted on the back panel selects<br />
for proper input voltage. If this slide is not set to the<br />
position that matches the input voltage from the electrical<br />
source the Smart Logic circuit will inhibit welding power<br />
source output. The digital meter will show primary input<br />
error code.<br />
NOTE<br />
Due to variations that can occur in manufactured<br />
products, claimed performance, voltages, ratings,<br />
all capacities, measurements, dimensions and<br />
weights quoted are approximate only. Achievable<br />
capacities and ratings in use and operation will<br />
depend upon correct installation, use, applications,<br />
maintenance and service.<br />
March 31, 2006
4.02 Weld Parameter Description<br />
Par<br />
ameter<br />
HOT START<br />
A<br />
CONTACTOR<br />
REMOTE<br />
Figure 5 - ARCMASTER <strong>400</strong> S Front Panel with Parameter Description<br />
D escr<br />
iption<br />
ARCMASTER <strong>400</strong> S<br />
This parameter operates in STICK weld mode and is used to improve<br />
the start characteristics for stick electrodes. e.g. low hydrogen<br />
electrodes. It sets the peak start current on top of the (WELD) current.<br />
Weld Current (Amperage)- sets the STICK and TIG WELD current.<br />
ARC CONTROL - This parameter provides a suitable short circuit<br />
current in STICK welding to improve electrode sticking and arc<br />
stability.<br />
LIFT TIG mode of operation. A remote control device may be used for<br />
use during LIFT TIG operation. See section 4.01, section 2 “Remote<br />
Control Socket ”, for complete details of the remote device.<br />
STICK Mode of operation<br />
Contactor operation in STICK Mode<br />
Selects in operation Panel board or Remote<br />
Table 3 – Weld Parameter Descriptions<br />
March 31, 2006 4-3
ARCMASTER <strong>400</strong> S<br />
4.03 Weld Parameters for ARCMASTER <strong>400</strong> S<br />
4-4<br />
Weld<br />
Parameter Parameter Range<br />
Factory<br />
Setting<br />
Weld Mode<br />
Incremental<br />
Unit STICK LIFT TIG<br />
HOT START 0 to 70A 20A 1A Yes No<br />
WELD CUR 5 to <strong>400</strong>A DC 80A 1A Yes Yes<br />
ARC CONTROL 0 to 100% 10% 1% Yes No<br />
4.04 Power Source Features<br />
Feature Description<br />
New Digital Control • Almost all welding parameters are adjustable<br />
Touch Panel Switches • Touch switches eliminate mechanical damage<br />
Front Control Cover • Protects front panel controls<br />
• Displays selected weld parameter value<br />
• Displays weld current when welding<br />
Digital Meter<br />
• Displays weld current for 20 seconds after weld has been<br />
completed<br />
• A selected weld parameter value can be adjusted at any time<br />
even while welding<br />
• The intelligent cooling system is designed to reduce dust and<br />
foreign material build-up, whilst providing optimum cooling.<br />
• Fan speed reduces approximately 30 seconds after machine<br />
Intelligent Fan Control<br />
is turned on<br />
• Fan speed increases when internal components reaches<br />
operating temperature<br />
ON/OFF switch • Primary voltage Supply ON/OFF switch located on rear panel<br />
Reduces the OCV when the power supply is not in use. Eliminates<br />
the need for add on voltage reducers and has no effect on arc<br />
starting.<br />
Voltage Reduction Device (VRD)<br />
• VRD fully complies to IEC 60974-1<br />
• When Stick mode is selected the green VRD light is ON when<br />
not welding and red when welding.<br />
• When in TIG modes VRD is off.<br />
March 31, 2006
SECTION 5:<br />
SET-UP FOR SMAW (STICK) AND GTAW (TIG)<br />
Conventional operating procedures apply when using the<br />
Welding Power Source, i.e. connect work lead directly to<br />
work piece and electrode lead is used to hold electrode. Wide<br />
safety margins provided by the coil design ensure that the<br />
Welding Power Source will withstand short-term overload<br />
without adverse effects. The welding current range values<br />
should be used as a guide only. Current delivered to the arc<br />
is dependent on the welding arc voltage, and as welding arc<br />
voltage varies between different classes of electrodes, welding<br />
current at any one setting would vary according to the type of<br />
electrode in use. The operator should use the welding current<br />
range values as a guide, then fi nally adjust the current setting<br />
to suit the application.<br />
! WARNING<br />
Before connecting the work clamp to the work<br />
and inserting the electrode in the electrode<br />
holder make sure the Primary power supply is<br />
switched off.<br />
CAUTION<br />
Remove any packaging material prior to use.<br />
Do not block the air vents at the front or rear<br />
or sides of the Welding Power Source.<br />
Figure 6 – <strong>400</strong> S Set-up<br />
ARCMASTER <strong>400</strong> S<br />
March 31, 2006 5-1
ARCMASTER <strong>400</strong> S<br />
5-2<br />
March 31, 2006
1<br />
2<br />
ARCMASTER <strong>400</strong> S<br />
SECTION 6:<br />
SEQUENCE OF OPERATION<br />
NOTE: Scroll Buttons are used to select the parameters to be set. The LED’s show which function<br />
is being adjusted on the weld sequence graph. Refer to Symbols Table located in the front of the<br />
manual for Symbol descriptions.<br />
1. Scroll Buttons – used to select the parameter to be set.<br />
The LED’s show which function is being adjusted on the<br />
Sequence Graph.<br />
2. Digital LED display – Welding amperage and parameter<br />
values are displayed in this window. Internal warnings<br />
such as over temperature, low or high input voltage<br />
applied are signaled to the operator by a warning sound<br />
and error message on the screen.<br />
3. Control knob – allows the operator to adjust the output<br />
amperage within the entire range of the power source,<br />
also used to set each parameter value.<br />
4. Process Button – This button selects between STICK or<br />
Lift TIG mode.<br />
5. Contactor function – Pressing this buttons enables<br />
Contactor functions.<br />
6. Remote Current function – Pressing this buttons enables<br />
remote current functions.<br />
6.01 Stick Welding<br />
• Connect work lead to negative terminal<br />
• Connect electrode lead to positive terminal<br />
• Switch machine on<br />
• Set Contactor<br />
• Connect remote control device if required<br />
3<br />
Figure 7 – <strong>400</strong> S Front Panel<br />
Use the Scroll Buttons to move to the parameter to be set.<br />
The LED will show which function is being adjusted on the<br />
weld sequence graph. Use the control knob to adjust each<br />
parameter.<br />
• Set HOT START<br />
• Set WELD current<br />
• Set Arc Control<br />
Commence welding<br />
6.02 DC LIFT TIG Welding<br />
• Connect work lead to positive terminal<br />
• Connect TIG torch to negative terminal<br />
• Switch machine on<br />
• Set weld current.<br />
• Connect remote control device if desired<br />
Use the Scroll Buttons to move to the parameter to be set.<br />
The LED will show which function is being adjusted on the<br />
weld sequence graph. Use the control knob to adjust each<br />
parameter.<br />
• Set WELD current<br />
Commence welding<br />
March 31, 2006 6-1<br />
5<br />
6<br />
4
ARCMASTER <strong>400</strong> S<br />
6-2<br />
March 31, 2006
7.01 Electrode Polarity<br />
SECTION 7:<br />
BASIC TIG WELDING GUIDE<br />
ARCMASTER <strong>400</strong> S<br />
Connect the TIG torch to the - / TORCH terminal and the work lead to the + / WORK terminal for direct current straight polarity.<br />
Direct current straight polarity is the most widely used polarity for DC TIG welding. It allows limited wear of the electrode since<br />
70% of the heat is concentrated at the work piece.<br />
7.02 Tungsten Electrode Current Ranges<br />
7.03 Tungsten Electrode Types<br />
Electrode Type<br />
(Ground Finish)<br />
Thoriated 2%<br />
Ceriated 2%<br />
7.04 Guide for Selecting Filler Wire<br />
Diameter<br />
Filler Wire Diameter DC Current Range (Amps)<br />
1/16” (1.6 mm) 20 - 90<br />
3/32” (2.4 mm) 65 - 115<br />
1/8” (3.2 mm) 100 - 165<br />
3/16” (4.8 mm) 200-350<br />
Table 6 – Filler wire selection guide<br />
Electrode Diameter DC Current (Amps)<br />
0.040” (1.0mm) 30 – 60<br />
1/16” (1.6mm) 60 – 115<br />
3/32” (2.4mm) 100 – 165<br />
1/8” (3.2mm) 135 – 200<br />
5/32” (4.0mm) 190 – 280<br />
3/16” (4.8mm) 250 – 340<br />
Table 4 – Current ranges for varies tungsten electrode sizes<br />
Welding Application Features Color<br />
Code<br />
DC welding of mild steel,<br />
stainless steel and copper.<br />
Excellent arc starting, Long life,<br />
High current carrying capacity.<br />
Red<br />
DC welding of mild steel,<br />
stainless steel, copper,<br />
Longer life, More stable arc,<br />
Easier starting, Wider current<br />
Grey<br />
l i i i d N<br />
Table 5 – Tungsten electrode types<br />
March 31, 2006 7-1<br />
NOTE<br />
The fi ller wire diameter specifi ed in Table 6 is a<br />
guide only, other diameter wires may be used<br />
according to the welding application.
ARCMASTER <strong>400</strong> S<br />
7.05 Shielding Gas Selection<br />
7-2<br />
Alloy Shielding Gas<br />
Aluminium & alloys Argon<br />
Carbon Steel Argon<br />
Stainless Steel Argon<br />
Nickel Alloy Argon<br />
Copper Argon<br />
Titanium Argon<br />
Table 7 – Shielding gas selection<br />
7.06 TIG Welding Parameters for Low Carbon & Low Alloy Steel Pipe<br />
Electrode Type &<br />
Diameter<br />
Thoriated 2%<br />
3/32” (2.4 mm)<br />
Thoriated 2%<br />
3/32” (2.4 mm)<br />
Thoriated 2%<br />
3/32” (2.4 mm)<br />
Current Range DC<br />
Amperes<br />
Filler Rod for Root<br />
Pass<br />
120 - 170 Yes<br />
100 - 160 Yes<br />
90 - 130 No<br />
Table 8 – TIG welding parameters for low carbon & low alloy steel pipe<br />
7.07 Welding Parameters for Steel<br />
Joint Preparation<br />
Base Metal DC Current DC Current for Tungsten Filler Rod Argon Gas<br />
Thickness for Mild Stainless Electrode Diameter Flow Rate<br />
Steel Steel Diameter (if required) Liters/min Joint Type<br />
0.040” 35-45 20-30 0.040” 1/16” 5-7 Butt/Corner<br />
1.0mm 40-50 25-35 1.0mm 1.6mm Lap/ Fillet<br />
0.045” 45-55 30-45 0.040” 1/16” 5-7 Butt/Corner<br />
1.2mm 50-60 35-50 1.0mm 1.6mm Lap/ Fillet<br />
1/16” 60-70 40-60 1/16” 1/16” 7 Butt/Corner<br />
1.6mm 70-90 50-70 1.6mm 1.6mm Lap/ Fillet<br />
1/8” 80-100 65-85 1/16” 3/32” 7 Butt/Corner<br />
3.2mm 90-115 90-110 1.6mm 2.4mm Lap/ Fillet<br />
3/16” 115-135 100-125 3/32” 1/8” 10 Butt/Corner<br />
4.8mm 140-165 125-150 2.4mm 3.2mm Lap/ Fillet<br />
¼” 160-175 135-160 1/8” 5/32” 10 Butt/Corner<br />
6.4mm 170-200 160-180 3.2mm 4.0mm Lap/ Fillet<br />
Table 9 – DC TIG welding parameters<br />
March 31, 2006
8.01 Electrode Polarity<br />
Stick electrodes are generally connected to the ‘+’ terminal<br />
and the work lead to the ‘-’ terminal but if in doubt consult<br />
the electrode manufacturers literature.<br />
8.02 Effects of Stick Welding Various<br />
Materials<br />
High tensile and Alloy steels<br />
The two most prominent effects of welding these steels<br />
are the formation of a hardened zone in the weld area,<br />
and, if suitable precautions are not taken, the occurrence<br />
in this zone of under-bead cracks. Hardened zone and<br />
under-bead cracks in the weld area may be reduced by<br />
using the correct electrodes, preheating, using higher<br />
current settings, using larger electrodes sizes, short runs<br />
for larger electrode deposits or tempering in a furnace.<br />
Manganese steels<br />
The effect on manganese steel of slow cooling from<br />
high temperatures is to em brittle it. For this reason it is<br />
absolutely essential to keep manganese steel cool during<br />
welding by quenching after each weld or skip welding to<br />
distribute the heat.<br />
SECTION 8:<br />
BASIC ARC WELDING GUIDE<br />
ARCMASTER <strong>400</strong> S<br />
Cast Iron<br />
Most types of cast iron, except white iron, are weldable.<br />
White iron, because of its extreme brittleness, generally<br />
cracks when attempts are made to weld it. Trouble<br />
may also be experienced when welding white-heart<br />
malleable, due to the porosity caused by gas held in this<br />
type of iron.<br />
Copper and Alloys<br />
The most important factor is the high rate of heat<br />
conductivity of copper, making preheating of heavy<br />
sections necessary to give proper fusion of weld and<br />
base metal.<br />
Types of Electrodes<br />
Arc Welding electrodes are classifi ed into a number of<br />
groups depending on their applications. There are a<br />
great number of electrodes used for specialized industrial<br />
purposes which are not of particular interest for everyday<br />
general work. These include some low hydrogen types<br />
for high tensile steel, cellulose types for welding large<br />
diameter pipes, etc. The range of electrodes dealt with in<br />
this publication will cover the vast majority of applications<br />
likely to be encountered; are all easy to use and all will<br />
work on even the most basic of welding machines.<br />
Metals being joined Electrode Comments<br />
Ideal electrodes for all general purpose work.<br />
Mild steel 6013 Features include out standing operator appeal,<br />
easy arc starting and low spatter.<br />
All positional electrode for use on mild and<br />
Mild steel 7014<br />
galvanized steel furniture, plates, fences,<br />
gates, pipes and tanks etc. Especially suitable<br />
for vertical-down welding.<br />
Cast iron 99% Nickel<br />
Suitable for joining all cast irons except white<br />
cast iron.<br />
Stainless steel 318L-16<br />
High corrosion resistance. Ideal for dairy work,<br />
etc. On stainless steels.<br />
Easy to use electrode for marine fi ttings, water<br />
Copper, Bronze, Brass, etc.<br />
Bronze<br />
5.7 ERCUSI-A<br />
taps and valves, water trough fl oat arms, etc.<br />
Also for joining copper to steel and for bronze<br />
overlays on steel shafts.<br />
High Alloy Steels,<br />
Dissimilar Metals,<br />
Crack Resistance.<br />
All Hard-To-Weld Jobs.<br />
It will weld most problematical jobs such as<br />
springs, shafts, broken joins mild steel to<br />
312-16<br />
stainless and alloy steels.<br />
Not suitable for Aluminum.<br />
Table 10 - Types of Electrodes<br />
March 31, 2006 8-1
ARCMASTER <strong>400</strong> S<br />
8-2<br />
March 31, 2006
SECTION 9:<br />
ROUTINE MAINTENANCE<br />
ARCMASTER <strong>400</strong> S<br />
The only routine maintenance required for the power supply is a thorough cleaning and inspection, with the frequency depending<br />
on the usage and the operating environment.<br />
! WARNING<br />
Disconnect primary power at the source before<br />
opening the enclosure. Wait at least two minutes<br />
before opening the enclosure to allow the primary<br />
capacitors to discharge.<br />
To clean the unit, open the enclosure (please refer to the <strong>400</strong> S Service Manual) and use a vacuum cleaner to remove any<br />
accumulated dirt and dust. The unit should also be wiped clean, if necessary; with solvents that are recommended for cleaning<br />
electrical apparatus.<br />
CAUTION<br />
Do not blow air into the power supply during<br />
cleaning. Blowing air into the unit can cause<br />
metal particles to interfere with sensitive electrical<br />
components and cause damage to the unit.<br />
March 31, 2006 9-1
ARCMASTER <strong>400</strong> S<br />
9-2<br />
Warning!<br />
Disconnect input power before maintaining.<br />
Visual check of<br />
regulator and pressure<br />
Art # A-07331<br />
Visually inspect the torch<br />
body and consumables<br />
Replace all<br />
broken parts<br />
Each Use<br />
Weekly<br />
3 Months<br />
6 Months<br />
Visual check of torch<br />
Consumable parts<br />
Visually inspect the<br />
cables and leads.<br />
Replace as needed<br />
Clean<br />
exterior<br />
of power supply<br />
Bring the unit to an authorized<br />
Thermal Arc Service Center<br />
to remove any accumulated dirt<br />
and dust from the interior.<br />
This may need to be done more<br />
frequently under exceptionally<br />
dirty conditions.<br />
Maintain more often<br />
if used under severe<br />
conditions<br />
March 31, 2006
SECTION 10:<br />
BASIC TROUBLESHOOTING<br />
! WARNING<br />
ARCMASTER <strong>400</strong> S<br />
There are extremely dangerous voltages and power levels present inside this product. Do not attempt to open or<br />
repair unless you are an Accredited Thermal Arc Service Agent and you have had training in power measurements<br />
and troubleshooting techniques.<br />
If major complex subassemblies are faulty, then the Welding Power Source must be returned to an Accredited Thermal Arc<br />
Service Agent for repair.<br />
The basic level of troubleshooting is that which can be performed without special equipment or knowledge.<br />
10.01 TIG Welding Problems<br />
Weld quality is dependent on the selection of the correct consumables, maintenance of equipment and proper welding<br />
technique.<br />
Description Possible Cause Remedy<br />
1. Excessive beard build-up or poor<br />
penetration or poor fusion at<br />
edges of weld.<br />
2. Weld bead too wide and fl at or<br />
undercut at edges of weld or<br />
excessive burn through<br />
3. Weld bead too small or<br />
insuffi cient penetration or ripples<br />
in bead are widely spaced apart<br />
4. Weld bead too wide or excessive<br />
bead build up or excessive<br />
penetra tion in butt joint<br />
Welding current is too low Increase weld current and/or faulty<br />
joint preparation<br />
Welding current is too high Decrease weld current<br />
Travel speed too fast Reduce travel speed<br />
Travel speed too slow Increase travel speed<br />
5. Uneven leg length in fi llet joint Wrong placement of fi ller rod Re-position fi ller rod<br />
6. Electrode melts when arc is<br />
struck.<br />
Electrode is connected to the ‘+’<br />
terminal.<br />
7. Dirty weld pool. A. Electrode contaminated through<br />
contact with work piece or fi ller rod<br />
material.<br />
Connect the electrode to the ‘−’<br />
terminal.<br />
A. Clean the electrode by grinding off<br />
the contaminates.<br />
B. Gas contaminated with air. B. Check gas lines for cuts and loose<br />
fi tting or change gas cylinder.<br />
March 31, 2006 10-1
ARCMASTER <strong>400</strong> S<br />
10-2<br />
Description Possible Cause Remedy<br />
8. Electrode melts or oxidizes when<br />
an arc is struck.<br />
A. No gas fl owing to welding region. A. Check the gas lines for kinks or<br />
breaks and gas cylinder contents.<br />
B. Torch is clogged with dust. B. Clean torch<br />
C. Gas hose is cut. C. Replace gas hose.<br />
D. Gas passage contains impurities. D. Disconnect gas hose from torch<br />
then raise gas pressure and blow<br />
out impurities.<br />
E. Gas regulator turned off. E. Turn on.<br />
F. Torch valve is turned off. F. Turn on.<br />
G. The electrode is too small for the<br />
welding current.<br />
G. Increase electrode diameter or<br />
reduce the welding current.<br />
9. Poor weld fi nish. Inadequate shielding gas. Increase gas fl ow or check gas line<br />
for gas fl ow problems.<br />
10. Arc fl utters during TIG welding. A. Tungsten electrode is too large for<br />
the welding current.<br />
11. Welding arc can not be<br />
established.<br />
A.. Select the right size electrode. Refer<br />
to Basic TIG Welding guide.<br />
B. Absence of oxides in the weld pool. B. Refer Basic TIG Welding Guide for<br />
ways to reduce arc fl utter.<br />
A. Work clamp is not connected to<br />
the work piece or the work/torch<br />
leads are not connected to the right<br />
welding terminals.<br />
A. Connect the work clamp to the work<br />
piece or connect the work/torch leads<br />
to the right welding terminals.<br />
B. Torch lead is disconnected. B. Connect it to the ‘−‘ terminal.<br />
C. Gas flow incorrectly set, cylinder<br />
empty or the torch valve is off.<br />
12. Arc start is not smooth. A. Tungsten electrode is too large for<br />
the welding current.<br />
B. The wrong electrode is being used<br />
for the welding job<br />
C. Select the right fl ow rate, change<br />
cylinders or turn torch valve on.<br />
A. Select the right size electrode.<br />
Refer to Section 7, Basic TIG<br />
Welding Guide.<br />
B. Select the right electrode type.<br />
Refer to Section 7, Basic TIG<br />
Welding Guide.<br />
C. Gas fl ow rate is too high. C. Select the correct rate for the<br />
welding job.<br />
Refer to Section 7, Basic TIG<br />
Welding Guide.<br />
D. Incorrect shielding gas is being<br />
used.<br />
E. Poor work clamp connection to work<br />
piece.<br />
D. Select the right shielding gas.<br />
Refer to Section 7, Basic TIG<br />
Welding Guide.<br />
E. Improve connection to work piece.<br />
March 31, 2006
10.02 Stick Welding Problems<br />
ARCMASTER <strong>400</strong> S<br />
Description Possible Cause Remedy<br />
1. Gas pockets or voids in weld metal A. Electrodes are damp. A. Dry electrodes before use.<br />
(Porosity).<br />
B. Welding current is too high. B. Reduce welding current.<br />
C. Surface impurities such as oil,<br />
grease, paint, etc.<br />
C. Clean joint before welding.<br />
2. Crack occurring in weld<br />
A. Rigidity of joint.<br />
A. Redesign to relieve weld joint<br />
metal soon after solidifi cation<br />
of severe stresses or use crack<br />
commences<br />
resistance electrodes.<br />
B. Insuffi cient throat thickness. B. Travel slightly slower to allow<br />
greater build up in throat.<br />
C. Cooling rate is too high. C. Preheat plate and cool slowly.<br />
3. A gap is left by failure of the weld A. Welding current is too low. A. Increase welding current<br />
metal to fi ll the root of the weld. B. Electrode too large for joint. B. Use smaller diameter<br />
electrode.<br />
C. Insuffi cient gap.<br />
C. Allow wider gap.<br />
D. Incorrect sequence. D. Use correct build-up sequence.<br />
Figure 8 – Example of insuffi cient gap or incorrect sequence<br />
4. Portions of the weld run do not fuse A. Small electrodes used on heavy A. Use larger electrodes and pre-heat<br />
to the surface of the metal or edge cold plate.<br />
the plate.<br />
of the joint.<br />
B. Welding current is too low. B. Increase welding current<br />
C. Wrong electrode angle. C. Adjust angle so the welding arc is<br />
directed more into the base metal<br />
D. Travel speed of electrode is too D.<br />
high.<br />
Reduce travel speed of electrode<br />
E. Scale or dirt on joint surface. E. Clean surface before welding.<br />
Figure 9 – Example of lack of fusion<br />
March 31, 2006 10-3
ARCMASTER <strong>400</strong> S<br />
5 Non-metallic parti cles are<br />
trapped in the weld metal<br />
(slag inclusion).<br />
10.03 Power Source Problems<br />
10-4<br />
A. Non-metallic particles may be trapped<br />
in undercut from previous run.<br />
A. If bad undercut is present, clean slag<br />
out and cover with a run from a smaller<br />
diameter electrode.<br />
B. Joint preparation too restricted. B. Allow for adequate penetration and room<br />
for cleaning out the slag.<br />
C. Irregular deposits allow slag to be<br />
trapped.<br />
D. Lack of penetration with slag trapped<br />
beneath weld bead.<br />
E. Rust or mill scale is preventing full<br />
fusion.<br />
F. Wrong electrode for position in which<br />
welding is done.<br />
Figure 10 – Examples of slag inclusion<br />
C. If very bad, chip or grind out<br />
irregularities.<br />
D. Use smaller electrode with sufficient<br />
current to give adequate penetration.<br />
Use suitable tools to remove all slag<br />
from corners.<br />
E. Clean joint before welding.<br />
F. Use electrodes designed for position in<br />
which welding is done, otherwise proper<br />
control of slag is diffi cult.<br />
Description Possible Cause Remedy<br />
1. The welding arc cannot be A. The Primary supply voltage has not A. Switch ON the Primary supply<br />
established<br />
been switched ON.<br />
voltage.<br />
B. The Welding Power Source switch B.<br />
is switched OFF.<br />
Switch ON the Welding Power Source.<br />
C. Loose connections internally. C. Have an Accredited Thermal Arc Service<br />
Agent repair the connection.<br />
2. Maximum output welding Defective control circuit Have an Accredited Thermal Arc Service<br />
current can not be achieved<br />
with nominal Mains supply<br />
voltage.<br />
Agent inspect then repair the welder.<br />
3. Welding current reduces when Poor work lead connection to the Ensure that the work lead has a<br />
welding<br />
work piece.<br />
positive electrical connection to the<br />
work piece.<br />
4. No gas fl ow when the torch A. Gas hose is cut.<br />
A. Replace gas hose.<br />
trigger switch is depressed. B. Gas passage contains impurities. B. Disconnect gas hose from the rear of<br />
Power Source then raise gas pressure<br />
and blow out impurities.<br />
C. Gas regulator turned off. C. Turn gas regulator on.<br />
D. Torch trigger switch lead is D. Reconnect lead or repair faulty switch/<br />
disconnected or switch/cable is<br />
faulty.<br />
cable.<br />
March 31, 2006
11.01 VRD Specifi cation<br />
SECTION 11:<br />
VOLTAGE REDUCTION DEVICE (VRD)<br />
ARCMASTER <strong>400</strong> S<br />
Description ArcMaster <strong>400</strong> S Notes<br />
VRD Open Circuit Voltage 15.3 to 19.8V Open circuit voltage between welding terminals<br />
VRD Resistance 148 to 193 ohms<br />
The required resistance between welding<br />
terminals to turn ON the welding power<br />
VRD Turn OFF Time 0.2 to 0.3 seconds<br />
The time taken to turn OFF the welding power<br />
once the welding current has stopped<br />
10.02 VRD Maintenance<br />
Routine inspection and testing (power source)<br />
An inspection of the power source, an insulation resistance<br />
test and an earth resistance test shall be carried out.<br />
a) For transportable equipment, at least once every 3<br />
months; and<br />
b) For fi xed equipment, at least once every 12 months.<br />
The owners of the equipment shall keep a suitable record of<br />
the periodic tests.<br />
Note 8<br />
A transportable power source is any equipment<br />
that is not permanently connected and fi xed in<br />
the position in which it is operated.<br />
In addition to the above tests and specifi cally in relation to<br />
the VRD fi tted to this machine, the following periodic tests<br />
should also be conducted by an accredited Thermal Arc<br />
service agent.<br />
Description IEC 60974-1 Requirements<br />
VRD Open Circuit Voltage Less than 20V; at Vin=208-230V or 460V<br />
VRD Turn ON Resistance Less than 200 ohms<br />
VRD Turn OFF Time Less than 0.3 seconds<br />
If this equipment is used in a hazardous location or environments with a high risk of electrocution then the above tests should<br />
be carried out prior to entering this location.<br />
March 31, 2006 11-1
ARCMASTER <strong>400</strong> S<br />
11.03 Switching VRD On/Off<br />
Switch the machine Off.<br />
a) Remove the clear plastic cover from the control panel (see Figure 11).<br />
• Lift up the cover so it rests on the top of the unit.<br />
• Place a small fl at bladed screw driver between the cover hinge on the front panel.<br />
• Gently lift the cover hinge out of the front cover mounting hole.<br />
• Remove the control’s clear plastic cover.<br />
b) Remove four mounting screws from the control panel (see Figure 12).<br />
c) Access the VRD control by gently prying back the front panel controls to reveal the VRD on/off potentiometer (see Figure<br />
12).<br />
d) Turning the VRD ON/OFF (see Figure 13).<br />
• To turn VRD ON: rote the trim potentiometer (VR1) on the display PCB fully clockwise. When VRD is turned ON check that<br />
it operates as per VRD Specifi cations on page 5-13.<br />
• To turn VRD OFF: rote the trim potentiometer (VR1) on the display PCB fully counter clockwise.<br />
11-2<br />
Figure 11 VRD ON/OFF Step A<br />
CAUTION<br />
Do not pull back the front panel with excessive force as this will unplug control PCB. Plugging the control PCB back<br />
into the front panel controls can only be achieved by removing the side covers.<br />
March 31, 2006
Figure 12 VRD ON/OFF Step B,C<br />
! WARNING<br />
ARCMASTER <strong>400</strong> S<br />
The VRD ON/OFF trim potentiometer MUST ONLY be positioned fully clockwise OR fully counter clockwise as the<br />
VRD function will be unknown for every other position.<br />
Figure 13 VRD ON/OFF Step D<br />
March 31, 2006 11-3
ARCMASTER <strong>400</strong> S<br />
11-4<br />
March 31, 2006
SECTION 12:<br />
POWER SOURCE ERROR CODES<br />
Description Possible Cause Remedy Remarks<br />
E01 error code displayed A The Welding Power Source’s duty cycle A Let Power Source cool down then keep Weld current ceases.<br />
has been exceeded.<br />
within its duty cycle.<br />
Temperature sensor TH1 (protects B Fan ceases to operate. B Have an Accredited Thermal Arc Buzzer sounds constantly.<br />
IGBTs) is greater than 80ºC for<br />
Service Agent investigate<br />
C Air flow is restricted by vents being C Unblock vents then let Power Source Fan operates at max speed.<br />
blocked<br />
cool down.<br />
E01 resets when TH1 decreases to<br />
70ºC for about 30 seconds.<br />
E02 error code displayed A The Welding Power Source’s duty cycle A Let Power Source cool down then keep Weld current ceases.<br />
has been exceeded.<br />
within its duty cycle.<br />
Temperature sensor TH2 (protects B Fan ceases to operate. B Have an Accredited Thermal Arc Buzzer sounds constantly.<br />
secondary diodes) is greater than<br />
Service Agent investigate<br />
80ºC for about 1 second<br />
C Air flow is restricted by vents being C Unblock vents then let Power Source Fan operates at max speed.<br />
blocked<br />
cool down.<br />
E02 resets when TH1 decreases to<br />
70ºC for about 30 seconds.<br />
1<br />
2<br />
ARCMASTER <strong>400</strong> S<br />
March 31, 2006 12-1<br />
A Reduce length of welding arc. Weld current ceases.<br />
E03 error code displayed A Primary current is too high because<br />
welding arc is too long.<br />
3<br />
Buzzer sounds constantly.<br />
B Have an Accredited Thermal Arc<br />
Service Agent or a qualified electrician<br />
check for low Mains voltage.<br />
Primary (input) current too high B Mains supply voltage is more than 10%<br />
below nominal voltage<br />
Switch machine off then on to reset<br />
E03 error.<br />
E11 error code displayed Primary supply voltage is greater than Have an Accredited Thermal Arc Weld current ceases.<br />
the nominal voltage plus 10%<br />
Service Agent or a qualified electrician<br />
check the Primary voltage.<br />
Over Primary supply (input) voltage<br />
Buzzer sounds constantly.<br />
at primary capacitors is exceeded<br />
for one second<br />
Error code E11 automatically will<br />
reset when the voltage reduces.<br />
4
ARCMASTER <strong>400</strong> S<br />
12-2<br />
E14 error code displayed Mains<br />
supply<br />
voltage<br />
is<br />
less<br />
than<br />
the<br />
Have an Accredited Thermal Arc Weld current available.<br />
nominal operating voltage less 10%.<br />
Service Agent or a qualified electrician<br />
check the Mains voltage.<br />
Under mains supply (input) voltage<br />
Buzzer sounds intermittently.<br />
warning primary capacitors is<br />
reduced for one second<br />
Error code E14 automatically will<br />
reset when the voltage increases.<br />
E12 error code displayed Mains<br />
supply<br />
voltage<br />
is<br />
down<br />
to<br />
a A Have an Accredited Thermal Arc Weld current ceases.<br />
dangerously low level.<br />
Service Agent or a qualified electrician<br />
5<br />
6<br />
check the Mains voltage<br />
Buzzer sounds constantly.<br />
Have an Accredited Thermal Arc<br />
Service Agent or a qualified electrician<br />
check the primary cable & fuses.<br />
Under mains supply (input) voltage<br />
primary capacitors is reduced for<br />
one second<br />
Error code E12 automatically will<br />
reset when the voltage increases.<br />
E81 error code displayed When<br />
3 phase<br />
machine<br />
is<br />
first<br />
turned<br />
on<br />
Have an Accredited Thermal Arc No weld current is available.<br />
with the wrong Primary supply (input) Service Agent or a qualified electrician<br />
voltage connected<br />
check the Mains voltage<br />
Wrong Primary supply (input)<br />
Buzzer sounds constantly.<br />
voltage connected<br />
Switch machine off.<br />
E82 error code displayed Link<br />
switch<br />
plug<br />
not<br />
connected<br />
Have<br />
an<br />
Accredited<br />
Thermal<br />
Arc<br />
No weld current is available.<br />
Service Agent check connector plug on<br />
input PCB<br />
7<br />
8<br />
Link switch plug not connected Buzzer sounds constantly.<br />
Switch machine off.<br />
March 31, 2006
E83 error code displayed The Primary supply (input) voltage Have an Accredited Thermal Arc No weld current is available.<br />
CPU checks mains supply (input) fluctuates and is not stable.<br />
Service Agent check connector plug on Buzzer sounds constantly.<br />
voltage when the on/off switch on<br />
input PCB and the Mains voltage<br />
rear panel of machine is turned ON.<br />
9<br />
Switch machine off then on to reset<br />
E83 error.<br />
E93 error code displayed Memory chip (EEPROM) error Have an Accredited Thermal Arc Weld current ceases.<br />
Memory chip (EEPROM) on control<br />
Service Agent check the control PCB Buzzer sounds constantly.<br />
PCB can not read/write weld<br />
parameters<br />
Switch machine off.<br />
E94 error code displayed The Welding Power Source’s<br />
Have an Accredited Thermal Arc Weld current ceases.<br />
Temperature sensor TH1 for IGBTs temperature sensors have<br />
Service Agent check or replace the Buzzer sounds constantly.<br />
or sensor TH2 for secondary diodes malfunctioned.<br />
temperature sensors.<br />
are open circuit<br />
10<br />
11<br />
Switch machine off.<br />
A Turn on/off switch on. Weld current ceases.<br />
B Have an Accredited Thermal Arc<br />
Service Agent or a qualified electrician<br />
check the Mains voltage and fuses<br />
E99 error code displayed A Main on/off switch on machine has been<br />
turned off<br />
Mains supply (input) voltage has B Mains supply (input) voltage has been<br />
been turned off but control circuit turned off<br />
has power from the primary<br />
capacitors<br />
ARCMASTER <strong>400</strong> S<br />
March 31, 2006 12-3<br />
12<br />
Buzzer sounds constantly.<br />
Must switch machine off then on to<br />
reset E99 error.
ARCMASTER <strong>400</strong> S<br />
A-2<br />
-<br />
N<br />
P<br />
R2<br />
+<br />
Ground<br />
SIDECHASSIS 1<br />
REAR<br />
PANEL<br />
1<br />
2<br />
3<br />
4<br />
5<br />
6<br />
460V<br />
S2<br />
230V<br />
FAN1<br />
+<br />
1<br />
2<br />
3<br />
4<br />
Line1<br />
Line2<br />
Line3<br />
E PCB21<br />
Filter<br />
Circuit Bord<br />
[WK-4917]<br />
CN1<br />
CN11<br />
S1<br />
APPENDIX A:<br />
INTERCONNECT DIAGRAM<br />
K(7)<br />
G(6)<br />
R(3)<br />
S(4)<br />
D1<br />
+<br />
(1)<br />
(0)<br />
T(5) -<br />
(2)<br />
CN1<br />
1<br />
2<br />
1 2 3<br />
4<br />
5<br />
1 2 3<br />
CN2<br />
A : Contactor Control /+24VDC<br />
B : Contactor Control /Contactor Clouser To"A"<br />
C : 0 To +10Vdc Output To Remote Control<br />
D : Remote Control Circuit Common<br />
E : 0 To +10Vdc Intput From Remote Control<br />
F: Not Used<br />
G:ChassisGround<br />
H:NotUsed<br />
I : Not Used<br />
J:NotUsed<br />
K:NotUsed<br />
L:NotUsed<br />
M : OK to Move(Current Detect Signal)<br />
N : OK to Move(Current Detect Signal)<br />
CON1<br />
A J<br />
B K I<br />
C L N H<br />
D M G<br />
E F<br />
L105<br />
EC<br />
EB<br />
1 2 3 4 5<br />
CN3<br />
1<br />
2<br />
3<br />
4<br />
CN4<br />
1<br />
2<br />
CN31 CN32 CN30<br />
CN31 CN32<br />
PCB5<br />
CN30<br />
ConectCircuit Bord<br />
[WK-5551]<br />
CN131 CN132 CN130<br />
CN131 CN132 CN130<br />
CN17<br />
CN17<br />
TB0<br />
P<br />
R2<br />
N<br />
CN3<br />
P<br />
R2<br />
N<br />
PCB2<br />
Link<br />
Circuit Bord<br />
[WK-5597]<br />
CN2<br />
1 2 3<br />
PCB4<br />
Detect<br />
Circuit Bord<br />
[WK-4819]<br />
CN7<br />
CN5 CN6 CN1<br />
CN5 CN6 CN4<br />
CN14<br />
CN15<br />
1<br />
2<br />
1 PCB7<br />
2<br />
CN27 3<br />
CN27 4<br />
5<br />
Filter<br />
Circuit Bord<br />
[WK-5550]<br />
1<br />
2<br />
3<br />
CN13<br />
CN18<br />
CN18<br />
CN20<br />
1<br />
2<br />
3<br />
CN1<br />
1 2 3<br />
TB1<br />
TB2<br />
TB3<br />
TB4<br />
CN7<br />
PCB3<br />
Control Souce<br />
Circuit Bord<br />
[WK-5548]<br />
CN18<br />
1 2 3<br />
TB13<br />
UB3<br />
TB14<br />
C<br />
CE<br />
C<br />
G<br />
Q1 TB10<br />
TB11<br />
C<br />
CE<br />
C<br />
G<br />
Q13<br />
TB15 E<br />
PCB1<br />
Main PCB8<br />
Circuit Bord IGBTGate<br />
[WK-5493] Circuit Bord<br />
TB1 [WK-5479]<br />
E<br />
C<br />
G<br />
E<br />
C<br />
Q2<br />
Q3<br />
TB12 E<br />
PCB10<br />
IGBTGate<br />
Circuit Bord<br />
[WK-5479]<br />
E<br />
C<br />
G<br />
E<br />
C<br />
Q14<br />
Q15<br />
G1<br />
E1<br />
1<br />
2<br />
3<br />
G<br />
E<br />
C Q4<br />
G4<br />
E4<br />
1<br />
2<br />
3<br />
G<br />
E<br />
C Q16<br />
G<br />
G<br />
E<br />
E<br />
G2 1<br />
C Q5 G3 1<br />
C Q17<br />
E2<br />
TB2<br />
2<br />
3<br />
4<br />
G<br />
E<br />
C Q6<br />
E3 2<br />
3<br />
4<br />
G<br />
E<br />
C Q18<br />
G<br />
G<br />
TB3<br />
E<br />
E<br />
1<br />
2<br />
3<br />
4<br />
E1<br />
G1<br />
E5<br />
G5<br />
CN1<br />
CN2<br />
TB18<br />
TB19<br />
C<br />
CE<br />
C<br />
G<br />
Q7 TB5<br />
UB1<br />
TB6<br />
C<br />
CE<br />
C<br />
G<br />
Q19<br />
TB20 E E<br />
C Q8<br />
TB7 E E<br />
C Q20<br />
TB4 PCB9<br />
IGBTGate<br />
Circuit Bord<br />
[WK-5479]<br />
G<br />
E<br />
C<br />
G<br />
Q9<br />
PCB11<br />
IGBTGate<br />
Circuit Bord<br />
[WK-5479]<br />
G<br />
E<br />
C<br />
G<br />
Q21<br />
G3 1<br />
E G7 1<br />
E<br />
E3 2<br />
3<br />
C Q10 E7 2<br />
3<br />
C Q22<br />
G<br />
G<br />
E<br />
E<br />
G4 1<br />
C Q11<br />
G8 1<br />
C Q23<br />
E4 2<br />
3<br />
4<br />
G<br />
E<br />
C Q12<br />
E8 2<br />
3<br />
4<br />
G<br />
E<br />
C Q24<br />
CT1<br />
CT2<br />
CT3<br />
CT4<br />
G<br />
E<br />
G<br />
E<br />
1 2 3 4 5 6<br />
CN20<br />
1 2<br />
1 2 3<br />
CN33<br />
CN20<br />
CN9<br />
CN1<br />
CN2<br />
1 2 3<br />
E2<br />
G2<br />
CN21<br />
PCB6<br />
Control<br />
Circuit Bord<br />
[WK-5549]<br />
E6<br />
G6<br />
1 2 3 4 5 6 7<br />
CN8<br />
1 2<br />
TH2 TH1<br />
E7<br />
G7<br />
CN22<br />
CN1<br />
CN2<br />
CN1<br />
CN2<br />
E3<br />
G3<br />
1 2 3 4 5 6<br />
CN19<br />
1 2 3<br />
P+21V<br />
PGND<br />
E8<br />
G8<br />
CN23<br />
E4<br />
G4<br />
1 2 3 4 5 6 7<br />
CN17<br />
CN21<br />
CN1<br />
1<br />
2<br />
3<br />
4<br />
5<br />
6<br />
7<br />
1<br />
2<br />
3<br />
4<br />
1<br />
2<br />
3<br />
4<br />
March 31, 2006
UB2<br />
UB4<br />
TB7<br />
TB21<br />
TB8<br />
CT1<br />
CT2<br />
TB16<br />
TB22<br />
TB17 CT3<br />
EB<br />
1 2 3 4 5<br />
CN8<br />
CT3<br />
CT4<br />
PCB14<br />
TRANS Bord<br />
[WK-5594]<br />
CT2<br />
L1<br />
AC4<br />
AC2<br />
TB35<br />
TB33<br />
TB34<br />
TB30<br />
TB32<br />
TB31<br />
AC4<br />
SH.DET-<br />
AC2 AC1<br />
PCB15<br />
DIODE Snubber<br />
Circuit Bord<br />
[WK-5606]<br />
SH.DET+<br />
1 2 3 4 5 6 7 8 9<br />
CN9<br />
/RY_ON<br />
RY+15V<br />
D5<br />
D7<br />
D2<br />
D4<br />
+15<br />
-15<br />
IS<br />
GND<br />
1<br />
2<br />
3<br />
4<br />
5<br />
6<br />
CN2<br />
PCB12<br />
Panel<br />
Circuit Board<br />
[WK-5527]<br />
CN1<br />
1 2 3 4<br />
FCH1<br />
PCB13<br />
Encorder Board<br />
[WK-5528]<br />
CN1<br />
1 2 3 4<br />
ARCMASTER <strong>400</strong> S<br />
TO2<br />
-Output<br />
Terminal<br />
March 31, 2006 A-3<br />
RY+15V<br />
/RY_ON<br />
SH.DET-<br />
1<br />
2<br />
3<br />
CN1<br />
PCB20<br />
Filter Circuit Bord<br />
[WK-5499]<br />
CN3<br />
UB1<br />
UB3<br />
1 2 3 4 5<br />
+15<br />
-15<br />
IS<br />
GND<br />
1 2 3 4<br />
+<br />
SIDE CHASSIS 2<br />
R2<br />
R3<br />
HCT1<br />
FRONT<br />
PANEL<br />
EB<br />
Ground<br />
SH.DET+<br />
+<br />
SIDE CHASSIS 3<br />
UB2<br />
UB4<br />
TO1<br />
+Output<br />
Terminal<br />
Ground
ARCMASTER <strong>400</strong> S<br />
A-4<br />
March 31, 2006
Appendix B:<br />
OPTIONS AND ACCESSORIES<br />
ARCMASTER <strong>400</strong> S<br />
PRODUCT PART NO. DESCRIPTION<br />
Stick Kit 10-4082A Work lead with 25’ #1 cable, and stick electrode holder with<br />
25’ #1 cable<br />
TIG Kit 10-4080 Includes regulator/fl owgauge, 12.5ft 200 Amp TIG torch with<br />
valve, accessory kit includes 1 ea of 0040”x7”, 1/16”x7”,<br />
3/32”x7” 2% Tungsten with collet & collet bodies, 1 ea 1/4”,<br />
5/16”, 3/8” alumina cup<br />
Dinse Connector 10-2020 T50mm Dinse style male plug<br />
Hand Held Pendant 10-2005 Includes contactor On/Off switch and current control with 25ft<br />
cable and 14-pin male plug<br />
Foot Control 10-2008 Contactor On/Off and current control with 15ft cable and 14-pin<br />
male plug<br />
10-2007 Contactor On/Off and current control with 25ft cable and 14-pin<br />
male plug<br />
Extension Cable 10-2030 3ft with 14-pin male plug and 14-pin female cable receptacle<br />
10-2031 15ft with 14-pin male plug and 14-pin female cable<br />
receptacle<br />
10-2032 25ft with 14-pin male plug and 14-pin female cable<br />
receptacle<br />
10-2033 50ft with 14-pin male plug and 14-pin female cable<br />
receptacle<br />
10-2034 75ft with 14-pin male plug and 14-pin female cable<br />
receptacle<br />
Torch Switch On/Off 10-2001 25ft torch mounted with 14-pin male plug<br />
Torch Switch On/Off w/current<br />
control<br />
10-2002 25ft torch mounted with 14-pin male plug - adapts to 5/8”-<br />
7/8” torch<br />
10-2003 25ft torch mounted with 14-pin male plug - adapts to 7/8”-1-<br />
1/8” torch handle<br />
10-2004 25ft torch mounted with 14-pin male plug - adapts to 1-1/8”-<br />
1-3/8” torch handle<br />
Rack Systems 10-4029 4 pack w/electrical<br />
10-4031 6 pack w/electrical<br />
10-4033 8 pack w/electrical<br />
March 31, 2006 B-1
LIMITED WARRANTY<br />
This information applies to Thermal Arc products that were purchased in the USA and Canada.<br />
April 2006<br />
LIMITED WARRANTY: Thermal Arc ® , Inc., A Thermadyne Company ("Thermal Arc"),<br />
warrants to customers of authorized distributors ("Purchaser") that its products will be free<br />
of defects in workmanship or material. Should any failure to conform to this warranty<br />
appear within the warranty period stated below, Thermal Arc shall, upon notification<br />
thereof and substantiation that the product has been stored, installed, operated, and<br />
maintained in accordance with Thermal Arc's specifications, instructions,<br />
recommendations and recognized standard industry practice, and not subject to misuse,<br />
repair, neglect, alteration, or damage, correct such defects by suitable repair or<br />
replacement, at Thermal Arc's sole option, of any components or parts of the product<br />
determined by Thermal Arc to be defective.<br />
This warranty is exclusive and in lieu of any warranty of<br />
merchantability, fitness for any particular purpose, or other warranty of<br />
quality, whether express, implied, or statutory.<br />
Limitation of liability: Thermal Arc shall not under any circumstances be liable for special,<br />
indirect, incidental, or consequential damages, including but not limited to lost profits and<br />
business interruption. The remedies of the purchaser set forth herein are exclusive, and<br />
the liability of Thermal Arc with respect to any contract, or anything done in connection<br />
therewith such as the performance or breach thereof, or from the manufacture, sale,<br />
delivery, resale, or use of any goods covered by or furnished by Thermal Arc, whether<br />
arising out of contract, tort, including negligence or strict liability, or under any warranty,<br />
or otherwise, shall not exceed the price of the goods upon which such liability is based.<br />
No employee, agent, or representative of Thermal Arc is authorized to change this<br />
warranty in any way or grant any other warranty, and Thermal Arc shall not be bound by<br />
any such attempt. Correction of non-conformities, in the manner and time provided<br />
herein, constitutes fulfillment of thermal’s obligations to purchaser with respect to the<br />
product.<br />
This warranty is void, and seller bears no liability hereunder, if purchaser used<br />
replacement parts or accessories which, in Thermal Arc's sole judgment, impaired the<br />
safety or performance of any Thermal Arc product. Purchaser’s rights under this warranty<br />
are void if the product is sold to purchaser by unauthorized persons.<br />
The warranty is effective for the time stated below beginning on the date that the<br />
authorized distributor delivers the products to the Purchaser. Notwithstanding the<br />
foregoing, in no event shall the warranty period extend more than the time stated plus<br />
one year from the date Thermal Arc delivered the product to the authorized distributor.<br />
Warranty repairs or replacement claims under this limited warranty must be submitted to<br />
Thermal Arc via an authorized Thermal Arc repair facility within thirty (30) days of<br />
purchaser's discovery of any defect. Thermal Arc shall pay no transportation costs of any<br />
kind under this warranty. Transportation charges to send products to an authorized<br />
warranty repair facility shall be the responsibility of the Purchaser. All returned goods<br />
shall be at the Purchaser's risk and expense. This warranty dated April 1 st 2006<br />
supersedes all previous Thermal Arc warranties. Thermal Arc ® is a Registered<br />
Trademark of Thermal Arc, Inc.
WARRANTY SCHEDULE<br />
This information applies to Thermal Arc products that were purchased in the USA and Canada.<br />
April 2006<br />
ENGINE DRIVEN WELDERS WARRANTY PERIOD LABOR<br />
Scout, Raider, Explorer<br />
Original Main Power Stators and Inductors .................................................................................. 3 years 3 years<br />
Original Main Power Rectifiers, Control P.C. Boards ................................................................... 3 years 3 years<br />
All other original circuits and components including, but not limited to, relays,<br />
switches, contactors, solenoids, fans, power switch semi-conductors..........................................1 year<br />
Engines and associated components are NOT warranted by Thermal Arc, although<br />
most are warranted by the engine manufacturer............................................................. See the Engine Manufactures Warranty for<br />
Details<br />
GMAW/FCAW (MIG) WELDING EQUIPMENT WARRANTY PERIOD LABOR<br />
Fabricator 131, 181; 190, 210, 251, 281; Fabstar 4030;<br />
PowerMaster 350, 350P, 500, 500P; Excelarc 6045.<br />
Wire Feeders; Ultrafeed, Portafeed<br />
Original Main Power Transformer and Inductor............................................................................ 5 years 3 years<br />
Original Main Power Rectifiers, Control P.C. Boards, power switch semi-conductors ................. 3 years 3 years<br />
All other original circuits and components including, but not limited to, relays,<br />
switches, contactors, solenoids, fans, electric motors...................................................................1 year 1 year<br />
GTAW (TIG) & MULTI-PROCESS INVERTER WELDING EQUIPMENT WARRANTY PERIOD LABOR<br />
160TS, 300TS, <strong>400</strong>TS, 185AC/DC, 200AC/DC, 300AC/DC, <strong>400</strong>GTSW, <strong>400</strong>MST,<br />
300MST, <strong>400</strong>MSTP<br />
Original Main Power Magnetics.................................................................................................... 5 years 3 years<br />
Original Main Power Rectifiers, Control P.C. Boards, power switch semi-conductors ................. 3 years 3 years<br />
All other original circuits and components including, but not limited to, relays,<br />
switches, contactors, solenoids, fans, electric motors...................................................................1 year 1 year<br />
PLASMA WELDING EQUIPMENT WARRANTY PERIOD LABOR<br />
Ultima 150<br />
Original Main Power Magnetics.................................................................................................... 5 years 3 years<br />
Original Main Power Rectifiers, Control P.C. Boards, power switch semi-conductors ................. 3 years 3 years<br />
Welding Console, Weld Controller, Weld Timer ........................................................................... 3 years 3 years<br />
All other original circuits and components including, but not limited to, relays,<br />
switches, contactors, solenoids, fans, electric motors, Coolant Recirculator. ...............................1 year 1 year<br />
SMAW (Stick) WELDING EQUIPMENT WARRANTY PERIOD LABOR<br />
Dragster 85<br />
Original Main Power Magnetics.....................................................................................................1 year 1 year<br />
Original Main Power Rectifiers, Control P.C. Boards .................................................................... 1 year 1 year<br />
All other original circuits and components including, but not limited to, relays,<br />
switches, contactors, solenoids, fans, power switch semi-conductors..........................................1 year 1 year<br />
160S, 300S, <strong>400</strong>S<br />
Original Main Power Magnetics.................................................................................................... 5 years 3 years<br />
Original Main Power Rectifiers, Control P.C. Boards ................................................................... 3 years 3 years<br />
All other original circuits and components including, but not limited to, relays,<br />
switches, contactors, solenoids, fans, power switch semi-conductors..........................................1 year 1 year<br />
GENERAL ARC EQUIPMENT WARRANTY PERIOD LABOR<br />
Water Recirculators ....................................................................................................................... 1 year 1 year<br />
Plasma Welding Torches.............................................................................................................180 days 180 days<br />
Gas Regulators (Supplied with power sources) ..........................................................................180 days Nil<br />
MIG and TIG Torches (Supplied with power sources)..................................................................90 days Nil<br />
Replacement repair parts .............................................................................................................90 days Nil<br />
MIG, TIG and Plasma welding torch consumable items...................................................................Nil Nil<br />
1 year
GLOBAL CUSTOMER SERVICE CONTACT INFORMATION<br />
Thermadyne USA<br />
2800 Airport Road<br />
Denton, Tx 76207 USA<br />
Telephone: (940) 566-2000<br />
800-426-1888<br />
Fax: 800-535-0557<br />
Email: sales@thermalarc.com<br />
Thermadyne Canada<br />
2070 Wyecroft Road<br />
Oakville, Ontario<br />
Canada, L6L5V6<br />
Telephone: (905)-827-1111<br />
Fax: 905-827-3648<br />
Thermadyne Europe<br />
Europe Building<br />
Chorley North Industrial Park<br />
Chorley, Lancashire<br />
England, PR6 7Bx<br />
Telephone: 44-1257-261755<br />
Fax: 44-1257-224800<br />
Thermadyne, China<br />
RM 102A<br />
685 Ding Xi Rd<br />
Chang Ning District<br />
Shanghai, PR, 200052<br />
Telephone: 86-21-69171135<br />
Fax: 86-21-69171139<br />
Thermadyne Asia Sdn Bhd<br />
Lot 151, Jalan Industri 3/5A<br />
Rawang Integrated Industrial Park - Jln Batu Arang<br />
48000 Rawang Selangor Darul Ehsan<br />
West Malaysia<br />
Telephone: 603+ 6092 2988<br />
Fax : 603+ 6092 1085<br />
Cigweld, Australia<br />
71 Gower Street<br />
Preston, <strong>Victor</strong>ia<br />
Australia, 3072<br />
Telephone: 61-3-9474-7<strong>400</strong><br />
Fax: 61-3-9474-7510<br />
Thermadyne Italy<br />
OCIM, S.r.L.<br />
Via Benaco, 3<br />
20098 S. Giuliano<br />
Milan, Italy<br />
Tel: (39) 02-98 80320<br />
Fax: (39) 02-98 281773<br />
Thermadyne International<br />
2070 Wyecroft Road<br />
Oakville, Ontario<br />
Canada, L6L5V6<br />
Telephone: (905)-827-9777<br />
Fax: 905-827-9797
World Headquarters<br />
Thermadyne Holdings Corporation<br />
Suite 300, 16052 Swingley Ridge Road<br />
St. Louis, MO 63017<br />
Telephone: (636) 728-3000<br />
Fascimile: (636) 728-3010<br />
Email: sales@thermalarc.com<br />
www.thermalarc.com


