Repair Manual Mobile Generator - Wacker Neuson
Repair Manual Mobile Generator - Wacker Neuson
Repair Manual Mobile Generator - Wacker Neuson

Create successful ePaper yourself
Turn your PDF publications into a flip-book with our unique Google optimized e-Paper software.
0175252en 004 0709<br />
0 1 7 5 2 5 2 E N<br />
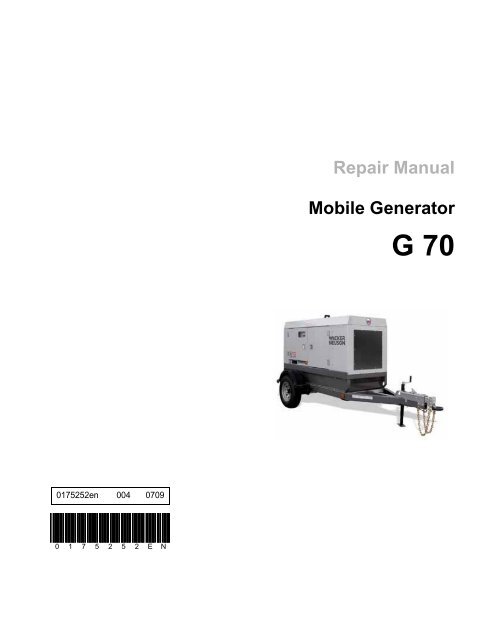
<strong>Repair</strong> <strong>Manual</strong><br />
<strong>Mobile</strong> <strong>Generator</strong><br />
G 70
Copyright<br />
notice<br />
© Copyright 2009 by <strong>Wacker</strong> <strong>Neuson</strong> Corporation.<br />
All rights, including copying and distribution rights, are reserved.<br />
This publication may be photocopied by the original purchaser of the machine. Any<br />
other type of reproduction is prohibited without express written permission from<br />
<strong>Wacker</strong> <strong>Neuson</strong> Corporation.<br />
Any type of reproduction or distribution not authorized by <strong>Wacker</strong> <strong>Neuson</strong> Corporation<br />
represents an infringement of valid copyrights. Violators will be prosecuted.<br />
Trademarks All trademarks referenced in this manual are the property of their respective owners.<br />
Manufacturer <strong>Wacker</strong> <strong>Neuson</strong> Corporation<br />
N92W15000 Anthony Avenue<br />
Menomonee Falls, WI 53051 U.S.A.<br />
Tel: (262) 255-0500 · Fax: (262) 255-0550 · Tel: (800) 770-0957
<strong>Mobile</strong> <strong>Generator</strong> <strong>Repair</strong> Foreword<br />
This manual covers machines with Item Number:<br />
0620350, 0620351, 0620352, 0620708<br />
Operating / Parts Information<br />
You must be familiar with the operation of this machine before you<br />
attempt to troubleshoot or repair it. Basic operating and maintenance<br />
procedures are described in the Operator’s <strong>Manual</strong> supplied with the<br />
machine. Keep a copy of the Operator’s <strong>Manual</strong> with the machine at all<br />
times. Use the separate Parts Book supplied with the machine to order<br />
replacement parts. If you are missing either of the documents, please<br />
contact <strong>Wacker</strong> <strong>Neuson</strong> Corporation to order a replacement.<br />
Damage caused by misuse or neglect of the unit should be brought to<br />
the attention of the operator to prevent similar occurrences from<br />
happening in the future.<br />
This manual provides information and procedures to safely repair and<br />
maintain the above <strong>Wacker</strong> <strong>Neuson</strong> model(s). For your own safety and<br />
protection from injury, carefully read, understand, and observe all<br />
instructions described in this manual. The information contained in this<br />
manual is based on machines manufactured up to the time of<br />
publication. <strong>Wacker</strong> <strong>Neuson</strong> Corporation reserves the right to change<br />
any portion of this information without notice.<br />
3
Foreword <strong>Mobile</strong> <strong>Generator</strong> <strong>Repair</strong><br />
WARNING<br />
CALIFORNIA<br />
Proposition 65 Warning:<br />
Diesel engine exhaust, some of its constituents, and certain vehicle<br />
components contain or emit chemicals known to the State of California<br />
to cause cancer and birth defects or other reproductive harm.<br />
Laws Pertaining to Spark Arresters<br />
Notice: State Health Safety Codes and Public Resources Codes<br />
specify that in certain locations spark arresters be used on internal<br />
combustion engines that use hydrocarbon fuels. A spark arrester is a<br />
device designed to prevent accidental discharge of sparks or flames<br />
from the engine exhaust. Spark arresters are qualified and rated by<br />
the United States Forest Service for this purpose.<br />
In order to comply with local laws regarding spark arresters, consult<br />
the engine distributor or the local Health and Safety Administrator.<br />
All rights, especially copying and distribution rights, are reserved.<br />
Copyright 2009 by <strong>Wacker</strong> <strong>Neuson</strong> Corporation<br />
No part of this publication may be reproduced in any form or by any<br />
means, electronic or mechanical, including photocopying, without<br />
express written permission from <strong>Wacker</strong> <strong>Neuson</strong> Corporation.<br />
Any type of reproduction or distribution not authorized by <strong>Wacker</strong><br />
<strong>Neuson</strong> Corporation represents an infringement of valid copyrights,<br />
and violators will be prosecuted. We expressly reserve the right to<br />
make technical modifications, even without due notice, which aim at<br />
improving our machines or their safety standards.<br />
4
G 70 Table of Contents<br />
1 Safety Information 9<br />
1.1 Operating Safety ................................................................................ 10<br />
1.2 Service Safety .................................................................................... 12<br />
1.3 Operator Safety while using Internal Combustion Engines ................ 14<br />
1.4 Towing Safety ..................................................................................... 15<br />
2 Theory of Operation 16<br />
2.1 Basic Schematic ................................................................................. 16<br />
2.2 Introduction ......................................................................................... 17<br />
2.3 Terminology ........................................................................................ 19<br />
3 Electrical Testing Techniques 23<br />
3.1 Checking Continuity ........................................................................... 23<br />
3.2 Checking Resistance .......................................................................... 23<br />
3.3 Checking Voltage ............................................................................... 23<br />
3.4 Probing ECM Plugs and Pins ............................................................. 24<br />
4 ECM Background Information 25<br />
4.1 ECM Handling Precaution .................................................................. 25<br />
4.2 Normal Boot-up Sequence ................................................................. 26<br />
4.3 Display Variables and Values ............................................................. 28<br />
4.4 ECM Display Screens—Start Switch in Remote Position ................... 29<br />
4.5 Additional Variables Monitored by the ECM ....................................... 30<br />
4.6 Voltage Display Errors ........................................................................ 32<br />
4.7 ECM Automatic Engine Shutdown Conditions ................................... 34<br />
4.8 ECM Wire Numbering & Colors .......................................................... 35<br />
4.9 Removing and Installing the ECM ...................................................... 36<br />
5 ECM/Sensor Troubleshooting 38<br />
5.1 Checking Power to the ECM .............................................................. 39<br />
5.2 Checking Outgoing Power From the ECM ......................................... 41<br />
5
Table of Contents G 70<br />
5.3 Fuel Sender Failure and Low Fuel Fault .............................................42<br />
5.4 Calibrating ECM Voltage Display ........................................................44<br />
5.5 Calibrating ECM AC Amperage Display ..............................................46<br />
5.6 Calibrating ECM AC Frequency Display .............................................47<br />
5.7 Calibrating ECM DC Display ...............................................................48<br />
5.8 Checking the ECM CAN BUS Circuit ..................................................49<br />
5.9 ECM Plugs and Pins ...........................................................................50<br />
5.10 Checking the Main Circuit Breaker ......................................................51<br />
6 John Deere Engines with ECU 53<br />
6.1 John Deere Engines With ECU—Background ....................................53<br />
6.2 Locations of Engine Electrical Components ........................................54<br />
7 Troubleshooting Engine Start System 55<br />
7.1 Checking Fuses ...................................................................................55<br />
7.2 Checking the Engine Control Module (ECM) ......................................57<br />
7.3 Checking the Emergency Stop Switch ................................................59<br />
7.4 Checking the Starter Relay .................................................................61<br />
7.5 Checking the Starter Solenoid .............................................................62<br />
7.6 Checking the Intake Air Heater Relay .................................................63<br />
7.7 Checking the Main Circuit Breaker ......................................................64<br />
8 Output Voltage Troubleshooting 66<br />
8.1 Where to Start .....................................................................................66<br />
8.2 Checking the Emergency Stop Switch ................................................67<br />
8.3 Checking the Lug Door Switch ............................................................68<br />
8.4 Checking the Main Circuit Breaker ......................................................70<br />
8.5 Checking the Voltage Adjusting Rheostat ...........................................72<br />
8.6 Checking the Auxiliary Winding ...........................................................73<br />
8.7 Checking the Exciter Stator .................................................................74<br />
8.8 Checking the AVR Sensing/Power Wires ............................................75<br />
8.9 Flashing the <strong>Generator</strong> (checking the excitation system) ...................77<br />
8.10 Checking Stator Windings at the Lugs ................................................78<br />
8.11 Checking the Rectifier Diodes .............................................................79<br />
8.12 Checking the Main Rotor Winding .......................................................80<br />
wc_br0175252en_004TOC.fm 6
G 70 Table of Contents<br />
8.13 Checking the Exciter Rotor Winding ................................................... 81<br />
8.14 Checking Stator Windings at the <strong>Generator</strong> ....................................... 82<br />
9 Disassembly and Assembly 83<br />
9.1 Tools Required for Disassembly/Assembly Procedures ..................... 83<br />
9.2 Information Regarding Replacement Parts ........................................ 83<br />
9.3 Information Regarding Reference Numbers ....................................... 83<br />
9.4 Removing the Roof ............................................................................. 84<br />
9.5 Removing the Voltage Selector Switch .............................................. 86<br />
9.6 Installing the Voltage Selector Switch ................................................ 87<br />
9.7 Removing the <strong>Generator</strong> .................................................................... 88<br />
9.8 Installing the <strong>Generator</strong> ...................................................................... 90<br />
9.9 Removing the AVR ............................................................................. 93<br />
9.10 Installing the AVR Prerequisites ......................................................... 94<br />
10 Schematics 98<br />
10.1 Engine Wiring Diagram—John Deere with ECU ................................ 98<br />
10.2 Engine Wiring Components—John Deere with ECU ......................... 99<br />
10.3 <strong>Generator</strong> Wiring Diagram ............................................................... 100<br />
10.4 <strong>Generator</strong> Wiring Components ......................................................... 101<br />
11 Technical Data 102<br />
11.1 Engine Data ...................................................................................... 102<br />
11.2 <strong>Generator</strong> Data ................................................................................. 103<br />
11.3 Trailer and Skid Data ........................................................................ 104<br />
11.4 Dimensions ....................................................................................... 105<br />
7
Table of Contents G 70<br />
Notes<br />
wc_br0175252en_004TOC.fm 8
G 70 Safety Information<br />
1 Safety Information<br />
DANGER<br />
WARNING<br />
CAUTION<br />
WARNING<br />
This manual contains DANGER, WARNING, CAUTION, NOTICE, and<br />
NOTE callouts which must be followed to reduce the possibility of<br />
personal injury, damage to the equipment, or improper service.<br />
This is the safety alert symbol. It is used to alert you to potential<br />
personal injury hazards. Obey all safety messages that follow this<br />
symbol to avoid possible injury or death.<br />
DANGER indicates a hazardous situation which, if not avoided, will<br />
result in death or serious injury.<br />
WARNING indicates a hazardous situation which, if not avoided, could<br />
result in death or serious injury.<br />
CAUTION indicates a hazardous situation which, if not avoided, could<br />
result in minor or moderate injury.<br />
NOTICE: Used without the safety alert symbol, NOTICE indicates a<br />
situation which, if not avoided, could result in property damage.<br />
Note: Contains additional information important to a procedure.<br />
Electrocution hazard!<br />
Electrocution or severe electrical shock hazards are present<br />
throughout the generator any time the engine is running! Read all<br />
safety notes contained in this section before operating or servicing this<br />
equipment.<br />
No one except a trained electrician, familiar with this equipment,<br />
should attempt repairs to the generator! Test procedures which require<br />
that the generator be running must be performed using extreme<br />
caution.<br />
This machine is built with user safety in mind; however, like any<br />
electrical device it can present serious hazards if improperly operated<br />
and serviced. Follow instructions carefully! Should questions arise<br />
during operation or service of this equipment, contact <strong>Wacker</strong> <strong>Neuson</strong><br />
Corporation.<br />
wc_si000353gb.fm 9
Safety Information G 70<br />
1.1 Operating Safety<br />
Familiarity and proper training are required for the safe operation of the<br />
machine. Machines operated improperly or by untrained personnel<br />
can be hazardous. Read the operating instructions contained in this<br />
manual and the engine manual, and familiarize yourself with the<br />
location and proper use of all controls. Inexperienced operators should<br />
receive instruction from someone familiar with the machine before<br />
being allowed to operate it.<br />
1.1.1 NEVER operate the generator when open containers of fuel, paint, or<br />
other flammable liquids are near.<br />
1.1.2 NEVER place flammable material or liquids near the generator.<br />
1.1.3 NEVER operate the generator, or tools attached to the generator, with<br />
wet hands.<br />
1.1.4 NEVER use worn electrical cords. Severe electrical shock and<br />
equipment damage may result.<br />
1.1.5 NEVER operate the machine indoors unless exhaust fumes can be<br />
adequately ventilated.<br />
1.1.6 NEVER overload the generator. The total amperage of the tools and<br />
equipment attached to the generator must not exceed the load rating<br />
of the generator.<br />
1.1.7 NEVER allow untrained personnel to operate or service the generator.<br />
The generator set should be set up by a certified electrician.<br />
1.1.8 NEVER operate generator in standing water.<br />
1.1.9 NEVER touch the hot engine, exhaust, or generator components.<br />
Burns will result.<br />
1.1.10 NEVER start a machine in need of repair.<br />
1.1.11 Use the emergency stop button only in an actual emergency. DO NOT<br />
restart the engine until the cause of the trouble has been determined<br />
and fixed.<br />
1.1.12 Wear hearing protection when operating equipment.<br />
1.1.13 ALWAYS follow starting and stopping instructions described in this<br />
manual. Know how to operate and stop generator before starting it.<br />
1.1.14 ALWAYS make a walk-around inspection of the generator set before<br />
starting it. Open side doors and visually inspect engine compartment<br />
for obvious damage or the presence of foreign objects which might<br />
affect operation.<br />
1.1.15 ALWAYS keep the machine at least one meter (three feet) away from<br />
structures, buildings, and other equipment during use.<br />
1.1.16 Store the machine properly when it is not being used. The machine<br />
should be stored in a clean, dry location out of the reach of children.<br />
WARNING<br />
wc_si000353gb.fm 10
G 70 Safety Information<br />
1.1.17 ALWAYS keep the area immediately surrounding and underneath the<br />
machine clean, neat, and free of debris and combustible materials.<br />
Make sure that the area overhead is clear of debris that could fall onto<br />
or into the machine or exhaust compartment.<br />
1.1.18 Be sure the machine is on a firm, level surface and will not tip, roll,<br />
slide, or fall while operating.<br />
1.1.19 ALWAYS remove all tools, cords, and other loose items from the<br />
generator before starting it.<br />
1.1.20 ALWAYS make certain the machine is well-grounded and securely<br />
fastened to a good earthen ground per national and local regulations.<br />
BACKFEED FROM THE GENERATOR INTO THE PUBLIC POWER<br />
DISTRIBUTION SYSTEM CAN CAUSE SERIOUS INJURY OR<br />
DEATH TO UTILITY WORKERS!<br />
DANGER<br />
Improper connection of generator to a building’s electrical system can<br />
allow electrical current from the generator to backfeed into utility lines.<br />
This may result in electrocution of utility workers, fire, or explosion.<br />
Connections to a building’s electrical system must be made by a<br />
qualified electrician and comply with all applicable laws and electrical<br />
codes.<br />
If connected to a building’s electrical system the generator must meet<br />
the power, voltage, and frequency requirements of the equipment in<br />
the building. Differences in power, voltage, and frequency<br />
requirements may exist and improper connection may lead to<br />
equipment damage, fire, and personal injury or death.<br />
wc_si000353gb.fm 11
Safety Information G 70<br />
1.2 Service Safety<br />
WARNING<br />
A poorly maintained machine can become a safety hazard! In order<br />
for the machine to operate safely and properly over a long period of<br />
time, periodic maintenance and occasional repairs are necessary.<br />
1.2.1 NEVER perform even routine service (oil/filter changes, cleaning,<br />
etc.) unless all electrical components are shut down. Before<br />
servicing this machine, make sure the engine start switch is turned to<br />
off “O”, the circuit breakers are open (off), the emergency stop switch<br />
is closed (pushed in), and the negative terminal on battery is<br />
disconnected. Attach a “DO NOT START” sign to the control panel.<br />
This will notify everyone that the unit is being serviced and will reduce<br />
the chance of someone inadvertently trying to start the unit. If the unit<br />
is connected to a remote start or transfer switch, make sure the remote<br />
switch is also off and tagged.<br />
1.2.2 Ground Connection<br />
The generator must be connected to a good earthen ground for proper<br />
operating safety!<br />
A central “equipment ground” is provided at the customer connection<br />
lugs. This point is connected directly to the generator set base. All<br />
other system grounds are connected to this central point. Ground the<br />
generator in accordance with the standards defined in national, state,<br />
and local regulations.<br />
1.2.3 DO NOT attempt to open the radiator cap while the unit is running or<br />
before the engine has cooled down. Severe burns may result!<br />
1.2.4 DO NOT allow water to accumulate around the base of the machine.<br />
If water is present, move the machine and allow the machine to dry<br />
before servicing.<br />
1.2.5 DO NOT service the machine if your clothing or skin is wet.<br />
1.2.6 DO NOT allow untrained personnel to service this equipment. Only<br />
trained electrical technicians should be allowed to service the electrical<br />
components of this equipment.<br />
1.2.7 Do not modify the machine without the express written approval of the<br />
manufacturer.<br />
1.2.8 DO NOT pressure wash the control panel, generator end, or any other<br />
electrical components when cleaning the machine. Never allow water<br />
to accumulate around the base of the generator set. If water is present,<br />
DO NOT service!<br />
1.2.9 ALWAYS replace the safety devices and guards after repairs and<br />
maintenance.<br />
1.2.10 ALWAYS let the engine cool before transporting or servicing the<br />
machine.<br />
wc_si000353gb.fm 12
G 70 Safety Information<br />
1.2.11 ALWAYS remain aware of moving parts and keep hands, feet, and<br />
loose clothing away from the moving parts of the machine.<br />
1.2.12 ALWAYS replace all guards, fasten doors, and make sure all safety<br />
devices operate properly after making repairs or servicing the<br />
equipment.<br />
1.2.13 ALWAYS keep hands, feet, and loose clothing away from the moving<br />
parts on the generator and engine.<br />
1.2.14 Keep the machine clean and labels legible. Replace all missing and<br />
hard-to-read labels. Labels provide important operating instructions<br />
and warn of dangers and hazards.<br />
1.2.15 ALWAYS check all external fasteners at regular intervals.<br />
1.2.16 ALWAYS make sure slings, chains, hooks, ramps, jacks, and other<br />
types of lifting devices are attached securely and have enough weightbearing<br />
capacity to lift or hold the machine safely. Always remain<br />
aware of the location of other people in the area when lifting the<br />
machine.<br />
wc_si000353gb.fm 13
Safety Information G 70<br />
1.3 Operator Safety while using Internal Combustion Engines<br />
Internal combustion engines present special hazards during operation<br />
and fueling. Read and follow the warning instructions in the engine<br />
owner’s manual and the safety guidelines below. Failure to follow the<br />
warnings and safety standards could result in severe injury or death.<br />
1.3.1 Do not run engine indoors or in an area with poor ventilation unless<br />
exhaust hoses are used.<br />
1.3.2 Do not fill or drain the fuel tank near an open flame, while smoking, or<br />
while the engine is running.<br />
1.3.3 Do not refuel a hot or running engine.<br />
1.3.4 Refill the fuel tank in a well-ventilated area.<br />
1.3.5 Do not touch or lean against hot exhaust pipes.<br />
1.3.6 Replace the fuel tank cap after refueling.<br />
1.3.7 Do not start the engine if fuel has spilled or a fuel odor is present. Move<br />
the generator away from the spill and wipe the generator dry before<br />
starting.<br />
1.3.8 Do not remove the radiator cap when the engine is running or hot. The<br />
radiator fluid is hot and under pressure and may cause severe burns!<br />
WARNING<br />
wc_si000353gb.fm 14
G 70 Safety Information<br />
1.4 Towing Safety<br />
WARNING<br />
Towing a large trailer requires special care. Both the trailer and vehicle<br />
must be in good condition and securely fastened to each other to<br />
reduce the possibility of an accident.<br />
1.4.1 ALWAYS check that the hitch and coupling on the vehicle are rated<br />
equal to, or greater than, the trailer’s “gross vehicle weight rating”<br />
(GVWR).<br />
1.4.2 ALWAYS inspect the hitch and coupling for wear or damage. DO NOT<br />
tow the trailer using defective parts.<br />
1.4.3 ALWAYS make sure the coupling is securely fastened to the vehicle.<br />
1.4.4 ALWAYS check the tires on the trailer for tread wear, inflation, and<br />
condition. Replace worn tires.<br />
1.4.5 ALWAYS connect the safety chains.<br />
1.4.6 ALWAYS connect the breakaway cable safety hook to the bumper or<br />
rear of the vehicle. DO NOT attach it to the hitch.<br />
1.4.7 ALWAYS test the surge brakes on the trailer and the brakes on the<br />
vehicle that will be used for towing.<br />
1.4.8 ALWAYS make sure directional and trailer lights are connected and<br />
working properly.<br />
1.4.9 ALWAYS check that the lug nuts holding the wheels are tight and that<br />
none are missing.<br />
1.4.10 Reporting Trailer Safety Defects<br />
If you believe your trailer has a defect which could cause a crash or<br />
could cause injury or death, you should immediately inform the<br />
National Highway Traffic Safety Administration (NHTSA) in addition to<br />
notifying <strong>Wacker</strong> <strong>Neuson</strong> Corporation.<br />
If NHTSA receives similar complaints, it may open an investigation;<br />
and if it finds that a safety defect exists in a group of vehicles, it may<br />
order a recall and remedy campaign. However, NHTSA cannot<br />
become involved in individual problems between you, your dealer, or<br />
<strong>Wacker</strong> <strong>Neuson</strong> Corporation.<br />
To contact NHTSA, you may either contact the Auto Safety Hotline tollfree<br />
at 1-800-424-9393 (or 366-0129 in Washington DC area),<br />
www.nhtsa.com, or write to NHTSA, U.S. Department of<br />
Transportation, 400 7th Street SW, (NSA-11), Washington, DC 20590.<br />
You can also obtain other information about motor vehicle safety from<br />
the Auto Safety Hotline.<br />
wc_si000353gb.fm 15
Theory of Operation <strong>Mobile</strong> <strong>Generator</strong><br />
2 Theory of Operation<br />
Y<br />
+<br />
a<br />
L<br />
–<br />
2.1 Basic Schematic<br />
DC out (exciter field)<br />
j<br />
c 3-Phase AC out d<br />
AMP HZ STAB VOLT<br />
AC in<br />
Ref. Component Ref. Component<br />
a Exciter stator winding g Automatic Voltage Regulator<br />
(AVR)<br />
b Rotor assembly h Main circuit breaker<br />
c Exciter rotor winding i Auxiliary winding<br />
d Rotating rectifier (diodes) j Voltage adjusting rheostat<br />
e Main rotor winding k Lug door switch<br />
f Main stator windings l Stator assembly<br />
wc_tx001077gb.fm 16<br />
b<br />
B R G Y L<br />
AC sensing<br />
DC in<br />
+<br />
e<br />
L/W L R<br />
g<br />
k<br />
–<br />
T9<br />
i<br />
l<br />
T1<br />
T2<br />
T10<br />
T3<br />
T4<br />
T12 T8<br />
T11<br />
f<br />
T7<br />
T6<br />
T5<br />
h<br />
L1<br />
L2<br />
3-Phase<br />
AC output<br />
n/a n/a<br />
B W<br />
5C5B<br />
7 5A 6 5 4A 4 3A 3 2 1<br />
GND<br />
L3<br />
N<br />
wc_gr003643
<strong>Mobile</strong> <strong>Generator</strong> Theory of Operation<br />
2.2 Introduction<br />
See Graphic: wc_gr003303<br />
A generator set is a transducer, which means it converts energy from<br />
one form (heat) into another (electrical). The two main components of<br />
a generator set are the prime mover (engine) and the generator<br />
assembly. The engine converts heat into rotating mechanical energy<br />
which is then converted by the generator assembly into electrical<br />
energy. The generator does so through the principle of<br />
electromagnetic induction. This principle states that when a coil of wire<br />
(also known as a winding) is passed through a magnetic field, a<br />
voltage is induced in the winding. The amount of voltage depends on<br />
three factors: 1) the speed of the coil cutting through the magnetic field<br />
(it does not matter which is moving—either the magnetic field or the<br />
winding); 2) the strength of the magnetic field; and 3) the amount of<br />
turns of wire in the winding. The principle also works in reverse; that is,<br />
if voltage and current are present in a coil of wire, a magnetic field is<br />
produced. It is important to understand this basic theory to understand<br />
how the generator functions.<br />
The typical brushless generator assembly consists of a stator<br />
(stationary element), a rotor (rotating element), a voltage regulator<br />
(voltage control device), and a rectifier assembly (current control<br />
device). The rotor can function as either the magnetic field or the<br />
winding. Likewise, the stator can function as either the magnetic field<br />
or the winding, depending on the application. In <strong>Wacker</strong> <strong>Neuson</strong><br />
generators there are two stators (a and b) and a single rotor assembly<br />
(c). The rotor assembly is made up of two halves—the exciter (d) and<br />
the main (e). Three windings make up the exciter half and a single<br />
winding makes up the main rotor half. There are three distinct stator<br />
windings—the exciter, the main, and the auxiliary. The exciter stator<br />
winding (a) is a stand-alone winding. The main and auxiliary windings<br />
are housed within the large stator housing (b).<br />
The exciter stator is the generator’s source of residual magnetism. As<br />
the engine spins, the exciter rotor portion of the rotor assembly spins<br />
inside the exciter stator, an AC voltage is induced in the exciter rotor.<br />
This AC voltage is rectified into DC by the diodes (f) connected to the<br />
rotor assembly. The DC voltage flows through the main rotor winding,<br />
creating a magnetic field. Voltage is then induced in the main stator<br />
windings and the auxiliary winding. The voltage induced in the main<br />
stator windings provides the voltage to the lugs and the receptacles.<br />
The voltage induced in the auxiliary winding is used to power the<br />
voltage regulator.<br />
wc_tx001077gb.fm 17
Theory of Operation <strong>Mobile</strong> <strong>Generator</strong><br />
a<br />
wc_tx001077gb.fm 18<br />
a<br />
b<br />
b<br />
d<br />
f<br />
e<br />
c<br />
c<br />
d<br />
e<br />
wc_gr003303
<strong>Mobile</strong> <strong>Generator</strong> Theory of Operation<br />
2.3 Terminology<br />
See Graphic: wc_gr003315<br />
To understand the terms “phase”, “leg”, “line-to-line”, and “line-toneutral”,<br />
review the following information.<br />
The main stator (a) consists of three separate groups of windings.<br />
These groups of windings are referred to as legs. The legs are labeled<br />
L1, L2, and L3. Each leg includes two individual windings. The ends of<br />
these windings are labeled T1, T2, T3, and so on, up to T12.<br />
Each individual winding has the same resistance (0.2 Ohms). The<br />
voltage selector switch determines how the windings are connected—<br />
in series or parallel. In series, the total voltage of a leg is equal to the<br />
sum of the voltages induced across both windings. In parallel, the total<br />
voltage of a leg is equal to the voltage induced across either winding<br />
(only one).<br />
Each leg (L1, L2, and L3) is physically 120° from each other.<br />
The main rotor (b) functions as a rotating magnetic field. It has four<br />
poles, two of which function as North and the other two as South.<br />
“Flux” is a term used to describe the amount of magnetic field in a<br />
given area. The term “lines of flux” refers to the direction of the attraction<br />
of the magnetic fields—North to South. The point where these<br />
lines of flux are closest to 90° is the point where the magnetic field is<br />
the strongest, i.e., at either pole. The lines of flux (c) of the main<br />
rotor’s magnetic field are as shown. When the windings of the stator<br />
cut these lines of flux, voltage is induced in them. The amount of<br />
induced voltage is greatest at the position where the stator winding is<br />
perpendicular to the lines of flux, i.e., when the rotor is in such a position<br />
that the windings of a leg are centered over one of the four magnetic<br />
poles.<br />
When the two windings of each leg are connected in series, this is the<br />
high-wye configuration (e). The voltage induced in this configuration is<br />
277V per leg. When the two windings of each leg are wired in parallel,<br />
this is the low-wye configuration (f). The voltage induced in this configuration<br />
is 139V per leg. (It is adjusted to a usable 120V by the control<br />
panel rheostat.)<br />
The amount of voltage induced in each leg over time can be graphed.<br />
This graph yields a sine wave (d). It represents the repeating event<br />
(cycle) of the induced positive voltage of the North pole followed by<br />
the induced negative voltage of the South pole. Since the rotor has<br />
four magnetic poles, this cycle occurs twice per revolution of the rotor.<br />
The engine spins the rotor at 1800 rpm which equals 30 revolutions<br />
per second (rps) (1800 ÷ 60 = 30). The number of revolutions per second<br />
multiplied by the cycles per revolution (cpr) equals the cycles per<br />
second (Hertz). Thus, 30 rps x 2 cpr = 60 Hz.<br />
wc_tx001077gb.fm 19
Theory of Operation <strong>Mobile</strong> <strong>Generator</strong><br />
High Wye<br />
L1<br />
T1<br />
Low Wye<br />
e f<br />
L3<br />
L3<br />
T9<br />
b<br />
L1<br />
T2<br />
T3<br />
T3 T1<br />
T11<br />
T10<br />
T4<br />
N<br />
T8<br />
T7<br />
T6<br />
T5<br />
L-N<br />
(277V)<br />
L-L<br />
(480V)<br />
L2<br />
T11<br />
L3<br />
T4 T2<br />
L-L<br />
(208V)<br />
N T6<br />
T5<br />
T8<br />
L2<br />
L-N<br />
(120V)<br />
0˚ 45˚ 90˚ 135˚ 180˚<br />
d<br />
N1<br />
S1<br />
L1<br />
0˚<br />
L1<br />
S2<br />
N2<br />
N1<br />
S1<br />
L2<br />
S2<br />
N2<br />
L3<br />
wc_tx001077gb.fm 20<br />
S1<br />
45˚<br />
L1<br />
N1<br />
N2<br />
S2<br />
c<br />
L2<br />
L2<br />
L1<br />
L3<br />
N1<br />
S1<br />
S1<br />
N2<br />
90˚<br />
L1<br />
S2<br />
N2<br />
N1<br />
S2<br />
L3 L2<br />
1 Hz<br />
N2<br />
a<br />
N1–S1 N2–S2<br />
0˚ 45˚ 90˚ 135˚ 180˚ 225˚ 270˚ 315˚ 360˚<br />
120˚ 120˚<br />
1 Rev<br />
L3<br />
135˚<br />
L1<br />
S1<br />
L3<br />
N1<br />
L3 L2<br />
S2<br />
N1<br />
S1<br />
L1<br />
L1<br />
S2<br />
N2<br />
N2<br />
S2<br />
180˚<br />
L1<br />
S1<br />
N1<br />
L2<br />
L2<br />
L3 L2<br />
wc_gr003315
<strong>Mobile</strong> <strong>Generator</strong> Theory of Operation<br />
277<br />
30˚<br />
a<br />
60˚<br />
120˚<br />
60˚<br />
120˚<br />
2(a)<br />
Since the legs are mechanically 120° apart, as the rotor spins, time<br />
elapses between the moment when one leg reaches its largest voltage<br />
potential and the moment when the next leg reaches its largest<br />
voltage potential. Thus, no two legs reach their largest voltage potential<br />
at the same moment in time, and their corresponding sine waves<br />
are 120° apart. In other words, the voltages induced in each leg are<br />
120° out of phase with each other.<br />
Although the largest amount of voltage induced in any single leg in the<br />
high-wye configuration is 277V, the voltage induced in a second leg<br />
(either of the other two legs) at that same moment can be tapped and<br />
combined with the 277V of the first leg to create the maximum voltage<br />
available from the generator. The amount of voltage in the second leg<br />
is less than its largest potential because of the position of the rotor’s<br />
magnetic field—it is less than perpendicular to the second leg. The<br />
amount of voltage induced is approximately 73% (203V) of its potential<br />
(see graphic wc_gr003317). Thus, 277V + 203V = 480V, which is<br />
the maximum voltage available from the generator. In the low-wye<br />
configuration, the largest usable voltage potential in any leg is 120V;<br />
adding the 73% of any second leg (88V), yields the maximum voltage<br />
potential for the low-wye configuration—208V.<br />
Any measurement between the end of a leg and neutral is know as<br />
line-to-neutral (L-N) voltage. Any measurement between the end of<br />
one leg to the end of another leg is known as line-to-line (L-L) voltage.<br />
Any combination of L-N or L-L voltages are 120° out of phase with<br />
each other. For example, L1–N is out of phase with L2–N; L2–N with<br />
L3–N; L3–N with L1–N. Likewise, L1–L2 is out of phase with L2–L3;<br />
L2–L3 with L3–L1; and L2–L3 with L1–L2.<br />
A three-phase event exists when a three-phase load is attached to the<br />
generator. The three-phase load uses both the voltage and current<br />
from each phase produced by the generator simultaneously. Positive<br />
current produced by the voltage from each leg flows to corresponding<br />
legs of the load.<br />
Sine 60 = 0.866<br />
Sine 60 = a/277<br />
0.866 = a/277<br />
277 x 0.866 = (a/277) x 277<br />
240 = a<br />
2(a) = 480<br />
480 – 277 = 203<br />
203/277 = 0.73 = 73%<br />
wc_tx001077gb.fm 21<br />
120<br />
30˚<br />
a<br />
60˚<br />
120˚<br />
60˚<br />
120˚<br />
2(a)<br />
Sine 60 = 0.866<br />
Sine 60 = a/120<br />
0.866 = a/120<br />
120 x 0.866 = (a/120) x 120<br />
104 = a<br />
2(a) = 208<br />
208 – 120 = 88<br />
88/120 = 0.73 = 73%<br />
wc_gr003317
Theory of Operation <strong>Mobile</strong> <strong>Generator</strong><br />
<strong>Wacker</strong> <strong>Neuson</strong> generators are designed to accommodate various<br />
loads and multiple power factors. Power factor is the relationship<br />
between power supplied to the load (referred to as apparent power in<br />
kVA) and true power (power used by the load (kW). It is expressed<br />
mathematically by the equation: power factor = true power ÷ apparent<br />
power. The power factor is determined by the type of load—inductive<br />
or resistive. In resistive loads, such as heaters, the power factor is typically<br />
1. In inductive loads, such as motors and transformers, the<br />
power factor is always less than 1. In inductive loads, a portion of the<br />
supplied power is converted to a magnetic field and not used by the<br />
load. This unused power is known as reactive power. The relationship<br />
between apparent power, true power, and reactive power is illustrated<br />
in the power right triangle below.<br />
Reactive power and true power are always represented 90° from each<br />
other. In the power right triangle, the angle formed by the hypotenuse<br />
(apparent power) and the adjacent side (true power) is referred to as<br />
theta ( ). Theta is derived from the separation in the sine waves of<br />
voltage and current. In inductive circuits, current lags the voltage due<br />
to such factors as coil length, coil material, and frequency. From trigonometry,<br />
the cosine of = adjacent side ÷ hypotenuse. Since cosine<br />
and power factor are calculated in the same manner, power factor is<br />
often referred to as cosine (cos ).<br />
Single-phase receptacles are tapped off the legs in a manner that<br />
keeps the generator balanced. That is, voltage supplies to the various<br />
single-phase outlets originate from different legs of the generator (L1<br />
and L3), not from the same leg. When tapping single-phase loads<br />
from the lugs, care must be taken so that the generator does not<br />
become unbalanced. Attach equal loads to each leg if you are running<br />
the generator in this manner.<br />
wc_tx001077gb.fm 22
<strong>Mobile</strong> <strong>Generator</strong> Electrical Testing Techniques<br />
3 Electrical Testing Techniques<br />
3.1 Checking Continuity<br />
Conduct continuity tests when the engine is shut down.<br />
When checking continuity, use the Ohm setting on your multimeter.<br />
Place a lead of the multimeter on one end of the wiring or component<br />
and the other lead on the opposite end. If your meter reads “OL” or<br />
“OPEN”, there is no continuity and the wiring or component must be<br />
repaired or replaced.<br />
Note: Some multimeters also have an audio signal setting for<br />
determining continuity. This setting may also be used.<br />
If your meter reads less than 1.0 Ohm, or the audio signal<br />
sounds, the wiring or component has continuity and should be<br />
OK.<br />
If your meter reads more than 1.0 Ohm, the wiring is faulty and<br />
must be repaired or replaced.<br />
3.2 Checking Resistance<br />
3.3 Checking Voltage<br />
Conduct resistance checks when the engine is shut down.<br />
Use the Ohm setting on your multimeter.<br />
Conduct resistance checks when the machine is as close to 21°C<br />
(70°F) as possible. Higher temperatures can affect resistance values.<br />
Most digital multimeters have some internal resistance. To obtain your<br />
multimeter’s internal resistance, simply cross the two leads of your<br />
multimeter and read the display. When conducting a resistance check,<br />
subtract your multimeter’s internal resistance from the value you<br />
measure to obtain the true resistance of the component you are<br />
checking.<br />
Conduct voltage checks when the engine is running.<br />
Use the Volt setting on your multimeter. To prevent damage to your<br />
instrument, start with the highest scale available on your multimeter.<br />
Adjust to a lower scale as readings dictate.<br />
Use extreme caution when checking voltage to reduce the risk of<br />
electric shock.<br />
wc_tx000699gb.fm 23
Electrical Testing Techniques <strong>Mobile</strong> <strong>Generator</strong><br />
3.4 Probing ECM Plugs and Pins<br />
See Graphic: wc_gr002926<br />
To measure the voltage at an ECM pin, attach an appropriate<br />
extension (a) to the positive probe on your multimeter. Slide the<br />
positive probe into the plug along the wire of the pin to be tested. Use<br />
care when testing this way so you don’t damage the wire, plug, or<br />
ECM. Find a suitable ground on the machine’s frame for the negative<br />
probe (b) of your multimeter.<br />
a<br />
b<br />
6 5<br />
3 2 1 4<br />
4 3<br />
2 1<br />
121110 9<br />
6 8<br />
5 4<br />
7<br />
3<br />
8 7<br />
2 1 4 3 6<br />
2 5<br />
1<br />
wc_gr002926<br />
24 wc_tx000699gb.fm
<strong>Mobile</strong> <strong>Generator</strong> <strong>Repair</strong> ECM Background Information<br />
4 ECM Background Information<br />
4.1 ECM Handling Precaution<br />
See Graphic:wc_gr003355<br />
NOTICE: Use care when working on or around the ECM. The ECM<br />
may be damaged or it may malfunction if it is accidentally hit by your<br />
hand or a tool. Do not touch the pins (a) of the ECM because the AC<br />
board of the ECM may malfunction.<br />
a<br />
wc_tx001066gb.fm 25<br />
wc_gr003355
ECM Background Information <strong>Mobile</strong> <strong>Generator</strong> <strong>Repair</strong><br />
4.2 Normal Boot-up Sequence<br />
During the boot-up sequence, the ECM scrolls through several<br />
screens before it settles into displaying the run screen.<br />
G 70, G 85, G 120<br />
ECM Display Description<br />
Initializing<br />
G 85<br />
Time to Service<br />
250<br />
Cranking 1 of 3<br />
80 P2 0 60.0<br />
71 75% 87 12.7<br />
Under Frequency<br />
Enabled<br />
480 P2 0 60.0<br />
71 75% 87 12.7<br />
wc_tx001066gb.fm 26<br />
Start of the boot-up sequence. The ECM display reads<br />
“Initializing” and shows the model of the generator. If the<br />
model displayed does not match the model of the generator,<br />
call <strong>Wacker</strong> <strong>Neuson</strong> Service.<br />
The ECM displays the countdown time until the next<br />
scheduled service. The timer starts at 250 and counts<br />
down to 0.<br />
The ECM displays this screen during the first cranking<br />
cycle.<br />
The ECM displays this screen as soon as the engine<br />
starts. Note that some of the values such as voltage, may<br />
not be up to their running values at this stage of the<br />
sequence.<br />
The ECM displays this screen to let the operator know<br />
that the under frequency system (engine speed) has<br />
been enabled.<br />
At this point in the sequence, the ECM displays running<br />
values.
<strong>Mobile</strong> <strong>Generator</strong> <strong>Repair</strong> ECM Background Information<br />
Engine Protection<br />
Enabled<br />
AC Configuration<br />
Alt Protection<br />
Enabled<br />
Rated Volts L to L<br />
480 P2 0 60.0<br />
71 75% 87 12.7<br />
wc_tx001066gb.fm 27<br />
The ECM displays this screen to let the operator know<br />
that the engine protection system has been enabled.<br />
The ECM displays the AC configuration as determined<br />
by the position of the voltage selector switch (VSS).<br />
The ECM displays this screen to let the operator know<br />
that the alternator protection system has been enabled.<br />
The ECM displays the line-to-line voltage. (This screen is<br />
shown for 3-phase VSS positions only.)<br />
At this point, the ECM displays the run screen and the<br />
values for the main generator variables: voltage, phase*<br />
(leg), amperage, hertz. (For generators with engines that<br />
include ECUs, the Hz reading will be 60.0. For all others<br />
the reading will be 61.5.) The ECM will also display the<br />
values for the main engine variables: oil pressure, fuel<br />
tank quantity, engine temperature, and battery voltage.<br />
*Note: The ECM display scrolls through each phase (P1,<br />
P2, P3) if in the 3-phase mode, or L1, L3, and L1 + L3 if<br />
in the single-phase mode.
ECM Background Information <strong>Mobile</strong> <strong>Generator</strong> <strong>Repair</strong><br />
4.3 Display Variables and Values<br />
See Graphic: wc_gr002944<br />
<strong>Generator</strong> Variables<br />
The values shown in the top line of the ECM display are all variables<br />
from the generator side of the machine. They are:<br />
(1) voltage (V)<br />
(2) phase (Ø) (or leg for single phase)<br />
(3) amperage (A)<br />
(4) frequency (Hz)<br />
Engine Variables<br />
The values shown in the lower line of the ECM display are all variables<br />
from the engine side of the machine. They are:<br />
(5) engine oil pressure (psi)<br />
(6) fuel tank quantity (shown in percentage of capacity)<br />
(7) engine temperature (°F)<br />
(8) battery voltage (V)<br />
Blinking Values<br />
When a value on the ECM display blinks on and off, it signifies that the<br />
variable (temperature, fuel capacity, etc.) is in a pre-alarm state. For<br />
example, the value for the temperature reading will blink when the<br />
temperature of the generator is below 23°C (74°F). This simply<br />
signifies that the manifold heater (or glow plugs) will be energized to<br />
aid in engine starting. The fuel capacity reading will blink when it is<br />
below 25%. This tells the operator that the generator will be requiring<br />
fuel soon. See Section Additional Variables Monitored by the ECM.<br />
Note: If your generator has a block heater, the temperature reading<br />
should not blink. If it does, check the block heater to make sure it is<br />
functioning properly.<br />
ND (No Data), 0 (zero), or Blank Values<br />
When a value on the ECM display reads ND, 0 (zero), or is blank, it<br />
signifies that there is no data available for the variable.<br />
wc_tx001066gb.fm 28
<strong>Mobile</strong> <strong>Generator</strong> <strong>Repair</strong> ECM Background Information<br />
1<br />
2 3 4<br />
481 P2 0 60.0<br />
71 24% 87 12.7<br />
5 6 7 8<br />
4.4 ECM Display Screens—Start Switch in Remote Position<br />
See Graphic: wc_gr002943<br />
When the start switch is placed in the REMOTE position, the following<br />
screens are displayed.<br />
4.4.1 “Initializing”<br />
The ECM display reads “Initializing” and shows the model of the<br />
generator. If the model displayed does not match the model of the<br />
generator, call <strong>Wacker</strong> <strong>Neuson</strong> Service.<br />
4.4.2 “Unit in Auto”<br />
The ECM displays “Unit in Auto” and the values for oil pressure,<br />
percentage of fuel remaining, engine temperature, and voltage of the<br />
battery.<br />
1 2<br />
Initializing<br />
G85<br />
wc_tx001066gb.fm 29<br />
wc_gr002944<br />
Unit in Auto<br />
0 50% 74 12.7<br />
wc_gr002943
ECM Background Information <strong>Mobile</strong> <strong>Generator</strong> <strong>Repair</strong><br />
4.5 Additional Variables Monitored by the ECM<br />
Holding the toggle switch in the HOURS/RESET position allows the<br />
operator to view additional variables monitored by the ECM. It also<br />
allows the time-to-service countdown timer to be reset. To reset the<br />
countdown timer, hold the toggle switch in the HOURS/RESET<br />
position for approximately 30 seconds or until all the screens have<br />
scrolled through twice. Note: The values from your generator may<br />
differ slightly from those shown here.<br />
ECM Display Description<br />
SPN.FMI 100.01<br />
Engine Hours<br />
1.9<br />
Time to Service<br />
250<br />
Throttle<br />
10%<br />
Load @RPM<br />
15%<br />
wc_tx001066gb.fm 30<br />
John Deere engine diagnostic codes.<br />
SPN = Suspect Parameter Number.<br />
FMI = Failure Mode Identifier.<br />
The ten most recent codes will be displayed from most<br />
current to least current. See the John Deere Engine<br />
<strong>Manual</strong> for details.<br />
The display shows total time, in 1/10 hour increments,<br />
that the engine has been run. New machines, or<br />
machines with new ECMs, will read “No Data” because<br />
the engine has not been run for more than 1/10 of an<br />
hour.<br />
The display shows the amount of time left until service on<br />
the machine is required. To reset the timer to 250 hours,<br />
hold the Hours/Reset toggle switch in the up position<br />
until all the screens have scrolled through twice.<br />
The display shows the amount the throttle is open at the<br />
current point in time.<br />
The display shows the present load on the engine. For<br />
no load conditions (generator not powering any outside<br />
tools or equipment) the display will read 15%.
<strong>Mobile</strong> <strong>Generator</strong> <strong>Repair</strong> ECM Background Information<br />
Engine Torque<br />
60%<br />
Fuel Temperature<br />
86° F<br />
Fuel Pressure<br />
147<br />
Fuel Rate<br />
0.9 GPH<br />
Manifold Temp<br />
95°F<br />
wc_tx001066gb.fm 31<br />
The display shows the percentage of total engine torque<br />
being used.<br />
The display shows, in °F, the temperature of the fuel.<br />
The display shows, in psi, the fuel pressure.<br />
The display shows, in gallons per hour (GPH), the rate at<br />
which fuel is being consumed.<br />
The display shows, in °F, the temperature of the engine<br />
intake manifold.
ECM Background Information <strong>Mobile</strong> <strong>Generator</strong> <strong>Repair</strong><br />
4.6 Voltage Display Errors<br />
See Graphic: wc_gr003308<br />
Single-Phase Display Mode<br />
When operating in the single-phase 120/240V position, line-to-line<br />
voltage will be displayed under P2 (240V). Line-to-neutral voltage<br />
(120V) will be displayed under P1 and P3. This is the normal singlephase<br />
display mode.<br />
Three-Phase Display Mode<br />
When operating in either three-phase position (208/120V or 480/<br />
277V), the line-to-line voltage will be displayed under P1, P2 and P3 of<br />
the ECM. For example, in the 480/277V position, with the control panel<br />
rheostat adjusted correctly, voltage values will read 480V on all three<br />
phases: P1=480, P2=480, and P3=480. In the 208/120V position,<br />
voltage values will read 208V on all three phases: P1=208, P2=208,<br />
and P3=208.<br />
If leg 2 (L2) voltage drops below 50V, the ECM is programmed to<br />
switch to its single-phase mode and stay there until the operator<br />
corrects the condition. Two common causes for this condition are:<br />
1) starting the generator with the connection lug door open and<br />
then closing it with the engine still running; 2) starting the generator<br />
in its single-phase position (120/240V), then switching it to a<br />
three-phase position (208/120V or 480/277V) without turning the<br />
generator off first. Both instances will cause the ECM to display a<br />
less than line-to-neutral voltage for P1 and P2, and full line-to-line<br />
voltage for P3. For example, in the 480/277V position P 1 and P2<br />
will read approximately 190V while P3 will read 480V. The voltage<br />
values displayed in this mode can lead one to conclude that<br />
the generator is not running correctly, when actually it is fine; the<br />
system just needs to be reset. To correct/reset the condition: stop<br />
the engine, make sure the lug door is closed, and then restart the<br />
engine. Allow the generator to cycle through the phases several<br />
times to develop the maximum voltage.<br />
When in the three-phase mode, if any one of the legs (L1, L2, or<br />
L3) drops out, two of the three phases will automatically also drop<br />
out. For example, if leg 1 drops out, there can be no L1–L2 (P1)<br />
voltage, nor can there be L3–L1 (P3) voltage. (The values displayed<br />
under P1 and P2 will be residual voltage for the legs themselves,<br />
not line-to-line voltage. Residual voltage is approximately<br />
36V.) The voltage displayed under P3 will be L2 line-to-neutral<br />
voltage. This condition is known as single-phasing. It is a sign<br />
there is a problem with the generator.<br />
wc_tx001066gb.fm 32
<strong>Mobile</strong> <strong>Generator</strong> <strong>Repair</strong> ECM Background Information<br />
Engine Hour Switch in Locked Position<br />
Another possible display error can occur when starting the machine<br />
with the engine hour switch (a) in the down (locked) position. This<br />
position is normally used to lock the display onto a single leg and to<br />
prevent the display from scrolling through volt and amp values for all<br />
three legs.<br />
On some generators, starting the engine with the switch in the down<br />
(locked) position will reverse the display for volts and amps. To correct<br />
the display, return the engine hour switch to its unlocked (scroll)<br />
position.<br />
To ensure the correct voltage display, make sure:<br />
The connection lug door is closed and latched before starting the<br />
engine.<br />
The voltage selection switch is in its correct position prior to starting<br />
the engine.<br />
The engine hour switch is in its unlocked (center) position.<br />
wc_tx001066gb.fm 33<br />
wc_gr003308<br />
a
ECM Background Information <strong>Mobile</strong> <strong>Generator</strong> <strong>Repair</strong><br />
4.7 ECM Automatic Engine Shutdown Conditions<br />
The engine protection system includes two automatic shutdown<br />
conditions: engine overcrank and low fuel. The ECM will also shut<br />
down the engine if an over-current condition exists.<br />
When the ECM has shut down the unit due to one of the faults, the<br />
ECM will display the fault and other pertinent information to aid in<br />
diagnosing the problem. RECORD ALL THE INFORMATION LISTED<br />
on the display, then refer to the following sections to diagnose and<br />
rectify the problem.<br />
When the engine has shut down due to something outside the control<br />
of the ECM, the ECM will display “ENGINE STOPPED”.<br />
Fault Pre-alarm setpoint Shutdown setpoint<br />
Overcrank n/a After third attempt<br />
Fuel level 15% 5%<br />
wc_tx001066gb.fm 34
<strong>Mobile</strong> <strong>Generator</strong> <strong>Repair</strong> ECM Background Information<br />
4.8 ECM Wire Numbering & Colors<br />
<strong>Generator</strong> and control wires are marked and color coded to assist in<br />
tracing line connections and troubleshooting. The charts below list wire<br />
labels and colors followed by a description of their use.<br />
ECM Plug 1 Wires ECM Plug 2 Wires<br />
Pin Wire Description Pin Wire Description<br />
10 Gr/61 Emergency stop 5 R/18 Battery + (for relays)<br />
3 W/L/56 Cold crank delay 1 Y/63 Crank (12V output)<br />
9 Or/60 Remote start 2 V/64 Run/Fuel (12V output)<br />
12 W/V/62 Fuel level 3 73 Remote annunciator (NA)<br />
8 B/59 Battery – 4 75 Remote annunciator (NA)<br />
7 R/53 Battery + (for ECM board) - - ---<br />
wc_tx001066gb.fm 35
ECM Background Information <strong>Mobile</strong> <strong>Generator</strong> <strong>Repair</strong><br />
4.9 Removing and Installing the ECM<br />
See Graphic: wc_gr003316<br />
Removal:<br />
4.9.1 Remove the nut securing the hour meter switch (a) and the nut<br />
securing the start switch (b) to the panel.<br />
4.9.2 Disconnect the four harness plugs (e).<br />
4.9.3 Remove the three red wires (d) from the start switch. Remove the start<br />
switch, the hour meter switch, and the ECM from the panel.<br />
Note: Replacement ECMs include start and hour meter switches.<br />
4.9.4 Remove the screws (c) securing the ECM to the panel.<br />
4.9.5<br />
Installation:<br />
Secure the ECM to the panel with screws (c).<br />
4.9.6 Secure the hour meter (a) and the start switch (b) to the control panel.<br />
4.9.7 Reconnect the four harness plugs (e).<br />
4.9.8 Re-install the three red wires (d) to the start switch.<br />
c<br />
wc_tx001066gb.fm 36<br />
c<br />
b<br />
a<br />
e e<br />
d<br />
wc_gr003316
<strong>Mobile</strong> <strong>Generator</strong> <strong>Repair</strong> ECM Background Information<br />
Notes<br />
wc_tx001066gb.fm 37
ECM/Sensor Troubleshooting G 70<br />
5 ECM/Sensor Troubleshooting<br />
This chapter of the manual provides procedures to:<br />
Check power to the ECM<br />
Check outgoing power from the ECM<br />
Check the fuel sender and low fuel fault<br />
Calibrate the ECM voltage display<br />
Calibrate the AC amperage display<br />
Calibrate the ECM AC frequency display<br />
Calibrate the ECM DC display<br />
Check the ECM can bus circuit<br />
wc_tx000956gb.fm 38
G 70 ECM/Sensor Troubleshooting<br />
5.1 Checking Power to the ECM<br />
Prerequisites Fully-charged (12+ Volts) battery<br />
Cable running between battery and starter relay is in good conditon and connections<br />
are good.<br />
Procedure Follow the procedure below to check incoming power to the ECM.<br />
1. Check the voltage between red wire #51 at B+ terminal strip and ground.<br />
Is at least 9.8 VDC measured?<br />
Yes ____ No ____ Your reading<br />
Continue. Check red wire #51 and all wiring between B+<br />
terminal strip and the battery.<br />
2. Check voltage between red wire #49 at START/RUN switch and ground.<br />
Is at least 9.8 VDC measured?<br />
Yes ____ No ____ Your reading<br />
Continue. <strong>Repair</strong> red wire #49.<br />
3. Place the START/RUN switch in the ON position.<br />
4. Check the voltage between red wire #53 at START/RUN switch and ground.<br />
Is at least 9.8 VDC measured?<br />
Yes ____ No ____ Your reading<br />
Continue.<br />
Replace the START/RUN switch.<br />
This procedure continues on the next page.<br />
wc_tx000956gb.fm 39
ECM/Sensor Troubleshooting G 70<br />
Continued from the previous page.<br />
5. Check the voltage between ECM pin 7 plug 1 (red wire #53) and pin 8 plug 1<br />
(black wire #59).<br />
Is at least 9.8 VDC measured?<br />
Yes ____ No ____ Your reading<br />
Continue. <strong>Repair</strong> red wire #53 and/or black wire #59.<br />
6. Open the engine compartment and locate the 10A fuse.<br />
Is the 10A fuse OK?<br />
Yes ____ No ____<br />
Continue. Replace the fuse with one of the same size and rating.<br />
Check the function of the main circuit breaker. The shunt of<br />
the main circuit breaker is most likely the cause of a fuse failure.<br />
See Section 5.10 Checking the Main Circuit Breaker.<br />
7. Check the voltage between ECM pin 5 plug 2 (red wire #18) and ground.<br />
Is at least 9.8 VDC measured?<br />
Yes ____ No ____ Your reading<br />
Power to the ECM<br />
is OK.<br />
Incoming power to the ECM has now been checked.<br />
wc_tx000956gb.fm 40<br />
Check continuity of red wire #18 between ECM<br />
and fuse box. Also check red wire #48 between<br />
fuse box and B+ terminal strip. <strong>Repair</strong> the wiring<br />
as needed.
G 70 ECM/Sensor Troubleshooting<br />
5.2 Checking Outgoing Power From the ECM<br />
Prerequisites Fully-charged (12+ Volts) battery<br />
At least 9.8 VDC incoming power to ECM on red wires #18 and #53<br />
Procedure Follow the procedure below to check the outgoing power from the ECM.<br />
1. Open the control panel and locate the ECM.<br />
2. Place the START/RUN switch in the ON position.<br />
3. Check the voltage between pin 1 plug 2 (yellow wire #63) and ground.<br />
Is at least 9.8 VDC measured?<br />
Yes ____ No ____ Your reading<br />
Continue. The ECM has failed.<br />
Call <strong>Wacker</strong> <strong>Neuson</strong> Service.<br />
4. Check the voltage between pin 2 plug 2 (violet wire #64) and ground.<br />
Is at least 9.8 VDC measured?<br />
Yes ____ No ____<br />
Outgoing power from the ECM is OK. The ECM has failed.<br />
Outgoing power from the ECM has now been checked.<br />
wc_tx000956gb.fm 41
ECM/Sensor Troubleshooting G 70<br />
5.3 Fuel Sender Failure and Low Fuel Fault<br />
Prerequisites Fuel in fuel tank<br />
Fully-charged battery<br />
Procedure Follow the procedure below to check the ECM and fuel sender.<br />
1. Open the large hinged panel and locate the fuel sender.<br />
2. Disconnect white/violet (W/V) wire #62 from the fuel sender.<br />
3. With the START/RUN switch in the ON position, measure the voltage between<br />
W/V wire #62 and ground.<br />
Is at least 4.8 VDC measured?<br />
Yes ____ No ____ Your reading<br />
Go to step 8. Continue.<br />
4. Open the control panel and locate the ECM.<br />
5. With the START/RUN switch in the ON position, measure the voltage between<br />
ECM plug 1 pin 12 (W/V wire #62) and ground.<br />
Is at least 4.8 VDC measured?<br />
Yes ____ No ____ Your reading<br />
<strong>Repair</strong> W/V wire #62; then<br />
continue.<br />
The ECM has failed.<br />
6. With the START/RUN switch in the OFF position, measure the resistance<br />
between the fuel sender and ground.<br />
This procedure continues on the next page.<br />
wc_tx000956gb.fm 42
G 70 ECM/Sensor Troubleshooting<br />
Continued from the previous page.<br />
7. Find the resistance measured in the chart below.<br />
Does the resistance measured reflect the actual fuel level in the tank?<br />
Yes ____ No ____<br />
The fuel sender is OK; the ECM has failed. The fuel sender has failed; replace it.<br />
Call <strong>Wacker</strong> <strong>Neuson</strong> Service.<br />
8. Reconnect W/V wire #62.<br />
The ECM and fuel sender have now been checked.<br />
wc_tx000956gb.fm 43
ECM/Sensor Troubleshooting G 70<br />
5.4 Calibrating ECM Voltage Display<br />
Prerequisites Functioning generator<br />
Procedure Follow the procedure below to calibrate the ECM voltage display.<br />
1. Open the large hinged panel. Remove the “key” (latch) from the lug door and<br />
place it in the slot of the lug door switch. NOTICE: Never place anything but the<br />
key into the slot of the lug door switch.<br />
2. Close the large hinged panel.<br />
3. Place the START/RUN switch in the ON position so that the engine starts.<br />
WARNING<br />
Electric shock hazard. High voltage exists at the lugs when the engine is running.<br />
Electric shock can cause injury or death.<br />
Do not touch the lugs when the engine is running.<br />
4. Open the lug door.<br />
5. With a multimeter, measure the AC voltage between lug 1 and lug 2.<br />
6. Compare the reading on the multimeter with that on the ECM.<br />
Are the readings within 2 Volts?<br />
Yes ____ No ____ Your reading<br />
No adjustment is necessary. Continue.<br />
This procedure continues on the next page.<br />
wc_tx000956gb.fm 44
G 70 ECM/Sensor Troubleshooting<br />
Continued from the previous page.<br />
7. Open the control panel and locate the VOLTS ADJ pot on the ECM.<br />
WARNING<br />
Electric shock hazard. High voltage exists at the cooling fins of the Automatic Voltage<br />
Regulator (AVR) when the engine is running. Electric shock can cause severe<br />
injury or death.<br />
Do not touch the AVR when the engine is running.<br />
8. Adjust the VOLTS ADJ pot until the ECM reads the same as the voltage measured<br />
at the lugs.<br />
9. Re-install the key to the door switch and close the control panel.<br />
The ECM voltage has now been calibrated.<br />
wc_tx000956gb.fm 45
ECM/Sensor Troubleshooting G 70<br />
5.5 Calibrating ECM AC Amperage Display<br />
Prerequisites Functioning generator<br />
Ammeter<br />
25A or greater load<br />
Procedure Follow the procedure below to calibrate the ECM amperage display.<br />
1. Attach a 25A or greater load to the lugs.<br />
2. Place the START/RUN switch in the ON position so that the engine starts.<br />
3. Close the main circuit breaker.<br />
4. Attach a clamp-style ammeter to one of the lines connected to the lugs.<br />
5. Observe the ECM display as it cycles through the amperage values for each leg. Place<br />
the hour meter switch into the down position when the ECM displays an amperage<br />
value.<br />
6. Compare the Amp reading on the ammeter with that on the ECM display.<br />
Are the readings within 0.5 Amps?<br />
Yes ____ No ____ Your reading<br />
No adjustment is necessary. Continue.<br />
7. Open the control panel and locate the AMPS ADJ pot.<br />
WARNING<br />
Electric shock hazard. High voltage exists at the cooling fins of the Automatic Voltage<br />
Regulator (AVR) when the engine is running. Electric shock can cause severe injury or<br />
death.<br />
Do not touch the AVR when the engine is running.<br />
8. Adjust the AMPS ADJ pot until the ECM reads the same as the amperage measured<br />
by the ammeter.<br />
9. Close the control panel.<br />
The ECM amperage display has now been calibrated.<br />
wc_tx000956gb.fm 46
G 70 ECM/Sensor Troubleshooting<br />
5.6 Calibrating ECM AC Frequency Display<br />
Prerequisites Functioning generator<br />
Procedure Follow the procedure below to calibrate the ECM AC frequency display.<br />
Note: Recalibrate only if your unit is off by more than 5 Hz.<br />
1. Start the generator. Using a tachometer or vibrotach, adjust the engine speed to<br />
1800 rpm or 60 Hz.<br />
2. Open the control panel to gain access to the ECM. Monitor the ECM display<br />
panel as adjustments are made.<br />
WARNING<br />
Electric shock hazard. High voltage exists at the cooling fins of the Automatic Voltage<br />
Regulator (AVR) when the engine is running. Electric shock can cause injury or<br />
death.<br />
Do not touch the AVR when the engine is running.<br />
3. Locate the AC frequency push button. Hold the AC frequency push button in<br />
until the ECM display reads 60 Hz.<br />
4. Set the engine no-load speed to 1850 rpm.<br />
The ECM AC frequency has now been calibrated.<br />
wc_tx000956gb.fm 47
ECM/Sensor Troubleshooting G 70<br />
5.7 Calibrating ECM DC Display<br />
Prerequisites Functioning generator<br />
Procedure Follow the procedure below to calibrate the ECM DC voltage (12V battery) display.<br />
1. Measure the voltage across the machine’s 12V battery using a multimeter.<br />
Note: This procedure works best when the battery voltage measures 12.6 VDC.<br />
2. Place the start switch in the REMOTE START position.<br />
3. Open the control panel to gain access to the ECM.<br />
4. Slide the number 2, Dual-In-line Package (DIP) switch to the ON position and<br />
then back to the OFF position. This resets the DC voltage display.<br />
The ECM DC voltage display is now calibrated.<br />
wc_tx000956gb.fm 48
G 70 ECM/Sensor Troubleshooting<br />
5.8 Checking the ECM CAN BUS Circuit<br />
Prerequisites <strong>Generator</strong> shut down<br />
ECM turned off<br />
Procedure Follow the procedure below to check the ECM CAN BUS circuit.<br />
1. Open the control panel.<br />
2. Disconnect the CAN BUS connector.<br />
3. Measure the resistance across terminals A and B of the connector.<br />
Is approximately 120 ohms measured?<br />
Yes ____ No ____<br />
The CAN BUS circuit is OK.<br />
The CAN BUS circuit has failed.<br />
Replace the ECM.<br />
4. Reconnect the CAN BUS connector.<br />
5. Close the control panel.<br />
The ECM CAN BUS circuit has now been checked.<br />
wc_tx000956gb.fm 49
ECM/Sensor Troubleshooting G 70<br />
5.9 ECM Plugs and Pins<br />
ECM Plug 1 Wires ECM Plug 2 Wires<br />
Pin Wire Description Pin Wire Description<br />
10 Gr/61 Emergency stop 5 R/18 Battery + (for relays)<br />
3 W/L/56 Cold crank delay 1 Y/63 Crank (12V output)<br />
9 Or/60 Remote start 2 V/64 Run/Fuel (12V output)<br />
12 W/V/62 Fuel level 3 73 Remote annunciator (NA)<br />
8 B/59 Battery – 4 75 Remote annunciator (NA)<br />
7 R/53 Battery + (for ECM board) - - ---<br />
wc_tx000956gb.fm 50
G 70 ECM/Sensor Troubleshooting<br />
5.10 Checking the Main Circuit Breaker<br />
Prerequisites Fully-charged battery<br />
Emergency stop switch in disengaged (out) position<br />
Engine shut down<br />
Procedure Follow the procedure below to check the main circuit breaker.<br />
WARNING<br />
Electric shock hazard. High voltage exists at the lugs with the engine running. High<br />
voltage can cause severe injury or death.<br />
Do not conduct this test with the engine running.<br />
1. Remove the “key” (latch) (a) from the lug door and place in the slot of the lug<br />
door switch. NOTICE: Do not place anything but the key into the slot of the lug<br />
door switch.<br />
2. Place the main circuit breaker in the ON position.<br />
Does the main circuit breaker stay in the ON position?<br />
Yes ____ No ____<br />
Continue. The main circuit breaker has failed; replace it.<br />
3. With the main circuit breaker in the ON position, remove the key from the lug<br />
door switch.<br />
Does the main circuit breaker trip?<br />
4. Disconnect the yellow wire of the main circuit breaker from the two yellow wires.<br />
This procedure continues on the next page.<br />
wc_tx000956gb.fm 51<br />
Yes ____ No ____<br />
Continue with step 6. Continue.
ECM/Sensor Troubleshooting G 70<br />
Continued from the previous page.<br />
5. Measure the voltage between the two yellow wires and ground.<br />
Is at least 9.8 VDC measured?<br />
Yes ____ No ____<br />
The main circuit breaker<br />
has failed;<br />
replace it.<br />
6. Place the key into the lug door switch.<br />
7. With the main circuit breaker in the ON position, check for continuity (continuity<br />
equals 0.0–1.0 Ohms) between L1 of the main circuit breaker and Lug 1. Also<br />
check between L2 and Lug 2, and L3 and Lug 3.<br />
Is there continuity for each check?<br />
8. With the main circuit breaker in the OFF position, check for continuity between<br />
L1 of the main circuit breaker and Lug 1. Also check between L2 and Lug 2, and<br />
L3 and Lug 3.<br />
Is there continuity for any of the checks?<br />
9. Reconnect the yellow (Y) wires and lug door key.<br />
The main circuit breaker has now been checked.<br />
wc_tx000956gb.fm 52<br />
Check condition/connection of yellow wire between the main circuit<br />
breaker and the terminal strip. There must be more than<br />
9.8 VDC between the wire and ground. When voltage exists,<br />
repeat step 4.<br />
Yes ____ No ____ Your reading<br />
Continue. The main circuit breaker has<br />
failed; replace it. ____; _____; _____<br />
Yes ____ No ____<br />
The main circuit breaker has failed;<br />
replace it.<br />
The main circuit breaker is functioning properly.
<strong>Mobile</strong> <strong>Generator</strong> <strong>Repair</strong> John Deere Engines with ECU<br />
6 John Deere Engines with ECU<br />
6.1 John Deere Engines With ECU—Background<br />
John Deere engines with electronic control systems are used on<br />
<strong>Wacker</strong> <strong>Neuson</strong> generator models G 70, G 85, and G 120. The<br />
electronic control system consists of:<br />
Engine Control Unit (ECU): the computer which controls fuel and<br />
the ignition system.<br />
The following sensors: oil pressure, coolant temperature, fuel<br />
temperature, manifold air temperature, crank position, and<br />
speed.<br />
Fuel pump control solenoid.<br />
Manifold air heater.<br />
The electronic control system serves as a governor by controlling the<br />
fuel to the engine. It does so by controlling the engine’s injection pump<br />
control valve through a proportional solenoid. In doing so, fuel is<br />
delivered according to engine conditions, in precise amounts, and at<br />
the precise time in relation to piston position.<br />
The ECU communicates with the Engine Control Module (ECM)<br />
mounted to the generator’s control panel through a Controller Area<br />
Network (CAN). The wiring between the controllers forms a bus<br />
(physical electrical interface where many devices share the same<br />
electrical connections). Diagnostic tools available from John Deere<br />
can plug into the CAN bus to assist in troubleshooting the operation of<br />
the engine. The ECM controls the engine up through engine start<br />
(cranking). Once started, the ECU controls the running of the engine.<br />
The ECU has diagnostic abilities and shares engine diagnostic<br />
information through codes which are displayed on the ECM display<br />
screen. These diagnostic codes are referred to as “SPN/FMI” codes:<br />
Suspect Parameter Number (SPN) and Failure Mode Identifier (FMI).<br />
SPN/FMI codes are conveyed in a two-part code number. The SPN<br />
typically contains between two and four digits and is the first number<br />
of the code. The FMI contains one or two digits and is the second<br />
number of the code. For example, if the ECM displays “SPN/FMI 100.<br />
4”, The SPN “100” indicates a condition with the engine oil. FMI “4”<br />
indicates that the engine oil pressure input voltage is lower than the<br />
sensor’s specification—a condition associated with a disconnected oil<br />
pressure sensor. There are many such SPN/FMI codes. See the John<br />
Deere service manual for more information.<br />
wc_tx001067gb.fm 53
John Deere Engines with ECU <strong>Mobile</strong> <strong>Generator</strong> <strong>Repair</strong><br />
6.2 Locations of Engine Electrical Components<br />
1<br />
Ref. Component Ref. Component<br />
1 Main circuit breaker 5 Starter motor<br />
2 Engine Control Module (ECM) 6 Starter relay<br />
3 Slave preheat relay 7 Engine Control Unit (ECU)<br />
4 Manifold heater 8 Fuel pump assembly<br />
wc_tx001067gb.fm 54<br />
8<br />
2<br />
3<br />
6<br />
7<br />
5<br />
4<br />
wc_gr005886
G 70 Troubleshooting Engine Start System<br />
7 Troubleshooting Engine Start System<br />
7.1 Checking Fuses<br />
Prerequisites Battery voltage measuring 11–13 VDC<br />
Procedure Follow the procedure below to check the fuses.<br />
1. Locate the 10A and 30A fuses.<br />
2. Check the condition of the 30A fuse. (Note: If the ECM display is blank when the<br />
START/RUN switch is in the ON position, the 30A fuse is most likely blown.)<br />
Is the fuse OK?<br />
Yes____ No____<br />
Continue. Replace the fuse with one of the same size and rating.<br />
Check the function of the main circuit breaker. The shunt of<br />
the main circuit breaker is most likely the cause of a fuse failure.<br />
See Section 7.7 Checking the Main Circuit Breaker.<br />
3. Check the condition of the 10A fuse.<br />
Is the fuse OK?<br />
Yes____ No____<br />
Continue. Replace the fuse with one of the same size and rating.<br />
This procedure continues on the next page.<br />
wc_tx000957gb.fm 55
Troubleshooting Engine Start System G 70<br />
Continued from the previous page.<br />
4. Check the condition of the ECM 10A fuse.<br />
Is the fuse OK?<br />
Yes____ No____<br />
The fuse is OK. Replace the fuse with one of the same size and rating.<br />
The fuses have now been checked. Continue with Section 7.2 Checking the ECM.<br />
wc_tx000957gb.fm 56
G 70 Troubleshooting Engine Start System<br />
7.2 Checking the Engine Control Module (ECM)<br />
Prerequisites Battery voltage measuring 11–13 VDC<br />
Procedure Follow the procedure below to check the ECM.<br />
1. Open the control panel and locate the ECM.<br />
.<br />
2. Place the START/RUN switch in the ON position.<br />
Does the ECM boot up and do the FUEL (a) and CRANK (b) LEDs illuminate?<br />
3. Check connections of battery cables. Also check battery voltage.<br />
Is the battery voltage 11–13 VDC?<br />
4. Locate Plug 1. Measure the voltage between red wire #53 of the plug and<br />
ground.<br />
Is at least 9.8V measured?<br />
5. Locate Plug 2. Measure the voltage between red wire #18 and ground during<br />
cranking.<br />
Is at least 9.8 VDC measured?<br />
This procedure continues on the next page.<br />
wc_tx000957gb.fm 57<br />
Plug 1<br />
V<br />
R<br />
Y<br />
Yes____ No____<br />
Go to step 6. Continue.<br />
Plug 2<br />
Yes____ No____ Your reading<br />
Continue. Charge the battery.<br />
Yes____ No____ Your reading<br />
Continue. <strong>Repair</strong> or replace wire #53.<br />
Yes____ No____ Your reading<br />
Continue. <strong>Repair</strong> or replace wire #18.<br />
R
Troubleshooting Engine Start System G 70<br />
Continued from the previous page.<br />
6. Locate Plug 2. Measure the voltage between violet wire #64 and ground. Also<br />
measure the voltage between yellow wire #63 and ground during cranking.<br />
Is there at least 9.8 VDC measured in each case?<br />
The ECM has now been checked. Continue with Section 7.3 Checking the<br />
Emergency Stop Switch.<br />
wc_tx000957gb.fm 58<br />
Yes____ No____<br />
The ECM is OK. The ECM has failed; replace it.
G 70 Troubleshooting Engine Start System<br />
7.3 Checking the Emergency Stop Switch<br />
Prerequisites Battery voltage measuring 11–13 VDC<br />
Procedure Follow the procedure below to check the emergency stop switch.<br />
1. Remove the rear panel from the machine to access the emergency stop switch<br />
(a).<br />
2. Check the connections of the wiring to the emergency stop switch. Make sure all<br />
connections are tight.<br />
Note: If wire #61 is shorted to ground, the machine will not start and the LCD display<br />
will read “EMERGENCY STOP”.<br />
3. Place the START/RUN switch in the ON position.<br />
4. Place the emergency stop switch in the de-activated (out) position.<br />
5. Measure the voltage between violet wire #64 (at the switch) and ground.<br />
V<br />
V<br />
#34<br />
#64<br />
#46<br />
#79<br />
wc_gr005181<br />
Is at least 9.8 VDC measured?<br />
Yes____ No____ Your reading<br />
Continue. <strong>Repair</strong> violet wire #64.<br />
This procedure continues on the next page.<br />
wc_tx000957gb.fm 59<br />
#61<br />
#20<br />
#45<br />
#44<br />
V<br />
V<br />
#34<br />
#64<br />
#61<br />
#79<br />
#46<br />
#20<br />
#45<br />
#44
Troubleshooting Engine Start System G 70<br />
Continued from the previous page.<br />
6. Measure the voltage between violet wire #34 (at the switch) and ground.<br />
Is at least 9.8 VDC measured?<br />
Yes____ No____ Your reading<br />
Continue. The emergency stop switch<br />
has failed; replace it.<br />
7. Place the emergency stop switch in the activated position (push it in).<br />
8. Check for voltage between violet wire #34 (at the switch) and ground.<br />
Is any voltage measured?<br />
The emergency stop switch has now been checked. Continue with Section 7.4<br />
Checking the Starter Relay.<br />
wc_tx000957gb.fm 60<br />
Yes ____ No ____ Your reading<br />
The emergency stop switch<br />
has failed; replace it.<br />
The emergency stop switch<br />
is OK.
G 70 Troubleshooting Engine Start System<br />
7.4 Checking the Starter Relay<br />
Prerequisites Battery voltage measuring 11–13 VDC<br />
Procedure Follow the procedure below to check the starter relay.<br />
1. Locate the starter relay.<br />
2. Check the voltage between the red wire #50 and ground.<br />
Is at least 9.8 VDC measured?<br />
Yes ____ No ____ Your reading<br />
Continue. <strong>Repair</strong> or replace red wire #50.<br />
3. Place the START/RUN switch in the ON position.<br />
4. Measure the voltage between red wire #422 and ground during cranking.<br />
Is at least 9.8VDC measured?<br />
Yes ____ No ____ Your reading<br />
Continue. <strong>Repair</strong> or replace red wire #422.<br />
5. Check the connection to ground of both black wires.<br />
Is there a path to ground?<br />
Yes ____ No ____ Your reading<br />
Continue. <strong>Repair</strong> or replace both black wires.<br />
6. Place the START/RUN switch in the ON position.<br />
7. Measure the voltage between the red wire (R) running to the starter solenoid<br />
and ground.<br />
Is at least 9.8 VDC measured?<br />
Yes ____ No ____ Your reading<br />
The starter relay is OK. The starter relay has failed;<br />
replace it.<br />
The starter relay has now been checked. Continue with Section 7.5 Checking the<br />
Starter Solenoid.<br />
wc_tx000957gb.fm 61
Troubleshooting Engine Start System G 70<br />
7.5 Checking the Starter Solenoid<br />
Prerequisites Battery voltage measuring 11–13 VDC<br />
Procedure Follow the procedure below to check the starter solenoid.<br />
1. Locate the starter (a) and the starter solenoid.<br />
2. Check the connection of the large red wire.<br />
3. Measure the voltage between the large red wire and ground.<br />
Is at least 9.8 VDC measured?<br />
Yes____ No____ Your reading<br />
Continue. <strong>Repair</strong> or replace the large red wire.<br />
4. Place the START/RUN switch in the ON position. Measure the voltage between<br />
the small red wire and ground during the cranking cycle.<br />
Is at least 9.8 VDC measured?<br />
Yes____ No____ Your reading<br />
Continue. <strong>Repair</strong> or replace small red wire.<br />
5. If at least 9.8 VDC is present at the starter and at the starter solenoid, the<br />
engine should crank. If the engine does not crank, the starter motor has failed.<br />
Replace the starter motor.<br />
The starter solenoid has now been checked. Continue with Section 7.6 Checking<br />
the Intake Air Heater Relay.<br />
wc_tx000957gb.fm 62
G 70 Troubleshooting Engine Start System<br />
7.6 Checking the Intake Air Heater Relay<br />
Prerequisites Battery voltage measuring 11–13 VDC<br />
Procedure Follow the procedure below to check the intake air heater relay.<br />
1. Locate the intake air heater relay.<br />
2. Measure the voltage between terminal 30 (red wire #11) of the intake air heater<br />
relay and ground.<br />
Is at least 9.8 VDC measured?<br />
Yes____ No____ Your reading<br />
Continue. <strong>Repair</strong> or replace red wire #11.<br />
3. Place the START/RUN switch in the ON position.<br />
4. Measure the voltage between terminal 86 (grey wire #65) and ground during the<br />
preheat cycle. Note: This cycle only lasts a few seconds.<br />
Is at least 9.8 VDC measured?<br />
Yes____ No____ Your reading<br />
Continue. <strong>Repair</strong> or replace grey wire #65.<br />
5. Check the connection to ground of black wire #13 at terminal 85.<br />
Is there a path to ground?<br />
Yes____ No____ Your reading<br />
Continue. <strong>Repair</strong> or replace wire #13.<br />
6. Place the START/RUN switch in the ON position.<br />
7. Measure the voltage between terminal 87 (red wire #12) and ground.<br />
Is at least 9.8 VDC measured?<br />
The intake air heater relay has now been checked.<br />
wc_tx000957gb.fm 63<br />
Yes____ No____ Your reading<br />
The intake air heater relay is<br />
OK.<br />
The intake air heater relay<br />
has failed; replace it.
Troubleshooting Engine Start System G 70<br />
7.7 Checking the Main Circuit Breaker<br />
Prerequisites Fully-charged battery<br />
Emergency stop switch in disengaged (out) position<br />
Engine shut down<br />
Procedure Follow the procedure below to check the main circuit breaker.<br />
WARNING<br />
Electric shock hazard. High voltage exists at the lugs with the engine running. High<br />
voltage can cause severe injury or death.<br />
Do not conduct this test with the engine running.<br />
1. Remove the “key” (latch) (a) from the lug door and place in the slot of the lug<br />
door switch. NOTICE: Do not place anything but the key into the slot of the lug<br />
door switch.<br />
2. Place the main circuit breaker in the ON position.<br />
Does the main circuit breaker stay in the ON position?<br />
Yes ____ No ____<br />
Continue. The main circuit breaker has failed; replace it.<br />
3. With the main circuit breaker in the ON position, remove the key from the lug<br />
door switch.<br />
Does the main circuit breaker trip?<br />
4. Disconnect the yellow wire of the main circuit breaker from the two yellow wires.<br />
This procedure continues on the next page.<br />
wc_tx000957gb.fm 64<br />
Yes ____ No ____<br />
Continue with step 6. Continue.
G 70 Troubleshooting Engine Start System<br />
Continued from the previous page.<br />
5. Measure the voltage between the two yellow wires and ground.<br />
Is at least 9.8 VDC measured?<br />
Yes ____ No ____<br />
The main circuit<br />
breaker has failed;<br />
replace it.<br />
6. Place the key into the lug door switch.<br />
7. With the main circuit breaker in the ON position, check for continuity (continuity<br />
equals 0.0–1.0 Ohms) between L1 of the main circuit breaker and Lug 1. Also<br />
check between L2 and Lug 2, and L3 and Lug 3.<br />
Is there continuity for each check?<br />
8. With the main circuit breaker in the OFF position, check for continuity between<br />
L1 of the main circuit breaker and Lug 1. Also check between L2 and Lug 2, and<br />
L3 and Lug 3.<br />
Is there continuity for any of the checks?<br />
9. Reconnect the yellow (Y) wires and lug door key.<br />
The main circuit breaker has now been checked.<br />
wc_tx000957gb.fm 65<br />
Check condition/connection of yellow wire between the main<br />
circuit breaker and the terminal strip. There must be more than<br />
9.8 VDC between the wire and ground. When voltage exists,<br />
repeat step 4.<br />
Yes ____ No ____ Your reading<br />
Continue. The main circuit breaker has<br />
failed; replace it. ____; _____; _____<br />
Yes ____ No ____<br />
The main circuit breaker has failed;<br />
replace it.<br />
The main circuit breaker is functioning<br />
properly.
Output Voltage Troubleshooting G 70<br />
8 Output Voltage Troubleshooting<br />
8.1 Where to Start<br />
Background Complete the troubleshooting procedures in the sequence below. Once the<br />
problem has been found, repair the machine and try it again. It is not necessary to<br />
perform all procedures once the problem has been diagnosed and repaired.<br />
Sequence<br />
Step Task<br />
1. Check the emergency stop switch.<br />
See Section 8.2 Checking the Emergency Stop Switch.<br />
2. Check the lug door switch.<br />
See Section 8.3 Checking the Lug Door Switch.<br />
3. Check the main circuit breaker.<br />
See Section 8.4 Checking the Main Circuit Breaker.<br />
4. Check the voltage adjusting rheostat.<br />
See Section 8.5 Checking the Voltage Adjusting Rheostat.<br />
5. Check the auxiliary winding.<br />
See Section 8.6 Checking the Auxiliary Winding.<br />
6. Check the exciter stator.<br />
See Section 8.7 Checking the Exciter Stator.<br />
7. Check the AVR sensing wires.<br />
See Section 8.8 Checking the AVR Sensing Wires.<br />
8. Flash the generator.<br />
See Section 8.9 Flashing the <strong>Generator</strong>.<br />
9. Check the stator windings at the Lugs.<br />
See Section 8.10 Checking the Stator Windings at the lugs.<br />
10. Check the rectifier diodes.<br />
See Section 8.11 Checking the Rectifier Diodes.<br />
11. Check the main rotor winding.<br />
See Section 8.12 Checking the Main Rotor Winding.<br />
12. Check the exciter rotor winding.<br />
See Section 8.13 Checking the Exciter Rotor Winding.<br />
13. Check the stator windings at the generator.<br />
See Section 8.14 Checking the Stator Windings at the<br />
<strong>Generator</strong>.<br />
wc_tx000958gb.fm 66
G 70 Output Voltage Troubleshooting<br />
8.2 Checking the Emergency Stop Switch<br />
Prerequisites <strong>Generator</strong> shut down<br />
Procedure Follow the procedure below to check the emergency stop switch.<br />
1. Open the large hinged panel. Locate the emergency stop switch (a).<br />
2. Place the emergency stop switch in the de-activated (out) position.<br />
3. Check the connections of the wiring to the emergency stop switch. Make sure all<br />
connections are tight.<br />
4. Measure the voltage between red wire #20 and ground.<br />
Is at least 9.8 VDC measured?<br />
Yes ____ No ____<br />
Continue. Check condition/connection of red wire #20 to terminal strip.<br />
5. Measure the voltage between yellow #45 and ground.<br />
Is any voltage measured?<br />
Yes ____ No ____<br />
The emergency stop switch has failed; replace it. Continue.<br />
6. Place the emergency stop switch in the activated (in) position.<br />
7. Measure the voltage between yellow #45 and ground.<br />
Is at least 9.8 VDC measured?<br />
Yes ____ No ____<br />
The emergency stop switch is OK. The emergency stop switch has failed;<br />
replace it.<br />
The emergency stop switch has now been checked. Continue with Section 8.3<br />
Checking the Lug Door Switch.<br />
wc_tx000958gb.fm 67
Output Voltage Troubleshooting G 70<br />
8.3 Checking the Lug Door Switch<br />
Prerequisites <strong>Generator</strong> shut down<br />
Procedure Follow the procedure below to check the lug door switch.<br />
1. Open the large hinged panel. Remove the “key” (latch) (a) from the lug door and<br />
place in the slot of the lug door switch. NOTICE: Do not place anything but the<br />
key into the slot of the lug door switch.<br />
2. Disconnect the blue wire and the orange wires of the lug door switch.<br />
Disconnect the blue/white wire at the AVR.<br />
3. With the key in the lug door switch, check for continuity between the blue wire<br />
and blue/white wire.<br />
Is there continuity?<br />
Yes ____ No ____<br />
Continue. The lug door switch has failed; replace it.<br />
4. Remove the key from the lug door switch.<br />
5. Check for continuity between the blue wire and the blue/white wire.<br />
Is there continuity?<br />
Yes ____ No ____<br />
The lug door switch has failed; replace it. Reconnect the blue and blue/white wires;<br />
then continue.<br />
6. Check for continuity between the orange wires.<br />
Is there continuity?<br />
This procedure continues on the next page.<br />
wc_tx000958gb.fm 68<br />
wc_gr005482<br />
Yes ____ No ____<br />
Continue. The lug door switch has failed; replace it.<br />
a
G 70 Output Voltage Troubleshooting<br />
Continued from the previous page.<br />
7. Place the key into the lug door switch.<br />
8. Check for continuity between the orange wires.<br />
Is there continuity?<br />
Yes ____ No ____<br />
The lug door switch has failed; replace it. The lug door switch is OK.<br />
9. Reconnect the wiring.<br />
10.Re-install the key (latch) to the lug door unless moving on to the next test.<br />
The lug door switch has now been checked. Continue with Section 8.4 Checking<br />
the Main Circuit Breaker.<br />
wc_tx000958gb.fm 69
Output Voltage Troubleshooting G 70<br />
8.4 Checking the Main Circuit Breaker<br />
Prerequisites Fully-charged battery<br />
Emergency stop switch in disengaged (out) position.<br />
Engine shut down.<br />
Procedure Follow the procedure below to check the main circuit breaker.<br />
WARNING<br />
Electric shock hazard. High voltage exists at the lugs with the engine running. High<br />
voltage can cause severe injury or death.<br />
Do not conduct this test with the engine running.<br />
1. Remove the “key” (latch) (a) from the lug door and place in the slot of the lug<br />
door switch. NOTICE: Do not place anything but the key into the slot of the lug<br />
door switch.<br />
2. Place the main circuit breaker in the ON position.<br />
Does the main circuit breaker stay in the ON position?<br />
Yes ____ No ____<br />
Continue. The main circuit breaker has failed; replace it.<br />
3. With the main circuit breaker in the ON position, remove the key from the lug<br />
door switch.<br />
Does the main circuit breaker trip?<br />
4. Disconnect the yellow wire of the main circuit breaker from the two yellow wires.<br />
This procedure continues on the next page.<br />
wc_tx000958gb.fm 70<br />
Yes ____ No ____<br />
Continue with step 6. Continue.
G 70 Output Voltage Troubleshooting<br />
Continued from the previous page.<br />
5. Measure the voltage between the two yellow wires and ground.<br />
Is at least 9.8 VDC measured?<br />
Yes ____ No ____<br />
The main circuit Check condition/connection of yellow wire between the main<br />
breaker has failed; circuit breaker and the terminal strip. There must be more than<br />
replace it. 9.8 VDC between the wire and ground. When voltage exists,<br />
repeat step 4.<br />
6. Place the key into the lug door switch.<br />
7. With the main circuit breaker in the ON position, check for continuity (continuity<br />
equals 0.0–1.0 Ohms) between L1 of the main circuit breaker and Lug 1. Also<br />
check between L2 and Lug 2, and L3 and Lug 3.<br />
Is there continuity for each check?<br />
Yes ____ No ____ Your reading<br />
Continue. The main circuit breaker has<br />
failed; replace it. ____; _____; _____<br />
8. With the main circuit breaker in the OFF position, check for continuity between<br />
L1 of the main circuit breaker and Lug 1. Also check between L2 and Lug 2, and<br />
L3 and Lug 3.<br />
Is there continuity for any of the checks?<br />
9. Reconnect the yellow (Y) wires and lug door key.<br />
The main circuit breaker has now been checked. Continue with Section 8.5<br />
Checking the Voltage Adjusting Rheostat.<br />
wc_tx000958gb.fm 71<br />
Yes ____ No ____<br />
The main circuit breaker has failed;<br />
replace it.<br />
The main circuit breaker is functioning<br />
properly.
Output Voltage Troubleshooting G 70<br />
8.5 Checking the Voltage Adjusting Rheostat<br />
Prerequisites <strong>Generator</strong> shut down<br />
Procedure Follow the procedure below to check the voltage adjusting rheostat.<br />
1. Open the control panel and locate the voltage adjusting rheostat.<br />
2. Disconnect the voltage adjusting rheostat from the Automatic Voltage Regulator<br />
(AVR).<br />
3. Loosen the rheostat’s locknut.<br />
4. Measure the resistances of the rheostat across the entire range of its travel.<br />
Does the voltage adjusting rheostat have a range of at least 5–145k ohms?<br />
Yes ____ No ____ Your reading<br />
Continue. The voltage adjusting rheostat has failed;<br />
replace it.<br />
5. Check each wire (violet & white) to ground (unpainted surface on door).<br />
Does each wire measure “OPEN” or “OL” to ground?<br />
6. Reconnect the voltage adjusting rheostat to the AVR.<br />
7. Tighten the rheostat’s locknut.<br />
The voltage adjusting rheostat has now been checked. Continue with Section 8.6<br />
Checking the Auxiliary Winding.<br />
wc_tx000958gb.fm 72<br />
Yes ____ No ____ Your reading<br />
The voltage adjusting<br />
rheostat is OK.<br />
The voltage adjusting<br />
rheostat has failed;<br />
replace it.
G 70 Output Voltage Troubleshooting<br />
8.6 Checking the Auxiliary Winding<br />
Prerequisites <strong>Generator</strong> shut down<br />
Procedure Follow the procedures below to check the auxiliary winding.<br />
1. Open the large hinged panel and locate the Automatic Voltage Regulator (AVR).<br />
2. Disconnect the red wire from the AVR.<br />
3. Disconnect the red wire from the blue wire of the lug door switch.<br />
4. Measure the resistances across the two red wires.<br />
Is 1.4–2.7 Ohms measured?<br />
Yes ____ No ____ Your reading<br />
Continue. Remove the vent cover from the generator and<br />
check the generator for damage.<br />
5. Check each red wire for continuity to ground.<br />
Does each wire measure “OPEN” or “OL” to ground?<br />
Yes ____ No ____ Your reading<br />
Auxiliary winding<br />
is OK<br />
6. Reconnect the wiring.<br />
The auxiliary winding has now been checked. Continue with Section 8.7 Checking<br />
the Exciter Stator.<br />
wc_tx000958gb.fm 73<br />
Remove the vent cover from the generator and<br />
check the generator for damage.
Output Voltage Troubleshooting G 70<br />
8.7 Checking the Exciter Stator<br />
Prerequisites <strong>Generator</strong> shut down<br />
Procedure Follow the procedure below to check the exciter stator.<br />
1. Open the large hinged panel and locate the Automatic Voltage Regulator (AVR).<br />
2. Disconnect the blue and yellow wires from the AVR.<br />
3. Measure the continuity between the blue wire and ground. Also measure<br />
between the yellow wire and ground.<br />
Does each wire measure “OPEN” or “OL” to ground?<br />
Yes ____ No ____ Your reading<br />
Continue. Remove the vent cover from the generator and<br />
check the generator for damage.<br />
4. Measure the resistance across the blue and the yellow wires.<br />
Is 10.6–12.0 Ohms measured?<br />
Yes ____ No ____ Your reading<br />
Continue. Remove the vent cover from the generator and<br />
check the generator for damage; then continue.<br />
5. Remove the vent cover from the generator to expose the rotor.<br />
6. Measure the continuity between the blue wire and the rotor. Also measure<br />
between the yellow wire and the rotor.<br />
Does each wire measure “OPEN” or “OL” to the rotor?<br />
Yes ____ No ____ Your reading<br />
The exciter stator is OK. The exciter stator has failed.<br />
7. Reconnect the wiring, and re-install the vent cover.<br />
The exciter stator has now been checked.<br />
wc_tx000958gb.fm 74
G 70 Output Voltage Troubleshooting<br />
8.8 Checking the AVR Sensing/Power Wires<br />
Prerequisites <strong>Generator</strong> shut down<br />
Procedure Follow the procedure below to check the AVR sensing/power wires.<br />
1. Open the large hinged panel and locate the Engine Control Module (ECM) and<br />
the Automatic Voltage Regulator (AVR).<br />
2. Disconnect the 4-pin connector (it has 3 wires) from the ECM.<br />
3. Remove the green and black wires from the AVR.<br />
4. Measure the resistance across the green and black wires.<br />
Is 0.2–1.0 Ohms measured?<br />
Yes ____ No ____ Your reading<br />
Continue. Remove the vent cover from the generator and<br />
check the generator for damage.<br />
5. Measure the resistance between the green wire and the ground lug. Also check<br />
between the black wire and the ground lug.<br />
Is 0.2–1.0 Ohms measured?<br />
Yes ____ No ____ Your reading<br />
Continue. Remove the vent cover from the generator and<br />
check the generator for damage.<br />
6. Remove the bus bar between the neutral lug and the ground lug.<br />
7. Measure the continuity between the green wire and the ground lug. Also check<br />
between the black wire and the ground lug.<br />
Does each wire measure “OPEN” or “OL” to the ground lug?<br />
Yes ____ No ____ Your reading<br />
The sensing wires<br />
are OK.<br />
This procedure continues on the next page.<br />
wc_tx000958gb.fm 75<br />
Remove the vent cover from the generator and<br />
check the generator for damage.
Output Voltage Troubleshooting G 70<br />
Continued from the previous page.<br />
8. Reconnect the 4-pin connector and the green and black wires to the AVR.<br />
NOTICE: NEVER run the generator when the green and black wires are<br />
disconnected from the AVR and all other wires are connected to the AVR.<br />
Damage to the generator will occur.<br />
9. Reconnect the bus bar. DO NOT run the generator with the bus bar disconnected.<br />
The AVR sensing wires have now been checked. Continue with Section 8.9<br />
Flashing the <strong>Generator</strong>.<br />
wc_tx000958gb.fm 76
G 70 Output Voltage Troubleshooting<br />
8.9 Flashing the <strong>Generator</strong> (checking the excitation system)<br />
Prerequisites Source of 12 VDC<br />
Procedure Follow the procedure below to flash the generator.<br />
1. Open the large hinged panel and locate the Automatic Voltage Regulator (AVR).<br />
1000<br />
F 200 V<br />
20<br />
2<br />
200m<br />
2. Disconnect all the wires from the AVR except the rheostat wires and the white<br />
jumper wire.<br />
3. Connect a multimeter (set to the 500 VAC (or higher) scale) to the green and<br />
black wires.<br />
4. Start the engine. Then, connect the blue wire to the ground lug and the yellow<br />
wire to the B+ terminal strip. NOTICE: Only connect the wires to the machine<br />
when the engine is running. Otherwise, damage to the winding may occur.<br />
5. Measure the voltage across the green and black wires.<br />
Is 270–320 VAC measured?<br />
6. Shut down the generator. Then, reconnect all the wires to the AVR.<br />
7. Start the engine and check the function of the generator.<br />
Does the generator now function properly?<br />
The excitation system has now been checked. Continue with Section 8.10<br />
Checking the Stator Windings at the Lugs.<br />
wc_tx000958gb.fm 77<br />
V- COM<br />
A<br />
WARNING<br />
Electric shock hazard. High voltage exists between the green and black wires when<br />
the engine is running. Electric shock can cause injury or death<br />
Do not touch the green and black wires when the engine is running.<br />
Yes ____ No ____ Your reading<br />
The excitation system is<br />
functioning properly.<br />
Continue.<br />
Check the exciter rotor<br />
winding. See Checking the<br />
Exciter Rotor Winding.<br />
Yes ____ No ____<br />
The generator is OK. The AVR has failed; replace it.
Output Voltage Troubleshooting G 70<br />
8.10 Checking Stator Windings at the Lugs<br />
Prerequisites <strong>Generator</strong> shut down<br />
Two alligator clips; each connected to 12 inches of 14-gauge wire<br />
Procedure Follow the procedure below to check the stator windings at the lugs.<br />
1. Place the voltage selector switch in the 480/277 position.<br />
2. Open the lug door. Connect the alligator clips/wires to Lug 1 and to the neutral<br />
lug (N).<br />
3. Close the lug door and place the main circuit breaker in the ON (closed)<br />
position.<br />
4. Measure the resistance between Lug 1 and the neutral lug. Enter the reading in<br />
the table below. Also measure the resistance between Lug 2 and the neutral lug,<br />
and lug 3 and the neutral lug. Enter these values in the table below.<br />
1000<br />
F 200 V<br />
20<br />
2<br />
200m<br />
V- COM<br />
5. Measure the resistance between Lug 1 and Lug 2; Lug 1 and Lug 3; and Lug 2<br />
and Lug 3. Enter these values into the table below. All values are in Ohms.<br />
480/277 position<br />
Are your readings approximately equal to the ideal measurements?<br />
The stator windings have now been checked at the lugs. Continue with Section<br />
8.11 Checking the Rectifier Diodes.<br />
wc_tx000958gb.fm 78<br />
L1–N L2–N L3–N L1–L2 L2–L3 L1–L3<br />
Ideal 0.1 0.1 0.1 0.2 0.2 0.2<br />
Your reading<br />
A<br />
Yes ____ No ____<br />
The main stator<br />
windings and the<br />
voltage selector<br />
switch are OK.<br />
1000<br />
F 200 V<br />
20<br />
2<br />
200m<br />
V- COM<br />
1. Clean the voltage selector switch with contact cleaner.<br />
2. Check the windings at the generator. See Checking Stator<br />
Windings at the Voltage Selector Switch.<br />
A<br />
wc_gr005496
G 70 Output Voltage Troubleshooting<br />
8.11 Checking the Rectifier Diodes<br />
Prerequisites <strong>Generator</strong> shut down<br />
Procedure Follow the procedures below to check the rectifier diodes.<br />
1. Remove the rear baffle (a) from the machine.<br />
2. Remove the cover (b) from the generator.<br />
3. Rotate the engine to access the diodes.<br />
4. Using the diode scale on your multimeter, place the meter leads near the diode,<br />
one on either side. Reverse the probes of your meter and check the diode<br />
again.<br />
Each diode should conduct in one direction and not in the other. Your meter should<br />
read 0.4–0.5V in the direction that conducts.<br />
Does each diode check OK?<br />
Yes No<br />
The diodes are OK. Replace all diodes.<br />
Call <strong>Wacker</strong> Service.<br />
The rectifier diodes have now been checked. Continue with Section 8.12 Checking<br />
the Main Rotor Winding. Note: If moving on to the next test, leave the generator<br />
disassembled.<br />
wc_tx000958gb.fm 79
Output Voltage Troubleshooting G 70<br />
8.12 Checking the Main Rotor Winding<br />
Prerequisites <strong>Generator</strong> shut down<br />
Procedure Follow the procedure below to check the main rotor winding.<br />
1. Remove the rear baffle from the machine.<br />
2. Remove the cover from the generator.<br />
3. Remove the screws that secure the bearing carrier to the stator.<br />
4. Disconnect the blue and yellow wires from the AVR.<br />
5. Using a puller, pull the bearing carrier/exciter stator from the stator housing.<br />
6. Disconnect the wires to the main rotor winding. One is marked with a red tag<br />
and the other is marked with a blue tag.<br />
7. Measure the resistance across the two wires.<br />
Is 1.4–3 Ohms measured?<br />
Yes ____ No ____ Your reading<br />
Continue. The main rotor winding has failed.<br />
Call <strong>Wacker</strong> Service.<br />
8. Check each wire for short (path) to the rotor shaft.<br />
Does each wire measure “OPEN” or “OL” to the rotor shaft?<br />
Yes ____ No ____ Your reading<br />
The main rotor<br />
winding is OK.<br />
The main rotor winding has now been checked. Continue with Section 8.13 Checking the<br />
Exciter Rotor Winding. Note: If moving on to the next test, leave the generator disassembled.<br />
wc_tx000958gb.fm 80<br />
The main rotor winding has failed.<br />
Call <strong>Wacker</strong> Service.<br />
wc_gr003811
G 70 Output Voltage Troubleshooting<br />
8.13 Checking the Exciter Rotor Winding<br />
Prerequisites <strong>Generator</strong> shut down<br />
Procedure Follow the procedure below to check the exciter rotor winding.<br />
1. Remove the rear baffle from the machine.<br />
2. Remove the cover from the generator.<br />
3. Remove the screws that secure the bearing carrier to the stator.<br />
4. Disconnect the blue and yellow wires from the AVR.<br />
5. Using a puller, pull the bearing carrier/exciter stator from the stator housing.<br />
6. Locate the three exciter rotor leads in between each pair of diodes.<br />
wc_gr005099<br />
7. Measure the resistance across each lead and the other two leads (one lead at a<br />
time).<br />
Is 0.3–1.0 Ohms measured in each case?<br />
Yes ____ No ____ Your reading<br />
The exciter rotor windings The exciter rotor has failed.<br />
are OK.<br />
_____; _____; _____<br />
8. Check each lead for short (path) to the rotor shaft.<br />
Does each lead measure “OPEN” or “OL” to the rotor shaft?<br />
Yes ____ No ____ Your reading<br />
The main rotor winding is OK. The main rotor winding has failed.<br />
9. Reassemble the generator components.<br />
The exciter rotor winding has now been checked. Continue with Section 8.13<br />
Checking Stator Windings at the <strong>Generator</strong>.<br />
wc_tx000958gb.fm 81<br />
wc_gr003811
Output Voltage Troubleshooting G 70<br />
8.14 Checking Stator Windings at the <strong>Generator</strong><br />
Prerequisites <strong>Generator</strong> shut down<br />
Procedure Follow the procedure below to check the main stator windings at the generator.<br />
1. Remove the cover from the Voltage Selector Switch (VSS).<br />
Or<br />
ECM<br />
2. Note the positions and labels of all wires connected to the VSS (T2, T3, T4 etc.).<br />
3. Check the resistance across each pair of wires for each winding (T1–T2, T3–T4<br />
and so on). Note: T1, T3, T4, T9, and T11 are located at the terminal strip.<br />
Your reading<br />
Gen<br />
Do all six stator windings measure approximately 0.2 Ohms?<br />
4. Reconnect the wires and re-install the generator components.<br />
The main stator windings have now been checked.<br />
wc_tx000958gb.fm 82<br />
T10<br />
Gen<br />
T2<br />
1 5 9 13 17 21 25<br />
3 7 11 15 19 23 27<br />
L1<br />
Br<br />
ECM CB<br />
26 22 18 14 10 6 2<br />
28 24 20 16 12 8 4<br />
L3 L2<br />
T1–T2 T3–T4 T5–T6 T7–T8 T9–T10 T11–T12<br />
Yes ____ No ____<br />
The main stator windings are OK. If there is a difference<br />
between the readings taken here and those taken at the lugs,<br />
the VSS has failed; replace it.<br />
T12<br />
Gen<br />
Gen<br />
T7<br />
CB TS<br />
Y<br />
ECM<br />
AVR = to Automatic Voltage Regulator<br />
ECM = to Engine Control Module<br />
Gen = from generator<br />
T5<br />
Gen<br />
TS<br />
N<br />
Gen<br />
T6<br />
L2<br />
TS<br />
Lug<br />
N<br />
TS<br />
T3<br />
TB*<br />
TS<br />
L0<br />
N<br />
TS<br />
T11<br />
TB**<br />
TB* = to terminal block R1 (T7 on older)<br />
TB**= to terminal block R2 (T9 on older)<br />
TS = to terminal strip<br />
CB = to main circuit breaker<br />
wc_gr005494<br />
The main stator<br />
windings have failed.
G 70 Disassembly and Assembly<br />
9 Disassembly and Assembly<br />
9.1 Tools Required for Disassembly/Assembly Procedures<br />
It is up to the mechanic to use common sense and good judgment in tool<br />
selection to reduce the risk of injury while repairing the machine.<br />
In cases where a special tool is required, the special tool is listed in the<br />
prerequisite section of the procedure.<br />
Before substituting another tool or procedure from those recommended in this<br />
manual, the mechanic must be satisfied that neither personal injury nor damage<br />
to the machine will result due to the substitution.<br />
9.2 Information Regarding Replacement Parts<br />
The repair procedures contained in this manual do not include part numbers.<br />
For replacement parts information, refer to the Parts Book originally supplied<br />
with the machine.<br />
If the original Parts Book has been lost, a replacement may be ordered from<br />
<strong>Wacker</strong> <strong>Neuson</strong> Corporation.<br />
When ordering a replacement Parts Book, please list the model number, item<br />
number, revision level, and serial number of the machine.<br />
Parts Books are also available on the <strong>Wacker</strong> <strong>Neuson</strong> Corporation Web site.<br />
See www.wackerneuson.com. Enter the site as a visitor.<br />
9.3 Information Regarding Reference Numbers<br />
<strong>Repair</strong> procedures contain reference numbers enclosed in parentheses ( ). These<br />
numbers refer to the item numbers shown on the assembly drawings and other<br />
detailed drawings. They are included to aid the mechanic in identifying parts and<br />
assembling components.<br />
wc_tx001068gb.fm 83
Disassembly and Assembly G 70<br />
9.4 Removing the Roof<br />
Prerequisites Machine shut down<br />
Crane capable of lifting 227 kg (500 lb)<br />
Procedure Follow the procedure below to remove the roof.<br />
1. Disconnect the battery.<br />
2. Remove the doors (a).<br />
3. Remove the front and rear access panels (b and c).<br />
4. Remove the screws that secure the roof to the side panels (d).<br />
5. Remove the screws that secure the control panel enclosure (e) to the lifting<br />
structure (f).<br />
6. Remove the screws that secure the door latch (g) to the lifting structure and<br />
remove the door latch.<br />
This procedure continues on the next page.<br />
wc_tx001068gb.fm 84
G 70 Disassembly and Assembly<br />
Continued from the previous page.<br />
7. Remove the screws that secure the lifting structure to the frame.<br />
8. Using an appropriate crane or hoist, lift the roof (h), by the lifting eye, off of the<br />
machine.<br />
The procedure is now complete.<br />
wc_tx001068gb.fm 85
Disassembly and Assembly G 70<br />
9.5 Removing the Voltage Selector Switch<br />
Prerequisites Machine shut down<br />
Engine cool<br />
Removal Follow the procedure below to remove the Voltage Selector Switch (VSS).<br />
WARNING<br />
Electric shock hazard. High voltage exists inside at voltage selector switch when<br />
the engine is running. High voltage can cause severe injury or death.<br />
Shut down the generator before performing this procedure.<br />
9. Remove the air cleaner assembly.<br />
10.Remove the cover (a) from the voltage selector switch box.<br />
11.Remove the switch handle (b), locking ring (c), and face plate (d).<br />
12.Label, then disconnect all the wires attached to the VSS (e).<br />
f<br />
13.Remove the mounting plate (f).<br />
14.Remove the VSS (e) and support plate (g) from the box.<br />
15.Remove the support plate from the VSS.<br />
The procedure is now complete.<br />
wc_tx001068gb.fm 86<br />
g<br />
e<br />
wc_gr005897<br />
c d<br />
wc_gr005890
G 70 Disassembly and Assembly<br />
9.6 Installing the Voltage Selector Switch<br />
Prerequisites Machine shut down<br />
New Voltage Selector Switch (VSS)<br />
Procedure Follow the procedure below to install the Voltage Selector Switch (VSS).<br />
WARNING<br />
Electric shock hazard. High voltage exists inside at voltage selector switch when<br />
the engine is running. High voltage can cause severe injury or death.<br />
Shut down the machine before performing this procedure.<br />
1. Attach the support plate (g) to the VSS (e).<br />
f<br />
2. Secure the VSS and support plate to the box.<br />
3. Install the mounting plate (f).<br />
4. Connect the wires to the VSS (e).<br />
5. Install the switch handle (b), locking ring (c), and face plate (d).<br />
6. Install the cover (a) to the voltage selector switch box.<br />
7. Install the air cleaner assembly.<br />
The procedure is now complete.<br />
wc_tx001068gb.fm 87<br />
g<br />
e<br />
wc_gr005897<br />
c d<br />
wc_gr005890
Disassembly and Assembly G 70<br />
9.7 Removing the <strong>Generator</strong><br />
Prerequisites Roof removed<br />
Crane capable of lifting 227 kg (500 lb)<br />
Procedure Follow the procedure below to remove the generator.<br />
1. Remove the voltage selector switch. See Section 9.5 Removing the Voltage<br />
Selector Switch.<br />
2. Label, then disconnect all wires from the terminal strip (a).<br />
3. Remove the lower bracket (b) of the voltage selector switch box.<br />
4. Remove the screen (c) from the generator.<br />
5. Place suitable blocks (j) underneath the engine to support it.<br />
Note: For clarity, the blocks are shown with the generator already removed.<br />
This procedure continues on the next page.<br />
wc_tx001068gb.fm 88
G 70 Disassembly and Assembly<br />
Continued from the previous page.<br />
6. Remove the screws (d) that secure the generator flex plates to the engine flywheel.<br />
7. Remove the secews (e) that secure the generator housing to the engine bell<br />
housing.<br />
8. Disconnect the ground strap (f).<br />
9. Remove the screws that secure the shock mount (g) to the frame.<br />
10.Using an appropriate crane or hoist, lift the generator out of the machine.<br />
The procedure is now complete.<br />
wc_tx001068gb.fm 89
Disassembly and Assembly G 70<br />
9.8 Installing the <strong>Generator</strong><br />
Prerequisites Crane capable of lifting 227 kg (500 lb)<br />
Loctite ® 243 or equivalent<br />
Two 3/8-16 x 3-inch threaded studs<br />
Three M10x30 threaded studs<br />
Procedure Follow the procedure below to install the generator.<br />
1. Outside of the machine, secure the shock mounts (g) to the generator housing.<br />
Torque the screws to 86 Nm (63 ft.lbs.).<br />
2. Clean all paint from the mating surface (x) of the generator housing.<br />
3. Install two 3/8-16 x 3-inch studs (h) into the engine flywheel 180° away from<br />
each other.<br />
4. Install three M10x30 studs (i) into the engine bell housing at 120° intervals.<br />
5. Using an appropriate crane or hoist, lower the generator into the machine. Slide<br />
the flex discs of the generator over the 3/8-16 studs. Use the studs to guide the<br />
generator into position.<br />
This procedure continues on the next page.<br />
wc_tx001068gb.fm 90
G 70 Disassembly and Assembly<br />
Continued from the previous page.<br />
6. Using Loctite 243 on screws (d), secure the generator flex plates to the engine<br />
flywheel. Remove the 3/8-16 studs. Torque the screws to 45 Nm (33 ft.lbs.).<br />
7. Using Loctite 243 on screws (e), secure the generator housing to the engine bell<br />
housing. Remove the M10 studs. Torque the screws to 86 Nm (45 ft.lbs.).<br />
8. Secure the shock mount (g) to the frame.<br />
9. Connect the ground strap (f).<br />
10.Install the lower bracket (b) of the voltage selector switch box.<br />
11.Connect the appropriate wires to the terminal strip (a).<br />
This procedure continues on the next page.<br />
wc_tx001068gb.fm 91
Disassembly and Assembly G 70<br />
Continued from the previous page.<br />
12.Install the screen (c).<br />
13.Re-install the voltage selector switch. See section Installing the Voltage Selector<br />
Switch.<br />
The procedure is now complete.<br />
wc_tx001068gb.fm 92
G 70 Disassembly and Assembly<br />
9.9 Removing the AVR<br />
Prerequisites Machine shut down<br />
Procedure Follow the procedure below to remove the Automatic Voltage Regulator (AVR).<br />
1. Remove the screws that secure the large access panel (a) and open the large<br />
access panel.<br />
2. Make note of the wires connected to the AVR (b).<br />
3. Disconnect the wires.<br />
4. Remove the screws that secure the AVR and remove the AVR from the<br />
machine.<br />
The procedure to remove the AVR is now complete.<br />
wc_tx001068gb.fm 93
Disassembly and Assembly G 70<br />
9.10 Installing the AVR Prerequisites<br />
Machine shut down<br />
Multimeter<br />
Procedure Follow the procedure below to install and set the Automatic Voltage Regulator<br />
(AVR).<br />
1. Check the function of the voltage adjusting rheostat. See section Checking the<br />
Voltage Adjusting Rheostat.<br />
2. Mount the AVR (b) to the machine with the two screws.<br />
3. Reconnect the wires to the AVR.<br />
4. Adjust the VOLT pot (a) on the new AVR counterclockwise as far as possible.<br />
This procedure continues on the next page.<br />
wc_tx001068gb.fm 94<br />
B W<br />
V W<br />
5C5B 7<br />
5C5B 7<br />
B R G Y L<br />
5C<br />
AMP HZ STAB VOLT<br />
L/W<br />
n/a n/a<br />
5B 7 5A 6 5 4A 4 3A 3 2 1<br />
wc_gr004583
G 70 Disassembly and Assembly<br />
Continued from the previous page.<br />
WARNING Electric shock hazard. Voltage exists at the cooling fins of the AVR<br />
when the engine is running. Electric shock can cause severe injury or death.<br />
Never touch the cooling fins when the engine is running.<br />
5. Place the voltage selector switch in the 208/120V position.<br />
6. Never adjust the AVR voltage pot with the voltage selector switch in any other<br />
position. Damage to the generator may occur.<br />
7. Loosen the lock nut and adjust the voltage adjusting rheostat (c) clockwise as<br />
far as possible.<br />
8. Open the large hinged panel. Remove the “key” (latch) from the lug door and<br />
place it in the slot of the lug door switch. NOTICE: Never place anything but the<br />
key into the slot of the lug door switch.<br />
9. Place the main circuit breaker in the ON position.<br />
10.Start the machine.<br />
NOTICE: Shut down the machine immediately if any load (change in engine rpm)<br />
on the generator is sensed. A change in engine rpm indicates incorrect wiring.<br />
Check the wiring.<br />
This procedure continues on the next page.<br />
wc_tx001068gb.fm 95<br />
wc_gr004587<br />
WARNING! Electric shock hazard. High voltage exists at the lugs when the engine<br />
is running. High voltage can kill or cause severe injury.<br />
Never touch the lugs when the engine is running.
Disassembly and Assembly G 70<br />
Continued from the previous page.<br />
11.Check the voltage between Lug 1 and Lug 2 with a multimeter.<br />
12.Adjust the VOLT pot of the AVR until 250 VAC is measured between Lug 1 and<br />
Lug 2.Test the consistency by checking the voltage across Lug 1 and Lug 2,<br />
Lug 2 and Lug 3, Lug 3 and Lug 1. Then, check the voltage between each lug<br />
and Neutral. Approximately 139V should be measured.<br />
13.Shut down the machine. Change the voltage selector switch to the 480/277<br />
position.<br />
14.Start the machine.<br />
15.Measure the voltage between Lug 1 and Lug 2. Adjust the voltage adjusting<br />
rheostat until 480V is measured. Tighten the lock nut.<br />
16.Test the consistency of the voltage by checking across Lug 1 and Lug 2, Lug 2<br />
and Lug 3, Lug 3 and Lug 1. Then, check the voltage between each lug and<br />
Neutral. Approximately 277V should be measured.<br />
This procedure continues on the next page.<br />
wc_tx001068gb.fm 96
G 70 Disassembly and Assembly<br />
Continued from the previous page.<br />
17.Check the consistency between the voltage measured at the lugs by the<br />
multimeter and that shown on the ECM display. If the ECM display is off by more<br />
than 2%, adjust the VOLT pot on the ECM so that the ECM display matches the<br />
reading on the multimeter.<br />
NOTICE: Only adjust the ECM pot when the voltage selector switch is in the<br />
480/277V position.<br />
18.Shut down the machine.<br />
19.Re-install the “key” (latch) to the lug door.<br />
20.Close the large access panel and secure it with two screws.<br />
The procedure to install and set the AVR is now complete.<br />
wc_tx001068gb.fm 97
Schematics G 70<br />
10 Schematics<br />
10.1 Engine Wiring Diagram—John Deere with ECU<br />
87<br />
14<br />
wc_tx000945gb.fm 98<br />
SO<br />
SI<br />
14<br />
CP CG<br />
429<br />
082<br />
20<br />
Or R<br />
G Y<br />
Br LL<br />
6<br />
R<br />
050<br />
21<br />
412<br />
050D<br />
ECM<br />
422<br />
K3<br />
G2<br />
J2<br />
K1<br />
A2<br />
JOHN DEERE<br />
ECU<br />
G1<br />
F1<br />
V<br />
A1 A2 A3<br />
B1 B2 B3<br />
C1 C2 C3<br />
D1 D2 D3<br />
23<br />
Y<br />
J<br />
25<br />
E1 E2 E3<br />
G<br />
B<br />
V<br />
F<br />
A<br />
22<br />
26<br />
LL<br />
F1 F2 F3<br />
G1 G2 G3<br />
J B<br />
C<br />
D<br />
A<br />
E<br />
F<br />
G<br />
23<br />
U<br />
H<br />
E<br />
D<br />
H1 H2 H3<br />
J1 J2 J3<br />
wc_gr004699<br />
K1 K2 K3<br />
24<br />
<strong>Wacker</strong> side
G 70 Schematics<br />
10.2 Engine Wiring Components—John Deere with ECU<br />
Ref. Description Ref. Description<br />
1 Plug 1 — engine sender inputs 14 Battery<br />
2 Plug 2 — engine start/run outputs 15 ECM 10A fuse<br />
3 Main circuit breaker (3-phase lugs) 16 Starter relay<br />
4 Shunt trip coil 17 Starter<br />
5 Emergency stop switch 18 Alternator<br />
6 Engine Control Module (ECM) 19 B+ terminal block<br />
7 Safety interlock switch 20 System 10A fuse<br />
8 Remote start terminals 21 System 30A fuse<br />
9 Fuel level sender 22 Harness connector<br />
10 Intake heater 23 CAN bus connector<br />
11 Slave preheat relay 24 Diagnostic connector<br />
12 Mechanical lugs (3 phase) 25 ECU harness connector<br />
13 Start switch 26 Hour meter switch<br />
ECM Plug 1 Wires ECM Plug 2 Wires<br />
Pin Wire Description Pin Wire Description<br />
10 Gr/61 Emergency stop 5 R/18 Battery + (for relays)<br />
3 W/L/56 Oil pressure sender 1 Y/63 Crank (12V output)<br />
9 Or/60 Remote start 2 V/64 Run/Fuel (12V output)<br />
12 W/V/62 Fuel level 3 73 Remote annunciator (NA)<br />
8 B/59 Battery – 4 75 Remote annunciator (NA)<br />
7 R/53 Battery + (for ECM board) - - ---<br />
Wire Colors<br />
B Black R Red Y Yellow Or Orange<br />
G Green T Tan Br Brown Pr Purple<br />
L Blue V Violet Cl Clear Sh Shield<br />
P Pink W White Gr Gray LL Light blue<br />
wc_tx000945gb.fm 99
Schematics G 70<br />
10.3 <strong>Generator</strong> Wiring Diagram<br />
wc_tx000945gb.fm 100
G 70 Schematics<br />
10.4 <strong>Generator</strong> Wiring Components<br />
Ref. Description Ref. Description<br />
1 Lug door (safety interlock) switch 15 Voltage Selector Switch (VSS)<br />
2 Mechanical lugs 16 <strong>Generator</strong><br />
3 Plug 3 - current transformer inputs 17 Automatic Voltage Regulator (AVR)<br />
4 Plug 4 - line voltage inputs 18 Voltage adjustment rheostat<br />
5 Shunt 19 Terminal block<br />
6 120V 20A GFI receptacle 20 Exciter rotor windings<br />
7 120V breaker 21 Exciter stator winding<br />
8 240V 50A breaker 22 Rotor<br />
9 240V 30A breaker 23 Rectifier (diodes)<br />
10 240V 50A receptacle 24 Main rotor winding<br />
11 240V 30A receptacle 25 Main stator windings<br />
12 Engine Control Module (ECM) 26 Auxiliary winding<br />
13 Bus bar 27 Stator<br />
14 Main breaker 28 Terminal strip<br />
ECM Plug 3 Wires ECM Plug 4 Wires<br />
Pin Wire Description Pin Wire Description<br />
4 Or<br />
39<br />
1 W<br />
36<br />
5 Y<br />
38<br />
2 Br<br />
37<br />
Ammeter line input CT3 3 Or<br />
41<br />
Ammeter input CT common<br />
wc_tx000945gb.fm 101<br />
4 Y<br />
43<br />
Ammeter line input CT2 2 Br<br />
42<br />
Ammeter line input CT1 - - ---<br />
Voltage line input L3 at volt<br />
selector #28<br />
Voltage line input L2 at volt<br />
selector #20<br />
Voltage line input L1 at volt<br />
selector #3
Technical Data G 70<br />
11 Technical Data<br />
11.1 Engine Data<br />
Engine Power Rating<br />
Gross standby power rating per ISO 8528-1 and SAE J1995. Actual<br />
power output may vary due to conditions of specific use.<br />
Item Number: G 70<br />
0620350<br />
0620352<br />
0620708<br />
Engine<br />
wc_td000267gb.fm 102<br />
G 70<br />
0620351<br />
Engine make / type John Deere / 4.5L John Deere / 4.5L<br />
Model 4045TF285 4045TF285<br />
Number of cylinders 4 4<br />
Displacement L (in 3 ) 4.5 (274.6) 4.5 (274.6)<br />
Engine speed rpm 1800 1800<br />
Power @ 1800 rpm kW/hp 74/99 74/99<br />
Coolant capacity L (qts.) 26.5 (28) 26.5 (28)<br />
Oil capacity L (qts.) 15 (15.9) 15 (15.9)<br />
Battery<br />
Volts/<br />
ccA<br />
12/720 12/1000<br />
Fuel type Diesel Diesel<br />
Fuel tank capacity L (gal) 337 (89) 337 (89)<br />
Fuel consumption,<br />
continuous load<br />
Running time,<br />
continuous load<br />
L/hr<br />
(gph) 18.7 (4.9) 18.7 (4.9)<br />
Hr<br />
18.2 18.2
G 70 Technical Data<br />
11.2 <strong>Generator</strong> Data<br />
Item Number: G 70<br />
0620350<br />
0620351<br />
0620352<br />
0620708<br />
<strong>Generator</strong><br />
Make/Type Mecc Alte / brushless<br />
Model ECO32-3L/4<br />
<strong>Generator</strong> speed rpm 1800<br />
Voltage selector switch 3-position<br />
AC voltages<br />
available<br />
wc_td000267gb.fm 103<br />
120/240 zig-zag<br />
120/208 low-wye<br />
277/480 Hi-wye<br />
Frequency 60 Hz<br />
Power factor<br />
1ø<br />
3ø<br />
1.0<br />
0.8<br />
Voltage regulation ±1.00%<br />
Insulation class H<br />
Sound level at 7 m<br />
(23 ft.)<br />
dB(A)<br />
68<br />
AC receptacles 2 duplex, 3 twist-lock<br />
1ø 120 GFI duplex Amps 2-20<br />
1ø 120/240 V twist lock Amps 1-30A 2-50A<br />
Standby Output kW/kVA 63/79<br />
Continuous Output kW/kVA 58/72<br />
Main breaker Amps 225
Technical Data G 70<br />
11.3 Trailer and Skid Data<br />
Item Number:<br />
Trailer and Skid<br />
G 70<br />
0620350<br />
Dry weight of skid kg (lbs) 1608<br />
(3544)<br />
Operating weight<br />
of skid<br />
Trailer weight kg (lbs)<br />
kg (lbs) 1896<br />
(4180)<br />
Single axle 442 (975)<br />
Tandem axle 499 (1100)<br />
GVWR kg (lbs)<br />
Single axle 2304 (5080)<br />
Tandem axle 2722 (6000)<br />
wc_td000267gb.fm 104<br />
G 70<br />
0620351<br />
0620352<br />
1648<br />
(3634)<br />
1937<br />
(4270)<br />
Surge brakes Fluid<br />
type<br />
DOT3<br />
Tires size ST225/75D-15D<br />
Item Number: G 70 ERT 0620708<br />
Trailer and Skid<br />
Dry weight of skid kg (lb) 1872 (4128)<br />
Operating weight of skid kg (lb) 2938 (6478)<br />
Trailer weight kg (lb) 605 (1334)<br />
GVWR kg (lb) 4534 (9995)<br />
Surge brakes Fluid type DOT 3<br />
Tires size 7.50 x 16E
G 70 Technical Data<br />
11.4 Dimensions<br />
mm (inches)<br />
A<br />
C<br />
Machine A B C D E F G<br />
G 70 965<br />
(38)<br />
G 70 ERT 1156<br />
(45.5)<br />
1970<br />
(77.5)<br />
1703<br />
(67)<br />
wc_td000267gb.fm 105<br />
B<br />
2477<br />
(97.5)<br />
2032<br />
(80)<br />
D<br />
3923<br />
(154.5)<br />
4470<br />
(176)<br />
E<br />
2445<br />
(96.3)<br />
2794<br />
(110)<br />
1346<br />
(53)<br />
1816<br />
(71.5)<br />
F<br />
wc_gr006389<br />
1475<br />
(58)<br />
1943<br />
(76.5)<br />
G
Threadlockers and Sealants<br />
TYPE<br />
( ) = Europe COLOR USAGE<br />
Loctite 222<br />
Hernon 420<br />
Omnifit 1150 (50M)<br />
Loctite 243<br />
Hernon 423<br />
Omnifit 1350 (100M)<br />
Loctite 271/277<br />
Hernon 427<br />
Omnifit 1550 (220M)<br />
Loctite 290<br />
Hernon 431<br />
Omnifit 1710 (230LL)<br />
Loctite 609<br />
Hernon 822<br />
Omnifit 1730 (230L)<br />
Loctite 545<br />
Hernon 947<br />
Omnifit 1150 (50M)<br />
Loctite 592<br />
Hernon 920<br />
Omnifit 790<br />
Loctite 515<br />
Hernon 910<br />
Omnifit 10<br />
Threadlockers and Sealants<br />
Threadlocking adhesives and sealants are specified throughout this<br />
manual by a notation of “S” plus a number (S#) and should be used<br />
where indicated. Threadlocking compounds normally break down at<br />
temperatures above 175°C (350°F). If a screw or bolt is hard to<br />
remove, heat it using a small propane torch to break down the sealant.<br />
When applying sealants, follow instructions on container. The sealants<br />
listed are recommended for use on <strong>Wacker</strong> <strong>Neuson</strong> equipment.<br />
Purple Low strength, for locking threads smaller<br />
than 6 mm (1/4”).<br />
Hand tool removable.<br />
Temp. range: -54 to 149°C (-65 to 300°F)<br />
Blue Medium strength, for locking threads<br />
larger than 6 mm (1/4”).<br />
Hand tool removable.<br />
Temp. range: -54 to 149°C (-65 to 300°F)<br />
Red High strength, for all threads up to 25 mm<br />
(1”).<br />
Heat parts before disassembly.<br />
Temp. range: -54 to 149°C (-65 to 300°F)<br />
Green Medium to high strength, for locking<br />
preassembled threads and for sealing<br />
weld porosity (wicking).<br />
Gaps up to 0.13 mm (0.005”)<br />
Temp. range: -54 to 149°C (-65 to 300°F)<br />
Green Medium strength retaining compound for<br />
slip or press fit of shafts, bearings, gears,<br />
pulleys, etc.<br />
Gaps up to 0.13 mm (0.005”)<br />
Temp. range: -54 to 149°C (-65 to 300°F)<br />
Brown Hydraulic sealant<br />
Temp. range: -54 to 149°C (-65 to 300°F)<br />
White Pipe sealant with Teflon for moderate<br />
pressures.<br />
Temp. range: -54 to 149°C (-65 to 300°F)<br />
Purple Form-in-place gasket for flexible joints.<br />
Fills gaps up to 1.3 mm (0.05”)<br />
Temp. range: -54 to 149°C (-65 to 300°F)<br />
PART NO. –<br />
SIZE<br />
73287 - 10 ml<br />
29311 - .5 ml<br />
17380 - 50 ml<br />
29312 - .5 ml<br />
26685 - 10 ml<br />
73285 - 50 ml<br />
28824 - .5 ml<br />
25316 - 10 ml<br />
29314 - .5 ml<br />
79356 - 50 ml<br />
26695 - 6 ml<br />
73289 - 50 ml<br />
70735 - 50 ml
Threadlockers and Sealants<br />
Threadlockers and Sealants (continued)<br />
TYPE<br />
( ) = Europe COLOR USAGE<br />
Loctite 496<br />
Hernon 110<br />
Omnifit Sicomet 7000<br />
Loctite Primer T<br />
Hernon Primer 10<br />
Omnifit VC Activator<br />
Threadlocking adhesives and sealants are specified throughout this<br />
manual by a notation of “S” plus a number (S#) and should be used<br />
where indicated. Threadlocking compounds normally break down at<br />
temperatures above 175°C (350°F). If a screw or bolt is hard to<br />
remove, heat it using a small propane torch to break down the sealant.<br />
When applying sealants, follow instructions on container. The sealants<br />
listed are recommended for use on <strong>Wacker</strong> <strong>Neuson</strong> equipment.<br />
Clear Instant adhesive for bonding rubber,<br />
metal and plastics; general purpose.<br />
For gaps up to 0.15 mm (0.006”)<br />
Read caution instructions before using.<br />
Temp. range: -54 to 82°C (-65 to 180°F)<br />
Aerosol<br />
Spray<br />
Fast curing primer for threadlocking,<br />
retaining and sealing compounds. Must<br />
be used with stainless steel hardware.<br />
Recommended for use with gasket<br />
sealants.<br />
PART NO. –<br />
SIZE<br />
52676 - 1oz.<br />
2006124-6 oz.
Torque Values<br />
Metric Fasteners (DIN)<br />
TORQUE VALUES (Based on Bolt Size and Hardness) WRENCH SIZE<br />
8.8 10.9 12.9<br />
Torque Values<br />
Size Nm ft.lb. Nm ft.lb. Nm ft.lb. Metric Inch Metric Inch<br />
M3 1.2 *11 1.6 *14 2.1 *19 5.5 7/32 2.5 –<br />
M4 2.9 *26 4.1 *36 4.9 *43 7 9/32 3 –<br />
M5 6.0 *53 8.5 6 10 7 8 5/16 4 –<br />
M6 10 7 14 10 17 13 10 – 5 –<br />
M8 25 18 35 26 41 30 13 1/2 6 –<br />
M10 49 36 69 51 83 61 17 11/16 8 –<br />
M12 86 63 120 88 145 107 19 3/4 10 –<br />
M14 135 99 190 140 230 169 22 7/8 12 –<br />
M16 210 155 295 217 355 262 24 15/16 14 –<br />
M18 290 214 405 298 485 357 27 1-1/16 14 –<br />
M20 410 302 580 427 690 508 30 1-1/4 17 –<br />
1 ft.lb. = 1.357 Nm * = in.lb. 1 inch = 25.4 mm
Torque Values<br />
Torque Values (continued)<br />
Inch Fasteners (SAE)<br />
Size Nm ft.lb. Nm ft.lb. Nm ft.lb. Metric Inch Metric Inch<br />
No.4 0.7 *6 1.0 *14 1.4 *12 5.5 1/4 – 3/32<br />
No.6 1.4 *12 1.9 *17 2.4 *21 8 5/16 – 7/64<br />
No.8 2.5 *22 3.5 *31 4.7 *42 9 11/32 – 9/64<br />
No.10 3.6 *32 5.1 *45 6.8 *60 – 3/8 – 5/32<br />
1/4 8.1 6 12 9 16 12 – 7/16 – 3/32<br />
5/16 18 13 26 19 33 24 13 1/2 – 1/4<br />
3/8 31 23 45 33 58 43 – 9/16 – 5/16<br />
7/16 50 37 71 52 94 69 16 5/8 – 3/8<br />
1/2 77 57 109 80 142 105 19 3/4 – 3/8<br />
9/16 111 82 156 115 214 158 – 13/16 – –<br />
5/8 152 112 216 159 265 195 24 15/16 – 1/2<br />
3/4 271 200 383 282 479 353 – 1-1/8 – 5/8<br />
1 ft.lb. = 1.357 Nm * = in.lb. 1 inch = 25.4 mm
<strong>Wacker</strong> <strong>Neuson</strong> SE · Preußenstraße 41 · D-80809 München · Tel.: +49-(0)89-3 54 02-0 · Fax: +49 - (0)89-3 54 02-390<br />
<strong>Wacker</strong> <strong>Neuson</strong> Corporation · P.O. Box 9007 · Menomonee Falls, WI 53052-9007 · Tel. : (262) 255-0500 · Fax: (262) 255-0550 · Tel. : (800) 770-0957<br />
<strong>Wacker</strong> <strong>Neuson</strong> Limited - Room 1701–03 & 1717–20, 17/F. Tower 1, Grand Century Place, 193 Prince Edward Road West, Mongkok, Kowloon, Hongkong.<br />
Tel: (852) 3605 5360, Fax: (852) 2758 0032