Installation and Maintenance Instructions - ETO Doors
Installation and Maintenance Instructions - ETO Doors
Installation and Maintenance Instructions - ETO Doors

You also want an ePaper? Increase the reach of your titles
YUMPU automatically turns print PDFs into web optimized ePapers that Google loves.
e<br />
Q<br />
P<br />
W<br />
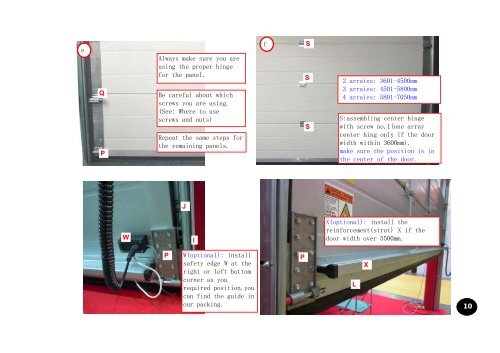
Always make sure you are<br />
using the proper hinge<br />
for the panel.<br />
Be careful about which<br />
screws you are using.<br />
(See: Where to use<br />
screws <strong>and</strong> nuts)<br />
Repeat the same steps for<br />
the remaining panels.<br />
P<br />
J<br />
I<br />
W(optional): install<br />
safety edge W at the<br />
right or left bottom<br />
corner as you<br />
required position.you<br />
can find the guide in<br />
our packing.<br />
f<br />
P<br />
S<br />
S<br />
S<br />
2 arraies: 3601-4500mm<br />
3 arraies: 4501-5800mm<br />
4 arraies: 5801-7050mm<br />
S:assembling center hinge<br />
with screw no.1(one array<br />
center hing only if the door<br />
width within 3600mm).<br />
make sure the position is in<br />
the center of the door.<br />
X(optional): install the<br />
reinforcement(strut) X if the<br />
door width over 5500mm.<br />
L<br />
X<br />
10