JENSEN User s Manual - FatWallet
JENSEN User s Manual - FatWallet
JENSEN User s Manual - FatWallet

You also want an ePaper? Increase the reach of your titles
YUMPU automatically turns print PDFs into web optimized ePapers that Google loves.
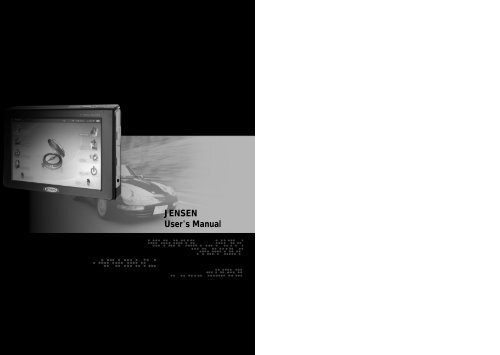
<strong>JENSEN</strong><br />
<strong>User</strong> s <strong>Manual</strong>
2<br />
Patent<br />
Thank you for buying our product<br />
The contents of this manual belong to Audiovox Electronics<br />
This manual covers set up and operation for the Uren Mobile AutoPC<br />
tablet.<br />
This manual s contents have been written with the utmost care so<br />
you the customer can easily learn how to use the Mobile Auto PC.<br />
However, upgrades can be done without prior notification. Please<br />
check our website if you have any problems.<br />
This manual and all contents cannot in any way, shape, or form, be<br />
electronically, or mechanically copied by copyright laws.<br />
Innowell is not responsible for nor be held legally liable for any data<br />
loss.<br />
We recommend that all important data be regularly backed up on<br />
another device for your own protection.<br />
All trademarks are used for information only. They are also protected<br />
under patents laws of their respective companies.<br />
VIA EDEN is a VIA Corporation trademark.<br />
All Microsoft products listed in this manual is protected by Microsoft<br />
Corporation trademarks.<br />
Apple Quicktime, iTunes, and AAC are trademarks of Apple<br />
Computer.<br />
SIRF Star III is a trademark of SIRF Corporation.<br />
All other trademarks are protected under their respective corporation.<br />
1 Beware<br />
1.1 Care during installation<br />
Installation should be done on a flat surface. Don’t install while holding<br />
it in your hands. Furthermore, installation in a car should be done while<br />
the AutoPC is in its cradle.<br />
Audiovox cannot be held liable for any damage incurred by dropping<br />
the device.<br />
We recommend you use only the authorized Audiovox adapter as your<br />
power supply.<br />
Please use power supply with overcharge resistant power bar.<br />
Before using any power supply for the first time, make sure it is the<br />
appropriate power supply or contact your local representative for<br />
confirmation or check our website for further details.<br />
Please operate the AutoPC safely including but not limited to<br />
protecting the power supply from water or any material on the AutoPC.<br />
Please confirm with your dealer before using it the first time before<br />
connecting the AutoPC to your car on whether it is compatible.<br />
Some vehicles like trucks sometimes use a higher voltage. Audiovox<br />
is not responsible for any damage incurred in this regard.<br />
Check your state and local traffic laws before mounting.<br />
Currently, state laws in Califonia and Minnesota prohibit drivers form<br />
using suction mounts on their windshields while operating motor<br />
vehicles.<br />
1.2 Care during installation<br />
Keep away from humidity.<br />
Don’t cover the ventilation system of the AutoPC.<br />
Beware<br />
Please follow all instructions regarding the safe use and operation of<br />
the AutoPC.<br />
3
Please keep all liquids away from the AutoPC to prevent shock or<br />
damage.<br />
Do not try to repair the AutoPC under any circumstances. Call the<br />
nearest authorized dealer for service. Warrantee is void if the<br />
customer tries to service the AutoPC by himself.<br />
1.2.1 Customer Service<br />
If the AutoPC in any way does not operate according to specification,<br />
send it back to us service.<br />
If you drop it or damage the AutoPC send it to us for service.<br />
If the screen isn’t acting within established parameters, sent it to us for<br />
an expert evaluation of the problem.<br />
1.3 Always keep it in a safe place<br />
Do not store it near a heat source.<br />
If you aren’t using the AutoPC, please disconnect the power supply to<br />
prevent overcharge.<br />
1.4 Proper Maintenance<br />
4<br />
Before cleaning, please disconnect all power sources from the<br />
AutoPC.<br />
During cleaning, please use LCD cleaning products only or use a<br />
warm DAMP cloth.<br />
NEVER use alcohol, solvent, or any other chemical agent on the<br />
AutoPC while cleaning.<br />
Do not spray directly onto the screen.<br />
Do not use any paper whatsoever since it can damage the screen.<br />
1.5 Storage Instructions<br />
The hard disk drive (HDD) is a fragile piece of equipment. Be careful<br />
when handling and keep away from all magnetic devices or sources.<br />
Please back up data regularly.<br />
Don’t shake the AutoPC since data can be lost due to the fragility of<br />
the HDD.<br />
Do fragmentation of the HDD regularly to optimize performance.<br />
Be careful when handling the MiniSD card especially watching out for<br />
static electricity.<br />
Manufacturer and or dealers are not responsible for any data loss<br />
under any circumstances.<br />
1.6 Careful Use While Traveling<br />
Always back up files before traveling.<br />
Always check power supply before use for suitability with the AutoPC.<br />
Please use carry case for maximum protection against loss of data.<br />
Beware<br />
5
6<br />
2<br />
Complete System List<br />
Main System<br />
Vehicle Cigar<br />
Adapter<br />
Vehicle Attachment<br />
Remote Control<br />
Pouch AC Adapter<br />
<strong>User</strong> <strong>Manual</strong><br />
Output Cable from<br />
System to TV.<br />
Cradle<br />
Navigation <strong>Manual</strong><br />
1. Beware 3<br />
1.1 Installation Instructions 3<br />
1.2 Operating Procedures 3<br />
1.3 Safe Storage 4<br />
1.4 Proper Maintenance 4<br />
1.5 Storage Instructions 4<br />
1.6 Careful Use while Traveling 5<br />
2. Complete System List 6<br />
3. System Introduction 8<br />
3.1 Special Features 8<br />
3.2 Specifications 9<br />
3.3 Name and function of each Part 10<br />
4. How to Use Auto PC 17<br />
4.1 System start up 17<br />
4.2 <strong>JENSEN</strong> Space 18<br />
4.3 How to Use Navigation System 22<br />
4.4 How to Use the Explorer 23<br />
4.5 How to Use Video Player 23<br />
4.6 Video Player Main Screen 26<br />
4.7 How to Use Audio Player 28<br />
4.8 System Set Up 30<br />
4.9 How to Use Windows XP 34<br />
4.10 Touch Screen Set Up 35<br />
4.11 Games 39<br />
4.12 <strong>User</strong> Setting 39<br />
4.13 Power Supply 39<br />
Index<br />
5. How to Use the Remote Control 40<br />
6. System Set Up 43<br />
6.1 Bios Set Up General Information 43<br />
6.2 Bios Set Up 43<br />
6.3 Main Setup 44<br />
6.4 Custom Setup 44<br />
6.5 Boot Setup 45<br />
6.6 Security Setup 45<br />
6.7 Chipset Setup 46<br />
6.8 47<br />
7. Warrantees 48<br />
8. Client Registration Card 49<br />
7
3.1 Special Features<br />
8<br />
3<br />
System Introduction<br />
Mobile Auto PC : The Auto PC is a complete navigation and tablet PC<br />
with many interesting features.<br />
It has a 7” wide TFT LCD touch screen :<br />
It supports from 800 X 480 pixel resolution up to 1024 X 768 pixel<br />
resolution.<br />
Industry leading multi-media capabilities : Auto PC can play all leading<br />
multi-media file formats including MPEG4, WMA/DivX, MP3/WMA/AAC.<br />
GPS navigation : Uren includes the SIRF CPS with internal antenna with a<br />
1GB memory for premium.<br />
Convenient audio system connection : Auto PC has FMT<br />
Network capability : Auto PC supports 10/100 Mbps Lan IEEE803.11b/g.<br />
Design : Auto PC has a slim and elegant design.<br />
Multi-tasking : You can listen to music or watch a movie or video while<br />
using the GPS system.<br />
3.2 Specifications<br />
standard section<br />
Graphic part<br />
General<br />
Navigation<br />
Functions<br />
DMB Function<br />
Function<br />
Supported<br />
Input/Output<br />
Power Supply<br />
1.8” 30 GB(HDD)<br />
Mini SD card slot<br />
Internal type SIRF-3<br />
System Introduction<br />
Item V1<br />
Display<br />
7”WVGA TFT LCD touch screen type<br />
Resolution<br />
800*480(Max 1024*768) pixel<br />
3D Graphic Support<br />
O<br />
Size<br />
192(W)*120.5(H)*25(Depth)mm<br />
Weight<br />
695g<br />
CPU<br />
V1A 1Gigah<br />
Memory<br />
256MB DDR2 533<br />
Storage<br />
GPS Antenna<br />
Navigation Type<br />
DMB<br />
Normal DMB Data Broadcasting<br />
Land-based Wire Lan<br />
Wireless Lan<br />
Multi-tasking<br />
System Recovery<br />
Speakers<br />
Microphone<br />
FM Transmitter<br />
Remote Control<br />
TV Output<br />
Interface<br />
Extension Port<br />
Battery<br />
Battery Life<br />
Power Range<br />
Microsoft Streets & Trips 2007<br />
Normal DMB included<br />
O<br />
10/100Mpbs Ethernet(extension port included/option)<br />
External USB type option<br />
O<br />
O<br />
Mono<br />
Internal<br />
O<br />
O<br />
O<br />
USB 2.0, mini SD slot, headphone jack,<br />
TV-output port<br />
USB 2.0 monitor Port 10/100 Mbps Ethernet port<br />
Internal Lithium-ion battery 1800mA<br />
1.5 Hours<br />
Input: 100~240 volts, 50~60 Hz/Output 12V, 4A<br />
9
3.3 Names and Functions of Each Part<br />
10<br />
Names and Functions of Each Part<br />
Headphone port<br />
TV port<br />
USB 2.0 port<br />
External I/O port<br />
Mini SD card slot*<br />
Some model do not have these ports.<br />
Front Face<br />
System Introduction<br />
LCD Color Display : Touch screen technology makes the Auto PC a joy<br />
to use.<br />
-Resolution default is 800*480 while maximum is 1024*768 pixels.<br />
Remote Control Receiver<br />
Internal Microphone : Voice recording is possible for remembering ideas,<br />
singing songs, taking a memo etc.<br />
Top of the Auto PC<br />
Button/HDD indicator : This button can call up the Auto PC menu at any<br />
time. The orange flashing indicates that the HDD work is in progress.<br />
11
12<br />
Star Button : Press the button to turn on the Auto PC.<br />
Green Button : System is in use Red : Battery is charging<br />
Stylus Pen Hole : Touch screen pen is inserted here for easy access at<br />
any time.<br />
Ventilation Duct : To keep the Auto PC cool, ventilation is on top. There is<br />
another in the back of the Auto PC.<br />
Back face<br />
This image is for the V1 model<br />
GPS Antenna Port : As an option, an external GPS port is given to<br />
provide better reception.<br />
Stylus Pen Hole<br />
Air Intake Hole for Ventilation<br />
Internal Speaker : Mono Speaker has a 1.5W output<br />
Left side<br />
System Introduction<br />
Expanded I/O Pack Port : Extra port is provided to allow users access to<br />
Internet, to connect to CRT monitor and to provide two extra USB 2.0<br />
ports<br />
Mini SD card slot : With mini SD slot, you can transfer information to<br />
many different devices including PDAs, Digital Cameras, Mobile phones<br />
Mini SD Card Information<br />
Mini SD card must be formatted<br />
The Auto PC can accept any electronic device mini SD format. However,<br />
the Auto PC mini SD format capability is not necessarily acceptable in all<br />
electronic devices<br />
Some models cannot support this feature<br />
13
14<br />
Right side<br />
Auto PC Electrical Socket : The Auto PC can use power from two<br />
sources which has been provided for your convenience: A regular AC<br />
adapter and a car cigar jack adapter. Innowell recommends use of original<br />
adapters and only replacements provided by Audiovox. Audiovox voids<br />
guarantee if another source is used.<br />
USB Ports : Two USB 2.0 ports have been provided for maximum<br />
flexibility. All electronic devices (digital cameras, printers, scanners etc)<br />
can be used.<br />
Audio/TV port : Audio port can connect to either headphones or<br />
speakers. The TV port on the Auto PC can connect to the TV input port<br />
so you can watch downloaded movies from the Auto PC or a TV.<br />
Bottom<br />
Battery on/off Switch : To save the internal battery’s long life, please<br />
switch the battery to off when not in use for a long time.<br />
Expanded I/O Port<br />
System Introduction<br />
15
16<br />
Lan Port : The Auto PC can connect to either a network or the Internet.<br />
Lan card speed is 10/100 Mpbs.<br />
External Monitor Expanded Port : You can connect to an external<br />
monitor for better resolution. You can use LCD and external monitor at<br />
the same time. You can also connect to monitor, projector, or TV to do<br />
muti-media, make presentations or watch a movie respectively.<br />
Additional USB Port : Two extra USB 2.0 ports are supplied for ease of<br />
use.<br />
Accessories<br />
AC Adapter : You can use this AC adapter worldwide due to its voltage<br />
parameter. Extra adapter plugs for other electrical formats are not<br />
included.<br />
Car Cigar Jack : Innowell has provided a car jack adapter for more<br />
convenience.<br />
How to mount unit with suction cup<br />
Before mounting unit on a windshield, clean the adhesive face pad with dry cloth<br />
Position mounting kit on a windshield<br />
Push vacuum lever to adhere to windshield<br />
Control angle of Arm and fix tightly by adjustable joint<br />
Control bracket angle and fix tightly by adjustable joint<br />
Connect cradle into bracket and confirm the display angle to your view<br />
4<br />
How to use the Auto PC<br />
4.1 System Start Up<br />
Connect Power Supply<br />
System Introduction<br />
Connect AC adapter or car cigar jack adapter to Auto PC.<br />
The AC adapter or car cigar jack adapter can be plugged into the lower<br />
right side power socket.<br />
- Please use the authorized Power Supply when using the Auto PC.<br />
- Please confirm that international sockets have the proper ampere.<br />
17
18<br />
Stylus Pen<br />
Stylus Pen replaces the mouse function. Holding the pen down on the<br />
touch screen for three seconds is equivalent to the right click of a mouse.<br />
Please return the stylus pen in its slot to prevent loss.<br />
4.2 <strong>JENSEN</strong> Space<br />
After booting, <strong>JENSEN</strong> Space is shown.<br />
<strong>JENSEN</strong> taskbar Items<br />
How to use the Auto PC<br />
<strong>JENSEN</strong> Logo : By clicking on the <strong>JENSEN</strong> logo in the top left<br />
hand corner of the screen, all programs will stop running.<br />
FM Icon : The FM icon is off when it is gray.<br />
Volume Icon : It indicates the level of volume that is being used.<br />
Date/Time Icon : Shows date and time.<br />
Battery Icon : Shows the amount of power in battery.<br />
19
20<br />
Navigation<br />
<strong>User</strong>-friendly GPS system for easy driving.<br />
Explorer<br />
Press the icon to start internet explorer<br />
Video Player<br />
You can play movie files.<br />
MP3 Player<br />
This MP3 Player can play MP3 and WMA audio files.<br />
Windows<br />
How to use the Auto PC<br />
You can go to Windows Original screen to execute Windows application<br />
programs.<br />
Game<br />
You can enjoy many different games.<br />
21
22<br />
Setting<br />
You can find out about FM Transmitter, date/time. LCD brightness,<br />
volume, user setting preference and version information.<br />
Power Off<br />
You can shut down the system by pressing this button.<br />
Traffic Information<br />
This button connects you to the Internet. It allows you to find out about the<br />
traffic condition in your community.<br />
<strong>User</strong><br />
<strong>User</strong>s can program the remote control for favorite applications.<br />
4.3 How to Use the Navigation System<br />
How to use the Auto PC<br />
A separate book has been supplied that explains how the navigation system<br />
works.<br />
23
4.4 How to use the explorer<br />
24<br />
Press the icon to start internet explorer<br />
Execution<br />
You can double-click the internet icon or click the left side internet icon then<br />
click the center icon to start internet explorer<br />
4.5 How to use Video Player<br />
How to operate<br />
Double-click the video player icon or click the left side icon then click the<br />
center icon to start the video player.<br />
Play file<br />
How to use the Auto PC<br />
Click on the menu to choose the file you want from the pop-up.<br />
- You can start the movie from the moment you last stopped it.<br />
- To watch movie from beginning: You can reset the movie to the<br />
beginning.<br />
- To watch new movie file: Click on the appropriate file.<br />
- Stop movie: Click or stop.<br />
If you want to view a movie, a second window will appear to allow you<br />
a chance to decide which movie you want to see.<br />
You can select the appropriate movie from the complete list of movies<br />
from the video file manager. The video file manager only shows<br />
executable files.<br />
25
26<br />
File Manager Menu Description<br />
You can search from Windows Original screen.<br />
You can go into my computer or driver from the Search Window.<br />
You can go into my documents and sub-files.<br />
You can add selected files to the play list.<br />
You can erase selected items.<br />
You can edict all items of the play list in the Search Window.<br />
You can erase all items in the play list.<br />
You can play only checked items.<br />
You can play all items in the play list.<br />
You can save all items in your play list.<br />
4<br />
5<br />
6<br />
7<br />
8<br />
9<br />
10<br />
11<br />
1 2 3 1213 1415 16<br />
You can skip any item on your play list so it isn’ t saved.<br />
You can control the order of the items in your play list upwardly.<br />
You can only move an item in the play list one step up at a time.<br />
You can only move an item in the play list one step down at a time.<br />
You can control the order of the items in your play list<br />
downwardly.<br />
You can completely check(or uncheck) all the items in your play list.<br />
4.6 Video Player Main System<br />
Start/Play/Pause<br />
Stop<br />
Ten second<br />
Ten second<br />
Volume control<br />
You can set up a repeating sequence.<br />
Go to video file manager<br />
Open set up Window<br />
Minimize button<br />
Changeable View Screen size button<br />
Maximize button<br />
Quit<br />
How to use the Auto PC<br />
27
28<br />
Video Player Setting Screen<br />
Basic Setting<br />
1. Screen Size : Set the screen size to big/full size.<br />
2. Shut down after play : Set if the system will automatically shut down<br />
after playing.<br />
3. Brightness Setting : Set the XVID codec video.<br />
4. Play : Set the play style to file, list, repeat.<br />
5. Quick Play : Set whether to load the help screen when selecting quick<br />
play.<br />
Caption Settings<br />
1. Color : Set the caption’s color.<br />
2. Size : Set the words’ size.<br />
3. Position : Set the caption’s position.<br />
4. Sync : Change if video does not match Audio.<br />
5. Language : Set the caption’s language.<br />
!<br />
You can not process DMB, Video, MP3 Player simultaneously.<br />
4.7 Using Audio Player<br />
How to use the Auto PC<br />
Double-click the icon as shown above and click the image in the center to<br />
process.<br />
29
30<br />
Audio Player Main Screen<br />
Title bar<br />
Play<br />
Stop<br />
To front<br />
To next song<br />
Volume Control<br />
Set repeat<br />
Set play mode<br />
Set Shuffle mode<br />
Enter Audio File Manager<br />
Move the selected file to front of list<br />
Move the selected file up one step<br />
Move the selected file down one step<br />
Move the selected file to last of list<br />
Save play list<br />
Delete songs (Saved files cannot be deleted)<br />
1<br />
7 8 9<br />
10<br />
17 18 19<br />
2 3 4 5 6 11 1 2 13 14 15 16<br />
Minimize button (Hide Player)<br />
Player size (Change Player size)<br />
Quit button<br />
Audio File Manager<br />
<strong>User</strong> methods are equal to that of the video manager<br />
4.8 Configuration<br />
How to use the Auto PC<br />
Double-click the icon as shown above and click the image in the center<br />
to process.<br />
31
32<br />
1. From the Jensen Space, please choose the “Setting”<br />
2. From the “Setting” menu, choose “FM Transmitter” tap as shown below.<br />
Note: Please notice that no sound plays while in FMT mode from the unit.<br />
3. Choose the designated frequency by arrow up & down buttons or<br />
clicking the numbers.<br />
How to use the Auto PC<br />
4. After choosing the frequency, please click “Config” button to activate the FMT.<br />
When the FMT mode is enabled, the button color is in light orange<br />
color. To disable the FMT click the “Config” button again.<br />
1. Choose the designated frequency first by using the arrows keys or<br />
numeric buttons<br />
2. Then, please click the “Preset” button<br />
3. Lastly, please choose the one of empty preset spaces where the<br />
selected frequency will be stored.<br />
4. After preset all five different frequency, please click “Apply” button<br />
to save the configuration.<br />
33
34<br />
Set Date/Time<br />
Select each item and use the up/down arrows to set the time and date.<br />
Set LCD Brightness/Volume<br />
Set LCD brightness and Standby time to save battery. You can also set<br />
volume<br />
<strong>User</strong> Setting<br />
How to use the Auto PC<br />
Select programs to assign to user1/2 buttons.<br />
Set process - One click : Process <strong>JENSEN</strong> Space programs with one click.<br />
Double click : Process <strong>JENSEN</strong> Space programs with two clicks.<br />
Topmenu setting<br />
<strong>User</strong>s enables to choose their favorable application for Navigation Map<br />
software, Internet Browser, Video player, Audio player, and Game. For<br />
changing the application, simply search the favorable application designated<br />
folder by windows browser, and choose execution file. After making a<br />
modification, please save it by clicking “Apply” button.<br />
35
36<br />
S/W Version<br />
You can check S/W version.<br />
You can update Firmware through the Internet.<br />
4.9 Using Windows XP<br />
If you click on the icon as shown above, the desktop screen appears.<br />
You can use typical windows programs on the desktop and set the Auto<br />
PC touch screen sensitivity.<br />
4.10 Setting Touch screen<br />
How to use the Auto PC<br />
The Auto PC does not offer an anti-virus program. Please install an antivirus<br />
program before connecting to the Internet. Refer to the individual<br />
user manuals of the anti-virus programs for installation. You may need<br />
external ODDs. To return to <strong>JENSEN</strong> Space, double click the <strong>JENSEN</strong><br />
icon.<br />
You can configure the touch screen settings by double slicking the<br />
Touchware icon as shown above.<br />
37
38<br />
Calibrate<br />
Decide how many dots (5. 9. 25) you will use to control and press the<br />
Calibrate button to open the configuration window.<br />
Press the center of the target for 2 seconds to adjust. You will need to<br />
press the same number of dots you selected.<br />
If, in the first boot the touch point does not work correctly, exit to the window<br />
mode and configure calibrate in the Touchware program.<br />
Setting<br />
How to use the Auto PC<br />
Touch Action : Decide the function’s method.<br />
Normal Touch<br />
Kiosk Emulation<br />
Click on Release<br />
Double Click : Control the double click speed. You can test the setting<br />
after configuring it with the slide bar.<br />
Sound Tone : Control the touch screen sound. You can configure the<br />
tone with the slide bar and the system will be set to mute when you<br />
uncheck the beep on the box.<br />
39
40<br />
Option/Tool<br />
Paint Tool : Open the Windows WP’s Drawing board.<br />
Drawing Tool :<br />
Right Button/Hide : Process program that helps the action of the<br />
mouse’s right button.<br />
Pressing the touch screen will<br />
bring the same effect of click the<br />
left button of the mouse.<br />
Pressing the touch screen will<br />
bring the same effect of click the<br />
right button of the mouse.<br />
Auto Scaling Function<br />
4.11 Game<br />
You can play Windows Spider game.<br />
How to use the Auto PC<br />
You can change the screen resolution by pressing the Auto button on the<br />
remote control.<br />
Resolution changes for every press.<br />
Because <strong>JENSEN</strong> Space and Navigation function in the full screen mode, Auto<br />
scaling function does not work.<br />
If you enter <strong>JENSEN</strong> Space during a changed resolution, the resolution will<br />
automatically change to 800*480, and will return to user resolution when <strong>JENSEN</strong><br />
Space is closed.<br />
41
4.12 <strong>User</strong> Set Program<br />
42<br />
You can open programs you linked in <strong>User</strong> settings by clicking on the<br />
<strong>User</strong>1,2 buttons<br />
4.13 Power<br />
If you press the power button of the main screen, a pop-up asking if you<br />
would shut down the system will appear. If you select “yes,” the system<br />
will shut down.<br />
5<br />
Using the Remote Control<br />
Power button: Boot, shut down system.<br />
Mute button: Mute the system.<br />
Menu button: Change to main screen.<br />
2D/3D button: Change map to 2D/3D.<br />
Esc button: Move to previous step.<br />
Navigation button: Process Navigation.<br />
Internet Explorer button : Surfing the web<br />
How to use the Auto PC<br />
Volume/up, down button: Control volume, Move the<br />
cursor up/down.<br />
Not used.<br />
Magnify, Minimize button: Magnify/Minimize screen<br />
when in Navigation mode.<br />
Select/Safe Register button: Select button when<br />
processing programs.<br />
Video Player button: Watch videos on Video Player.<br />
Audio Player button: Listen to music on Audio Player.<br />
FM Transmitter button: Listen to the radio with FM Transmitter.<br />
Windows button: Load Windows XP.<br />
Play/Pause button: Play or pause when using<br />
Audio/Video Player.<br />
43
44<br />
Stop button: Stop when using Audio/Video Player.<br />
Not used.<br />
Previous/Next button: Move to previous or next song<br />
when listening to songs. When viewing video, use it to<br />
move back or forward 10 seconds.<br />
Repeat button: Use to repeat select phrases.<br />
Change screen button: Change screens when using<br />
multiple programs.<br />
Minimize button: Minimize the current program.<br />
Quit button: Quit the current program.<br />
Auto button: Change resolution (800*480, 800*600,<br />
1024*600, 1024*768).<br />
<strong>User</strong> 1,2: Process programs you selected in the Settings<br />
6<br />
System Setup<br />
6.1 Bios Setup<br />
!<br />
How to use the Auto PC<br />
This is a utility in which you can configure hardware to fit your uses.<br />
Bios setup is used to configure booting rank when a new hardware. Be<br />
careful: Improper configuration may result in critical problems. Set up<br />
contents may change to the improvement of the product’s functions.<br />
6.2 Entering BIOS Setup<br />
Connect the USB keyboard to the USB port on the right of the system. Then<br />
press the power button for 2 seconds. Seeing the screen shown above, press<br />
“Del” on the keyboard and enter . Bios setup<br />
45
6.3 Setting Time and Date<br />
46<br />
System Time: You can set the time. But if you change the time<br />
through Windows the time will change according to that.<br />
System Date: You can set the date. But if you change the date<br />
through Windows the time will change accordingly.<br />
6.4 Set Advanced<br />
Specifically configures various settings. Be careful: Critical problems may<br />
result from improper settings.<br />
6.5 Set Boot<br />
Using the Remote Control<br />
Configure the system’s booting rank. Configure the rank between HDD,<br />
external ODD, USB Flask CD, and external FDD<br />
6.6 Set Security<br />
47
6.7 Set Chipset<br />
48<br />
Change the settings of the system’s Chipset. Be careful: Improper<br />
settings may cause critical problems<br />
6.8 Save settings<br />
Using the Remote Control<br />
You may save load settings<br />
Save Changes and Exit<br />
Discard Changes and Exit<br />
Discard Changes<br />
Load Optimal Defaults: Set Bios settings to system optimal mode.<br />
Load Failsafe Defaults Set Bios settings to system failsafe mode.<br />
49