M50 Owner's Manual - Korg
M50 Owner's Manual - Korg
M50 Owner's Manual - Korg
Create successful ePaper yourself
Turn your PDF publications into a flip-book with our unique Google optimized e-Paper software.
32<br />
Playing and editing Programs<br />
Using Tone Adjust<br />
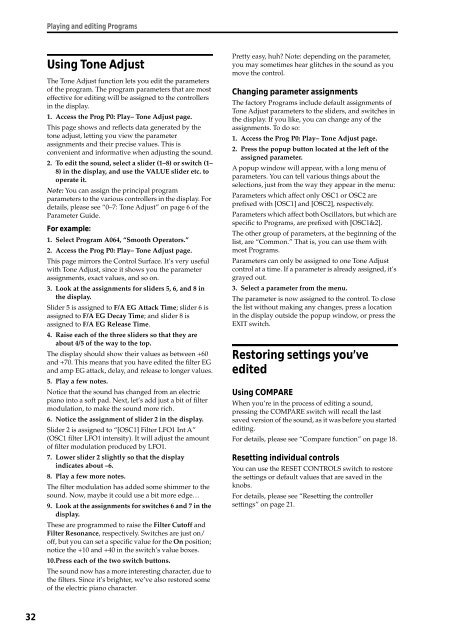
The Tone Adjust function lets you edit the parameters<br />
of the program. The program parameters that are most<br />
effective for editing will be assigned to the controllers<br />
in the display.<br />
1. Access the Prog P0: Play– Tone Adjust page.<br />
This page shows and reflects data generated by the<br />
tone adjust, letting you view the parameter<br />
assignments and their precise values. This is<br />
convenient and informative when adjusting the sound.<br />
2. To edit the sound, select a slider (1–8) or switch (1–<br />
8) in the display, and use the VALUE slider etc. to<br />
operate it.<br />
Note: You can assign the principal program<br />
parameters to the various controllers in the display. For<br />
details, please see “0–7: Tone Adjust” on page 6 of the<br />
Parameter Guide.<br />
For example:<br />
1. Select Program A064, “Smooth Operators.”<br />
2. Access the Prog P0: Play– Tone Adjust page.<br />
This page mirrors the Control Surface. It’s very useful<br />
with Tone Adjust, since it shows you the parameter<br />
assignments, exact values, and so on.<br />
3. Look at the assignments for sliders 5, 6, and 8 in<br />
the display.<br />
Slider 5 is assigned to F/A EG Attack Time; slider 6 is<br />
assigned to F/A EG Decay Time; and slider 8 is<br />
assigned to F/A EG Release Time.<br />
4. Raise each of the three sliders so that they are<br />
about 4/5 of the way to the top.<br />
The display should show their values as between +60<br />
and +70. This means that you have edited the filter EG<br />
and amp EG attack, delay, and release to longer values.<br />
5. Play a few notes.<br />
Notice that the sound has changed from an electric<br />
piano into a soft pad. Next, let’s add just a bit of filter<br />
modulation, to make the sound more rich.<br />
6. Notice the assignment of slider 2 in the display.<br />
Slider 2 is assigned to “[OSC1] Filter LFO1 Int A”<br />
(OSC1 filter LFO1 intensity). It will adjust the amount<br />
of filter modulation produced by LFO1.<br />
7. Lower slider 2 slightly so that the display<br />
indicates about –6.<br />
8. Play a few more notes.<br />
The filter modulation has added some shimmer to the<br />
sound. Now, maybe it could use a bit more edge…<br />
9. Look at the assignments for switches 6 and 7 in the<br />
display.<br />
These are programmed to raise the Filter Cutoff and<br />
Filter Resonance, respectively. Switches are just on/<br />
off, but you can set a specific value for the On position;<br />
notice the +10 and +40 in the switch’s value boxes.<br />
10.Press each of the two switch buttons.<br />
The sound now has a more interesting character, due to<br />
the filters. Since it’s brighter, we’ve also restored some<br />
of the electric piano character.<br />
Pretty easy, huh? Note: depending on the parameter,<br />
you may sometimes hear glitches in the sound as you<br />
move the control.<br />
Changing parameter assignments<br />
The factory Programs include default assignments of<br />
Tone Adjust parameters to the sliders, and switches in<br />
the display. If you like, you can change any of the<br />
assignments. To do so:<br />
1. Access the Prog P0: Play– Tone Adjust page.<br />
2. Press the popup button located at the left of the<br />
assigned parameter.<br />
A popup window will appear, with a long menu of<br />
parameters. You can tell various things about the<br />
selections, just from the way they appear in the menu:<br />
Parameters which affect only OSC1 or OSC2 are<br />
prefixed with [OSC1] and [OSC2], respectively.<br />
Parameters which affect both Oscillators, but which are<br />
specific to Programs, are prefixed with [OSC1&2].<br />
The other group of parameters, at the beginning of the<br />
list, are “Common.” That is, you can use them with<br />
most Programs.<br />
Parameters can only be assigned to one Tone Adjust<br />
control at a time. If a parameter is already assigned, it’s<br />
grayed out.<br />
3. Select a parameter from the menu.<br />
The parameter is now assigned to the control. To close<br />
the list without making any changes, press a location<br />
in the display outside the popup window, or press the<br />
EXIT switch.<br />
Restoring settings you’ve<br />
edited<br />
Using COMPARE<br />
When you’re in the process of editing a sound,<br />
pressing the COMPARE switch will recall the last<br />
saved version of the sound, as it was before you started<br />
editing.<br />
For details, please see “Compare function” on page 18.<br />
Resetting individual controls<br />
You can use the RESET CONTROLS switch to restore<br />
the settings or default values that are saved in the<br />
knobs.<br />
For details, please see “Resetting the controller<br />
settings” on page 21.


