IR Interactive Whiteboard Manual - Qomo
IR Interactive Whiteboard Manual - Qomo
IR Interactive Whiteboard Manual - Qomo

Create successful ePaper yourself
Turn your PDF publications into a flip-book with our unique Google optimized e-Paper software.
QOMO Hite Vision <strong>Interactive</strong> <strong>Whiteboard</strong> User <strong>Manual</strong><br />
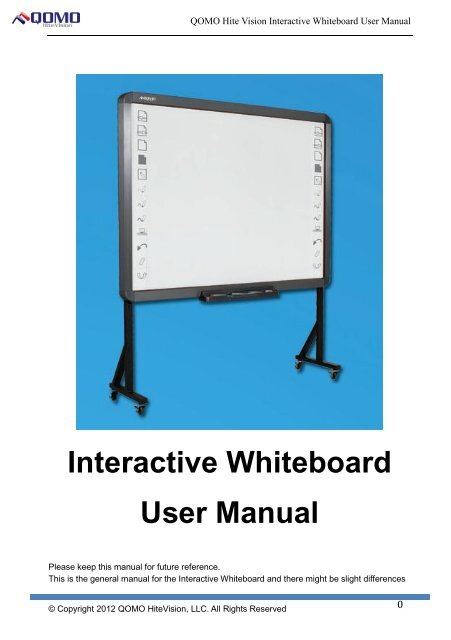
<strong>Interactive</strong> <strong>Whiteboard</strong><br />
User <strong>Manual</strong><br />
Please keep this manual for future reference.<br />
This is the general manual for the <strong>Interactive</strong> <strong>Whiteboard</strong> and there might be slight differences<br />
© Copyright 2012 QOMO HiteVision, LLC. All Rights Reserved 0
QOMO Hite Vision <strong>Interactive</strong> <strong>Whiteboard</strong> User <strong>Manual</strong><br />
between the actual product and these descriptions.<br />
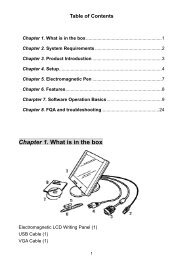
Table of Contents<br />
ATTENTION<br />
SYSTEM REQU<strong>IR</strong>EMENTS ............................................................................. 3<br />
HOW TO INSTALL HARDWARE ....................................................................................... 6<br />
HOW TO INSTALL SOFTWARE ...................................................................................... 13<br />
SPECIFICATIONS ........................................................................................... 25<br />
© Copyright 2012 QOMO HiteVision, LLC. All Rights Reserved 1
QOMO Hite Vision <strong>Interactive</strong> <strong>Whiteboard</strong> User <strong>Manual</strong><br />
Attention<br />
• Do not expose this whiteboard to rain or moisture to reduce the risk<br />
of fire or electric shock.<br />
• Do not expose this whiteboard to fire, electric shock, or sunlight for<br />
long periods of time.<br />
• This device is heavy with a Net Weight over 15 kg (33 lbs). Use<br />
expansion bolts to securely mount the device to the wall.<br />
• When the projector and interactive whiteboard are used together, do<br />
not stare directly at the light from the projector.<br />
• This user manual is only applicable to <strong>IR</strong> interactive whiteboard<br />
products.<br />
• Only the matched pens from our company or human fingers can write<br />
or operate on the interactive whiteboard.<br />
• This product uses the <strong>IR</strong> annotation technology. Make sure the<br />
product will not contact with any other hard objects to avoid<br />
deformation of the board’s surface.<br />
• If the interactive whiteboard is connected with a wire, make sure the<br />
connection between this device and the computer is secure. It is<br />
recommended that the wires are hidden to avoid pulling and<br />
dragging the cables.<br />
• If the interactive whiteboard is connected with a wire, use the cables<br />
in the accessory box. Other cables might not be compatible with<br />
this product.<br />
• If the interactive whiteboard is connected by radio frequency, the<br />
distance between the receiver and interactive whiteboard must not<br />
exceed 15m (49 ft.). Avoid any obstacles which may shield the<br />
electromagnetic waves.<br />
• Do not touch, cut, or scratch the panel and frame with sharp or hard<br />
objects. Do not drill holes or nail in any place of the product since it<br />
will damage the device.<br />
© Copyright 2012 QOMO HiteVision, LLC. All Rights Reserved 2
QOMO Hite Vision <strong>Interactive</strong> <strong>Whiteboard</strong> User <strong>Manual</strong><br />
• Please refer to the user manual for instructions on how to use the<br />
interactive software.<br />
System Requirements<br />
Lowest Environmental Requirements:<br />
• CPU: 1.0 GHz×86<br />
• Memory: 256 MB<br />
• Display Card: Support 256 or higher<br />
• Hard Disk: 1 GB<br />
• Screen Display Resolution:800×600, 1024×768, 1280×1024<br />
• USB 1.1 Port<br />
Recommended:<br />
• CPU: 2.0 GHz×86<br />
• Memory: 512 MB or higher<br />
• Display Card: Support 256 or higher<br />
• Hard Disk: 2 GB<br />
• Screen Display Resolution:1024×768, 1280×1024<br />
• USB 2.0 Port<br />
Software Running Environment:Microsoft Windows XP/2003/Vista/7 32-bit<br />
or 64-bit<br />
© Copyright 2012 QOMO HiteVision, LLC. All Rights Reserved 3
QOMO Hite Vision <strong>Interactive</strong> <strong>Whiteboard</strong> User <strong>Manual</strong><br />
Introduction<br />
This interactive whiteboard uses <strong>IR</strong> scan and sensor technology. Working<br />
seamlessly with a projector and computer, the <strong>Interactive</strong> whiteboard can<br />
become a large touch display. Any projected image on the whiteboard can<br />
be operated by pens or fingers directly, thus providing an interactive<br />
presentation platform for the presenter.<br />
Main Performances:<br />
• Writing:User can write and draw with pens or fingers directly on the<br />
display panel and show your writing information instantly during a<br />
presentation.<br />
• Annotation:The user can operate and annotate over any format files<br />
including .ppt, .doc, .xls, .avi, .mpeg, .jpeg, etc.<br />
• Touching:In working mode, the interactive whiteboard can also be a<br />
high precision touching interactive whiteboard. User can use their<br />
fingers or a wand as a mouse to click and drag directly on the display<br />
panel.<br />
• Touch Recognition:The interactive whiteboard can recognize touch of a<br />
single-finger, multiple fingers, double click, left click and right click.<br />
• Hot Keys:Hot keys on one side or both sides of the board are used to do<br />
functions within the annotation software.<br />
• Smart Pen tray:The user can change pen writing stroke colors when<br />
using the smart pen tray.<br />
© Copyright 2012 QOMO HiteVision, LLC. All Rights Reserved 4
QOMO Hite Vision <strong>Interactive</strong> <strong>Whiteboard</strong> User <strong>Manual</strong><br />
• Driver Free Mode:This product design is in accordance with HID<br />
category standard and supports driver free mode.<br />
• Display Panel:The board has a high gain and high contrast display.<br />
• Energy Conservation:Power consumption is less than 0.5W. There<br />
isn’t a need for any independent power supply.<br />
Note: On the upper left and bottom right corner on the board, there are projection area lines (such as<br />
" "). When images are projected to the interactive whiteboard, the projection area should be<br />
limited within these lines for better results when you are using the board.<br />
© Copyright 2012 QOMO HiteVision, LLC. All Rights Reserved 5
QOMO Hite Vision <strong>Interactive</strong> <strong>Whiteboard</strong> User <strong>Manual</strong><br />
How to Install<br />
The following instructions apply to the installation for all whiteboard products from our company. The<br />
user can refer to corresponding instructions according to the products purchased. Please contact the<br />
local distributor for more details.<br />
How to Install Hardware<br />
I.<strong>Whiteboard</strong> installation for A series<br />
1. First install the smart pen tray of the interactive whiteboard:Insert the box<br />
underprop into the pen tray. The PCB in the pen tray should be exactly in<br />
the outlet of the underprop and the pen tray joints should be exactly in the<br />
box underprop slot.<br />
pen tray. See the following diagram:<br />
Screw in two M3 screws from the bottom of the<br />
© Copyright 2012 QOMO HiteVision, LLC. All Rights Reserved 6
C<br />
QOMO Hite Vision <strong>Interactive</strong> <strong>Whiteboard</strong> User <strong>Manual</strong><br />
2. Drill 8 holes for expansion bolts on the wall according to your preference<br />
(Figure A). Install the wall-mount brackets and tighten the bolts into each<br />
hole. Hang up the whiteboard with the calibration hole D in four corners<br />
in the wall-mounting bolts (Figure B).<br />
A B A<br />
A B A<br />
Figure A<br />
© Copyright 2012 QOMO HiteVision, LLC. All Rights Reserved 7
QOMO Hite Vision <strong>Interactive</strong> <strong>Whiteboard</strong> User <strong>Manual</strong><br />
Figure B<br />
© Copyright 2012 QOMO HiteVision, LLC. All Rights Reserved 8
QOMO Hite Vision <strong>Interactive</strong> <strong>Whiteboard</strong> User <strong>Manual</strong><br />
II.<strong>Whiteboard</strong> installation for B series<br />
1.First install the smart pen tray of the interactive whiteboard:Lock the smart<br />
pen tray to the metal supporting plate with three M5 bolts. See the following<br />
diagram.<br />
2.There are wall-mount brackets A and B on the back of the whiteboard. The<br />
wall-mount brackets B should be screwed in. See the following diagram.<br />
© Copyright 2012 QOMO HiteVision, LLC. All Rights Reserved 9
QOMO Hite Vision <strong>Interactive</strong> <strong>Whiteboard</strong> User <strong>Manual</strong><br />
Install the fixing plate according to the space between wall-mounts brackets<br />
A:<br />
After hanging up the whiteboard, drill 2 holes for expansion bolts according to<br />
actual positions, and fix the wall-mount brackets B into the wall. See the<br />
following diagram.<br />
© Copyright 2012 QOMO HiteVision, LLC. All Rights Reserved 10
QOMO Hite Vision <strong>Interactive</strong> <strong>Whiteboard</strong> User <strong>Manual</strong><br />
© Copyright 2012 QOMO HiteVision, LLC. All Rights Reserved 11
QOMO Hite Vision <strong>Interactive</strong> <strong>Whiteboard</strong> User <strong>Manual</strong><br />
V.<strong>Interactive</strong> System Building<br />
1. Make sure the whiteboard is firmly fixed before building the interactive<br />
system.<br />
2. Adjust the positions of the projector and whiteboard to make sure the<br />
images are projected to writing area of the whiteboard in full screen<br />
mode.<br />
3. One corner of the whiteboard is set with a USB port (position of the USB<br />
port will be varied in different models). Plug the USB cable into the USB<br />
port. The USB cable in the accessory box is designed for this whiteboard.<br />
Note: A normal USB cable might not be compatible to this whiteboard.<br />
4. Connect the USB cable to the USB port in the computer.<br />
5. Connect the computer and the projector (refer to the projector’s User<br />
<strong>Manual</strong> for more details).<br />
© Copyright 2012 QOMO HiteVision, LLC. All Rights Reserved 12
QOMO Hite Vision <strong>Interactive</strong> <strong>Whiteboard</strong> User <strong>Manual</strong><br />
How to Install Software<br />
Before installing the software, temporarily disable the anti-virus or virus<br />
protection software in your computer since it may affect the proper installation<br />
of this software. The instructions in this manual are based on a Microsoft<br />
Windows 7 system.<br />
There is an installation disc in the accessory box. Insert the installation disc<br />
and you will see the following instructions. You can open the disc manually if<br />
you do not see the following:<br />
Follow the instructions and complete the installation of the whiteboard<br />
software. For complete functions, click the Full Installation button and<br />
complete the installation as instructed. The computer needs to restart to<br />
activate the software after the installation has completed.<br />
© Copyright 2012 QOMO HiteVision, LLC. All Rights Reserved 13
QOMO Hite Vision <strong>Interactive</strong> <strong>Whiteboard</strong> User <strong>Manual</strong><br />
Calibration<br />
The strokes on the whiteboard should coincide with actual ones, so<br />
calibration is needed for proper functioning. The board needs to be<br />
calibrated for the following situations.<br />
• The whiteboard is used for the first time.<br />
• The whiteboard software have been reinstalled or updated.<br />
• The position of the whiteboard or projector is changed.<br />
• The computer connected to the whiteboard is changed.<br />
• The computer's resolution ratio or refresh rate is changed.<br />
• Calibration deviation caused by other reasons.<br />
How to calibrate:<br />
Step 1:Connect all necessary devices and make sure the whiteboard service<br />
program has been automatically launched once the computer’s power is on.<br />
If not, click "Start-All Programs-QOMO-Flow!Works server" and run the<br />
whiteboard service program. It will take a few seconds for the program to<br />
load.<br />
Step 2:A whiteboard driver icon will appear in the taskbar notification area.<br />
The red dot in the icon will turn green to indicate that the board and the driver<br />
are connected.<br />
The service program icon has two statuses:A red icon indicates that the<br />
whiteboard is disconnected. A green icon indicates that the whiteboard is<br />
© Copyright 2012 QOMO HiteVision, LLC. All Rights Reserved 14
QOMO Hite Vision <strong>Interactive</strong> <strong>Whiteboard</strong> User <strong>Manual</strong><br />
connected and will work normally.<br />
Step 3:Adjust the projection angle and make sure the projection area is<br />
within the whiteboard display area.<br />
Step 4:Left click on the whiteboard program icon at the bottom right of the<br />
screen and you will see the following:<br />
Click "Calibrate" and the calibration screen will be displayed:<br />
Step 5:Follow the directions that are given on the board. Touch the center<br />
of the flashing " 十 " with the interactive whiteboard pen tip or your finger. A<br />
© Copyright 2012 QOMO HiteVision, LLC. All Rights Reserved 15
QOMO Hite Vision <strong>Interactive</strong> <strong>Whiteboard</strong> User <strong>Manual</strong><br />
status bar will appear to be filling up. Hold your contact there until the bar is<br />
completely filled. Move to the next calibration point as directed and continue<br />
with this process until the calibration is finished.<br />
© Copyright 2012 QOMO HiteVision, LLC. All Rights Reserved 16
QOMO Hite Vision <strong>Interactive</strong> <strong>Whiteboard</strong> User <strong>Manual</strong><br />
Notes:<br />
• Calibration with a finger might lead to inaccurate calibration. Calibration<br />
with the pen tend to be more effective.<br />
• Wrong calibration may lead to the whiteboard not working properly and<br />
this requires recalibration.<br />
• Pressing "ESC" during calibration can cancel the current calibration<br />
operation.<br />
• There are minor differences between the calibration interfaces of<br />
different versions of the software. However, the calibration process is<br />
very much the same. For products with shortcut keys on the board, there<br />
are shortcut-key calibration steps at end of the calibration session.<br />
© Copyright 2012 QOMO HiteVision, LLC. All Rights Reserved 17
QOMO Hite Vision <strong>Interactive</strong> <strong>Whiteboard</strong> User <strong>Manual</strong><br />
How to Use the <strong>Whiteboard</strong><br />
The whiteboard can be used after the calibration is finished. Common<br />
computer operations can be launched and used by the simple touch of the<br />
screen.<br />
Left Click Tapping the whiteboard with a finger or a pen has the same<br />
effect as a left click of a mouse.<br />
Double Click Tapping the whiteboard twice in the same area with a<br />
finger or pen has the same effect as a double click of a mouse.<br />
Right Click Touching the whiteboard with a finger or pen for about<br />
seconds has the same effect as a right click of a mouse.<br />
Double click the Flow! Works annotation software icon on the desktop to run<br />
the software.<br />
You can do the following with the annotation software:<br />
© Copyright 2012 QOMO HiteVision, LLC. All Rights Reserved 18
QOMO Hite Vision <strong>Interactive</strong> <strong>Whiteboard</strong> User <strong>Manual</strong><br />
Write You can write, draw, and erase with the pen by pressing and sliding<br />
on the whiteboard.<br />
Hand Rover Spread your palm and press the whiteboard with five<br />
fingers at the same time and slide; this activates the hand rover function.<br />
Note: The multi-touch whiteboard does not support this function. You can<br />
contact the local distributor for more details.<br />
Tools and Resources For a more detailed description of all of the<br />
annotation software’s functions, tools, and resources, refer to the Flow!<br />
Works user manual.<br />
Key Notes:<br />
• When using the rover feature, you need to have five fingers pressing the<br />
whiteboard at the same time. Your fingers will be recognized as being<br />
writing if they are not pressing at the same time.<br />
• For the best writing results, use the pen in the accessory box to operate.<br />
• To avoid scratching the surface, do not use other objects to write on the<br />
board.<br />
© Copyright 2012 QOMO HiteVision, LLC. All Rights Reserved 19
QOMO Hite Vision <strong>Interactive</strong> <strong>Whiteboard</strong> User <strong>Manual</strong><br />
How to Use the Smart Pen Tray<br />
Priority increases in order<br />
The smart pen tray contains three whiteboard pens and one eraser. The slots<br />
on the pen tray from left to right are for the red pen, black pen, blue pen and<br />
the eraser. All of them have priority properties: The eraser has the top<br />
priority, then blue pen, black pen and lastly the red pen. When you pick up a<br />
pen from the pen tray and write on whiteboard, the stroke color is what the<br />
slot represents. When you pick up several pens from the pen tray, the stroke<br />
color will be what the slot which has the highest priority represents.<br />
When pens are picked up from the pen tray, you can choose the stroke color<br />
from the software tools bar. Put the pens into corresponding slot in the pen<br />
tray when you are not going to use them.<br />
© Copyright 2012 QOMO HiteVision, LLC. All Rights Reserved 20
QOMO Hite Vision <strong>Interactive</strong> <strong>Whiteboard</strong> User <strong>Manual</strong><br />
The driver icon is green when the driver program and whiteboard are<br />
connected. If the annotation software is not open, you can use the eraser or<br />
any pen from the pen tray to open the software and create a new white page.<br />
If the writing page is open, you can use the eraser or any pen from the pen<br />
tray to switch to other programs.<br />
Key Notes:<br />
• The stroke colors are only associated with the pen tray slots and have no<br />
relation with pen colors.<br />
• When pens are in the pen tray, the pen colors should be corresponding<br />
with the color marks in the pen tray slot. They are marked for your<br />
convenience.<br />
• The pen tray slot has built-in PCBs. Do not put other objects in it. Do not<br />
expose the pen tray to liquid. Clean the dust in the pen tray slot with a dry<br />
cloth regularly. The pen tray might work abnormally if it is not cleaned for<br />
a long time.<br />
© Copyright 2012 QOMO HiteVision, LLC. All Rights Reserved 21
QOMO Hite Vision <strong>Interactive</strong> <strong>Whiteboard</strong> User <strong>Manual</strong><br />
Screen Keys<br />
Screen keys, also known as hot keys, are the icons found on the sides of the<br />
whiteboard. If the whiteboard is set with hot keys and the Flow!Works<br />
software is not running, you can run Flow!Work by tapping one of the hot<br />
keys.<br />
Different models have different hot key functions. Refer to the above hot<br />
key explanations according to the actual models that you purchased.<br />
© Copyright 2012 QOMO HiteVision, LLC. All Rights Reserved 22
QOMO Hite Vision <strong>Interactive</strong> <strong>Whiteboard</strong> User <strong>Manual</strong><br />
Trouble Shooting<br />
Solutions to Problems<br />
Problems Issue Presumable Causes Solutions<br />
Go to Programs menu,<br />
click on the Flow!Works<br />
Service program has not<br />
folder, then click on the<br />
No service program started up.<br />
Flow!Works server<br />
icon on the right<br />
program.<br />
bottom of the<br />
Install the service<br />
computer<br />
Service program is not program from the <strong>Qomo</strong><br />
installed.<br />
website or installation<br />
disk.<br />
Connect the whiteboard<br />
and computer with the<br />
<strong>Interactive</strong><br />
The whiteboard is not<br />
USB cable. If it is<br />
whiteboard is<br />
connected to the<br />
already plugged in,<br />
not working<br />
computer.<br />
disconnect and plug it<br />
back in.<br />
Drive icon is red<br />
Check to see if there are<br />
The self-checking feature<br />
any other objects<br />
of the whiteboard is not<br />
pressing on the surface<br />
successful and cannot be<br />
of the whiteboard.<br />
connected.<br />
Remove them, if any.<br />
Driver malfunction<br />
Uninstall the driver and<br />
reinstall it.<br />
Drive icon is green Inaccurate calibration.<br />
Refer to instructions<br />
above and recalibrate.<br />
© Copyright 2012 QOMO HiteVision, LLC. All Rights Reserved 23
QOMO Hite Vision <strong>Interactive</strong> <strong>Whiteboard</strong> User <strong>Manual</strong><br />
Some<br />
calibration<br />
points cannot<br />
be seen<br />
during<br />
calibration.<br />
No green crossed<br />
cursor on<br />
whiteboard.<br />
The projector is not<br />
adjusted correctly so that<br />
part of the image is<br />
outside the whiteboard<br />
projection area.<br />
Adjust the projector.<br />
Cannot write<br />
Mouse pointer can<br />
move but no writing<br />
stroke.<br />
The software is not in<br />
writing mode.<br />
The current stroke color is<br />
same with the<br />
background color.<br />
Select a writing mode in<br />
the annotation software.<br />
Change the stroke color<br />
or background color.<br />
The pen is<br />
working but<br />
there are<br />
deviations.<br />
Part of the<br />
whiteboard has<br />
large deviations.<br />
Inaccurate calibration.<br />
There is projection<br />
distortion.<br />
Recalibrate correctly.<br />
Adjust the projector.<br />
The pen is<br />
working but<br />
reactions are<br />
slow.<br />
The strokes do not<br />
sync with the<br />
writing and there is<br />
a delay.<br />
Conflict with anti-virus<br />
software.<br />
The computer is running<br />
too many programs.<br />
The computer's hardware<br />
configuration is too low.<br />
Exit, or temporarily<br />
disable, the anti-virus<br />
software.<br />
Exit the programs which<br />
will not be used during<br />
the presentation.<br />
Contact professional<br />
personnel to upgrade<br />
the computer hardware.<br />
The pen tray<br />
is not working<br />
normally.<br />
Cannot change the<br />
stroke color when<br />
picking up or<br />
There are other objects or<br />
dust in the pen tray slots.<br />
Remove other objects<br />
or clean the dust from<br />
the pen tray slots.<br />
© Copyright 2012 QOMO HiteVision, LLC. All Rights Reserved 24
QOMO Hite Vision <strong>Interactive</strong> <strong>Whiteboard</strong> User <strong>Manual</strong><br />
putting down the<br />
pen from the pen<br />
tray.<br />
The pen tray is not fixed<br />
firmly to the whiteboard or<br />
not well-connected with<br />
the whiteboard.<br />
Take off and re-plug the<br />
pen tray and press<br />
firmly on the bottom of<br />
the pen tray.<br />
Specifications<br />
Technology<br />
Infrared<br />
Touch System<br />
Pen, Finger<br />
Resolution 4096 x 4096<br />
Tracing Velocity<br />
125 P/S<br />
Scan Period<br />
≤8 ms<br />
Calibration Accuracy<br />
1 mm<br />
Consumption (wired)<br />
Power < 0.5 W<br />
Port<br />
USB<br />
Operation System<br />
Microsoft Windows<br />
WP/2003/Vista/7-32 Bit and 64<br />
Bit<br />
Operation Temperature -15 to 50C (17 to 122F)<br />
Operation Humidity 20 - 90%<br />
Storage Temperature<br />
-40 to 50C (-40 to 122F)<br />
Storage Humidity 10 - 95%<br />
We commit ourselves to keeping our products up to date and are always striving to<br />
improve our technology. The contents in this manual are subject change without prior<br />
notice.<br />
© Copyright 2012 QOMO HiteVision, LLC. All Rights Reserved 25
QOMO Hite Vision <strong>Interactive</strong> <strong>Whiteboard</strong> User <strong>Manual</strong><br />
Contact Us:<br />
QOMO Hite Vision<br />
46950 Magellan Drive<br />
Wixom, MI 48393, USA<br />
www.qomo.com<br />
1-866-990-QOMO<br />
support@qomo.com<br />
© Copyright 2012 QOMO HiteVision, LLC. All Rights Reserved 26