X431 Manual English.pdf (2M) - OBD China
X431 Manual English.pdf (2M) - OBD China
X431 Manual English.pdf (2M) - OBD China

Create successful ePaper yourself
Turn your PDF publications into a flip-book with our unique Google optimized e-Paper software.
http://www.obdchina.com/launch-x431-gx3-super-scanner-p-33.html<br />
LAUNCH X-431<br />
Trademark Information<br />
LAUNCH is a registered trademark of<br />
LAUNCH TECH. CO., LTD. (short for<br />
LAUNCH) in <strong>China</strong> and other countries. All<br />
other LAUNCH trademarks, service marks,<br />
domain names, logos, and company names<br />
referred to in this manual are either<br />
trademarks, registered trademarks, service<br />
marks, domain names, logos, company names<br />
of or are otherwise the property of LAUNCH or<br />
its affiliates. In countries where any of the<br />
LAUNCH trademarks, service marks, domain<br />
names, logos and company names are not<br />
registered, LAUNCH claims other rights<br />
associated with unregistered trademarks,<br />
service marks, domain names, logos, and<br />
company names. Other products or company<br />
names referred to in this manual may be<br />
trademarks of their respective owners. You<br />
may not use any trademark, service mark,<br />
domain name, logo, or company name of<br />
LAUNCH or any third party without permission<br />
from the owner of the applicable trademark,<br />
service mark, domain name, logo, or company<br />
name. You may contact LAUNCH by visiting<br />
Launch at www. cnlaunch. com, or writing to<br />
LAUNCH TECH. CO., LTD., Launch Industrial<br />
Park, North of Wuhe Avenue, Banxuegang,<br />
Bantian, Longgang, Shenzhen, Guangdong,<br />
P.R.<strong>China</strong>., to request written permission to<br />
use Materials on this manual for purposes or<br />
for all other questions relating to this manual.<br />
Copyright Information<br />
Copyright © 2006 by LAUNCH TECH. CO.,<br />
LTD. All rights reserved. No part of this<br />
publication may be reproduced, stored in a<br />
retrieval system, or transmitted in any form or<br />
by any means, electronic, mechanical,<br />
photocopying, recording or otherwise, without<br />
the prior written permission of LAUNCH. The<br />
information contained herein is designed only<br />
for the use of this unit. LAUNCH is not<br />
responsible for any use of this information as<br />
applied to other units.<br />
Neither LAUNCH nor its affiliates shall be<br />
liable to the purchaser of this unit or third<br />
parties for damages, losses, costs, or<br />
expenses incurred by purchaser or third<br />
parties as a result of: accident, misuse, or<br />
abuse of this unit, or unauthorized<br />
modifications, repairs, or alterations to this unit,<br />
or failure to strictly comply with LAUNCH<br />
operating and maintenance instructions.<br />
LAUNCH shall not be liable for any damages<br />
or problems arising from the use of any<br />
options or any consumable products other<br />
than those designated as Original LAUNCH<br />
Products or LAUNCH Approved Products by<br />
LAUNCH.<br />
General Notice<br />
Other product names used herein are for<br />
identification purposes only and may be<br />
trademarks of their respective owners.<br />
LAUNCH disclaims any and all rights in those<br />
marks.<br />
Disclaimer<br />
• To take full advantage of the unit, you<br />
should be familiar with the engine.<br />
• All information, illustrations, and<br />
specifications contained in this manual<br />
are based on the latest information<br />
available at the time of publication. The<br />
right is reserved to make change at any<br />
time without notice.<br />
C-i<br />
Email: service007@obdchina.com
http://www.obdchina.com/launch-x431-gx3-super-scanner-p-33.html<br />
LAUNCH X-431<br />
End User License Agreement<br />
IMPORTANT: PLEASE READ THIS END USER<br />
LICENSE AGREEMENT CAREFULLY. USING<br />
LAUNCH OR LAUNCH-SUPPLIED PRODUCTS<br />
AND SOFTWARE CONSTITUTES<br />
ACCEPTANCE OF THIS AGREEMENT.<br />
license to use for Customer's internal business<br />
purposes the Materials and the Document for<br />
which Customer has paid the required license<br />
fees. "Document" means written information<br />
(whether contained in user or technical manuals,<br />
training materials, specifications or otherwise)<br />
specifically pertaining to the equipment and<br />
made available by LAUNCH with the equipment<br />
in any manner (including on CD-Rom, or on-line).<br />
LAUNCH IS WILLING TO LICENSE THE<br />
PRODUCTS, INFORMATION, SOFTWARE AND<br />
DOCUMENTS (COLLECTIVELY, "MATERIALS")<br />
TO YOU ONLY UPON THE CONDITION THAT<br />
YOU ACCEPT ALL OF THE TERMS<br />
CONTAINED IN THIS LICENSE AGREEMENT.<br />
BY USING THE MATERIALS, YOU ARE<br />
BINDING YOURSELF AND THE BUSINESS<br />
ENTITY THAT YOU REPRESENT<br />
(COLLECTIVELY, "CUSTOMER") TO THIS<br />
AGREEMENT. IF YOU DO NOT AGREE TO ALL<br />
OF THE TERMS OF THIS AGREEMENT, THEN<br />
LAUNCH IS UNWILLING TO LICENSE THE<br />
MATERIALS TO YOU AND DO NOT USE THE<br />
PRODUCTS AND DOWNLOAD OR INSTALL<br />
THE SOFTWARE.<br />
The following terms of this End User License<br />
Agreement ("Agreement") govern Customer's<br />
access and use of the product, except to the<br />
extent there is a separate signed agreement<br />
between Customer and LAUNCH governing<br />
Customer's use.<br />
License. Conditioned upon compliance with the<br />
terms and conditions of this Agreement, LAUNCH<br />
TECH. CO, LTC. or its subsidiary licensing the<br />
Materials instead of LAUNCH, grants to<br />
Customer a nonexclusive and nontransferable<br />
Unless otherwise expressly provided in the<br />
Document, Customer shall use the Software<br />
solely as embedded in, for execution on or<br />
(where the applicable document permits<br />
installation on non-LAUNCH equipment) for<br />
communication with LAUNCH equipment owned<br />
or leased by Customer and used for Customer's<br />
internal business purposes.<br />
Note:<br />
For evaluation or beta copies for which LAUNCH<br />
does not charge a license fee, the above<br />
requirement to pay license fees does not apply.<br />
General Limitations. This is a license, not a<br />
transfer of title, to the materials, and LAUNCH<br />
retains ownership of all copies of the Materials.<br />
Customer acknowledges that the Materials<br />
contain trade secrets of LAUNCH, its suppliers or<br />
licensors, including but not limited to the specific<br />
internal designed structure of individual programs<br />
and associated interface information. Accordingly,<br />
except as otherwise expressly provided under<br />
this Agreement, Customer shall have no right and<br />
Customer specifically agrees not to:<br />
(i) transfer, assign or sublicense its license rights<br />
to any other person or entity, or use the Materials<br />
on unauthorized or secondhand LAUNCH<br />
C-2<br />
Email: service007@obdchina.com
http://www.obdchina.com/launch-x431-gx3-super-scanner-p-33.html<br />
LAUNCH X-431<br />
equipment, and Customer acknowledges that<br />
any attempted transfer, assignment, sublicense<br />
or use shall be void;<br />
(ii) make error corrections to or otherwise modify<br />
or adapt the Materials or create derivative works<br />
based upon the Materials, or permit third parties<br />
to do the same;<br />
(iii) reverse engineer or decompile, decrypt,<br />
disassemble or otherwise reduce the Materials to<br />
human-readable form, except to the extent<br />
otherwise expressly permitted under applicable<br />
law notwithstanding this restriction;<br />
(iv) use or permit the Materials to be used to<br />
perform services for third parties, whether on a<br />
service bureau or time sharing basis or otherwise,<br />
without the express written authorization of<br />
LAUNCH;<br />
(v) disclose, provide, or otherwise make available<br />
trade secrets contained within the Materials in<br />
any form to any third party without the prior<br />
written consent of LAUNCH. Customer shall<br />
implement reasonable security measures to<br />
protect such trade secrets.<br />
To the extent required by law, and at Customer's<br />
written request, LAUNCH shall provide Customer<br />
with the interface information needed to achieve<br />
interoperability between the Materials and<br />
another independently created program, on<br />
payment of LAUNCH's applicable fee, if any.<br />
Customer shall observe strict obligations of<br />
confidentiality with respect to such information<br />
and shall use such information in compliance<br />
with any applicable terms and conditions upon<br />
which LAUNCH makes such information<br />
available.<br />
Software, Upgrades and Additional Copies. For<br />
purposes of this Agreement, "Software" shall<br />
include (and the terms and conditions of this<br />
Agreement shall apply to) computer programs,<br />
including firmware, as provided to Customer by<br />
LAUNCH or an authorized LAUNCH reseller, and<br />
any upgrades, updates, bug fixes or modified<br />
versions thereto (collectively, "Upgrades") or<br />
backup copies of the Software licensed or<br />
provided to Customer by LAUNCH or an<br />
authorized LAUNCH reseller.<br />
NOTWITHSTANDING ANY OTHER PROVISION<br />
OF THIS AGREEMENT: (1) CUSTOMER HAS<br />
NO LICENSE OR RIGHT TO USE ANY<br />
ADDITIONAL COPIES OR UPGRADES<br />
UNLESS CUSTOMER, AT THE TIME OF<br />
ACQUIRING SUCH COPY OR<br />
UPGRADE,ALREADY HOLDS A VALID<br />
LICENSE TO THE ORIGINAL SOFTWARE AND<br />
HAS PAID THE APPLICABLE FEE FOR THE<br />
UPGRADE OR ADDITIONAL COPIES; (2) USE<br />
OF UPGRADES IS LIMITED TO LAUNCH<br />
EQUIPMENT FOR WHICH CUSTOMER IS THE<br />
ORIGINAL END USER PURCHASER OR<br />
LESSEE OR WHO OTHERWISE HOLDS A<br />
VALID LICENSE TO USE THE SOFTWARE<br />
WHICH IS BEING UPGRADED; AND (3) THE<br />
MAKING AND USE OF ADDITIONAL COPIES IS<br />
LIMITED TO NECESSARY BACKUP<br />
PURPOSES ONLY.<br />
Proprietary Notices. Customer agrees to maintain<br />
and reproduce all copyright and other proprietary<br />
notices on all copies, in any form, of the Materials<br />
in the same form and manner that such copyright<br />
and other proprietary notices are included on the<br />
Materials. Except as expressly<br />
authorized in this Agreement, Customer shall not<br />
make any copies or duplicates of any Materials<br />
without the prior written permission of LAUNCH.<br />
Term and Termination. This Agreement and the<br />
C-3<br />
Email: service007@obdchina.com
http://www.obdchina.com/launch-x431-gx3-super-scanner-p-33.html<br />
LAUNCH X-431<br />
license granted herein shall remain effective until<br />
terminated. Customer may terminate this<br />
Agreement and the license at any time by<br />
destroying all copies of Materials and any<br />
Document. Customer's rights under this<br />
Agreement will terminate immediately without<br />
notice from LAUNCH if Customer fails to comply<br />
with any provision of this Agreement. Upon<br />
termination, Customer shall destroy all copies of<br />
Software in its possession or control. All<br />
confidentiality obligations of Customer and all<br />
limitations of liability and disclaimers and<br />
restrictions of warranty shall survive termination<br />
of this Agreement.<br />
Customer Records. Customer grants to LAUNCH<br />
and its independent accountants the right to<br />
examine Customer's books, records and<br />
accounts during Customer's normal business<br />
hours to verify compliance with this Agreement.<br />
In the event such audit discloses non-compliance<br />
with this Agreement, Customer shall promptly pay<br />
to LAUNCH the appropriate license fees, plus the<br />
reasonable cost of conducting the audit.<br />
Export. Software, including technical data, may<br />
be subject to PRC. export control laws, including<br />
the PRC. Export Administration Act and its<br />
associated regulations, and may be subject to<br />
export or import.<br />
C-4<br />
Email: service007@obdchina.com
http://www.obdchina.com/launch-x431-gx3-super-scanner-p-33.html<br />
LAUNCH X-431<br />
Contents<br />
Trademark Information .................................C-1<br />
Copyright Information ...................................C-1<br />
General Notice..............................................C-1<br />
Layout of Main Unit...........................................C-2<br />
Introduction .......................................................C-3<br />
Interface........................................................C-3<br />
Input..............................................................C-5<br />
Using the Soft Keyboard ..........................C-5<br />
Input by Keyboard....................................C-5<br />
Input by Writing Board..............................C-5<br />
Control of App...............................................C-6<br />
Check Box................................................C-6<br />
Scrolling Bar.............................................C-6<br />
Common Button .......................................C-6<br />
Help ..............................................................C-6<br />
Tool and Game..................................................C-7<br />
Tools .............................................................C-7<br />
Calculator.................................................C-7<br />
World Time...............................................C-8<br />
Dictionary .................................................C-8<br />
Picture View .............................................C-9<br />
Game..........................................................C-10<br />
FIR .........................................................C-10<br />
Reversi...................................................C-10<br />
PIM.................................................................. C-11<br />
Memo.......................................................... C-11<br />
Add New Memo...................................... C-11<br />
View Memo ............................................C-12<br />
Edit Memo..............................................C-12<br />
Delete Memo..........................................C-12<br />
Edit Type ................................................C-12<br />
Browse By Types ...................................C-12<br />
Address ......................................................C-13<br />
Add New Address...................................C-13<br />
View Address .........................................C-13<br />
Edit Address...........................................C-13<br />
Delete Address.......................................C-14<br />
Search Address......................................C-14<br />
To Do ..........................................................C-14<br />
Add New To Do ......................................C-15<br />
View To Do .............................................C-15<br />
Edit To Do...............................................C-15<br />
Delete To Do ..........................................C-16<br />
Edit Type ................................................C-16<br />
The Set of display ..................................C-16<br />
Schedule.....................................................C-17<br />
Add New Schedule.................................C-17<br />
View Schedule....................................... C-19<br />
Edit Schedule......................................... C-19<br />
Delete Schedule .................................... C-19<br />
System ........................................................... C-19<br />
Control Panel ............................................. C-19<br />
Application ............................................. C-20<br />
Power Management............................... C-21<br />
Clock...................................................... C-21<br />
Contrast ................................................. C-23<br />
Language............................................... C-23<br />
System Information .................................... C-24<br />
Calibrate Touch screen.......................... C-24<br />
User Register......................................... C-24<br />
About ..................................................... C-25<br />
Shut Down ................................................. C-25<br />
Vehicle Maintaining......................................... C-25<br />
Vehicle Decoding Device ........................... C-25<br />
Sensor Testing and Simulating................... C-25<br />
Update of Diagnostic Software................... C-25<br />
User Registration................................... C-25<br />
Fill User Information............................... C-26<br />
Software Update ........................................ C-27<br />
Member Login........................................ C-27<br />
Software Download................................ C-27<br />
Software Purchase and Update............. C-28<br />
Hardware Requirement.......................... C-29<br />
Software Update.................................... C-30<br />
Remaking of X-431 CF card .................. C-31<br />
Appendix: Flow Chart of X-431 UpgradeC-32<br />
Important Notice ............................................. C-33<br />
FAQ............................................................ C-33<br />
Warranty........................................................... C-a<br />
Disclaimer......................................................... C-a<br />
Order Information ............................................. C-a<br />
Customer Service............................................. C-a<br />
C-1<br />
Email: service007@obdchina.com
http://www.obdchina.com/launch-x431-gx3-super-scanner-p-33.html<br />
LAUNCH X-431<br />
Layout of Main Unit<br />
Paper In<br />
Printer adjustor<br />
Ejector<br />
CF Card Slot<br />
Paper<br />
Out<br />
Hot Key<br />
Power Button<br />
Fig.01<br />
Touch Screen<br />
www.obdchina.com<br />
Serial Port 1<br />
DATA I/O<br />
C-2<br />
Email: service007@obdchina.com
http://www.obdchina.com/launch-x431-gx3-super-scanner-p-33.html<br />
LAUNCH X-431<br />
Introduction<br />
Interface<br />
Turn on the power source, and then press<br />
[Power] key on the machine. The screen will<br />
display the prompts about touch screen<br />
calibration. Press [Hot] key (refer to the<br />
section "Calibrate Touch screen" for detailed<br />
steps) if you want to make calibration,<br />
otherwise, you can wait until it displays the<br />
start interface as shown in Fig.02.<br />
Functions:<br />
PIM<br />
(Personal<br />
Information<br />
Management)<br />
Memo<br />
Fig.02<br />
Address<br />
To Do<br />
Schedule<br />
Note:<br />
An interface for User Register will be<br />
displayed when the machine is started at<br />
first time. Refer to the section "User<br />
Register"for detailed steps.<br />
When you want to turn off the machine, press<br />
and hold [Power] key for at least 2 seconds.<br />
[Start] button: Its function is the same as that<br />
in Windows. Click it to pop up the start menu.<br />
The items and their respective functions in the<br />
menu are shown in the following table.<br />
[ ] Active Taskbar Icon: Click it by stylus to<br />
display and switch the executed programs.<br />
[ ] Back Light Icon: Click it to turn on/off<br />
back light.<br />
[ ] Soft Keyboard Icon: Click it to activate<br />
the soft keyboard. Then you have two ways to<br />
choose:<br />
1. Input by soft keyboard;<br />
2. Input by writing board.<br />
To record all kinds of important information and ideas, and make<br />
corresponding classification.<br />
To store the detailed information of relative, friends, colleagues<br />
and business partners, which can be easily edited, retrieved and<br />
searched.<br />
It is convenient for user to record the business to do or being<br />
done, to delete or add task records, to arrange the priority of<br />
tasks, and to browse the classified tasks.<br />
To arrange the appointments, journeys and meetings in a whole<br />
day; to check time schedule on business daily, weekly, monthly<br />
and/or annually; and to describe the place, time and other<br />
details for each schedule record.<br />
www.obdchina.com<br />
C-3<br />
Email: service007@obdchina.com
http://www.obdchina.com/launch-x431-gx3-super-scanner-p-33.html<br />
LAUNCH X-431<br />
Tools<br />
Game<br />
Control Panel<br />
Vehicle<br />
maintenance<br />
Calculator<br />
World Time<br />
Mini Dictionary<br />
Picture View<br />
Run<br />
FIR<br />
Reversi<br />
Application<br />
Power<br />
Management<br />
Clock Set<br />
Contrast<br />
Language Set<br />
Vehicle diagnosis<br />
Sensor test and<br />
simulation<br />
Both simple and scientific calculators are available.<br />
The time of many big cities in the world are offered. It is a helpful<br />
assistant for your travel.<br />
An <strong>English</strong>-Chinese dictionary embodies a large number of<br />
words, which cover all fields to overcome your inconvenience in<br />
language.<br />
To enjoy all kinds of pictures which can be zoomed in/out.<br />
To start executable applications which are based on the<br />
operating system of the unit.<br />
It is a kind of chess.<br />
To play for a while in your leisure time.<br />
To link the application with the 'Start' menu, or delete it from<br />
the 'Start' menu.<br />
To preset the use of power to save on electricity as possible.<br />
To set the system time.<br />
To adjust the contrast of display.<br />
To select language to be used.<br />
Professional function of vehicle diagnosis.<br />
To test the sensor on vehicle and simulate the output signal from<br />
the sensor.<br />
www.obdchina.com<br />
C-4<br />
Email: service007@obdchina.com
http://www.obdchina.com/launch-x431-gx3-super-scanner-p-33.html<br />
LAUNCH X-431<br />
Input<br />
Note: To input data, please activate Soft<br />
Keyboard with stylus and use the stylus in<br />
the subsequent operations.<br />
white key at the bottom right of the Soft<br />
Keyboard is space key.<br />
Using the Soft Keyboard<br />
Activate And Hide<br />
You can click Soft Keyboard icon on the<br />
bottom of the touch screen to activate the soft<br />
keyboard, and click again to hide it.<br />
Input By Soft Keyboard<br />
You have two ways to choose. One is to input<br />
by Soft Keyboard just like normal keyboard,<br />
but with stylus instead of finger. The other is to<br />
input by writing board.<br />
Click [En] button, it will switch from normal<br />
keyboard to writing board [Hw]. And click [Hw]<br />
button, it will switch back.<br />
The Function Key<br />
There are four function keys on the upper-right<br />
of the Soft Keyboard. SBC/DBC case,<br />
punctuations, Keyboard/Writing board, and the<br />
Soft Keyboard position can be determined by<br />
clicking one of the four keys for each of the<br />
functions from left to right. (Refer to Fig.03)<br />
The four function keys at the upper-middle<br />
position are for moving the cursor leftward,<br />
rightward, upward or downward.<br />
Fig.03<br />
In keyboard mode, the key at the bottom left of<br />
the keyboard is [Shift] key. Click it to change<br />
the lowercase letter into the uppercase letter,<br />
and the numeral key into special symbol<br />
(same as the special characters corresponding<br />
to the numeral keys in normal keyboard). The<br />
Fig.04<br />
In writing board mode (refer to Fig.04), there<br />
are eight function keys at the lower left of the<br />
soft keyboard. The four ones on the bottom<br />
implement the function: to move the cursor<br />
leftward, rightward, upward or downward. The<br />
other four functions are (from left to right): to<br />
delete the first character before the current<br />
cursor, clear the hand-writing section, space<br />
and return.<br />
Input by Keyboard<br />
1) Open an interface, such as User<br />
information.<br />
2) Click Soft Keyboard Icon in the tool bar<br />
to activate Soft Keyboard.<br />
3) Click the characters on Soft Keyboard to<br />
enter data. (Refer to Fig.05)<br />
Input by Writing Board<br />
1) Open an interface, such as Memo.<br />
2) Click [New] button.<br />
3) Click the function key to switch to Writing<br />
Board. (Refer to the section "Use for Soft<br />
Keyboard").<br />
4) Write on the white board to the right of the<br />
Soft Keyboard. Enter the information by<br />
function key operation.<br />
www.obdchina.com<br />
C-5<br />
Email: service007@obdchina.com
http://www.obdchina.com/launch-x431-gx3-super-scanner-p-33.html<br />
LAUNCH X-431<br />
description will be displayed on the right of the<br />
check box. You can select several functions at<br />
the same time. (Refer to Fig.06)<br />
Control of App<br />
Check Box<br />
Fig.05<br />
Fig.06<br />
Click the check box to select the function.<br />
When the function is selected, 'X ' will be<br />
marked in the check box and the function<br />
www.obdchina.com<br />
C-6<br />
Fig.07<br />
Scrolling Bar<br />
Scrolling Bar is usually at the right side of the<br />
touch screen. You can click or drag it to<br />
operate. If the content can't be displayed<br />
completely in one page, moving the Scrolling<br />
Bar can turn to next page. (Refer to Fig.07)<br />
Common Button<br />
[ ] Button at top right corner of the interface:<br />
After clicking it, current interface will be closed.<br />
When editing is being done, clicking of the<br />
button will be treated as quitting the editing.<br />
[ ] Button at top right corner of the interface:<br />
After clicking it, the help information will be<br />
shown.<br />
[Cancel] Button in the interface: After clicking it,<br />
current interface will be closed.<br />
Help<br />
Click [ ] button at the top right corner of the<br />
interface to get helpful tips for current<br />
Email: service007@obdchina.com
http://www.obdchina.com/launch-x431-gx3-super-scanner-p-33.html<br />
LAUNCH X-431<br />
interface.<br />
simple calculator.<br />
Tool and Game<br />
Tools<br />
Fig.08<br />
1) Click [Start] button.<br />
2) Select 'Tools' in the pop-up menu.<br />
3) Select the function needed in the pop-up<br />
submenu. (Refer to Fig.08)<br />
Calculator<br />
This calculator can perform not only common<br />
calculations as a simple calculator, such as<br />
addition and subtraction, but also the function<br />
operations as a scientific calculator, such as<br />
logarithm and factorial. (Refer to Fig.10).<br />
1) In the pop-up menu of 'Tools', select<br />
'Calculator' to open the Calculator<br />
interface.<br />
2) Click the square overlap icon on upper<br />
left of the screen to switch between<br />
scientific calculator and simple<br />
calculator.<br />
3) Click 'Unit Conversion' button to switch<br />
between unit conversion calculator and<br />
www.obdchina.com<br />
C-7<br />
Fig.09<br />
Fig.10<br />
Common Calculator (Refer to Fig.09):<br />
1) Click numeral keys on the screen to<br />
input.<br />
2) Or activate Soft Keyboard, and click<br />
Email: service007@obdchina.com
http://www.obdchina.com/launch-x431-gx3-super-scanner-p-33.html<br />
LAUNCH X-431<br />
numeral key on Soft Keyboard to input.<br />
3) The operation is the same as that for<br />
normal calculator.<br />
World Time<br />
Unit Conversion Calculator (Refer to Fig.11):<br />
1) Click 'Unit type' button at the top right<br />
corner to select unit type.<br />
2) Input the number to be converted in the<br />
blank next to the unit name, and then<br />
you will see the conversion result.<br />
3) If you want to return to simple calculator,<br />
please click 'X' button at the top right<br />
corner to close the current interface.<br />
Fig.11<br />
Fig.12<br />
1) In the pop-up menu of 'Tools', select<br />
'world time' to open the world time<br />
interface.<br />
2) Click the button under the 'Home Time'<br />
icon to select region.<br />
3) Click the button under the 'World Time'<br />
icon to select region.<br />
4) Then you can see the time directly.<br />
(See Fig.12).<br />
Dictionary<br />
1) In the pop-up menu of 'Tools', select<br />
'Dictionary' to open the Dictionary<br />
interface. (See Fig.13)<br />
2) Activate Soft Keyboard, and input words.<br />
3) Select the word from the list on the left.<br />
4) Click the word, and then you can find the<br />
translation in the right list.<br />
www.obdchina.com<br />
C-8<br />
Email: service007@obdchina.com
http://www.obdchina.com/launch-x431-gx3-super-scanner-p-33.html<br />
LAUNCH X-431<br />
Fig.13<br />
Picture View<br />
1) Click [Start] button.<br />
2) Select 'Tools' in the pop-up menu. (See<br />
Fig.14)<br />
3) In the pop-up 'Tools' list, select 'Picview' to<br />
open the Picture interface.<br />
4) In the Picture interface, click icon in<br />
the toolbar on the top. (See Fig.15)<br />
5) Select directory from the left list interface.<br />
6) Select file from the right list interface.<br />
7) Click [Parent Dir] button, and you can see<br />
the directory of current directory's parent.<br />
8) You can see the directory of the picture at<br />
the right side of 'Path'.<br />
9) You can see the file name of the picture at<br />
the right side of 'File'.<br />
10) Click [OK] button to open the picture.<br />
Fig.14<br />
Fig.15<br />
www.obdchina.com<br />
Browse the pictures in current directory<br />
1) In the Picture interface, click icon<br />
on the top to browse the previous<br />
picture.<br />
2) In the Picture interface, click icon<br />
on the top to browse the next picture.<br />
C-9<br />
Email: service007@obdchina.com
http://www.obdchina.com/launch-x431-gx3-super-scanner-p-33.html<br />
LAUNCH X-431<br />
Note:<br />
This operation is needed only when more<br />
than one picture has been stored.<br />
choose the black or white chessman at the<br />
bottom of the Chess Board before starting<br />
playing.<br />
Zoom in and zoom out:<br />
In the Picture interface, click or icon<br />
on the top, then you can zoom in or zoom out<br />
the current picture at will.<br />
Game<br />
Fig.16<br />
1) Click [Start] button.<br />
2) Select 'Game' in the pop-up menu.<br />
3) Select the function in the pop-up<br />
submenu. (See Fig.16)<br />
FIR<br />
1) In the pop-up submenu of 'Game',<br />
select 'FIR' to open the Chess Board.<br />
2) Click black or white chessman to begin<br />
the game. The one who select the black<br />
chessman will start first. (See Fig.17)<br />
www.obdchina.com<br />
Fig.17<br />
Rules for the game:<br />
You must try to make your five chessmen line<br />
up and prevent your adversary from achieving<br />
this goal in the process. The one whose 5<br />
chessmen are lined up first is winner. You can<br />
Fig.18<br />
Reversi<br />
1) In the pop-up menu of 'Game', select<br />
C-10<br />
Email: service007@obdchina.com
http://www.obdchina.com/launch-x431-gx3-super-scanner-p-33.html<br />
LAUNCH X-431<br />
'Reversi' to open the Chess Board. (See<br />
Fig.18)<br />
2) Click [New Game] button to start.<br />
3) Click [Undo] button for pull back.<br />
4) Click [Close] button to close the Chess<br />
Board.<br />
Rule:<br />
The one who chooses white chessman can<br />
play first. All black chessmen between two<br />
white chessmen will turn to white ones and all<br />
white chessmen between two black chessmen<br />
will turn to black ones. So the player should be<br />
able to reverse adversary's chessmen in each<br />
step. When the chessboard is full of chessmen,<br />
the number of the chessmen for each color<br />
should be counted. The one who conserve<br />
more chessmen on the chessboard is winner.<br />
PIM<br />
1) Click [Start] button.<br />
2) Select 'PIM ' in the pop-up menu.<br />
3) Select the function needed in the pop-up<br />
list. See Fig.19.<br />
Fig.19<br />
Memo<br />
The basic functions of Memo include: add new<br />
memo, view memo, delete memo, browse by<br />
types, etc.<br />
1) In the pop-up 'PIM' list, select 'Memo' to<br />
open the Memo interface. (See Fig.20)<br />
2) After you click the [ ] button on top right<br />
corner, the type list will pop up. Then you<br />
can select the type of the memo.<br />
3) You can also select the Edit Group in the<br />
type list to open the Edit Group interface.<br />
4) The memo list of corresponding type will<br />
be displayed in the list box on the midst<br />
of the Memo interface.<br />
5) Click one memo in the memo list to open<br />
the Memo Edit interface.<br />
6) Click [New] button to open the New<br />
Memo interface.<br />
Fig.20<br />
www.obdchina.com<br />
Add New Memo<br />
1) In the Memo interface, click [New] button<br />
to open the New Memo interface.<br />
2) Activate Soft Keyboard, and fill the<br />
subject and contents.<br />
3) Click the button on top right corner, then<br />
select the type in the pop-up list<br />
4) Click [OK] button to save and close the<br />
C-11<br />
Email: service007@obdchina.com
http://www.obdchina.com/launch-x431-gx3-super-scanner-p-33.html<br />
LAUNCH X-431<br />
New Memo interface.<br />
5) Then you can see the new memo in the<br />
list box of the Memo interface.<br />
View Memo<br />
1) In the list box of the Memo interface,<br />
click the memo that you want to view.<br />
2) Then you can view the contents of the<br />
memo in the opened Memo Edit<br />
interface.<br />
3) Click [OK] button to close the Memo Edit<br />
interface.<br />
Edit Memo<br />
1) In the list box of the Memo interface,<br />
click the memo that you want to edit.<br />
2) Then you can edit the contents of the<br />
memo in the opened Memo Edit interface.<br />
See Fig.21.<br />
3) After editing, click [OK] button to save<br />
the edited contents and close the Memo<br />
Edit interface.<br />
Fig.21<br />
3) Click [Delete] button to delete the memo<br />
and close the Memo Edit interface.<br />
Edit Type<br />
1) Click the [ ] button on the top right of<br />
the interface so that the type list pops<br />
up.<br />
2) In the type list, select the Edit Group to<br />
open the Edit Group interface.<br />
3) In the Edit Group interface, activate Soft<br />
Keyboard.<br />
4) In the text box at the bottom of the<br />
interface, input the name of the type.<br />
5) Click [Add] button to add a new type and<br />
it will be displayed in the list box of the<br />
Edit Group interface. (See Fig.22)<br />
6) Select one type in the list box, and then<br />
click [Delete] button to delete it.<br />
7) Click [Close] button to close the Edit<br />
Group interface.<br />
The interface : It represents the Memo<br />
Interface, the New Memo interface and the<br />
Memo Edit interface.<br />
www.obdchina.com<br />
Delete Memo<br />
1) In the list box of the Memo interface, click<br />
the memo that you want to delete.<br />
2) Then you can delete the memo in the<br />
opened Memo Edit interface.<br />
Fig.22<br />
Browse By Types<br />
1) Click the [ ] button on the top right of<br />
C-12<br />
Email: service007@obdchina.com
http://www.obdchina.com/launch-x431-gx3-super-scanner-p-33.html<br />
LAUNCH X-431<br />
the Memo interface so that the type list<br />
pops up.<br />
2) Select the type in the list.<br />
3) Then you can see the memo belonging<br />
to the type in the list box.<br />
Note: Only the memo belonging to the type<br />
can be displayed here. If you want to<br />
browse all memos, please select 'All' in the<br />
steps 1 and 2.<br />
Address<br />
The basic functions of Address Book include:<br />
add new address, view address, delete<br />
address, to search address, etc.<br />
1) In the pop-up 'PIM' list, select 'Address'<br />
to open the Address Book interface.<br />
2) It lists the name of persons whose<br />
communication information has been<br />
stored.<br />
3) Click [New] button to open the Address<br />
New interface. (See Fig.23)<br />
4) Click [Find] button to pop up the Find<br />
People interface.<br />
The operation guide for each function is<br />
described below:<br />
Add New Address<br />
1) In the Address Book interface, click [New]<br />
button to open the Address New<br />
interface. (See Fig.24)<br />
2) Activate Soft Keyboard, and fill the<br />
detailed information on relatives and<br />
friends.<br />
3) Click [OK] button to save and close the<br />
Address New interface.<br />
4) Then the added name will be displayed<br />
in the list box of the Address Book<br />
interface.<br />
Fig.24<br />
View Address<br />
1) In the list box of the Address Book<br />
interface, click the name that you want to<br />
view.<br />
2) Then the detailed information about the<br />
person will be shown in the opened<br />
Address Edit interface.<br />
3) Click [OK] button to close the Address<br />
Edit interface.<br />
www.obdchina.com<br />
Fig.23<br />
Edit Address<br />
1) In the list box of the Address Book<br />
interface, click the name that you want to<br />
edit.<br />
2) Then the information about the person<br />
C-13<br />
Email: service007@obdchina.com
http://www.obdchina.com/launch-x431-gx3-super-scanner-p-33.html<br />
LAUNCH X-431<br />
can be edited in the opened Address Edit<br />
interface. See Fig.25.<br />
3) After editing, click [OK] button to save<br />
the edited contents and close the<br />
Address Edit interface.<br />
Fig.25<br />
Delete Address<br />
1) In the list box of the Address Book<br />
interface, click the name that you want to<br />
delete.<br />
2) Then the information about the person<br />
will be shown in the opened Address Edit<br />
interface.<br />
3) Click [Delete] button to delete the<br />
person's information and close the<br />
Address Edit interface.<br />
Search Address<br />
1) In the Address Book interface, click [Find]<br />
button to pop up the Find People<br />
interface. See Fig.26.<br />
2) Activate Soft Keyboard, and input the<br />
name you want to search.<br />
3) Click [OK] button, and then you will see<br />
that the name you search is highlighted<br />
in the list box.<br />
To Do<br />
Fig.26<br />
The basic functions of To Do include: add new<br />
To Do, view To Do, delete To Do and set To Do,<br />
etc.<br />
www.obdchina.com<br />
Fig.27<br />
C-14<br />
Email: service007@obdchina.com
http://www.obdchina.com/launch-x431-gx3-super-scanner-p-33.html<br />
LAUNCH X-431<br />
1) In the pop-up 'PIM' list, select 'To Do'<br />
item to open the To Do interface.<br />
2) The To Do list of corresponding items will<br />
be displayed in the list box on the midst<br />
of the Memo interface.<br />
3) Click [Options] button to open the To Do<br />
Display interface. (See Fig.27)<br />
4) Click [New] button to open the To Do<br />
New interface.<br />
marked in the box.<br />
8) Click [OK] button to save and close the<br />
To Do Detail interface.<br />
9) In the To Do Detail interface, click [OK]<br />
button to save and close the To Do New<br />
interface.<br />
Add New To Do<br />
Fig.28<br />
1) In the To Do interface, click [New] button<br />
to open the To Do New interface. See<br />
Fig.28.<br />
2) Activate Soft Keyboard, and fill in the<br />
subject and contents.<br />
3) Click [Detail] button to open the To Do<br />
Detail interface. See Fig.29.<br />
4) In the To Do Detail interface, click the<br />
button to the right of 'Group' to pop up<br />
the type list.<br />
5) Click the button to the right of 'Expired',<br />
and select the data in the pop-up list.<br />
6) Click the number to the right of 'Priority'<br />
to set the priority of the To Do.<br />
7) If the To Do has been finished, please<br />
click the box to the right of 'Finished'.<br />
When the function is selected, 'X' will be<br />
www.obdchina.com<br />
C-15<br />
Fig.29<br />
View To Do<br />
1) In the list box of the To Do interface, click<br />
the to do that you want to view.<br />
2) Then the contents of the To Do will be<br />
shown in the opened To Do Edit<br />
interface.<br />
3) Click [OK] button to close the To Do Edit<br />
interface.<br />
Edit To Do<br />
1) In the list box of the To Do interface, click<br />
the memo that you want to edit.<br />
2) Then the contents of the memo will be<br />
shown in the opened To Do Edit<br />
interface.<br />
3) Click [Detail] button to open the To Do<br />
Detail interface, please refer to step 4~8<br />
in the section "Add New To Do".<br />
4) After editing, click [OK] button to save<br />
the edited contents and close the To Do<br />
Edit interface.<br />
Email: service007@obdchina.com
http://www.obdchina.com/launch-x431-gx3-super-scanner-p-33.html<br />
LAUNCH X-431<br />
Delete To Do<br />
1) In the list box of the To Do interface,<br />
click the to do that you want to delete.<br />
2) Then the contents will be shown in the<br />
opened To Do Edit interface.<br />
3) Click [Delete] button to delete the To Do<br />
and close the To Do Edit interface.<br />
Edit Type<br />
1) Click the [ ] button to the right of<br />
'Group' in the interface so that the<br />
type list pops up.<br />
2) In the type list, select 'Edit Group' to<br />
open the Edit Group interface. See<br />
Fig.30.<br />
3) In the Edit Group interface, activate Soft<br />
Keyboard.<br />
4) In the text box at the bottom of the<br />
interface, input the name of the type.<br />
5) Click [New] button to add a new type and<br />
it will be displayed in the list box of the<br />
Edit Group interface.<br />
6) Select one type in the list box, and then<br />
click [Delete] button to delete it.<br />
7) Click [Close] button to close the Edit<br />
Group interface.<br />
The interface : It represents the To Do<br />
Detail Interface (Refer to step 1-3 in the<br />
section "Add New To Do" and "Edit To Do"),<br />
and the To Do Display interface (Refer to<br />
step 1 in the section "The Set of Display ").<br />
The Set of display<br />
Fig.30<br />
www.obdchina.com<br />
Fig.31<br />
C-16<br />
1) In the To Do interface, click [Options]<br />
button to open the To Do Display<br />
interface.<br />
2) In the To Do Display interface, click the<br />
button to the right of 'Group' to pop up<br />
Email: service007@obdchina.com
http://www.obdchina.com/launch-x431-gx3-super-scanner-p-33.html<br />
LAUNCH X-431<br />
type list, and select the type in the<br />
pop-up list.<br />
3) Click the button to the right of 'Expired',<br />
and select the data in the pop-up list.<br />
4) Click the number or 'All' to the right of<br />
'Priority' to set the priority of the<br />
displayed To Do.<br />
5) Click the box to the right of each function.<br />
When 'X' is displayed in the box, the<br />
function is selected. (See Fig.31)<br />
6) Click [OK] button to close the To Do<br />
Display interface.<br />
7) Then you can see the corresponding To<br />
Do in the list box of the To Do interface.<br />
Schedule<br />
The basic functions of Schedule include: add<br />
new schedule, view schedule, delete schedule,<br />
etc.<br />
Fig.32<br />
1) In the pop-up list of 'PIM', select<br />
'Schedule' to open the Schedule<br />
interface.<br />
2) Click the Date button on the upper left of<br />
the interface to open the Select Date<br />
interface.<br />
3) In the list box in the middle of the<br />
interface, all schedules on that day<br />
corresponding to the Date button will be<br />
displayed. (See Fig.32)<br />
4) Click [New] button, and then the cycle<br />
list pops up. You may select 'Common',<br />
'Daily', 'Weekly', 'Monthly' and 'Annual'.<br />
5) In the cycle list, select one item to open<br />
the Schedule New interface.<br />
Add New Schedule<br />
Set the date of the schedule:<br />
1) In the Schedule interface, click the Date<br />
button on the upper left to open the<br />
Select Date interface.<br />
2) In the Select Date interface, click [ ]<br />
icon to the left of the month or year to<br />
select the previous month or year.<br />
3) Click the [ ] icon to the right of the<br />
month or year to select the next month<br />
or year. (See Fig.33)<br />
4) Click to select the date in the current<br />
month. When it is highlighted, it is<br />
selected.<br />
5) Or click [Today] button to display the<br />
current year, month and date directly.<br />
6) Click [OK] button to save the date setting<br />
and close the Select Date interface.<br />
7) You may see the date you set on the<br />
button on the top right of the Schedule<br />
interface.<br />
www.obdchina.com<br />
C-17<br />
Email: service007@obdchina.com
http://www.obdchina.com/launch-x431-gx3-super-scanner-p-33.html<br />
LAUNCH X-431<br />
Fig.33<br />
Set the cycle of the schedule:<br />
1) In the Schedule interface, click [New]<br />
button so that the Cycle list pops up. See<br />
Fig.34.<br />
2) In the Cycle list, select 'Common' if it is<br />
done on the selected date.<br />
3) Select 'Daily' if it is done every day.<br />
4) Select 'Weekly' if it is done on a fixed day<br />
every week.<br />
5) Select 'Monthly' if it is done on a fixed<br />
day every month.<br />
6) Select 'Annual' if it is done on a fixed day<br />
every year.<br />
7) After selecting, open the New Schedule<br />
interface.<br />
Fig.34<br />
Set the content of the schedule:<br />
www.obdchina.com<br />
Fig.35<br />
C-18<br />
1) In the Schedule New interface, activate<br />
Soft Keyboard, and fill the subject and<br />
contents.<br />
2) In the textbox on the top of the interface,<br />
Email: service007@obdchina.com
http://www.obdchina.com/launch-x431-gx3-super-scanner-p-33.html<br />
LAUNCH X-431<br />
fill the time of the schedule.<br />
3) If the selected cycle is 'Daily', 'Weekly',<br />
'Monthly' or 'Annual', you can input the<br />
repeat time in the textbox on the bottom<br />
of the interface. See Fig.35.<br />
4) "Remind" function can be selected and<br />
the reminding time can be set in the<br />
interface. The "Remind" function will not<br />
be available when the machine is turned<br />
off.<br />
5) Click [OK] button to save and close the<br />
Schedule New interface<br />
date of the schedule")<br />
2) In the list box of the Schedule interface,<br />
click Scrolling Bar to turn to next page,<br />
and click the schedule you want to edit.<br />
3) Then the schedule will be shown in the<br />
opened Schedule View interface. See<br />
Fig.36.<br />
4) Click [Delete] button to delete it and<br />
close the Schedule View interface.<br />
View Schedule<br />
1) In the Schedule interface, select the<br />
date that has been scheduled. (Refer to<br />
the section "Add New Schedule Set<br />
the date of the schedule")<br />
2) In the list box of the Schedule interface,<br />
click Scrolling Bar to turn to next page,<br />
and click the schedule you want to view.<br />
3) Then the contents of the schedule will<br />
be shown in the opened Schedule View<br />
interface.<br />
4) Click [OK] button to close the Schedule<br />
View interface.<br />
Edit Schedule<br />
1) In the Schedule interface, select the<br />
date that has been scheduled. (Refer to<br />
the section "Add New Schedule Set<br />
the date of the schedule")<br />
2) In the list box of the Schedule interface,<br />
click Scrolling Bar to turn to next page,<br />
and click the schedule you want to edit.<br />
3) Then the contents of the schedule will<br />
be shown in the opened Schedule View<br />
interface.<br />
4) If the edited affair is 'Daily', 'Weekly',<br />
'Monthly' or 'Annual', you can edit the<br />
repeat time in the textbox on the bottom<br />
of the interface.<br />
5) After editing, click [OK] button to save<br />
the edited contents and close the<br />
Schedule View interface.<br />
Delete Schedule<br />
1) In the Schedule interface, select the date<br />
that has been scheduled. (Refer to the<br />
section "Add New Schedule Set the<br />
System<br />
Control Panel<br />
Fig.36<br />
The control panel includes all interrelated<br />
software and hardware configurations. It<br />
makes the software more custom-built for you<br />
by configuring.<br />
1) Click [Start] button.<br />
2) Select 'Control Panel' in the pop-up<br />
menu.<br />
3) Open the Control Panel interface. (See<br />
Fig.37)<br />
www.obdchina.com<br />
C-19<br />
Email: service007@obdchina.com
http://www.obdchina.com/launch-x431-gx3-super-scanner-p-33.html<br />
LAUNCH X-431<br />
icon to open the Application Manager<br />
interface.<br />
2) Then you can see the corresponding<br />
information in the list box of the interface.<br />
(See Fig.38)<br />
3) Insert a new group:<br />
Click [Insert] button and input the item<br />
name. Then choose "Start" as its parent<br />
and click [OK] button.<br />
Fig.37<br />
Application<br />
It displays the application information<br />
contained in the 'Start' menu, including the<br />
group name, the submenu, etc.<br />
Fig.39<br />
4) Insert a new submenu:<br />
Click [Insert] button and input the item<br />
name and the file path. Then choose a<br />
group as its parent and click [OK] button.<br />
The path can be inputted directly or<br />
found out in a dialogue box after clicking<br />
[Browser] button. See Fig.39 and Fig.40.<br />
Click [OK] button after selecting an item<br />
in the list. Then the selected file will<br />
automatically copied to the edit box.<br />
www.obdchina.com<br />
Fig.38<br />
1) In the Control Panel interface, click 'App'<br />
The submenu should be linked to a<br />
present group instead of the "Start" item<br />
or another submenu.<br />
5) Delete a group or a submenu:<br />
C-20<br />
Email: service007@obdchina.com
http://www.obdchina.com/launch-x431-gx3-super-scanner-p-33.html<br />
LAUNCH X-431<br />
Select a group or a submenu and then<br />
click [Delete] button. When a group is<br />
deleted, all of its submenus will be<br />
deleted.<br />
6) Modify a group or a submenu:<br />
Click [Modify] button and then select the<br />
group or submenu from the list. Now you<br />
can modify the item name, file path and<br />
so on followed by clicking [OK] button.<br />
'Power' icon to open the Power Manager<br />
interface.<br />
2) Click the button to the right of 'Standby<br />
time', and select the time or 'None' in the<br />
pop-up list.<br />
3) Click [OK] button to save the setting and<br />
close the Power Manager interface.<br />
7) Save the information:<br />
After editing the application, click [OK]<br />
button. The modified information will be<br />
saved in the corresponding file. If you<br />
want to quit the modification, click<br />
[Cancel] button.<br />
Note:<br />
Quit all other applications before saving<br />
the modification.<br />
Fig.40<br />
Power Management<br />
In the Power Manager interface, you can see<br />
the condition of memory, and set the standby<br />
time. (See Fig.41)<br />
Fig.41<br />
Clock<br />
User can set the time and the time zone of the<br />
system.<br />
www.obdchina.com<br />
1) In the Control Panel interface, click<br />
C-21<br />
Email: service007@obdchina.com
http://www.obdchina.com/launch-x431-gx3-super-scanner-p-33.html<br />
LAUNCH X-431<br />
Fig.42<br />
Set Time:<br />
1) In the Control Panel interface, click<br />
'Clock' icon to open the Date/Time<br />
interface as shown in Fig.42.<br />
2) In the Date/Time interface, click [Set<br />
Time] button to open the Set Time<br />
interface as shown in Fig.43.<br />
3) Click the characters to the right of 'Day'<br />
to set AM and PM, the selected one will<br />
be highlighted.<br />
4) Activate Soft Keyboard, and then you<br />
can set 'Hours', 'Minutes' and 'Seconds'<br />
directly.<br />
5) Click [OK] button to save and close the<br />
Set Time interface.<br />
Fig.43<br />
Set Date:<br />
1) In the Date/Time interface, you can set<br />
date directly.<br />
2) Click [ ] icon to the left of the month<br />
or year to select the previous month or<br />
year.<br />
3) Click the [ ] icon to the right of the<br />
month or year to select the next month or<br />
year. (See Fig.42)<br />
4) Click the date in the current month. It will<br />
be highlighted when it is selected.<br />
5) Click [Set Time] button to save the<br />
setting.<br />
6) Click [Quit] button to exit.<br />
Set Time Zone<br />
1) In the Date/Time interface, click [Set<br />
Time zone] button to open the Set Zone<br />
interface as shown in Fig.44.<br />
2) Click Scrolling Bar to turn to next page of<br />
the list, and select your zone. It will be<br />
highlighted when it is selected.<br />
3) Click [OK] button to save and close the<br />
Set Zone interface.<br />
www.obdchina.com<br />
C-22<br />
Email: service007@obdchina.com
http://www.obdchina.com/launch-x431-gx3-super-scanner-p-33.html<br />
LAUNCH X-431<br />
Fig.44<br />
After finishing all setting, click [OK] button in<br />
the Date/Time interface to exit and close the<br />
interface.<br />
Contrast<br />
It is for adjusting the contrast of the screen to<br />
make the interface clearer.<br />
1) In the Control Panel interface, click<br />
'Contrast' icon to open the Contrast<br />
interface. See Fig.45.<br />
2) In the Contrast interface, click the<br />
position you want, and then you can set<br />
it.<br />
Fig.45<br />
Language<br />
You can make selection among several<br />
languages for convenient operation of the<br />
system.<br />
www.obdchina.com<br />
C-23<br />
Fig.46<br />
1) In the Control Panel interface, click<br />
Email: service007@obdchina.com
http://www.obdchina.com/launch-x431-gx3-super-scanner-p-33.html<br />
LAUNCH X-431<br />
'Language' icon to open the Language<br />
interface. See Fig.46.<br />
2) Select the language you want to use.<br />
3) Click [OK] button to confirm the selection<br />
and close the language interface and the<br />
Control Panel interface.<br />
4) In the User Information interface,<br />
activate Soft Keyboard, and input the<br />
user information. (See Fig.48)<br />
5) Click [OK] button to save the information<br />
and close the User Information interface.<br />
Note: Before selecting language, be sure to<br />
quit all applications.<br />
System Information<br />
Calibrate Touch screen<br />
It is for getting the desired accuracy of the<br />
touch screen. Calibrating of touch screen can<br />
be divided into two steps. The first step is to<br />
detect noise automatically. If you click the<br />
touch screen at this step, the noise value<br />
would be affected. After detecting the noise,<br />
the system will come to the calibration step.<br />
Now the cross cursor will be displayed.<br />
1) After switching on the machine, follow<br />
the tips to press the hot key. The<br />
calibration interface will be opened.<br />
2) Click the cross cursor on the screen<br />
accurately, and wait until it changes.<br />
Then one step of calibration is finished.<br />
3) After calibration is finished for all corners,<br />
the system will automatically return to<br />
the start-up main interface.<br />
Note:<br />
♦ Do not click the touch screen before<br />
the cross cursor appears.<br />
♦ In the calibration step, if you fail to<br />
click the cross cursor accurately, the<br />
cross cursor will be displayed on the<br />
screen again and again until the<br />
calibration is finished completely.<br />
User Register<br />
The user's right can be well protected after<br />
registration.<br />
www.obdchina.com<br />
Fig.47<br />
1) Click [Start] button.<br />
2) Select 'Information' in the pop-up menu.<br />
3) Select 'User' in the pop-up list to open<br />
the User Information interface. (See<br />
Fig.47)<br />
C-24<br />
Fig.48<br />
Email: service007@obdchina.com
http://www.obdchina.com/launch-x431-gx3-super-scanner-p-33.html<br />
LAUNCH X-431<br />
About<br />
In 'Information' list, click 'About' to display the<br />
information on system software and hardware,<br />
then click [OK] button to close it. (See Fig.49)<br />
Sensor Testing and<br />
Simulating<br />
Click [Start] button, select 'Vehicle Maintaining'<br />
in the menu, and then click 'Sensor Testing<br />
and Simulating' to open the Test interface.<br />
Refer to "<strong>X431</strong>-Sensorbox Operation<br />
Guideline" for detailed description of this<br />
function.<br />
Shut Down<br />
Fig.49<br />
Click "Shut Down" in the Start menu when you<br />
attempt to turn off the machine.<br />
Vehicle Maintaining<br />
Vehicle Decoding Device<br />
Click [Start] button, select 'Vehicle Maintaining'<br />
in the pop-up menu, and then click 'Vehicle<br />
Diagnosing' to open the Test interface.<br />
Another way to enter the Test interface:<br />
Insert CF card, turn on the machine, and then<br />
press [Hot key] to enter the Test interface.<br />
Refer to "<strong>X431</strong>-Smartbox Operation Guideline"<br />
for detailed description of vehicle diagnosis.<br />
Update of Diagnostic<br />
Software<br />
The Internet update function of <strong>X431</strong> can let<br />
the user conveniently and quickly download<br />
the software from our website for update.<br />
LAUNCH put the latest version of software to<br />
www. x431. com and display the massage on<br />
the news page. User can use computer to visit<br />
the Website at any part of the world. After<br />
registration, the latest version of software can<br />
be downloaded. Then user can update his<br />
X-431 by unzipping and installing the software.<br />
The operation procedure is as follows:<br />
User Registration<br />
Log on www.<strong>X431</strong>.com. Select the favorite<br />
language on the pull-down menu at the upper<br />
left of the interface to enter the homepage.<br />
See Fig.50<br />
Fig.50<br />
www.obdchina.com<br />
Click "Register" in the interface as shown in<br />
Fig.50 to open the window as shown in fig 51.<br />
C-25<br />
Email: service007@obdchina.com
http://www.obdchina.com/launch-x431-gx3-super-scanner-p-33.html<br />
LAUNCH X-431<br />
the message as shown in fig. below.<br />
Click "OK" button to return to the<br />
previous interface to re-fill the correct<br />
numbers.<br />
Fig.51<br />
Note:<br />
When the member purchases one or more<br />
products after registration, he should log<br />
onto the member area, and then click<br />
"product control" to register the newly<br />
purchased product. Refer to the section<br />
"Member login".<br />
The terms of service is shown in the screen.<br />
After reading and fully understand it, click "I<br />
accept" button to enter the interface as shown<br />
in fig 52.<br />
Fill User Information<br />
Fig. 53<br />
Fig.52<br />
The serial No. is marked on the back of<br />
smartbox. The registration No. is in an<br />
envelope delivered with the product (the<br />
number must be kept confidential). The dealer<br />
code is attached on the last page of the user's<br />
manual.<br />
After the information is filled, click "Next step"<br />
to enter the next interface as shown in fig 53.<br />
Note:<br />
1. When a product is sold, the dealer will<br />
log onto www. <strong>X431</strong>. com and enter<br />
the dealer code in the "Dealer<br />
administration" area so that the user<br />
can do effective registration later.<br />
User should contact the dealer if<br />
registration can not be done<br />
effectively.<br />
2. If the filled serial No. or registration<br />
No. is invalid, the screen will display<br />
After information is filled in the interface shown<br />
in fig 53(The red textbox must be filled. After<br />
registration, we will send the confidential<br />
information to your registered e-mail, so<br />
please make sure that your e-mail is valid.),<br />
click "Next step", and then the screen will<br />
display the interface shown as fig 54. Click<br />
"OK" then the registration is completed.<br />
Fig 54<br />
Note:<br />
Only the registered user can download and<br />
update the software.<br />
C-26<br />
Email: service007@obdchina.com
http://www.obdchina.com/launch-x431-gx3-super-scanner-p-33.html<br />
LAUNCH X-431<br />
Software Update<br />
Member Login<br />
The user becomes the registered member<br />
after registration. Member can log in the<br />
website by filling username, password and<br />
user type in the interface as shown in fig 50.<br />
Note: when choosing the user type, the<br />
common users may choose the customer.<br />
If the dealer and the branch want to log in<br />
the website, please use the user<br />
information given by LAUNCH head office.<br />
After log successfully, the screen will display the<br />
interface as shown in fig 55 (The default interface<br />
is download center interface).<br />
Fig 55<br />
[Download Center]: Refer to "software<br />
download".<br />
[Purchase Center]& [Update center]: Refer to<br />
"software purchase and update".<br />
[Member Information]: Display and renew the<br />
current member information.<br />
[Product Registration]: Register newly<br />
purchased product.<br />
[Order Information]: Check or cancel the unpaid<br />
order.<br />
[Renew Password]: After entering the right old<br />
password, then can renew the password.<br />
[Awarded for complaint] If users meet some<br />
trouble during the operation, he can feedback to<br />
LAUNCH. Effective complaint will be awarded by<br />
LAUNCH<br />
[Logout]: Users exit the registration.<br />
Software Download<br />
After log successfully, the screen will enter the<br />
[download center] interface. (See fig.55)<br />
Registered user can download the software that<br />
installed in the download center.<br />
Before download, users had better set up a new<br />
folder named [X-431 update] on the computer<br />
desktop and put the download file to the[X-431<br />
update] according the next steps.<br />
Note:<br />
1. Software update of free charge will<br />
be provided by LAUNCH for one<br />
year. The free period is from the<br />
registration date on the website,<br />
not the purchase date. That is,<br />
during one year after the<br />
registration, users can free<br />
download the corresponding<br />
software.<br />
2. If there is not the latest version in<br />
the download center, users can buy<br />
the version in the purchase center<br />
or in the update center. In the<br />
purchase center, users can buy the<br />
software that doesn't install in the<br />
download center. In the update<br />
center, users can buy the software<br />
that is beyond the free download<br />
period. After purchase successfully,<br />
the purchased software will be<br />
automatically added to the<br />
download center list.<br />
Update Tool Download<br />
Before update, users must download the update<br />
tools. On the drop-down menu, users select the<br />
language then click [download]. The screen will<br />
display the interface as shown in fig 56.<br />
C-27<br />
Email: service007@obdchina.com
http://www.obdchina.com/launch-x431-gx3-super-scanner-p-33.html<br />
LAUNCH X-431<br />
diagnostic program and the display program. See<br />
Fig 58<br />
Fig 56<br />
Click [save] to put it into the[X-431 update].<br />
Display Program Download<br />
When downloading the diagnostic program,<br />
users can also download the display program.<br />
On the drop-down menu, users select the<br />
language then click [down].Click [save] on the<br />
pop-up menu to put the program into the[X-431<br />
update].<br />
Diagnostic Program Download<br />
On the drop-down menu, select the language<br />
and the version (The default version is the latest<br />
version). Click [down] icon, then click [save] on<br />
the pop-up menu to save the file.<br />
Click [view] to learn the detailed information of<br />
the version.<br />
Users can down the diagnostic program into the<br />
[X-431 update]. Up to now, the software that is<br />
for update is downloaded completely.<br />
Fig 58<br />
Select the module for update in the interface<br />
shown in Fig 58, and click "Update" icon to<br />
update. When the update is completed, prompts<br />
will appear to notify successful update.<br />
Software Purchase and Update<br />
If users can't find the software that he needed, at<br />
this time users should buy the software in the<br />
purchase center. Log on the www.<strong>X431</strong>.com then<br />
enter the interface as shown in fig 59.<br />
Fig 59<br />
Fig.57<br />
Click [purchase center] to choose the serial<br />
number, and then tick in front of the serial<br />
number.<br />
Software Update<br />
Open the "X-431 update" folder, and double click<br />
the icon . Then install the update tool<br />
according to the prompts on the screen.<br />
When the installation is complete, the "X-431<br />
update tool" icon will appear on the desktop.<br />
Double click the "X-431 update tool" icon to run<br />
the program. The program will automatically<br />
check the downloaded update files, including the<br />
C-28<br />
Fig 60<br />
Take the Transporter& V Class as an example,<br />
Email: service007@obdchina.com
http://www.obdchina.com/launch-x431-gx3-super-scanner-p-33.html<br />
LAUNCH X-431<br />
click the [view] that is in the same line with the<br />
Transporter& V Class. The screen will display the<br />
concrete information about the Transporter&V<br />
Class diagnostic software.<br />
A new page will appear when user clicks<br />
"Download" button. The pop up window will show<br />
the description for updating the downloaded<br />
software.<br />
Hardware Requirement<br />
The following should be made ready:<br />
1. A computer that can be connected to<br />
Internet.<br />
2. A CF card reader/writer and a CF card that<br />
need to be updated.<br />
See Fig.63 for hardware connection.<br />
Fig 61<br />
Click 'order' to add the selected software to<br />
shopping chart. (See fig.61).<br />
Fig.63<br />
1-CF card reader/writer 2-Update cable<br />
3-USB Port 4-Computer 5-CF cartridge<br />
Fig 62<br />
Click 'pay' to buy the software. The bought<br />
software will be automatically added to the user's<br />
download center.<br />
Click 'clear' to clear all the software in the<br />
shopping cart.<br />
Click 'purchase other' to buy other software. (See<br />
fig 62).<br />
Note:<br />
The operation for update center is the same<br />
as for the purchase center.<br />
Select the programs that can be deleted and<br />
click "Delete" button to make some more<br />
space available.<br />
C-29<br />
1. Insert the CF card into the CF card<br />
reader/writer.<br />
2. Connect one end of the update cable(2) to<br />
the port of the CF card reader/writer(1),<br />
and the other end to the USB port of the<br />
computer.<br />
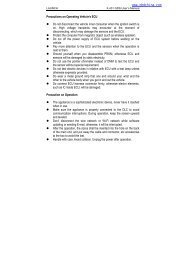
Precaution on operation of the CF card<br />
reader/writer:<br />
1) Install the driver<br />
If it is the first time to use the CF card<br />
reader/writer, you may have to install its driver.<br />
Use CD-ROM or floppy disk which are bought<br />
separately or delivered with the CF card<br />
reader/writer to install the driver.<br />
CF card reader/writer can use the default<br />
driver in Windows Me/2000/XP and Mac OS<br />
9.x/Mac OS X. However, it is necessary to<br />
install the driver on Windows 98.<br />
The installation procedure is as follows:<br />
1. Boot Windows 98.<br />
2. Insert the CD-ROM into CD-ROM drive.<br />
3. Connect CF card to the USB port of the<br />
PC with the attached USB cable.<br />
4. Find and Double click on setup.exe file in<br />
Email: service007@obdchina.com
http://www.obdchina.com/launch-x431-gx3-super-scanner-p-33.html<br />
LAUNCH X-431<br />
the catalogue of CD-ROM. The system will<br />
make preparation for the installation. See<br />
Fig.64.<br />
5. When the preparation is complete, the<br />
screen will prompt to continue the<br />
operation. See Fig.65. Click "Next" to start<br />
installation.<br />
successfully, a "Removable disk" icon<br />
will be added in the catalogue of "My<br />
computer".<br />
Note:<br />
♦ Do not unplug the CF card reader/writer<br />
from the USB port while its LED is<br />
blinking, otherwise data would be<br />
damaged!<br />
♦ Data on CF card cannot be restored from<br />
the "Recycle Bin" once deleted.<br />
2) Pull out the CF card<br />
The CF card must not be pulled out when the<br />
CF card reader/writer is being used. Otherwise,<br />
the data in the CF card will be lost.<br />
Fig.64<br />
Fig.65<br />
6. When installation is finished, the screen<br />
will display the information as shown in<br />
Fig.66. Click "Finish" to exit.<br />
Procedure for pulling out the CF cartridge:<br />
On the desktop of Windows, open the window<br />
of "My computer". Click the right mouse button<br />
on "Removable disk" to pop up a menu. Select<br />
"Ejector (J) " in the menu. Then pull out the CF<br />
card. The written data may be lost if the CF<br />
card is pulled out discretionarily. When you<br />
want to use the CF card again, put it in.<br />
Software Update<br />
Open the "X-431 update" folder, and double<br />
click the icon . Then install the update tool<br />
according to the prompts on the screen.<br />
When the installation is complete, the "<strong>X431</strong><br />
update tool" icon will appear on the desktop.<br />
Make sure that the X-431 CF card<br />
reader/writer and the CF card are well<br />
connected to the computer. Then double click<br />
the "<strong>X431</strong> update tool" icon to run the program.<br />
The program will automatically check the<br />
downloaded update files, including the<br />
diagnostic program and the display program.<br />
See Fig.67.<br />
Fig.66<br />
When the CF card reader/writer is installed<br />
C-30<br />
Email: service007@obdchina.com
http://www.obdchina.com/launch-x431-gx3-super-scanner-p-33.html<br />
LAUNCH X-431<br />
• DISPLAY PROGRAM---- for<br />
displaying the X-431 diagnostic<br />
information and managing the X-431<br />
diagnostic programs<br />
• SYSTEM DATA---- system data<br />
used by X-431 system<br />
Fig.67<br />
Select the module for update in the interface<br />
shown in Fig.67, and click "Update" icon to<br />
update. When the update is complete,<br />
prompts will appear to notify successful<br />
update.<br />
After completion of update, press "Esc" key to<br />
exit the update tool.<br />
2) Optional programs that can be selected<br />
according to user's demand:<br />
Diagnostic program for various vehicles<br />
2. Install the X-431 UPDATE TOOLS into<br />
computer.<br />
3. Format the X-431 CF card.<br />
4. Run the X-431 UPDATE TOOLS and write<br />
the display program, system data and<br />
diagnostic programs onto CF card.<br />
If error message appears during update, it<br />
may be the following circumstances. Solve the<br />
problem and try again.<br />
1) CF card reader/writer is not well<br />
connected to the computer, or its driver is<br />
not correctly installed in the computer.<br />
2) Memory of CF card is insufficient.<br />
3) Other cause.<br />
Remaking of X-431 CF card<br />
In case X-431 CF card is damaged and the<br />
program in the card can not be used, please<br />
use the following procedure to remake the CF<br />
card:<br />
1. Log onto the website "www.x431.com".<br />
Enter your username and password to log<br />
in.<br />
Select the SMARTBOX No., and then<br />
download the following programs into your<br />
computer:<br />
1) Necessary programs for making CF card:<br />
• <strong>X431</strong> UPDATE TOOLS---- for writing<br />
the program from computer to CF<br />
card when doing X-431 update<br />
C-31<br />
Email: service007@obdchina.com
http://www.obdchina.com/launch-x431-gx3-super-scanner-p-33.html<br />
LAUNCH X-431<br />
Appendix: Flow Chart of X-431 Upgrade<br />
Log on www. x431. com<br />
Select language<br />
For unregistered user<br />
Click [Register]<br />
For member<br />
Enter username and PW<br />
Read terms of service, click [I accept]<br />
Complete the registration<br />
Click [Login]<br />
Select SMARTBOX Serial No.<br />
Download software and update tool<br />
Connect CF card writer and CF card,install CF card writer driver<br />
Install and run <strong>X431</strong> update tool<br />
Select module and perform update<br />
After update, press [ESC]<br />
C-32<br />
Email: service007@obdchina.com
http://www.obdchina.com/launch-x431-gx3-super-scanner-p-33.html<br />
LAUNCH X-431<br />
Important Notice<br />
FAQ<br />
Q: Why can't I input data after I activate Soft<br />
Keyboard?<br />
A: It may be the following situations.<br />
1) The position where the cursor lies<br />
can't be edited.<br />
2) You have not activated the cursor on<br />
the input position. Use the stylus to<br />
click the part to edit. When the cursor<br />
twinkles, you can input the data.<br />
Q: Why can't I switch from Active Taskbar to<br />
the running application interface?<br />
A: Please close interfaces related to the<br />
application, such as the Help or Detail.<br />
Q: Why is the screen inactive after the cross<br />
cursor appears on the screen?<br />
A: The system is calibrating the touch screen.<br />
It will start up after calibrating. To know more,<br />
please refer to the section "System<br />
Information Calibrate Touch screen".<br />
A: Please quit the current application<br />
(interface), and run it again. If the problem is<br />
not solved, please restart the system.<br />
Q: How can I know what applications<br />
(interfaces) I've opened?<br />
A: Click the active taskbar icon, then the<br />
pop-up list will display the applications<br />
(interfaces) you've opened.<br />
Q: Why can't I operate the current interface?<br />
A: It may be the following situations.<br />
1) Your current interface has exit illegally.<br />
In this situation, You may not see the<br />
name of the application (interface) in<br />
the pop-up list when you click the<br />
active taskbar icon.<br />
2) The system is busy, please wait<br />
patiently, or click the active taskbar<br />
icon to switch to another application<br />
(interface).<br />
Q: Why does the system prompt that 'CF card<br />
is not found' when it is started?<br />
A: Your CF card is inserted incorrectly or it is<br />
damaged.<br />
Q: Why does the saved data disappear?<br />
A: It may be the following situations:<br />
1) Your CF card is damaged.<br />
2) You've changed language and the data is<br />
related to language. You may find the<br />
data after switching back to the former<br />
language.<br />
Q: Why is there no reaction or wrong reaction<br />
when I click with stylus?<br />
A: Now you may need to calibrate the touch<br />
screen. Refer to the section "System<br />
Information Calibrate Touch screen" for<br />
calibration.<br />
Q: What can I do when the screen is<br />
confused?<br />
C-33<br />
Email: service007@obdchina.com
http://www.obdchina.com/launch-x431-gx3-super-scanner-p-33.html<br />
LAUNCH X-431<br />
Warranty<br />
THIS WARRANTY IS EXPRESSLY LIMITED<br />
TO PERSONS WHO PURCHASE LAUNCH<br />
PRODUCTS FOR PURPOSES OF RESALE<br />
OR USE IN THE ORDINARY COURSE OF<br />
THE BUYER'S BUSINESS.<br />
LAUNCH electronic product is warranted<br />
against defects in materials and workmanship<br />
for one year (12 months) from date of delivery<br />
to the user. This warranty does not cover any<br />
part that has been abused, altered, used for a<br />
purpose other than for which it was intended,<br />
or used in a manner inconsistent with<br />
instructions regarding use. The exclusive<br />
remedy for any automotive meter found to be<br />
defective is repair or replacement, and<br />
LAUNCH shall not be liable for any<br />
consequential or incidental damages. Final<br />
determination of defects shall be made by<br />
LAUNCH in accordance with procedures<br />
established by LAUNCH. No agent, employee,<br />
or representative of LAUNCH has any<br />
authority to bind LAUNCH to any affirmation,<br />
representation, or warranty concerning<br />
LAUNCH automotive meters, except as stated<br />
herein.<br />
Customer Service<br />
If you have any questions on the operation of<br />
the unit, please contact us:<br />
Tel: 86-755-84528431/84528822<br />
E-mail: <strong>X431</strong>@cnlaunch.com<br />
If your unit requires repair service, return it to<br />
the manufacturer with a copy of the sales<br />
receipt and a note describing the problem. If<br />
the unit is determined to be in warranty, it will<br />
be repaired or replaced at no charge. If the<br />
unit is determined to be out of warranty, it will<br />
be repaired for a nominal service charge plus<br />
return freight. Send the unit pre-paid to:<br />
Attn: Customer Service Department<br />
LAUNCH TECH. CO., LTD.<br />
Launch Industrial Park,<br />
North of Wuhe Avenue,<br />
Banxuegang, Bantian,<br />
Longgang, Shenzhen, Guangdong<br />
P.R.<strong>China</strong>, 518112<br />
Disclaimer<br />
THE ABOVE WARRANTY IS IN LIEU OF ANY<br />
OTHER WARRANTY, EXPRESSED OR<br />
IMPLIED, INCLUDING ANY WARRANTY OF<br />
MERCHANTABILITY OR FITNESS FOR A<br />
PARTICULAR PURPOSE.<br />
Order Information<br />
Replaceable and optional parts can be<br />
ordered directly from your LAUNCH authorized<br />
tool supplier. Your order should include the<br />
following information:<br />
1. Quantity<br />
2. Part number<br />
3. Item description<br />
C-a<br />
Email: service007@obdchina.com