Service Manual PLATINUM ENG.pdf
Service Manual PLATINUM ENG.pdf
Service Manual PLATINUM ENG.pdf

Create successful ePaper yourself
Turn your PDF publications into a flip-book with our unique Google optimized e-Paper software.
TECHNICAL SERVICE<br />
MANUAL<br />
Emissione Luglio 2007<br />
REV.00
Ideas with Passion<br />
<strong>PLATINUM</strong> TECHNICAL SERVICE MANUAL (Rev 00 Aug.06): CONTENTS<br />
1. Introduction (rev.00)<br />
1.1 Documentation required<br />
1.2 Tools and equipment required<br />
1.3 Safety warnings<br />
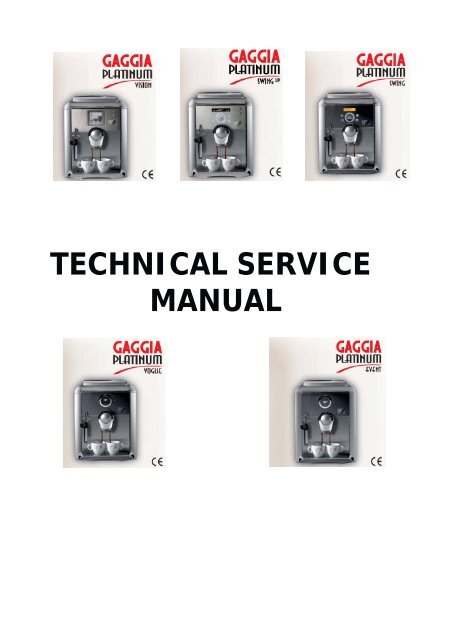
1.4 Platinum range<br />
2. Technical data (rev.00)<br />
2.1 Product technical data<br />
2.2 Internal / external machine components<br />
3. Summarised instructions (rev.00)<br />
3.1 Client and programming menu (rev.00)<br />
3.2 Maintenance and cleaning (rev.00)<br />
4. Diagrams (rev.00)<br />
4.1 Wiring diagram (rev.00)<br />
4.2 Water circuit diagram (rev.00)<br />
5. Troubleshooting (rev.00)<br />
5.1 Test functions (rev.00)<br />
5.2 Diagnostics function (rev.00)<br />
5.3 Error messages for <strong>Service</strong> personnel (rev.00)<br />
5.4 Problems, Causes, Remedies (rev.00)<br />
6. Operating logic (rev.00)<br />
6.1 Resetting coffee grounds drawer (rev.00)<br />
6.2 Water reserve (rev.00)<br />
6.3 Motorized tank (rev.00)<br />
6.4 Prima water (rev.00)<br />
6.5 SBS valve (rev.00)<br />
6.6 Solenoid pilot (rev.00)<br />
7. Component assembly / disassembly (rev.00)<br />
7.1 Top cover (rev.00)<br />
7.2 Right and left-side cover (rev.00)<br />
7.3 Electronics (rev.00)<br />
7.4 Gearmotor (rev.00)<br />
7.5 Pump (rev.00)<br />
7.6 Heater and solenoid pilot unit (rev.00)<br />
7.7 Oetiker clamp assembly and disassembly (rev.00)<br />
7.8 Coffee grinder (rev.00)<br />
7.9 Grinder adjustment/assembly and disassembly (rev.00)<br />
7.10 Grinder adjustment during servicing (rev.00)<br />
7.11 Motorized drip tray (rev.00)<br />
8. <strong>Service</strong> schedule (rev.00)<br />
8.1 Routine maintenance Check list (rev.00)<br />
9. Exploded drawing (rev.00)<br />
TALEA Contents<br />
REV00 - August 06<br />
1/1
SECTION 1<br />
INTRODUCTION<br />
TALEA Section 01<br />
REV.00<br />
REV00 - August 06
1.1 Documentation required<br />
The following technical documentation is required for repairs:<br />
Instruction booklet for specific model.<br />
Technical documentation for specific model (diagrams, exploded drawings).<br />
1.2 Tools and equipment required<br />
As well as the standard equipment, the tools listed below are required.<br />
1 special screwdriver with Torx T10 tip.<br />
1 digital thermometer with full 200°C scale.<br />
This must be suitable for measuring in liquids and on surfaces.<br />
1 set of pliers for Oetiker clamps.<br />
1 pincer.<br />
1 CC -A - Vdc tester.<br />
1.3 Safety warnings<br />
Before starting operations on the machine, consult the relative instruction booklet.<br />
Observe all current standards related to the repair of domestic appliances.<br />
Always disconnect the power plug from the mains before carrying out repairs. Simply turning<br />
off the main switch is not sufficient to prevent electrical discharge.<br />
This domestic appliance is rated with insulation class I.<br />
On completion of repairs, the insulation and dielectric rigidity tests must be performed.<br />
TALEA Section 01<br />
REV00 - August 06<br />
1/2
Ideas with Passion<br />
1.4 Platinum range<br />
VISION<br />
- Touch Screen<br />
- S B S<br />
- Cup warmer<br />
- Motorized tank<br />
- Milk adapter<br />
- Rapid Steam<br />
- Pre-ground option<br />
SWING UP<br />
SWING<br />
- 24x2 display<br />
- Ring selector<br />
- S B S<br />
- Cup warmer<br />
- Motorized tank<br />
- Milk adapter<br />
- Rapid Steam<br />
- Pre-ground option<br />
- 10x2 display<br />
- Ring selector<br />
- S B S<br />
- Milk adapter<br />
- Rapid Steam<br />
- Pre-ground option<br />
VOGUE<br />
- Height adjustment ringnut<br />
- S B S<br />
- Milk adapter<br />
- Rapid Steam<br />
TALEA Section 01<br />
REV00 - August 06<br />
2/2
EVENT<br />
- S B S<br />
- Rapid Steam<br />
TALEA - ODEA Cap. 01<br />
REV00 - Luglio 07<br />
3/3
SECTION 2<br />
TECHNICAL DATA<br />
TALEA Section 02<br />
REV00 - August 06<br />
REV.00
2.1 Product technical data<br />
Power supply and output: 230 V~, 50/60 Hz, 1300 W.<br />
Temperature control:<br />
1 (NTC) variable resistor sensor – transmits the value<br />
to the electronic board.<br />
Safety system:<br />
2 x 175°C manual reset thermostats.<br />
Coffee heat exchanger output: 1300 W – to dispense coffee, hot water and steam.<br />
Stainless steel<br />
Motorized tank only on<br />
24V stepper motor.<br />
Platinum Vision e Swing Up<br />
Water level and drip<br />
Capacitive sensor<br />
tray sensor:<br />
Gearmotor:<br />
33VC with 2 directions of rotation.<br />
Cup warmer plate:<br />
Solo Platinum Vision e Swing Up<br />
Activated via MENU display.<br />
PTC Type.<br />
Pump:<br />
Ulka reciprocating piston type with thermal cutout at<br />
100°C,<br />
48 W, 230V, 50 Hz, Type EX5 approx. 13-15 bars.<br />
Pressure relief valve:<br />
Opening at approx. 18-20 bars.<br />
Water filter:<br />
In tank.<br />
Coffee grinder:<br />
DC motor with ceramic plate<br />
grinders.<br />
Solenoid pilot:<br />
15 VA.<br />
Coffee dose control:<br />
Hall sensor – Pulse control. Dose adjustment can<br />
be set from approx. 7 to 10.5 g.<br />
Amps: During heating phase- approx. 5.6 A.<br />
Dimensions: l x h x d in mm: 310/390/440<br />
Weight:<br />
10 kg (average).<br />
Water tank capacity: 1.7 l.<br />
Coffee container capacity:<br />
250g coffee granules.<br />
Coffee grounds drawer capacity: 14<br />
Heatex changer capacity:<br />
Approx. 10 cc.<br />
Water circuit filling time:<br />
Approx. 15 sec on first filling cycle.<br />
Heating time:<br />
Approx. 45 sec.<br />
Dispensed drink temperature: Approx. 73°C - 83°C<br />
Grinding time:<br />
Approx. 8-10 sec.<br />
TALEA Section 02<br />
REV00 - August 06<br />
1/4
Internal components<br />
Heater<br />
Pump<br />
Static<br />
eliminator<br />
Turbine<br />
Power<br />
board<br />
CPU<br />
Card<br />
Coffee grinder<br />
Solenoid pilot<br />
Motorized tank<br />
stepper motor<br />
on 02<br />
REV00 - August 06<br />
4/4
Ideas with Passion<br />
SECTION 3<br />
BRIEF<br />
INSTRUCTIONS<br />
TALEA Section 03<br />
REV.00<br />
REV00 - August 06
Ideas with Passion<br />
3.1 Client and programming menu<br />
Platinum Vision<br />
Press “go to menu”<br />
The programming menu will open.<br />
Detailed<br />
beverage programming<br />
To set current<br />
time<br />
Beverage<br />
settings<br />
Clock<br />
Main menu<br />
Machine<br />
settings<br />
Maintenance<br />
settings<br />
Machine function<br />
programming<br />
Show text<br />
8:30 a<br />
Go to<br />
diagnostics<br />
Next<br />
page<br />
Next<br />
Go<br />
back<br />
Exit<br />
After setting each of the following menus, press:<br />
- “Go back” to be returned to the previous screen and save any new<br />
settings.<br />
- “Previous settings” to reset previous values.<br />
- “Go back to menu” to be returned to the main menu and save new<br />
settings.<br />
Machine settings<br />
Language &<br />
display<br />
Water<br />
settings<br />
Cup warmer<br />
Machine settings menu.<br />
- Language & display = to set menu language and display contrast.<br />
- Water settings = to set some water functions.<br />
- Cup warmer = to set cut warmer functions.<br />
Go back to<br />
menu<br />
Go<br />
back<br />
Beverage settings menu<br />
To set general parameters for the dispense of beverages containing coffee,<br />
press the “beverage settings” key in the main menu.<br />
Beverage settings<br />
Espresso<br />
Coffee<br />
Long coffee<br />
The following can be set for each beverage selected:<br />
Go back<br />
to menu<br />
Go<br />
back<br />
Coffee settings<br />
Pre-brewing<br />
of coffee<br />
Pre-brewing<br />
normal<br />
Temperature<br />
medium<br />
The temperature of the<br />
dispensed coffee.<br />
The amount of coffee to be<br />
ground and use of<br />
pre-ground coffee.<br />
Aroma<br />
normal<br />
Go back to<br />
menu<br />
Water quantity<br />
240 / 500<br />
Go<br />
back<br />
The amount of water to be<br />
used in dispensed coffee.<br />
Clock menu<br />
To set the current time and timer (for<br />
standby), press the “clock settings”<br />
key on the main menu.<br />
To set current<br />
time.<br />
Time<br />
Clock settings<br />
Stand-by<br />
To set stand-by parameters<br />
after coffee is<br />
dispensed.<br />
Go back to<br />
menu<br />
Go<br />
back<br />
TALEA Section 03<br />
REV00 - August 06<br />
1/3
Ideas with Passion<br />
Platinum Swing Up<br />
To open programming<br />
menu.<br />
Strong aroma<br />
Espresso coffee 08:33<br />
To select milk-based<br />
beverage.<br />
Use the touch-ring to select the<br />
type of beverage you want.<br />
MENU<br />
Confirm key.<br />
To select coffee<br />
aroma.<br />
Hot water key.<br />
Beverage settings<br />
To set beverage preparation parameters: press the MENU key and use the touch-ring to select “beverage settings”.<br />
At this point, you can:<br />
Exit the<br />
programming page.<br />
Rotate the touch-ring to vary the<br />
following settings:<br />
- The amount of coffee dispensed<br />
(1 square = approx. 15 ml).<br />
- The amount of water added<br />
(1 square = approx. 15 ml).<br />
- Coffee temperature.<br />
- Pre-brewing of coffee.<br />
MENU<br />
1 Beverage settings<br />
Reset default (factory) settings.<br />
Function depends on the current<br />
programming level.<br />
To select coffee<br />
aroma.<br />
To save new settings.<br />
Machine settings<br />
To set general machine settings, press the MENU key, select “machine settings” then use the touch-ring to select:<br />
2.1 Language<br />
2.2 Cup warmer<br />
2.3 Beeps<br />
Italian<br />
Disabled<br />
Enabled<br />
To set menu language. To set cup warmer function. To enable beep warnings.<br />
2.4 Filter alarm.<br />
Enabled<br />
To set machine function with<br />
“Aqua Prima” filter.<br />
2.5 Rinse<br />
Enabled<br />
To set circuit rinsing.<br />
2.6 Water hardness<br />
1<br />
To set water<br />
hardness.<br />
2.7 Clock<br />
To set internal clock.<br />
MENU<br />
2 Machine settings<br />
To exit at any time from<br />
“Machine settings”<br />
without saving any changes made,<br />
press the MENU key.<br />
TALEA Section 03<br />
REV00 - August 06<br />
2/3
Ideas with Passion<br />
3.2 Maintenance and cleaning<br />
STEPS<br />
A Empty coffee grounds drawer. As instructed.<br />
B Empty drip tray. As necessary.<br />
C Clean water tank. Once a week.<br />
D Clean the coffee granule container. As necessary.<br />
E Clean casing. As necessary<br />
F Clean and grease the brew group. Monthly or every<br />
500 coffees.<br />
H Descaling. As instructed.<br />
J Clean drip tray. Weekly.<br />
K Clean coffee circuit. Weekly.<br />
Descaling.<br />
Hardness Water hardness Descaling frequency *<br />
1 Soft water (up to 7ºdH) Approx. every 3 months/120 litres<br />
2 Medium water (7º-14ºdH) Approx. every 2 months / 90 litres<br />
3 Hard water (15º-21ºdH) Approx. every 6 weeks / 60 litres<br />
4 Very hard water (over 21ºdH) Approx. every 4 weeks / 30 litres<br />
* Without Prima water filter<br />
TALEA Section 03<br />
REV00 - August<br />
3/3
Ideas with Passion<br />
SECTION 4<br />
DIAGRAMS<br />
TALEA Section 04<br />
REV.00<br />
REV00 - August 06
Ideas with Passion<br />
4.1 Wiring diagram<br />
Platinum Vision<br />
1/5<br />
TALEA Section 04<br />
REV00 - August 06<br />
BLACK<br />
BLACK<br />
BLACK<br />
BLACK<br />
BLACK<br />
WHITE<br />
BLACK<br />
BLACK<br />
BLACK<br />
BLACK<br />
BLACK<br />
BLACK<br />
BLACK<br />
BLACK<br />
BLACK<br />
BLACK<br />
BLACK<br />
BLACK<br />
YELLOW<br />
RED<br />
RED<br />
GREEN<br />
WHITE<br />
WHITE<br />
BLUE<br />
BLACK<br />
GREEN<br />
RED<br />
FLAT-CABLE<br />
BLACK<br />
BLACK<br />
BLACK<br />
BLACK<br />
BLACK<br />
BLACK<br />
BLACK<br />
BLACK<br />
BLACK<br />
BLACK<br />
BLACK<br />
BLACK<br />
YELLOW<br />
BLACK<br />
RED<br />
BLACK<br />
GREEN<br />
BLACK<br />
BLACK<br />
BLACK<br />
BLACK<br />
WHITE<br />
WHITE<br />
BLACK<br />
RED<br />
GREEN<br />
BLUE<br />
DISPLAY<br />
RED<br />
RED<br />
Y-G<br />
Y-G<br />
Y-G<br />
Y-G<br />
Y-G<br />
BLACK<br />
BLACK<br />
BLACK<br />
BLACK<br />
BLACK<br />
BLACK<br />
BLACK<br />
BLACK<br />
BLACK<br />
BLACK<br />
BLACK<br />
BLACK<br />
BLACK<br />
BLACK<br />
BLACK<br />
BLACK<br />
BLACK<br />
BLACK<br />
BLACK<br />
BLACK<br />
BLACK<br />
BLACK<br />
BLACK<br />
BLACK<br />
BLACK<br />
BLACK<br />
BLACK<br />
FLAT-CABLE<br />
BLACK<br />
YELLOW<br />
RED<br />
WHITE<br />
BLUE<br />
RED<br />
BLACK<br />
BLACK<br />
BLACK<br />
BLACK<br />
BLACK<br />
BLACK<br />
YELLOW<br />
BLUE<br />
BLUE<br />
WHITE<br />
YELLOW<br />
BLACK<br />
WHITE<br />
BLUE<br />
BLUE<br />
BLACK<br />
BLUE<br />
YELLOW BLUE<br />
BLUE<br />
BLUE<br />
BLUE<br />
BLACK<br />
BLACK<br />
Y-G<br />
YELLOW-GREEN<br />
YELLOW-GREEN
Ideas with Passion<br />
Platinum Swing UP<br />
2/5<br />
TALEA Section 04<br />
REV00 - August 06<br />
GREEN<br />
FLAT-CABLE<br />
BLACK<br />
BLACK<br />
BLACK<br />
BLACK<br />
BLACK<br />
YELLOW<br />
WHITE<br />
RED<br />
GREEN<br />
BLACK<br />
RED<br />
GREEN<br />
BLUE<br />
BLACK<br />
BLACK<br />
DISPLAY<br />
WHITE<br />
RED<br />
RED<br />
BLACK<br />
BLACK<br />
BLACK<br />
BLACK<br />
BLACK<br />
BLACK<br />
BLACK<br />
BLACK<br />
BLACK<br />
BLACK<br />
FLAT-CABLE<br />
BLACK<br />
BLACK<br />
YELLOW<br />
RED<br />
WHITE<br />
BLUE<br />
RED<br />
BLACK<br />
BLACK<br />
BLACK<br />
BLUE<br />
BLUE<br />
BLACK<br />
BLUE<br />
YELLOW-GREEN<br />
YELLOW-GREEN<br />
YELLOW BLUE<br />
Y-G<br />
BLUE<br />
BLUE<br />
BLUE<br />
BLACK<br />
BLACK<br />
Y-G<br />
Y-G<br />
Y-G<br />
BLACK<br />
BLACK<br />
BLACK<br />
BLACK<br />
BLACK<br />
BLACK<br />
YELLOW<br />
BLUE<br />
BLUE<br />
WHITE<br />
YELLOW<br />
BLACK<br />
WHITE<br />
BLACK<br />
BLACK<br />
BLACK<br />
BLACK<br />
BLACK<br />
BLACK<br />
BLACK<br />
BLACK<br />
BLACK<br />
BLACK<br />
BLACK<br />
BLACK<br />
BLUE<br />
BLACK<br />
GREEN<br />
RED<br />
WHITE<br />
RED<br />
YELLOW<br />
BLACK<br />
BLACK<br />
BLACK<br />
BLACK<br />
BLACK<br />
BLACK<br />
BLACK<br />
BLACK<br />
BLACK<br />
BLACK<br />
BLACK<br />
WHITE<br />
BLACK<br />
BLACK<br />
BLACK<br />
BLACK<br />
BLACK<br />
BLACK<br />
WHITE<br />
RED<br />
BLACK<br />
BLACK<br />
BLACK<br />
BLACK<br />
BLACK<br />
BLACK<br />
BLACK<br />
BLACK<br />
BLACK<br />
BLACK<br />
BLACK<br />
BLACK<br />
BLACK<br />
BLACK<br />
BLACK<br />
BLACK<br />
BLACK<br />
BLACK<br />
BLACK<br />
BLACK<br />
BLACK<br />
BLACK
Ideas with Passion<br />
Platinum Swing<br />
3/5<br />
TALEA Section 04<br />
REV00 - August 06<br />
DIPLAY<br />
BLACK<br />
BLACK<br />
WHITE<br />
BLACK<br />
BLACK<br />
BLACK<br />
BLACK<br />
BLACK<br />
BLACK<br />
BLACK<br />
WHITE<br />
BLACK<br />
BLACK<br />
BLACK<br />
GREEN<br />
BLACK<br />
RED<br />
YELLOW<br />
BLACK<br />
BLACK<br />
BLUE<br />
BLACK<br />
GREEN<br />
RED<br />
BLACK<br />
BLACK<br />
BLACK<br />
BLACK<br />
BLACK<br />
BLACK<br />
BLACK<br />
BLACK<br />
BLACK<br />
BLACK<br />
BLACK<br />
BLACK<br />
BLACK<br />
BLACK<br />
BLACK<br />
BLACK<br />
BLACK<br />
BLACK<br />
BLACK<br />
BLACK<br />
BLACK<br />
BLACK<br />
BLACK<br />
BLACK<br />
BLACK<br />
WHITE<br />
BLACK<br />
BLACK<br />
BLACK<br />
BLACK<br />
BLACK<br />
YELLOW<br />
WHITE<br />
RED<br />
BLACK<br />
GREEN<br />
BLACK<br />
RED<br />
GREEN<br />
BLUE<br />
BLACK<br />
BLACK<br />
BLACK<br />
BLACK<br />
BLACK<br />
BLACK<br />
RED<br />
RED<br />
BLACK<br />
BLACK<br />
BLACK<br />
BLACK<br />
BLACK<br />
BLACK<br />
BLACK<br />
BLACK<br />
BLACK<br />
BLACK<br />
BLACK<br />
BLACK<br />
BLUE<br />
BLUE<br />
BLACK<br />
BLUE<br />
YELLOW-GREEN<br />
YELLOW-GREEN<br />
YELLOW BLUE<br />
Y-G<br />
BLUE<br />
BLUE<br />
BLUE<br />
BLACK<br />
BLACK<br />
BLACK<br />
BLACK<br />
BLACK<br />
BLACK<br />
YELLOW<br />
BLUE<br />
BLUE<br />
WHITE<br />
YELLOW<br />
BLACK<br />
WHITE<br />
BLACK<br />
BLACK<br />
BLACK<br />
BLACK<br />
BLACK<br />
BLACK<br />
BLACK<br />
BLACK<br />
BLACK<br />
BLACK<br />
BLACK<br />
BLACK
Platinum Vogue<br />
4/5<br />
TALEA Section 04<br />
REV00 - August 06<br />
BLACK<br />
BLACK<br />
BLACK<br />
BLACK<br />
WHITE<br />
BLUE<br />
BLACK<br />
GREEN<br />
RED<br />
BLACK<br />
WHITE<br />
GREEN<br />
RED<br />
BLACK<br />
YELLOW<br />
BLACK<br />
BLACK<br />
BLACK<br />
YELLOW<br />
RED<br />
WHITE<br />
BLACK<br />
RED<br />
BLACK<br />
WHITE<br />
GREEN<br />
BLUE<br />
BLACK<br />
BLACK<br />
GREEN<br />
BLACK<br />
BLACK<br />
BLACK<br />
BLACK<br />
BLUE<br />
WHITE<br />
YELLOW<br />
BLACK<br />
BLACK<br />
BLUE<br />
BLUE<br />
YELLOW-GREEN<br />
Y-G<br />
BLACK<br />
BLACK<br />
BLACK<br />
BLACK<br />
BLACK<br />
BLACK<br />
BLACK<br />
BLACK<br />
BLACK<br />
BLACK<br />
RED<br />
RED<br />
BLACK<br />
BLACK<br />
BLACK<br />
BLACK<br />
BLACK<br />
BLACK<br />
BLACK<br />
BLACK<br />
BLACK<br />
BLACK<br />
BLACK<br />
BLACK<br />
BLACK<br />
BLACK<br />
BLACK<br />
BLACK<br />
BLACK<br />
BLACK<br />
BLACK<br />
BLACK<br />
BLACK<br />
BLACK<br />
BLACK<br />
BLACK<br />
BLACK<br />
BLACK<br />
BLACK<br />
BLACK<br />
BLACK<br />
BLACK<br />
BLACK<br />
BLACK<br />
BLACK<br />
BLACK<br />
BLACK<br />
BLACK<br />
BLACK<br />
BLACK<br />
BLACK<br />
BLACK<br />
BLUE<br />
YELLOW-GREEN<br />
BLACK<br />
BLUE<br />
BLACK<br />
YELLOW<br />
YELLOW<br />
BLACK<br />
BLACK<br />
WHITE<br />
BLUE<br />
BLUE<br />
BLUE<br />
BLUE<br />
BLACK<br />
BLACK
Ideas with Passion<br />
4.2 Platinum water circuit<br />
TANK<br />
Silicon tube<br />
Turbine<br />
Silicon tube<br />
Pump<br />
Steam tube<br />
STEAM/WATER<br />
DISPENSE<br />
1300W heater<br />
Reinforced silicon hose<br />
Reinforced silicon hose<br />
Reinforced silicon hose<br />
Reinforced silicon hose<br />
WATER DRAINED<br />
TO DRIP TRAY<br />
Water drain connector<br />
Water/steam valve Water drain connector<br />
WATER DRAINED<br />
TO TANK<br />
Connector with 3 bar relief valve<br />
Silicon tube<br />
MILK ISLAND STEAM<br />
DISPENSE<br />
Reinforced silicon hose<br />
COFFEE<br />
DISPENSE<br />
Brew unit<br />
SBS valve<br />
Brew unit pin<br />
Coffee dispense valve (3-5 bars)<br />
Relief valve (16-19 bars)<br />
Drain valve<br />
TALEA Section 04<br />
REV00 - August 06<br />
5/5
Ideas with Passion<br />
5.1 Test functions<br />
Platinum Vision<br />
2 3<br />
4<br />
1<br />
In the first three seconds after the<br />
appliance is switched on, you can<br />
enter test mode by pressing the keys<br />
in the sequence shown on the left.<br />
t.0<br />
Software version<br />
CPU_V01.04.09<br />
Next<br />
On entering test mode, the screen<br />
shown in the screenshot opens.<br />
Press the next key to move on to<br />
subsequent levels.<br />
* * *<br />
Level T1 – brew group<br />
At this level, brew group gearmotor and associated microswitches function is tested.<br />
t.1 - Brewing unit<br />
Next<br />
bu_current (mA) = 3<br />
bu_home<br />
= OFF<br />
bu_work<br />
= ON<br />
bu_present = ON<br />
bu_dregdrawer = ON<br />
bu_door<br />
= ON<br />
bu go<br />
home<br />
bu go<br />
work<br />
bu go<br />
stop<br />
- bu_current (mA) - indicates current absorbed by gearmotor.<br />
- bu_home - indicates state of brew group home position microswitch.<br />
- bu_work - indicates state of brew group work position microswitch.<br />
- bu_present - indicates state of brew group presence microswitch.<br />
- bu_dregdraver - indicates state of coffee grounds drawer presence microswitch.<br />
- bu_door - indicates state of side door closed microswitch.<br />
- By pressing “bu go home” once, the gearmotor moves the brew group to the home position.<br />
- By pressing “bu go work” once, the gearmotor moves the brew group to the work position.<br />
- By pressing “bu stop” once, the gearmotor stops the brew group.<br />
Level T2 – heating unit<br />
At this level, you can check heater function and the associated ntc sensor.<br />
t.2 - Heating unit<br />
Next<br />
boiler_temp (C°) =79.8<br />
- boiler_temp (C°) - indicates the temperature of the water heater.<br />
- Pressing “cup heater” once will turn the cup warmer on.<br />
- Pressing “boiler” once will turn the heater on.<br />
Cup<br />
heater<br />
Boiler<br />
*<br />
Level T3 – hydraulic circuit<br />
At this level, you can test pump, solenoid valve, drip tray/water tank level, milk island and water/steam valve status sensor<br />
function.<br />
t.3<br />
Hydraulic circuit<br />
TALEA Section 05<br />
REV00 - August 06<br />
Next<br />
flow_meter (p/s) = 0<br />
driptray_sens = OFF<br />
waterlevel_sens = ON<br />
knob_milk<br />
= OFF<br />
knob_water&steam = ON<br />
knob_closed = OFF<br />
milk island present = OFF<br />
caraffe present = OFF<br />
valve pump<br />
water<br />
*<br />
- flow_meters (p/s) - indicates revolutions per second of the hall sensor in the turbine.<br />
- driptray_sens - indicates the state of the capacitive sensor reading the water level in the<br />
drip tray.<br />
- waterlevel_sens - indicates the state of the capacitive sensor reading the water level in the<br />
water tank.<br />
- knob_milk - indicates the state of the water/steam/milk-island knob in the milk position.<br />
- knob_water&steam - indicates the state of the water/steam/milk-island knob in the water/<br />
steam position.<br />
- knob_closed - indicates the state of the water/steam/milk-island knob in the closed position.<br />
1/17
Ideas with Passion<br />
- Milk island present indicates the state of the milk island present microswitch.<br />
- Caraffe present indicates the state of the milk carafe present microswitch.<br />
- Pressing “valve” once will excite the solenoid valve.<br />
- Pressing “water pump” once will start the pump.<br />
- Pressing “valve” once will activate the solenoid valve.<br />
Level T4 – Grinder unit<br />
At this level, you can test coffee grinder function.<br />
t.4 - Grinder unit<br />
Next<br />
pulses_counter = 0<br />
delay_time (msec) = 0<br />
bean_door = ON<br />
bean_alarm = OFF<br />
- pulse_counter - indicates the number of grinding pulses the grinder performs.<br />
- delay_time (msec) - indicates revolutions per second of the hall sensor in the coffee<br />
grinder.<br />
- bean_door - indicates the state of the coffee bean container lid magnetic sensor.<br />
- bean_alarm - indicates the no coffee beans left alarm during last grinding.<br />
- Holding and pressing “grinder” starts the coffee grinder for at least 200 grinding pulses.<br />
- Pressing “bean test” once starts the coffee grinder to check the no coffee bean alarm.<br />
grinder * bean<br />
test<br />
Level T5 – Cup lift<br />
At this level, you can check cup-lift function.<br />
t.5 - Cup lift<br />
upper_switch<br />
lower_switch<br />
key_up<br />
key_down<br />
cup_lift<br />
up<br />
cup_lift<br />
down<br />
Next<br />
= OFF<br />
= OFF<br />
= OFF<br />
= OFF<br />
*<br />
- upper_switch - indicates the state of the moving tray up position microswitch in the up<br />
position of the moving tray.<br />
- upper_switch - indicates the state of the moving tray lower position microswitch in the<br />
lower position of the moving tray.<br />
- key_up - indicates the state of the capacitive sensor that raises the moving tray.<br />
- key_up - indicates the state of the capacitive sensor that lowers the moving tray.<br />
- Holding and pressing “cup_lift” moves the cup lift up to the uppermost position.<br />
- Holding and pressing “cup_down” moves the cup lift up to the lowermost position.<br />
Level T6 – Grinder dose<br />
At this level, you can test and modify the amount of coffee that is ground.<br />
t.6 - Grinder dose<br />
Next<br />
Mild dose = 63<br />
Medium dose = 70<br />
Strong dose = 77<br />
Mild Medium Strong<br />
Value<br />
up<br />
Value<br />
down<br />
Value<br />
test<br />
- Mild dose - indicates the number of grinding pulses to set for a mild coffee.<br />
- Medium dose - indicates the number of grinding pulses to set for a medium-strength coffee.<br />
- Strong dose - indicates the number of grinding pulses to set for a strong coffee.<br />
- Pressing “value up” increases the number of grinding pulses for a medium-strength coffee in<br />
steps of 5.<br />
- Pressing “value down” reduces the number of grinding pulses for a medium-strength coffee<br />
in steps of 5.<br />
- “Mild” and “strong” values are equal to 10% less and 10% more respectively than the average<br />
value set.<br />
- Pressing “value test” starts grinding at the selected strength (mild, medium or strong).<br />
TALEA Section 05<br />
REV00 - August 06<br />
2/17
Level T7 – Coffee grounds drawer<br />
At this level, you can modify the current value of the number of coffee grounds (maximum of 13).<br />
t.7 - Dreg counter<br />
Max dreg counter = 13<br />
Current dreg counter = 9<br />
Next<br />
- max dreg counter - indicates the maximum number of coffee grounds that the drip tray<br />
can contain.<br />
- current dreg counter - indicates the current number of coffee grounds<br />
Value<br />
up<br />
Value<br />
down<br />
*<br />
Level T8 – Steam out<br />
At this level, you can drain the water circuit..<br />
t.8 - Steam out<br />
Next<br />
Boiler_temp (C°)<br />
- boiler_temp (C°) - indicates the temperature of the water heater.<br />
Pressing start will run the procedure.<br />
If the knob state is not in the water/steam/milk-island position, the message shows below<br />
will appear on the display.<br />
Start * *<br />
t.8 - Steam out<br />
Next<br />
Boiler_temp (C°)<br />
Open knob to water & steam<br />
- open knob to water & steam - indicates that the knob is not in the water/steam position.<br />
Moving the knob to the water/steam state will start the procedure to drain the water circuit.<br />
Start * *<br />
t.8 - Steam out<br />
Next<br />
boiler_temp (C°) = 105.9<br />
counter = 7.4<br />
- boiler_temp (C°) - indicates the temperature of the water heater.<br />
- counter - indicates the time remaining until the end of the cycle.<br />
When the water heater reaches 100°C, it switches off and the counter starts.<br />
Start * *<br />
t.8 - Steam out<br />
Next<br />
boiler_temp (C°) = 105.9<br />
counter = 7.4<br />
pass..<br />
- pass - indicates that the procedure has been completed.<br />
Press next to move on.<br />
Start * *<br />
T<br />
REV00 - August 06<br />
3/17
Ideas with Passion<br />
Platinum Swing e Swing Up<br />
3<br />
1<br />
2<br />
4<br />
When in test mode<br />
Switch the appliance on (double-pole switch on right side) and wait for the CA to finish initializing; then<br />
press and hold the illustrated menu key for 2 seconds until the string “Exit” appears on the screen. Press<br />
the capacitive keypad keys in the order shown on the left within the next two seconds.<br />
MENU<br />
Exit<br />
STEAM<br />
MENU<br />
AROMA<br />
WATER<br />
COFFEE<br />
The following string appears when you enter test mode:<br />
*Test* M0 12345 oo:mm:ss<br />
SWvx.xx.xx<br />
FFHz<br />
Where:<br />
- *Test* indicates that the C.A. is in test mode.<br />
- M0 indicates the test level.<br />
- 12345 indicate the keys pressed in the sequence shown in figure 1.<br />
- oo:mm:ss indicates the hours and minutes of the CPU clock.<br />
- SWvx.xx.xx indicates the SW version installed in the CPU card microcontroller.<br />
- FFHz indicates actual supply voltage frequency.<br />
To move from one test level to another, use the touch-ring around the coffee key, turning it clockwise to move to the next level<br />
and anticlockwise to go back a level.<br />
Level M1<br />
*Test* MO<br />
DLv:1.01.10.FT<br />
The state of the microswitch is shown at this level; the following string is shown on the second line:<br />
Inputs 123456789ABCDEFG<br />
Where:<br />
1 Brew group presence microswitch excited.<br />
2 Brew group work position microswitch excited.<br />
3 Brew group home position microswitch excited.<br />
4 Turbine sensor excited.<br />
5 Tank water level capacitive sensor excited.<br />
6 Side door closed microswitch excited.<br />
7 Coffee grounds drawer presence microswitch excited.<br />
8 Coffee bean container sensor excited.<br />
9 Coffee grinder direction of rotation sensor excited.<br />
A Drip tray level capacitive sensor excited.<br />
B Water/steam knob in milk-island position.<br />
C Water/steam knob in water/steam position.<br />
D Milk-island presence microswitch excited.<br />
E Milk carafe presence microswitch excited.<br />
F Cup-lift-down microswitch excited (only on Ring Plus).<br />
F Cup-lift-up microswitch excited (only on Ring Plus).<br />
H Water/steam knob in closed position.<br />
oo:mm:ss<br />
50HZ<br />
Numbers 6 and 7 are not displayed if the coffee grounds drawer is removed.<br />
TALEA Section 05<br />
REV00 - August 06<br />
4/17
Ideas with Passion<br />
Level M2<br />
Gearmotor function is tested at this level. To move the gearmotor, the coffee grounds drawer and side door microswitches must<br />
be excited. The status of the microswitches listed below is shown at the right of the top line on the display:<br />
1 Brew group presence microswitch excited.<br />
2 Brew group work position microswitch excited.<br />
3 Brew group home position microswitch excited.<br />
6 Side door closed microswitch excited.<br />
7 Coffee grounds drawer presence microswitch excited.<br />
Gearmotor status after the aroma key and capacitive keypad menu have been pressed is shown on the second line on the<br />
display:<br />
- Aroma key - the gearmotor brings the group to the home position.<br />
- Menu key - the gearmotor brings the group to the work position.<br />
Power absorbed (mA) by the gearmotor during movement is shown on the right of the second line on the display.<br />
Level M3<br />
Coffee grinder, pump, cup warmer (Ring Plus only) and solenoid valve function are tested at this level. The above are primed by<br />
pressing the following keys:<br />
- Steam key: coffee grinder.<br />
- Water key: pump.<br />
- Aroma key: varies grinding aroma.<br />
- Menu key: solenoid valve.<br />
- Coffee key: coffee grinder pulses.<br />
COFFEE GRINDER TEST:<br />
Coffee bean container sensor must be excited.<br />
When the appropriate key is pressed, the following string appears on the second line of the display:<br />
- Grinder ON 8 GG %%<br />
Where:<br />
- 8 indicates that the coffee bean container sensor has been excited.<br />
- GG indicates the number of rotations performed by the coffee grinder.<br />
- %% indicates the ratio between coffee grinder revolutions at 100% and 50% supply.<br />
To set medium aroma pulses, press the coffee key then use the touch-ring to choose aroma pulses. After this, press the coffee<br />
key to save the number of impulses selected. Press the steam key to restore default settings.<br />
By pressing the aroma key, you can vary grinding aroma. The value of the selected aroma is shown on the bottom left of the<br />
display, classified as follows:<br />
1 - mild aroma.<br />
2 - medium aroma.<br />
3 - strong aroma.<br />
PUMP TEST:<br />
By pressing the appropriate key, the following string appears on the display:<br />
- Flowmeter (Imp/s) GG<br />
Where:<br />
- GG indicates the number of revolutions performed by the turbine.<br />
SOLENOID VALVE TEST:<br />
By pressing the menu key, the following string appears on the second line of the display:<br />
- Ev Brew On<br />
TALEA Section 05<br />
REV00 - August 06<br />
5/17
Ideas with Passion<br />
Level M4<br />
At this level you can check water heater, relative ntc sensor and cup warmer function.<br />
- When you press the steam key, the ambient temperature (tt.t) is shown on the second line of the display in degrees centigrade.<br />
- When you press the water key, the state of the ntc sensor (open or short), on the water heater<br />
(open or short), or the water heater temperature in degrees centigrade are shown on the second line of the display.<br />
- Pressing the aroma key switches on the water heater (pressing the water key shows the rising temperature) and the string<br />
Heater ON appears on the second line of the display.<br />
- When you press the menu key, the cup warmer is switched on and the string<br />
Cup Heater (Ring Plus only) appears on the second line of the display.<br />
Steamout<br />
Open the knob in the water/steam position to prepare for steamout (draining water heater). Press the coffee key to start, the<br />
water heater will be brought to 120°, at which time the machine emits a sequence of beeps.<br />
WARNING: At the end of this procedure, the machine will automatically switch to English.<br />
Level M5 (Cup lift position) on Ring Plus only.<br />
At this level, you can check cup-lift function.<br />
- Press the aroma key to move the cup-lift down to its lowermost position.<br />
- Press the menu key to raise the cup-lift to its uppermost position.<br />
Level M6 (LCD contrast)<br />
You can change display contrast at this level.<br />
- Press the coffee key to edit display contrast (the percentage value starts blinking).<br />
- You can use the touch-ring to change this value: turn clockwise to increase it, and anticlockwise to decrease it.<br />
- Press the coffee key again to save the value selected.<br />
Level M7 (LCD backlight)<br />
You can change display brightness at this level.<br />
- Press the coffee key to change display brightness<br />
(the percentage value starts blinking).<br />
- You can use the touch-ring to change this value: turn clockwise to increase it, and anticlockwise to decrease it.<br />
- Press the coffee key again to save the value selected.<br />
Level M8 (Self-test)<br />
The machine automatically tests its main functions in the self-test. The brew group must be present and the doors<br />
closed.<br />
On completion of this procedure (which lasts approx. 10 seconds), the outcome will appear on the display.<br />
Pass!! and 2 consecutive beeps if it was successful.<br />
If an error was encountered, 10 beeps will be emitted and a message appears on the display.<br />
Level M9<br />
- Exit.<br />
Press the coffee key to exit test mode and fully restart the appliance.<br />
TALEA Section 05<br />
REV00 - August 06<br />
6/17
Platinum Vogue<br />
Coffee key<br />
Press once to select a coffee.<br />
Press twice to select a double coffee.<br />
Stops coffee from being dispensed when pressed during dispensing.<br />
Water/steam key<br />
To select either water or steam.<br />
Press and hold for 6 seconds to “reset” descaling alarm.<br />
When off, indicates that the machine is ready to release steam.<br />
When on, indicates that the machine is ready to dispense water.<br />
Aroma key<br />
To select either a mild coffee, a medium coffee or a strong coffee.<br />
Middle button<br />
To select length of coffee required.<br />
TALEA Section 05<br />
REV00 - August 06<br />
7/17
Ideas with Passion<br />
Messages/Alarms<br />
Temperature ready LED Fixed on. Indicates “Coffee ready” or “Steam ready”.<br />
Temperature ready LED Slow blinking. The correct temperature has not been reached.<br />
Water/steam LED Off The appliance is in steam mode.<br />
Water/steam LED Fixed on. The appliance is in water mode.<br />
Aroma LED Fixed on. To set aroma.<br />
General alarms LED Fixed on. Fill water tank.<br />
Empty drip tray.<br />
Out of coffee (*)<br />
General alarms LED Slow blinking. Door open.<br />
Brew group missing.<br />
Drip tray missing.<br />
Coffee container cover missing.<br />
Milk island or carafe missing.<br />
General alarms LED Fast blinking. Prime circuit.<br />
Coffee grounds drawer<br />
LED<br />
Descaling LED<br />
(60 litres)<br />
Coffee grounds drawer<br />
and descaling LEDs<br />
Temperature ready LED<br />
Descaling LED<br />
General alarms LED<br />
Coffee grounds drawer<br />
LED<br />
Fixed on.<br />
Slow blinking.<br />
Blinking alternately.<br />
Light up one after the<br />
other anticlockwise.<br />
(*) Removing and replacing the coffee bean container will reset the “out of coffee” alarm.<br />
Test mode<br />
Indicates that grounds drawer needs emptying.<br />
Indicates that descaling (manual) is required.<br />
Max. brew group torque exceeded.<br />
Brew group timeout or microswitch error.<br />
Coffee grinder blocked.<br />
OUT OF SERVICE<br />
Indicates that the appliance is running a “rinse<br />
cycle”.<br />
To open Test Mode, press<br />
rapid flashing of LEDs<br />
and turn the appliance on at the same time (Power On). Entering Test Mode is indicated by the<br />
(lighting up repeatedly ANTICLOCKWISE one after the other), continuing until<br />
is released.<br />
TALEA Section 05<br />
REV00 - August 06<br />
8/17
Ideas with Passion<br />
POSITION<br />
POTENTIOMETER<br />
Press<br />
ACTION<br />
Solenoid pilot<br />
Coffee grinder<br />
CHECK<br />
Press<br />
Press<br />
Valve open.<br />
Brew group missing microswitch<br />
Drawer missing microswitch<br />
Door open microswitch.<br />
Coffee container cover microswitch<br />
Carafe present microswitch<br />
(with valve closed).<br />
Turbine sensor<br />
(during pump function)<br />
Water tank sensor<br />
Coffee grounds drawer<br />
Set aroma.<br />
(default: 90-100-110 pulses).<br />
lights up and stays on.<br />
blinks slowly.<br />
blinks slowly.<br />
blinks slowly.<br />
blinks slowly.<br />
lights up and stays on.<br />
blinks (turb. freq.)<br />
lights up and stays on.<br />
lights up and stays on.<br />
POSITION<br />
POTENTIOMETER<br />
Press<br />
ACTION<br />
Coffee heater.<br />
Unit down.<br />
CHECK<br />
Press<br />
Set aroma.<br />
Press<br />
(default: 90-100-110 pulses).<br />
Unit down microswitch.<br />
+ Steam key pressed. blinks quickly.<br />
Valve open.<br />
Brew group missing microswitch<br />
Drawer missing microswitch<br />
Door open microswitch.<br />
Coffee container cover microswitch<br />
Carafe present microswitch<br />
(with valve closed).<br />
Turbine sensor<br />
(during pump function)<br />
Water tank sensor<br />
Coffee grounds drawer<br />
lights up and stays on.<br />
blinks slowly.<br />
blinks slowly.<br />
blinks slowly.<br />
blinks slowly.<br />
lights up and stays on.<br />
blinks (turb. freq.)<br />
lights up and stays on.<br />
lights up and stays on.<br />
TALEA Section 05<br />
REV00 - August 06<br />
9/17
Ideas with Passion<br />
POSITION<br />
POTENTIOMETER<br />
Press<br />
ACTION<br />
Pump<br />
Unit up.<br />
CHECK<br />
Press<br />
Set aroma.<br />
Press<br />
(default: 90-100-110 pulses).<br />
Unit microswitch up.<br />
+ Steam key pressed. blinks quickly.<br />
Valve open.<br />
Brew group missing microswitch<br />
Drawer missing microswitch<br />
Door open microswitch.<br />
Coffee container cover microswitch<br />
Carafe present microswitch<br />
(with valve closed).<br />
Turbine sensor<br />
(during pump function)<br />
Water tank sensor<br />
Coffee grounds drawer<br />
lights up and stays on.<br />
blinks slowly.<br />
blinks slowly.<br />
blinks slowly.<br />
blinks slowly.<br />
lights up and stays on.<br />
blinks (turb. freq.)<br />
lights up and stays on.<br />
lights up and stays on.<br />
Special functions mode<br />
The “Special Functions” mode allows you to:<br />
1) Activate the steamout procedure.<br />
2) Identify which microswitch is responsible for the “General Alarms” LED lighting up.<br />
To enter Special Functions Mode, press<br />
and switch on the appliance (Power On) at the same time. Entering Special<br />
Functions Mode is indicated by the rapid flashing of LEDs<br />
(lighting up repeatedly CLOCKWISE one<br />
after the other), continuing until<br />
is released.<br />
TALEA Section 05<br />
REV00 - August 06<br />
10/17
Ideas with Passion<br />
POSITION<br />
POTENTIOMETER<br />
ACTION<br />
Open valve and<br />
press<br />
CHECK<br />
Steamout procedure.<br />
While the procedure is underway (for a total of 30 seconds), the following<br />
LEDs light up alternately one after the other in a clockwise direction<br />
Press<br />
light up and each time the key is pressed, the number of<br />
pulses for AVERAGE AROMA is reduced by 5 pulses to a minimum of 60<br />
pulses.<br />
Brew group missing<br />
microswitch lights up and stays on.<br />
Drawer missing<br />
microswitch lights up and stays on.<br />
Door open<br />
microswitch.<br />
lights up and stays on.<br />
Coffee container<br />
cover microswitch<br />
lights up and stays on.<br />
POSITION<br />
POTENTIOMETER<br />
ACTION<br />
CHECK<br />
Press<br />
No action!<br />
No action!<br />
Press<br />
Brew group missing<br />
microswitch lights up and stays on.<br />
Drawer missing<br />
microswitch lights up and stays on.<br />
Door open<br />
microswitch.<br />
lights up and stays on.<br />
Coffee container<br />
cover microswitch<br />
lights up and stays on.<br />
POSITION<br />
POTENTIOMETER<br />
ACTION<br />
CHECK<br />
Press<br />
No action!<br />
Press<br />
light up and each time the key is pressed, the number of<br />
pulses for AVERAGE AROMA is increased by 5 pulses up to a maximum of<br />
150 pulses.<br />
Brew group missing<br />
microswitch lights up and stays on.<br />
Drawer missing<br />
microswitch lights up and stays on.<br />
Door open<br />
microswitch.<br />
lights up and stays on.<br />
Coffee container<br />
cover microswitch<br />
lights up and stays on.<br />
TALEA Section 05<br />
REV00 - August 06<br />
11/17
Ideas with Passion<br />
DIP SWITCH<br />
ON<br />
ON<br />
1 2 3<br />
1 2 3<br />
CONFIGURATION<br />
<strong>PLATINUM</strong> EVENT<br />
CONFIGURATION<br />
<strong>PLATINUM</strong> VOGUE<br />
DEFAULT DATA<br />
AROMA PULSES<br />
MILD STR<strong>ENG</strong>TH MEDIUM STR<strong>ENG</strong>TH STRONG STR<strong>ENG</strong>TH<br />
54 60 66<br />
59 65 71<br />
63 70 77<br />
68 75 82<br />
72 80 88<br />
77 85 93<br />
81 90 99<br />
86 95 104<br />
90 100 110<br />
95 105 115<br />
99 110 121<br />
104 115 126<br />
108 120 132<br />
113 125 137<br />
117 130 143<br />
122 135 148<br />
126 140 154<br />
131 145 159<br />
135 150 165<br />
TALEA Section 05<br />
REV00 - August 06<br />
12/17
Ideas with Passion<br />
5.2 Diagnostics function<br />
Platinum Swin up<br />
1 2 When in diagnostics mode<br />
3<br />
4<br />
Switch the appliance on (double-pole switch on right side) and wait for the CA to finish initializing; then<br />
press and hold the menu key for 2 seconds until the string “Exit” appears on the screen. Press the capacitive<br />
keypad keys in the order shown on the left within the next two seconds.<br />
MENU<br />
Exit<br />
STEAM<br />
MENU<br />
AROMA<br />
WATER<br />
COFFEE<br />
To move from one test level to another, use the touch-ring around the coffee key, turning it clockwise to move to the next level<br />
and anticlockwise to go back a level.<br />
Press the coffee key to open the sub-menus.<br />
Press the coffee again to confirm any changes.<br />
Press the menu key to exit sub-menus.<br />
Level M1 : Product Counters<br />
The following counters are shown at this level:<br />
1.1 Total Products<br />
1.2 Total number of espressos.<br />
1.3 Total ml of espresso<br />
1.4 Total number of coffees.<br />
1.5 Total ml of coffee.<br />
1.6 Total number of long coffees.<br />
1.7 Total ml of long coffee.<br />
1.8 Total number of waters.<br />
1.9 Total ml of water.<br />
Level M2 : Total Counters<br />
The following counters are shown at this level:<br />
2.1 Water S.L.Descale water since last descaling.<br />
2.2 Water S. 1 Descale water since last descaling.<br />
2.3 Water S. 2 Descale water since second last descaling.<br />
2.4 Water S. 3 Descale water since third last descaling.<br />
2.5 Water Since Prod. water used since production.<br />
2.6 Descaling N° total number of times appliance descaled.<br />
2.7 B.U. Cleanings N° times group cleaned.<br />
2.8 Water Filters N° filters used.<br />
2.9 E2prom writes N°<br />
TALEA Section 05<br />
REV00 - August 06<br />
13/17
Ideas with Passion<br />
Level M3 : Error Log<br />
3.1 Errors List<br />
The following are shown at this level:<br />
-) The last 20 errors involving the CA<br />
-) The date the error occurred.<br />
The error map is shown below:<br />
Code Brief description Description<br />
COFFEE GRINDER ERRORS<br />
Coffee grinder blocked.<br />
The coffee grinder won’t turn: there may be something obstructing<br />
the grinders or beverage signal has not been read correctly by the Hall<br />
01<br />
probe in the coffee grinder.<br />
03<br />
TORQUE_FAULT_FWD<br />
TIMEOUT_FWD<br />
TIMEOUT_FWD_DOWN<br />
BREW GROUP ERRORS<br />
Maximum force exceeded in forward movement to dispense position<br />
(second attempt).<br />
Maximum time exceeded to reach dispense position.<br />
Maximum time exceeded to clear home position microswitch.<br />
HOME_WHILE_WORKING<br />
Home position microswitch activated while moving to work position.<br />
04<br />
16<br />
05<br />
10<br />
TORQUE_FAULT_RWD<br />
TIMEOUT_RWD<br />
WORK_WHILE_HOMING<br />
HOME_AND_WORK_PRESSED<br />
Water circuit blocked.<br />
SENSOR1_SHORT<br />
Maximum force exceeded returning to home position.<br />
Maximum time exceeded returning to rest position.<br />
Work position microswitch activated while moving to home position.<br />
Both the work and home microswitches are activated at the same time.<br />
WATER CIRCUIT ERRORS<br />
This can happen for a variety of reasons ...(trips when water not flowing<br />
in turbine).<br />
TEMPERATURE CONTROL ERRORS<br />
Coffee heater sensor shorted.<br />
11 SENSOR1_OPEN Coffee heater sensor in open circuit.<br />
14 TEMPERATURE_BO_TOO_HIGH Coffee heater temperature too high.<br />
15<br />
TEMPERATURE_BO_OUT_CONTROL<br />
Coffee heater temperature out of control (not responding to stimuli:<br />
e.g. heater on but temperature not rising).<br />
19<br />
No zero crossing.<br />
GENERAL ERRORS<br />
No zero crossing on card, could be caused by power card.<br />
3.2 Clear all?<br />
pressing YES will delete all errors at level 3.1.<br />
TALEA Section 05<br />
REV00 - August 06<br />
14/17
Ideas with Passion<br />
Level M4 : Products Settings<br />
The parameters for each different beverage are shown at this level; these parameters can be modified by opening each item<br />
using the coffee key and selecting with the touch-ring.<br />
4.1 Espresso Settings:<br />
4.1.1 Product Qty. (imp.) Number of water pulses.<br />
4.1.2 Aroma Displays coffee grinder pulses in 60-150 pulse range.<br />
0: pre-ground (0 pulses); 1: mild (- 10% medium); 2: medium; 3: strong (+10% medium).<br />
4.1.3 Prebrewing Prebrewing 1: enabled; 0: disabled; 2: long.<br />
4.1.4 Temperature Shows temperature in °C. Low (-3°C average), average, high (+3°C average).<br />
4.2 Coffee Settings:<br />
4.2.1 Product Qty. (imp.) Number of water pulses.<br />
4.2.2 Aroma 0: pre-ground; 1: mild; 2: medium; 3: strong.<br />
4.2.3 Prebrewing 1: enabled; 0: disabled; 2: long.<br />
4.2.4 Temperature in °C<br />
4.3 Long Coffee Settings:<br />
4.3.1 Product Qty. (imp.) Number of water pulses.<br />
4.3.2 Aroma 0: pre-ground; 1: mild; 2: medium; 3: strong.<br />
4.3.3 Prebrewing 1: enabled; 0: disabled; 2: long.<br />
4.3.4 Temperature in °C<br />
Level M5 : System Settings<br />
System parameter values are shown at this level:<br />
5.1 SW Version<br />
5.2 Boot Version<br />
5.3 Aroma Setup (imp.) Number of pulses set for medium aroma.<br />
5.4 Temp. Standby From 50° to 80°C.<br />
5.5 Cup. temp.<br />
5.6 Standby temp. Standby time can be varied in 15 minute intervals.<br />
5.7 Flowrate (L/h) Water flowrate.<br />
5.8 Language<br />
5.9 Water Hardness<br />
5.10 Lcd Backlight Display brightness.<br />
5.11 Lcd contrast Display contrast.<br />
5.12 Grounds Limit Stop coffee grounds.<br />
5.13 Grounds Left Coffee grounds counter.<br />
5.14 Grounds Warning Empty coffee grounds.<br />
5.15 W.Filter C. Date Date Aqua Prima filter was installed.<br />
5.16 <strong>Service</strong> Date (to be added after servicing).<br />
5.17 Production Date<br />
TALEA Section 05<br />
REV00 - August 06<br />
15/17
Ideas with Passion<br />
5.3 Error messages for service personnel<br />
Code<br />
Applicable models:<br />
Brief description Description<br />
01 All models Coffee grinder 1 blocked.<br />
The coffee grinder is blocked (grinders blocked or sensor not reading<br />
properly).<br />
03 All models Brew group blocked in work position.<br />
04 All models Brew group blocked in home position.<br />
05 All models Water circuit blocked. No water in turbine.<br />
Microswitch not released in up position after 3”, torque error trying to<br />
move down, descent time out exceeded.<br />
Microswitch not released in down position after 3”, torque error trying to<br />
move up, ascent time out exceeded.<br />
10-11 All models Various sensor errors. Water heater sensors shorted or in open circuit.<br />
14-15 All models Various temperature errors. Heater temperatures out of control.<br />
16 All models Both microswitches activated on brew group. The work and home microswitches have both been activated.<br />
17 All models Memory error. Impossible to read or write to e2prom.<br />
18 All models Clock error. Memory defect or impossible to set.<br />
19 All models No zero crossing. No zero crossing on card, could be caused by power card.<br />
20 All models Cup lift error.<br />
The two stroke end position microswitches are activated at the same<br />
time.<br />
On models in the new Platinum ranges, errors recorded can be viewed on the display (during diagnosis) or on a PC (with programmer). The following<br />
are saved:<br />
A) The last 20 errors to be recorded.<br />
B) Total number of errors (not all models).<br />
• Since production (total).<br />
• Since last service (partial).<br />
• Current.<br />
PRIMEA Section 05<br />
REV00 - August 06<br />
16/17
Ideas with Passion<br />
5.4 Problems, causes, remedies<br />
HELP MESSAGES DISPLAYED<br />
Turn the appliance off and on to solve the problem.<br />
Call the <strong>Service</strong> Center.<br />
Insert drip tray.<br />
Close coffee granule container cover.<br />
Insert ground coffee.<br />
Insert brew group.<br />
Insert coffee grounds drawer.<br />
Empty coffee grounds drawer.<br />
Close side door<br />
Fill water tank.<br />
Empty drip tray below brew group.<br />
Insert milk container.<br />
Prime circuit.<br />
The descaling cycle did not run correctly.<br />
Replace Aqua Prima filter.<br />
The cleaning cycle did not run correctly.<br />
Insert cappuccinatore.<br />
Rinse milk container.<br />
Descale appliance.<br />
Standby.<br />
HOW TO RESET MESSAGE<br />
Switch off and after 30 sec. turn on the appliance to<br />
restore normal operating conditions.<br />
Problem requiring assistance of <strong>Service</strong> Center.<br />
Insert drip tray.<br />
Close the coffee granule container to enable delivery<br />
of any beverage.<br />
This message guides the user when this type of coffee<br />
has been selected during personalised beverage<br />
programming.<br />
Insert brew groupin seat.<br />
Insert coffee grounds drawer.<br />
Remove coffee grounds drawer and empty.<br />
N.B: The coffee grounds drawer must only be emptied<br />
when the appliance is switched on. The drawer must<br />
be removed for at least 5 seconds. If the drawer is<br />
emptied when the appliance is switched off the message<br />
is not reset.<br />
Close service door.<br />
Fill tank.<br />
Empty drip tray.<br />
Insert container in milk compartment.<br />
Start filling water circuit automatically. The appliance<br />
will automatically try to fill the circuit 5 times; if it<br />
fails, contact the <strong>Service</strong> Centre.<br />
Repeat the operation as described in the relative<br />
chapter in the instruction booklet.<br />
This message is only displayed if the filter control is<br />
enabled (see instruction booklet).<br />
Replace the filterif:<br />
1) 60 litres of water have been dispensed.<br />
2) 90 days have elapsed since installation.<br />
3) 20 days have elapsed since the coffee maker was<br />
last used.<br />
Repeat the operation as described in the relative<br />
chapter in the instruction booklet.<br />
Insert cappuccinatore in milk compartment.<br />
Clean container after use.<br />
Run descaling cycle<br />
Press “ start”.<br />
PRIMEA Section 05<br />
REV00 - August 06<br />
17/17
SECTION 6<br />
OPERATING<br />
LOGIC<br />
TALEA Section 06<br />
REV.00<br />
REV00 - August 06
6.1 Reset coffee grounds drawer.<br />
The “empty coffee grounds drawer” message is signalled by a “coffee” beverages counter<br />
controlled by the appliance electronics.<br />
The counter is cleared “empty coffee grounds drawer” reset message:<br />
1. After 13 coffees, if the grounds drawer is removed for more than 5 seconds.<br />
2. Each time the grounds drawer is removed for more than 5 seconds when an “empty<br />
coffee grounds drawer” alarm has been generated (it is assumed that the grounds<br />
drawer has been emptied).<br />
N.B:<br />
If the 12th coffee is actually a “double coffee”, the “empty coffee grounds drawer” alarm will be<br />
generated at the 14th coffee. As a result, the counter for the “empty coffee grounds drawer” in<br />
this case would be reset at the 14th coffee.<br />
6.2 Water reserve<br />
Platinum models have a fixed reserve (turbine pulses) to ensure the selected beverage can be fully<br />
(partially or totally) dispensed each time the capacitive sensor registers the presence of water<br />
in the water tank. Otherwise, the appliance displays the “fill water tank” message and will not<br />
dispense the beverage.<br />
The beverage will be dispensed in full or in part depending on whether the remaining reserve is<br />
enough to cover the programmed length of the selected beverage.<br />
On selection, a message requests that the water tank is filled.<br />
Example:<br />
10 cc<br />
actual 90 cc level<br />
not configurable<br />
via SW<br />
Starting water level<br />
Capacitive sensor<br />
e.g: sensor registers presence of water (+10cc).<br />
Hypothesis 1) A 60cc beverage is selected, 50cc is taken from the reserve, the beverage is<br />
dispensed in full, and the “fill water tank” message appears.<br />
Hypothesis 2) A 110cc beverage is selected, 90cc is taken from the reserve, the product is<br />
dispensed in part (100cc), and the “fill water tank” message appears.<br />
Hypothesis 3) A double 110cc coffee is selected; the first is dispensed in part (100cc),<br />
the fill tank message appears, then the second one is dispensed in full (110cc).<br />
Hypothesis 4) Double 40cc coffees are selected; the appliance dispenses both in full.<br />
TALEA Section 06<br />
REV00 - August 06<br />
1/6
Ideas with Passion<br />
6.3 Motorized tray<br />
The movement of the motorized tray is mechanical by means of a stepper motor (1) in 24V<br />
DC, controlled by two capacitive pushbuttons (2) located at the front of the tray.<br />
The two microswitches (3) are for the limit switch, and operation can be checked in test mode<br />
(see section 5.1).<br />
3<br />
1<br />
2<br />
2<br />
3<br />
3<br />
3<br />
TALEA Section 06<br />
REV00 - August 06<br />
2/6
Ideas with Passion<br />
6.4 Aqua Prima<br />
Operating logic with “AQUA PRIMA” filter.<br />
When use of the “aqua prima” filter is selected on the user menu or via the control panel, the<br />
system water count logic is as follows:<br />
If the “aqua prima” function is enabled the electronics perform a pulse count of the turbine,<br />
recording one pulse every 2 revolutions.<br />
If the “aqua prima” function is disabled, the electronics perform a pulse count of the turbine,<br />
recording one pulse every revolution.<br />
The graph in the figure below illustrates this function:<br />
Aqua Prima<br />
on<br />
Aqua Prima<br />
off<br />
Turbine revs<br />
360°<br />
1 rev<br />
360°<br />
1 rev<br />
360°<br />
1 rev<br />
360°<br />
1 rev<br />
= 1 pulse<br />
TALEA Section 06<br />
REV00 - August 06<br />
3/6
Ideas with Passion<br />
6.5 SBS Valve<br />
Beverage dispensing<br />
The SBS brewing system valve (see Fig. 2) controllable via the knob, enables variation (increasing<br />
or decreasing according to the position of the knob) of the water flow rate for brewing.<br />
This adjusts the coffee brewing time (extraction time) and consequently the intensity of taste,<br />
keeping the cream quality constant.<br />
Function<br />
With the SBS valve in the open position, coffee is accumulated in the membrane valve due to a<br />
low back-pressure of the SBS valve. Consequently the membrane valve needle remains in the<br />
maximum open position, due to resistance of the spring. Coffee exits quickly (see fig. 3).<br />
With the SBS valve in the closed position, coffee is accumulated on the membrane of the valve<br />
with a consequent increase in pressure in the valve. The spring yields to the back-pressure and<br />
the needle then reduces the coffee passage (see Fig. 4).<br />
Fig.1<br />
Fig.2<br />
TALEA Section 06<br />
REV00 - August 06<br />
Fig.3<br />
Fig.4<br />
4/6
Ideas with Passion<br />
SBS valve operation check<br />
To ensure correct operation of the valve SBS a long coffee should be made, and during<br />
preparation of the latter, check the difference in dispensing speed between the maximum and<br />
minimum positions.<br />
The difference in dispensing speed is approx. 2.5 times greater (and therefore VERY<br />
obvious!!).<br />
Knob MAX<br />
position<br />
Knob MED<br />
position<br />
Knob MIN<br />
position<br />
SBS<br />
SBS<br />
SBS<br />
-> Rapid coffee delivery<br />
-> Medium coffee delivery<br />
-> Slow coffee delivery<br />
-> Good coffee brew -> Good coffee brew -> Maximum coffee brew<br />
-> Medium counter-pressure<br />
-> Medium-high counter-pressure -> High counter-pressure<br />
(Light coffee) (Medium-strong coffee) (Strong coffee)<br />
CAFFÈ CREME ESPRESSO RISTRETTO<br />
TALEA Section 06<br />
REV00 - August 06<br />
5/6
Ideas with Passion<br />
6.6 Solenoid pilot<br />
Turbine<br />
Reinforced silicon hose<br />
Water/steam valve<br />
Water drain connector<br />
WATER DRAINED<br />
TO TANK<br />
Connector with 3 bar relief valve<br />
Needle<br />
TANK<br />
Silicon tube<br />
Steam tube<br />
STEAM/WATER<br />
DISPENSE<br />
Reinforced silicon hose<br />
Silicon tube<br />
Reinforced silicon hose<br />
MILK ISLAND STEAM<br />
DISPENSE<br />
COFFEE<br />
DISPENSE<br />
Brew unit<br />
SBS valve<br />
Silicon tube<br />
1300W heater<br />
Drain<br />
Pump<br />
Reinforced silicon hose<br />
Brew group valve<br />
(3 - 5 bars)<br />
Brew<br />
group<br />
drain valve<br />
Reinforced silicon hose<br />
WATER DRAINED Water drain connector<br />
TO DRIP TRAY<br />
Brew unit pin<br />
Coffee dispense valve (3-5 bars)<br />
Relief valve (16-19 bars)<br />
Drain valve<br />
Solenoid pilot function:<br />
1. Brew group drain: before the group is lowered, the solenoid pilot opens briefly creating a depression<br />
that in turn opens the valve in the opposite direction from dispensing, allowing any<br />
water left in the group to be drained and keeping the pad dry.<br />
2. Coffee ready after steam: when a coffee or water are selected, the solenoid pilot opens the drain valve<br />
to lower pressure in the heater.<br />
3. Prime heater: after a period in standby or when the appliance has not been used for an extended period<br />
(1st coffee), the pump loads briefly during grinding to get rid of any water between the<br />
heater pin and heater, and to pre-heat the elements.<br />
4. Fill circuit: the solenoid pilot discharges and recharges automatically. The discharge occurs via the drain<br />
pipe and not via the valve.<br />
5. Relief valve: the solenoid pilot also serves as a relief valve (not present on pump), opening in the event<br />
of pressure in excess of 16-19 bars.<br />
6. Lower pressure: pressure is lowered by the circuit being discharged for 10 seconds after water or steam<br />
have been dispensed (see variables A and B).<br />
A) Configuration with dual-sensor valve card (water/steam position sensor + Milk Island position<br />
sensor):<br />
After water has been dispensed - > the solenoid pilot opens to the discharge side as soon as the sensor is<br />
disengaged.<br />
Immediately after steam has been dispensed - > the solenoid pilot opens to the discharge side as soon as<br />
the sensor is disengaged.<br />
Water dispensed after steam has been dispensed -> the solenoid pilot opens to the discharge side as soon<br />
as the sensor is disengaged.<br />
- After each beverage has been dispensed -> the solenoid pilot opens to the discharge side.<br />
- Each time the appliance is switched on and the temperature is reached -> the solenoid pilot opens to the<br />
discharge side.<br />
- When the temperature is reached -> the solenoid pilot opens to the discharge side.<br />
B) Configuration with three-sensor valve card (water/steam sensor + closed position sensor +<br />
milk island position sensor):<br />
In addition to the functions described in configuration A, the following also occur:<br />
Each time the closed position central sensor is disengaged -> always open the solenoid pilot towards the<br />
discharge side.<br />
TALEA Section 06<br />
REV00 - August 06<br />
6/6
Ideas with Passion<br />
6.7 Milk Island<br />
Electrical connection<br />
to appliance.<br />
Button to<br />
attach/release<br />
Milk Island<br />
from appliance.<br />
Steam<br />
outfeed<br />
Carafe<br />
present<br />
LED<br />
Water pipe connected to<br />
appliance for steam inlet.<br />
Anchor pin<br />
between Milk Island<br />
and appliance.<br />
Unscrew bolts<br />
indicated to<br />
dissassemble.<br />
1<br />
2<br />
1<br />
Cappucinatore cover.<br />
5<br />
3<br />
4<br />
2<br />
3<br />
Cappucinatore valve cover.<br />
Vernay valve.<br />
6<br />
7<br />
4<br />
5<br />
Cappucinatore valve<br />
cover insert.<br />
Cappucinatore body.<br />
8<br />
6<br />
7<br />
8<br />
Carafe handle.<br />
Carafe milk suction pipe.<br />
Carafe steamout pipe.<br />
9<br />
9 Top part carafe.
Ideas with Passion<br />
SECTION 7<br />
COMPONENT<br />
ASSEMBLY<br />
AND DISASSEMBLY<br />
TALEA Section 07<br />
REV.00<br />
REV00 - August 06
Remove the coffee top container ,<br />
unscrew the three screws pointed<br />
out and lift the upper cover.<br />
Disconnet the cups warmer<br />
( where included ), the ground<br />
wire cable and the coffee top<br />
container sensor.<br />
In order to dismantle the distributor completely, extract the regulation stick and, following the<br />
screws sequence, dismantle the different parts.
Unscrew the four screws which block the frontal panel, so that it can move.<br />
Unnhook the anterior riser, by unblocking firstly the two lower hooks and then the upper ones ( see<br />
photo ), paying attention to not break the riser’s hooks. After having removed the riser, it is possible<br />
to remove the frontal panel.
Ideas with Passion<br />
7.2 Right and left side casing<br />
Loosen the screw as shown.<br />
To remove the right<br />
side, loosen the<br />
screws as indicated.<br />
To remove the left<br />
side, loosen the<br />
screws as indicated.<br />
To take the left-side off, release the small<br />
clamp and pull out the wire mesh pipe<br />
connecting the steam pipe to the valve,<br />
removing the metal band as shown.<br />
1<br />
2<br />
Split the two sides of the casing (see Fig..1).<br />
Press from the bottom (see Fig.2).<br />
Release and take it off from the side and at the bottom<br />
(see Fig. 3), pulling towards you at the same time (see Fig. 4).<br />
3<br />
4<br />
TALEA Section 07<br />
REV00 - August 06<br />
2/11
Ideas with Passion<br />
7.3 Electronics<br />
CPU card<br />
1<br />
2<br />
3<br />
Fig.1 Loosen the screws as indicated and turn the front piece upwards to get to the card.<br />
Fig.2 Take off the small clamp.<br />
Fig.3 Disconnect all connectors and loosen the screws as indicated.<br />
Power board<br />
Remove the small clamps, disconnect all connectors and loosen the screws indicated.<br />
TALEA Section 07<br />
REV00 - August 06<br />
3/11
7.4 Gearmotor<br />
A<br />
B<br />
Remove the safety guard (A)<br />
by loosening the screws as<br />
indicated.<br />
D<br />
F<br />
G<br />
A<br />
B<br />
E<br />
C<br />
Loosen the four screws indicated<br />
and remove the heater valve asm.<br />
When refitting it, be careful with<br />
the two oil-rings shown in the<br />
smaller picture.<br />
Disassemble the protection<br />
plate (B) by<br />
loosening the screws as<br />
indicated.<br />
The following are located inside the compartment<br />
protected by the guard:<br />
- Electric motor (A) with gears (B) and (C) for<br />
transmission and timing of the brew group.<br />
- The drip tray present reed switch<br />
sensor (D).<br />
- Brew group present microswitch (E).<br />
- Microswitch (F) brew group at Home position.<br />
- Microswitch (G) brew group at dispensing<br />
position.<br />
Withdraw the gear (C) that meshes with the motor<br />
transmission shaft.<br />
Withdraw the large gear (B).<br />
Pull out the motor (A) complete with transmission<br />
shaft (H).<br />
B<br />
P<br />
L<br />
Install the motor and transmission shaft,<br />
inserting the guides (L) in the relative seat.<br />
Insert the gear (B), taking care<br />
that the arrow stamped on the<br />
element is within the opening that<br />
contains pin (P).<br />
TALEA Section 07<br />
REV00 - August 06<br />
4/11
Ideas with Passion<br />
7.5 Pump<br />
1<br />
2<br />
Take the pump out from the rubber<br />
support guides.<br />
Withdraw the faston connectors<br />
as indicated.<br />
Pull out the adapter.<br />
Take off the oetiker<br />
clamp as indicated and<br />
pull out the reinforced<br />
flexible hose.<br />
TALEA Section 07<br />
REV00 - August 06<br />
5/11
Ideas with Passion<br />
7.6 Heater and solenoid pilot unit<br />
Loosen the screws as indicated.<br />
A<br />
B<br />
C<br />
Take off the oetiker clamp A,<br />
pull out the reinforced flexible<br />
hose, loosen screw B and<br />
withdraw the drain pipe C<br />
from the solenoid pilot.<br />
Loosen the screws on the<br />
relief valve assembly.<br />
A<br />
Heater<br />
Unhook the teeth anchoring<br />
to the body and lift the<br />
heater and solenoid pilot.<br />
Solenoid pilot.<br />
TALEA Section 07<br />
REV00 - August 06<br />
6/11
Ideas with Passion<br />
7. 7 OETIKER clamp assembly and disassembly<br />
Heater clamps<br />
1<br />
HEATER<br />
Figure (1) shows the assembly position of the clamp on the heater connector.<br />
Solenoid pilot<br />
2<br />
SOLENOID PILOT<br />
Figure (2) shows the assembly position of the clamp on the plastic solenoid pilot connectors.<br />
A<br />
Use suitable pliers to tighten the clamp.<br />
Ensure correct tightening (A) and positioning<br />
as shown in illustrations (1) / (2).<br />
B<br />
To remove the clamp, use a pincer as shown in (B)<br />
TALEA Section 07<br />
REV00 - August 06<br />
7/11
Ideas with Passion<br />
7.8 Coffee grinder<br />
A<br />
Loosen the screws on the cover<br />
and lift it off, being careful to<br />
withdraw damper A.<br />
Unclamp and remove the connector<br />
inserted in the card.<br />
When refitting the motor assembly,<br />
be careful to reinsert the<br />
spring.<br />
TALEA Section 07<br />
REV00 - August 06<br />
8/11
7.9 Coffee grinder setting, assembly and disassembly<br />
To remove the upper grinder support, use a wrench, turning it clockwise to release the<br />
grinder support from the bayonet coupling.<br />
To remove the upper burr, rotate<br />
anti-clockwise until it detaches from<br />
the bayonet coupling.<br />
On the lower burr, keep the increment pin as<br />
indicated locked in position and proceed as<br />
shown in the figure above.<br />
When refitting the upper grinder support,<br />
take care to reposition the mark as<br />
shown in the picture.<br />
TALEA Section 07<br />
REV00 - August 06<br />
9/11
Ideas with Passion<br />
7.10 Grinder adjustment during servicing<br />
To adjust the coffee grinder (in addition to user-permitted adjustments of “C” with the grinding<br />
adjustment tool “A”), remove the coffee granule container and turn adjustment insert “B” to<br />
widen or tighten grinding. This insert can be repositioned to move interval “C”.<br />
Be very careful not to separate the grinders from their supports.<br />
C<br />
B<br />
-<br />
+<br />
To vary the grinding setting,<br />
tighten or loosen with wrench “A”<br />
supplied.<br />
(+) = Coarse grinding<br />
( - ) = Fine grinding.<br />
A<br />
WARNING:<br />
- Grinding must be adjusted with the motor in movement.<br />
- Adjust the grinding level by one step at a time.<br />
- After setting grinding, run two grinding cycles and check the resulting granules<br />
and dose.<br />
- Repeat if further adjustment is required.<br />
TALEA Section 07<br />
REV00 - August 06<br />
10/11
Ideas with Passion<br />
7.11 Motorized drip tray<br />
Loosen the screws as indicated.<br />
Pull the motorized tray towards you.<br />
Disassembling the motorized tank stepper motor<br />
Loosen the two screws to release<br />
the electric motor with worm gear<br />
TALEA Section 07<br />
REV00 - August 06<br />
To withdraw the stop (A) use pliers to grip the tabs<br />
securing the lifting system to the base and pull outwards.<br />
Withdraw the electric motor with worm gear<br />
from above.<br />
11/11
Ideas with Passion<br />
SECTION 8<br />
SERVICE<br />
SCHEDULE<br />
TALEA Section 08<br />
REV.00<br />
REV00 - August 06
Ideas with Passion<br />
8.1 Routine maintenance check list<br />
S= Replacement<br />
R= <strong>Service</strong><br />
P= Cleaning<br />
D= Descaling<br />
C= Inspection<br />
*= Number of beverages dispensed<br />
Parts Task Reason Item<br />
<strong>Service</strong><br />
5,000*<br />
10,000*<br />
Casing, tanks, containers, power<br />
cable.<br />
C C C Dirty, damaged. See documentation (exp. drawing).<br />
Water coffee andè milk lines.<br />
GACO DIM 14 seals S S S Wear<br />
Water filter S S S Dirty, hygiene.<br />
Silicon tube C D D Dirty, scale, leaks. See documentation (exp. drawing).<br />
Turbine C D D Dirty, scale, leaks. See documentation (exp. drawing).<br />
Heater C D D Dirty, scale, leaks. See documentation (exp. drawing).<br />
Multi-valve C D D Dirty, scale, leaks. See documentation (exp. drawing).<br />
Heater pin o-ring S S S Dirty, scale, leaks.<br />
Brew group P P P Dirty, hygiene. See documentation (exp. drawing).<br />
Cappuccinatore P P P Dirty, hygiene. See documentation (exp. drawing).<br />
Coffee grinder<br />
Grinders<br />
Check grinding and dose.<br />
Brew group<br />
P<br />
C<br />
P<br />
C<br />
P<br />
C<br />
Dirty, hygiene.<br />
Grain size and dose<br />
See documentation (exp. drawing).<br />
Cleaning C R R Dirty, hygiene.<br />
Lubrication C R R Dirty, hygiene.<br />
O-ring C S S Wear See documentation (exp. drawing).<br />
Full service C C C Wear<br />
Othertasks<br />
Descale C D D<br />
Then check condition of<br />
parts.<br />
Temperature check C C C Client information<br />
Explanation of fault C C C Client information<br />
Safety check C C C Always<br />
Packing C C S Check, always. Use new packaging if necessary.<br />
TALEA Section 08<br />
REV00 - August 06<br />
1/1