Clarity Margay II Quick Start Guide - Planar
Clarity Margay II Quick Start Guide - Planar
Clarity Margay II Quick Start Guide - Planar

You also want an ePaper? Increase the reach of your titles
YUMPU automatically turns print PDFs into web optimized ePapers that Google loves.
2<br />
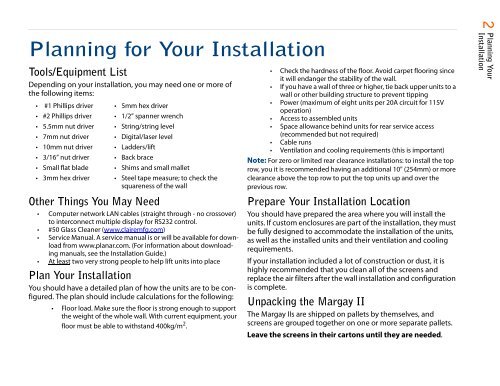
Planning for Your Installation<br />
Tools/Equipment List<br />
Depending on your installation, you may need one or more of<br />
the following items:<br />
• #1 Phillips driver • 5mm hex driver<br />
• #2 Phillips driver • 1/2” spanner wrench<br />
• 5.5mm nut driver • String/string level<br />
• 7mm nut driver • Digital/laser level<br />
• 10mm nut driver • Ladders/lift<br />
• 3/16” nut driver • Back brace<br />
• Small flat blade • Shims and small mallet<br />
• 3mm hex driver • Steel tape measure; to check the<br />
squareness of the wall<br />
Other Things You May Need<br />
• Computer network LAN cables (straight through - no crossover)<br />
to interconnect multiple display for RS232 control.<br />
• #50 Glass Cleaner (www.clairemfg.com)<br />
• Service Manual. A service manual is or will be available for download<br />
from www.planar.com. (For information about downloading<br />
manuals, see the Installation <strong>Guide</strong>.)<br />
• At least two very strong people to help lift units into place<br />
Plan Your Installation<br />
You should have a detailed plan of how the units are to be configured.<br />
The plan should include calculations for the following:<br />
• Floor load. Make sure the floor is strong enough to support<br />
the weight of the whole wall. With current equipment, your<br />
floor must be able to withstand 400kg/m 2 .<br />
• Check the hardness of the floor. Avoid carpet flooring since<br />
it will endanger the stability of the wall.<br />
• If you have a wall of three or higher, tie back upper units to a<br />
wall or other building structure to prevent tipping<br />
• Power (maximum of eight units per 20A circuit for 115V<br />
operation)<br />
• Access to assembled units<br />
• Space allowance behind units for rear service access<br />
(recommended but not required)<br />
• Cable runs<br />
• Ventilation and cooling requirements (this is important)<br />
Note: For zero or limited rear clearance installations: to install the top<br />
row, you it is recommended having an additional 10" (254mm) or more<br />
clearance above the top row to put the top units up and over the<br />
previous row.<br />
Prepare Your Installation Location<br />
You should have prepared the area where you will install the<br />
units. If custom enclosures are part of the installation, they must<br />
be fully designed to accommodate the installation of the units,<br />
as well as the installed units and their ventilation and cooling<br />
requirements.<br />
If your installation included a lot of construction or dust, it is<br />
highly recommended that you clean all of the screens and<br />
replace the air filters after the wall installation and configuration<br />
is complete.<br />
Unpacking the <strong>Margay</strong> <strong>II</strong><br />
The <strong>Margay</strong> <strong>II</strong>s are shipped on pallets by themselves, and<br />
screens are grouped together on one or more separate pallets.<br />
Leave the screens in their cartons until they are needed.<br />
Planning Your<br />
Installation