Clarity Margay II Quick Start Guide - Planar
Clarity Margay II Quick Start Guide - Planar
Clarity Margay II Quick Start Guide - Planar

You also want an ePaper? Increase the reach of your titles
YUMPU automatically turns print PDFs into web optimized ePapers that Google loves.
Wall Installation - First Row<br />
Note: Detailed instructions for wall, tower or banner installation can<br />
be found on the Installation <strong>Guide</strong> CD.<br />
1 <strong>Start</strong> by finding the highest part of the installation area. All<br />
cubes/bases/cube feet will need to be shimmed/adjusted<br />
to be level with the cube/base/cube feet positioned here.<br />
2 If you ordered bases, unpack and assemble them now.<br />
3 For each unit, install the Video Input Module and Option<br />
Key, if ordered. If you are building a tall array, it is easier to<br />
install them while they are on the ground.<br />
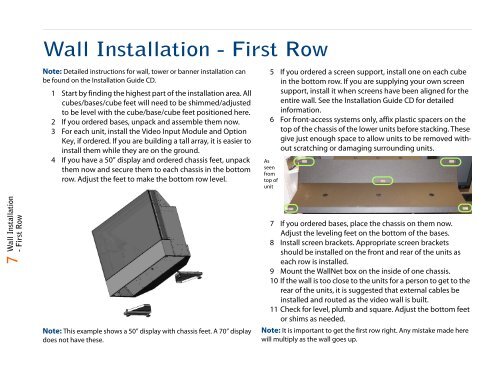
4 If you have a 50” display and ordered chassis feet, unpack<br />
them now and secure them to each chassis in the bottom<br />
row. Adjust the feet to make the bottom row level.<br />
5 If you ordered a screen support, install one on each cube<br />
in the bottom row. If you are supplying your own screen<br />
support, install it when screens have been aligned for the<br />
entire wall. See the Installation <strong>Guide</strong> CD for detailed<br />
information.<br />
6 For front-access systems only, affix plastic spacers on the<br />
top of the chassis of the lower units before stacking. These<br />
give just enough space to allow units to be removed without<br />
scratching or damaging surrounding units.<br />
As<br />
seen<br />
from<br />
top of<br />
unit<br />
Wall Installation<br />
- First Row<br />
7<br />
Note: This example shows a 50” display with chassis feet. A 70” display<br />
does not have these.<br />
7 If you ordered bases, place the chassis on them now.<br />
Adjust the leveling feet on the bottom of the bases.<br />
8 Install screen brackets. Appropriate screen brackets<br />
should be installed on the front and rear of the units as<br />
each row is installed.<br />
9 Mount the WallNet box on the inside of one chassis.<br />
10 If the wall is too close to the units for a person to get to the<br />
rear of the units, it is suggested that external cables be<br />
installed and routed as the video wall is built.<br />
11 Check for level, plumb and square. Adjust the bottom feet<br />
or shims as needed.<br />
Note: It is important to get the first row right. Any mistake made here<br />
will multiply as the wall goes up.