Table of Contents - Covidien
Table of Contents - Covidien
Table of Contents - Covidien

Create successful ePaper yourself
Turn your PDF publications into a flip-book with our unique Google optimized e-Paper software.
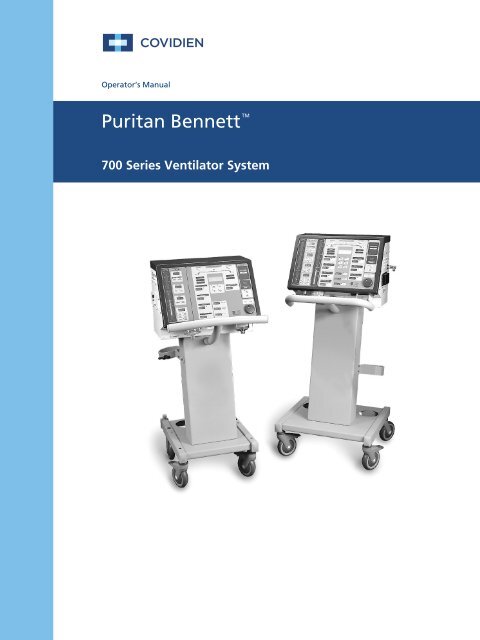
Operator’s Manual<br />
Puritan Bennett<br />
TM<br />
700 Series Ventilator System
To obtain information about a warranty, if any, contact <strong>Covidien</strong> Technical Services at<br />
1.800.635.5267 or your local representative.<br />
Purchase <strong>of</strong> this instrument confers no express or implied license under any <strong>Covidien</strong><br />
patent to use the instrument with any Ventilator System that is not manufactured or<br />
licensed by <strong>Covidien</strong>.
Copyright Information<br />
Copyright 2011 <strong>Covidien</strong>. COVIDIEN, COVIDIEN with logo. The <strong>Covidien</strong> logo and<br />
positive results for life are U.S. and internationally registered trademarks <strong>of</strong> <strong>Covidien</strong><br />
AG. Other brands are trademarks <strong>of</strong> a <strong>Covidien</strong> company. U.S. Patents 5,540,222;<br />
5,596,984; 5,632,270; 5,664,560; 5,673,689; 5,909,731; 5,915,382; 5,934,274; 6,116,240;<br />
6,142,150; 6,321,748; 6,467,478.<br />
The information contained in this manual is the sole property <strong>of</strong> <strong>Covidien</strong> and may not<br />
be duplicated without permission. This manual may be revised or replaced by <strong>Covidien</strong><br />
at any time and without notice. You should ensure that you have the most current<br />
applicable version <strong>of</strong> this manual; if in doubt, contact the Technical Publications<br />
Department <strong>of</strong> <strong>Covidien</strong>. While the information set forth herein is believed to be<br />
accurate, it is not a substitute for the exercise <strong>of</strong> pr<strong>of</strong>essional judgment.<br />
The ventilator should be operated and serviced only by trained pr<strong>of</strong>essionals.<br />
<strong>Covidien</strong>’s sole responsibility with respect to the ventilator, and its use, is as stated in<br />
the limited warranty provided.<br />
Nothing in this manual shall limit or restrict in any way <strong>Covidien</strong>’s right to revise or<br />
otherwise change or modify the equipment (including its s<strong>of</strong>tware) described herein,<br />
without notice. In the absence <strong>of</strong> an express, written agreement to the contrary,<br />
<strong>Covidien</strong> has no obligation to furnish any such revisions, changes, or modifications to<br />
the owner or user <strong>of</strong> the equipment (including its s<strong>of</strong>tware) described herein.
Preface<br />
Definitions<br />
This manual uses these special indicators to convey information <strong>of</strong> a<br />
specific nature:<br />
Warning<br />
Indicates a condition that can endanger the patient or<br />
the ventilator operator.<br />
Caution<br />
Indicates a condition that can damage the equipment.<br />
NOTE:<br />
Indicates points <strong>of</strong> particular emphasis that make operation <strong>of</strong><br />
the ventilator more efficient or convenient.<br />
Warnings, cautions, and notes<br />
Please take the time to familiarize yourself with the following safety<br />
considerations, special handling requirements, and regulations that<br />
govern the use <strong>of</strong> the 700 Series Ventilator System.<br />
Warning<br />
To avoid an electrical shock hazard while servicing the ventilator,<br />
be sure to remove all power to the ventilator by disconnecting<br />
the power source and turning <strong>of</strong>f all ventilator power switches.<br />
ii 10066984 Rev. D 700 Series Ventilator Operator’s Manual
Warning<br />
To avoid a fire hazard, keep matches, lighted cigarettes, and all<br />
other sources <strong>of</strong> ignition (e.g., flammable anesthetics and/or<br />
heaters) away from the ventilator and oxygen hoses.<br />
Do not use oxygen hoses that are worn, frayed, or contaminated<br />
by combustible materials such as grease or oils. (Textiles, oils,<br />
and other combustibles are easily ignited and burn with great<br />
intensity in air enriched with oxygen.)<br />
In case <strong>of</strong> fire or a burning smell, immediately disconnect the<br />
ventilator from the oxygen supply and electrical power source.<br />
Warning<br />
Patients on life-support equipment should be appropriately<br />
monitored by competent medical personnel and suitable<br />
monitoring devices.<br />
The 700 Series Ventilator is not intended to be a comprehensive<br />
monitoring device and does not activate alarms for all types <strong>of</strong><br />
dangerous conditions for patients on life-support equipment.<br />
Preface<br />
Warning<br />
Check the ventilator periodically as outlined in the service manual;<br />
do not use if defective. Immediately replace parts that are broken,<br />
missing, obviously worn, distorted, or contaminated.<br />
Warning<br />
An alternative source <strong>of</strong> ventilation should always be available<br />
when using the 700 Series Ventilator System.<br />
700 Series Ventilator Operator’s Manual 10066984 Rev. D iii
Preface<br />
Warning<br />
To ensure proper servicing and avoid the possibility <strong>of</strong> physical<br />
injury, only qualified personnel should attempt to service or<br />
make authorized modifications to the ventilator.<br />
The user <strong>of</strong> this product shall have sole responsibility for any<br />
ventilator malfunction due to operation or maintenance<br />
performed by anyone not trained by <strong>Covidien</strong> staff.<br />
Warning<br />
For a thorough understanding <strong>of</strong> ventilator operations, be<br />
sure to read the 700 Series Ventilator System Operator's<br />
Manual in its entirety before attempting to use the system.<br />
Warning<br />
Before activating any part <strong>of</strong> the ventilator, be sure to check<br />
the equipment for proper operation and, if appropriate, run<br />
the self-diagnostic short self test (SST) program described in<br />
this manual.<br />
Caution<br />
U.S. Federal law restricts this device to sale by or on the order<br />
<strong>of</strong> a physician.<br />
Warranty<br />
The 700 Series Ventilator System is warranted against defects in<br />
material and workmanship in accordance with <strong>Covidien</strong> Medical<br />
Equipment Warranty for a period <strong>of</strong> one year from the time <strong>of</strong> sale.<br />
To ensure the validity <strong>of</strong> the warranty, be sure to keep a maintenance<br />
record.<br />
Year <strong>of</strong> manufacture<br />
The 700 Series Ventilator System’s year <strong>of</strong> manufacture is indicated<br />
by the fifth and sixth digits <strong>of</strong> the serial number which is located at<br />
the lower edge <strong>of</strong> the ventilator front panel.<br />
iv 10066984 Rev. D 700 Series Ventilator Operator’s Manual
Manufacturer<br />
Manufacturer:<br />
<strong>Covidien</strong> llc<br />
15 Hampshire Street<br />
Mansfield, MA 02048<br />
USA<br />
Electromagnetic susceptibility<br />
Preface<br />
The 700 Series Ventilator System complies with the requirements <strong>of</strong><br />
IEC 60601-1-2 (EMC Collateral Standard), which includes E-field<br />
susceptibility and ESD requirements. However, even though the<br />
device is compliant at the levels <strong>of</strong> immunity specified in the<br />
standard, certain transmitting devices (cellular phones, walkietalkies,<br />
cordless phones, paging transmitters, etc.) emit radio<br />
frequencies that could interrupt ventilator operation if located in a<br />
range too close to the ventilator. It is difficult to determine when the<br />
field strength <strong>of</strong> these devices becomes excessive. Practitioners<br />
should be aware that radio frequency emissions are additive, and<br />
that the ventilator must be located a sufficient distance from<br />
transmitting devices to avoid interruption. Do not operate the<br />
ventilator in a magnetic resonance imaging (MRI) environment.<br />
The Alarm handling section <strong>of</strong> this manual describes possible<br />
ventilator alarms and what to do if they occur. Consult with your<br />
institution’s biomedical engineering department in case <strong>of</strong><br />
interrupted ventilator operation, and before relocating any life<br />
support equipment.<br />
Customer assistance<br />
Authorized Representative:<br />
<strong>Covidien</strong> Ireland Limited<br />
IDA Business & Technology Park<br />
Tullamore<br />
For further assistance contact your local <strong>Covidien</strong> representative.<br />
700 Series Ventilator Operator’s Manual 10066984 Rev. D v
This page is intentionally blank.<br />
vi 10066984 Rev. D 700 Series Ventilator Operator’s Manual
<strong>Table</strong> <strong>of</strong> <strong>Contents</strong> 2<br />
1 Introduction<br />
1.1 Functional description........................................................1-3<br />
1.2 Symbols and labels .............................................................1-8<br />
1.3 Keyboard...........................................................................1-13<br />
1.3.1 VENTILATOR SETTINGS .........................................1-14<br />
1.3.2 PATIENT DATA .....................................................1-25<br />
1.3.3 VENTILATOR STATUS ...........................................1-31<br />
2 Setting up the ventilator<br />
2.1 Connecting and using internal and external batteries ....2-2<br />
2.2 Connecting the electrical supply .......................................2-6<br />
2.3 Connecting the oxygen supply ..........................................2-8<br />
2.4 Connecting the ventilator breathing circuit ...................2-10<br />
2.5 Installing the collector vial...............................................2-13<br />
2.6 Installing the flex arm ......................................................2-13<br />
2.7 Installing the humidifier ..................................................2-15<br />
2.8 Using the ventilator cart ..................................................2-17<br />
3 Getting started<br />
3.1 Powering up the ventilator................................................3-1<br />
3.2 Selecting ventilator settings ..............................................3-4<br />
3.3 Viewing and changing alarm settings...............................3-6<br />
3.4 Entering and exiting standby mode..................................3-7<br />
4 Self tests (SST and EST)<br />
4.1 Short self test (SST) .............................................................4-3<br />
4.2 Extended self test (EST) ....................................................4-13<br />
5 Once ventilation begins<br />
5.1 Changing settings: a quick review.....................................5-1<br />
5.1.1 Changing settings ...................................................5-1<br />
5.1.2 Switching between VCV, PCV, and PSV .................5-2<br />
5.1.3 Changing the mode ................................................5-3<br />
5.2 Viewing and changing alarm settings: a quick review ....5-3<br />
700 Series Ventilator Operator’s Manual 10066984 Rev. D vii
<strong>Table</strong> <strong>of</strong> <strong>Contents</strong><br />
5.3 Adjusting apnea parameters..............................................5-4<br />
5.3.1 Adjusting the apnea interval..................................5-5<br />
5.4 Viewing patient data..........................................................5-6<br />
5.5 The 100% O 2 and MANUAL INSP keys...............................5-9<br />
5.6 The EXP PAUSE and INSP PAUSE keys (760 only) ............5-10<br />
6 The MENU key<br />
6.1 More active alarms..............................................................6-6<br />
6.2 Autoreset alarms.................................................................6-6<br />
6.3 Self tests...............................................................................6-7<br />
6.4 User settings .......................................................................6-8<br />
6.4.1 Endotracheal tube...................................................6-8<br />
6.4.2 Humidifier type .......................................................6-8<br />
6.4.3 Date and time set....................................................6-9<br />
6.4.4 Apnea interval (Ta)................................................6-10<br />
6.4.5 VCV flow pattern...................................................6-10<br />
6.4.6 Speaking valve setup.............................................6-11<br />
6.4.7 Alarm volume ........................................................6-17<br />
6.4.8 PCV timing setting.................................................6-17<br />
6.4.9 Volume LED bar.....................................................6-17<br />
6.5 Oxygen sensor ...................................................................6-18<br />
6.6 Standby mode ...................................................................6-20<br />
6.7 Battery info ......................................................................6-20<br />
6.8 S<strong>of</strong>tware revision ..............................................................6-21<br />
6.9 Service summary................................................................6-21<br />
6.10 Nebulizer ...........................................................................6-21<br />
7 Alarm handling<br />
7.1 Autoreset alarms.................................................................7-2<br />
7.2 Alarm silence .......................................................................7-3<br />
7.3 Alarm reset ..........................................................................7-4<br />
7.4 Clinical and technical alarms ..............................................7-4<br />
7.5 Power alarm ......................................................................7-20<br />
7.5.1 Loss <strong>of</strong> AC Power ..................................................7-20<br />
7.5.2 Loss <strong>of</strong> Power.........................................................7-20<br />
viii 10066984 Rev. D 700 Series Ventilator Operator’s Manual
A Maintenance<br />
B Part numbers<br />
<strong>Table</strong> <strong>of</strong> <strong>Contents</strong><br />
A.1 Cleaning, disinfection, and sterilization ......................... A-2<br />
A.1.1 Cleaning: general guidelines................................. A-4<br />
A.1.2 Disinfection and sterilization ................................ A-5<br />
A.2 Preventive maintenance ................................................... A-6<br />
A.2.1 Daily or as required: inspiratory and expiratory<br />
bacteria filters ....................................................... A-8<br />
A.2.2 Daily or as required: collector vial ........................ A-9<br />
A.2.3 Daily or as required: in-line water traps............. A-10<br />
A.2.4 As necessary: oxygen sensor calibration............. A-10<br />
A.2.5 Every 250 hours (or 1 month <strong>of</strong> use):<br />
cooling fan filter.................................................. A-11<br />
A.2.6 Every 1000 hours (or 3 months <strong>of</strong> use):<br />
air intake filter..................................................... A-12<br />
A.2.7 Every 2 years: device checks ................................ A-13<br />
A.2.8 Storage ................................................................. A-13<br />
A.2.9 Repacking ............................................................. A-14<br />
C Specifications<br />
C.1 Physical ...............................................................................C-2<br />
C.2 Environmental ...................................................................C-3<br />
C.3 Power ................................................................................C-4<br />
C.4 Compliance and approvals ................................................C-6<br />
C.5 Technical ............................................................................C-7<br />
D Breath delivery<br />
D.1 A/C mode ........................................................................... D-3<br />
D.2 SPONT mode ..................................................................... D-4<br />
D.3 SIMV mode ........................................................................ D-5<br />
D.3.1 Breath timing ......................................................... D-5<br />
700 Series Ventilator Operator’s Manual 10066984 Rev. D ix
<strong>Table</strong> <strong>of</strong> <strong>Contents</strong><br />
E Alarm testing<br />
F Pneumatic schematic<br />
G Glossary<br />
Index<br />
x 10066984 Rev. D 700 Series Ventilator Operator’s Manual
Figures 2<br />
Figure 1-1 . Block diagram: 700 Series Ventilator function . . . . . . . . . . 1-5<br />
Figure 1-2. 740 Ventilator System keyboard . . . . . . . . . . . . . . . . . . . . . 1-13<br />
Figure 1-3. 760 Ventilator System keyboard . . . . . . . . . . . . . . . . . . . . . 1-14<br />
Figure 2-1. Lifting the ventilator . . . . . . . . . . . . . . . . . . . . . . . . . . . . . . . 2-2<br />
Figure 2-2. Internal battery charge indicator . . . . . . . . . . . . . . . . . . . . . 2-3<br />
Figure 2-3. Plugging the external battery into the ventilator . . . . . . . 2-5<br />
Figure 2-4. Disconnecting the external battery . . . . . . . . . . . . . . . . . . . 2-6<br />
Figure 2-5. Connecting the ventilator power cord . . . . . . . . . . . . . . . . . 2-7<br />
Figure 2-6. Storing the power cord on the ventilator . . . . . . . . . . . . . . 2-7<br />
Figure 2-7. Connecting the oxygen supply . . . . . . . . . . . . . . . . . . . . . . . 2-9<br />
Figure 2-8 . Connecting the ventilator breathing circuit . . . . . . . . . . . 2-12<br />
Figure 2-9. Installing the collector vial . . . . . . . . . . . . . . . . . . . . . . . . . 2-13<br />
Figure 2-10. Installing the flex arm . . . . . . . . . . . . . . . . . . . . . . . . . . . . . 2-14<br />
Figure 2-11. Shortening the flex arm. . . . . . . . . . . . . . . . . . . . . . . . . . . . 2-15<br />
Figure 2-12. Installing the humidifier . . . . . . . . . . . . . . . . . . . . . . . . . . . 2-16<br />
Figure 2-13. Locking and unlocking the cart’s front wheels . . . . . . . . . 2-17<br />
Figure 3-1. Turning the power switch on (the “I” position) . . . . . . . . . 3-2<br />
Figure 5-1. Viewing patient data. . . . . . . . . . . . . . . . . . . . . . . . . . . . . . . 5-7<br />
Figure 5-2. Volume bar graph (760 Ventilator only) . . . . . . . . . . . . . . . 5-8<br />
Figure 6-1. Using the More active alarms menu function to view<br />
active alarms. . . . . . . . . . . . . . . . . . . . . . . . . . . . . . . . . . . . . . 6-6<br />
Figure 6-2. Using the Autoreset alarms menu function to view<br />
autoreset alarms . . . . . . . . . . . . . . . . . . . . . . . . . . . . . . . . . . 6-7<br />
Figure 7-1. Viewing active alarms . . . . . . . . . . . . . . . . . . . . . . . . . . . . . . 7-2<br />
Figure A-1. Removing/replacing the collector vial . . . . . . . . . . . . . . . A-10<br />
Figure A-2. Cooling fan cover . . . . . . . . . . . . . . . . . . . . . . . . . . . . . . . . A-11<br />
Figure A-3. Air intake filter . . . . . . . . . . . . . . . . . . . . . . . . . . . . . . . . . A-12<br />
Figure B-1. Ventilator accessories . . . . . . . . . . . . . . . . . . . . . . . . . . . . . B-11<br />
Figure C-1. Recommended ventilator breathing circuit<br />
configurations . . . . . . . . . . . . . . . . . . . . . . . . . . . . . . . . . . . C-10<br />
Figure D-1. Flow waveform . . . . . . . . . . . . . . . . . . . . . . . . . . . . . . . . . . D-3<br />
Figure D-2. SIMV breath period intervals . . . . . . . . . . . . . . . . . . . . . . . D-5<br />
Figure D-3. Synchronizing breath intervals with patient effort . . . . . . D-5<br />
Figure D-4. Spontaneous breaths during SIMV . . . . . . . . . . . . . . . . . . . D-6<br />
700 Series Ventilator Operator’s Manual 10066984 Rev. D xi
Figures<br />
Figure D-5. Mandatory breaths during SIMV . . . . . . . . . . . . . . . . . . . . . D-6<br />
Figure D-6. Manual inspiration during SIMV . . . . . . . . . . . . . . . . . . . . . D-6<br />
xii 10066984 Rev. D 700 Series Ventilator Operator’s Manual
<strong>Table</strong>s 2<br />
<strong>Table</strong> 1-1. Mode/breath type availability on 740/760 Ventilators. . . . . . . 1-2<br />
<strong>Table</strong> 1-2. Changes to current settings in occlusion cycling mode . . . . . . 1-7<br />
<strong>Table</strong> 1-3. 700 Series Ventilator keyboards: VENTILATOR SETTINGS . . . 1-15<br />
<strong>Table</strong> 1-4. 700 Series Ventilator keyboards: PATIENT DATA . . . . . . . . . . 1-25<br />
<strong>Table</strong> 1-5. 700 Series Ventilator keyboards: VENTILATOR STATUS . . . . . 1-31<br />
<strong>Table</strong> 4-1. 700 Series Ventilator self tests . . . . . . . . . . . . . . . . . . . . . . . . . . 4-2<br />
<strong>Table</strong> 4-2. SST sequence <strong>of</strong> tests . . . . . . . . . . . . . . . . . . . . . . . . . . . . . . . . . 4-9<br />
<strong>Table</strong> 4-3. Overall SST results. . . . . . . . . . . . . . . . . . . . . . . . . . . . . . . . . . . 4-12<br />
<strong>Table</strong> 4-4. EST hardware requirements. . . . . . . . . . . . . . . . . . . . . . . . . . . 4-13<br />
<strong>Table</strong> 4-5. EST setup messages . . . . . . . . . . . . . . . . . . . . . . . . . . . . . . . . . 4-14<br />
<strong>Table</strong> 4-6. EST test sequence . . . . . . . . . . . . . . . . . . . . . . . . . . . . . . . . . . . 4-17<br />
<strong>Table</strong> 4-7. Key functions during EST . . . . . . . . . . . . . . . . . . . . . . . . . . . . 4-22<br />
<strong>Table</strong> 4-8. Prompts during EST . . . . . . . . . . . . . . . . . . . . . . . . . . . . . . . . . 4-22<br />
<strong>Table</strong> 4-9. EST completion status . . . . . . . . . . . . . . . . . . . . . . . . . . . . . . . 4-25<br />
<strong>Table</strong> 5-1. Breath type availability . . . . . . . . . . . . . . . . . . . . . . . . . . . . . . . 5-2<br />
<strong>Table</strong> 6-1. Menu function summary . . . . . . . . . . . . . . . . . . . . . . . . . . . . . . 6-3<br />
<strong>Table</strong> 7-1. Clinical alarms . . . . . . . . . . . . . . . . . . . . . . . . . . . . . . . . . . . . . . . 7-5<br />
<strong>Table</strong> 7-2. Technical alarms . . . . . . . . . . . . . . . . . . . . . . . . . . . . . . . . . . . 7-14<br />
<strong>Table</strong> A-1. Cleaning, disinfection, and sterilization . . . . . . . . . . . . . . . . . A-3<br />
<strong>Table</strong> A-2. Preventive maintenance schedule . . . . . . . . . . . . . . . . . . . . . A-7<br />
<strong>Table</strong> B-1. Ventilator accessories . . . . . . . . . . . . . . . . . . . . . . . . . . . . . . . . . B-2<br />
<strong>Table</strong> C-1. Physical specifications. . . . . . . . . . . . . . . . . . . . . . . . . . . . . . . . . C-2<br />
<strong>Table</strong> C-2. Environmental specifications . . . . . . . . . . . . . . . . . . . . . . . . . . . C-3<br />
<strong>Table</strong> C-3. Power specifications . . . . . . . . . . . . . . . . . . . . . . . . . . . . . . . . . . C-4<br />
<strong>Table</strong> C-4. Compliance and approvals. . . . . . . . . . . . . . . . . . . . . . . . . . . . . C-6<br />
<strong>Table</strong> C-5. Technical specifications . . . . . . . . . . . . . . . . . . . . . . . . . . . . . . . C-7<br />
700 Series Ventilator Operator’s Manual 10066984 Rev. D xiii
This page is intentionally blank.<br />
xiv 10066984 Rev. D 700 Series Ventilator Operator’s Manual
Introduction<br />
The 700 Series Ventilator System (including the 740 and 760<br />
Ventilators) provides respiratory support for a wide range <strong>of</strong><br />
pediatric to adult patients for a wide variety <strong>of</strong> clinical conditions.<br />
The ventilator’s mixing technique allows it to ventilate critically ill<br />
patients at adjustable oxygen concentrations without the need for a<br />
blender, compressor, or hospital-grade wall air.<br />
The 700 Series Ventilator System can be mains- or battery-powered.<br />
Each ventilator includes two microcontrollers: one for breath delivery<br />
(which controls ventilation), and one for the user interface (which<br />
monitors ventilator and patient data). Each microcontroller verifies that<br />
the other is functioning properly. Using two independent<br />
microcontrollers in this fashion prevents a single fault from causing a<br />
simultaneous failure <strong>of</strong> controlling and monitoring functions.<br />
The 700 Series Ventilator System supplies mandatory or spontaneous<br />
breaths with a piston-based pneumatic system. <strong>Table</strong> 1-1 summarizes<br />
the modes and breath types <strong>of</strong>fered by the 740 and 760 Ventilators.<br />
Mandatory breaths can be volume control ventilation (VCV, available<br />
on 740 and 760 Ventilators) or pressure control ventilation (PCV,<br />
available on the 760 Ventilator only). VCV delivers breaths to the<br />
patient at a preset tidal volume, peak flow, waveform, and oxygen<br />
concentration at a minimum respiratory rate. PCV delivers breaths to
Introduction<br />
the patient at a preset inspiratory pressure, I:E ratio or inspiratory<br />
time, rise time factor (how quickly inspiratory pressure rises to<br />
achieve the set inspiratory pressure), and oxygen concentration at a<br />
minimum respiratory rate. A spontaneous breath allows the patient<br />
inspiratory flows <strong>of</strong> up to 300 L/min, with or without pressure<br />
support ventilation (PSV). On the 760 Ventilator, you can set the rise<br />
time factor and exhalation flow sensitivity (that is, the point at<br />
which the ventilator cycles from inspiration to exhalation) in PSV.<br />
The ventilator begins apnea ventilation if no breath (patient- ,<br />
ventilator-, or operator-initiated) is delivered within the selected<br />
apnea interval. Apnea ventilation is active during all modes. On the<br />
740 Ventilator, only VCV breaths are available in apnea ventilation.<br />
On the 760 Ventilator, VCV or PCV breaths are available in apnea<br />
ventilation.<br />
The 760 Ventilator also <strong>of</strong>fers the ability to perform respiratory<br />
mechanics calculations and maneuvers as a standard feature using<br />
the EXP PAUSE (to calculate auto-PEEP) and INSP PAUSE (to calculate<br />
patient resistance and compliance) keys.<br />
<strong>Table</strong> 1-1: Mode/breath type availability on 740/760 Ventilators<br />
Mode/breath type 740 Ventilator 760 Ventilator<br />
VCV breath type • •<br />
PCV breath type •<br />
PSV breath type (support pressure<br />
setting)<br />
PSV (rise time factor and exhalation<br />
sensitivity settings)<br />
• •<br />
SIMV mode • •<br />
Apnea ventilation (VCV breath type) • •<br />
Apnea ventilation (choice <strong>of</strong> VCV or<br />
PCV breath type)<br />
Respiratory mechanics (EXP PAUSE<br />
and INSP PAUSE)<br />
1�2 10066984 Rev. D 700 Series Ventilator Operator’s Manual<br />
•<br />
•<br />
•
Introduction<br />
This manual tells you how to operate and perform simple<br />
maintenance for the 700 Series Ventilator. <strong>Covidien</strong> recommends<br />
that you become familiar with this manual and accompanying labels<br />
before attempting to operate or maintain the ventilator. If you need<br />
additional copies <strong>of</strong> this manual, contact your <strong>Covidien</strong><br />
representative.<br />
To ensure optimum performance <strong>of</strong> the 700 Series Ventilator System,<br />
<strong>Covidien</strong> recommends that a qualified service technician perform<br />
periodic maintenance on the ventilator. For more information,<br />
contact your <strong>Covidien</strong> representative.<br />
1.1 Functional description<br />
By pressing keys and turning the knob on the ventilator keyboard,<br />
the operator gives initial instructions and data to the ventilator<br />
(Figure 1-1). The user interface microcontroller processes this<br />
information and stores it in the ventilator’s memory. The breath<br />
delivery microcontroller uses this stored information to control and<br />
monitor the flow <strong>of</strong> gas to and from the patient.<br />
The 700 Series Ventilator uses a flow trigger to recognize patient<br />
effort. The trigger monitors flow from the piston during exhalation.<br />
When the patient inhales, patient circuit pressure drops very slightly<br />
below end-expiratory pressure. At the same time, the piston moves<br />
forward to deliver flow to the ventilator breathing circuit and<br />
maintain the preset PEEP/CPAP level. The level <strong>of</strong> flow depends on<br />
the patient’s effort. If this flow exceeds the user-set level, the<br />
ventilator triggers. By design, the ventilator attempts to maintain<br />
PEEP in the presence <strong>of</strong> a circuit leak. Since a leak drives the piston to<br />
deliver flow to make up for pressure losses, a circuit leak can require<br />
an increase in the flow trigger level to avoid autocycling.<br />
During exhalation, the ventilator’s piston retracts and draws air and<br />
oxygen into the cylinder. The ventilator uses room air, which means<br />
the ventilator can operate without a compressor or wall air source.<br />
Room air enters the ventilator through a protected user-replaceable<br />
air intake filter just inside the ventilator cabinet. This filter captures<br />
airborne particles.<br />
700 Series Ventilator Operator’s Manual 10066984 Rev. D 1�3
Introduction<br />
Oxygen from a cylinder or wall supply enters the ventilator through<br />
a hose and oxygen fitting (the fitting is available in several versions).<br />
Once inside the ventilator, the oxygen is regulated to a pressure the<br />
ventilator can use, then mixed with air, according to the selected<br />
% O2 .<br />
The flow-triggered piston/cylinder system and motor controller<br />
circuit control the flow <strong>of</strong> gas to the patient. On the 760 Ventilator in<br />
PCV or PSV, the rate <strong>of</strong> flow is also determined by the preset rise time<br />
factor. This system is designed with a minute gap (about the size <strong>of</strong> a<br />
thin sheet <strong>of</strong> paper) between the piston and the cylinder wall.<br />
This design eliminates the friction between the piston and cylinder,<br />
allowing it to respond more rapidly than a “sealed” system.<br />
A small amount <strong>of</strong> gas leaks through the gap between the piston<br />
and cylinder. Ventilator s<strong>of</strong>tware and a continuous forward motion<br />
<strong>of</strong> the piston compensate for this leak.<br />
The piston delivers the mixed air and oxygen through the inspiratory<br />
manifold system, and out to the patient. The oxygen concentration<br />
and temperature <strong>of</strong> the delivered gas are monitored here, using a<br />
galvanic oxygen sensor and a thermistor. The galvanic sensor<br />
generates a voltage proportional to the partial pressure <strong>of</strong> oxygen,<br />
from which the oxygen concentration is calculated. The ventilator<br />
alarms if the monitored oxygen concentration is more than ten<br />
percentage points above or below the % O2 setting. The inspiratory<br />
manifold system also includes a safety valve to relieve patient<br />
pressure if necessary (for example, if the ventilator breathing circuit<br />
is kinked or occluded).<br />
The patient system includes the components external to the ventilator<br />
that route gas between the ventilator and the patient. These<br />
components include the inspiratory filter (which protects against<br />
contamination between the ventilator and patient), a humidification<br />
device, ventilator breathing circuit (the tubing through which the gas<br />
travels), collector vial (which protects the exhalation system from<br />
moisture in the exhaled gas, and can be emptied without losing circuit<br />
PEEP), and an expiratory filter (which limits the bacteria in the<br />
patient’s exhaled gas from escaping to room air or contaminating the<br />
ventilator).<br />
1�4 10066984 Rev. D 700 Series Ventilator Operator’s Manual
Piston/cylinder<br />
system<br />
Expiratory<br />
filter<br />
Collector<br />
vial<br />
Exhalation/<br />
PEEP/CPAP<br />
system<br />
Keyboard<br />
Ventilator breathing circuit<br />
(expiratory limb)<br />
Figure 1-1 . Block diagram: 700 Series Ventilator function<br />
Introduction<br />
The heated exhalation system monitors the flow <strong>of</strong> the patient’s<br />
exhaled gas using a differential pressure transducer. The patient<br />
exhales through the exhalation valve. During exhalation, the<br />
PEEP/CPAP system maintains user-selected pressure in the ventilator<br />
breathing circuit.<br />
700 Series Ventilator Operator’s Manual 10066984 Rev. D 1�5<br />
740 Ventilator<br />
- +<br />
Regulator<br />
Filter<br />
Oxygen<br />
Room air<br />
Inspiration<br />
manifold<br />
Inspiratory<br />
filter<br />
Patient<br />
Gas intake<br />
system<br />
Humidification<br />
device<br />
Ventilator breathing circuit<br />
(inspiratory limb)<br />
7-00017
Introduction<br />
Throughout the respiratory cycle, pressure transducers monitor<br />
inspiratory, expiratory, and atmospheric pressures. The temperatures<br />
<strong>of</strong> the pneumatic compartment and inspiratory gas are also<br />
monitored. Information from these transducers is continuously used<br />
to update the calculations that control ventilation. (Appendix F<br />
provides a diagram <strong>of</strong> the ventilator’s pneumatic system and<br />
ventilator breathing circuit.)<br />
Power to operate the ventilator comes from ac mains (wall) or<br />
battery power. The power supply is designed to protect against<br />
excessive voltages, temperatures, or current draws. A power cord<br />
retainer prevents the cord from accidental disconnection.<br />
The ventilator includes an internal battery, and accommodates an<br />
optional external battery. Depending on the ventilator settings,<br />
battery backup power can be supplied for up to 2 ½ hours using the<br />
internal battery, and up to 7 hours using the external battery.<br />
Both batteries are recharged during operation from ac power.<br />
If both are installed, the external battery is used first when ac power<br />
is not present. If the external battery is depleted or not installed, the<br />
internal battery supplies power to the ventilator when ac power is<br />
not available. The keyboard indicates the source <strong>of</strong> power and<br />
battery charge level <strong>of</strong> the internal battery at all times.<br />
Emergency modes: The ventilator declares a ventilator inoperative<br />
(VENT INOP) condition if a hardware failure or critical s<strong>of</strong>tware error<br />
that could compromise safe ventilation occurs. In case <strong>of</strong> a ventilator<br />
inoperative condition, the VENT INOP indicator lights and the<br />
ventilator enters the safety valve open (SVO) state. To correct a<br />
ventilator inoperative condition, the ventilator must be turned <strong>of</strong>f,<br />
then powered on again; at power-on, the operator must run<br />
extended self-test (EST). The ventilator must pass EST before normal<br />
ventilation can resume.<br />
The safety valve allows the patient to breathe room air unassisted<br />
when the ventilator is in the SVO state. The ventilator remains in the<br />
SVO state until power-on self-test (POST) verifies that power levels to<br />
the ventilator are acceptable and that the motor controller and<br />
microcontrollers are functioning correctly, and until the user has<br />
confirmed ventilator settings.<br />
1�6 10066984 Rev. D 700 Series Ventilator Operator’s Manual
Introduction<br />
If the ventilator enters the SVO state and POST is not running, the<br />
SAFETY VALVE OPEN indicator lights and a high-priority alarm<br />
sounds. The ventilator enters the SVO state if it detects a hardware<br />
or s<strong>of</strong>tware failure that could compromise safe ventilation. In case <strong>of</strong><br />
a malfunction that prevents s<strong>of</strong>tware from opening the safety valve,<br />
there is also an analog circuit that opens the safety valve when<br />
system pressure exceeds 115 cmH2O (113 hPa).<br />
If the ventilator detects an occlusion or a continuous high inspiratory<br />
pressure condition, it opens the safety and exhalation valves to vent<br />
excess pressure, then shuts them and begins occlusion cycling mode.<br />
In occlusion cycling mode the ventilator uses current settings except<br />
for those summarized in <strong>Table</strong> 1-2. If the ventilator again detects an<br />
occlusion or continuous high pressure condition, it again opens the<br />
safety and exhalation valves then resumes occlusion cycling mode.<br />
If the operator presses the alarm reset key or the ventilator does not<br />
detect an occlusion or continuous high pressure condition, it reverts<br />
to normal ventilation using the most recently accepted settings.<br />
<strong>Table</strong> 1-2: Changes to current settings in occlusion cycling mode<br />
Setting Change to setting<br />
HIGH PRESSURE<br />
alarm (VCV breath<br />
type)<br />
Set to 30 cmH 2 O<br />
PEEP (all modes) Set to 0 cmH 2 O<br />
% O 2 (all modes) Set to 100%<br />
SPONT mode<br />
(PSV breath type)<br />
SUPPORT<br />
PRESSURE<br />
(PSV breath type)<br />
SUPPORT<br />
PRESSURE<br />
(PCV breath type)<br />
RISE TIME FACTOR<br />
(PCV breath type)<br />
Breaths are delivered at a rate <strong>of</strong> 12/min with an<br />
inspiratory time <strong>of</strong> 2 seconds.<br />
If less than 15 cmH 2 O: set to 15 cmH 2 O.<br />
If 15 cmH 2 O or above: the current setting is used<br />
(no change).<br />
If less than 15 cmH 2 O: set to 15 cmH 2 O.<br />
If 15 cmH 2 O or above: the current setting is used<br />
(no change).<br />
Set to 70%<br />
700 Series Ventilator Operator’s Manual 10066984 Rev. D 1�7
Introduction<br />
1.2 Symbols and labels<br />
These symbols and labels appear on the 700 Series Ventilator System:<br />
SN<br />
1<br />
7-00421<br />
7-00418<br />
7-00416<br />
7-00426<br />
7-00414<br />
7-00427<br />
7-00415<br />
7-00403<br />
Power switch positions per IEC 601-1.”I” represents ON<br />
position; “O” represents OFF position.<br />
Refer to manual per IEC 601-1. When this symbol appears<br />
on product, it means “Refer to documentation for<br />
information.”<br />
Potential equalization point, per IEC 601-1<br />
External battery connection<br />
Circuit breaker<br />
Serial number<br />
ac current<br />
Type B equipment, per IEC 601-1<br />
Indicates the degree <strong>of</strong> protection provided by enclosure<br />
(drip-pro<strong>of</strong>).<br />
1�8 10066984 Rev. D 700 Series Ventilator Operator’s Manual
8-00417<br />
7-00420<br />
Exhaust port connector<br />
Introduction<br />
Signifies compliance with the Medical Device Directive,<br />
93/42/EEC<br />
CSA and NRTL (Nationally Recognized Testing Laboratory)<br />
certification, granted by CSA<br />
The TUV Rheinland logo signifies TUV Rheinland Type Test<br />
approval to Annex III <strong>of</strong> the Medical Device Directive<br />
Inspiratory limb connector<br />
Expiratory limb connector<br />
EXHAUST<br />
TO<br />
PATIENT<br />
FROM<br />
PATIENT<br />
700 Series Ventilator Operator’s Manual 10066984 Rev. D 1�9
Introduction<br />
Oxygen inlet port label<br />
Air intake label<br />
Cooling fan label<br />
1�10 10066984 Rev. D 700 Series Ventilator Operator’s Manual<br />
V . ma<br />
O 2<br />
General life support equipment warning label<br />
61006<br />
61010<br />
61009<br />
61011
740 Ventilator back panel label<br />
Introduction<br />
700 Series Ventilator Operator’s Manual 10066984 Rev. D 1�11
Introduction<br />
760 Ventilator back panel label<br />
1�12 10066984 Rev. D 700 Series Ventilator Operator’s Manual
1.3 Keyboard<br />
Introduction<br />
Caution<br />
To avoid damaging the keyboard, do not press on it with sharp<br />
objects.<br />
The keyboard (Figure 1-2 shows the 740 keyboard and Figure 1-3<br />
shows the 760 keyboard) is grouped into three sections:<br />
• VENTILATOR SETTINGS: Where you set breath delivery variables.<br />
• PATIENT DATA: Where you set alarm limits and view the<br />
monitored pressures, breath timing, and volumes.<br />
• VENTILATOR STATUS: Where you see the alarm status and<br />
operating condition <strong>of</strong> the ventilator.<br />
Patient data Ventilator status<br />
Ventilator settings<br />
Figure 1-2. 740 Ventilator System keyboard<br />
7-00048<br />
700 Series Ventilator Operator’s Manual 10066984 Rev. D 1�13
Introduction<br />
Patient data Ventilator status<br />
Figure 1-3. 760 Ventilator System keyboard<br />
1.3.1 VENTILATOR SETTINGS<br />
Ventilator settings<br />
7-00123<br />
The VENTILATOR SETTINGS section <strong>of</strong> the keyboard allows you to<br />
select the ventilation mode, breath type, and settings. For more<br />
detail on ventilation modes and breath delivery, see Appendix D.<br />
To change the mode and settings, select the mode, then the breath<br />
type, and then the ventilator settings. The keys flash during setup<br />
and mode changes to ensure that you review all pertinent settings.<br />
The keyboard is designed to minimize accidental or unintentional<br />
changes.<br />
<strong>Table</strong> 1-3 summarizes the functions <strong>of</strong> the keys, knob, and indicators<br />
in the VENTILATOR SETTINGS section <strong>of</strong> the keyboard. Ventilator<br />
settings are also limited by these breath delivery boundaries:<br />
• I:E ratio ≤ 4:1 for PCV (760 Ventilator only), ≤ 3:1 for all other<br />
breath types<br />
• Inspiratory time = 0.2 to 8 seconds (excluding plateau)<br />
• Expiratory time ≥ 0.2 seconds<br />
1�14 10066984 Rev. D 700 Series Ventilator Operator’s Manual
Introduction<br />
• PEEP/CPAP + SUPPORT PRESSURE or INSPIRATORY PRESSURE<br />
≤ 80 cmH 2 O (80 hPa)<br />
NOTE:<br />
Maximum SUPPORT PRESSURE is 70 cmH 2 O, maximum<br />
INSPIRATORY PRESSURE is 80 cmH 2 O.<br />
• SUPPORT PRESSURE or INSPIRATORY PRESSURE + PEEP/CPAP<br />
< HIGH PRESSURE - 2 cmH2O (2 hPa)<br />
• HIGH PRESSURE (in A/C and SIMV modes) > PEEP/CPAP +<br />
7 cmH2O (7 hPa)<br />
• HIGH PRESSURE (in SPONT mode) > PEEP/CPAP + SUPPORT<br />
PRESSURE + 2 cmH2O (2 hPa)<br />
• HIGH PRESSURE > LOW INSP PRESSURE<br />
• Minute volume ≤ 50 L/min at an I:E ratio <strong>of</strong> 2:1<br />
<strong>Table</strong> 1-3: 700 Series Ventilator keyboards: VENTILATOR SETTINGS<br />
Key/indicator Specifies... Range<br />
Mode/breath type settings<br />
A/C Assist/control mode VCV (volume control<br />
ventilation) and PCV<br />
(pressure control ventilation)<br />
breath types.<br />
(PCV available on 760<br />
Ventilator only.)<br />
SIMV Synchronous intermittent<br />
mandatory ventilation mode<br />
VCV, PCV (760 only), and PSV<br />
(pressure support<br />
ventilation) breath types.<br />
SPONT Spontaneous mode PSV breath type<br />
VCV VCV breath type VCV available on 740 and<br />
760 Ventilators in A/C or<br />
SIMV modes.<br />
700 Series Ventilator Operator’s Manual 10066984 Rev. D 1�15
Introduction<br />
<strong>Table</strong> 1-3: 700 Series Ventilator keyboards: VENTILATOR SETTINGS<br />
Key/indicator Specifies... Range<br />
Mode/breath type settings (continued)<br />
PCV PCV breath type PCV available on 760<br />
Ventilator only in A/C or<br />
SIMV modes.<br />
PSV PSV breath type PSV available in SIMV or<br />
SPONT modes.<br />
Mandatory (VCV) settings<br />
RESPIRATORY<br />
RATE<br />
TIDAL<br />
VOLUME<br />
The minimum number <strong>of</strong><br />
mandatory breaths the<br />
patient receives per minute.<br />
During apnea ventilation the<br />
minimum RESPIRATORY RATE<br />
setting is 6 /minute.<br />
Volume delivered to the<br />
patient during a mandatory<br />
breath, compliancecompensated<br />
and corrected to<br />
body temperature and<br />
pressure, saturated (BTPS).<br />
PEAK FLOW Maximum flow <strong>of</strong> gas<br />
delivered during a mandatory<br />
breath (BTPS). (Combined<br />
with tidal volume, peak flow<br />
defines the active portion <strong>of</strong><br />
inspiratory time.)<br />
PLATEAU (s) Length <strong>of</strong> inspiratory pause<br />
after a mandatory breath has<br />
been delivered, during which<br />
no gas is delivered.<br />
Mandatory (PCV) settings (760 Ventilator only)<br />
RESPIRATORY<br />
RATE<br />
The minimum number <strong>of</strong><br />
mandatory breaths the<br />
patient receives per minute.<br />
During apnea ventilation the<br />
minimum RESPIRATORY RATE<br />
setting is 6 /minute.<br />
1 to 70 /minute<br />
Accuracy:<br />
± (0.1 + 1%) /minute<br />
40 to 2000 ml<br />
Accuracy:<br />
± (10 ml + 10% <strong>of</strong> setting)<br />
3 to 150 L/min<br />
Accuracy:<br />
± (5 + 10% <strong>of</strong> setting) L/min<br />
0.0 to 2.0 second<br />
Accuracy: ± 0.05 second<br />
1 to 70 /minute<br />
Accuracy:<br />
± (0.1 + 1%) /minute<br />
1�16 10066984 Rev. D 700 Series Ventilator Operator’s Manual
Introduction<br />
<strong>Table</strong> 1-3: 700 Series Ventilator keyboards: VENTILATOR SETTINGS<br />
Key/indicator Specifies... Range<br />
Mandatory (PCV) settings (760 Ventilator only) (continued)<br />
INSPIRATORY<br />
PRESSURE<br />
(760 only)<br />
T I /I:E RATIO<br />
(760 only)<br />
RISE TIME<br />
FACTOR<br />
(760 only)<br />
Pressure above PEEP during<br />
the inspiratory phase <strong>of</strong> a PCV<br />
breath.<br />
You can use the MENU key to<br />
select inspiratory time (T I ) or<br />
I:E ratio as the breath timing<br />
setting for a PCV breath. You<br />
can change the selected<br />
breath timing setting (T I or I:E<br />
ratio), but the setting remains<br />
constant when you change<br />
the respiratory rate in PCV.<br />
Selecting I:E ratio makes the<br />
set ratio <strong>of</strong> inspiratory time to<br />
expiratory time for a PCV<br />
breath.<br />
The time for inspiratory<br />
pressure to rise from 0 to 95%<br />
<strong>of</strong> the target pressure level<br />
during a PCV breath.<br />
A setting <strong>of</strong> 100 = a 100-ms<br />
rise time, and a setting <strong>of</strong><br />
5 = 80% <strong>of</strong> the inspiratory<br />
time or 2500 ms, whichever is<br />
less.<br />
When you adjust this setting,<br />
the message window shows<br />
the actual time (in seconds) to<br />
reach 95% <strong>of</strong> target pressure.<br />
5 to 80 cmH 2 O (5 to 80 hPa)<br />
Accuracy:<br />
± (3 + 2.5% <strong>of</strong> setting) cmH 2O<br />
Inspiratory time (T I ):<br />
0.2 to 8 seconds<br />
Accuracy: ± 0.05 second<br />
I:E ratio: ≤ 4:1<br />
Accuracy: ± (0.1 + 2%)<br />
5 to 100<br />
NOTE:<br />
To help determine the correct setting for inspiratory time, during<br />
PCV the message window displays peak inspiratory flow, end<br />
inspiratory flow, and end exhalation flow in L/min.<br />
700 Series Ventilator Operator’s Manual 10066984 Rev. D 1�17
Introduction<br />
<strong>Table</strong> 1-3: 700 Series Ventilator keyboards: VENTILATOR SETTINGS<br />
Key/indicator Specifies... Range<br />
Spontaneous (PSV) settings<br />
SUPPORT<br />
PRESSURE<br />
RISE TIME<br />
FACTOR<br />
(760 only)<br />
Pressure above PEEP<br />
maintained during<br />
spontaneous inspiration.<br />
Support pressure is<br />
terminated when inspiratory<br />
flow falls to 25% <strong>of</strong> peak<br />
inspiratory flow, or to the<br />
exhalation sensitivity setting<br />
(760 only), or 10 L/min or 25%<br />
<strong>of</strong> peak flow, whichever is<br />
lower (740 only). Maximum<br />
inspiratory time is 3.5 seconds<br />
for adults, and 2.5 seconds for<br />
pediatric patients.<br />
The time for inspiratory<br />
pressure to rise from 0 to 95%<br />
<strong>of</strong> the target pressure level<br />
during a PSV breath.<br />
A setting <strong>of</strong> 100 = a 100-ms<br />
rise time, and a setting <strong>of</strong><br />
5 = 80% <strong>of</strong> the inspiratory<br />
time or 1500 ms (when adult<br />
ventilator breathing circuit is<br />
selected) or 600 ms (when<br />
pediatric circuit is selected),<br />
whichever is less.<br />
When you adjust this setting,<br />
the message window shows<br />
the actual time (in seconds) to<br />
reach 95% <strong>of</strong> target pressure.<br />
0 to 70 cmH 2 O (0 to 70 hPa)<br />
Accuracy:<br />
± (3 + 2.5% <strong>of</strong> setting) cmH 2O<br />
5 to 100<br />
1�18 10066984 Rev. D 700 Series Ventilator Operator’s Manual
Introduction<br />
<strong>Table</strong> 1-3: 700 Series Ventilator keyboards: VENTILATOR SETTINGS<br />
Key/indicator Specifies... Range<br />
Spontaneous (PSV) settings (continued)<br />
EXH<br />
SENSITIVITY<br />
(760 only)<br />
Common settings<br />
The percent <strong>of</strong> peak expiratory<br />
flow at which the ventilator<br />
cycles from inspiration to<br />
exhalation for spontaneous<br />
breaths. The flow at which the<br />
ventilator cycles from<br />
inspiration to exhalation for<br />
PSV breaths. Exhalation begins<br />
when the inspiratory flow is<br />
less than the set value.<br />
To help set EXH SENSITIVITY<br />
appropriately, the peak<br />
inspiratory flow and end<br />
inspiratory flow are displayed<br />
in the message window in PSV.<br />
(To ensure accurate estimates<br />
<strong>of</strong> these flows, it is important<br />
to run SST so that tubing<br />
compliance calculations are<br />
correct.)<br />
PEEP/CPAP Positive end expiratory<br />
pressure/continuous positive<br />
airway pressure. Minimum<br />
pressure maintained during<br />
inspiratory and expiratory<br />
phases.<br />
TRIGGER<br />
SENSITIVITY<br />
(L/min)<br />
% O 2<br />
Inspiratory flow required to<br />
trigger the ventilator to<br />
deliver a breath.<br />
Percentage <strong>of</strong> inspired oxygen<br />
<strong>of</strong> the gas delivered to the<br />
patient.<br />
1 to 80%<br />
0 to 35 cmH 2 O (0 to 35 hPa)<br />
Accuracy:<br />
± (2 cmH 2O + 4% <strong>of</strong> setting)<br />
1 to 20 L/min<br />
21 to 100%<br />
Accuracy: ± 3% full scale<br />
NOTE:<br />
It may take several minutes for the oxygen percentage<br />
to stabilize.<br />
700 Series Ventilator Operator’s Manual 10066984 Rev. D 1�19
Introduction<br />
<strong>Table</strong> 1-3: 700 Series Ventilator keyboards: VENTILATOR SETTINGS<br />
Key/indicator Specifies... Range<br />
Other keys, knobs, and indicators<br />
APNEA<br />
PARAMS key<br />
Allows you to select VCV or PCV (760 Ventilator only) apnea<br />
ventilation, and the apnea ventilation settings. The apnea<br />
interval is adjustable from 10 to 60 seconds. Apnea<br />
ventilation is available in all modes. For apnea parameter<br />
ranges, see mandatory VCV settings and mandatory PCV<br />
(760 Ventilator only) settings.<br />
MENU Allows you to view active and reset alarms, run SST and EST,<br />
adjust certain settings (including alarm volume, PCV timing,<br />
volume bar graph display, endotracheal tube size, and date<br />
and time), access oxygen sensor functions (calibrate, enable<br />
or disable % O 2 alarm limits, and enable or disable display <strong>of</strong><br />
oxygen sensor reading), enter standby mode, view battery<br />
information, display s<strong>of</strong>tware revision, display service<br />
information, and enter EasyNeb nebulizer functions.<br />
(Chapter 6 tells you how to use the menu function.)<br />
100% O 2<br />
MANUAL<br />
INSP<br />
Switches the % O 2 to 100% for 2 minutes, then returns to<br />
the current % O 2 setting. The 2-minute interval restarts<br />
every time you press 100% O 2 . Once the 100% O 2 has<br />
started, you can press CLEAR to stop the maneuver (unless<br />
you have entered a MENU key function or selected a<br />
setting).<br />
Delivers one mandatory breath to the patient according to<br />
the current mandatory settings (in A/C or SIMV) or the<br />
current apnea parameters (in SPONT). You can deliver a<br />
MANUAL INSP at any time during the exhalation phase <strong>of</strong> a<br />
breath as long as the exhaled flow is less than 30% <strong>of</strong> the<br />
peak exhaled flow, except during apnea ventilation.<br />
1�20 10066984 Rev. D 700 Series Ventilator Operator’s Manual
Introduction<br />
<strong>Table</strong> 1-3: 700 Series Ventilator keyboards: VENTILATOR SETTINGS<br />
Key/indicator Specifies... Range<br />
Other keys, knobs, and indicators (continued)<br />
EXP PAUSE<br />
(760 only)<br />
Allows you to measure the patient’s auto-PEEP. An EXP PAUSE<br />
maneuver causes the ventilator to close the exhalation valve<br />
at the end <strong>of</strong> the expiratory phase, and not deliver the next<br />
mandatory breath. At the end <strong>of</strong> the maneuver, the message<br />
window shows the calculated value for auto-PEEP (expiratory<br />
pressure at the beginning <strong>of</strong> the maneuver minus expiratory<br />
pressure at the end <strong>of</strong> the maneuver) and total PEEP for<br />
30 seconds.<br />
The message window shows the end expiratory flow in L/min<br />
at the beginning <strong>of</strong> each breath. If there is expiratory flow<br />
when the ventilator delivers the next breath, auto-PEEP is<br />
present.<br />
The EXP PAUSE continues as long as you hold down the key,<br />
and should last only until expiratory pressure stabilizes. An<br />
EXP PAUSE maneuver ends when you release the key, the<br />
patient initiates a breath, an alarm occurs, the expiratory<br />
phase (including the maneuver) lasts more than 20 seconds,<br />
or the ventilator detects a leak.<br />
Auto-PEEP:<br />
Range: 1 to 35 cmH 2 O.<br />
Accuracy: ± (1 cmH 2O + 3% <strong>of</strong> reading).<br />
The EXP PAUSE maneuver is unavailable when the<br />
RESPIRATORY RATE setting is less than 3 /minute.<br />
700 Series Ventilator Operator’s Manual 10066984 Rev. D 1�21
Introduction<br />
<strong>Table</strong> 1-3: 700 Series Ventilator keyboards: VENTILATOR SETTINGS<br />
Key/indicator Specifies... Range<br />
Other keys, knobs, and indicators (continued)<br />
INSP PAUSE<br />
(760 only)<br />
Allows you to measure the patient’s compliance and<br />
resistance. An extended inspiratory pause also allows you to<br />
expand the patient’s lungs for up to 10 seconds.<br />
Pressing INSP PAUSE momentarily causes the ventilator to<br />
wait until the end <strong>of</strong> the inspiratory phase <strong>of</strong> the current or<br />
next mandatory breath (in SPONT mode, the ventilator<br />
delivers a mandatory breath using the MANUAL INSP key<br />
according to the apnea settings), stop breath delivery, and<br />
keep the exhalation valve closed. The INSP PAUSE continues<br />
until the ventilator detects a stable plateau pressure or<br />
2 seconds have elapsed. An INSP PAUSE maneuver ends when<br />
a stable plateau is reached or an alarm occurs.<br />
Pressing INSP PAUSE for 2 or more seconds after the pause<br />
begins causes the ventilator to deliver an inspiratory pause for<br />
as long as you hold down the key. An extended INSP PAUSE<br />
maneuver ends when you release the key or 10 seconds have<br />
elapsed.<br />
You can press CLEAR or release the INSP PAUSE key at any<br />
time to cancel an INSP PAUSE maneuver, and alarms cancel<br />
the maneuver.<br />
At the end <strong>of</strong> the breath, the message window shows the<br />
calculated value for compliance and resistance (if the<br />
mandatory breath was a VCV breath) or compliance (if the<br />
mandatory breath was a PCV breath) for 30 seconds.<br />
Compliance:<br />
Range: 1 to 150 mL/H 2 O.<br />
Accuracy: ± (1 mL/cmH 2O + 20% <strong>of</strong> reading).<br />
Resistance:<br />
Range: 0 to 150 cmH 2 O/L/second.<br />
Accuracy: ± (3 cmH 2 O/L/second + 20% <strong>of</strong> reading).<br />
CLEAR Pressing CLEAR before accepting a setting cancels the<br />
proposed setting. Pressing CLEAR does not cancel accepted<br />
settings.<br />
Pressing CLEAR twice returns the ventilator to its previous<br />
state (unless you have entered a MENU key function that<br />
requires you to press CLEAR more times).<br />
Pressing CLEAR during a 100% O 2 maneuver cancels the<br />
maneuver.<br />
1�22 10066984 Rev. D 700 Series Ventilator Operator’s Manual
Introduction<br />
<strong>Table</strong> 1-3: 700 Series Ventilator keyboards: VENTILATOR SETTINGS<br />
Key/indicator Specifies... Range<br />
Other keys, knobs, and indicators (continued)<br />
ACCEPT Makes changes to settings effective. If you don’t press<br />
ACCEPT within 30 seconds <strong>of</strong> proposing a new setting, the<br />
user interface returns to its previous state.<br />
Knob Adjusts the value <strong>of</strong> a setting or selects a menu option.<br />
A setting value that flashes means that the knob is linked to<br />
that setting. Turning the knob clockwise increases the value,<br />
and turning the knob counterclockwise decreases the value.<br />
CURRENT Lights when the ventilator is operating according to the<br />
displayed settings, or during apnea ventilation. (There is one<br />
indicator for mandatory breaths, and one for spontaneous<br />
breaths.)<br />
PROPOSED Lights when you propose a mode or breath type, or you are<br />
setting apnea parameters. Once a proposed setting is<br />
accepted, it becomes effective at the next breath.<br />
APNEA<br />
PARAMS<br />
indicator<br />
Message<br />
window<br />
Lights when apnea ventilation is active.<br />
Lights with PROPOSED indicator when you are setting apnea<br />
parameters, and both indicators turn <strong>of</strong>f once apnea<br />
parameters are accepted.<br />
Shows up to four lines <strong>of</strong> information (20 characters per<br />
line).<br />
First line: Reserved for the highest-priority active or<br />
autoreset alarm. On the 760 Ventilator only, if no alarm is<br />
active and the display <strong>of</strong> the oxygen sensor reading is<br />
enabled, the % O 2 is displayed here. Otherwise, if VCV is the<br />
current or proposed breath type and there are no active or<br />
autoreset alarms, shows the selected VCV flow pattern (ramp<br />
or square).<br />
Second line: Information about the menu function or<br />
settings, alarm silence time remaining, or current date and<br />
time. During normal ventilation, shows “Flow (L/min).”<br />
Third and fourth lines: Reserved for other messages. For<br />
every breath type, peak and end inspiratory flows are<br />
displayed on the third line, and end expiratory flow is<br />
displayed on the fourth line (except that inspiratory flow is<br />
not displayed during VCV breaths or VCV apnea ventilation).<br />
700 Series Ventilator Operator’s Manual 10066984 Rev. D 1�23
Introduction<br />
1.3.2 PATIENT DATA<br />
The PATIENT DATA section <strong>of</strong> the keyboard allows you to view the<br />
pressure, breath timing, and volume <strong>of</strong> the patient’s breath. You can<br />
also view the alarm settings. A lighted key indicates that a<br />
measurement is selected, and its value appears in the display<br />
window. Values are continuously displayed and updated during<br />
ventilation.<br />
<strong>Table</strong> 1-4 summarizes the functions <strong>of</strong> the keys and indicators in the<br />
PATIENT DATA section <strong>of</strong> the keyboard.<br />
Key/<br />
indicator<br />
Pressure<br />
MEAN<br />
PRESSURE<br />
PEAK<br />
PRESSURE<br />
PLATEAU<br />
PRESSURE<br />
(760 only)<br />
PEEP/CPAP<br />
(760 only)<br />
<strong>Table</strong> 1-4: 700 Series Ventilator keyboards: PATIENT DATA<br />
Function Range<br />
Shows the calculated value <strong>of</strong><br />
ventilator breathing circuit<br />
pressure over an entire<br />
respiratory cycle. Updated at the<br />
beginning <strong>of</strong> each breath.<br />
Shows the maximum pressure<br />
measured during inspiration.<br />
Updated at the beginning <strong>of</strong><br />
each expiratory phase. (Default<br />
pressure display.)<br />
Shows the pressure measured at<br />
the end <strong>of</strong> the plateau period <strong>of</strong><br />
a mandatory inspiration<br />
(whether the inspiration is in a<br />
regular VCV breath or is part <strong>of</strong><br />
an inspiratory pause maneuver).<br />
Updated at the beginning <strong>of</strong><br />
each expiratory phase. The<br />
PRESSURE display shows a blank<br />
if the ventilator does not detect<br />
a stable plateau pressure.<br />
Shows the pressure measured at<br />
the expiratory limb before any<br />
inspiratory effort. Updated at<br />
the beginning <strong>of</strong> each<br />
inspiratory phase.<br />
0 to 99 cmH 2O<br />
(0 to 99 hPa)<br />
Accuracy:<br />
± (3 + 4% <strong>of</strong> reading) cmH 2 O<br />
0 to 140 cmH 2O<br />
(0 to 140 hPa)<br />
Accuracy:<br />
± (3 + 4% <strong>of</strong> reading) cmH 2 O<br />
0 to 140 cmH 2O<br />
(0 to 140 hPa)<br />
Accuracy:<br />
± (3 + 4% <strong>of</strong> reading) cmH 2 O<br />
0 to 140 cmH 2O<br />
(0 to 140 hPa)<br />
Accuracy:<br />
± (3 + 4% <strong>of</strong> reading) cmH 2 O<br />
1�24 10066984 Rev. D 700 Series Ventilator Operator’s Manual
Breath timing<br />
RATE<br />
(/min)<br />
Shows the calculated value <strong>of</strong><br />
the total respiratory rate, based<br />
on the previous 60 seconds or 8<br />
breaths (whichever interval is<br />
shorter). Updated at the<br />
beginning <strong>of</strong> each breath.<br />
(Default breath timing display.)<br />
The calculation is reset (and<br />
display is blank) when<br />
ventilation starts, when apnea<br />
ventilation starts or autoresets,<br />
when you change the mode,<br />
breath type, or RESPIRATORY<br />
RATE setting, and when you<br />
press the alarm reset key.<br />
I:E RATIO Shows the ratio <strong>of</strong> measured<br />
inspiratory time to measured<br />
expiratory time. Updated at the<br />
beginning <strong>of</strong> each breath.<br />
INSP<br />
TIME(s)<br />
(760 only)<br />
<strong>Table</strong> 1-4: 700 Series Ventilator keyboards: PATIENT DATA<br />
Key/<br />
indicator<br />
Function Range<br />
The measured inspiratory time,<br />
including breaths that are<br />
truncated due to a HIGH<br />
PRESSURE alarm. Updated at the<br />
beginning <strong>of</strong> each expiratory<br />
phase.<br />
Introduction<br />
1 to 199 /minute<br />
Accuracy:<br />
± (0.1 +1% <strong>of</strong> reading)/minute<br />
1:99.9 to 9.9:1<br />
Accuracy:<br />
± (0.1 + 2%)<br />
0.1 to 9.90 seconds<br />
Accuracy:<br />
± 0.05 seconds<br />
700 Series Ventilator Operator’s Manual 10066984 Rev. D 1�25
Introduction<br />
Volume<br />
EXHALED<br />
VOLUME<br />
(ml)<br />
TOTAL<br />
MINUTE<br />
VOLUME<br />
(L)<br />
DELIVERED<br />
VOLUME<br />
(ml)<br />
(760 only)<br />
<strong>Table</strong> 1-4: 700 Series Ventilator keyboards: PATIENT DATA<br />
Key/<br />
indicator<br />
Function Range<br />
Shows the patient’s measured<br />
expiratory tidal volume<br />
averaged over the last 5 breaths<br />
(for A/C VCV breaths, ventilatorinitiated<br />
PCV breaths, and PCV<br />
apnea breaths) or for the justcompleted<br />
breath (for all other<br />
breaths). Corrected to BTPS and<br />
compliance-compensated.<br />
Updated at the beginning <strong>of</strong><br />
each inspiration. (Default<br />
volume display.)<br />
The calculation is reset when<br />
ventilation starts, when apnea<br />
ventilation starts or autoresets,<br />
when you change the mode or<br />
breath type, and when you press<br />
the alarm reset key.<br />
Shows the patient’s measured<br />
expiratory minute volume, based<br />
on the previous 60 seconds or 8<br />
breaths (whichever interval is<br />
shorter). Updated at the<br />
beginning <strong>of</strong> each breath.<br />
The calculation is reset when<br />
ventilation starts, when apnea<br />
ventilation starts or autoresets,<br />
when you change the mode or<br />
breath type, and when you press<br />
the alarm reset key.<br />
Shows the measured inspiratory<br />
tidal volume for the justcompleted<br />
PCV or PSV breath.<br />
Corrected to BTPS and<br />
compliance-compensated.<br />
Updated at the beginning <strong>of</strong><br />
each inspiration for PCV and PSV<br />
breath types.<br />
0 to 9 L<br />
Accuracy:<br />
± (10 ml + 10% <strong>of</strong> reading)<br />
0 to 99 L<br />
Accuracy:<br />
± (10 ml + 10% <strong>of</strong> reading)<br />
0 to 3000 ml<br />
Accuracy:<br />
± (10 ml + 10% <strong>of</strong> reading)<br />
1�26 10066984 Rev. D 700 Series Ventilator Operator’s Manual
Volume (continued)<br />
SPONT<br />
MINUTE<br />
VOLUME<br />
(L)<br />
(760 only)<br />
Shows the patient’s measured<br />
expiratory minute volume for all<br />
spontaneous breaths, based on<br />
the previous 60 seconds or 8<br />
breaths (whichever interval is<br />
shorter). Updated at the<br />
beginning <strong>of</strong> each breath.<br />
The calculation is reset when<br />
ventilation starts, when apnea<br />
ventilation starts or autoresets,<br />
when you change the mode or<br />
breath type, and when you press<br />
the alarm reset key.<br />
Alarm settings<br />
HIGH RATE An active alarm indicates that<br />
measured respiratory rate is<br />
higher than the alarm setting.<br />
HIGH<br />
TIDAL<br />
VOLUME<br />
LOW INSP<br />
PRESSURE<br />
LOW<br />
TIDAL<br />
VOLUME<br />
<strong>Table</strong> 1-4: 700 Series Ventilator keyboards: PATIENT DATA<br />
Key/<br />
indicator<br />
Function Range<br />
An active alarm indicates that<br />
exhaled volume for three out <strong>of</strong><br />
four consecutive breaths was<br />
above the alarm setting.<br />
An active alarm indicates that<br />
monitored circuit pressure is<br />
below the alarm setting at the<br />
end <strong>of</strong> inspiration. Inactive in for<br />
any spontaneous breath.<br />
An active alarm indicates that<br />
delivered volume for three out<br />
<strong>of</strong> four consecutive breaths were<br />
below the alarm setting. (If this<br />
alarm is set to 0 ml and breath<br />
type is PCV, an active alarm<br />
indicates that delivered volume<br />
is less than 3 ml for three out <strong>of</strong><br />
four consecutive breaths.)<br />
Introduction<br />
0 to 99 L<br />
Accuracy:<br />
± (10 ml + 10% <strong>of</strong> reading)<br />
3 to 100 /minute<br />
Accuracy:<br />
± (0.1 +1% <strong>of</strong> setting)/minute<br />
20 to 6000 ml<br />
Accuracy:<br />
± (10 ml + 10% <strong>of</strong> setting)<br />
3 to 60 cmH 2 O (3 to 60 hPa)<br />
Accuracy:<br />
± (1 + 3% <strong>of</strong> setting)<br />
0 to 2000 ml<br />
Accuracy:<br />
± (10 ml + 10% <strong>of</strong> setting)<br />
700 Series Ventilator Operator’s Manual 10066984 Rev. D 1�27
Introduction<br />
Alarm settings (continued)<br />
HIGH<br />
PRESSURE<br />
LOW<br />
MINUTE<br />
VOLUME<br />
Other indicators<br />
Pressure<br />
bar graph<br />
Volume<br />
bar graph<br />
(760 only)<br />
<strong>Table</strong> 1-4: 700 Series Ventilator keyboards: PATIENT DATA<br />
Key/<br />
indicator<br />
Function Range<br />
An active alarm indicates that<br />
two consecutive breaths were<br />
truncated because circuit<br />
pressure reached the alarm<br />
setting.<br />
An active alarm indicates that<br />
monitored minute volume is less<br />
than the alarm setting, based on<br />
an eight-breath running average<br />
or the previous minute,<br />
whichever is less.<br />
Shows real-time pressures in<br />
centimeters <strong>of</strong> water (cmH 2 O) or<br />
hectopascals (hPa).<br />
LEDs show the current HIGH<br />
PRESSURE alarm setting and the<br />
peak pressure <strong>of</strong> the last breath<br />
during exhalation.<br />
Shows real-time exhaled volume<br />
in milliliters (ml). Volumes are<br />
compliance-compensated and<br />
corrected to BTPS.<br />
The active scale is determined by<br />
the HIGH TIDAL VOLUME alarm<br />
setting. LEDs show the current<br />
HIGH TIDAL VOLUME and LOW<br />
TIDAL VOLUME alarm settings.<br />
You can use the MENU key to<br />
enable or disable the volume bar<br />
graph. During exhalation, LEDs<br />
show the maximum exhaled<br />
volume <strong>of</strong> the last breath.<br />
MAND Lights at the start <strong>of</strong> each breath<br />
to indicate a ventilator- or<br />
operator-initiated (time or<br />
manually triggered) mandatory<br />
breath is being delivered.<br />
10 to 90 cmH 2 O<br />
(10 to 90 hPa)<br />
Accuracy:<br />
± (1 + 3% <strong>of</strong> setting)<br />
0 to 50 L<br />
Accuracy:<br />
± (10 ml + 10% <strong>of</strong> setting)<br />
-10 to 90 cmH 2O<br />
(-10 to 90 hPa)<br />
Resolution: 1 cmH 2 O (1 hPa)<br />
If HIGH TIDAL VOLUME<br />
setting < 500 ml: 0 to 500 ml<br />
Resolution: 5 ml<br />
If HIGH TIDAL VOLUME<br />
setting<br />
> 500 ml: 0 to 2000 ml<br />
Resolution: 20 ml<br />
Not applicable<br />
1�28 10066984 Rev. D 700 Series Ventilator Operator’s Manual
<strong>Table</strong> 1-4: 700 Series Ventilator keyboards: PATIENT DATA<br />
Key/<br />
indicator<br />
Other indicators (continued)<br />
ASSIST Lights at the start <strong>of</strong> each breath Not applicable<br />
to indicate a patient-initiated<br />
mandatory (flow triggered)<br />
breath is being delivered.<br />
SPONT Lights at the start <strong>of</strong> each breath<br />
to indicate a patient-initiated<br />
spontaneous (flow triggered)<br />
breath is being delivered.<br />
1.3.3 VENTILATOR STATUS<br />
Not applicable<br />
Introduction<br />
The VENTILATOR STATUS section <strong>of</strong> the keyboard shows the operating<br />
condition <strong>of</strong> the ventilator, and is continuously updated during<br />
operation. <strong>Table</strong> 1-5 summarizes the functions <strong>of</strong> the keys and<br />
indicators in the VENTILATOR STATUS section <strong>of</strong> the keyboard.<br />
<strong>Table</strong> 1-5: 700 Series Ventilator keyboards: VENTILATOR STATUS<br />
Key/<br />
indicator<br />
ALARM Red<br />
(high priority)<br />
CAUTION Yellow<br />
(medium<br />
priority)<br />
Function Range<br />
Color Function<br />
Flashes when a high-priority alarm is active.<br />
A repeating sequence <strong>of</strong> three, then two<br />
beeps sounds. Lights steadily when a highpriority<br />
alarm has been autoreset.<br />
Flashes when a medium-priority alarm is<br />
active. A repeating sequence <strong>of</strong> three beeps<br />
sounds. Lights steadily when a mediumpriority<br />
alarm has been autoreset.<br />
NORMAL Green Lights when no alarm condition is present.<br />
700 Series Ventilator Operator’s Manual 10066984 Rev. D 1�29
Introduction<br />
<strong>Table</strong> 1-5: 700 Series Ventilator keyboards: VENTILATOR STATUS<br />
Key/<br />
indicator<br />
VENT INOP Red<br />
(high priority)<br />
SAFETY<br />
VALVE<br />
OPEN<br />
ON AC/<br />
BATTERY<br />
CHARGING<br />
ON<br />
INTERNAL<br />
BATTERY<br />
ON<br />
EXTERNAL<br />
BATTERY<br />
INTERNAL<br />
BATTERY<br />
LEVEL<br />
7-00423<br />
Color Function<br />
Red<br />
(high priority)<br />
Lights to indicate that the ventilator<br />
is inoperative, and the ventilator safety<br />
valve is open. A qualified service technician<br />
must run and pass the extended self-test<br />
(EST) before normal ventilation can resume.<br />
If the condition that caused the safety valve<br />
to open no longer exists, and the VENT<br />
INOP indicator is <strong>of</strong>f, press the alarm reset<br />
key to resume ventilation.<br />
Lights when the ventilator’s safety valve<br />
and exhalation valve open and only room<br />
air is available to the patient.<br />
Can indicate that the ventilator is inoperative,<br />
or there is an occlusion in the ventilator<br />
breathing circuit. If possible, the message<br />
window shows the alarm that triggered the<br />
safety valve open condition and how much<br />
time has elapsed since the last breath was<br />
triggered.<br />
Green Lights when the ventilator is running on ac<br />
power and the battery is charging.<br />
Yellow Flashes when the ventilator is running on<br />
the internal battery.<br />
Yellow Flashes when the ventilator is running on<br />
the external battery.<br />
Green Shows the relative charge level <strong>of</strong> the<br />
internal battery.<br />
Yellow Alarm silence: Silences the alarm sound<br />
for 2 minutes from the most recent key<br />
press.<br />
1�30 10066984 Rev. D 700 Series Ventilator Operator’s Manual
Introduction<br />
<strong>Table</strong> 1-5: 700 Series Ventilator keyboards: VENTILATOR STATUS<br />
Key/<br />
indicator<br />
7-00424<br />
Color Function<br />
Not applicable Alarm reset: Reestablishes all alarm<br />
indicators, cancels the alarm silence period,<br />
and resets the patient data displays. If the<br />
condition that caused the alarm still exists,<br />
the alarm reactivates. Cancels apnea<br />
ventilation, if active. Reestablishes previous<br />
settings and ventilation resumes, unless the<br />
ventilator is inoperative.<br />
700 Series Ventilator Operator’s Manual 10066984 Rev. D 1�31
This page is intentionally blank.<br />
1�32 10066984 Rev. D 700 Series Ventilator Operator’s Manual
Setting up the ventilator<br />
This section tells you how to set up the ventilator, including:<br />
• Connecting and using the internal and external batteries<br />
• Connecting the electrical supply<br />
• Connecting the oxygen supply<br />
• Connecting the ventilator breathing circuit<br />
• Installing the collector vial<br />
• Installing the flex arm<br />
• Installing the humidifier<br />
• Using the ventilator cart<br />
Warning<br />
• To avoid tipping or damaging the ventilator, do not stack<br />
other equipment on the ventilator. 700 Series Ventilators<br />
are designed to be mounted on either a cart or a shelf by a<br />
qualified service technician. When lifting the ventilator, lift<br />
from the base, and use assistance and appropriate safety<br />
precautions. Figure 2-1 shows proper lifting technique.
Setting up the ventilator<br />
• To avoid the possibility <strong>of</strong> injury to the patient and to<br />
ensure proper ventilator operation, do not attach any<br />
device to the port labeled “EXHAUST” unless the device is<br />
specifically authorized by <strong>Covidien</strong>.<br />
• To minimize the increased risk <strong>of</strong> fire due to an oxygenenriched<br />
environment, do not use the ventilator in a<br />
hyperbaric chamber.<br />
• To avoid raising the oxygen concentration <strong>of</strong> room air, use<br />
the ventilator in an adequately ventilated room.<br />
Caution<br />
Do not obstruct the cooling fan.<br />
Use two people to lift<br />
7-00053<br />
Figure 2-1. Lifting the ventilator<br />
Lift ventilator from<br />
base only<br />
2.1 Connecting and using internal and external batteries<br />
Warning<br />
A <strong>Covidien</strong> battery must always be installed in the ventilator.<br />
Without a battery, the ventilator is not protected against low<br />
or lost ac power. Do not use the ventilator unless a battery<br />
with at least minimal charge is installed.<br />
2�2 10066984 Rev. D 700 Series Ventilator Operator’s Manual
Setting up the ventilator<br />
NOTE:<br />
If the ventilator has been stored for an extended period, allow<br />
it to acclimate to its environment before turning it on. This<br />
helps ensure that the ventilator powers up correctly.<br />
Every 700 Series Ventilator System includes an internal battery as a<br />
backup power supply that comes standard with the ventilator.<br />
The internal battery can provide up to 2 ½ hours <strong>of</strong> backup power,<br />
depending on ventilator settings and battery charge level. The<br />
ventilator operates on backup power when ac power is lost or drops<br />
below minimum. The internal battery’s charge level is continuously<br />
indicated on the keyboard (see Figure 2-2). The ventilator alarms<br />
when it determines that only 5 minutes <strong>of</strong> power remain using the<br />
current settings.<br />
- +<br />
7-00054<br />
Internal<br />
battery level<br />
Figure 2-2. Internal battery charge indicator<br />
The optional external battery supplies up to 7 additional hours <strong>of</strong><br />
backup power in case ac power is lost or falls below minimum. (See<br />
Appendix B for external battery ordering information.) If installed,<br />
the external battery is the first source <strong>of</strong> backup power. The ventilator<br />
uses the internal battery if the external battery is depleted or is not<br />
connected.<br />
NOTE:<br />
When the ventilator switches <strong>of</strong>f because battery charge is<br />
inadequate, turn <strong>of</strong>f the power switch to prevent the battery<br />
from being fully depleted. Connect the ventilator to ac power<br />
as soon as possible.<br />
700 Series Ventilator Operator’s Manual 10066984 Rev. D 2�3
Setting up the ventilator<br />
The ventilator charges the internal and external batteries during ac<br />
power operation, or in standby mode when attached to ac power.<br />
(See Appendix C for battery specifications.) When the ventilator is<br />
operating on battery, you can use the MENU key to check the<br />
estimated operational time remaining until recharge is required for<br />
the internal and external batteries. (Chapter 6 tells you how to use<br />
the MENU key.) The ventilator must operate for 2 minutes before it<br />
can estimate battery time remaining.<br />
You can disconnect and connect the external battery during normal<br />
operation. When operating the ventilator on battery power, you can<br />
install the external battery on the cart for easy transport. Follow these<br />
steps to connect the external battery:<br />
1. Mount the external battery on the base <strong>of</strong> the cart (or other<br />
suitable location).<br />
2. Plug the external battery’s cable into the connector (Figure 2-3).<br />
3. Figure 2-4 shows you how to disconnect the external battery.<br />
To ensure that the batteries retain their charge, store the ventilator<br />
in standby mode, with its power switch on, and connected to ac<br />
power. If the ventilator is not stored in this manner, check battery<br />
charge levels before using the ventilator.<br />
Caution<br />
If you plan to store the ventilator for more than 6 months,<br />
remove batteries before storage. Replace the internal battery<br />
before using the ventilator again. A qualified service technician<br />
must replace the battery according to the instructions in the 700<br />
Series Ventilator System Service Manual.<br />
If you turn on the ventilator after it has been unplugged for an<br />
extended period, the LOW EXT BATTERY and LOW INT BATTERY<br />
alarms may become active. If so, recharge the internal battery by<br />
leaving the ventilator plugged in and turned on in standby mode<br />
(with no patient connected) for up to 8 hours.<br />
If the LOW EXT BATTERY, LOW INT BATTERY, or BAT NOT CHARGING<br />
alarm is still active after 8 hours, replace the batteries. If you turn <strong>of</strong>f<br />
the ventilator when the battery is absent or inadequately charged, a<br />
LOSS OF POWER alarm sounds for at least 2 minutes.<br />
2�4 10066984 Rev. D 700 Series Ventilator Operator’s Manual
Setting up the ventilator<br />
NOTE:<br />
The ON BATTERY indicator flashes when the ventilator is<br />
operating on battery power.<br />
External<br />
battery<br />
connector<br />
External<br />
battery<br />
7-00055<br />
Figure 2-3. Plugging the external battery into the ventilator<br />
700 Series Ventilator Operator’s Manual 10066984 Rev. D 2�5
Setting up the ventilator<br />
Figure 2-4. Disconnecting the external battery<br />
2.2 Connecting the electrical supply<br />
7-00051<br />
Warning<br />
• To avoid electrical shock hazard, connect the ventilator<br />
power cord into a grounded ac power outlet. If the integrity<br />
<strong>of</strong> the ac ground is in question, operate the ventilator from<br />
the internal or external battery.<br />
• If used in the U.S., connect the ventilator to an ac receptacle<br />
marked “Hospital Only” or “Hospital Grade” to ensure<br />
grounding reliability.<br />
Every 700 Series Ventilator System is supplied with a power cord.<br />
A power cord retainer covers the connector and socket to protect<br />
against liquid spills or accidental disconnection.<br />
When the ventilator is ready for operation on ac power, connect the<br />
power cord to ac power (see Figure 2-5).<br />
2�6 10066984 Rev. D 700 Series Ventilator Operator’s Manual
Setting up the ventilator<br />
NOTE:<br />
During operation on ac power, the power cord retainer must<br />
always be in place.<br />
To ac<br />
power<br />
Power cord retainer<br />
Power cord<br />
7-00056<br />
Figure 2-5. Connecting the ventilator power cord<br />
When the power cord is not in use, you can wrap the power cord<br />
around the brackets on the back <strong>of</strong> the ventilator for convenient<br />
storage (see Figure 2-6).<br />
7-00057<br />
Figure 2-6. Storing the power cord on the ventilator<br />
700 Series Ventilator Operator’s Manual 10066984 Rev. D 2�7
Setting up the ventilator<br />
2.3 Connecting the oxygen supply<br />
Warning<br />
• To ensure proper oxygen concentration, do not obstruct the<br />
ventilator’s air intake.<br />
• To ensure adequate oxygen delivery to the patient, use<br />
<strong>Covidien</strong>-supplied oxygen hoses only. Use <strong>of</strong> other oxygen<br />
hoses could result in inadequate or inappropriate oxygen<br />
pressures or leaks at the oxygen inlet.<br />
• When using a cylinder oxygen supply, point the cylinder's<br />
pressure relief device away from the ventilator air intake.<br />
This helps avoid creating an oxygen-rich environment<br />
within the ventilator in the event that the cylinder oxygen<br />
regulator malfunctions.<br />
The 700 Series Ventilator System can use oxygen from a cylinder or<br />
wall supply. Follow these steps to connect the oxygen supply:<br />
1. Ensure that the oxygen supply pressure is between 40 and 90 psi<br />
(275 and 620 kPa) (50 psi (345 kPa) recommended).<br />
Warning<br />
Due to excessive restriction <strong>of</strong> certain hose assemblies (listed in<br />
<strong>Table</strong> B-1), reduced FIO2 levels may result when oxygen inlet<br />
pressures < 50 psi (345 kPa) are used. To maintain correct FIO2 levels, make sure that oxygen inlet pressure is ≥ 50 psi (345 kPa)<br />
when using these hose assemblies.<br />
2. Connect the oxygen supply to the oxygen inlet connector on the<br />
side <strong>of</strong> the ventilator (see Figure 2-7). Make sure ventilator is<br />
configured with adapter(s) as required.<br />
Caution<br />
To prevent damage to the ventilator, ensure that the<br />
connection to the oxygen supply is clean and unlubricated.<br />
2�8 10066984 Rev. D 700 Series Ventilator Operator’s Manual
Setting up the ventilator<br />
NOTE:<br />
Whenever a pressurized oxygen source is connected to the<br />
ventilator, the oxygen regulator has a maximum bleed rate <strong>of</strong><br />
3 L/min, even when the ventilator is not in use. Always take this<br />
bleed rate into account when calculating oxygen cylinder volume<br />
and duration. This is especially important when using the<br />
ventilator and cart while transporting patients who are being<br />
ventilated at above-ambient FIO 2 levels.<br />
Air intake<br />
Oxygen inlet<br />
connector<br />
Oxygen hose (to<br />
oxygen supply)<br />
7-00058<br />
Figure 2-7. Connecting the oxygen supply<br />
700 Series Ventilator Operator’s Manual 10066984 Rev. D 2�9
Setting up the ventilator<br />
2.4 Connecting the ventilator breathing circuit<br />
Warning<br />
• To minimize the risk <strong>of</strong> bacterial contamination or<br />
component damage, inspiratory and expiratory filters must<br />
always be handled with care and connected to the<br />
ventilator during use.<br />
• Use <strong>of</strong> an external pneumatically powered nebulizer with a<br />
700 Series Ventilator results in added flow to the ventilator<br />
breathing circuit. This additional flow can affect delivered<br />
tidal volumes, spirometry and spirometry alarms, delivered<br />
FIO2 , and patient triggering. (However, the <strong>Covidien</strong> EasyNeb<br />
Nebulizer is designed to deliver aerosol medications to the<br />
patient without affecting ventilator performance or patient<br />
data.)<br />
• To minimize the risk <strong>of</strong> patient injury, use only ventilator<br />
breathing circuits qualified for use in oxygen-enriched<br />
environments with 700 Series Ventilators. Do not use<br />
antistatic or electrically conductive tubing. To ensure a leaktight<br />
connection, only use connectors and tubes with ISOstandard<br />
cone and socket fittings (or use adapters to<br />
connect barbed cuff fittings to ISO-standard fittings).<br />
• Use ventilator breathing circuits identified by <strong>Covidien</strong> for<br />
use with 700 Series Ventilators or circuits that ensure that<br />
the maximum resistance values specified in <strong>Table</strong> C-5 are not<br />
exceeded. Using a circuit with a higher resistance does not<br />
prevent the ventilator from ventilating as long as the<br />
ventilator passes SST.<br />
Caution<br />
Adding accessories to the ventilator can increase system<br />
resistance. Ensure that any changes to the recommended<br />
ventilator circuit configurations do not exceed the values for<br />
resistance provided in Appendix C.<br />
2�10 10066984 Rev. D 700 Series Ventilator Operator’s Manual
Setting up the ventilator<br />
NOTE:<br />
• <strong>Covidien</strong> recommends that you run SST every 15 days,<br />
between patients, and when you change the ventilator<br />
breathing circuit. <strong>Covidien</strong> recognizes that the protocol for<br />
running SST varies widely among healthcare institutions.<br />
It is not possible for <strong>Covidien</strong> to specify or require specific<br />
practices that will meet all needs, or to be responsible for<br />
the effectiveness <strong>of</strong> those practices.<br />
• The ventilator uses an oxygen sensor to trigger an alarm if<br />
the delivered % O2 is 10 percentage points above or below<br />
the % O2 setting. You can view the ventilator’s % O2 measurement by using the User settings function <strong>of</strong> the<br />
MENU key.<br />
• Check the inspiratory and expiratory limbs <strong>of</strong> the ventilator<br />
breathing circuit and the collector vial and in-line water<br />
traps regularly for water buildup. Under certain conditions,<br />
they can fill quickly. In case <strong>of</strong> a partial occlusion alarm,<br />
check for water in the ventilator breathing circuit. In very<br />
severe cases, such a water occlusion can potentially cause<br />
the ventilator to enter occlusion cycling mode. Empty and<br />
clean the collector vial and in-line water traps as necessary.<br />
• <strong>Covidien</strong> recommends using pediatric circuits when<br />
ventilating patients with 5-mm or smaller internal-diameter<br />
artificial airways.<br />
Figure 2-8 shows how to connect the ventilator breathing circuit,<br />
including the inspiratory filter, humidifier (if used), inspiratory limb,<br />
patient wye, expiratory limb, collector vial, and expiratory filter.<br />
700 Series Ventilator Operator’s Manual 10066984 Rev. D 2�11
Setting up the ventilator<br />
Ventilator<br />
(from patient)<br />
Expiratory filter<br />
(arrow on filter<br />
indicates direction<br />
<strong>of</strong> flow)<br />
Collector vial<br />
Expiratory<br />
limb <strong>of</strong> the<br />
ventilator<br />
breathing<br />
circuit<br />
7-00059<br />
Ventilator<br />
(to patient)<br />
Inspiratory filter<br />
(arrow on filter<br />
indicates direction<br />
<strong>of</strong> flow)<br />
Humidifier<br />
Inspiratory limb <strong>of</strong> the<br />
ventilator breathing<br />
circuit (install EasyNeb<br />
between inspiratory<br />
filter and patient wye)<br />
Patient wye<br />
Figure 2-8 . Connecting the ventilator breathing circuit<br />
2�12 10066984 Rev. D 700 Series Ventilator Operator’s Manual
2.5 Installing the collector vial<br />
Setting up the ventilator<br />
Figure 2-9 shows you how to slide the collector vial into the bracket<br />
on the cart or shelf mounting plate.<br />
Collector<br />
vial<br />
2.6 Installing the flex arm<br />
Bracket (on<br />
cart or shelfmounting<br />
plate)<br />
Figure 2-9. Installing the collector vial<br />
7-00060<br />
Figure 2-10 shows you how to install the flex arm onto the threaded<br />
socket on the ventilator.<br />
700 Series Ventilator Operator’s Manual 10066984 Rev. D 2�13
Setting up the ventilator<br />
Flex arm<br />
Figure 2-10. Installing the flex arm<br />
NOTE:<br />
If the flex arm is too large to fit into a tight space, you can<br />
shorten the arm by removing the middle segment (Figure 2-11).<br />
2�14 10066984 Rev. D 700 Series Ventilator Operator’s Manual<br />
7-00061
2.7 Installing the humidifier<br />
Remove<br />
Remove<br />
Figure 2-11. Shortening the flex arm<br />
Setting up the ventilator<br />
Remove<br />
Figure 2-12 shows you how to slide the humidifier into the bracket<br />
on the cart or shelf mounting plate.<br />
NOTE:<br />
The humidifier must be powered independently <strong>of</strong> the<br />
ventilator (regardless <strong>of</strong> whether the ventilator is running on<br />
ac or battery power).<br />
700 Series Ventilator Operator’s Manual 10066984 Rev. D 2�15
Setting up the ventilator<br />
Humidifier<br />
Figure 2-12. Installing the humidifier<br />
Bracket (on<br />
cart or shelfmounting<br />
plate)<br />
7-00063<br />
2�16 10066984 Rev. D 700 Series Ventilator Operator’s Manual
2.8 Using the ventilator cart<br />
Setting up the ventilator<br />
The ventilator cart is equipped with a storage area for the external<br />
battery. You can lock and unlock the cart’s front wheels with your<br />
foot, as shown in Figure 2-13.<br />
Caution<br />
To prevent equipment damage, pull, rather than push, the<br />
ventilator over high thresholds when using the cart to transport<br />
the ventilator. Ensure that the flex arm is positioned at the front<br />
<strong>of</strong> the ventilator.<br />
Unlocked<br />
Ventilator<br />
cart base<br />
Unlocked<br />
Locked<br />
Figure 2-13. Locking and unlocking the cart’s front wheels<br />
700 Series Ventilator Operator’s Manual 10066984 Rev. D 2�17<br />
7-00064
This page is intentionally blank.<br />
2�18 10066984 Rev. D 700 Series Ventilator Operator’s Manual
Getting started<br />
This section tells you how to:<br />
• Power up the ventilator<br />
• Select ventilator settings<br />
• View and change alarm limits<br />
• Enter and exit standby mode<br />
SECTION<br />
NOTE:<br />
<strong>Covidien</strong> recommends that before using the ventilator for the<br />
first time, you wipe the ventilator exterior clean and sterilize its<br />
components according to the instructions in Appendix A. Follow<br />
your institution’s protocol for cleaning and sterilizing the<br />
ventilator and its components.<br />
3.1 Powering up the ventilator<br />
NOTE:<br />
To ensure battery charge(s), store the ventilator in standby<br />
mode with the power cord plugged into the mains and the<br />
power switch in the on (I) position whenever possible. The<br />
power switch controls ac mains and battery power to the<br />
ventilator.
Getting started<br />
1. Turn the power switch on (see Figure 3-1). The ventilator<br />
displays this message:<br />
POST running...<br />
NPB 7x0 S/W Rev x<br />
PM due xxxxx hrs<br />
“PM due” refers to the number <strong>of</strong> hours until a routine<br />
preventive maintenance procedure is due, based on the<br />
ventilator’s operational hours.<br />
Warning<br />
If a single beep is not audible during POST, the main audible<br />
alarm may be malfunctioning. Remove the ventilator from use<br />
and contact service.<br />
NOTE:<br />
• If the ventilator is running on ac but the battery is low, upon<br />
power up it may begin ventilating using the last valid<br />
settings and an ABNORMAL RESTART alarm may occur.<br />
• Do not switch <strong>of</strong>f ventilator power during POST.<br />
7-00065<br />
Figure 3-1. Turning the power switch on (the “I” position)<br />
3-2 10066984 Rev. D 700 Series Ventilator Operator’s Manual
2. Once the power-on self-test (POST) is complete (several<br />
seconds), the ventilator displays the message:<br />
Accept settings<br />
to start ventilation<br />
The last valid settings are proposed, and the appropriate<br />
indicator lights to show the ventilator’s source <strong>of</strong> power.<br />
Getting started<br />
Warning<br />
Always let the ventilator run for 10 minutes before placing it<br />
on a patient to allow heaters to warm up. Failure to warm up<br />
the ventilator could result in failure <strong>of</strong> the SST flow sensor test,<br />
and higher measured exhaled tidal volumes.<br />
Caution<br />
<strong>Covidien</strong> recommends running short self-test (SST) and testing<br />
alarms to check proper operation <strong>of</strong> the ventilator before<br />
ventilation begins or according to your institution’s protocol.<br />
Chapter 4 tells you how to run SST. Appendix E tells you how<br />
to test alarms.<br />
NOTE:<br />
If the ventilator detects low oxygen pressure, a low battery<br />
level, or an occluded or missing air intake filter during POST,<br />
POST continues uninterrupted. These alarms become active<br />
when POST is complete, and you can override them by pressing<br />
the alarm reset key.<br />
700 Series Ventilator Operator’s Manual 10066984 Rev. D 3-3
Getting started<br />
3.2 Selecting ventilator settings<br />
NOTE:<br />
Each keypress should result in a “blip” sound; otherwise, the<br />
main alarm speaker may be faulty. If a keypress does not result<br />
in this sound, turn the ventilator <strong>of</strong>f then on to run POST and<br />
verify the proper functioning <strong>of</strong> the speaker.<br />
1. Select the mode: To select a mode, press A/C, SIMV, or SPONT.<br />
(Appendix D gives a detailed explanation <strong>of</strong> these ventilation<br />
modes.)<br />
A/C<br />
SIMV<br />
SPONT<br />
In assist/control (A/C) mode, you can only select volume<br />
control ventilation (VCV) or pressure control<br />
ventilation (PCV) settings (PCV is only available on the<br />
760 Ventilator).<br />
In synchronous intermittent mandatory ventilation<br />
(SIMV) mode, you can select both VCV or PCV (760 only)<br />
and pressure support ventilation (PSV) settings.<br />
In spontaneous (SPONT) mode, you can only select PSV<br />
settings.<br />
2. Confirm or change settings: For every flashing key light, you<br />
must touch the key (and adjust the setting if necessary) before<br />
you can apply the settings. You can confirm or change settings<br />
in any order.<br />
Once you press a key, the proposed<br />
setting flashes to indicate that the<br />
knob is linked to the selected<br />
setting. The setting’s LCD window<br />
shows the setting and the message<br />
window displays the current<br />
setting, range, units, name <strong>of</strong> the<br />
setting, and associated parameter.<br />
Turn the knob to change the<br />
setting or press another key to<br />
leave the setting as is. (The setting<br />
then stops flashing.)<br />
Press each flashing key<br />
and turn the knob to<br />
adjust.<br />
7-00066<br />
3-4 10066984 Rev. D 700 Series Ventilator Operator’s Manual
Getting started<br />
3. Press CLEAR to cancel the most recently changed setting and<br />
return to the last valid setting. (This only works if you haven’t<br />
pressed ACCEPT yet.) Pressing CLEAR after you’ve pressed<br />
100% O2 stops the 100% O2 maneuver. The ventilator will beep<br />
if you attempt to change a setting to a value above or below<br />
the setting range.<br />
4. PEEP/CPAP, TRIGGER SENSITIVITY, and % O2 : You<br />
can change these settings in any mode. These keys<br />
don’t flash when you select a new mode, and you<br />
are not required to confirm these settings.<br />
PEEP/CPAP<br />
NOTE:<br />
The O 2 % alarm is delayed for 30 seconds and 12 L <strong>of</strong> tidal<br />
volume following a change in setting so that the oxygen<br />
concentration can stabilize.<br />
5. Apply the settings: Press ACCEPT.<br />
ACCEPT<br />
TRIGGER<br />
SENSITIVITY<br />
L/min<br />
NOTE:<br />
If apnea ventilation is possible, the ventilator displays this<br />
message when normal ventilation begins:<br />
Review Ta = xx s<br />
where Ta is the apnea interval and xx is the current setting in<br />
seconds (from 10 to 60 s). Chapter 5 tells you how to adjust<br />
apnea ventilation parameters. You are not required to review<br />
apnea parameters before normal ventilation begins.<br />
700 Series Ventilator Operator’s Manual 10066984 Rev. D 3-5<br />
% O2<br />
7-00067
Getting started<br />
Ventilation begins according to the displayed settings and the<br />
existing alarm limits. You should review all alarm limits and<br />
change them if necessary. (Section 3.3 tells you how.) You can<br />
change alarm limits or ventilator settings at any time during<br />
normal ventilation.<br />
Warning<br />
In PSV it is impossible to set support pressure + PEEP to<br />
deliberately cause a HIGH PRESSURE alarm. Although <strong>Covidien</strong><br />
does not recommend doing so, it is possible in VCV to set a tidal<br />
volume that causes breath truncation and a HIGH PRESSURE<br />
alarm. To avoid activating a HIGH PRESSURE alarm, select the<br />
appropriate TIDAL VOLUME and HIGH PRESSURE alarm settings.<br />
3.3 Viewing and changing alarm settings<br />
You can view alarm settings at any time without affecting<br />
ventilation by pressing the appropriate key. The ALARM SETTINGS<br />
window displays the value <strong>of</strong> the alarm being viewed or changed.<br />
The alarm setting flashes for up to 30 seconds, and you can change<br />
an alarm setting any time its setting is flashing in the window.<br />
All alarm settings are in effect during ventilation (except for<br />
LOW INSP PRESSURE, which is not active in SPONT mode). You can<br />
change alarm settings at any time during ventilation. You can only<br />
change one alarm setting at a time.<br />
To change a setting: touch, turn, ACCEPT.<br />
1. Touch the key: The key light turns<br />
on, and the current alarm setting<br />
flashes in the window for 30<br />
seconds. The message window<br />
shows the current setting, range,<br />
and units <strong>of</strong> the alarm.<br />
2. Turn the knob to adjust the alarm<br />
setting (this only works when the<br />
alarm setting is flashing in the<br />
window). The ventilator will beep if<br />
you attempt to select a setting<br />
above or below the setting range.<br />
7-00066<br />
7-00068<br />
3-6 10066984 Rev. D 700 Series Ventilator Operator’s Manual
3. Press ACCEPT to apply the new<br />
alarm setting. The new alarm<br />
setting stops flashing and the<br />
message window displays this<br />
message:<br />
Setting(s) accepted<br />
Getting started<br />
Warning<br />
• Inadvertent extubation in which the endotracheal tube<br />
remains connected to the breathing circuit could result in<br />
pressurization above the LOW INSP PRESSURE alarm setting.<br />
The LOW INSP PRESSURE and low volume alarms should be<br />
set appropriately.<br />
• To ensure patient safety, always set the LOW TIDAL<br />
VOLUME and HIGH RATE alarms.<br />
NOTE:<br />
The O 2 % alarm limits are based on the set % O 2 . The high<br />
O 2 % alarm limit is 10 percentage points above the set % O 2 ,<br />
and the low O 2 % alarm limit is 10 percentage points below<br />
the set % O 2 . The measured % O 2 is shown in the message<br />
window if its display is enabled (using the Oxygen sensor<br />
menu function, described in Chapter 6).<br />
3.4 Entering and exiting standby mode<br />
ACCEPT<br />
7-00067<br />
Standby mode is a waiting state in which there is no ventilation, but<br />
the ventilator maintains its settings and battery charge(s).<br />
700 Series Ventilator Operator’s Manual 10066984 Rev. D 3-7
Getting started<br />
Warning<br />
• To avoid raising the oxygen concentration <strong>of</strong> room air,<br />
ensure that the ventilator is in an adequately ventilated<br />
room if connected to an oxygen supply while in standby<br />
mode. Disconnect the oxygen supply if you do not intend to<br />
use the ventilator immediately.<br />
• To avoid patient injury due to lack <strong>of</strong> ventilatory support, do<br />
not enter standby mode with a patient attached to the<br />
ventilator. You must confirm that no patient is attached<br />
before entering standby mode.<br />
NOTE:<br />
To maintain battery charge(s), the ventilator must be plugged<br />
into ac power with the power switch on while in standby<br />
mode.<br />
Follow these steps to enter standby mode:<br />
1. Turn on the ventilator. If ventilation has already begun, you<br />
must turn <strong>of</strong>f the ventilator, then turn it back on without<br />
starting ventilation. This allows you access to the Standby mode<br />
menu function.<br />
2. Press MENU.<br />
3. Turn the knob to select standby mode.<br />
4. Press ACCEPT. The ventilator displays this message:<br />
Is pt disconnected?<br />
ACCEPT to proceed<br />
5. Confirm that no patient is attached by pressing ACCEPT. (If you<br />
don’t press ACCEPT while this message is displayed, the<br />
ventilator will not enter standby mode.)<br />
3-8 10066984 Rev. D 700 Series Ventilator Operator’s Manual
Getting started<br />
6. This message tells you that the ventilator is in standby mode:<br />
In standby mode<br />
Clear to exit<br />
The ON AC/BATTERY CHARGING, INTERNAL BATTERY LEVEL,<br />
and SAFETY VALVE OPEN indicators turn on. All other key lights<br />
and displays are <strong>of</strong>f during standby mode. The only alarms that<br />
can become active during standby mode are FAN FAILED ALERT,<br />
BAT NOT CHARGING, LOSS AC POWER, and LOSS OF POWER.<br />
Follow these steps to exit from standby mode and resume ventilation:<br />
1. Press CLEAR.<br />
2. The ventilator displays this message:<br />
POST running...<br />
3. After a few seconds, POST is complete and the ventilator begins<br />
ventilation using the last valid settings.<br />
700 Series Ventilator Operator’s Manual 10066984 Rev. D 3-9
This page is intentionally blank.<br />
3-10 10066984 Rev. D 700 Series Ventilator Operator’s Manual
Self tests (SST and EST)<br />
SECTION<br />
All 700 Series Ventilators include these built-in self tests:<br />
• Short self test (SST) is a short (about 2 to 3 minutes) and simple<br />
sequence <strong>of</strong> tests that verifies proper ventilator operation, checks<br />
the ventilator breathing circuit for leaks, and measures the circuit<br />
compliance. Power on self test (POST) is part <strong>of</strong> SST.<br />
• Extended self test (EST) is a thorough test <strong>of</strong> the operational<br />
integrity <strong>of</strong> the ventilator, both the electronics and the<br />
pneumatics. POST and SST are part <strong>of</strong> EST.<br />
Warning<br />
• Before running SST or EST, you must disconnect the<br />
ventilator from the patient. Running SST or EST while the<br />
ventilator is connected to the patient can injure the patient.<br />
• A fault identified in SST or EST indicates that the ventilator or<br />
an associated component is defective. A defective ventilator<br />
or associated component should be repaired before the<br />
ventilator is returned to service, unless it can be determined<br />
with certainty that the defect cannot create a hazard for the<br />
patient, or add to the risks which may arise from other<br />
hazards.
Self tests (SST and EST)<br />
Caution<br />
To ensure accurate SST and EST operation, run SST and EST in<br />
room air (% O2 is 21%) after the ventilator has been powered<br />
on for at least 10 minutes. (EST also requires an oxygen<br />
supply.)<br />
<strong>Table</strong> 4-1 describes SST and EST.<br />
<strong>Table</strong> 4-1: 700 Series Ventilator self tests<br />
Test name Purpose When test is run<br />
Short self<br />
test (SST)<br />
Extended<br />
self test<br />
(EST)<br />
An abbreviated version <strong>of</strong> EST to<br />
be run primarily by the operator.<br />
Makes detailed checks <strong>of</strong> the<br />
pneumatics and electronics. It also<br />
characterizes system leaks and<br />
system/tubing compliance to<br />
compensate during breath<br />
delivery. POST is run as part <strong>of</strong> SST.<br />
Thoroughly tests the operational<br />
integrity <strong>of</strong> the ventilator, both<br />
the electronics and pneumatics.<br />
POST and SST are part <strong>of</strong> EST.<br />
Before patient is<br />
connected to the<br />
ventilator or after<br />
ventilator breathing<br />
circuit or humidifier is<br />
changed.<br />
• When the ventilator<br />
is serviced.<br />
• As part <strong>of</strong> the<br />
ventilator<br />
performance<br />
verification.<br />
• Following a ventilator<br />
inoperative.<br />
NOTE:<br />
The performance verification, described in the 700<br />
Series Ventilator System Service Manual, is a more<br />
thorough test <strong>of</strong> the ventilator to verify specifications<br />
are met. The technician runs a partial or full<br />
performance verification after servicing the ventilator<br />
and at regular intervals.<br />
4-2 10066984 Rev. D 700 Series Ventilator Operator’s Manual
4.1 Short self test (SST)<br />
<strong>Table</strong> 4-2 summarizes the functions <strong>of</strong> SST.<br />
Self tests (SST and EST)<br />
NOTE:<br />
• <strong>Covidien</strong> recommends that you run SST every 15 days,<br />
between patients, and when you change the ventilator<br />
breathing circuit. <strong>Covidien</strong> recognizes that the protocol for<br />
running SST varies widely among healthcare institutions.<br />
It is not possible for <strong>Covidien</strong> to specify or require specific<br />
practices that will meet all needs, or to be responsible for<br />
the effectiveness <strong>of</strong> those practices.<br />
• When SST asks you to do something (for example, press<br />
ACCEPT or block the patient wye), the ventilator will wait<br />
indefinitely for your response.<br />
Follow these steps to run SST:<br />
1. Turn on the ventilator. If ventilation has already begun, you<br />
must turn <strong>of</strong>f the ventilator, then turn it back on without<br />
starting ventilation. This allows you access to the Self test menu<br />
function.<br />
If you select the Self test function during ventilation the<br />
window displays this message:<br />
N/A in ventilation<br />
2. Press MENU, turn the knob to select Self test, then press ACCEPT.<br />
The usual 30-second timeout for your input is disabled during<br />
the entry to the Self test function.<br />
3. The window displays this message:<br />
Short self test<br />
Turn knob to view<br />
4. Turn the knob to select Short self test (you can also select<br />
Extended self test). The window displays this message:<br />
Short self test<br />
Vent warming 09:59<br />
CLEAR to bypass<br />
700 Series Ventilator Operator’s Manual 10066984 Rev. D 4-3
Self tests (SST and EST)<br />
If the ventilator has already been running for more than<br />
10 minutes before you select Short self test, this message is<br />
bypassed (see step 5). If the ventilator was recently running and<br />
is already warmed up, you can press CLEAR to override the<br />
Vent warming message and begin SST. <strong>Covidien</strong> cannot<br />
guarantee the accuracy <strong>of</strong> test results in this case, however.<br />
5. The window displays this message:<br />
Is pt disconnected?<br />
ACCEPT to proceed<br />
6. Press ACCEPT to confirm that no patient is connected to the<br />
ventilator. (Or press CLEAR to back up through the menu.)<br />
The window displays this message:<br />
Block wye<br />
7. Block the patient wye and then press ACCEPT.<br />
8. The ventilator runs power-on self-test (POST) and displays this<br />
message for a few seconds:<br />
POST running...<br />
Warning<br />
If a single beep is not audible during POST, the main audible<br />
alarm may be malfunctioning. Remove the ventilator from use<br />
and contact service.<br />
NOTE:<br />
• If the ventilator is running on ac but the battery is low, upon<br />
power up it may begin ventilating using the last valid settings<br />
and an ABNORMAL RESTART alarm may occur.<br />
• During POST it is recommended that you not switch <strong>of</strong>f<br />
ventilator power.<br />
9. The message window then displays this message:<br />
humidification device type<br />
Choose humidifier<br />
where the humidification device type is the most recently<br />
selected type, as follows:<br />
4-4 10066984 Rev. D 700 Series Ventilator Operator’s Manual
Self tests (SST and EST)<br />
• HME: Heat moisture exchanger (“artificial nose”)<br />
• Dual heated wire: Humidifier with heated wire on expiratory<br />
limb, or on both inspiratory and expiratory limbs<br />
• No heated wire: Conventional humidifier without heated<br />
wire circuit on the expiratory limb<br />
Turn the knob to select the humidifier type attached, then<br />
press ACCEPT.<br />
Warning<br />
Incorrectly specifying the humidifier type during SST can affect<br />
the accuracy <strong>of</strong> spirometry calculations.<br />
10. The message window then displays this message:<br />
tubing type<br />
Choose tubing type<br />
where the tubing type is the most recently selected ventilator<br />
breathing circuit type.<br />
Turn the knob to select the ventilator breathing circuit type<br />
(adult or pediatric tubing) attached to the ventilator, then<br />
press ACCEPT.<br />
Warning<br />
Incorrectly specifying the ventilator breathing circuit type<br />
during SST can cause an inappropriate sensitivity for the leak<br />
test and occlusion alarm. <strong>Covidien</strong> recommends using pediatric<br />
circuits when ventilating patients with 5-mm or smaller<br />
internal-diameter artificial airways.<br />
NOTE:<br />
To ensure that compliance compensation functions correctly,<br />
you must run SST with the circuit configured as intended for<br />
use on the patient.<br />
700 Series Ventilator Operator’s Manual 10066984 Rev. D 4-5
Self tests (SST and EST)<br />
11. The message window then displays this message:<br />
ET size: x.x mm<br />
Choose ET size<br />
Turn the knob to select the appropriate ET (endotracheal tube)<br />
size, then press ACCEPT.<br />
Warning<br />
Specifying an ET tube size that is too large can cause premature<br />
termination <strong>of</strong> breaths on very small pediatric patients. During<br />
normal ventilation, you can use the MENU key’s User settings<br />
function to change the ET tube size (see Chapter 6).<br />
12. The ventilator automatically starts the test sequence. A message<br />
indicates which test is being performed. Once started, a test<br />
cannot be interrupted. In most cases you don’t need to do<br />
anything unless a test result is fault or fail, or your action is<br />
required. When a test passes, SST automatically starts the next<br />
test.<br />
NOTE:<br />
The PRESSURE bar graph and the PRESSURE display window<br />
show the real-time expiratory pressure throughout SST.<br />
4-6 10066984 Rev. D 700 Series Ventilator Operator’s Manual
These keys are valid during SST:<br />
ACCEPT<br />
CLEAR<br />
MANUAL<br />
INSP<br />
7-00424<br />
7-00423<br />
7-00072<br />
To confirm that a requested action is complete.<br />
Self tests (SST and EST)<br />
To repeat a test, return to the prompt at the start <strong>of</strong> a test,<br />
or indicate an inaudible alarm (during the Main alarm<br />
speaker test and Backup alarm test only).<br />
To override an Incomplete or Fault test result.<br />
To restart from the beginning <strong>of</strong> SST.<br />
To stop testing and skip to the end <strong>of</strong> SST.<br />
NOTE:<br />
If the tubing or humidifier type or ET tube size that<br />
you’ve selected has changed from the previous time<br />
SST was run, this key is temporarily disabled until the<br />
Circuit comp test is complete.<br />
700 Series Ventilator Operator’s Manual 10066984 Rev. D 4-7
Self tests (SST and EST)<br />
13. The I/E filter test prompts you to complete these actions (press<br />
ACCEPT when each action is complete):<br />
Display:<br />
Disconnect I tubing<br />
Reconnect I tubing<br />
Display:<br />
Unblock wye<br />
Block wye<br />
Display:<br />
Disconnect E tubing<br />
Reconnect E tubing<br />
(Do not disconnect inspiratory filter.)<br />
4-8 10066984 Rev. D 700 Series Ventilator Operator’s Manual<br />
740 Ventilator<br />
- +<br />
7-00069<br />
740 Ventilator<br />
- +<br />
7-00070<br />
(Do not disconnect expiratory filter.)<br />
740 Ventilator<br />
- +<br />
7-00071
Self tests (SST and EST)<br />
14. When the final test in the sequence is complete, this message is<br />
displayed along with the overall SST result:<br />
SST finished testing<br />
<strong>Table</strong> 4-3 summarizes overall SST results and how to proceed in<br />
each case.<br />
15. Unblock the patient wye, then press ACCEPT. The ventilator<br />
reruns POST.<br />
<strong>Table</strong> 4-2: SST sequence <strong>of</strong> tests<br />
Test Function Comments<br />
Is pt<br />
disconnected?<br />
Asks for confirmation that a<br />
patient is not connected to<br />
the ventilator.<br />
Leak test Checks the ventilator<br />
breathing circuit for leaks.<br />
Displays expiratory pressure<br />
on pressure bar graph.<br />
P e P cyl<br />
compare<br />
Auto-zero sol<br />
test<br />
Circuit comp<br />
test<br />
Verifies proper function <strong>of</strong><br />
pressure transducers in<br />
internal pneumatics and<br />
ventilator breathing circuit.<br />
Displays expiratory pressure<br />
on pressure bar graph.<br />
Verifies the proper function<br />
(ability to open and close)<br />
<strong>of</strong> the P e (expiratory) and<br />
P cyl (cylinder) solenoids.<br />
Determines the compliance<br />
<strong>of</strong> the ventilator breathing<br />
circuit. Displays expiratory<br />
pressure on pressure bar<br />
graph.<br />
SST cannot proceed until<br />
you confirm that a patient is<br />
not connected.<br />
Fault if not passed.<br />
Overriding a fault could<br />
cause improper compliance<br />
compensation, inaccurate<br />
tidal volume delivery,<br />
or autocycling.<br />
Fault if not passed.<br />
Overriding a fault could<br />
cause improper compliance<br />
compensation,<br />
or autocycling.<br />
Failure if not passed.<br />
Fault if not passed.<br />
Overriding a fault could<br />
cause improper compliance<br />
compensation or inaccurate<br />
tidal volume delivery.<br />
700 Series Ventilator Operator’s Manual 10066984 Rev. D 4-9
Self tests (SST and EST)<br />
Safety valve<br />
test<br />
PEEP system<br />
test<br />
Flow/O 2<br />
sensor test<br />
<strong>Table</strong> 4-2: SST sequence <strong>of</strong> tests (continued)<br />
Test Function Comments<br />
Verifies that safety valve<br />
relieves excess circuit<br />
pressure. Displays<br />
expiratory pressure on<br />
pressure bar graph.<br />
Verifies that the PEEP<br />
system can generate and<br />
maintain preset PEEP levels.<br />
Displays expiratory pressure<br />
on pressure bar graph.<br />
Checks the accuracy <strong>of</strong> the<br />
exhalation flow sensor and<br />
the oxygen sensor.<br />
I/E filter test Checks the pressure drop<br />
across the inspiratory and<br />
expiratory limbs <strong>of</strong> the<br />
entire patient system.<br />
Checks the pressure drop<br />
across the filters.<br />
Failure if not passed.<br />
Failure if not passed.<br />
Failure if flow sensor test<br />
does not pass.<br />
Fault if oxygen sensor test<br />
does not pass. Use the<br />
MENU key’s Oxygen sensor<br />
function to recalibrate the<br />
oxygen sensor (see<br />
Chapter 6).<br />
Overriding a fault (oxygen<br />
sensor test only) could result<br />
in inaccurate % O 2<br />
measurement.<br />
Fault if not passed. This test<br />
is optional: pressing CLEAR<br />
at the initial prompt skips<br />
this test.<br />
Skipping this test or<br />
overriding a fault could<br />
result in inadequate<br />
bacteria protection or<br />
excessive resistance to<br />
inspiration or exhalation.<br />
4-10 10066984 Rev. D 700 Series Ventilator Operator’s Manual
Heaters test Verifies correct operation <strong>of</strong><br />
the heaters in the<br />
exhalation subsystem.<br />
Main alarm<br />
test<br />
Backup alarm<br />
test<br />
<strong>Table</strong> 4-2: SST sequence <strong>of</strong> tests (continued)<br />
Sounds alarm at three<br />
volumes and verifies that<br />
user reports hearing it.<br />
Self tests (SST and EST)<br />
Test Function Comments<br />
Checks the operation <strong>of</strong> the<br />
backup alarm circuit.<br />
Fault if not passed.<br />
Overriding a fault could<br />
cause inaccurate monitoring<br />
<strong>of</strong> exhaled volume or lead to<br />
damage to the ventilator’s<br />
flow sensor or exhalation<br />
valve.<br />
Failure if not passed.<br />
If alarm is audible press<br />
ACCEPT. If not, press CLEAR.<br />
Fault if not passed. If alarm<br />
is audible press ACCEPT.<br />
If not, press CLEAR.<br />
Overriding a fault could<br />
cause no backup audible<br />
alarm in case the main<br />
audible alarm fails.<br />
NOTE:<br />
Faults detected during SST may require removing<br />
the ventilator from clinical use immediately and<br />
servicing it. A trained operator, however, must<br />
evaluate the situation and determine whether the<br />
ventilator can be used. Failures detected during SST<br />
require rerunning SST (using the alarm reset key).<br />
It is not possible to exit SST if SST fails. If SST<br />
continues to fail, the ventilator must be removed<br />
from service.<br />
700 Series Ventilator Operator’s Manual 10066984 Rev. D 4-11
Self tests (SST and EST)<br />
If the SST<br />
result is:<br />
<strong>Table</strong> 4-3: Overall SST results<br />
It means: Do this:<br />
SST passed All tests passed. Press ACCEPT to exit SST<br />
or press the alarm reset<br />
key to restart SST from<br />
the beginning.<br />
SST<br />
incomplete<br />
All tests performed were<br />
passed, but some were<br />
skipped. The skipped tests<br />
were passed on a previous<br />
run.<br />
SST fault One or more tests did not<br />
pass. These tests might not<br />
compromise the ventilator’s<br />
ability to ventilate safely,<br />
based on the operator’s<br />
evaluation <strong>of</strong> the situation.<br />
SST failed One or more critical<br />
problems were detected.<br />
Press the alarm reset key<br />
to restart SST from the<br />
beginning or press<br />
MANUAL INSP to override<br />
this result and exit SST.*<br />
Press the alarm reset key<br />
to restart SST from the<br />
beginning or press<br />
MANUAL INSP to override<br />
this result and exit SST.*<br />
Press the alarm reset key to<br />
rerun SST. It is not possible<br />
to exit SST if SST fails. If SST<br />
continues to fail, remove<br />
the ventilator from use and<br />
contact service.<br />
* If you press MANUAL INSP to exit SST, you will be prompted to confirm that you<br />
wish to override the fault or incomplete test. Confirm by pressing MANUAL INSP<br />
again.<br />
4-12 10066984 Rev. D 700 Series Ventilator Operator’s Manual
4.2 Extended self test (EST)<br />
Self tests (SST and EST)<br />
To run EST, you must have the hardware listed in <strong>Table</strong> 4-4.<br />
Hardware<br />
description<br />
Ventilator<br />
breathing circuit<br />
Stopper, wye<br />
(no. 2)<br />
Stopper,<br />
inspiration port<br />
(no. 3)<br />
Oxygen source,<br />
40 to 90 psi<br />
(275 to 620 kPa)<br />
Warning<br />
<strong>Table</strong> 4-4: EST hardware requirements<br />
Manufacturer/model or <strong>Covidien</strong> part number<br />
To use as test circuit: G-061208-00 or equivalent (adult,<br />
reusable, without heated wire)<br />
NOTE:<br />
To ensure that compliance compensation<br />
functions correctly, the user must run EST or SST<br />
with the circuit configured as intended for use<br />
on the patient.<br />
G-061574-00 or local supplier<br />
G-061575-00 or local supplier<br />
Local supplier<br />
Due to excessive restriction <strong>of</strong> Air Liquide*, Australian, and<br />
Dräger* hose assemblies, reduced FIO 2 levels can result if you use<br />
oxygen inlet pressures < 50 psi (345 kPa). Make sure oxygen inlet<br />
pressure is ≥ 50 psi (345 kPa) when using these hose assemblies, to<br />
maintain correct FIO 2 levels.<br />
700 Series Ventilator Operator’s Manual 10066984 Rev. D 4-13
Self tests (SST and EST)<br />
NOTE:<br />
<strong>Covidien</strong> recommends that you always run the full EST before<br />
placing the ventilator into operation following service and as<br />
part <strong>of</strong> the ventilator’s routine performance verification. For<br />
more information on performance verification, see the<br />
700 Series Ventilator System Service Manual.<br />
Follow these steps to run EST:<br />
1. Set up the ventilator as for normal operation, complete with<br />
humidifier, if applicable, and leak-tight ventilator breathing<br />
circuit.<br />
2. Turn on the ventilator. If ventilation has already begun, you<br />
must turn <strong>of</strong>f the ventilator, then turn it back on without<br />
starting ventilation. This allows you access to the Self test menu<br />
function.<br />
3. Press MENU, turn the knob to select Self test, then press ACCEPT.<br />
4. Turn the knob to select Extended self test. The window displays<br />
the messages shown in <strong>Table</strong> 4-5.<br />
<strong>Table</strong> 4-5: EST setup messages<br />
Message Description<br />
Extended self<br />
test Vent<br />
warming xx:xx<br />
CLEAR to bypass<br />
Is pt<br />
disconnected?<br />
This message is displayed (followed by a countdown) if<br />
you just turned on the ventilator. The ventilator must<br />
be on for 10 minutes before running EST so that<br />
component temperatures can stabilize.<br />
If the ventilator was recently running and is already<br />
warmed up, you can press CLEAR to override the Vent<br />
warming message and begin SST. <strong>Covidien</strong> cannot<br />
guarantee the accuracy <strong>of</strong> test results in this case,<br />
however.<br />
Confirm that patient is disconnected by pressing<br />
ACCEPT; or press CLEAR to return to service menu.<br />
Block wye Install no. 2 stopper and then press ACCEPT.<br />
4-14 10066984 Rev. D 700 Series Ventilator Operator’s Manual
POST running... Wait a few seconds until POST is completed.<br />
humidification<br />
device type<br />
Choose<br />
humidifier<br />
<strong>Table</strong> 4-5: EST setup messages (continued)<br />
Message Description<br />
Self tests (SST and EST)<br />
NOTE:<br />
• If a single beep is not audible during POST,<br />
the main audible alarm may be<br />
malfunctioning. Contact service.<br />
• During POST do not switch <strong>of</strong>f ventilator<br />
power.<br />
Turn knob to select desired humidification device,<br />
then press ACCEPT. Device types include: HME (heatmoisture<br />
exchanger or “artificial nose”), Dual heated<br />
wire (humidifier with heated wires on both<br />
inspiratory and expiratory limbs), or No heated wire<br />
(humidifier without a heated wire on expiratory limb).<br />
Warning<br />
Incorrectly specifying the humidifier type during<br />
EST can affect the accuracy <strong>of</strong> spirometry<br />
calculations.<br />
700 Series Ventilator Operator’s Manual 10066984 Rev. D 4-15
Self tests (SST and EST)<br />
tubing type<br />
Choose tubing<br />
type<br />
ET size: x.x mm<br />
Choose ET size<br />
<strong>Table</strong> 4-5: EST setup messages (continued)<br />
Message Description<br />
Turn knob to select either Adult tubing or Pediatric<br />
tubing and then press ACCEPT.<br />
Warning<br />
Incorrectly specifying the ventilator breathing<br />
circuit type during EST can cause an<br />
inappropriate sensitivity for the leak test and<br />
occlusion alarm. <strong>Covidien</strong> recommends using<br />
pediatric circuits when ventilating patients with<br />
5-mm or smaller internal-diameter artificial<br />
airways.<br />
NOTE:<br />
To ensure that compliance compensation<br />
functions correctly, run EST with the circuit<br />
configured as intended for use on the patient.<br />
Turn knob to select appropriate ET (endotracheal<br />
tube) size, and then press ACCEPT.<br />
Warning<br />
Specifying an ET tube size that is too large can<br />
cause premature termination <strong>of</strong> breaths on very<br />
small pediatric patients. During normal<br />
ventilation, you can use the MENU key’s User<br />
settings function to change the ET tube size (see<br />
Chapter 6).<br />
4-16 10066984 Rev. D 700 Series Ventilator Operator’s Manual
Self tests (SST and EST)<br />
5. The ventilator automatically starts the test sequence (<strong>Table</strong> 4-6).<br />
Unless a test requires your intervention (and waits indefinitely<br />
for your response), you don’t need to do anything until a test<br />
result is fault or failed, or EST is complete. Use the keys listed in<br />
<strong>Table</strong> 4-7 as needed.<br />
Test number<br />
and name<br />
1. DAC-ADC<br />
loop test<br />
2. Safety valve<br />
test<br />
3. Motor<br />
sensor test<br />
4. Zeroing <strong>of</strong><br />
P o<br />
5. O 2 solenoids<br />
test<br />
6. Flow sensor<br />
test<br />
<strong>Table</strong> 4-6: EST test sequence<br />
Function Comments<br />
A loopback test to check<br />
digital-to-analog (D/A) and<br />
analog-to-digital (A/D)<br />
converters’ operation.<br />
Verifies that safety valve<br />
relieves excess circuit<br />
pressure.<br />
Checks operation <strong>of</strong> rotary<br />
encoder.<br />
Zeroes oxygen regulator<br />
pressure transducer.<br />
Disconnect and reconnect<br />
oxygen supply, as directed.<br />
Press ACCEPT to signify you<br />
have performed each<br />
requested action.<br />
Checks oxygen solenoids<br />
and oxygen sensor.<br />
Checks accuracy <strong>of</strong><br />
exhalation flow sensor.<br />
Failure if not passed. Not in<br />
SST.<br />
Failure if not passed. Also in<br />
SST.<br />
Failure if not passed. Not in<br />
SST.<br />
Fault if not passed. Not in<br />
SST.<br />
NOTE:<br />
Overriding this fault<br />
could result in<br />
inaccurate oxygen<br />
percentage delivery.<br />
Fault if not passed. Not in<br />
SST.<br />
NOTE:<br />
Overriding this fault<br />
could result in<br />
inaccurate oxygen<br />
percentage delivery.<br />
Failure if not passed. Also in<br />
SST.<br />
700 Series Ventilator Operator’s Manual 10066984 Rev. D 4-17
Self tests (SST and EST)<br />
Test number<br />
and name<br />
7. Leak test Checks ventilator breathing<br />
circuit for leaks.<br />
7. P e P cyl<br />
compare<br />
(also part<br />
<strong>of</strong> test 7)<br />
7. Auto-zero<br />
sol test (also<br />
part <strong>of</strong><br />
test 7)<br />
8. Circuit comp<br />
test<br />
<strong>Table</strong> 4-6: EST test sequence (continued)<br />
Function Comments<br />
Verifies proper functioning<br />
<strong>of</strong> pressure transducers and<br />
ventilator breathing circuit.<br />
Verifies the proper function<br />
<strong>of</strong> the P e and P cyl solenoids.<br />
Determines ventilator<br />
breathing circuit<br />
compliance.<br />
Fault if not passed. Also in<br />
SST.<br />
NOTE:<br />
Overriding this fault<br />
could cause improper<br />
compliance<br />
compensation,<br />
inaccurate tidal volume<br />
delivery, or autocycling.<br />
Fault if not passed. Also in<br />
SST.<br />
NOTE:<br />
Overriding this fault<br />
could cause improper<br />
compliance<br />
compensation,<br />
inaccurate tidal volume<br />
delivery, or autocycling.<br />
Failure if not passed. Also in<br />
SST.<br />
NOTE:<br />
Overriding this fault<br />
could cause improper<br />
compliance<br />
compensation,<br />
inaccurate tidal volume<br />
delivery, or autocycling.<br />
Fault if not passed. Also in<br />
SST.<br />
4-18 10066984 Rev. D 700 Series Ventilator Operator’s Manual
Test number<br />
and name<br />
9. I/E filter test Checks pressure drop across<br />
inspiratory and expiratory<br />
limbs <strong>of</strong> entire patient<br />
system. Checks pressure<br />
drop across filters.<br />
Disconnect and reconnect<br />
inspiration (I) tube from/to<br />
inspiratory filter outlet, and<br />
exhalation (E) tube from/to<br />
expiratory filter inlet, as<br />
directed. Block and unblock<br />
wye with a no. 2 stopper, as<br />
directed. Press ACCEPT to<br />
signify you have performed<br />
each requested action.<br />
10. PEEP<br />
system test<br />
11. Check<br />
valve test<br />
<strong>Table</strong> 4-6: EST test sequence (continued)<br />
Verifies that PEEP system can<br />
generate and maintain<br />
preset PEEP levels within<br />
either <strong>of</strong> two sets <strong>of</strong> limits. If<br />
results are within the inner<br />
set <strong>of</strong> limits, test passes the<br />
first time. If the results are<br />
outside <strong>of</strong> the outer set <strong>of</strong><br />
limits, test fails the first<br />
time. If the results are<br />
outside the inner limits but<br />
within the outer limits, the<br />
ventilator adjusts its<br />
calibration table in<br />
nonvolatile RAM (NVRAM)<br />
and repeats the test to verify<br />
the calibration. The test fails<br />
if the calibration cannot be<br />
verified after five attempts.<br />
Self tests (SST and EST)<br />
Function Comments<br />
Checks check valves on inlet<br />
and outlet ports <strong>of</strong> cylinder<br />
and on exhalation limb <strong>of</strong><br />
ventilator breathing circuit.<br />
Fault if not passed. Also in<br />
SST. Mandatory in EST, but<br />
optional in SST.<br />
NOTE:<br />
Overriding this fault<br />
could result in<br />
inadequate bacteria<br />
protection or excessive<br />
resistance to inspiration<br />
or exhalation.<br />
Failure if not passed. Also in<br />
SST, but not identical.<br />
Failure if not passed. Not in<br />
SST.<br />
700 Series Ventilator Operator’s Manual 10066984 Rev. D 4-19
Self tests (SST and EST)<br />
Test number<br />
and name<br />
12. Piston leak<br />
test<br />
13. Lightsdisplays<br />
test<br />
Checks piston leak against a<br />
table <strong>of</strong> leak values stored<br />
in NVRAM.<br />
First remove inspiratory filter;<br />
then block and unblock<br />
inspiratory filter port as<br />
directed, using no. 3 stopper.<br />
Press ACCEPT to signify you<br />
have performed each<br />
requested action. Replace<br />
inspiratory tubing at end <strong>of</strong><br />
test.<br />
Verifies that lights and<br />
displays function.<br />
Observe each named display,<br />
and press ACCEPT to verify<br />
that it is lit. Press CLEAR if a<br />
display is not lit.<br />
14. Keys test Verifies that every row and<br />
column <strong>of</strong> key matrix can be<br />
correctly read.<br />
Press each named key (each<br />
key’s LED will also be lit).<br />
Press CLEAR if a key’s LED is<br />
not lit.<br />
15. Main alarm<br />
test<br />
<strong>Table</strong> 4-6: EST test sequence (continued)<br />
Function Comments<br />
Checks whether various<br />
alarm sounds are audible (at<br />
maximum volume).<br />
Listen for each named<br />
sound, then press ACCEPT to<br />
verify that it is audible. Press<br />
CLEAR if a sound is not<br />
audible.<br />
Failure if not passed. Not in<br />
SST.<br />
Failure if not passed. Not in<br />
SST.<br />
Failure if not passed. Not in<br />
SST.<br />
Failure if not passed. Also in<br />
SST.<br />
4-20 10066984 Rev. D 700 Series Ventilator Operator’s Manual
Test number<br />
and name<br />
16. Backup<br />
alarm test<br />
Checks operation <strong>of</strong> backup<br />
alarm circuit.<br />
Press ACCEPT if alarm is<br />
audible or press CLEAR if<br />
alarm is not audible.<br />
17. Fan test Verifies that main fan is<br />
operating correctly by<br />
reading fan status bits.<br />
18. Heaters<br />
test<br />
<strong>Table</strong> 4-6: EST test sequence (continued)<br />
Self tests (SST and EST)<br />
Function Comments<br />
Verifies correct operation <strong>of</strong><br />
heaters in exhalation<br />
system.<br />
Fault if not passed. Also in<br />
SST.<br />
NOTE:<br />
Overriding this fault<br />
could result in no<br />
audible alarm if the<br />
main speaker fails.<br />
Failure if not passed. Not in<br />
SST.<br />
Fault if not passed. Also in<br />
SST.<br />
NOTE:<br />
Overriding this fault<br />
could result in<br />
inaccurate monitoring<br />
<strong>of</strong> exhaled volume or<br />
damage to the<br />
ventilator’s flow sensor<br />
or exhalation valve.<br />
At the end <strong>of</strong> each test, the test name and pass/fail/fault status<br />
are displayed. When a test passes, EST automatically starts the<br />
next test. You do not need to do anything unless a test result is<br />
Fault or Fail, or your action is required. If a test does not pass,<br />
you can still continue EST, although the overall EST result is not<br />
passed until the error condition is corrected. Since information<br />
on multiple errors can help troubleshooting, it can be useful to<br />
complete EST even with errors.<br />
700 Series Ventilator Operator’s Manual 10066984 Rev. D 4-21
Self tests (SST and EST)<br />
<strong>Table</strong> 4-7: Key functions during EST<br />
Key Function<br />
ACCEPT<br />
CLEAR<br />
MANUAL<br />
INSP<br />
7-00424<br />
7-00423<br />
7-00072<br />
To confirm that a requested action is complete.<br />
Repeat a test or return to prompt at start <strong>of</strong> a test.<br />
To override an Incomplete or Fault test result.<br />
To restart from the beginning <strong>of</strong> SST.<br />
To stop testing and skip to the end <strong>of</strong> SST.<br />
NOTE:<br />
If the tubing or humidifier type or ET tube size<br />
that you’ve selected has changed from the<br />
previous time SST was run, this key is temporarily<br />
disabled until the Circuit comp test is complete.<br />
6. Some tests display additional prompts, some <strong>of</strong> which require<br />
your response. These are listed in <strong>Table</strong> 4-8.<br />
<strong>Table</strong> 4-8: Prompts during EST<br />
Prompt Your response<br />
Disconnect O 2<br />
supply<br />
Reconnect O 2<br />
supply<br />
Disconnect ventilator from oxygen supply.<br />
Press ACCEPT.<br />
Reconnect ventilator to oxygen supply. Press ACCEPT.<br />
4-22 10066984 Rev. D 700 Series Ventilator Operator’s Manual
Self tests (SST and EST)<br />
Disconnect I tubing Disconnect tubing from inspiratory filter outlet.<br />
Leave inspiratory filter in place. Press ACCEPT.<br />
I drop = x x.x at 100<br />
or<br />
I drop = x x.x at 40<br />
Reconnect I tubing<br />
This is the inspiratory filter pressure drop in cmH 2 O at<br />
a flow <strong>of</strong> 100 L/min (adult tubing) or 40 L/min<br />
(pediatric tubing). Reconnect tubing to inspiratory<br />
filter outlet. Press ACCEPT.<br />
Unblock wye Remove stopper from patient wye. Press ACCEPT.<br />
Block wye Insert a stopper into patient wye. Press ACCEPT.<br />
Disconnect E tubing Reconnect tubing to inspiratory filter outlet, and<br />
disconnect tubing from expiratory filter inlet. Leave<br />
expiratory filter in place. Press ACCEPT.<br />
E drop = x.x at 100<br />
or<br />
E drop = x x.x at 40<br />
Reconnect E tubing<br />
This is the expiratory filter pressure drop in cmH 2 O at<br />
a flow <strong>of</strong> 100 L/min (adult tubing) or 40 L/min<br />
(pediatric tubing). Press ACCEPT. Reconnect tubing to<br />
expiratory filter outlet.<br />
Block insp filt port Remove inspiratory filter. Insert no. 3 stopper into<br />
inspiratory filter outlet. Press ACCEPT.<br />
Reconnect I tubing Remove stopper from inspiratory filter outlet.<br />
Reinstall inspiratory filter. Press ACCEPT.<br />
Name <strong>of</strong> a section<br />
<strong>of</strong> display<br />
Upper MDW =<br />
blocks?<br />
Lower MDW =<br />
blocks?<br />
Name <strong>of</strong> a key Press named key.<br />
Press ACCEPT to confirm that all LEDs/LCDs in named<br />
section are on.<br />
Press ACCEPT to confirm that all pixels are turned on<br />
in upper half.<br />
Press ACCEPT to confirm that all pixels are turned on<br />
in lower half.<br />
High alarm sound Confirm that you hear alarm by pressing ACCEPT.<br />
Medium alarm<br />
sound<br />
<strong>Table</strong> 4-8: Prompts during EST (continued)<br />
Prompt Your response<br />
Confirm that you hear alarm by pressing ACCEPT.<br />
700 Series Ventilator Operator’s Manual 10066984 Rev. D 4-23
Self tests (SST and EST)<br />
No sound Confirm that you do not hear alarm by pressing<br />
ACCEPT.<br />
Is backup alarm<br />
ON?<br />
<strong>Table</strong> 4-8: Prompts during EST (continued)<br />
Prompt Your response<br />
Confirm that you hear alarm by pressing ACCEPT.<br />
7. When the last test in the sequence is complete, the EST<br />
completion status is displayed (<strong>Table</strong> 4-9). Respond as indicated.<br />
If certain tests do not pass, safe ventilation may be<br />
compromised, and the ventilator is rendered inoperative until it<br />
is repaired. This is called a ventilator failure. If certain other<br />
tests do not pass, but ventilation might not be compromised<br />
(subject to a trained operator’s evaluation), this is called a<br />
ventilator fault.<br />
NOTE:<br />
Faults detected during EST may not require the ventilator to<br />
be serviced or removed from use immediately. A trained<br />
operator, however, must evaluate the situation and determine<br />
whether the ventilator can be used. Failures detected during<br />
EST require immediate servicing and removal <strong>of</strong> the ventilator<br />
from clinical use.<br />
4-24 10066984 Rev. D 700 Series Ventilator Operator’s Manual
If the EST<br />
result is:<br />
<strong>Table</strong> 4-9: EST completion status<br />
It means: Do this:<br />
EST passed All tests were<br />
performed and all<br />
passed.<br />
EST<br />
incomplete<br />
All tests passed, but<br />
some tests were<br />
skipped. The skipped<br />
tests were passed on a<br />
previous run.<br />
Self tests (SST and EST)<br />
To retest from start <strong>of</strong> test<br />
sequence, press alarm reset key.<br />
To exit EST and resume<br />
ventilation, press ACCEPT.<br />
Unblock the wye as directed, then<br />
press ACCEPT. POST now runs, and<br />
ventilation resumes at last valid<br />
settings.<br />
To retest from the start <strong>of</strong> the<br />
test sequence, press the alarm<br />
reset key.<br />
To exit EST and resume<br />
ventilation, press MANUAL INSP.<br />
You are then asked whether you<br />
want to use the override feature.<br />
Press MANUAL INSP again to<br />
complete the override. Unblock<br />
the wye as directed, then press<br />
ACCEPT. POST now runs, and<br />
ventilation resumes at last valid<br />
settings.<br />
700 Series Ventilator Operator’s Manual 10066984 Rev. D 4-25
Self tests (SST and EST)<br />
If the EST<br />
result is:<br />
<strong>Table</strong> 4-9: EST completion status (continued)<br />
It means: Do this:<br />
EST fault One or more tests did<br />
not pass. These tests<br />
might not compromise<br />
the ventilator’s ability<br />
to ventilate safely,<br />
based on the<br />
operator’s evaluation<br />
<strong>of</strong> the situation.<br />
To retest from the start <strong>of</strong> the<br />
test sequence, press the alarm<br />
reset key.<br />
To exit EST and resume<br />
ventilation, press MANUAL INSP.<br />
You are asked whether you want<br />
to use the override feature. Press<br />
MANUAL INSP again to complete<br />
the override. Unblock the wye as<br />
directed, then press ACCEPT. POST<br />
now runs, and ventilation<br />
resumes at last valid settings.<br />
Warning<br />
Do not use a ventilator that has completed EST with a<br />
fault status without verifying its operational integrity<br />
by means other than EST and determining that the<br />
patient will not be placed at risk.<br />
EST failed One or more tests<br />
failed that might<br />
compromise the<br />
ventilator’s ability to<br />
ventilate safely.<br />
A VENT INOP condition<br />
is declared when you<br />
cycle power to the<br />
ventilator.<br />
Contact service.<br />
To retest from the start <strong>of</strong> the<br />
test sequence, press the alarm<br />
reset key.<br />
4-26 10066984 Rev. D 700 Series Ventilator Operator’s Manual
Once ventilation begins<br />
This section tells you:<br />
• How to change settings (a quick review)<br />
• How to view and change alarm limits (a quick review)<br />
• How to adjust apnea parameters<br />
• How to view patient data<br />
• About the 100% O2 and MANUAL INSP keys<br />
• About the EXP PAUSE and INSP PAUSE keys<br />
5.1 Changing settings: a quick review<br />
This section describes changing settings, switching between volume<br />
control ventilation (VCV), pressure control ventilation (PCV, available<br />
on the 760 Ventilator only) and pressure support ventilation (PSV),<br />
and changing modes.<br />
5.1.1 Changing settings<br />
You can only change a setting that is part <strong>of</strong> the current or proposed<br />
mode and breath type, or is one <strong>of</strong> the three common settings (PEEP/<br />
CPAP, TRIGGER SENSITIVITY, and % O 2 ). For example, in SPONT mode,<br />
you cannot change TIDAL VOLUME. You can change several settings at<br />
once, or one at a time.
Once ventilation begins<br />
To change a setting: touch, turn, ACCEPT.<br />
1. Touch the key: The key lights, the selected setting flashes, and<br />
the message window shows the current setting, range, units,<br />
and name <strong>of</strong> the setting. (If applicable, associated parameter<br />
information is also displayed.)<br />
2. Turn the knob to adjust the setting.<br />
3. Repeat steps 1 and 2 for every setting you want to change.<br />
Press CLEAR to cancel the most recent setting.<br />
4. Press ACCEPT to apply the new settings. The key lights turn <strong>of</strong>f,<br />
new settings are displayed, and the message window displays<br />
this message:<br />
Setting(s) accepted<br />
5.1.2 Switching between VCV, PCV, and PSV<br />
To switch between breath types, you must first select a mode that<br />
allows it. Follow the steps in Section 5.1.3 to change the mode.<br />
If you try to select a breath type that is not allowed in the current<br />
mode, the ventilator displays this message:<br />
Choose mode before<br />
choosing type<br />
<strong>Table</strong> 5-1 summarizes which breath types are available on the<br />
740 and 760 Ventilators, and when those breath types are<br />
selectable.<br />
<strong>Table</strong> 5-1: Breath type availability<br />
Ventilator Breath types Comments<br />
740<br />
Ventilator<br />
760<br />
Ventilator<br />
• Volume control<br />
ventilation (VCV)<br />
• Pressure support<br />
ventilation (PSV)<br />
• VCV<br />
• PSV<br />
• Pressure control<br />
ventilation (PCV)<br />
• VCV not available in SPONT<br />
mode<br />
• PSV not available in A/C mode<br />
• All breath types available in<br />
SIMV mode.<br />
• VCV and PCV not available in<br />
SPONT mode<br />
• PSV not available in A/C mode<br />
• All breath types available in<br />
SIMV mode.<br />
5-2 10066984 Rev. D 700 Series Ventilator Operator’s Manual
5.1.3 Changing the mode<br />
Once ventilation begins<br />
During ventilation, the current mode key is lit and settings are<br />
displayed. To change the mode:<br />
1. Select the mode: Press A/C, SIMV, or SPONT. The key lights for<br />
the applicable settings flash.<br />
2. Select the breath type: If you selected A/C or SIMV modes, select<br />
VCV or PCV (760 only). If you selected SIMV or SPONT modes,<br />
select PSV.<br />
3. Select the settings: For every flashing key light, you must touch<br />
the key (and adjust the setting if necessary) before the new<br />
mode can be applied.<br />
4. You can change PEEP/CPAP, TRIGGER SENSITIVITY, and % O2 at<br />
any time, but you are not required to acknowledge or change<br />
these settings when you change the mode.<br />
5. Apply the settings: Press ACCEPT.<br />
NOTE:<br />
See Appendix D for a detailed explanation <strong>of</strong> mode and<br />
breath types.<br />
5.2 Viewing and changing alarm settings: a quick review<br />
You can view alarm settings at any time without affecting ventilation:<br />
just touch the appropriate key.<br />
You can change alarm settings at any time during ventilation. You<br />
can only change one alarm setting at a time. To change a setting:<br />
touch, turn, ACCEPT.<br />
1. Touch the key: The key lights steadily and the alarm setting<br />
flashes in its window for up to 30 seconds.<br />
2. Turn the knob to adjust the alarm setting. (You can adjust the<br />
setting as long as the setting flashes.)<br />
3. Press ACCEPT to apply the new alarm setting. The new alarm<br />
setting stops flashing, and the message window displays this<br />
message:<br />
Setting(s) accepted<br />
700 Series Ventilator Operator’s Manual 10066984 Rev. D 5-3
Once ventilation begins<br />
You cannot change alarm settings until ventilator settings have<br />
been accepted.<br />
5.3 Adjusting apnea parameters<br />
Warning<br />
To ensure that the patient is ventilated appropriately in case<br />
<strong>of</strong> apnea, you must review apnea parameters, and adjust them<br />
if necessary.<br />
NOTE:<br />
During an APNEA alarm, you can change APNEA PARAMS but<br />
not other settings.<br />
You can view or change apnea parameters only when apnea<br />
ventilation is possible (in SPONT mode, or in A/C or SIMV when<br />
RESPIRATORY RATE is less than 6 /minute).<br />
1. Press APNEA PARAMS to view apnea<br />
parameter settings. When apnea<br />
ventilation is possible, the ventilator<br />
shows this message when you have<br />
accepted settings and normal<br />
ventilation has started:<br />
Review Ta = xx s<br />
where Ta is the apnea inteval, and xx<br />
is the current apnea interval setting in<br />
seconds.<br />
For every flashing key light, touch the<br />
key (and adjust the setting if<br />
necessary), then apply the settings.<br />
APNEA<br />
PARAMS<br />
7-00086<br />
7-00066<br />
• On the 740 Ventilator, only VCV<br />
apnea ventilation settings (RESPIRATORY RATE, TIDAL VOLUME,<br />
and PEAK FLOW) are available.<br />
• On the 760 Ventilator, you can select VCV apnea settings or PCV<br />
apnea settings (RESPIRATORY RATE, INSPIRATORY PRESSURE,<br />
and I:E RATIO or TI ; RISE TIME FACTOR is fixed at 50%).<br />
5-4 10066984 Rev. D 700 Series Ventilator Operator’s Manual
Once ventilation begins<br />
2. To change apnea parameters: Touch<br />
each flashing key. Its key light stops<br />
flashing, the current setting flashes,<br />
and the message window shows the<br />
current setting, range, units, and<br />
name <strong>of</strong> the setting.<br />
3. Turn the knob to change the setting.<br />
4. Repeat for each flashing key light.<br />
5. Press ACCEPT to apply the new apnea<br />
ACCEPT<br />
ventilation settings. APNEA PARAMS<br />
turns <strong>of</strong>f and this message is<br />
displayed:<br />
Setting(s) accepted<br />
If you press CLEAR before settings<br />
have been accepted, apnea<br />
parameters will not be updated. The<br />
APNEA PARAMS key flashes, and the ventilator displays this<br />
message:<br />
All setup cancelled<br />
Update apnea<br />
5.3.1 Adjusting the apnea interval<br />
7-00068<br />
7-00067<br />
To adjust the apnea interval, select MENU option 4 (User settings)<br />
and follow these steps:<br />
1. Once you’ve selected the User settings menu function, press<br />
ACCEPT. Turn the knob to display:<br />
Apnea interval (Ta)<br />
Press ACCEPT.<br />
2. The ventilator displays this message:<br />
xx (10 - 60) s<br />
Apnea interval<br />
where xx is the apnea interval in seconds. Turn the knob to adjust<br />
the apnea interval from 10 to 60 seconds. Press CLEAR to cancel<br />
any changes, or press ACCEPT to select the new apnea interval<br />
and return to the list <strong>of</strong> user settings.<br />
700 Series Ventilator Operator’s Manual 10066984 Rev. D 5-5
Once ventilation begins<br />
5.4 Viewing patient data<br />
You can view patient data (pressure, breath timing, and volume<br />
values) on the 740 and 760 Ventilators at any time without affecting<br />
ventilation by pressing the appropriate key (see Figure 5-1). The key<br />
lights and the value is displayed in its window. Patient data values<br />
are continuously updated during ventilation.<br />
• During ventilation on the 740 and 760 Ventilators, if no alarm is<br />
active or autoreset, the first line <strong>of</strong> the message window displays<br />
% O2 (unless display <strong>of</strong> the oxygen sensor reading is disabled).<br />
% O2 information is overwritten by maneuver information (auto-<br />
PEEP, and compliance and resistance calculations), which is<br />
displayed for 30 seconds after a maneuver is complete. % O2 information is also displayed during an oxygen sensor calibration.<br />
If no maneuver information is being displayed, the first line is<br />
blanked when you select a setting or use the MENU key.<br />
• On the 740 and 760 Ventilators, peak inspiratory flow, end<br />
inspiratory flow, and end expiratory flow are displayed on the<br />
second, third, and fourth lines <strong>of</strong> the message window for every<br />
breath type (except that inspiratory flow is not displayed during<br />
VCV breaths and VCV apnea ventilation). You can use these<br />
values to adjust the settings for TI /I:E RATIO (for PCV breaths) and<br />
EXH SENSITIVITY (for PSV breaths). These flows are updated at<br />
the beginning <strong>of</strong> every inspiration or exhalation, and are<br />
displayed as follows:<br />
Flow (L/min)<br />
I: Peak: xx End xx<br />
E: End xx<br />
Pressing ALARM RESET blanks the third and fourth lines. Status<br />
messages may overwrite this information for up to 30 seconds.<br />
• If patient data is measured to be outside <strong>of</strong> the specified range,<br />
the minimum or maximum value flashes in its window.<br />
• The 760 keyboard also includes a volume bar graph (see Figure 5-2),<br />
which you can enable using the MENU key.<br />
5-6 10066984 Rev. D 700 Series Ventilator Operator’s Manual
HIGH<br />
PRESSURE<br />
alarm setting<br />
Peak pressure <strong>of</strong><br />
current breath at<br />
patient wye<br />
(displayed during<br />
exhalation only)<br />
LEDs show the<br />
rise and fall <strong>of</strong><br />
circuit<br />
pressure<br />
PATIENT DATA<br />
MAND ASSIST SPONT<br />
MEAN<br />
PRESSURE<br />
PRESSURE<br />
Press the appropriate key<br />
to view patient data<br />
Figure 5-1. Viewing patient data<br />
Once ventilation begins<br />
700 Series Ventilator Operator’s Manual 10066984 Rev. D 5-7<br />
7-00073<br />
Pressure is displayed in<br />
centimeters <strong>of</strong> water (cmH 2 O)<br />
or hectoPascals (hPa)<br />
PEAK<br />
PRESSURE<br />
7-00074
Once ventilation begins<br />
7-00050<br />
Active scale determined<br />
by HIGH TIDAL VOLUME<br />
setting<br />
HIGH TIDAL VOLUME<br />
alarm setting<br />
Maximum exhaled volume<br />
<strong>of</strong> previous breath displayed<br />
during exhalation<br />
LEDs show rise and fall<br />
<strong>of</strong> exhaled volume<br />
LOW TIDAL VOLUME<br />
alarm setting<br />
Figure 5-2. Volume bar graph (760 Ventilator only)<br />
5-8 10066984 Rev. D 700 Series Ventilator Operator’s Manual
5.5 The 100% O 2 and MANUAL INSP keys<br />
Once ventilation begins<br />
The 100% O 2 key delivers 100% oxygen to the patient for 2 minutes<br />
at any time except during apnea ventilation. Pressing CLEAR at any<br />
time after the 100% O 2 maneuver begins cancels the maneuver and<br />
the oxygen concentration returns to the set % O 2 .<br />
1. Press 100% O2 : The key lights and<br />
delivered oxygen concentration<br />
increases to 100%.<br />
2. Once the oxygen concentration<br />
reaches 100%, a 2-minute timer<br />
starts and the ventilator delivers<br />
100% O2 to the patient. Pressing<br />
the 100% O2 key again restarts the<br />
2-minute timer.<br />
3. When the 2-minute interval has elapsed, the 100% O 2 key light<br />
turns <strong>of</strong>f and the oxygen concentration returns to the set % O 2 .<br />
NOTE:<br />
The displayed EXHALED VOLUME for the first breath after you<br />
press the 100% O 2 key may be higher than the actual volume<br />
exhaled from the patient. The high displayed volume is a<br />
result <strong>of</strong> an initial flush <strong>of</strong> the ventilator with 100% O 2 and<br />
does not reflect actual volume delivered to the patient.<br />
The MANUAL INSP key delivers one<br />
mandatory breath to the patient<br />
according to the current settings (in<br />
A/C or SIMV mode) or the current<br />
apnea settings (in SPONT mode).<br />
You can deliver a MANUAL INSP at<br />
any time during the exhalation<br />
phase <strong>of</strong> a breath. (To deliver a<br />
7-00086<br />
MANUAL INSP, 200 ms <strong>of</strong> the exhalation phase must have<br />
elapsed, and expiratory flow must have decreased to 50% <strong>of</strong><br />
peak inspiratory flow. If you press INSP PAUSE during SPONT<br />
mode, a manual inspiration is delivered when 200 ms <strong>of</strong> the<br />
exhalation phase have elapsed, and expiratory flow is less than<br />
2 L/min for 50 ms) MANUAL INSP is not functional during apnea<br />
ventilation.<br />
700 Series Ventilator Operator’s Manual 10066984 Rev. D 5-9<br />
100%<br />
O2<br />
MANUAL<br />
INSP<br />
7-00086
Once ventilation begins<br />
4. Press MANUAL INSP; you do not have to hold the key down.<br />
The key lights and the ventilator displays this message:<br />
Man insp in progress<br />
5. When the manual inspiration is complete, the MANUAL INSP<br />
key light turns <strong>of</strong>f and breath delivery continues according to<br />
existing settings.<br />
5.6 The EXP PAUSE and INSP PAUSE keys (760 only)<br />
You can use the EXP PAUSE key to calculate<br />
the patient’s auto-PEEP (an estimate <strong>of</strong> the<br />
pressure that remains in the patient’s lungs<br />
at the end <strong>of</strong> exhalation, also known as<br />
intrinsic PEEP or occult PEEP). The presence<br />
<strong>of</strong> end expiratory flow (displayed as<br />
E: End xx in the message window) indicates<br />
the presence <strong>of</strong> auto-PEEP.<br />
EXP<br />
PAUSE<br />
7-00086<br />
1. Press the EXP PAUSE key during inspiration or exhalation: The<br />
key lights, and the ventilator closes the exhalation valve at the<br />
end <strong>of</strong> the expiratory phase without delivering a breath.<br />
Until the maneuver begins, the ventilator displays this message:<br />
Exp pause requested<br />
During the maneuver the ventilator displays this message:<br />
Exp pause active<br />
2. The EXP PAUSE maneuver ends when you release the key: hold<br />
the key down only until expiratory pressure stabilizes (watch<br />
the pressure bar graph or the message window).<br />
3. Once you release the EXP PAUSE key, the message window<br />
continues to display the patient’s calculated auto-PEEP for<br />
30 seconds:<br />
PEEP: i=xxx t=xxx<br />
where i is intrinsic PEEP and t is the total PEEP<br />
(total PEEP = measured PEEP + intrinsic PEEP).<br />
Once the maneuver is complete, the ventilator immediately<br />
delivers the mandatory breath that was suspended for the<br />
maneuver.<br />
5-10 10066984 Rev. D 700 Series Ventilator Operator’s Manual
Once ventilation begins<br />
An EXP PAUSE maneuver also ends if the patient initiates a breath,<br />
an alarm occurs, the expiratory phase (including the pause) lasts<br />
longer than 20 seconds, or the ventilator detects a leak. If the EXP<br />
PAUSE maneuver is cancelled for any reason, the ventilator displays<br />
this message:<br />
Exp pause cancelled<br />
You can use the INSP PAUSE key to:<br />
INSP<br />
PAUSE<br />
• Calculate the patient’s compliance<br />
(an estimate <strong>of</strong> the elasticity <strong>of</strong> the<br />
patient’s lungs) and resistance<br />
(an estimate <strong>of</strong> how restrictive the<br />
patient’s airway is, based on the<br />
pressure drop at a given flow) by<br />
pressing, then immediately releasing, the INSP PAUSE key to<br />
7-00086<br />
generate a momentary inspiratory pause <strong>of</strong> two seconds or less.<br />
• Expand the patient’s lungs for purposes such as x-rays or lung<br />
mechanics by holding down the INSP PAUSE key for more than<br />
two seconds after the start <strong>of</strong> the pause to generate an extended<br />
inspiratory pause. The pause continues as long as you hold down<br />
the key (up to a maximum <strong>of</strong> ten seconds). Compliance and<br />
resistance are also displayed at the end <strong>of</strong> an extended INSP<br />
PAUSE maneuver.<br />
The INSP PAUSE maneuver is performed during a mandatory breath,<br />
and if SPONT mode is selected, the ventilator delivers a mandatory<br />
breath according to current apnea settings when the exhaled flow<br />
for the last breath drops below 2 L/min. Compliance can be calculated<br />
for VCV or PCV breaths, and resistance can be calculated only for VCV<br />
breaths.<br />
If you request a momentary pause, you can press CLEAR before or<br />
during the pause to cancel the maneuver. An INSP PAUSE maneuver<br />
(momentary or extended) is also cancelled if an alarm occurs or if<br />
circuit pressure reaches the HIGH PRESSURE setting.<br />
700 Series Ventilator Operator’s Manual 10066984 Rev. D 5-11
Once ventilation begins<br />
If the INSP PAUSE maneuver is cancelled for any reason, the<br />
ventilator displays this message:<br />
Insp pause cancelled<br />
1. Press the INSP PAUSE key during inspiration or exhalation: the<br />
key lights, and the ventilator adds a plateau (keeps the<br />
exhalation valve closed) at the end <strong>of</strong> the inspiratory phase <strong>of</strong><br />
the current or next mandatory breath.<br />
• For a momentary pause, press and release the INSP PAUSE<br />
key, or<br />
• For an extended pause, hold down the INSP PAUSE key for<br />
more than two seconds after the pause starts.<br />
Until the maneuver begins, the ventilator displays this message:<br />
Insp pause requested<br />
During the maneuver the ventilator displays this message:<br />
Insp pause active<br />
2. The INSP PAUSE maneuver ends when:<br />
• the ventilator detects a stable plateau pressure or two<br />
seconds have elapsed (for a momentary pause), or<br />
• you release the key or ten seconds have elapsed (for an<br />
extended pause).<br />
3. Once the maneuver is complete, the message window displays<br />
the patient’s calculated compliance and resistance for 30 seconds:<br />
C = (xxx)? R = (xxx)?<br />
where:<br />
• xxx is the calculated value <strong>of</strong> compliance or resistance.<br />
• Values from 0.0 to 9.9 are displayed as x.x, values from 10 to<br />
99 are displayed as _xx, and values from 100 and above are<br />
displayed as xxx.<br />
• C (compliance) is measured in units <strong>of</strong> mL/cmH2O, and<br />
R (resistance) is measured in units <strong>of</strong> cmH2O/L/second. • Parentheses ( ) indicate potentially inaccurate values, and<br />
appear around both values when the inspiratory time is short<br />
and the compliance or resistance is large. (Check for patient<br />
airway occlusion or adjust settings to increase the inspiratory<br />
time.)<br />
5-12 10066984 Rev. D 700 Series Ventilator Operator’s Manual
Once ventilation begins<br />
• A question mark ? indicates potentially inaccurate values,<br />
and appears after both values if the pressure was unstable at<br />
the end <strong>of</strong> the plateau. (Possible causes for this may be an<br />
excessive leak, excessive tube movement, or the patient<br />
fighting the ventilator.) A question mark ? appears after the<br />
resistance value if the inspiratory pressure rise was too fast or<br />
too slow. (A possible cause may be a peak flow or tidal<br />
volume that is inappropriate for a given respiratory rate.)<br />
• Three dashes (- - -) appear after R when the ventilator is in<br />
PCV, since resistance can’t be measured in PCV.<br />
700 Series Ventilator Operator’s Manual 10066984 Rev. D 5-13
This page is intentionally blank.<br />
5-14 10066984 Rev. D 700 Series Ventilator Operator’s Manual
The MENU key<br />
You can use the MENU key at any time to:<br />
• View all active alarms.<br />
• View all autoreset alarms.<br />
• Run SST and EST (Chapter 4 tells you how to run these self tests.)<br />
• Select user settings, including endotracheal (ET) tube size,<br />
humidifier type, ventilator date and time, apnea interval, VCV<br />
flow pattern, speaking valve setup, alarm volume, PCV timing<br />
variable (760 Ventilator only), and volume LED bar enable/disable<br />
(760 Ventilator only).<br />
• Use oxygen sensor functions, including calibration, O2 % alarm<br />
limit enable/disable, and O2 sensor display enable/disable.<br />
• Enter standby mode (Chapter 3 tells you how to enter and exit<br />
standby mode).<br />
• View battery information.<br />
• View the s<strong>of</strong>tware revision.<br />
• View the service summary.<br />
• Use the EasyNeb Nebulizer functions, including, start<br />
nebulization, stop nebulization, and view nebulization state.
The MENU key<br />
Menu information is displayed on the second line <strong>of</strong> the message<br />
window. (The first line is reserved for displaying the highest-priority<br />
active or autoreset alarm, if any, and any relevant breath or<br />
maneuver information.)<br />
To access the menu function, remember: touch, turn, ACCEPT.<br />
1. Touch MENU. The MENU key lights<br />
MENU<br />
and the first menu function is<br />
displayed in the message window.<br />
2. Turn the knob to select a<br />
menu function.<br />
7-00086<br />
7-00068<br />
3. Press ACCEPT to enter the menu<br />
function. <strong>Table</strong> 6-1 summarizes the<br />
menu functions.<br />
ACCEPT<br />
• Turning the knob scrolls through<br />
the menu items or changes a<br />
menu setting.<br />
• Press ACCEPT to select a function<br />
or setting.<br />
7-00067<br />
• Press CLEAR to cancel the current function or the displayed<br />
setting, or to exit from the menu function.<br />
• You can view any patient data, or press the alarm reset or<br />
alarm silence key, without affecting the menu function.<br />
• Pressing any ventilator settings or alarm settings key exits<br />
the menu function and cancels any changes in progress.<br />
6-2 10066984 Rev. D 700 Series Ventilator Operator’s
<strong>Table</strong> 6-1: Menu function summary<br />
MENU option Function<br />
1. More active<br />
alarms<br />
2. Autoreset<br />
alarms<br />
The MENU key<br />
Lists other active alarms in order <strong>of</strong> priority.<br />
(The highest-priority active alarm is always displayed<br />
on the first line <strong>of</strong> the message window.)<br />
Turning the knob displays other active alarms.<br />
The alarm reset key clears (erases) this list.<br />
Lists alarms that have autoreset since alarm reset key<br />
was last pressed.<br />
Turning the knob lists other autoreset alarms.<br />
The alarm reset key clears (erases) this list.<br />
3. Self tests Begins short self test (SST) or extended self test (EST).<br />
See Chapter 4 for detailed instructions on running SST<br />
and EST.<br />
700 Series Ventilator Operator’s Manual 10066984 Rev. D 6-3
The MENU key<br />
<strong>Table</strong> 6-1: Menu function summary (continued)<br />
MENU option Function<br />
4. User settings Selects the following:<br />
• Endotracheal tube: selects the patient’s ET tube<br />
size. This allows the ventilator to adjust breath<br />
delivery in PCV (760 Ventilator only) and PSV<br />
accordingly.<br />
• Humidifier type: selects the humidifier type (HME,<br />
dual heated wire, or no heated wire). This option<br />
helps correct spirometry calculations without<br />
re-running SST.<br />
• Date and time set: sets ventilator date and time.<br />
CLEAR returns to user settings.<br />
• Apnea interval (Ta): sets the apnea interval from<br />
10 to 60 seconds.<br />
• VCV flow pattern: selects a squre or ramp flow<br />
waveform for VCV mandatory breaths, including<br />
apnea breaths.<br />
• Speaking valve setup: selects settings for use with<br />
one-way valves that allow patients to speak.<br />
• Alarm volume: selects the loudness <strong>of</strong> the audible<br />
alarm from 1 to 5 (5 is the loudest), then return to<br />
user settings. You can adjust the alarm volume even<br />
when the alarm silence is active.<br />
• PCV timing setting (760 Ventilator only): selects<br />
the I:E ratio or inspiratory time setting to remain<br />
constant when the respiratory rate setting changes.<br />
• Volume LED bar (760 Ventilator only): enables or<br />
disables the volume bar graph.<br />
6-4 10066984 Rev. D 700 Series Ventilator Operator’s
5. Oxygen<br />
sensor<br />
6. Standby<br />
mode<br />
The MENU key<br />
Selects these oxygen sensor functions:<br />
• Calibrate O 2 sensor: allows you to perform a twopoint<br />
calibration <strong>of</strong> the oxygen sensor. Only available<br />
before normal ventilation begins (patient must not<br />
be connected).<br />
NOTE:<br />
<strong>Covidien</strong> recommends calibrating the oxygen<br />
sensor once a week or with each new patient.<br />
• O 2 alarm info: allows you to enable or disable the<br />
oxygen sensor.<br />
• O 2 sensor display: allows you to enable or disable<br />
displaying the oxygen sensor reading (unless an<br />
alarm is active) in the message window, which is<br />
updated several times per second.<br />
Places the ventilator in a non-ventilating waiting<br />
state. See Chapter 3 for detailed instructions on<br />
entering and exiting standby mode.<br />
7. Battery info Displays the estimated operational time remaining on<br />
the internal and external batteries until they need<br />
recharging. (Available only when ventilator has been<br />
operating on battery power for at least two minutes.)<br />
8. S<strong>of</strong>tware<br />
revision<br />
9. Service<br />
summary<br />
<strong>Table</strong> 6-1: Menu function summary (continued)<br />
MENU option Function<br />
Displays the version <strong>of</strong> s<strong>of</strong>tware installed in the<br />
ventilator.<br />
Allows you to view estimates <strong>of</strong> oxygen sensor life<br />
remaining, internal battery operational time<br />
remaining, and time until the next preventive<br />
maintenance is due.<br />
10. Nebulizer Allows you to start, stop, or view the current state <strong>of</strong><br />
an EasyNeb Nebulizer attached to the ventilator.<br />
700 Series Ventilator Operator’s Manual 10066984 Rev. D 6-5
The MENU key<br />
6.1 More active alarms<br />
1. Once you’ve selected the More active alarms menu function,<br />
press ACCEPT.<br />
The message window displays the list <strong>of</strong> currently active alarms,<br />
except the highest-priority active alarm, which is always flashing<br />
on the first line <strong>of</strong> the message window.<br />
2. Turn the knob to scroll through the list <strong>of</strong> active alarms, which<br />
are listed in order <strong>of</strong> priority (see Figure 6-1). Each alarm is listed<br />
only once, even if the alarm occurred several times.<br />
3. Press CLEAR to return to the list <strong>of</strong> menu functions.<br />
Pressing the alarm reset key clears the More active alarms list.<br />
If a new alarm becomes active, or a currently active alarm<br />
becomes autoreset, the ventilator exits the active alarm list and<br />
returns to the list <strong>of</strong> menu functions.<br />
6.2 Autoreset alarms<br />
DISCONNECT<br />
1. HI RESP RATE<br />
Highest-priority active alarm<br />
flashes on first line <strong>of</strong> message<br />
window. If no alarm is active,<br />
the first line shows the<br />
highest-priority reset alarm.<br />
Turn knob to scroll through<br />
list <strong>of</strong> active alarms, which<br />
are numbered in order <strong>of</strong><br />
priority.<br />
Figure 6-1. Using the More active alarms menu function<br />
to view active alarms<br />
1. Once you’ve selected the Autoreset alarms menu function,<br />
press ACCEPT.<br />
The message window displays a list <strong>of</strong> alarms that have been<br />
autoreset since the last time the alarm reset key was pressed.<br />
The highest-priority active alarm is always flashing on the first<br />
line <strong>of</strong> the message window. If no alarm is active, the first line<br />
shows the highest-priority autoreset alarm.<br />
6-6 10066984 Rev. D 700 Series Ventilator Operator’s
6.3 Self tests<br />
The MENU key<br />
2. Turn the knob to scroll through the list <strong>of</strong> autoreset alarms, which<br />
are listed in order <strong>of</strong> priority (see Figure 6-2). Each autoreset alarm<br />
is listed only once, even if the alarm was autoreset several times.<br />
3. Press CLEAR to return to the list <strong>of</strong> menu functions.<br />
Pressing the alarm reset key clears the Autoreset alarms list.<br />
If a new alarm becomes active, or a currently active alarm becomes<br />
autoreset, the ventilator exits the autoreset alarm list and returns to<br />
the list <strong>of</strong> menu functions.<br />
LOW INSP PRESSURE<br />
1. LO EX TIDAL VOLUME<br />
Highest-priority active alarm<br />
flashes on first line <strong>of</strong> message<br />
window. If no alarm is active,<br />
the first line shows the highestpriority<br />
reset alarm.<br />
Turn knob to scroll through<br />
list <strong>of</strong> active alarms, which<br />
are numbered in order <strong>of</strong><br />
priority.<br />
Figure 6-2. Using the Autoreset alarms menu function<br />
to view autoreset alarms<br />
The Self tests menu option allows you to run short self-test (SST) or<br />
extended self test (EST). SST checks for leaks, determines the compliance<br />
<strong>of</strong> the ventilator breathing circuit, and verifies the proper operation <strong>of</strong><br />
the ventilator. EST is a thorough test <strong>of</strong> the operational integrity <strong>of</strong><br />
the ventilator’s electronics and pneumatics, and should be run<br />
following service. Chapter 4 tells you how to run SST and EST.<br />
700 Series Ventilator Operator’s Manual 10066984 Rev. D 6-7
The MENU key<br />
6.4 User settings<br />
1. Once you’ve selected the User settings menu function, press<br />
ACCEPT. Turn the knob to display one <strong>of</strong> these messages:<br />
Endotracheal tube<br />
Humidifier type<br />
Date and time set<br />
Apnea interval (Ta)<br />
VCV flow pattern<br />
Speaking valve setup<br />
Alarm volume<br />
PCV timing setting<br />
Volume LED bar<br />
2. Press ACCEPT to select the option.<br />
6.4.1 Endotracheal tube<br />
If you select Endotracheal tube, the ventilator displays the current ET<br />
size setting.<br />
1. Turn the knob to select the appropriate size for the patient.<br />
2. Press ACCEPT to apply and return to the list <strong>of</strong> user settings.<br />
Press CLEAR to exit without making any changes.<br />
6.4.2 Humidifier type<br />
1. If you select Humidifier type, the ventilator displays the<br />
currently-selected type:<br />
• HME: Heat-moisture exchanger (“artificial nose”)<br />
• Dual heated wire: humidifier with heated wire on expiratory<br />
limb, or on both inspiratory and expiratory limbs<br />
• No heated wire: conventional humidifier, no heated wire on<br />
expiratory limb<br />
2. Turn the knob to select the humidifier type attached, then press<br />
ACCEPT. Press CLEAR to exit without making any changes.<br />
6-8 10066984 Rev. D 700 Series Ventilator Operator’s
6.4.3 Date and time set<br />
The MENU key<br />
1. If you select Date and time set, turn the knob to display one <strong>of</strong><br />
these messages, then press ACCEPT:<br />
Time set<br />
Date set<br />
2. If you are setting the time, the message window displays one <strong>of</strong><br />
these messages:<br />
12hr: hh:mm am<br />
12hr: hh:mm pm<br />
24hr: hh:mm<br />
The time (hh = hours; mm = minutes) is displayed in 12- or 24-hour<br />
format. This format can be changed by a qualified service technician.<br />
3. If you are setting the date, the message window displays one <strong>of</strong><br />
these messages:<br />
EUR: dd/mm/yy<br />
US: mm/dd/yy<br />
Whether the date is displayed in European (day/month/year) or<br />
American (month/day/year) format can be changed by a<br />
qualified field service technician.<br />
4. Turn the knob to adjust the value <strong>of</strong> each time or date field,<br />
then press ACCEPT. The next field is then selected. Even if you<br />
make no change, press ACCEPT for each field. You must confirm<br />
or change all fields <strong>of</strong> the time or date message before the new<br />
time or date can be applied.<br />
5. Once you have selected the new time or date, the message<br />
window returns to the Time set or Date set messages. You can<br />
turn the knob to select time or date, or press CLEAR to return to<br />
the list <strong>of</strong> user settings.<br />
700 Series Ventilator Operator’s Manual 10066984 Rev. D 6-9
The MENU key<br />
6.4.4 Apnea interval (Ta)<br />
1. If you select Apnea inteval (Ta), the ventilator displays this<br />
message:<br />
xx (10 - 60) s<br />
Apnea interval<br />
where xx is the apnea interval in seconds.<br />
2. Turn the knob to select an apnea interval from 10 to 60 seconds.<br />
3. Press CLEAR to cancel any changes, or press ACCEPT to apply the<br />
new interval and return to the list <strong>of</strong> user settings.<br />
6.4.5 VCV flow pattern<br />
1. If you select VCV flow pattern, the ventilator displays this<br />
message:<br />
VCV Flow: xxxxxx<br />
Ti = y.yy s<br />
where xxxxxx is the currently selected flow pattern and y.yy is<br />
the current inspiratory time (the value <strong>of</strong> y.yy depends on the<br />
selected flow pattern).<br />
2. Turn the knob to select RAMP (descending ramp flow pattern)<br />
or SQUARE (square flow pattern).<br />
If the flow pattern change would result in a violation <strong>of</strong> breath<br />
delivery boundaries, the ventilator displays one <strong>of</strong> these<br />
messages:<br />
Change not permitted<br />
Adjust VCV first<br />
or<br />
Change not permitted<br />
Adjust Ap. VCV first<br />
3. Press CLEAR to cancel any changes, or press ACCEPT to select the<br />
new flow pattern and return to the list <strong>of</strong> user settings.<br />
6-10 10066984 Rev. D 700 Series Ventilator Operator’s
The MENU key<br />
NOTE:<br />
When VCV is the current or proposed breath type and there<br />
are no active or autoreset alarms, the ventilator displays one<br />
<strong>of</strong> the following messages on the first line <strong>of</strong> the message<br />
window:<br />
VCV RAMP FLOW<br />
VCV SQUARE FLOW<br />
6.4.6 Speaking valve setup<br />
700 Series Ventilators now <strong>of</strong>fer a speaking valve option for use with<br />
one-way valves that allow patients to speak. Because exhaling<br />
through a speaking valve affects the accuracy <strong>of</strong> any exhaled volume<br />
measurements, the ventilator monitors delivered (instead <strong>of</strong> exhaled)<br />
volume to detect the LOW TIDAL VOLUME and HIGH TIDAL VOLUME<br />
alarms, and turns <strong>of</strong>f the LOW MINUTE VOLUME and DISCONNECT<br />
alarms. Once the speaking valve option is enabled, it remains in effect<br />
until you disable the option, the ventilator is turned <strong>of</strong>f, the ventilator<br />
exits standby mode, a ventilator inoperative condition occurs, or any<br />
other reset condition occurs.<br />
700 Series Ventilator Operator’s Manual 10066984 Rev. D 6-11
The MENU key<br />
Warning<br />
Enabling the speaking valve option requires that competent<br />
medical practitioners closely monitor the patient and<br />
ventilator. Because the speaking valve option decreases the<br />
ventilator’s ability to detect some conditions, ensure that all<br />
ventilator settings and alarm limits are set appropriately. In<br />
the case <strong>of</strong> these specific conditions, consider the following:<br />
• Low pressure delivered to the patient: check for appropriate<br />
LOW INSP PRESSURE alarm and the apnea interval settings,<br />
check the ventilator breathing circuit regularly for water<br />
buildup.<br />
• Possible breath stacking (that is, delivering a breath before<br />
the previous breath is complete): check for appropriate<br />
TRIGGER SENSITIVITY and other mandatory settings.<br />
• Low respiratory rate delivered to the patient: check for<br />
appropriate RESPIRATORY RATE setting.<br />
• Low flows delivered to the patient: monitor patient’s<br />
condition and check for appropriate LOW TIDAL VOLUME<br />
alarm and ventilator settings.<br />
• High flows delivered to the patient: monitor the patient’s<br />
condition and check for appropriate HIGH TIDAL VOLUME<br />
and HIGH PRESSURE alarm settings.<br />
• Exhaling through a speaking valve affects the accuracy <strong>of</strong><br />
the INSP PAUSE and EXP PAUSE maneuvers (760 Ventilator<br />
only).<br />
Read the manufacturer’s instructions in their entirety before<br />
attempting to use the speaking valve.<br />
To select the speaking valve option, select MENU option 4 (User settings).<br />
See the MENU key section <strong>of</strong> the 700 Series Ventilator System Operator’s<br />
Manual for complete information on using MENU functions. Follow these<br />
steps to select the speaking valve option:<br />
1. Once you’ve selected the User settings menu function, press<br />
ACCEPT. Turn the knob to display:<br />
Speaking valve setup<br />
Press ACCEPT.<br />
6-12 10066984 Rev. D 700 Series Ventilator Operator’s
The MENU key<br />
2. The message window shows this message:<br />
Speaking valve XXX<br />
where XXX is the current option status (ON or OFF). Turn the<br />
knob to select ON (option enabled) or OFF (option disabled).<br />
Press CLEAR to cancel any changes, or press ACCEPT to select the<br />
displayed status.<br />
3. At each <strong>of</strong> these prompts, press ACCEPT to proceed with the<br />
speaking valve setup or CLEAR to return to user settings without<br />
enabling the speaking valve option:<br />
Volume alarms based<br />
on delivered volume<br />
Alarm DISABLED<br />
Low minute volume<br />
Alarm DISABLED<br />
Disconnect alarm<br />
NOTE:<br />
Because the ventilator monitors delivered (instead <strong>of</strong><br />
exhaled) volume to detect the LOW TIDAL VOLUME and<br />
HIGH TIDAL VOLUME alarms when the speaking valve<br />
option is enabled, their alarm messages change as follows:<br />
• HIGH TIDAL VOLUME (instead <strong>of</strong> HI EX TIDAL VOLUME)<br />
• LOW TIDAL VOLUME (instead <strong>of</strong> LO EX TIDAL VOLUME)<br />
The recommended alarm handling (described in Chapter 7 <strong>of</strong><br />
this manual) for these conditions is unchanged.<br />
4. The ventilator then prompts you to set PEEP. The default and<br />
recommended PEEP setting is 0.0 H2O (to minimize the<br />
probability <strong>of</strong> autocycling), but you can choose a different<br />
setting:<br />
Recommend 0.0 cmH2O PEEP/CPAP<br />
If you adjust the setting, the ventilator displays:<br />
xx (0-35) cmH 2 O<br />
PEEP/CPAP<br />
700 Series Ventilator Operator’s Manual 10066984 Rev. D 6-13
The MENU key<br />
Once you have selected the setting, press ACCEPT to proceed<br />
with the speaking valve setup or CLEAR to return to user<br />
settings without enabling the speaking valve option.<br />
5. The ventilator then prompts you to review the apnea interval. The<br />
default and recommended apnea interval setting is 10 seconds,<br />
but you can choose a different setting:<br />
Recommend 10 s<br />
Apnea interval<br />
If you adjust the setting, the ventilator displays:<br />
xx (10 - 60) s<br />
Apnea interval<br />
Once you have selected the setting, press ACCEPT to enable the<br />
option, or press CLEAR to return to user settings without<br />
enabling the option.<br />
6. The ventilator then prompts you to review the LOW INSP PRESSURE<br />
alarm limit. If A/C or SIMV mode is active, the ventilator displays:<br />
Review xx cmH2O Low insp pressure<br />
If you adjust the setting, the ventilator displays:<br />
xx (3 - 60) cmH2O Low insp pressure<br />
In SPONT mode the LOW INSP PRESSURE alarm is not normally<br />
available, but is active when the speaking valve option is enabled.<br />
This helps the ventilator to detect a disconnected patient circuit.<br />
The default and recommended LOW INSP PRESSURE alarm limit in<br />
SPONT mode is based on the target pressure, but you can choose a<br />
different setting:<br />
Recommend xx cmH2O Low insp pressure<br />
If you adjust the setting, the ventilator displays:<br />
xx (3 - 60) cmH2O Low insp pressure<br />
Once you have selected the setting, press ACCEPT to enable the<br />
speaking valve option or CLEAR to return to user settings<br />
without enabling the speaking valve option.<br />
6-14 10066984 Rev. D 700 Series Ventilator Operator’s
The MENU key<br />
NOTE:<br />
When the speaking valve option is enabled and there are no<br />
active or autoreset alarms, the ventilator displays these<br />
messages on the first line <strong>of</strong> the message window:<br />
DISCONNECT DISABLED<br />
SPEAKING VALVE ON<br />
DELIVERED VOLUME xxxxml (740 Ventilator only)<br />
To help you select the HIGH TIDAL VOLUME and LOW TIDAL VOLUME<br />
alarm settings when the speaking valve option is enabled, the<br />
ventilator displays delivered volume:<br />
• In the message window (740 Ventilator).<br />
• In the DELIVERED VOLUME (mL) display (760 Ventilator).<br />
760 Ventilator only: turning the speaking valve option on<br />
disables the volume bar graph.<br />
7. To disable the speaking valve option, select the User settings<br />
menu function, then turn the knob to select the Speaking valve<br />
setup option. Turn the knob to display:<br />
Speaking valve OFF<br />
then press ACCEPT to disable the option or CLEAR to exit and<br />
leave the option enabled.<br />
700 Series Ventilator Operator’s Manual 10066984 Rev. D 6-15
The MENU key<br />
8. If you choose to disable the speaking valve option, the ventilator<br />
displays the following messages to tell you that it is resuming<br />
exhaled volume monitoring to detect the LOW TIDAL VOLUME<br />
and HIGH TIDAL VOLUME alarms, and restoring the previous<br />
settings for PEEP/CPAP, LOW MINUTE VOLUME alarm, DISCONNECT<br />
alarm, LOW INSP PRESSURE alarm, and the apnea interval:<br />
Volume alarms based<br />
on exhaled volume<br />
Restore to x.xL<br />
Low minute volume<br />
Alarm RESTORED<br />
Disconnect alarm<br />
Restore to x.xcmH2O PEEP/CPAP<br />
Restore to xx s<br />
Apnea interval<br />
When A/C or SIMV mode is active:<br />
Restore to xx cmH2O Low insp pressure<br />
When SPONT mode is active:<br />
No LIP alrm in SPONT<br />
NOTE:<br />
If a setting changed when the speaking valve option was<br />
enabled that makes any <strong>of</strong> these previous settings invalid, the<br />
ventilator displays the maximum valid value for that setting in<br />
its Restore message.<br />
On the 760 Ventilator, if the volume bar graph was disabled by<br />
turning the speaking valve option on, it is re-enabled when<br />
the option is <strong>of</strong>f.<br />
Press ACCEPT at each prompt to disable the option and return<br />
to user settings. Press CLEAR to exit and leave the option<br />
enabled.<br />
6-16 10066984 Rev. D 700 Series Ventilator Operator’s
6.4.7 Alarm volume<br />
The MENU key<br />
1. If you select Alarm volume, the ventilator displays this message:<br />
Volume level: x<br />
An audible tone sounds that corresponds to x, the alarm volume<br />
for a high-priority alarm.<br />
2. Turn the knob to adjust the alarm volume from 1 to 5 (where 5<br />
is the loudest).<br />
3. Press CLEAR to cancel any changes, or press ACCEPT to select the<br />
new alarm volume and return to the list <strong>of</strong> user settings.<br />
6.4.8 PCV timing setting<br />
1. If you select PCV timing setting (760 Ventilator only), the<br />
ventilator displays the currently-selected variable (one <strong>of</strong> these<br />
messages):<br />
Timing variable = Ti<br />
Timing variable = I:E<br />
This allows you to change which timing variable remains<br />
constant when the respiratory rate setting changes in PCV<br />
(the currently-selected variable is lit on the keyboard).<br />
2. Turn the knob to select TI (inspiratory time) or I:E (I:E ratio).<br />
3. Press CLEAR to cancel any changes, or press ACCEPT to change<br />
the timing variable and return to the list <strong>of</strong> user settings.<br />
6.4.9 Volume LED bar<br />
1. If you select Volume LED bar (760 Ventilator only), the ventilator<br />
displays one <strong>of</strong> these messages:<br />
Enable LED bar<br />
Disable LED bar<br />
2. Turn the knob to enable or disable the volume LED bar.<br />
3. Press ACCEPT to select Enable or Disable and return to the list <strong>of</strong><br />
user settings. Press CLEAR to exit without making any change.<br />
700 Series Ventilator Operator’s Manual 10066984 Rev. D 6-17
The MENU key<br />
6.5 Oxygen sensor<br />
1. Once you’ve selected the Oxygen sensor menu function, press<br />
ACCEPT. Turn the knob to display one <strong>of</strong> these messages:<br />
Calibrate O2 sensor<br />
O2 alarm info<br />
O2 sensor display<br />
2. Press ACCEPT.<br />
3. If you selected Calibrate O2 sensor, turn the knob to display one<br />
<strong>of</strong> these messages:<br />
Start O2 calibration<br />
Exit O2 calibration<br />
Once normal ventilation has begun, you cannot perform an<br />
oxygen sensor calibration until you turn <strong>of</strong>f the ventilator and<br />
restart without entering ventilation. (The ventilator must be<br />
connected to a 50-psi oxygen source to perform a calibration.)<br />
4. Turn the knob to display Start O2 calibration, then press ACCEPT.<br />
While the calibration is in progress, the message window shows<br />
this message:<br />
Start O2 calibration<br />
Please wait...<br />
Once the calibration has begun, you can only restart the<br />
calibration or exit. Oxygen sensor calibration takes<br />
approximately 5 minutes.<br />
5. When the calibration is complete press ACCEPT, turn the<br />
knob to display Exit O2 calibration, then press ACCEPT. The<br />
ventilator restarts.<br />
NOTE:<br />
If the calibration is not successful, contact service. To continue<br />
ventilating (if indicated by your institution’s protocol), disable<br />
the oxygen sensor (select O 2 alarm info from the Oxygen<br />
sensor menu function). <strong>Covidien</strong> recommends using an<br />
external oxygen monitor whenever the ventilator’s oxygen<br />
sensor is disabled.<br />
6-18 10066984 Rev. D 700 Series Ventilator Operator’s
The MENU key<br />
6. If you selected O2 alarm info, turn the knob to display one <strong>of</strong><br />
these messages:<br />
Enable O2 alarm +/-10%<br />
Disabled O2 alarm<br />
Press ACCEPT to select Enable or Disabled and return to the<br />
Oxygen sensor function. Press CLEAR to exit without making<br />
a change.<br />
The O 2 alarm info function allows you to enable or disable the<br />
O 2% alarm limits by suspending all oxygen sensing capability from<br />
the inspiratory limb <strong>of</strong> the ventilator. Disabling the O 2% alarm<br />
does not disable the LOW O 2 SUPPLY alarm.<br />
NOTE:<br />
The O 2 % alarm limits are based on the set % O 2, and are not<br />
operator-adjustable. The high O 2% alarm limit is ten percentage<br />
points above the set % O 2, and the low O 2% alarm limit is ten<br />
percentage points below the set % O 2.<br />
Warning<br />
<strong>Covidien</strong> recommends that the O2 % alarm limits be enabled<br />
at all times, unless the oxygen sensor is depleted. Replace a<br />
defective or depleted oxygen sensor as soon as possible.<br />
NOTE:<br />
When the O2% alarm is disabled, the message window<br />
displays this message throughout normal ventilation:<br />
% O2 ALARMS DISABLED<br />
Whenever the ventilator is powered on or exits standby mode, the<br />
oxygen sensor is enabled and continuously measures the delivered<br />
oxygen concentration. The measured value <strong>of</strong> % O2 is displayed,<br />
and triggers an alarm if the delivered value is 10 percentage points<br />
higher or lower than the set % O2. 700 Series Ventilator Operator’s Manual 10066984 Rev. D 6-19
The MENU key<br />
7. If you selected O2 sensor display, the window shows one <strong>of</strong><br />
these messages (the option that is currently selected is<br />
displayed):<br />
Enable O2 display<br />
Disable O2 display<br />
Press ACCEPT to select Start or Stop and return to the Oxygen<br />
sensor function. Press CLEAR to exit without making a change. If<br />
the display is enabled, the first line <strong>of</strong> the message window<br />
shows % O2 reading if no alarm is active.<br />
6.6 Standby mode<br />
6.7 Battery info<br />
Standby mode is a waiting state used for maintaining ventilator<br />
settings and battery charging, in which there is no ventilation.<br />
Chapter 3 tells you how to enter and exit standby mode.<br />
Warning<br />
To avoid patient injury due to lack <strong>of</strong> ventilatory support, do<br />
not enter standby mode with a patient attached to the<br />
ventilator. You must confirm that no patient is attached<br />
before entering standby mode.<br />
1. Once you’ve selected the Battery info, press ACCEPT. Turn the<br />
knob to display either one <strong>of</strong> these messages when the<br />
ventilator is operating on battery power:<br />
Int battery hh:mm<br />
Ext battery hh:mm<br />
These are estimates <strong>of</strong> the hours (hh) and minutes (mm) <strong>of</strong><br />
operational time remaining (based on battery charge levels and<br />
current draw) until the batteries need recharging.<br />
If the ventilator is operating on ac power or has been operating<br />
on battery power for less than two minutes, Battery info<br />
displays one <strong>of</strong> these messages:<br />
Int battery N/A<br />
Ext battery N/A<br />
where “N/A” indicates that the information is not available.<br />
6-20 10066984 Rev. D 700 Series Ventilator Operator’s
2. Press CLEAR to return to the list <strong>of</strong> menu functions.<br />
6.8 S<strong>of</strong>tware revision<br />
The MENU key<br />
Selecting the S<strong>of</strong>tware revision function displays the revision <strong>of</strong> the<br />
s<strong>of</strong>tware installed in the ventilator. Press CLEAR to return to the<br />
S<strong>of</strong>tware revision menu item.<br />
6.9 Service summary<br />
6.10 Nebulizer<br />
The Service summary function allows you to view the following<br />
information:<br />
• An estimate <strong>of</strong> the hours <strong>of</strong> operational time remaining for the<br />
internal battery (based on its battery charge level and current<br />
draw) until the internal battery needs recharging (available only<br />
if the ventilator is operating on internal battery power).<br />
• When routine service is due (expressed in hours remaining) based<br />
on the ventilator’s operational hours.<br />
1. Select the Service summary function, then press ACCEPT.<br />
2. Turn the knob to scroll through the list <strong>of</strong> service summary<br />
messages.<br />
3. Press CLEAR to return to the list <strong>of</strong> menu functions.<br />
The Nebulizer function allows you to stop, start, or view the state <strong>of</strong><br />
an EasyNeb Nebulizer attached to the ventilator.<br />
700 Series Ventilator Operator’s Manual 10066984 Rev. D 6-21
The MENU key<br />
NOTE:<br />
• The EasyNeb Operator’s Manual and 700 Series Ventilator<br />
Operator’s Manual describe both continuous and phasic<br />
nebulization (nebulization synchronized with the<br />
inspiratory or expiratory breath cycle). Please note that only<br />
continuous nebulization is available for EasyNeb nebulizers<br />
sold in the United States.<br />
• When using an EasyNeb with the ventilator, please refer to<br />
the EasyNeb Operator’s Manual (see Appendix B for part<br />
numbers).<br />
1. Select the Nebulizer function and press ACCEPT.<br />
If you attempt to select the nebulizer function before<br />
ventilation begins or on a ventilator that does not have the<br />
Communications option installed, the message window displays<br />
this message:<br />
Neb not available<br />
2. Once you’ve selected ventilator settings and the Nebulizer<br />
function, turn the knob to view one <strong>of</strong> these messages:<br />
Start nebulizer<br />
Stop nebulizer<br />
View nebulizer state<br />
3. If you select Start nebulizer and the nebulizer is on, the message<br />
window displays this message:<br />
Nebulizer already on<br />
If the nebulizer is <strong>of</strong>f, the message window displays this message:<br />
Neb time = xx mins<br />
Turn knob to adjust<br />
where xx is the previously-selected nebulization time. Turn the<br />
knob if you want to change the time (you can select from 1 to<br />
60 minutes), then press ACCEPT to proceed.<br />
4. The message window displays this message:<br />
Neb phase = INSP<br />
Turn knob to adjust<br />
6-22 10066984 Rev. D 700 Series Ventilator Operator’s
The MENU key<br />
where INSP is the previously-selected nebulization breath phase.<br />
Turn the knob to select INSP (nebulization synchronized with the<br />
inspiratory phase), EXH (nebulization synchronized with the<br />
expiratory phase), or BOTH (continuous nebulization). Press ACCEPT<br />
to begin nebulization or CLEAR to cancel. Once nebulization begins,<br />
the display returns to View nebulizer state.<br />
5. If you select Stop nebulizer and the nebulizer is <strong>of</strong>f, the message<br />
window displays this message:<br />
Nebulizer not active<br />
If the nebulizer is on, the message window displays this<br />
message:<br />
Time left = xx mins<br />
Halt nebulization?<br />
CLEAR(N) ACCEPT(Y)<br />
Press CLEAR to leave nebulization unchanged and display View<br />
nebulizer state. Press ACCEPT to display Stop nebulizer.<br />
6. If you select View nebulizer state and the nebulizer is on, the<br />
message window displays this message:<br />
Time left = xx mins<br />
Neb phase = INSP<br />
Press CLEAR to exit<br />
Press CLEAR to return to Nebulizer menu option.<br />
700 Series Ventilator Operator’s Manual 10066984 Rev. D 6-23
This page is intentionally blank.<br />
6-24 10066984 Rev. D 700 Series Ventilator Operator’s
Alarm handling<br />
This section describes possible ventilator alarms and what to do if<br />
they occur. 700 Series Ventilator System alarms are classified as highor<br />
medium-priority:<br />
• High-priority alarms require immediate attention to ensure<br />
patient safety. During a high-priority alarm, the red ALARM<br />
indicator flashes, the high-priority audible alarm (a repeating<br />
sequence <strong>of</strong> three, then two beeps) sounds, and the message<br />
window shows an alarm message.<br />
• Medium-priority alarms require prompt attention. During a<br />
medium-priority alarm, the yellow CAUTION indicator flashes,<br />
the medium-priority audible alarm (a repeating sequence <strong>of</strong><br />
three beeps) sounds, and the message window shows an alarm<br />
message.<br />
If the active alarm is one <strong>of</strong> the operator-adjustable alarms, its key<br />
light also flashes, and the ALARM SETTINGS window is blank. The key<br />
light for any active alarm continues to flash if you press the alarm<br />
silence key. (The operator-adjustable alarms are HIGH RATE, LOW INSP<br />
PRESSURE, HIGH PRESSURE, HIGH TIDAL VOLUME, LOW TIDAL<br />
VOLUME, and LOW MINUTE VOLUME.)<br />
NOTE:<br />
You can always change an alarm setting even when alarms are<br />
active. You do not need to press the alarm reset key or wait for<br />
the alarm to autoreset.
Alarm handling<br />
The highest-priority active alarm always flashes on the first line <strong>of</strong><br />
the message window. If no alarm is active, the first line displays the<br />
highest-priority autoreset alarm. You can use the menu function to<br />
view all remaining active and autoreset alarms. (Chapter 6 <strong>of</strong> this<br />
manual tells you how to use the menu function.) Figure 7-1<br />
summarizes how to view active alarms.<br />
7-00054<br />
ALARM SETTINGS<br />
7-00075<br />
7.1 Autoreset alarms<br />
- +<br />
ALARM<br />
Red ALARM indicator flashes when<br />
high-priority alarm is active.<br />
CAUTION<br />
Yellow CAUTION indicator flashes<br />
when medium-priority alarm is active.<br />
Figure 7-1. Viewing active alarms<br />
Silences alarm sounds but<br />
does not change visual<br />
indicators.<br />
The highest-priority active<br />
alarm flashes on the first line<br />
<strong>of</strong> the message window.<br />
If the active alarm is an operatoradjustable<br />
alarm, its key light flashes and<br />
the ALARM SETTINGS window is blank.<br />
When an alarm is autoreset (that is, reset because the condition<br />
corrected itself), it is added to the Autoreset alarms list. You can view<br />
the Autoreset alarms list using the MENU key. (Chapter 6 tells you<br />
how to use the MENU key.)<br />
When an alarm autoresets, the CAUTION or ALARM indicator lights<br />
steadily (instead <strong>of</strong> flashing). Any alarm key lights that were flashing<br />
when the alarm was active return to their previous states (<strong>of</strong>f or<br />
steadily lit).<br />
Pressing alarm reset immediately clears all autoreset alarms. For accurate<br />
alarm condition evaluation, press alarm silence and view autoreset<br />
alarms (using the Autoreset alarms function, as described in Chapter 6).<br />
7-2 10066984 Rev. D 700 Series Ventilator Operator’s Manual
7.2 Alarm silence<br />
7-00086<br />
7-00423<br />
Alarm handling<br />
Silences the alarm sound for 2 minutes<br />
from the most recent key press. (The visual<br />
alarm indicators do not change.) If a new<br />
alarm occurs during the alarm silence<br />
period, the alarm sound resumes. If the<br />
condition that caused the initial alarm still<br />
exists after 2 minutes, the alarm sound<br />
resumes.<br />
NOTE:<br />
If the condition that caused a HIGH PRESSURE alarm persists, it<br />
cannot be silenced.<br />
During certain bedside procedures, you may want to silence new<br />
alarms. Pressing the alarm silence key when the ventilator is in a<br />
normal state prevents a new alarm from sounding for 2 minutes. If a<br />
new alarm occurs, the ALARM or CAUTION indicator flashes and its<br />
alarm message is displayed in the message window. New alarms that<br />
do not sound if an alarm silence is in effect are:<br />
• APNEA<br />
• DISCONNECT<br />
• HI EX TIDAL VOLUME<br />
• HI RESP RATE<br />
• HIGH PRESSURE (if circuit pressure is less than 90 cmH2O (90 hPa)<br />
• LO EX TIDAL VOLUME<br />
• LOW EX MINUTE VOLUME<br />
• LOW INSP PRESSURE<br />
• LOW RATE<br />
Warning<br />
For all bedside procedures, such as breathing circuit disconnection,<br />
<strong>Covidien</strong> recommends that you use the alarm silence key only<br />
when you plan to perform the procedure immediately.<br />
700 Series Ventilator Operator’s Manual 10066984 Rev. D 7-3
Alarm handling<br />
7.3 Alarm reset<br />
7-00086<br />
7-00424<br />
7.4 Clinical and technical alarms<br />
Clears all alarm indicators and cancels the<br />
alarm silence period. If the condition that<br />
caused the alarm still exists, the alarm<br />
reactivates.<br />
Clinical alarms are triggered by a ventilator setting or patient<br />
condition and can occur in the usual course <strong>of</strong> patient care. Technical<br />
alarms are triggered by the ventilator’s ongoing tests, and rarely if<br />
ever occur during routine ventilator operation. <strong>Table</strong> 7-1 lists clinical<br />
alarms, and <strong>Table</strong> 7-2 lists technical alarms.<br />
7-4 10066984 Rev. D 700 Series Ventilator Operator’s Manual
When you<br />
see this<br />
message...<br />
<strong>Table</strong> 7-1: Clinical alarms<br />
It means... Do this...<br />
APNEA High-priority alarm.<br />
Patient has not triggered a<br />
breath within the selected<br />
apnea interval.<br />
Autoreset when patient<br />
triggers 2 consecutive breaths.<br />
CONTINUOUS<br />
HI PRES<br />
High-priority alarm.<br />
HIGH PRESSURE alarm is active<br />
but circuit pressure has not<br />
dropped below HIGH PRESSURE<br />
setting.<br />
Alarm does not autoreset. The<br />
ventilator enters occlusion<br />
cycling mode.<br />
DISCONNECT High-priority alarm.<br />
Measured exhaled tidal volume<br />
is 15% or less <strong>of</strong> delivered tidal<br />
volume for 4 consecutive<br />
breaths.<br />
Autoreset when exhaled tidal<br />
volume is greater than 15% <strong>of</strong><br />
the delivered tidal volume for<br />
one breath.<br />
The DISCONNECT alarm is<br />
turned <strong>of</strong>f when the speaking<br />
valve option is active (see<br />
Chapter 6 for more<br />
information).<br />
Alarm handling<br />
Check patient.<br />
Consider switching<br />
from SPONT mode.<br />
Check patient; provide<br />
alternate ventilation.<br />
Check for blockage at<br />
EXHAUST port.<br />
Remove ventilator from<br />
use and contact service.<br />
Check patient.<br />
Check ventilator<br />
breathing circuit<br />
connections.<br />
Press the alarm reset<br />
key.<br />
700 Series Ventilator Operator’s Manual 10066984 Rev. D 7-5
Alarm handling<br />
When you<br />
see this<br />
message...<br />
HI EX TIDAL<br />
VOLUME<br />
HI RESP<br />
RATE<br />
<strong>Table</strong> 7-1: Clinical alarms (continued)<br />
It means... Do this...<br />
Medium-priority alarm.<br />
Exhaled volume for 3 <strong>of</strong> 4<br />
consecutive breaths was above<br />
HIGH TIDAL VOLUME setting.<br />
Autoreset when 3 <strong>of</strong> 4<br />
consecutive breaths are within<br />
alarm setting.<br />
Medium-priority alarm.<br />
Monitored respiratory rate<br />
higher than HIGH RATE setting.<br />
Autoreset when monitored<br />
respiratory rate is less than or<br />
equal to alarm setting.<br />
Check patient.<br />
Consider appropriate<br />
HIGH TIDAL VOLUME,<br />
TIDAL VOLUME, and<br />
SUPPORT PRESSURE<br />
settings.<br />
Check patient.<br />
Check for ventilator<br />
breathing circuit leak<br />
that could cause<br />
autocycling.<br />
Consider appropriate<br />
HI RATE, RESPIRATORY<br />
RATE, and TRIGGER<br />
SENSITIVITY settings.<br />
Consider adequacy <strong>of</strong><br />
ventilatory support and<br />
patient comfort.<br />
NOTE:<br />
The annunciation and autoreset <strong>of</strong> the HI RESP RATE<br />
alarm is deferred for 30 seconds following any<br />
breath setting change to allow an adequate<br />
number <strong>of</strong> breaths to occur for accurate<br />
determination <strong>of</strong> respiratory rate.<br />
7-6 10066984 Rev. D 700 Series Ventilator Operator’s Manual
When you<br />
see this<br />
message...<br />
HIGH<br />
PRESSURE<br />
LO EX<br />
TIDAL<br />
VOLUME<br />
<strong>Table</strong> 7-1: Clinical alarms (continued)<br />
It means... Do this...<br />
High-priority alarm.<br />
Two consecutive breaths were<br />
truncated because circuit<br />
pressure reached the HIGH<br />
PRESSURE setting. (Inspiration<br />
phase ends and exhalation<br />
valve opens to prevent<br />
excessive pressure.)<br />
Autoreset when circuit pressure<br />
is less than alarm setting for<br />
5 breaths. Cannot be silenced if<br />
alarm condition persists.<br />
Medium-priority alarm.<br />
Delivered tidal volume less than<br />
LOW TIDAL VOLUME setting for 3<br />
out <strong>of</strong> 4 consecutive breaths. If<br />
LOW TIDAL VOLUME ALARM<br />
setting = 0 and breath type is<br />
PCV, this alarm indicates that<br />
delivered tidal volume is less than<br />
3 ml for 3 out <strong>of</strong> 4 consecutive<br />
breaths.<br />
Autoreset when delivered value<br />
is at least equal to alarm setting<br />
for 3 out <strong>of</strong> 4 consecutive<br />
breaths.<br />
Alarm handling<br />
Check patient.<br />
Check for water in the<br />
inspiratory limb or<br />
kinked tubing.<br />
Consider appropriate<br />
HIGH PRESSURE and<br />
ventilator settings.<br />
Check patient. Check<br />
for blocked or kinked<br />
ET tube (PCV and PSV<br />
breath types when<br />
LOW TIDAL VOLUME<br />
setting = 0).<br />
Consider appropriate<br />
INSPIRATORY<br />
PRESSURE, PEAK FLOW,<br />
LOW TIDAL VOLUME,<br />
TIDAL VOLUME, EXH<br />
SENSITIVITY, RISE TIME<br />
FACTOR, and SUPPORT<br />
PRESSURE settings.<br />
700 Series Ventilator Operator’s Manual 10066984 Rev. D 7-7
Alarm handling<br />
When you<br />
see this<br />
message...<br />
LOW EX<br />
MINUTE<br />
VOLUME<br />
<strong>Table</strong> 7-1: Clinical alarms (continued)<br />
It means... Do this...<br />
Medium-priority alarm.<br />
Monitored minute volume less<br />
than LOW MINUTE VOLUME<br />
setting.<br />
Autoreset when monitored<br />
value is at least equal to alarm<br />
setting.<br />
The LOW MINUTE VOLUME<br />
alarm is turned <strong>of</strong>f when the<br />
speaking valve option is active<br />
(see Chapter 6 for more<br />
information).<br />
Check patient.<br />
Consider appropriate<br />
LOW MINUTE VOLUME<br />
and ventilator settings.<br />
NOTE:<br />
The annunciation <strong>of</strong> the LO EX MINUTE VOLUME<br />
alarm is disabled for up to 10 breaths following a<br />
100% O 2 maneuver, PEEP setting change, or the<br />
termination <strong>of</strong> the SVO state. It is deferred for 30<br />
seconds to allow an adequate number <strong>of</strong> breaths to<br />
occur for accurate determination <strong>of</strong> minute volume<br />
following a setting change.<br />
7-8 10066984 Rev. D 700 Series Ventilator Operator’s Manual
When you<br />
see this<br />
message...<br />
LOW INSP<br />
PRESSURE<br />
<strong>Table</strong> 7-1: Clinical alarms (continued)<br />
It means... Do this...<br />
High-priority alarm.<br />
Monitored circuit pressure<br />
never rises above the<br />
LOW INSP PRESSURE setting<br />
during inspiration (this alarm is<br />
only active during A/C and<br />
SIMV modes).<br />
Autoreset when circuit pressure<br />
is at least equal to alarm<br />
setting during inspiration.<br />
Alarm handling<br />
Check patient.<br />
Check for ventilator<br />
breathing circuit<br />
disconnect.<br />
Consider appropriate<br />
LOW INSP PRESSURE<br />
and ventilator settings.<br />
NOTE:<br />
A patient outdrawing the ventilator’s set flow rate<br />
can trigger the LOW INSP PRESSURE alarm. Make<br />
sure the PEAK FLOW setting is adequate to mee the<br />
patient’s demand.<br />
700 Series Ventilator Operator’s Manual 10066984 Rev. D 7-9
Alarm handling<br />
When you<br />
see this<br />
message...<br />
LOW RATE<br />
(760<br />
Ventilator<br />
only)<br />
<strong>Table</strong> 7-1: Clinical alarms (continued)<br />
It means... Do this...<br />
Medium-priority alarm.<br />
The ventilator cannot deliver<br />
the current RESPIRATORY RATE<br />
setting (insufficient time for<br />
piston to retract and deliver<br />
next breath). Monitored<br />
respiratory rate lower than<br />
RESPIRATORY RATE setting by<br />
one breath per minute + 10%<br />
<strong>of</strong> the setting.<br />
Autoreset after 30 seconds.<br />
Pressing alarm reset key<br />
immediately disables the alarm<br />
and clears the autoreset, and<br />
the alarm is not reannunciated<br />
unless the condition persists<br />
after you change settings.<br />
Check patient.<br />
Check for ventilator<br />
breathing circuit<br />
disconnect or occlusion.<br />
Consider appropriate<br />
RESPIRATORY RATE and<br />
other mandatory<br />
settings.<br />
Consider adequacy <strong>of</strong><br />
ventilatory support and<br />
patient comfort.<br />
NOTE:<br />
The annunciation <strong>of</strong> the LOW RATE alarm is<br />
disabled for 30 seconds following a setting change<br />
to allow enough breaths to occur for accurate<br />
determination <strong>of</strong> respiratory rate following a<br />
setting change.<br />
7-10 10066984 Rev. D 700 Series Ventilator Operator’s Manual
When you<br />
see this<br />
message...<br />
<strong>Table</strong> 7-1: Clinical alarms (continued)<br />
It means... Do this...<br />
% O 2 HIGH High-priority alarm.<br />
Measured % O 2 more than<br />
10 percentage points above<br />
setting for at least 30 seconds.<br />
Autoreset when measured<br />
% O 2 is within 10 percentage<br />
points <strong>of</strong> setting.<br />
Alarm handling<br />
Check air intake filter<br />
for occlusions and<br />
replace if necessary.<br />
(Appendix A tells you<br />
how.)<br />
View the oxygen sensor<br />
measurement and<br />
consider recalibrating<br />
the sensor (using the<br />
Oxygen sensor menu<br />
function, as described<br />
in Chapter 6).<br />
If indicated by your<br />
institution’s protocol,<br />
disable the O 2 % alarm<br />
limits (using the<br />
Oxygen sensor menu<br />
function).<br />
Warning<br />
<strong>Covidien</strong> recommends that the O2 alarm limits be<br />
enabled at all times, unless the oxygen sensor is<br />
faulty or missing. Replace a faulty or missing oxygen<br />
sensor as soon as possible.<br />
Check patient; check<br />
oxygen supply; provide<br />
alternate ventilation.<br />
Remove ventilator from<br />
use and contact service<br />
(consider replacing<br />
oxygen sensor).<br />
700 Series Ventilator Operator’s Manual 10066984 Rev. D 7-11
Alarm handling<br />
When you<br />
see this<br />
message...<br />
<strong>Table</strong> 7-1: Clinical alarms (continued)<br />
It means... Do this...<br />
% O 2 LOW High-priority alarm.<br />
Measured % O 2 more than<br />
10 percentage points below<br />
setting for at least 30 seconds.<br />
Autoreset when measured<br />
% O 2 is within 10 percentage<br />
points <strong>of</strong> setting.<br />
View the oxygen sensor<br />
measurement and<br />
consider recalibrating<br />
the sensor (using the<br />
Oxygen sensor menu<br />
function, as described<br />
in Chapter 6).<br />
If indicated by your<br />
institution’s protocol,<br />
disable the O 2 % alarm<br />
limits (using the<br />
Oxygen sensor menu<br />
function).<br />
Warning<br />
<strong>Covidien</strong> recommends that the O2 alarm limits be<br />
enabled at all times, unless the oxygen sensor is<br />
faulty or missing. Replace a faulty or missing oxygen<br />
sensor as soon as possible.<br />
Check patient; check<br />
oxygen supply; provide<br />
alternate ventilation.<br />
Remove ventilator from<br />
use and contact service<br />
(consider replacing<br />
oxygen sensor).<br />
7-12 10066984 Rev. D 700 Series Ventilator Operator’s Manual
When you<br />
see this<br />
message...<br />
OCCLUSION High-priority alarm.<br />
Ventilator breathing circuit or<br />
inspiratory or expiratory filters<br />
occluded. Ventilator detects<br />
above-normal difference<br />
between inspiratory and<br />
expiratory pressure transducers.<br />
The ventilator enters occlusion<br />
cycling mode.<br />
Autoreset when the ventilator<br />
no longer detects an occlusion.<br />
PARTIAL<br />
OCCLUSION<br />
SETUP TIME<br />
ELAPSED<br />
<strong>Table</strong> 7-1: Clinical alarms (continued)<br />
It means... Do this...<br />
High-priority alarm.<br />
Ventilator breathing circuit or<br />
inspiratory or expiratory filters<br />
partially occluded. Ventilator<br />
detects above-normal difference<br />
between inspiratory and<br />
expiratory pressure transducers.<br />
The ventilator continues normal<br />
ventilation.<br />
Autoreset when partial<br />
occlusion no longer exists for<br />
two consecutive breaths.<br />
High-priority alarm.<br />
At least 30 seconds have<br />
elapsed since you pressed a key<br />
or turned the knob (occurs at<br />
power-on only).<br />
Autoreset when you accept<br />
proposed settings.<br />
Alarm handling<br />
Check patient.<br />
Check ventilator<br />
breathing circuit and<br />
inspiratory and<br />
expiratory filters for<br />
occlusions or kinks.<br />
Empty excess water<br />
from tubes.<br />
Press the alarm reset<br />
key.<br />
If this does not resolve<br />
the problem, provide<br />
alternate ventilation<br />
and contact service.<br />
Check the patient.<br />
Check the ventilator<br />
breathing circuit for<br />
water, kinks, or other<br />
blockages.<br />
If this does not resolve<br />
the problem, provide<br />
alternate ventilation<br />
and contact service.<br />
Check the patient. Be<br />
sure to complete<br />
ventilator setup before<br />
connecting the<br />
ventilator breathing<br />
circuit to the patient.<br />
Select appropriate<br />
ventilator settings.<br />
700 Series Ventilator Operator’s Manual 10066984 Rev. D 7-13
Alarm handling<br />
When you<br />
see this<br />
message...<br />
Any alarm<br />
message not<br />
listed in this<br />
table.<br />
AIR INTAKE<br />
ABSENT<br />
AIR INTAKE<br />
BLOCKED<br />
BAT NOT<br />
CHARGING<br />
CONTACT<br />
SERVICE<br />
DELIV GAS<br />
HI TEMP<br />
<strong>Table</strong> 7-2: Technical alarms<br />
It means... Do this...<br />
The ventilator’s ongoing checks<br />
have detected an alarm<br />
condition.<br />
High-priority alarm.<br />
Air intake filter sensor has<br />
detected a missing filter.<br />
Alarm does not autoreset; you<br />
must press the alarm reset key.<br />
High-priority alarm.<br />
Ventilator has detected abovenormal<br />
resistance at the air<br />
intake filter.<br />
Alarm does not autoreset: you<br />
must press the alarm reset key.<br />
High-priority alarm.<br />
Battery voltage has not increased<br />
during past hour.<br />
Alarm does not autoreset; you<br />
must press the alarm reset key.<br />
High-priority alarm.<br />
Ventilator requires servicing.<br />
High-priority alarm.<br />
Inspiration temperature too<br />
high.<br />
Autoreset when temperature is<br />
within acceptable limit.<br />
Check patient; provide<br />
alternate ventilation.<br />
Remove ventilator from<br />
use and contact service.<br />
Verify that air intake<br />
filter is installed and<br />
seated securely.<br />
Replace air intake filter.<br />
Remove ventilator from<br />
use and contact service.<br />
Check patient.<br />
Check for visible<br />
occlusions (for example,<br />
a curtain, clothing, or<br />
furniture blocking the air<br />
intake).<br />
Press the alarm reset key.<br />
Replace air intake filter.<br />
(Appendix A tells you<br />
how.)<br />
Check connections and<br />
charge <strong>of</strong> external<br />
battery. Replace battery,<br />
if applicable.<br />
Contact service.<br />
Remove ventilator from<br />
use and contact service.<br />
Make sure room<br />
temperature is not too<br />
high.<br />
Remove ventilator from<br />
use and contact service.<br />
7-14 10066984 Rev. D 700 Series Ventilator Operator’s Manual
When you<br />
see this<br />
message...<br />
DELIV GAS<br />
LOW TEMP<br />
EXH CCT<br />
HI TEMP<br />
EXH CCT<br />
LO TEMP<br />
FAN FAILED<br />
ALERT<br />
<strong>Table</strong> 7-2: Technical alarms (continued)<br />
It means... Do this...<br />
High-priority alarm.<br />
Inspiration temperature too low.<br />
Autoreset when temperature is<br />
within acceptable limit.<br />
High-priority alarm.<br />
Temperature <strong>of</strong> the exhalation<br />
heater is above acceptable limit.<br />
The ventilator continues to<br />
annunciate the alarm while the<br />
condition persists.<br />
Autoreset when temperature is<br />
within acceptable limit.<br />
High-priority alarm.<br />
Temperature <strong>of</strong> the exhalation<br />
heater is below acceptable limit.<br />
The ventilator continues to<br />
annunciate the alarm while the<br />
condition persists.<br />
Autoreset when temperature is<br />
within acceptable limit.<br />
High-priority alarm.<br />
Fan filter occluded or fan not<br />
operational.<br />
Alarm does not autoreset; you<br />
must press the alarm reset key.<br />
Alarm handling<br />
Make sure room<br />
temperature is not too<br />
low.<br />
Remove ventilator from<br />
use and contact service.<br />
If problem persists,<br />
remove ventilator from<br />
use and contact service.<br />
Be aware that spirometry<br />
may be affected<br />
(monitored values may<br />
be higher than actual).<br />
If problem persists,<br />
remove ventilator from<br />
use and contact service.<br />
Be aware that spirometry<br />
may be affected<br />
(monitored values may<br />
be lower than actual).<br />
Make sure ventilator has<br />
warmed up sufficiently.<br />
Check fan filter for<br />
occlusions and clean if<br />
necessary. (Appendix A<br />
tells you how to check<br />
and clean the fan filter.)<br />
Press the alarm reset key.<br />
If this does not resolve<br />
the problem, contact<br />
service.<br />
700 Series Ventilator Operator’s Manual 10066984 Rev. D 7-15
Alarm handling<br />
When you<br />
see this<br />
message...<br />
HI BBU<br />
TEMP ALERT<br />
HI SYS<br />
TEMP ALERT<br />
LOSS AC<br />
POWER<br />
<strong>Table</strong> 7-2: Technical alarms (continued)<br />
It means... Do this...<br />
High-priority alarm.<br />
Internal power supply<br />
temperature above acceptable<br />
limit.<br />
Autoreset when temperature is<br />
below acceptable limit.<br />
High-priority alarm.<br />
Temperature inside ventilator<br />
enclosure above acceptable<br />
limit.<br />
Autoreset when temperature is<br />
below acceptable limit.<br />
Medium-priority alarm.<br />
Loss <strong>of</strong> ac power, although<br />
battery backup available.<br />
Autoreset after 2 minutes or<br />
when ac power restored.<br />
If problem persists,<br />
remove ventilator from<br />
use and contact service.<br />
Check fan and fan filter.<br />
Press the alarm silence or<br />
alarm reset key.<br />
If problem persists,<br />
remove ventilator from<br />
use and contact service.<br />
Check integrity <strong>of</strong><br />
connection to ac power.<br />
If ac power is present<br />
and verified:<br />
ON AC/BATTERY<br />
CHARGING lights within<br />
5 seconds.<br />
Press the alarm reset key<br />
to return to normal<br />
operation.<br />
If battery operation<br />
continues, remove the<br />
ventilator from use and<br />
contact service.<br />
7-16 10066984 Rev. D 700 Series Ventilator Operator’s Manual
When you<br />
see this<br />
message...<br />
LOSS OF<br />
POWER<br />
<strong>Table</strong> 7-2: Technical alarms (continued)<br />
It means... Do this...<br />
High-priority alarm.<br />
The ac supply was lost and the<br />
batteries are so low that all<br />
power may be lost. The unit will<br />
shut down in 5 minutes.<br />
Autoreset when ac or battery<br />
power is restored. Alarm sounds<br />
until autoreset, and for at least 2<br />
minutes following loss <strong>of</strong> both<br />
battery and ac power.<br />
Alarm handling<br />
Check integrity <strong>of</strong> ac<br />
power and battery<br />
connections. Disconnect<br />
the ventilator power<br />
cord for a few seconds,<br />
then reconnect it to wall<br />
power.<br />
If ac power is present, the<br />
VENTILATOR STATUS<br />
indicator displays the ON<br />
AC/BATTERY CHARGING<br />
message within 5 seconds.<br />
Press the alarm reset<br />
button to return the<br />
ventilator to normal<br />
operation.<br />
Replace batteries<br />
(internal and external, if<br />
installed) if necessary.<br />
If ac power is present<br />
and battery operation<br />
continues, obtain<br />
alternative ventilation.<br />
NOTE:<br />
Actual battery backup time remaining depends on<br />
battery condition and ventilator settings.<br />
700 Series Ventilator Operator’s Manual 10066984 Rev. D 7-17
Alarm handling<br />
When you<br />
see this<br />
message...<br />
LOW EXT<br />
BATTERY<br />
LOW INT<br />
BATTERY<br />
LOW O 2<br />
SUPPLY<br />
<strong>Table</strong> 7-2: Technical alarms (continued)<br />
It means... Do this...<br />
High-priority alarm.<br />
Low external battery voltage<br />
detected during POST, although<br />
ac power is sufficient. This alarm<br />
occurs only when the internal<br />
battery is also low or missing.<br />
Autoreset after 2 minutes, or<br />
when external battery is<br />
replaced. Once reset, alarm is not<br />
reannunciated.<br />
High-priority alarm.<br />
Low internal battery voltage<br />
detected during POST, although<br />
ac power is sufficient.<br />
Autoreset after 2 minutes. Once<br />
reset, alarm is not<br />
reannunciated.<br />
High-priority alarm.<br />
Low oxygen supply pressure.<br />
Ventilation continues with<br />
reduced % O 2 . (Alarm is not<br />
activated when % O 2 setting is<br />
21%.)<br />
Autoreset when sufficient<br />
oxygen supply pressure is<br />
detected.<br />
Verify reliable ac power<br />
source.<br />
Check battery<br />
connections.<br />
Replace external battery<br />
if necessary.<br />
Verify reliable ac<br />
power source.<br />
Contact service to check<br />
internal battery<br />
connections and replace<br />
internal battery if<br />
necessary.<br />
Check patient.<br />
Check integrity <strong>of</strong><br />
oxygen supply and<br />
connections. Increase<br />
oxygen supply pressure if<br />
necessary.<br />
7-18 10066984 Rev. D 700 Series Ventilator Operator’s Manual
When you<br />
see this<br />
message...<br />
REPLACE O 2<br />
SENSOR<br />
SPEAKER<br />
FAILED<br />
SWITCH INT<br />
BATTERY<br />
<strong>Table</strong> 7-2: Technical alarms (continued)<br />
It means... Do this...<br />
High-priority alarm.<br />
Oxygen sensor missing or<br />
reading out<br />
<strong>of</strong> range.<br />
Alarm does not autoreset; you<br />
must press the alarm reset key.<br />
Alarm handling<br />
Remove ventilator from<br />
use and contact service.<br />
NOTE:<br />
This alarm is not annunciated if O 2 alarms were<br />
disabled.<br />
High-priority alarm.<br />
Main alarm speaker failed and<br />
backup speaker sounds. The<br />
ventilator continues to<br />
annunciate this alarm while the<br />
condition persists.<br />
Does not autoreset.<br />
Medium-priority alarm.<br />
Ventilator power source has<br />
switched to internal battery, due<br />
to loss <strong>of</strong> external battery.<br />
Autoreset after 2 minutes, when<br />
ac power is restored, or when<br />
external battery is replaced.<br />
Remove ventilator from<br />
use and contact service.<br />
Check external battery<br />
connections.<br />
Replace external battery<br />
if necessary.<br />
Verify reliable ac<br />
power source.<br />
700 Series Ventilator Operator’s Manual 10066984 Rev. D 7-19
Alarm handling<br />
7.5 Power alarm<br />
This section describes what happens in case <strong>of</strong> a LOSS AC POWER or<br />
LOSS OF POWER alarm.<br />
7.5.1 Loss <strong>of</strong> AC Power<br />
When the 700 Series ventilator detects a loss <strong>of</strong> ac power:<br />
• A medium-priority audio alarm sounds for 2 minutes.<br />
• The message LOSS AC POWER flashes in the display window for<br />
2 minutes.<br />
• The CAUTION indicator bar flashes for 2 minutes.<br />
• The ON INTERNAL BATTERY or ON EXTERNAL BATTERY indicator<br />
flashes, depending on which battery is providing power, once<br />
battery operation begins.<br />
If there is no user intervention within 2 minutes, the following<br />
occurs:<br />
• The audio alarm stops.<br />
• LOSS AC POWER stops flashing and lights steadily.<br />
• The CAUTION indicator stops flashing and lights steadily on the<br />
VENTILATOR STATUS bar.<br />
• The ON INTERNAL BATTERY or ON EXTERNAL BATTERY message<br />
flashes, depending on which battery is providing power, once<br />
battery operation begins.<br />
7.5.2 Loss <strong>of</strong> Power<br />
If a ventilator continues to operate on battery power and 5 minutes<br />
(or less) <strong>of</strong> battery power remains:<br />
Warning<br />
If the 700 Series ventilator is allowed to operate on a depleted<br />
battery, ventilation support ends. The ventilator will shutdown<br />
and the backup alarm will continue to sound for a minimum <strong>of</strong><br />
2 minutes.<br />
7-20 10066984 Rev. D 700 Series Ventilator Operator’s Manual
Alarm handling<br />
1. The following indicators occur:<br />
• The INTERNAL BATTERY LEVEL indicator turns <strong>of</strong>f.<br />
• The high-priority main audio alarm sounds.<br />
• The ALARM indicator flashes on the VENTILATOR STATUS<br />
bar.<br />
• The LOSS OF POWER message flashes in the display window.<br />
2. The ventilator shuts down and runs POST.<br />
3. Following POST, the message window displays LOW INT BATTERY<br />
and CONNECT MAINS POWER.<br />
4. The ventilator shuts down in a safe state with the safety valve<br />
open and the backup alarm sounding for a minimum <strong>of</strong> 2 minutes.<br />
5. If ac power is reconnected, the ventilator runs POST and restarts<br />
using the previously-selected ventilation mode at the settings.<br />
700 Series Ventilator Operator’s Manual 10066984 Rev. D 7-21
This page is intentionally blank.<br />
7-22 10066984 Rev. D 700 Series Ventilator Operator’s Manual
Maintenance<br />
To ensure proper ventilator operation, perform the following<br />
maintenance procedures at the recommended intervals. All procedures<br />
should be adapted to your institution's policies and protocol.<br />
This section describes:<br />
• Cleaning, disinfecting, and sterilizing<br />
• Preventive maintenance<br />
• Storage<br />
• Repacking<br />
For instructions for qualified service technicians on performing more<br />
detailed testing, troubleshooting, or other service procedures, see the<br />
700 Series Ventilator System Service Manual for more information,<br />
including theory <strong>of</strong> operation, calibration instructions, parts list, and<br />
circuit diagrams. (Individual electronic components are not<br />
field-repairable.)
Maintenance<br />
A.1 Cleaning, disinfection, and sterilization<br />
<strong>Table</strong> A-1 tells you how to clean, disinfect, and sterilize ventilator<br />
components.<br />
NOTE:<br />
<strong>Covidien</strong> recognizes that sanitation practices vary widely among<br />
healthcare institutions. It is not possible for <strong>Covidien</strong> to specify<br />
or require specific practices that will meet all needs, or to be<br />
responsible for the effectiveness <strong>of</strong> cleaning, disinfecting,<br />
sterilizing, and other practices carried out in the patient care<br />
setting. This manual can only give general guidelines for<br />
cleaning, disinfecting, and sterilizing. It is the user’s<br />
responsibility to ensure the validity and effectiveness <strong>of</strong> the<br />
methods used.<br />
Warning<br />
• Do not attempt to remove, clean, or flush the flow sensor<br />
with liquids or pressurized air.<br />
• Because a patient's inspired gas contacts some parts that can<br />
absorb sterilizing agents, be sure to sterilize parts according<br />
to the techniques described in <strong>Table</strong> A-1. Exposure to<br />
sterilizing agents may reduce the useful life <strong>of</strong> some parts.<br />
• Handle filters with care, to minimize the risk <strong>of</strong> bacterial<br />
contamination or physical damage.<br />
A-2 10066984 Rev. D 700 Series Ventilator Operator’s Manual
<strong>Table</strong> A-1: Cleaning, disinfection, and sterilization<br />
Part Procedure Comments<br />
Ventilator<br />
exterior<br />
(including<br />
keyboard<br />
and flex arm)<br />
Ventilator<br />
breathing<br />
circuit<br />
tubing<br />
In-line<br />
water traps<br />
Couplings<br />
and<br />
connectors<br />
Wipe clean with a damp<br />
cloth and mild detergent.<br />
Clean keyboard with<br />
keyboard cleaning spray<br />
(P/N G-061576-00).<br />
Reusable: Disassemble and<br />
clean, then autoclave,<br />
pasteurize or chemically<br />
disinfect.<br />
Disposable: Disinfect or<br />
sterilize, then discard.<br />
Maintenance<br />
Do not allow liquid to penetrate<br />
the ventilator.<br />
If submersed in liquid, use<br />
pressurized air to blow moisture<br />
from inside the tubing before<br />
use. Inspect for nicks and cuts,<br />
and replace if damaged. Run<br />
SST to check for leaks when a<br />
new breathing circuit is<br />
installed. Follow circuit<br />
instructions for installation<br />
and cleaning.<br />
Caution<br />
Autoclaving reusable ventilator breathing circuits can<br />
decrease circuit life span, decrease flexibility, and<br />
cause discoloration (yellowing) <strong>of</strong> the tubing.<br />
Disassemble and clean,<br />
then autoclave, pasteurize,<br />
or chemically disinfect.<br />
Autoclave, pasteurize, or<br />
chemically disinfect.<br />
Collector vial Disassemble and clean,<br />
then autoclave,<br />
pasteurize, or chemically<br />
disinfect.<br />
Inspect for cracks, and replace if<br />
damaged. Follow circuit<br />
instructions for installation and<br />
cleaning.<br />
If submersed in liquid, use<br />
pressurized air to blow moisture<br />
from inside the part before use.<br />
Inspect for nicks and cuts, and<br />
replace if damaged. Follow circuit<br />
instructions for installation<br />
and cleaning.<br />
Inspect for cracks, and replace<br />
if damaged.<br />
700 Series Ventilator Operator’s Manual 10066984 Rev. D A-3
Maintenance<br />
<strong>Table</strong> A-1: Cleaning, disinfection, and sterilization (continued)<br />
Part Procedure Comments<br />
Expiratory<br />
and<br />
inspiratory<br />
bacteria<br />
filters<br />
Cooling<br />
fan filter<br />
Air<br />
intake filter<br />
Other<br />
accessories<br />
Reusable: Autoclave.<br />
Disposable: Disinfect or<br />
sterilize, then discard.<br />
Every 250 hours (or<br />
1 month <strong>of</strong> use) or as<br />
necessary: clean or replace.<br />
Replace every 1000 hours<br />
(or 3 months <strong>of</strong> use) <strong>of</strong><br />
operation, or as necessary.<br />
Follow manufacturer’s<br />
instructions.<br />
A.1.1 Cleaning: general guidelines<br />
Do not chemically disinfect or<br />
expose to ethylene oxide (ETO)<br />
gas. Check filter resistance<br />
before reuse. Follow<br />
manufacturer’s<br />
recommendations<br />
for reusability.<br />
Replace when filter element<br />
appears worn or occluded or a<br />
FAN FAILED ALERT alarm occurs.<br />
Replace when an<br />
AIR INTAKE BLOCKED alarm<br />
occurs. Do not attempt to clean<br />
or reuse the air intake filter.<br />
Do not clean or reuse single-patient use or disposable products.<br />
When cleaning parts, do not use hard brushes or other instruments<br />
that could damage surfaces.<br />
1. Wash parts in warm water and detergent.<br />
2. Rinse parts thoroughly in clean, warm water (tap water is fine)<br />
and air dry.<br />
3. <strong>Covidien</strong> recommends that you inspect all parts at every<br />
cleaning. Replace any damaged parts.<br />
4. Whenever you use new parts on the ventilator, run short<br />
self-test (SST).<br />
A-4 10066984 Rev. D 700 Series Ventilator Operator’s Manual
Caution<br />
Maintenance<br />
Follow the detergent manufacturer's instructions. Using detergent<br />
solution stronger than necessary can shorten the useful life <strong>of</strong> the<br />
products. Detergent residue can cause blemishes or fine cracks,<br />
especially on parts exposed to elevated temperatures during<br />
sterilization.<br />
A.1.2 Disinfection and sterilization<br />
Do not disinfect, sterilize, or reuse single-patient use or disposable<br />
products. When sterilizing tubing, coil tubing in a large loop, avoiding<br />
kinks, or crossing tubing. The tubing lumen should be free <strong>of</strong> any<br />
visible droplets prior to wrapping.<br />
Follow these steps (the order depends on what method <strong>of</strong><br />
disinfection/sterilization you use):<br />
Autoclave<br />
sterilization<br />
Chemical disinfection<br />
or pasteurization<br />
1. Disassemble 1. Disassemble<br />
2. Clean 2. Clean<br />
3. Inspect 3. Inspect<br />
4. Reassemble 4. Disinfect<br />
5. Sterilize 5. Reassemble<br />
6. Run SST 6. Run SST<br />
Caution<br />
Formaldehyde and phenol-based disinfectants are not<br />
recommended because they can cause plastic parts to crack<br />
and craze. Exposing parts to disinfectant concentration<br />
stronger than required for excessive time may shorten product<br />
life. To prevent spotting and blemishing when exposed to<br />
elevated temperatures, thoroughly rinse and dry parts.<br />
700 Series Ventilator Operator’s Manual 10066984 Rev. D A-5
Maintenance<br />
A.2 Preventive maintenance<br />
<strong>Table</strong> A-2 summarizes preventive maintenance intervals and<br />
procedures. The estimated hours <strong>of</strong> use until preventive maintenance<br />
is due appears in the message window during power-on self-test<br />
(POST).<br />
NOTE:<br />
The internal battery must be replaced approximately every 2<br />
years (under typical usage). You can use the MENU key to view<br />
the service summary, which includes an estimate <strong>of</strong> how long<br />
the ventilator can operate on the current charge <strong>of</strong> the internal<br />
battery. (Chapter 6 tells you how to use the MENU key. The<br />
700 Series Ventilator System Service Manual tells you how to<br />
replace components and perform preventive maintenance.)<br />
Caution<br />
To avoid component damage due to excessive wear, perform<br />
preventive maintenance and replace components at<br />
recommended intervals. You may find it convenient to note<br />
anticipated replacement dates for all components based on<br />
typical use rates or recommended intervals.<br />
NOTE:<br />
Dispose <strong>of</strong> all parts removed from the ventilator during<br />
maintenance procedures according to your institution’s protocol.<br />
Sterilize before nondestructive disposal. Follow local governing<br />
ordinances and recycling plans regarding disposal or recycling <strong>of</strong><br />
device components.<br />
A-6 10066984 Rev. D 700 Series Ventilator Operator’s Manual
<strong>Table</strong> A-2: Preventive maintenance schedule<br />
Frequency Part Maintenance<br />
Daily or as<br />
required by<br />
your<br />
institution’s<br />
policy<br />
250 hours or<br />
1 month <strong>of</strong> use<br />
(or more<br />
<strong>of</strong>ten, if<br />
required)<br />
1000 hours or<br />
3 months <strong>of</strong><br />
use (or more<br />
<strong>of</strong>ten, if<br />
required)<br />
Annually or<br />
after 100<br />
autoclave<br />
cycles<br />
Ventilator<br />
breathing<br />
circuit:<br />
Inspiratory<br />
and expiratory<br />
limbs<br />
Inspiratory<br />
and expiratory<br />
bacteria filters<br />
Collector vial<br />
and water<br />
traps<br />
Cooling fan<br />
filter<br />
Air intake<br />
filter<br />
Reusable<br />
inspiratory<br />
and expiratory<br />
bacteria filters<br />
Maintenance<br />
Check for water build-up; empty and clean<br />
as necessary.<br />
Use SST to check filter resistance whenever<br />
new filter is installed, or if you suspect<br />
excess resistance.<br />
Check and empty as needed.<br />
Clean. Replace when filter shows signs <strong>of</strong><br />
wear, or a FAN FAILED ALERT alarm occurs.<br />
Replace at recommended interval or when<br />
an AIR INTAKE BLOCKED alarm occurs.<br />
Replace. Sterilize between patients and<br />
circuit changes, or according to your<br />
institution’s policy. Sterilize before<br />
nondestructive disposal.<br />
700 Series Ventilator Operator’s Manual 10066984 Rev. D A-7
Maintenance<br />
<strong>Table</strong> A-2: Preventive maintenance schedule (continued)<br />
Frequency Part Maintenance<br />
As necessary Oxygen sensor Perform a calibration by selecting<br />
Calibrate O 2 sensor from the MENU<br />
key’s Oxygen sensor function.<br />
As necessary Internal<br />
battery, and<br />
external<br />
battery<br />
(if installed)<br />
Every 2 years Entire<br />
ventilator<br />
Every<br />
15,000 hours<br />
Replace if necessary.<br />
Perform device checks described in<br />
Section A.2.7.<br />
Various parts Use appropriate preventive maintenance<br />
kit (preventive maintenance must be<br />
performed by a qualified service<br />
technician according to instructions in the<br />
700 Series Ventilator System Service<br />
Manual).<br />
A.2.1 Daily or as required: inspiratory and expiratory<br />
bacteria filters<br />
Inspect and check the resistance across inspiratory and expiratory<br />
filters before every use, and after 15 days <strong>of</strong> continuous use in the<br />
exhalation limb. At every circuit change, autoclave reusable filters or<br />
discard disposable filters. SST checks the resistance <strong>of</strong> the inspiratory<br />
and expiratory filters.<br />
• Filter resistance greater than 4 cmH2O (4 hPa) at 100 L/min flow<br />
can indicate an occluded filter. For reusable filters, autoclave and<br />
check the resistance again. If filter resistance is still greater than<br />
4 cmH2O, discard the filter. For disposable filters, discard and<br />
replace with a new filter.<br />
• Filter resistance less than 1 cmH2O (1 hPa) at 100 L/min flow can<br />
indicate a ruptured filter. Discard the filter.<br />
A-8 10066984 Rev. D 700 Series Ventilator Operator’s Manual
Maintenance<br />
Replace reusable filters after a maximum <strong>of</strong> one year <strong>of</strong> service or<br />
100 autoclave cycles, whichever comes first. When you put a reusable<br />
filter into service, write the anticipated replacement date on the<br />
filter and keep <strong>of</strong> record <strong>of</strong> the number <strong>of</strong> autoclave cycles to which<br />
the filter has been subjected. Discard disposable filters between<br />
patients.<br />
A.2.2 Daily or as required: collector vial<br />
At every ventilator breathing circuit change, autoclave or disinfect<br />
the collector vial. The patented design <strong>of</strong> the collector vial maintains<br />
circuit pressure (minimizes PEEP loss) and prevents condensate from<br />
spraying when you remove the collector vial from the ventilator<br />
breathing circuit.<br />
Empty the collector vial before it fills:<br />
1. Turn the collector vial counterclockwise to release it from the<br />
ventilator breathing circuit.<br />
2. Empty the collector vial, referring to Figure A-1.<br />
3. Replace the empty collector vial: turn clockwise to secure the<br />
vial into place, which reopens its access to the ventilator<br />
breathing circuit.<br />
700 Series Ventilator Operator’s Manual 10066984 Rev. D A-9
Maintenance<br />
Figure A-1. Removing/replacing the collector vial<br />
A.2.3 Daily or as required: in-line water traps<br />
Drain as required.<br />
7-00076<br />
A.2.4 As necessary: oxygen sensor calibration<br />
Use the MENU key’s Oxygen sensor function, then select Calibrate<br />
O 2 sensor to perform a two-point calibration <strong>of</strong> the oxygen sensor<br />
anytime you want to verify proper sensor operation. You can only<br />
calibrate the oxygen sensor immediately following powerup, before<br />
a patient is connected. (Chapter 6 tells you how to use the MENU<br />
key.)<br />
A-10 10066984 Rev. D 700 Series Ventilator Operator’s Manual
A.2.5 Every 250 hours (or 1 month <strong>of</strong> use): cooling<br />
fan filter<br />
Maintenance<br />
1. Remove the cooling fan cover from the back <strong>of</strong> the ventilator by<br />
loosening the two screws (see Figure A-2).<br />
2. Remove the cooling fan filter, wash in a mild detergent<br />
solution, rinse well, then dry thoroughly. Replace filter if it<br />
appears worn or occluded, or a FAN FAILED ALERT alarm occurs.<br />
3. Replace the cooling fan filter inside the cooling fan cover.<br />
4. Reposition the cooling fan cover and tighten the two screws<br />
(see Figure A-2).<br />
NOTE:<br />
Clean the filter more <strong>of</strong>ten than every 250 hours (or 1 month<br />
<strong>of</strong> use) if necessary, or when the ventilator displays the FAN<br />
FAILED ALERT message. (Some environments cause lint and<br />
dust to collect more quickly.)<br />
Cover<br />
Filter<br />
7-00077<br />
Figure A-2. Cooling fan cover<br />
700 Series Ventilator Operator’s Manual 10066984 Rev. D A-11
Maintenance<br />
A.2.6 Every 1000 hours (or 3 months <strong>of</strong> use):<br />
air intake filter<br />
1. Turn the two captive thumbscrews to remove the air intake<br />
cover (see Figure A-3).<br />
2. Discard the used air intake filter.<br />
Caution<br />
Do not attempt to clean or reuse the air intake filter.<br />
3. Place the new air intake filter over the air intake port inside<br />
the ventilator.<br />
4. Reposition the air intake cover, making sure the intake slots face<br />
down. Tighten the two thumbscrews.<br />
NOTE:<br />
Replace the filter more <strong>of</strong>ten than every 1000 hours (or<br />
3 months <strong>of</strong> use) if necessary, or when the ventilator displays<br />
the AIR INTAKE BLOCKED message. (Some environments<br />
collect lint and dust more quickly.)<br />
NOTE:<br />
To prevent an AIR INTAKE ABSENT alarm, ensure that the filter<br />
is seated properly.<br />
Air intake cover<br />
7-00078<br />
Figure A-3. Air intake filter<br />
Air intake filter<br />
A-12 10066984 Rev. D 700 Series Ventilator Operator’s Manual
A.2.7 Every 2 years: device checks<br />
Maintenance<br />
<strong>Covidien</strong> recommends that you perform these checks every 2 years:<br />
1. Inspect the ventilator exterior for mechanical damage or<br />
evidence that the device has been subjected to a mechanical<br />
shock (for example, dropped). Any apparent damage constitutes<br />
a failure <strong>of</strong> this check.<br />
2. Run a full performance verification to verify that the ventilator<br />
functions properly, as described in the 700 Series Ventilator<br />
System Service Manual.<br />
3. Verify that the audible and visual alarms are functioning<br />
properly, as described in Appendix E.<br />
4. Inspect the labels for legibility.<br />
Record this data in an equipment log. If the ventilator fails any <strong>of</strong><br />
checks 1 through 3, remove it from use. Have a suitably qualified<br />
person service the ventilator and perform a full performance<br />
verification, as described in the 700 Series Ventilator System Service<br />
Manual. If the ventilator fails check 4, replace the labels, referring to<br />
the Service Manual for ordering information.<br />
A.2.8 Storage<br />
If you are storing the ventilator for 10 days or less, place the ventilator<br />
in standby mode (Chapter 3 tells you how) and disconnect the oxygen<br />
supply if you do not intend to use the ventilator immediately.<br />
If you are storing the ventilator for 6 months or longer, <strong>Covidien</strong><br />
recommends that a qualified service technician remove the internal<br />
battery (according to instructions in the 700 Series Ventilator System<br />
Service Manual), and that the external battery be disconnected.<br />
NOTE:<br />
A LOSS OF POWER alarm will sound for at least 2 minutes after<br />
you turn <strong>of</strong>f the power switch when no batteries are connected.<br />
700 Series Ventilator Operator’s Manual 10066984 Rev. D A-13
Maintenance<br />
A.2.9 Repacking<br />
If it is necessary to ship the ventilator for any reason, use the original<br />
packing materials if possible. If those materials are not available, order<br />
a repacking kit.<br />
See the 700 Series Ventilator System Service Manual for repacking<br />
instructions.<br />
A-14 10066984 Rev. D 700 Series Ventilator Operator’s Manual
Part numbers<br />
This appendix lists 700 Series Ventilator part numbers. Figure B-1<br />
shows ventilator parts corresponding to the part numbers listed in<br />
<strong>Table</strong> B-1.<br />
NOTE:<br />
Although <strong>Covidien</strong> does not <strong>of</strong>fer single-patient use ventilator<br />
breathing circuits for use with 700 Series Ventilators, the<br />
ventilator has been tested and shown to meet the specifications<br />
<strong>of</strong> <strong>Table</strong> C-5 using Baxter Healthcare Corporation single-patient<br />
use circuits. Contact your Baxter Medical representative to<br />
purchase these circuits.
Part numbers<br />
Item<br />
no.<br />
<strong>Table</strong> B-1: Ventilator accessories<br />
Description Part no.<br />
1 Ventilator breathing circuit, adult, reusable.<br />
Includes:<br />
Tube, adult, 120-cm (2 included)<br />
Tube, adult, 40-cm (2 included)<br />
Tube, adult, 15-cm<br />
Wye, adult<br />
Wye, adult, with temperature port<br />
Water trap, in-circuit (2 included)<br />
Adapter, 22-mm male x 22-mm male<br />
Tube hanger<br />
Directions for use, 700/800 Series breathing<br />
circuit, adult<br />
* Not shown<br />
Ventilator breathing circuit, adult, reusable,<br />
with heated wire, for Fisher & Paykel*<br />
humidifiers.* Includes:<br />
Tube, adult, 15-cm<br />
Tube, adult, 150-cm (2 included)<br />
Wye, adult, with temperature port<br />
Adapter, 22-mm male x 22-mm male<br />
Tube hanger<br />
Adapter, hose heater<br />
Temperature probe, dual-airway<br />
Heater wire, inspiratory limb<br />
Heater wire, expiratory limb<br />
Draw wire, 1.5-m<br />
Directions for use, 700/800 Series breathing<br />
circuit, adult, heated wire<br />
G-061208-00<br />
G-061439-00<br />
G-061440-00<br />
G-061441-00<br />
G-061718-00<br />
G-061209-27<br />
G-061213-00<br />
G-061483-00<br />
G-061214-00<br />
10072487<br />
G-061235-00<br />
G-061441-00<br />
G-061438-00<br />
G-061209-00<br />
G-061483-00<br />
G-061214-00<br />
G-061437-00<br />
G-061479-00<br />
G-061436-00<br />
G-061435-00<br />
G-061478-00<br />
10070393<br />
B-2 10066984 Rev. D 700 Series Ventilator Operator’s Manual
Item<br />
no.<br />
1<br />
(cont.)<br />
* Not shown<br />
<strong>Table</strong> B-1: Ventilator accessories (continued)<br />
Ventilator breathing circuit, pediatric,<br />
reusable.* Includes:<br />
Tube, pediatric, 120-cm (2 included)<br />
Tube, pediatric, 40-cm (2 included)<br />
Tube, pediatric, 15-cm<br />
Wye, pediatric, straight<br />
Water trap, in-circuit (2 included)<br />
Adapter, 22-mm male/15-mm female, with<br />
temperature port<br />
Adapter, 22-mm male/15-mm female<br />
Tube hanger<br />
Adapter, 22-mm male x 15-mm female<br />
Adapter, 15-mm male x 10-mm female<br />
Directions for use, 700/800 Series breathing<br />
circuit, pediatric<br />
Part numbers<br />
Description Part no.<br />
Ventilator breathing circuit, pediatric, reusable,<br />
with heated wire, for Fisher & Paykel*<br />
humidifiers.* Includes:<br />
Tube, pediatric, 15-cm<br />
Tube, pediatric, 150-cm (2 included)<br />
Wye, pediatric, straight<br />
Adapter, 22-mm male x 15-mm female<br />
Tube hanger<br />
Adapter, hose heater<br />
Temperature probe, dual-airway<br />
Heater wire, inspiratory limb<br />
Heater wire, expiratory limb<br />
Draw wire, 1.5-m<br />
Adapter, 22-mm male/15-mm female, with<br />
temperature port<br />
Adapter, 22-mm male/15-mm female<br />
Adapter, 15-mm male/10-mm female<br />
Directions for use, 700/800 Series breathing<br />
circuit, pediatric, heated wire<br />
G-061223-00<br />
G-061452-00<br />
G-061453-00<br />
G-061454-00<br />
G-061480-00<br />
G-061213-00<br />
G-061482-00<br />
G-061481-00<br />
G-061214-00<br />
4-900MR5-34<br />
4-900MR5-33<br />
10068219<br />
G-061237-00<br />
G-061454-00<br />
G-061451-00<br />
G-061480-00<br />
4-900MR1-34<br />
G-061214-00<br />
G-061437-00<br />
G-061479-00<br />
G-061436-00<br />
G-061435-00<br />
G-061478-00<br />
G-061482-00<br />
G-061481-00<br />
4-900MR5-33<br />
10070394<br />
700 Series Ventilator Operator’s Manual 10066984 Rev. D B-3
Part numbers<br />
Item<br />
no.<br />
2 Flex arm 4-032006-00<br />
3 Power cord, for North America and Japan G-061241-00<br />
* Not shown<br />
<strong>Table</strong> B-1: Ventilator accessories (continued)<br />
Description Part no.<br />
Power cord, for Australia G-061242-00<br />
Power cord, for continental Europe G-061243-00<br />
Power cord, for Denmark G-061244-00<br />
Power cord, for India/South Africa (old Britishstyle<br />
plug with round prongs)<br />
G-061247-00<br />
Power cord, for Israel G-061248-00<br />
Power cord, for Italy G-061245-00<br />
Power cord, for Switzerland G-061246-00<br />
Power cord, for United Kingdom G-060135-00<br />
B-4 10066984 Rev. D 700 Series Ventilator Operator’s Manual
Item<br />
no.<br />
4 Hose assembly, oxygen, DISS female (for USA<br />
and Japan)<br />
* Not shown<br />
<strong>Table</strong> B-1: Ventilator accessories (continued)<br />
Part numbers<br />
4-001474-00<br />
Hose assembly, oxygen, DISS male (for Canada) G-061269-00<br />
Hose assembly, oxygen, NIST (for United<br />
Kingdom)<br />
Hose assembly, oxygen, Air Liquide* (for<br />
France)<br />
Warning<br />
G-061201-00<br />
G-061190-00<br />
Due to excessive restriction <strong>of</strong> this hose assembly, reduced<br />
FIO 2 levels may result when oxygen inlet pressures < 50 psi<br />
(345 kPa) are employed. Make sure oxygen inlet<br />
pressure is ≥ 50 psi (345 kPa) when using this hose assembly,<br />
to maintain correct FIO 2 levels.<br />
Hose assembly, oxygen, for Australia G-061198-00<br />
Warning<br />
Due to excessive restriction <strong>of</strong> this hose assembly, reduced<br />
FIO 2 levels may result when oxygen inlet pressures < 50 psi<br />
(345 kPa) are employed. Make sure oxygen inlet<br />
pressure is ≥ 50 psi (345 kPa) when using this hose assembly,<br />
to maintain correct FIO 2 levels.<br />
Hose assembly, oxygen, Dräger* (for Germany) 5-029059-00<br />
Warning<br />
Description Part no.<br />
Due to excessive restriction <strong>of</strong> this hose assembly, reduced<br />
FIO 2 levels may result when oxygen inlet pressures < 50 psi<br />
(345 kPa) are employed. Make sure oxygen inlet<br />
pressure is ≥ 50 psi (345 kPa) when using this hose assembly,<br />
to maintain correct FIO 2 levels.<br />
700 Series Ventilator Operator’s Manual 10066984 Rev. D B-5
Part numbers<br />
Item<br />
no.<br />
5 External battery kit (Includes external battery<br />
and cover)<br />
6 External battery charger, for North America<br />
and Japan *<br />
G-061140-00<br />
G-061260-00<br />
External battery charger, for Australia * G-061261-00<br />
External battery charger, for continental<br />
Europe *<br />
G-061500-00<br />
External battery charger, for Denmark * G-061501-00<br />
External battery charger, for India/South Africa<br />
(old British-style plug with round prongs) *<br />
G-061504-00<br />
External battery charger, for Israel * G-061505-00<br />
External battery charger, for Italy * G-061502-00<br />
External battery charger, for Switzerland * G-061503-00<br />
External battery charger, for United Kingdom* G-061499-00<br />
7 Collector vial assembly with mounting bracket<br />
(includes items 8, 9, and 17)<br />
G-061668-00<br />
8 Collector vial kit G-062501-00<br />
9 Tube, adult, 10 cm (connects collector vial to<br />
expiratory filter)<br />
10 Inspiratory bacteria filter,<br />
22-mm ISO connectors, disposable<br />
(D/Flex, carton <strong>of</strong> 12)<br />
* Not shown<br />
<strong>Table</strong> B-1: Ventilator accessories (continued)<br />
Inspiratory bacteria filter,<br />
22-mm ISO connectors, reusable<br />
(Re/Flex, one per package)<br />
Description Part no.<br />
G-062499-00<br />
4-074601-00<br />
4-074600-00<br />
B-6 10066984 Rev. D 700 Series Ventilator Operator’s Manual
Item<br />
no.<br />
11 Expiratory bacteria filter, reusable (Re/X700,<br />
one per package) *<br />
Expiratory bacteria filter, disposable (D/X7,<br />
carton <strong>of</strong> 12) *<br />
Part numbers<br />
G-060525-00<br />
G-060526-00<br />
12 Cooling fan filter (package <strong>of</strong> 6) * G-061263-00<br />
13 Air intake filter (package <strong>of</strong> 6) * G-061262-00<br />
14 Mounting kit, shelf, for use with Fisher & Paykel*<br />
Humidifiers. Includes shelf plus the applicable<br />
mounting hardware. *<br />
Mounting kit, shelf, for use with Hudson RCI*<br />
ConchaTherm* Humidifier. Includes shelf plus<br />
the applicable mounting hardware. *<br />
15 Mounting kit, humidifier, Fisher & Paykel*,<br />
shelf mount only *<br />
* Not shown<br />
<strong>Table</strong> B-1: Ventilator accessories (continued)<br />
Description Part no.<br />
Bracket, humidifier, Hudson RCI*<br />
ConchaTherm*, shelf-mount only *<br />
G-061279-00<br />
G-061601-00<br />
G-061602-00<br />
G-061603-00<br />
700 Series Ventilator Operator’s Manual 10066984 Rev. D B-7
Part numbers<br />
Item<br />
no.<br />
<strong>Table</strong> B-1: Ventilator accessories (continued)<br />
16 Cart kit, including Fisher & Paykel*<br />
humidifier mount<br />
Cart kit, including Hudson RCI*<br />
ConchaTherm* Humidifier mount *<br />
EasyCart Mobility System (quick-connects to<br />
standard wheelchair, order humidifier mounting<br />
kit separately) *<br />
Mounting kit, EasyCart, Fisher & Paykel*<br />
humidifier *<br />
Mounting kit, EasyCart, Hudson RCI*<br />
humidifier *<br />
EasyCart Mobility linkage arm kit (to dock the<br />
EasyCart to a nonstandard wheelchair) *<br />
G-061581-00<br />
G-061582-00<br />
G-061727-00<br />
G-061227-00<br />
G-061228-00<br />
G-061845-00<br />
17 Mounting kit, collector vial, cart-mount G-062502-00<br />
18 Mounting kit, humidifier, Fisher & Paykel*,<br />
cart<br />
Mounting kit, humidifier, Hudson RCI*<br />
ConchaTherm*, cart *<br />
G-061227-00<br />
G-061228-00<br />
19 Test lung 4-000612-00<br />
20 Humidifier kit, Fisher & Paykel* MR730 G-061232-00<br />
* Not shown<br />
Description Part no.<br />
B-8 10066984 Rev. D 700 Series Ventilator Operator’s Manual
Item<br />
no.<br />
Part numbers<br />
21 Operator’s manual, 700 Series, English * 10066984<br />
Operator’s manual, 700 Series, French * 10069629<br />
Operator’s manual, 700 Series, German * 10069624<br />
Operator’s manual, 700 Series, Italian * 10069626<br />
Operator’s manual, 700 Series, Japanese * 10069633<br />
Operator’s manual, 700 Series, Polish * 10069631<br />
Operator’s manual, 700 Series, Portuguese * 10069630<br />
Operator’s manual, 700 Series, Russian * 10069632<br />
Operator’s manual, 700 Series, Spanish* 10069625<br />
22 Service manual, English * 10070389<br />
23 Oxygen sensor (To be replaced as necessary by a<br />
qualified service technician.) *<br />
24 Internal battery (To be replaced as necessary by<br />
a qualified service technician.) *<br />
25 15,000-hour preventive maintenance kit<br />
(Preventive maintenance kits must be installed<br />
by a qualified service technician.) *<br />
26 30,000-hour preventive maintenance kit<br />
(Preventive maintenance kits must be installed<br />
by a qualified service technician.) *<br />
G-061143-00<br />
G-061139-00<br />
G-061166-00<br />
G-061167-00<br />
27 Keyboard cleaning spray * G-061576-00<br />
28 700 Series Ventilator Communications option<br />
kit (Communications option must be installed<br />
by a qualified service technician.) *<br />
* Not shown<br />
<strong>Table</strong> B-1: Ventilator accessories (continued)<br />
Description Part no.<br />
G-061831-00<br />
700 Series Ventilator Operator’s Manual 10066984 Rev. D B-9
Part numbers<br />
Item<br />
no.<br />
<strong>Table</strong> B-1: Ventilator accessories (continued)<br />
29 Operator’s manual, EasyNeb Nebulizer,<br />
Czech *<br />
Operator’s manual, EasyNeb Nebulizer,<br />
English *<br />
Operator’s manual, EasyNeb Nebulizer,<br />
French *<br />
Operator’s manual, EasyNeb Nebulizer,<br />
German *<br />
Operator’s manual, EasyNeb Nebulizer,<br />
Italian *<br />
Operator’s manual, EasyNeb Nebulizer,<br />
Japanese *<br />
Operator’s manual, EasyNeb Nebulizer,<br />
Polish *<br />
Operator’s manual, EasyNeb Nebulizer,<br />
Portuguese *<br />
Operator’s manual, EasyNeb Nebulizer,<br />
Russian *<br />
Operator’s manual, EasyNeb Nebulizer,<br />
Spanish*<br />
G-061781-00<br />
G-061769-00<br />
G-061782-00<br />
G-061783-00<br />
G-061784-00<br />
G-061785-00<br />
G-061786-00<br />
G-061787-00<br />
G-061788-00<br />
G-061789-00<br />
30 Basket, ventilator cart * G-061205-00<br />
31 Ventilator attachment kit (attaches ventilator<br />
to cart) *<br />
G-061849-00<br />
32 Bumpers, cart (quantity 4 cart, 2 handle) * G-062019-00<br />
* Not shown<br />
Description Part no.<br />
B-10 10066984 Rev. D 700 Series Ventilator Operator’s Manual
19<br />
7<br />
1<br />
9<br />
8<br />
2<br />
16<br />
Figure B-1. Ventilator accessories<br />
Part numbers<br />
700 Series Ventilator Operator’s Manual 10066984 Rev. D B-11<br />
5<br />
10<br />
17<br />
3<br />
18<br />
20<br />
4<br />
7-00079
This page is intentionally blank.<br />
B-12 10066984 Rev. D 700 Series Ventilator Operator’s Manual
Specifications<br />
This appendix provides specifications for the 700 Series Ventilator<br />
System, including:<br />
• Physical<br />
• Environmental<br />
• Power<br />
• Compliance and approvals<br />
• Technical
Specifications<br />
C.1 Physical<br />
<strong>Table</strong> C-1: Physical specifications<br />
Weight Ventilator only: 30 kg (66 lb)<br />
Cart only: 18 kg (40 lb)<br />
External battery: 12.75 kg (28 lb)<br />
Dimensions Ventilator only: 378 mm H x 515 mm W x<br />
370 mm D<br />
(14.9 in. H x 20.3 in. W x<br />
14.6 in. D)<br />
Ventilator and cart: 1255 mm H x 515 mm W x<br />
370 mm D<br />
(49.4 in. H x 20.3 in. W x<br />
14.6 in. D)<br />
Connectors Inspiratory limb connector: ISO 22-mm conical male<br />
Expiratory limb connector: ISO 22-mm conical female<br />
Gas exhaust port: ISO 30-mm conical<br />
Oxygen inlet: DISS, DISS female, NIST, Air<br />
Liquide*, or Australian<br />
type (depending on<br />
country and configuration)<br />
Ventilator<br />
heat<br />
generation<br />
400 to 500 British thermal units (BTUs) per hour<br />
Oxygen<br />
sensor life<br />
Gas mixing<br />
system<br />
Two years, nominal. (Actual life depends on operating<br />
environment; operation at higher temperature or FIO2 levels will result in shorter sensor life.)<br />
Range <strong>of</strong> flow delivery to the patient: Up to 300 L/min<br />
for pressure support ventilation (PSV) spontaneous<br />
breaths or pressure control ventilation (PCV)<br />
mandatory breaths; 3 to 150 L/min for mandatory<br />
or assisted volume control ventilation (VCV)<br />
breaths.<br />
Leakage from one gas system to another:<br />
Not applicable<br />
(no high-pressure air source).<br />
Design pressure: 50 psi (345 kPa)<br />
Operating pressure range: 40 to 90 psi (275 to 620 kPa)<br />
Oxygen regulator bleed: Up to 3 L/min<br />
C-2 10066984 Rev. D 700 Series Ventilator Operator’s Manual
Bacteria<br />
filter<br />
efficiency<br />
Alarm<br />
volume<br />
C.2 Environmental<br />
Specifications<br />
Inspiratory and expiratory filters (disposable and<br />
reusable): 99.97% retention <strong>of</strong> 0.3 μm particles at<br />
100 L/min.<br />
Minimum (level 1): 74 dBA at 1 m<br />
Maximum (level 5): 88 dBA at 1 m<br />
<strong>Table</strong> C-2: Environmental specifications<br />
Temperature Operating: 5 to 45 °C (41 to 113 °F)<br />
at 10 to 95% relative humidity<br />
Storage: -40 to 60 °C (-40 to 140 °F) at<br />
10 to 95% relative humidity<br />
Atmospheric<br />
pressure<br />
<strong>Table</strong> C-1: Physical specifications (continued)<br />
Operating: 8.7 to 16.0 psi<br />
(600 to 1100 hPa)<br />
Storage: 7.3 to 16.0 psi<br />
(500 to 1100 hPa)<br />
Altitude Operating: Up to 4570 m (15,000 ft)<br />
Storage: Up to 15,240 m (50,000 ft)<br />
Oxygen inlet<br />
supply<br />
Pressure:<br />
Warning<br />
40 to 90 psi (275 to 620 kPa)<br />
Due to excessive restriction <strong>of</strong> certain hose<br />
assemblies (listed in <strong>Table</strong> B-1), reduced FIO 2<br />
levels may result when oxygen inlet pressures<br />
< 50 psi (345 kPa) are employed. Make sure<br />
oxygen inlet pressure is ≥ 50 psi (345 kPa) when<br />
using these hose assemblies, to maintain correct<br />
FIO 2 levels.<br />
Flow: At least 160 L/min at standard<br />
temperature and pressure,<br />
dry (STPD) required<br />
700 Series Ventilator Operator’s Manual 10066984 Rev. D C-3
Specifications<br />
C.3 Power<br />
Power<br />
supply<br />
Earth<br />
leakage<br />
current<br />
Enclosure<br />
leakage<br />
current<br />
Internal<br />
battery<br />
<strong>Table</strong> C-3: Power specifications<br />
Input range: 100 to 120 V ac nominal,<br />
220 to 240 V ac nominal,<br />
50/60 Hz, 2.9 A (100 to<br />
120 V units) or 1.3 A (220<br />
to 240 V units), 290 VA<br />
Main fuse: 10 A, 250 V, medium time<br />
lag, high (H) breaking<br />
capacity, 6 x 32 mm (meets<br />
IEC and CSA standards).<br />
(A circuit breaker opens<br />
when current draw<br />
exceeds 4 A.)<br />
At 100 to 120 V ac operation: less than 300 μA<br />
At 220 to 240 V ac operation: less than 500 μA<br />
(Includes ventilator, power cord, and internal and<br />
external batteries)<br />
Less than 50 μA in normal condition (all units)<br />
Less than 300 μA in single fault condition at 100-120 V<br />
AC operation<br />
Less than 500 μA in single fault condition at 220-240 V<br />
AC operation<br />
24 V dc, 7 Ah<br />
Operating time (for a new, fully-charged battery at<br />
20 °C and sea level):<br />
• Approximately 2.5 hours under nominal conditions<br />
(nominal conditions: tidal volume 0.6 L, respiratory<br />
rate 15/min, PEEP/CPAP 5 cmH2O, peak flow<br />
60 L/min, plateau 0 s; average peak pressure<br />
30 cmH2O, average mean pressure 8 cmH2O) • Approximately 2 hours under extreme conditions<br />
(extreme conditions: tidal volume 1.2 L, respiratory<br />
rate 15/min, PEEP/CPAP 15 cmH2O, peak flow<br />
60 L/min, plateau 0 s; average peak pressure<br />
64 cmH2O, average mean pressure 24 cmH2O) Recharge time: 2.5 to 3 hours in ventilator<br />
Charges automatically while ventilator is connected to<br />
ac power and power switch is on (including standby<br />
mode)<br />
Charge level indicated on keyboard<br />
C-4 10066984 Rev. D 700 Series Ventilator Operator’s Manual
External<br />
battery<br />
Battery shelf<br />
life when<br />
charge is not<br />
maintained<br />
<strong>Table</strong> C-3: Power specifications (continued)<br />
Specifications<br />
24 V dc, 17 Ah<br />
Operating time (for a new, fully-charged battery at<br />
20 °C and sea level):<br />
• Approximately 7 hours under nominal conditions<br />
(See internal battery for definition <strong>of</strong> nominal<br />
conditions.)<br />
• Approximately 5.5 hours under extreme conditions<br />
(See internal battery for definition <strong>of</strong> extreme<br />
conditions.)<br />
Recharge time: 7.5 to 8 hours in ventilator, 3 to 4 hours<br />
using optional battery charger<br />
Charges automatically while ventilator is connected<br />
to ac power and the power switch is ON (including<br />
standby mode)<br />
Battery charge levels available under menu function<br />
Ideally internal and external batteries should be<br />
stored in a cool, dry place. If the batteries are stored<br />
without maintaining charge, typical shelf life is as<br />
follows:<br />
At 0 to 20 °C (32 to 68 °F): 12 months<br />
At 21 to 30 °C (69 to 86 °F): 9 months<br />
At 31 to 40 °C (87 to 104 °F): 5 months<br />
At 41 to 50 °C (105 to 122 °F): 2.5 months<br />
NOTE:<br />
Battery life specifications are approximate. To<br />
ensure maximum battery life, maintain<br />
full charge and minimize the number <strong>of</strong><br />
complete discharges.<br />
700 Series Ventilator Operator’s Manual 10066984 Rev. D C-5
Specifications<br />
C.4 Compliance and approvals<br />
IEC 601-1<br />
classification<br />
The 700<br />
Series<br />
Ventilator<br />
System<br />
complies<br />
with these<br />
International<br />
and<br />
European<br />
standards:<br />
The 700<br />
Series<br />
Ventilator<br />
System has<br />
been<br />
certified by<br />
these test<br />
agencies:<br />
<strong>Table</strong> C-4: Compliance and approvals<br />
The 700 Series Ventilator System complies with the<br />
requirements <strong>of</strong> Directive 93/42/EEC concerning<br />
medical devices. It therefore bears the CE marking.<br />
Protection class I, Type B, internally powered, drippro<strong>of</strong><br />
equipment, continuous operation.<br />
IEC 601-1/EN 60601-1<br />
IEC 601-1-2/EN 60601-1-2<br />
EN 794-1<br />
In addition, the 700 Series Ventilator System has<br />
been approved to the type test requirements<br />
<strong>of</strong> Annex III <strong>of</strong> the Medical Device Directive, by<br />
the notified body, TUV Rheinland.<br />
TUV Rheinland: EC Type Test Certificate to the<br />
requirements <strong>of</strong> Annex III <strong>of</strong> the Medical Device<br />
Directive<br />
CSA: CSA C22.2 No. 601-1, CSA C22.2<br />
No. 601-2-12, NRTL certification<br />
C-6 10066984 Rev. D 700 Series Ventilator Operator’s Manual
C.5 Technical<br />
Maximum<br />
limited<br />
pressure<br />
Maximum<br />
ventilating<br />
pressure<br />
Measuring<br />
and display<br />
devices<br />
<strong>Table</strong> C-5: Technical specifications<br />
Specifications<br />
92 cmH 2 O (92 hPa).<br />
A dedicated backup circuit opens the safety valve if<br />
system pressure exceeds 115 cmH 2 O (113 hPa).<br />
89 cmH 2 O (89 hPa) for VCV breaths or 80 cmH 2 O<br />
(80 hPa) for PSV breaths, ensured by HIGH PRESSURE<br />
limit.<br />
Purpose: Mean airway pressure<br />
Sensing position: Exhalation limb<br />
Range: 0 to 99 cmH2O (0 to 99 hPa)<br />
Type: Silicon solid state<br />
Purpose: Peak pressure<br />
Sensing position: Exhalation limb<br />
Range: 0 to 140 cmH2O (0 to 140 hPa)<br />
Type: Silicon solid state<br />
Purpose: Plateau pressure (760 Ventilator<br />
only)<br />
Sensing position: Exhalation limb<br />
Range: 0 to 140 cmH2O (0 to 99 hPa)<br />
Type: Silicon solid state<br />
Purpose: PEEP/CPAP pressure<br />
Sensing position: Exhalation limb<br />
Range: 0 to 140 cmH2O (0 to 140 hPa)<br />
Type: Silicon solid state<br />
Purpose: Rate<br />
Sensing position: Microprocessor<br />
Range: 3 to 500/min<br />
Type: Calculated from inspiratory and<br />
expiratory time measurements<br />
Purpose: I:E ratio<br />
Sensing position: Microprocessor<br />
Range: 1:99.9 to 1:9.9<br />
Type: Calculated from inspiratory and<br />
expiratory time measurements<br />
700 Series Ventilator Operator’s Manual 10066984 Rev. D C-7
Specifications<br />
Measuring<br />
and display<br />
devices<br />
(continued)<br />
<strong>Table</strong> C-5: Technical specifications (continued)<br />
Purpose: Inspiratory time (760 Ventilator<br />
only)<br />
Sensing position: Microprocessor<br />
Range: 0.00 to 9.90 s<br />
Type: Inspiratory time measurement<br />
Purpose: Exhaled tidal volume<br />
Sensing position: Exhalation limb<br />
Range: 0 to 9 L<br />
Type: Differential pressure<br />
pneumotach<br />
Purpose: Total minute volume<br />
Sensing position: Exhalation limb<br />
Range: 0 to 99 L<br />
Type: Differential pressure<br />
pneumotach<br />
Purpose: Delivered volume (760 Ventilator<br />
only)<br />
Sensing position: Exhalation limb<br />
Range: 0 to 3000 ml<br />
Type: Differential pressure<br />
pneumotach<br />
Purpose: Spontaneous minute volume<br />
Sensing position: Exhalation limb<br />
Range: 0 to 99 L<br />
Type: Calculated from expiratory flow<br />
measurements<br />
Purpose: FIO2 sensor<br />
Sensing position: Inspiratory manifold<br />
Range: 18 to 109%<br />
Type: Galvanic cell<br />
C-8 10066984 Rev. D 700 Series Ventilator Operator’s Manual
Results <strong>of</strong><br />
ventilator<br />
breathing<br />
system<br />
testing<br />
(using<br />
circuits<br />
identified<br />
for use with<br />
700 Series<br />
Ventilators)<br />
<strong>Table</strong> C-5: Technical specifications (continued)<br />
Specifications<br />
NOTE:<br />
To achieve compliance with the more rigid<br />
requirements for oxygen monitoring (as set forth<br />
in ISO 7767), <strong>Covidien</strong> recommends using an<br />
external monitor that meets that standard.<br />
Internal volume: Not applicable; 700 Series Ventilators<br />
automatically adjust for volume losses due to gas<br />
compressibility (that is, automatic compliance<br />
compensation), subject to a maximum delivered<br />
volume <strong>of</strong> 2.5 L.<br />
NOTE:<br />
To ensure that compliance compensation<br />
functions correctly, the user must run SST with<br />
the circuit configured as intended for use on<br />
the patient.<br />
NOTE:<br />
Ventilator breathing circuit testing specifications<br />
are based on the recommended configurations<br />
shown in Figure C-1 (heated wire humidifier<br />
without water traps and non-heated wire<br />
humidifier with water traps).<br />
700 Series Ventilator Operator’s Manual 10066984 Rev. D C-9
Specifications<br />
Heated wire humidifier, no water traps<br />
1500 mm<br />
1500 mm<br />
No heated wire humidifier, with water traps<br />
1200 mm<br />
1200 mm<br />
To expiratory filter<br />
300 mm<br />
300 mm<br />
Figure C-1. Recommended ventilator breathing circuit configurations<br />
C-10 10066984 Rev. D 700 Series Ventilator Operator’s Manual<br />
250 mm<br />
120 mm<br />
To expiratory filter<br />
250 mm<br />
120 mm<br />
7-00080<br />
To<br />
inspiratory<br />
filter<br />
To<br />
inspiratory<br />
filter
Breath delivery<br />
All ventilatory modes are classified as mandatory or spontaneous, or<br />
synchronous intermittent mandatory ventilation (SIMV), which is a<br />
mix <strong>of</strong> mandatory and spontaneous breaths.<br />
Mandatory modes deliver breaths whose parameters are determined<br />
by the ventilator’s settings. For volume control ventilation (VCV)<br />
breath types, settings include respiratory rate, peak inspiratory flow,<br />
tidal volume, and plateau. For pressure control ventilation (PCV)<br />
breath types, settings include respiratory rate, inspiratory pressure, I:E<br />
ratio or inspiratory time, and rise time factor (PCV is available on the<br />
760 Ventilator only). Breaths in a mandatory mode can be initiated by<br />
the ventilator, operator, or patient. The 740 and 760 Ventilator<br />
Systems deliver mandatory mode breaths with a square (constant<br />
flow) waveform.<br />
• Ventilator-initiated mandatory (VIM) breaths are delivered at a<br />
rate determined by the RESPIRATORY RATE setting. The MAND<br />
indicator lights when a VIM breath is delivered.<br />
• Patient-initiated mandatory (PIM) breaths are delivered when<br />
the patient triggers a mandatory breath. The ASSIST indicator<br />
lights when a PIM breath is delivered.
Breath delivery<br />
• Operator-initiated mandatory (OIM) breaths are delivered when<br />
the operator presses MANUAL INSP. The ventilator does not deliver<br />
a manual inspiration until at least 200 ms <strong>of</strong> the exhalation phase<br />
have elapsed, and expiratory flow has fallen to less than 30% <strong>of</strong><br />
peak expiratory flow. The ventilator does not deliver manual<br />
inspirations during apnea ventilation. The MAND indicator lights<br />
when a OIM breath is delivered.<br />
Spontaneous modes deliver breaths whose parameters (including<br />
peak inspiratory flow and tidal volume) are partially determined<br />
by the patient. The breaths in a spontaneous mode are initiated<br />
by the patient. When the patient triggers a spontaneous breath,<br />
the inspiratory flow and the tidal volume are determined by<br />
the combination <strong>of</strong> patient effort and the support pressure setting<br />
(on the 740 Ventilator), or the support pressure, rise time factor, and<br />
exhalation sensitivity (on the 760 Ventilator). The SPONT indicator<br />
lights when a spontaneous breath is delivered.<br />
The 700 Series Ventilator System <strong>of</strong>fers three modes <strong>of</strong> ventilation:<br />
• Assist/control (A/C), which consists entirely <strong>of</strong> mandatory breaths.<br />
• Spontaneous (SPONT), which consists entirely <strong>of</strong> spontaneous<br />
breaths.<br />
• SIMV, which can include both mandatory and spontaneous<br />
breaths.<br />
During ventilation the message window shows flow information<br />
(Figure D-1 illustrates this information using a waveform) that can<br />
be helpful in selecting ventilator settings:<br />
• Peak inspiratory flow and end inspiratory flow are displayed as:<br />
I:Peak xx End xx<br />
where I: refers to inspiratory flows, Peak is peak inspiratory flow<br />
and End is end inspiratory flow.<br />
• End exhalation flow is displayed as:<br />
E:End xx<br />
where E: refers to expiratory flow and End is end expiratory flow.<br />
D-2 10066984 Rev. D 700 Series Ventilator Operator’s Manual
D.1 A/C mode<br />
Peak<br />
expiratory<br />
flow End<br />
inspiratory<br />
flow<br />
End<br />
expiratory<br />
flow<br />
7-00052<br />
Figure D-1. Flow waveform<br />
Breath delivery<br />
Apnea ventilation is declared in any mode if no breath (spontaneous,<br />
VIM, or OIM) is detected within the selected apnea interval. Apnea<br />
ventilation continues until the operator presses the alarm reset key or<br />
the patient triggers two consecutive breaths.<br />
During A/C mode, the ventilator delivers mandatory breaths only,<br />
using volume control ventilation (VCV, available on the 740 and<br />
760 Ventilators) or pressure control ventilation (PCV, available on the<br />
760 Ventilator only).<br />
When a VCV breath is triggered, the ventilator delivers a breath based<br />
on the set TIDAL VOLUME and PEAK FLOW settings. You can extend the<br />
inspiratory phase <strong>of</strong> a VCV breath by setting a PLATEAU time (though<br />
this reduces the expiratory time). When a PCV breath is triggered, the<br />
ventilator delivers a breath based on the set INSPIRATORY PRESSURE,<br />
I:E RATIO or inspiratory time, and RISE TIME FACTOR.<br />
During A/C, the RESPIRATORY RATE setting determines when a VIM<br />
breath is delivered. If PIM or OIM breaths increase the respiratory<br />
rate, the set breath is delivered more <strong>of</strong>ten and the minute volume<br />
increases.<br />
The ventilator normally terminates the inspiratory phase <strong>of</strong> a<br />
breath when:<br />
• the set TIDAL VOLUME has been delivered (VCV breaths), or<br />
• a plateau period has elapsed (VCV breaths), or<br />
700 Series Ventilator Operator’s Manual 10066984 Rev. D D-3
Breath delivery<br />
• the set I:E RATIO is reached or inspiratory time has elapsed<br />
(PCV breaths).<br />
The ventilator delivers a VIM breath at the preset respiratory rate.<br />
The ventilator delivers a PIM breath if it detects a patient effort, as<br />
defined by the TRIGGER SENSITIVITY setting. The ventilator delivers<br />
an OIM breath if the operator presses MANUAL INSP.<br />
D.2 SPONT mode<br />
During SPONT mode, the ventilator delivers spontaneous breaths.<br />
Pressure support ventilation (PSV) is available in SPONT. In PSV the<br />
ventilator augments the patient’s inspiratory effort to sustain the set<br />
level <strong>of</strong> SUPPORT PRESSURE. On the 760 Ventilator only, the RISE TIME<br />
FACTOR setting determines how quickly the target pressure is<br />
achieved, and the EXH SENSITIVITY setting determines the point at<br />
which the breath cycles to exhalation. When the inspiratory phase <strong>of</strong> a<br />
PSV breath terminates, the exhalation valve opens and pressure falls<br />
to the set level <strong>of</strong> PEEP/CPAP. The patient triggers all spontaneous<br />
breaths, and influences their inspiratory flow, inspiratory time, and<br />
tidal volume.<br />
The ventilator normally terminates the inspiratory phase <strong>of</strong> a PSV<br />
breath when:<br />
• inspiratory flow drops to 10 L/min or 25% <strong>of</strong> peak flow, whichever<br />
is less (740 Ventilator), or when the inspiratory flow is less than the<br />
set value <strong>of</strong> EXH SENSITIVITY (760 Ventilator), or<br />
• patient wye pressure exceeds the set inspiratory pressure<br />
(Pi + PEEP) by more than 3 cmH2O (3 hPa), or<br />
• inspiratory time exceeds 3.5 seconds (2.5 seconds for pediatric<br />
ventilator breathing circuits).<br />
The ventilator delivers an OIM breath during SPONT when an operator<br />
presses MANUAL INSP. OIM breaths delivered during SPONT are based<br />
on the apnea settings.<br />
D-4 10066984 Rev. D 700 Series Ventilator Operator’s Manual
D.3 SIMV mode<br />
Breath delivery<br />
During SIMV, the ventilator can deliver a combination <strong>of</strong> mandatory<br />
and spontaneous breaths. The ventilator, operator, or patient can<br />
trigger mandatory breaths. The patient can also trigger spontaneous<br />
breaths. Spontaneous breaths can be augmented by PSV.<br />
D.3.1 Breath timing<br />
In SIMV, a breath period (T b ) is divided into two intervals: a mandatory<br />
interval (T m ) and a spontaneous interval (T s ) (Figure D-2).<br />
T m<br />
T b<br />
Figure D-2. SIMV breath period intervals<br />
During T b , the ventilator typically delivers one mandatory breath,<br />
and the patient may trigger a number <strong>of</strong> spontaneous breaths.<br />
When T b begins, the ventilator enters T m . If the patient triggers a<br />
breath during T m , a PIM breath is delivered, the T m terminates<br />
(regardless <strong>of</strong> whether the full T m has elapsed), and the ventilator<br />
enters and remains in T s until T b has elapsed (Figure D-3).<br />
Tm<br />
T s<br />
PIM<br />
T m T s T m T s<br />
T m = up to 60% <strong>of</strong> T b<br />
T s extension<br />
Figure D-3. Synchronizing breath intervals with patient effort<br />
If the patient triggers a breath during T s , the ventilator delivers a<br />
spontaneous breath based on the SUPPORT PRESSURE setting<br />
(Figure D-4). On the 760 Ventilator, a spontaneous breath is also<br />
based on the RISE TIME FACTOR and EXH SENSITIVITY settings.<br />
700 Series Ventilator Operator’s Manual 10066984 Rev. D D-5<br />
T s<br />
7-00136<br />
7-00081
Breath delivery<br />
T m<br />
PIM SPONT<br />
T s extension<br />
Figure D-4. Spontaneous breaths during SIMV<br />
The ventilator remains in T s until T b has elapsed, then reenters T m .<br />
If the patient does not trigger a breath during T m , the ventilator<br />
delivers a VIM breath when T m has elapsed (Figure D-5).<br />
NOTE:<br />
To prevent “breath stacking” in SIMV mode, the ventilator will<br />
not deliver the next VIM breath to maintain the breath rate<br />
until the flow drops to 50% <strong>of</strong> the peak inspiratory flow and<br />
at least 200 ms <strong>of</strong> the expiratory phase have elapsed.<br />
Figure D-5. Mandatory breaths during SIMV<br />
The ventilator can deliver an OIM (manual inspiration) during T m or<br />
T s (Figure D-6). If the ventilator delivers an OIM during T s , the SIMV<br />
breath timing is unaffected. If the ventilator delivers an OIM during<br />
T m , T m terminates and the ventilator enters T s .<br />
Figure D-6. Manual inspiration during SIMV<br />
D-6 10066984 Rev. D 700 Series Ventilator Operator’s Manual<br />
T s<br />
7-00082<br />
VIM VIM<br />
Tm Ts Tm Ts VIM PIM OIM OIM<br />
T m T s T m<br />
T s<br />
T s extension<br />
T m<br />
T s<br />
T s extension<br />
7-00083<br />
7-00084
Alarm testing<br />
This appendix tells you how to check the operation <strong>of</strong> these alarms<br />
before attaching the ventilator to a patient:<br />
• LOW INSP PRESSURE<br />
• LO EX TIDAL VOLUME<br />
• DISCONNECT<br />
• HIGH PRESSURE<br />
• CONTINUOUS HI PRES<br />
• LOSS AC POWER<br />
• APNEA<br />
• % O2 LOW<br />
Section 3.3 tells you how to view and change alarm limits, and<br />
Chapter 7 tells you what to do if an alarm occurs.<br />
1. Set up the ventilator for operation (connect oxygen source,<br />
attach adult or pediatric breathing circuit). Attach a test lung<br />
(P/N 4-000612-00) to the wye.<br />
2. Select the following settings:<br />
Mode A/C<br />
RESPIRATORY RATE 5/min<br />
TIDAL VOLUME 500 ml<br />
PEAK FLOW 60 L/min<br />
PLATEAU 0 s<br />
HIGH RATE 100/min<br />
LOW INSP PRESSURE 3 cmH 2 O (3 hPa)
Alarm testing<br />
HIGH PRESSURE 50 cmH2O (50 hPa)<br />
HIGH TIDAL VOLUME 1500 ml<br />
LOW TIDAL VOLUME 5 ml<br />
LOW MINUTE VOLUME 0 L<br />
PEEP/CPAP 5 cmH2O (5 hPa)<br />
TRIGGER SENSITIVITY 3 L/min<br />
3. LOW INSP PRESSURE, LO EX TIDAL VOLUME, and DISCONNECT<br />
alarm tests: Allow the ventilator to deliver at least 10 breaths.<br />
During the inspiratory phase <strong>of</strong> a breath, disconnect the test<br />
lung.<br />
4. The ventilator annunciates the LOW INSP PRESSURE alarm during<br />
the first breath after you disconnect the test lung, and the<br />
DISCONNECT and LO EX TIDAL VOLUME alarms after the fourth<br />
breath. Verify the correct audible and visual characteristics <strong>of</strong> the<br />
alarm.<br />
5. HIGH PRESSURE alarm test: Change the HIGH PRESSURE alarm<br />
setting to 11 cmH2O (11 hPa).<br />
6. Press the alarm reset key to reset the DISCONNECT alarm.<br />
Block the wye.<br />
7. The ventilator terminates inspiration without alarming on the<br />
first breath. The ventilator annunciates a HIGH PRESSURE alarm<br />
during the second breath.<br />
8. CONTINUOUS HI PRES alarm test: Reset the HIGH PRESSURE<br />
alarm setting to 20 cmH2O. Block the EXHAUST port. Press the<br />
alarm reset key to reset all alarms.<br />
9. Press MANUAL INSP. After one breath, the ventilator annunciates<br />
a CONTINUOUS HI PRES alarm. (If not, check the ventilator<br />
breathing circuit to ensure that it is not leaking.)<br />
10. Unblock the EXHAUST port. Unblock the wye and reconnect the<br />
test lung. Change the HIGH PRESSURE alarm setting to 50 cmH 2 O.<br />
Press the alarm reset key to reset all alarms.<br />
11. LOSS AC POWER alarm test: Allow the ventilator to deliver at<br />
least 3 breaths, then disconnect the power cord from ac power.<br />
E-2 10066984 Rev. D 700 Series Ventilator Operator’s Manual
Alarm testing<br />
NOTE:<br />
Run this test only with a fully charged battery. (Determine charge<br />
<strong>of</strong> internal battery by checking INTERNAL BATTERY LEVEL display.)<br />
12. If battery backup is available, the ventilator annunciates a<br />
LOSS AC POWER alarm. (If less than 5 minutes <strong>of</strong> battery backup<br />
are available, the ventilator annunciates a LOSS OF POWER<br />
alarm.)<br />
13. Reconnect the power cord to ac power. The LOSS OF POWER or<br />
LOSS AC POWER alarm should autoreset.<br />
14. APNEA alarm test: Press the MENU key, turn the knob to display<br />
User Settings, then press ACCEPT. Turn the knob to display<br />
Apnea interval (Ta), then press ACCEPT. Turn the knob to select<br />
an apnea interval <strong>of</strong> 20 seconds.<br />
15. Select the following settings:<br />
Mode SPONT<br />
APNEA PARAMS:<br />
RESPIRATORY RATE 5/min<br />
TIDAL VOLUME 400 L<br />
PEAK FLOW 10 L/min<br />
SUPPORT PRESSURE 0 cmH2O (0 hPa)<br />
The ventilator annunciates an APNEA alarm 20 seconds after the<br />
last breath triggered.<br />
NOTE:<br />
To avoid triggering a breath during the selected apnea interval,<br />
do not touch the test lung.<br />
16. Squeeze the test lung twice to simulate two subsequent<br />
patient-initiated breaths. The APNEA alarm should autoreset.<br />
700 Series Ventilator Operator’s Manual 10066984 Rev. D E-3
Alarm testing<br />
17. % O2 LOW alarm test: Select the following settings:<br />
Mode A/C<br />
RESPIRATORY RATE 20/min<br />
TIDAL VOLUME 1000 ml<br />
PEAK FLOW 60 L/min<br />
PLATEAU 0 s<br />
HIGH PRESSURE<br />
% O2 90 cmH2O (90 hPa)<br />
100 %<br />
18.<br />
Allow 36 seconds for % O2 setting to stabilize (the % O2 setting is<br />
stable when the ventilator has delivered 12 L <strong>of</strong> volume).<br />
Disconnect the oxygen inlet supply.<br />
19. The ventilator annunciates a LOW O2 SUPPLY alarm within<br />
2 breaths, and a % O2 LOW alarm within approximately<br />
30 seconds.<br />
20. Reconnect the oxygen inlet supply. The LOW O2 SUPPLY and<br />
% O2 LOW alarms should autoreset within approximately<br />
30 seconds.<br />
The alarm test is complete.<br />
E-4 10066984 Rev. D 700 Series Ventilator Operator’s Manual
Pneumatic schematic<br />
Oxygen solenoids<br />
Oxygen<br />
regulator<br />
pressure<br />
transducer<br />
PRESSURE SOLENOID<br />
PCB<br />
Oxygen<br />
fitting<br />
Mixing<br />
manifold<br />
Inlet<br />
check<br />
valve<br />
PEEP pump<br />
Piston/cylinder<br />
ass’y<br />
Oxygen<br />
regulator<br />
Safety<br />
valve<br />
Motor/<br />
encoder<br />
Oxygen<br />
sensor<br />
Muffler<br />
Exhalation<br />
solenoid<br />
PEEP reservoir<br />
Filter<br />
Air<br />
intake<br />
filter<br />
Outlet<br />
check<br />
valve<br />
Exhaust<br />
port<br />
Jet venturi<br />
Thermistor<br />
Heater ass’y<br />
Exhalation<br />
check valve<br />
Exhalation<br />
valve<br />
Cylinder<br />
pressure<br />
transducer<br />
autozero<br />
solenoid<br />
Thermistor<br />
assembly<br />
Exhalation<br />
pressure transducer<br />
autozero solenoid<br />
Exhalation<br />
flow sensor<br />
Inspiratory filter<br />
Expiratory filter<br />
7-00085<br />
To patient<br />
Collector<br />
vial
Pneumatic schematic<br />
This page is intentionally blank.<br />
F-2 10066984 Rev. D 700 Series Ventilator Operator’s Manual
Glossary<br />
/min Breaths per minute (unit <strong>of</strong> respiratory rate).<br />
% O 2<br />
SECTION<br />
The percentage <strong>of</strong> oxygen in the gas delivered to the<br />
patient.<br />
A Amperes (unit <strong>of</strong> current).<br />
A/C Assist/control mode. Allows the patient, ventilator, or<br />
operator to initiate mandatory breaths.<br />
ac Alternating current.<br />
alarm reset Clears all alarm indicators and cancels the alarm silence<br />
period.<br />
alarm silence Silences alarm sound for two minutes from the most<br />
recent key press, but does not change visual indicators.<br />
apnea Cessation <strong>of</strong> breathing. 700 Series Ventilators declare<br />
apnea and begins apnea ventilation when the patient<br />
does not trigger a breath within the user-selected<br />
apnea interval.<br />
APNEA<br />
PARAMS<br />
Apnea parameters, the settings for apnea ventilation.<br />
The ventilator enters apnea ventilation if it does not<br />
deliver a breath to the patient within the user-selected<br />
apnea interval.<br />
autoreset When an alarm becomes inactive because the triggering<br />
condition has self-corrected.<br />
BTPS Body temperature and pressure, saturated: 37 °C, at<br />
ambient barometric pressure, at 100% relative<br />
humidity.
Glossary<br />
CE Mark that indicates compliance with the Medical<br />
Device Directive, 93/42/EEC.<br />
clinical alarm An alarm triggered by a ventilator setting or patient<br />
condition, can occur in the usual course <strong>of</strong> patient care.<br />
cm Centimeter (unit <strong>of</strong> length).<br />
cmH 2 O Centimeters <strong>of</strong> water (unit <strong>of</strong> pressure), approximately<br />
equal to 1 hPa.<br />
CSA Canadian Standards Association.<br />
dc Direct current.<br />
DISS Diameter index safety standard, a standard for highpressure<br />
gas inlet fittings.<br />
EMC Electromagnetic compatibility.<br />
EN European norm.<br />
end<br />
inspiratory<br />
flow<br />
END INSP<br />
PRESSURE<br />
The flow at the patient wye at the end <strong>of</strong> the inspiratory<br />
phase. On the 760 Ventilator only, the end inspiratory<br />
flow is displayed in the message window at the end <strong>of</strong><br />
each PCV or PSV breath, and can be used to assess the<br />
EXH SENSITIVITY setting.<br />
End inspiratory pressure, patient data displayed on the<br />
760 Ventilator only. The pressure measured at the end<br />
<strong>of</strong> inspiration, excluding any plateau.<br />
EST Extended self-test, a comprehensive test <strong>of</strong> ventilator<br />
function, intended to be run by a qualified service<br />
technician.<br />
ETO Ethylene oxide.<br />
EXP PAUSE Expiratory pause, available on the 760 Ventilator only.<br />
Closes the exhalation valve at the end <strong>of</strong> the expiratory<br />
phase while the EXP PAUSE key is pressed, used to<br />
calculate patient’s auto-PEEP.<br />
EXH<br />
SENSITIVITY<br />
FIO 2<br />
Exhalation sensitivity, a ventilator setting that determines<br />
the flow (in L/min) at which the ventilator cycles from<br />
inspiration to exhalation for PSV breaths, available on the<br />
760 Ventilator only.<br />
Fractional inspired oxygen, <strong>of</strong>ten expressed as % O 2 .<br />
G-2 10066984 Rev. D 700 Series Ventilator Operator’s Manual
ft Feet (unit <strong>of</strong> length).<br />
Glossary<br />
heated wire A type <strong>of</strong> ventilator breathing circuit that includes a<br />
heated wire on the expiratory limb, or on both the<br />
inspiratory and expiratory limbs.<br />
high-priority<br />
alarm<br />
An alarm that requires immediate attention to ensure<br />
patient safety. When a high-priority alarm is active, the<br />
red ALARM indicator flashes and the high-priority audible<br />
alarm (a repeating sequence <strong>of</strong> three, then two beeps)<br />
sounds.<br />
HME Heat-moisture exchanger (“artificial nose”).<br />
hPa Hectopascal (unit <strong>of</strong> pressure), approximately equal to<br />
1 cmH 2 O.<br />
Hz Hertz (unit <strong>of</strong> frequency), indicating cycles per second.<br />
I:E ratio The ratio <strong>of</strong> inspiratory time to expiratory time. On the<br />
760 Ventilator only, a ventilator setting that determines<br />
breath timing in PCV.<br />
IEC International Electrotechnical Commission.<br />
INSP PAUSE Inspiratory pause, available on the 760 Ventilator only.<br />
Closes the exhalation valve at the end <strong>of</strong> the inspiratory<br />
phase <strong>of</strong> a mandatory breath until a stable plateau is<br />
reached (for a momentary pause), or for as long as you<br />
hold down the key (for an extended pause). Used to<br />
calculate patient’s compliance (for VCV or PCV<br />
mandatory breaths) and resistance (for VCV mandatory<br />
breaths).<br />
INSP<br />
PRESSURE<br />
Inspiratory pressure, available on the 760 Ventilator<br />
only. Defines the pressure above PEEP during the<br />
inspiratory phase <strong>of</strong> a PCV breath.<br />
INSP TIME Inspiratory time, available on the 760 Ventilator only.<br />
As a ventilator setting (selected using the MENU key),<br />
determines the breath timing <strong>of</strong> a PCV breath. As a<br />
patient data display, shows the measured inspiratory<br />
time.<br />
ISO International Standards Organization.<br />
kg Kilogram (unit <strong>of</strong> weight).<br />
L Liter (unit <strong>of</strong> volume).<br />
700 Series Ventilator Operator’s Manual 10066984 Rev. D G-3
Glossary<br />
L/min Liters per minute (unit <strong>of</strong> flow).<br />
lb Pound (unit <strong>of</strong> weight).<br />
LOW INSP<br />
PRESSURE<br />
An alarm that indicates that monitored circuit pressure<br />
is below the alarm setting at the end <strong>of</strong> inspiration.<br />
m Meter (unit <strong>of</strong> length).<br />
maintenance All actions necessary to keep equipment in, or restore<br />
it to, serviceable condition. Includes servicing, repair,<br />
modification, overhaul, inspection, and performance<br />
verification.<br />
mandatory A breath whose settings and timing are preset; can be<br />
triggered by the ventilator, patient, or operator. A<br />
mandatory breath is characterized by three <strong>of</strong> these<br />
four variables: tidal volume, flow waveform, inspiratory<br />
time, and plateau (inspiratory pause).<br />
manual<br />
inspiration<br />
mean<br />
pressure<br />
mediumpriority<br />
alarm<br />
An operator-initiated mandatory breath. Pressing the<br />
MANUAL INSP key on a 700 Series Ventilator delivers<br />
one mandatory breath to the patient.<br />
A calculation <strong>of</strong> the measured average ventilator<br />
breathing circuit pressure over an entire respiratory<br />
cycle.<br />
An alarm that requires prompt attention. When a<br />
medium-priority alarm is active, the yellow CAUTION<br />
indicator flashes and the medium-priority audible<br />
alarm (a repeating sequence <strong>of</strong> three beeps) sounds.<br />
min Minute (unit <strong>of</strong> time).<br />
minute<br />
volume<br />
The volume delivered to a patient in 1 min (V T x<br />
respiratory rate). The 740 Ventilator estimates total<br />
minute volume based on the previous 60 s or eight<br />
breaths, whichever interval is shorter.<br />
ml Milliliter (unit <strong>of</strong> volume).<br />
MRI Magnetic resonance imaging.<br />
ms Millisecond (unit <strong>of</strong> time).<br />
NIST Non-interchangeable screw thread, a standard for<br />
high-pressure gas fittings.<br />
G-4 10066984 Rev. D 700 Series Ventilator Operator’s Manual
normal<br />
ventilation<br />
O2 occlusion<br />
cycling mode<br />
The state <strong>of</strong> the ventilator when breathing is in<br />
progress and no alarms are active.<br />
Oxygen.<br />
Glossary<br />
A ventilation mode in effect during a severe occlusion.<br />
In occlusion cycling mode, the ventilator opens the<br />
safety and exhalation valves to vent excess pressure,<br />
then attempts to deliver breaths using modified<br />
settings. If the ventilator again detects an occlusion or<br />
continuous high pressure condition, it reopens the<br />
safety and exhalation valves to vent excess pressure,<br />
then resumes occlusion cycling mode.<br />
OIM Operator-initiated mandatory breath, delivered when<br />
the operator presses MANUAL INSP.<br />
PCV Pressure control ventilation, in which the ventilator<br />
delivers a breath at a preset inspiratory pressure for a<br />
preset inspiratory time or I:E ratio. Available on the<br />
760 Ventilator only, in A/C or SIMV mode.<br />
peak flow Maximum flow <strong>of</strong> gas delivered during a mandatory<br />
breath. (Combined with tidal volume and plateau,<br />
constant peak flow defines the inspiratory time.)<br />
peak<br />
pressure<br />
The patient wye pressure measured at the end <strong>of</strong><br />
inspiration (excluding plateau, if any).<br />
PEEP/CPAP Positive end expiratory pressure/continuous positive<br />
airway pressure. The minimum level <strong>of</strong> pressure<br />
maintained in the patient circuit throughout<br />
ventilation.<br />
On the 760 Ventilator only, PEEP/CPAP can be displayed<br />
in patient data area.<br />
PIM Patient-initiated mandatory breath.<br />
plateau The amount <strong>of</strong> time the inspiration phase <strong>of</strong> a<br />
mandatory breath is extended after inspiratory flow<br />
has ceased (inspiratory hold).<br />
POST Power-on self-test, a self-test that the ventilator runs<br />
whenever it is powered on, or when normal ventilation<br />
resumes.<br />
700 Series Ventilator Operator’s Manual 10066984 Rev. D G-5
Glossary<br />
PSV Pressure support ventilation, in which a positive<br />
pressure is delivered during the inspiratory phase <strong>of</strong><br />
spontaneous breaths. Available in SPONT and SIMV<br />
modes.<br />
preventive<br />
maintenance<br />
Procedures that keep subassemblies in satisfactory<br />
operational condition by providing system inspection,<br />
detection, and prevention <strong>of</strong> failures. Procedures<br />
include fan and air intake filter replacement,<br />
lubrication, calibration, etc.<br />
resistance The pressure drop resulting from the restriction <strong>of</strong> flow<br />
through an airway. Measured in cmH 2 O/L/s or hPa/L/s.<br />
respiratory<br />
rate<br />
RISE TIME<br />
FACTOR<br />
As a setting in A/C and SIMV, the minimum number <strong>of</strong><br />
mandatory breaths the patient receives per minute.<br />
As a monitored value, the average total number <strong>of</strong><br />
breaths delivered to the patient.<br />
A ventilator setting that determines how quickly the<br />
ventilator achieves target inspiratory pressure, available<br />
on the 760 Ventilator only for PCV and PSV breath types.<br />
s Second (unit <strong>of</strong> time).<br />
SIMV Synchronous intermittent mandatory ventilation, a<br />
mode that allows the ventilator to deliver a<br />
combination <strong>of</strong> mandatory and spontaneous breaths.<br />
SN Serial number.<br />
SPONT Spontaneous ventilation, a mode during which the<br />
patient triggers all breaths delivered by the ventilator<br />
with no set mandatory respiratory rate (the 20-second<br />
apnea interval ensures a minimum rate <strong>of</strong> 3 breaths<br />
per minute). The patient controls the breath variables,<br />
and the breath can be augmented by support pressure.<br />
SST Short self-test, a test that checks circuit integrity,<br />
calculates circuit compliance and filter resistance, and<br />
checks ventilator function. SST is intended to be run by<br />
the operator, at intervals according to your institution’s<br />
protocol.<br />
standby<br />
mode<br />
A waiting state used for maintaining ventilator<br />
settings and battery charging, in which there is no<br />
ventilation.<br />
G-6 10066984 Rev. D 700 Series Ventilator Operator’s Manual
Glossary<br />
STPD Standard temperature and pressure, dry.<br />
(In the United States STPD = 760 mmHg at 21.11 °C; in<br />
Europe STPD = 760 mmHg at 0 °C.)<br />
support<br />
pressure<br />
Pressure above PEEP maintained during spontaneous<br />
inspiration.<br />
SVO Safety valve open, a condition in which the ventilator is<br />
inoperative, and the safety valve opens to allow the<br />
patient to breathe room air unassisted by the ventilator.<br />
T b<br />
T I<br />
T m<br />
Ts technical<br />
alarm<br />
SIMV breath period.<br />
Inspiratory time.<br />
SIMV mandatory breath period.<br />
SIMV spontaneous breath period.<br />
An alarm that is triggered by the ventilator’s ongoing<br />
background tests, and typically does not occur in the<br />
normal course <strong>of</strong> patient care.<br />
tidal volume Volume delivered to the patient during a mandatory<br />
breath. The tidal volume delivered by a 700 Series<br />
Ventilator is compliance-compensated and corrected to<br />
body temperature and pressure, saturated (BTPS).<br />
trigger<br />
sensitivity<br />
unheated<br />
wire<br />
Inspiratory flow required to trigger the ventilator to<br />
deliver a breath.<br />
A type <strong>of</strong> ventilator breathing circuit that does not<br />
include a heated wire on the expiratory or inspiratory<br />
limb.<br />
V Volts (unit <strong>of</strong> voltage).<br />
VA Volt-amperes (unit <strong>of</strong> power).<br />
VCV Volume control ventilation, in which the ventilator<br />
delivers a preset tidal volume at a preset peak flow.<br />
Available in A/C and SIMV modes.<br />
VENT INOP A condition in which the ventilator is inoperative, and<br />
the safety valve opens to allow the patient to breathe<br />
room air unassisted by the ventilator. A qualified<br />
service technician must power up the ventilator and<br />
run extended self-test (EST) before normal ventilation<br />
can resume.<br />
700 Series Ventilator Operator’s Manual 10066984 Rev. D G-7
Glossary<br />
ventilator<br />
breathing<br />
circuit<br />
The entire inspiratory-expiratory conduit, including<br />
tubing, humidifier, and water traps.<br />
VIM Ventilator-initiated mandatory breath.<br />
V MAX<br />
V T<br />
Maximum flow rate demanded by the ventilator at the<br />
oxygen inlet connector.<br />
Tidal volume.<br />
G-8 10066984 Rev. D 700 Series Ventilator Operator’s Manual
Index<br />
Symbols<br />
% O 2 key, description 1-19<br />
Numerics<br />
100% O 2 key<br />
description 1-20<br />
how to use 5-9<br />
15,000-hour preventive maintenance<br />
kit, part number B-9<br />
30,000-hour preventive maintenance<br />
kit, part number B-9<br />
700 Series Ventilator<br />
block diagram 1-5<br />
compliance and approvals C-6<br />
functional description 1-3–1-7<br />
general description 1-1–1-7<br />
pneumatic schematic F-1<br />
setup 2-1–2-17<br />
specifications C-1–C-10<br />
start up 3-1–3-9<br />
theory <strong>of</strong> operation D-1–D-6<br />
A<br />
A/C (assist/control) ventilation mode<br />
description D-3–D-4<br />
A/C key, description 1-15<br />
ACCEPT key, description 1-23<br />
Accessories, part numbers B-2–B-10<br />
Air intake filter<br />
maintenance A-12<br />
part number B-7<br />
ALARM light, description 1-29<br />
Alarm reset 7-4<br />
ALARM RESET key, description 1-31<br />
ALARM SETTINGS display 1-27, 1-28<br />
Alarm silence 7-3<br />
ALARM SILENCE key, description 1-30<br />
Alarm test procedure E-1<br />
Alarms<br />
active, how to display 6-6<br />
autoreset 7-2<br />
how to display 6-6–6-7<br />
clinical, definition 7-4<br />
effectivity <strong>of</strong> 3-6<br />
high-priority 7-1<br />
how to read message window 7-2<br />
how to respond to 7-1–7-19<br />
how to view and set 3-6–3-7<br />
LOSS AC POWER, description 7-20<br />
LOSS OF POWER, description 7-20<br />
medium-priority 7-1<br />
messages<br />
clinical, list 7-5–7-13<br />
technical, list 7-14–7-19<br />
oxygen (FIO 2)<br />
how limits are determined 3-7<br />
power, description 7-20<br />
reset 7-4<br />
settings<br />
how to view and change 5-3<br />
technical, definition 7-4<br />
testing E-1<br />
volume specifications C-3<br />
APNEA 1-20<br />
Apnea interval, how to adjust 5-5<br />
Apnea interval, setting 6-10<br />
Apnea parameters<br />
how to adjust 5-4–5-5<br />
APNEA PARAMS indicator<br />
description 1-23<br />
700 Series Ventilator Operator’s Manual 10066984 Rev. D 1
Index<br />
APNEA PARAMS key<br />
description 1-20<br />
Apnea ventilation<br />
description 1-2<br />
in spontaneous mode D-4<br />
ASSIST indicator, description 1-29<br />
Assist/control (A/C) ventilation mode<br />
description D-3–D-4<br />
Autoclaving, procedure A-5<br />
Auto-PEEP<br />
calculating using EXP PAUSE 1-21<br />
Auto-PEEP, calculating using EXP<br />
PAUSE key 5-10<br />
Autoreset alarms 7-2<br />
Autoreset alarms menu function<br />
6-6–6-7<br />
Availability <strong>of</strong> modes and breath types<br />
on 740 and 760 Ventilators 1-2<br />
Availability, breath types, on 740 and<br />
760 Ventilators 5-2<br />
B<br />
Bacteria filter<br />
expiratory<br />
maintenance A-9<br />
operation <strong>of</strong> 1-4<br />
part number B-7<br />
resistance check A-9<br />
inspiratory<br />
maintenance A-8–A-9<br />
operation <strong>of</strong> 1-4<br />
part numbers B-6<br />
resistance check A-8–A-9<br />
Bar graph display<br />
pressure<br />
description 1-28<br />
volume<br />
description 1-28<br />
Bar graph, volume, how to view 5-8<br />
Basket, cart, part number B-10<br />
Battery<br />
external<br />
description 2-3–2-4<br />
how to display remaining life<br />
6-20–6-21<br />
how to install 2-4–2-5<br />
operation <strong>of</strong> 1-6<br />
part number B-6<br />
shelf life C-5<br />
specifications C-5<br />
how to retain charge during<br />
storage 2-4<br />
internal<br />
description 2-2–2-4<br />
how to display remaining life<br />
6-20–6-21, 6-21<br />
illustration <strong>of</strong> charge indicator<br />
2-3<br />
operation <strong>of</strong> 1-6<br />
part number B-9<br />
shelf life C-5<br />
specifications C-4<br />
Battery charger, external<br />
part numbers B-6<br />
Battery info menu function 6-20–6-21<br />
Bracket, mounting, humidifier<br />
part numbers B-7, B-8<br />
Breath delivery<br />
theory <strong>of</strong> operation D-1–D-6<br />
BREATH TIMING display 1-25<br />
Breath type/mode settings 1-15, 1-16<br />
Breath types<br />
availability on 740 and 760<br />
Ventilators 5-2<br />
how to change 5-2<br />
mandatory, description D-1–D-2<br />
spontaneous, description D-2<br />
Breathing circuit, ventilator<br />
how to install 2-10–2-11<br />
2 10066984 Rev. D 700 Series Ventilator Operator’s Manual
operation <strong>of</strong> 1-4<br />
specifications C-9–C-10<br />
Bumpers, cart, part number B-10<br />
C<br />
Calibrating the oxygen sensor 6-18<br />
Calibration, oxygen sensor A-10<br />
Cart<br />
basket, part number B-10<br />
how to use 2-17<br />
part number B-8<br />
Cart bumpers, part number B-10<br />
CAUTION light, description 1-29<br />
Chemical disinfection A-5<br />
caution about using<br />
formaldehyde and<br />
phenol-based disinfectants A-5<br />
procedure A-5<br />
Circuit, ventilator breathing<br />
operation <strong>of</strong> 1-4<br />
part numbers B-2–B-3<br />
Cleaning, disinfection, and<br />
sterilization A-2–A-5<br />
Cleaning, general guidelines A-4–A-5<br />
CLEAR key, description 1-22<br />
Clinical alarms<br />
definition 7-4<br />
messages, list 7-5–7-13<br />
Collector vial<br />
how to install 2-13<br />
maintenance A-9–A-10<br />
operation <strong>of</strong> 1-4<br />
part number B-6<br />
Compliance and resistance<br />
calculating using INSP PAUSE 1-22<br />
calculating using INSP PAUSE key<br />
5-11<br />
Connectors, specifications C-2<br />
Console, description 1-13–1-31<br />
Controls and indicators 1-13–1-31<br />
Cooling fan filter<br />
maintenance A-11<br />
part number B-7<br />
CURRENT display, description 1-23<br />
700 Series Ventilator Operator’s Manual 10066984 Rev. D 3<br />
D<br />
Index<br />
D/Flex filter. See Inspiratory filter<br />
D/X7 filter. See Expiratory filter B-7<br />
Date and time, setting 6-9<br />
DELIVERED VOLUME (ml) key/display,<br />
description 1-26<br />
Dimensions, ventilator C-2<br />
Disinfection A-5<br />
caution about using<br />
formaldehyde and phenolbased<br />
disinfectants A-5<br />
procedure A-5<br />
Display<br />
message, description 1-23<br />
See also name <strong>of</strong> specific display<br />
E<br />
EasyNeb Nebulizer operation<br />
6-21–6-23<br />
EasyNeb Operator’s manual, part<br />
numbers B-10<br />
Electrical specifications C-4–C-5<br />
Enabling or disabling the O 2 % alarm<br />
limits 6-19<br />
Enabling or disabling the O 2 % display<br />
6-20<br />
Endotracheal tube size, selecting 6-8<br />
Environmental specifications C-3<br />
EXH SENSITIVITY key, description 1-19<br />
Exhalation system, operation <strong>of</strong> 1-5<br />
Exhalation valve, operation <strong>of</strong> 1-5
Index<br />
EXHALED VOLUME (ml) key/display,<br />
description 1-26<br />
EXP PAUSE<br />
using to calculate auto-PEEP 1-21<br />
EXP PAUSE key<br />
description 1-21<br />
how to use 5-10<br />
Expiratory filter<br />
maintenance A-9<br />
operation <strong>of</strong> 1-4<br />
part number B-7<br />
resistance check A-9<br />
Extended self-test (EST) 4-13–4-26<br />
hardware requirements 4-13<br />
how to interpret results 4-25–4-26<br />
how to run 4-14–4-24<br />
key definitions during operation<br />
4-22<br />
list <strong>of</strong> tests 4-17–4-21<br />
prompts 4-22–4-24<br />
setup messages 4-14–4-16<br />
when to run 4-2<br />
External battery<br />
description 2-3–2-4<br />
how to display remaining life<br />
6-20–6-21<br />
how to install 2-4–2-5<br />
operation <strong>of</strong> 1-6<br />
part number B-6<br />
shelf life C-5<br />
specifications C-5<br />
F<br />
Failure, in EST, definition 4-24<br />
Failure, meaning <strong>of</strong> in SST 4-12<br />
Fan filter, cooling<br />
maintenance A-11<br />
part number B-7<br />
Fault, in EST, definition 4-24<br />
Fault, meaning <strong>of</strong> in SST 4-12<br />
Filter<br />
air intake<br />
maintenance A-12<br />
part number B-7<br />
bacteria<br />
expiratory<br />
maintenance A-8–A-9<br />
operation <strong>of</strong> 1-4<br />
part number B-7<br />
resistance check A-8–A-9<br />
inspiratory<br />
maintenance A-8–A-9<br />
operation <strong>of</strong> 1-4<br />
part numbers B-6<br />
resistance check A-8–A-9<br />
cooling fan<br />
maintenance A-11<br />
part number B-7<br />
expiratory<br />
maintenance A-9<br />
operation <strong>of</strong> 1-4<br />
part number B-7<br />
resistance check A-9<br />
inspiratory<br />
maintenance A-8–A-9<br />
operation <strong>of</strong> 1-4<br />
part numbers B-6<br />
resistance check A-8–A-9<br />
Flex arm<br />
how to install or shorten<br />
2-13–2-15<br />
part number B-4<br />
Flow pattern, VCV, setting 6-10<br />
Fuse, main, specifications C-4<br />
4 10066984 Rev. D 700 Series Ventilator Operator’s Manual
G<br />
Glossary G-1–G-8<br />
Graph, pressure bar (display)<br />
description 1-28<br />
Graph, volume bar (display)<br />
description 1-28<br />
H<br />
High pressure<br />
continuous<br />
handling 1-7<br />
HIGH PRESSURE key/display<br />
description 1-28<br />
HIGH RATE key/display<br />
description 1-27<br />
HIGH TIDAL VOLUME key/display<br />
description 1-27<br />
Hose assembly, oxygen, part numbers<br />
B-5<br />
Humidifier mounting kit, part<br />
numbers B-7, B-8<br />
Humidifier type, selecting 6-8<br />
Humidifier, how to install 2-15–2-16<br />
I<br />
I:E or T I, selecting 6-17<br />
I:E RATIO key/display, description 1-25<br />
Indicator. See name <strong>of</strong> specific<br />
indicator<br />
INSP PAUSE key<br />
description 1-22<br />
INSP PAUSE key, how to use 5-11<br />
INSP PAUSE, using to calculate<br />
compliance and resistance 1-22<br />
INSP TIME (s) key/display<br />
description 1-25<br />
Inspiratory filter<br />
700 Series Ventilator Operator’s Manual 10066984 Rev. D 5<br />
Index<br />
maintenance A-8–A-9<br />
operation <strong>of</strong> 1-4<br />
part numbers B-6<br />
resistance check A-8–A-9<br />
Inspiratory manifold system,<br />
operation <strong>of</strong> 1-4<br />
INSPIRATORY PRESSURE key,<br />
description 1-17<br />
Installation<br />
collector vial 2-13<br />
external battery 2-4–2-5<br />
flex arm 2-13–2-15<br />
humidifier 2-15–2-16<br />
to electrical supply 2-6–2-7<br />
to oxygen supply 2-8–2-9<br />
ventilator breathing circuit<br />
2-10–2-11<br />
Internal battery<br />
description 2-2–2-4<br />
how to display remaining life<br />
6-20–6-21, 6-21<br />
illustration <strong>of</strong> charge indicator 2-3<br />
operation <strong>of</strong> 1-6<br />
part number B-9<br />
shelf life C-5<br />
specifications C-4<br />
INTERNAL BATTERY LEVEL indicator,<br />
description 1-30<br />
Introduction 1-1–1-31<br />
K<br />
Key. See name <strong>of</strong> specific key<br />
Keyboard<br />
description 1-13–1-31<br />
PATIENT DATA section, key and<br />
indicator descriptions 1-24–1-29<br />
VENTILATOR SETTINGS section,<br />
key and indicator descriptions<br />
1-14–1-23
Index<br />
VENTILATOR STATUS section, key<br />
and indicator descriptions<br />
1-29–1-31<br />
Kit<br />
15-000-hour preventive<br />
maintenance, part number B-9<br />
30-000-hour preventive<br />
maintenance, part number B-9<br />
shelf mounting, part numbers B-7<br />
ventilator attachment, part<br />
number B-10<br />
Knob, description 1-23<br />
L<br />
Labels and symbols, descriptions<br />
1-8–1-12<br />
LCD display (message window),<br />
description 1-23<br />
Leakage current, specifications C-4<br />
Light. See name <strong>of</strong> specific light<br />
Limitations on ventilator settings 1-14<br />
LOSS AC POWER alarm<br />
description 7-20<br />
LOSS OF POWER alarm<br />
after powering on ventilator<br />
without batteries A-13<br />
description 7-20<br />
LOW BATTERY alarm<br />
after ventilator storage 2-4<br />
LOW INSP PRESSURE key/display,<br />
description 1-27<br />
LOW MINUTE VOLUME key/display,<br />
description 1-28<br />
LOW TIDAL VOLUME key/display,<br />
description 1-27<br />
M<br />
Maintenance A-1–A-14<br />
preventive A-6–A-12<br />
how to display when due 6-21<br />
schedule A-7–A-8<br />
See also name <strong>of</strong> specific part<br />
See also the 740/760 Ventilator<br />
Service Manual<br />
MAND indicator, description 1-28<br />
Mandatory (PCV) settings 1-16–1-17<br />
Mandatory (VCV) settings 1-16<br />
Mandatory breath, description<br />
D-1–D-2<br />
MANUAL INSP key<br />
description 1-20<br />
how to use 5-9–5-10<br />
use in SST to override fault or<br />
incomplete test 4-12<br />
Manual inspiration, how to deliver<br />
5-9–5-10<br />
MEAN PRESSURE key/display,<br />
description 1-24<br />
MENU key 6-1–6-21<br />
description 1-20<br />
summary <strong>of</strong> functions 6-3–6-5<br />
Message window<br />
description 1-23<br />
how to read alarms display 7-2<br />
Messages, alarm<br />
clinical, list 7-5–7-13<br />
technical, list 7-14–7-19<br />
Mode<br />
standby<br />
alarms active during 3-9<br />
definition 3-7<br />
how to enter and exit 3-7–3-9<br />
warning about connection to<br />
oxygen supply during 3-8<br />
ventilation<br />
assist/control (A/C),<br />
description D-3–D-4<br />
classifications D-1<br />
6 10066984 Rev. D 700 Series Ventilator Operator’s Manual
<strong>of</strong>fered on 740 and 760<br />
Ventilators D-2<br />
SIMV, description D-5–D-6<br />
spontaneous (SPONT),<br />
description D-2–D-3, D-4<br />
Mode and breath type availability<br />
740 and 760 Ventilators 1-2<br />
Mode/breath type settings 1-15, 1-16<br />
how to change 5-1–5-3<br />
Modes<br />
how to change 5-3<br />
More active alarms menu function 6-6<br />
Motor controller circuit<br />
operation <strong>of</strong> 1-4<br />
Mounting kit, humidifier<br />
part numbers B-7, B-8<br />
N<br />
Nebulizer<br />
starting 6-22<br />
stopping 6-23<br />
viewing nebulizer state 6-23<br />
Nebulizer menu function 6-21–6-23<br />
NORMAL light, description 1-29<br />
O<br />
O 2 % alarm<br />
how limits are determined 3-7<br />
O 2 % alarm limits, enabling or<br />
disabling 6-19<br />
O 2 % display<br />
enabling or disabling 6-20<br />
Occlusion cycling mode<br />
description 1-7<br />
Occlusion, handling 1-7<br />
ON AC/ BATTERY CHARGING light<br />
description 1-30<br />
ON EXTERNAL BATTERY light<br />
700 Series Ventilator Operator’s Manual 10066984 Rev. D 7<br />
Index<br />
description 1-30<br />
ON INTERNAL BATTERY light<br />
description 1-30<br />
Operator B-10<br />
Operator’s manual, part numbers B-9<br />
Oxygen hose assembly, part numbers<br />
B-5<br />
Oxygen percentage alarm<br />
how limits are determined 3-7<br />
Oxygen sensor<br />
calibration 6-18, A-10<br />
enabling or disabling the O 2 %<br />
alarm limits 6-19<br />
enabling or disabling the O 2 %<br />
display 6-20<br />
how to display remaining life 6-21<br />
part number B-9<br />
use in ventilator 2-11<br />
Oxygen sensor menu function<br />
6-18–6-20<br />
Oxygen supply<br />
how to connect 2-8–2-9<br />
P<br />
Parts list B-1<br />
PATIENT DATA section (<strong>of</strong> keyboard),<br />
key and indicator descriptions<br />
1-24–1-29<br />
Patient data, how to view 5-6–5-8<br />
Patient system, operation <strong>of</strong> 1-4<br />
Patient tubing circuit<br />
how to install 2-10–2-11<br />
operation <strong>of</strong> 1-4<br />
part numbers B-2–B-3<br />
specifications C-9–C-10<br />
PCV key, description 1-16<br />
PCV timing setting, selecting 6-17<br />
PEAK FLOW key, description 1-16
Index<br />
PEAK PRESSURE key/display,<br />
description 1-24<br />
PEEP/CPAP key, description 1-19<br />
PEEP/CPAP key/display<br />
description 1-24<br />
PEEP/CPAP system, operation <strong>of</strong> 1-5<br />
Periodic maintenance A-6–A-12<br />
how to display when due 6-21<br />
schedule A-7–A-8<br />
Piston/cylinder system<br />
operation <strong>of</strong> 1-4<br />
PLATEAU key, description 1-16<br />
PLATEAU PRESSURE key/display<br />
description 1-24<br />
Pneumatic schematic F-1<br />
Power alarms<br />
description 7-20<br />
Power cord, part numbers B-4<br />
Power specifications C-4–C-5<br />
Power supply, input range C-4<br />
Power-on self-test (POST) 3-2–3-3<br />
Pressure control ventilation (PCV)<br />
in A/C mode D-3<br />
PRESSURE display 1-24<br />
Pressure support ventilation (PSV)<br />
in spontaneous mode D-4<br />
settings 1-18–1-19<br />
Pressure transducers, operation <strong>of</strong> 1-6<br />
Pressure-controlled ventilation (PCV)<br />
settings 1-16–1-17<br />
Preventive maintenance A-6–A-12<br />
how to display when due 6-21<br />
schedule A-7–A-8<br />
Preventive maintenance kit<br />
15,000-hour, part number B-9<br />
30,000-hour, part number B-9<br />
PROPOSED display, description 1-23<br />
PSV key, description 1-16<br />
8 10066984 Rev. D 700 Series Ventilator Operator’s Manual<br />
R<br />
RATE /min key/display, description 1-25<br />
Re/Flex filter. See Inspiratory filter<br />
Re/X700 filter. See Expiratory filter<br />
Repacking the ventilator A-14<br />
Resistance and compliance<br />
calculating using INSP PAUSE 1-22<br />
Respiratory mechanics and<br />
maneuvers, using EXP PAUSE and<br />
INSP PAUSE keys 1-2<br />
RESPIRATORY RATE key<br />
description 1-16<br />
RESPIRATORY RATE key, description<br />
1-16<br />
RISE TIME FACTOR key<br />
description 1-17, 1-18<br />
S<br />
Safety valve open (SVO) state,<br />
operation during 1-6–1-7<br />
SAFETY VALVE OPEN light<br />
description 1-30<br />
Schedule <strong>of</strong> preventive maintenance<br />
A-7–A-8<br />
Self tests (SST and EST) 4-1–4-26<br />
warning about running with<br />
patient disconnected 4-1<br />
Self tests menu function 6-7<br />
Sensor, oxygen<br />
how to display remaining life 6-21<br />
life expectancy C-2<br />
part number B-9<br />
use in ventilator 2-11<br />
Service A-1–A-14<br />
how to display when due 6-21<br />
See also the 740/760 Ventilator<br />
Service Manual<br />
Service manual, part number B-9<br />
Service summary menu function 6-21
Settings, ventilator<br />
apnea parameters<br />
how to adjust 5-4–5-5<br />
how to change 5-1–5-2<br />
how to make 3-4–3-6<br />
limitations 1-14<br />
mandatory (PCV) 1-16–1-17<br />
mandatory (VCV) 1-16<br />
mode/breath type 1-15, 1-16<br />
spontaneous (PSV) 1-18–1-19<br />
Settings, ventilator, mode/breath type<br />
how to change 5-1–5-3<br />
Shelf mounting kit, part numbers B-7<br />
Short self-test (SST) 4-3–4-12<br />
failure, meaning <strong>of</strong> 4-12<br />
fault, meaning <strong>of</strong> 4-12<br />
how to interpret test results 4-12<br />
how to override fault or<br />
incomplete test 4-12<br />
how to run 4-3–4-12<br />
key definitions during operation<br />
4-7<br />
list <strong>of</strong> tests 4-9–4-11<br />
recommendation to run before<br />
ventilation 3-3<br />
when to run 4-2, 4-3<br />
SIMV key, description 1-15<br />
SIMV mode<br />
breath timing D-5–D-6<br />
description D-5–D-6<br />
S<strong>of</strong>tware revision menu function 6-21<br />
S<strong>of</strong>tware version, how to display 6-21<br />
Speaking valve setup 6-11<br />
Specifications C-1–C-10<br />
alarm volume C-3<br />
dimensions C-2<br />
environmental C-3<br />
flow range C-2<br />
leakage current C-4<br />
700 Series Ventilator Operator’s Manual 10066984 Rev. D 9<br />
Index<br />
measuring and display devices<br />
C-7–C-9<br />
operating pressure range C-2<br />
oxygen inlet supply C-3<br />
oxygen sensor life C-2<br />
physical C-2–C-3<br />
power C-4–C-5<br />
power supply C-4<br />
ventilator breathing circuit<br />
C-9–C-10<br />
ventilator connectors C-2<br />
weight C-2<br />
SPONT indicator, description 1-29<br />
SPONT key, description 1-15<br />
SPONT MINUTE VOLUME (L) key/<br />
display, description 1-27<br />
Spontaneous (PSV) settings 1-18–1-19<br />
Spontaneous (SPONT) mode,<br />
description D-2–D-3, D-4<br />
Spontaneous breath, description D-2<br />
SST incomplete, meaning 4-12<br />
Standby mode<br />
alarms active during 3-9<br />
definition 3-7<br />
how to enter and exit 3-7–3-9<br />
warning about connection to<br />
oxygen supply during 3-8<br />
Standby mode menu function 6-20<br />
Sterilization A-5<br />
Storage<br />
caution to remove batteries<br />
before storage 2-4<br />
how to ensure battery charge<br />
during 3-1<br />
requirements A-13<br />
Support arm<br />
how to install or shorten<br />
2-13–2-15<br />
part number B-4<br />
SUPPORT PRESSURE key
Index<br />
description 1-18<br />
SVO (safety valve open) state,<br />
operation during 1-6–1-7<br />
Symbols and labels<br />
descriptions 1-8–1-12<br />
T<br />
Technical alarm messages<br />
list 7-14–7-19<br />
Test lung, part number B-8<br />
Testing alarms E-1<br />
Theory <strong>of</strong> operation D-1–D-6<br />
T I or I:E, selecting 6-17<br />
T I/I<br />
E RATIO key, description 1-17<br />
TIDAL VOLUME key, description 1-16<br />
TOTAL MINUTE VOLUME (L) key/<br />
display, description 1-26<br />
Transducers, pressure<br />
operation <strong>of</strong> 1-6<br />
Trap, water, in-line, maintenance A-10<br />
TRIGGER SENSITIVITY key, description<br />
1-19<br />
Tubing circuit, patient<br />
operation <strong>of</strong> 1-4<br />
U<br />
User interface (UI)<br />
description 1-13–1-31<br />
User settings<br />
alarm volume 6-17<br />
apnea interval 6-10<br />
date and time 6-9<br />
endotracheal tube size 6-8<br />
humidifier type 6-8<br />
PCV timing setting (T I or I:E) 6-17<br />
speaking valve setup 6-11<br />
VCV flow pattern 6-10<br />
volume bar graph 6-17<br />
User settings menu function 6-8–6-9<br />
10 10066984 Rev. D 700 Series Ventilator Operator’s Manual<br />
V<br />
Valve, exhalation, operation <strong>of</strong> 1-5<br />
VCV flow pattern, setting 6-10<br />
VCV key, description 1-15<br />
VENT INOP condition 1-6<br />
VENT INOP light, description 1-30<br />
Ventilation<br />
apnea, in spontaneous mode D-4<br />
theory <strong>of</strong> operation D-1–D-6<br />
Ventilation modes<br />
assist control (A/C), description<br />
D-3–D-4<br />
classifications D-1<br />
<strong>of</strong>fered on 740 and 760 Ventilators<br />
D-2<br />
SIMV, description D-5–D-6<br />
spontaneous (SPONT), description<br />
D-2–D-3, D-4<br />
Ventilator<br />
how to make settings 3-4–3-6<br />
power-up 3-1–3-3<br />
Ventilator attachment kit, part<br />
number B-10<br />
Ventilator breathing circuit<br />
how to install 2-10–2-11<br />
operation <strong>of</strong> 1-4<br />
part numbers B-2–B-3<br />
Ventilator cart basket<br />
part number B-10<br />
Ventilator inoperative condition 1-6<br />
Ventilator settings<br />
apnea parameters, how to adjust<br />
5-4–5-5<br />
how to change 5-1–5-2<br />
limitations 1-14<br />
mandatory (PCV) 1-16–1-17
mandatory (VCV) 1-16<br />
mode/breath type 1-15, 1-16<br />
spontaneous (PSV) 1-18–1-19<br />
VENTILATOR SETTINGS section (<strong>of</strong><br />
keyboard), key and indicator<br />
descriptions 1-14–1-23<br />
VENTILATOR STATUS section (<strong>of</strong><br />
keyboard), key and indicator<br />
descriptions 1-29–1-31<br />
Vial, collector<br />
how to install 2-13<br />
maintenance A-9–A-10<br />
operation <strong>of</strong> 1-4<br />
part number B-6<br />
Volume bar graph, enabling or<br />
disabling 6-17<br />
Volume bar graph, how to view 5-8<br />
VOLUME display 1-26–1-27<br />
Volume-controlled ventilation (VCV)<br />
in A/C mode D-3<br />
settings 1-16<br />
W<br />
Water trap, in-line, maintenance A-10<br />
Weight, ventilator C-2<br />
Index<br />
700 Series Ventilator Operator’s Manual 10066984 Rev. D 11
This page is intentionally blank.<br />
12 10066984 Rev. D 700 Series Ventilator Operator’s Manual
Part No. 10066984 Rev. D<br />
COVIDIEN, COVIDIEN with logo and <strong>Covidien</strong> logo are U.S.<br />
and/or internationally registered trademarks <strong>of</strong> <strong>Covidien</strong> AG.<br />
* Trademark <strong>of</strong> its respective owner.<br />
Proportional Assist and PAV are registered trademarks <strong>of</strong><br />
The University <strong>of</strong> Manitoba, Canada. Used under license.<br />
Other brands are trademarks <strong>of</strong> a <strong>Covidien</strong> company.<br />
©2011 <strong>Covidien</strong>.<br />
<strong>Covidien</strong> llc,<br />
15 Hampshire Street,<br />
Mansfield, MA 02048 USA.<br />
<strong>Covidien</strong> Ireland Limited,<br />
IDA Business & Technology Park,Tullamore.<br />
www.covidien.com [T] 1-800-635-5267