CommandCenter Secure Gateway - Deployment Guide - v4.1 - Raritan
CommandCenter Secure Gateway - Deployment Guide - v4.1 - Raritan
CommandCenter Secure Gateway - Deployment Guide - v4.1 - Raritan

Create successful ePaper yourself
Turn your PDF publications into a flip-book with our unique Google optimized e-Paper software.
Chapter 4: Install CC-SG<br />
4. Connect a video monitor and keyboard using KVM cables to the<br />
corresponding ports on the rear panel of the CC-SG unit.<br />
Note: The CC-SG V1 hardware ships with Gigabit Ethernet NIC adaptors.<br />
As long as the NIC interfaces are using the default auto-negotiation<br />
setting, practically any cable can successfully be used between the<br />
interfaces and an Ethernet port. Depending on the cable, full 1000Mbps<br />
connectivity may not be possible, but minimally you should get 100Mbps.<br />
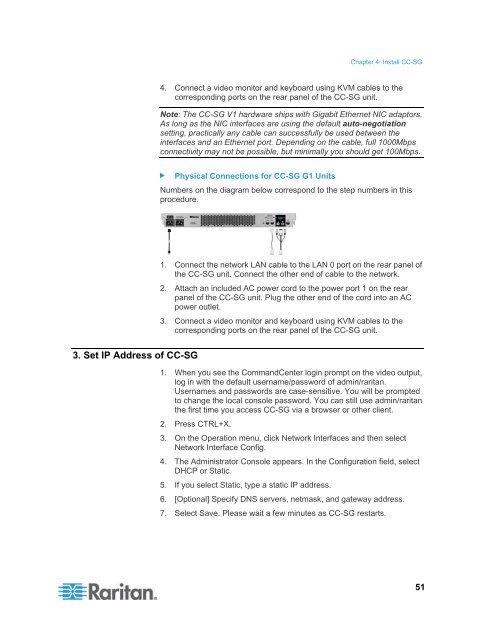
Physical Connections for CC-SG G1 Units<br />
Numbers on the diagram below correspond to the step numbers in this<br />
procedure.<br />
1. Connect the network LAN cable to the LAN 0 port on the rear panel of<br />
the CC-SG unit. Connect the other end of cable to the network.<br />
2. Attach an included AC power cord to the power port 1 on the rear<br />
panel of the CC-SG unit. Plug the other end of the cord into an AC<br />
power outlet.<br />
3. Connect a video monitor and keyboard using KVM cables to the<br />
corresponding ports on the rear panel of the CC-SG unit.<br />
3. Set IP Address of CC-SG<br />
1. When you see the <strong>CommandCenter</strong> login prompt on the video output,<br />
log in with the default username/password of admin/raritan.<br />
Usernames and passwords are case-sensitive. You will be prompted<br />
to change the local console password. You can still use admin/raritan<br />
the first time you access CC-SG via a browser or other client.<br />
2. Press CTRL+X.<br />
3. On the Operation menu, click Network Interfaces and then select<br />
Network Interface Config.<br />
4. The Administrator Console appears. In the Configuration field, select<br />
DHCP or Static.<br />
5. If you select Static, type a static IP address.<br />
6. [Optional] Specify DNS servers, netmask, and gateway address.<br />
7. Select Save. Please wait a few minutes as CC-SG restarts.<br />
51