

#PRP1787 Star Trek TOS Wall Communicator ... - Roddenberry.com
#PRP1787 Star Trek TOS Wall Communicator ... - Roddenberry.com
#PRP1787 Star Trek TOS Wall Communicator ... - Roddenberry.com

You also want an ePaper? Increase the reach of your titles
YUMPU automatically turns print PDFs into web optimized ePapers that Google loves.
<strong>#PRP1787</strong> - St a r Tr e k <strong>TOS</strong> Wa l l Co m m u n ic a t o r Pr o p Kit As s e m b l y Ma n u a l 5<br />
Assembly of the <strong>Wall</strong> <strong>Communicator</strong> may be done in any order.<br />
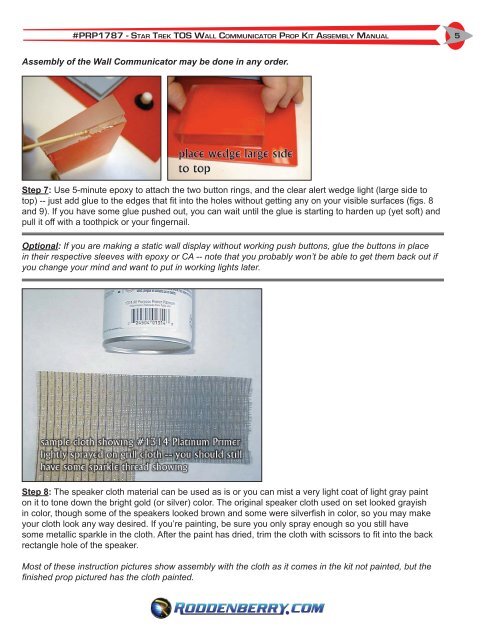
Step 7: Use 5-minute epoxy to attach the two button rings, and the clear alert wedge light (large side to<br />
top) -- just add glue to the edges that fit into the holes without getting any on your visible surfaces (figs. 8<br />
and 9). If you have some glue pushed out, you can wait until the glue is starting to harden up (yet soft) and<br />
pull it off with a toothpick or your fingernail.<br />
Optional: If you are making a static wall display without working push buttons, glue the buttons in place<br />
in their respective sleeves with epoxy or CA -- note that you probably won’t be able to get them back out if<br />
you change your mind and want to put in working lights later.<br />
Step 8: The speaker cloth material can be used as is or you can mist a very light coat of light gray paint<br />
on it to tone down the bright gold (or silver) color. The original speaker cloth used on set looked grayish<br />
in color, though some of the speakers looked brown and some were silverfish in color, so you may make<br />
your cloth look any way desired. If you’re painting, be sure you only spray enough so you still have<br />
some metallic sparkle in the cloth. After the paint has dried, trim the cloth with scissors to fit into the back<br />
rectangle hole of the speaker.<br />
Most of these instruction pictures show assembly with the cloth as it <strong>com</strong>es in the kit not painted, but the<br />
finished prop pictured has the cloth painted.


