

“DusTbusTeR” PhaseR PRoP - Roddenberry.com
“DusTbusTeR” PhaseR PRoP - Roddenberry.com
“DusTbusTeR” PhaseR PRoP - Roddenberry.com

You also want an ePaper? Increase the reach of your titles
YUMPU automatically turns print PDFs into web optimized ePapers that Google loves.
10<br />
#PRP1745 - Th e Ne x t Generation 1s t Se a s o n “Du s t b u s t e r” Ph a s e r Pr o p Kit As s e m b l y Ma n u a l<br />
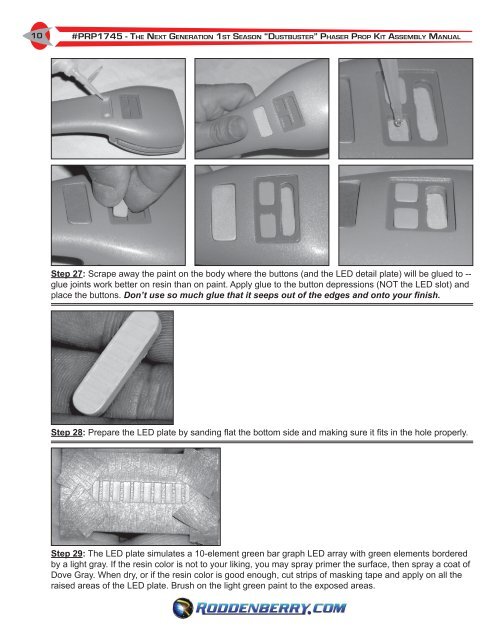
Step 27: Scrape away the paint on the body where the buttons (and the LED detail plate) will be glued to --<br />
glue joints work better on resin than on paint. Apply glue to the button depressions (NOT the LED slot) and<br />
place the buttons. Don’t use so much glue that it seeps out of the edges and onto your finish.<br />
Step 28: Prepare the LED plate by sanding flat the bottom side and making sure it fits in the hole properly.<br />
Step 29: The LED plate simulates a 10-element green bar graph LED array with green elements bordered<br />
by a light gray. If the resin color is not to your liking, you may spray primer the surface, then spray a coat of<br />
Dove Gray. When dry, or if the resin color is good enough, cut strips of masking tape and apply on all the<br />
raised areas of the LED plate. Brush on the light green paint to the exposed areas.


