

“DusTbusTeR” PhaseR PRoP - Roddenberry.com
“DusTbusTeR” PhaseR PRoP - Roddenberry.com
“DusTbusTeR” PhaseR PRoP - Roddenberry.com

You also want an ePaper? Increase the reach of your titles
YUMPU automatically turns print PDFs into web optimized ePapers that Google loves.
8<br />
#PRP1745 - Th e Ne x t Generation 1s t Se a s o n “Du s t b u s t e r” Ph a s e r Pr o p Kit As s e m b l y Ma n u a l<br />
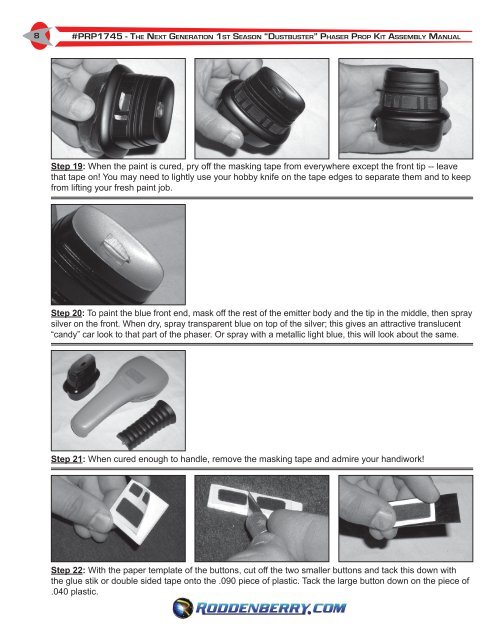
Step 19: When the paint is cured, pry off the masking tape from everywhere except the front tip -- leave<br />
that tape on! You may need to lightly use your hobby knife on the tape edges to separate them and to keep<br />
from lifting your fresh paint job.<br />
Step 20: To paint the blue front end, mask off the rest of the emitter body and the tip in the middle, then spray<br />
silver on the front. When dry, spray transparent blue on top of the silver; this gives an attractive translucent<br />
“candy” car look to that part of the phaser. Or spray with a metallic light blue, this will look about the same.<br />
Step 21: When cured enough to handle, remove the masking tape and admire your handiwork!<br />
Step 22: With the paper template of the buttons, cut off the two smaller buttons and tack this down with<br />
the glue stik or double sided tape onto the .090 piece of plastic. Tack the large button down on the piece of<br />
.040 plastic.


