General Sewing Instructions - Leena's.com
General Sewing Instructions - Leena's.com
General Sewing Instructions - Leena's.com

You also want an ePaper? Increase the reach of your titles
YUMPU automatically turns print PDFs into web optimized ePapers that Google loves.
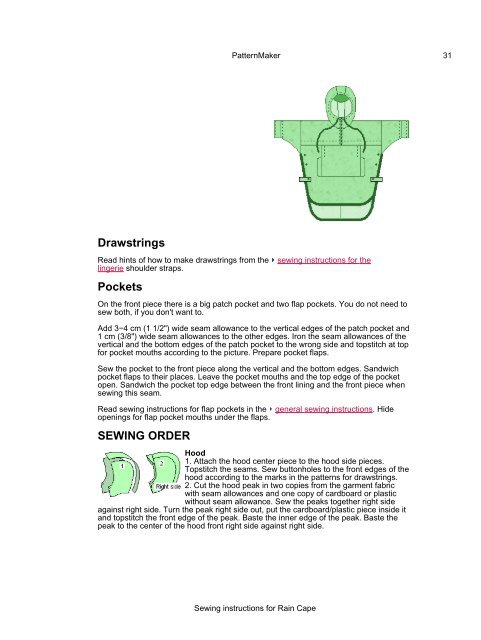
PatternMaker 31<br />
Drawstrings<br />
Read hints of how to make drawstrings from the<br />
lingerie shoulder straps.<br />
Pockets<br />
sewing instructions for the<br />
On the front piece there is a big patch pocket and two flap pockets. You do not need to<br />
sew both, if you don't want to.<br />
Add 3−4 cm (1 1/2") wide seam allowance to the vertical edges of the patch pocket and<br />
1 cm (3/8") wide seam allowances to the other edges. Iron the seam allowances of the<br />
vertical and the bottom edges of the patch pocket to the wrong side and topstitch at top<br />
for pocket mouths according to the picture. Prepare pocket flaps.<br />
Sew the pocket to the front piece along the vertical and the bottom edges. Sandwich<br />
pocket flaps to their places. Leave the pocket mouths and the top edge of the pocket<br />
open. Sandwich the pocket top edge between the front lining and the front piece when<br />
sewing this seam.<br />
Read sewing instructions for flap pockets in the general sewing instructions. Hide<br />
openings for flap pocket mouths under the flaps.<br />
SEWING ORDER<br />
Hood<br />
1. Attach the hood center piece to the hood side pieces.<br />
Topstitch the seams. Sew buttonholes to the front edges of the<br />
hood according to the marks in the patterns for drawstrings.<br />
2. Cut the hood peak in two copies from the garment fabric<br />
with seam allowances and one copy of cardboard or plastic<br />
without seam allowance. Sew the peaks together right side<br />
against right side. Turn the peak right side out, put the cardboard/plastic piece inside it<br />
and topstitch the front edge of the peak. Baste the inner edge of the peak. Baste the<br />
peak to the center of the hood front right side against right side.<br />
<strong>Sewing</strong> instructions for Rain Cape