The Trumpet - Sample Modeling
The Trumpet - Sample Modeling
The Trumpet - Sample Modeling

You also want an ePaper? Increase the reach of your titles
YUMPU automatically turns print PDFs into web optimized ePapers that Google loves.
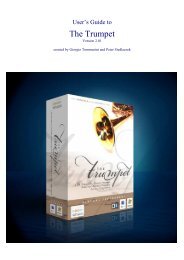
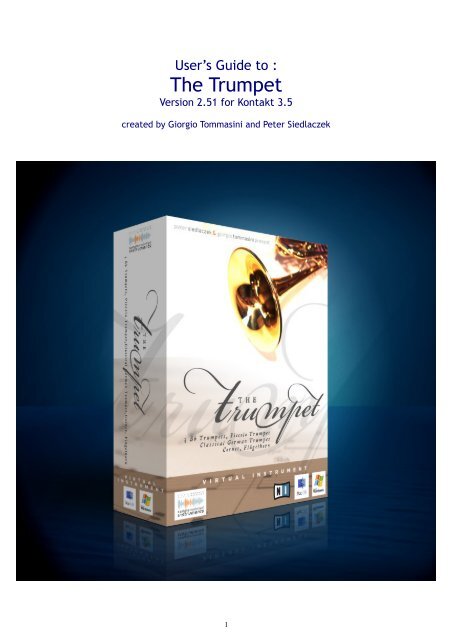
User’s Guide to :<br />
<strong>The</strong> <strong>Trumpet</strong><br />
Version 2.51 for Kontakt 3.5<br />
created by Giorgio Tommasini and Peter Siedlaczek<br />
1
Table of Contents<br />
Before you start 3<br />
Kontakt 3.5 3<br />
Installation 3<br />
Online Activation 3<br />
System requirements 4<br />
MOST IMPORTANT 5<br />
Introduction 6<br />
<strong>The</strong> Instruments 7<br />
<strong>The</strong> Mutes 8<br />
<strong>The</strong> Graphical Interface (GUI) 9<br />
Velocity Remapping 10<br />
Controller Knobs 11<br />
<strong>The</strong> Controllers and their function 12<br />
Volume control by CC7 14<br />
<strong>The</strong> Mutes 14<br />
CC remapping 15<br />
Wind Controller Mode 16<br />
Breath Controller Mode 17<br />
Portamento Time 18<br />
Playing Techniques 19<br />
<strong>The</strong> Performance Keyswitches 22<br />
Appendix 1<br />
Using the Convolution Reverb 26<br />
<strong>The</strong> Reverb Folder 27<br />
Appendix 2<br />
Tested Systems (v. 2.01) 28<br />
Appendix 3<br />
Technical Support 30<br />
2
Before you start<br />
Before installing “<strong>The</strong> <strong>Trumpet</strong>”, please read very carefully the items below:<br />
Kontakt 3.5 Player. <strong>The</strong> <strong>Trumpet</strong> is supplied with the 3.5 NI Kontakt Player, the<br />
read-only version of Native Instruments latest flagship sampler. It involves many new<br />
features and bugfixes, including 64 bit, extended memory and multicore support, DFD<br />
optimisation, better compliance with some OS and hosts, aftertouch support etc. <strong>The</strong><br />
Player is included as a separate installer, and no additional software is required to play<br />
the instrument. Stand-alone mode, as well as plugin formats VST, DXi, RTAS and AU are<br />
supported. For further details, please refer to the Player Manual.<br />
Kontakt 3.5 <strong>Sample</strong>r. <strong>The</strong> instruments can be also loaded and played in the full<br />
version of Kontakt 3.5. Please note, however, that they cannot be opened or modified,<br />
and no access to the samples, impulse responses or instrument programming is provided.<br />
Installation. Please read carefully and follow the instructions found in the Readme<br />
file.<br />
Note: : If the full Kontakt 3.5 <strong>Sample</strong>r, or the Kontakt 3.5 Player are already installed on<br />
your system, simply skip the Player installation procedure.<br />
Online activation :<br />
After installation of the software, you will need<br />
to activate <strong>The</strong> <strong>Trumpet</strong> via Internet, using the<br />
enclosed Service Center utility. Just click on the<br />
“activate” button as shown here beside →<br />
Without activation the instruments will appear on a black background, and they will<br />
not work, not even in demo mode.<br />
Note: after activation, please close and reopen Kontakt to get the instrument(s)<br />
fully functional.<br />
Note: In case your computer has no internet connection and you need an offline<br />
activation, please contact the Native Instruments support : http://www.nativeinstruments.com/support.info<br />
3
System requirements<br />
<strong>The</strong> <strong>Trumpet</strong> provides unprecedented realism and expressiveness. However, it’s a<br />
demanding software in terms of CPU load. <strong>The</strong> original 2.01 version for Kontakt Player2<br />
was developed and thoroughly tested on a PC with IntelCore2 6600 @ 2.40 GHz, 2GB<br />
RAM, Windows XP, 2 SATA drives, and a 24 bit audio card with low latency (
MOST IMPORTANT:<br />
Like a real instrument, and differently from conventional sample libraries, <strong>The</strong> <strong>Trumpet</strong><br />
allows continuous transition across the dynamics (from ppp to fff), free from phasing<br />
artefacts. To accomplish this, a suitable continuous physical MIDI controller, such as an<br />
expression (CC11) or volume (CC7) pedal, a breath or a windcontroller (CC2) is absolutely<br />
necessary. Without this controller the instrument will not work, displaying a warning.<br />
Other physical MIDI controllers, like sliders, knobs or modwheel, though not<br />
recommended, can be used to this purpose. Please refer do the Remapping section of this<br />
manual for further details.<br />
Keyboard or Windcontroller. A five-octave midi keyboard, mappable from C1 to<br />
C6, with pitchwheel, modwheel, and an expression pedal or breath controller, or a<br />
programmable windcontroller, constitute the minimum requirements for real time<br />
playing. Keyboards with several mappable physical midi controllers are recommended<br />
for full exploitation of the expressiveness of the instrument.<br />
Sequencer. If real time playing is not contemplated (you will miss a great fun though),<br />
using a sequencer may obviate the need for several physical midi controllers, while<br />
maintaining full control of the instrument’s expressiveness. “<strong>The</strong> <strong>Trumpet</strong>” has been<br />
thoroughly tested under several sequencers, including Cubase, Ableton Live, Digital<br />
Performer, Logic and Sonar.<br />
Tip: Logic users, by deactivating the trumpet track will dramatically reduce the CPU load,<br />
and greatly improve the overall performance.<br />
Tip: Sonar users might experience hanging notes upon stopping the playback. This is due<br />
to the fact that Sonar sends an “All-Notes-Off” command when the Stop button is pressed.<br />
<strong>The</strong> problem can be easily solved by checking the box “Accept all notes off/ all sounds off”<br />
under “Instrument Options -> Controller”, as shown below.<br />
5
Introduction<br />
Another <strong>Trumpet</strong>?<br />
Well, not just another trumpet, but probably the most expressive virtual instrument<br />
made so far.<br />
<strong>The</strong> real trumpet is one of the most versatile, dynamic, flexible and expressive musical<br />
instruments. It covers an incredibly wide range of sounds and moods. Whether a soft<br />
ballad or a powerful fanfare, a pop song or a huge orchestral arrangement - the trumpet<br />
is an indispensable instrument in a vast majority of musical styles.<br />
However, it’s extremely difficult to emulate - a true challenge for developers of virtual<br />
instruments.<br />
That’s why we chose it…<br />
Our virtual instrument uses recorded samples of real trumpets as base material. This<br />
proved to be the best choice to preserve the timbral characteristics of the original<br />
instrument. We used, of course, state-of-the-art recording technique and experienced,<br />
careful microphone placement. But we went beyond. All sounds were recorded in an<br />
anechoic chamber. To our knowledge, this is actually the first sample-based anechoic<br />
virtual instrument.<br />
Why anechoic ? <strong>The</strong> purpose of anechoic recording was threefold: 1) avoid<br />
“contamination” of the pure trumpet sounds with the uncontrolled resonances of a<br />
particular ambience, 2) allow artifact-free “harmonic alignment” processing, 3) provide<br />
clean articulations and phrases as a database to build the “adaptive model”. (see<br />
below).<br />
What we finally obtained is, far from the “dead” sound that some might expect, a pure,<br />
homogeneous timbre without coloration.<br />
This will set you free of adding just the most suitable acoustic environment, without<br />
incurring multiple-ambience issues. This can be carried out within the same Kontant<br />
Player, which provides a high quality convolution reverb. See Appendix 1 for details.<br />
6
<strong>The</strong> Instruments<br />
<strong>The</strong> <strong>Trumpet</strong> package includes several instruments belonging to the same family:<br />
Three B <strong>Trumpet</strong>s<br />
Along with the main, solo B trumpet (“Main <strong>Trumpet</strong>”) you will find 2 other ones –<br />
named “<strong>Trumpet</strong> 2” and “<strong>Trumpet</strong> 3”, sounding slightly different, and suitable for being<br />
used in trumpet sections (what shouldn’t mean that your arrangements need to be<br />
limited to 3 voices only).<br />
Flügelhorn<br />
Similar to the trumpet, but with a wider, conical bore, the Flügelhorn provides a darker<br />
and much softer tone. Its beautiful, warm sound is mainly used in jazz or in brass bands,<br />
as well as in popular music.<br />
German <strong>Trumpet</strong><br />
This more “massive” type of trumpet uses rotary valves and sounds less “bright” than<br />
the jazz trumpet. It possesses a larger volume of tone which may better blend with<br />
other instruments. It’s mainly used in classical music.<br />
Cornet<br />
Similar to the trumpet, but more compact in shape. It sounds a bit warmer and mellow.<br />
Its agility makes the Cornet particularly suitable for melodic passages. It is mostly used<br />
in brass-, but also in jazz bands.<br />
Piccolo <strong>Trumpet</strong><br />
Also known as “Bach trumpet”, it represents the smallest instrument of the trumpet<br />
family. Its tubing, which is only one-half the length of the “normal” trumpet, as well as<br />
other construction details, make this instrument more advantageous for playing in the<br />
highest register – not only in Baroque music. Piccolo <strong>Trumpet</strong> sounds “smaller” and<br />
brighter than the B trumpet.<br />
All these instruments are now at your fingertips… You can really PLAY them – shaping the<br />
sound like a real trumpet player does. But please, read the manual first and learn more<br />
about how to do it in the best way. It is easy and intuitive but, like every music<br />
instrument, “<strong>The</strong> <strong>Trumpet</strong>” needs some practice and experience. You will certainly learn<br />
it very quickly! <strong>The</strong> demonstrations we prepared show how realistic our trumpet sounds.<br />
If you want to learn more about how this has been achieved, please visit our homepage<br />
and download the demos we prepared for you as MIDI files:<br />
http://www.samplemodeling.com/en/demos_trumpet.php<br />
7
<strong>The</strong> Mutes<br />
Mutes are devices affecting the timbre and/or volume of an instrument. <strong>The</strong> trumpet –<br />
like other brass instruments – uses a wide range of mutes; the most common are Harmon<br />
(with or without stem), Straight, Cup and Bucket. <strong>The</strong>y are mostly cone-shaped and are<br />
inserted into the bell or simply held or clipped outside the bell. Depending on the shape<br />
or material (metal, wood, plastic) they may significantly vary the sound of the trumpet.<br />
<strong>The</strong> most common mutes are:<br />
Straight - commonly used, cone-shaped, hollow mute – provides more metallic and<br />
„nasal“ sound. It is available for all the brass instruments.<br />
<strong>The</strong> Cup mute, which is similar to the Straight, decreases high and low frequencies<br />
providing a rounder, more „muffled“ sound.<br />
<strong>The</strong> bulbous, hollow Harmon mute provides the very characteristic „Miles Davis sound“.<br />
It completely blocks the air output forcing it to pass the hole in the middle of the mute,<br />
providing a very bright, „buzzy“ sound, frequently used in Jazz. Harmon can be<br />
combined with the stem, which is a short metal pipe with a funnel-like end, fitted into<br />
the hole of the Harmon mute.<br />
<strong>The</strong> Bucket mute uses some soft materials which remove the high frequencies providing<br />
a much softer, darker sound.<br />
<strong>The</strong> Plunger – which, indeed, is very similar to an unused toilet plunger – is kept by the<br />
player in one hand and manipulated in front of the bell. By closing and opening it, the<br />
typical “wah-wah” effect – even imitating the human voice - can be obtained.<br />
All these mutes are available for use with our B trumpets. We used sophisticated<br />
technologies to capture the “fingerprints” of each mute, which were ultimately coded<br />
into a suitable impulse response. <strong>The</strong> latter can be loaded in a fraction of a second from<br />
a drop down menu of the graphical interface, or via MIDI, using CC100 (see MIDIloadable<br />
mutes, page 13).<br />
8
<strong>The</strong> Graphical Interface<br />
This is how the instrument looks upon loading. A warning message appears, reminding<br />
you that:<br />
An Expression controller (CC11, CC7 or CC2) is absolutely necessary for proper<br />
functioning of the instrument.<br />
Upon receiving the appropriate CC (from your keyboard or other midi sources, such as a<br />
windcontroller or sequencer), the warning disappears, and the instrument is fully<br />
functional.<br />
<strong>The</strong> grey button in the lower right corner opens a drop down menu.<br />
You may choose among several options:<br />
9
Velocity Curve Mapping<br />
It is well known that midi keyboards have different and uneven velocity<br />
response, and this may heavily influence the performance of a virtual<br />
instrument. To obviate this problem, the instrument includes automatic<br />
detection of any velocity inhomogeneities or non-linearity emitted by the<br />
keyboard, and provides automatic remapping to any desired curve.<br />
If “Vel. curve” is selected in the drop down menu, the velocity mapping<br />
GUI will be displayed:<br />
As a default, velocity mapping is disabled.<br />
Velocity mapping is activated by clicking on the “Mapping” button until it turns yellow.<br />
Now, the relationship between in (X axis) and out (Y axis) velocity values is represented<br />
by the upper graph. A straight line, from bottom left to top right means linear mapping.<br />
<strong>The</strong> graph can be directly edited with your mouse, so that you can program any velocity<br />
response you need.<br />
To compensate for a nonlinear behaviour of your keyboard, an automatic calibration<br />
procedure is provided.<br />
Just click on “Calibration”, and the GUI will appear like this:<br />
Now what you have to do is to hit any key at random<br />
velocity, trying to cover the whole velocity range. Each<br />
new output velocity will appear as a new bar in the<br />
lower panel. <strong>The</strong> overall velocity curve output of your<br />
keyboard will progressively be updated in the upper<br />
panel.<br />
<strong>The</strong> response of a nonlinear keyboard.<br />
After you’re finished with the automatic mapping<br />
procedure, i.e. when you notice, that no new velocity<br />
bar appears anymore, disable “Calibration” by clicking<br />
on it until it turns grey. Since now, compensation for<br />
nonlinearity of note-on velocities will be carried out if<br />
“Mapping” is active (i.e. yellow). You may also correct<br />
the compensated curve with your mouse. Please note<br />
that all changes will be maintained upon reloading the<br />
instrument.<br />
10
Controller Knobs<br />
All the controllers needed for proper functioning of the instrument are<br />
mapped to virtual knobs in three GUI panels, which can be activated by<br />
a drop down menu.<br />
<strong>The</strong> function of each controller is indicated by the associated label.<br />
<strong>The</strong> virtual knobs permit to monitor the incoming midi data, but can<br />
also be used to directly control the instrument. This allows users of<br />
keyboards without physical MIDI controllers or knobs, to explore the<br />
expressive capabilities of <strong>The</strong> <strong>Trumpet</strong>.<br />
Please note that, for realistic and expressive playing, the controller knobs cannot substitute<br />
the essential controllers, such as CC11, modwheel (C1) and pitchbend, which must be<br />
provided by your keyboard or sequencer.<br />
<strong>The</strong> three “Controllers” GUIs, show<br />
each MIDI-controlled function, the<br />
associated CC number and its current<br />
value. Each knob is bidirectionally<br />
mapped to its CC. This means that<br />
you may set each CC by moving the<br />
associated knob. Conversely, any<br />
incoming MIDI CC will be mirrored<br />
by the corresponding knob, and its<br />
current value will be shown on the<br />
display panel.<br />
1<br />
1
<strong>The</strong> Controllers and their function.<br />
PB (pitchwheel): linearly mapped to one semitone to about 85% of the full scale (+/-<br />
7095). Above this value, linearly mapped to two semitones at full scale (+/- 8192).<br />
CC1 – (modwheel) : vibrato - shake intensity. Vibrato intensity increases linearly for<br />
CC1 values between 0 and 96. Above 96, vibrato converts into a full step shake. Shake<br />
intensity linearly increases with CC1.<br />
CC5 : portamento time. By default, the duration of<br />
portamento is controlled by the velocity of the overlapped<br />
note. Under some circumstances, it may be preferable to<br />
control the duration of portamento with a dedicated CC. This<br />
is particularly true when using a Wind Controller, where the<br />
velocity of the overlapped note basically corresponds to the<br />
current dynamics. Lower dynamics unavoidably yield long<br />
portamentos and vice versa.<br />
By activating “Portamento time” in the drop down menu you<br />
will open a dedicated window. <strong>The</strong> two knobs show how the<br />
duration of portamento is currently controlled.<br />
Default is 100% by velocity, as already stated.<br />
By acting on the knobs, you may set the relative weight of<br />
velocity vs. CC5 for controlling portamento time.<br />
CC11: expression. Controls continuous transition across the dynamics, from ppp to fff,<br />
free from phasing artifacts, due to our proprietary Harmonic Alignment Technology. An<br />
expression pedal, or a breath controller, routed to C11, are highly recommended for the<br />
most realistic realtime playing.<br />
CC19: vibrato rate. <strong>The</strong> frequency range is approximately 2.5 – 8 Hz. Default = 50.<br />
CC20: default note-on pitch-modulation depth. Reproduces the typical slight pitch<br />
modulation of the real attacks. May vary from none (more precise initial intonation) to<br />
slightly excessive. Default = 100.<br />
CC21: growl intensity. High frequency flutter may be added by directly acting on this<br />
controller, to produce a “growly, dirty” sound. Default = 0.<br />
CC22: on-transition flutter intensity. Bursts of high frequency flutter are<br />
automatically generated on transitions, reproducing the behaviour of the real<br />
instrument. CC22 controls the overall intensity of this flutter. <strong>The</strong> useful range is 70 to<br />
110 (slightly excessive). Default = 95.<br />
CC23: frullato intensity. Flutter-tongue-like effect may be added by directly acting on<br />
this controller. Default = 0.<br />
Tip: Different types of frullato can be obtained by adding CC21 to CC23.<br />
12
CC24 : dynamic pitch modulation. In the real instrument, the current pitch is affected<br />
by transient changes of the dynamics. <strong>The</strong> <strong>Trumpet</strong> exactly reproduces this behaviour.<br />
<strong>The</strong> intensity of this pitch response can be varied with CC24, to better cope with<br />
different styles. For example, barock music generally exhibits less fluctuations, and the<br />
overall pitch tends to be more steady. You may reproduce this behaviour by decreasing<br />
CC24 somewhat from the default value of 64. Conversely, a “funny trumpet”, mimicking<br />
the performance of a beginner, (or a drunken player, see http://www.samplemodeling.com/Demos/5-Oktoberfest.mp3<br />
) can be obtained by increasing CC24 to very<br />
high values.<br />
Tip: Higher settings of CC24 may also allow BC players to perform a realistic vibrato by<br />
simply modulating the air flow.<br />
CC25: dynamics linked to velocity. <strong>The</strong> dynamic is normally controlled by CC11 only.<br />
CC25 allows to control the initial dynamics by note-on velocity. This allows fast<br />
sforzato-crescendo effects, often too difficult to create with the expression pedal CC11.<br />
If the value of CC25 is different from zero, the dynamic time course will follow a ramp,<br />
connecting the note-on velocity to the current CC11 value. If the former is higher than<br />
the latter, a sforzato effect is obtained. In the opposite case, one gets a crescendo<br />
effect. <strong>The</strong> overall dynamic excursion is proportional to CC25. It varies from zero (no<br />
dependence on velocity) to 127 (initial dynamic determined only by velocity). Default =<br />
0.<br />
CC26: default note-on pitch-modulation duration. Default = 94.<br />
CC27:<br />
default note-off release duration. Default = 10. (for fast releases)<br />
Note: CC26 and CC27 also allow to modify the relative duration of each keyswitch. (See<br />
“Performance Keyswitches” below).<br />
CC100: MIDI-loadable mutes. Loaded mutes are: “None” (default) (for CC100 between 0<br />
and 21), “Straight (22-42) , “Cup” (43-63), “Bucket” (64-85), “Harmon” (86-106),<br />
“Harmon + stem” (107-127).<br />
CC129: Channel Aftertouch<br />
NEW !<br />
Aftertouch: Kontakt 3.5 recognizes Channel Aftertouch as CC129.<br />
Tip: Aftertouch is very suitable for controlling Growl or Flutter Tongue.<br />
<strong>The</strong> slightly increased pressure associated with a keystroke may add some extra<br />
growl to the initial part of the note, yielding very realistic effects.<br />
13
Volume control by CC7<br />
Tip: If you wish to control the instrument volume by CC7, don’t forget to enable this<br />
function by checking the box “Accept standard controllers for Volume and Pan”,<br />
under “Instrument Options -> Controller”, as shown below.<br />
<strong>The</strong> Mutes<br />
<strong>The</strong> mutes are selected on the drop down menu from<br />
the upper button.<br />
You may choose among “Straight”, “Cup”,<br />
“Bucket”, Harmon” and “Harmon + Stem”.<br />
Please note that the actual activation of the mute will<br />
occur on the first detached note (i.e. the note which<br />
is separated from the preceding one), in order to<br />
preserve the continuity of a phrase. To disable the<br />
mute and restore the “normal” sound please select<br />
“None” on the Mutes menu. <strong>The</strong> “unmuted” sound<br />
will occur on the first detached note.<br />
Tip: Unlike the other mutes, the Plunger does not appear in the GUI menu but is activated by<br />
pressing (and holding) the Key Switch A#1. In this mode, CC11 controls directly the “wahwah”<br />
effect. For more details see “Playing techniques” below.<br />
14
CC Remapping<br />
NEW !<br />
Version 2.01 allowed to remap only five parameters,<br />
namely Dynamics, Vibrato Intensity, Vibrato Rate,<br />
Dynamic Pitch and Portamento Time to different<br />
CCs.<br />
In version 2.51 three different CC-remapping panels<br />
allow remapping of all controllers to any CC.<br />
Note: Please note that CC128 (Pitchbend)<br />
cannot be remapped nor used to control other<br />
parameters.<br />
If one tries to do so, the remapper will<br />
automatically switch to CC129.<br />
15
Wind controller Mode<br />
This option opens the WindController panel<br />
By clicking on “Use Windcontroller” button, you will<br />
activate the universal Windcontroller mode.<br />
<strong>The</strong> selected mode will appear on the main view GUI<br />
WC mode automatically maps the Dynamics to CC2, and gives complete<br />
(100%) control of Portamento Time (see below) to CC5.<br />
In Keyboard mode, the duration of portamento is determined by the velocity of<br />
the overlapped note. Since note-on velocities output by Windcontrollers<br />
generally reflect the current CC2 value, portamento time becomes a function of<br />
the current Dynamics. This is undesirable, since, for example, playing pp will<br />
always lead to long portamento and vice versa. Linking portamento time to a<br />
separate controller, such as CC5, permits to overcome this limitation. <strong>The</strong><br />
duration of portamento can now be controlled with any suitable physical<br />
controller mapped to CC5. If no controller is available, one might anyway set<br />
CC5 to a suitable value by directly acting with the mouse on the appropriate<br />
knob in the Controllers 1 panel.<br />
A mixed-mode behaviour is also possible, partially linking the duration of<br />
portamento to both dynamics (velocity) and CC5, allowing even greater<br />
flexibility and expressiveness.<br />
A pitch sensitivity knob is provided to compensate differences among different<br />
brands. For example, the Pitchbend output of theYamaha WC5 is smaller, and<br />
cannot easily cover the standard two-semitone range. This can be fixed by<br />
setting Pitch Sensitivity to a higher (200%) value.<br />
<strong>The</strong> default setting (100%) should be generally adequate for Akai devices.<br />
WC mode is deactivated by clicking on the yellow button. Dynamics control<br />
will be automatically remapped to CC11.<br />
16
Breath controller Mode<br />
This option opens the Breathcontrol panel<br />
By clicking on “Use Breathcontroller” button, you will<br />
activate the Breathcontroller mode.<br />
<strong>The</strong> selected mode will appear on the main view GUI<br />
BC mode automatically maps the Dynamics to CC2.<br />
In addition, it’s the BC which actually triggers note-on & off when<br />
overcoming or going below a certain threshold. As in the real instrument, the<br />
pressed key only determines the note which will be played.<br />
<strong>The</strong> note-on velocity is related to the steepness of the initial CC2 curve, so<br />
that a quickly rising CC2 will trigger a stronger attack.<br />
This does not apply to legato notes, where legato/portamento duration is<br />
determined, as usual, by the velocity of the overlapped notes.<br />
BC mode is deactivated by clicking on the yellow button. Dynamics control<br />
will be automatically remapped to CC11.<br />
17
Portamento Time<br />
This option opens the Portamento Time<br />
panel.<br />
In Keyboard (default) mode, the duration of portamento is determined by the<br />
velocity of the overlapped note. While this represents a very convenient<br />
approach to portamento control, there might be cases where linking<br />
portamento time to a separate controller (such as CC5) would be preferable.<br />
By setting the right knob to 100%, the duration of portamento could be linked<br />
to any physical controller mapped to CC5.<br />
A mixed-mode behaviour is also possible, partially linking the duration of<br />
portamento to both velocity and CC5, allowing even greater flexibility and<br />
expressiveness.<br />
In this example, portamento time is<br />
determined 30% by the velocity of<br />
the overlapped note, and 70% by CC5.<br />
18
Playing Techniques<br />
Despite its structural complexity, this instrument is very intuitive and easy to play.<br />
<strong>The</strong> <strong>Trumpet</strong> does not use pre-recorded articulations, and shaping the sound is the task<br />
of the player, carried out by proper use of a few midi controllers. However, extensive<br />
use of advanced Artificial Intelligence (AI) techniques greatly facilitates this task.<br />
Our revolutionary “Adaptive Model” approach acts by minimizing the differences with<br />
the real instrument, whatever articulation or phrase you play. You can therefore<br />
concentrate on creating music, rather than mastering complex sample bank<br />
management.<br />
Nevertheless, thorough knowledge of the controllers and the keyswitches, and some<br />
practice are certainly needed to get virtuoso effects.<br />
Before starting to play, please make sure your expression pedal (or breath controller) is<br />
connected to the keyboard and properly mapped to CC11 (or CC2).<br />
Playing range<br />
Active notes of the Main <strong>Trumpet</strong> are in the range E2 – G5. D#2 and G#5 are silent<br />
notes, useful for portamenti & falls “to nowhere”.<br />
C1 to D2 are reserved for the performance keyswitches.<br />
<strong>The</strong> range of the other instruments is:<br />
Flügelhorn: E2 – C5<br />
Second and Third <strong>Trumpet</strong>: E2 – F5<br />
Cornet: E2 – C5<br />
German <strong>Trumpet</strong>: E2 – C5<br />
Piccolo <strong>Trumpet</strong>: G#2 – G5<br />
Basic playing techniques<br />
Detached notes. Detached (non legato), is a note separated from the previous one by<br />
some amount of time. <strong>The</strong>y consist of an attack, a sustain, and a release phase.<br />
<strong>The</strong> type of the attack depends on the interaction between note-on velocity and CC11.<br />
For a given dynamics (between pp and ff), determined by the CC11, you can vary<br />
between softer attacks (low velocity), “normal” attacks (medium velocity, up to 89) and<br />
more accented attacks (velocity between 90 and 127. <strong>The</strong> higher the velocity, the more<br />
“punchy” the attack. <strong>The</strong> pitch-modulation depth of the attack and its duration – which<br />
19
creates a characteristic timbral richness -<br />
respectively.<br />
can be varied with CC20 and CC26,<br />
<strong>The</strong> dynamics of the sustain phase is entirely under control of CC11. You may<br />
continuously morph from pp to ff by acting on your expression pedal or breath<br />
controller.<br />
A natural release curve is performed on note-off. <strong>The</strong> duration of the default release<br />
can be varied with CC27. <strong>The</strong> default setting of 10 corresponds to a very short decay.<br />
Please refer to the “Controllers” section above for more details.<br />
Legato/Portamento notes. “Legato” means “bound together”: legato notes are not<br />
separated, but rather connected to the previous note by some form of transition. <strong>The</strong><br />
transition time (and type) between subsequent notes represents one of the most<br />
important elements of expression. If it’s short, it is usually named legato. If exceeds a<br />
certain time, the transition may “carry” from one note to another by a slide, which is<br />
called “portamento”. On a real trumpet, this can be achieved by skilled control of the<br />
lip tension, or by “switching” the tube length with the valves.<br />
To get a legato or portamento on our virtual trumpet is indeed very easy. You only need<br />
to overlap subsequent notes with the appropriate velocity. <strong>The</strong> duration of<br />
legato/portamento ranges from 20 msec to about 1 sec., dependent on the velocity of<br />
the overlapped note and on the played interval. Normal legato is obtained with<br />
velocities ranging from 70 to 90. Lower velocities lead to a portamento effect.<br />
Portamento may be interrupted by overlapping a new note. This leads to the very<br />
realistic effect of a split portamento, especially if a wide interval is played in an<br />
arpeggio-like fashion.<br />
Please note: very low velocities (below 10), which are necessary for longer portamentos,<br />
might be difficult to play on some keyboards, so the proper calibration of the velocity<br />
response of your keyboard may be very helpful. Under these circumstances we strongly<br />
recommend using our velocity remapping tool. Please refer to the Menu description<br />
above to learn more how to apply it.<br />
Half-valve sound. To perform legato/portamento on a real trumpet, the player<br />
frequently applies the so-called “half-valve” – technique. By pressing the valves only<br />
about half way down the tone “collapses”, providing a characteristic “squeezed” sound.<br />
During this very unstable status of the instrument the player is able to perform within<br />
some limits a nearly continuous glissando. In our virtual trumpet, the half valve sound is<br />
automatically activated if low velocity is applied. Please note that, in order to maintain<br />
realism, larger portamento intervals shouldn’t be played entirely with the half valve<br />
sound; instead, some intermediate, fixed notes should be inserted. This might be<br />
sometimes quite difficult in the realtime – for that reason some keyswitches have been<br />
programmed to perform ready-to use “split portamento” transitions. Please refer to the<br />
keyswitch section for more details.<br />
Vibrato. An extremely important element of musical expression. <strong>The</strong> vibrato of a real<br />
trumpet has a very complex “anatomy” which can be described as a modulation of pitch,<br />
intensity and timbre. Also, vibrato intensity and frequency slightly vary over time. Our<br />
virtual trumpet creates a realistic vibrato by reproducing these subtle variations by<br />
advanced AI techniques. Vibrato intensity is controlled by the ModWheel (CC1), vibrato<br />
rate by CC19 (available also on the instrument GUI).<br />
Vibrato-like endings. If you analyse any real trumpet phrase, you will notice that<br />
many notes have a brief, tasteful kind of vibrato at the very end. This vibrato is mostly<br />
20
just a single oscillation (one period) long, and adds a very typical expression to the<br />
sound. This articulation, nearly impossible to perform by the interaction of the main<br />
controllers, can be easily obtained by a simple touch on a keyswitch. Keyswitch F1<br />
provides a more brief type of short vibrato, which also can be used again and again as<br />
“on-the fly – vibrato” at any point in the middle of a phrase. Keyswitch F#1 triggers a<br />
more definite, stronger pronounced end-vibrato. Keyswitch A1 can also be used. If<br />
pressed before note-off, it adds the same type of effect on the release of the note.<br />
Since the intensity (via KS velocity) and duration are entirely under your control, these<br />
keyswitches are one of the most important articulation tools, allowing incredible realism<br />
to be easily achieved.<br />
Trills / shakes & ornamentations. Realistic trills, ornamentations and shakes can<br />
be obtained by simply playing them on a keyboard. However, a very helpful retrigger<br />
feature greatly facilitates this task: upon release of an overlapped note, the previous<br />
note will be played again (retriggered) if the key is still held down. So in order to play a<br />
trill, keep the initial note pressed while pressing and releasing the other note. Try<br />
different velocities, which noticeably determine the character of the trill/shake. This<br />
technique works also in more complex ornamentations using two or more overlapping<br />
notes. Typical trumpet shakes can be played either using the technique described above,<br />
or raising the ModWheel (CC1) to 110-127. In this latter case, a very realistic vibrato-toshake<br />
transition will be obtained.<br />
Falls. Falls are descending glissandos going to nowhere, i.e. they just fade out and do<br />
not stop on a particular note. If performed using only the half-valve sound, which is<br />
more suitable for longer falls, they sound smoother and softer. If a “punchy” or “sloppy”<br />
fall is needed, a series of notes (usually in fortissimo) is played – either chromatic, or<br />
using any other – e.g. harmonic - series of notes.<br />
<strong>The</strong>se articulations may be directly executed on the keyboard by skillful players.<br />
However, and more conveniently, the same effect will be obtained by using dedicated<br />
keyswitches. For more details please refer to the “Performance Keyswitches” below.<br />
Pitchbend. Under certain circumstances a real trumpet is capable of playing<br />
continuous, glissando-like pitch change. This is either possible using the half-valve<br />
technique described above, or – within limited intervals and mostly in higher register –<br />
applying a skilled control of lip pressure. With our virtual trumpet one may achieve a<br />
very similar effect by simply using the Pitch Bend, which performs a continuous pitch<br />
glide within a realistic interval, accompanied by some timbral interaction typical of a<br />
real trumpet.<br />
Growl & Flutter-tongue. Growl & Flutter-tongue. <strong>The</strong>se playing techniques provide<br />
a characteristic “dirty” sound, which is the result of a frequency modulation of the<br />
sound. <strong>The</strong> most common is “growling”, accomplished by singing a tone of a different<br />
pitch (vocalizing) while playing a note. <strong>The</strong> flutter-tongue (frullato) is accomplished by<br />
modulating the airflow: while playing a note, the trumpet player flutters his tongue<br />
making the typical “Frrrrr” – sound, similar to pronouncing a “rolling R”. “<strong>The</strong> <strong>Trumpet</strong>”<br />
uses 2 controllers to obtain growling and frullato effects: CC21 and CC23, where CC21<br />
uses higher modulating frequency. To differentiate the results, they can be used<br />
separately or mixed in different proportions.<br />
Playing 3 or more trumpets in unison. <strong>The</strong> trumpet 2 and 3 differ slightly from<br />
each other, and from the main trumpet, as far as the timbre, time response and<br />
articulations are concerned. So, even if played at unison from the same keyboard, they<br />
will sound very realistic. However, by all means, try to play them individually, applying<br />
21
slightly different pitch, pitch bending, portamento, vibrato depth and frequency, etc.<br />
Those small differences in sound and articulations are essential for a natural section<br />
sound. Please note that even real trumpets, if played in a very similar, “perfect”<br />
manner, may produce some phasing-like sound, spoiling the richness in timbre.<br />
22
<strong>The</strong> Performance Keyswitches<br />
Basic concepts<br />
<strong>The</strong> keyswitches (KS) are conceived to ease the task of shaping complex articulations or<br />
phrases which are impossible or too difficult to perform with the usual interaction of the<br />
expression pedal, pitchbend and modwheel.<br />
For example, sforzato, crescendo, sforzato-crescendo, on-the-fly modulation and<br />
different types of release, can be obtained by a simple touch on one of the modulating<br />
keyswitches.<br />
Non-modulating keyswitches perform several specific tasks, such as wah-wah effects,<br />
automated split portamentos and other typical phrases, such as falls or semi-legato.<br />
<strong>The</strong> reserved keyswitch range is C1 – D2.<br />
Four types of modulating KS are available:<br />
1) Note-on KS. (C1-D1). When held down, these KS will affect the next detached<br />
note(s).<br />
2) Legato/portamento KS (C#1). Similar to 1), but affecting also overlapped (legato)<br />
note(s).<br />
3) On-the-fly KS (D#1- F#1). <strong>The</strong>y affect the note which is being played, with<br />
characteristic modulation patterns.<br />
4) Note-off KS. (G1 – A1). <strong>The</strong>y affect the release of the current note(s).<br />
23
Five types of non-modulating KS are also available:<br />
1) Wah-wah effect (A#1)<br />
2) Default fall(B1)<br />
3) Modeled split portamento and falls (C2)<br />
4) Legato > detached conversion (C#2)<br />
5) Legato > semi-legato conversion (D2)<br />
Note-on, legato/portamento, on-the-fly and release KS do not produce repetitive,<br />
stereotypical patterns, as a presampled articulation would do. Rather, they act by<br />
modulating the note so that the current dynamics, pitch and evolution are preserved.<br />
This ensures that a virtually infinite series of nuances can be elicited by pressing a single<br />
KS.<br />
<strong>The</strong> intensity of the effect carried out by a modulating keyswitch is linked to the KS<br />
note-on velocity (from none to slightly excessive, for special effects).<br />
<strong>The</strong> duration of the modulating KS articulation has a default value of 64, which is<br />
generally most appropriate. It can, however, be varied by holding down just the<br />
selected KS while setting CC26 (for note-on) or 27 (for release) to the desired value.<br />
Note-on and legato/portamento keyswitches<br />
C1: Sforzato. This KS imparts an accent to the next detached note(s).<br />
C#1: Crescendo. This KS imparts a fast crescendo pattern to the next detached and<br />
legato note(s).<br />
D1: Upward pitchbend. This KS applies an upward pitchbend to the next detached<br />
note(s).<br />
On-the-fly keyswitches<br />
D#1: Decrescendo. This KS imparts a fast decrescendo pattern to the note which is<br />
being played.<br />
E1: Downward pitchbend. This KS imparts a downward pitchbend to the note which<br />
is being played.<br />
F1: Vibrato-like ending #1. This KS imparts a characteristic vibrato-like pattern to<br />
the note which is being played.<br />
F#1: Vibrato-like ending #2. This KS imparts a characteristic, shorter and more<br />
“definitive” vibrato-like pattern to the note which is being played.<br />
24
Note-off keyswitches<br />
G1: Release pattern #1. This KS imparts a characteristic, rich release pattern to the<br />
next note- off.<br />
G#1: Release pattern #2. This KS imparts a very short release pattern to the next<br />
note-off. Very suitable for fast sequences.<br />
A1: Release pattern #3. This KS imparts a characteristic, vibrato-like ending release<br />
pattern to the next note-off.<br />
Tip: note-on, on-the-fly and note-off KS may be simultaneously activated for multiple<br />
modulations. For example, by holding down C#1 and pressing on-the-fly D#1 one can obtain<br />
a crescendo-decrescendo dynamic pattern. By simultaneously holding down C1 and A1, one<br />
can obtain a sforzato pattern with vibrato-like ending on each next staccato note.<br />
Note: CC26 also allow to modify the relative duration of each note-on and on-the-fly<br />
keyswitch. To perform this, you need to set the controller while holding down the keyswitch.<br />
Similarly, CC27 will allow to modify the relative duration of each release keyswitch. A<br />
message on the lower bar will report the new value. Please note that this new value will be<br />
stored, replacing the default. By pressing a keyswitch, the associated value will be displayed<br />
on CC26 and CC27 GUI knobs.<br />
Non-modulating keyswitches<br />
A#1: Wah-wah effect. This KS reproduces the wah-wah effect of the plunger. This<br />
effect is directly controlled by CC11. Two different plunger types (unused and used,<br />
presumably) are activated on the basis of the KS velocity. Activation/deactivation of the<br />
wah-wah actually takes place on the next detached note, to preserve the integrity of<br />
the phrase.<br />
B1: Short fall. This KS reproduces a typical short fall from the currently played note.<br />
This obviates the necessity of playing a very quick scale with staccato notes to get the<br />
same effect. <strong>The</strong> fall starts upon pressing the KS. <strong>The</strong> duration of the fall is determined<br />
by the KS velocity. <strong>The</strong> fall can be interrupted, before its natural end, by releasing the<br />
KS, or by playing a new note while the fall is still sounding.<br />
25
C2: Automated split portamento. This KS modifies the normal portamento pattern<br />
into a harmonically based, split portamento, very typical for a trumpet. This obviates<br />
the necessity of playing a very complex arpeggio with staccato notes, instead of just<br />
overlapping the start and destination notes. <strong>The</strong> overall portamento duration is similar<br />
to that of a normal portamento, and is therefore determined by the velocity of the<br />
overlapped note, and by the played interval.<br />
Note: C2, pressed along with another KS, such as C1 to A#1, will activate non-default,<br />
different types of split portamento and falls:<br />
C2 + C1 : chromatic split portamento<br />
C2 + C#1: semi-chromatic split portamento<br />
C2 + D1 : half valve split portamento<br />
C2 + D#1: arabic scale split portamento<br />
C2 + E1 : pentatonic scale split portamento<br />
C2 + F1 : mixed mode half-valve split portamento<br />
C2 + F#1: doit, or “upward fall”<br />
C2 + G1: “upward half-valve fall”<br />
C2 + A#1: half-valve fall<br />
C2 + A1 : chromatic fall<br />
C2 + G#1: chromatic long fall<br />
C#2: Automated legato>detached conversion. When playing fast, it may prove<br />
very difficult to avoid overlapping notes when a staccato sequence is instead desired.<br />
This KS converts overlapped notes into staccato (with normal attacks & sustains).<br />
D2: Automated legato>semi-legato conversion. This KS is very much alike C#2,<br />
converting legato notes to semi-legato, an articulation which sounds between staccato<br />
and legato, with a strong reattack.<br />
Note: semi-legato is also automatically generated when two non-legato notes are very close<br />
to each other, i.e. when the time interval between the release of the first note and the<br />
subsequent note-on is less than 35 msec. This avoids the overlap of the release of the first<br />
note with the subsequent attack, which would otherwise lead to unrealistic results.<br />
26
Appendix 1<br />
Using the Convolution Reverb<br />
Both Kontakt 3.5 Player and <strong>Sample</strong>r have a built-in convolution reverb. It is capable of<br />
recreating a reverb of real acoustic environment previously sampled and stored as an IR<br />
(Impulse Response). Even if you do not own the full <strong>Sample</strong>r, you can apply this high<br />
quality reverb to any patch using the Player included in this library. Open the output<br />
section of the Player and insert the Convolution into the Aux channel. Click on “Conf”<br />
and make sure that the output of the Aux channel is routed to the main output. Open<br />
the convolution unit (double-clicking on the insert) and drag-and-drop an Impuls<br />
Response into its editor window. You will find a small library of the IRs in the Player<br />
folder (Kontakt Player 3.5 > Presets > Impulses). Move the slider “DRY” to zero to<br />
eliminate the direct (dry) signal.<br />
For more details refer to the Kontakt Player Guide.<br />
27
<strong>The</strong> Reverb Folder<br />
A useful application of the convolution reverb described above is supplied with the<br />
<strong>Trumpet</strong> package. <strong>The</strong> Reverb folder contains the instruments with reverb (“Multis”).<br />
<strong>The</strong> Amount of the reverb (reverb send) can be controlled by the Aux slider as shown<br />
below. To make the Aux sliders visible, click on the small “Aux” icon in the right upper<br />
corner:<br />
If you are asked “Replace Multi (pressing “no” will merge to the new instruments)?”,<br />
always click on “Yes” to load the complete reverb configuration.<br />
<strong>The</strong> above Multi uses an impulse response encoded in the “Impulse Responses.nkx” file.<br />
<strong>The</strong>re are further audio files representing various impulse responses in the Kontakt<br />
player folder. You can exchange them per drag & drop. Please refer to the Player manual<br />
for further details.<br />
28
Appendix 2<br />
Tested Systems<br />
“<strong>The</strong> <strong>Trumpet</strong>” (v. 2.01) has been tested on the following systems:<br />
Mac:<br />
Mac Pro Quad Core 3 GHz, 8GB RAM, Mac OS 10.5.2,<br />
Sequencer: Logic 8.01 and Ableton Live 7.02<br />
Audio hardware: MOTU 2408mk3<br />
Power Mac G4 (MDD) dual 1GHz, 1.75GB RAM, Mac OS 10.4.11<br />
Sequencer: Cubase 4.1.2, Cubase 4.0.3, Cubase SX 3.1.1, Digital Performer 5.1.2<br />
Audio hardware: MOTU 2408mk3<br />
Mac Pro G5 single cpu, 1.6Ghz, 2 GB RAM, MacOSX 10.4.11,<br />
Sequencer: Cubase SE 3.03<br />
Audio Hardware: Core Audio, DSP driver<br />
Mac Mini Core 2 Duo 2GHz, 2GB RAM, Mac OSX 10.5.1<br />
Sequencer: Logic 8.1<br />
Audio hardware: Core Audio, Edirol UA-1D; Tascam US-428<br />
Power Mac G5, 2 x 2 GHz, 3,5 GB RAM, OS 10.4.9<br />
Sequencer: Logic Pro 7.2.3<br />
Audio Hardware: RME Fireface 800<br />
Windows:<br />
IntelCore2 6600 & 2.40 Ghz, 2 GB RAM, Win XP<br />
Sequencer: Cubase SX3<br />
Audio Hardware: Creative Audigy, M-Audio Fast Track Pro<br />
Core 2 Duo, 3 GHz, 3 GB RAM, Win XP<br />
Sequencer: Cubase 4.1<br />
Audio Hardware: RME Fireface 800<br />
Core 2 Duo, 1,8 GHz, 2 GB RAM, Win XP<br />
Sequencer: Cubase 4.1<br />
Audio Hardware: Terratec EWX 24/96, Edirol DA2496<br />
AMD Athlon 64 X2 Dual Core 3800+, 2 GHz, 1 GB RAM, Win XP<br />
Sequencer: Cubase SE 3.03<br />
Audio Hardware: Digidesign Mbox<br />
29
Mac Mini Core 2 Duo 2GHz, 2GB RAM, Windows XP Home SP2<br />
Sequencer: Cubase 4.1, SE 3.03<br />
Audio hardware: Edirol UA-1D; Tascam US-428<br />
Intel “D”duo, 3 GHz, 2 GB RAM, Win XP<br />
Sequencer: Cubase 4.1<br />
Audio Hardware: RME Fireface 800<br />
AMD Opteron 275, 2 x dual core 2,2 GHz, 2 GB RAM, Win XP<br />
Sequencer: Cubase SX 3<br />
Audio Hardware: Scope<br />
AMD Opteron 270, 2 x dual core 2 GHz, 2 GB RAM, Win XP<br />
Sequencer: Cubase 4.01<br />
Audio Hardware: Echo Audio, Layla (PCI)<br />
Core 2 Duo E6600, 2 GB RAM, Win XP<br />
Sequencer: Sonar 7.0.3, Producer Edition<br />
Audio Hardware: E-MU 1820M<br />
An updated list will be eventually made available on our website:<br />
http://www.samplemodeling.com/en/benchmarks.php<br />
Please note that all the above is reported for informative purposes only, and cannot be<br />
taken as a guarantee, since even identical systems may under certain circumstances<br />
behave differently.<br />
30
Appendix 3<br />
Technical Support<br />
All questions related to the installation and activation of <strong>The</strong> <strong>Trumpet</strong>, or those<br />
pertinent to the Kontakt sampler/player, or the host (sequencer, DAW etc.), should be<br />
addressed first to Native Instruments support: http://www.nativeinstruments.com/support.info<br />
.<br />
Specific questions on how to use <strong>The</strong> <strong>Trumpet</strong>, the controllers, the keyswitches, or<br />
related to some apparent malfunction of the instrument should be emailed to<br />
<strong>Sample</strong>modeling, info@samplemodeling.com , or via the contact page in our website:<br />
http://www.samplemodeling.com/en/contact.php , providing as much information as<br />
possible on the system, including computer, OS, audiocard, sampler and sequencer and<br />
their settings. A midi file showing the problem is usually the best approach to debugging.<br />
Technology-related questions, exchange of experiences, tips & tricks, examples, demos<br />
(mp3) can be posted in our forum: http://www.samplemodeling.com/forum by<br />
registered customers.<br />
Copyright © 2009 Giorgio Tommasini & Peter Siedlaczek All rights reserved.<br />
First printing 2008<br />
This guide is written by Giorgio Tommasini and Peter Siedlaczek.<br />
31