

Download - Haas Automation, Inc.
Download - Haas Automation, Inc.
Download - Haas Automation, Inc.

You also want an ePaper? Increase the reach of your titles
YUMPU automatically turns print PDFs into web optimized ePapers that Google loves.
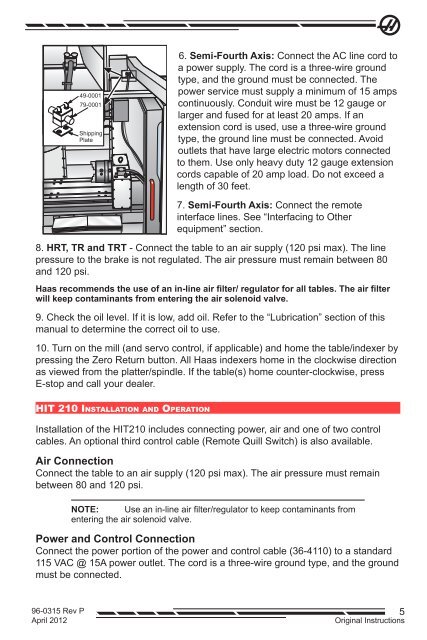
49-0001<br />
79-0001<br />
Shipping<br />
Plate<br />
6. Semi-Fourth Axis: Connect the AC line cord to<br />
a power supply. The cord is a three-wire ground<br />
type, and the ground must be connected. The<br />
power service must supply a minimum of 15 amps<br />
continuously. Conduit wire must be 12 gauge or<br />
larger and fused for at least 20 amps. If an<br />
extension cord is used, use a three-wire ground<br />
type, the ground line must be connected. Avoid<br />
outlets that have large electric motors connected<br />
to them. Use only heavy duty 12 gauge extension<br />
cords capable of 20 amp load. Do not exceed a<br />
length of 30 feet.<br />
7. Semi-Fourth Axis: Connect the remote<br />
interface lines. See “Interfacing to Other<br />
equipment” section.<br />
8. HRT, TR and TRT - Connect the table to an air supply (120 psi max). The line<br />
pressure to the brake is not regulated. The air pressure must remain between 80<br />
and 120 psi.<br />
<strong>Haas</strong> recommends the use of an in-line air filter/ regulator for all tables. The air filter<br />
will keep contaminants from entering the air solenoid valve.<br />
9. Check the oil level. If it is low, add oil. Refer to the “Lubrication” section of this<br />
manual to determine the correct oil to use.<br />
10. Turn on the mill (and servo control, if applicable) and home the table/indexer by<br />
pressing the Zero Return button. All <strong>Haas</strong> indexers home in the clockwise direction<br />
as viewed from the platter/spindle. If the table(s) home counter-clockwise, press<br />
E-stop and call your dealer.<br />
HIT 210 Installation and Operation<br />
Installation of the HIT210 includes connecting power, air and one of two control<br />
cables. An optional third control cable (Remote Quill Switch) is also available.<br />
Air Connection<br />
Connect the table to an air supply (120 psi max). The air pressure must remain<br />
between 80 and 120 psi.<br />
NOTE: Use an in-line air filter/regulator to keep contaminants from<br />
entering the air solenoid valve.<br />
Power and Control Connection<br />
Connect the power portion of the power and control cable (36-4110) to a standard<br />
115 VAC @ 15A power outlet. The cord is a three-wire ground type, and the ground<br />
must be connected.<br />
96-0315 Rev P<br />
April 2012<br />
5<br />
Original Instructions


