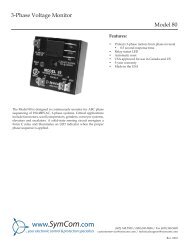
installation instructions for the model 777-690-p - SymCom
installation instructions for the model 777-690-p - SymCom
installation instructions for the model 777-690-p - SymCom

You also want an ePaper? Increase the reach of your titles
YUMPU automatically turns print PDFs into web optimized ePapers that Google loves.
PROGRAMMING<br />
1. Rotate <strong>the</strong> MODE SELECT switch to <strong>the</strong> parameter to be programmed. <strong>SymCom</strong> recommends<br />
that LV be programmed first and <strong>the</strong>n move clockwise through <strong>the</strong> positions to complete <strong>the</strong><br />
process.<br />
2. Press and hold <strong>the</strong> RESET/PROGRAM button.<br />
3. Rotate <strong>the</strong> DISPLAY/PROGRAM knob until <strong>the</strong> proper setting <strong>for</strong> <strong>the</strong> parameter that is being<br />
programmed is displayed.<br />
4. Release <strong>the</strong> RESET/PROGRAM button. This stores <strong>the</strong> new parameter in <strong>the</strong> nonvolatile<br />
memory. If <strong>the</strong> number changes back to what is was be<strong>for</strong>e programming, <strong>the</strong>n <strong>the</strong> tamper guard<br />
is on and will need to be unlocked be<strong>for</strong>e programming can be completed (see <strong>the</strong> TAMPER<br />
GUARD section <strong>for</strong> a complete description).<br />
5. Continue steps 1-4 until all parameters are programmed.<br />
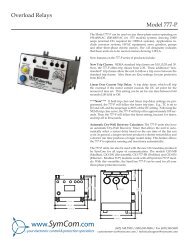
OPERATION<br />
The relay operation of <strong>the</strong> Model <strong>777</strong>-<strong>690</strong>-P is designed to be fail safe. This means when everything<br />
is within <strong>the</strong> limits programmed into <strong>the</strong> unit, <strong>the</strong> relay will energize, <strong>the</strong> NO contact will close and<br />
<strong>the</strong> NC contact will open. Once <strong>the</strong> unit has been wired and programmed, <strong>the</strong> unit is ready to<br />
operate. Turn MODE SELECT to <strong>the</strong> RUN position. The display will show “run” alternating with some<br />
number (<strong>the</strong> numbers displayed will be <strong>the</strong> number corresponding to where <strong>the</strong><br />
DISPLAY/PROGRAM knob is pointed). It will do this <strong>for</strong> <strong>the</strong> amount of time programmed into RD1.<br />
After this time has expired, <strong>the</strong> relay will energize (NO contact will close and <strong>the</strong> NC contact will<br />
open). If something else is in <strong>the</strong> display, see <strong>the</strong> troubleshooting section <strong>for</strong> more in<strong>for</strong>mation. If<br />
MODE SELECT is taken out of <strong>the</strong> RUN position, <strong>the</strong> unit’s relay will de-energize.<br />
CLEARING LAST FAULT<br />
The last fault stored can be cleared on <strong>the</strong> MotorSaver ® Plus following <strong>the</strong>se steps:<br />
1. Rotate <strong>the</strong> MODE SELECT switch to GF.<br />
2. Press and hold <strong>the</strong> RESET/PROGRAM button. Adjust <strong>the</strong> DISPLAY/PROGRAM adjustment until<br />
“cLr” appears on <strong>the</strong> display. Release <strong>the</strong> RESET/PROGRAM button.<br />
To verify <strong>the</strong> last fault was cleared, place <strong>the</strong> MODE SELECT switch in <strong>the</strong> RUN position. Then<br />
press and hold <strong>the</strong> RESET/PROGRAM button; “cLr” should be on <strong>the</strong> display.<br />
TAMPER GUARD<br />
The MotorSaver’s setpoints can be locked to protect against unauthorized program changes.<br />
1. Rotate <strong>the</strong> MODE SELECT switch to GF.<br />
2. Press and hold <strong>the</strong> RESET button. Adjust <strong>the</strong> DISPLAY/PROGRAM knob until “Loc” appears on<br />
<strong>the</strong> display.<br />
3. Release <strong>the</strong> RESET button.<br />
4. Turn MODE SELECT switch to RUN.<br />
The program is now locked, but all settings can be viewed. The unit can be unlocked by<br />
following <strong>the</strong> same steps except adjust <strong>the</strong> DISPLAY/PROGRAM knob to “unL” in step 2.<br />
- 7 -<br />
6/07 A1