Mobi and Interwrite Workspace Beginners Manual - Crosby ISD
Mobi and Interwrite Workspace Beginners Manual - Crosby ISD
Mobi and Interwrite Workspace Beginners Manual - Crosby ISD

Create successful ePaper yourself
Turn your PDF publications into a flip-book with our unique Google optimized e-Paper software.
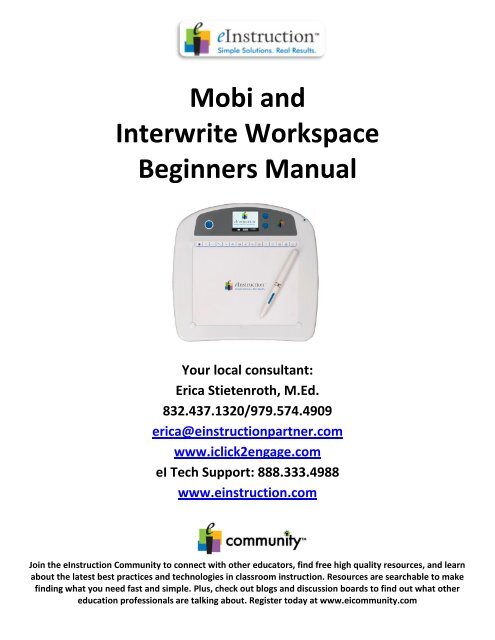
<strong>Mobi</strong> <strong>and</strong><br />
<strong>Interwrite</strong> <strong>Workspace</strong><br />
<strong>Beginners</strong> <strong>Manual</strong><br />
Your local consultant:<br />
Erica Stietenroth, M.Ed.<br />
832.437.1320/979.574.4909<br />
erica@einstructionpartner.com<br />
www.iclick2engage.com<br />
eI Tech Support: 888.333.4988<br />
www.einstruction.com<br />
Join the eInstruction Community to connect with other educators, find free high quality resources, <strong>and</strong> learn<br />
about the latest best practices <strong>and</strong> technologies in classroom instruction. Resources are searchable to make<br />
finding what you need fast <strong>and</strong> simple. Plus, check out blogs <strong>and</strong> discussion boards to find out what other<br />
education professionals are talking about. Register today at www.eicommunity.com
1<br />
What is <strong>Workspace</strong>?<br />
<strong>Workspace</strong> is a program that connects a computer to an <strong>Interwrite</strong> interactive<br />
whiteboard, panel or wireless pad, such as the MOBI.<br />
The program includes tools for writing <strong>and</strong> drawing during a presentation.<br />
Teachers can use <strong>Workspace</strong> to create <strong>and</strong> conduct interactive lessons.<br />
Teacher<br />
MOBI<br />
Student<br />
MOBI<br />
Getting Started<br />
Before using the <strong>Interwrite</strong> MOBI or the interactive pen for the first time, they should<br />
be charged for about 12 hours.<br />
Make sure the Pad <strong>and</strong> Pen(s) are charged before connecting to a computer.<br />
Charging the <strong>Interwrite</strong> MOBI<br />
When the MOBI battery is low, the Battery Status icon will display as an empty<br />
battery.<br />
Place the Interactive Pen in the Pen slot.<br />
Connect the Mini USB Cable to the Mini USB port at the top of the MOBI <strong>and</strong> then<br />
into a USB port on the computer OR into the provided AC adapter. Note: the<br />
<strong>Interwrite</strong> MOBI can be used while it is charging.<br />
When fully charged the Battery Status icon will display a full battery.
2<br />
NOTES:<br />
The teacher <strong>and</strong> student MOBIs function similarly <strong>and</strong> even look almost identical to each<br />
other. The ONLY difference between the two is that the Teacher MOBI has a color LCD KWIK<br />
(Know What I Know) screen that allows the teacher to view individual <strong>and</strong> class reports live if<br />
utilizing the MOBI with our CPS response pads.<br />
Before the first use, you need to charge the MOBI <strong>and</strong> the pen for about 12 hours. You have<br />
two ways to charge your MOBI. One, you can connect the MOBI to the computer using the<br />
USB cable that came in the box. The computer will need to be on for charging to occur. The<br />
second method is with the A/C adaptor (which we recommend) that came with the MOBI.<br />
When charging your MOBI make sure the pen is pressed securely into its holder <strong>and</strong> look at<br />
the screen to verify that the pen picture indicates it is charging. If you ever try to use your<br />
MOBI <strong>and</strong> it is not charged you can connect it to the computer <strong>and</strong> charge it while you use it<br />
(NOTE: this method will not charge your pen while it’s in use – it must be seated in the slot to<br />
charge). Remember: you will need to keep your MOBI charged in order to use it mobile in your<br />
classroom.<br />
Now turn on your MOBI <strong>and</strong> look at the KIWK (Know What I Know) screen. The Antenna icon<br />
lets you know that your MOBI is connected via radio frequency. If this does not show up, click<br />
the blue button on the top of the stick receiver; it should flash. Now, quickly press <strong>and</strong> release<br />
the blue button on the bottom side of the MOBI. When your MOBI is connected to the<br />
computer using the USB cable the “Paired with Computer” icon will be replaced with the USB<br />
icon. When you see the In Proximity box appear the pen is able to control the cursor <strong>and</strong> is<br />
active. The battery life indicator is displayed all the time <strong>and</strong> will display the battery charge for<br />
the MOBI. The Pen Charge Icon will be displayed only when you are charging the MOBI <strong>and</strong> the<br />
pen is plugged in properly. It will not indicate strength of charge. To see what these icons look<br />
like, see page 5.
3<br />
Installation of Software<br />
Ideally, software should be the newest version. Most often this will be found on the<br />
website at http://www.einstruction.com/support_downloads/downloads.html. ALL<br />
eInstruction DEVICES MUST BE UNPLUGGED FROM THE COMPUTER BEFORE<br />
INSTALLATION OF ANY eInstruction SOFTWARE.<br />
You will know <strong>Interwrite</strong> <strong>Workspace</strong> has installed successfully by the appearance of<br />
the eInstruction icon in the System Tray on the Windows Task Bar (if the icon<br />
does not appear, restart your computer). This icon indicates that the eInstruction<br />
Device Manager is now running in the background. The Device Manager can be<br />
opened through the icon menu.<br />
Setup <strong>and</strong> Device Manager<br />
Plug the RF Receiver into a USB port on the computer. The computer will<br />
automatically detect the USB device <strong>and</strong> install the new hardware for use.<br />
A blue LED light on the RF Receiver will light up when it is plugged in.<br />
Turn on the MOBI.<br />
In most cases the computer will automatically find the MOBI <strong>and</strong> it will be visible in<br />
the Device Manager. If it is NOT automatically discovered:<br />
Naming Devices<br />
o Press the lighted Activation button on the RF Receiver. The blue LED light will<br />
start blinking.<br />
o Turn over the MOBI <strong>and</strong> press the blue button next to the battery case to<br />
activate the RF signal. Note: up to two minutes is allowed to press the<br />
Activation button on the MOBI.<br />
o This process can be used to add additional MOBIs to the Device Manager, as in<br />
Multi-User mode.<br />
Click to select the device icon in the<br />
Device Manager window.<br />
Click on Options <strong>and</strong> select Properties<br />
or click on the wrench Properties button.<br />
Select the General tab at the top of the<br />
window.<br />
Type a device name in the Name<br />
text field.<br />
<br />
Note: this is also where<br />
the softkeys can be customized.
4<br />
NOTES:<br />
To view the Device Manger,<br />
Make sure the <strong>Mobi</strong> is turned on.<br />
Select the eInstruction Icon in the system tray at the bottom right<br />
of the computer screen.<br />
From the popup window select eInstruction Device Manager.<br />
When your Device Manager window opens you, should see the<br />
MOBI Icon in the window. A green check mark indicates that the<br />
MOBI is connected.<br />
Use the icons or Options menu to view or<br />
change the preferences on the <strong>Mobi</strong>.<br />
NOTE: If the eInstruction Device Manager icon is<br />
not in your system tray or if you have previously<br />
exited the Device Manager you will need to<br />
restart it. To do this, go to your Start menu, click<br />
All Programs / eInstruction / Device Manager / Device Manager. After a few moments the<br />
eInstruction icon will return to the system tray.
5<br />
Check for Updates<br />
Open the Device Manager. Click on the picture of the<br />
RF Receiver. Choose File / Preferences from the menu<br />
options. Click the Firmware Update tab <strong>and</strong> click the<br />
Check for Updates box.<br />
Click the eInstruction icon in the System Tray of the<br />
Windows Task Bar. Select the Check for Updates<br />
option. If a new version of the <strong>Workspace</strong> software<br />
is available download it now.<br />
KWIK Screen on the Teacher MOBI<br />
The MOBI KWIK (Know What I Know) Screen displays icons associated with the MOBI’s status.
6<br />
NOTES:<br />
It is good habit to check for updates about once a month. You can set up the software to<br />
remind you to do so.
7<br />
MOBI Learner Status Screen<br />
The Interactive Pen<br />
The MOBI requires an interactive pen.<br />
Tap on the pad with the pen tip to perform the “left click” action of a mouse.<br />
Hold the pen just above the surface of the MOBI <strong>and</strong> press the upper part of the rocker<br />
button to perform a “right click.”<br />
Hold the pen just above<br />
the surface of the MOBI <strong>and</strong><br />
press the lower part of the<br />
rocker button to “double click.”<br />
Recharge the pen regularly.<br />
o Place the pen firmly<br />
in the recharging holder.<br />
o A pen <strong>and</strong> a battery icon will appear<br />
on the KWIK screen indicating the pen is charging.<br />
o Remember to return the pen to the recharging<br />
holder when not in use.
8<br />
NOTES:<br />
There are two ways to use your MOBI: as a mouse <strong>and</strong> as an interactive device.<br />
We’ll begin by underst<strong>and</strong>ing how to use it as a mouse. Let’s start with the pen. The first<br />
thing to note is that the pen does not need to touch the board until you are ready to write.<br />
You’ll notice that if you hover within a ¼ inch of the board your curser will move. Try<br />
hovering in the upper right-h<strong>and</strong> corner of your MOBI; you’ll see that the cursor on your<br />
computer will move to that location on your computer.<br />
Tap to left click, use the rocker button to double click or to right click.<br />
The best way to get comfortable with using your MOBI is to get rid of your normal ‘mouse’<br />
<strong>and</strong> use the MOBI instead. We also suggest playing games like Solitaire or going to<br />
www.edheads.org <strong>and</strong> using your MOBI to work through a virtual surgery. These activities<br />
get you acquainted with hovering, clicking, dragging <strong>and</strong> dropping. Once you master this,<br />
your MOBI will become your best friend.<br />
You will notice as you are moving your pen around the pad, the location is calibrated to the<br />
computer screen. Unlike interactive whiteboards no manual calibration ever has to be<br />
done.<br />
To launch an application, i.e. internet explorer, you follow these steps. Move your pen to<br />
the location of the icon <strong>and</strong> then press the double click (rocker bar towards the tip). There<br />
is no need to do multiple taps. Now, try this method to launch Internet Explorer.<br />
Right click: Hover over the icon, press<br />
the Rocker Bar towards the top of the<br />
pen. The right-click menu will appear.<br />
Double click: Hover over the icon, press<br />
the Rocker Bar towards the tip of the<br />
pen. The program will open.<br />
You will never have to go back to your<br />
computer mouse.
9<br />
Interactive Mode<br />
There are multiple ways to open <strong>Interwrite</strong> <strong>Workspace</strong>.<br />
o Use the pen to click the <strong>Workspace</strong> softkey on the MOBI.<br />
o Click the eInstruction icon in the Windows System Tray <strong>and</strong> choose <strong>Workspace</strong>.<br />
o Use the desktop icon or:<br />
Start / All programs / eInstruction / <strong>Interwrite</strong> <strong>Workspace</strong> / Interactive mode.<br />
A toolbar will appear near the right h<strong>and</strong> side of the desktop. It will look thinner than<br />
the toolbar below.<br />
The toolbar will become translucent after a period of non-use.<br />
Moving the Toolbar<br />
Position the mouse pointer at<br />
the top of the toolbar near the<br />
<strong>Interwrite</strong> icon.<br />
Click <strong>and</strong> drag the toolbar to a<br />
new location.<br />
Resizing the toolbar<br />
Position the mouse pointer on the<br />
edge of the Toolbar until a doubleheaded<br />
arrow appears.<br />
Click <strong>and</strong> drag the double-headed<br />
arrow to change the size <strong>and</strong> layout<br />
of the Toolbar.<br />
Setting <strong>Workspace</strong> Preferences<br />
Dozens of preference changes can be made<br />
to the <strong>Interwrite</strong> <strong>Workspace</strong> program.<br />
65 different tools are available to be<br />
added to a customized toolbar.<br />
Three groups of tools are available at all times:<br />
o Main Toolbar (always on screen)<br />
o Toolbox tools<br />
o Right click tools<br />
Note: this is the default Intermediate toolbar
NOTES:<br />
10
11<br />
Three default toolbars are provided but may be customized:<br />
o Basic<br />
o Intermediate<br />
o Advanced<br />
Recommended Preferences: Click on the <strong>Workspace</strong> Menu button. Select Preferences.<br />
Toolbar Settings Tab<br />
Classic Rectangle will give the greatest available page space or “real estate” within<br />
<strong>Workspace</strong>.<br />
Toolbar Button Size in Pixels – the icons are most visible in the 40 x 40 size.<br />
Optional Custom Buttons - will allow one click linking to either files or websites.<br />
Options Tab<br />
o click on P1<br />
o Type in a description<br />
o Use the Application Path <strong>and</strong> browse to a file (such as a lesson) or program<br />
o Use the URL icon <strong>and</strong> type in a full website address (URL)<br />
Annotation Window Options – checking the box will allow you to resize <strong>Workspace</strong> so it<br />
can be utilized side-by-side with another program, such as for note-taking.<br />
Cursor Orientation – can be changed for a left-h<strong>and</strong>ed individual.<br />
Automatically Save Pages Every – will allow the program to save the current<br />
activity/lesson at regular intervals.<br />
Snap Grid Settings – Snap Objects to Grid is suggested for teachers who might be<br />
utilizing graphs. Spacing in Pixels can be set at 30 to allow drawn lines to snap to the<br />
premade graph lines on the grid page.<br />
New Page Setup Tab<br />
Blank Page – studies have shown that a white page is not the best choice for student<br />
viewing. Use Change Background Color to change to off-white or other light color.<br />
Grid Page – for graphing purposes check Vertical <strong>and</strong> Center Grid. Add Title Box if<br />
desired. Spacing should be set at 30 Pixels. Language Arts teachers may want to space<br />
the horizontal lines further apart to allow for easier writing by the students. Change<br />
background color as desired.<br />
Transparency & Language Tab<br />
There are no specific suggestions for this tab.
12<br />
NOTES:<br />
The toolbar you see when you first open <strong>Workspace</strong> is the default (intermediate) toolbar <strong>and</strong><br />
the MAIN toolbar. Let’s go ahead <strong>and</strong> make the changes now. First step is to click the<br />
<strong>Workspace</strong> Menu Icon (the down triangle at the top of the toolbar). Now click on Preferences<br />
from the menu. After it opens select the TOOLBAR SETTINGS tab. The default is classic<br />
rectangle. Now change the toolbar button size in pixels. The default is 22x22, change that to<br />
40x40. Click OK at the bottom.<br />
We recommend changing a few other items w/in the toolbar as well. Please go ahead <strong>and</strong> go<br />
back into the PREFERENCES <strong>and</strong> change the starred items under each tab.
13<br />
Gradient Page Setup Tab<br />
<br />
School colors are good choices for the gradient pages.<br />
Customize Toolbar Tab<br />
The current toolbar defaults to the pre-created Intermediate toolbar. Advanced <strong>and</strong><br />
beginner toolbars are also available.<br />
The Toolbox is a group of secondary tools readily available by clicking the Toolbox icon<br />
in the Main Toolbar during <strong>Workspace</strong> use.<br />
Customize the toolbar by dragging icons from the Available Tools section into the Main<br />
Toolbar, Toolbox or Right Click Toolbar.<br />
Some popular, but unusual, tools are noted in the picture below:<br />
Freeh<strong>and</strong> text<br />
Freeh<strong>and</strong> shape<br />
Curtain<br />
Grid page<br />
Record <strong>and</strong> Playback<br />
Timer<br />
Hovering the pointer over an icon will provide the tool name.<br />
The P1 through P5 icons are only available if the Custom Buttons were created in the<br />
Toolbar Settings tab.
14<br />
NOTES:<br />
There are many ways to customize your toolbar. We recommend starting with the<br />
Intermediate toolbar <strong>and</strong> adding/removing buttons. The toolbar you create will be your MAIN<br />
toolbar from now on. You can create as many customized toolbars as you want. We<br />
recommend you place only the tools you use regularly on your main toolbar (box on the left<br />
center). Other buttons that you want quick access to should be placed in the Toolbox (box on<br />
the right center). To add or remove buttons you simply click <strong>and</strong> drag them in or out of either<br />
the Main Toolbar or Toolbox areas. You can also re-arrange buttons. Flow is key – you might<br />
want your paper <strong>and</strong> graph paper towards the top of your toolbar instead of at the bottom.<br />
Some buttons we recommend for your main toolbar are: Annotate Over Desktop, Create New<br />
Page, Create Grid Page, Pen, Freeh<strong>and</strong> Text, Highlighter, Eraser, Content Gallery, Timer, Undo,<br />
ExamView, CPS, Capture, Curtain, Record <strong>and</strong> Playback. See pages 41 <strong>and</strong> 43 for<br />
pictures/descriptions of all the tools. Jumpstart the tool name popups by clicking on one icon,<br />
dragging it slightly to one side <strong>and</strong> letting go.<br />
WHY do we recommend Annotate Over Desktop? This mode is perfect for using the MOBI<br />
with your document camera, websites, other application programs (PowerPoint), etc. Equate<br />
it with placing a transparency or ‘glass’ over your screen. Whatever is under the ‘glass’ will<br />
maintain its live mode.
Main Tools <strong>and</strong> Descriptions<br />
Page Creation Tools<br />
15<br />
Click to create blank pages for lessons, notes, etc.<br />
The screen will now look similar to this:<br />
IMPORTANT: The Properties Bar will change depending on the tool being used. The<br />
above example shows the Pen tool <strong>and</strong> its properties: line color, width, transparency,<br />
ends, dash styles <strong>and</strong> the Preview showing the current settings.
16<br />
NOTES:<br />
It’s often asked, “How user-friendly is your software?” The truth is, once you’ve customized<br />
your toolbar – you should be able to do just about anything with it in one or two taps of your<br />
pen!<br />
Once you select any tool, you’ll see the Properties bar appear at the bottom of your page.<br />
Here you can change color, line thickness (if applies), transparency (if applies), line ends (if<br />
applies), dash styles (if applies), fill shape (if applies), etc. (NOTE: if you change your properties<br />
for a tool, it will keep what you last used as the default for that tool).
Annotation Tools<br />
17
NOTES:<br />
18
Editing Tools<br />
19
20<br />
Extending a Page <strong>and</strong> Panning<br />
By clicking on either the downward extend button or the right side extend button the<br />
default blank page space will be widened or lengthened.<br />
Click on the Pan Tool in your toolbar or toolbox (if it was a chosen tool) <strong>and</strong> then click<br />
<strong>and</strong> drag on the <strong>Workspace</strong> page to move in any direction across a page that<br />
is larger than the current screen size, such as in a PDF.<br />
Layers Toolbar<br />
By default, all items are organized in a single layer. To add layers:<br />
Locate the Layers Toolbar at the bottom left corner of the<br />
<strong>Workspace</strong> page.<br />
To view the layers click on the maximize layers button.<br />
Click the Add Layer button.<br />
The Layer Toolbar has additional options such as moving layers up/down, selecting<br />
layers, showing/hiding layers, editing layers <strong>and</strong> deleting layers.
File Management Tools<br />
21
See page 39<br />
22
NOTES:<br />
24
The Gallery<br />
25<br />
NOTE: When you first launch the Gallery it must be built. The computer will find the location<br />
where the <strong>Interwrite</strong> <strong>Workspace</strong> Content was downloaded <strong>and</strong> you will need to allow it to fill<br />
the Gallery.<br />
Categories<br />
<br />
<br />
<br />
<br />
Select different categories to view pre-existing files organized<br />
by subject.<br />
Select subject <strong>and</strong> sub-categories.<br />
Click on a resource in the lower window.<br />
Use the pen to drag the resource to an existing page in<br />
<strong>Workspace</strong>.<br />
Resources from Gallery<br />
<br />
<br />
There are thous<strong>and</strong>s of images, image pages <strong>and</strong> Flash files.<br />
Most images can be rotated, moved <strong>and</strong> resized.<br />
Files with a dog-eared corner are<br />
Image Pages <strong>and</strong> cannot be<br />
manipulated.<br />
Flash files are interactive. They<br />
can be identified by the blue<br />
circle with the “f” inside. They<br />
can be found in the Interactive<br />
Sims folder.
26<br />
NOTES:<br />
In order to use the content gallery you need to make sure you have installed it from our<br />
website (this is a separate install from the <strong>Workspace</strong> software).<br />
With a blank workspace window page open click on the gallery tool. The first time you launch<br />
the gallery all of the images will go through a build process. Once finished, the gallery window<br />
will open <strong>and</strong> you will see folders in the top. It will look like the screenshot on page 23. Find a<br />
subject folder for your subject area. Some folders will have additional folders inside. Images<br />
will appear in the bottom window. It will look like the screenshot on page 25. When you find<br />
the image you want to use, drag that image into the workspace page (you do not have to click<br />
with the rocker bar, simply drag with the pen tip). Page 25 shows you image pages <strong>and</strong> Flash<br />
files.<br />
The <strong>Interwrite</strong> Content Gallery was designed to be open-architecture. This means that you<br />
can bring in many different file types of your own: pictures, .pdf, .ppt, etc. into the gallery <strong>and</strong><br />
store them for access during or while building lessons. For example, if you have a .pdf that<br />
you want to bring into the gallery you simply select or create the folder you want to store it in<br />
<strong>and</strong> then drag <strong>and</strong> drop the .pdf into the folder. To use it, select a New Page <strong>and</strong> then drag<br />
<strong>and</strong> drop the .pdf from within the gallery onto the paper – it will load all pages for you to use.<br />
From here, you can utilize tools such as the zoom <strong>and</strong> curtain tools (to focus on one question<br />
at a time) or the capture tool to select part of the .pdf <strong>and</strong> then have it automatically placed<br />
inside a new page – helping you to focus on just one item at a time.<br />
Try bringing in flash files <strong>and</strong> other content from sites you use every day!
<strong>Interwrite</strong> Sims<br />
There are over 100 pre-created Flash simulations for use with a variety of curriculum<br />
areas. Any Flash tools can be utilized, including those created by students or found on<br />
copyright-free websites. To copy a Flash file from a copyright-free site right click on the<br />
file (for example, a game) <strong>and</strong> choose “Save Target As…”<br />
27<br />
Searching for Resources<br />
Type a keyword in the text field at the top of the Gallery window.<br />
Click on the Keyword Search button (magnifying glass).<br />
Scroll through the resources in the lower window to find search matches.<br />
Sample Lessons<br />
Some sample lessons can be found under the category “<strong>Workspace</strong> Lessons” within the<br />
gallery.
eI Community:<br />
o Many more lessons are available from eI Community, which requires a free<br />
registration. eI Community is a searchable clearinghouse of lessons, images,<br />
ExamView content <strong>and</strong> more created both by eInstruction employees <strong>and</strong><br />
everyday teachers.<br />
o eI Community can be accessed from www.eInstruction.com <strong>and</strong> through the<br />
<strong>Interwrite</strong> Gallery (File / eI Community Portal).<br />
o From within eI Community hover over Resources <strong>and</strong> click Search Resources.<br />
o Use the Content Format window to choose specific file types.<br />
o The most results will be returned when options are left open (such as Bloom’s<br />
Taxonomy Level, etc.) although choosing grade levels is recommended.<br />
o Save desired resources to My Materials <strong>and</strong> download them.<br />
o Note: When downloading, opt to SAVE rather than OPEN the files.<br />
28
29<br />
Add Media from File<br />
Click on the Gallery tool icon.<br />
Highlight the folder where you would like the file to reside. Click File / Add Files to<br />
Gallery.<br />
Alternately, an entire folder can be added by using File / Add Folder of Files to Gallery.<br />
Click Browse to find media. Click OK.<br />
Types (the <strong>Interwrite</strong> Content Gallery was designed to be open-architecture. You can<br />
import many different file types of your own: pictures, .pdf, .ppt, etc. into the gallery<br />
<strong>and</strong> store them for access during or while building lessons).<br />
o :Images: BMP, JPG, GIF, EMF, WMF, TIFF, PNG, ICO<br />
o Sound: WAV, MP2, MP3, MPA, MPEG, SND, WMA<br />
o Video: AVI, WMV, MOV, MPEG, SWF<br />
Note: You can also simply drag files straight into the gallery. Drag <strong>and</strong> drop!<br />
Add Files to Gallery<br />
Objects created in a <strong>Workspace</strong> lesson can be added to the Gallery for future use.<br />
Use the Select tool (arrow) to select the object.<br />
Click the Add files to Gallery icon from the properties toolbar.<br />
Choose Add selection to Gallery or Add current page to Gallery.<br />
It will be added to the currently open category, or to the New Category folder.<br />
Multi-User<br />
Use the Device Manager window to connect all devices.<br />
Set Presenter<br />
Beep<br />
Lock<br />
Open the Device Manager window.<br />
Select the device desired to be the master MOBI.<br />
Click the Presenter icon.<br />
If multiple, unnamed MOBIs are connected using<br />
the Beep icon will allow determination of the pads.<br />
Using the Lock icon will prevent input from any locked device until unlocked.
30<br />
NOTES:<br />
Only have your MOBI? Borrow another MOBI from a colleague <strong>and</strong> use it during one of your<br />
lessons! Up to nine MOBIs will connect to one MOBI receiver. Make sure all MOBIs are<br />
connected through your device manager before setting this up inside of <strong>Workspace</strong>.<br />
Remember, inside the device manager you can even change the name of the MOBIs too.
31<br />
Using Multi-User<br />
Open Interactive Mode <strong>and</strong> create a blank page.<br />
Click on the Multi-User icon at the bottom right.<br />
Select Multi-User Page Setup. Note: all connected<br />
devices will be displayed.<br />
Select the desired Page Setup<br />
based on the number of MOBIs<br />
being used.<br />
Select each device <strong>and</strong> drag it to a<br />
quadrant. The MOBI will be limited<br />
to working within that particular<br />
area <strong>and</strong> will not be capable of<br />
writing in another. Note: placing<br />
all of the MOBIs in the single main<br />
work area will permit collaborative<br />
work.<br />
Click OK.<br />
Each device in the page layout will<br />
have its own simplified toolbar.<br />
Note: it is not possible to customize this toolbar.<br />
Lessons<br />
Click the Menu button<br />
<strong>and</strong> choose File / New<br />
Add a new blank page or grid page from the toolbar.<br />
Add text to a page using the Text tool<br />
o Type text into the text box.<br />
o Copy <strong>and</strong> paste text from existing documents.<br />
o Resize text box to desired size.<br />
o Use the Split function to break the text<br />
into individual words, if desired.
32<br />
Add images, sound files <strong>and</strong> simulations from the Gallery.<br />
Add basic shapes using the shape tool,<br />
or convert freeh<strong>and</strong> drawings to shapes with the freeh<strong>and</strong> shape tool.<br />
Use the Selection tool to move, rotate, copy or resize items.<br />
o The Selection tool is very powerful.<br />
o Its properties bar has many functions, including ordering of objects, grouping,<br />
colors, notes, snap to grid, copier, lock, transparency, export, depending on the<br />
type of object selected.<br />
Navigate through lessons using the Previous Page <strong>and</strong> Next Page arrows.<br />
The Toolbox<br />
The Toolbox is a place for you to store the tools you do not need all the time, but that<br />
you’d like to have quick access to.<br />
Click on the Toolbox tool on the toolbar.<br />
A sub-menu will appear displaying additional tools available in <strong>Workspace</strong>. The tools<br />
shown in the Toolbox are designated on the Customize Toolbar tab of <strong>Workspace</strong><br />
Preferences.<br />
Below are some of the additional tools available for use in <strong>Workspace</strong>.