Line 6 TonePort UX8 GearBox 3.5 User Manual - MIDI Manuals
Line 6 TonePort UX8 GearBox 3.5 User Manual - MIDI Manuals
Line 6 TonePort UX8 GearBox 3.5 User Manual - MIDI Manuals

You also want an ePaper? Increase the reach of your titles
YUMPU automatically turns print PDFs into web optimized ePapers that Google loves.
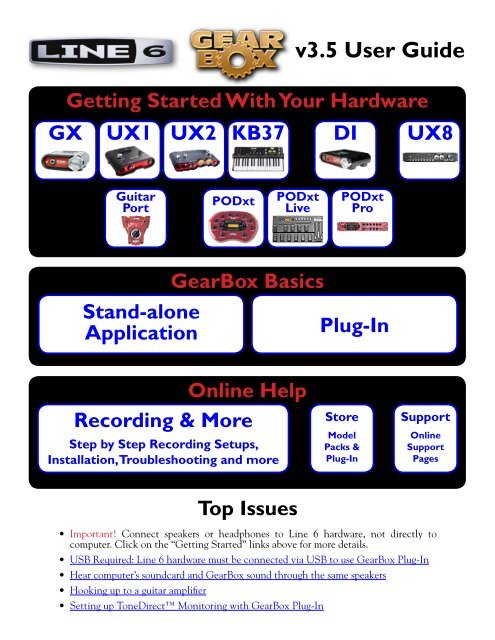
v<strong>3.5</strong> <strong>User</strong> Guide<br />
Getting Started With Your Hardware<br />
GX UX1 UX2 KB37 DI <strong>UX8</strong><br />
Guitar<br />
Port<br />
PODxt<br />
PODxt<br />
Live<br />
PODxt<br />
Pro<br />
Stand-alone<br />
Application<br />
<strong>GearBox</strong> Basics<br />
Plug-In<br />
Online Help<br />
Recording & More<br />
Step by Step Recording Setups,<br />
Installation, Troubleshooting and more<br />
Store<br />
Model<br />
Packs &<br />
Plug-In<br />
Support<br />
Online<br />
Support<br />
Pages<br />
Top Issues<br />
• Important! Connect speakers or headphones to <strong>Line</strong> 6 hardware, not directly to<br />
computer. Click on the “Getting Started” links above for more details.<br />
• USB Required: <strong>Line</strong> 6 hardware must be connected via USB to use <strong>GearBox</strong> Plug-In<br />
• Hear computer’s soundcard and <strong>GearBox</strong> sound through the same speakers<br />
• Hooking up to a guitar amplifier<br />
• Setting up ToneDirect Monitoring with <strong>GearBox</strong> Plug-In
Table of Contents<br />
Start Here.................................................................................................1•1<br />
Activation....................................................................................................................... 1•1<br />
Transferring Activations................................................................................................. 1•1<br />
About <strong>Line</strong> 6 Hardware & Software............................................................................... 1•3<br />
Before You Get Started................................................................................................... 1•3<br />
System Requirements and Installation........................................................................... 1•3<br />
Updating & Registering with <strong>Line</strong> 6 Monkey................................................................ 1•3<br />
Login account.................................................................................................................. 1•3<br />
Register your hardware.................................................................................................... 1•3<br />
Compatibility Check....................................................................................................... 1•3<br />
Using Your <strong>Line</strong> 6 Hardware....................................................................2•1<br />
<strong>TonePort</strong> UX1................................................................................................................. 2•1<br />
<strong>TonePort</strong> UX2................................................................................................................. 2•3<br />
<strong>TonePort</strong> <strong>UX8</strong>................................................................................................................. 2•6<br />
<strong>TonePort</strong> KB37.............................................................................................................. 2•11<br />
<strong>TonePort</strong> DI................................................................................................................... 2•13<br />
<strong>TonePort</strong> GX................................................................................................................. 2•15<br />
GuitarPort..................................................................................................................... 2•16<br />
PODxt........................................................................................................................... 2•17<br />
PODxt Live................................................................................................................... 2•18<br />
PODxt PRO.................................................................................................................. 2•19<br />
PODxt - Audio Signal Routing & Re-Amping............................................................ 2•21<br />
Routing audio from your <strong>Line</strong> 6 hardware to an external device................................. 2•22<br />
Connecting analog outputs to an external device ....................................................... 2•22<br />
Routing analog outputs to another sound card............................................................. 2•23<br />
Connecting the Digital Output from <strong>TonePort</strong> UX2, <strong>UX8</strong>, KB37 or<br />
PODxt Pro to an external digital device ...................................................................... 2•23<br />
ToneDirect Monitoring............................................................................................. 2•23<br />
Sound Cards & Sound Issues........................................................................................ 2•26<br />
<strong>Line</strong> 6 Driver Panel & Recording............................................................3•1<br />
Audio Routing................................................................................................................. 3•1<br />
The <strong>Line</strong> 6 Audio-<strong>MIDI</strong> Device Control Panel............................................................. 3•2<br />
Important Things to Know When Recording.............................................................. 3•24<br />
<strong>GearBox</strong> Stand-alone Application..........................................................4•1<br />
Overview......................................................................................................................... 4•1<br />
<strong>GearBox</strong> Controls and Operation................................................................................... 4•1<br />
ii
Pre/Post Record Send...................................................................................................... 4•6<br />
Monitoring a <strong>GearBox</strong>-processed tone while recording “Dry”....................................... 4•7<br />
Dual-Tone operation (<strong>TonePort</strong> UX1/UX2/<strong>UX8</strong>/KB37)............................................... 4•8<br />
<strong>MIDI</strong> Control.................................................................................................................. 4•9<br />
<strong>TonePort</strong> UX2/<strong>UX8</strong>/KB37 Controllers......................................................................... 4•10<br />
KB37 Controllers.......................................................................................................... 4•10<br />
<strong>GearBox</strong> with PODxt.................................................................................................... 4•13<br />
<strong>GearBox</strong> Controls and Operation................................................................................. 4•13<br />
PODxt <strong>MIDI</strong> control..................................................................................................... 4•14<br />
How To.......................................................................................................................... 4•15<br />
<strong>GearBox</strong> Plug-In.......................................................................................5•1<br />
A Quickie Plug-in Primer............................................................................................... 5•1<br />
Activating the <strong>GearBox</strong> Plug-in..................................................................................... 5•2<br />
<strong>GearBox</strong> Plug-in Controls and Operation...................................................................... 5•5<br />
Where can I find the <strong>GearBox</strong> Plug-in on my computer?.............................................. 5•6<br />
Model Gallery...........................................................................................6•1<br />
Guitar Amp & Cab Models............................................................................................ 6•3<br />
Bass Amp & Cab Models.............................................................................................. 6•11<br />
Preamp Models.............................................................................................................. 6•13<br />
Effects............................................................................................................................ 6•15<br />
Model List...................................................................................................................... 6•23<br />
Troubleshooting........................................................................................7•1<br />
What Is…..................................................................................................8•1<br />
Online Help & Support............................................................................9•1<br />
<strong>Line</strong> 6, PODxt, PODxt Pro, <strong>TonePort</strong>, <strong>GearBox</strong>, ToneDirect Monitoring, GuitarPort, <strong>Line</strong> 6 Edit and Custom<br />
Tone are trademarks of <strong>Line</strong> 6, Inc. All other product names, trademarks, and artists’ names are the property of<br />
their respective owners, which are in no way associated or affiliated with <strong>Line</strong> 6.<br />
© 2007 <strong>Line</strong> 6, Inc.<br />
iii
<strong>Line</strong> 6 <strong>GearBox</strong> <strong>3.5</strong> – Start Here<br />
Start Here<br />
Activation<br />
Some features of <strong>GearBox</strong> require “activation” using <strong>Line</strong> 6 Monkey and your Internet connection.<br />
Activation turns these features on in your <strong>GearBox</strong>-compatible hardware, so they can operate in the<br />
<strong>GearBox</strong> stand-alone application and Plug-in. “Monkey, you say?” – get the skinny on <strong>Line</strong> 6 Monkey<br />
here.<br />
Detailed information on activating <strong>GearBox</strong> Plug-In can be found here.<br />
Model Packs that you purchase from www.line6.com/store also need to be activated. You’ll find<br />
instructions on just how to do that here.<br />
You may also transfer your activations to another computer with or without Internet access. The next<br />
section describes the process in detail.<br />
Transferring Activations<br />
So you just upgraded your computer to the latest and greatest (this week anyway…) model, and want<br />
to move <strong>GearBox</strong> to your new system? In this section, we’ll explain how to make the transfer process<br />
as easy as A-B-C, whether the new computer can connect to the internet or not.<br />
The destination computer has an Internet connection<br />
This is the easiest scenario: Download and install the <strong>GearBox</strong> application (always available at line6.<br />
com/software). This will also install the necessary drivers for your hardware and the <strong>Line</strong> 6 Monkey<br />
application.<br />
<strong>GearBox</strong> Plug-in doesn’t work!!! Where are my Model Packs??? Relax –Your Add-Ons (Model<br />
Packs, Plug-in, etc…) are tied-in to your hardware’s ESN, but also need to be authorized with each<br />
new computer you’ll be using <strong>GearBox</strong> on. In other words, they work but just haven’t been enabled on<br />
the new computer yet.<br />
Launch <strong>Line</strong> 6 Monkey. The Monkey utility will connect to the server and scan your hardware for any<br />
activated Add-ons, and if it finds any, will display the following message:<br />
1•1
<strong>Line</strong> 6 <strong>GearBox</strong> <strong>3.5</strong> – Start Here<br />
Just click Authorize, and Monkey will enable the use of your activated Add-On(s) on the new<br />
computer system.<br />
The destination computer lacks an Internet connection<br />
So you just got the call from Mr. Big Time Producer for a session at so-and-so’s studio, and you want<br />
to bring all this great <strong>Line</strong> 6 tone along for tracking – but their computer does not connect to the<br />
internet. You can still move your <strong>GearBox</strong> activation to their recording environment by following<br />
these steps:<br />
Prerequisite: This may seem obvious but we’ll mention it anyway: Your hardware and all <strong>GearBox</strong><br />
Software and Add-ons must already be activated and authorized on your own computer (meaning,<br />
an Internet connection is required and has been used for the initial activation of your <strong>GearBox</strong><br />
assets).<br />
On your computer:<br />
• Locate and copy all .aet files to removable media (CD, Flash drive, etc…). In Windows®<br />
environments, these files can be found in the C:\Document_and_Settings\(username)\<br />
Application Data\<strong>Line</strong> 6\GuitarPort folder; on Mac®, look in /<strong>User</strong>s/(username)/Library/<br />
Application Support/<strong>Line</strong> 6/GuitarPort.<br />
• Copy the <strong>GearBox</strong> installer to removable media, since the destination computer will not be able<br />
to download it.<br />
On the destination computer:<br />
• Install the <strong>GearBox</strong> software.<br />
• Copy the .aet files from your removable storage into the correct folder (described above). You<br />
may have to create this folder manually if it isn’t present.<br />
1•2
<strong>Line</strong> 6 <strong>GearBox</strong> <strong>3.5</strong> – Start Here<br />
You’re done! You should now be able to launch the <strong>GearBox</strong> application with all Add-Ons enabled.<br />
Just remember that for Plug-in operation, your <strong>Line</strong> 6 hardware must always be connected via USB<br />
(even if you’re using a 3rd-party interface).<br />
About <strong>Line</strong> 6 Hardware & Software<br />
Before You Get Started<br />
OK, you’ve got your guitar, a computer and a head full of songs and cool licks, so how do you get<br />
this all going? You’re just a few steps away from turning your computer into a serious Tone, jamming<br />
and recording machine. First, here is some valuable information to ensure you have all the latest and<br />
greatest updates….<br />
System Requirements and Installation<br />
If you need to check the system requirements or some assistance with installing <strong>GearBox</strong> on your<br />
Windows or Mac computer, please refer to the separate documents located on the <strong>GearBox</strong> Online<br />
Help page of the <strong>Line</strong> 6 website.<br />
Updating & Registering with <strong>Line</strong> 6 Monkey<br />
<strong>Line</strong> 6 Monkey is the intelligent updater utility that is automatically installed with your <strong>GearBox</strong><br />
application. You are prompted to run <strong>Line</strong> 6 Monkey at the end of your <strong>GearBox</strong> installation, but it’s a<br />
great idea to do this often so you can be sure you have all the latest updates for all your <strong>Line</strong> 6 software<br />
and hardware products. Registering your <strong>Line</strong> 6 hardware is also very important because it ensures<br />
that you’re dialed in for warranty service and makes it possible for us to contact you if new software<br />
versions or other cool enhancements are offered - cutting edge technology and such! So don’t put this<br />
off any longer. Connect your <strong>Line</strong> 6 hardware to your computer and follow these steps to launch <strong>Line</strong><br />
6 Monkey...<br />
• On Mac®, go to Applications - <strong>Line</strong> 6.<br />
• On Windows®, go to Start - Programs - <strong>Line</strong> 6 - Tools.<br />
Login account<br />
You’ll need to Login so that <strong>Line</strong> 6 Monkey can communicate with the online <strong>Line</strong> 6 Server and<br />
provide you with exactly what you need. It’s just a few clicks, and it’s free!<br />
• If you have a <strong>Line</strong> 6 account, then type in your <strong>User</strong> Name and Password at the top of the<br />
Monkey dialog.<br />
• If you have not yet created an account, click the New <strong>User</strong> button and you’ll be walked right<br />
through the steps.<br />
Register your hardware<br />
If you have not already done so, you’ll be prompted to Register your connected <strong>Line</strong> 6 hardware. It’s a<br />
painless process really, so click that Register Now button and fill in the blanks on the Web page. This<br />
page will list all your registered <strong>Line</strong> 6 gear in one place.<br />
Compatibility Check<br />
To check your Mac® or Windows® computer system to see if it meets the requirements to run <strong>GearBox</strong>,<br />
launch <strong>Line</strong> 6 Monkey and go to the Compatibility tab:<br />
1•3
<strong>Line</strong> 6 <strong>GearBox</strong> <strong>3.5</strong> – Start Here<br />
Just click the Run Check button and Monkey will check your system and list a report of all items in<br />
the window, letting you know if they pass the minimum requirements needed for <strong>GearBox</strong>.<br />
For a complete list of <strong>GearBox</strong> system requirements, please see the <strong>GearBox</strong> 2 Release Notes document<br />
on the <strong>GearBox</strong> Online Help page of the <strong>Line</strong> 6 website.<br />
1•4
<strong>Line</strong> 6 <strong>GearBox</strong> <strong>3.5</strong> – Using Your <strong>Line</strong> 6 Hardware<br />
Using Your <strong>Line</strong> 6 Hardware<br />
The <strong>GearBox</strong> 3 software is designed to work with your <strong>Line</strong> 6 <strong>TonePort</strong> GX, DI, UX1, UX2, <strong>UX8</strong>,<br />
KB37, GuitarPort, PODxt, PODxt Live or PODxt Pro hardware. Your <strong>Line</strong> 6 device, since it connects<br />
to your computer via USB and utilizes the high-performance <strong>Line</strong> 6 Audio & <strong>MIDI</strong> drivers, it is easily<br />
configured to work as your computer’s sound card. This means that you can access all your Tones<br />
coming out of <strong>GearBox</strong> directly from most any audio recording application, all at the highest quality!<br />
But you are of course not just limited to using your <strong>Line</strong> 6 hardware to record into your computer – the<br />
outputs provided on the back of your device additionally allow you to feed your <strong>GearBox</strong> signal to<br />
external tape machines, DAT recorders, PA systems, or whatever else will accept an analog line level<br />
signal. Additionally, <strong>TonePort</strong> UX2, <strong>UX8</strong> and PODxt Pro devices include a digital S/PDIF output to<br />
allow you to make these connections digitally!<br />
There are some differences in the setup and functionality between the supported <strong>Line</strong> 6 devices,<br />
so be sure to look for the instructions in the following sections for your specific device. Primarily,<br />
<strong>TonePort</strong> and GuitarPort devices function quite similarly since all the Digital Signal Processing (DSP)<br />
is performed on your computer when using these units. PODxt devices do all their DSP magic inside<br />
the PODxt itself. Using the <strong>GearBox</strong> software is pretty similar for all these devices once you have<br />
everything setup. So here we go…<br />
<strong>TonePort</strong> UX1<br />
Connect your electric guitar or bass<br />
Connect a microphone<br />
Connect your stereo headphones<br />
Mic - To input a signal from a microphone, connect it here using an XLR cable. This inputs the<br />
microphone signal into <strong>GearBox</strong> where you can choose your tone, and then route the processed signal<br />
both to your audio software and out the <strong>TonePort</strong> outputs.<br />
Guitar/Bass - To input your electric guitar or bass, plug it in here using a standard 1/4-inch TS<br />
instrument cable. This inputs the instrument’s signal into <strong>GearBox</strong> where you can then choose your<br />
tone and route the processed signal both to your audio software and out the <strong>TonePort</strong> outputs.<br />
Phones - If you want to listen to the audio from <strong>TonePort</strong> using stereo headphones, then plug them<br />
into this 1/4-inch stereo jack. This headphone jack outputs the same signal fed to the Analog Outs on<br />
the rear panel of <strong>TonePort</strong>; the audio from your audio software on the computer, as well as anything<br />
plugged into any <strong>TonePort</strong> input.<br />
2•1
<strong>Line</strong> 6 <strong>GearBox</strong> <strong>3.5</strong> – Using Your <strong>Line</strong> 6 Hardware<br />
Connect any line level input<br />
source for monitoring to the Stereo<br />
Monitor In<br />
Connect any line level input source<br />
that you want to record into the<br />
<strong>Line</strong> Inputs<br />
Connect a USB cable from here to<br />
your computer’s USB port.*<br />
Connect the Analog Outs to your<br />
audio monitors<br />
*Note – be sure to always power off or mute your speakers or monitoring setup before connecting and<br />
disconnecting the USB cable between <strong>TonePort</strong> and your computer, as well as before booting up or<br />
shutting down your computer if <strong>TonePort</strong> is already connected. The best practice is to always power on<br />
your speakers last, and power them off first when connected to other audio gear to avoid a “pop”.<br />
<strong>Line</strong> Inputs - To record the signal from a line level source, such as a keyboard, your stereo receiver,<br />
the line out from a mixing console, etc., connect them to these Left and Right ins using 1/4-inch TS<br />
audio cables.<br />
Monitor In - If you want to hear the signal from a line level source along with all the other audio<br />
coming from your computer, but do not want this audio recorded, then plug the source in here. Note<br />
that this is a stereo jack, so you should use a stereo 1/4-inch TRS audio cable for this connection.<br />
USB - This of course is where you connect the supplied USB cable to <strong>TonePort</strong>, with the other<br />
end going to your computer’s USB port. Note that you should always connect to a separate USB<br />
controller channel from other USB audio or <strong>MIDI</strong> interfaces to provide <strong>TonePort</strong> with the full USB<br />
bandwidth. <strong>TonePort</strong> also gets its power from this USB connection, so it should not be plugged into a<br />
non-powered USB hub, or operated on the same USB controller channel with un-powered devices. It<br />
is also recommended to connect directly into a USB port on your computer and not into a USB hub.<br />
Analog Outs - These Left and Right unbalanced jacks output all the audio from <strong>TonePort</strong>; the audio<br />
from your audio software on the computer, and anything plugged into any <strong>TonePort</strong> input. These<br />
are what you want to connect to your powered speakers or monitoring system for a recording setup.<br />
Use 1/4-inch TS cables to connect directly to powered speakers, mixer or power amp setup. Note<br />
that you can also use the headphone jack on the front of <strong>TonePort</strong> if you want to use headphones for<br />
monitoring.<br />
2•2
<strong>Line</strong> 6 <strong>GearBox</strong> <strong>3.5</strong> – Using Your <strong>Line</strong> 6 Hardware<br />
<strong>TonePort</strong> UX2<br />
Connect up to two<br />
Microphones<br />
Connect your electric Guitar or Bass<br />
Connect your stereo<br />
Headphones<br />
Microphone Inputs - You can receive input from one or two mics at the same time using these ins.<br />
There is also a +48V Phantom Power switch that you should toggle to “on” if your mic requires<br />
phantom power (most condenser type mics do, but check the documentation for your mic if you are<br />
not sure). Connect each mic using an XLR cable. This inputs each microphone signal independently<br />
into <strong>GearBox</strong> where you can choose your tone, and then route the processed signal both to your audio<br />
software and out the <strong>TonePort</strong> outputs.<br />
Guitar/Bass Inputs -To input your electric guitar or bass, plug it into one of these inputs. Either of<br />
these routes the instrument’s signal into <strong>GearBox</strong> where you can choose your tone and route the<br />
processed signal both to your audio software and out the <strong>TonePort</strong> outputs.<br />
Norm – this input is for a standard instrument level output. Plug your guitar/bass into here using a<br />
standard 1/4-inch TS instrument cable.<br />
Pad - this input is designed for high output level basses and guitars, especially those with active pickups.<br />
Plug your high output instrument into here using a standard 1/4-inch TS instrument cable.<br />
Headphone - If you want to listen to the audio from <strong>TonePort</strong> using stereo headphones, then plug<br />
them into this 1/4-inch stereo jack. This Headphone jack outputs the same signal fed to the Analog<br />
Outs on the rear panel of <strong>TonePort</strong>; the audio from your audio software on the computer, as well as<br />
anything plugged into any <strong>TonePort</strong> input.<br />
2•3
<strong>Line</strong> 6 <strong>GearBox</strong> <strong>3.5</strong> – Using Your <strong>Line</strong> 6 Hardware<br />
port*<br />
Connect up to two standard toggle or momentary<br />
pedal switches into the Footswitches jacks for remote<br />
control of <strong>GearBox</strong> and audio application functions<br />
Connect any line level<br />
input source that you want<br />
to record into the <strong>Line</strong><br />
Inputs<br />
Connect your USB cable<br />
from your computer’s USB<br />
Connect to the S/PDIF input of an<br />
external device to send <strong>TonePort</strong>’s<br />
output digitally<br />
Connect any line level input<br />
source for monitoring to the<br />
Stereo Monitor In<br />
Connect the Analog<br />
Outs to your audio<br />
monitors<br />
*Note – be sure to always power off or mute your speakers or monitoring setup before connecting and<br />
disconnecting the USB cable between <strong>TonePort</strong> and your computer, as well as before booting up or<br />
shutting down your computer if <strong>TonePort</strong> is already connected. The best practice is to always power on<br />
your speakers last, and power them off first when connected to other audio gear to avoid a “pop”.<br />
<strong>Line</strong> Inputs - if you want to record the signal from a line level source, such as a keyboard, your stereo<br />
receiver, the line out from a mixing console, etc., connect them to these Left and Right ins using 1/4-<br />
inch TS audio cables.<br />
Footswitches - if you want to use one or two on/off toggle or momentary footswitches to remotely<br />
control functions in the <strong>GearBox</strong> software, you can plug the 1/4-inch footswitch plugs into these 1<br />
and 2 jacks. To configure each Footswitch, go to the <strong>GearBox</strong> Preferences. For <strong>TonePort</strong> UX1, UX2,<br />
and KB37, you can also use these footswitches to trigger recording and playback commands within the<br />
included Ableton Live Lite software!<br />
USB - This of course is where you connect the supplied USB cable to <strong>TonePort</strong>, with the other<br />
end going to your computer’s USB port. Note that you should always connect to a separate USB<br />
controller channel from other USB audio or <strong>MIDI</strong> interfaces to provide <strong>TonePort</strong> with the full USB<br />
bandwidth. <strong>TonePort</strong> also gets its power from this USB connection, so it should not be plugged into a<br />
non-powered USB hub, or operated on the same USB controller channel with un-powered devices. It<br />
is also recommended to connect directly into a USB port on your computer and not into a USB hub.<br />
S/PDIF Digital Out - To send the output of <strong>TonePort</strong> to an external device digitally, connect a 75-<br />
Ohm coaxial cable into this RCA jack and then into the S/PDIF digital input on the external device.<br />
This is the best choice for connecting to digital recording devices, such as a DAT recorder. This S/<br />
PDIF output sends the same audio as is sent to <strong>TonePort</strong>’s Analog Outs* (with the exception that any<br />
audio coming into the <strong>TonePort</strong>’s Monitor In jack is not routed to the S/PDIF output). The digital<br />
signal is always sent at 24-bit resolution.<br />
2•4
<strong>Line</strong> 6 <strong>GearBox</strong> <strong>3.5</strong> – Using Your <strong>Line</strong> 6 Hardware<br />
Monitor In - If you want to hear the signal from a line level source mixed with all the other audio<br />
coming from your computer, but do not want this audio recorded, then plug the source in here. Note<br />
that this is a stereo jack, so you should use a stereo 1/4-inch TRS audio cable for this connection.<br />
Analog Outs - These Left and Right balanced jacks output all the audio from <strong>TonePort</strong>; the audio from<br />
your audio software on the computer, and anything plugged into any <strong>TonePort</strong> input. So, these are<br />
what you want to connect to your monitoring system when using <strong>TonePort</strong> as your computer’s sound<br />
card. Use either 1/4-inch TS or TRS cables to connect directly to your powered speakers, mixer or<br />
power amp setup. Note that you can also use the headphone jack on the front of <strong>TonePort</strong> if you want<br />
to use headphones for monitoring.<br />
2•5
<strong>Line</strong> 6 <strong>GearBox</strong> <strong>3.5</strong> – Using Your <strong>Line</strong> 6 Hardware<br />
<strong>TonePort</strong> <strong>UX8</strong><br />
The <strong>TonePort</strong> <strong>UX8</strong> is a multichannel recording interface designed for professional use, offering plenty<br />
of headroom, a wide dynamic range and an exceedingly low noise floor. Designed with high quality<br />
electrical components and a rugged exterior, the <strong>UX8</strong> is built to provide many years of reliability.<br />
Included with the <strong>UX8</strong> is the <strong>GearBox</strong> Plug-In, providing all your tracks with same POD quality tone<br />
trusted by scores of platinum-selling musicians and recording engineers. In addition, the <strong>GearBox</strong><br />
standalone application provides a virtual front end for professional tone processing.<br />
Rear Panel Features<br />
Balanced Outputs<br />
<strong>TonePort</strong> <strong>UX8</strong> provides 8 balanced analog outputs (4 stereo pairs). For the cleanest audio signal, use<br />
1/4-inch TRS cables to connect directly to your powered speakers, mixer or power amp setup.<br />
Note that you can use each output pair to provide different monitor mixes for musicians during a<br />
tracking session. You can set the input mix levels for each output pair using the <strong>Line</strong> 6 Audio-<strong>MIDI</strong><br />
Devices application.<br />
S/PDIF Digital Audio<br />
To send or receive S/PDIF, connect a 75-Ohm coaxial cable to the <strong>UX8</strong>’s RCA jack and the external<br />
S/PDIF device. This is the best choice for connecting to digital recording devices, such as a DAT<br />
recorder. This S/PDIF output sends the same audio as Main Outs 1-2. The digital signal is always sent<br />
at 24 bit.<br />
2•6
<strong>Line</strong> 6 <strong>GearBox</strong> <strong>3.5</strong> – Using Your <strong>Line</strong> 6 Hardware<br />
To sync to an external S/PDIF device, set the <strong>UX8</strong> to sync to S/PDIF in the <strong>Line</strong> 6 Audio-<strong>MIDI</strong><br />
Devices application.<br />
Footswitch and Expression Pedal Jacks<br />
You can use up to 2 on/off toggle or momentary footswitches, and 1 expression pedal to remotely<br />
control functions in the <strong>GearBox</strong> software, such as stomp effects or wah level. You can also configure<br />
footswitches and the expression pedal to send <strong>MIDI</strong> commands, which can be useful for controlling<br />
your recording software’s transport.<br />
To configure footswitch and expression assignments, go to the <strong>Line</strong> 6 Audio-<strong>MIDI</strong> Devices application,<br />
<strong>MIDI</strong> tab.<br />
USB 2.0<br />
This of course is where you connect the supplied USB cable to <strong>TonePort</strong>, with the other end going to<br />
one of your computer’s USB ports. Note that you should always connect to a separate USB controller<br />
channel from other USB audio or <strong>MIDI</strong> interfaces to provide <strong>TonePort</strong> with the full USB bandwidth.<br />
It is also recommended to connect directly into a USB port on your computer and not into a USB<br />
hub.<br />
<strong>Line</strong> Level and XLR Inputs<br />
8 unbalanced line level inputs are available for recording line level sources, such as a keyboard, stereo<br />
receiver, the line out from a mixing console, etc. Connect to line level inputs using 1/4-inch TS audio<br />
cables.<br />
2•7
<strong>Line</strong> 6 <strong>GearBox</strong> <strong>3.5</strong> – Using Your <strong>Line</strong> 6 Hardware<br />
8 XLR preamp inputs are provided for balanced and mic input sources. +48 V Phantom Power switches<br />
are located on the front panel for mics requiring phantom power (most condenser type mics do, but<br />
check the documentation for your mic if you are not sure). Connect to these inputs using XLR<br />
cables.<br />
Front Panel Features<br />
Guitar/Bass Inputs<br />
High-Z instrument inputs for guitar and bass are conveniently located on the front panel, providing<br />
convenient access for fast instrument switching.<br />
-20 dB pad switches provide attenuation for hot levels, typically for instruments with onboard preamps<br />
or active pickups.<br />
The <strong>TonePort</strong> <strong>UX8</strong>’s instrument inputs work directly with the <strong>GearBox</strong> standalone application to<br />
provide ToneDirect Monitoring, which provides a fully processed signal with ultra-low latency,<br />
critical for tracking with the desired sound.<br />
Note that the processed signal from <strong>GearBox</strong> will show up in your recording application as additional<br />
sends to analog inputs 1 – 8. You can simultaneously record the direct, unprocessed signal (i.e. Input<br />
1-2) for later processing using the included <strong>GearBox</strong> Plug-In.<br />
For more information on using the <strong>GearBox</strong> standalone application, see <strong>GearBox</strong> (Full Program). For<br />
more information on using the <strong>GearBox</strong> Plug-In, see <strong>GearBox</strong> Plug-in.<br />
Microphone Input Controls<br />
Rear panel XLR input levels are controlled by a row of trim knobs on the front panel. Use these inputs<br />
for microphones or balanced input signals with a gain range of 0 dB to 45 dB.<br />
Each XLR input has a -20 dB pad switch, which can be used to provide more headroom for high output<br />
microphones. A 75 Hz cutoff switch is also provided, useful for eliminating low frequency rumble from<br />
microphone sources.<br />
Two +48 V phantom power switches are provided for powered mics, such as condenser mics. Phantom<br />
power is distributed via two XLR input banks, permitting the option to run dynamic mics in a nonpowered<br />
bank.<br />
2•8
<strong>Line</strong> 6 <strong>GearBox</strong> <strong>3.5</strong> – Using Your <strong>Line</strong> 6 Hardware<br />
Signal and Clip LEDs<br />
Signal and Clip LEDs exist for each input. The signal LED lights up when signal activity is present,<br />
glowing brighter as the signal level increases. When the input level reaches the 0 dBfs, the clip LED<br />
lights up momentarily.<br />
VU Meter and Clip Display<br />
The <strong>TonePort</strong> <strong>UX8</strong> provides a stereo pair of large VU meters on the front panel.<br />
By default, these meters display Inputs 1-2 levels. Using the Inputs & Recording Tab of the <strong>Line</strong> 6<br />
Audio-<strong>MIDI</strong> Devices application, you can assign the hardware meters to display input and output<br />
levels of any stereo pair or <strong>GearBox</strong> send. The clip LEDs light up when the signal reaches 0 dBfs.<br />
Main Output Level Controls<br />
Main Outputs 1-2 are controlled by a main volume knob and main mute button. The volume knob<br />
is an analog level control and does not affect any level being sent to your computer. When Mute is<br />
engaged, as solid amber LED illuminates, blinking about once every 2 seconds.<br />
Note that these controls operate on main outputs 1-2 only (headphone and S/PDIF levels are not<br />
affected). Outputs 3 – 8 are software controlled.<br />
Headphone Output Controls<br />
Headphone outputs 1-2 and 3-4 provide duplicate stereo outputs or Main Outs 1-2 and 3-4 respectively,<br />
providing discrete control over output levels sent over the headphone jacks. Note that headphone<br />
output levels are controlled independently of the Main volume control.<br />
2•9
<strong>Line</strong> 6 <strong>GearBox</strong> <strong>3.5</strong> – Using Your <strong>Line</strong> 6 Hardware<br />
Power Button<br />
When the power button is engaged, the <strong>TonePort</strong> <strong>UX8</strong>’s main LEDs will illuminate. <strong>TonePort</strong> <strong>UX8</strong> is<br />
not USB powered and receives no power from the computer.<br />
*Note – be sure to always power off or mute your speakers or monitoring setup before connecting and<br />
disconnecting the USB cable between <strong>TonePort</strong> and your computer, powering on/off your <strong>TonePort</strong>, as<br />
well as before booting up or shutting down your computer if <strong>TonePort</strong> is already connected. The best<br />
practice is to always power on your speakers last, and power them off first when connected to other<br />
audio gear to avoid a “pop”.<br />
LED status indicators<br />
The Main Mute and Main Clip LEDs provide secondary functions in their ability to indicate the<br />
connection status of USB and S/PDIF, as follows:<br />
• No USB connection - The main clip LEDs alternate steadily between left and right, about once<br />
every second. The USB cable may be unplugged or the <strong>UX8</strong> driver may not be installed on your<br />
computer.<br />
• No S/PDIF clock sync - The Mute LED blinks 3 times rapidly about once every second<br />
when the clock mode set to S/PDIF, and no external clock is present.<br />
2•10
<strong>Line</strong> 6 <strong>GearBox</strong> <strong>3.5</strong> – Using Your <strong>Line</strong> 6 Hardware<br />
<strong>TonePort</strong> KB37<br />
Connect any line<br />
level input source for<br />
monitoring to the<br />
Stereo Monitor In<br />
Connect any line level input<br />
source that you want to record<br />
into the <strong>Line</strong> Inputs<br />
Connect your electric<br />
Guitar or Bass<br />
Connect up to two standard toggle or<br />
momentary pedal switches into the<br />
Footswitches jacks for remote control<br />
of <strong>GearBox</strong> and audio application<br />
C o n n e c t<br />
your stereo<br />
Headphones<br />
Connect the Analog Outs<br />
to your audio monitors<br />
Connect up to two<br />
Microphones<br />
Connect your USB cable<br />
from your computer’s USB<br />
port.*<br />
Connect to the S/PDIF input<br />
of an external device to send<br />
<strong>TonePort</strong>’s output digitally<br />
Connect an<br />
Expression Pedal<br />
here for control of<br />
<strong>MIDI</strong> parameters<br />
Microphone Inputs - You can receive input from one or two mics at the same time using these ins.<br />
There is also a +48V Phantom Power switch that you should toggle to “on” if your mic requires<br />
phantom power (most condenser type mics do, but check the documentation for your mic if you are<br />
not sure). Connect each mic using an XLR cable. This inputs each microphone signal independently<br />
into <strong>GearBox</strong> where you can choose your tone, and then route the processed signal both to your audio<br />
software and out the <strong>TonePort</strong> outputs.<br />
Guitar/Bass Input -To connect your electric guitar or bass, plug it into this input. This connection<br />
routes the instrument’s signal into <strong>GearBox</strong> where you can choose your tone and route the processed<br />
signal both to your audio software and out the <strong>TonePort</strong> outputs. This input also features a Pad switch;<br />
engage this switch when using a guitar/bass with high-output or active pickups, to avoid overdriving<br />
the input.<br />
Headphones - If you want to listen to the audio from <strong>TonePort</strong> using stereo headphones, then plug<br />
them into this 1/4-inch stereo jack. This Headphone jack outputs the same signal fed to the Analog<br />
Outs on the rear panel of <strong>TonePort</strong>; the audio from your audio software on the computer, as well as<br />
anything plugged into any <strong>TonePort</strong> input.<br />
*Note – be sure to always power off or mute your speakers or monitoring setup before connecting and<br />
disconnecting the USB cable between <strong>TonePort</strong> and your computer, as well as before booting up or<br />
shutting down your computer if <strong>TonePort</strong> is already connected. The best practice is to always power on<br />
your speakers last, and power them off first when connected to other audio gear to avoid a “pop”.<br />
<strong>Line</strong> Inputs - if you want to record the signal from a line level source, such as a keyboard, your stereo<br />
receiver, the line out from a mixing console, etc., connect them to these Left and Right ins using 1/4-<br />
inch TS audio cables.<br />
2•11
<strong>Line</strong> 6 <strong>GearBox</strong> <strong>3.5</strong> – Using Your <strong>Line</strong> 6 Hardware<br />
Footswitches - if you want to use one or two on/off toggle or momentary footswitches to remotely<br />
control functions in the <strong>GearBox</strong> software, you can plug the 1/4-inch footswitch plugs into these<br />
1 and 2 jacks. To configure each Footswitch, go to the <strong>GearBox</strong> Preferences. You can also use these<br />
footswitches to trigger recording and playback commands within the included Ableton Live Lite 5<br />
software!<br />
Expression Pedal - Connect a 1/4-inch TS expression pedal to control Volume, Wah or any other<br />
<strong>MIDI</strong> CC parameter in <strong>GearBox</strong> or your recording application. To configure the expression pedal, go<br />
to the <strong>GearBox</strong> preferences .<br />
USB - This of course is where you connect the supplied USB cable to <strong>TonePort</strong>, with the other<br />
end going to your computer’s USB port. Note that you should always connect to a separate USB<br />
controller channel from other USB audio or <strong>MIDI</strong> interfaces to provide <strong>TonePort</strong> with the full USB<br />
bandwidth. <strong>TonePort</strong> also gets its power from this USB connection, so it should not be plugged into a<br />
non-powered USB hub, or operated on the same USB controller channel with un-powered devices. It<br />
is also recommended to connect directly into a USB port on your computer and not into a USB hub.<br />
S/PDIF Digital Out - To send the output of <strong>TonePort</strong> to an external device digitally, connect a 75-<br />
Ohm coaxial cable into this RCA jack and then into the S/PDIF digital input on the external device.<br />
This is the best choice for connecting to digital recording devices, such as a DAT recorder. This S/<br />
PDIF output sends the same audio as is sent to <strong>TonePort</strong>’s Analog Outs* (with the exception that any<br />
audio coming into the <strong>TonePort</strong>’s Monitor In jack is not routed to the S/PDIF output). The digital<br />
signal is always sent at 24-bit resolution.<br />
*Note that when using <strong>TonePort</strong> KB37 with <strong>GearBox</strong>, the GuitarPort Player playback audio is never<br />
routed to this S/PDIF output. This is necessary to comply with artist copyright requirements that <strong>Line</strong><br />
6 follows for the GuitarPort Online Tracks and artist content.<br />
Monitor In - If you want to hear the signal from a line level source mixed with all the other audio<br />
coming from your computer, but do not want this audio recorded, then plug the source in here. Note<br />
that this is a stereo jack, so you should use a stereo 1/4-inch TRS audio cable for this connection.<br />
Analog Outs - These Left and Right balanced jacks output all the audio from <strong>TonePort</strong>; the audio from<br />
your audio software on the computer, and anything plugged into any <strong>TonePort</strong> input. So, these are<br />
what you want to connect to your monitoring system when using <strong>TonePort</strong> as your computer’s sound<br />
card. Use either 1/4-inch TS or TRS cables to connect directly to your powered speakers, mixer or<br />
power amp setup. Note that you can also use the headphone jack on the front of <strong>TonePort</strong> if you want<br />
to use headphones for monitoring.<br />
2•12
<strong>Line</strong> 6 <strong>GearBox</strong> <strong>3.5</strong> – Using Your <strong>Line</strong> 6 Hardware<br />
<strong>TonePort</strong> DI<br />
Connect your electric Guitar<br />
or Bass<br />
Guitar/Bass - To input your electric guitar or bass, plug it in here using a standard 1/4-inch TS<br />
instrument cable. This input also features a Pad switch; engage this switch when using a guitar/bass<br />
with high-output or active pickups, to avoid overdriving the input.<br />
Connect your stereo<br />
Headphones<br />
Connect a USB cable from<br />
here to your computer<br />
Connect to your 3rd-party audio<br />
interface for recording with <strong>GearBox</strong><br />
plug-in<br />
Analog <strong>Line</strong> Outs – connect<br />
to your powered speakers or<br />
mixer<br />
USB - This of course is where you connect the supplied USB cable to <strong>TonePort</strong>, with the other<br />
end going to your computer’s USB port. Note that you should always connect to a separate USB<br />
controller channel from other USB audio or <strong>MIDI</strong> interfaces to provide <strong>TonePort</strong> with the full USB<br />
bandwidth. <strong>TonePort</strong> also gets its power from this USB connection, so it should not be plugged into a<br />
non-powered USB hub, or operated on the same USB controller channel with un-powered devices. It<br />
is also recommended to connect directly into a USB port on your computer and not into a USB hub.<br />
Phones - If you want to listen to the audio from <strong>TonePort</strong> using stereo headphones, then plug them<br />
into this 1/4-inch stereo jack. This headphone jack outputs the same signal fed to the Analog Outs on<br />
the rear panel of <strong>TonePort</strong>; the audio from your audio software on the computer, as well as anything<br />
plugged into any <strong>TonePort</strong> input.<br />
D.I Out - This connection lets you record an unprocessed signal to your track, to which you can apply<br />
the <strong>GearBox</strong> plug-in. If you use a 3rd-party audio interface, connect the D.I. to one of its inputs, and<br />
route that input to the track you’re recording into.<br />
2•13
<strong>Line</strong> 6 <strong>GearBox</strong> <strong>3.5</strong> – Using Your <strong>Line</strong> 6 Hardware<br />
Analog Outputs - When using <strong>TonePort</strong> DI as an audio interface for your recording application,<br />
these outputs carry the Master stereo mix from your recording project. If you ‘re using a 3rd-party<br />
Audio Interface, these outputs supply the ToneDirect magic to your interface or mixer, when using<br />
the <strong>GearBox</strong> application alongside the plug-in. See the ToneDirect Monitoring section for more<br />
details.<br />
2•14
<strong>Line</strong> 6 <strong>GearBox</strong> <strong>3.5</strong> – Using Your <strong>Line</strong> 6 Hardware<br />
<strong>TonePort</strong> GX<br />
Connect your electric Guitar<br />
or Bass<br />
Guitar/Bass - To input your electric guitar or bass, plug it in here using a standard 1/4-inch TS<br />
instrument cable.<br />
Connect your stereo<br />
Headphones/<strong>Line</strong> Out Cable<br />
Connect USB cable from here<br />
to your computer<br />
USB - This of course is where you connect the supplied USB cable to <strong>TonePort</strong> GX, with the other<br />
end going to your computer’s USB port. Note that you should always connect to a separate USB<br />
controller channel from other USB audio or <strong>MIDI</strong> interfaces to provide <strong>TonePort</strong> GX with the full<br />
USB bandwidth. <strong>TonePort</strong> GX also gets its power from this USB connection, so it should not be<br />
plugged into a non-powered USB hub, or operated on the same USB controller channel with unpowered<br />
devices. It is also recommended to connect directly into a USB port on your computer and<br />
not into a USB hub.<br />
<strong>Line</strong> Out/Phones - When connecting <strong>TonePort</strong> GX as an audio interface for your recording application,<br />
this output carries the Master stereo mix from your recording project. If you ‘re using a 3rd-party<br />
Audio Interface, these outputs supply the ToneDirect magic to your interface or mixer, when using<br />
the <strong>GearBox</strong> application alongside the plug-in. See the ToneDirect Monitoring section for more<br />
details.<br />
If you want to listen to the audio directly from <strong>TonePort</strong> GX using stereo headphones, you can also<br />
plug them into this 1/8-inch stereo jack. This line out/headphone jack outputs the same signal fed to<br />
the Analog Outs on the rear panel of <strong>TonePort</strong>; the audio from your audio software on the computer,<br />
as well as anything plugged into any <strong>TonePort</strong> input.<br />
2•15
<strong>Line</strong> 6 <strong>GearBox</strong> <strong>3.5</strong> – Using Your <strong>Line</strong> 6 Hardware<br />
GuitarPort<br />
Instrument input - your electric guitar or bass, plug it into this input using a standard 1/4-inch TS<br />
instrument cable. This inputs the signal into <strong>GearBox</strong> where you can choose your Tone and route the<br />
processed signal both to your audio software and out the GuitarPort outputs.<br />
Analog <strong>Line</strong> Outs – connect to your<br />
powered speakers or mixer<br />
Connect your stereo headphones<br />
Monitor In – connect a line level, stereo<br />
output (from your stereo, MP3 player,<br />
etc).<br />
Connect USB cable from here to your<br />
computer<br />
Analog <strong>Line</strong> Outs - These Left and Right RCA jacks output all audio signals; the audio from your<br />
audio software on the computer, and anything plugged into any the Instrument or Monitor inputs.<br />
So, these are what you want to connect to your monitoring system when using GuitarPort as your<br />
computer’s sound card. Use sheilded RCA to RCA tipped cables to connect directly to your powered<br />
speakers, mixer or power amp setup. Note that you can also use the headphone jack on GuitarPort if<br />
you want to use headphones for monitoring.<br />
Headphones - If you want to listen to the audio using stereo headphones, then plug them into this<br />
1/8-inch stereo jack. This Headphone jack outputs the same signal fed to the Analog <strong>Line</strong> Outs; the<br />
audio from your audio software on the computer, as well as anything plugged into the Instrument or<br />
<strong>Line</strong> inputs.<br />
Monitor In - If you want to hear the signal from a line level source mixed with all the other audio<br />
coming from your computer, but do not want this audio recorded, then plug the source in here. Note<br />
that this is a stereo jack, so you should use a stereo 1/8-inch tipped stereo audio cable for this connection.<br />
You’ll hear any audio coming into this jack via the Analog <strong>Line</strong> Outs and Phones, but it won’t go to<br />
GuitarPort’s Record Send 1-2.<br />
USB - This is where you connect the supplied USB cable to GuitarPort, with the other end going<br />
to your computer’s USB port. Note that you should always connect to a separate USB controller<br />
channel from other USB audio or <strong>MIDI</strong> interfaces to provide GuitarPort with the full USB bandwidth.<br />
GuitarPort also gets its power from this USB connection, so it should not be plugged into a nonpowered<br />
USB hub, or operated on the same USB controller channel with un-powered devices. It is<br />
also recommended to connect directly into a USB port on your computer and not into a USB hub.<br />
2•16
<strong>Line</strong> 6 <strong>GearBox</strong> <strong>3.5</strong> – Using Your <strong>Line</strong> 6 Hardware<br />
PODxt<br />
Phones - Connect your<br />
stereo Headphones<br />
Instrument Input - Connect<br />
your guitar or bass<br />
Instrument input – Connect your electric guitar or bass here using a standard 1/4-inch TS instrument<br />
cable. PODxt itself contains the processing power that turns your naked input signal into that roaring<br />
guitar Tone, which is then fed out the Analog <strong>Line</strong> Outs, as well as fed to the Record Send 1-2 digitally<br />
to your computer across the USB connection. When you are connected via USB to your computer, you<br />
can also launch <strong>GearBox</strong> and use it to alternatively load Tones stored on your hard disc, edit them on<br />
your screen, and make adjustments for output and Record Send levels.<br />
Phones - If you want to listen to the audio using stereo headphones, then plug them into this 1/4-inch<br />
stereo jack. This Headphone jack outputs the same signal fed to the Analog <strong>Line</strong> Outs; the audio from<br />
your audio software on the computer, as well as anything plugged into the Instrument input.<br />
Analog <strong>Line</strong> Outs – connect<br />
to your powered speakers or<br />
mixer<br />
USB - Connect to<br />
your computer<br />
Analog <strong>Line</strong> Outs - These Left and Right ¼-inch jacks output all audio signals; the audio from your<br />
audio software on the computer, and anything plugged into any the Instrument input. So, these are<br />
what you want to connect to your monitoring system when using PODxt as your computer’s sound<br />
card. Use shielded ¼-inch tipped cables to connect directly to your powered speakers, mixer or power<br />
amp setup. Note that you can also use the Phones jack on PODxt if you want to use headphones for<br />
monitoring.<br />
USB - This is where you connect the supplied USB cable to PODxt, with the other end going to your<br />
computer’s USB port. Of course your PODxt is capable of processing your guitar Tone all by itself, but<br />
you’ll need to connect the USB cable to your computer to use it with <strong>GearBox</strong>, and to use PODxt as<br />
your sound card device. Note that you should always connect to a separate USB controller channel<br />
from other USB audio or <strong>MIDI</strong> interfaces to provide PODxt with the full USB bandwidth. It is also<br />
recommended to connect directly into a USB port on your computer and not into a USB hub.<br />
2•17
<strong>Line</strong> 6 <strong>GearBox</strong> <strong>3.5</strong> – Using Your <strong>Line</strong> 6 Hardware<br />
PODxt Live<br />
Instrument Input - Connect<br />
your guitar or bass<br />
Analog <strong>Line</strong> Outs – connect to<br />
your powered speakers or mixer<br />
Aux Input – (Monitor in)<br />
connect a line level, stereo<br />
output (from your stereo, MP3<br />
player, etc)<br />
Phones - Connect your<br />
stereo Headphones<br />
USB - Connect to<br />
your computer<br />
Instrument input – Connect your electric guitar or bass here using a standard 1/4-inch TS instrument<br />
cable. PODxt Live itself contains the processing power that turns your naked input signal into that<br />
roaring guitar Tone, which is then fed out the Analog <strong>Line</strong> Outs, as well as fed to the Record Send<br />
1-2 digitally to your computer across the USB connection. When you are connected via USB to your<br />
computer, you can also launch <strong>GearBox</strong> and use it to alternatively load Tones stored on your hard disc,<br />
edit them on your screen, and make adjustments for output and Record Send levels.<br />
Analog <strong>Line</strong> Outs - These Left and Right ¼-inch jacks output all audio signals; the audio from your<br />
audio software on the computer, and anything plugged into any the Instrument and Aux inputs.<br />
So, these are what you want to connect to your monitoring system when using PODxt Live as your<br />
computer’s sound card. Use shielded ¼-inch tipped cables to connect directly to your powered speakers,<br />
mixer or power amp setup. Note that you can also use the Phones jack on PODxt Live if you want to<br />
use headphones for monitoring.<br />
Aux In (Monitor In) - If you want to hear the signal from a line level source mixed with all the other<br />
audio coming from your computer, but do not want this audio recorded, then plug the source in here.<br />
Note that this is a stereo jack, so you should use a stereo 1/8-inch tipped stereo audio cable for this<br />
connection. You’ll hear any audio coming into this jack via the Analog <strong>Line</strong> Outs and Phones, but it<br />
won’t go to PODxt Live’s Record Send 1-2.<br />
Phones - If you want to listen to the audio using stereo headphones, then plug them into this 1/4-inch<br />
stereo jack. This Headphone jack outputs the same signal fed to the Analog <strong>Line</strong> Outs; the audio<br />
from your audio software on the computer, as well as anything plugged into the Instrument and Aux<br />
inputs.<br />
USB - This is where you connect the supplied USB cable to PODxt Live, with the other end going<br />
to your computer’s USB port. Of course your PODxt Live is capable of processing your guitar Tone all<br />
by itself, but you’ll need to connect the USB cable to your computer to use it with <strong>GearBox</strong>, and to<br />
use PODxt Live as your sound card device. Note that you should always connect to a separate USB<br />
controller channel from other USB audio or <strong>MIDI</strong> interfaces to provide PODxt Live with the full USB<br />
bandwidth. It is also recommended to connect directly into a USB port on your computer and not into<br />
a USB hub.<br />
2•18
<strong>Line</strong> 6 <strong>GearBox</strong> <strong>3.5</strong> – Using Your <strong>Line</strong> 6 Hardware<br />
PODxt PRO<br />
Phones - Connect your<br />
stereo Headphones<br />
Instrument Input - Connect<br />
your guitar or bass<br />
Instrument input – Connect your electric guitar or bass here using a standard 1/4-inch TS instrument<br />
cable. PODxt Pro itself contains the processing power that turns your naked input signal into that<br />
roaring guitar Tone, which is then fed out the Analog and Digital Outs, as well as fed to the Record<br />
Send 1-2 digitally to your computer across the USB connection. When you are connected via USB to<br />
your computer, you can also launch <strong>GearBox</strong> and use it to alternatively load Tones stored on your hard<br />
disc, edit them on your screen, and make adjustments for output and Record Send levels.<br />
Phones - If you want to listen to the audio using stereo headphones, then plug them into this 1/4-inch<br />
stereo jack. This Headphone jack outputs the same signal fed to the Analog <strong>Line</strong> Outs; the audio from<br />
your audio software on the computer, as well as anything plugged into the Instrument input.<br />
Connect any <strong>Line</strong>-Level<br />
source you want to record<br />
to the <strong>Line</strong> Input<br />
Unprocessed Instrument Out- When<br />
using <strong>GearBox</strong> Plug-in, connect to 3rdparty<br />
audio recording interface<br />
USB - Connect to<br />
your computer<br />
Analog <strong>Line</strong> Outs, Use either Unbalanced<br />
(¼ -inch) jacks or Balanced (XLR) jacks to<br />
connect to your powered speakers or mixer<br />
Digital Input and Output – use the AES/EBU<br />
or S/PDIF type connections to connect to other<br />
digital gear that uses one of these formats<br />
<strong>Line</strong> Input - if you want to record the signal from a line level source, such as a keyboard, your receiver,<br />
the line out from a mixing console, etc…, connect it to this input using a 1/4-inch TS audio cable.<br />
Unprocessed Guitar Out - This connection allows you to send an unprocessed signal to your recording<br />
application, while monitoring the fully processed signal thru the main Outputs. Very handy if you’re<br />
using a 3rd party recording interface with your recording application and the <strong>GearBox</strong> plug-in. For<br />
more info, go to the ToneDirect Monitoring section of this Guide.<br />
Note: Your PODxt Pro can also send an unprocessed signal thru its USB connector, as explained<br />
here.<br />
2•19
<strong>Line</strong> 6 <strong>GearBox</strong> <strong>3.5</strong> – Using Your <strong>Line</strong> 6 Hardware<br />
Unbalanced and Balanced Analog <strong>Line</strong> Outs - The Left and Right Unbalanced ¼-inch jacks and the<br />
Balanced XLR jacks output all audio signals; the audio from your audio software on the computer, and<br />
anything plugged into any the Instrument inputs (and effects loop, if you are using it). So, these are<br />
what you want to connect to your monitoring system when using PODxt Live as your computer’s sound<br />
card. Use shielded ¼-inch tipped or XLR tipped cables to connect directly to your powered speakers,<br />
mixer or power amp setup. Note that you can also use the Phones jack on PODxt Pro if you want to<br />
use headphones for monitoring.<br />
USB - This is where you connect the supplied USB cable to PODxt Pro, with the other end going<br />
to your computer’s USB port. Of course your PODxt Pro is capable of processing your guitar Tone all<br />
by itself, but you’ll need to connect the USB cable to your computer to use it with <strong>GearBox</strong>, and to<br />
use PODxt Pro as your sound card device. Note that you should always connect to a separate USB<br />
controller channel from other USB audio or <strong>MIDI</strong> interfaces to provide PODxt Pro with the full USB<br />
bandwidth. It is also recommended to connect directly into a USB port on your computer and not into<br />
a USB hub.<br />
AES/EBU and S/PDIF Digital connections - To connect to another digital audio device with your<br />
PODxt Pro, use the pair of these digital jacks that matches the format of your other device (AES/EBU<br />
or S/PDIF). Connecting digitally is the best choice for routing to external digital recording devices,<br />
such as a DAT recorder. These digital outputs send the same audio as is sent to PODxt Pro’s Analog<br />
Outs.* The digital signal is always sent at 24-bit resolution. All settings for configuring the PODxt Pro’s<br />
digital in/out options are found on the PODxt Pro device itself by pressing the “I/O Dig Select” button<br />
on the front panel (these digital I/O options are not accessible in <strong>GearBox</strong>). For more information on<br />
using these digital connections, please see your PODxt Pro Pilot’s Handbook.<br />
2•20
<strong>Line</strong> 6 <strong>GearBox</strong> <strong>3.5</strong> – Using Your <strong>Line</strong> 6 Hardware<br />
PODxt - Audio Signal Routing & Re-Amping<br />
Re-Amping is the fancy schmancy name for recording a dry, unaltered instrument signal to be processed<br />
later during mixing - this gives you the greatest flexibility to make later tone tweaks, since you don’t<br />
have to commit a particular sound to the track(s). This is of course the way that plug-ins work, so it’s<br />
something that all plug-ins, including <strong>GearBox</strong> Plug-in, provide. If you don’t have plug-ins but do have<br />
PODxt, there’s another kind of re-amping available.<br />
PODxt, PODxt Pro* and PODxt Live provide an additional set of driver options for recording where<br />
the signal fed to Record Send 1-2 can be set to “processed” or “unprocessed” independently from<br />
what you are hearing as your monitor signal from the PODxt device. Access the PODxt Audio Signal<br />
Routing options by clicking the Advanced button in the <strong>Line</strong> 6 Audio-<strong>MIDI</strong> Devices control panel...<br />
Select the signal to be<br />
routed to the Record<br />
Sends here.<br />
The text in the Record<br />
Sends panel describes the<br />
signal now being carried<br />
on he Record Sends<br />
This slider sets the level of<br />
the re-amped signal sent<br />
to PODxt for monitoring<br />
In the PODxt Signal Routing selector you can choose one of four routing modes for the signals that<br />
run inside PODxt, and to Record Send 1-2:<br />
• Send Processed Guitar - This is the normal mode of operation: PODxt-processed sound is sent<br />
to your computer via Record Send 1-2 so it can be recorded in your audio software. PODxt gets<br />
its input from the guitar plugged into its INPUT jack, and you can listen to PODxt-processed<br />
guitar sound as well as sound coming from your computer via PODxt’s LEFT OUTPUT, RIGHT<br />
OUTPUT and PHONES jacks.<br />
• Send Clean Guitar - This mode sends unprocessed guitar to your to Record Send 1-2, while you<br />
listen to PODxt-processed guitar and software playback coming out of your PODxt. You can use<br />
this to record an unprocessed guitar signal in your audio software for later re-amping, while hearing<br />
your PODxt-processed guitar signal without latency being added by your recording program. You<br />
can then choose USB Signal Routing modes 3 and 4 when you’re ready to playback that track<br />
and re-amp it through your PODxt. You may also want to record a copy of your PODxt-processed<br />
sound from the analog outputs of your PODxt when you are making your digital recording of the<br />
clean guitar, so you have the processed version for reference when re-amping. This track is also<br />
handy for punch-ins, since you can listen to it during punch-ins to hear the processed version of<br />
the part of the previously recorded track that you want to keep.<br />
• Send Clean Guitar Re-Amp Playback - This mode sends un-processed guitar to your recording<br />
software, feeds the signal from your computer into PODxt’s processing, and lets you hear the<br />
PODxt-processed computer sound at PODxt’s outputs. You can use this to run an unprocessed<br />
guitar track that you recorded using USB Signal Routing mode 2 into your PODxt for re-amping,<br />
2•21
<strong>Line</strong> 6 <strong>GearBox</strong> <strong>3.5</strong> – Using Your <strong>Line</strong> 6 Hardware<br />
allowing you to listen to or record the PODxt-processed result via PODxt’s analog outputs. You<br />
can also use this mode during initial recording, so that unprocessed guitar can be recorded to a<br />
track, and the output of that track can be sent by the recording program to PODxt at the same<br />
time. This lets you punch-in on the track while you’re recording, and hear PODxt processing of<br />
the already recorded part of the track as well as the new portion that you’re recording during the<br />
punch-in. Your recording software will add some latency to the guitar signal that it is monitoring<br />
back through to PODxt. You can generally get the lowest latency by reducing your buffer size in<br />
the recording software, but lower buffer settings will utilize more of your computer’s processing,<br />
so you may not be able to run as many tracks or effects in your recording software when you do<br />
this. See your recording software’s instructions for details.<br />
• Send Re-Amp Playback - This mode is designed to receive unprocessed guitar from your recording<br />
program, and send processed guitar back to the recording program for recording. You can use this<br />
to run an unprocessed guitar track that you recorded using USB Signal Routing mode 2 into your<br />
PODxt for re-amping, so you can digitally record the PODxt-processed signal back to another<br />
track in the recording program.<br />
Note – it is not a supported practice to “hot swap” your <strong>Line</strong> 6 device (unplug the USB cable and plug<br />
it into a different USB device) while it is in use by <strong>GearBox</strong> or any other audio software. In fact, this<br />
just isn’t a good idea to do with any USB audio devices, since it can result in a loud pop, loss of sync<br />
and possibly crash or corrupt your current audio software project.<br />
Routing audio from your <strong>Line</strong> 6 hardware to an external device<br />
In addition to the ability to route digital audio directly within your computer, you may instead want<br />
to route your <strong>GearBox</strong> or PODxt signal into another sound card on the same or separate computer.<br />
Better yet, with all the great tones you can now create for your mics & instruments with <strong>GearBox</strong>,<br />
there is no need to limit them to the inside of a computer! You may also want to send the signal to<br />
external hardware such as an analog or tape Multitrack unit, a DAT or video tape recorder, or even to<br />
an amplifier or P.A. system for live performance. To follow are instructions for these different types of<br />
setups.<br />
Connecting analog outputs to an external device<br />
You can route your <strong>GearBox</strong> Tone to just about any type of external device simply by connecting the<br />
Analog Outs from the back of your GuitarPort, <strong>TonePort</strong> or PODxt directly into the external device’s<br />
line level inputs. This allows you to amplify or record your <strong>GearBox</strong> signal using any external device<br />
that accepts analog line level inputs.<br />
Connect your <strong>TonePort</strong>,<br />
GuitarPort or PODxt Analog<br />
Outs to the analog inputs on<br />
any external audio device<br />
2•22
<strong>Line</strong> 6 <strong>GearBox</strong> <strong>3.5</strong> – Using Your <strong>Line</strong> 6 Hardware<br />
Routing analog outputs to another sound card<br />
If you want to use <strong>GearBox</strong> and your <strong>Line</strong> 6 device in a computer recording setup where a sound card<br />
already exists, then you might find it useful to connect your Analog Outs into the analog inputs of the<br />
existing sound card. More information can be found in the Sound Card and Sound Issues section of<br />
this guide.<br />
Connecting the Digital Output from <strong>TonePort</strong> UX2, <strong>UX8</strong>, KB37 or<br />
PODxt Pro to an external digital device<br />
<strong>TonePort</strong> UX2, <strong>UX8</strong>, KB37 and PODxt Pro also include digital outputs, which allow you to connect to<br />
digital devices such as a DAT recorder, Minidisk, another sound card, or most any device that offers a<br />
S/PDIF (or AES/EBU for PODxt Pro) format digital input. Please refer to your hardware’s <strong>User</strong> Guide<br />
for more information.<br />
ToneDirect Monitoring<br />
A unique feature of your <strong>Line</strong> 6 hardware is ToneDirect Monitoring, which is a separate audio path<br />
that allows you to monitor the incoming signal with the lowest possible latency, for uncompromised<br />
feel and responsiveness when recording or jamming.<br />
Plus, this lets you to set the audio buffer size in your recording application at a large value for efficient<br />
use of your computer, yet still enjoy extreme low latency monitoring while recording. On Windows<br />
systems, the ToneDirect audio path has its own buffer adjustment while on Mac, no adjustments are<br />
needed.<br />
ToneDirect Monitoring buffer size slider (Windows®)<br />
<strong>TonePort</strong> & GuitarPort devices The <strong>Line</strong> 6 ToneDirect Monitoring audio path has its own buffer to<br />
allow you to keep your ASIO Buffer Size at a high value, for more solid performance and more efficient<br />
performance of your ASIO software. The initial default is one tick to the right of “Extra Small” as<br />
shown. Raise this slider if you are getting any dropouts in your monitor signal.<br />
PODxt devices utilize a USB audio buffer (rather than ToneDirect Monitoring) which provides an<br />
independent, direct monitor signal with its own buffer adjustment. When a PODxt/Live/Pro is selected<br />
as the <strong>Line</strong> 6 device in this dialog, the ToneDirect Monitoring section of the dialog is replaced by a<br />
PODxt-specific “USB Audio Streaming” buffer slider:<br />
2•23
<strong>Line</strong> 6 <strong>GearBox</strong> <strong>3.5</strong> – Using Your <strong>Line</strong> 6 Hardware<br />
ToneDirect and your <strong>Line</strong> 6 Hardware as the preferred Audio Interface/Sound<br />
Card<br />
If you choose your <strong>Line</strong> 6 hardware as the preferred sound card for your audio setup, you get the benefits<br />
of ToneDirect monitoring automatically when running the <strong>GearBox</strong> application for tone control.<br />
This is standard operation when <strong>GearBox</strong> is acting as a tone front end for recording or jamming.<br />
PODxt/Live/Pro users: All Tone processing is performed internally on the PODxt device, saving<br />
CPU resources and providing even better feel and responsiveness for recording!<br />
ToneDirect Monitoring while recording with <strong>GearBox</strong> Plug-in<br />
ToneDirect is a feature of the <strong>GearBox</strong> full application, not the <strong>GearBox</strong> Plug-in, so in order for<br />
you to enjoy the feel and responsiveness provided by ToneDirect, you’ll need to run the <strong>GearBox</strong><br />
application alongside the <strong>GearBox</strong> Plug-in. Keep in mind that these 2 applications run independently<br />
of each other, so any tone settings you make in the <strong>GearBox</strong> application will have to be matched in<br />
the Plug-in to provide the same results. You can achieve this by making your settings in the <strong>GearBox</strong><br />
application, saving the tone to your tones folder, and then recalling that tone later when applying the<br />
<strong>GearBox</strong> Plug-in.<br />
Using a 3rd-party Audio Interface with <strong>TonePort</strong> DI<br />
If you use the <strong>GearBox</strong> Plug-in with a <strong>TonePort</strong> DI or a PODxt PRO, you’ll be able to monitor your<br />
signal with ToneDirect by following these steps (illustrated on the graphic at the beginning of this<br />
Guide):<br />
• Connect the signal source to the input of your <strong>Line</strong> 6 Hardware.<br />
• Connect the unprocessed dry output of the <strong>TonePort</strong> DI / PODxt PRO to your Audio Interface.<br />
This will be the source you’re running the plug-in on.<br />
• Disable Input Monitoring in your recording application, for the track you’re recording into.<br />
• Connect the processed Analog Outs to your Audio Interface, or alternatively, to a mixer (if you<br />
don’t want to connect them to the recording interface, or if your interface does not support input<br />
monitoring)<br />
• Launch the <strong>GearBox</strong> application and monitor the recorded signal thru the Analog Outputs of<br />
your <strong>Line</strong> 6 Hardware, to get the benefits of ToneDirect monitoring<br />
Using a 3rd-party Audio Interface with other <strong>Line</strong> 6 Hardware<br />
If you have a non-<strong>Line</strong> 6 audio interface you’d like to use for computer recording/playback, you’ll need<br />
to purchase a guitar/signal splitter, which will afford you the unprocessed dry output needed to feed<br />
your Audio Interface.<br />
• Connect your recording source to the splitter input.<br />
• Connect Output A from the splitter to your audio interface. This will be the source to run the<br />
<strong>GearBox</strong> plug-in on.<br />
• Choose this channel as the track input in your recording application, and disable input monitoring<br />
for that track.<br />
2•24
<strong>Line</strong> 6 <strong>GearBox</strong> <strong>3.5</strong> – Using Your <strong>Line</strong> 6 Hardware<br />
• Connect Output B from the splitter to your <strong>Line</strong> 6 Hardware, the outputs of which will be<br />
connected to your audio interface, or a mixer (if you don’t want to connect to your audio<br />
interface, or if your interface does not support input monitoring).<br />
• Launch the <strong>GearBox</strong> application, and monitor the <strong>GearBox</strong> processed signal thru your hardware’s<br />
<strong>Line</strong> Outputs. These outputs supply the ToneDirect Monitoring magic.<br />
Mac® <strong>User</strong>s: There’s yet another option for you!<br />
The Mac Core Audio driver features the ability to combine the inputs from 2 separate audio interfaces<br />
into one aggregate device (for more info on this, please refer to the Recording Setup Guide available<br />
in the Online Help page). Perform the following steps:<br />
• Combine your Audio Interface and your <strong>Line</strong> 6 hardware into one aggregate device.<br />
• Connect the recording source to your <strong>Line</strong> 6 hardware<br />
• Make sure that your hardware is sending an unprocessed signal thru USB. Choose this signal as<br />
the input for the track you’re recording into. This track will receive the <strong>GearBox</strong> plug-in.<br />
• Disable Input Monitoring for the track you’re recording into.<br />
• Launch the <strong>GearBox</strong> application, and monitor the <strong>GearBox</strong> processed signal thru your hardware’s<br />
<strong>Line</strong> Outputs. These outputs supply the ToneDirect Monitoring magic.<br />
Using <strong>Line</strong> 6 Hardware as your Audio Interface<br />
In order to enjoy the benefits of ToneDirect Monitoring, perform the following steps:<br />
• Connect the recording source to your <strong>Line</strong> 6 hardware<br />
• Launch the <strong>GearBox</strong> application, and monitor the <strong>GearBox</strong> processed signal thru your hardware’s<br />
<strong>Line</strong> Outputs. These outputs supply the ToneDirect Monitoring magic.<br />
• Route the unprocessed signal to your recording application. Choose this signal as the input for<br />
the track you’re recording into. This track will receive the <strong>GearBox</strong> plug-in.<br />
• Disable Input Monitoring for the track you’re recording into.<br />
2•25
<strong>Line</strong> 6 <strong>GearBox</strong> <strong>3.5</strong> – Using Your <strong>Line</strong> 6 Hardware<br />
Sound Cards & Sound Issues<br />
One of the many unique features of your <strong>Line</strong> 6 Hardware is its ability to function as a computer<br />
sound card. You can choose to make your hardware the preferred sound card for your computer, or<br />
alternatively keep your current sound card the default device for playing system sounds, etc…, and<br />
connect your hardware to it so you can hear <strong>GearBox</strong> tone thru your computer’s sound card.<br />
Choosing your <strong>Line</strong> 6 Hardware as the Preferred Audio Device<br />
Setting up your <strong>Line</strong> 6 Hardware as the preferred Audio device means that all system sounds, as well as<br />
the audio output of your mp3 player and other audio applications will be routed thru your hardware.<br />
Windows®<br />
Go to your computer’s Control Panel, and select Sounds and Audio Devices.<br />
Click on the Audio Tab<br />
All your sound devices appear here<br />
Select your <strong>Line</strong> 6 Hardware as the<br />
default audio device for Playback<br />
and Recording<br />
Click Apply when done<br />
2•26
<strong>Line</strong> 6 <strong>GearBox</strong> <strong>3.5</strong> – Using Your <strong>Line</strong> 6 Hardware<br />
Mac®<br />
Go to your computer’s System Preferences, and click on <strong>Line</strong> 6 Audio-<strong>MIDI</strong> Devices<br />
Click on the Audio Devices Tab<br />
All your sound devices appear in the<br />
drop down menus<br />
Select your <strong>Line</strong> 6 Hardware as the<br />
default audio device for Input and<br />
Output<br />
Close the window when done.<br />
Connecting <strong>Line</strong> 6 Hardware to your Preferred Audio Device<br />
If you want to use <strong>GearBox</strong> and your <strong>Line</strong> 6 device in a computer recording setup where a sound card<br />
already exists, then you might find it useful to connect your Analog Outs into the analog inputs of the<br />
existing sound card. This allows you to use the existing sound card with your recording application<br />
to also receive additional discrete inputs directly from other sources at the same time, if this is the<br />
preferred setup. When your <strong>Line</strong> 6 device is connected to another sound card this way, then you<br />
will want to be sure your recording software is set to use the other sound card as its input device for<br />
recording. In this configuration, since your <strong>Line</strong> 6 device is not in use by an audio application as a<br />
sound card, its Analog Out signal is what is being recorded, and therefore, levels are controlled by the<br />
<strong>GearBox</strong> Monitor level and hardware Output knob.<br />
GuitarPort users<br />
Connect a 1/8-inch stereo cord to<br />
the Headphone Out, or use the<br />
Stereo RCA <strong>Line</strong> outputs with an<br />
adapter.<br />
Connect the other end to the <strong>Line</strong><br />
Input of your sound card.<br />
2•27
<strong>Line</strong> 6 <strong>GearBox</strong> <strong>3.5</strong> – Using Your <strong>Line</strong> 6 Hardware<br />
<strong>TonePort</strong> users<br />
Connect the mono 1/4-inch Analog<br />
<strong>Line</strong> Outputs.<br />
Or, connect a 1/4-inch stereo cord to<br />
the Headphone Out<br />
Use an adapter if needed to connect<br />
to the <strong>Line</strong> Input of your sound<br />
card.<br />
POD xt/Live/Pro users<br />
Connect the mono 1/4-inch<br />
Analog <strong>Line</strong> Outputs .<br />
Or, connect a 1/4-inch stereo<br />
cord to the Headphone Out<br />
Use an adapter if needed to<br />
connect to the <strong>Line</strong> Input of<br />
your sound card.<br />
2•28
<strong>Line</strong> 6 <strong>GearBox</strong> <strong>3.5</strong> – Driver Panel & Recording<br />
<strong>Line</strong> 6 Driver Panel & Recording<br />
So, just how does all that huge amount of Tone get routed around between your <strong>Line</strong> 6 gear, computer<br />
and recording software you ask? All this is performed by the audio driver - a software component<br />
installed with <strong>GearBox</strong> that allows the audio to be routed to the right place. This section provides an<br />
overview of the different driver types and where you can tweak a few settings to work best with your<br />
particular computer setup.<br />
For more instructions about setting up <strong>GearBox</strong> and your <strong>Line</strong> 6 hardware for recording with specific<br />
audio recording programs, please check out the Recording Setup Guide documentation found on the<br />
<strong>GearBox</strong> Online Help page.<br />
Audio Routing<br />
<strong>TonePort</strong> and GuitarPort - As shown in the following basic diagram, sources that are input into<br />
the <strong>Line</strong> 6 hardware are handled by the audio driver, which manages applying the <strong>GearBox</strong> Tone<br />
processing to your signal, feeding the processed audio out the Record Sends to your audio software,<br />
gathering playback audio from your audio software and then routing the audio back to the <strong>Line</strong> 6<br />
hardware’s outputs and to your monitoring system. The driver also grabs the <strong>GearBox</strong> processed signal<br />
before routing it to the Record Sends and hands this off to Tone Direct Monitoring immediately, to<br />
provide a low latency monitor signal, which is then routed to the <strong>Line</strong> 6 hardware and mixed with the<br />
rest of your audio and fed to your monitoring system.<br />
PODxt - As shown in the following basic diagram, sources that are input into PODxt are fully processed<br />
right on the PODxt hardware and the <strong>GearBox</strong> software acts as a computer Graphical <strong>User</strong> Interface<br />
for the processing running on PODxt. The PODxt processed audio is then handled by the audio driver,<br />
which manages feeding the audio out the Record Send to your audio software, gathering playback<br />
audio from the audio software, and then routing the mixed audio back to the PODxt’s outputs and to<br />
your monitoring system. PODxt also grabs its processed signal before routing it to the Record Sends<br />
its internal Monitoring system immediately, to provide a low latency monitor signal, and then mixes it<br />
with the rest of your audio to your monitoring system.<br />
3•1
<strong>Line</strong> 6 <strong>GearBox</strong> <strong>3.5</strong> – Driver Panel & Recording<br />
The <strong>Line</strong> 6 Audio-<strong>MIDI</strong> Device Control Panel<br />
Since your <strong>Line</strong> 6 device includes our high-performance audio driver, it can act as a USB sound card<br />
for just about any audio software that might be installed on your computer. This is the place where you<br />
can access the audio driver settings for your connected device to see and configure things such as the<br />
current Sample Rate, Bit Depth, Buffer settings, Record Sends, etc. One thing to note here is that<br />
this dialog offers controls specifically for your <strong>Line</strong> 6 hardware. The <strong>GearBox</strong> software is independent<br />
of these settings, however, you’ll see information regarding your Record Sends here which may change<br />
depending on whether <strong>GearBox</strong> is currently running or not. For <strong>TonePort</strong> and GuitarPort devices, you<br />
can think of the <strong>GearBox</strong> software like a giant rack of gear – if it is not running and configured to use<br />
your <strong>TonePort</strong>/GuitarPort hardware, your guitar signal will still be heard, but will be “naked”, without<br />
all those lovely amp & effects sounds. For PODxt devices, since your Tone is always running on the<br />
PODxt itself, you’ll hear whatever your PODxt’s Tone and audio routing settings are set to deliver, and<br />
<strong>GearBox</strong> can be running or not to control which Tones you want to hear. There, aren’t you feeling<br />
smarter already?<br />
The options in the <strong>Line</strong> 6 Audio-<strong>MIDI</strong> Device dialog are slightly different if you are on a Windows®<br />
versus a Mac® system, and also slightly different depending on which <strong>Line</strong> 6 hardware you are using.<br />
Just check out the descriptions that match your setup in the following sections…<br />
Windows®<br />
You can launch the <strong>Line</strong> 6 Audio-<strong>MIDI</strong> Devices dialog from within the Windows® Control Panel<br />
(Start button > Settings > Control Panel), or from the <strong>GearBox</strong> Help > Hardware & Driver Settings.<br />
<strong>TonePort</strong> & GuitarPort - This example shows <strong>TonePort</strong> UX2 as the selected device, with the <strong>GearBox</strong><br />
software running. You’ll see some differences with a PODxt device selected, which are noted in the<br />
following diagram - click on a number to go to its description. If you have the <strong>TonePort</strong> <strong>UX8</strong>, you’ll<br />
have even more options, so be sure to also read up on the <strong>UX8</strong> specifics...<br />
3•2
<strong>Line</strong> 6 <strong>GearBox</strong> <strong>3.5</strong> – Driver Panel & Recording<br />
Driver Tab<br />
1 2 3<br />
4<br />
5<br />
9<br />
6<br />
7<br />
10<br />
8<br />
1 – <strong>Line</strong> 6 Device selector: Allows selection of any supported <strong>Line</strong> 6 USB audio device that is<br />
connected. Note that if you have more than one supported device connected, each will be selectable<br />
in this list, regardless if it is in use by the <strong>GearBox</strong> application or not. If your device is not connected<br />
and powered on, it will not appear in this list.<br />
2 – Selected Device Icon: An icon for the selected <strong>Line</strong> 6 Device appears here.<br />
3 – Driver version: Displays the current device’s installed driver version number.<br />
4 – ESN: Displays the current device’s unique Electronic Serial Number.<br />
5 – ASIO Client indicator: If you are running audio software that is using this <strong>Line</strong> 6 device as its<br />
ASIO sound card, the name of the software will appear here. If not in use by an ASIO software, “none”<br />
is displayed here as shown.<br />
6 – Buffer Size: The ASIO buffer size in use. Note this field is only active when in use by an ASIO<br />
application. As your audio software documentation will likely tell you, the ASIO Buffer Size will<br />
affect the “responsiveness” and “latency” of the audio. The lower the setting, the faster the response,<br />
but with the trade-off of higher processor usage and the risk of audio dropouts. Raise the value if you<br />
are getting inconsistent playback or recording in the audio software. Basically, 512 is generally a good<br />
average setting.*<br />
3•3
<strong>Line</strong> 6 <strong>GearBox</strong> <strong>3.5</strong> – Driver Panel & Recording<br />
*Note that <strong>TonePort</strong> and GuitarPort devices also offer ToneDirect Monitoring, which is a<br />
separate audio path with its own Buffer setting. This allows you to keep the above ASIO Buffer Size<br />
at a “safer”, higher value, yet still benefit from low latency monitoring of your input signal while<br />
recording. Similarly, PODxt devices offer a USB audio buffer which provides an independent, direct<br />
monitor signal with its own buffer adjustment as well. More info on ToneDirect monitoring can be<br />
found in this section.<br />
7 – Bit Depth: The ASIO bit depth in use. Note this field is only active when in use by an ASIO<br />
application. It is best to use the highest bit rate your ASIO software will support to ensure high quality<br />
audio.<br />
8 – Sample Rate Converter Active indicator:<br />
<strong>TonePort</strong>s support 44.1 and 48 kHz sample rates natively. Some <strong>TonePort</strong>s also support 88 and 96 kHz<br />
sample rates by way of an internal sample rate converter. This indicator lights up to show you when<br />
this converter is active, which can be any time your ASIO software is requesting a different sample rate<br />
than what your device “natively” supports. <strong>TonePort</strong> <strong>UX8</strong> supports 44.1, 48, 88.2 and 96 kHz sample<br />
rates natively, meaning that these sample rates are not converted.<br />
9 – Driver Operation indicator:<br />
<strong>TonePort</strong> & GuitarPort devices - Displays what sample and bit rate the current device is operating at<br />
(or with no text if not in use).<br />
PODxt devices do not utilize this feature and therefore no text will appear here when a PODxt is<br />
the selected device.<br />
10 – Lock Driver Format: When checked, this forces the <strong>Line</strong> 6 audio driver to operate at the Sample<br />
and Bit rate settings entered in the two fields below (as opposed to following the sample rate requested<br />
by a host audio application).<br />
Note – This checkbox will remain grayed-out while the current <strong>Line</strong> 6 device is in use by the<br />
<strong>GearBox</strong> application and/or any 3rd party audio application. To access the Force Driver Format<br />
feature, you will need to exit <strong>GearBox</strong> as well as any audio software that might be using the currently<br />
selected <strong>Line</strong> 6 device as its audio device. This checkbox will then be selectable.<br />
3•4
<strong>Line</strong> 6 <strong>GearBox</strong> <strong>3.5</strong> – Driver Panel & Recording<br />
Inputs & Recording Tab<br />
Input Source Select: This is a mirrored control for the Source Select within the <strong>GearBox</strong> application<br />
where it allows the user to select which physical input is used on the device. Note that this control is<br />
ONLY selectable when the <strong>GearBox</strong> software is not in use by the current device. When <strong>GearBox</strong> is in<br />
use, it remains grayed out, but displays the current Source that is selected within <strong>GearBox</strong>.<br />
When Gearbox is not in use by the selected <strong>Line</strong> 6 device, this Input Source Select, like the Source<br />
Select in the <strong>GearBox</strong> application, offers a list of input options.<br />
GuitarPort and PODxt devices are always “fixed” to only route their “instrument” 1 /4 input signal<br />
into <strong>GearBox</strong>. When a GuitarPort or PODxt is the selected device, this Input Source Select list offers<br />
only “Instrument” as the source.<br />
<strong>TonePort</strong> <strong>UX8</strong> has a larger set of options - see the next section for its Inputs & Recording tab.<br />
Device Sends Info box: One line for each <strong>GearBox</strong> Record Send appears here along with a description<br />
for exactly what signal each Send is carrying.<br />
<strong>TonePort</strong> devices will show two Sends (Record 1-2 and Record 3-4)<br />
3•5
<strong>Line</strong> 6 <strong>GearBox</strong> <strong>3.5</strong> – Driver Panel & Recording<br />
• Single Tone Source (Mono/Stereo): When the <strong>GearBox</strong> application is not running, Record 1-2<br />
and 3-4 both carry the unprocessed signal. When running <strong>GearBox</strong>, Record 1-2 will carry the<br />
fully <strong>GearBox</strong>-processed signal. For Record 3-4, you can choose between a signal with no posteffects,<br />
and a fully unprocessed signal.<br />
• Dual-Tone Source: If you’ve selected one of the dual input configurations from the input menu,<br />
Record 3-4 will always carry the signal from the second audio source. When <strong>GearBox</strong> is running,<br />
these sends will carry the Tone 2 signal of a Dual-Tone configuration. See the <strong>TonePort</strong> Dual-<br />
Tone Operation section for more about this.<br />
Note: <strong>TonePort</strong> DI and GX can only run in Single-Tone configuration.<br />
GuitarPort will show two Sends (Record 1-2 and Record 3-4). When the <strong>GearBox</strong> application is<br />
not running, Record 1-2 and 3-4 both carry the unprocessed signal from GuitarPort’s input. When<br />
running <strong>GearBox</strong>, Record 1-2 will carry the fully <strong>GearBox</strong> –processed signal, and for Record 3-4 you’ll<br />
have a choice between routing a signal with no post-effects, or a fully unprocessed signal.<br />
*If using <strong>TonePort</strong> or GuitarPort with an audio recording software that is configured to access <strong>TonePort</strong><br />
via its WDM or DirectSound drivers, then only one Send will be available in the recording software<br />
(Send 1-2). You must access <strong>TonePort</strong> via its ASIO driver on Windows to utilize the additional Send<br />
3-4.<br />
PODxt will show only one Record Send (Record 1-2). The type of signal that is routed to the<br />
Record<br />
Send 1-2 is determined by the PODxt Signal Routing option within the Audio Signal Routing dialog<br />
(accessed by the Advanced button within the <strong>Line</strong> 6 Audio-<strong>MIDI</strong> Devices dialog). Note that this<br />
Audio Signal Routing determines this signal routing regardless if <strong>GearBox</strong> is running or not for PODxt<br />
devices. (See the PODxt Audio Signal Routing section for more about this dialog).<br />
3•6
<strong>Line</strong> 6 <strong>GearBox</strong> <strong>3.5</strong> – Driver Panel & Recording<br />
Inputs & Recording Tab (<strong>TonePort</strong> <strong>UX8</strong> only)<br />
The Inputs & Recording tab lets you select specific inputs for recording. Input source options are as<br />
follows:<br />
Input 1: Instrument 1 or XLR 1 or <strong>Line</strong> 1 or S/PDIF (L)<br />
Input 2: Instrument 2 or XLR 2 or <strong>Line</strong> 2 or S/PDIF (R)<br />
Input 3: XLR 3 or <strong>Line</strong> 3<br />
Input 4: XLR 4 or <strong>Line</strong> 4<br />
Input 5: XLR 5 or <strong>Line</strong> 5<br />
Input 6: XLR 6 or <strong>Line</strong> 6<br />
Input 7: XLR 7 or <strong>Line</strong> 7<br />
Input 8: XLR 8 or <strong>Line</strong> 8<br />
You can also link inputs into stereo pairs. This affects<br />
hardware monitoring controls in the Outputs &<br />
Monitoring tab (see below).<br />
3•7
<strong>Line</strong> 6 <strong>GearBox</strong> <strong>3.5</strong> – Driver Panel & Recording<br />
Using Inputs 1 & 2 with the <strong>GearBox</strong> standalone application<br />
The <strong>GearBox</strong> standalone application works with the <strong>TonePort</strong> <strong>UX8</strong> driver to provide ultra-low latency<br />
via ToneDirect monitoring for Inputs 1 & 2 of the <strong>UX8</strong>, which includes two high-Z Instrument<br />
inputs, two XLR inputs, two <strong>Line</strong> level inputs and stereo S/PDIF input. <strong>GearBox</strong>’s ToneDirect<br />
Monitoring is ideally suited for recording guitar and bass with amp and effects processing, providing<br />
the instantaneous feel necessary for competent performance while tracking.<br />
ASIO Record Sends<br />
This box displays the ASIO names of the <strong>UX8</strong>’s input sources as they appear in recording applications<br />
utilizing the <strong>UX8</strong>’s audio drivers.<br />
Sends 9-10 and 11-12 represent processed and semiprocessed<br />
signals respectively, from the <strong>GearBox</strong><br />
standalone application. If <strong>GearBox</strong> is not running,<br />
Sends 9-10 and 11-12 carry the signal from Input 1.<br />
See <strong>GearBox</strong> Standalone Application for details on using the <strong>GearBox</strong> sends with the <strong>TonePort</strong><br />
<strong>UX8</strong>.<br />
Hardware Meters Show<br />
Use this menu to select the input and output levels<br />
you want the <strong>UX8</strong>’s hardware meters to display.<br />
Clock Source<br />
Set your preferred <strong>TonePort</strong> <strong>UX8</strong> clock source with this<br />
menu. Select SPDIF to sync the <strong>UX8</strong> to S/PDIF clock<br />
source from another device’s digital output.<br />
3•8
<strong>Line</strong> 6 <strong>GearBox</strong> <strong>3.5</strong> – Driver Panel & Recording<br />
Outputs & Monitoring Tab (<strong>TonePort</strong> <strong>UX8</strong> Only)<br />
Important: Note that the Outputs & Monitoring tab provides control over monitoring levels,<br />
specifically, what you hear coming out of the <strong>UX8</strong>. These controls do not affect Output or Send levels,<br />
the audio that streams into your recording software. In other words, volume and pan levels here are<br />
purely analog, intended for monitoring live input levels (from instruments, mics, etc) and computer<br />
output levels, in order to facilitate the recording process.<br />
The Outputs & Monitoring tab provides control over hardware monitoring settings, including input<br />
source volume, pan and mute states. You can specify different mix settings for each pair of <strong>UX8</strong> outputs<br />
if you like.<br />
By default, the only sounds that come out of the <strong>UX8</strong> are the computer’s output and <strong>GearBox</strong> 9-<br />
10 signal (fully processed), all through Main Outs 1-2. You can directly monitor other <strong>UX8</strong> inputs<br />
by unmuting the corresponding input source in this tab. The <strong>UX8</strong> provides monitoring through the<br />
hardware with zero latency, which is ideal for tracking with multiple sources simultaneously.<br />
Use the drop-down menu at the top to select<br />
the output pair for which you want to mix.<br />
Each output pair can have different mix<br />
settings.<br />
3•9
<strong>Line</strong> 6 <strong>GearBox</strong> <strong>3.5</strong> – Driver Panel & Recording<br />
Mix Controls<br />
Inputs 1 - 8 offer the following controls:<br />
Mute (On/Off)<br />
Monitor Volume (-100dB to +6dB)<br />
Monitor Pan (100% Left - 100% Right)*<br />
Stereo Monitor Meters<br />
* -3dB panning law is applied to the pan control to maintain a constant monitoring level across the<br />
panorama.<br />
Mix Controls for Inputs 9 - 12:<br />
<strong>GearBox</strong> monitoring controls behave identically to Inputs 1- 8, with the exception of the Volume<br />
Level. <strong>GearBox</strong> Sends provide a max monitoring level of 0 dB, whereas the other inputs max at +6<br />
dB, in order to match the 0 dB maximum monitoring level provided by the <strong>GearBox</strong> standalone<br />
application.<br />
Main Monitor Volume<br />
This slider controls the overall monitoring volume for the current output pair. What you hear is<br />
displayed in the adjacent level meter and includes the combination of input sources and computergenerated<br />
signals, such as those assigned to the current output from within your recording software.<br />
Note that computer-generated signals are unaffected by the volume slider. The level meter’s clip LED<br />
graphics light up when the signal reaches 0 dB.<br />
Main Mix vs. Talent Mix<br />
The <strong>UX8</strong>’s two front panel headphone outputs mirror Outs 1-2 and 3-4 respectively. You can use the<br />
monitor controls, for example, to create a “main mix (1-2)” that captures the overall image of the<br />
recording project, while a separate “talent mix (3-4)” can be provided for the musician who is currently<br />
adding a new part, and may need a click track and an ample level of themselves above the rest of the<br />
mix. Additional output pairs 5-6 and 7-8 are available for headphone mixers or sending to a mixer,<br />
other monitors, etc.<br />
3•10
<strong>Line</strong> 6 <strong>GearBox</strong> <strong>3.5</strong> – Driver Panel & Recording<br />
Stereo Pairs<br />
When the “Stereo” checkbox is active in the Inputs & Recording tab for a pair of Inputs, the<br />
representative Inputs in the Ouputs and Monitoring tab will display them as “locked” as a stereo pair.<br />
The lock icon represents<br />
two sources linked as a<br />
stereo pair.<br />
The Pan sliders for a<br />
“locked” stereo pair are<br />
automatically set to<br />
100% Left and Right.<br />
Using tool tips<br />
You can obtain precise value readings for output levels, volume sliders and pan sliders. Do this by<br />
hovering the mouse cursor over the meter or slider you wish to read.<br />
Mac®<br />
<strong>Line</strong> 6 Audio-<strong>MIDI</strong> Settings - Driver Tab<br />
You can launch the <strong>Line</strong> 6 Audio-<strong>MIDI</strong> Devices dialog from within the Mac® System Preferences,<br />
or from the <strong>GearBox</strong> Preferences > Hardware tab. On Mac® systems, all <strong>Line</strong> 6 hardware utilizes the<br />
Mac® OS X® Core Audio driver format, which means that most of your <strong>Line</strong> 6 device settings will<br />
be in the OS X® Audio-<strong>MIDI</strong> Setup dialog. You can get to this dialog from within the <strong>Line</strong> 6 Audio-<br />
<strong>MIDI</strong> Devices dialog (or, from the Finder by going to Applications > Utilities > Audio-<strong>MIDI</strong> Setup).<br />
<strong>TonePort</strong> & GuitarPort – The following example shows <strong>TonePort</strong> UX2 as the selected device, with<br />
the <strong>GearBox</strong> software running. If you have the <strong>TonePort</strong> <strong>UX8</strong>, you’ll have even more options, so be<br />
sure to also read up on the <strong>UX8</strong> specifics...<br />
PODxt - You’ll see some differences with a PODxt device selected – which are noted in the following<br />
descriptions…<br />
3•11
<strong>Line</strong> 6 <strong>GearBox</strong> <strong>3.5</strong> – Driver Panel & Recording<br />
1 2 3 4<br />
5<br />
6<br />
1 – <strong>Line</strong> 6 Device selector: Allows selection of any supported <strong>Line</strong> 6 USB audio device that is<br />
connected. Note that if you have more than one supported device connected, each will be selectable<br />
in this list, regardless if it is in use by the <strong>GearBox</strong> application or not. If your device is not connected<br />
and powered on, it will not appear in this list.<br />
2 – Selected Device Icon: An icon for the selected <strong>Line</strong> 6 Device appears here.<br />
3 – Driver version: Displays the current device’s installed driver version number.<br />
4 - ESN: Displays the current device’s unique Electronic Serial Number.<br />
5 – Run Audio-<strong>MIDI</strong> Setup button: On Mac® systems, Core Audio sound card driver settings are<br />
configured in the OS X® Audio-<strong>MIDI</strong> Settings utility. This button launches this dialog for you (see<br />
following OS X Audio-<strong>MIDI</strong> Settings Dialog section).<br />
6 – Sample Rate Converter Active indicator: <strong>TonePort</strong>s support 44.1 and 48 kHz sample rates natively.<br />
Some <strong>TonePort</strong>s also support 88 and 96 kHz sample rates by way of an internal sample rate converter.<br />
This indicator lights up to show you when this converter is active, which can be any time your audio<br />
software is requesting a different sample rate you’re your device “natively” supports or is “fixed” at.<br />
Also see the Force Driver Format checkbox option. <strong>TonePort</strong> <strong>UX8</strong> supports 44.1, 48, 88.2 and 96 kHz<br />
sample rates natively, meaning that these sample rates are not converted. See the description for the<br />
3•12
<strong>Line</strong> 6 <strong>GearBox</strong> <strong>3.5</strong> – Driver Panel & Recording<br />
Mac Audio-<strong>MIDI</strong> Setup dialog for more about Sample Rates.<br />
Note that <strong>TonePort</strong> ToneDirect Monitoring, which is a separate audio path than what the Mac®<br />
Core Audio system routes to your audio software. ToneDirect Monitoring allows your Gearbox<br />
processed monitor signal to function with very low latency. There are no adjustments necessary for<br />
these monitoring systems. More information on ToneDirect can be found in the next section.<br />
Mac OS X® Audio-<strong>MIDI</strong> Settings Dialog<br />
Note: For <strong>TonePort</strong> <strong>UX8</strong>, please see the following <strong>UX8</strong> Audio-<strong>MIDI</strong> Settings section<br />
5a<br />
5b<br />
5c<br />
5e<br />
5d<br />
5f<br />
5a – System Settings:<br />
• The Default Input and Default Output options allow you to choose the sound card you want<br />
your audio applications to use by default. If you want this to be your <strong>Line</strong> 6 device, select it<br />
here.<br />
• The System Output option allows you to choose which sound card the Mac System Settings are<br />
played through. You may NOT want to choose this to be your <strong>Line</strong> 6 device, since it can be rather<br />
annoying to hear those dings, beeps or frogs croaking at blaring volumes in your headphones<br />
or monitors when working in your audio application! Even better, you can turn these system<br />
settings off completely in the System Preferences > Sounds dialog.<br />
5b – Properties For: Choose your <strong>Line</strong> 6 device here to allow the Audio Input and Audio Output<br />
options display its settings.<br />
5c – Audio Input:<br />
• In the top selector, you will be able to choose your Record Send for your <strong>Line</strong> 6 device to configure<br />
its Format options below. <strong>TonePort</strong> devices will offer Record Send 1-2 and Record Send 3-4 here.<br />
3•13
<strong>Line</strong> 6 <strong>GearBox</strong> <strong>3.5</strong> – Driver Panel & Recording<br />
<strong>TonePort</strong> <strong>UX8</strong> will show several Sends and more options - please see next section. GuitarPort<br />
and PODxt devices will show their Record Send 1-2 here as the only option.<br />
• The Format selectors show you the Sample Rate* and Bit Depth that the <strong>Line</strong> 6 device will is<br />
operating at for recording. The Bit Depth for all <strong>Line</strong> 6 devices is fixed at 24 bit.<br />
*It is recommended that you do not use the Sample Rate selector in the Mac Audio-<strong>MIDI</strong> Setup<br />
dialog to set your sample rate when your recording software is running. Typically, your recording<br />
software will offer a Sample Rate option within its own “Preferences” or “Audio Setup” settings. It is<br />
best to configure the Sample Rate within the recording software, and you will see the device’s sample<br />
rate switch automatically to match it.<br />
5d – Volume sliders (audio input):<br />
Sliders 1 and 2 will adjust the level of the Record Send selected above*.<br />
*It is recommended that you use ONLY the <strong>GearBox</strong> Record Send knob instead of using these sliders<br />
here to set your Record Send Levels for <strong>Line</strong> 6 devices. Adjusting the sliders in this AMS dialog may<br />
result in unexpected levels if adjusted also in <strong>GearBox</strong>.<br />
5e – Audio Output:<br />
• The Format selectors show you the Sample Rate* and Bit Depth that the <strong>Line</strong> 6 device will is<br />
operating at for playback. The Bit Depth for all <strong>Line</strong> 6 devices is fixed at 24 bit.<br />
*It is recommended that you do not use the Sample Rate selector in the Mac Audio-<strong>MIDI</strong> Setup<br />
dialog to set your sample rate when your recording software is running. Typically, your recording<br />
software will offer a Sample Rate option within its own “Preferences” or “Audio Setup” settings. It is<br />
best to configure the Sample Rate within the recording software, and you will see the device’s sample<br />
rate switch automatically to match it.<br />
5f – Volume sliders (audio output):<br />
Sliders 1 and 2 will adjust the playback level coming from your <strong>Line</strong> 6 device*.<br />
*It is recommended that you use the <strong>GearBox</strong> Out To Monitor controls (or the knobs on your <strong>Line</strong><br />
6 hardware) instead of using these sliders here since you may otherwise end up with two controls<br />
affecting your playback volume, which can get rather confusing.<br />
3•14
<strong>Line</strong> 6 <strong>GearBox</strong> <strong>3.5</strong> – Driver Panel & Recording<br />
Mac OS X® Audio-<strong>MIDI</strong> Settings Dialog (<strong>TonePort</strong> <strong>UX8</strong> Only)<br />
5a<br />
5b<br />
5c<br />
5e<br />
5d<br />
5f<br />
5a – System Settings:<br />
• The Default Input and Default Output options allow you to choose the sound card you want<br />
your audio applications to use by default. If you want this to be your <strong>Line</strong> 6 device, select your<br />
<strong>UX8</strong> here.<br />
• The System Output option allows you to choose which sound card the Mac System Settings are<br />
played through. You may NOT want to choose this to be your <strong>Line</strong> 6 device, since it can be rather<br />
annoying to hear those dings, beeps or frogs croaking at blaring volumes in your headphones<br />
or monitors when working in your audio application! Even better, you can turn these system<br />
settings off completely in the System Preferences > Sounds dialog.<br />
5b – Properties For: Choose your <strong>TonePort</strong> <strong>UX8</strong> here to allow the Audio Input and Audio Output<br />
options display its settings.<br />
5c – Audio Input:<br />
• In the top selector, you will be able to choose your Record Send for the <strong>TonePort</strong> <strong>UX8</strong> to<br />
configure its Format options below.<br />
• The Format selectors show you the Sample Rate* and Bit Depth that the <strong>Line</strong> 6 device will is<br />
operating at for recording. The Bit Depth is fixed at 24 bit.<br />
3•15
<strong>Line</strong> 6 <strong>GearBox</strong> <strong>3.5</strong> – Driver Panel & Recording<br />
*It is recommended that you do not use the Sample Rate selector in the Mac Audio-<strong>MIDI</strong> Setup<br />
dialog to set your sample rate when your recording software is running. Typically, your recording<br />
software will offer a Sample Rate option within its own “Preferences” or “Audio Setup” settings. It is<br />
best to configure the Sample Rate within the recording software, and you will see the device’s sample<br />
rate switch automatically to match it.<br />
5d – Volume sliders (audio input):<br />
These sliders 1 - 12 will adjust the level of the Record Send selected above*.<br />
*It is recommended that you use ONLY the <strong>GearBox</strong> Record Send knob instead of using these sliders<br />
here to set your Record Send Levels for <strong>Line</strong> 6 devices. Adjusting the sliders in this AMS dialog may<br />
result in unexpected levels if adjusted also in <strong>GearBox</strong>.<br />
5e – Audio Output:<br />
• The Format selectors show you the Sample Rate* and Bit Depth that the <strong>TonePort</strong> <strong>UX8</strong> is<br />
operating at for playback. The Bit Depth for all <strong>Line</strong> 6 devices is fixed at 24 bit.<br />
*It is recommended that you do not use the Sample Rate selector in the Mac Audio-<strong>MIDI</strong> Setup<br />
dialog to set your sample rate when your recording software is running. Typically, your recording<br />
software will offer a Sample Rate option within its own “Preferences” or “Audio Setup” settings. It is<br />
best to configure the Sample Rate within the recording software, and you will see the device’s sample<br />
rate switch automatically to match it.<br />
5f – Volume sliders (audio output):<br />
Sliders 1 - 8 will adjust the playback level coming from your <strong>Line</strong> 6 device*.<br />
*It is recommended that you use the <strong>GearBox</strong> Out To Monitor controls (or the knobs on your <strong>Line</strong><br />
6 hardware) instead of using these sliders here since you may otherwise end up with two controls<br />
affecting your playback volume, which can get rather confusing.<br />
3•16
<strong>Line</strong> 6 <strong>GearBox</strong> <strong>3.5</strong> – Driver Panel & Recording<br />
<strong>Line</strong> 6 Audio <strong>MIDI</strong> Settings Dialog - Inputs & Recording Tab<br />
1<br />
2<br />
1 – Input Source Select: This is a mirrored control for the Source Select within the <strong>GearBox</strong> application<br />
where it allows you to select which physical input is used on the device. Note that this control is ONLY<br />
selectable when the <strong>GearBox</strong> software is not in use by the current device. When <strong>GearBox</strong> is in use, this<br />
selector remains grayed out, but displays the current Source that is selected within <strong>GearBox</strong>.<br />
When <strong>GearBox</strong> is not launched, this Input Source Select, like the Source Select in the <strong>GearBox</strong><br />
application, offers a list of input options. The options will differ depending on the <strong>Line</strong> 6 device.<br />
<strong>TonePort</strong> UX1/UX2 display the following:<br />
3•17
<strong>Line</strong> 6 <strong>GearBox</strong> <strong>3.5</strong> – Driver Panel & Recording<br />
When <strong>GearBox</strong> is not in use,<br />
the Input Source Select menu is<br />
available. As shown here, <strong>TonePort</strong><br />
devices offer several input Sources<br />
to choose from. The selected Source<br />
is what gets routed to the Device<br />
Sends.<br />
GuitarPort and PODxt devices are always “fixed” to only route their “instrument” 1 /4 input signal<br />
into <strong>GearBox</strong>. When a GuitarPort or PODxt is the selected device, this Input Source Select list offers<br />
only “Instrument” as the source.<br />
2 – Device Sends info box: One line for each <strong>GearBox</strong> Record Send appears here along with a<br />
description for exactly what signal each Send is carrying (see the description above for item #7).<br />
The Device Sends Description then shows<br />
the input Source, and informs you if that<br />
signal is “processed” or not. Since <strong>GearBox</strong><br />
is not running, the signal is unprocessed.<br />
<strong>TonePort</strong> UX1/UX2 will show two Sends (Record 1-2 and Record 3-4)<br />
• Single Tone Source (Mono/Stereo): When the <strong>GearBox</strong> application is not running, Record 1-2<br />
and 3-4 both carry the unprocessed signal. When running <strong>GearBox</strong>, Record 1-2 will carry the<br />
fully <strong>GearBox</strong>-processed signal. For Record 3-4, you can choose between a signal with no posteffects,<br />
and a fully unprocessed signal.<br />
• Dual-Tone Source: If you’ve selected one of the dual input configurations from the input menu,<br />
Record 3-4 will always carry the signal from the second audio source. When <strong>GearBox</strong> is running,<br />
these sends will carry the Tone 2 signal of a Dual-Tone configuration. See the <strong>TonePort</strong> Dual-<br />
Tone Operation section for more about this.<br />
Note: <strong>TonePort</strong> DI and GX can only run in Single-Tone configuration.<br />
GuitarPort will show two Sends (Record 1-2 and Record 3-4). When the <strong>GearBox</strong> application is<br />
not running, Record 1-2 and 3-4 both carry the unprocessed signal from GuitarPort’s input. When<br />
running <strong>GearBox</strong>, Record 1-2 will carry the fully <strong>GearBox</strong> –processed signal, and for Record 3-4 you’ll<br />
have a choice between routing a signal with no post-effects, or a fully unprocessed signal.<br />
3•18
<strong>Line</strong> 6 <strong>GearBox</strong> <strong>3.5</strong> – Driver Panel & Recording<br />
PODxt will show only one Record Send (Record 1-2). The type of signal that is routed to the Record<br />
Send 1-2 is determined by the PODxt Signal Routing option within the Audio Signal Routing dialog<br />
(accessed by the Advanced button within the <strong>Line</strong> 6 Audio-<strong>MIDI</strong> Devices dialog). Note that this<br />
Audio Signal Routing determines this signal routing regardless if <strong>GearBox</strong> is running or not for PODxt<br />
devices. (See the PODxt Audio Signal Routing section for more about this dialog).<br />
<strong>Line</strong> 6 Audio <strong>MIDI</strong> Settings Dialog - Inputs & Recording Tab (<strong>TonePort</strong> <strong>UX8</strong> Only)<br />
1<br />
2<br />
3<br />
4<br />
5<br />
1 – Input Source Select: <strong>TonePort</strong> <strong>UX8</strong> offers 8 individual input sources, each with its own selector<br />
where you can choose which physical input is to be used for each. Input source options are as follows:<br />
Input 1: Instrument 1 or XLR 1 or <strong>Line</strong> 1 or S/PDIF (L)<br />
Input 2: Instrument 2 or XLR 2 or <strong>Line</strong> 2 or S/PDIF (R)<br />
Input 3: XLR 3 or <strong>Line</strong> 3<br />
Input 4: XLR 4 or <strong>Line</strong> 4<br />
Input 5: XLR 5 or <strong>Line</strong> 5<br />
Input 6: XLR 6 or <strong>Line</strong> 6<br />
Input 7: XLR 7 or <strong>Line</strong> 7<br />
Input 8: XLR 8 or <strong>Line</strong> 8<br />
3•19
<strong>Line</strong> 6 <strong>GearBox</strong> <strong>3.5</strong> – Driver Panel & Recording<br />
Using Inputs 1 & 2 with the <strong>GearBox</strong> standalone application<br />
The <strong>GearBox</strong> standalone application works with the <strong>TonePort</strong> <strong>UX8</strong> driver to provide ultra-low latency<br />
via ToneDirect monitoring for Inputs 1 & 2 of the <strong>UX8</strong>, which includes two high-Z Instrument<br />
inputs, two XLR inputs, two <strong>Line</strong> level inputs and stereo S/PDIF input. <strong>GearBox</strong>’s ToneDirect<br />
Monitoring is ideally suited for recording guitar and bass with amp and effects processing, providing<br />
the instantaneous feel necessary for competent performance while tracking.<br />
When <strong>GearBox</strong> is not in use, the Input 1 & input<br />
2 selectors are available. As shown here, <strong>TonePort</strong><br />
<strong>UX8</strong> offers several input Sources to choose from.<br />
The selected Source is what gets routed to the<br />
Device Send.<br />
Stereo Paired Inputs<br />
You can also link inputs into stereo pairs. This affects<br />
hardware monitoring controls in the Outputs &<br />
Monitoring tab (see below).<br />
2 – Device Sends info box: One line for each <strong>GearBox</strong> Record Send appears here along with a<br />
description for exactly what signal each Send is carrying.<br />
The Device Sends Description shows the input<br />
Source, and informs you if that signal is “processed”<br />
or not. In this example, Gearbox is running and is<br />
set to process the Input 1 Source, therefore, you can<br />
record the processed signal by choosing “Send 9-10”<br />
in your recording application.<br />
3 - Restore Defaults - click this button to restore all this tabs settings to their original default values.<br />
4 - Clock Source - Set your preferred <strong>TonePort</strong> <strong>UX8</strong> clock source with this menu. Select S/PDIF to<br />
sync the <strong>UX8</strong> to an external S/PDIF clock source from another device’s digital output. If you are not<br />
connecting anything into <strong>UX8</strong>’s digital S/PDIF input, then keep this set to Internal to use the <strong>UX8</strong>’s<br />
own clock.<br />
3•20
<strong>Line</strong> 6 <strong>GearBox</strong> <strong>3.5</strong> – Driver Panel & Recording<br />
5 - Hardware Meters Show - This selector allows you to choose what the VU meters on the front of<br />
the <strong>UX8</strong> are measuring. Note that these hardware meters function even if the <strong>GearBox</strong> software is<br />
not currently running.<br />
Outputs & Monitoring Tab (<strong>TonePort</strong> <strong>UX8</strong> Only)<br />
Important: Note that the Outputs & Monitoring tab provides control over monitoring levels,<br />
specifically, what you hear coming out of the <strong>UX8</strong>. These controls do not affect Send levels, the<br />
audio that streams into your recording software. In other words, volume and pan levels here are purely<br />
analog, intended for monitoring live input levels (from instruments, mics, etc) and computer output<br />
levels, in order to facilitate the recording process.<br />
3•21
<strong>Line</strong> 6 <strong>GearBox</strong> <strong>3.5</strong> – Driver Panel & Recording<br />
The Outputs & Monitoring tab provides control over hardware monitoring settings, including input<br />
source volume, pan and mute states. You can specify different mix settings for each pair of <strong>UX8</strong> outputs<br />
if you like.<br />
By default, the only sounds that come out of the <strong>UX8</strong> are the computer’s output and <strong>GearBox</strong> 9-<br />
10 signal (fully processed), all through Main Outs 1-2. You can directly monitor other <strong>UX8</strong> inputs<br />
by unmuting the corresponding input source in this tab. The <strong>UX8</strong> provides monitoring through the<br />
hardware with zero latency, which is ideal for tracking with multiple sources simultaneously.<br />
Use the drop-down menu at the top<br />
to select the output pair for which you<br />
want to mix. Each output pair can have<br />
different mix settings.<br />
Mix Controls<br />
Inputs 1 - 8 offer the following controls:<br />
Mute (On/Off)<br />
Monitor Volume (-100dB to +6dB)<br />
Monitor Pan (100% Left - 100% Right)*<br />
Stereo Monitor Meters<br />
* -3dB panning law is applied to the pan control to maintain a constant monitoring level across the<br />
panorama.<br />
Mix Controls for Inputs 9 - 12:<br />
<strong>GearBox</strong> monitoring controls behave identically to Inputs 1- 8, with the exception of the Volume<br />
Level. <strong>GearBox</strong> Sends provide a max monitoring level of 0 dB, whereas the other inputs max at +6<br />
dB, in order to match the 0 dB maximum monitoring level provided by the <strong>GearBox</strong> standalone<br />
application.<br />
3•22
<strong>Line</strong> 6 <strong>GearBox</strong> <strong>3.5</strong> – Driver Panel & Recording<br />
Main Monitor Volume<br />
This slider controls the overall monitoring volume for the current output pair. What you hear is<br />
displayed in the adjacent level meter and includes the combination of input sources and computergenerated<br />
signals, such as those assigned to the current output from within your recording software.<br />
Note that computer-generated signals are unaffected by the volume slider. The level meter’s clip LED<br />
graphics light up when the signal reaches 0 dB.<br />
Main Mix vs. Talent Mix<br />
The <strong>UX8</strong>’s two front panel headphone outputs mirror Outs 1-2 and 3-4 respectively. You can use the<br />
monitor controls, for example, to create a “main mix (1-2)” that captures the overall image of the<br />
recording project, while a separate “talent mix (3-4)” can be provided for the musician who is currently<br />
adding a new part, and may need a click track and an ample level of themselves above the rest of the<br />
mix. Additional output pairs 5-6 and 7-8 are available for headphone mixers or sending to a mixer,<br />
other monitors, etc.<br />
Stereo Pairs<br />
When the “Stereo” checkbox is active in the Inputs & Recording tab for a pair of Inputs, the<br />
representative Inputs in the Ouputs and Monitoring tab will display them as “locked” as a stereo pair.<br />
The lock icon represents two sources linked as a stereo pair.<br />
The Pan sliders for a “locked” stereo pair are automatically set to 100% Left and Right.<br />
Using tool tips<br />
You can obtain precise value readings for output levels, volume sliders and pan sliders. Do this by<br />
hovering the mouse cursor over the meter or slider you wish to read.<br />
3•23
<strong>Line</strong> 6 <strong>GearBox</strong> <strong>3.5</strong> – Driver Panel & Recording<br />
Important Things to Know When Recording<br />
This section will give you some great pointers for using your <strong>Line</strong> 6 Hardware for recording, to help you<br />
get your brain wrapped around all that complex computer stuff your geeky friends talk about at parties.<br />
We’ve got even more info, including setup tips for specific audio programs and system tweaking tips in<br />
our <strong>GearBox</strong> Recording Setup Guide – its available free on the line6.com <strong>GearBox</strong> Online Help page!<br />
Sample Rate and Bit Depth<br />
When you set a sample rate and bit depth (also sometimes called “word length”) in your recording<br />
software, your <strong>Line</strong> 6 software will automatically match these settings. If you want to check to make<br />
sure that everything is going as it should, just perform these steps:<br />
• Configure your recording program’s sample rate settings, and then confirm that your <strong>Line</strong> 6<br />
hardware is running at the correct settings in the <strong>Line</strong> 6 Audio-<strong>MIDI</strong> Devices dialog (Windows)<br />
or in the Audio-<strong>MIDI</strong> Setup dialog (on Mac). It is best to always change the sample rate settings<br />
in your audio software.<br />
• Typically, you can choose the 44,100 sample rate in your audio software for most projects. But if<br />
you have special requirements for your session, then you can alternatively choose 48,000, 88,200<br />
or 96,000 Hz in your audio software and your <strong>Line</strong> 6 device will support any of these rates.<br />
• For the Bit depth, it is typically best choose the 32-bit option in your Windows audio software<br />
and in the <strong>Line</strong> 6 Audio-<strong>MIDI</strong> Devices dialog IF your Windows audio software supports this rate.<br />
If not, then 24-bit is the next best choice. On Mac, choose 24-bit in your recording software.<br />
Avoid using 16 bit unless you have to since it can lower the audio quality.<br />
GuitarPort Tracks Can’t Be Recorded<br />
Attention GuitarPort Online members… Your guitar and/or other input signals (except for Monitor<br />
In) from your <strong>Line</strong> 6 device are the only signals routed to the Record Sends and made available<br />
to recording software. Tracks played via the <strong>GearBox</strong> program’s internal Player will not be routed<br />
to the Recorded Send, cannot be recorded to other programs, and won’t be routed to the S/PDIF<br />
digital outputs for <strong>Line</strong> 6 devices that include those outputs. This restriction on Player audio routing is<br />
required in order for <strong>Line</strong> 6 to protect the copyrights of the musicians and other copyright owners that<br />
have licensed music for use in GuitarPort Online.<br />
3•24
<strong>Line</strong> 6 <strong>GearBox</strong> <strong>3.5</strong> –<strong>GearBox</strong> Standalone Application<br />
<strong>GearBox</strong> Stand-alone Application<br />
Overview<br />
The <strong>GearBox</strong> software is your new Tone Control Central. It gives you visual control, makes it easy<br />
to create, edit and save your Tones, includes plenty of great presets, and connects you directly to<br />
our exclusive online Tone Library of thousands of professionally programmed Tones. <strong>GearBox</strong> can<br />
run alongside your favorite recording software, letting you easily control every detail of your sound<br />
right from your computer during recording. And our additional <strong>GearBox</strong> Online Help documentation<br />
includes step-by-step instruction for using <strong>GearBox</strong> with some of the most popular Windows® and<br />
Mac® recording software, to help make your computer recording experience a great one. <strong>GearBox</strong><br />
even connects you to GuitarPort Online, our exclusive online world for guitarists who want to play<br />
along with the latest and greatest tracks, lessons and licks, covering the greatest guitarists of all time.<br />
Check it out when you’re looking to pick up a few new tricks, or just want to have a great time playing<br />
some tunes.<br />
The <strong>GearBox</strong> software is free for every owner of our <strong>TonePort</strong>, GuitarPort and PODxt recording and<br />
modeling interfaces. Combine that with <strong>Line</strong> 6 Monkey, our world class driver software technology,<br />
options like GuitarPort Online and Model Packs, plus access to the online Tone Library, and it all<br />
adds up to be the world’s most advanced tone system for guitarists. We call the whole shooting match<br />
The <strong>GearBox</strong> Platform. To follow is a tour of the <strong>GearBox</strong> interface - note that the <strong>GearBox</strong> interface<br />
includes different options depending on if you are using <strong>TonePort</strong>, GuitarPort or PODxt hardware.<br />
Click on a number to go to its description…<br />
<strong>GearBox</strong> Controls and Operation<br />
1 2 3 4 5 6 7 8 9 10<br />
23<br />
22<br />
21<br />
11<br />
12<br />
13<br />
14<br />
20<br />
15<br />
19 18 17<br />
16<br />
4•1
<strong>Line</strong> 6 <strong>GearBox</strong> <strong>3.5</strong> –<strong>GearBox</strong> Standalone Application<br />
The above screen shows <strong>GearBox</strong> running with a <strong>TonePort</strong> device in use. There are some differences<br />
when connected to a GuitarPort or PODxt device - look for the mentions of device-specific controls<br />
and behaviors in the descriptions below. Some of the unique GuitarPort and PODxt controls and<br />
behaviors are also called out in following sections. All descriptions that follow are the same for<br />
Windows® or Mac®, unless otherwise noted.<br />
1 – Source Select menu:<br />
<strong>TonePort</strong> UX1, UX2, <strong>UX8</strong>, KB37 – Here is where you choose which physical input(s) you want<br />
to use for the <strong>GearBox</strong> Tone path. Note that <strong>TonePort</strong> devices also offer a Dual-Tone Source option.<br />
See the next Dual-Tone section for more about this.<br />
<strong>TonePort</strong> DI, GX, GuitarPort, PODxt – No Source Selct is shown since these units offer only<br />
one input.<br />
2 - Show/Hide button: Clicking this button collapses or expands the viewable height of the Amp and<br />
Effects controls. It’s useful to collapse these controls if you want to maximize the size of only the lower<br />
Browser window.<br />
3 - Tone Menu: Click here to choose from all saved Tones – when you create and save your own<br />
masterpiece Tones, they’ll appear here too.<br />
4 - Amp Model menu: Choose from all available Amp Models available for your connected device.<br />
Remember, you can add more models with optional Model Packs from the <strong>Line</strong> 6 store!<br />
5 - Cab Model menu: Choose from a huge assortment of speaker cabinets. We’ve pre-chosen cabs to<br />
match up with your selected amp, but you can choose the Cab here independently - a different cab can<br />
make a huge difference on the sound, so try a few different ones!<br />
6 - Tone Options menu: Click this button to do an “A/B” Compare of your settings vs. preset settings,<br />
view or edit the Tone Info, Save the Tone, or Save As to do a copy of the current Tone.<br />
7 - Monitor controls:<br />
• Monitor Volume – the level of whatever input signal you are feeding into <strong>GearBox</strong> (e.g. - your<br />
guitar) – this is independent of the level routed to your Record Send 1-2 as well as the “playback”<br />
level of audio software that is routing its output to your <strong>Line</strong> 6 device.<br />
• Monitor/Clip light – will light up green to indicate your signal, and gets yellow and then red as<br />
the level increases. Red means your signal is too hot (in which case you should turn down your<br />
input source and/or Monitor vol.)<br />
• Mute button – Mutes the monitor signal only.<br />
Note – <strong>GearBox</strong> will not display this Mute button when PODxt is the source device.<br />
4•2
<strong>Line</strong> 6 <strong>GearBox</strong> <strong>3.5</strong> –<strong>GearBox</strong> Standalone Application<br />
• Pan slider – Pans your source input left or right. This affects the signal that is routed to BOTH<br />
your Record Send 1-2 and the Monitor path. Double click on the slider to set it to dead center.<br />
For <strong>TonePort</strong> devices – When using a single Tone Source, these control the Record Send 1-2<br />
Monitor signal path. Send 3-4 has its own set of Monitor controls (accessible in the effects panel<br />
when you click the Send 3-4 icon). If you are in a Dual-Tone Source mode, these controls will affect<br />
the current, visible Tone only.<br />
For <strong>TonePort</strong> <strong>UX8</strong> only – Note that <strong>GearBox</strong>’s record sends are labeled “9-10” and “11-12”.<br />
8 - Out To Hardware controls:<br />
<strong>TonePort</strong> & GuitarPort –<br />
• Volume knob – controls the level of audio routed out the analog <strong>Line</strong> Outs (and headphone out)<br />
of your device. This will affect both your Monitor signal AND the playback signal coming into<br />
your <strong>Line</strong> 6 device from your audio software. It does NOT affect the level of your signal going to<br />
the Record Send 1-2.<br />
• Output Indicator/Clip light – will light up green to indicate your signal, and gets yellow and<br />
then red as the level increases. Red means your signal is too hot and you should reduce all<br />
individual levels and/or the Volume knob.<br />
• Mute <strong>Line</strong> Out button – Mutes all signals routed to the <strong>Line</strong> Outs only (and not your headphone<br />
out), but does not affect the signal routed to the Record Sends. This is very useful when recording<br />
with a Mic since it stops your mic signal from coming out your speakers (to avoid feedback) but<br />
still lets your hear it and everything else through your headphones.<br />
Note – <strong>GearBox</strong> will not display this set of Out To Hardware controls when PODxt is the source<br />
device.<br />
For <strong>TonePort</strong>/GuitarPort devices – These controls affect the Monitor and playback signal paths for<br />
both Record Sends 1-2 and 3-4, or both Tones when using a Dual-Tone Source.<br />
For <strong>TonePort</strong> <strong>UX8</strong> only – Note that <strong>GearBox</strong>’s record sends are labeled “9-10” and “11-12”.<br />
9 - Bypass button:<br />
<strong>TonePort</strong> – will bypass all amp and effects processing for the currently displayed Tone. Just your<br />
“naked”, unprocessed signal will be heard as well as routed to your Record Sends when bypassed.<br />
GuitarPort – will bypass all amp and effects processing. Just your “naked”, unprocessed signal will<br />
be heard as well as routed to your Record Sends when bypassed.<br />
PODxt – will bypass only the amp<br />
10 - Tuner button: Toggles the display of the Guitar Tuner.<br />
11&12 - Effects Show/Hide and On/Off toggles:<br />
• Clicking on the top portion of each of the little “stomp box” icons in this row will toggle the<br />
lower Effects Panel to display that effect’s controls. You can do this independently of switching<br />
the effect itself On/Off. Note that you can use your left or right mouse button to do this.<br />
• Clicking the bottom portion of the stomp box will toggle the effect On and Off.<br />
4•3
<strong>Line</strong> 6 <strong>GearBox</strong> <strong>3.5</strong> –<strong>GearBox</strong> Standalone Application<br />
13 - <strong>GearBox</strong> Record Send and VU Meters:<br />
<strong>TonePort</strong> & GuitarPort – These show the signal level of the <strong>GearBox</strong>-processed audio that is<br />
sent to your recording software. For <strong>UX8</strong>, this send is labeled Send 9-10. For other <strong>TonePort</strong>s, it’s<br />
labeled Send 1-2. This send represents the fully-processed <strong>GearBox</strong> audio signal. To record exactly<br />
what you hear, select this send as your audio input, within your recording application. If the little<br />
clip indicator at the bottom of each meter lights red, turn down the RECORD knob and/or turn<br />
off the +18 button, because you are clipping your audio, which can cause harsh, bad sound for your<br />
recording.<br />
These indicators will light up red when<br />
the signal is clipping.<br />
Note – Gearbox will not display VU Meters when a PODxt is the source device.<br />
14 - Record Send 1-2 controls:<br />
• Record knob – controls the level of your <strong>GearBox</strong> processed Tone that is routed to Record Send<br />
1-2. this will ultimately control the record level into your audio software for any track receiving<br />
this Send 1-2 signal.<br />
• +18 button – Boosts the level of the Record Send – useful if your <strong>GearBox</strong> signal is a weak one<br />
and you need more level to get a good record level.<br />
• Mono button – sums the <strong>GearBox</strong> stereo Tone to a Mono signal for Record Send 1-2 (the same<br />
mono signal is fed to both Send 1 and 2 channels). Useful if you want to record from Send 1 or<br />
2 and ensure it is not one side of a stereo signal.<br />
Note – Gearbox will not display the Mono button when a PODxt is the source device.<br />
15 - USB device connection indicator:<br />
<strong>TonePort</strong> & GuitarPort – This little USB plug icon appears flashing if <strong>GearBox</strong> does not find a<br />
supported <strong>Line</strong> 6 USB device connected to the computer.<br />
PODxt – When <strong>GearBox</strong> is set to use a PODxt source device, a little red PODxt icon is displayed.<br />
If the PODxt device is disconnected or powered off, the icon appears with a question mark.<br />
16 - CPU meter: Shows how much of your computer’s processing power is currently being utilized. If it<br />
reaches the red then you may experience audible dropouts and therefore need to reduce other processes<br />
running, or bypass some <strong>GearBox</strong> effects.<br />
17 - Effects Control display: This panel displays the controls for the selected effect (see # 11 & 12<br />
and #18 for how to choose to show an effect’s controls). For <strong>TonePort</strong> this can also show the Record<br />
Send 3-4 controls.<br />
4•4
<strong>Line</strong> 6 <strong>GearBox</strong> <strong>3.5</strong> –<strong>GearBox</strong> Standalone Application<br />
18 - Effect menu: Offers selection for which effect’s controls are shown in the Effects Control display<br />
area.<br />
19 - Info Bar: Text appears in this bar relating to what your mouse cursor is currently hovering over.<br />
This is a very handy source of tips while using <strong>GearBox</strong> – remember to look here for info while clicking<br />
around!<br />
20 - Browser controls: All button in this row control things that appear in the Browser panel below.<br />
We’ll go into more detail on the browser section separately, which includes the GuitarPort Online<br />
functionality, Player, Tone Locker, and more!<br />
21 - Hardware Meters Show menu:<br />
<strong>TonePort</strong> UX2/KB37 only – allows selection for what signal the VU meters on the <strong>TonePort</strong> UX2<br />
device will measure.<br />
22 - Show/Hide Effects display button: Click this button to collapse or expand the area which shows<br />
the Effects Control display and Record Send 1-2 controls.<br />
For <strong>TonePort</strong> <strong>UX8</strong> only – Note that <strong>UX8</strong> hardware meters are configured in the <strong>Line</strong> 6 Audio-<br />
<strong>MIDI</strong> Devices application, Inputs & Recording tab.<br />
23 - Hum Reducer feature:<br />
<strong>TonePort</strong> & GuitarPort – Use this feature to eliminate that annoying hum that guitars sometime<br />
have, especially when in front of computer monitors. Click the Hum Reducer button to walk<br />
through the use of this feature:<br />
4•5
<strong>Line</strong> 6 <strong>GearBox</strong> <strong>3.5</strong> –<strong>GearBox</strong> Standalone Application<br />
Note 1 – <strong>GearBox</strong> will not display the Hum Reducer options when a PODxt is the source device.<br />
Note 2 – The Hum Reducer is for Instrument Input 1 only. Hum Reducer is not available for Mic, <strong>Line</strong><br />
or Digital input.<br />
<strong>GearBox</strong> with <strong>TonePort</strong> and GuitarPort<br />
Using <strong>GearBox</strong> with a <strong>TonePort</strong> or GuitarPort device gives you access to multiple Record Sends, and<br />
with a <strong>TonePort</strong> UX1/UX2/<strong>UX8</strong>/KB37, you get Dual-Tone operation, bringing out the most out of<br />
<strong>GearBox</strong>!<br />
Note: <strong>TonePort</strong> DI, GX and GuitarPort can only run in Single-Tone configuration.<br />
Pre/Post Record Send<br />
<strong>GearBox</strong> displays an additional Record Send for <strong>TonePort</strong> and GuitarPort devices, which provides<br />
several useful signal routing functions. When you have a single input Source chosen in the Source<br />
Select menu, you’ll see the Send 3-4 icon (labeled Send 11-12 for <strong>UX8</strong>) in the row of the Effects<br />
icons.<br />
Click on this Send icon to show its controls in the panel below.<br />
4•6
<strong>Line</strong> 6 <strong>GearBox</strong> <strong>3.5</strong> –<strong>GearBox</strong> Standalone Application<br />
Select PRE to route an<br />
unprocessed signal to Send 3-4.<br />
Select POST to route a semiprocessed<br />
signal to Send 3-4<br />
(see below).<br />
Record Send 3-4 has its own dedicated set of controls and meters that are equivalent in function to the<br />
Send 1-2 controls of the same name (see the <strong>GearBox</strong> Controls and Operations section). When using<br />
an audio recording software configured to use the ASIO <strong>TonePort</strong> driver (on Windows®) or Core<br />
Audio driver (on Mac®), it is possible to select the <strong>GearBox</strong> Send 1-2 or Send 3-4 independently for<br />
your track inputs for recording.<br />
Please note that the pre/post setting of Record Send 3-4 is not saved within the Tone Preset.<br />
Note – if your audio application is configured to use the <strong>TonePort</strong> WDM driver (on Windows®), you<br />
will only be able to access Send 1-2 in the recording software, and it will carry both <strong>GearBox</strong> Send 1-2<br />
and 3-4 signal paths, pre-mixed into Send 1-2.<br />
Monitoring a <strong>GearBox</strong>-processed tone while recording “Dry”<br />
With <strong>GearBox</strong> Send 3-4, you can send a dry, unprocessed signal to your favorite recording application,<br />
while monitoring a fully <strong>GearBox</strong>-processed tone thru your hardware’s outputs. The Send’s Pre/Post<br />
switch gives you a couple of options:<br />
• In the PRE position, Send 3-4 taps into the audio path before any processing is applied to the<br />
input source, routing a totally dry signal thru the USB port. This of course is useful when using<br />
plug-ins, including the <strong>GearBox</strong> Plug-in, since you can record a pass with a no-compromise,<br />
great feeling tone, without committing any tone shaping to the track (see the ToneDirect<br />
Monitoring section for more info).<br />
• In the POST position, Send 3-4 taps into the audio path right after the EQ, and before any post-<br />
FX are applied. With this setting, you can apply some amp or mic preamp modeling to your signal<br />
before routing it to Send 3-4.<br />
In the POST scenario, you can designate the Modulation, Delay and Reverb FX to be either before<br />
or after Send 3-4 to determine if that effect is processed on the Send 3-4 signal or not. For example,<br />
if you move set a Delay and a Reverb effect both to “Post”, then they are only processed on the signal<br />
sent to Send 1-2, and Send 3-4 is tapping the signal just before these effects. This makes it possible<br />
to monitor Send 1-2 and hear these effects, but then choose Send 3-4 in your audio application and<br />
actually record the signal without them.<br />
For <strong>TonePort</strong> <strong>UX8</strong> only – Note that <strong>GearBox</strong>’s pre/post record send is labeled “11-12”.<br />
4•7
<strong>Line</strong> 6 <strong>GearBox</strong> <strong>3.5</strong> –<strong>GearBox</strong> Standalone Application<br />
The selected effect’s icon moves to the left or right of the<br />
Send 3-4 icon depending on the effect’s Pre/Post setting<br />
Click on an effect to<br />
display its control display<br />
in the Effects panel<br />
Use the Pre/Post toggle<br />
switch<br />
Dual-Tone operation (<strong>TonePort</strong> UX1/UX2/<strong>UX8</strong>/KB37)<br />
These <strong>TonePort</strong> devices are unique in that they give you not one, but two independent Tone paths!<br />
This feature allows you to process two completely independent Tones for two separate inputs at the<br />
same time, such as your guitar plus a microphone, and allows your recording software to record each<br />
in its own separate track.<br />
The “Dual-Tone” inputs are the ones in the<br />
Source Select menu that have the “&” symbol in<br />
the names (e.g. Inst. & Mic 1).<br />
When choosing one of the Dual-Tone input Sources, this displays two distinct Tones within <strong>GearBox</strong>,<br />
allowing you to tweak each source with its own independent Tone settings. When in this Dual-Tone<br />
mode, <strong>GearBox</strong> automatically routes Tone 1 to Record Send 1-2, and Tone 2 to Record Send 3-4,<br />
which allows your recording software to record each into separate tracks.<br />
For <strong>TonePort</strong> <strong>UX8</strong> only – Tone 1 and Tone 2 route to Record Send 9-10 and Record Send 11-12<br />
respectively.<br />
In Dual -Tone mode, the Tone 1 & Tone 2 toggle buttons appear at the top left to allow you to show<br />
the Amp and FX configuration for the respective Tone path. Note that these other controls across<br />
the top of the dialog automatically adjust the currently displayed Tone’s settings. For example, here<br />
the “Inst. & Mic1” Source is selected, and the “Instrument” Source’s Tone path is selected. Several<br />
controls at the top now affect only the Instrument Tone. To adjust the Mic 1 Tone settings, you switch<br />
the Tone 1, 2 toggle button, and then adjust the controls independently.<br />
Tone 1, 2 toggle buttons<br />
Monitor controls affect the currently displayed<br />
Source’s Tone<br />
Selects a Tone preset for current Source’s Tone<br />
Out To Hardware controls affect BOTH Tones<br />
Note that the Send meters and control automatically change when toggling between Tone 1 and Tone<br />
2 Sources as well.<br />
4•8
<strong>Line</strong> 6 <strong>GearBox</strong> <strong>3.5</strong> –<strong>GearBox</strong> Standalone Application<br />
The Send 1-2 controls are shown for Tone 1, and<br />
Send 3-4 controls are shown for Tone 2<br />
Operating <strong>GearBox</strong> in Dual-Tone mode can require some major processing power from your computer<br />
(not surprisingly, twice as much as a single Tone!). Each effect that is powered “on” will use some<br />
processing power – effects that are “off” do not use processing power.<br />
Note that the Hum Reducer is for Instrument Input 1 only. Hum Reducer is not available for Mic, <strong>Line</strong><br />
or Digital input.<br />
<strong>MIDI</strong> Control<br />
When using <strong>GearBox</strong> with <strong>TonePort</strong> and GuitarPort devices, <strong>GearBox</strong> offers options for remote control<br />
of its parameters. You can connect a 3rd party <strong>MIDI</strong> controller device to a <strong>MIDI</strong> port on your computer<br />
and set <strong>GearBox</strong> to receive <strong>MIDI</strong> Continuous Controller (CC) data from it.<br />
<strong>GearBox</strong> is also capable of sending out <strong>MIDI</strong> CC data for the adjustment of the onscreen <strong>GearBox</strong><br />
knobs and switches.<br />
To send out <strong>MIDI</strong> CC data from the<br />
adjustment of <strong>GearBox</strong> onscreen knobs &<br />
switches, check this box.<br />
To control <strong>GearBox</strong> features (such as Wah<br />
or Volume) from a 3rd party hardware <strong>MIDI</strong><br />
controller device or software, choose the <strong>MIDI</strong><br />
Port that your controller unit is connected to.<br />
<strong>GearBox</strong> will then receive <strong>MIDI</strong> CC data on<br />
<strong>MIDI</strong> Channel 1.<br />
4•9
<strong>Line</strong> 6 <strong>GearBox</strong> <strong>3.5</strong> –<strong>GearBox</strong> Standalone Application<br />
<strong>TonePort</strong> UX2/<strong>UX8</strong>/KB37 Controllers<br />
<strong>TonePort</strong> UX2, <strong>UX8</strong> and KB37 include footswitch jacks on the hardware to provide remote control<br />
of <strong>GearBox</strong> parameters, such as Wah and Stomp On/Off. You can assign these controls to any<br />
available <strong>GearBox</strong> parameter or <strong>MIDI</strong> function from the <strong>MIDI</strong> tab of the <strong>Line</strong> 6 Audio-<strong>MIDI</strong> Devices<br />
application.<br />
<strong>TonePort</strong> devices have the following jacks:<br />
UX2<br />
<strong>UX8</strong><br />
KB37<br />
2 footswitch jacks<br />
2 footswitch jacks<br />
1 Expression pedal jack<br />
2 footswitch jacks<br />
1 Expression pedal jack<br />
KB37 Controllers<br />
Additionally, the <strong>TonePort</strong> KB37 features a number of knobs, wheels and buttons which can be<br />
configured to control more <strong>GearBox</strong> and 3rd-party application functions. KB37 ships with a default set<br />
of functions assigned to its controllers, which you can of course re-configure in the <strong>Line</strong> 6 Audio-<strong>MIDI</strong><br />
Devices control panel.<br />
3<br />
4 5 6 7 8 9 10 11 12 13 14 15<br />
2<br />
1<br />
16 17 18 19<br />
KB37 default messages for non-<strong>GearBox</strong> applications<br />
Controller<br />
Default <strong>MIDI</strong>/Control Message<br />
1 - Octave up None (internally shifts note numbers +1 octave; Not Re-assignable)<br />
2 - Octave down None (internally shifts note numbers -1 octave; Not Re-assignable)<br />
3 - Pitch Wheel Pitch Wheel (Not Re-Assignable)<br />
4 - Mod Wheel CC 1 (Modulation Wheel)<br />
5 - Program increment +1<br />
6 - Program decrement - 1<br />
7 - Knob 1 CC 73 (Attack Time)<br />
8 - Knob 2 CC 75 (Decay Time)<br />
4•10
<strong>Line</strong> 6 <strong>GearBox</strong> <strong>3.5</strong> –<strong>GearBox</strong> Standalone Application<br />
Controller<br />
Default <strong>MIDI</strong>/Control Message<br />
9 - Knob 3 CC 72 (Release Time)<br />
10 - Knob 4 CC 91 (Effects | Depth)<br />
11 - Rewind MMC Rewind<br />
12 - Forward MMC Fast Forward<br />
13 - Stop MMC Pause<br />
14 - Play MMC Play/Stop<br />
15 - Record MMC Record/Punch<br />
16 - Button 1 CC 65 (Portamento)<br />
17 - Button 2 CC 127 (Poly On)<br />
18 - Button 3 CC 126 (Mono On)<br />
19 - Button 4 CC 123 (All Notes Off)<br />
Expresion Pedal<br />
CC 11 (Expression)<br />
Footswitch 1 (Sustain) CC 64 (Sustain)<br />
Footswitch 2<br />
MMC Record Punch<br />
To re-map the functions of any of these controllers, go to Edit>Preferences and follow these steps:<br />
Select the Hardware<br />
tab<br />
Click here to display<br />
the <strong>Line</strong> 6 Audio-<br />
<strong>MIDI</strong> Device control<br />
panel<br />
Select the <strong>MIDI</strong> tab<br />
4•11
<strong>Line</strong> 6 <strong>GearBox</strong> <strong>3.5</strong> –<strong>GearBox</strong> Standalone Application<br />
Click here to recall any<br />
Preset or Default Mapings ...Or click here to<br />
create a Custom <strong>MIDI</strong><br />
Mapping<br />
This column populates with all re-assignable controllers<br />
for your device (<strong>TonePort</strong> KB37 shown here)<br />
Name and Save your Custom<br />
Mapping as a Preset<br />
Choose which <strong>GearBox</strong> function<br />
(if any) to assign to controllers<br />
Choose the Type of Control, which<br />
CC/Action it will perform, and the<br />
Switch Mode for your controllers<br />
Click Apply, then OK<br />
when done<br />
Note - For a complete list of <strong>GearBox</strong> <strong>MIDI</strong> - parameter assignments, and more help on Footswitch/<br />
Controller setup, please check out the <strong>GearBox</strong> Online Help.<br />
4•12
<strong>Line</strong> 6 <strong>GearBox</strong> <strong>3.5</strong> –<strong>GearBox</strong> Standalone Application<br />
<strong>GearBox</strong> with PODxt<br />
One difference between PODxt and <strong>TonePort</strong> or GuitarPort devices is that PODxt’s have their own<br />
onboard DSP processing and Memory. You can think of <strong>GearBox</strong> as a computer “user interface” for what<br />
is running on your PODxt device. Because of this hardware architecture, you’ll see a few differences<br />
here for <strong>GearBox</strong> controls with PODxt as compared to <strong>TonePort</strong> or GuitarPort. It also means that the<br />
processing horsepower used to apply all those juicy amp, cab and effects models to your Tone don’t<br />
need to run on your computer’s processor, which should give you a bit more reserve processing power<br />
for other things, like recording software and more complex sessions.<br />
When using PODxt, PODxt Pro or PODxt Live hardware with <strong>GearBox</strong>, the <strong>GearBox</strong> interface offers<br />
a fixed set of Tone options. The Instrument input is “fixed” as the <strong>GearBox</strong> input source, and the input<br />
signal is routed to the Record Send 1-2. Please refer back to the <strong>GearBox</strong> Controls and Operation<br />
section for description of the common interface features. To follow are some details on the items<br />
specific to using <strong>GearBox</strong> with PODxt devices.<br />
<strong>GearBox</strong> Controls and Operation<br />
The <strong>GearBox</strong> interface offers controls for a single Tone path when PODxt is in use. Click on a number<br />
to go to its description…<br />
1 2 3 4 5 6<br />
4•13<br />
7 8<br />
1 - Source Device indicator: A PODxt, PODxt Live or PODxt Pro* icon appears here to indicate<br />
which type of device is now in use by <strong>GearBox</strong> as the Source device.<br />
2 - Tone menu: Select from your set of <strong>GearBox</strong> Tones folder to load one on your PODxt. Note<br />
that you can also select a preset directly on your PODxt hardware and all its settings will appear in<br />
<strong>GearBox</strong>. You can also use the Tone Locker in the <strong>GearBox</strong> Browser panel to access items stored in<br />
your PODxt Memory.<br />
3 - Monitor Volume knob: Adjusts the monitoring level of your Tone - this is independent of the<br />
level routed to your Record Send 1-2 as well as the “playback” level of audio software that is routing<br />
its output back to your PODxt.
<strong>Line</strong> 6 <strong>GearBox</strong> <strong>3.5</strong> –<strong>GearBox</strong> Standalone Application<br />
4 - Pan slider: Pans your source input left or right. This affects the signal that is routed to BOTH your<br />
Record Send 1-2 and the Monitor path. Double click on the slider to set it to dead center.<br />
5 - Amp bypass: Bypasses the current Amp model so that you’ll hear your guitar with no amp processing<br />
(yawn), but you’ll still hear any effects that are powered on. Note that this bypassed signal is also what<br />
is routed to Record Send 1-2.<br />
Note: The Amp Bypass control is an exclusive feature of PODxt devices. Any PODxt tone saved<br />
with the amp bypassed will load in a <strong>TonePort</strong> or GuitarPort device with the amp active.<br />
6 - Tuner button: Toggles the display of the Guitar Tuner.<br />
7, 8 - Record Send 1-2 controls:<br />
• Record knob - controls the level of your PODxt Tone that is routed to Record Send 1-2. This<br />
will ultimately control the record level into your audio software for any track receiving this Send<br />
1-2 signal.<br />
Note that for PODxt devices, there is also further control of what type of signal is routed to<br />
Record Send 1-2 within the Audio Signal Routing dialog. Get to this from the <strong>Line</strong> 6 Audio-<br />
<strong>MIDI</strong> Devices control panel – read more about it in this section.<br />
• +18 button - Boosts the level of the Record Send – useful if your signal is a weak one and you<br />
need more level to get a good record level.<br />
PODxt <strong>MIDI</strong> control<br />
For PODxt, PODxt Pro and PODxt Live - <strong>MIDI</strong> control options are found on the device itself - you<br />
can connect <strong>MIDI</strong> cables directly to your PODxt and then dial up the <strong>MIDI</strong> settings on the PODxt’s<br />
display panel. Please refer to your PODxt Pilot’s Handbook for all the details on <strong>MIDI</strong> control.<br />
Using PODxt’s <strong>MIDI</strong> control features, you can remotely control most parameters on your PODxt<br />
device and hear them in real time. Likewise, PODxt can transmit <strong>MIDI</strong> CC data back out its <strong>MIDI</strong><br />
Out when you adjust its knobs and switches. This interaction all takes place between PODxt and your<br />
<strong>MIDI</strong> device, without <strong>GearBox</strong> needing to be involved at all. When your PODxt is also connected<br />
to your computer and you are using it with <strong>GearBox</strong>, you will see the respective onscreen <strong>GearBox</strong><br />
controls also automatically adjust when you are controlling PODxt remotely. Again, just think of<br />
Gearbox as a computer “user interface” for what is running on your PODxt hardware.<br />
4•14
<strong>Line</strong> 6 <strong>GearBox</strong> <strong>3.5</strong> –<strong>GearBox</strong> Standalone Application<br />
How To...<br />
Basic Operation..................................................................................... 4•16<br />
How to turn <strong>GearBox</strong>’s software knobs......................................................................... 4•16<br />
How to fine-tune <strong>GearBox</strong>’s knobs and Model or Tone menus.................................... 4•16<br />
How to show an effect’s controls without turning on an effect.................................... 4•17<br />
How to show/hide all Tone controls............................................................................. 4•17<br />
How to show/hide the Browser..................................................................................... 4•17<br />
How to show/hide the Effect control panel.................................................................. 4•17<br />
How to resize the <strong>GearBox</strong> program window............................................................... 4•17<br />
Use the Tuner................................................................................................................ 4•18<br />
Metronome Tips............................................................................................................ 4•19<br />
Change and Save Tones......................................................................... 4•21<br />
How to initialize a Tone................................................................................................ 4•21<br />
How to save a Tone....................................................................................................... 4•22<br />
How to change the factory Preset Tones....................................................................... 4•22<br />
How to set the De-Esser................................................................................................ 4•23<br />
How to use the Wah and Volume effects...................................................................... 4•23<br />
Hardware setup..................................................................................... 4•24<br />
How to select hardware for <strong>GearBox</strong> to use.................................................................. 4•24<br />
How to select your Preferred Audio Device................................................................. 4•25<br />
How to connect your Hardware to a guitar amp........................................................... 4•25<br />
Stay Up To Date..................................................................................... 4•26<br />
How to check the versions of <strong>GearBox</strong>, <strong>Line</strong> 6 hardware driver & firmware,<br />
and get updates.............................................................................................................. 4•26<br />
How to register your <strong>Line</strong> 6 Hardware purchase........................................................... 4•26<br />
How to purchase Model Packs...................................................................................... 4•26<br />
How to use your Model Packs with <strong>GearBox</strong>............................................................... 4•27<br />
GuitarPort Online & Player Operation............................................... 4•28<br />
How to adjust the volume balance between your guitar and the Track....................... 4•28<br />
How to connect to the Internet.................................................................................... 4•28<br />
How to disable Download Accelerators........................................................................ 4•29<br />
How to find FAQs......................................................................................................... 4•29<br />
How to find <strong>GearBox</strong> Tone and GuitarPort Online Track files on your hard disk...... 4•29<br />
How to join GuitarPort Online.................................................................................... 4•30<br />
How to load an MP3, WAV or AIFF file....................................................................... 4•31<br />
How to load a Track from an Audio CD....................................................................... 4•31<br />
How to load a Track file from GuitarPort Online......................................................... 4•34<br />
4•15
<strong>Line</strong> 6 <strong>GearBox</strong> <strong>3.5</strong> –<strong>GearBox</strong> Standalone Application<br />
How to load a Track file from your hard disk................................................................ 4•34<br />
How to load GuitarPort’s Tutorial Track...................................................................... 4•35<br />
How to prevent GuitarPort Online from trying to connect to the Internet................ 4•35<br />
How to set the Loop start and end points..................................................................... 4•36<br />
How to share your Tones with other GuitarPort users................................................. 4•36<br />
How to show/hide all Tone controls............................................................................. 4•37<br />
How to show/hide the browser...................................................................................... 4•37<br />
How to show/hide the effect control panel................................................................... 4•37<br />
How to show/hide the Track sections display............................................................... 4•38<br />
Basic Operation<br />
How to turn <strong>GearBox</strong>’s software knobs<br />
• Click your mouse anywhere on the knob (Windows® users, you’ll be using your left mouse<br />
button for this).<br />
• While continuing to hold the mouse button, drag the mouse up and down.<br />
• Do not drag your mouse in a circular turning motion.<br />
Also, check out the details on fine-tuning knob and other settings…<br />
You can double-click many knobs such as Pan, Record, Monitor, Amp Model knobs and the Out To<br />
Hardware volume knob to re-set them to their default settings.<br />
p Return to How To Topics<br />
How to fine-tune <strong>GearBox</strong>’s knobs and Model or Tone menus<br />
You can fine-tune the setting of most of <strong>GearBox</strong>’s on-screen knobs as well as the Model and Tone<br />
menus.<br />
For knobs:<br />
• Click the left button of your mouse anywhere on the knob or other control.<br />
• Use your keyboard’s left/right arrows to jump big steps. The up/down arrows fine-tune.<br />
• Or, use your number keypad’s / and * for big jumps and + and - to fine-tune.<br />
For Model and Tone menus:<br />
• Your keyboard’s up/down arrows select items in the menu once you’ve clicked on the menu to<br />
select it.<br />
p Return to How To Topics<br />
4•16
<strong>Line</strong> 6 <strong>GearBox</strong> <strong>3.5</strong> –<strong>GearBox</strong> Standalone Application<br />
How to show an effect’s controls without turning on an effect<br />
To see an effect’s controls without turning it on, click on the top portion of the effect’s “stomp box”<br />
icon. (Click directly on the On/Off portion of the icon to toggle the effect On/Off). Windows® users<br />
can also right-click anywhere on the icon to show its controls. Mac® users can control-click.<br />
p Return to How To Topics<br />
How to show/hide all Tone controls<br />
Click the Collapse/Expand arrow button to the left of the Tone menu at the top left of the<br />
<strong>GearBox</strong> program’s window to show/hide the Amp and Effects controls in one click. Note that this is<br />
independent of the Browser window, allowing you to keep the Browser window’s contents visible and<br />
toggle your Tone controls to be shown or hidden as you need them. There are also separate show/hide<br />
arrows for the Effects section and the Browser.<br />
p Return to How To Topics<br />
How to show/hide the Browser<br />
The bottom portion of the <strong>GearBox</strong> window, where the GuitarPort Online content and other<br />
items are shown, is called the Browser. Click the arrow button at the top left side of it, to the left<br />
of the Back/Fwd arrow buttons, to show/hide the Browser. There are also separate show/hide arrows<br />
for showing/hiding the Amp and Effects controls together individually, or you can click the top-most<br />
arrow button to show/hide the Amp and Effects in one motion.<br />
p Return to How To Topics<br />
How to show/hide the Effect control panel<br />
It can be handy to hide the Effects’ details when you don’t need to fine-tune them and want more<br />
space available to view items in the Browser. Click the arrow button at the left side of the Effects area<br />
to show/hide the Effects control panel.<br />
There are also separate show/hide arrows for showing/hiding the Amp and Effects controls together<br />
individually, or you can click the top-most arrow button to show/hide the Amp and Effects in one<br />
motion.<br />
p Return to How To Topics<br />
How to resize the <strong>GearBox</strong> program window<br />
The width of the <strong>GearBox</strong> window cannot be changed. However, when the Browser is expanded. The<br />
height of the main Gearbox windows can be increased to allow the Browser to take as much vertical<br />
space as you have available on your computer’s display.<br />
On Windows® - When the main <strong>GearBox</strong> window is not maximized (and when the Browser is<br />
expanded), you can click and hold the top or bottom edge of the main <strong>GearBox</strong> window and drag to<br />
make it taller or shorter. You can also click the maximizing icon (at the top right edge of the program<br />
window’s title bar) to maximize its vertical size.<br />
4•17
<strong>Line</strong> 6 <strong>GearBox</strong> <strong>3.5</strong> –<strong>GearBox</strong> Standalone Application<br />
On Mac® – When the Browser is expanded, you can click on the bottom right corner of the main<br />
<strong>GearBox</strong> windows and drag to resize it vertically.<br />
The Show/Hide “arrow” buttons work in conjunction with the show/hide arrows for the Effects,<br />
Browser and Track sections display to allow you to show/hide portions of the GuitarPort controls and<br />
maximize the space available for the Browser to display information.<br />
p Return to How To Topics<br />
Use the Tuner<br />
Click the button at the top right of the <strong>GearBox</strong> interface to display the Tuners tuner. You can<br />
then play an open single string on your guitar (or bass guitar), and the display on the right side of the<br />
tuner will show you which note that string is currently tuned to. The large meter in the tuner shows<br />
you whether the string is sharp or flat relative to that note. When the needle is pointing anywhere<br />
on the left side of the meter, your string is flat and needs to be tuned up. When the needle is pointing<br />
anywhere on the right side of the meter, your string is sharp and needs to be tuned down. The Mute/<br />
Bypass switch lets you choose whether your guitar will be muted while tuning, or if you will hear it with<br />
amp/cab/effect processing bypassed.<br />
The Tuner’s Reference control tells the Tuner what to tune to. 440Hz is the standard reference value<br />
for A and is generally used for tuning reference. Unless you have a particular need to adjust the Tuner’s<br />
reference, you probably want to stick with the standard 440Hz setting for this control.<br />
The standard tuning for guitar is, from the largest string to the smallest, E-A-D-G-B-E. Other tunings<br />
are also sometimes used. For instance, “Drop-D” tuning is accomplished by tuning the biggest string<br />
down to D instead of E. The table below provides a number of alternate tunings for you to try. Tunings<br />
are listed on the left. Columns labeled String 6 (the fattest string) to String 1 (the thinnest string) tell<br />
you the pitch to which you need to tune that string:<br />
Tuning String 6 String 5 String 4 String 3 String 2 String 1<br />
Standard E A D G B E<br />
Down 1 Half Step Eb Ab Db Gb Bb Eb<br />
Down 2 Half Steps D G C F A D<br />
Down 3 Half Steps Db Gb B E Ab Db<br />
Down 4 Half Steps C F Bb Eb G C<br />
Down 5 Half Steps Bb Eb Ab Db F Bb<br />
Drop D D A D G B E<br />
Drop Db Db Ab Db Gb Bb Eb<br />
Drop A A E A D Gb B<br />
Drop B B Gb B E Ab Db<br />
Drop C C G C F A D<br />
Open E E B E Ab B E<br />
Open E7 E B D Ab B E<br />
Open G D G D G B D<br />
Open D D A D Gb A D<br />
Open A E A Db E A E<br />
4•18
<strong>Line</strong> 6 <strong>GearBox</strong> <strong>3.5</strong> –<strong>GearBox</strong> Standalone Application<br />
Tuning String 6 String 5 String 4 String 3 String 2 String 1<br />
DADGAD D A D G A D<br />
Note: All half-steps use flats to match the chromatic tuner.<br />
p Return to How To Topics<br />
Metronome Tips<br />
The Metronome provides a simple “beat sequencer” you can use to practice your timing. To use the<br />
metronome, press the Metronome button above the Browser. The metronome will then be displayed<br />
within the Browser panel.<br />
Metronome Controls<br />
• Speed - The metronome’s tempo is controlled by the Speed knob and text box on the left and is<br />
measured in beats-per-minute. For fine tuning, click the text box and drag it or just double click<br />
on the text box and manually enter the speed you want.<br />
• Volume - The metronome’s monitor volume is controlled by the Volume knob. The metronome<br />
will not be sent to the digital out of GuitarPort. So you can Record Digitally without recording<br />
the metronome. So turn it up!<br />
• Start/Stop - The Start/Stop switch will turn metronome play on and off.<br />
4•19
<strong>Line</strong> 6 <strong>GearBox</strong> <strong>3.5</strong> –<strong>GearBox</strong> Standalone Application<br />
Presets<br />
Presets allow you to instantly play along with a variety of patterns.<br />
• Style - <strong>GearBox</strong> comes with several preset drum sequences available - just click on the “STYLE”<br />
menu and select the one you want. If you can’t find what you need, you can build it with the<br />
“beat sequencer”.<br />
• Saving - The last modified sequence will be automatically saved as “Custom”, but you may want<br />
to click the “Save” button and give your percussive creation a name. This also keeps you from<br />
overwriting it later by modifying another sequence. If you get bored of one of your creations,<br />
just load it up from the “STYLE” menu and press the “Delete” button. You can not overwrite or<br />
delete the original presets.<br />
Building a Beat<br />
If you don’t find a pattern you like, you can customize your own.<br />
4•20
<strong>Line</strong> 6 <strong>GearBox</strong> <strong>3.5</strong> –<strong>GearBox</strong> Standalone Application<br />
• Beat Slider - The Beat Slider indicates how many beats are played before the loop repeats itself.<br />
Every tick mark is one half-beat. Two half-beats make one beat, so the numbers below the tick<br />
marks indicate the total number of whole beats played per loop. You can have a maximum of 8<br />
beats or 16 half-beats or a minimum of 1 half-beat to every loop.<br />
Now comes the fun part - making the drum sequence. Each row in the matrix beneath the beat slider is<br />
a separate percussion sample and each column is a beat. To sound a drum sample on a particular beat,<br />
just click the button where the percussion row meats the beat you want. Enabled beats appear red with<br />
a small circle while disabled beats are blue. You can make modifications to the sequence while running<br />
the metronome - just click the Start switch to get it going. The light will sit over the currently playing<br />
beat.<br />
p Return to How To Topics<br />
Change and Save Tones<br />
How to initialize a Tone<br />
Select Basic Guitar, Bass, or Vocal Tone from the Tone menu at the top left of the <strong>GearBox</strong> program’s<br />
window to call up a Tone we’ve included as a basic starting place for use when you’re creating your own<br />
Tones (hence the name “Basic Tone”).<br />
All the effects have basic sounds programmed so they’re ready to go if you turn them on. This Tone is,<br />
of course, completely customizable by you, so you can turn it into whatever you want.<br />
Saving the Basic Tone - Once you’ve made alterations to this basic Tone, you can then choose Save<br />
Tone from <strong>GearBox</strong>’s File menu if you’d like to have your changes replace the Basic Tone. Or...<br />
Save As - Choose Save Tone As from <strong>GearBox</strong>’s File menu if you’d like to leave the Basic Tone as<br />
it was, and save the new setting you’ve created as a new Tone. You’ll then be given a dialog to name<br />
the Tone, and provide additional information to categorize the Tone if you like.<br />
4•21
<strong>Line</strong> 6 <strong>GearBox</strong> <strong>3.5</strong> –<strong>GearBox</strong> Standalone Application<br />
p Return to How To Topics<br />
How to save a Tone<br />
You can create, edit and save your own Tones any time you like. A Tone includes your Guitar or Bass<br />
Amp & Cab, Preamp, and Effect Model selections and their settings. The yellow Tone menu at the top<br />
left of the <strong>GearBox</strong> program’s window shows which Tone is currently selected and will also give you<br />
access to the new Tones you save.<br />
If the Tone name is shown in italics in the Tone menu as shown above, it has been altered versus the<br />
saved version of the Tone. If the Tone name is shown without italics, the Tone has NOT been altered<br />
versus the saved version of the Tone. Once you’ve altered a Tone, if you want to keep that altered<br />
version you’ll need to decide whether you want to Save your Tone or Save As, as described below.<br />
Save Tone – If you select Save Tone from <strong>GearBox</strong>’s drop down menu, your current settings will<br />
replace the Tone whose name was shown in italics in the Tone Menu. The old version of the Tone<br />
will be erased and replaced by this new Tone, which will now be available from the Tone menu<br />
whenever you want it.<br />
Save Tone As – If you select Save Tone As from <strong>GearBox</strong>’s drop down menu, your current settings<br />
will be stored as a brand new Tone. The Tone whose name was shown in italics in the Tone Menu<br />
will not be affected. The new Tone you create will be added to the Tone menu so you can call it up<br />
again in the future whenever you want it. To Save As:<br />
• From <strong>GearBox</strong>’s drop down menu, select Save Tone As. You’ll be able to name your Tone and<br />
save descriptive information.<br />
• Click the Browse button at the top of the Save Tone As dialog box if you want to choose a<br />
different location to save this Tone, or you want to create a new folder for storing Tones in.<br />
Tones must be stored within <strong>GearBox</strong>’s Tones folder in order for them to be accessible from the<br />
<strong>GearBox</strong> Tone menu.<br />
• Click on the Save button to finish saving your new Tone.<br />
p Return to How To Topics<br />
How to change the factory Preset Tones<br />
If you want to tweak one of the factory Preset Tones, all you have to do is:<br />
• Select a Tone from the Preset Folder in the Tones menu.<br />
• Make the changes you want.<br />
• From the File menu, select Save to update the Preset Tone with your changes.<br />
• To save your new Tone without replacing the Preset Tone, choose Save As instead.<br />
p Return to How To Topics<br />
4•22
<strong>Line</strong> 6 <strong>GearBox</strong> <strong>3.5</strong> –<strong>GearBox</strong> Standalone Application<br />
How to set the De-Esser<br />
The Female and Male De-esser Stomp effects are available in <strong>GearBox</strong> only when used with <strong>TonePort</strong><br />
devices.<br />
A de-esser is an audio tool designed to reduce sibilance (Sss and Shh sounds) from vocals. It does<br />
this by “listening” for audio energy focused at a selected FREQUENCY (the frequency where the<br />
objectionable part of the Sss and Shh sounds are occurring). When it hears high level audio at and<br />
around this frequency, it quickly ducks the volume by the AMOUNT you choose, effectively reducing<br />
the volume of Sss and Ssh sounds that get recorded.<br />
To use the De-Esser appropriately, try first recording a test vocal track without it. If you hear more Sss<br />
and Shh sounds that you would like, try adding a band of EQ to that recorded track in your recording<br />
program. Set that EQ to provide a bandpass with a narrow width or Q, and set it to cut quite a bit,<br />
maybe something like -20dB. Now set the frequency for that band of EQ to one of the frequency points<br />
available from <strong>GearBox</strong>’s De-Esser, and playback the recorded track, switching back and forth between<br />
enabling and bypassing the EQ to hear the results. Try different frequencies until you find the one that<br />
seems to have the most effect on the Sss and Shh sounds, then disable that EQ. Use that frequency<br />
setting in <strong>GearBox</strong>’s De-Esser, set the AMOUNT knob to a medium setting, and record another test<br />
track. If all has gone well, you should hear that your Sss and Ssh sounds are being reduced, and you can<br />
then further adjust the AMOUNT knob as needed.<br />
See the Model Gallery for specifics of the Female De-Esser and Male De-Esser Models.<br />
p Return to How To Topics<br />
How to use the Wah and Volume effects<br />
<strong>GearBox</strong>’s Wah and Volume effects can be controlled via <strong>MIDI</strong> using a hardware controller or messages<br />
from <strong>MIDI</strong> software. See the <strong>GearBox</strong> Online Help page of the <strong>Line</strong> 6 web site to learn more about<br />
setting up <strong>MIDI</strong> control. The Wah effects can also be used without a <strong>MIDI</strong> controller for a “parked<br />
wah” sound: just turn the Wah effect on, and set its Position knob to get the sound you like.<br />
p Return to How To Topics<br />
4•23
<strong>Line</strong> 6 <strong>GearBox</strong> <strong>3.5</strong> –<strong>GearBox</strong> Standalone Application<br />
Hardware setup<br />
How to select hardware for <strong>GearBox</strong> to use<br />
<strong>GearBox</strong> software can be used with <strong>TonePort</strong> GX, DI, UX1, UX2, <strong>UX8</strong>, KB37, GuitarPort, PODxt,<br />
PODxt Live, or PODxt Pro* hardware. When you start <strong>GearBox</strong>, it automatically looks for the <strong>Line</strong><br />
6 device connected to your computer. If <strong>GearBox</strong> cannot detect your <strong>Line</strong> 6 device at startup, it will<br />
show a ‘No Hardware Found’ message, and ask you to choose what <strong>Line</strong> 6 device to configure for.<br />
You can also select use <strong>GearBox</strong>’s Preferences to set how it will configure itself for your <strong>Line</strong> 6 hardware.<br />
Choose Preferences from <strong>GearBox</strong>’s Edit menu (Windows®) or <strong>GearBox</strong> menu (Mac®) and select the<br />
Hardware tab:<br />
If your <strong>Line</strong> 6 hardware is connected to your computer and it’s not available from the “Launch <strong>GearBox</strong><br />
using:” menu there, there is a USB connection error. It is specifically recommended to always connect<br />
your <strong>Line</strong> 6 device directly to your computer’s USB port, and not into a USB hub. USB hubs can<br />
4•24
<strong>Line</strong> 6 <strong>GearBox</strong> <strong>3.5</strong> –<strong>GearBox</strong> Standalone Application<br />
sometimes cause communication errors with USB audio devices.<br />
* Note – On Windows® systems, it is not recommended that you connect both a PODxt and PODxt<br />
Pro unit to the computer at the same time. These two specific <strong>Line</strong> 6 devices utilize a common device<br />
driver, and only one can be initialized at a time.<br />
p Return to How To Topics<br />
How to select your Preferred Audio Device<br />
See the Sound Cards and Sound Issues section of this guide to learn how to set your <strong>Line</strong> 6 device or<br />
some other soundcard as your Preferred Audio Device in Windows® or Mac®.<br />
p Return to How To Topics<br />
How to connect your Hardware to a guitar amp<br />
We get this one a lot – Many <strong>Line</strong> 6 users want to know how to physically connect their hardware to<br />
a guitar amp, because they think it will sound better that way. In fact, the opposite is true: Because the<br />
audio signal we provide for direct monitoring features a virtual amp emulation that’s optimized for fullrange<br />
systems, the results you’ll get when using a guitar amp will be less than ideal, due to the limited<br />
range of guitar speakers.<br />
If a guitar amp is your only monitoring solution, following are a few pointers to help you get the most<br />
out this connection:<br />
If your amp has an effect loop, plugging into the effect return is the preferred connection, for 2<br />
reasons:<br />
• You are bypassing the preamp’s tone stack, which tends to color the signal in an undesirable<br />
fashion.<br />
• Your <strong>Line</strong> 6 Hardware generally puts out a line-level signal, which is generally too hot for the<br />
guitar input of your amp.<br />
If your amp has no effect loop, then plug into the front input, following these steps:<br />
• Place all your tone controls at the 12 O’clock position.<br />
• Turn your amp’s Drive or Volume setting all the way to zero. If your amp has a Master Volume,<br />
place that control at 12 O’clock or below.<br />
• Plug in your hardware, and slowly bring up the Drive until you hear a satisfactory level of volume,<br />
being careful not to overdrive the input.<br />
You can also try disabling cabinet modeling, by selecting No Cab in <strong>GearBox</strong>’s Cabinet menu, to<br />
further enhance your tonal experience.<br />
PODxt (PODxt PRO, PODxt Live) <strong>User</strong>s: Your device features an output setup menu that optimizes<br />
the output for different monitoring systems, including the front end or the loop of a guitar amp. Please<br />
refer to your PODxt <strong>Manual</strong> for more information.<br />
p Return to How To Topics<br />
4•25
<strong>Line</strong> 6 <strong>GearBox</strong> <strong>3.5</strong> –<strong>GearBox</strong> Standalone Application<br />
Stay Up To Date<br />
How to check the versions of <strong>GearBox</strong>, <strong>Line</strong> 6 hardware driver & firmware, and get<br />
updates<br />
To easily see what version of <strong>GearBox</strong> software you are using, just go the Help menu and choose About<br />
<strong>GearBox</strong>. This also lists the credits for the creation of this software.<br />
To check for any available updates for <strong>GearBox</strong> or your <strong>Line</strong> 6 Gear…with your <strong>Line</strong> 6 hardware USB<br />
cable connected, and with your computer’s Internet connection active, launch <strong>Line</strong> 6 Monkey from<br />
<strong>GearBox</strong>’s Help menu. Don’t forget to check out all those additional items available for you in the<br />
Optional Add-Ons tab of <strong>Line</strong> 6 Monkey!<br />
p Return to How To Topics<br />
How to register your <strong>Line</strong> 6 Hardware purchase<br />
It’s important to register your <strong>Line</strong> 6 hardware so that you can obtain customer support and stay<br />
informed about the latest new products and Add-Ons. Visit the <strong>Line</strong> 6 web site Support section and<br />
select the Register Gear option there.<br />
p Return to How To Topics<br />
How to purchase Model Packs<br />
Model Packs are additional sets of amp, cab and/or effects that you can purchase to expand your Tone<br />
possibilities for your <strong>Line</strong> 6 device! You can purchase, install and authorize Model Packs using <strong>Line</strong>6<br />
Monkey online – you don’t even need to get out of your chair! With your <strong>Line</strong> 6 device connected,<br />
just launch <strong>Line</strong> 6 Monkey and go to the Optional Add-Ons tab and see what’s available for your<br />
<strong>Line</strong> 6 hardware. Follow the steps to easily purchase and download Add-Ons and start using them in<br />
minutes.<br />
You can launch the <strong>Line</strong> 6 Monkey program from the <strong>GearBox</strong> Help menu by choosing Update &<br />
Configure with <strong>Line</strong> 6 Monkey.<br />
Alternatively, you can launch <strong>Line</strong> 6 Monkey directly by going to:<br />
• Windows® - Start Menu / Programs / <strong>Line</strong> 6 / Tools / <strong>Line</strong> 6 Monkey<br />
• Mac® - Finder / Applications / <strong>Line</strong> 6 / <strong>Line</strong> 6 Monkey<br />
p Return to How To Topics<br />
4•26
<strong>Line</strong> 6 <strong>GearBox</strong> <strong>3.5</strong> –<strong>GearBox</strong> Standalone Application<br />
How to use your Model Packs with <strong>GearBox</strong><br />
Once you’ve purchased and authorized your Model Packs, simply restart <strong>GearBox</strong> with your <strong>Line</strong> 6<br />
hardware connected and you’ll see the new models available within the <strong>GearBox</strong>.<br />
The Metal Shop, Classic Collection & Bass Expansion pack models will appear under the AMP<br />
MODEL drop down menu with either an MS, CC or BX prefix added to the start of their names.<br />
The FX Junkie pack models will be spread out among Stomps, Mods, and Delays and will be preceded<br />
by an FX.<br />
The Power Pack is included as a standard feature set on PODxt family devices, and is an optional<br />
upgrade on <strong>TonePort</strong>/GuitarPort. Power Pack models will not have any special prefix, but they will<br />
appear under AMP MODEL, Stomps, Mods, Delays, and Verbs.<br />
4•27
<strong>Line</strong> 6 <strong>GearBox</strong> <strong>3.5</strong> –<strong>GearBox</strong> Standalone Application<br />
For more info on Model Packs, please check out the Model Pack Handbooks.<br />
p Return to How To Topics<br />
GuitarPort Online & Player Operation<br />
How to adjust the volume balance between your guitar and the Track<br />
Use the Track Level slider under the Player button above the Browser to set the level for the current<br />
Track playback…<br />
…and use the Volume knob on the amp panel to set the level of your guitar signal<br />
More tips…<br />
• Guitar still too quiet versus your Track? Try Guitar too quiet in the Troubleshooting section.<br />
• For Track Level problems, see Track Level issues Troubleshooting.<br />
• Getting distortion or clipping as you try to make these adjustments? See Noise and Distortion<br />
troubleshooting.<br />
p Return to How To Topics<br />
How to connect to the Internet<br />
You need an Internet connection to use the GuitarPort Online features of <strong>GearBox</strong>. If you do not<br />
already have an Internet connection, you will need to contact an ISP (Internet Service Provider)<br />
and purchase an Internet access plan from them. We recommend a “broadband” connection such as<br />
DSL, ISDN or cable modem for use with GuitarPort Online. LAN (Local Area Network) connections<br />
such as many businesses have also should work well with GuitarPort Online (you can tell the boss<br />
you’re doing “research”!). You can also use a “dial-up” connection, but these are generally slower and<br />
downloading Tracks from GuitarPort Online will take some time over a dial-up connection.<br />
Note – you will need to enable Cookies in your Internet Browser software to successfully connect to<br />
GuitarPort Online.<br />
4•28
<strong>Line</strong> 6 <strong>GearBox</strong> <strong>3.5</strong> –<strong>GearBox</strong> Standalone Application<br />
p Return to How To Topics<br />
How to disable Download Accelerators<br />
Please see the troubleshooting topic for Download Errors – Download Accelerators.<br />
p Return to How To Topics<br />
How to find FAQs<br />
For the latest Frequently Asked Questions and up-to-the-minute support information, please visit the<br />
<strong>GearBox</strong> Online Help page of the <strong>Line</strong> 6 website. You can also go to the <strong>Line</strong>6.com web site directly,<br />
navigate to the FAQTRAQ system within the Support section and search for information on all <strong>Line</strong><br />
6 products!<br />
p Return to How To Topics<br />
How to find <strong>GearBox</strong> Tone and GuitarPort Online Track files on your hard disk<br />
<strong>GearBox</strong> stores Tones and GuitarPort Online Tracks as files on your hard disk. By default, the <strong>GearBox</strong><br />
installer creates a <strong>GearBox</strong> folder and stores all your Tone files in this location:<br />
Windows® - My Documents\<strong>Line</strong> 6\Tones\<strong>GearBox</strong><br />
Mac® – Documents/<strong>Line</strong> 6/Tones/<strong>GearBox</strong><br />
Tones must be stored in this <strong>GearBox</strong> folder to appear in the Tone menu at the top left of the <strong>GearBox</strong><br />
window, and to appear in the Tone Locker. You can organize your Tones without leaving <strong>GearBox</strong> by<br />
using the Tone Locker, which is available from the Tone Locker button above the Browser.<br />
Additionally, by default the <strong>GearBox</strong> installer creates a Tracks folder and stores your GuitarPort Online<br />
Tracks within it at this location:<br />
Windows® - My Documents\<strong>Line</strong> 6\Tracks<br />
Mac® – Documents/<strong>Line</strong> 6/Tracks<br />
Alternatively, Tracks can be stored anywhere on your hard disk, and can be opened from The <strong>GearBox</strong><br />
4•29
<strong>Line</strong> 6 <strong>GearBox</strong> <strong>3.5</strong> –<strong>GearBox</strong> Standalone Application<br />
File menu - Open command, or via the LOAD FROM HARD DISK button available from the Player<br />
button above the Browser.<br />
To get to the default Tones and Tracks folders and access the Tone and Track files outside of the<br />
<strong>GearBox</strong> program:<br />
Windows®<br />
• Double-click the My Computer icon on your desktop.<br />
• Double-click Drive C:, then Program Files, then <strong>Line</strong>6.<br />
• Double-click the Tones or Tracks folder.<br />
Mac®<br />
• Open the Finder and select Documents.<br />
• Select <strong>Line</strong> 6 and then look in the Tones or Tracks folders.<br />
p Return to How To Topics<br />
How to join GuitarPort Online<br />
If you’re not already a member of GuitarPort Online, click the GuitarPort Online button above the<br />
Browser with your Internet connection active and the Browser will show you how to become a member<br />
or take a tour to see what GuitarPort Online is all about.<br />
s<br />
4•30
<strong>Line</strong> 6 <strong>GearBox</strong> <strong>3.5</strong> –<strong>GearBox</strong> Standalone Application<br />
If you want to be a better player, and learn more licks, technique and songs, this is the place you need<br />
to be!<br />
p Return to How To Topics<br />
How to load an MP3, WAV or AIFF file<br />
Click the LOAD FROM HARD DISK button under the Player button above the Browser to load an<br />
MP3, WAV or AIFF file from your hard disk to use as a GuitarPort Track.<br />
The recently used Tracks are also available in the <strong>GearBox</strong> File > Track > Recent Tracks menu<br />
p Return to How To Topics<br />
How to load a Track from an Audio CD<br />
Note – you do not need to be a GuitarPort Online to use the Player to load CD Tracks or audio files<br />
from your hard drive and play along with them!<br />
GuitarPort can load audio from a standard Audio CD. The steps are slightly different depending if you<br />
are on Mac® or Windows®:<br />
Mac®:<br />
• Click on the Player button above the Browser.<br />
• Insert an Audio CD (you can disable auto-launch of CD player programs).<br />
• Click LOAD FROM: CD, select the Track you want, and click the Open button.<br />
• This launches the Open window, where you can choose your CD drive to access its contents.<br />
4•31
<strong>Line</strong> 6 <strong>GearBox</strong> <strong>3.5</strong> –<strong>GearBox</strong> Standalone Application<br />
Choose your CD drive here to view its<br />
contents<br />
Select a track and click Play to preview<br />
the track before loading it<br />
Click Open to load the selected track<br />
into the Player<br />
• Once you click Save, the CD track is automatically loaded in the Player and played directly<br />
from your CD drive. You can play just like with any other GPO Track or Hard Disk file using the<br />
transport.<br />
TIP – You can launch the Mac® iTunes® program if you want to have it connect to the Internet<br />
and retrieve the CD Artist name and Track info for the CD. Once iTunes® does this, you can close<br />
it and the Open dialog will then show all the actual CD Track names since they will be stored in<br />
memory from iTunes®.<br />
Windows®:<br />
• Click on the Player button above the Browser.<br />
• Insert an Audio CD (you can disable auto-launch of CD player programs).<br />
• Click LOAD FROM: CD, select the Track you want, and click the Open button.<br />
• You should now see the contents of your audio CD in the window.<br />
4•32
<strong>Line</strong> 6 <strong>GearBox</strong> <strong>3.5</strong> –<strong>GearBox</strong> Standalone Application<br />
If you want the dialog to<br />
retrieve the actual name of<br />
the CD, Artist and Track<br />
names, click the Get CD<br />
Info button.<br />
Select a track and click Play<br />
to preview the track before<br />
loading it.<br />
Click Refresh if you have a<br />
CD inserted but its tracks<br />
do not appear in the list.<br />
Click Open to load the<br />
selected track.<br />
• Once you click Open, you are prompted where to Save a copy of this Track – this “rips” the CD<br />
track to your hard drive as a WAV file. The default Save directory is your \My Documents\<strong>Line</strong><br />
6\Tracks folder.<br />
• Once you click Save, the CD track is automatically loaded in the Player and you can play this<br />
track just like any other GPO Track or Hard Disk file using the transport.<br />
p Return to How To Topics<br />
4•33
<strong>Line</strong> 6 <strong>GearBox</strong> <strong>3.5</strong> –<strong>GearBox</strong> Standalone Application<br />
How to load a Track file from GuitarPort Online<br />
Note – you must be a GuitarPort Online member to gain access to GuitarPort Online tracks. For<br />
membership details, please visit www.guitarport.com<br />
Click the LOAD FROM: Online button in the Player to load a Track from GuitarPort Online.<br />
The recently used Tracks are also available from the Track Loaded menu:<br />
p Return to How To Topics<br />
How to load a Track file from your hard disk<br />
Click the LOAD FROM: Hard Disk button in the Player to load a GuitarPort Track file that you have<br />
saved to your hard disk.<br />
The recently used Tracks are also available from the Track Loaded menu:<br />
p Return to How To Topics<br />
4•34
<strong>Line</strong> 6 <strong>GearBox</strong> <strong>3.5</strong> –<strong>GearBox</strong> Standalone Application<br />
How to load GuitarPort’s Tutorial Track<br />
GuitarPort includes a Tutorial Track to introduce you to its basic features and operation. You can load<br />
it from the Help menu at the top edge of the <strong>GearBox</strong> program’s window, by selecting Open Tutorial<br />
Track.<br />
p Return to How To Topics<br />
How to prevent GuitarPort Online from trying to connect to the Internet<br />
By default, <strong>GearBox</strong> is configured so that GuitarPort Online will attempt to automatically connect to<br />
the Internet as needed to access the online features. You can disable the auto- connect behavior via<br />
the <strong>GearBox</strong> Preferences:<br />
• Select Preferences from the <strong>GearBox</strong> menu (Mac ®) or Edit menu (Windows ®) and click the<br />
Internet tab.<br />
• Click the Help question mark at the top of the dialog box and click an item for details.<br />
• Uncheck the Network Enabled box and then click OK to exit the Preferences.<br />
p Return to How To Topics<br />
4•35
<strong>Line</strong> 6 <strong>GearBox</strong> <strong>3.5</strong> –<strong>GearBox</strong> Standalone Application<br />
How to set the Loop start and end points<br />
When the Loop is on for the Track loaded in the Player button above the Browser, you’ll be able to see<br />
and set the Loop’s start and end points in the Track Sections Display:<br />
• Click the Loop button to light it red if it’s not lit already.<br />
• The looped portion of the Track is shown in orange.<br />
• Light the BY SECTIONS button if you want the loop points to “snap” to the sections.<br />
• Click, hold and drag the orange arrow at either end of the loop to set the start/end.<br />
• There are also Hot Keys for setting Loop start, end and on/off.<br />
• You can also double-click a section to set the loop start and end points to loop that section.<br />
• You can hold the SHIFT key and double-click a section extend the loop to include that<br />
section.<br />
• If you choose Save Track from the <strong>GearBox</strong> File menu and save the Track to your hard disk, the<br />
Loop points will be saved with the track.<br />
p Return to How To Topics<br />
How to share your Tones with other GuitarPort users<br />
If you are a GuitarPort Online subscriber, you can put Tones you want to share in the Public folder of<br />
your Tone Locker. From there, any other GuitarPort Online member can access them and experience<br />
your Tone-creation genius! Tone is your Private folder will not be visible to other GuitarPort Online<br />
members.<br />
GuitarPort Online members have access to the Online Tone Locker, which<br />
appears in this right pane of the Tone Locker<br />
4•36
<strong>Line</strong> 6 <strong>GearBox</strong> <strong>3.5</strong> –<strong>GearBox</strong> Standalone Application<br />
You can also, of course, share Tones that are stored on your local hard disk by emailing them as<br />
individual file attachments to your friends who also have <strong>GearBox</strong>.<br />
p Return to How To Topics<br />
How to show/hide all Tone controls<br />
Click the Collapse/Expand arrow button to the left of the Tone menu at the top left of the <strong>GearBox</strong><br />
program’s window to show/hide the Amp and Effects controls in one click.<br />
Note that this is independent of the Browser window, allowing you to keep GuitarPort Online visible<br />
and toggle your Tone controls to be shown or hidden as you need them. There are also separate show/<br />
hide arrows for the Effects and the Browser sections as well.<br />
p Return to How To Topics<br />
How to show/hide the browser<br />
The bottom portion of the <strong>GearBox</strong> window, where the GuitarPort Online content and other items<br />
are shown, is called the Browser. Click the arrow button at the top left to show/hide the Browser.<br />
There are also separate show/hide arrows for showing/hiding the Amp and Effects controls together<br />
individually, or you can click the top-most arrow button to show/hide the Amp and Effects in one<br />
motion.<br />
p Return to How To Topics<br />
How to show/hide the effect control panel<br />
It can be handy to hide the effect details when you don’t need to fine-tune the effects, and you want to<br />
have more space available to view items in the Browser. Click the arrow button at the left side of the<br />
effects area to show/hide the Effects control panel.<br />
There are also separate show/hide arrows for showing/hiding the Amp and Effects controls together<br />
individually, or you can click the top-most arrow button to show/hide the Amp and Effects in one<br />
motion.<br />
p Return to How To Topics<br />
4•37
<strong>Line</strong> 6 <strong>GearBox</strong> <strong>3.5</strong> –<strong>GearBox</strong> Standalone Application<br />
How to show/hide the Track sections display<br />
Click here<br />
When you’ve selected the Player button above the Browser, you’ll see a display like the one above. You<br />
can click the arrow button to the left of the GuitarPort Online tab button to show/hide the bottom<br />
portion of this display. Separate show/hide arrows control the display of tone controls together, Effects<br />
and the Browser.<br />
p Return to How To Topics<br />
4•38
<strong>Line</strong> 6 <strong>GearBox</strong> <strong>3.5</strong> – <strong>GearBox</strong> Plug-In<br />
<strong>GearBox</strong> Plug-In<br />
Welcome to the wonderful world of <strong>GearBox</strong> Plug-in, where legendary studio-standard tone and classic<br />
vintage effects are all available to you within your favorite recording application, in a flexible native<br />
software plug-in format!<br />
A Quickie Plug-in Primer<br />
There are many types of plug-ins in the world of software. Plug-ins are relatively small applications<br />
that can only run when loaded inside a compatible host application. Plug-ins operate within the host<br />
application to extend the capabilities of the host. In the world of music software, audio plug-ins find<br />
frequent use inside audio/<strong>MIDI</strong> host applications, commonly referred to as DAWs (Digital Audio<br />
Workstations). Audio plug-ins provide signal processing for your audio tracks or live audio input.<br />
A helpful analogy for plug-ins is to think of them as effects pedals. Effects pedals change the tone of<br />
your bass or guitar before the signal reaches your amplifier. As with pedals, rack effects units, or any<br />
other conventional piece of outboard gear, plug-ins provide graphical controls for whatever parameters<br />
they might expose. For example, a distortion plug-in will most likely have similar controls to a typical<br />
distortion pedal (such as drive, gain and tone). Visually, plug-ins often resemble the physical gear they<br />
emulate.<br />
When working with DAWs, using plug-ins provides numerous benefits over using outboard effects like<br />
pedals or rack processors. Here are a few of the primary benefits:<br />
• Plug-ins are “non-destructive” to your audio track – this means that you can add or remove<br />
effects and tweak their settings as often as you like without actually affecting the original audio<br />
recording. Recording with outboard gear means that the signal going to tape will be “wet” (with<br />
effects and amp tone) and cannot be changed without recording another pass.<br />
• Plug-ins sound the same way twice. Because you can store plug-in settings as presets, precise<br />
settings can be loaded reliably with tweaking. Every time you go back to work on a specific song,<br />
you can rest assured that your tones will be identical to the last session.<br />
• Plug-ins are automatable. Host applications provide easy ways to create and manipulate<br />
automation, giving you surgical precision of your tone without having to “ride the faders” of<br />
external gear during a record pass.<br />
• Plug-ins don’t break, corrode, take up space on your floor or get stolen<br />
<strong>MIDI</strong> Remote Control and Plug-in automation<br />
Most audio plug-ins are automatable, meaning their parameters can be manipulated in real-time by<br />
some method. The two most prevalent methods are <strong>MIDI</strong> automation and plug-in automation. Both<br />
methods provide unique benefits.<br />
<strong>MIDI</strong> automation means using <strong>MIDI</strong> messages, either from an external controller like a KB37, or from<br />
the host application, to modify parameter settings on the target plug-in. Most host applications, such<br />
as Cubase or SONAR, provide robust <strong>MIDI</strong> sequencing capabilities, allowing you to literally draw<br />
<strong>MIDI</strong> controller changes (<strong>MIDI</strong> automation), which then get sent to track plug-ins or externally, to<br />
outboard gear. The latter example is the most common use of <strong>MIDI</strong> before the rise in popularity of<br />
plug-ins.<br />
Today the most common use of <strong>MIDI</strong> with plug-ins is simply to control them from a tactile control<br />
surface or, in the case of software instruments, from a <strong>MIDI</strong> keyboard. This is called <strong>MIDI</strong> remote<br />
5•1
<strong>Line</strong> 6 <strong>GearBox</strong> <strong>3.5</strong> – <strong>GearBox</strong> Plug-In<br />
control, because the <strong>MIDI</strong> control messages are coming from an external (remote) source. To<br />
successfully use <strong>MIDI</strong> remote control, you must know what parameters respond to a given <strong>MIDI</strong> CC<br />
function. Manufacturers typically supply this information with their product.<br />
Plug-in automation means controlling plug-in parameters from with the host application. Conceptually<br />
this is similar to <strong>MIDI</strong> automation, in that you create automation within the track of the host<br />
application. The automation sends parameter change values to the plug-in. But there are a couple<br />
distinct advantages:<br />
• Plug-in automation is sample accurate (far more accurate than <strong>MIDI</strong>). This high resolution<br />
allows you to create smooth curves and fades, without any stair-stepping effect, ideal for critical,<br />
professional applications.<br />
• Plug-in automation parameters carry the actual names of the parameters, where as <strong>MIDI</strong> requires<br />
mapping generic <strong>MIDI</strong> control functions to various plug-in parameters.<br />
Plug-in Formats<br />
There are quite a few available plug-in formats in the digital audio recording world. The <strong>GearBox</strong><br />
Plug-in uses the VST® (Virtual Studio Technology) format for Windows® recording environments,<br />
and the AU® (AudioUnits) format on the Mac® platform, and RTAS® (Real Time Audio Suite) for<br />
both Mac and Windows, for compatibility with the vast majority of audio recording software on the<br />
market.<br />
Activating the <strong>GearBox</strong> Plug-in<br />
So how do I get the <strong>GearBox</strong> plug-in, you ask? The upgrade process is easy – make sure your <strong>Line</strong> 6<br />
Hardware is connected to your computer (with an internet connection), and follow these steps:<br />
Launch <strong>Line</strong> 6 Monkey<br />
You’ll need to log into your <strong>Line</strong> 6 account, and make sure that your hardware is fully up-to-date. If<br />
this all new to you, get help here.<br />
Grab any available updates<br />
Login to your <strong>Line</strong> 6 acoount<br />
<strong>TonePort</strong> DI Silver/Gold bundle customers: The <strong>GearBox</strong> Plug-in is included in your purchase, and<br />
needs only to be enabled on your computer. This way, please…<br />
5•2
<strong>Line</strong> 6 <strong>GearBox</strong> <strong>3.5</strong> – <strong>GearBox</strong> Plug-In<br />
Purchasing the <strong>GearBox</strong> Plug-in<br />
Click on the Optional Add-Ons tab, select <strong>GearBox</strong> Plug-in, then click on Purchase Add-Ons.<br />
You will be taken to the <strong>Line</strong> 6 Store, where you can purchase a license for the plug-in. Follow the<br />
instructions on the resulting page to receive your activation key.<br />
Activating the Plug-in<br />
In <strong>Line</strong> 6 Monkey, click on Activate Purchase. A window will pop up, that will prompt you to enter<br />
the activation key you just received.<br />
<strong>Line</strong> 6 Monkey will connect to the server to validate the license, and program your hardware. That’s it,<br />
you’re done! You are now ready to use the <strong>GearBox</strong> Plug-in with your favorite recording application.<br />
5•3
<strong>Line</strong> 6 <strong>GearBox</strong> <strong>3.5</strong> – <strong>GearBox</strong> Plug-In<br />
<strong>TonePort</strong> DI Customers<br />
Your hardware comes with the <strong>GearBox</strong> Plug-in activated from the factory, so the <strong>Line</strong> 6 Monkey<br />
application will display an extra button for you, as shown:<br />
Click the Optional Add-Ons tab<br />
Click Authorize<br />
This checkmark indicates the Plug-in is activated on your hardware<br />
When clicking the Authorize button, <strong>Line</strong> 6 Monkey will connect to the server and enable your<br />
computer to use the activated add-ons. Tada! You are now ready to use the <strong>GearBox</strong> Plug-in with your<br />
favorite recording software!<br />
5•4
<strong>Line</strong> 6 <strong>GearBox</strong> <strong>3.5</strong> – <strong>GearBox</strong> Plug-In<br />
<strong>GearBox</strong> Plug-in Controls and Operation<br />
The <strong>GearBox</strong> Plug-in Graphical <strong>User</strong> Interface or GUI (you guessed it, it’s pronounced “gooey”)<br />
is remarkably similar to that of the <strong>GearBox</strong> application, so we invite you to refer to the <strong>GearBox</strong><br />
Standalone Application section for a description of all the controls and functions. In this section, we’ll<br />
point out the differences between the Plug-in and its full-version brother.<br />
Only a single tone path<br />
per instance<br />
Click here for Plug-in<br />
help<br />
VU-Meters always show the<br />
<strong>GearBox</strong> Plug-in Output level<br />
Sets the level sent to the audio track<br />
(or into the next Plug-in)<br />
Attenuates the level of the<br />
signal fed into the Plug-in<br />
You can create Tones within the Plug-in, which you can save for later recall, or you can use any of<br />
the <strong>GearBox</strong> application Tones. <strong>GearBox</strong> Plug-in Tones are totally compatible with its full-version<br />
counterparts, and all Tones are stored in one convenient folder on your hard drive (the default location<br />
is My Documents/<strong>Line</strong> 6/Tones/<strong>GearBox</strong> on Windows®, and Documents/<strong>Line</strong> 6/Tones/<strong>GearBox</strong> on<br />
Mac®).<br />
5•5
<strong>Line</strong> 6 <strong>GearBox</strong> <strong>3.5</strong> – <strong>GearBox</strong> Plug-In<br />
Where can I find the <strong>GearBox</strong> Plug-in on my computer?<br />
Your favorite recording application must locate the <strong>GearBox</strong> Plug-in in order to use it. Some<br />
applications scan your hard drive for all available plug-ins while others need you to point them to the<br />
correct folder.<br />
On Windows® computers, you can define where the <strong>GearBox</strong> Plug-in is installed during the <strong>GearBox</strong><br />
installation process. If you didn’t specify a location, then the VST plug-in is installed by default in<br />
the C:\Program Files\<strong>Line</strong>6\VstPlugIns\<strong>Line</strong> 6 folder. RTAS® is installed to C:\PROGRAM<br />
FILES\Common Files\Digidesign\DAE\Plug-Ins\<strong>Line</strong> 6<br />
On Mac®, the AudioUnits® specification requires that the <strong>GearBox</strong> Plug-in be installed in Library ><br />
Audio > Plug-Ins > Components. RTAS is installed to Library > Application Support > Digidesign<br />
> Plug-Ins > <strong>Line</strong> 6<br />
For detailed help on using the <strong>GearBox</strong> Plug-in with today’s most popular audio recording software<br />
applications, please visit the <strong>GearBox</strong> Online Help page.<br />
5•6
<strong>Line</strong> 6 <strong>GearBox</strong> <strong>3.5</strong> – Model Gallery<br />
Model Gallery<br />
Guitar Amp & Cab Models......................................................................6•3<br />
<strong>Line</strong> 6 Chemical X ......................................................................................................... 6•3<br />
<strong>Line</strong> 6 Insane .................................................................................................................. 6•3<br />
<strong>Line</strong> 6 Piezacoustic 2 ...................................................................................................... 6•3<br />
<strong>Line</strong> 6 Spinal Puppet ...................................................................................................... 6•4<br />
<strong>Line</strong> 6 Treadplate ............................................................................................................ 6•4<br />
1953 Small Tweed .......................................................................................................... 6•4<br />
1958 Tweed B-Man ........................................................................................................ 6•4<br />
1964 Blackface ‘Lux ....................................................................................................... 6•5<br />
1967 Class A-30 Top Boost............................................................................................. 6•5<br />
1968 Plexi Lead 100 ....................................................................................................... 6•6<br />
1968 Plexi Jump Lead ..................................................................................................... 6•6<br />
1987 Jazz Clean .............................................................................................................. 6•7<br />
1990 Brit J-800 ............................................................................................................... 6•7<br />
1993 Solo 100 Head ....................................................................................................... 6•8<br />
2001 Treadplate Dual ..................................................................................................... 6•8<br />
Brit Gain 18..................................................................................................................... 6•9<br />
Citrus D-30...................................................................................................................... 6•9<br />
Tube Instrument Preamp ................................................................................................ 6•9<br />
Guitar Cab Models........................................................................................................ 6•10<br />
Bass Amp & Cab Models....................................................................... 6•11<br />
Rock Classic.................................................................................................................. 6•11<br />
Flip Top.......................................................................................................................... 6•11<br />
Adam and Eve............................................................................................................... 6•12<br />
Silverface Bass............................................................................................................... 6•12<br />
Eighties.......................................................................................................................... 6•12<br />
Bass Cab Models ........................................................................................................... 6•13<br />
Preamp Models...................................................................................... 6•13<br />
American Classic.......................................................................................................... 6•13<br />
Vintage U.K................................................................................................................... 6•14<br />
Lo-Fi.............................................................................................................................. 6•14<br />
Vintage.......................................................................................................................... 6•14<br />
Modern ......................................................................................................................... 6•14<br />
Console.......................................................................................................................... 6•15<br />
Effects..................................................................................................... 6•15<br />
Delay.............................................................................................................................. 6•15<br />
6•1
<strong>Line</strong> 6 <strong>GearBox</strong> <strong>3.5</strong> – Model Gallery<br />
Analog Delay w/Modulation..................................................................... 6•15<br />
Tube Echo.................................................................................................. 6•15<br />
Digital Delay.............................................................................................. 6•16<br />
Mod............................................................................................................................... 6•16<br />
Sine Chorus............................................................................................... 6•16<br />
<strong>Line</strong> 6 Flanger............................................................................................ 6•16<br />
Phaser......................................................................................................... 6•16<br />
U-Vibe....................................................................................................... 6•17<br />
Opto Tremolo............................................................................................ 6•17<br />
Rotary Drum + Horn................................................................................. 6•17<br />
Stomp............................................................................................................................ 6•18<br />
Facial Fuzz.................................................................................................. 6•18<br />
Fuzz Pi........................................................................................................ 6•18<br />
Screamer.................................................................................................... 6•18<br />
Classic Distortion...................................................................................... 6•19<br />
Vetta Comp................................................................................................ 6•19<br />
Verb (Reverb) ............................................................................................................... 6•19<br />
Standard Spring......................................................................................... 6•19<br />
Brite Room................................................................................................. 6•20<br />
Medium Hall.............................................................................................. 6•20<br />
Cavernous.................................................................................................. 6•20<br />
Slap Plate................................................................................................... 6•20<br />
Wah............................................................................................................................... 6•20<br />
Vetta Wah.................................................................................................. 6•20<br />
Weeper....................................................................................................... 6•20<br />
Bass Effects.................................................................................................................... 6•20<br />
Bass Overdrive........................................................................................... 6•20<br />
Bronze Master............................................................................................ 6•21<br />
Sub Octaves............................................................................................... 6•21<br />
Other Effects.................................................................................................................. 6•21<br />
Comp (Compressor) ................................................................................. 6•21<br />
EQ ............................................................................................................. 6•22<br />
Gate .......................................................................................................... 6•22<br />
Vol (Volume)............................................................................................. 6•22<br />
Female De-Esser......................................................................................... 6•22<br />
Male De-Esser............................................................................................ 6•23<br />
Model List............................................................................................... 6•23<br />
6•2
<strong>Line</strong> 6 <strong>GearBox</strong> <strong>3.5</strong> – Model Gallery<br />
You probably know by now that we’re relentless tone fanatics here at <strong>Line</strong> 6. Once we’ve set our sights<br />
on creating a software emulation of a particular piece of gear, we go to great lengths to be sure that<br />
we’ve gotten our hands on the very best example of an amp, preamp, effect or speaker cabinet that we<br />
can find to study. We will (and have) scoured the globe in search of just the right specimen — that<br />
one, very particular piece of “holy grail” gear that has the magic. In fact, we pride ourselves on hand<br />
selecting each and every one of the amps, effect, preamps and speaker cabinets that we studied to<br />
create the software models in <strong>GearBox</strong> and all of <strong>Line</strong> 6’s other products. The result is an extensive line<br />
up of Models, some completely original to <strong>Line</strong> 6, some based on well loved classics.<br />
To follow is the list of amp, cab and FX models that are included as “Factory-Standard*” models for<br />
<strong>TonePort</strong>. Many Models in this list are also included as standard with GuitarPort hardware. For the<br />
breakdown of the Factory-Standard Models for each <strong>Line</strong> 6 device, please see the Model List section<br />
in this document. For descriptions of the Factory-Standard Models included in PODxt, PODxt Pro<br />
and PODxt Live devices, please refer to your PODxt Pilot’s Handbook, and more info is also available<br />
in the Model Pack Handbooks.<br />
* Factory-Standard Models are those that are included as permanently installed models on a <strong>Line</strong> 6<br />
device. These models cannot be transferred to other <strong>Line</strong> 6 devices. However, it is possible to transfer<br />
the License Key that you are granted for any Add-On Model Packs that you purchase separately<br />
between any supporting <strong>Line</strong> 6 device that you own by using <strong>Line</strong> 6 Monkey. Please visit the <strong>Line</strong> 6<br />
Online Support pages for more about Transferring License Keys.<br />
Guitar Amp & Cab Models<br />
<strong>Line</strong> 6 Chemical X<br />
Just like those secret ingredients that detergent companies used to crow about (Now! Contains<br />
Ingredient X-27!), the <strong>Line</strong> 6 Sound Design guys wouldn’t tell us anything about what the inspiration<br />
for this one was or who it might have belonged to (no matter what type of bribery we attempted).<br />
Suffice to say that it’s a very punchy hi-gain sound that also cleans up quite nicely when you roll your<br />
volume back.<br />
p Return to Model Gallery List<br />
<strong>Line</strong> 6 Insane<br />
Our goal here was to provide you with as much input gain distortion as possible short of complete<br />
meltdown. You get ridiculous, rich tube drive to shame the distortion of pretty much any amp on the<br />
planet while still retaining tonal definition and character. As a result, you get way lots of bottom end<br />
and cabinet character with tons of wide-ranging tone shaping. Crank up the Drive control and take<br />
no prisoners!<br />
p Return to Model Gallery List<br />
<strong>Line</strong> 6 Piezacoustic 2<br />
This one is designed to work with the piezo output of solid body electrics that have one of those<br />
newfangled bridges with the ‘acoustic’ pickup built in. Since you don’t have to worry about the body<br />
shaking itself to pieces with feedback on that type of guitar, we’ve cooked up this model with more<br />
low-mids and low frequencies.<br />
p Return to Model Gallery List<br />
6•3
<strong>Line</strong> 6 <strong>GearBox</strong> <strong>3.5</strong> – Model Gallery<br />
<strong>Line</strong> 6 Spinal Puppet<br />
You know how, when you’re playing head-bangin’ music, you look out into the audience and see all<br />
those heads bobbing up and down? Those are Spinal Puppets. Need we say more?<br />
p Return to Model Gallery List<br />
<strong>Line</strong> 6 Treadplate<br />
Looking for tight, high gain tone? The kind of sound that powers classic Metallica or Dream Theater<br />
tracks? Then you’ve come to the right place, my friend. This model lets you dial in plenty of distortion<br />
perfect for chunk-chunk-chunking, and also ready to power some mosh pit punking. Its tone controls<br />
have plenty of range to let you scoop out your mids, or beef up the bottom for just the tone you need.<br />
p Return to Model Gallery List<br />
1953 Small Tweed<br />
Modeled after* a 1953 “wide panel” Fender® Tweed Deluxe Reverb®,<br />
the 1953 Small Tweed Amp Model will snarl with the best of them.<br />
The original amp had only a single tone control, essentially a treble<br />
roll off. We set up the Treble knob to give you this treble roll off when<br />
using this Amp Model, which left us with the Bass and Middle knobs<br />
just sitting there, so we set up the Bass and Middle as post-Amp Model<br />
controls, which essentially lets you EQ up your tone as you would do<br />
on a mixing console after recording your amp. Set the Bass and Middle<br />
knobs at halfway to put them in ‘neutral’, turn the Presence to 0, and try<br />
the Treble knob somewhere above halfway for a classic Tweed sound.<br />
* FENDER® and DELUXE REVERB® are registered trademarks of Fender Musical Instruments<br />
Corporation and are in no way associated or affiliated with <strong>Line</strong> 6. These product names, descriptions and<br />
images are provided for the sole purpose of identifying the specific products that were studied during <strong>Line</strong> 6’s<br />
sound model development.<br />
p Return to Model Gallery List<br />
1958 Tweed B-Man<br />
The 1959 Tweed B-Man Model is based on* the classic ‘58 Fender®<br />
Bassman® 4x10 combo, the amp that started it all — instant rock and roll<br />
tone. Originally a bass guitar amp, the Bassman® became a Blues staple for<br />
6-string guitarists. It has the fat bottom end you’d expect from a bass amp,<br />
but also has the Fender® twang on the top. Incidentally, when Jim Marshall<br />
built his first amps with Ken Bran they were heavily influenced by the early<br />
Bassman®.<br />
One of the interesting things about the Bassman® is just how interactive the<br />
Middle and Treble controls are. The Middle control isn’t a bandpass, as in<br />
most tone control setups. Instead, it’s almost like a second treble control. The<br />
two are additive, so if you’re running your Middle knob higher than halfway<br />
up with this model, you’ll find that the Treble control might give you more<br />
bright than you really want. On the other hand, when you turn the Middle knob down, you’ll probably<br />
want to boost the Treble.<br />
The Bassman®, like many of the amps modeled for <strong>GearBox</strong>, didn’t have a master volume. So to get<br />
6•4
<strong>Line</strong> 6 <strong>GearBox</strong> <strong>3.5</strong> – Model Gallery<br />
the kind of tone that the Bassman® can deliver at higher gain settings, you had to crank it up loud<br />
enough to do some serious damage to anyone who might be standing close by. Now you can get that<br />
kind of tone at a bedroom or studio level — or even through your headphones! Try a Drive setting of<br />
about 4 or 5 — it’s guaranteed to dredge up the best R & B licks you know.<br />
* FENDER® and BASSMAN® are registered trademarks of Fender Musical Instruments Corporation<br />
and are in no way associated or affiliated with <strong>Line</strong> 6. These product names, descriptions and images are<br />
provided for the sole purpose of identifying the specific products that were studied during <strong>Line</strong> 6’s sound model<br />
development.<br />
p Return to Model Gallery List<br />
1964 Blackface ‘Lux<br />
The Holy Grail for many blues, country, and “roots” players has<br />
been a blackface Fender® Deluxe Reverb®. After listening to<br />
quite a few candidates back when we were seeking the ultimate<br />
Deluxe Reverb® for our 1964 Blackface ‘Lux model to be<br />
based on*, we stumbled upon an extremely cool ‘64 Deluxe<br />
Reverb®. We still haven’t found one better.<br />
Most players love a Deluxe Reverb® when it’s turned up<br />
to about 7 for a nice gritty sound that cleans up when you<br />
back off your guitar’s volume knob just a little. Notice how<br />
the tone control response changes as this Amp Model’s Drive<br />
is changed: clean settings are crisp and present, while more<br />
driven settings will mellow the high end. This is typical of<br />
what you get from a Deluxe Reverb® and is nicely captured here. The Deluxe Reverb® itself has only<br />
Bass and Treble controls, leaving us, once again, with the prospect of a couple knobs with nothing to<br />
say for themselves. But fear not; in this case, we’ve set up the model’s Middle knob so you can add some<br />
post-Amp Model Midrange contouring for a little more flexibility, while Presence adds, well, Presence.<br />
Once again, set the Middle knob to its “neutral” 12 o’clock position and the Presence knob to 0 for the<br />
classic Deluxe sound. Tweaked up right, this tone will cut through and sing. We jacked into Input 1 of<br />
the Vibrato Channel to get this model cooked up.<br />
* FENDER® and DELUXE REVERB® are registered trademarks of Fender Musical Instruments<br />
Corporation and are in no way associated or affiliated with <strong>Line</strong> 6. These product names, descriptions and<br />
images are provided for the sole purpose of identifying the specific products that were studied during <strong>Line</strong> 6’s<br />
sound model development.<br />
p Return to Model Gallery List<br />
1967 Class A-30 Top Boost<br />
The 1967 Class A-30 Top Boost model is based on* a Vox®<br />
AC 30. Music was changing in the early ‘60s and guitarists<br />
were asking for more brilliance & twang. So the Jennings<br />
Company, makers of Vox® amps, decided to add Treble and<br />
Bass controls (and an extra 12AX7 gain stage, incidentally)<br />
in addition to the Treble Cut knob it already had (which in<br />
actuality was a sliding bandpass filter that always seemed like<br />
it was working backwards); this additional circuit became<br />
known as Top Boost.<br />
6•5
<strong>Line</strong> 6 <strong>GearBox</strong> <strong>3.5</strong> – Model Gallery<br />
The AC 30 with Top Boost was the amp made famous by many British invasion bands. Much of the<br />
unique character of the Vox® sound can be attributed to the fact that Class A amps overdrive in a very<br />
different way than Class AB. Brian May of Queen, Mike Campbell of Tom Petty’s Heartbreakers, and<br />
The Edge of U2 have all used classic AC 30s to make their music. Although usually played fairly clean,<br />
a cranked AC 30 has a great saturated lead tone, a la Brian May on the early Queen albums.<br />
On this Amp Model, the Middle control acts like the original Cut knob on the AC 30. We plugged<br />
into the Hi gain input of the AC 30’s Brilliant channel when creating it. We also turned the tone<br />
controls around, since original Top Boost amps had the bass and treble turned all the way down when<br />
the knob was all the way up. Go figure.<br />
VOX® is a registered trademark of Korg Europe Limited and is in no way associated or affiliated with <strong>Line</strong><br />
6. These product names, descriptions and images are provided for the sole purpose of identifying the specific<br />
products that were studied during <strong>Line</strong> 6’s sound model development.<br />
p Return to Model Gallery List<br />
1968 Plexi Lead 100<br />
The 1968 Plexi Lead 100 is modeled after* the infamous ‘68<br />
Marshall® ‘Plexi’ Super Lead — coveted by tone connoisseurs the<br />
world over. We literally scoured the world for this particular amp,<br />
finally finding a great example of a Super Lead languishing (we like<br />
to think fate preserved it for us) in Holland. By the time this amp was<br />
built (ca. 1968), Marshall® had completely changed the circuitry<br />
away from the Fender® 6L6 power tube heritage and moved to an<br />
EL34 tube. Another major tone difference was due to the necessary<br />
output & power supply transformer changes. All this mucking about<br />
added up to create a tone forever linked with Rock Guitar. Amps of<br />
this era didn’t have any sort of master volume control, so to get the<br />
sound you’d have to crank your Super Lead to max — just the thing<br />
to help you really make friends with the neighbors. Hendrix used<br />
Marshall®s of this era; a decade later Van Halen’s first two records<br />
owed their “brown sound” to a 100-watt Plexi (Our Super Lead, in<br />
fact, has the ‘lay down’ transformer that was unique to ‘68 models,<br />
the same as Hendrix and Van Halen’s Marshalls®.). To get a crunch sound out of a Plexi, you would<br />
likely crank the input volume and tone controls (to 10!). You’ll find that, in keeping with our “makeit-sound-a-whole-lot-like-the-original”<br />
concept, this model is set up to do pretty darned near the same<br />
thing.<br />
* All product names used in this document are trademarks of their respective owners, which are in no<br />
way associated or affiliated with <strong>Line</strong> 6. These product names, descriptions and images are used solely to<br />
identify the specific products whose tones and sounds were studied during <strong>Line</strong> 6’s sound model development.<br />
MARSHALL® is a registered trademark of Marshall Amplification PLC. FENDER® is a registered<br />
trademark of Fender Musical Instruments Corporation.<br />
p Return to Model Gallery List<br />
1968 Plexi Jump Lead<br />
Guitar playing is all about experimentation, isn’t it? That, and<br />
finding all the possible ways to get more distortion out of whatever<br />
gear you have at hand. One of the fun things you can do with<br />
a Plexi is take a short guitar cable and jumper channel I and<br />
channel II (as they’re frequently numbered) together for a little<br />
6•6
<strong>Line</strong> 6 <strong>GearBox</strong> <strong>3.5</strong> – Model Gallery<br />
extra saturation. Some guys loved this sound so much that they pulled the chassis and permanently<br />
wired a jumper into the amp. Being the obsessive/compulsive tone freaks we are, we just had to give<br />
you the 1968 Plexi Jump Lead model to give you a sound based on* of this setup.<br />
* All product names used in this document are trademarks of their respective owners, which are in no<br />
way associated or affiliated with <strong>Line</strong> 6. These product names, descriptions and images are used solely to<br />
identify the specific products whose tones and sounds were studied during <strong>Line</strong> 6’s sound model development.<br />
MARSHALL® is a registered trademark of Marshall Amplification PLC. FENDER® is a registered<br />
trademark of Fender Musical Instruments Corporation.<br />
p Return to Model Gallery List<br />
1987 Jazz Clean<br />
The 1987 Jazz Clean Amp Model is modeled after* the classic<br />
Roland® JC-120.<br />
This transistor amp was known for a strident clean sound and<br />
built-in stereo chorus. When using the JC-120 model, try<br />
cranking up the Treble for a shimmering clean sound that’ll<br />
cut through just about any mix. It’s also perfect for that 80’s<br />
“new wave” sound (after all, it was Andy Summers’ favorite<br />
amp with The Police).<br />
You should also try setting all the tone controls at 12 o’clock<br />
for a darker jazz tone. It’ll give you an essentially flat response,<br />
providing a balanced tone across the fret board for jazz chord melodies or single-line phrasing.<br />
* ROLAND® is a registered trademark of Roland Corporation and is in no way associated or affiliated with<br />
<strong>Line</strong> 6. These product names, descriptions and images are provided for the sole purpose of identifying the<br />
specific products that were studied during <strong>Line</strong> 6’s sound model development.<br />
p Return to Model Gallery List<br />
1990 Brit J-800<br />
The 1990 Brit J-800 Amp Model is based on* a Marshall® JCM 800.<br />
Turn to this Amp Model to conjure up tones of the coveted JCM<br />
800, one of Marshall’s most universally acclaimed modern amps. This<br />
updated version of the Plexi continued Marshall’s heritage with added<br />
gain and edge for a new generation of rock guitarists. One of the biggest<br />
differences here is that the tone controls are located after the preamp<br />
tubes.<br />
Incidentally, some versions of JCM 800’s get their distortion by clipping<br />
a diode. The amp we modeled uses a tube for distortion.<br />
The JCM 800 is, of course, the metal sound Marshall made famous.<br />
And although not many people play Marshalls clean, it is a great tone,<br />
so you should also be sure to check out this model with a low Drive<br />
setting. Of course, you can always pump up the drive and rage...<br />
* MARSHALL® is a registered trademark of Marshall Amplification<br />
PLC and is in no way associated or affiliated with <strong>Line</strong> 6. These product names, descriptions and images<br />
6•7
<strong>Line</strong> 6 <strong>GearBox</strong> <strong>3.5</strong> – Model Gallery<br />
are provided for the sole purpose of identifying the specific products that were studied during <strong>Line</strong> 6’s sound<br />
model development.<br />
p Return to Model Gallery List<br />
1993 Solo 100 Head<br />
The 1993 Solo 100 Head Amp Model is based on* a Soldano SLO-100<br />
head.<br />
Mike Soldano first came to fame as the guy who could do all the really<br />
cool mods to your Marshall®. It wasn’t long before he started building<br />
his own ‘hot-rod’ amps — sporting chromed transformers and chassis, no<br />
less. Mike’s amps are also famous for their bullet-proof construction and<br />
military spec wiring and components.<br />
While primarily known for its high gain personality, the SLO-100 has a<br />
great clean tone as well. Eric Clapton put Soldano on the map when he<br />
played “Saturday Night Live” with his Soldano SLO-100.<br />
* MARSHALL® is a registered trademark of Marshall Amplification PLC and is in no way associated or<br />
affiliated with <strong>Line</strong> 6. These product names, descriptions and images are provided for the sole purpose of<br />
identifying the specific products that were studied during <strong>Line</strong> 6’s sound model development.<br />
p Return to Model Gallery List<br />
2001 Treadplate Dual<br />
The 2001 Treadplate Dual Amp Model is based on* a 2001 3 Channel<br />
Mesa/Boogie® Dual Rectifier® Solo Head. The Dual Rectifier® was part<br />
of Boogie’s more modern, high gain approach for that “big hair” sound.<br />
In contrast to the earlier Boogies, the Dual Rectifier’s tone controls have<br />
more influence at high gain settings, so you can scoop the mids and<br />
increase the bottom end.<br />
We used Channel 3 on the Modern setting for this one with the rear<br />
switches set to Bold and Tube Rectifier®, respectively.<br />
* MESA/BOOGIE® and RECTIFIER® are registered trademarks of<br />
Mesa/Boogie, Limited and are in no way associated or affiliated with <strong>Line</strong><br />
6. These product names, descriptions and images are provided for the sole<br />
purpose of identifying the specific products that were studied during <strong>Line</strong> 6’s<br />
sound model development.<br />
p Return to Model Gallery List<br />
6•8
<strong>Line</strong> 6 <strong>GearBox</strong> <strong>3.5</strong> – Model Gallery<br />
Brit Gain 18<br />
Based on the Marshall® 1974X “authentic re-issue” of the famous 1974<br />
18W Combo from the late ‘60’s. (brief editorial aside: Marshall® has<br />
had a long tradition of coming up with model numbers that can easily<br />
be taken for years. The Model 1974 combo was manufacturer from 1965<br />
to 1968, the Model 1961 and 1962 combos were first made in 1965. Is it<br />
any wonder we look confused sometimes?). The 1974 has a basic preamp,<br />
(gain and tone controls) and a cathode biased twin EL84 power amp.<br />
It is a great recording amplifier, with a wonderfully com-pressed and<br />
harmonically rich tone.<br />
*All product names are trademarks of their respective owners, which are in<br />
no way associated or affiliated with <strong>Line</strong> 6. These product names, descriptions<br />
and images are provided for the sole purpose of identifying the specific products that were studied during <strong>Line</strong><br />
6’s sound model development. MARSHALL® is a registered trademark of Marshall Amplification PLC.<br />
p Return to Model Gallery List<br />
Citrus D-30<br />
In 1968, in a little music store on Old Compton St. in London, Clifford<br />
Cooper was having trouble getting amplifier manufacturers to take him<br />
seriously as a dealer, as they thought he was too young, and his shop<br />
too small. So he did what seemed only logical to an enthusiastic young<br />
man with a background in electrical engineering – he designed and built<br />
his own amplifiers. Since he had come into a large quantity of bright<br />
orange vinyl that was what he used to cover his cabinets. It wasn’t long<br />
before high-profile musicians like Fleetwood Mac, Stevie Wonder, and<br />
Frank Zappa were beating a path to his door. This model is based on<br />
an Orange® AD30TC head, a 30 watt, Class A number with a great<br />
personality that gracefully marries vintage British mid-gain breakup with<br />
modern shimmer and presence. Back off the drive and you’ll get chimey<br />
boutique tones, dig in with the drive up and the AD30 purrs pure Brit<br />
Rock tone.<br />
*All product names are trademarks of their respective owners, which are in no way associated or affiliated<br />
with <strong>Line</strong> 6. These product names, descriptions and images are provided for the sole purpose of identifying<br />
the specific products that were studied during <strong>Line</strong> 6’s sound model development. ORANGE is a registered<br />
trademark of Orange Musical Electronic Company, Ltd.<br />
p Return to Model Gallery List<br />
Tube Instrument Preamp<br />
Before we created the dedicated Preamp Models featured in <strong>GearBox</strong>, we developed this simple tube<br />
preamp model for the Amp Model slot of our PODxt® and GuitarPort®. This model was created to<br />
give PODxt and GuitarPort users a solution for plugging the output from an acoustic guitar’s piezo<br />
pickup or a bass into GuitarPort or PODxt hardware. It can also deliver some tasty tones with a<br />
standard electric guitar. With the tone controls at 12 o’clock, the EQ is “flat.”<br />
6•9
<strong>Line</strong> 6 <strong>GearBox</strong> <strong>3.5</strong> – Model Gallery<br />
Adventurous recordists will find that it can even be used to add some tube warmth or distorted grind<br />
to just about anything — warming up keyboards, crunching up drums, and fuzzing up vocals the way<br />
producers and engineers often do in the studio with vintage tube gear. When you do this stuff, you<br />
want to use the Drive control like a mix knob on a reverb to control how much processing you want<br />
to hear.<br />
p Return to Model Gallery List<br />
Guitar Cab Models<br />
While we’re not going to bore you with complete descriptions of each cabinet that’s modeled in<br />
<strong>GearBox</strong> (“...and with the change from 12 ply Finnish Spruce to 13 ply Baltic Birch in October of<br />
1973, the resonant frequency of this cabinet dropped to 113.7Hz”), here’s a list of all the speaker<br />
cabinets that were modeled for <strong>GearBox</strong>:<br />
1 x 6 1960 Super O (based on Supro S6616)<br />
1 x 8 1960 Tiny Tweed (based on Fender® Tweed Champ®)<br />
1x10<br />
1959 Gibtone (based on Gibson® combo)<br />
1x10 1960 G-Brand (based on Gretsch® 6156)<br />
1x12<br />
1x12<br />
1x12<br />
1953 Small Tweed (based on Fender® Tweed Wide Panel Deluxe<br />
Reverb®)<br />
1964 Blackface ‘Lux (based on Fender® Deluxe Reverb®)<br />
1960 Class A-15 (based on Vox® AC-15)<br />
2 x 2 2001 Mini T (based on Fender® Mini Twin)<br />
2x12 2001 <strong>Line</strong> 6<br />
2x12<br />
2x12<br />
1965 Blackface (based on Fender® Blackface Twin Reverb®)<br />
1996 Match Chief (based on Matchless Chieftain)<br />
2x12 1987 Jazz Clean (based on Roland® Jazz Chorus 120)<br />
2x12<br />
1967 Class A-30 (based on Vox® AC-30 Top Boost)<br />
4x10 2001 <strong>Line</strong> 6<br />
4x10<br />
1959 Tweed B-Man (based on Fender® Bassman® cab)<br />
4x12 2001 <strong>Line</strong> 6<br />
4x12<br />
4x12<br />
4x12<br />
4x12<br />
4x12<br />
1x15<br />
2x12<br />
1967 Green 20s (based on Marshall® “Basket Weave” cab with Celestion®<br />
Greenbacks)<br />
1968 Green 25s (based on Marshall® cab with Celestion® Greenbacks)<br />
1978 Brit Celest T-75s (based on Marshall® cab with stock Celestion®<br />
T-75’s)<br />
1996 Brit Celest V-30s (based on Marshall® cab with Celestion® Vintage<br />
30’s)<br />
2001 Treadplate (based on Mesa/Boogie® Dual Rectifier® cab)<br />
1962 Thunder (based on Supro® ‘62 Thunderbolt)<br />
1967 Wishbook (based on Silvertone ‘67 Twin Twelve)<br />
* All product names used in this document are trademarks of their respective owners, which are in no<br />
way associated or affiliated with <strong>Line</strong> 6. These product names, descriptions and images are used solely to<br />
identify the specific products whose tones and sounds were studied during <strong>Line</strong> 6’s sound model development.<br />
6•10
<strong>Line</strong> 6 <strong>GearBox</strong> <strong>3.5</strong> – Model Gallery<br />
SUPRO is a registered trademark of Zinky Electronics. GIBSON is a registered trademark of Gibson Guitar<br />
Corp. GRETSCH is a registered trademark of Fred W. Gretsch Enterprises, Ltd. FENDER, CHAMP,<br />
DELUXE REVERB, TWIN REVERB and BASSMAN are registered trademarks of Fender Musical<br />
Instruments Corporation. VOX is a registered trademark of Korg Europe Limited. ROLAND is a registered<br />
trademark of Roland Corporation. MARSHALL is a registered trademark of Marshall Amplification PLC.<br />
MESA/BOOGIE and RECTIFIER are registered trademarks of Mesa/Boogie, Limited. SILVERTONE is<br />
a registered trademark of Samick Music Corporation.<br />
p Return to Model Gallery List<br />
Bass Amp & Cab Models<br />
Rock Classic<br />
For 30 years now, we’ve heard the tone and felt the power of the mighty<br />
Ampeg® SVT® that <strong>GearBox</strong>’s Rock Classic model is based on*. This<br />
workhorse has appeared on innumerable recordings and arena stages<br />
worldwide – there is no equal to the original SVT® and its 300 watts of<br />
pure tube magic. First introduced in July 1969, the SVT® set the tone,<br />
punch and arena-rattling standard for all future big gun bass rigs. Its users<br />
have included everyone from The Rolling Stones to Van Halen, and pretty<br />
much every “rock” bass player in between. For <strong>GearBox</strong>’s Rock Classic<br />
Model, we selected a 1974 Ampeg® SVT®, and we’ve also given you a<br />
70’s SVT 8x10 speaker cabinet to pair it with. The sonic combination of<br />
this head and cab is beyond big, but you had to pray that your bandmates<br />
would help you move it! Thanks to <strong>GearBox</strong>, you can now get big classic rock bass tone without<br />
frequent visits to the chiropractor.<br />
* AMPEG® and SVT® are registered trademarks of St. Louis Music, Inc. and are in no way associated<br />
or affiliated with <strong>Line</strong> 6. These product names, descriptions and images are provided for the sole purpose of<br />
identifying the specific products that were studied during <strong>Line</strong> 6’s sound model development.<br />
p Return to Model Gallery List<br />
Flip Top<br />
The Flip Top model is based on* a 60’s Ampeg® B-15 Portaflex® — one<br />
of the most popular studio bass amps of all time. It’s tuned and frontported,<br />
has a closed back, is 25 watts with a single 15-inch speaker, and set<br />
a new standard for cabinet and speaker efficiency, tone and convenience<br />
in bass amplification. If we had to sum up the amp’s sound up in one<br />
sentence, we would simply say: Listen to James Jamerson’s bass playing<br />
on the Motown®/Tamala records of the 1960’s — The Supremes, The<br />
Four Tops, The Temptations, Marvin Gaye, Stevie Wonder, and many<br />
more. Jamerson played bass on more Motown hits than anyone else, and<br />
his choice for amplification was the Ampeg® B-15. We think you’ll agree<br />
that the sound of his P Bass® through that amp on those records is as fresh<br />
and exciting today as it was 35 years ago. And if he’s not enough to convince you, how about “Duck”<br />
Dunn! Don’t get us started....<br />
* All product names used in this document are trademarks of their respective owners, which are in no<br />
way associated or affiliated with <strong>Line</strong> 6. These product names, descriptions and images are used solely to<br />
identify the specific products whose tones and sounds were studied during <strong>Line</strong> 6’s sound model development.<br />
6•11
<strong>Line</strong> 6 <strong>GearBox</strong> <strong>3.5</strong> – Model Gallery<br />
AMPEG and PORTAFLEX are registered trademarks of St. Louis Music, Inc. MOTOWN is a registered<br />
trademark of UMG Recordings, Inc. P BASS is a registered trademark of Fender Musical Instruments<br />
Corporation.<br />
p Return to Model Gallery List<br />
Adam and Eve<br />
After David Eden made cabs for SWR® for 3 or 4 years, he went into the business of making his own<br />
bass amp and cabinet line. Jim Demeter designed the electronics of the first Eden amps, and they were<br />
quickly adopted by a veritable who’s who of modern bass society. <strong>GearBox</strong>’s Adam and Eve model is<br />
based on* the WT-300, one of Eden’s latter offerings which produces a clean, clear and rich tone.<br />
* SWR® is a registered trademark of Fender Musical Instruments Corporation and is in no way associated<br />
or affiliated with <strong>Line</strong> 6. These product names, descriptions and images are provided for the sole purpose of<br />
identifying the specific products that were studied during <strong>Line</strong> 6’s sound model development.<br />
p Return to Model Gallery List<br />
Silverface Bass<br />
The Silverface Bass is modeled after* a 1967 Fender® Bassman®. By ’68,<br />
when the Beatles went in to record The White Album, they had pretty<br />
much done away with their Vox® amps in favor of the new “silverface”<br />
Fender® line. John and George each played through a Twin Reverb®,<br />
and Paul through the 2x15 “tall cab” Bassman®. This amp remained his<br />
favorite through the end of the Beatles’ recording career, and can be seen<br />
in the Revolution video (the cab is laying on its side), and all over the<br />
Let It Be movie — including the infamous “rooftop” concert which closes<br />
the film. Paul went on to use the amp for his first solo recordings, and live<br />
during the early Wings period. We’ve paired this Bassman® head with<br />
a 2x15 closed back cab loaded with JBL®s. The sound of this cab also<br />
reminds us of the theme music from Barney Miller, and all of those days<br />
practicing with the high-school jazz ensemble. Try playing a little of the Peter Gunn Theme....<br />
* All product names used in this document are trademarks of their respective owners, which are in no<br />
way associated or affiliated with <strong>Line</strong> 6. These product names, descriptions and images are used solely to<br />
identify the specific products whose tones and sounds were studied during <strong>Line</strong> 6’s sound model development.<br />
FENDER, BASSMAN, and TWIN REVERB are registered trademarks of Fender Musical Instruments<br />
Corporation. VOX is a registered trademark of Korg Europe Limited.<br />
p Return to Model Gallery List<br />
Eighties<br />
What would any collection of bass amps be without a<br />
Gallien-Krueger 800RB? This model is based on the solid<br />
state amp that helped define what new bass amps sounded<br />
like for the better part of that decade. Geddy Lee had one.<br />
Will Lee used one on “Late Night With David Letterman”.<br />
And bands like Def Leppard powered through a decade<br />
of pop metal with the 800RB. The GK 800RB produces a<br />
very scooped sound, and doesn’t really distort. Try pairing<br />
this amp with another legend of the Eighties, the Hartke<br />
410 cabinet. This rig is known for producing what we call<br />
the “mid 80’s metal bass” tone. It’s the perfect choice when you’re ready for a little Pyromania....<br />
6•12
<strong>Line</strong> 6 <strong>GearBox</strong> <strong>3.5</strong> – Model Gallery<br />
*All product names used in this document are trademarks of their respective owners, which are in no way<br />
associated or affiliated with <strong>Line</strong> 6. These product names, descriptions and images are used solely to identify<br />
the specific products whose tones and sounds were studied during <strong>Line</strong> 6’s sound model development.<br />
p Return to Model Gallery List<br />
Bass Cab Models<br />
1 x 15 Flip Top Based on a 1960’s Ampeg® B-15<br />
2 x 15 DoubleShow Based on a Fender® Dual Showman® D130F<br />
4 x 10 Adam Eve Based on an Eden 410 cab<br />
4 x 10 Silvercone Based on a Hartke 410 cab<br />
8 x 10 Classic Based on an Ampeg® SVT® Cab<br />
* All product names used in this document are trademarks of their respective owners, which are in no<br />
way associated or affiliated with <strong>Line</strong> 6. These product names, descriptions and images are used solely to<br />
identify the specific products whose tones and sounds were studied during <strong>Line</strong> 6’s sound model development.<br />
AMPEG and SVT are registered trademarks of St. Louis Music, Inc. FENDER and DUAL SHOWMAN<br />
are trademarks of Fender Musical Instruments Corporation.<br />
p Return to Model Gallery List<br />
Preamp Models<br />
American Classic<br />
This model is based on* an API 512 Mic Pre and API 550b<br />
EQ housed in an API Lunchbox 500 6-B. In 1967 API<br />
introduced the 512 as the first modular mic pre. Along for<br />
the ride also came the 550 EQ and together the modular<br />
components were housed in a 4 position rack complete with<br />
a handle — the lunchbox. This combination is responsible<br />
for many legendary recordings of the 60’s and 70’s. The<br />
resulting American Classic model also incorporates tonal<br />
elements of the analog tape machines of the day, by Revox,<br />
Studer, and MCI. Hence, our model is designed to give<br />
your inputs the “sonic love” of the entire analog recording<br />
process from the API mic pre, through the EQ, to the sound<br />
of recording to tape.<br />
* All product names used in this document are trademarks of their respective owners, which are in no way<br />
associated or affiliated with <strong>Line</strong> 6. These product names, descriptions and images are used solely to identify<br />
the specific products whose tones and sounds were studied during <strong>Line</strong> 6’s sound model development. SWR is<br />
a registered trademark of Fender Musical Instruments Corporation. REVOX and STUDER are trademarks<br />
of Studer Professional Audio GmbH.<br />
p Return to Model Gallery List<br />
6•13
<strong>Line</strong> 6 <strong>GearBox</strong> <strong>3.5</strong> – Model Gallery<br />
Vintage U.K.<br />
<strong>GearBox</strong>’s Vintage UK model is based on* the truly classic<br />
Neve 1073 pre-amp. Designed by Rupert Neve in the early<br />
1970’s, as a discrete transistor mic/line amp with 3-band EQ<br />
and high-pass filter, the 1073 was used in a variety of Neve<br />
consoles. NOT known for being the flattest or cleanest kid on<br />
the block, the Neve 1073 became the “Gold Standard” of pre<br />
amps regardless. It’s credits are endless and likely numerous<br />
songs playing on the radio right now, as you read this, were<br />
recorded with a Neve 1073. Like the American Classic, this<br />
model’s sound is based not just on our analysis of the 1073, but<br />
also incorporates the kind of “sonic love” you’d have gotten<br />
when recording through a 1073 to legendary Revox, Studer,<br />
and MCI analog tape machines.<br />
* All product names used in this document are trademarks of their respective owners, which are in no way<br />
associated or affiliated with <strong>Line</strong> 6. These product names, descriptions and images are used solely to identify<br />
the specific products whose tones and sounds were studied during <strong>Line</strong> 6’s sound model development. NEVE<br />
is a registered trademark of AMS Neve Ltd. REVOX and STUDER are trademarks of Studer Professional<br />
Audio GmbH.<br />
p Return to Model Gallery List<br />
Lo-Fi<br />
Looking for something aggressive, trashy, or just plain interesting? Try the Lo-Fi tip. It gives you tones<br />
that are very band passed (meaning there’s little low end or extreme high end), with lots of distortion<br />
available from the driver knob. You’ll find it’s just the thing when you want your vocals to sound like<br />
they came through a telephone, megaphone or toy microphone.<br />
p Return to Model Gallery List<br />
Vintage<br />
Incorporating elements of analog tape machines of the day, this composite model is true to form,<br />
lacking the crystal clear 8k and above which wouldn’t arrive for years.<br />
p Return to Model Gallery List<br />
Modern<br />
This model is based on* an Avalon® VT-737, which is an<br />
excellent example of a modern tube preamp design incorporating<br />
an all-discrete, Class A transistor circuit in the built-in 4-<br />
band equalizer. This is a good choice for clean, bright, noncompressed<br />
sound, with soft transients.<br />
All product names used in this document are trademarks of their<br />
respective owners, which are in no way associated or affiliated<br />
with <strong>Line</strong> 6. These trademarks of other manufacturers are used<br />
solely to identify the products of those manufacturers whose tones and sounds were studied during <strong>Line</strong> 6’s<br />
sound model development. AVALON is a registered trademark of Avalon Industries, Inc.<br />
p Return to Model Gallery List<br />
6•14
<strong>Line</strong> 6 <strong>GearBox</strong> <strong>3.5</strong> – Model Gallery<br />
Console<br />
Here’s our model inspired by solid state console mic pre designs, delivering flat frequency response that<br />
is very clean and without the additional personality that the other Preamp Models provide. This is a<br />
great choice when you want to capture quality audio without adding color, as you might want to do<br />
when recording line level instruments like keyboards.<br />
p Return to Model Gallery List<br />
Effects<br />
Delay<br />
Delay Effects create echoes by repeating a delayed version of the signal that feeds them. The FEEDBACK<br />
knob on Delay control panels determine how many repeats you’ll hear. TIME determines how late the<br />
echo will be versus the input signal, and allows Tap Tempo. A short delay time and low feedback<br />
setting will give you a classic “slap back” delay. Longer delay times give you a distinctly separate echo,<br />
and higher feedback settings increase the number of echoes. There’s always a MIX control, and each<br />
of the Models has a few other controls as well....<br />
Analog Delay w/Modulation<br />
The Analog Delay w/ Modulation model is based on* the<br />
Electro-Harmonix® Deluxe Memory Man which is a pedal<br />
that uses the “bucket brigade” electronics of other analog<br />
echoes, and adds a chorus circuit to boot. This adjustable<br />
chorus is applied to the echoes only, leaving the direct sound<br />
unaffected. The Memory Man, with its warm, distorted tone<br />
and swimming echoes, became an important tool for many<br />
guitarists, and was an essential part of the guitar sounds for<br />
the first U2 album. Part of the Deluxe in Deluxe Memory Man<br />
was the increased delay time of 500 milliseconds. Analog w/<br />
Mod emulates that classic Memory Man tone with the added<br />
advantage of 2 seconds of delay time. The mod speed and<br />
depth controls set up the chorus on the delays.<br />
* ELECTRO-HARMONIX® is a trademark of New Sensor Corp. and is in no way associated or affiliated<br />
with <strong>Line</strong> 6. These product names, descriptions and images are provided for the sole purpose of identifying<br />
the specific products that were studied during <strong>Line</strong> 6’s sound model development.<br />
Tube Echo<br />
The classic 1963 Maestro EP-1 was the first of a series of “Echoplex” designs<br />
distributed by the company, and made by Harris-Teller in Chicago. As<br />
touted in a Maestro advertisement, the Echoplex’s “...special effects range<br />
all the way from a controlled high speed reverberation to a full, throbbing<br />
echo”! The main feature of the Echoplex design is a special cartridge of<br />
looped 1/4-inch audio tape that wraps past separate record and playback<br />
heads. The position of the playback head can be moved to adjust the<br />
delay time from 60 to 650 milliseconds. Tube Echo is based on* the classic<br />
Echoplex tone with the extra advantage of up to 2 seconds of delay time.<br />
DRIVE lets you dial up some tube warmth like the original and FLUTTER<br />
(short for wow and flutter) adds that unique sound of a slipping, dirty tape<br />
capstan!<br />
6•15
<strong>Line</strong> 6 <strong>GearBox</strong> <strong>3.5</strong> – Model Gallery<br />
* MAESTRO® and ECHOPLEX® are trademarks of Gibson Guitar Corp. and are in no way associated<br />
or affiliated with <strong>Line</strong> 6. These product names, descriptions and images are provided for the sole purpose of<br />
identifying the specific products that were studied during <strong>Line</strong> 6’s sound model development.<br />
Digital Delay<br />
This model is a straight up digital delay with Bass and Treble tone controls. Nothing fancy here, just<br />
basic echo-cho-cho-cho. After all, it’s good to cleanse the palate every once in a while.<br />
p Return to Model Gallery List<br />
Mod<br />
Mod Effects are things that swoosh, pulse and warble — from phase shifters to flangers to choruses.<br />
Why are they called Mod (Modulation) effects? Well, if we consult a dictionary, we discover that<br />
‘modulate,’ in the electronic world means to “alter the amplitude or frequency of (a wave) by (using)<br />
a wave of a lower frequency to carry a signal” (definition courtesy of The Oxford Encyclopedic English<br />
Dictionary, Third Edition, thank you very much). That modulating wave is what causes all that<br />
swooshing, pulsing, and warbling. The SPEED of the Mod effects controls how quickly (or slowly) the<br />
modulating waveform sweeps, and generally allows Tap Tempo. DEPTH controls overall amplitude of<br />
the modulating wave, which usually determines just how intense the effect will be. There’s always a<br />
MIX control, and sometimes there are also other controls, as we’re about to describe....<br />
Sine Chorus<br />
Here’s your basic digital chorus, which gives you the classic swimmy/watery sound of chorus, plus<br />
BASS and TREBLE controls for bass-ing and trebl-ing. :-)<br />
Subtle settings of the chorus can also be used to give a fatter sound. Extreme settings can totally change<br />
the character of your sound.<br />
<strong>Line</strong> 6 Flanger<br />
Flanger is most famously known as the “jet-plane” whoosh effect of several classic 70s recordings. It<br />
can also be used to give a “swooshy” or “swept” sound to guitar and other sources, or just to create a<br />
“bigger” sound. Eddie Van Halen, for instance, used flanger effects as an important part of his signature<br />
sound on many classic Van Halen recordings, including “Ain’t Talkin’ ‘Bout Love” and much of the<br />
Van Halen I album. For details on each of the Flanger controls, move your mouse over the control and<br />
look in the Info Bar at the bottom of the <strong>GearBox</strong> window. The <strong>Line</strong> 6 Flanger really shines when you<br />
set CONFIG to POST, letting the stereo sweep offset serve up luscious harmonic shimmer.<br />
Phaser<br />
<strong>GearBox</strong>’s Phaser is based on* the MXR® Phase 90 — the guitar stomp box<br />
phaser that changed the world. The Phase 90 is relatively subtle compared<br />
to other phasers, and when you use it, it becomes part of the overall guitar<br />
tone rather than trying to grab the spotlight all to itself. Its lush, organic,<br />
and groovy swirl can be heard all over the first two Van Halen albums,<br />
as well as Jimmy Page’s work on Physical Graffiti. The Phase 90 is a four<br />
stage phaser; its single knob controlled only speed. <strong>GearBox</strong>’s Phaser gives<br />
you additional flexibility with MIX and FEEDBACK controls to adjust<br />
the intensity of the effect.<br />
* MXR® is a trademark of Applied Research and Technology, Inc. and is in<br />
no way associated or affiliated with <strong>Line</strong> 6. These product names, descriptions<br />
6•16
<strong>Line</strong> 6 <strong>GearBox</strong> <strong>3.5</strong> – Model Gallery<br />
and images are provided for the sole purpose of identifying the specific products that were studied during <strong>Line</strong><br />
6’s sound model development.<br />
U-Vibe<br />
The U-Vibe model is based on* the now-legendary Uni-Vibe,<br />
which was put on the map in 1969 by Jimi Hendrix. Essentially<br />
a four-stage phase shifter, the Uni-Vibe is best known for<br />
its watery texture and sultry tones. One listen to “Machine<br />
Gun” and you’ll know what we mean. You can recreate the<br />
effect of the original Uni-Vibe’s vibrato switch by turning<br />
the MIX control to 100% wet. (That’s what the switch did<br />
on the original.) The DEPTH control acts like the Uni-Vibe’s<br />
“Intensity” knob.<br />
*All product names used in this document are trademarks of their respective owners, which are in no way<br />
associated or affiliated with <strong>Line</strong> 6. These product names, descriptions and images are used solely to identify<br />
the specific products whose tones and sounds were studied during <strong>Line</strong> 6’s sound model development.<br />
Opto Tremolo<br />
The Opto Tremolo model is based on* the optical tremolo<br />
circuit that was used in the blackface Fender® amps, like the<br />
‘64 Deluxe Reverb® and ‘65 Twin Reverb®. Basically a light<br />
bulb and a photo-resistor, when the light got brighter, the<br />
tremolo got louder. It’s a very smooth, even tremolo, and the<br />
obvious choice for use with the amp models that are based on<br />
Fender® originals.<br />
* FENDER®, DELUXE REVERB® and TWIN REVERB®<br />
are trademarks of Fender Musical Instruments Corporation<br />
and are in no way associated or affiliated with <strong>Line</strong> 6. These product names, descriptions and images are<br />
provided for the sole purpose of identifying the specific products that were studied during <strong>Line</strong> 6’s sound model<br />
development.<br />
Rotary Drum + Horn<br />
Fine furniture and cool tones — the Leslie® 145 that the Rotary Drum<br />
+ Horn model is based on* gave you both at once! That tube-driven<br />
behemoth (you definitely don’t want to try picking one up on your<br />
own) features a belt-drive rotating high frequency horn along with a<br />
downward-facing 15-inch speaker that had a segmented drum spinning<br />
under it to disperse the sound. It was originally designed to be used with<br />
electric organs like the Hammond B3, but once guitarists (and even<br />
vocalists!) heard it, they just had to get in on the rotate-o-rama. Our<br />
model gives you all that whirligig glory, without giving you a herniated<br />
disc. Slow/Fast switch acts like the one that came on the Leslie 145’s<br />
preamp, ramping between the two speeds. This effect also gives you<br />
TONE and MIX settings. For the truly authentic kind of spin that a<br />
Leslie delivers, you’ll want to set the MIX knob to max, since a Leslie<br />
had no ‘dry’ path.<br />
* LESLIE® is a trademark of Suzuki Musical Instrument Manufacturing Co. Ltd. and is in no way<br />
associated or affiliated with <strong>Line</strong> 6. These product names, descriptions and images are provided for the sole<br />
purpose of identifying the specific products that were studied during <strong>Line</strong> 6’s sound model development.<br />
6•17
<strong>Line</strong> 6 <strong>GearBox</strong> <strong>3.5</strong> – Model Gallery<br />
p Return to Model Gallery List<br />
Stomp<br />
Stomp Effects give you a choice of Models of classic distortions stompboxes, a stomp box-style<br />
compressor, and a couple of De-Esser effects designed for taming Sss and Shh sounds that are common<br />
when recording vocals.<br />
Facial Fuzz<br />
Sometime in late 1966, an infamous circular stomp box hit the London<br />
music scene. Designed and built by Arbiter Music, the Fuzz Face would<br />
soon begin its famous association with guitar legend Jimi Hendrix. Like<br />
all stompboxes from the early era, the Fuzz Face would see many design<br />
changes, as well as re-issues. Our model is based on* the germanium<br />
diode-powered treasure pictured here: an original, very early “gray with<br />
black screening” Arbiter Fuzz Face. Call the Facial Fuzz model up, and<br />
treat yourself to our faithful re-creation of the original’s fuzz and glory.<br />
Crank up the drive, and you’ll be seeing Purple Haze right before your<br />
eyes!<br />
*All product names used in this document are trademarks of their respective<br />
owners, which are in no way associated or affiliated with <strong>Line</strong> 6. These<br />
product names, descriptions and images are used solely to identify the specific products whose tones and<br />
sounds were studied during <strong>Line</strong> 6’s sound model development.<br />
Fuzz Pi<br />
Not to be outdone by the Brits, the colonies came up with<br />
their own twist on the fuzz rage. Mike Mathews and his band<br />
of merry men at Electro-Harmonix® had been cooking up<br />
all sorts of nifty effects when their attention turned to the<br />
distortion/fuzz pedal. Their most popular offering was the<br />
Electro-Harmonix® Big Muff Pi, which <strong>GearBox</strong>’s Fuzz Pi<br />
model is based on*. The Pi was known more for its sweet<br />
sustain than for its buzz.<br />
*All product names used in this document are trademarks of<br />
their respective owners, which are in no way associated or<br />
affiliated with <strong>Line</strong> 6. These product names, descriptions and images are used solely to identify the specific<br />
products whose tones and sounds were studied during <strong>Line</strong> 6’s sound model development.<br />
Screamer<br />
From Stevie Ray Vaughan to Michael Landau, the simple Ibanez® Tube<br />
Screamer® is the overdrive heard ‘round the world. This medium-gain pedal<br />
was introduced in the early ‘80s, and in many blues circles, you’re not allowed<br />
to solo without one. Over the years, Ibanez® issued several variations of the<br />
venerable Tube Screamer®, but none have reached the fabled status of the<br />
TS-808® that this model is based on*.<br />
* IBANEZ® is a trademark of Hoshino Gakki Co. Ltd. and is in no way<br />
associated or affiliated with <strong>Line</strong> 6. These product names, descriptions and images<br />
are provided for the sole purpose of identifying the specific products that were<br />
studied during <strong>Line</strong> 6’s sound model development.<br />
6•18
<strong>Line</strong> 6 <strong>GearBox</strong> <strong>3.5</strong> – Model Gallery<br />
Classic Distortion<br />
Born and bred in the late ‘70s, the ProCo Rat was the beginning<br />
of a new generation of distortion boxes. With a sound that was<br />
angrier and more aggressive than a fuzz, the Rat put teeth into<br />
a new breed of metal that was beginning to crawl to the surface<br />
of the music scene. The TONE knob on <strong>GearBox</strong>’s Classic<br />
Distortion Model based on* the Rat model functions like the<br />
original’s “filter” control, giving you brighter tone at lower<br />
settings, and darker tone at higher settings. Once bitten, you’ll<br />
know why we call this one “tone with teeth!”<br />
* All product names used in this document are trademarks of their respective owners, which are in no way<br />
associated or affiliated with <strong>Line</strong> 6. These product names, descriptions and images are used solely to identify<br />
the specific products whose tones and sounds were studied during <strong>Line</strong> 6’s sound model development.<br />
Vetta Comp<br />
This effect is taken from the Vetta II, <strong>Line</strong> 6’s flagship guitar<br />
amplifier. A <strong>Line</strong> 6 original, Vetta Comp has a fixed ratio<br />
(2.35:1, in case you’re asking) with the threshold (that would<br />
be your SENS knob) adjustable from -9dB to -56dB and up to<br />
12dB of gain available at the LEVEL knob. In other words, turn<br />
the SENS knob ‘til you like the way your signal’s compressed,<br />
then set the volume with LEVEL.<br />
p Return to Model Gallery List<br />
Verb (Reverb)<br />
Verb Effects simulate the reverberation of sound in a physical space, where the source sound combines<br />
with countless, tightly spaced echoes. <strong>GearBox</strong>’s collection of reverb models emulate physical<br />
environments (rooms and halls), plate reverbs (which traditionally feature a big steel plate with some<br />
sort of speaker driving it plus multiple pickups to pick up the vibrations of the plate) and spring<br />
reverbs (the kind guitar players know best). Choose a Spring Reverb when you want the kind of classic<br />
sound created by spring reverb tanks built into guitar amps, or used for studio processing on classic<br />
recordings. This is the place to come, for instance, when you’re looking for that signature Surf Music<br />
sound of splattering reverb. Choose a Room Reverb when you want a polished, modern studio sound.<br />
It simulates the sound of ambience in a room, and can be set to subtly enhance the size and polish of<br />
your tone, or make it sound like you’re playing in a large, resonant chamber.<br />
Standard Spring<br />
One of the many things that people have loved about the<br />
blackface Fender® Twin Reverb® over the years has been its<br />
rich, dense reverb sound. The three-spring tank offered a more<br />
complex sound than the Fender® earlier spring reverbs, and<br />
of course that’s what the <strong>GearBox</strong> Standard Spring model is<br />
based on*. Go find yourself a bevy of bikini-clad beauties, wax<br />
up your board, and dig in.<br />
* FENDER® and TWIN REVERB® are trademarks of Fender<br />
Musical Instruments Corporation and are in no way associated<br />
or affiliated with <strong>Line</strong> 6. These product names, descriptions and<br />
images are provided for the sole purpose of identifying the specific<br />
6•19
<strong>Line</strong> 6 <strong>GearBox</strong> <strong>3.5</strong> – Model Gallery<br />
products that were studied during <strong>Line</strong> 6’s sound model development.<br />
Brite Room<br />
Here’s the sound of a live, bright room to add life to any track.<br />
Medium Hall<br />
A medium sized hall with heavy reflections - this one is meant to be heard.<br />
Cavernous<br />
Now that’s big! Fire this verb up and get set for a long night of dandelion dreams...<br />
Slap Plate<br />
This reverb dishes up the vibe of early rock and roll recordings, like Sam Phillips’ great work at Sun<br />
Studios. Thank you very much.<br />
p Return to Model Gallery List<br />
Wah<br />
The <strong>GearBox</strong> Wah effects simulate classic wah pedals, and can be used to provide a “parked wah”<br />
sound, or can be controlled via <strong>MIDI</strong> for wah pedal effects.<br />
Vetta Wah<br />
This is the original PODxt/Vetta Wah Model, which is a bit of a play on an old classic. We’ve made it<br />
a nice balanced wah, designed to sound great in most any style of playing.<br />
Weeper<br />
Modeled after* an Arbiter® Cry Baby, this is yet another variation on the original Vox® wah design.<br />
The biggest variation between many of these wah pedals is the inductor and the tolerances of the<br />
capacitors and resistors that make up the filter circuit. Just like vintage guitar amps, two of them made<br />
on the same day, by the same person, from the same parts bin might sound totally different. As always,<br />
we went for the best examples we could find.<br />
All product names are trademarks of their respective owners, which are in no way associated or affiliated<br />
with <strong>Line</strong> 6. These product names, descriptions and images are provided for the sole purpose of identifying<br />
the specific products that were studied during <strong>Line</strong> 6’s sound model development. VOX® is a registered<br />
trademark of Korg Europe Limited. ARBITER® is a registered trademark of Arbiter Group PLC.<br />
p Return to Model Gallery List<br />
Bass Effects<br />
Bass Overdrive<br />
This model was inspired by our look at the Tech 21 Bass Sans Amp, plus a few extra liberties taken<br />
by the <strong>Line</strong> 6 sound design team. The Sans Amp is famous for delivering a very quiet and crisp signal<br />
under all circumstances, while also serving up a very distinct distortion. Is pleasingly metallic quality<br />
makes it a favorite with the Post-Metal crowd and Industrial bands, and producers in all genres of<br />
music have come to favor the Bass Sans Amp for crunching up loops. The Bass Overdrive covers the<br />
6•20
<strong>Line</strong> 6 <strong>GearBox</strong> <strong>3.5</strong> – Model Gallery<br />
same sort of territory, with a bit of a uniquely <strong>Line</strong> 6 bent. Choose this distortion for your bass or any<br />
other signal and it will immediately become a very close and furry friend. Note for non-bass players:<br />
this stomp box absolutely rocks on signals other than bass. No, really, try it.<br />
Bronze Master<br />
The Maestro® Bass Brassmaster is considered by many to be the Holy Grail of bass distortion units, and<br />
ultra-rare bird designed in the early ‘70’s for Maestro® by synth genius Tom Oberheim. It showed up<br />
on Chris Squire’s gear list in a mid-70’s Yes tour program. In fact, the Brassmaster was the first distortion<br />
unit we can think of designed primarily with the bassist in mind, and man, did Mr. Oberheim get it<br />
right! The original has a fairly elaborate set of controls, include two separate volumes and toggles for<br />
accentuating different harmonic voicings. We weren’t able to make an exact duplicate of some of that<br />
complexity when creating the Bronze Master for <strong>GearBox</strong>, but you’ll find that this model does give you<br />
a luscious palette of super-sweet bass fuzz in the style of the Brassmaster, with righteous distortion that<br />
doesn’t take away that all-important low end. For guitar players, think of it as somewhere between an<br />
Octave Fuzz and a synth. You can get positively freaky with this one.<br />
All product names are trademarks of their respective owners, which are in no way associated or affiliated with<br />
<strong>Line</strong> 6. These product names, descriptions and images are provided for the sole purpose of identifying the<br />
specific products that were studied during <strong>Line</strong> 6’s sound model development. MAESTRO® is a registered<br />
trademark of Gibson Guitar Corp.<br />
Sub Octaves<br />
All bassists know that in just about every musical situation, lower can be better! But we couldn’t just<br />
let bass players have all the fun, so we’ve included an Octave device in your PODxt that’s inspired<br />
by the very popular Boss OC-2. Your Sub Octave gets you down into booty-shaking territory mighty<br />
quick. Use it to create additional voices below what you’re playing. Remember, lower can be better,<br />
especially when it makes the booty shake!<br />
p Return to Model Gallery List<br />
All product names are trademarks of their respective owners, which are in no way associated or<br />
affiliated with <strong>Line</strong> 6. These product names, descriptions and images are provided for the sole purpose<br />
of identifying the specific products that were studied during <strong>Line</strong> 6’s sound model development.<br />
Other Effects<br />
Comp (Compressor)<br />
The Comp (Compressor) effect in <strong>GearBox</strong> is modeled<br />
after* the classic, studio-standard LA-2A® tube<br />
compressor. It’s just the thing when you want to smooth<br />
out your levels the way that you would typically do in a<br />
recording studio. The THRESHOLD knob determines<br />
how aggressive the compressor will be in smoothing things<br />
out. Turning the knob farther to the left give you more<br />
aggressive compression. The GAIN knob lets you increase<br />
level once you’ve smoothed things out. But be careful: if<br />
you add too much gain here, you may see that you start<br />
clipping, and need to back off again on the gain.<br />
* LA-2A® is a trademark of William Putnam and is in no way associated or affiliated with <strong>Line</strong> 6. These<br />
product names, descriptions and images are provided for the sole purpose of identifying the specific products<br />
that were studied during <strong>Line</strong> 6’s sound model development.<br />
6•21
<strong>Line</strong> 6 <strong>GearBox</strong> <strong>3.5</strong> – Model Gallery<br />
EQ<br />
<strong>GearBox</strong>’s 4 Band Semi-Parametric EQ lets you emphasize and de-emphasize selected ranges of audio<br />
frequencies, from bass to midrange to treble. The knobs on the left of the EQ’s control panel let you<br />
choose the frequency that each of the 4 bands of the EQ will focus on, and set the amount of gain that<br />
will be added to or subtracted from that frequency band.<br />
The top knob pair is for the highest frequency range (the treble), providing a high shelf which boosts<br />
all the audio at and above the frequency point you select. As you make changes to this and the other<br />
EQ bands, the resulting EQ curve is shown in the EQ control panel’s display area. The second knob<br />
pair down controls a bandpass filter for the for the high-mids, boosting frequencies at and around the<br />
frequency that you select. The third knob pair down is for the low mids, and the bottom knob pair,<br />
for the bass, controls a low which boosts all the audio at and below the frequency you select. Press the<br />
RESET button to “zero” out all the gains, and set each band to a default frequency point, which is<br />
generally a good starting point when you want to make EQ adjustments. As you make EQ adjustments,<br />
it’s a good idea to frequently check what the Tone sounds like with the EQ turned off, to make sure<br />
that you’re really making improvements when adding EQ!<br />
Gate<br />
<strong>GearBox</strong>’s Gate is designed to reduce the noise that your guitar or other source makes when you are<br />
not playing. You can think of it as a gate that opens to let your guitar or other sound through when you<br />
play, and closes when you stop playing to shut out the noise you would otherwise hear after you stop<br />
playing. (For guitars and basses, the Hum Reducer is available to tame noise in another way.)<br />
The Gate works by detecting the input level coming into <strong>GearBox</strong>. When the input level is below<br />
the level set for the gate’s THRESHOLD knob, the gate will close at the speed set by the Gate’s<br />
DECAY knob, and cut off the signal from your input. When the input level is above the threshold,<br />
the gate will open to let your input signal through. Turning the Threshold knob clockwise increases<br />
the aggressiveness of the gate in its effort to cut off sound. The idea is to set the threshold low enough<br />
so that it doesn’t cut off the signal as you are playing or a note is sustaining, but high enough so that<br />
the background noise from your guitar or other source doesn’t keep the gate open. When you’re using<br />
a Stomp effect, Amp Model or Preamp Model that adds a lot of distortion to your Tone, you’ll need<br />
to adjust the Gate to work well with that, and you’ll probably have to tweak the Gate if you change<br />
Models, change drive settings, or use different guitar(s), pickup configurations, or other changes to<br />
your input source, and the volume of audio that it’s providing.<br />
You can turn the Gate on/off by clicking its icon, and the setting of the Gate is saved as part of a<br />
Tone.<br />
Vol (Volume)<br />
<strong>GearBox</strong>’s Vol (Volume) allows a <strong>MIDI</strong> controller to operate a volume pedal effect in <strong>GearBox</strong> to<br />
control the volume of your processed sound. The CONFIGURE switch on the Volume control panel<br />
lets you decide whether the volume pedal will run before the amp/cab/mic or Preamp processing<br />
(“Pre”), or after (“Post”).<br />
Female De-Esser<br />
The Female De-esser should be your first choice when taming the Sss and Shh sounds of female<br />
vocalists, although as with all things musical, you may find many uses for it and may find that for some<br />
male vocalists it works better than the Male De-Esser. For general information on De-Essers, see the<br />
Set the De-Esser topic in the How To section. Technically-savvy users will want to know that this deesser<br />
performs its gain reduction only on the selected frequency band, unlike the more typical insertstyle<br />
De-Essing of the Male De-Esser.<br />
6•22
<strong>Line</strong> 6 <strong>GearBox</strong> <strong>3.5</strong> – Model Gallery<br />
Male De-Esser<br />
The Male De-esser should be your first choice for controlling the Sss and Shh sounds of male vocalists,<br />
although as with all things musical, you may find many uses for it and may find that for some female<br />
vocalists it works better than the Female De-Esser. For general information on De-Essers, see the Set<br />
the De-Esser topic in the How To section. Technically-savvy users will want to know that this is a<br />
standard insert-style de-esser, performing gain reduction on the full bandwidth audio signal.<br />
p Return to Model Gallery List<br />
Model List<br />
To follow is a list of all Amp, Cab and Effects models that are included as “Factory-Standard*” models<br />
for each <strong>Line</strong> 6 device supported by <strong>GearBox</strong>, as well as included within each optional Model Pack.<br />
These models will appear within the <strong>GearBox</strong> Amp Model, Cab Model and Effect Model menus when<br />
the respective device is the one in use by <strong>GearBox</strong>, and if the optional Model Packs are authorized for<br />
this <strong>Line</strong> 6 device.<br />
Note that all PODxt devices already include the models from the Power Pack as Factory-Standard, and<br />
that PODxt Live additionally comes with the FX Junkie Pack included as Factory-Standard.<br />
*Factory-Standard Models are those that are included as permanently installed models on a <strong>Line</strong> 6<br />
device. These models cannot be transferred to other <strong>Line</strong> 6 devices. However, it is possible to transfer<br />
the License Key that you are granted for any Add-On Model Packs that you purchase separately<br />
between any supporting <strong>Line</strong> 6 device that you own by using <strong>Line</strong> 6 Monkey. Please visit the <strong>Line</strong> 6<br />
Online Support pages for more about Transferring License Keys.<br />
Please refer to the Model Gallery section for descriptions of the GuitarPort and <strong>TonePort</strong> Models.<br />
Additional descriptions for PODxt can be found in the PODxt Pilot’s Handbook and in the Model<br />
Pack Handbooks. Please visit the <strong>Line</strong> 6 Online Store for information about Add-On Model Packs – or<br />
just launch <strong>Line</strong> 6 Monkey with your <strong>Line</strong> 6 device connected and look in the Optional Add-Ons tab<br />
to see what’s in store for you!<br />
Model Name<br />
GuitarPort-<br />
TonnePort<br />
Standard<br />
PodXT<br />
Standard<br />
Power Pack<br />
Metal Shop<br />
Pack<br />
Collector<br />
Classis Pack<br />
FX Junkie<br />
Pack<br />
Bass Expan.<br />
Pack<br />
Guitar Amps<br />
<strong>Line</strong> 6 21st Century Clean • •<br />
<strong>Line</strong> 6 Sparkle<br />
<strong>Line</strong> 6 Twang<br />
<strong>Line</strong> 6 Bayou<br />
<strong>Line</strong> 6 JTS-45 • •<br />
<strong>Line</strong> 6 Class A • •<br />
<strong>Line</strong> 6 Mood • •<br />
<strong>Line</strong> 6 Spinal Puppet • •<br />
<strong>Line</strong> 6 Throttle<br />
<strong>Line</strong> 6 Chemical X • •<br />
•<br />
•<br />
•<br />
•<br />
6•23
<strong>Line</strong> 6 <strong>GearBox</strong> <strong>3.5</strong> – Model Gallery<br />
Model Name<br />
GuitarPort-<br />
TonnePort<br />
Standard<br />
PodXT<br />
Standard<br />
Power Pack<br />
Metal Shop<br />
Pack<br />
Collector<br />
Classis Pack<br />
FX Junkie<br />
Pack<br />
Bass Expan.<br />
Pack<br />
<strong>Line</strong> 6 Purge<br />
<strong>Line</strong> 6 Insane • •<br />
<strong>Line</strong> 6 Octone<br />
<strong>Line</strong> 6 Piezacoustic 2 • •<br />
2001 Zen Master •<br />
1953 Small Tweed • •<br />
1958 Tweed B-Man • •<br />
1960 Tiny Tweed •<br />
1964 Blackface ‘Lux • •<br />
1965 Double Verb • •<br />
•<br />
1996 Mini Double •<br />
1960 Gibtone Expo •<br />
1960 Two-Tone • •<br />
1973 Hiway 100 • •<br />
1965 Plexi 45 • •<br />
1968 Plexi Lead 100 • •<br />
1968 Brit Plexi Bass 100 •<br />
1968 Plexi Jump Lead • •<br />
1968 Plexi Variac’d • •<br />
1969 Brit Plexi Lead 200 •<br />
1990 Brit J-800 • •<br />
1996 Brit JM Pre • •<br />
1996 Match Chief • •<br />
1993 Match D-30 • •<br />
2001 Treadplate Dual • •<br />
2001 Cali Diamond Plate •<br />
1985 Cali Crunch •<br />
1987 Jazz Clean • •<br />
1967 Wishbook Silver 12 •<br />
1993 Solo 100 Head • •<br />
1960s Super O • •<br />
1962 Super O Thunder •<br />
1960 Class A-15 • •<br />
1967 Class A-30 Top Boost • •<br />
•<br />
6•24
<strong>Line</strong> 6 <strong>GearBox</strong> <strong>3.5</strong> – Model Gallery<br />
Model Name<br />
GuitarPort-<br />
TonnePort<br />
Standard<br />
PodXT<br />
Standard<br />
Power Pack<br />
Metal Shop<br />
Pack<br />
Collector<br />
Classis Pack<br />
FX Junkie<br />
Pack<br />
Bass Expan.<br />
Pack<br />
Tube Instrument Preamp • •<br />
2002 Bomber Uber •<br />
2002 Bomber X-TC •<br />
2002 Angel P-Ball •<br />
<strong>Line</strong> 6 Variax Acoustic • •<br />
<strong>Line</strong> 6 Super Clean<br />
<strong>Line</strong> 6 Super Sparkle<br />
<strong>Line</strong> 6 Sparkle Clean<br />
<strong>Line</strong> 6 Crunch<br />
<strong>Line</strong> 6 Smash<br />
<strong>Line</strong> 6 Fuzz<br />
<strong>Line</strong> 6 Chunk Chunk<br />
<strong>Line</strong> 6 Big Bottom<br />
<strong>Line</strong> 6 Treadplate • • •<br />
<strong>Line</strong> 6 Lunatic • •<br />
<strong>Line</strong> 6 Agro • •<br />
2003 Connor 50 •<br />
•<br />
•<br />
•<br />
•<br />
•<br />
2003 Deity Crunch •<br />
2003 Deity Lead •<br />
2003 Deity’s Son •<br />
1963 Blackface Vibro •<br />
1967 Double Show •<br />
1972 Silverface Bass •<br />
1987 Brit Gain Silver J •<br />
1992 Brit Gain J-900 Clean •<br />
1992 Brit Gain J-900 Dist •<br />
2003 Brit Gain J-2000 •<br />
2002 Mississippi Criminal •<br />
Citrus D-30 • •<br />
L6 Modern Hi Gain • •<br />
L6 Boutique #1 • •<br />
Class A-30 Fawn • •<br />
Brit Gain 18 • •<br />
Brit J-2000 #2 • •<br />
•<br />
•<br />
•<br />
6•25
<strong>Line</strong> 6 <strong>GearBox</strong> <strong>3.5</strong> – Model Gallery<br />
Model Name<br />
GuitarPort-<br />
TonnePort<br />
Standard<br />
PodXT<br />
Standard<br />
Power Pack<br />
Metal Shop<br />
Pack<br />
Collector<br />
Classis Pack<br />
FX Junkie<br />
Pack<br />
Bass Expan.<br />
Pack<br />
Bass Amps<br />
<strong>Line</strong> 6 Tube Preamp<br />
<strong>Line</strong> 6 Classic Jazz<br />
<strong>Line</strong> 6 Brit Invader<br />
<strong>Line</strong> 6 Super Thor<br />
<strong>Line</strong> 6 Frankenstein<br />
<strong>Line</strong> 6 Ebony Lux<br />
<strong>Line</strong> 6 Doppleganger<br />
<strong>Line</strong> 6 Sub Dub<br />
1972 Amp 360 •<br />
2003 Jaguar •<br />
1975 Alchemist •<br />
1974 Rock Classic • •<br />
1968 Flip Top • •<br />
1998 Adam and Eve • •<br />
1958 Tweed B-Man •<br />
1967 Silverface Bass • •<br />
1964 Double Show •<br />
1989 Eighties • •<br />
1973 Hiway 100 •<br />
1971 Hiway 200 •<br />
1969 British Major •<br />
1968 Brit Bass •<br />
2003 California •<br />
1998 Jazz Tone •<br />
1978 Stadium •<br />
2002 Studio Tone •<br />
1967 Motor City •<br />
1965 Brit Class A100 •<br />
•<br />
•<br />
•<br />
•<br />
•<br />
•<br />
•<br />
•<br />
Pre-Amps<br />
American Classic<br />
Brit Classic<br />
Lo-Fi<br />
•<br />
•<br />
•<br />
6•26
<strong>Line</strong> 6 <strong>GearBox</strong> <strong>3.5</strong> – Model Gallery<br />
Model Name<br />
GuitarPort-<br />
TonnePort<br />
Standard<br />
PodXT<br />
Standard<br />
Power Pack<br />
Metal Shop<br />
Pack<br />
Collector<br />
Classis Pack<br />
FX Junkie<br />
Pack<br />
Bass Expan.<br />
Pack<br />
Vintage<br />
Modern<br />
Console<br />
•<br />
•<br />
•<br />
Guitar Cabs<br />
1x6 1960s Super O • •<br />
1x8 1960 Tiny Tweed • •<br />
1x10 1959 Gibtone • •<br />
1x10 1960 G-Brand • •<br />
1x12 2001 <strong>Line</strong> 6 • •<br />
1x12 1953 Small Tweed • •<br />
1x12 1964 Blackface ‘Lux • •<br />
1x12 1960 Class A-15 • •<br />
2x2 2001 Mini T • •<br />
2x12 2001 <strong>Line</strong> 6 • •<br />
2x12 1965 Blackface • •<br />
2x12 1996 Match Chief • •<br />
2x12 1987 Jazz Clean • •<br />
2x12 1967 Class A-30 • •<br />
4x10 2001 <strong>Line</strong> 6 • •<br />
4x10 1958 Tweed B-Man • •<br />
4x12 2001 <strong>Line</strong> 6 • •<br />
4x12 1967 Green 20s • •<br />
4x12 1968 Green 25s • •<br />
4x12 1978 Brit Celest T-75s • •<br />
4x12 1996 Brit Celest V-30s • •<br />
4x12 2001 Treadplate • •<br />
1x15 1962 Thunder • •<br />
2x12 1967 Wishbook • •<br />
Bass Cabs<br />
1x12 Boutique<br />
1x12 Motor City<br />
1x15 Flip Top • •<br />
•<br />
•<br />
6•27
<strong>Line</strong> 6 <strong>GearBox</strong> <strong>3.5</strong> – Model Gallery<br />
Model Name<br />
GuitarPort-<br />
TonnePort<br />
Standard<br />
PodXT<br />
Standard<br />
Power Pack<br />
Metal Shop<br />
Pack<br />
Collector<br />
Classis Pack<br />
FX Junkie<br />
Pack<br />
Bass Expan.<br />
Pack<br />
1x15 Jazz Tone<br />
1x18 Session<br />
1x18 Amp 360<br />
1x18 California<br />
1x18+12 Stadium •<br />
2x10 Modern UK<br />
2x15 Doubleshow • •<br />
2x15 California<br />
2x15 Class A<br />
4x10 <strong>Line</strong> 6<br />
4x10 Tweed<br />
4x10 Adam and Eve • •<br />
4x10 Silvercone • •<br />
4x10 Session<br />
4x12 Hiway<br />
4x12 Green 2019s<br />
4x12 Green 2519s<br />
4x15 Big Boy<br />
8x10 Classic • •<br />
•<br />
•<br />
•<br />
•<br />
•<br />
•<br />
•<br />
•<br />
•<br />
•<br />
•<br />
•<br />
•<br />
•<br />
Dynamic FX<br />
Volume Pedal • •<br />
Noise Gate • •<br />
Compressor • •<br />
A.I.R. • •<br />
Blue Comp • •<br />
Blue Comp Treble Boost<br />
Red Comp • •<br />
Vetta Comp • •<br />
Vetta Juice<br />
Auto Swell • •<br />
Female De-Esser<br />
Male De-Esser<br />
•<br />
•<br />
•<br />
•<br />
6•28
<strong>Line</strong> 6 <strong>GearBox</strong> <strong>3.5</strong> – Model Gallery<br />
Model Name<br />
GuitarPort-<br />
TonnePort<br />
Standard<br />
PodXT<br />
Standard<br />
Power Pack<br />
Metal Shop<br />
Pack<br />
Collector<br />
Classis Pack<br />
FX Junkie<br />
Pack<br />
Bass Expan.<br />
Pack<br />
Delay FX<br />
Delay<br />
Analog Delay • •<br />
Analog Delay w/Modulation • •<br />
Tube Echo • •<br />
Multi-Head Delay • •<br />
Sweep Echo • •<br />
Digital Delay • •<br />
Stereo Delay • •<br />
Ping Pong Delay • •<br />
Reverse Delay • •<br />
Tape Echo • •<br />
Echo Platter<br />
Low Rez<br />
Phaze Eko<br />
Bubble Echo<br />
•<br />
•<br />
•<br />
•<br />
Modulation FX<br />
Sine Chorus • •<br />
Analog Chorus • •<br />
<strong>Line</strong> 6 Flanger • •<br />
Jet Flanger • •<br />
Phaser • •<br />
U-Vibe • •<br />
Opto Tremolo • •<br />
Bias Tremolo • •<br />
Rotary Drum + Horn • •<br />
Rotary Drum • •<br />
Auto Pan • •<br />
Lumpy Phase<br />
Stereo Square Chorus<br />
Expo Flange<br />
Random Chorus<br />
Analog Square Chorus<br />
•<br />
•<br />
•<br />
•<br />
•<br />
6•29
<strong>Line</strong> 6 <strong>GearBox</strong> <strong>3.5</strong> – Model Gallery<br />
Model Name<br />
GuitarPort-<br />
TonnePort<br />
Standard<br />
PodXT<br />
Standard<br />
Power Pack<br />
Metal Shop<br />
Pack<br />
Collector<br />
Classis Pack<br />
FX Junkie<br />
Pack<br />
Bass Expan.<br />
Pack<br />
POD Purple X<br />
Random S & H<br />
Tape Eater<br />
Hi Talk<br />
Sweeper<br />
Warble-Matic<br />
Stereo Expo Chorus<br />
Stereo Square Flange<br />
•<br />
•<br />
•<br />
•<br />
•<br />
•<br />
•<br />
•<br />
Reverb FX<br />
‘Lux Spring • •<br />
Standard Spring • •<br />
King Spring • •<br />
Small Room • •<br />
Tiled Room • •<br />
Brite Room • •<br />
Dark Hall • •<br />
Medium Hall • •<br />
Large Hall • •<br />
Rich Chamber • •<br />
Chamber • •<br />
Cavernous • •<br />
Slap Plate • •<br />
Vintage Plate • •<br />
Large Plate • •<br />
Distortion FX<br />
Facial Fuzz • •<br />
Tube Drive<br />
Fuzz Pi • •<br />
Screamer • •<br />
Octave Fuzz<br />
•<br />
Classic Distortion • •<br />
Killer Z<br />
•<br />
•<br />
6•30
<strong>Line</strong> 6 <strong>GearBox</strong> <strong>3.5</strong> – Model Gallery<br />
Model Name<br />
GuitarPort-<br />
TonnePort<br />
Standard<br />
PodXT<br />
Standard<br />
Power Pack<br />
Metal Shop<br />
Pack<br />
Collector<br />
Classis Pack<br />
FX Junkie<br />
Pack<br />
Bass Expan.<br />
Pack<br />
Boost + EQ<br />
Bass Overdrive • •<br />
Bronze Master • •<br />
•<br />
Wah FX<br />
Vetta Wah • •<br />
Fassel • •<br />
Weeper • •<br />
Chrome • •<br />
Chrome Custom • •<br />
Throaty • •<br />
Conductor • •<br />
Colorful • •<br />
Filter FX<br />
4 Band SemiParametric EQ • •<br />
Auto Wah • •<br />
Synth Lead<br />
Synth String<br />
Synth Analog<br />
Synth FX<br />
Buzz Wave<br />
Rez Synth<br />
Saturn 5 Ring Mod<br />
Double Bass<br />
Synth Harmony<br />
Dingo Tron<br />
Clean Sweep<br />
Seismik Synth<br />
Sub Octaves • •<br />
Bender • •<br />
•<br />
•<br />
•<br />
•<br />
•<br />
•<br />
•<br />
•<br />
•<br />
•<br />
•<br />
•<br />
6•31
<strong>Line</strong> 6 <strong>GearBox</strong> <strong>3.5</strong> – Troubleshooting<br />
Troubleshooting<br />
Audio Glitches................................................................................................................ 7•2<br />
Auto-connect options don’t work................................................................................... 7•4<br />
Why can’t I hear the effects?........................................................................................... 7•5<br />
Why can’t I record a Track from GuitarPort to other programs..................................... 7•5<br />
Why can’t I play the GuitarPort Track I just downloaded?............................................ 7•5<br />
Disabling auto-launching of Windows Media Player, iTunes or other CD player<br />
programs while using <strong>GearBox</strong>........................................................................................ 7•6<br />
Download Errors – Download Accelerators.................................................................... 7•6<br />
The <strong>Line</strong> 6 device Audio Driver cannot be found by your computer when<br />
connecting your <strong>Line</strong> 6 device, or on startup................................................................. 7•6<br />
Guitar volume is too quiet at max setting...................................................................... 7•7<br />
Trouble accessing GuitarPort Online.............................................................................. 7•7<br />
Why do I still hear hum when my Hum Reducer is on?................................................. 7•8<br />
Incomplete Downloads.................................................................................................... 7•8<br />
Light is off on GuitarPort or <strong>TonePort</strong> hardware............................................................ 7•8<br />
Multiple computers: using <strong>GearBox</strong> and GuitarPort Online on more than<br />
one computer................................................................................................................... 7•8<br />
<strong>TonePort</strong>/GuitarPort hardware does not power up......................................................... 7•9<br />
No sound......................................................................................................................... 7•9<br />
Causes of excess noise or unwanted distortion and clipping........................................ 7•11<br />
I still hear noise when the Gate is on........................................................................... 7•12<br />
Track Level Issues.......................................................................................................... 7•12<br />
Track playback when using the Player is frequently interrupted.................................. 7•12<br />
USB Errors..................................................................................................................... 7•13<br />
<strong>TonePort</strong> <strong>UX8</strong> does not reconnect after Windows goes into standby.......................... 7•13<br />
Warranty, Customer Service and Repair Information.................................................. 7•14<br />
Windows XP Optimization........................................................................................... 7•14<br />
7•1
<strong>Line</strong> 6 <strong>GearBox</strong> <strong>3.5</strong> – Troubleshooting<br />
Audio Glitches<br />
Audible pops and clicks and other audio glitches may occur when another program or device is trying<br />
to stream audio or video, or your computer cannot provide enough system resources (RAM memory,<br />
or hard disk or computer processor speed) for <strong>GearBox</strong>. There can be many different causes for this<br />
type of problem, since there are so many possible computer models, parts, and configurations. First, be<br />
sure to check the instructions in the <strong>GearBox</strong> Recording Setup Guide and Windows XP Optimizations<br />
documents that you can find on the <strong>GearBox</strong> Online Help page of the <strong>Line</strong> 6 website. There’s detail<br />
there on how to properly setup <strong>Line</strong> 6 devices and <strong>GearBox</strong> with a variety of recording software, plus<br />
information on fine-tuning the setup of Windows computers for audio recording and processing. The<br />
following tips may also help with resolve audio issues…<br />
On Windows® systems -<br />
If you are experiencing audio dropouts or glitches, then you can try adjusting the ToneDirect<br />
Monitoring buffer slider (for <strong>TonePort</strong> or GuitarPort devices) or by adjusting the USB Audio<br />
Streaming slider (for PODxt devices). You can access this control by going to the <strong>Line</strong> 6 Audio-<br />
<strong>MIDI</strong> Devices dialog:<br />
Start button > Settings > Control Panel > <strong>Line</strong> 6 Audio-<strong>MIDI</strong> devices.<br />
For <strong>TonePort</strong> or GuitarPort devices, adjust the slider one tick to the right at a time, until the<br />
monitoring signal is free from audio dropouts:<br />
For PODxt devices, adjust the slider one tick to the right at a time, until the monitoring signal is<br />
free from audio dropouts:<br />
On Mac® or Windows® systems –<br />
If you are recording into your audio software and the recording have dropouts or pops and clicks,<br />
then you can try adjusting a Recording Buffer, if one is offered.<br />
On Windows® systems, the <strong>Line</strong> 6 Audio-<strong>MIDI</strong> settings dialog offer an ASIO Buffer size adjustment,<br />
and this is what you should use. (Note that this is only available when you are using <strong>GearBox</strong> and<br />
your <strong>Line</strong> 6 hardware’s ASIO driver with your audio software). You can access the <strong>Line</strong> 6 ASIO<br />
Buffer size setting by going to the <strong>Line</strong> 6 Audio-<strong>MIDI</strong> Devices dialog:<br />
7•2
<strong>Line</strong> 6 <strong>GearBox</strong> <strong>3.5</strong> – Troubleshooting<br />
Start button > Settings > Control Panel > <strong>Line</strong> 6 Audio-<strong>MIDI</strong> device<br />
Note that some Windows® audio programs also offer access to an ASIO Buffer size control within<br />
their own preferences or audio options, but is recommended that you always make ASIO buffer<br />
settings adjustments in the <strong>Line</strong> 6 Audio-<strong>MIDI</strong> devices dialog only.<br />
On Mac® systems, <strong>Line</strong> 6 devices utilize the Mac® Core Audio driver system and all these audio<br />
driver settings are all handled by the Mac® Operating System’s Audio-<strong>MIDI</strong> Setup dialog. This<br />
dialog does not offer buffer settings for the Core Audio driver. However, some recording applications<br />
do offer their audio buffer settings – please check the documentation for your Mac recording software<br />
to see if any such options are available.<br />
Audio glitches can be caused by your computer just being too busy processing other tasks from other<br />
software or hardware. When doing anything with <strong>GearBox</strong> or audio software on your Windows® or<br />
Mac® computer, it is always a good idea to shut down all other programs that you do not need. It is<br />
especially important during audio recording on your computer that you are not performing other tasks<br />
on your computer such as copying files, typing a letter or burning a CD!<br />
Note that it is specifically recommended that you connect your <strong>Line</strong> 6 device’s USB directly to a USB<br />
port on your computer, and not into a USB hub. Some USB hubs can cause communication errors<br />
with USB audio devices .<br />
Other computer peripherals can sometimes cause conflicts with your <strong>Line</strong> 6 hardware, or might be<br />
fighting for use of the same computer resources. You can try disconnecting any USB devices you do not<br />
need while using your <strong>Line</strong> 6 device if you encounter any such USB device conflicts.<br />
Also note that some USB speakers occasionally create clicks and pops themselves. Listen to your<br />
speakers separate from <strong>GearBox</strong> for a while if you suspect this might be the problem.<br />
7•3
<strong>Line</strong> 6 <strong>GearBox</strong> <strong>3.5</strong> – Troubleshooting<br />
If you are getting audio glitches in the playback of Tracks in the <strong>GearBox</strong> Player - You may be able<br />
to reduce or eliminate audio glitches by making an adjustment to the <strong>GearBox</strong> Preferences:<br />
Go to the Edit menu (Windows®) or <strong>GearBox</strong> menu (Mac®) and choose Preferences, then go to the<br />
Tracks tab:<br />
Try adjusting the Buffer slider to the right to reduce the demands puts on your computer to play<br />
Tracks.<br />
Hard disk access speed - One common cause of clicks and pops in your recording and playback audio<br />
is caused from your computer not being able to write/read the audio data from your hard disk fast<br />
enough. Most audio recording software will recommend that you use a hard disk that is rated at 7200<br />
RPM disk speed (or faster). It is also not advisable that you use an external hard disk that is connected<br />
via USB 1.0 – instead it should be USB 2.0 or Firewire to ensure fast data transfer for audio work.<br />
On Windows®, you should also check to be sure that your internal IDE controller (which controls<br />
your hard disk and CD/DVD drives in your computer) is configured for PIO mode rather than DMA<br />
operation. <strong>GearBox</strong>, and most other audio applications, will work much better if you change your IDE<br />
controller for those drives to use DMA. To configure your drives to use DMA mode under Windows®<br />
XP®:<br />
• Click on the Start button, and select Settings > Control Panel.<br />
• Double-Click the System icon.<br />
• Select the Hardware tab, and press the Device Manager button.<br />
• Select the IDE ATA/ATAPI Controllers tree and open it.<br />
• Check each IDE channel to make sure the Transfer Mode is set to DMA if available.<br />
• You must reboot your machine if you make changes to these settings.<br />
p Return to Troubleshooting List<br />
Auto-connect options don’t work<br />
<strong>GearBox</strong> can be set to automatically connect to the Internet when needed to access GuitarPort Online.<br />
To configure your Auto-connect options, go to the Gearbox Edit menu (Windows ®) or <strong>GearBox</strong><br />
menu (Mac ®), select Preferences, and select the Internet tab. To learn more about any item in the<br />
Preferences dialog, click the ? button at the top right corner of the Preferences dialog, then click on<br />
the item you want to know more about.<br />
AOL users having trouble with the auto-connect features should be sure to upgrade to the latest AOL<br />
software.<br />
7•4
<strong>Line</strong> 6 <strong>GearBox</strong> <strong>3.5</strong> – Troubleshooting<br />
p Return to Troubleshooting List<br />
Why can’t I hear the effects?<br />
Each effect – Gate, Wah, Comp, EQ, Stomp, Mod, Delay and Verb – can be turned on and off<br />
independently of the others, by clicking on the lower portion of its stomp box icon. You’ll see the OFF<br />
or ON status shown on this icon. To see the settings for the effect, click on the top portion of the icon<br />
and the controls will appear in the Effect edit panel below.<br />
p Return to Troubleshooting List<br />
Why can’t I record a Track from GuitarPort to other programs<br />
<strong>GearBox</strong> sends your processed guitar signal to other programs for recording. The track you are playing<br />
in the GuitarPort Player will NOT be sent to other programs, and cannot be recorded into those<br />
other programs. This restriction on re-recording GuitarPort Tracks is required in order for <strong>Line</strong> 6 to<br />
protect the copyrights of the musicians and other copyright owners that have licensed music for use<br />
on GuitarPort Online.<br />
Note that the audio from the Player playback will also not be routed out the S/PDIF outs of <strong>TonePort</strong><br />
UX2 and PODxt Pro* units.<br />
* Note – On Windows® systems, it is not recommended that you connect both a PODxt and PODxt<br />
Pro unit to the computer at the same time. These two specific <strong>Line</strong> 6 devices utilize a common device<br />
driver and only one can be initialized at a time.<br />
p Return to Troubleshooting List<br />
Why can’t I play the GuitarPort Track I just downloaded?<br />
If you download a track from GuitarPort Online, and get an error when trying to load the track, there<br />
are a few problems that might have happened:<br />
• Your computer’s date may be set incorrectly. Please verify that not only the time, but also the day<br />
and year are valid. It doesn’t need to match the NIST atomic clock to the millisecond, but your<br />
computer shouldn’t be partying like it was 1999 either.<br />
• Your GuitarPort subscription may have expired. You must be subscribed to play the subscriptiononly<br />
tracks from GuitarPort Online. Check your account information on GuitarPort Online.<br />
• You may not have connected to GuitarPort Online within the last 30 days. In this case, just<br />
reconnect to GuitarPort Online, then try opening the track again.<br />
• You may have a different <strong>Line</strong> 6 hardware device connected than the one it was downloaded<br />
with. Tracks are tied to the device that downloaded them, so if you have both a GuitarPort and<br />
a PODxt, then you’ll need to use the track you downloaded while using a PODxt on the PODxt.<br />
You’ll need to download the track again with the GuitarPort device to use it on GuitarPort.<br />
Same rules apply if you have a <strong>TonePort</strong>.<br />
• The file may have been corrupted during download. Download accelerators will cause file<br />
corruption with GuitarPort Online Track downloads. Make sure to disable them.<br />
p Return to Troubleshooting List<br />
7•5
<strong>Line</strong> 6 <strong>GearBox</strong> <strong>3.5</strong> – Troubleshooting<br />
Disabling auto-launching of Windows Media Player, iTunes or other CD player<br />
programs while using <strong>GearBox</strong><br />
Windows Media Player, WinAmp, iTunes and other CD player programs can be set so that, each time<br />
you insert a CD into your computer, they auto-launch and start playing the first CD track. When<br />
<strong>GearBox</strong> is the foreground application on your computer, it will attempt to prevent these programs<br />
from automatically launching and playing a CD that you insert, since you’re probably putting the CD<br />
in so you can load a track from it into the <strong>GearBox</strong> Player.<br />
If the <strong>GearBox</strong> automatic efforts to prevent the auto-launch of the CD application don’t work with<br />
your system, you can also:<br />
• (On Windows®) Hold down the SHIFT key while inserting the Audio CD into your computer<br />
if you want to avoid auto-launching of your CD player program for this one time only.<br />
• (On Mac® or Windows®) If you want to permanently disable auto-launching of your CD player<br />
program, go to that program and adjust its Preferences to disable auto-launching.<br />
p Return to Troubleshooting List<br />
Download Errors – Download Accelerators<br />
When you use GuitarPort Online to get Tracks, Tones and other data, <strong>GearBox</strong> downloads files from<br />
the GuitarPort Online servers to your computer. The Transfer Manager displays completed, in progress,<br />
and unsuccessful transfers. If you are having trouble with downloads, please make sure you do not have<br />
a Download Accelerator installed, because these are generally incompatible with GuitarPort Online.<br />
Real Download and Download Accelerator are two examples of download accelerators that are not<br />
compatible with <strong>GearBox</strong>/GuitarPort Online.<br />
Download accelerators generally allow you to disable them for particular applications. Since Gearbox<br />
uses Internet Explorer (on Windows®) to download from the Internet, you need to disable the<br />
download accelerator for Internet Explorer in order to allow GuitarPort Online to work.<br />
If you want to be able to use the download accelerator when you’re not running <strong>GearBox</strong> or accessing<br />
GuitarPort Online, you can. You’ll need to disable the download accelerator for Internet Explorer<br />
before launching <strong>GearBox</strong>, and then you can re-enable it once you are finished using <strong>GearBox</strong>.<br />
NetZero HighSpeed Internet access includes a download accelerator that you’ll need to disable for<br />
<strong>GearBox</strong>. You’ll need to turn off the high-speed mode by right-clicking on its status bar icon and<br />
selecting Turn HiSpeed Off.<br />
See the troubleshooting information on Incomplete Downloads if you have disabled your Download<br />
Accelerator and are still having problems.<br />
p Return to Troubleshooting List<br />
The <strong>Line</strong> 6 device Audio Driver cannot be found by your computer when<br />
connecting your <strong>Line</strong> 6 device, or on startup<br />
When this happens, it means that one of the <strong>Line</strong> 6 device driver files may be missing or corrupted.<br />
Download the latest <strong>GearBox</strong> installer from the Internet, or pop the <strong>GearBox</strong> Installation CD into<br />
your computer and re-run the installer. Any missing or corrupt files will be re-installed, leaving any<br />
Tones and Tracks that you’ve saved in place. Alternatively, you can also launch <strong>Line</strong> 6 Monkey and<br />
look in the Updates tab. Just select the Driver item and you can choose to install (or re-install) just<br />
the driver here.<br />
7•6
<strong>Line</strong> 6 <strong>GearBox</strong> <strong>3.5</strong> – Troubleshooting<br />
p Return to Troubleshooting List<br />
Guitar volume is too quiet at max setting<br />
If you’re not getting as much volume as you want from the guitar Tone you’ve chosen, you may need<br />
to adjust your hardware’s volume knob, your Guitar Volume, Amp Volume, Track Volume, or Master<br />
Volume:<br />
Hardware’s Volume - The Volume or Output knob on your <strong>Line</strong> 6 hardware determines the overall<br />
volume of everything you hear coming out of it. Be sure it is turned to maximum to get the loudest possible<br />
output. If turning it to maximum causes new problems with distortion, click here for assistance.<br />
Guitar Volume - Make sure that the Volume knob on your guitar is turned up. If you are using a stomp<br />
box between your guitar and your <strong>Line</strong> 6 device, be sure its output level is turned up as well. The only<br />
thing to be careful of here is that you shouldn’t turn up so loud that you are now clipping your <strong>Line</strong> 6<br />
hardware - the word CLIP will be shown on the <strong>GearBox</strong> Amp panel when this happens (and the word<br />
CLIP with be shown on a PODxt display as well).<br />
Amp Volume - Turn the Volume knob on the Amp Model that you’re using as high as you can go<br />
without clipping. You may want to save the Tone with this setting so you get this volume again when<br />
you want it. Different Amp Models and settings of the amp knobs will result in different perceived<br />
ranges for the Volume knob. This is because of the very different amount of energy that the Tone<br />
includes at various frequency ranges, and how the different distortion characters of the different amps<br />
are perceived as volume by our ears and brains. Turning the mids way down with a heavily overdriven<br />
sound to get a classic metal Tone, for instance, can result in a perceived lack of volume because all the<br />
midrange portion of your guitar signal has been removed.<br />
Track Volume - If you’ve already got the volume knobs maxed out on your <strong>Line</strong> 6 hardware, your<br />
guitar and the Gearbox amp model, you can move the Track Level slider in the TRACKS area to the<br />
left to reduce the level of a Track that you are playing along with so that your guitar will sound louder<br />
versus the Track. You can then save the Track to your hard disk, and this level adjustment will be<br />
remembered.<br />
Out to Hardware Volume - (This feature is not available when PODxt is being used with Gearbox).<br />
Normally, you’ll want to set the <strong>GearBox</strong> Out To Hardware Volume knob at the top of the window to<br />
the maxed-out position, so you’ll get the maximum output level from the software.<br />
p Return to Troubleshooting List<br />
Trouble accessing GuitarPort Online<br />
You <strong>Line</strong> 6 <strong>TonePort</strong>, GuitarPort or PODxt hardware must be connected via USB to your computer to<br />
use the GuitarPort features, including access to GuitarPort Online. If this is not happening, make sure<br />
the Driver is properly installed or check USB Errors.<br />
You of course also need to have a live Internet connection, so be sure your Internet or network<br />
connection is plugged in and active before looking for more complex solutions!<br />
Note that if you own more than one of these <strong>Line</strong> 6 devices, that your GuitarPort Online membership<br />
is only authenticated on the one device that you originally used to sign up. You must use this <strong>Line</strong> 6<br />
device to gain access to the GuitarPort Online membership content.<br />
p Return to Troubleshooting List<br />
7•7
<strong>Line</strong> 6 <strong>GearBox</strong> <strong>3.5</strong> – Troubleshooting<br />
Why do I still hear hum when my Hum Reducer is on?<br />
(This feature is not available when PODxt hardware is used with <strong>GearBox</strong>.) The Hum Reducer will<br />
not completely eliminate hum from your guitar and the electrical interference it receives from your<br />
computer’s display and other emission sources, but it is usually able to reduce it considerably. If you’re<br />
not getting the hum reduction you expect, remember that you need to press the Learn button to set<br />
up the Hum Reducer before using it. It’s important to position yourself and your guitar in your normal<br />
playing position in relationship to your computer display, etc. while the Hum Reducer is learning the<br />
pattern of the noise that it will reduce. When you change positions relative to the monitor, change<br />
guitars or pickups, or add other possible sources of interference (turning on a nearby television, say),<br />
the character of the interference that your guitar is receiving and transmitting as hum will change, and<br />
you should press the Learn button again to have the Hum Reducer relearn this new hum pattern.<br />
You can also try the Gate to eliminate the noise.<br />
p Return to Troubleshooting List<br />
Incomplete Downloads<br />
The Transfer Manager gives details on in progress, completed and unsuccessful transfers of data between<br />
your computer and GuitarPort Online. If a download is interrupted or incomplete, it will be listed in<br />
the Transfer Manager as “Aborted”. You’ll need to start this download again from the beginning; there<br />
is no way to continue a partial download.<br />
Download Accelerators are incompatible with <strong>GearBox</strong>/GuitarPort Online, and must be disabled to<br />
successfully use GuitarPort Online. If you have frequent problems with incomplete downloads, there<br />
is probably an issue with your Internet connection or the way it is setup, and you may need to contact<br />
your Internet Service Provider for assistance. If you are using a dial-up modem connection over regular<br />
phone lines and you have Call Waiting, be sure you have Call Waiting turned off when using your<br />
Internet Connection so that the Call Waiting signal doesn’t interrupt your download. On some phone<br />
systems, you can dial *70 before a call to disable Call Waiting for that one call.<br />
p Return to Troubleshooting List<br />
Light is off on GuitarPort or <strong>TonePort</strong> hardware<br />
If the light on your GuitarPort or <strong>TonePort</strong> UX1 hardware does not light up, or if your <strong>TonePort</strong> UX2<br />
front panel meters do not light up, it means that the is not receiving power from the USB connection.<br />
See USB Errors.<br />
p Return to Troubleshooting List<br />
Multiple computers: using <strong>GearBox</strong> and GuitarPort Online on more than one<br />
computer<br />
You can use <strong>GearBox</strong> and the GuitarPort Online features with more than one computer if you like.<br />
You will, of course, need to install the <strong>GearBox</strong> software on each computer. Once you’ve done that,<br />
just connect your <strong>Line</strong> 6 hardware to the computer you’d like to use, start the <strong>GearBox</strong> program and<br />
you’ll be able to use both the standard features of <strong>GearBox</strong> and GuitarPort Online. You won’t be able<br />
to access any <strong>GearBox</strong> features without your <strong>Line</strong> 6 hardware connected.<br />
p Return to Troubleshooting List<br />
7•8
<strong>Line</strong> 6 <strong>GearBox</strong> <strong>3.5</strong> – Troubleshooting<br />
<strong>TonePort</strong>/GuitarPort hardware does not power up<br />
The light on top of the GuitarPort and <strong>TonePort</strong> UX1 hardware comes on to show that it is receiving<br />
power, and should be green when the driver is correctly initialized and ready to go. <strong>TonePort</strong> UX2’s front<br />
VU meters will light up when the unit receives power. These units’ lights should come on whenever<br />
connected via USB to your computer or hub. If it does not, see the discussion of USB Errors.<br />
p Return to Troubleshooting List<br />
No sound<br />
There are a number of things that could be wrong here. Let’s start with the simple stuff, and work our<br />
way through the possibilities for the <strong>Line</strong> 6 hardware:<br />
• <strong>TonePort</strong>/GuitarPort hardware output volume – Be sure the knob on the your <strong>TonePort</strong> or<br />
GuitarPort device is turned up, that it is connected properly to your headphones, speakers or<br />
audio system, that the power is on for your speakers or audio system, and that their volume(s) are<br />
turned up. Try playing something else through the speakers, audio system or headphones to make<br />
sure they’re working. Try switching audio cables too since they sometimes can be the problem. If<br />
you are using <strong>TonePort</strong>, be sure the <strong>GearBox</strong> Source Select menu is correctly set to the input(s)<br />
you are plugged into.<br />
• Can’t get any input level from a microphone when plugging into <strong>TonePort</strong>’s Mic input? – Be<br />
sure you are using a good XLR type mic cable, and if you are plugging the cable directly from the<br />
mic into the <strong>TonePort</strong> XLR Mic In jack (no need to first go into a mixer or preamp – <strong>GearBox</strong><br />
will provide the preamp for you). Check that the Mic Level knob on your <strong>TonePort</strong> is turned up.<br />
Make sure the <strong>GearBox</strong> Source Select menu at the top left of the software is correctly set to your<br />
Mic 1 (or Mic 2) input that you are plugged into.<br />
• Is the <strong>GearBox</strong> software running? – Seems like a silly question, but of you have other software<br />
windows open, you might have closed <strong>GearBox</strong> and not noticed it! For <strong>TonePort</strong> and GuitarPort<br />
devices, you will not hear any processed signal unless <strong>GearBox</strong> is running and not Muted or<br />
bypassed.<br />
• Is there a USB problem with your hardware? – The light on top of the GuitarPort or <strong>TonePort</strong><br />
UX1 normally lights green when connected and properly recognized by the computer. If the light<br />
is not lit or is lit red, see USB Errors. If the light is green, try disconnecting and reconnecting<br />
the USB cable from the <strong>Line</strong> 6 hardware to “reboot” it to see if that fixes the problem. Also, try<br />
connecting into a different USB slot on your computer if one is available. The same is true of the<br />
<strong>TonePort</strong> UX2 front panel VU meters – they should light up when the correctly connected and<br />
powered by the computer.<br />
• Is the guitar input working with your <strong>TonePort</strong>/GuitarPort hardware? – The light on the<br />
GuitarPort hardware also acts as an input level indicator, flashing orange when medium volume<br />
sound is being received at the guitar connector, and red when the maximum level is reached. If<br />
the light doesn’t go orange as you play your guitar loudly, you may have the volume turned down<br />
on your guitar (been there, done that), a bad guitar cable, the cable not plugged in all the way<br />
to the <strong>TonePort</strong>/GuitarPort hardware (been there and done that, too!), or a broken guitar. Try<br />
plugging the guitar into an amp or other device to see if it’s working OK with them.<br />
• Are the meters moving in the <strong>GearBox</strong> software? – The round VU meters at the right of<br />
the <strong>GearBox</strong> program’s window show the level of audio that is being output by the software. If<br />
they’re moving but you don’t hear sound, be sure you’ve checked the hardware output volume.<br />
If they’re not moving as you play guitar, play back a Track or play audio through <strong>GearBox</strong>, no<br />
sound is happening in the software. You could have the BYPASS button, MUTE or MUTE LINE<br />
OUT button activated (at the top of the <strong>GearBox</strong> window), the Monitor Volume knob turned<br />
7•9
<strong>Line</strong> 6 <strong>GearBox</strong> <strong>3.5</strong> – Troubleshooting<br />
all the way down, the Amp Model’s volume turned all the way down, or the Track Level slider all<br />
the way to the left. If you can hear the Track, but not the guitar, it’s also possible that you’ve got<br />
the Gate on with too aggressive a setting. Try turning the Gate off by clicking its icon.<br />
• Are some of the <strong>TonePort</strong> <strong>UX8</strong>’s inputs muted? – In the ‘Outputs & Monitoring’ tab of the<br />
<strong>Line</strong> 6 Audio-<strong>MIDI</strong> Devices application, you can mute/unmute <strong>UX8</strong> inputs as well as <strong>GearBox</strong><br />
sends. If you want to hear the <strong>GearBox</strong>-processed audio from either Send 9-10 or Send 11-12,<br />
make sure that these inputs are not muted. If you are recording a dry signal into your recording<br />
software, but want to hear the processed signal, simply mute Inputs 1-2, unmute <strong>GearBox</strong> Send<br />
9-10 and select the Input 1-2 as your audio source within your recording software.<br />
Note that all settings in the ‘Outputs & Monitoring’ panel affect only the <strong>UX8</strong> hardware<br />
monitoring levels. These settings do not affect signals that are sent to the recording software.<br />
• Is the <strong>TonePort</strong> <strong>UX8</strong> plugged into an AC outlet? Is the power switch on? – Unlike other<br />
<strong>TonePort</strong>s, the <strong>UX8</strong> does not receive power from the USB bus. Make sure the unit is plugged in<br />
and switched on.<br />
• No system sounds or sound from other programs while using <strong>TonePort</strong>/GuitarPort hardware<br />
– Do these programs allow you to see and choose your <strong>Line</strong> 6 device or audio driver in their<br />
preferences? If not, then the <strong>Line</strong> 6 driver may not be installed correctly. You can run <strong>Line</strong> 6<br />
Monkey with your <strong>Line</strong> 6 device connected and choose “Drivers” in the Updates tab to make<br />
sure you have the latest version. Or, just try re-installing the driver using Monkey, following the<br />
installer steps it provides.<br />
• Not getting sound while using PODxt with Gearbox software? - Start by confirming that your<br />
PODxt is working OK on its own. Power up your PODxt, connect your guitar to PODxt’s INPUT<br />
jack, and turn up the guitar’s volume. The best thing to do at this point is connect headphones<br />
to PODxt’s PHONES jack, turn up PODxt’s OUTPUT knob and confirm that you’re hearing<br />
sound. (Using headphones to listen avoids the possibility of problems with some other setup<br />
that you might be trying to listen through.) If you can’t hear anything at this point, you may<br />
have dead headphones or a bad guitar cable; try other ones if you’ve got them. Also, make sure<br />
PODxt’s TUNER button is not lit, because PODxt defaults to muting its output while you’re<br />
tuning.<br />
• If you hear sound through headphones connected to your PODxt, but don’t hear sound<br />
through an amp and speakers or other audio system that you’ve connected to PODxt,<br />
thoroughly check the connections of your audio setup, and make sure that all the necessary<br />
volumes are turned up. Try connecting something else through the speakers, audio system<br />
or headphones to make sure they’re working.<br />
• If you can hear PODxt’s guitar processing, but can’t hear Tracks or other audio played back<br />
by the <strong>GearBox</strong> Player, check to make sure you have the Track Level slider up (at the top<br />
of the Browser window when the Player is in view), and make sure you aren’t having a USB<br />
problem.<br />
• If your <strong>Line</strong> 6 Hardware is not configured as your Sound Card: You must connect a cable from<br />
the Output of your <strong>Line</strong> 6 device to the input of your sound card.<br />
• GuitarPort <strong>User</strong>s: Connect an 1/8-inch stereo cord from the Monior Out to the <strong>Line</strong> input<br />
of your sound card (very likely another 1/8-inch stereo connector).<br />
• PODxt users: Connect the ¼-inch line outs, or the Headphone Output to your sound<br />
card.<br />
• <strong>TonePort</strong> <strong>User</strong>s: Connect either the ¼-inch Analog Outs or the Headphone Out to your<br />
sound card<br />
p Return to Troubleshooting List<br />
7•10
<strong>Line</strong> 6 <strong>GearBox</strong> <strong>3.5</strong> – Troubleshooting<br />
Causes of excess noise or unwanted distortion and clipping<br />
Noise and distortion? That’s what electric guitar is all about, right!? But if you’re hearing the bad<br />
kind of noise or distortion from <strong>GearBox</strong>, there are several possible sources and solutions, including<br />
the hardware output knob, the onscreen Monitor Volume knob and Out To Hardware knob, Track<br />
playback clipping, soundcard noise, guitar noise, and speaker or audio system noise. Let’s run through<br />
each of these, and how it might be a part of your problem:<br />
• Output knob set too high – It’s possible that your speakers, headphones or other audio system<br />
can’t handle the maximum output level from the <strong>TonePort</strong> or GuitarPort hardware or PODxt<br />
that you are using. Try turning the knob on the hardware down and see if this eliminates the<br />
distortion.<br />
• Different sources of Clipping – “Clipping” is audio distortion that happens when you have<br />
some thing(s) turned up higher than a system is designed for, and the loudest parts of your signal<br />
get clipped off as a result. Check your system’s clipping indicators.<br />
• The <strong>GearBox</strong> Monitor Volume and Out To Hardware controls at the top of the window<br />
have a little clip indicator light next to each. These are green when receiving a proper level<br />
signal, and red if clipping. Back off the knob level if you see red here.<br />
• The <strong>GearBox</strong> amp panel also shows the word CLIP that lights up red to show when the amp<br />
is clipping. The Track Level Slider within the Player will light up red when clipping.<br />
• When PODxt is used, the word CLIP is shown on the PODxt’s own screen.<br />
• If you see clipping displayed with either setup while you’re playing back the Track and<br />
playing guitar, but the clipping stops when you stop playing guitar and leave the Track still<br />
playing, it probably means that the combination of the Track volume and guitar volume<br />
are too much, even though neither one may clip on its own. In this case, <strong>TonePort</strong> and<br />
GuitarPort hardware users should turn down the Out to Hardware Volume and PODxt<br />
hardware users should turn down PODxt’s OUTPUT knob. Or you can pull back on the<br />
Track Level slider and the Amp Model’s Volume knob a bit to get things out of the clipping<br />
range.<br />
• Guitar Noise – It’s easy to find out if your guitar or guitar cable is the source of your noise<br />
problem. Just disconnect your guitar cable from your <strong>Line</strong> 6 hardware and see if the noise goes<br />
away. If it does, try using a different guitar cable to see if the cable is the problem. If changing<br />
the cable doesn’t take care of it, you may just have a guitar with noisy pickups, or your guitar may<br />
be picking up electrical noise from your computer’s display or other sources. You can generally<br />
reduce these noises with the <strong>GearBox</strong> Gate and Hum Reducer features.<br />
• Speaker or other Audio System Noise when using <strong>TonePort</strong> or GuitarPort hardware<br />
– It’s also possible that the noise is occurring AFTER <strong>TonePort</strong>/GuitarPort, in your speakers,<br />
headphones, or other system that you are connecting your device to for listening. If you’re using<br />
headphones, try another pair that you own or can borrow from a friend to see if the headphones<br />
are the problem. If you’re listening via multimedia speakers or other equipment, try listening<br />
with headphones instead to see whether the noise is coming from <strong>TonePort</strong>/GuitarPort or your<br />
speakers or audio system. You may have the volume turned too high on the speakers or audio<br />
system, causing distortion there. Also, try unplugging the cable that connects your <strong>Line</strong> 6 device<br />
to your speakers or audio system, and see if the noise goes away. If it does, the noise is probably<br />
coming from the <strong>Line</strong> 6 device or something feeding into it; if the noise doesn’t go away, it means<br />
that the speakers or other audio system components are probably the noise makers. You should<br />
also try a different cable to connect your device’s output to your system, to make sure the cable<br />
isn’t the problem.<br />
• Noise complaints from your family and neighbors – Sorry, you’re on your own there.<br />
7•11
<strong>Line</strong> 6 <strong>GearBox</strong> <strong>3.5</strong> – Troubleshooting<br />
p Return to Troubleshooting List<br />
I still hear noise when the Gate is on<br />
The <strong>GearBox</strong> Gate will not completely eliminate noise but it will reduce it considerably. Please see the<br />
information on the Gate to learn how to gate works and how its light can help you adjust the Gate for<br />
best performance as you change Amp Models, pickups or guitars.<br />
<strong>TonePort</strong> and GuitarPort hardware users can also try the Hum Reducer to eliminate the noise. Hum<br />
Reducer is not available with PODxt.<br />
p Return to Troubleshooting List<br />
Track Level Issues<br />
The Player’s Track Level slider is available at the top right of the Browser window when the Player is<br />
selected.<br />
It sets the playback level for any Track that you load into the <strong>GearBox</strong> Player. The light to the right<br />
of the slider glows green to show the current level of the Track as the Track is playing, and flashes red<br />
if the Track “clips” because it is turned up too loud. When this happens you may hear distortion in the<br />
Track playback, especially as the louder parts of the Track play, and you should move the slider to the<br />
left to reduce the volume of the Track playback and avoid this clipping distortion.<br />
p Return to Troubleshooting List<br />
Track playback when using the Player is frequently interrupted<br />
Interrupted Track playback may be caused when another USB device is trying to stream audio or video,<br />
or your computer cannot provide enough system resources (RAM memory or computer processor<br />
speed) for <strong>GearBox</strong>. You may be able to reduce or eliminate these problems by making an adjustment<br />
to your <strong>GearBox</strong> Preferences > tracks tab:<br />
In the lower part of the Tracks tab, move the Playback Buffer slider to the right to reduce the load that’s<br />
put on your computer when playing back Tracks.<br />
Click the Help question mark at the top of the Preferences dialog box and click an item for more<br />
details.<br />
p Return to Troubleshooting List<br />
7•12
<strong>Line</strong> 6 <strong>GearBox</strong> <strong>3.5</strong> – Troubleshooting<br />
USB Errors<br />
If you are having USB communication problems, the first thing to do is check your cables to make sure<br />
they haven’t gotten disconnected accidentally. If you have a spare USB cable, try it instead to make<br />
sure the cable isn’t the problem.<br />
<strong>TonePort</strong> <strong>UX8</strong> does not reconnect after Windows goes into standby<br />
When Windows goes into standby mode or hibernation, the <strong>UX8</strong> may not come back online. Toggle<br />
the power switch to reconnect the unit to the driver.<br />
USB connection indicators<br />
• This icon shown solid at the bottom right corner of the Gearbox program’s window shows you<br />
the status of the USB connection to your <strong>Line</strong> 6 device. For <strong>TonePort</strong> and GuitarPort devices,<br />
this icon appears as a little USB plug tip . If the <strong>TonePort</strong> or GuitarPort USB connection<br />
is not successfully detected, this icon will be flashing to indicate this problem.<br />
• For PODxt, PODxt Live or PODxt Pro* devices this icon appears as a little PODxt icon .<br />
If the PODxt USB connection is not successfully detected (or if the PODxt is powered off), the<br />
icon appears with a question mark .<br />
USB Connectivity<br />
• It is specifically recommended that you always connect your <strong>Line</strong> 6 device directly to your<br />
computer’s “built-in” USB port and not into a USB hub. USB hubs are known to sometimes cause<br />
communication errors with USB audio devices. USB audio devices require a fast, uninterrupted<br />
flow of audio data to and from the computer.<br />
• On Windows® systems, it is not recommended that you connect both a PODxt and PODxt Pro<br />
unit to the computer at the same time. These two specific <strong>Line</strong> 6 devices utilize a common device<br />
driver and only one can be initialized at a time.<br />
• USB connection to PODxt is required in order to use the audio features of <strong>GearBox</strong>, access<br />
GuitarPort Online, etc. So make sure PODxt is connected to your computer via USB and powered<br />
on if you want to use these features. If you don’t care about these features of the <strong>GearBox</strong> software<br />
and only want to edit the sounds on your PODxt, you can instead connect <strong>MIDI</strong> cables between<br />
PODxt and your computer’s properly configured <strong>MIDI</strong> interface hardware, and select your <strong>MIDI</strong><br />
interface’s connections in the <strong>GearBox</strong> software’s <strong>MIDI</strong> Preferences.<br />
• If you believe that your <strong>MIDI</strong> or USB connections are OK, you may want to try re-installing the<br />
<strong>Line</strong>6 device’s Driver or <strong>GearBox</strong> software, which will not affect any Tones or Tracks that you’ve<br />
stored. The easiest way to do this is to run <strong>Line</strong> 6 Monkey with your <strong>Line</strong> 6 device connected<br />
and go to the Updates tab. Here you will see if you have the latest driver and <strong>GearBox</strong> software<br />
versions installed. You can download and install any available updates here by selecting them in<br />
the Monkey Updates tab, or choose to re-install the same versions to make sure all is configured<br />
correctly. Just follow the steps as prompted.<br />
p Return to Troubleshooting List<br />
7•13
<strong>Line</strong> 6 <strong>GearBox</strong> <strong>3.5</strong> – Troubleshooting<br />
Warranty, Customer Service and Repair Information<br />
Before contacting the <strong>Line</strong> 6 Customer Service team, please take the time to investigate this Help<br />
system to see if it can answer your questions. Don’t forget the searchable FAQTRAQ system which<br />
is often the fastest and easiest way to get answers. There are also several documents posted on the<br />
<strong>GearBox</strong> Online Help section of the <strong>Line</strong> 6 website – please visit the site for the most up to date<br />
information on your <strong>Line</strong> 6 gear and warranty and service information.<br />
p Return to Troubleshooting List<br />
Windows XP Optimization<br />
You will find information on optimizing your Windows XP operating system for <strong>GearBox</strong> at the<br />
<strong>GearBox</strong> Online Help section of the <strong>Line</strong> 6 website.<br />
p Return to Troubleshooting List<br />
7•14
<strong>Line</strong> 6 <strong>GearBox</strong> <strong>3.5</strong> – Glossary (What Is...?)<br />
What Is…<br />
What is A.I.R.?................................................................................................................ 8•3<br />
What are the Amp, Cab and Effect Models?.................................................................. 8•3<br />
What are the Amp Panel and Amp Model and Cab Model controls?........................... 8•4<br />
What is ASIO®?............................................................................................................. 8•4<br />
What is the Auto-Select (Tones) Button?...................................................................... 8•5<br />
What is the Browser?....................................................................................................... 8•5<br />
What is the Bypass button?............................................................................................. 8•7<br />
What is Chorus?.............................................................................................................. 8•7<br />
What is Comp (Compressor)?......................................................................................... 8•8<br />
What is Core Audio?....................................................................................................... 8•8<br />
What is the CPU Usage Meter?...................................................................................... 8•9<br />
What is Delay?................................................................................................................. 8•9<br />
What is the Device Manager in Windows®?.................................................................. 8•9<br />
What are the Effects?...................................................................................................... 8•9<br />
What is EQ (Equalizer)?................................................................................................ 8•11<br />
What is a Flanger?......................................................................................................... 8•11<br />
What is Gate?................................................................................................................ 8•11<br />
What is GuitarPort Online?.......................................................................................... 8•12<br />
What is the (Player) Half Speed Button?..................................................................... 8•12<br />
What are Hot Keys (keyboard shortcut assignments)?................................................. 8•13<br />
What is the Hum Reducer?........................................................................................... 8•15<br />
What is the Info Bar?.................................................................................................... 8•15<br />
What is the Loaded (Track) Menu?.............................................................................. 8•16<br />
What is the Loop Button?............................................................................................. 8•16<br />
What is <strong>MIDI</strong>?............................................................................................................... 8•16<br />
What is Mod?................................................................................................................ 8•17<br />
What are Model Packs?................................................................................................. 8•17<br />
What are the numbers shown in some tracks?.............................................................. 8•18<br />
What is a Preferred Audio Device?............................................................................... 8•18<br />
What is Re-Amping...................................................................................................... 8•18<br />
What is a Record Send?................................................................................................ 8•19<br />
What is the Reference control in the Tuner?............................................................... 8•19<br />
What is a Rotary Drum + Horn?................................................................................... 8•19<br />
What are Sends?............................................................................................................ 8•20<br />
What is a Soundcard?.................................................................................................... 8•20<br />
What is Stomp?............................................................................................................. 8•20<br />
What is Tap Tempo?...................................................................................................... 8•21<br />
What is a Tone?............................................................................................................. 8•21<br />
8•1
<strong>Line</strong> 6 <strong>GearBox</strong> <strong>3.5</strong> – Glossary (What Is...?)<br />
What are Tone Changes (on GuitarPort Online Tracks)?........................................... 8•21<br />
What is the Tone Library?............................................................................................. 8•22<br />
What is the Tone Locker?............................................................................................. 8•24<br />
What is the Track Level?............................................................................................... 8•30<br />
What is the Track Sections Display?............................................................................. 8•30<br />
What is the Transfer Manager?..................................................................................... 8•31<br />
What is Tremolo?.......................................................................................................... 8•32<br />
What is a USB hub?...................................................................................................... 8•32<br />
What is Verb (Reverb)?................................................................................................. 8•32<br />
What is Vol?.................................................................................................................. 8•33<br />
What is Wah?................................................................................................................ 8•33<br />
What is the “! Warning” Triangle?................................................................................ 8•33<br />
8•2
<strong>Line</strong> 6 <strong>GearBox</strong> <strong>3.5</strong> – Glossary (What Is...?)<br />
What is A.I.R.?<br />
A.I.R. is the <strong>Line</strong> 6 exclusive Acoustically Integrated Recording technology that accurately simulates<br />
the sound of a microphone and recording space. Click on the A.I.R. icon when the effects panel is<br />
shown, and you will be able to adjust A.I.R. for the current Tone. Point your mouse at items in the<br />
effect panel and look at the Info Bar for more information on those items. Settings made to A.I.R. are<br />
saved and loaded with Tones.<br />
Note that the order of the “stomp box” icons in the row show you the signal flow order of the Effects,<br />
starting from the Gate effect, and flowing to the right through the effect icons. Effects to the left of the<br />
A.I.R. icon are running “Pre” (before the amp, cab and mic models) and effects shown to the right of<br />
the A.I.R. icon are running “Post” (after the amp, cab and mic models).<br />
p Return to What Is Topics<br />
What are the Amp, Cab and Effect Models?<br />
<strong>Line</strong> 6 pioneered the use of modeling technology for guitarists with the world’s first modeling guitar<br />
amp. Since then, all <strong>Line</strong> 6’s products have included Models developed through extensive, meticulous<br />
studies of guitar equipment heralded for its classic tone qualities.<br />
To create a Model, we first locate an absolute mint version of a particular piece of equipment, with that<br />
special sound quality that makes it a truly remarkable guitar sound machine. We lock ourselves away<br />
in the <strong>Line</strong> 6 labs and sound studios to study this piece of classic equipment in exhaustive detail. We<br />
play guitars through it, listen to it, measure, write software, and then play and listen some more as we<br />
carefully craft a software Model that captures the signature qualities of the equipment being studied.<br />
The resulting Model is designed to emulate the controls and sound qualities of the original equipment<br />
studied, including the beloved quirks and unruly qualities that made the original equipment classic in<br />
the first place. Each model is painstakingly perfected until it becomes an organic, living thing with<br />
guitar tone pumping through its veins. And when they’re finally ready, we unleash these software<br />
Models in revolutionary new products like <strong>GearBox</strong>.<br />
Of course, as we’re studying all that classic equipment, we’re bound to come up with an idea or two for<br />
something that classic equipment can’t do. When we do, you end up with something like the <strong>Line</strong> 6<br />
Insane Amp Model—with as much paint-peeling high gain as a distortion box, but the well defined,<br />
love-to-play-it quality of a truly world class guitar amplifier.<br />
The particular Models that power <strong>GearBox</strong> were each originally developed for <strong>Line</strong> 6’s revolutionary<br />
PODxt, which has now transformed the way that guitar is recorded in the world’s greatest studios, for<br />
countless platinum recordings. Each one represents a particular amplifier, cabinet or type of effect that<br />
has become a standard in the guitar world. Together, they deliver a range of sound that allows you and<br />
<strong>GearBox</strong> to achieve the signature sounds of countless classic recordings.<br />
Check out the Model Gallery section to see exactly what gear <strong>Line</strong> 6 used to capture these classic<br />
Amp, Cab and Effects models!<br />
8•3
<strong>Line</strong> 6 <strong>GearBox</strong> <strong>3.5</strong> – Glossary (What Is...?)<br />
p Return to What Is Topics<br />
What are the Amp Panel and Amp Model and Cab Model controls?<br />
The Amp Panel includes the following controls:<br />
• Amp Model – Click the Amp Model menu, and drag down while holding your mouse button to<br />
select one of the Gearbox Amp Models.<br />
• Cab Model – Click the Cab Model menu, and drag down while holding your mouse button to<br />
select one of the Gearbox Cab Models.<br />
• Drive – All of the Gearbox Amp Models include a Drive knob. Turn this up for more “dirt”,<br />
and turn it down to clean up your sound. The particular drive character and range for each Amp<br />
Model is different, emulating the drive character of the original amplifier that was modeled for<br />
GuitarPort.<br />
• Volume – All of the Gearbox Amp Models include a Volume knob. Turn this up to make your<br />
guitar louder, and turn it down to make your guitar quieter.<br />
• “Original” Knobs – Each Amp Model will have a different set of tone knobs that emulate the<br />
controls of the original amplifier that was modeled for <strong>GearBox</strong>. These are shown as threedimensional<br />
knobs in the main part of the amp panel, like Drive, Tone and Volume on the Small<br />
Tweed panel above.<br />
• “Bonus” Knobs – Some Amp Models also have additional tone controls that weren’t on the<br />
original amp that was studied to create the model. These knobs are shown on a “display” at the<br />
right side of the Amp Panel, like Bass, Treble and Presence on the Small Tweed panel above.<br />
Point your mouse at any of these controls and look in the Info Bar at the bottom of the GuitarPort<br />
window to see a description of the control and its use, then give it a spin and try it out!<br />
The selection of Amp, Cab and Effect Models, as well as the setting of all the amp and effect controls<br />
are saved when you save a Tone. Selecting a Tone from the Tone menu at the top left of the <strong>GearBox</strong><br />
window will set all these controls to match the settings that were saved for that Tone.<br />
p Return to What Is Topics<br />
What is ASIO®?<br />
ASIO® is a protocol for computer audio that allows audio software to communicate with audio<br />
hardware. It is a feature available on many recording programs, which use ASIO® to communicate<br />
with a soundcard or other audio device. <strong>Line</strong> 6 <strong>TonePort</strong>, GuitarPort and PODxt devices come with<br />
ASIO® drivers for Windows® - these drivers are installed when you run the <strong>GearBox</strong> application<br />
installer, or can be downloaded individually from the <strong>Line</strong> 6 Support - Software Downloads page.<br />
ASIO® was designed with the assumption that a single soundcard would provide input and output to<br />
the computer. When you choose to use ASIO® with <strong>TonePort</strong>, GuitarPort or PODxt hardware, it will<br />
8•4
<strong>Line</strong> 6 <strong>GearBox</strong> <strong>3.5</strong> – Glossary (What Is...?)<br />
act as that single soundcard. Your guitar (or whatever you are plugging into your <strong>Line</strong> 6 hardware’s<br />
input) will feed into your computer through your <strong>Line</strong> 6 hardware, and your recording program will<br />
play back through this hardware’s outputs, not through other soundcards outputs on your computer.<br />
ASIO® also provides better performance on Windows® systems since it allows the input signal that is<br />
fed into the soundcard travel through the computer, your audio software, and back out the soundcard<br />
outputs in a very short amount of time. This is what is referred to as “low latency” operation. Please see<br />
your Windows® recording program’s instructions for details on ASIO® operation.<br />
Note - <strong>Line</strong> 6 hardware utilizes ASIO® drivers for Windows® systems only. For Mac® computers,<br />
<strong>Line</strong> 6 hardware uses the Core Audio driver, which also offers low latency operation, and is the driver<br />
format compatible with most popular Mac® audio software.<br />
p Return to What Is Topics<br />
What is the Auto-Select (Tones) Button?<br />
This button is available in the Player interface, within the Browser when the Player button is active.<br />
It can be used with Tracks available from GuitarPort Online to automatically load up a recommended<br />
Tone custom-made to match the Track. It is also used (for selected Tracks) to enable automatic Tone<br />
Changes for that Track. If a Track does not have any Tones embedded in it for auto-selection, the<br />
Auto-Select Button will be grayed out.<br />
The Auto-Select Button includes three options:<br />
• Off – Disables automatic Tone selection for this track.<br />
• Single Coil – Selects a Tone optimized for single coil pickups, or OK for all pickups.<br />
• Humbucker – Selects a Tone optimized for humbucker pickups, or OK for all pickups.<br />
If you really like a particular Tone that you’ve found embedded in a Track, and you want to have this<br />
Tone available to use without the Track as well, all you have to do is load the Tone from the Track, and<br />
then Save it from the <strong>GearBox</strong> File menu.<br />
p Return to What Is Topics<br />
What is the Browser?<br />
A Browser is a program that understands HTML, JavaScript, image files, sound files and other data,<br />
and can display them to you to provide an interactive visual and sound experience. Internet Explorer®,<br />
for example is the browser made by Microsoft, included on Windows® XP® computers to browse the<br />
8•5
<strong>Line</strong> 6 <strong>GearBox</strong> <strong>3.5</strong> – Glossary (What Is...?)<br />
Internet. Likewise, Mac computers come with the Safari® browser program.<br />
An enhanced browser is built into the bottom portion of the <strong>GearBox</strong> window. It is used to display<br />
text, images and sound from GuitarPort Online, and also displays the Player, Metronome, Tone Locker<br />
and Tone Library.<br />
Click the buttons along the top of the Browser to access the different features:<br />
• GuitarPort Online - Connect to a world of guitar online...<br />
• Player - GuitarPort’s advanced jam tools.<br />
• Metronome - Configure a custom beat to play along to.<br />
• Tone Locker - Organize your Tones.<br />
• Tone Library - Download hundreds of custom and Artist created Tones for free!<br />
There are three controls at the top left of the Browser:<br />
8•6
<strong>Line</strong> 6 <strong>GearBox</strong> <strong>3.5</strong> – Glossary (What Is...?)<br />
• BACK – Steps back through the items that the browser has displayed.<br />
• FWD – After clicking the BACK button, you can click the FWD button to step forward again<br />
through the items that the browser has displayed. The button will replaced by an outline if you<br />
have not used the BACK button yet, or you have forwarded to the last item displayed by the<br />
Browser.<br />
• Show/Hide Browser – The arrow button at the left shows/hides the Browser.<br />
p Return to What Is Topics<br />
What is the Bypass button?<br />
The Bypass button will bypass ALL the <strong>GearBox</strong> processing of your input signal. The monitor signal<br />
you hear will then be rather “naked”, as well as the signal routed to your Record Sends. Engaging the<br />
Bypass button reduces the CPU load of your computer as well since it turns off all signal processing<br />
tasks. You’ll see the <strong>GearBox</strong> interface “gray out” to indicate this when the Bypass button is engaged:<br />
Note, for PODxt, the Bypass button functions as an Amp Bypass only, where only the amplifier<br />
processing is bypassed, and any effects that are active are still applied to the input signal by your<br />
PODxt.<br />
p Return to What Is Topics<br />
What is Chorus?<br />
Chorus is one kind of Mod (modulation) Effect. It is generally used to give a “lush” or “swimmy” sound<br />
to guitar. Andy Summers of the Police, for instance, made chorus an important part of his signature<br />
sound. For details on each of the Chorus controls, move your mouse over the control and look in the<br />
Info Bar at the bottom of the <strong>GearBox</strong> window.<br />
8•7
<strong>Line</strong> 6 <strong>GearBox</strong> <strong>3.5</strong> – Glossary (What Is...?)<br />
Some effects are modeled after classic gear described in the Model Gallery.<br />
p Return to What Is Topics<br />
What is Comp (Compressor)?<br />
Comp, which is an abbreviation for Compressor, is one of the Gearbox Effects. Compressors even out<br />
signals by reducing the volume of the loudest sounds to better match the volume of quieter sounds.<br />
You can use subtle compression to make your guitar playing sound more even, or drastic compression<br />
for dramatically increased sustain and a very consistent level. For details on each of the Compressor<br />
controls, move your mouse over the control and look in the Info Bar at the bottom of the GuitarPort<br />
window.<br />
The <strong>GearBox</strong> Stomp effect also includes the Vetta Comp compressor that runs “pre” (before) the amp<br />
processing, which can give a different kind of sound than the dedicated Comp effect which always runs<br />
“post” (after) the amp processing.<br />
Some effects are modeled after classic gear described in the Model Gallery.<br />
p Return to What Is Topics<br />
What is Core Audio?<br />
Core Audio is a Mac® protocol for computer audio that allows audio software to communicate<br />
with audio hardware. Most all popular Mac® audio recording programs now utilize Core Audio to<br />
communicate with a soundcard or other audio device. <strong>Line</strong> 6 <strong>TonePort</strong>, GuitarPort and PODxt devices<br />
come with Core Audio drivers - these drivers are installed when you run the <strong>GearBox</strong> application<br />
installer, or can be downloaded individually from the <strong>Line</strong> 6 Support - Software Downloads page.<br />
Core Audio also provides excellent performance on Mac® systems since it allows the input signal that<br />
is fed into the soundcard travel through the computer, your audio software, and back out the soundcard<br />
outputs in a very short amount of time. This is what is referred to as “low latency” operation. Please see<br />
your Mac® recording program’s instructions for details on Core Audio operation.<br />
8•8
<strong>Line</strong> 6 <strong>GearBox</strong> <strong>3.5</strong> – Glossary (What Is...?)<br />
p Return to What Is Topics<br />
What is the CPU Usage Meter?<br />
The CPU Usage Meter at the bottom right corner of the <strong>GearBox</strong> window shows how much of your<br />
computer’s CPU horsepower is being used to power <strong>GearBox</strong>. If you see the meter close to fully lit<br />
(as the meter shown above is), <strong>GearBox</strong> is putting a heavy load on your computer. When you bypass<br />
<strong>GearBox</strong>’s tone processing engine by pressing the second button to the right of the Tone menu, you’ll<br />
see the CPU Usage Meter’s level drop.<br />
Windows® users can reduce the load <strong>GearBox</strong> and <strong>TonePort</strong> put on their CPU by selecting Hardware<br />
& Settings from <strong>GearBox</strong>’s Help menu and increasing the setting used by ToneDirect monitoring.<br />
Click Driver & Recording to the left, and select the Windows® Driver topic for more info about<br />
Windows® <strong>TonePort</strong> driver settings.<br />
p Return to What Is Topics<br />
What is Delay?<br />
Delay is one of the types of <strong>GearBox</strong> Effects, and you’ll find several types of Delays in Gearbox. Delay<br />
adds a delayed echo of your guitar. A short delay time and low feedback setting will give you a classic<br />
“slapback” delay. Longer delay times give you a distinctly separate echo, and higher feedback settings<br />
increase the number of echoes. For details on each of the Delay controls, move your mouse over the<br />
control and look in the Info Bar at the bottom of the GuitarPort window.<br />
Some Delay effects are modeled after classic gear described in the Model Gallery.<br />
p Return to What Is Topics<br />
What is the Device Manager in Windows®?<br />
To learn about the Windows® Device Manager and see how it can be used to view and adjust the<br />
settings for your computer’s hardware, please see the Windows XP Optimizations document on the<br />
<strong>GearBox</strong> Online Help section of the <strong>Line</strong> 6 web site.<br />
p Return to What Is Topics<br />
What are the Effects?<br />
<strong>GearBox</strong> includes nine simultaneous Effects - A.I.R., Comp, Delay, Gate, Mod, Stomp, Verb, Vol<br />
(Volume Pedal) and Wah. When you load a Tone from <strong>GearBox</strong>’s Tone Menu, the Effects will be set<br />
to the settings saved for that Tone. Saving a Tone will save all the effect settings with the Tone.<br />
8•9
<strong>Line</strong> 6 <strong>GearBox</strong> <strong>3.5</strong> – Glossary (What Is...?)<br />
• Clicking the arrow to the left of the Gate icon shows and hides the Effects control panel.<br />
• Click directly on the ON/OFF portion of the Gate, Wah, Stomp, Delay, Mod, Comp, EQ, and<br />
Verb icons to toggles the effect On or Off. The Volume, Amp/Mic/ER and Send 3-4 icons do not<br />
turn on/off. (Send 3-4 is available only for <strong>TonePort</strong> devices).<br />
• Clicking the top portion of an effect icon to will also cause its controls to be displayed in the<br />
Effects control panel – this is independent of toggling the effect On/Off.<br />
• You can also select a particular effect for display in the Control Panel by selecting it from the<br />
menu just below the Gate icon, or by right-clicking the effect (Windows®) or control-clicking<br />
(Mac®).<br />
• As you move your mouse over any effect control, you’ll get a description and tips on using the<br />
control in the Info Bar at the bottom of the <strong>GearBox</strong> window.<br />
• Click switches in the Control Panel or turn any knobs to adjust the selected effect. Or doubleclick<br />
numerical values to type in values.<br />
• Some effects include a Model menu for selecting which Model you’d like to use for the effect.<br />
• The order of the effects icons shows you <strong>GearBox</strong>’s signal flow, from left to right.<br />
• The Vol, Mod, Delay and Reverb effects include a Pre/Post switch so they can run Pre (before the<br />
amp/cab/mic or Preamp processing) or Post (after the amp/cab/mic or Preamp). As you click the<br />
pre/post switches of these effects, you’ll see all the icons re-ordered to show the new signal flow.<br />
• Many of the effects are modeled after classic gear described in the Model Gallery.<br />
p Return to What Is Topics<br />
8•10
<strong>Line</strong> 6 <strong>GearBox</strong> <strong>3.5</strong> – Glossary (What Is...?)<br />
What is EQ (Equalizer)?<br />
EQ, which is an abbreviation for Equalizer or equalization, is one of the <strong>GearBox</strong> Effects. Equalizers<br />
add or remove any range of audio frequencies from bass to treble. The EQ is configured as a “post”<br />
effect – that is, it comes after both the Compressor and the Amp in your signal chain. For details<br />
on each of the Equalizer controls, move your mouse over the control and look in the Info Bar at the<br />
bottom of the <strong>GearBox</strong> window.<br />
p Return to What Is Topics<br />
What is a Flanger?<br />
Flanger is one of the <strong>GearBox</strong> Mod Effects. Flanger is most famously known as the “jet-plane” whoosh<br />
effect of several classic 70s recordings. It can also be used to give a “swooshy” or “swept” sound to<br />
guitar, or just to create a “bigger” sound. Eddie Van Halen, for instance, used flanger effects as an<br />
important part of his signature sound on many classic Van Halen recordings. For details on each of<br />
the Flanger controls, move your mouse over the control and look in the Info Bar at the bottom of the<br />
<strong>GearBox</strong> window.<br />
p Return to What Is Topics<br />
What is Gate?<br />
8•11
<strong>Line</strong> 6 <strong>GearBox</strong> <strong>3.5</strong> – Glossary (What Is...?)<br />
The Gate effect included in <strong>GearBox</strong> is designed to reduce the noise that your guitar makes when you<br />
are not playing. You can think of it as a gate that opens to let your guitar sound through when you<br />
play, and closes when you stop playing to shut out the noise you would otherwise hear after you stop<br />
playing.<br />
The Gate works by detecting the input level to <strong>GearBox</strong> from your guitar. When the input level is<br />
below the level set for the gate’s Threshold knob, the gate will close at the speed set by the Gate’s<br />
Decay knob, and cut off the signal from your guitar. When the input level is above the threshold, the<br />
gate will open to let your guitar signal through. Turning the Threshold knob clockwise increases the<br />
aggressiveness of the gate in its effort to cut off sound. The idea is to set the threshold low enough so<br />
that it doesn’t cut off the signal as you are playing or a note is sustaining, but high enough so that the<br />
background noise from your guitar doesn’t keep the gate open. You’ll need to select the Gate setting<br />
that works best with the Amp Model you’ve chosen as well as the guitar(s) and pickups you happen to<br />
be using with <strong>GearBox</strong>. (The Hum Reducer eliminates noise in another way.)<br />
p Return to What Is Topics<br />
What is GuitarPort Online?<br />
GuitarPort Online is the membership service accessible from within the <strong>GearBox</strong> software which<br />
offers guitar lessons, artist biographies, guitar news, transcriptions to popular songs and licks and more!<br />
If you are not already a member of GuitarPort Online, click the GuitarPort Online button above the<br />
Browser to take a tour of GuitarPort Online.<br />
p Return to What Is Topics<br />
What is the (Player) Half Speed Button?<br />
The Half Speed button is available in the Player interface, which is displayed in the Browser when you<br />
select the Player button. When the Half Speed button is lit red, the Player will play back the currently<br />
loaded Track at half speed without changing pitch. This can be very handy when you are trying to<br />
learn a guitar part. Slow the track to half speed for careful study, then switch back to normal speed once<br />
you’re ready to put what you’ve learned into action.<br />
To use the Half Speed Button:<br />
• Click the button to light it red.<br />
• Use the Track controls, including the Loop, as normal.<br />
• Click the Half Speed button again to return to normal playback speed.<br />
p Return to What Is Topics<br />
8•12
<strong>Line</strong> 6 <strong>GearBox</strong> <strong>3.5</strong> – Glossary (What Is...?)<br />
What are Hot Keys (keyboard shortcut assignments)?<br />
What Hot Keys are available in <strong>GearBox</strong>? You can type on your computer’s keyboard to activate<br />
various <strong>GearBox</strong> functions:<br />
Hot Key Assignments<br />
Command - Action Windows® Mac®<br />
Main Menu Commands<br />
File-Tone-Open Ctrl + O z O<br />
File-Tone-Save Ctrl + S z S<br />
File-Tone-Save As Ctrl + Shift + S Òz S<br />
File-Tone-Info Ctrl + I z I<br />
File-Tone-Recent Ctrl + [0 - 9] z [ 0 - 9]<br />
Edit-Cut Ctrl + X z X<br />
Edit-Copy Ctrl + C z C<br />
Edit-Paste Ctrl + V z V<br />
Edit-Delete Del Del<br />
View-Show/Hide Browser Ctrl + B z B<br />
View-Browser-Back Alt + Left Arrow z [<br />
View-Browser-Forward Alt + Right Arrow z ]<br />
View-Browser-Refresh Ctrl + R z R<br />
View-Browser-Stop Ctrl + Z z .<br />
View-Browser-Home Ctrl + H Òz H<br />
View-Transfers Ctrl + T z T<br />
Help-Open Help F1 z ?<br />
File-Tone-Open (B) Ctrl + Alt + O x z O<br />
File-Tone-Save (B) Ctrl + Alt + S x z S<br />
File-Tone-Save As (B) Ctrl + Alt + Shift + S xÒz S<br />
File-Tone-Info (B) Ctrl + Alt + I x z I<br />
File-Tone-Recent (B) Ctrl + Alt + [0 - 9] x z [0 - 9]<br />
Player - Transport<br />
Toggle Half Speed F3 F3<br />
Toggle Looping F4 F4<br />
Play Start/Stop F5, Spacebar F5, Spacebar<br />
RTZ F6 F6<br />
Rewind F7 F7<br />
Fast Forward F8 F8<br />
Previous Section F9 z F9<br />
Next Section F10 z F10<br />
8•13
<strong>Line</strong> 6 <strong>GearBox</strong> <strong>3.5</strong> – Glossary (What Is...?)<br />
Hot Key Assignments<br />
Command - Action Windows® Mac®<br />
Set Loop Start F11 z F11<br />
Set Loop End F12 z F12<br />
Browser<br />
Scroll Down Down Arrow, Spacebar Down Arrow, Spacebar<br />
Scroll Up Up Arrow, Shift + Spacebar Up Arrow, Ò Spacebar<br />
Scroll Left Left Arrow Left Arrow<br />
Scroll Right Right Arrow Right Arrow<br />
Popup Menus<br />
Next Item Down Arrow Down Arrow<br />
Previous Item Up Arrow Up Arrow<br />
Knobs<br />
Single Step Up Up Arrow Up Arrow<br />
Single Step Down Down Arrow Down Arrow<br />
Large Step Up Right Arrow Right Arrow<br />
Large Step Down Left Arrow Left Arrow<br />
p Return to What Is Topics<br />
8•14
<strong>Line</strong> 6 <strong>GearBox</strong> <strong>3.5</strong> – Glossary (What Is...?)<br />
What is the Hum Reducer?<br />
The Hum Reducer reduces the noise that your guitar (or bass guitar) puts out*, including noise that<br />
is caused by electrical interference from your computer display and other sources that are picked up by<br />
your guitar’s pickups. The Hum Reducer will not completely eliminate hum, but it is usually able to<br />
reduce it considerably. To use the Hum Reducer:<br />
• Click the Hum Reducer button to light it up red, then<br />
• Click the Learn button, then<br />
• Follow the other directions on-screen in the Hum Reducer window.<br />
It’s important to position yourself and your guitar in your normal playing position in relationship to<br />
your computer display, etc. when the Hum Reducer is learning the pattern of the noise that it will<br />
reduce. When you change positions relative to the monitor, change guitars or pickups, or add other<br />
possible sources of interference (turning on a nearby television, say), the character of the interference<br />
that your guitar is receiving and transmitting will change, and you should press the Learn button again<br />
to have the Hum Reducer relearn this new hum pattern.<br />
*Note – the Hum Reducer is only available when using <strong>GearBox</strong> with <strong>TonePort</strong> or GuitarPort<br />
hardware. It does not appear in <strong>GearBox</strong> when using PODxt as the connected device.<br />
p Return to What Is Topics<br />
What is the Info Bar?<br />
The Info Bar is the area at the very bottom of the <strong>GearBox</strong> window. Point your mouse (you don’t<br />
have to click the mouse button) at something in the <strong>GearBox</strong> program and look at the Info Bar to see<br />
8•15
<strong>Line</strong> 6 <strong>GearBox</strong> <strong>3.5</strong> – Glossary (What Is...?)<br />
a description of the thing you’re pointing at as well as brief instructions on how to use it. For some<br />
controls, the current setting of the control is shown (in parentheses) at the end of the Info Bar text.<br />
p Return to What Is Topics<br />
What is the Loaded (Track) Menu?<br />
The Loaded Track Menu within the Player interface, which is displayed in the Browser when you<br />
select the Player button, shows the name of the currently loaded Track. Click your mouse button on<br />
the menu and drag down to select from up to 10 of the Tracks that you loaded before the current one.<br />
p Return to What Is Topics<br />
What is the Loop Button?<br />
When the Loop Button is on for the Track loaded within the Player interface, which is displayed in<br />
the Browser when you select the Player button, the Track will repeatedly play from the Loop’s start to<br />
end.<br />
The loop is shown and set in the Track Sections Display.<br />
p Return to What Is Topics<br />
What is <strong>MIDI</strong>?<br />
<strong>MIDI</strong> (Musical Instrument Digital Interface) is a communications standard supported by a variety of<br />
music equipment and software. All the tone controls of the <strong>GearBox</strong> software (and PODxt hardware)<br />
are associated with one of the 127 <strong>MIDI</strong> CC (continuous controller) messages.<br />
<strong>MIDI</strong> Pedals and Controllers<br />
PODxt includes <strong>MIDI</strong> connectors that allow you to connect a <strong>MIDI</strong> controller (for instance, a controller<br />
pedal) directly to it to select channel memories, operate wah and volume, or control other Tone<br />
parameters, all of which can also be done using a <strong>Line</strong> 6 FBV family foot controller. More information<br />
on those is available at www.line6.com/podxt, and in your PODxt Pilot’s Handbook.<br />
A <strong>MIDI</strong> pedal or other <strong>MIDI</strong> controller can also be used with <strong>TonePort</strong> or GuitarPort hardware to<br />
operate the <strong>GearBox</strong> Wah and Volume, as well as any other Tone parameter. Connect the <strong>MIDI</strong><br />
pedal or other <strong>MIDI</strong> controller hardware to a <strong>MIDI</strong> input jack on your computer’s hardware <strong>MIDI</strong><br />
interface, then select that <strong>MIDI</strong> input port in the <strong>MIDI</strong> tab of the <strong>GearBox</strong> application Preferences ><br />
<strong>MIDI</strong> tab. Remember that you will also have to configure the <strong>MIDI</strong> hardware to send the right <strong>MIDI</strong><br />
controller messages, which are listed below. For example, the Wah’s Position knob is associated with<br />
<strong>MIDI</strong> CC #4. When CC #4 messages are received by the <strong>GearBox</strong> software, the Wah’s Position knob<br />
moves accordingly, and you’ll hear your guitar Tone change just the way it would if a wah pedal was<br />
being used. Please see the <strong>MIDI</strong> Continuous Controller Reference document for more details on <strong>MIDI</strong><br />
connectivity and how to map <strong>MIDI</strong> hardware to specific <strong>GearBox</strong> parameters.<br />
8•16
<strong>Line</strong> 6 <strong>GearBox</strong> <strong>3.5</strong> – Glossary (What Is...?)<br />
<strong>MIDI</strong> Channel<br />
When <strong>TonePort</strong> or GuitarPort hardware is used, the <strong>GearBox</strong> software always sends <strong>MIDI</strong> messages<br />
on Channel 1 and responds to messages on any channel. PODxt users, please see your PODxt Pilot’s<br />
Handbook to learn how to set your PODxt’s <strong>MIDI</strong> Channel to match your other <strong>MIDI</strong> hardware and<br />
software.<br />
p Return to What Is Topics<br />
What is Mod?<br />
Mod, an abbreviation for Modulation, is one of <strong>GearBox</strong>’s Effects. The Modulation effect can use one<br />
several different Models, all described in the Model Gallery.<br />
p Return to What Is Topics<br />
What are Model Packs?<br />
Model Packs are expansion sets you can purchase for your <strong>TonePort</strong>, GuitarPort and PODxt.<br />
• The Metal Shop pack contains 18 bone crushing high gain amp models.<br />
• The Classic Collection pack contains 18 vintage amp models.<br />
• The FX Junkie contains 17 sinister stomps, 13 mind bending mods, and 5 dreamy delays. (The<br />
PODxt Live unit already includes all models in the FX Junkie).<br />
• The Power Pack expands a <strong>TonePort</strong>’s or GuitarPort’s amp, stomp, mod, delay, and verb<br />
collection to that of a PODxt. (PODxt’s already include all models in the Power Pack).<br />
• The Bass Expansion Model pack delivers 28 bass amp and 22 bass cab models all paired with the<br />
perfect mic selections.<br />
Just connect your <strong>Line</strong> 6 device to your computer and launch <strong>Line</strong> 6 Monkey – the Optional Add-Ons<br />
tab will show you which Model Packs and other goodies are just a few clicks away (well, a few clicks<br />
and a credit card number anyway). For more info, please check out the Model Pack Handbooks.<br />
p Return to What Is Topics<br />
8•17
<strong>Line</strong> 6 <strong>GearBox</strong> <strong>3.5</strong> – Glossary (What Is...?)<br />
What are the numbers shown in some tracks?<br />
The small numbers shown at the bottom of some Tracks are the Tone Changes included in some Tracks<br />
available from GuitarPort Online. Please see the What are Tone Changes? section that follows.<br />
p Return to What Is Topics<br />
What is a Preferred Audio Device?<br />
Windows® calls the device it uses to play system sounds the Preferred Audio Device. You can choose<br />
to make your <strong>Line</strong> 6 device your preferred audio device, and then Windows® will route all sounds that<br />
your computer makes through <strong>GearBox</strong> and to the <strong>Line</strong> 6 hardware via the USB cable.<br />
Your <strong>Line</strong> 6 USB audio device is one of the best-sounding USB bus-powered devices in the world, so if<br />
you do use it as your preferred audio device, you’ll get no-compromise sound quality. However, on some<br />
systems you will lose some sound capabilities if your <strong>Line</strong> 6 device is the preferred audio device:<br />
• If your soundcard provides surround sound via multiple speakers, this would also be a feature that<br />
you would lose by making your <strong>Line</strong> 6 hardware your preferred audio device.<br />
• Some sound cards also have synthesizer chips onboard that feed audio directly out of the card<br />
without the computer “seeing” it, so these sounds might also not be available to you if you were<br />
using your <strong>Line</strong> 6 device as the preferred audio device. If your soundcard has one of these, you<br />
could get around this by connecting the audio output from your computer to the Monitor In jack<br />
on the back of your <strong>Line</strong> 6 device.<br />
• Some computers have the audio output of their internal CD drive connected to the internal<br />
sound card via a direct analog connection, so the audio from the CD drive is never “seen” by the<br />
computer as the CD plays. If your computer is set up this way, making your <strong>Line</strong> 6 device your<br />
preferred audio device would mean you could not use the computer’s CD to play audio CDs via<br />
WinAmp or other programs. However, you do sometimes get an alternative to enable digital<br />
playback of the CD. This can be accessed on some Windows® systems by right clicking on the<br />
“My Computer” icon on your desktop and choosing Properties. You will then see a tab named<br />
Device Manager. Select your CD here and navigate to an option to enable digital audio playback<br />
of the CD (if this option is provided), and you will now be able to playback audio from your<br />
computer’s CD drive in any program, and hear it coming out of your <strong>Line</strong> 6 device. If your CD<br />
doesn’t support digital playback, you could also get around this by connecting the audio output<br />
from your computer to the Monitor In (or Aux In) jack of your <strong>Line</strong> 6 device.<br />
p Return to What Is Topics<br />
What is Re-Amping<br />
Re-amping is the process by which you can record a completely dry unprocessed signal to your digital<br />
recorder/computer, while monitoring an amp/fx processed tone. This process allows you to record a<br />
dry track so that you can adjust the tone and effects on playback, in a non-destructive manner. The<br />
PODxt family of products features digital re-amping thru the USB output, and this process is covered<br />
in detail in this section.<br />
p Return to What Is Topics<br />
8•18
<strong>Line</strong> 6 <strong>GearBox</strong> <strong>3.5</strong> – Glossary (What Is...?)<br />
What is a Record Send?<br />
A Record Send is a signal routing mechanism utilized in audio hardware and software mixing systems<br />
which allow specific input signal to be mixed together or processed and then made available as to<br />
recording inputs. <strong>GearBox</strong> provides stereo Record Sends that are accessible within the <strong>GearBox</strong><br />
software, as well as from the <strong>Line</strong> 6 Control Console dialog. These Record Sends are able to carry your<br />
whatever signal(s) you input into your <strong>Line</strong> 6 device and route them to the Audio Driver so that they<br />
are available in digital form for your audio recording software. Your recording software can then choose<br />
the <strong>GearBox</strong> Sends as mono or stereo inputs for recording into tracks.<br />
The number of Record Sends available in <strong>GearBox</strong> depends upon the <strong>Line</strong> 6 device in use – GuitarPort<br />
and PODxt devices have one stereo Record Send, and <strong>TonePort</strong> devices have two stereo Record Sends<br />
that show up as inputs in your recording software.<br />
Additional information is provided in the Recording Setup Guide on the <strong>GearBox</strong> Online Help section<br />
of the <strong>Line</strong> 6 web site.<br />
p Return to What Is Topics<br />
What is the Reference control in the Tuner?<br />
This control is available within the Tuner interface. It tells the Tuner what to tune to. 440Hz is the<br />
standard reference value for A, and is generally used for tuning reference. All the Tracks available from<br />
GuitarPort Online use the standard 440Hz reference. So, unless you have a particular need to adjust<br />
the Tuner’s reference (and tune your guitar to match something other than GuitarPort Tracks), you<br />
probably want to stick with the standard 440Hz setting for this control.<br />
p Return to What Is Topics<br />
What is a Rotary Drum + Horn?<br />
A Rotary Drum + Horn (or rotary speaker) is one of those things that makes you go, “Gee whiz!”<br />
when you first hear about it: a speaker is mounted on a rotating motor, and spun around as sound plays<br />
through it. A switch allows you to select slow or fast speed for the rotation, and one cool thing about a<br />
rotary is the gradual change in sound that you hear as the speaker speeds up or slows down to the new<br />
speed. The rotary drum + horn speaker enclosure was originally developed for organ players, but guitar<br />
8•19
<strong>Line</strong> 6 <strong>GearBox</strong> <strong>3.5</strong> – Glossary (What Is...?)<br />
players soon put it to use as well. Effects manufacturers also quickly started making foot pedals that<br />
emulated this effect too (check out the <strong>GearBox</strong> U-Vibe in the Mod Effects menu for a model of one<br />
of these popular effects). Stevie Ray Vaughn and The Beatles were both heavy users of rotary speaker<br />
effects for guitar. For details on each of the Rotary Speaker controls, move your mouse over the control<br />
and look in the Info Bar at the bottom of the <strong>GearBox</strong> window.<br />
Many of the effects are modeled after classic gear described in the Model Gallery.<br />
p Return to What Is Topics<br />
What are Sends?<br />
Sends are signal routing mechanisms utilized in audio hardware and software mixing systems which<br />
allow specific input signal to be mixed together or processed and then made available as to recording<br />
inputs. <strong>GearBox</strong> provides stereo Sends that are accessible within the <strong>GearBox</strong> software, as well as<br />
from the <strong>Line</strong> 6 Control Console dialog. These Sends are able to carry your whatever signal(s) you<br />
input into your <strong>Line</strong> 6 device and route them to the Audio Driver so that they are available in digital<br />
form for your audio recording software. Your recording software can then choose the <strong>GearBox</strong> Sends as<br />
mono or stereo inputs for recording into tracks.<br />
The number of Sends available in <strong>GearBox</strong> depends upon the <strong>Line</strong> 6 device in use – GuitarPort and<br />
PODxt devices have one stereo Send, and <strong>TonePort</strong> devices have two stereo Sends that show up as<br />
inputs in your recording software.<br />
Additional information is provided in the Recording Setup Guide on the <strong>GearBox</strong> Online Help section<br />
of the <strong>Line</strong> 6 web site.<br />
p Return to What Is Topics<br />
What is a Soundcard?<br />
A soundcard is the piece of hardware in (or attached to) your computer that plays back and receives<br />
sound into the computer for recording or other uses. <strong>Line</strong> 6 <strong>TonePort</strong>, GuitarPort and PODxt devices<br />
all operates as USB soundcards, since they utilize high performance audio drivers and can be accessed by<br />
most any audio software on your Mac or Windows computer for quality audio recording and playback.<br />
Additional information is provided in the Recording Setup Guide on the <strong>GearBox</strong> Online Help section<br />
of the <strong>Line</strong> 6 web site.<br />
p Return to What Is Topics<br />
What is Stomp?<br />
Stomp is one of the types of <strong>GearBox</strong> Effects. A selection of stomp box distortion, fuzz and compressor<br />
effects are available from its Effect Model menu. For details on each of the Stomp controls, move your<br />
mouse over the control and look in the Info Bar at the bottom of the <strong>GearBox</strong> window.<br />
Many of the effects are modeled after classic gear described in the Model Gallery.<br />
p Return to What Is Topics<br />
8•20
<strong>Line</strong> 6 <strong>GearBox</strong> <strong>3.5</strong> – Glossary (What Is...?)<br />
What is Tap Tempo?<br />
All <strong>GearBox</strong>’s Delay and Mod Effects (except for Rotary Drum + Horn) allow you to set their time/<br />
speed two ways. One way is to turn their speed or time knob. The other way is to choose a tempo.<br />
You choose a tempo one of two ways. You can type into the TEMPO field shown for these effects. Or<br />
you can select a note value from the button to the left of their FX TEMPO display, then click a few<br />
times on the TAP button to set tempo to match the tempo of the music you’re working on.<br />
The most common use of tap tempo is to set the note value to a quarter note (as shown above), tap<br />
along with the song you’re recording, and enjoy <strong>GearBox</strong>’s Delay and/or Mod Effect as it pulses in<br />
quarter note time to match your song. You can also choose other notes values — U2’s guitarist, The<br />
Edge, is fond of using dotted-eighth note delays.<br />
<strong>GearBox</strong> uses one tempo for both the Mod and Delay effects, so when you set it with one, it will also<br />
be used by the other. Choose (OFF) from the button to the left of the tempo display if you’d like Delay<br />
or Mod to ignore the tempo. Mod and Delay can have different note values, so for instance your delays<br />
could be dotted-eighth notes while your tremolo pulses along in quarter note time.<br />
p Return to What Is Topics<br />
What is a Tone?<br />
A Tone is a saved setting for all controls that affect the processed sound applied to <strong>TonePort</strong> inputs.<br />
Tones stored on your computer are accessed from the Tones menu at the top left of the <strong>GearBox</strong><br />
window. Some Basic Tones and a folder of Preset Tones are available in this menu. The menu also has<br />
a <strong>User</strong> folder ready to store any new Tones that you save.<br />
p Return to What Is Topics<br />
What are Tone Changes (on GuitarPort Online Tracks)?<br />
The small numbers shown at the bottom of some Tracks are the Tone Changes included in some<br />
Tracks available from GuitarPort Online. When Tone Changes are available, the Auto-Select button<br />
lets you choose to use them, or turn this feature off.<br />
Only selected GuitarPort Online tracks include Tone Changes. You’ll most likely see these included<br />
in Tracks where the guitarist used significantly different equipment or settings to achieve a variety of<br />
sounds on the recording. When these Tracks are created, <strong>Line</strong> 6 creates multiple Tones that deliver<br />
the required range of sounds. These Tones are then embedded into the Track along with Tone Changes<br />
that trigger the right Tone to load at the right time. Wherever a Tone Change occurs, a boxed number<br />
is shown in the Track Sections Display. There are three Tone Changes in the example below: Tone<br />
8•21
<strong>Line</strong> 6 <strong>GearBox</strong> <strong>3.5</strong> – Glossary (What Is...?)<br />
Change 1 at the beginning of the Track, number 2 at the beginning of the Solo, and number 1 again<br />
later in the Solo:<br />
Replacing Tones in Tracks<br />
You can also choose a different Tone for a Tone Change to trigger. Stop the Track somewhere just<br />
after the Tone you want to change. Edit the Tone as you wish or choose a completely different Tone<br />
from the Tone menu. Then, from the File menu, choose Save > Tone > Replace Track Tone with Current<br />
Tone. The Tone you’re using has now been saved to the numbered tone change just before the green<br />
playback indicator in the Track. In the example above, the playback indicator is at the start of Chorus<br />
1, so Tone Change number 1 would be the Tone that would get replaced, because that’s the first Tone<br />
Change before this point in the Track. This Tone will now be used for every Tone Change number 1<br />
in the Track. In the example above, you’ll get this Tone at the beginning of the Track, and then again<br />
for the latter part of the Solo toward the end.<br />
You can not add additional Tone Changes into a Track, move the Tone Changes, or change the<br />
number assigned to each Tone Change.<br />
p Return to What Is Topics<br />
What is the Tone Library?<br />
The Tone Library is your resource for <strong>Line</strong> 6 created Tones – and its free! This library holds a collection<br />
of Tones matching the sounds of the greatest guitarists, bands and gear of all time. Originally created for<br />
the <strong>Line</strong> 6 GuitarPort Online Tracks and Lessons, these Tones are made available for you to download<br />
by clicking on the Tone Library button above the Browser window. Even better, new Tones are added<br />
to this library all the time. Note that you do not need to be a GuitarPort Online member to have access<br />
to this library – you need only an Internet connection. Just Browse or Search for a Tone, then click<br />
the Load button at the right to load the Tone directly into <strong>GearBox</strong>. Click on a number to go to its<br />
description…<br />
1<br />
2<br />
3<br />
4<br />
5<br />
6<br />
7<br />
8<br />
8•22
<strong>Line</strong> 6 <strong>GearBox</strong> <strong>3.5</strong> – Glossary (What Is...?)<br />
1 -GuitarPort Online membership sign up: Click the Join Now button to take you to the online signup<br />
page for the GPO membership.<br />
2 -Browse button: Click this tab button to see all available Tones in the Library. Use the Search to<br />
find specific Tones.<br />
3 -Newest button: Click here to show you the most recently added Tones.<br />
4 -Top 10 button: Click here to show the current 10 most popular loaded Tones.<br />
5 -Tone Locker button: Click here to load the <strong>GearBox</strong> Tone Locker in the Browser, where you can<br />
manage your Tones.<br />
6 -Search option: Type in the name of any Guitarist, Band, Song title or Tone title in this field and<br />
press go to find any Tones that match.<br />
7 -Sort By selector: Choose Band or Guitarist, then press the GO button to sort the library’s list by<br />
either.<br />
8 -Load button: Press the Load button to the right of the desired Tone to have it load into <strong>GearBox</strong>.<br />
You’ll then see the Tone’s name appear in the main Tone menu at the top of <strong>GearBox</strong>:<br />
Note that the Tone name appears in italics since it is not a saved Tone yet. If you want to keep<br />
this Tone, be sure to do File > Tone > Save to permanently save this Tone into your <strong>GearBox</strong> Tones<br />
folder.<br />
9 -Pick-up type indicator: You’ll see that either the “single coil” or “humbucker” type pickup is<br />
selected for each Tone. This is an indicator saved within the Tone by its creator to let you know what<br />
type of pickup it was intended for use with. You can of course use it with any pickup setting on your<br />
guitar, but it the Tone will sound most faithful to what it is trying to match if you use the same pickup<br />
type as indicated.<br />
p Return to What Is Topics<br />
8•23
<strong>Line</strong> 6 <strong>GearBox</strong> <strong>3.5</strong> – Glossary (What Is...?)<br />
What is the Tone Locker?<br />
<strong>GearBox</strong>’s Tone Locker lets you access and organize your Tones. Click the Tone Locker button above<br />
the Browser to access the Tone Locker:<br />
• The list on the left shows Tones stored on your computer. This list shows the contents of the<br />
folder that is set as the Tones Root Folder in your <strong>GearBox</strong> Preferences – Tones tab window.<br />
• The list on the right shows the Online Tone Locker for GuitarPort Online members.<br />
• To load a Tone into <strong>GearBox</strong> so you can hear it, double-click the Tone in one of the lists, or<br />
click a Tone in either list to highlight it, and then click the Load button above its list, or type<br />
the ENTER key on your computer’s keyboard to load it.<br />
• Point with your mouse at something in the Tone Locker and look at the Info Bar at the bottom<br />
of the <strong>GearBox</strong> window for information on it.<br />
PODxt users also have a Right List Shows menu at the top of the Tone Locker to select whether the<br />
right list will show their Online Locker or PODxt Memory. (More on this in the following Memory<br />
List sub-section).<br />
Computer List<br />
8•24
<strong>Line</strong> 6 <strong>GearBox</strong> <strong>3.5</strong> – Glossary (What Is...?)<br />
When you first install <strong>GearBox</strong>, the following items are displayed in the Computer list on the left side<br />
of the Tone Locker:<br />
• The Preset folder containing a selection of factory-programmed Tones.<br />
• The <strong>User</strong> folder containing Tones you save from the File menu.<br />
• If you had a previous version of <strong>GearBox</strong> installed, you might also see an Old Presets folder<br />
– this contains all the Tones from your previous version, and you can still use them in your new<br />
<strong>GearBox</strong> version.<br />
• A set of Basic Tones for Guitar, Bass and Vocals is supplied as a starting point for creating your<br />
own Tones. These are within the Preset folder:<br />
Online List<br />
If you’re a member of GuitarPort Online, there are three main folders in the Online list on the right<br />
(PODxt users, select “Online Locker” from the Right List Shows menu at the top of Tone Locker to<br />
see these):<br />
• The Public folder, for Tones you want visible to all members of GuitarPort Online.<br />
• The All <strong>User</strong>s folder. Inside this folder, you’ll find the Public folders of all GuitarPort Online<br />
users. Hear what other GuitarPort Online users have created for you to share!<br />
• The Private folder. Tones in this folder are only visible to you. Copy Tones here if you want to<br />
keep them private, while being able to access them from another Internet-connected computer<br />
that you use with GuitarPort.<br />
As shown in the image above, the buttons above the Online list will be grayed out if you are not<br />
currently looking at the contents of the Private or Public folders, because you cannot add, delete or<br />
alter files at any other location.<br />
8•25
<strong>Line</strong> 6 <strong>GearBox</strong> <strong>3.5</strong> – Glossary (What Is...?)<br />
Memory List (PODxt)<br />
PODxt users, select “PODxt Memory” from the Right List Shows menu at the top of the Tone Locker<br />
to see your PODxt’s memory displayed as three “folders” for Tones (Channel Memories), Amp Setups<br />
and FX Setups:<br />
• Double-click the Amp Setups folder to see the 32 Amp Setups plus any additional amp model<br />
packs stored in your PODxt.<br />
• Double-click the FX Setups folder to see PODxt’s 64 FX Setups.<br />
• Double-click the Tones folder to see the 128 Channel Memories of your PODxt.<br />
• Click the Refresh button at the top of the list to update the memory display.<br />
• Amp Setups and FX Setups can be loaded just like Tones, by double-clicking their names, or<br />
clicking the Load button at the top of the list when they are highlighted.<br />
• Amp Setups can not be renamed (because there is always one Amp Setup for each Amp Model,<br />
named to match that model).<br />
The Name and Load buttons above the Memory list will be grayed out until you have opened the<br />
Amp Setups, FX Setups or Tones folder and selected one or more of the memory locations within<br />
it.<br />
Navigating Folders<br />
You can double-click a folder in the Tone Locker to open it. The folder selectors at the top of the<br />
Computer, Online and Memory lists let you move from the folder you are in to the enclosing<br />
folder(s).<br />
8•26
<strong>Line</strong> 6 <strong>GearBox</strong> <strong>3.5</strong> – Glossary (What Is...?)<br />
F5 or Right-click to Refresh lists<br />
You can press the F5 key on your computer keyboard or click the right mouse button (on Windows®)<br />
while pointing to a Tone Locker list to have the list updated to show the current folder contents. You’ll<br />
find this handy, for instance, if you’re viewing a friend’s Public Tones via the All <strong>User</strong>s folder, and<br />
they’ve just added a new Tone while you’re there. In that case, right-click and refresh the folder display<br />
and you’ll see the Tone that’s just been added. The PODxt Memory list has a Refresh button at the top<br />
of the list, which will update the list to show the current memory of your PODxt.<br />
Delete Tones<br />
Click a Delete button to delete one or more Tones or Folders (items in PODxt Memory list cannot<br />
be deleted):<br />
• Highlight a Tone by clicking its name in the left or right Tone Locker list.<br />
• Click the Delete button to delete the highlighted Tone(s).<br />
• You can SHIFT-click multiple Tones to select several at once to be deleted.<br />
• The Delete button will be dimmed if no Tones are currently selected.<br />
Copy ><br />
GuitarPort Online members can use the Copy > button to copy one or more Tones or folders from<br />
their local Computer list to the Online list:<br />
• Open your Private or Public folder on the right so that the name of the folder is shown in<br />
the folder selector at the top of the Online list, and the folder’s contents are shown in the list<br />
below.<br />
• Highlight a Tone or folder by clicking its name in the Computer panel list on the left.<br />
• You can SHIFT-click multiple Local Tones or folders to select several at once to be copied.<br />
• The button will be dimmed if no Local Tones or folders are currently selected, or the<br />
Public or Private folder is not open in the Online panel on the right.<br />
• Click the<br />
folder.<br />
Copy <<br />
button to make a copy of the highlighted Tone(s) or folder(s) in the Online<br />
GuitarPort Online members can use the < Copy button to copy one or more Tones or folders from the<br />
Online list to their local Computer list:<br />
• Open your Private or Public folder on the right so that the name of the folder is shown in<br />
the folder selector at the top of the Online list, and the folder’s contents are shown in the list<br />
8•27
<strong>Line</strong> 6 <strong>GearBox</strong> <strong>3.5</strong> – Glossary (What Is...?)<br />
below.<br />
• In the Computer list, open the folder that you’d like the Tone(s) or folder(s) copied to.<br />
• Highlight a Tone or folder in the Online folder by clicking its name.<br />
• You can SHIFT-click multiple Online Tones or folders to select several at once to be copied.<br />
• The<br />
button will be dimmed if no Online Tones or folders are currently selected.<br />
• Click the<br />
folder.<br />
< Selected<br />
button to make a copy of the highlighted Tone(s) or folder(s) in the Local<br />
When PODxt users select “PODxt Memory” from the Right List Shows menu at the top of Tone<br />
Locker to see your PODxt’s memory, the<br />
memory to computer files:<br />
button can be used to copy items from PODxt<br />
• Double-click the Tones, Amp Setups or Effect Setups folder to show the memory items in it,<br />
and select one.<br />
• Click the<br />
button to make a computer file containing the memory data.<br />
• The file icons are — Tone: Amp Setup: FX Setup:<br />
• You can SHIFT-click multiple items in a PODxt folder, then click the<br />
files from them all at once.<br />
button to make<br />
• Or, select a folder and click the<br />
from its entire contents.<br />
button to make individual files on your computer<br />
• The button will be dimmed if no PODxt Tone, Amp Setup, Effect Setup or folder has<br />
been selected in the list.<br />
8•28
<strong>Line</strong> 6 <strong>GearBox</strong> <strong>3.5</strong> – Glossary (What Is...?)<br />
> Selected<br />
When PODxt users select “PODxt Memory” from the Right List Shows menu at the top of the Tone<br />
Locker to see your PODxt’s memory, the<br />
list to your PODxt memory:<br />
button can be used to send data from the Computer<br />
• Select a Tone, Amp Setup or FX Setup file in the left Computer list.<br />
• Click the<br />
button to transfer that Tone or Setup to your PODxt.<br />
• A dialog box will ask you to confirm that you want to replace a Tone or Setup in your PODxt<br />
with the computer data you’ve chosen. If you highlight a PODxt memory location in the Memory<br />
list on the right before pressing the button, the dialog will ask if you want to put the data at the<br />
PODxt location you’ve highlighted.<br />
• You can SHIFT-click multiple items in a Computer folder, then click the<br />
send them all to your PODxt.<br />
button to<br />
• The<br />
button will be dimmed if no PODxt Tone, Amp Setup, Effect Setup file has<br />
been selected in the left Tone Locker list.<br />
< Bundle and > Bundle<br />
When PODxt users select “PODxt Memory” from the Right List Shows menu at the top of Tone<br />
Locker to see your PODxt’s memory, the < Bundle and > Bundle buttons can be used to backup and<br />
restore the complete memory of PODxt to your computer:<br />
• Click the<br />
• The Bundle file icon is:<br />
button to backup your complete PODxt memory as a Bundle file.<br />
• Select a Bundle file in the left Tone Locker list, then click the<br />
PODxt’s memory with the data in the Bundle file.<br />
button to replace your<br />
• A dialog box will ask you to confirm that you want to replace your PODxt memory with the<br />
computer data you’ve chosen.<br />
• The<br />
button will be dimmed if no Bundle file is selects in the left Tone Locker list.<br />
<strong>GearBox</strong> stores Tones on your hard disk. Note that Tones and Tone folders must be stored in the<br />
<strong>GearBox</strong> Tones folder in order to be available from <strong>GearBox</strong>’s Tones menu. To see where this folder<br />
resides on your computer, look in the <strong>GearBox</strong> Preferences – Tracks tab and see the “Tones Root<br />
Folder” setting.<br />
8•29
<strong>Line</strong> 6 <strong>GearBox</strong> <strong>3.5</strong> – Glossary (What Is...?)<br />
p Return to What Is Topics<br />
What is the Track Level?<br />
The Track Level slider is available in the Player interface, which is displayed in the Browser when<br />
selecting the Player button above the Browser. This slider sets the playback level for any Track that you<br />
load into the Player, and its setting is saved with a Track if you save the Track to your hard disk. The<br />
light to the right of the slider glows green to show the current level of the Track as the Track is playing,<br />
and flashes red if the Track “clips” because it is turned up too loud. Note that this independently adjusts<br />
the playback level of your Track, and you can adjust your guitar level separately using the <strong>GearBox</strong><br />
Amp Volume knob. If you are having trouble with clipping or other issues, see the Troubleshooting<br />
information for Track Level Issues.<br />
p Return to What Is Topics<br />
What is the Track Sections Display?<br />
When you’ve selected the Player button above the Browser, you’ll see a Track Sections Display – it’s<br />
the bottom portion of the image shown above. You can click the arrow graphic to the left of<br />
the LOAD FROM menu to show/hide the Track Sections Display. You may want to hide the Track<br />
Sections Display (and use the tone controls show/hide arrow) when you want to have more room in<br />
the Browser to see tablature, a lead sheet, or other Track contents.<br />
Tracks imported from Audio CD or MP3, WAV and AIFF files will show a single section for the<br />
entire Track. Tracks provided by <strong>Line</strong> 6 will show multiple sections. Clicking the<br />
(Fast<br />
Forward) and (Rewind) buttons will jump you to the next/previous section boundary in the<br />
Track (if you click and hold the buttons, the play point will move smoothly forward or backward<br />
instead of jumping by sections). When Loop<br />
shown and set here also.<br />
is on, the loop start and stop points will be<br />
p Return to What Is Topics<br />
8•30
<strong>Line</strong> 6 <strong>GearBox</strong> <strong>3.5</strong> – Glossary (What Is...?)<br />
What is the Transfer Manager?<br />
The Transfer Manager shows the status of in progress, completed, and aborted transfers of data between<br />
your computer and GuitarPort Online.<br />
Download progress activity shows at the bottom right of the <strong>GearBox</strong> program’s window.<br />
Click there to open the Transfer Manager window which shows details of transfers, like this:<br />
In the example display above, the Transfer Manager shows that downloading of the “12 Bar Jam - No<br />
Lead” track was aborted, “67-70 Groove - Drums Only” will be downloaded and automatically loaded<br />
once the items currently downloading have been completed, “Back In Black Solo” was downloaded<br />
successfully and “12-8 Blues - No Lead” is currently being downloaded, won’t be automatically loaded,<br />
and is 405K of 4716K—which works out to be 9%—complete. The Retry button can be clicked to<br />
retry a download on the currently selected item. In this case, that would be “12 Bar Jam - No Lead”.<br />
Once you have downloaded a Tone, Track, or other item, you can often reload it into <strong>GearBox</strong> simply<br />
by selecting it in the Transfer Manager and pressing Load. This can be especially useful for some<br />
online lessons if you wish to use Half Speed on sound bytes, or if you did not have items auto-load after<br />
downloading. Automatic saving and loading may be configured by selecting the <strong>GearBox</strong> Preferences,<br />
then choosing the General tab.<br />
Selecting a transfer and pressing the Abort button will abort the transfer. It may take a few seconds<br />
to finish aborting, as it tries to politely disconnect from the server. You can clear all inactive transfers<br />
- transfers that are not currently downloading - by pressing Clear Inactive.<br />
p Return to What Is Topics<br />
8•31
<strong>Line</strong> 6 <strong>GearBox</strong> <strong>3.5</strong> – Glossary (What Is...?)<br />
What is Tremolo?<br />
Tremolo is one kind of effect that can be run by <strong>GearBox</strong>’s Mod (Modulation) Effect. Tremolo produces<br />
a pulsing sound. It works by turning the volume of your input down and back up again repeatedly, at<br />
the speed set for the tremolo. For details on each of the Tremolo controls, move your mouse over the<br />
control and look in the Info Bar at the bottom of the <strong>GearBox</strong> window.<br />
Many of the effects are modeled after classic gear described in the Model Gallery.<br />
p Return to What Is Topics<br />
What is a USB hub?<br />
A USB hub is a hardware device that can be connected to a computer’s “built-in” USB port to<br />
expand the number of USB connections to the computer. However, please note that it is specifically<br />
recommended that you always connect your <strong>Line</strong> 6 device directly into your computer’s built-in<br />
USB port and not into a USB hub. USB hubs are known to sometimes cause communication errors<br />
for audio devices, which require a nice fast, uninterrupted flow of audio data.<br />
p Return to What Is Topics<br />
What is Verb (Reverb)?<br />
Verb, an abbreviation for Reverb, is one of the <strong>GearBox</strong> Effects. The Effect Model menu in the Reverb<br />
control panel lets you choose from a number of different models, including Spring Reverb as well as<br />
Room, Hall and Plate Reverb types:<br />
• Choose the Spring Reverb when you want the kind of classic sound created by spring reverb<br />
tanks built into guitar amps, or used for studio processing on classic recordings. This is the place<br />
to come, for instance, when you’re looking for that signature Surf Music sound of splattering<br />
reverb.<br />
• Choose a Room or Hall Reverb when you want a polished, modern studio sound. These<br />
simulate the sound of your amped guitar echoing in a small or large room, and can be set to<br />
8•32
<strong>Line</strong> 6 <strong>GearBox</strong> <strong>3.5</strong> – Glossary (What Is...?)<br />
subtly enhance the size and polish of your tone, or make it sound like you’re playing in a large,<br />
resonant chamber.<br />
• Choose a Plate Reverb for a more reflective reverberation, reminiscent of some of the famous old<br />
recordings. Plate reverb can be excellent for vocals or drums too.<br />
Many of the effects are modeled after classic gear described in the Model Gallery.<br />
p Return to What Is Topics<br />
What is Vol?<br />
Vol (Volume) is one of <strong>GearBox</strong>’s Effects, and can be accessed remotely via an external <strong>MIDI</strong> controller<br />
device to provide you with a Volume pedal for your Gearbox “rig”. Note that the position of the Vol<br />
can be set “Pre” or “Post” in the signal chain.<br />
The Vol and other effects are described in detail in the Model Gallery.<br />
p Return to What Is Topics<br />
What is Wah?<br />
Wah is one of <strong>GearBox</strong>’s Effects, and there are two different Wah models to choose – the Vetta Wah,<br />
and the Weeper. Both are designed after classic wah pedals, and can be used to provide a “parked wah”<br />
sound, or can be controlled via <strong>MIDI</strong> for wah pedal effects.<br />
Many of the effects are modeled after classic gear described in the Model Gallery.<br />
p Return to What Is Topics<br />
What is the “! Warning” Triangle?<br />
This warning icon will show at the bottom right of the <strong>GearBox</strong> application window if some<br />
aspect of your computer’s setup appears to be incompatible with <strong>GearBox</strong>, or your hard disk space runs<br />
low.<br />
p Return to What Is Topics<br />
8•33
<strong>Line</strong> 6 <strong>GearBox</strong> <strong>3.5</strong> – Online Help & Support<br />
Online Help & Support<br />
For all your unanswered questions, help is available around the clock at<br />
http://www.line6.com/support/knowledgebase/toneporthelp/<br />
9•1