DIRECTV® Receiver User Guide (D11) - DBSInstall.com
DIRECTV® Receiver User Guide (D11) - DBSInstall.com
DIRECTV® Receiver User Guide (D11) - DBSInstall.com

Create successful ePaper yourself
Turn your PDF publications into a flip-book with our unique Google optimized e-Paper software.
Getting Started<br />
Choose Your Setup<br />
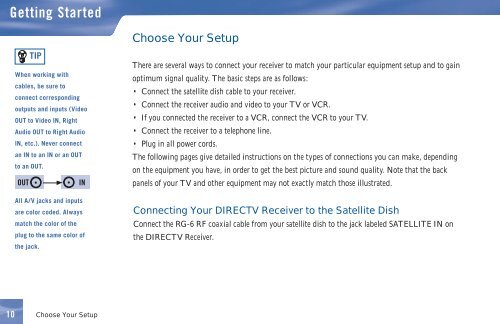
TIP<br />
When working with<br />
cables, be sure to<br />
connect corresponding<br />
outputs and inputs (Video<br />
OUT to Video IN, Right<br />
Audio OUT to Right Audio<br />
IN, etc.). Never connect<br />
an IN to an IN or an OUT<br />
to an OUT.<br />
OUT<br />
IN<br />
All A/V jacks and inputs<br />
are color coded. Always<br />
match the color of the<br />
plug to the same color of<br />
the jack.<br />
There are several ways to connect your receiver to match your particular equipment setup and to gain<br />
optimum signal quality. The basic steps are as follows:<br />
• Connect the satellite dish cable to your receiver.<br />
• Connect the receiver audio and video to your TV or VCR.<br />
• If you connected the receiver to a VCR, connect the VCR to your TV.<br />
• Connect the receiver to a telephone line.<br />
• Plug in all power cords.<br />
The following pages give detailed instructions on the types of connections you can make, depending<br />
on the equipment you have, in order to get the best picture and sound quality. Note that the back<br />
panels of your TV and other equipment may not exactly match those illustrated.<br />
Connecting Your DIRECTV <strong>Receiver</strong> to the Satellite Dish<br />
Connect the RG-6 RF coaxial cable from your satellite dish to the jack labeled SATELLITE IN on<br />
the DIRECTV <strong>Receiver</strong>.<br />
10<br />
Choose Your Setup