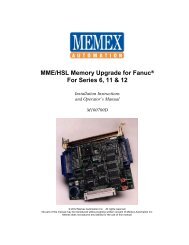
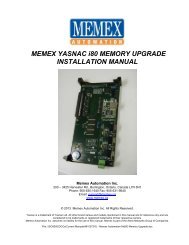
Series Installation Manual - Memex Automation
Series Installation Manual - Memex Automation
Series Installation Manual - Memex Automation

Create successful ePaper yourself
Turn your PDF publications into a flip-book with our unique Google optimized e-Paper software.
INSTALLATION INSTRUCTIONS<br />
FOR FANUC 15i / 16i / 18i / 20i & 21i Controls<br />
SAVE CNC DATA WITH PCMCIA SRAM CARD BEFORE UPGRADING MEMORY<br />
All Fanuc “i” model controls have a memory card slot on the front left-hand side of the CRT.<br />
This slot is to be used with an SRAM card (these are PCMCIA cards) to back up all of your<br />
existing SRAM memory (this SRAM is your on-board part program storage). Using a PCMCIA<br />
SRAM card, you will be able to quickly and easily perform a complete backup for safety<br />
reasons. Although the procedure can be done manually with the serial port, we strongly<br />
recommend you use this SRAM card feature during this memory upgrade.<br />
There are various sizes of SRAM cards that can be purchased – 1, 2 & 4 megabytes.<br />
<br />
When you have a Fanuc 15 or 16 “i” control that can be upgraded to 2.25 megabytes of<br />
memory, you will need a 4 megabyte SRAM card to back it up properly.<br />
The Fanuc 18 “i” control has a maximum memory of 2 megabyte (5120 meters), so a 4<br />
megabyte SRAM card will be needed.<br />
<br />
The Fanuc 20 & 21 “i” controls have a maximum memory of 512 kilobyte (1280 meters)<br />
and so a 1 Meg card will be needed to back them up.<br />
<strong>Memex</strong> <strong>Automation</strong> Inc., 200 – 3425 Harvester Rd., Burlington, Ontario Canada L7N 3N1<br />
Phone: (905) 634-1540 Fax: (905) 631-9640<br />
www.memex.ca
1. DIRECTIONS TO USE SRAM CARD FOR A SYSTEM BACK-UP<br />
Turn the control ON while pressing the two right-hand soft keys until the System Monitor Main<br />
Menu Screen comes up.<br />
Select number 5 (SRAM DATA BACK-UP).<br />
Press SELECT softkey.<br />
Choose number 1 (SRAM DATA BACK-UP TO CNC MEMORY CARD).<br />
Press SELECT.<br />
Press YES.<br />
The screen will now show COMPLETE.<br />
Press SELECT. Now exit by paging down to END. Press SELECT. Page down to 10:END.<br />
Press SELECT and YES.<br />
You will have a binary file (or files) on your PCMCIA SRAM card with all the data of your control.<br />
At this time using a laptop or other PCMCIA Type II slot read the card and save the files.<br />
# of Files 1 2 3 4 5<br />
Size<br />
256 KB SRAM256A.FDB<br />
0.5 Meg SRAM0_5A.FDB<br />
1.0 Meg SRAM1_0A.FDB SRAM1_0B.FDB<br />
1.5 Meg SRAM1_5A.FDB SRAM1_5B.FDB SRAM1_5C.FDB<br />
2.5 Meg SRAM2_5A.FDB SRAM2_5B.FDB SRAM2_5C.FDB SRAM2_5D.FDB SRAM2_5E.FDB<br />
► Note that to reload an SRAM file, you must change the name of the saved file to match the<br />
new file name expected. As such, if you had a backup with SRAM0_5A.FDB, when you upgrade<br />
the memory card to 1 Meg the SRAM Restore screen (Holding the right 2 softkey IPL mode) will<br />
only see files that look like SRAM1_0A.FDB and so on.<br />
2. BACKUP OF PART PROGRAMS NECESSARY<br />
After booting to the normal Fanuc screen, you must now download to this same SRAM card (or<br />
to a PC using the standard Fanuc serial port) the following information:<br />
► BACKUP ALL YOUR PART PROGRAMS & O8000/O9000 MACRO PROGRAMS as they<br />
will be lost when the new option is enabled to expanded the memory after the base<br />
SRAM restore.<br />
Optionally, it is recommended that you also backup all NC PARAMETERS, PMC<br />
PARAMETERS, PITCH ERROR COMPENSATION, MACRO VARIABLES, OFFSETS and any<br />
other variables to have a readable copy of the system parameters before this upgrade.<br />
How to do this is discussed in your Maintenance <strong>Manual</strong> under the Inputting and Outputting of<br />
data.<br />
<strong>Memex</strong> <strong>Automation</strong> Inc., 200 – 3425 Harvester Rd., Burlington, Ontario Canada L7N 3N1<br />
Phone: (905) 634-1540 Fax: (905) 631-9640<br />
www.memex.ca
PCMCIA Type II SRAM Card Available from <strong>Memex</strong><br />
3. OPTIONAL FANUC SERIAL BACKUP PROCEDURE<br />
Turn on the machine tool (the control is already on), home all axes, and clear any alarms.<br />
3.1 Punching out NC parameters:<br />
Select the M-Card as the I/O device (or leave the serial settings if you are downloading serially).<br />
To set the M-Card as the I/O Device, select MDI;<br />
Press OFFSET SETTING key;<br />
Press SETTING soft key;<br />
Turn on PWE (by setting PARAMETER WRITE ENABLE to a 1);<br />
Press INPUT;<br />
Cursor down to I/O CHANNEL;<br />
Press 4 and INPUT (to select the M-Card).<br />
► TO UNPROTECT 8000 AND 9000 SERIES MACRO PART PROGRAMS<br />
With PWE on, now is a good time to unprotect the 8000/9000 Macro Programs. To do<br />
this simply go to Parameter 3202 and change bit 4 and bit 0 to a 0<br />
(e.g. P3202=”xxx0 xxx0” where x is existing value).<br />
Reset PWE to 0.<br />
Now that you have a known I/O Channel…<br />
Go to EDIT mode.<br />
Press SYSTEM key.<br />
If you are using a PC, make it ready to receive your NC Parameter file (e.g. Fanuc18i.NCP)<br />
Press the following soft keys:<br />
PARAM, OPRT, “+”, PUNCH, NON-0, EXEC<br />
Now you will see OUTPUT flashing.<br />
This procedure generates a file on the M-Card called “CNCPARAM.DAT”.<br />
<strong>Memex</strong> <strong>Automation</strong> Inc., 200 – 3425 Harvester Rd., Burlington, Ontario Canada L7N 3N1<br />
Phone: (905) 634-1540 Fax: (905) 631-9640<br />
www.memex.ca
3.2 Punching out PMC parameters:<br />
Select MDI mode.<br />
Press OFFSET SETTING key TWICE.<br />
Make PWE = 1<br />
Press the SYSTEM key.<br />
Now press the following soft keys:<br />
PMC, then PMCPRM, then KEEP RL<br />
Select K-17.<br />
Set bit one to one. (K17=xxxx xx1x)<br />
(Note if you have more than 20 Keep Relays, page down & change 900.1 to a 1 instead<br />
of K17.1=1. Also make sure you stop the ladder when reloading PMC parameters)<br />
Change to EDIT mode.<br />
Press left arrow key.<br />
Press I/O soft key.<br />
This brings up the Device Screen. Set it as follows:<br />
DEVICE - M-CARD<br />
FUNCTION - WRITE<br />
Cursor down to the DATA KIND, and press PARAM.<br />
Then press EXEC.<br />
Change to MDI mode.<br />
Press OFFSET SETTING key and set PWE to zero.<br />
Press RESET to clear PWE alarm.<br />
3.3 Downloading Programs:<br />
Go to EDIT mode.<br />
Turn MEMORY PROTECT key OFF and ON.<br />
Press PROG key.<br />
Press “+”, CARD, OPTR, PUNCH soft keys.<br />
This will bring up the M-Card Directory.<br />
<strong>Memex</strong> <strong>Automation</strong> Inc., 200 – 3425 Harvester Rd., Burlington, Ontario Canada L7N 3N1<br />
Phone: (905) 634-1540 Fax: (905) 631-9640<br />
www.memex.ca
You must now name the files you want saved as one file.<br />
Call them, for example: “33” - Key in 33 and press the soft key F NAME.<br />
Next type in -9999 [minus 9999], then press O SET, and then EXEC.<br />
Your programs are now stored on the M-Card as FILE: NAMED 33.<br />
3.4 To Save Offsets:<br />
Press OFFSET SETTING key.<br />
Press the following soft keys:<br />
OFFSET, OPRT, “+”, PUNCH, EXEC<br />
3.5 To Save Macro Variables:<br />
Press OFFSET SETTING key.<br />
Press the following soft keys:<br />
“+”, Marco, OPRT, “+”, PUNCH, EXEC<br />
Now your backup is complete.<br />
A Fanuc 18i Model A Control From Behind The Monitor<br />
4. PHYSICAL INSTALLATION OF THE MEMORY MODULE<br />
Have control and main machine power OFF.<br />
Locate the buried Fanuc Memory Module (DIMM).<br />
(Depending upon which hardware configuration you have, this may involve removing a<br />
yellow cage behind the display. If this is the case, disconnect the back light inverter<br />
<strong>Memex</strong> <strong>Automation</strong> Inc., 200 – 3425 Harvester Rd., Burlington, Ontario Canada L7N 3N1<br />
Phone: (905) 634-1540 Fax: (905) 631-9640<br />
www.memex.ca
connector at the upper right, the fans and the battery and any other cable in the way.<br />
Mark each cable and take care.)<br />
Remove the mounting screws from each corner of the cage.<br />
Pull the cage assembly straight back to disconnect it from the circuit board.<br />
(Set it aside for later reassembly)<br />
Remove any cards, which may be concealing the memory Fanuc Memory Module.<br />
After removing the yellow case and the left 2 covering cards, you will see the SRAM module (DIMM) in the center.<br />
The memory can be recognized by one of the following numbers printed on the upper side,<br />
along the edge farthest from the socket into which it is fitted:<br />
A20B-3900-0052<br />
A20B-3900-0053<br />
A20B-3900-0060<br />
A20B-3900-0061<br />
Remove the Fanuc Memory Module (DIMM) carefully with two hands – watch for static by<br />
grounding yourself before touch the boards.<br />
Replace it with the <strong>Memex</strong> Memory Module, which is mounted with B side UP (label showing).<br />
<strong>Memex</strong> <strong>Automation</strong> Inc., 200 – 3425 Harvester Rd., Burlington, Ontario Canada L7N 3N1<br />
Phone: (905) 634-1540 Fax: (905) 631-9640<br />
www.memex.ca
Replace the card or cards that were removed to gain access to the DIMM.<br />
Be very careful lining them up before pressing them into their connectors, as shown on Page B,<br />
attached.<br />
Re-install the card cage, fans, etc, which were removed earlier.<br />
Check that everything is correct.<br />
You are now ready to power ON and complete the installation.<br />
5. LOADING DATA INTO YOUR CONTROL FROM THE SRAM CARD<br />
Enable E-STOP (Emergency Stop)<br />
Press RESET and DELETE to clear the new memory card, and hold these keys while turning<br />
the control ON until the normal screen comes up (with alarms).<br />
With the SRAM Card installed, turn the CNC off and then on holding the right 2 soft keys to get<br />
back to the IPL screen.<br />
With the file name changed on the SRAM card to reflect the new memory size, proceed to<br />
restore the SRAM backup file. If you do not have enough files, that is OK as long as the first file<br />
is named and loads properly. The rest of the files are usually blank. If you want to get a blank<br />
512k file we have one on our web site at:<br />
http://www.memex.ca/products/SRAM2_5D.FDB<br />
After restoring the base file and exiting IPL, your control should load normally. If this is the case,<br />
jump ahead to section 5.2, otherwise continue...<br />
5.1 Optional Re-Load Your NC Parameters:<br />
Press SYSTEM key.<br />
Cursor down parameter 20.<br />
<strong>Memex</strong> <strong>Automation</strong> Inc., 200 – 3425 Harvester Rd., Burlington, Ontario Canada L7N 3N1<br />
Phone: (905) 634-1540 Fax: (905) 631-9640<br />
www.memex.ca
Press 4 and INPUT. (This sets the I/O device to M-Card)<br />
Press right chapter “+” soft key.<br />
Press READ<br />
Press EXECUTE. (This re-loads your NC parameters)<br />
Turn control OFF and ON.<br />
5.2 Set Options to Re-Size Your Memory<br />
Press OFFSET SETTING key TWICE.<br />
Set PWE to one, turning it on.<br />
Press SYSTEM.<br />
Press 9921 and then NO SRH<br />
Set bit 4, 3, 2, 1, 0 to ZERO. DO NOT CHANGE bits 7, 6, 5 however. (P9921= “xxx0 0000”)<br />
If and of these bits were on and you have turned one off, you will now get a warning screen that<br />
says you will lose information.<br />
Press DELETE (so it accepts that change).<br />
<strong>Memex</strong> <strong>Automation</strong> Inc., 200 – 3425 Harvester Rd., Burlington, Ontario Canada L7N 3N1<br />
Phone: (905) 634-1540 Fax: (905) 631-9640<br />
www.memex.ca
NOW SET ONE OF THE FOLLOWING MEMORY PARAMETERS:<br />
With PWE on, in MDI mode and Parameters 9921 reset, you then set:<br />
(A) Parameter 9943, bit 6 to 1 for 512k (P9943 = “x1xx xxxx”), or set it to “0” & set<br />
(B) Parameter 9953, bit 2 to 1 for 1 megabyte (P9953 = “xxxx x10x”), or set<br />
(C) Parameter 9953, bit 1 to 1 for 2 megabytes (P9953 = “xxxx x01x”).<br />
Additionally, you can also turn on parameter 9920, bit one, to a one.<br />
This allows the G10 tool offsets to be inputted.<br />
Reset PWE to 0 after you are done.<br />
You still have a “000 Alarm – Power Must Be Off”<br />
Turn control OFF and then ON.<br />
Your control should come up fine with the new memory size. If so, jump to section 5.4 to reload<br />
your 8000 and 9000 macro part programs.<br />
5.3 To Re-Load Your PMC Parameters:<br />
Press SYSTEM key.<br />
Press PMC, PMCPRM, KEEP RL.<br />
Cursor to K17 and set bit one, to ONE by keying in 10 and INPUT.<br />
(Note if you have more than 20 Keep Relays, page down & change 900.1 to a 1 instead<br />
of K17.1=1. Also make sure you stop the ladder when reloading PMC parameters)<br />
Press left soft key.<br />
Press I/O<br />
Press M-CARD.<br />
Cursor down to FUNCTION and press READ soft key.<br />
Input the file name you created on the M-Car for the PC parameters, by keying in @ PMC – RB<br />
PRM.<br />
Press EXEC.<br />
Turn control OFF and ON.<br />
Take control out of E-STOP.<br />
<strong>Memex</strong> <strong>Automation</strong> Inc., 200 – 3425 Harvester Rd., Burlington, Ontario Canada L7N 3N1<br />
Phone: (905) 634-1540 Fax: (905) 631-9640<br />
www.memex.ca
Press SYSTEM and then enter 3202 and press NO.SRH.<br />
At parameter 3202, turn bit 4 and bit 0 to Zero.<br />
Press OFFSET SETTING key TWICE to bring up PWE and set it to zero (OFF).<br />
Then press RESET to clear your alarm.<br />
5.4 To Re-Load Your Part Programs and 8000/9000 Macro Programs:<br />
Make sure PWE is off and there are no alarms.<br />
Select EDIT mode.<br />
At this point you must confirm that the MEMORY PROTECT key lock switch is OFF.<br />
Press PROG, “+”, CARD, OPRT, F READ.<br />
Now enter the file number – not the file name (e.g. O0009), for the file you named 33, to reload<br />
this batch of files.<br />
Press F SET.<br />
Press EXEC.<br />
If all seems OK with the control, jump to section 5.8 to reset the 8000/9000 protection, otherwise<br />
reload the system files from your backup as follows…<br />
5.5 Optionally To Re-Load Macro Variables:<br />
(By way of explanation, there are two steps to this: You have to input the macro file saved<br />
earlier in to the control, and then execute that file.)<br />
Press F READ<br />
Input the MACROVAR.DAT file number from the SRAM card.<br />
Press F SET.<br />
Then give it a file number for the control (such as 20).<br />
Press O SET.<br />
Press EXEC.<br />
5.6 Optionally To Execute the Macros (if not loaded):<br />
Go to MEM MODE.<br />
<strong>Memex</strong> <strong>Automation</strong> Inc., 200 – 3425 Harvester Rd., Burlington, Ontario Canada L7N 3N1<br />
Phone: (905) 634-1540 Fax: (905) 631-9640<br />
www.memex.ca
Press PROG. This should bring up the macro program, because it was the last thing you<br />
entered. If not, select macro from the directory.<br />
Press the OPRT soft key.<br />
Press the O SRH soft key to select the MACRO program number (20, if you used 20).<br />
Press CYCLE START.<br />
This re-loads the macro settings.<br />
5.7 Optionally To Re-Load Offset Data:<br />
Press OFFSET SETTING key TWICE.<br />
Press OPRT, “+”, READ, EXEC.<br />
Like the macro file, this offset needs to be run like a program to automatically set the offsets.<br />
5.8 Re-Protect the 8000/9000 Macro Programs<br />
The Last thing to do is RE-LOCK parameter 3202, bit 4 and bit 0 (Changing them to ONE)<br />
This protects the 8000 and 9000 programs.<br />
… To do this, select MDI mode.<br />
Press OFFSET SETTING key TWICE.<br />
Bring up PWE and set it to one (turn it on).<br />
Press SYSTEM key.<br />
Find parameter 3202 and turn on bits 4 and 0.<br />
Press OFFSET SETTING key.<br />
Bring up PWE again, and turn it off (set it to ZERO).<br />
Check your control completely…<br />
5.9 Absolute Encoder Note:<br />
Note: If you have absolute encoders and you get a 300 APC Alarm, you may need to reset the<br />
absolute encoders. With PWE on in MDI mode, set Parameter 1815 bit 4 on all axes to 0. Reset<br />
PWE to 0. Hit reset to clear alarms. Home the control manually and check that P1815 bit 4 is<br />
back to a 1 (if it is not set PWE and make it a 1 in all applicable axes). With PWE off, hit RESET<br />
to clear all alarms.<br />
CONGRATULATIONS YOUR FANUC i SERIES MEMORY UPGRADE IS NOW COMPLETE.<br />
<strong>Memex</strong> <strong>Automation</strong> Inc., 200 – 3425 Harvester Rd., Burlington, Ontario Canada L7N 3N1<br />
Phone: (905) 634-1540 Fax: (905) 631-9640<br />
www.memex.ca
MEMEX AUTOMATION INC.<br />
200 – 3425 Harvester Rd.<br />
Burlington, Ontario<br />
Canada L7N 3N1<br />
Sales: (905) 635-3041<br />
Support: (905) 635-3042<br />
www.memex.ca<br />
Thank you for Choosing <strong>Memex</strong><br />
File: \ISO9000\DOCs\Current <strong>Manual</strong>s\M100734B – Fanuc I <strong>Series</strong> <strong>Installation</strong> <strong>Manual</strong>.doc<br />
<strong>Memex</strong> <strong>Automation</strong> Inc., 200 – 3425 Harvester Rd., Burlington, Ontario Canada L7N 3N1<br />
Phone: (905) 634-1540 Fax: (905) 631-9640<br />
www.memex.ca