Fanuc 15A Manual for Add-on Memory Board
Fanuc 15A Manual for Add-on Memory Board
Fanuc 15A Manual for Add-on Memory Board
Create successful ePaper yourself
Turn your PDF publications into a flip-book with our unique Google optimized e-Paper software.
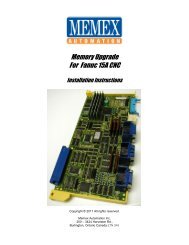
INSTALLATION INSTRUCTIONS<str<strong>on</strong>g>for</str<strong>on</strong>g>FANUC <str<strong>on</strong>g>15A</str<strong>on</strong>g> CONTROLS(512K, 1 Megabyte, 2 Megabytes)NOTE: IF YOU HAVE FAPT (CONVERSATIONAL) ON YOUR CONTROL,DO NOT PROCEED. PLEASE TELEPHONE US.1. CNC PARAMETER SETTINGSTurn c<strong>on</strong>trol "ON". Have a normal screen appear.Note that under your c<strong>on</strong>trol screen you have a row of soft keys, which aredistinct from the keys <strong>on</strong> the MDI (<str<strong>on</strong>g>Manual</str<strong>on</strong>g> Data Input) keypad to the right of thescreen.Press "LEFT ARROW" soft key twice.Press "SETTINGS" soft key <strong>on</strong>ce.On SETTING (HANDY) screen, write down INPUT UNIT value (whether it is <strong>on</strong>eor zero). You will need this in<str<strong>on</strong>g>for</str<strong>on</strong>g>mati<strong>on</strong> in Step 9 below.Select MDI mode. Press "PAGE UP" <strong>on</strong> MDI keypad.This gives you the 8000 parameter <strong>on</strong> the SETTINGS (SERVICE) screen.Change all bits to "1" <str<strong>on</strong>g>for</str<strong>on</strong>g> the 8000 parameter.Do this by pressing "1" <strong>on</strong> the MDI keypad, and then soft key “ON = 1”.Bit "0" sets the PWE (Parameter Write Enable).Press "SERVICE" soft key. This brings up the PARAMETER (SETTINGS) screenwhich you must copy down and change certain parameters.We provide space <strong>on</strong> the next page <str<strong>on</strong>g>for</str<strong>on</strong>g> you to write these parameters down.200 – 3425 Harvester Rd., Burlingt<strong>on</strong>, ON, L7N 3N1 (905)-635-3040 fx:905-631-9640sales@memex.ca www.memex.ca
You may be using PORT 1 (CD4A) or PORT 2 (CD4B) <strong>on</strong> your Base-0 board.Select the appropriate column and make the following changes:Copy Down ParameterThen set to:<str<strong>on</strong>g>for</str<strong>on</strong>g> Port 1 (CD4A)Then set to:<str<strong>on</strong>g>for</str<strong>on</strong>g> Port 2 (CD4B)0000 00001010 000010100020 1 20021 1 2Using the MDI numeric keypad, key in 5000 and press the soft key “INPUT_NO.".5001 1 unchanged5002 unchanged 25110 8 Unchanged5111 2 Unchanged5112 10 Unchanged5120 unchanged 85121 unchanged 25122 unchanged 10NOTE: After COPYING the above parameters, must then CHANGE them asindicated above.In order <str<strong>on</strong>g>for</str<strong>on</strong>g> your computer to be able to communicate with the c<strong>on</strong>trol, make suresettings in your communicati<strong>on</strong>s software corresp<strong>on</strong>d to:BAUD RATE 4800two stop bitsparity EVENseven data bits.Both PROCOMM (versi<strong>on</strong> 2.4.2) and TELIX communicati<strong>on</strong> software work wellwith these instructi<strong>on</strong>s.200 – 3425 Harvester Rd., Burlingt<strong>on</strong>, ON, L7N 3N1 (905)-635-3040 fx:905-631-9640sales@memex.ca www.memex.ca
NOW YOU MUST BACK UP EVERYTHING.Back up all data - all part programs, all offsets, NC and PC parameters, etc.To save this in<str<strong>on</strong>g>for</str<strong>on</strong>g>mati<strong>on</strong>, OUTPUT it via the serial port to a pers<strong>on</strong>al computer.Once you have downloaded everything, check that it is correct. We suggest youput this file <strong>on</strong> a computer text editor and check the data.2. SAVING PART PROGRAMSVerify that your 8000 and 9000 series parameters are UN-protected.- For 8000 parameters, set parameter 0011, bit 0, to zero to unprotect.- For 9000 parameters, set parameter 2201, bit 0, to zero to unprotect.Make sure your pers<strong>on</strong>al computer is set up to receive your part program file.Press “LEFT ARROW‟ soft key twice.Press soft key “PROGRAM”.Press “RIGHT ARROW” soft key twice.Press “PUNCH” soft key.Press “ALL” soft key.3. OUTPUT TO YOUR COMPUTER TO SAVE NC PARAMETERS.Press “SERVICE” soft key to get PARAMETER(SETTINGS) screen.Make sure your pers<strong>on</strong>al computer is set up ready to receive your NC ParameterFile.Press “RIGHT ARROW” soft key twice.Press “PUNCH” soft key.Press “ALL” soft key.Note that the word „PUNCH‟ will flash while it is uploading.4. OUTPUTTING OFFSETSMake sure your pers<strong>on</strong>al computer is set up ready to receive your Offsets filePress “OFFSET” soft key.Press “RIGHT ARROW” soft key.Press “PUNCH” soft key.Press “ALL” soft key.200 – 3425 Harvester Rd., Burlingt<strong>on</strong>, ON, L7N 3N1 (905)-635-3040 fx:905-631-9640sales@memex.ca www.memex.ca
The word “PUNCH” will flash while uploading.5. OUTPUTTING PC PARAMETERS.Make sure your pers<strong>on</strong>al computer is set up ready to receive your PC Parameterfile.Set PWE (parameter write enable) switch if not already turned ON( as per ourearlier instructi<strong>on</strong>s in paragraph One).Press “E-STOP”.Press “PCPRM” soft key.Press “KEEPRL” soft key.On the MDI keypad in the lower left corner, press the double left arrow keyto getthe pointer to KeepRelay #18 ( this will bring up K17)Set K17 bit 7 to <strong>on</strong>e. ( Enter 10000000 and press “INPUT” <strong>on</strong> MDI keypad.)This permits entry of PC parameters.Press “LEFT ARROW” soft key.Press “RIGHT ARROW” soft key.Press “SYSPRM” soft key.Choose “PG CHANNEL” <strong>on</strong> screen.Change the zero to <strong>on</strong>e ( by pressing “1” and “INPUT” <strong>on</strong> the MDI keypad.Press “LEFT ARROW” soft key.Press “I/O” soft key.Press “FDCAS” soft key.Press “OUTPUT” soft key.Press “PARAM” soft key.Press “ADD” soft key.Press “EXEC” soft key.The word “EXECUTING” will flash while uploading.Your c<strong>on</strong>trol screen will say “OUTPUT COMPLETED‟.200 – 3425 Harvester Rd., Burlingt<strong>on</strong>, ON, L7N 3N1 (905)-635-3040 fx:905-631-9640sales@memex.ca www.memex.ca
NOW YOU ARE READY TO INPUT DATA FROM YOURCOMPUTER TO THE CONTROL.6. INSTALLING THE RAM FILE BOARDTurn C<strong>on</strong>trol OFFInsert the 512k/1megabyte/2megabyte board in your backplaneLook in your maintenance <str<strong>on</strong>g>Manual</str<strong>on</strong>g> <str<strong>on</strong>g>for</str<strong>on</strong>g> your backplane diagrams.The recommended locati<strong>on</strong> <str<strong>on</strong>g>for</str<strong>on</strong>g> this board is Slot 01P27.However, this board can be installed in any empty slot.( For example, if the Base2 board has a sub-board mounted <strong>on</strong> it, there will notbe room in slot 01P27.)Tighten screws after inserting the board.Remove the battery c<strong>on</strong>nector from the BASE0 board and plug it into the RAMFile board.Plug the cable which is soldered to the RAM file board into the c<strong>on</strong>nector <strong>on</strong> theBASE0 board.Turn the c<strong>on</strong>trol ON, While pressing “7” and “9” <strong>on</strong> the MDI keypad.Keeping the “7” and “9” pressed erases all in<str<strong>on</strong>g>for</str<strong>on</strong>g>mati<strong>on</strong> in the system.Keep “7” and “9” pressed until you see “CLEAR FILE” come up <strong>on</strong> the screen.Exit IPL screen by pressing “6” and then “INPUT” <strong>on</strong> the MDI keypad.You will see many alarm messages because n<strong>on</strong>e of your parameters have beenentered. Ignore these alarms.Press “LEFT ARROW” soft key twice.Press “SETTING” soft key twice. This will give you the SETTINGS(SETTINGS)SCREEN.Press “PAGE UP” <strong>on</strong> the MDI keypad. This will bring up the 8000 parameter <strong>on</strong>the screen.Press “1” <strong>on</strong> the MDI keypad.Press soft key “ON:1”. This turns ON all of the bits in the 8000 parameter.Press “LEFT ARROW” soft key and then press “SERVICE” soft key.Enter changed parameters previously written down by hand ( as directed at the200 – 3425 Harvester Rd., Burlingt<strong>on</strong>, ON, L7N 3N1 (905)-635-3040 fx:905-631-9640sales@memex.ca www.memex.ca
eginning of these upgrade instructi<strong>on</strong>s.YOU ARE NOW READY TO COMMUNICATE WITH YOURPERSONAL COMPUTER TO INPUT PARAMETERS.7. TURNING ON INCREASED MEMORY IN YOUR <str<strong>on</strong>g>15A</str<strong>on</strong>g>Using a STANDARD TEXT EDITOR <strong>on</strong> your pers<strong>on</strong>al computer, EDIT thefollowing NC parameters.Parameter N9120Set bits 0, 2, 3 and 5 to zero.(It will read xx0x00x0 where x is unchanged.Parameter N9110Set bit 4 to zero.(It will read xxx0xxxx where x is unchanged.Parameter N9134For 512K memory, turn Parameter 9134, bit 0 to <strong>on</strong>e.For 1 Megabyte, turn Parameter 9134, bit 1 to <strong>on</strong>e.For 2 megabytes, turn Parameter 9134, bit 2 to <strong>on</strong>e.NOTE:The above are all memory parameter bits. Only <strong>on</strong>e can be turned ON.SAVE THESE CHANGES.8. INPUTTING NC PARAMETERS FROM COMPUTER.Do step 8 twice, turning the c<strong>on</strong>trol OFF and ON after the first time.Press “RIGHT ARROW” soft key twice.Press “READ” soft key.Press “ALL” soft key.The word “READ” will be flashing <strong>on</strong> your screen.Set your pers<strong>on</strong>al computer to download the modified NC Parameter File to yourc<strong>on</strong>trol.Press “ENTER” <strong>on</strong> your computer to begin downloading data.You will see “LOCKED PARAMETER” <strong>on</strong> your screen. Ignore this.When “READ” stops flashing <strong>on</strong> your screen, downloading is complete.Turn c<strong>on</strong>trol OFF, wait a few sec<strong>on</strong>ds, then turn c<strong>on</strong>trol back ON.200 – 3425 Harvester Rd., Burlingt<strong>on</strong>, ON, L7N 3N1 (905)-635-3040 fx:905-631-9640sales@memex.ca www.memex.ca
REPEAT STEP 8.9 INPUTTING PC PARAMETERS FROM COMPUTER.Prepare your computer to input the PC Parameter File to your c<strong>on</strong>trol.Since you have turned OFF your c<strong>on</strong>trol, you must again set PWE (parameterwrite enable)Once again, get the SETTINGS(SERVICE) SCREEN.Call up Parameter 8000.Change bit 0 (PWE) to <strong>on</strong>e, which will enable the parameters to be changed.IMPORTANT:Be<str<strong>on</strong>g>for</str<strong>on</strong>g>e you operate your c<strong>on</strong>trol you MUST CHANGE <strong>on</strong> theSETTINGS(HANDY) page the INPUT UNIT to the value you previouslyrecorded in Step One – OTHERWISE THE MACHINE COULD CRASH.MAKE THE CHANGE NOW!On the c<strong>on</strong>trol, press the “NC/PC” key.Press the right arrow key.Press the “EDIT” soft key.Press the right arrow key again.Press the “PASWRD” soft key.Press the “ENAON” soft key.Press the left arrow key twice.Press the right arrow key <strong>on</strong>ce.Press the “PCPRM” soft key.Press the Right soft keyPress the “MODE” soft keySelect the data transfer rate to be the same as in parameter 5112.200 – 3425 Harvester Rd., Burlingt<strong>on</strong>, ON, L7N 3N1 (905)-635-3040 fx:905-631-9640sales@memex.ca www.memex.ca
Press the “KEEPRL” soft key.On the MDI keypad in the lower left corner, press the double left arrow keyTWICE to get you to KeepRelay #18. This is address K17. Make sure you are <strong>on</strong>the right line.Set K17 bit 7 to a <strong>on</strong>e ( Enter 10000000 and press “INPUT” <strong>on</strong> the MDI keypad).This permits entry of PC Parameters.Press the right arrow key.Press the “LEFT ARROW” soft key.Press the “RIGHT ARROW” soft key.Press the “SYSPRM” soft key.Choose “PG Channel” <strong>on</strong> the screen. Change the zero to <strong>on</strong>e ( by pressing “1”and “INPUT” <strong>on</strong> the MDI keypad ).Press the “LEFT ARROW” soft key.Press the “I/O” soft key.Press the “FDCAS” soft key.Press the “INPUT” soft key.Press the “EXEC” soft key.YOU ARE NOW READY TO INPUT THE PC PARAMETER FILEFROM YOUR COMPUTER TO YOUR CONTROL.From the computer, send the PC Parameter file.Your c<strong>on</strong>trol screen will say “INPUT COMPLETED”.Press the “LEFT ARROW” soft key.Press the “RUN” soft key.Now <strong>on</strong> the MDI keypad, press “NC/PC”Set PWE to zero.(parameter 8000, bit 0.)200 – 3425 Harvester Rd., Burlingt<strong>on</strong>, ON, L7N 3N1 (905)-635-3040 fx:905-631-9640sales@memex.ca www.memex.ca
Switch to “EDIT” mode.Now you must re-load all of your part programs, all offsets, and any other datayou had in your c<strong>on</strong>trol prior to beginning this upgrade, as required.YOUR MEMORY UPGRADE IS COMPLETED.If during the saving of part programs to a pers<strong>on</strong>al computer (at Step Two) youunlock the 8000 and 9000 parameters, YOU MUST NOW RE-LOCK THEM.Press the “NC/PC” key to change back the NC parameters to the way they werebe<str<strong>on</strong>g>for</str<strong>on</strong>g>e (which is probably how you want them to be in order to operate yourmachine tool.)200 – 3425 Harvester Rd., Burlingt<strong>on</strong>, ON, L7N 3N1 (905)-635-3040 fx:905-631-9640sales@memex.ca www.memex.ca
HEXADECIMALCONVERSION SHEET200 – 3425 Harvester Rd., Burlingt<strong>on</strong>, ON, L7N 3N1 (905)-635-3040 fx:905-631-9640sales@memex.ca www.memex.ca
200 – 3425 Harvester Rd., Burlingt<strong>on</strong>, ON, L7N 3N1 (905)-635-3040 fx:905-631-9640sales@memex.ca www.memex.ca
200 – 3425 Harvester Rd., Burlingt<strong>on</strong>, ON, L7N 3N1 (905)-635-3040 fx:905-631-9640sales@memex.ca www.memex.ca
200 – 3425 Harvester Rd., Burlingt<strong>on</strong>, ON, L7N 3N1 (905)-635-3040 fx:905-631-9640sales@memex.ca www.memex.ca
NOTE CONCERNING PROTECTED PROGRAM SERIESIn order to download/upload/edit/etc. the 9000 series programs, and also the 8000 seriesprograms, you will have to un-protect them.The following table gives the parameters governing this.CONTROL PROGRAM #s PARAMETER BIT # TO PROTECT TO UN-PROTECT0 9000 10 4 <strong>on</strong>e zero6 9000 318 7 <strong>on</strong>e zero10 9000 2201 0 <strong>on</strong>e zero11 9000 2201 0 <strong>on</strong>e zero12 9000 2201 0 <strong>on</strong>e zero15 9000 2201 0 <strong>on</strong>e zero16/18 9000 3202 4 <strong>on</strong>e zero6 8000 319 7 <strong>on</strong>e zero10 8000 11 0 <strong>on</strong>e zero11 8000 11 0 <strong>on</strong>e zero12 8000 11 0 <strong>on</strong>e zero15 8000 11 0 <strong>on</strong>e zero16/18 8000 3202 0 <strong>on</strong>e zeroBits read from right to left: 7 6 5 4 3 2 1 0Thus bit 0 is <strong>on</strong> the far right, and bit 7 is <strong>on</strong> the far left.NOTE:On certain c<strong>on</strong>trols there may or may not be a range of program numbers protected.For 10, 11, 12 and 15 c<strong>on</strong>trols look at your parameters 2210, 2211, 2212 and 2213, and<str<strong>on</strong>g>for</str<strong>on</strong>g> 16/18 (A/B/C/i) c<strong>on</strong>trols, look at parameters 3210, 3211, 3212 and 3213. If you haveanything except zero's in these parameters, please c<strong>on</strong>sult your <str<strong>on</strong>g>Fanuc</str<strong>on</strong>g> Operator's <str<strong>on</strong>g>Manual</str<strong>on</strong>g><str<strong>on</strong>g>for</str<strong>on</strong>g> the unprotect parameter.200 – 3425 Harvester Rd., Burlingt<strong>on</strong>, ON, L7N 3N1 (905)-635-3040 fx:905-631-9640sales@memex.ca www.memex.ca


