Download - The University of New Orleans - PeopleSoft Training
Download - The University of New Orleans - PeopleSoft Training
Download - The University of New Orleans - PeopleSoft Training

You also want an ePaper? Increase the reach of your titles
YUMPU automatically turns print PDFs into web optimized ePapers that Google loves.
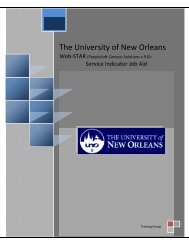
<strong>The</strong> <strong>University</strong> <strong>of</strong> <strong>New</strong> <strong>Orleans</strong><br />
PeopleS<strong>of</strong>t 9.0: nVision & Reporting<br />
<strong>Training</strong> Group
Introduction to nVision Reporting Last Modified:March 23, 2010<br />
Table <strong>of</strong> Contents<br />
Introduction to nVision Reporting .................................................................................................................... 3<br />
Accessing PeopleS<strong>of</strong>t Financials nVision Reports ........................................................................................... 3<br />
Pop-upBlockers ................................................................................................................................................. 3<br />
Choosing a Report............................................................................................................................................. 4<br />
Understanding the Report Manager .................................................................................................................. 4<br />
Explorer Page ................................................................................................................................................ 4<br />
List Page........................................................................................................................................................ 5<br />
Administration Page...................................................................................................................................... 8<br />
Process Monitor ................................................................................................................................................ 8<br />
View Reports ................................................................................................................................................ 8<br />
Retrieve nVision Reports ................................................................................................................................ 10<br />
Reading the nVision Report ........................................................................................................................ 14<br />
Drill down options .......................................................................................................................................... 18<br />
Getting to the Details (Run Drill Down)..................................................................................................... 18<br />
Saving Reports ................................................................................................................................................ 26<br />
Terms for nVision Report ............................................................................................................................... 27<br />
<strong>University</strong> <strong>of</strong> <strong>New</strong> <strong>Orleans</strong><br />
Page 2 <strong>of</strong> 27
Introduction to nVision Reporting<br />
Introduction to nVision Reporting Last Modified:March 23, 2010<br />
PeopleS<strong>of</strong>t nVision is a report writing tool that enables you to retrieve information from the General Ledger<br />
in the PeopleS<strong>of</strong>t Financials database into a Micros<strong>of</strong>t Excel spreadsheet—not merely as ―raw‖ data, but as<br />
information in a form that helps you see the big picture, explore the details and make decisions. Also, you<br />
can use familiar Excel commands to format and analyze the data to drill down to transaction details.<br />
We recommend that the departmental expenditure transactions on the nVision report(s) be reviewed<br />
monthly to help assure the validity <strong>of</strong> financial transactions by comparing original documents to the<br />
transactions listed on the report(s). <strong>The</strong> initial nVision report provides year to date information by chartfield<br />
combination. In order to retrieve the details behind the amounts, there is a feature called Run Drilldown. To<br />
use this feature an ―add-in‖ needs to be installed within Excel on the PC. (Refer to the nVision setup document<br />
to install the nVision add-on.) http://pstrain.uno.edu/docs/nVision_config.pdf Please contact 504-280-<br />
5645 or email psweb@uno.edu to obtain the add-in file.<br />
Accessing PeopleS<strong>of</strong>t Financials nVision Reports<br />
Access to the budget reports in nVision is given by the Office <strong>of</strong> Financial Services.<br />
Log in to PeopleS<strong>of</strong>t Financials https://finserv.uno.edu/finprd/signon.html<br />
You must use your UNO LAN account (same as your email, computer and WebSTAR user name and<br />
password) to access PeopleS<strong>of</strong>t (PS) Financials nVision. If you do not have access contact the HELP DESK<br />
at 504-280-4537.<br />
Pop-upBlockers<br />
If pop-up blockers are installed most Excel windows may not open. Disable the pop-up blockers by<br />
selecting Tools>Pop-up Blocker> Turn Off Pop-up Blocker<br />
<strong>University</strong> <strong>of</strong> <strong>New</strong> <strong>Orleans</strong><br />
Page 3 <strong>of</strong> 27
Introduction to nVision Reporting Last Modified:March 23, 2010<br />
Choosing a Report<br />
<strong>The</strong>re will be a folder for each year. Folders can be opened by clicking the expand icon. Upon clicking on<br />
the expanded folder for the fiscal year, there are separate folders for each college and major support unit.<br />
<strong>The</strong> folder contains the file name <strong>of</strong> the nVision report. <strong>The</strong>se are the elements (chartfield combination also<br />
known as the speedkey minus the account) for identifying and choosing the desired report:<br />
Field<br />
Department ID Tracks information<br />
according to the divisional breakdown <strong>of</strong> the<br />
<strong>University</strong><br />
Fund <strong>The</strong> primary structural units <strong>of</strong><br />
Education and Government accounting<br />
Program Established by the National<br />
Association <strong>of</strong> College and <strong>University</strong><br />
Business Officers;<br />
Classification <strong>of</strong> the types <strong>of</strong> support given<br />
to the <strong>University</strong><br />
Description<br />
Appears as ―Dept‖ followed by the department ID e.g.<br />
1300000000 (College <strong>of</strong> Business)<br />
View a list <strong>of</strong> Department ID’shttp://financialservices.uno.edu/peoples<strong>of</strong>t/docs/department_id.pdf<br />
Appears as ―FD‖ followed by the fund code for this report.<br />
View a list <strong>of</strong> Fund Codeshttp://financialservices.uno.edu/peoples<strong>of</strong>t/docs/fund_code.pdf<br />
Appears as ―PM‖ followed by the program code for this<br />
report.<br />
View a list <strong>of</strong> Program Codeshttp://financialservices.uno.edu/peoples<strong>of</strong>t/docs/program_code.pdf<br />
Understanding the Report Manager<br />
<strong>The</strong> Report Manager stores reports run through the Process Scheduler and lets you view, print, or save<br />
online reports. To navigate to the Report Manger from your menu select, Reporting Tools> Report<br />
Manager. <strong>The</strong> Report Manger link can also be located on various process pages. When you arrive on the<br />
Report Manger Page you will see 4 tabs:<br />
Explorer Page<br />
<strong>The</strong> Explorer page is a hierchical view <strong>of</strong> all nVision reports. To view the report, expand the Budgets sheets<br />
icon, select the division, and department. Click the hyperlink <strong>of</strong> the report to open it in a new window.<br />
<strong>University</strong> <strong>of</strong> <strong>New</strong> <strong>Orleans</strong><br />
Page 4 <strong>of</strong> 27
Introduction to nVision Reporting Last Modified:March 23, 2010<br />
List Page<br />
<strong>The</strong> list page shows reports that have been processed and not purged. <strong>The</strong> list page allows users to view all<br />
<strong>of</strong> the reports that are in the system that the user is authorized to access. <strong>The</strong> reports will remain in the<br />
system for 90 days by default.<br />
When using the list page the Reports are displayed by:<br />
List Page Field (―Reports‖ Section)<br />
Report<br />
Report Description<br />
Folder Name<br />
Completion Date/Time<br />
Report ID<br />
Process Instance<br />
Description<br />
Clik the Report Name to view the Log or Message File<br />
on the Report Detail page.<br />
Detailed description <strong>of</strong> the report.<br />
Displays the folder in which the report is located.<br />
Displ;ays the Date and Time at which the Report was<br />
Created.<br />
Displays the Report ID that was automatically assigned<br />
when the Report was run.<br />
Displays the Process Instance Number that was<br />
automatically assigned when the Report was run.<br />
In the ―View Report For‖ section, the user can define specific criteria to minimize the number <strong>of</strong> reports<br />
shown. Fields that have been left blank will be bypassed.<br />
<strong>The</strong> list options are:<br />
List Page Options (―View Report For‖ Section)<br />
Folder<br />
Instance, to<br />
Name<br />
Created On<br />
Last<br />
Refresh Button<br />
Description<br />
Select a specific folder to list only Reports that are within<br />
the specified folder.<br />
Enter a range <strong>of</strong> Process Instance..<br />
Enter the Name or part <strong>of</strong> a name to list only reports that<br />
match the Name entered<br />
Use the Calendar, or enter a specific Date to list only<br />
Reports that are created on that Date.<br />
Use to display only those Reports that were Created in<br />
the last number <strong>of</strong> Days, Hours, or Minutes.<br />
<strong>The</strong> refresh button must be selected after a user specifies<br />
criteria within the ―view report for‖ section.<br />
<strong>University</strong> <strong>of</strong> <strong>New</strong> <strong>Orleans</strong><br />
Page 5 <strong>of</strong> 27
Introduction to nVision Reporting Last Modified:March 23, 2010<br />
See the Example below on how you can use the list tab to look up the current Fiscal Year nVision report for<br />
a specified Department.<br />
1. Navigate to Reporting tools> Report Manager.<br />
2. Select the List tab<br />
3. In the ―View Reports For‖ modify the following fields:<br />
3a. Name: Enter the partial or full Department ID number to only match the number you enter.<br />
Example: 2400500000<br />
3b. Last: Select the drop-down menu and change the field to Days. Use to display only thoes<br />
reports that were created in the last number <strong>of</strong> days.<br />
Example: 1 day<br />
Note: Remember nVision Reports are ran every weekday. If you use this feature on a Monday you<br />
will need to change this field to 3 days.<br />
4. Select Refresh<br />
5. A list <strong>of</strong> links will appear based on the keyed Department ID.<br />
6. Select the desired Report Name.<br />
6a. To filter a specific grant or project select the (Optional) link on the grid.<br />
<strong>University</strong> <strong>of</strong> <strong>New</strong> <strong>Orleans</strong><br />
Page 6 <strong>of</strong> 27
Introduction to nVision Reporting Last Modified:March 23, 2010<br />
6b. Enter the partial or full Project or Grant ID in the Script Prompt window and select ok.<br />
6c. Follow steps 6-8.<br />
7. From the Report book select the Excel file.<br />
8. <strong>The</strong> selected nVision report will appear.<br />
<strong>University</strong> <strong>of</strong> <strong>New</strong> <strong>Orleans</strong><br />
Page 7 <strong>of</strong> 27
Introduction to nVision Reporting Last Modified:March 23, 2010<br />
Administration Page<br />
<strong>The</strong> Aministration page allow you to view reports that you run. To view the repot, click on the description<br />
name hyperlink or select, Details link, then select the file. Note: You may not have permissions to delete<br />
reports.<br />
Process Monitor<br />
Reports run through the process monitor and are also available directly from the process monitor. To view<br />
reports or cancel report errors navigate to the process monitor: People Tools>Process Scheduler> Process<br />
Monitor.<br />
View Reports<br />
1. To view reports from the process monitor selct the Details hyperlink once the process is Success and<br />
Posted.<br />
<strong>University</strong> <strong>of</strong> <strong>New</strong> <strong>Orleans</strong><br />
Page 8 <strong>of</strong> 27
Introduction to nVision Reporting Last Modified:March 23, 2010<br />
2. <strong>The</strong> process details page will appear. In the ―Process List‖ section Select, View Log/Trace<br />
hyperlink.<br />
3. <strong>The</strong> View Log/Trace page will appear. Select the file name from the file list section and the report<br />
will open in a new window.<br />
<strong>University</strong> <strong>of</strong> <strong>New</strong> <strong>Orleans</strong><br />
Page 9 <strong>of</strong> 27
Introduction to nVision Reporting Last Modified:March 23, 2010<br />
Retrieve nVision Reports<br />
Navigation to nVision Reports: Reporting Tools>Report Manager<br />
<strong>The</strong> Report Manager allows you to view nVision Reports. Follow the steps to access your Department or<br />
Organizations nVision Report.<br />
1. From the menu, select Reporting Tools.<br />
2. Select the Report Manager hyper link.<br />
3. In the report Manager select Budget Sheets.<br />
Note: <strong>The</strong> Report Manager allows you to view nVision Reports.<br />
4. Select the appropriate fiscal year<br />
<strong>University</strong> <strong>of</strong> <strong>New</strong> <strong>Orleans</strong><br />
Page 10 <strong>of</strong> 27
Introduction to nVision Reporting Last Modified:March 23, 2010<br />
5. Select the Division name<br />
6. Select the Department<br />
Note: <strong>The</strong> date is the Report Run Date.<br />
(A new report will run every morning<br />
and the old report can be found in the<br />
List Tab.)<br />
7. Select the report by clicking the report description hyperlink [4300300000-101XX-00000-2009-08-<br />
11-13.42.17.000000]<br />
<strong>University</strong> <strong>of</strong> <strong>New</strong> <strong>Orleans</strong><br />
Page 11 <strong>of</strong> 27
Introduction to nVision Reporting Last Modified:March 23, 2010<br />
8. Select the xls File from the File list [Dept(8700401300)-FD150XX-PM80000.xls] to open the<br />
nVision Report.<br />
9. If the Excel file does not open in a separate window automatically, Select open from the file<br />
download dialog box. NOTE: When the nVision report dialog box opens if you choose to open the<br />
file the document view will be Read Only. You also have the option to save the file to your desktop<br />
or a desired folder on your computer, then reopen the file from the saved location.<br />
<strong>University</strong> <strong>of</strong> <strong>New</strong> <strong>Orleans</strong><br />
Page 12 <strong>of</strong> 27
Introduction to nVision Reporting Last Modified:March 23, 2010<br />
<strong>The</strong> nVision report will open in a separate Excel window.<br />
Fig 1: nVision Report<br />
<strong>University</strong> <strong>of</strong> <strong>New</strong> <strong>Orleans</strong><br />
Page 13 <strong>of</strong> 27
Introduction to nVision Reporting Last Modified:March 23, 2010<br />
Reading the nVision Report<br />
<strong>The</strong> report format is an Excel spreadsheet the following information is available on the nVision report.<br />
Report ID Information – the upper left corner has the identifying information: Fund, Department,<br />
Program, and Project (if it applies to the report).<br />
Report Date Information – the upper right corner has the date information: Report Date, Fiscal Year,<br />
Run Date. <strong>The</strong> Run Date informs the user <strong>of</strong> the last date in which this report was updated. nVision is<br />
updated nightly.<br />
Report Groupings – by Account (classifies the nature <strong>of</strong> the transaction)<br />
EXPENDITURES & TRANSFERS section<br />
Expenditure<br />
accounts<br />
begin with a<br />
“6”<br />
Transfer<br />
accounts<br />
begin with<br />
an “8”<br />
Personnel Services – all the expense accounts for salaries and wages<br />
Employee Benefits<br />
Non-Payroll Expenses – are grouped by the ―pooled budget‖ accounts, each with its<br />
own subtotal. <strong>The</strong>se ―pooled budget‖ groups are:<br />
Travel<br />
Operating Services<br />
Supplies<br />
Pr<strong>of</strong>essional Services<br />
Other Charges<br />
Capital Outlay<br />
Major Repairs<br />
Debt Service<br />
Indirect Cost Recovery<br />
Transfers<br />
<strong>University</strong> <strong>of</strong> <strong>New</strong> <strong>Orleans</strong><br />
Page 14 <strong>of</strong> 27
Introduction to nVision Reporting Last Modified:March 23, 2010<br />
REVENUE section - revenue accounts begin with a ―4‖<br />
OPENING FUND BALANCE section – carry forward balance from previous fiscal year;<br />
begins with a ―3‖<br />
CALCULATION OF FUND BALANCE TO DATE section<br />
=Opening Fund Balance + Revenue – Expenditures<br />
Report Totals – at the end <strong>of</strong> the report are expenditure and transfer totals by:<br />
Payroll & Benefits Total<br />
Operating & Other Total<br />
Total <strong>of</strong> All Expenditures & Transfers<br />
Report Columns – (DR – Debit; CR – Credit)<br />
Preliminary Budget – this is the budget amount for each ―pooled budget‖ account as <strong>of</strong> the<br />
date <strong>of</strong> the report; therefore, it is the initial budget plus/minus any budget adjustments<br />
EXPENDITURES section <strong>of</strong> nVision REVENUE section <strong>of</strong> nVision<br />
DR - negative budget (should inquire) DR – positive budget<br />
CR - positive budget<br />
CR – negative budget (should inquire)<br />
<strong>University</strong> <strong>of</strong> <strong>New</strong> <strong>Orleans</strong><br />
Page 15 <strong>of</strong> 27
Introduction to nVision Reporting Last Modified:March 23, 2010<br />
Pre-Encumbrance – initially this column will not have entries; when online requisitions are<br />
<strong>of</strong>fered, the amount associated with the requisitions will be here; the pre-encumbered amount<br />
is the total <strong>of</strong> requisitions not yet processed into purchase orders<br />
EXPENDITURES only section <strong>of</strong> nVision<br />
DR – positive encumbrance<br />
CR – negative encumbrance (should inquire)<br />
Encumbrance – this is the value <strong>of</strong> all outstanding purchase orders<br />
EXPENDITURES only section <strong>of</strong> nVision<br />
DR – positive encumbrance<br />
CR – negative encumbrance (should inquire)<br />
Fund Balance, Revenue, Expenditure – this column includes revenue, expenditure, and<br />
fund balance amounts:<br />
• REVENUE section <strong>of</strong> nVision<br />
o DR – Debit – negative revenue (should inquire)<br />
o CR – Credit – positive/realized revenue<br />
• EXPENDITURES section <strong>of</strong> nVision - the total <strong>of</strong> all expenses actually paid or<br />
recorded as a payable; this will also include any transfers or reclassifications <strong>of</strong><br />
expenses (i.e., interdepartmental transfers)<br />
o DR – Debit – positive/actual expenditures<br />
o CR – Credit – negative expenditures (should inquire)<br />
• <strong>The</strong> total <strong>of</strong> the carryforward fund balance<br />
o DR – Debit – negative fund balance (should inquire)<br />
o CR – Credit – positive fund balance<br />
Budget Balance/Budget Deficit – this column is calculated; it adds the columns across for<br />
the captioned revenue, expense, total, or subtotal.<br />
<strong>University</strong> <strong>of</strong> <strong>New</strong> <strong>Orleans</strong><br />
Page 16 <strong>of</strong> 27
Introduction to nVision Reporting Last Modified:March 23, 2010<br />
<strong>The</strong> last column in the spreadsheet does not have a column heading; it indicates whether there is a remainingbalance<br />
or overdrawn balance (deficit) by subtotal.<br />
<strong>University</strong> <strong>of</strong> <strong>New</strong> <strong>Orleans</strong><br />
Page 17 <strong>of</strong> 27
Introduction to nVision Reporting Last Modified:March 23, 2010<br />
Drill down options<br />
<strong>The</strong> drill down feature in nVision allows you to see detailed transactions associated with the data on the nVision<br />
Report. To utilize the drill down feature you will need to complete the nVision Set Up. <strong>The</strong> instructions can be found<br />
at http://pstrain.uno.edu/docs/nVision_config.pdf<br />
Getting to the Details (Run Drill Down)<br />
<strong>The</strong> initial nVision report provides year to date information by chartfield combination. In order to retrieve the details<br />
behind the amounts, there is a feature called Run Drilldown. <strong>The</strong> drill downs are accessible through Report Manager.<br />
This feature reads the detail transaction information directly from the database. This feature works from any field in<br />
the report that is not an Excel formula.<br />
Below are the drill down options available are as follows:<br />
<strong>The</strong> Drill options used most <strong>of</strong>ten are:<br />
Budget Details- Preliminary Budget<br />
Encumbrance Details- Encumbrance<br />
Expenditure Details (AP VCHRS)- Expenditures from Accounts Payable Vouchers<br />
Journal Entry Detail (Expenditure/Revenue)- Journal entries in either Expenditure or Revenue<br />
Journal Details (Summed)- Journal entries combined with no detail<br />
Payroll Expenditure Details-Payroll Detail<br />
<strong>University</strong> <strong>of</strong> <strong>New</strong> <strong>Orleans</strong><br />
Page 18 <strong>of</strong> 27
To use drilldowns, please follow the steps below:<br />
Introduction to nVision Reporting Last Modified:March 23, 2010<br />
1. Select the cell <strong>of</strong> the nVision report in which you desire to see details.<br />
Drilldowns work when a number is shown in the cell. <strong>The</strong>y do not work when there is a formula<br />
in the cell, i.e., E11-C19.<br />
<strong>University</strong> <strong>of</strong> <strong>New</strong> <strong>Orleans</strong><br />
Page 19 <strong>of</strong> 27
Introduction to nVision Reporting Last Modified:March 23, 2010<br />
2. From the Micros<strong>of</strong>t Excel menu bar on the Add-Ins Tab, select nVisionDrill and choose ―nVision Drill‖ and select<br />
Drill.<br />
3. Choose a drill down description. Be sure to choose an option consistent with<br />
the type <strong>of</strong> amount you have chosen. In the example below, the user is looking for the details<br />
on an amount in the ―Salaried Employees Regular Pay‖ column; therefore, the user will choose Payroll Expenditure<br />
Details and select the yellow Run Drilldown button.<br />
<strong>University</strong> <strong>of</strong> <strong>New</strong> <strong>Orleans</strong><br />
Page 20 <strong>of</strong> 27
Introduction to nVision Reporting Last Modified:March 23, 2010<br />
Note: When you select to run the DrillDown, a new browser window opens and displays the processing page as<br />
shown in Fig 1-3 below.<br />
Fig: 1 <strong>of</strong> 2<br />
Fig: 2<strong>of</strong> 3<br />
Fig: 3<strong>of</strong> 3<br />
4. When processing is complete the results <strong>of</strong> the DrillDown will be deliverd to the window.<br />
<strong>University</strong> <strong>of</strong> <strong>New</strong> <strong>Orleans</strong><br />
Page 21 <strong>of</strong> 27
Introduction to nVision Reporting Last Modified:March 23, 2010<br />
If the window is closed before processing is complete, you will need to go to Report Manager to view the results.<br />
Navigation to Report Manager: Reporting tools> Report Manager> List tab.<br />
‣ On the Report Manger, Report List page, click yellow Cancel button<br />
to stop the refresh.<br />
‣ Change the Report criteria to view the General Folder, Last: 30 minutes and click Refresh.<br />
‣ After your Drill Down runs it appears as a report in your report list. DrillDown Report descriptions always<br />
include DR, the parent process instance number, and the original report description.<br />
‣ Click the Report link for the Drill Down to display the Report.<br />
‣ Selct the .xls file hyperlink.<br />
<strong>University</strong> <strong>of</strong> <strong>New</strong> <strong>Orleans</strong><br />
Page 22 <strong>of</strong> 27
Introduction to nVision Reporting Last Modified:March 23, 2010<br />
‣ Select open from the File <strong>Download</strong> dialog box.<br />
6. Drill results will open in a separate excel spreadsheet. To close the window click the X.<br />
• (column B) <strong>of</strong> the spreadsheet results <strong>of</strong> the drill is the Journal (also known as the<br />
• Journal ID), which is a type <strong>of</strong> identifier <strong>of</strong> the transaction.<br />
• Column C is the Jrnl Date, which is the effective date <strong>of</strong> the transaction.<br />
• Column D is the Name Field, which is the name <strong>of</strong> the payee.<br />
• Column K is the Amount <strong>of</strong> the transaction.<br />
• Columns F thru H include the chartfield combination for this transaction.<br />
<strong>University</strong> <strong>of</strong> <strong>New</strong> <strong>Orleans</strong><br />
Page 23 <strong>of</strong> 27
Introduction to nVision Reporting Last Modified:March 23, 2010<br />
At this point, you can do one <strong>of</strong> the following:<br />
1. Return to the report by using the Window menu item at the top <strong>of</strong> the screen.<br />
2. Return to the initial View screen by clicking the icon to the right <strong>of</strong> the spreadsheet.<br />
3. Save the spreadsheet (see save instructions below), OR<br />
4. Close the spreadsheet.<br />
Multiple drill results windows can be open at the same time.<br />
Return to the report using the Window menu item at the top <strong>of</strong> the screen<br />
Now, we will choose the Expenditure/Revenue drill option.<br />
Follow the drill steps and select :<br />
<strong>University</strong> <strong>of</strong> <strong>New</strong> <strong>Orleans</strong><br />
Page 24 <strong>of</strong> 27
Introduction to nVision Reporting Last Modified:March 23, 2010<br />
Drill results are brought to the screen in a separate spreadsheet.<br />
When drilling on expenditures in the Personnel Services grouping, the Journal ID will, most <strong>of</strong>ten, be composed<br />
<strong>of</strong> an ―HRPR‖ followed by a series <strong>of</strong> number (for example, HRPR000079)<br />
When drilling on all other expenditure groupings, when the Journal ID:<br />
Begins with ―AP‖, it is, more than likely, an Accounts Payable journal<br />
Begins with ―LEG‖, it is a transaction transferred from the legacy system<br />
Begins with ―PO‖, it is an encumbrance<br />
Begins with ―DEPT‖, it is a departmental deposit transaction done through Student Financials<br />
Begins with ―SF‖, it is a Student Financials journal entry is a series <strong>of</strong> numbers, it is an online journal<br />
entry, such as an interdepartmental.<br />
Scroll to the bottom using the scroll bar to the right <strong>of</strong> the spreadsheet.<br />
Notice those transactions whose Journal ID begins with ―AP‖ also have a Ref/Voucher ID. <strong>The</strong>se transactions indicate<br />
that a vendor has been paid OR that a payable was setup and a vendor will be paid in the future.<br />
In order to view more detail on these types <strong>of</strong> transactions (only), you can drill on Expenditure Detail.<br />
Return to the report by using the Window menu. <strong>The</strong> cursor should still be on the amount in the cell on which<br />
details are required.<br />
<strong>University</strong> <strong>of</strong> <strong>New</strong> <strong>Orleans</strong><br />
Page 25 <strong>of</strong> 27
Introduction to nVision Reporting Last Modified:March 23, 2010<br />
Saving Reports<br />
<strong>The</strong> reports are delivered in Micros<strong>of</strong>t Excel spreadsheets, allowing the user to save all or selected reports to<br />
their own computer’s hard drive.<br />
To do this:<br />
1. From the menu at the top <strong>of</strong> the screen, click File and then Save As<br />
2. In the ―Save in‖ box choose a location on your PC<br />
3. You may keep the same file name or change it at your discretion<br />
4. Click Save<br />
Each drill down screen is a separate spreadsheet and can be saved by using the above instructions.<br />
<strong>University</strong> <strong>of</strong> <strong>New</strong> <strong>Orleans</strong><br />
Page 26 <strong>of</strong> 27
Introduction to nVision Reporting Last Modified:March 23, 2010<br />
Terms for nVision Report<br />
Preliminary Budget- Amount a department has been allocated to spend.<br />
Pre-Encumbrance- Amount <strong>of</strong> funds that have been committed by an online Purchse Order requisition.<br />
UNO will not use the Pre-Encumbrance column at this time.<br />
Encumbrance- Amount <strong>of</strong> funds that have been commited by purchse orders.<br />
Fund Balance, Revenue, Expenditure- Amount that has been credited or debited from an account.<br />
Budget Balance- <strong>The</strong> balance remaing after all expenses are taken into consideration<br />
Budget Deficit- <strong>The</strong> amount Overdrawn<br />
Department- Tracks information according to the divisional breakdown <strong>of</strong> the <strong>University</strong><br />
Fund- <strong>The</strong> primary structural units <strong>of</strong> Education and Government accounting<br />
Program- Established by the National Association <strong>of</strong> College and <strong>University</strong> Business Officers;<br />
Classification <strong>of</strong> the types <strong>of</strong> support given to the <strong>University</strong><br />
Account- <strong>The</strong> nature <strong>of</strong> the financial transaction that is entered inro the system.<br />
Accounting Date- <strong>The</strong> accounting date indicates when a transaction is recognized, as opposed to the date<br />
the transaction actually occurred. <strong>The</strong> accounting date and transaction date can be the same. <strong>The</strong> accounting<br />
date determines the period in the general ledger to which the transaction is to be posted. You can only select<br />
an accounting date that falls within an open period in the ledger to which you are posting. <strong>The</strong> accounting<br />
date for an item is normally the invoice date<br />
<strong>University</strong> <strong>of</strong> <strong>New</strong> <strong>Orleans</strong><br />
Page 27 <strong>of</strong> 27