Part 9 - ThinManager
Part 9 - ThinManager
Part 9 - ThinManager

Create successful ePaper yourself
Turn your PDF publications into a flip-book with our unique Google optimized e-Paper software.
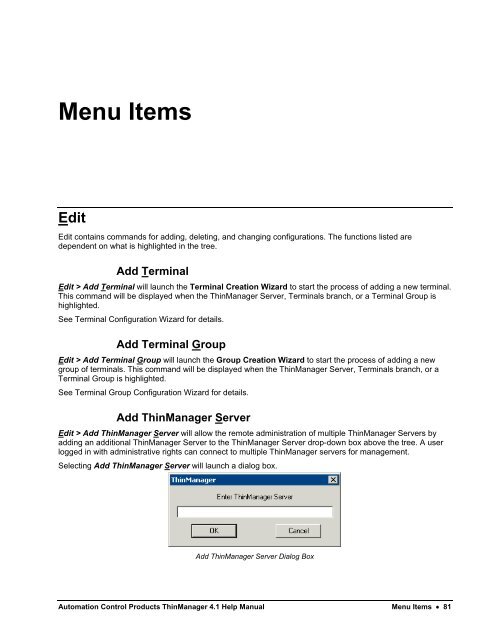
Menu Items<br />
Edit<br />
Edit contains commands for adding, deleting, and changing configurations. The functions listed are<br />
dependent on what is highlighted in the tree.<br />
Add Terminal<br />
Edit > Add Terminal will launch the Terminal Creation Wizard to start the process of adding a new terminal.<br />
This command will be displayed when the <strong>ThinManager</strong> Server, Terminals branch, or a Terminal Group is<br />
highlighted.<br />
See Terminal Configuration Wizard for details.<br />
Add Terminal Group<br />
Edit > Add Terminal Group will launch the Group Creation Wizard to start the process of adding a new<br />
group of terminals. This command will be displayed when the <strong>ThinManager</strong> Server, Terminals branch, or a<br />
Terminal Group is highlighted.<br />
See Terminal Group Configuration Wizard for details.<br />
Add <strong>ThinManager</strong> Server<br />
Edit > Add <strong>ThinManager</strong> Server will allow the remote administration of multiple <strong>ThinManager</strong> Servers by<br />
adding an additional <strong>ThinManager</strong> Server to the <strong>ThinManager</strong> Server drop-down box above the tree. A user<br />
logged in with administrative rights can connect to multiple <strong>ThinManager</strong> servers for management.<br />
Selecting Add <strong>ThinManager</strong> Server will launch a dialog box.<br />
Add <strong>ThinManager</strong> Server Dialog Box<br />
Automation Control Products <strong>ThinManager</strong> 4.1 Help Manual Menu Items 81
Enter computer name or the IP address of a <strong>ThinManager</strong> server. This adds the <strong>ThinManager</strong> Server to the<br />
<strong>ThinManager</strong> Server drop-down box above the tree pane of the local <strong>ThinManager</strong> so that the configuration<br />
can be displayed in the tree when needed.<br />
Note: The <strong>ThinManager</strong> Server may need to be defined in the <strong>ThinManager</strong> Server List Wizard.<br />
<strong>ThinManager</strong> Adding an Additional <strong>ThinManager</strong> Server<br />
The new <strong>ThinManager</strong> Server will be added to the <strong>ThinManager</strong> Server drop-down box. Selecting the new<br />
<strong>ThinManager</strong> Server in the drop-down will display the tree for that <strong>ThinManager</strong> Server.<br />
Members of the Administrator group or the <strong>ThinManager</strong> Administrators group have full control of the remote<br />
<strong>ThinManager</strong> Server and can make changes as needed. Members of the <strong>ThinManager</strong> Power Users group<br />
can monitor the connection.<br />
See <strong>ThinManager</strong> Security Groups for more details.<br />
If <strong>ThinManager</strong> is installed on a Windows XP Pro workstation, it cannot be added to a <strong>ThinManager</strong> on a<br />
Windows 2003 unless a security option is changed.<br />
In Windows XP Pro select Start > Control Panel > Administrative Tools > Local Security Policy.<br />
82 Menu Items Automation Control Products <strong>ThinManager</strong> 4.1 Help Manual
Windows XP Pro – Local Security Settings<br />
Highlight the Security Options folder in the Local Security Settings program. Change the Network access:<br />
Sharing and Security model for local accounts from the default Guest Only to Classic to match the<br />
setting of the Windows 2003 terminal server.<br />
Remove <strong>ThinManager</strong> Server<br />
Edit > Remove <strong>ThinManager</strong> Server will delete a highlighted <strong>ThinManager</strong> Server from the tree.<br />
Delete<br />
Edit > Delete will launch a message box that will remove a highlighted <strong>ThinManager</strong> Server, group or<br />
terminal. Deleting a remote <strong>ThinManager</strong> Server will remove it from the local list.<br />
Delete Group Message Box<br />
Deleting a group will give the option of deleting the group terminals or moving them under the server without a<br />
group.<br />
Automation Control Products <strong>ThinManager</strong> 4.1 Help Manual Menu Items 83
Modify<br />
The function of Edit > Modify depends on what tree icon is highlighted when Modify is selected.<br />
Modify will launch the <strong>ThinManager</strong> Server Configuration Wizard for a<br />
highlighted <strong>ThinManager</strong> Server. This allows the <strong>ThinManager</strong> Server to be<br />
configured as described in the <strong>ThinManager</strong> Server Configuration Wizard.<br />
Modify will launch the Terminal Group Configuration Wizard for a highlighted<br />
group. Modifications can be made as described in Terminal Group Configuration<br />
Wizard.<br />
Modify will launch the Terminal Configuration Wizard for a highlighted terminal.<br />
Modifications can be made as described in Terminal Configuration Wizard.<br />
Modify will launch the appropriate Display Server Configuration Wizard for a<br />
highlighted Display Server member.<br />
Modify will launch the appropriate VCenter Server Property Wizard for a<br />
highlighted VCenter member.<br />
Modify will launch the appropriate Display Client Configuration Wizard for a<br />
highlighted Display Client member.<br />
Modify will launch the TermSecure Configuration Wizard for a highlighted<br />
TermSecure user or group.<br />
Rename<br />
Edit > Rename will allow a highlighted tree item to have its name changed.<br />
Note: The terminal name should be less than 15 characters because of limitations of the terminal server.<br />
Lock<br />
When a tree member is opened for modification, the entry in the configuration is automatically locked to<br />
prevent two people from making changes at one time.<br />
Edit > Lock will manually lock the configuration of a tree member to prevent it from being changed. A lock<br />
icon will designate the locked state.<br />
Lock Icons<br />
Unlock<br />
Edit > Unlock will manually unlock a tree member that was locked while being modified. This is used if the<br />
server was shut down while a tree member was locked, preventing the member from being unlocked<br />
automatically when the modifications are complete.<br />
Using the Unlock function will display a warning to alert the user.<br />
84 Menu Items Automation Control Products <strong>ThinManager</strong> 4.1 Help Manual
Lock Warning Message<br />
Unlocking a locked member can cause a loss of configuration data if another user is modifying it.<br />
Note: This tool is to be used only when a tree member remains locked due to an unexpected server shut<br />
down while a member is being configured. Using this tool while another is configuring that terminal can<br />
lead to corruption of the database.<br />
Find<br />
Edit > Find launches a Find dialog that searches the tree for the item typed into the Find field.<br />
Find Dialog Box<br />
The Find function has several checkboxes to enhance the search:<br />
Search Names – this, when checked, will search for a name entered in the Find field.<br />
Search IP Addresses - this, when checked, will search for an IP address entered in the Find field.<br />
Search Terminal Ids - this, when checked, will search for a MAC address/Terminal ID entered in the<br />
Find field.<br />
Search Terminal Models – this, when checked, will search for a thin client model entered in the Find<br />
field.<br />
Exact Match Only - this, when checked, will limit searches to exact matches to the name entered in<br />
the Find field.<br />
CTRL+F is the short cut key to launch Find.<br />
Find Next<br />
Edit > Find Next will continue searching the tree for the next instance of the text in the Find field of the Find<br />
dialog box.<br />
F3 is the shortcut key for this function.<br />
Automation Control Products <strong>ThinManager</strong> 4.1 Help Manual Menu Items 85
Manage<br />
<strong>ThinManager</strong> Server List<br />
Manage > <strong>ThinManager</strong> Server List will launch the <strong>ThinManager</strong> List Wizard. See <strong>ThinManager</strong> Server<br />
List for details.<br />
TermSecure Access Groups<br />
Selecting Manage > TermSecure Access Groups will launch the Access Groups window to create<br />
Permission Groups for use with TermSecure.<br />
See Permissions for more details.<br />
Access Groups Window<br />
Select the OK button to accept the changes and close the window.<br />
Select the Edit button to change the highlighted Access Group.<br />
Select the Add button to add a new Access Group.<br />
Select the Delete button to remove the highlighted Access Group.<br />
If the Add button is selected, an Access Group Creation window will be displayed.<br />
Access Group Creation Window<br />
86 Menu Items Automation Control Products <strong>ThinManager</strong> 4.1 Help Manual
Enter a name for the new Access Group and select OK to create the group.<br />
TermSecure Access Groups Added<br />
Defined Access Groups will be displayed in the Access Group window. See Permissions for more details.<br />
DNS Configuration<br />
Manage > DNS Configuration will launch the DNS Configuration Wizard. See DNS Configuration for<br />
details.<br />
Configure Default Terminal<br />
Manage > Configure Default Terminal will launch the Terminal Properties for the “Default” terminal. This<br />
default terminal is used as a template that terminals created during Auto-Create are based on. See Auto-<br />
Creation of Terminals for details on Auto-Creation of terminals.<br />
Restore Configuration<br />
Manage > Restore Configuration will allow a backed up <strong>ThinManager</strong> configuration to be applied to the<br />
<strong>ThinManager</strong> Server. Select Restore Configuration to launch the desired <strong>ThinManager</strong> Configuration file in<br />
the browse window and select Open. The backup copy will overwrite the existing configuration.<br />
Automation Control Products <strong>ThinManager</strong> 4.1 Help Manual Menu Items 87
Restore <strong>ThinManager</strong> Configuration<br />
Backup Configuration<br />
Manage > Backup Configuration allows the <strong>ThinManager</strong> Configuration to be saved. Select Backup<br />
Configuration to launch a browse window and select the Save button to save a backup copy.<br />
Backup <strong>ThinManager</strong> Configuration<br />
Synchronize Configuration<br />
Manage > Synchronize Configuration allows the configuration of multiple <strong>ThinManager</strong> Servers to be kept<br />
identical so that a terminal will boot with the same configuration regardless of what <strong>ThinManager</strong> Server the<br />
terminal connects to.<br />
Note: <strong>ThinManager</strong> has an Automatic Synchronization feature that will keep two <strong>ThinManager</strong> Servers<br />
synchronized without requiring a manual input. See <strong>ThinManager</strong> Server List Page for details.<br />
88 Menu Items Automation Control Products <strong>ThinManager</strong> 4.1 Help Manual
Although Automatic Synchronization is the preferred method of synchronization, Manual Synchronization is<br />
useful to synchronize the configurations on the primary and backup <strong>ThinManager</strong> Servers before turning on<br />
the Automatic Synchronization.<br />
Selecting Synchronize Configuration will launch the Synchronize <strong>ThinManager</strong> Server Configurations<br />
Wizard. See Manual Synchronization for details.<br />
Reconnect<br />
This command will reinitiate the connection between the highlighted <strong>ThinManager</strong> Server and the ThinServer<br />
service.<br />
Disconnect<br />
This command will disconnect the connection between the highlighted <strong>ThinManager</strong> Server and the<br />
ThinServer service.<br />
Install<br />
Install is a new menu item that contains the commands from Manage that involve installation.<br />
Licenses<br />
Install > License opens up the Licensing dialog box.<br />
Licensing Window<br />
The Master License Number field shows the number of the installed master license. See Creating a Master<br />
License for details.<br />
The Licensing window displays several columns.<br />
Automation Control Products <strong>ThinManager</strong> 4.1 Help Manual Menu Items 89
License Number – This displays the component product license numbers included in the installed<br />
master license. A green monitor indicates a valid license while invalid licenses will display a red “X”.<br />
Location – This lists the <strong>ThinManager</strong> Server(s) that the component product license applies to.<br />
Redundancy – This indicates whether the license type is redundant or mirrored.<br />
Description – This lists the license type.<br />
Expiration – This displays the license expiration date.<br />
The Installation ID field displays the Installation ID number that is used in the license activation process.<br />
<strong>ThinManager</strong> Servers that are auto-synchronized will display the Install ID of both <strong>ThinManager</strong> Servers.<br />
Install License – This button launches a file browser that allows a license file to be added.<br />
Delete License – This button allows a highlighted license to be deleted.<br />
Details – This button displays the details of a highlighted license.<br />
Install Demo Code – This button allows a Demo Code to be added to give temporary functionality.<br />
Show Old Licenses – This lists the previously installed <strong>ThinManager</strong> 3.x licenses on the<br />
<strong>ThinManager</strong> Server.<br />
Done – This button closes the Licensing window.<br />
See Licensing <strong>ThinManager</strong> for details.<br />
Modules<br />
Install > Modules open the Modules dialog box. This displays the modules that are available to the ACP<br />
Enabled thin clients. See Module Overview for details.<br />
Installed Modules Windows<br />
The Module Type drop-down allows all modules to be displayed or allows the modules to be filtered by type.<br />
90 Menu Items Automation Control Products <strong>ThinManager</strong> 4.1 Help Manual
The Modules for Server X window has three columns.<br />
Description – This lists the modules by name.<br />
Version – This is the version number of the module. This can be compared against the latest<br />
versions from http://www.thinmanager.com/support/downloads.shtml#modules.<br />
License Reqd – This shows what license is required, if any, to use the module.<br />
The Modules for Server X window has three buttons.<br />
Install Module – This button launches a file browser that allows a module file to be added or<br />
updated.<br />
Remove Module form All Terminals – This button will remove a highlighted module from all<br />
terminals. It doesn’t remove the module from the system; it just removes it from the configurations.<br />
Done – This button closes the Modules window.<br />
Selecting Install Module… will launch a dialog box that allows modules files to be selected.<br />
Open Module File<br />
A module can be added to the list of available modules by highlighting the desired module file and selecting<br />
Open. . The window will close when the license is installed.<br />
Note: The module files should not be saved directly into the <strong>ThinManager</strong> folder but should be saved to<br />
another folder and be installed using <strong>ThinManager</strong>.<br />
See Module Overview for details<br />
Reports (Installation)<br />
Install > Reports will launch a Reports window that allows additional reports to be added to <strong>ThinManager</strong>.<br />
Each report has two components, an HTML template and a SQL query.<br />
See Reports for information on reports.<br />
Automation Control Products <strong>ThinManager</strong> 4.1 Help Manual Menu Items 91
Reports Window –Reports Templates<br />
The Reports widow has radio buttons to display report templates, SQL files, and images, finished reports,<br />
and assorted files.<br />
Selecting the Report Template radio button will display installed report templates. <strong>ThinManager</strong> installs a<br />
variety of templates. New templates can be downloaded from www.thinmanager.com.<br />
Selecting the Install button will launch a file browser to install new templates. Selecting the Delete button will<br />
delete a highlighted report.<br />
Open File Window<br />
Navigated to the desired template, highlight the file, and select Open. This will install the template and close<br />
the file browser window.<br />
92 Menu Items Automation Control Products <strong>ThinManager</strong> 4.1 Help Manual
Reports Window – SQL Files<br />
Selecting the SQL Files radio button will display installed SQL queries. <strong>ThinManager</strong> installs a variety of SQL<br />
queries as companions to the report templates. New SQL queries for new reports can be downloaded from<br />
www.thinmanager.com.<br />
Selecting the Install button will launch a file browser to install new SQL queries. Selecting the Delete button<br />
will delete a highlighted SQL query.<br />
Reports Window – Images, Finished Reports, etc.<br />
Selecting the Images, Finished Reports, etc. radio button will display installed images and reports.<br />
Automation Control Products <strong>ThinManager</strong> 4.1 Help Manual Menu Items 93
Selecting the Install button will launch a file browser to install new images. Selecting the Delete button will<br />
delete a highlighted image, report, or file. This is a handy way do delete older copies of backed up reports and<br />
configurations that were saved using the Scheduler. See System Schedule for details.<br />
Selecting the OK button will close the Reports window.<br />
Firmware<br />
<strong>ThinManager</strong> allows the firmware for the <strong>ThinManager</strong> Ready thin client to be upgraded with the latest version<br />
from the <strong>ThinManager</strong> web site (www.thinmanager.com).<br />
Select Install > Firmware to launch a file browser.<br />
Install New Firmware<br />
Select the new version of the firmware.acp and select Open. This will install the new version of the firmware.<br />
The <strong>ThinManager</strong> Ready thin clients will download the new version of firmware the next time they are<br />
rebooted.<br />
TermCap Database<br />
<strong>ThinManager</strong> has a Terminal Capability Database (termcap.db) that provides <strong>ThinManager</strong> with the<br />
configuration parameters for each thin client model. At each terminal connection, the TermCap database is<br />
checked and an integrity check is performed. If the configuration does not match the terminal specifications,<br />
<strong>ThinManager</strong> may reconfigure the terminal to acceptable parameters.<br />
Terminal Capabilities Integrity Check<br />
The Terminal Capability database can be updated with the current release from the <strong>ThinManager</strong> web site<br />
(www.thinmanager.com).<br />
To update the Terminal Capabilities Database, select Install > TermCap Database.<br />
94 Menu Items Automation Control Products <strong>ThinManager</strong> 4.1 Help Manual
Install New TermCap Database<br />
An Open dialog box will be launched.<br />
Select the new version of the termcap.db and select the Open button. This will install the new version.<br />
Tools<br />
Tools contain commands that affect the terminals.<br />
Restart Terminals<br />
Tools > Restart Terminals will perform an intelligent restart of a terminal. It will load any changes to the<br />
configuration, modules, firmware, and reconnect them to the terminal server without cycling power to the<br />
terminal, unless it is needed to reload the firmware.<br />
Note: Restarting a terminal does not close the session on the terminal server nor does it unlock a frozen<br />
session. It reloads changes independent of the session on the terminal server. It will reconnect to the<br />
same session without changing the session.<br />
<br />
<br />
<br />
Highlight a terminal in the <strong>ThinManager</strong> tree pane and select this command to<br />
restart a terminal.<br />
Highlight a group in the <strong>ThinManager</strong> tree pane and select this command to restart<br />
all the terminals of the group.<br />
Highlight a <strong>ThinManager</strong> Server in the <strong>ThinManager</strong> tree pane and select this<br />
command to restart all the terminals on the <strong>ThinManager</strong> Server.<br />
Reboot Terminals<br />
Tools > Reboot Terminals will cycle the power to the terminal, reloading the firmware and configuration, and<br />
reconnect it to the terminal server. The function of this command has been largely replaced by the Restart<br />
Terminal command.<br />
Automation Control Products <strong>ThinManager</strong> 4.1 Help Manual Menu Items 95
Note: Rebooting a terminal does not close the session on the terminal server nor does it unlock a frozen<br />
session. It reboots and reloads the firmware and configuration independent of the session on the<br />
terminal server. It will reconnect to the same session without changing the session.<br />
<br />
<br />
<br />
Highlight a terminal in the <strong>ThinManager</strong> tree pane and select this command to<br />
reboot a terminal.<br />
Highlight a group in the <strong>ThinManager</strong> tree pane and select this command to reboot<br />
all the terminals of the group.<br />
Highlight a <strong>ThinManager</strong> Server in the <strong>ThinManager</strong> tree pane and select this<br />
command to reboot all the terminals on the <strong>ThinManager</strong> Server.<br />
Reboot Terminal Server<br />
Tools > Reboot Terminal Server will send a command to restart the highlighted terminal server.<br />
Highlight a terminal server in the <strong>ThinManager</strong> tree pane and select this command<br />
to restart a terminal server.<br />
Caution: Reboot Terminal Server will restart the terminal server and log off all sessions without giving users<br />
a chance to save their data. Use wisely.<br />
Disable Terminals<br />
The Disable Terminal command will disable any highlighted Group or Terminal by displaying a lockout<br />
screen. The terminal will wait until it is enabled with the Tools > Enable Terminal function to be functional<br />
again. This allows terminals to be locked down for security reasons, or to prevent the terminals from<br />
accessing the terminal servers.<br />
Highlighting a Terminal Server, or Group in the <strong>ThinManager</strong> tree and selecting Tools > Disable Terminal<br />
will disable every terminal assigned to it.<br />
Disabled Terminal Icons<br />
If a Group or Terminal is disabled using the Tools > Disable function, it will be displayed with a red X over<br />
the terminal icon. An entire <strong>ThinManager</strong> Server or an entire Group can be disabled, but only the terminal<br />
icons will show the X, not the <strong>ThinManager</strong> Server icon or the Group icons.<br />
Once a terminal is disabled, a disabling screen will appear on the terminal until the terminal has been<br />
enabled.<br />
96 Menu Items Automation Control Products <strong>ThinManager</strong> 4.1 Help Manual
Disabled Terminal Screen – Logged On<br />
A logged on terminal will display a screen indicating that the terminal is disabled.<br />
Disabled Boot Screen<br />
Terminals that are booted while disabled will halt on a blue screen indicating that the terminal is disabled.<br />
Enable Terminals<br />
The Enable Terminal command will remove the disabling from a highlighted Group or terminal and allow it to<br />
continue functioning or resume the boot process.<br />
Automation Control Products <strong>ThinManager</strong> 4.1 Help Manual Menu Items 97
Disable Terminal Server<br />
The Disable Terminal Server command will disable all connections from the selected terminal server to all<br />
<strong>ThinManager</strong> Ready thin clients logged onto that server. The sessions will be disconnected but not reset.<br />
Disabled Terminal Servers<br />
This is useful in updating terminal servers. Clients can be disconnected and have their sessions logged off,<br />
allowing the server can be updated. Once it is updated in can be enabled to allow client to connect to it again.<br />
Enable Terminal Server<br />
The Enable Terminal Server command will enable a disabled terminal server to allow connections from<br />
<strong>ThinManager</strong> Ready thin clients.<br />
Calibrate Touch Screen<br />
<strong>ThinManager</strong> has a touch screen configuration utility that can calibrate a thin client touch screen. The utility<br />
can be started three ways:<br />
<br />
<br />
<br />
<br />
On the thin client, select Start > Program Files > Automation Control Products<br />
> Calibrate Touch Screen (or Start > Program Files > Acp ><br />
CalTouchScreen). This is useful because it allows the operator to calibrate the<br />
touch screen without administrative support.<br />
On the <strong>ThinManager</strong> Server, highlight the desired terminal in <strong>ThinManager</strong> and select<br />
Tools > Calibrate Touch Screen from the menu bar. This will launch the<br />
calibration on the selected terminal.<br />
The Calibration Touch Down Time (seconds) setting on the touch screen module<br />
will allow the calibration to be triggered by holding a finger on the touch screen for<br />
the amount of time set in the parameter. See Touch Screen Modules for details.<br />
The TermMon ActiveX can be configured to launch the calibration program. See<br />
TermMon ActiveX Control for details.<br />
98 Menu Items Automation Control Products <strong>ThinManager</strong> 4.1 Help Manual
Touch Screen Calibration Screen<br />
A new touch screen calibration program was released with <strong>ThinManager</strong> 2.6 and is included in the 2.6 and<br />
later touch screen modules. When the calibration is run, a “+” appears in the lower left. Touch the center of<br />
the + and then touch the center of the other four +s as they appear. This provides touch screen mapping for<br />
the terminal.<br />
Note: The touch screen module must first be added through the Module page in the Terminal Configuration<br />
wizard.<br />
To launch the calibration program from the Start menu from within the session requires that the<br />
<strong>ThinManager</strong> Utilities be installed on each terminal server. See Standard <strong>ThinManager</strong> Installation in<br />
Windows for details.<br />
Send Message<br />
Send Message will send a message to a highlighted terminal.<br />
Send Message Window<br />
Enter the message into the Message text box. The Message Title can be changed, if desired.<br />
Select the OK button to send or the Cancel button to cancel.<br />
Automation Control Products <strong>ThinManager</strong> 4.1 Help Manual Menu Items 99
Send Message Window<br />
When a message is sent, an ACP splash screen will be displayed with the message until the message is<br />
acknowledged.<br />
Clear Event Log<br />
Selecting Clear Event Log will clear the event log. The event log is configured the <strong>ThinManager</strong> Server<br />
Configuration Wizard that is launched by double-clicking on the <strong>ThinManager</strong> in the tree or highlighting the<br />
<strong>ThinManager</strong> and selecting Edit > Modify from the menu.<br />
View<br />
Status Bar<br />
The Status Bar shows advice and comments on the bottom of the <strong>ThinManager</strong> window. When the Status<br />
Bar command is checked, the Status Bar text is visible. When the Status Bar command is unchecked, the<br />
Status Bar text is invisible.<br />
Show Connected Only<br />
View > Show Connected Only, if checked, will simplify the tree by removing unconnected terminals, terminal<br />
servers and terminal server groups.<br />
Reports (Selection)<br />
View > Reports will open the Select Reports window.<br />
100 Menu Items Automation Control Products <strong>ThinManager</strong> 4.1 Help Manual
Select Reports Window<br />
The Select Reports window allows the selection of the default report that will display when the Report tab is<br />
selected for a <strong>ThinManager</strong> Server, terminal, terminal server, or TermSecure user.<br />
The default reports can be changed by selecting a different report in the drop-down boxes.<br />
See Reports for details.<br />
Print<br />
View > Print will print the highlighted tab of the Details pane..<br />
Automation Control Products <strong>ThinManager</strong> 4.1 Help Manual Menu Items 101
Print Reports<br />
A Print dialog box will appear to allow the selection of the printer and the desired number of copies.<br />
Options<br />
Selecting Options will launch the Options dialog box.<br />
102 Menu Items Automation Control Products <strong>ThinManager</strong> 4.1 Help Manual
Options<br />
The Display “Create New Terminal” dialog for unknown terminals check box, if selected, will launch the<br />
Terminal Configuration Wizard on the <strong>ThinManager</strong> Server when a new terminal is added.<br />
The Display “Create New User” dialog for unknown users check box, if selected, will launch the<br />
TermSecure User Configuration Wizard on the <strong>ThinManager</strong> Server when an unknown ID device (USB key<br />
or ID card) is read by a terminal.<br />
Note: Checking the Display “Create New User” dialog for unknown users check box is useful for<br />
assigning ID cards to TermSecure Users. See Card and Badge Configuration for a TermSecure User<br />
for details.<br />
The Minimize to the System Tray checkbox will send the <strong>ThinManager</strong> icon in the system tray when<br />
<strong>ThinManager</strong> is minimized.<br />
Warn if license will expire within __ day(s) will set the warning period before license expiration. This is<br />
useful for time-limited demonstration and Trialware licenses.<br />
RemoteView<br />
Interactive Shadow<br />
Interactive Shadow, if checked, allows Administrators and members of the <strong>ThinManager</strong> Security Groups<br />
that have interactive shadow permissions to interact and control a shadowed terminal session. If this value is<br />
unchecked the sessions will be viewable, but observers cannot take control of the session.<br />
Scaled to Window<br />
Scaled to Windows, if checked, will scale the shadowed terminal session to fit the Details pane of<br />
<strong>ThinManager</strong>. If this value is unchecked the session will be viewed regular-sized, requiring the use of scroll<br />
bars to view portions of the screen.<br />
Automation Control Products <strong>ThinManager</strong> 4.1 Help Manual Menu Items 103
Go FullScreen<br />
This allows the connection from the Connect tab on <strong>ThinManager</strong> to the terminal server to be displayed full<br />
screen instead of in a window in <strong>ThinManager</strong>.<br />
This session can be switched to full-screen by selecting RemoteView > Go FullScreen in the menu. This<br />
changes the appearance from running from within a window to running as a desktop.<br />
The full screen session will have a tool tab at the top of the screen with controls that allow the window to be<br />
switched back to the window or to close the connection.<br />
Remote Session Tool Bar<br />
The standard Minimize, Maximize, and Close icons on the Remote Session Tool Bar allow control over the<br />
session.<br />
The hot keys of CTL+ALT+BREAK will allow you to switch to full screen mode or to exit full screen mode.<br />
Connect Options<br />
Selecting RemoteView > Connect Options will launch the Terminal Server Connect Options window that<br />
allows the terminal server Remote View connection to be configured.<br />
Terminal Server Connect Options<br />
The Video Settings include:<br />
Video Mode – This allows the connection to be displayed at a specific resolution or<br />
as full screen.<br />
Width – This allows the connection to be displayed at a specific width if the Video<br />
Mode is set to Custom.<br />
Height – This allows the connection to be displayed at a specific height if the Video<br />
Mode is set to Custom.<br />
Color Depth - This allows the connection to be displayed at a specific color depth.<br />
Windows 2003 is required for high-color.<br />
104 Menu Items Automation Control Products <strong>ThinManager</strong> 4.1 Help Manual
The Access Options include:<br />
Allow Auto-Login – This allows the connection to login without prompting when<br />
checked. It will use the login information that is entered on the Terminal Server<br />
Name page of the Terminal Server Wizard.<br />
Allow Access to Local Drives – This allows the user to access the hard drive on<br />
the remote computer from the remote connection.<br />
Connect To Console – This allows the <strong>ThinManager</strong> user to capture the console<br />
session for display through <strong>ThinManager</strong> instead of starting a new session on the<br />
terminal server.<br />
Send Key<br />
Send Key allows the sending of key commands to the shadowed session that are normally saved for the local<br />
machine and don’t function in shadowing. These include:<br />
CTLL+ALT+DEL<br />
CTL+ESC<br />
ALT+Tab<br />
ALT+Shift+Tab<br />
ALT+ESC<br />
ALT+Space.<br />
Select RemoteView > Send Key and the desired key combination to send the key command to the<br />
shadowed session.<br />
Note: The Key Block module will block this command if it is used on the terminal. See Key Block Module for<br />
details.<br />
Help<br />
Help Topics<br />
Selecting Help Topics will launch the <strong>ThinManager</strong> Help file. This file can also be launched by selecting F1<br />
while using <strong>ThinManager</strong>.<br />
About <strong>ThinManager</strong><br />
Selecting About <strong>ThinManager</strong> will display a dialog box with <strong>ThinManager</strong> version information, copyright<br />
information, and contact information for <strong>ThinManager</strong>.<br />
Automation Control Products <strong>ThinManager</strong> 4.1 Help Manual Menu Items 105
Right Click Menus in the Tree Pane<br />
<br />
<br />
Right Click on the <strong>ThinManager</strong> Server Icon<br />
Reconnect - This causes the ThinServer service to try to reconnect to the<br />
highlighted <strong>ThinManager</strong> Server.<br />
Modify - This launches the <strong>ThinManager</strong> Server Configuration Wizard to<br />
configure the highlighted <strong>ThinManager</strong> Server.<br />
Remove - This removes the highlighted <strong>ThinManager</strong> Server from the tree. It does<br />
not remove any configuration or uninstall the program.<br />
See Add <strong>ThinManager</strong> Server for details.<br />
<br />
<br />
<br />
<br />
<br />
<br />
<br />
<br />
<br />
Right Click on the Terminals Branch Icon<br />
Add Terminal - This launches the Terminal Configuration Wizard to create a<br />
terminal.<br />
Add Group - This launches the Terminal Group Configuration Wizard to create a<br />
group.<br />
Restart Terminals - This sends a signal to all the terminals to reload any changes<br />
to its configuration, modules, or firmware. It will only do a full reboot if needed.<br />
Right Click on a Terminal Group Icon<br />
Add Terminal - This launches the Terminal Configuration Wizard to create a<br />
terminal in the group.<br />
Add Group - This launches the Terminal Group Configuration Wizard to create a<br />
group.<br />
Restart Terminals - This sends a signal to all the terminals under the highlighted<br />
icon to reload any changes to its configuration, modules, or firmware. It will only do<br />
a full reboot if needed.<br />
Modify - This launches the Terminal Group Configuration Wizard to configure<br />
the highlighted group.<br />
Rename - This allows the Group to be renamed.<br />
Delete - This removes the Group from the <strong>ThinManager</strong> configuration. Member<br />
terminals can be deleted with the group, or moved out of the group, depending on<br />
the choice in the confirmation window.<br />
Delete Group confirmation Window<br />
106 Menu Items Automation Control Products <strong>ThinManager</strong> 4.1 Help Manual
Selecting Yes will delete the Group and all member terminals.<br />
Selecting No will delete only the group. The member terminals will be moved out of the group and retain their<br />
configuration as individuals.<br />
Selecting Cancel will stop the process and allow the group to remain as it is.<br />
<br />
<br />
<br />
<br />
<br />
Right Click on a Terminal Icon<br />
Modify - This launches the Terminal Configuration Wizard to configure the<br />
highlighted terminal.<br />
Rename - This allows the terminal to be renamed.<br />
Delete - This removes the terminal from the <strong>ThinManager</strong> configuration.<br />
Go to TermSecure User - This changes the focus of the tree to the TermSecure<br />
User that is logged into the terminal.<br />
Restart Terminal - This sends a signal to the terminal to reload any changes to the<br />
configuration, modules, or firmware. It will only do a full reboot if needed.<br />
<br />
Right Click on the Display Servers Terminal Servers Branch<br />
Icon<br />
Add Terminal Server - This launches the Terminal Server Wizard to create and<br />
configure a new terminal server.<br />
Edit Terminal Server - This launches the Terminal Server List Wizard to allow<br />
the configuration of an existing terminal server.<br />
See Terminal Services Display Servers for details<br />
<br />
<br />
<br />
Right Click on a Terminal Server Icon<br />
Modify - This launches the Terminal Server Configuration Wizard to allow<br />
changes to the configuration of the highlighted terminal server.<br />
Rename - This allows the terminal server to be renamed.<br />
Delete - This removes the terminal server from the <strong>ThinManager</strong> configuration.<br />
Terminal Server Deletion Confirmation<br />
<strong>ThinManager</strong> will prompt for confirmation before deletion.<br />
Terminal Server Deletion Error<br />
Automation Control Products <strong>ThinManager</strong> 4.1 Help Manual Menu Items 107
A terminal server cannot be deleted from a configuration if it still has terminals assigned to it.<br />
Restart Terminals - This sends a signal to the terminal to reload any changes to all<br />
terminals connected to the terminal server. It will only do a full reboot if needed.<br />
Right Click on the VCenter Servers Branch Icon<br />
The branches of the VCenter Server tree have various right-click menus:<br />
VCenter Servers:<br />
o Add vCenter Server – Launches the VCenter Server Property Wizard to allow a VCenter<br />
Server to be defined.<br />
Defined VCenter Servers:<br />
o Remove – Removes the defined VCenter Server.<br />
Imported Datacenter:<br />
o Rename – Allows you to rename the datacenter.<br />
o Delete – Allows you to delete the datacenter.<br />
Virtual Machine:<br />
o Power Operations:<br />
• Power On – Turns on a stopped or suspended virtual machine.<br />
• Power Off – Turns off a stopped or suspended virtual machine.<br />
• Suspend – Suspends a running virtual machine and stores the state.<br />
• Reset – Cycles power to the virtual machine to restart the virtual machine.<br />
o Snapshot:<br />
• Take Snapshot – Captures and stores the state of the virtual machine.<br />
• Revert to Current Snapshot – Reapplies the stored state of a previously saved<br />
virtual machine.<br />
• Snapshot Manager – Launches the Snapshot management tool.<br />
o Rename – Allows the virtual machine to be renamed.<br />
o Remove from Inventory – Removes the virtual machine from the tree without deleting the<br />
files.<br />
o Delete – Removes the virtual machine from the tree AND deletes the file system.<br />
<br />
Right Click on the Display Client Branch Icon<br />
Add Display Client- This launches the Display Client Wizard to create and<br />
configure a new Display Client.<br />
Edit Display Client- This launches the Display Client List to allow the<br />
configuration of an existing Display Client.<br />
See Display Client List for details.<br />
<br />
Right Click on a Display Client Member Icon<br />
Modify - This launches the Display Client Configuration Wizard to allow changes<br />
to the configuration of the highlighted Display Client.<br />
108 Menu Items Automation Control Products <strong>ThinManager</strong> 4.1 Help Manual
Rename - This allows the Display Client to be renamed.<br />
Delete - This removes the Display Client from the <strong>ThinManager</strong> configuration.<br />
Terminal Services Display Client Deletion Confirmation<br />
<strong>ThinManager</strong> will prompt for confirmation before deletion.<br />
Display Client Deletion Error<br />
A Display Client cannot be deleted from a configuration if it still has terminals assigned to it.<br />
Automation Control Products <strong>ThinManager</strong> 4.1 Help Manual Menu Items 109
Right Click on the TermSecure Users Branch<br />
Add TermSecure User – This launches the TermSecure User Configuration<br />
Wizard to allow a TermSecure User to be defined.<br />
Add TermSecure User Group – This launches the TermSecure User Group<br />
Configuration Wizard to allow a TermSecure User Group to be defined.<br />
Right Click on a TermSecure Users Group Icon<br />
Add TermSecure User – This launches the TermSecure User Configuration<br />
Wizard to allow a TermSecure User to be defined.<br />
Add TermSecure User Group – This launches the TermSecure User Group<br />
Configuration Wizard to allow a TermSecure User Group to be defined.<br />
Modify - This launches the TermSecure User Group Configuration Wizard to<br />
allow changes to the configuration of the highlighted TermSecure User Group.<br />
Rename - This allows the TermSecure User Group to be renamed.<br />
Delete - This will remove the TermSecure User Group from the <strong>ThinManager</strong><br />
configuration. Members can be deleted with the group or moved out of the group,<br />
depending on the choice in the confirmation window.<br />
Delete Group confirmation Window<br />
Selecting Yes will delete the Group and all members.<br />
Selecting No will delete only the group. The members will be moved out of the group and retain their<br />
configuration as individuals.<br />
Selecting Cancel will stop the process and allow the group to remain as it is.<br />
<br />
<br />
<br />
<br />
<br />
Right Click on a TermSecure Users Icon<br />
Modify - This launches the TermSecure User Configuration Wizard to allow<br />
changes to the configuration of the highlighted TermSecure User.<br />
Rename - This allows the TermSecure User to be renamed.<br />
Delete - This removes the TermSecure User from the <strong>ThinManager</strong> configuration.<br />
Logoff User – This logs the TermSecure User out the terminal that it is currently<br />
logged into.<br />
Go to Terminal - This changes the focus of the tree to the terminal that the<br />
TermSecure User is logged into.<br />
110 Menu Items Automation Control Products <strong>ThinManager</strong> 4.1 Help Manual