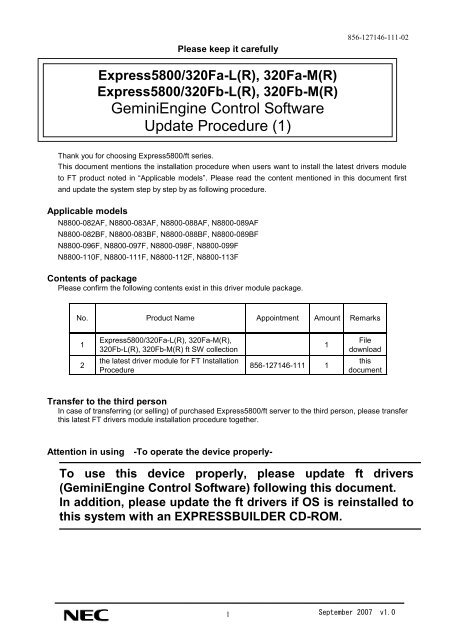
GeminiEngine Control Software Update Procedure (1)
GeminiEngine Control Software Update Procedure (1)
GeminiEngine Control Software Update Procedure (1)

You also want an ePaper? Increase the reach of your titles
YUMPU automatically turns print PDFs into web optimized ePapers that Google loves.
Please keep it carefully<br />
856-127146-111-02<br />
Express5800/320Fa-L(R), 320Fa-M(R)<br />
Express5800/320Fb-L(R), 320Fb-M(R)<br />
<strong>GeminiEngine</strong> <strong>Control</strong> <strong>Software</strong><br />
<strong>Update</strong> <strong>Procedure</strong> (1)<br />
Thank you for choosing Express5800/ft series.<br />
This document mentions the installation procedure when users want to install the latest drivers module<br />
to FT product noted in “Applicable models”. Please read the content mentioned in this document first<br />
and update the system step by step by as following procedure.<br />
Applicable models<br />
N8800-082AF, N8800-083AF, N8800-088AF, N8800-089AF<br />
N8800-082BF, N8800-083BF, N8800-088BF, N8800-089BF<br />
N8800-096F, N8800-097F, N8800-098F, N8800-099F<br />
N8800-110F, N8800-111F, N8800-112F, N8800-113F<br />
Contents of package<br />
Please confirm the following contents exist in this driver module package.<br />
No. Product Name Appointment Amount Remarks<br />
1<br />
Express5800/320Fa-L(R), 320Fa-M(R),<br />
320Fb-L(R), 320Fb-M(R) ft SW collection<br />
1<br />
File<br />
download<br />
2<br />
the latest driver module for FT Installation<br />
<strong>Procedure</strong><br />
856-127146-111 1<br />
this<br />
document<br />
Transfer to the third person<br />
In case of transferring (or selling) of purchased Express5800/ft server to the third person, please transfer<br />
this latest FT drivers module installation procedure together.<br />
Attention in using -To operate the device properly-<br />
To use this device properly, please update ft drivers<br />
(<strong>GeminiEngine</strong> <strong>Control</strong> <strong>Software</strong>) following this document.<br />
In addition, please update the ft drivers if OS is reinstalled to<br />
this system with an EXPRESSBUILDER CD-ROM.<br />
1 September 2007 v1.0
<strong>Procedure</strong> of installing the latest FT drivers<br />
856-127146-111-02<br />
It shows the procedure to install the latest ft drivers (<strong>GeminiEngine</strong> <strong>Control</strong> <strong>Software</strong>) to this<br />
system.<br />
This document is for the system which version of ft driver is 1.00.70 - 1.01.12.<br />
Starting update<br />
1. Preparing<br />
Confirm the version of BIOS(Firmware)<br />
the same<br />
not same<br />
BIOS automatic update setting, reboot, BIOS update<br />
Usually, this operation<br />
is required for only the<br />
system in which the<br />
CPU/IO module has<br />
been replaced.<br />
2. Confirm setting, information evacuation<br />
Driver update, confirm task setting (Temporary)<br />
3. <strong>Update</strong> FT driver<br />
<strong>Update</strong> FT driver (run GESWUP.BAT)<br />
Reboot (reboot the system)<br />
Confirm the FT driver (GESW) version<br />
1.01.13 or 1.01.21<br />
4. Setting restore<br />
<strong>Update</strong> the driver, restore the task setting<br />
5. Confirm system environment<br />
Review of system environment<br />
<strong>Update</strong> finished<br />
2 September 2007 v1.0
856-127146-111-02<br />
Step 1 Preparing (Confirm and update BIOS version)<br />
Confirm the BIOS version of two modules by Server Maintenance Utility. If the BIOS version of two<br />
modules are not the same, please make them same by updating BIOS in following procedure.<br />
(1) Logon to Windows 2003 by Administrator account of Built-in account.<br />
(2) If the FT status LED does not light green (not duplex), Wait for lighting in green.<br />
(3) From Start menu, choose All Programs->NEC ESMPRO Agent->Server Maintenance Utility.<br />
(4) In Server Maintenance Utility window, select CPU Module of Module#0 and Module#1, confirm<br />
each version of Firmware.<br />
Please write down the version of firmware<br />
(BIOS) on each module here.<br />
Module#0:<br />
Module#1:<br />
If the version of Module#0 and Module#1 are same, the following step is not required.<br />
(5) If the version of Module#0 and Module#1 are not same, please use the automatic BIOS update to<br />
make older BIOS version same as the new one. Please set Automatic firmware update and<br />
Automatic module start as Enable in System Configuration menu of Server Maintenance Utility.<br />
(6) Please push the module POWER switch in the module front left side (on lower position if it is a tower<br />
type) of the module of which the firmware (BIOS) version is older (the value is lower). The module is<br />
separated and the remaining module runs as a simplex system.<br />
(7) Reboot the system. When system and Windows OS reboot, in the timing of system duplex, BIOS is<br />
updated automatically. BIOS update takes about 10 minutes.<br />
Confirm the BIOS update status by Status of CPU and PCI module in Server Maintenance Utility.<br />
In addition, the status can not refresh automatically. Please execute Refresh appropriately to confirm.<br />
(8) Following Step 2) and step 3), please confirm that the versions of the firmware (BIOS) on both<br />
modules are same.<br />
3 September 2007 v1.0
856-127146-111-02<br />
Step 2 Setting confirmation, Save information<br />
2.1 Driver update, task setting confirmation<br />
(1) Confirm the setting of Task Scheduler<br />
Select Administrative Tools -> Services, confirm the status of Task Scheduler. If the service is<br />
not as following status, the updating of <strong>GeminiEngine</strong> <strong>Control</strong> <strong>Software</strong> can not be finished.<br />
Name Status Startup Type<br />
Task Scheduler Start Automatic<br />
If it is not in state mentioned above, write down the status of the service of Task Scheduler,<br />
and please change setting of Task Scheduler as above.<br />
Name Status Startup Type<br />
Task Scheduler<br />
(2) Select System Properties -> Hardware tab -> Driver Signing, check if the Driver Signing Options<br />
is set other than Block. If it is set as Block, please change it to Warn before applying this update.<br />
4 September 2007 v1.0
856-127146-111-02<br />
2.2 Confirm the FT driver (<strong>GeminiEngine</strong> <strong>Control</strong> <strong>Software</strong>) version<br />
(1) Log on to Windows Server 2003 as Administrative user.<br />
(2) Open Start -> <strong>Control</strong> Panels -> Add or Remove Programs.<br />
(3) Click Click here for support information under <strong>GeminiEngine</strong> <strong>Control</strong> <strong>Software</strong>, the version will<br />
be shown.<br />
(4) Please write down the displayed version number.<br />
Version: 1. .<br />
Cautions<br />
When HAD is not displayed on the list of installed programs, the account which logs on is not<br />
appropriate.<br />
Please be sure to log on by Administrator of built-in account, and to carry out subsequent<br />
updates, where HAD is displayed on the list of programs.<br />
When you cannot log on by built-in Administrator account, please update HAD individually after<br />
applying update of Step 3.<br />
The procedure which updates HAD individually is indicated to STEP 3.<br />
(5) The difference of the procedure by version<br />
If the version number is earlier than 1.00.70 (1.00.66 or etc.)<br />
To update LAN driver, remove the LAN duplex setting after confirming.<br />
If the version number is 1.00.70 and later (1.00.71 or 1.01.07 etc.)<br />
It is not necessary to change the setting of LAN, please go to step 3.<br />
5 September 2007 v1.0
856-127146-111-02<br />
Step 3 <strong>Update</strong> of FT server<br />
■ Be sure to follow the procedure shown in this guide.<br />
■ Logon to the system using the local account (Administrator of built-in) which is<br />
used during OS installation. When you cannot log on by built-in Administrator<br />
account, please update HAD individually after applying update. The procedure which<br />
updates HAD individually is indicated to HAD.TXT.<br />
■ Perform the update after confirming that the system is working in duplex mode and<br />
FT status LED is green.<br />
■ Confirm that unsupported devices are not connected to the USB port.<br />
Only the supported keyboard (mouse) are allowed to connect.<br />
• <strong>Procedure</strong> of <strong>Update</strong><br />
(1) Download latest FT driver to the adequate folder on the HDD.<br />
(2) Extract GE10113E.ZIP. Right-click on the GE10113E.ZIP, and select Extract all.<br />
Extraction Wizard will be displayed and extract the compressed file following the instruction<br />
of the wizard.<br />
[CD1] folder will be extracted. Copy [CD1] folder to C drive. (Other drives also can be used<br />
if C drive is not available. Be sure to place the [CD1] folder on the top directory of the d<br />
rive)<br />
(3) Select Run... from Start menu.<br />
(4) Enter C:\CD1\GESWUP.BAT to the dialog box of Open, and click OK.<br />
(C: means that the drive letter to which the [CD1] folder is copied.)<br />
Command Prompt is started it starts to update. During the update, confirmation dialog appears<br />
several times. Follow the messages on the dialog in this case.<br />
In case of updating LAN driver, the following message will be displayed. Before executing the<br />
update, be sure to confirm that the network setting parameter are wrote down and the teaming<br />
setting of LAN is removed properly.<br />
‣ Do not perform any operation using keyboard and mouse until update is completed. It takes<br />
approximately 15minutes.<br />
(5) When installation is completed, the system requires to shutdown.<br />
When complete FT driver install (update), following message will be displayed.<br />
Before clicking OK button, you must confirm that below driver files exist in the system.<br />
6 September 2007 v1.0
856-127146-111-02<br />
C:\Windows\system32\drivers<br />
Driver File name check<br />
SCSI<br />
adpu320.sys<br />
SCSI duplex control haddsm.sys<br />
HA System <strong>Control</strong>ler HasCtrl.sys<br />
HA IPMI<br />
HASIPMI.SYS<br />
MPIO<br />
mpdev.sys<br />
mpio.sys<br />
mpspfltr.sys<br />
When all of above files exist, click OK button on following dialog. The system reboots<br />
automatically.<br />
If the file of a SCSI driver does not exist, please execute the following programs from the file<br />
extracted by the above-mentioned 2.<br />
\CD1\HASSETUP\SCSI\UPDATE.VBS<br />
Then, please check existence of the above-mentioned file again.<br />
When other driver files do not exist, please perform update again in the above-mentioned 3.<br />
Please choose overwrite, although the check dialog of whether to overwrite is displayed in that<br />
case. Then, please check existence of the above-mentioned file anew.<br />
Even if it carries out the operation so far, when there is a file not existing, please inform a<br />
maintenance member, without pushing the "O.K." button.<br />
Confirm <strong>GeminiEngine</strong> SW version in following procedure.<br />
(1) Log on Windows 2003 by Administrative user<br />
(2) Open Add or Remove programs in <strong>Control</strong> panels from Start menu.<br />
(3) Version will be displayed by clicking Click here for support information in the<br />
<strong>GeminiEngine</strong> <strong>Control</strong> <strong>Software</strong>.<br />
(4) After this update, the version has been updated to 1.01.13 or 1.01.21.<br />
Version before update Version after update<br />
Less than 1.01.13 1.01.13<br />
1.01.20 1.01.21<br />
7 September 2007 v1.0
856-127146-111-02<br />
<strong>Procedure</strong> of <strong>Update</strong> HAD individually<br />
If the <strong>GeminiEngine</strong> <strong>Control</strong> <strong>Software</strong> is updated when the "HAD" program is not displayed on<br />
"Add or Remove Programs", after reboot the warning dialog of "ILLEGAL FILE" may be<br />
displayed when logged on by the user who updated.<br />
In this case, please update the HAD driver in the following procedures.<br />
If the warning dialog of "ILLEGAL FILE" is displayed, please click the "Close" button to close<br />
the dialog. Then, update the HAD driver in the following procedures.<br />
1. Expand the update file "GE10113E.ZIP". And copy "CD1" folder directly under C drive.<br />
2. Copy the following file to the folder for work according to the version before update of the<br />
<strong>GeminiEngine</strong> <strong>Control</strong> <strong>Software</strong>.<br />
- Create folder "CD1HAD" under C drive for work.<br />
- Copy the following file to the "CD1HAD" folder.<br />
Version before update File to copy<br />
1.00.xx (xx: 52 - 73) C:\CD1\HASSETUP\HAD\HASHADUS.CAB<br />
1.01.yy (yy: 03 - 12) C:\CD1\HASSETUP\HAD\HASHADUS.CAB<br />
1.01.20 C:\CD1\HASSETUP\HAD117\HASHADUS.CAB<br />
3. Open command prompt. And move to the C:\CD1HAD folder.<br />
4. Expand "HASHADUS.CAB" by the following command.<br />
> expand HASHADUS.CAB -F:* .<br />
5. Create "bin", "mof", and "esm" folder by the following commands.<br />
> mkdir bin<br />
> mkdir mof<br />
> mkdir esm<br />
6. Expand "BIN.CAB", "MOF.CAB", and "ESM.CAB" to "bin", "mof", and "esm" folder<br />
by the following commands.<br />
> expand BIN.CAB -F:* bin<br />
> expand MOF.CAB -F:* mof<br />
> expand ESM.CAB -F:* esm<br />
7. Move to "esm" folder by the following command.<br />
> cd esm<br />
8. Create "en" and "jp" folder by the following commands.<br />
> mkdir en<br />
> mkdir jp<br />
9. Expand "EN.CAB" and "JP.CAB" to "en" and "jp" folder by the following commands.<br />
> expand EN.CAB -F:* en<br />
> expand JP.CAB -F:* jp<br />
10. Move to the folder on one by the following command.<br />
> cd ..<br />
8 September 2007 v1.0
856-127146-111-02<br />
11. Run "HadSetup.bat". <strong>Update</strong> of the HAD driver starts.<br />
12. Click the "YES" button, if the "Security Alert" dialog is displayed during update.<br />
13. Log on by the user who updated and check that the "ILLEGAL FILE" dialog is not displayed,<br />
after rebooting. And remove the folder used for work after the check.<br />
<strong>Update</strong> is completion.<br />
STEP 4 Restoring the setting<br />
(1) If the version of original FT driver is less than 1.00.70, reconfigure the network setting.<br />
(2) If Task Scheduler setting is changed in 1) of step2, restore the original setting.<br />
(3) If Driver Signing is changed from System Properties in 2) of step2, restore the original setting.<br />
(4) Installation is completed. Go to STEP 5 to review the system environment.<br />
STEP 5 Confirm system environment and Notices<br />
Memory Dump<br />
In the case that the following log is outputted to Event Log (System), enable to collecting memory<br />
dump by setting the paging file size more than recommended size.<br />
Event source: ESMCommonService, Types: warning, Event ID: 2001<br />
Description:<br />
Memory dump may not be able to extract normally.<br />
The initial size of the paging file of the starting drive is set below the recommendation value.<br />
It is recommended to set the value of 1.5 times loading memory size or above.<br />
Please select Complete memory dump if the installed memory size is 2GB or less.<br />
SNMP service<br />
Confirm [service status] is [Auto Start] and [Status] is [Automatic] in SNMP Service in Service<br />
If this service is stopped, the ESMPRO Agent Alert messages which could not be sent to Manager<br />
accumulate to the system and it causes high-load status of the system.<br />
When SNMP service cannot be started, please give the SNMP report of ESMPRO/ ServerAgent as<br />
disable. Please perform a configuration of a report-function by report setup of<br />
ESMPRO/ServerAgent on a control panel.<br />
<strong>GeminiEngine</strong> Monitor Tool<br />
Application of this update will register a <strong>GeminiEngine</strong> Monitor tool into a start menu.<br />
Refer to the user's guide of Express5800/320Fb for the usage of this tool.<br />
9 September 2007 v1.0
856-127146-111-02<br />
Connection Monitoring Function (IPCHK)<br />
With this server, [Connection Monitoring Function] operates when the system is started up. This<br />
[Connection Monitoring Function] is used to avoid the following issue.<br />
"The network connection might not start session when an effective LAN cables are not connected<br />
to the IO module started first during the system starts with Intel adapter teaming existed in the<br />
system".<br />
This function monitors the connection initiation. It automatically restarts the network adapter if the<br />
connection is stopped and keeps the connection. The [Connection Monitoring Function] is provided<br />
with "IPCHK.VBS."<br />
"IPCHK.VBS" uses wscript.exe which is one of the processes relating to Microsoft Windows<br />
operating system. Therefore, "IPCHK.VBS" cannot be operated in the system where the programs<br />
associated to vbs are disabled by wscript.exe or wscript.exe itself is disabled.<br />
The command prompt screen of "IPCHK" will be left displayed when the system starts in the above<br />
environment, it is necessary to invalidate the service of ipchk by the following procedure.<br />
----Disable the "IPCHK" service----<br />
1. Open [<strong>Control</strong> Panel] -> [Administrative Tools] -> [Computer Management].<br />
2. Click [Services and Applications] -> [Services].<br />
3. In [Services] tree, right click [EXECSV] and click [stop].<br />
4. Again right click [EXECSV] and click [properties].<br />
5. Change [Startup Type] to [Disabled].<br />
6. Click [OK].<br />
In the environment where ipchk is assumed to be disabled or ipchk is not applied, the connection<br />
might not be able to start session when an effective LAN cables are not connected to the IO<br />
module started first during the system starts with Intel adapter teaming existed in the system.<br />
In this case, it must be manually disabled the virtual adapter at once and reeffective it again by the<br />
following procedure.<br />
------Disable/Enable manually the virtual adapter--------<br />
1. Right Click [<strong>Control</strong> Panel]->[Network Connections] and choose [Open].<br />
2. Right Click the Virtual adapter[Local Area Connection xx] and click [Disable].<br />
3. Right Click the Virtual adapter[Local Area Connection xx] and click [Enable].<br />
10 September 2007 v1.0


![NEC ESMPRO Manager Ver. 5 Installation Guide (Linux) [PDF]](https://img.yumpu.com/24150981/1/184x260/nec-esmpro-manager-ver-5-installation-guide-linux-pdf.jpg?quality=85)