mdp control series - Omega Engineering
mdp control series - Omega Engineering
mdp control series - Omega Engineering

You also want an ePaper? Increase the reach of your titles
YUMPU automatically turns print PDFs into web optimized ePapers that Google loves.
MDP CONTROL SERIES<br />
LT61 (0709)<br />
CONTROLS<br />
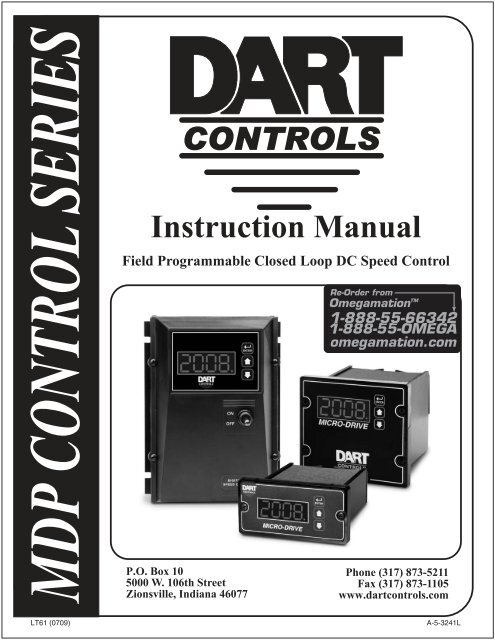
Instruction Manual<br />
Field Programmable Closed Loop DC Speed Control<br />
P.O. Box 10<br />
5000 W. 106th Street<br />
Zionsville, Indiana 46077<br />
Phone (317) 873-5211<br />
Fax (317) 873-1105<br />
www.dart<strong>control</strong>s.com<br />
A-5-3241L
Quick Jump<br />
What models and options are available?<br />
See page 3.<br />
Looking for detailed specifi cations?<br />
See page 3 & 4.<br />
Want to get started fast?<br />
See basic electrical hook-up details on page 8.<br />
See mechanical installation details on page 4 & 5.<br />
See some sample applications starting on page 24.<br />
Need Help?<br />
See troubleshooting on page 29.<br />
Warranty<br />
Dart Controls, Inc. (DCI) warrants its products to be free from defects in material and workmanship. The exclusive remedy<br />
for this warranty is DCI factory replacement of any part or parts of such product which shall within 12 months after delivery<br />
to the purchaser be returned to DCI factory with all transportation charges prepaid and which DCI determines to its satisfaction<br />
to be defective. This warranty shall not extend to defects in assembly by other than DCI or to any article which has<br />
been repaired or altered by other than DCI or to any article which DCI determines has been subjected to improper use. DCI<br />
assumes no responsibility for the design characteristics of any unit or its operation in any circuit or assembly. This warranty is<br />
in lieu of all other warranties, express or implied; all other liabilities or obligations on the part of DCI, including consequential<br />
damages, are hereby expressly excluded.<br />
NOTE: Carefully check the <strong>control</strong> for shipping damage. Report any damage to the carrier immediately. Do not attempt to<br />
operate the drive if visible damage is evident to either the circuit or to the electronic components.<br />
All information contained in this manual is intended to be correct, however information and data in this manual are subject<br />
to change without notice. DCI makes no warranty of any kind with regard to this information or data. Further, DCI is not<br />
responsible for any omissions or errors or consequential damage caused by the user of the product. DCI reserves the right<br />
to make manufacturing changes which may not be included in this manual.<br />
WARNING<br />
Improper installation or operation of this <strong>control</strong> may cause injury to personnel or <strong>control</strong> failure. The <strong>control</strong> must<br />
be installed in accordance with local, state, and national safety codes. Make certain that the power supply is disconnected<br />
before attempting to service or remove any components!!! If the power disconnect point is out of sight,<br />
lock it in disconnected position and tag to prevent unexpected application of power. Only a qualifi ed electrician or<br />
service personnel should perform any electrical troubleshooting or maintenance. At no time should circuit continuity<br />
be checked by shorting terminals with a screwdriver or other metal device.
Table of Contents<br />
Introduction ....................................................................................................................................... 2<br />
General Features .............................................................................................................................. 2<br />
Models & Options ............................................................................................................................. 3<br />
Model Table ................................................................................................................................... 3<br />
Available Options .......................................................................................................................... 3<br />
Recommended Accessories ......................................................................................................... 3<br />
Agency Approvals ......................................................................................................................... 3<br />
Specifi cations ................................................................................................................................... 3<br />
Electrical ....................................................................................................................................... 3<br />
Mechanical ................................................................................................................................... 4<br />
Environmental ............................................................................................................................... 4<br />
Dimension Chart ........................................................................................................................... 4<br />
Installation and Mechanical Dimensions ....................................................................................... 5<br />
Exploded Panel View .................................................................................................................... 5<br />
Cut-out and Mounting Dimensions ............................................................................................... 6<br />
PU-E Series Pickup Installation .................................................................................................... 7<br />
Electrical Installation & Diagrams ................................................................................................... 8<br />
P1 Terminal Block Hook-Up Diagrams .......................................................................................... 8<br />
P1 Terminal Block Descriptions .................................................................................................... 9<br />
-1 Option Wiring .......................................................................................................................... 10<br />
Basic Operating Instructions ........................................................................................................ 10<br />
Control Algorithm Discussion ..................................................................................................... 10<br />
Pulse-Accumulation Loop PI Tuning .......................................................................................... 10<br />
Master (Rate and Time) and Follower (Ratio) Modes Explained ................................................ 11<br />
Visual Reference ........................................................................................................................ 12<br />
How to Change a Parameter's Value (The Short Story) ............................................................. 12<br />
Operating the User Interface (The Long Story) .......................................................................... 12<br />
Detailed Confi guration Instructions ............................................................................................. 13<br />
Default Confi guration .................................................................................................................. 13<br />
Resetting the Unit to Factory Defaults ........................................................................................ 13<br />
JP1 (Program Enable Jumper) .................................................................................................. 13<br />
Software Parameters .................................................................................................................. 14<br />
Parameter Descriptions .............................................................................................................. 16<br />
Application Examples .................................................................................................................... 24<br />
Pump Controller with Audible and Visual Alarm ......................................................................... 24<br />
Conveyor Oven Controller with Two Preset Process Times ........................................................ 25<br />
Synchronized Conveyor Controller with Jog Switch ................................................................... 26<br />
Troubleshooting .............................................................................................................................. 29<br />
Technical Support Options .......................................................................................................... 29<br />
What's Special About www.dart<strong>control</strong>s.com? ........................................................................... 29<br />
1
Introduction<br />
The MDP <strong>series</strong> motor <strong>control</strong>s are compact, microprocessor-based units capable of being either fi eld<br />
or factory confi gured for a number of industry's motion <strong>control</strong> needs. These <strong>control</strong>s are designed<br />
around a pulse-accumulation PI algorithm. They can be easily confi gured to operate as a digital speed<br />
<strong>control</strong>ler, time-based process <strong>control</strong>ler, or a ratiometric follower <strong>control</strong>ler in master-slave systems.<br />
Utilizing Dart's new modular bus design techniques, the MDP <strong>series</strong> is ideal for volume OEM applications<br />
requiring specialized inputs and outputs. Contact Dart Controls' Sales Department for details. This<br />
fl exibility makes the MDP <strong>series</strong> ideal for applications such as:<br />
Water and Waste Treatment Systems<br />
Conveyor Oven Controllers<br />
Synchronized Conveyor Lines<br />
Its durable 1/8 and 1/4 DIN aluminum housings can be easily mounted in a panel or <strong>control</strong> cabinet.<br />
New optional pluggable terminal block allows the installer to quickly install or replace units without the<br />
hassle of physically removing and reattaching wires. The units can be ordered with either standard<br />
European-style terminal block or optional “pluggable” connector.<br />
General Features<br />
- Microprocessor-based design combines the ultimate in responsiveness and accuracy in one package<br />
- Digital closed-loop algorithm ensures long-term accuracy of +/-1/2 RPM of set speed or equiv.<br />
- Non-volatile memory stores adjustable parameters even when power has been removed<br />
- Factory or fi eld programmable via front-panel keypad<br />
- Adjustable parameters include min, max, accel, decel, display options, alarm options, etc.<br />
- Internal program-enable jumper selectively prevents tampering with unit’s confi guration<br />
- Universal power supply accepts line voltages inputs from 85-265VAC (85-250 VAC for MD3E models) @<br />
50-60Hz without switches or jumpers. The unit automatically adjusts as needed.<br />
- Transient voltage protection prolongs unit's life in harsh industrial environments<br />
- Compatible with a variety of signal input types including: Hall-Effect Pickups, Photoelectric, TTL, etc.<br />
Note: Open collector devices must be capable of sinking 3mA.<br />
- Self-contained power supply for external sensor, limited to 5V @ 50mA<br />
- Programmable alarm output with Form C contacts rated to 250VAC @ 5A<br />
- Flexible user inputs support inhibit, emergency stop, and jog functionality.<br />
- 1/8 and 1/4 DIN durable aluminum housing for panel mounting the MD10P and MD3P, respectively.<br />
- Large 4 digit, 1/2” LED display<br />
- G.E. Lexan membrane and gasket (which are included) meet NEMA 4X standards when used with<br />
NEMA 4X enclosures<br />
- European terminal block or pluggable terminal block available<br />
- Recognized, fi le #E78180 (MD10P, MD3P & MD3E)<br />
- Wide operating ambient temperature range of -10C to 45C (14F to 113F)<br />
- Multiple operating modes including:<br />
• Master, Rate Mode – Controls in rate unit such as RPM, Gallons per Second, etc.<br />
• Master, Time Mode – Controls in time unit such as HH:MM, MM:SS, SS:TT, or other unit<br />
• Follower Mode – Controls in percentage of master rate. This mode allows the MDP <strong>control</strong> to<br />
precisely follow the actions of a master process without any long-term loss of position<br />
2
Model Table<br />
Model<br />
Available Options<br />
Recommended Accessories<br />
Agency Approvals<br />
Electrical<br />
Input Voltage<br />
@ 50 - 60Hz<br />
Models & Options<br />
Output Voltage<br />
@ 120VAC<br />
(@ 240VAC)<br />
MD10P 85-265VAC 90VDC<br />
(180VDC)<br />
MD3P 85-265VAC 90VDC<br />
(180VDC)<br />
MD3E 85-250VAC 90VDC<br />
(180VDC)<br />
Specifi cations<br />
3<br />
Max. Output H.P.<br />
@ 120VAC<br />
(@240VAC)<br />
1/2<br />
1<br />
1<br />
2<br />
1<br />
2<br />
Model Description Pulses per<br />
Revolution<br />
Max Continuous<br />
Armature DC<br />
Amps<br />
5<br />
5<br />
10<br />
10<br />
10<br />
10<br />
Pickup or<br />
Encoder<br />
Required?<br />
Option Suffi x Description Example<br />
-1<br />
Expansion board which adds support for remote push button wiring<br />
via a European-style terminal block.<br />
MD10P-1, MD3P-1<br />
-P Optional pluggable European-style terminal block MD10P-P, MD3P-1-P<br />
-9 Blank Lexan MD10P-9<br />
OPT3 Sine wave to square wave converter for magnetic pickup Ordered Separately<br />
Yes<br />
Yes<br />
Yes<br />
RPM Range When Used With<br />
MD10P & MD3P<br />
PU-2E Hall-Effect Pickup, Single Channel 1 1.0 – 50,000 RPM<br />
PU-4E Hall-Effect Pickup, Single Channel 2 0.5 – 25,000 RPM<br />
PU-20E Hall-Effect Pickup, Single Channel 10 0.1 – 5,000 RPM<br />
PU-40E Hall-Effect Pickup, Single Channel 20 0.05 – 2,500 RPM<br />
Recognized Component MD10P, MD3P ........................................................................................... E78180<br />
MD3E ....................................................................................................................................................34M5<br />
NEMA 4X ....................................................................................................................................MD10P / MD3P / MD3E<br />
Line Input Voltage .................................................... Any Voltage from 85-265 VAC (85-250 VAC for MD3E models)<br />
Line Input Frequency ...................................................................................................... Any Freq. from 48-62 Hertz<br />
Signal Input Voltage Range ..................................................................................0-5VDC to 0-24VDC square wave<br />
Signal Input Frequency Range ....................................................................................0 – 50,000 Pulses per Minute<br />
(Higher frequencies are possible when using internal frequency divisor / prescaler)<br />
Display Range ....................................................................................................................................0.001 – 99,990<br />
Units of Operation ..................................................................................................... User Programmable, any Unit<br />
Sensor / Pickup Power Supply ............................................................................................................... 5V @ 50mA<br />
Isolated Alarm Relay Output Ratings ..................................................................................................250VAC @ 5A<br />
Average Armature Output Voltage ................................................. Line Input Voltage Dependent (See model table)<br />
Design Overload Capacity .............................................................................................................200% for 1 minute
Mechanical<br />
Display Type .................................................................................................................LED, Red, 4 Digit, ½” Height<br />
Housing Type MD10P & MD3P (with supplied gasket) ...............................................................................NEMA 4X<br />
MD3E .......................................................................................................................................................... NEMA 4<br />
Connector Style (pluggable connector optional) ................................................... 12-position 5mm European Style<br />
Terminal Block Torque Setting ................................................................................................4.4 in. lb. Max or .5Nm<br />
Faceplate Material ......................................................................................... Polycarbonate with GE Lexan Overlay<br />
Housing Material ........................................................................................................................................Aluminum<br />
Length MD10P & MD3P(Required Panel Depth) ......................................................................... 4.625”, 117.48mm<br />
Faceplate Width ........................................................................................................................... 4.539”, 115.29mm<br />
Weight MD10P ............................................................................................................. 0.8425 lb, 13.48 oz, 382.14g<br />
MD3P ................................................................................................................... 1.52 lb, 24.32 oz, 689.44g<br />
MD3E ................................................................................................................... 1.64 lb, 26.24 oz, 743.88g<br />
Environmental<br />
Operating Temperature Range ----------------------------------------------------------------------------- -10C to 45C (15F to 115F)<br />
Operating Humidity Range ----------------------------------------------------------------------------------------- 95%, non-condensing<br />
Dimension Chart<br />
Model Width Height Depth<br />
MD10P English (inches)<br />
Housing 3.62 1.66 4.625<br />
Lens 4.539 2.289 0.375<br />
MD10P Metric (millimeters)<br />
Housing 91.94 42.16 117.27<br />
Lens 115.28 58.14 9.53<br />
MD3P English (inches)<br />
Housing 3.60 3.497 4.625<br />
Lens 4.539 4.179 0.375<br />
MD3P Metric (millimeters)<br />
Housing 91.44 88.82 117.27<br />
Lens 115.28 106.15 9.53<br />
MD3E English (inches)<br />
Assembly 5.53 7.40 3.90<br />
MD3E Metric (millimeters)<br />
Assembly 140.46 187.96 99.06<br />
4
Installation and Mechanical Dimensions<br />
Exploded Panel View<br />
CUSTOMER<br />
MOUNTING PANEL<br />
(HOLE CUT-OUT FOR CONTROL<br />
HOUSING APPROXIMATELY<br />
3.622" WIDE BY 1.770" HIGH)<br />
SUPPLIED WITH EACH CONTROL:<br />
1) GASKET<br />
2) (2) 6-32 X 3/4 PANHEAD BLACK OXIDE STAINLESS SCREWS<br />
3) (2) #6 NUT WITH LOCKWASHER<br />
CUSTOMER<br />
MOUNTING PANEL<br />
(HOLE CUT-OUT FOR CONTROL<br />
HOUSING APPROXIMATELY<br />
3.622" WIDE BY 3.622" HIGH)<br />
SUPPLIED WITH EACH CONTROL:<br />
1) GASKET<br />
2) (4) 6-32 X 3/4 PANHEAD BLACK OXIDE STAINLESS SCREWS<br />
3) (4) #6 NUT WITH LOCKWASHER<br />
5<br />
PANEL MOUNTING GASKET<br />
(WITH THE ADHESIVE SIDE OF<br />
GASKET FACING THE CUSTOMER<br />
MOUNTING PANEL)<br />
MD10P<br />
CONTROL<br />
PANEL MOUNTING GASKET<br />
(WITH THE ADHESIVE SIDE OF<br />
GASKET FACING THE CUSTOMER<br />
MOUNTING PANEL)<br />
MD3P<br />
CONTROL
Cut-out and Mounting Dimensions<br />
MD10P and MD3P Dimensions<br />
2.289"<br />
CONTROLS Page<br />
Ite<br />
Valu Val<br />
m<br />
4.000"<br />
Tach<br />
MICRO-DRIVE<br />
MICRO-DRIVE<br />
CONTROLS<br />
5.000"<br />
4.625"<br />
ENTER<br />
ENTER<br />
.140" x 2<br />
.140" x 4<br />
1.656"<br />
6<br />
4.179"<br />
4.000"<br />
3.622"<br />
MD10P<br />
HOUSING DEPTH<br />
4.625"<br />
PANEL CUT-OUT<br />
3.622<br />
MD3P<br />
HOUSING DEPTH<br />
4.625"<br />
PANEL CUT-OUT<br />
5.000"<br />
4.625"<br />
0.885"<br />
1.770"<br />
0.811"<br />
3.622"<br />
2.000"<br />
1.928"
MD3E Mounting and Dimensions<br />
PU-E Series Pickup Installation<br />
The PU-E <strong>series</strong> pickup is an economical way to monitor motor speed. Its patented design provides for<br />
ease of installation in otherwise diffi cult to reach areas. The PU-E operates from a +5V power supply,<br />
producing a 5 volt square wave whose frequency is proportional to speed. This signal is fed into the<br />
MDP <strong>control</strong> as a speed or position reference for the microprocessor.<br />
dust<br />
cover<br />
10-32<br />
screw<br />
7.400<br />
magnet<br />
disc<br />
flat<br />
washer<br />
black wire<br />
common<br />
PU-E<br />
bearing<br />
white wire<br />
signal<br />
Page<br />
3/16"<br />
spacer<br />
red wire<br />
+5 volts<br />
5.530<br />
Item Valu<br />
CONTROLS<br />
5.125 TYP.<br />
tapped<br />
motor<br />
shaft<br />
CAUTION:<br />
DO NOT OVER TIGHTEN MOUNTING SCREW !!<br />
No other mounting screws are necessary, as the cord<br />
will keep the unit from rotating.<br />
7<br />
Tach<br />
ON<br />
OFF<br />
ENTER<br />
7/32" TYP.<br />
(4 SLOTS)<br />
.350 DEEP<br />
5.500<br />
.750<br />
Model<br />
Number<br />
PU-2E<br />
PU-4E<br />
PU-20E<br />
PU-40E<br />
Pulses per<br />
Revolution<br />
1<br />
2<br />
10<br />
20<br />
Dimensions<br />
1.60 .875<br />
72.00<br />
2.40
Caution: The PU-E cord should not be grouped with other wires or cords. For applications with PU-E<br />
wire over 6 feet long, or noisy environments, a shielded cable is recommended. Connect the shield to<br />
the common terminal on the MDP, leaving the shield on the PU-E end fl oating.<br />
Electrical Installation & Diagrams<br />
P1 Terminal Block Hook-Up Diagrams<br />
MDP<br />
MASTER<br />
MDP<br />
FOLLOWER<br />
P1-1<br />
P1-2<br />
N<br />
L<br />
FUSE<br />
MD10P = 7.5 Amp*<br />
MD3P = 15 Amp*<br />
AC INPUT<br />
}85-265VAC<br />
AC INPUT<br />
P1-3<br />
-A<br />
-ARM<br />
P1-4<br />
+A<br />
+ARM<br />
MOTOR<br />
P1-5<br />
COM<br />
COMMON black<br />
P1-6<br />
+5V<br />
+5VDC red<br />
P1-7<br />
S1<br />
SIGNAL white<br />
P1-8<br />
S2<br />
**Jog Input<br />
P1-9<br />
P1-10<br />
P1-11<br />
NO<br />
C<br />
NC<br />
Alarm Output - Normally Open<br />
Alarm Output - Common<br />
Form C<br />
Relay Output<br />
Alarm Output - Normally Closed}<br />
(Programmable)<br />
P1-12<br />
IN1<br />
User Input 1<br />
**INHIBIT<br />
COM (P1-5)<br />
black<br />
* For AC inputs utilizing two hot lines, both inputs should be<br />
protected with appropriately sized fuses or circuit breakers.<br />
** P1-8 & P1-12 user input may be programmed<br />
for a number of functions. Including (jog, inhibit, etc.)<br />
white<br />
P1-1<br />
P1-2<br />
P1-3<br />
P1-4<br />
P1-5<br />
P1-6<br />
P1-7<br />
P1-8<br />
P1-9<br />
P1-10<br />
P1-11<br />
P1-12<br />
N<br />
L<br />
FUSE<br />
MD10P = 7.5 Amp*<br />
MD3P = 15 Amp*<br />
AC INPUT<br />
}85-265VAC<br />
AC INPUT<br />
-A<br />
-ARM<br />
+A<br />
+ARM<br />
MOTOR<br />
COM<br />
COMMON<br />
black<br />
+5V<br />
+5VDC<br />
red<br />
S1<br />
SIGNAL 1<br />
white<br />
S2<br />
SIGNAL 2<br />
NO Alarm Output - Normally Open<br />
C Alarm Output - Common<br />
Form C<br />
Relay Output<br />
NC Alarm Output - Normally Closed}<br />
(Programmable)<br />
IN1<br />
User Input 1<br />
**INHIBIT<br />
COM (P1-5)<br />
* For AC inputs utilizing two hot lines, both inputs should be<br />
protected with appropriately sized fuses or circuit breakers.<br />
** P1-8 & P1-12 user input may be programmed<br />
for a number of functions. Including (jog, inhibit, etc.)<br />
8<br />
PICK-UP MOUNTED<br />
TO MOTOR SHAFT<br />
(Mounts on rotating<br />
end shaft with 10-32<br />
tapped hole, 1/2" deep)<br />
FOLLOWER PICK-UP<br />
MOUNTED TO<br />
MOTOR SHAFT<br />
(Mounts on rotating<br />
end shaft with 10-32<br />
tapped hole, 1/2" deep)
MD3E<br />
P1-1<br />
P1-2<br />
P1-3<br />
P1-4<br />
P1-5<br />
P1-6<br />
P1-7<br />
P1-8<br />
P1-9<br />
P1-10<br />
P1-11<br />
P1-12<br />
N<br />
L<br />
-A<br />
+A<br />
COM<br />
+5V<br />
S1<br />
S2<br />
NO<br />
C<br />
NC<br />
IN1<br />
-ARM<br />
+ARM<br />
COMMON<br />
+5VDC<br />
SIGNAL<br />
*Jog Input<br />
Ground Lug<br />
P1 Terminal Block Descriptions<br />
P1-1 (AC / N) – For single phase AC lines connect the Neutral side of your AC line to this terminal.<br />
For systems with two hot AC lines, connect either of the Hot AC lines to this terminal.<br />
P1-2 (AC / L) – For single phase AC lines connect the Hot side of your AC line to this terminal. For<br />
systems with two hot AC lines, connect either of the Hot AC lines to this terminal.<br />
P1-3 (-A) - This is the -Armature terminal. For normal rotation of your motor you should connect<br />
the -Armature lead of your motor to this terminal. The +Armature lead of your motor will be<br />
connected here when a reverse directional rotation of the armature is desired.<br />
P1-4 (+A) - This is the +Armature terminal. For normal rotation of your motor you should connect<br />
the +Armature lead of your motor to this terminal. The -Armature lead of your motor will be<br />
connected here when a reverse directional rotation of the armature is desired.<br />
P1-5 (COM) – This is the common point for the <strong>control</strong> logic. The speed sensor common lead as<br />
well as any other source needing to reference the <strong>control</strong> common will be connected to this<br />
terminal.<br />
P1-6 (+5V) – This is a self-contained +5VDC power supply capable of up to 50mA. The speed sensor<br />
supply lead can be connected to this terminal for its power source.<br />
P1-7 (S1) – This is the signal input terminal for the motor's digital pickup or encoder.<br />
P1-8 (S2) – This input can be programmed to perform a number of advanced functions. In Follower<br />
Mode, this input is the signal input terminal for the master's digital pickup or encoder. In Master<br />
modes (Rate and Time), this input can be confi gured to function as an emergency stop, inhibit,<br />
or jog command.<br />
P1-9 (NO) – This is the normally-open contact of the user assignable relay output.<br />
P1-10 (C) – This is the common contact of the user assignable relay.<br />
P1-11 (NC) – This is the normally-closed contact of the user assignable relay output.<br />
P1-12 (IN1) – This input can be programmed to perform a number of advanced functions. It can be<br />
confi gured to function as an emergency stop, inhibit, or jog command.<br />
9<br />
AC INPUT<br />
AC INPUT}<br />
85-265VAC<br />
black<br />
red<br />
white<br />
MOTOR<br />
Alarm Output - Normally Open<br />
Alarm Output - Common<br />
Alarm Output - Normally Closed<br />
User Input 1<br />
*INHIBIT<br />
COM (P1-5)<br />
Form C<br />
Relay Output } (Programmable)<br />
* P1-8 & P1-12 user input may be programmed<br />
for a number of functions. Including (jog, inhibit, etc.)<br />
PICK-UP MOUNTED<br />
TO MOTOR SHAFT<br />
(Mounts on rotating<br />
end shaft with 10-32<br />
tapped hole, 1/2" deep)
-1 Option Wiring<br />
The -1 option board is a module which allows external up and down push buttons to be wired to the<br />
unit. These buttons operate exactly like the Up and Down buttons on the user interface. This module<br />
is commonly used to allow PLCs or hand-held pendants to operate the front-panel remotely. Wire for<br />
the external buttons are attached via a 3mm European terminal block on the -1 option board. The<br />
buttons are activated by shorting the terminal labeled Com to either the Up or Down terminal.<br />
MICROPROCESSOR<br />
SERIES PC BOARD<br />
-1 OPTION<br />
BOARD<br />
Basic Operating Instructions<br />
Control Algorithm Discussion<br />
-3 -2 -1<br />
COMMON UP<br />
DOWN<br />
The MDP <strong>series</strong> <strong>control</strong>s are based on a pulse-accumulation algorithm. The advantage to this type of<br />
algorithm is that it allows the <strong>control</strong> to follow a master process with exceptional long-term accuracy.<br />
The MD10P and MD3P <strong>control</strong>s have three parameters which allow the user to adjust how aggressively<br />
the units drive the motor to achieve the target speed. These 3 parameters are as follows:<br />
P Gain - This is the proportional gain for the <strong>control</strong> loop. In pure pulse-accumulation algorithms, there<br />
is no loop error to base a 'P' factor on; therefore, these units must estimate error based on several<br />
<strong>control</strong> loop factors. Those who are familiar with PID <strong>control</strong> tuning should be aware that the MD10P<br />
and MD3P <strong>control</strong>'s P Gain is somewhat different than that of standard velocity-form PID algorithms.<br />
The P Gain is a function of instantaneous error, a measure of the difference between the target (desired)<br />
speed and the current speed of the motor.<br />
I Gain -This is the integral gain for the <strong>control</strong> loop. The I Gain is a function of accumulated error, a<br />
measure of the difference between the target (desired) speed and the current speed of the motor.<br />
Pulse Accumulation Limit - This parameter allows the user to limit the maximum number of pulses<br />
the drive will accumulate prior to intentionally losing count and therefore long-term accuracy. See the<br />
details for parameter 29 in the Parameter Description section.<br />
Pulse-Accumulation Loop PI Tuning<br />
Many applications do not require tuning of the P and I Gain parameters beyond the supplied factory<br />
default settings. If more responsiveness is desired or if the motor oscillates an unacceptable amount when<br />
changing speeds, it may be necessary to adjust the P and I gains to obtain optimal performance.<br />
Increasing the P and/or I gains will cause the <strong>control</strong> to drive the motor more aggressively. Decreasing<br />
the P and/or I gains will cause the <strong>control</strong> to perform more sluggishly. Properly tuning the P and I<br />
gains encompasses more than independently adjusting the P and I. The ratio between the two is<br />
very important as well. Although initial tuning can be a time-consuming task, here is a basic outline<br />
of how to proceed:<br />
10<br />
REMOTE SWITCHING<br />
DOWN UP
Test Procedure: Adjust the target (displayed) speed as expected during normal operation, including<br />
testing inhibit and jog transitions if applicable.<br />
Tuning Method:<br />
Step 1 - Connect <strong>control</strong> to loaded motor with application's anticipated load for realistic<br />
tuning<br />
Step 2 - Perform test procedure<br />
Step 3 - If <strong>control</strong> performs adequately, stop tuning and record settings<br />
Step 4 - If <strong>control</strong> is too sluggish or takes too long to reach the target speed, then try<br />
increasing I Gain slightly (add 250). Perform the test procedure again. Continue<br />
increasing I Gain until motor starts to slightly oscillate or become unstable. At this<br />
point, decrease the I Gain by 250.<br />
Step 5 - If <strong>control</strong> is too aggressive or is causing the motor to oscillate or become unstable,<br />
then try decreasing I Gain slightly (subtract 250). Perform the test procedure again.<br />
Continue decreasing I Gain until motor starts to stabilize and regulate more accurately.<br />
Step 6 - Once I is set, adjust P Gain and perform test procedure. In this <strong>control</strong>, additional P<br />
Gain may or may not improve response or stability. Experimentation will be required.<br />
Accel and decel settings have a small impact on PI tuning as well. Specifi cally, when accel and decel<br />
settings are extremely fast, they can cause the <strong>control</strong> loop to perform more sluggishly. Another thing<br />
to keep in mind is that PI tuning also affects accel and decel times. For instance, a sluggishly tuned PI<br />
<strong>control</strong> loop may take longer than the programmed accel and decel times to reach the target; whereas,<br />
an aggressively tuned PI <strong>control</strong> loop will reach the target faster.<br />
Master (Rate and Time) and Follower (Ratio) Modes Explained<br />
The MDP <strong>control</strong>s have two basic modes of operation, master and follower. In the Master modes, the<br />
<strong>control</strong>s are capable of operating independently; whereas, in the Follower Mode, the <strong>control</strong> requires a<br />
signal from a master to operate. The Follower Mode is used in applications which require the MDP to<br />
closely follow a master process. For example, if a factory has ten conveyors which must be synchronized<br />
over long periods of time, an industrial engineer could use one MDP as a master <strong>control</strong> for the fi rst<br />
conveyor and nine MDPs as slaves or followers which would receive their speed commands from the<br />
fi rst conveyor's master <strong>control</strong> or pickup.<br />
In Master Rate Mode, the MDP <strong>control</strong>s the rate of the motor by tracking the motor's pickup pulses<br />
which are applied to signal input 1 (S1). In this mode, the display indicates in rate units such as<br />
Gallons-per-minute, feet-per-second, and RPM.<br />
In Master Time Mode, the MDP <strong>control</strong>s the process time by tracking the motor's pickup pulses which<br />
are applied to signal input 1 (S1). In this mode, the display indicates in time units such as HH:MM or<br />
MM:SS, where HH is hours, MM is minutes, and SS is seconds. This mode is most-commonly used<br />
in time-sensitive processes such as conveyor ovens and plating applications.<br />
In Follower Mode, the MDP tracks the number of pulses which are applied to the master signal input<br />
(S2). From these pulses, it calculates the rate of the master process. This rate is then multiplied by<br />
the percentage which is displayed on the user interface. The display is in 0.1% of master units. For<br />
example, 675 = 67.5 percent of master speed. A master running at 1350 RPM, would cause the<br />
follower to run its motor at 67.5% * 1350 RPM or 911.25 RPM. Typical follower applications include<br />
synchronized rotation, synchronized conveyors, and some web-material processes.<br />
11
Display Window<br />
Display Window<br />
Visual Reference<br />
CONTROLS<br />
Page<br />
Ite<br />
m<br />
Valu<br />
Tach<br />
MICRO-DRIVE<br />
MICRO-DRIVE<br />
CONTROLS<br />
ENTER<br />
ENTER<br />
ENTER (Select) Button<br />
Up & Down Buttons<br />
ENTER (Select) Button<br />
Up & Down Buttons<br />
How to Change a Parameter's Value (The Short Story)<br />
1. Hold down the Enter button until Parameter-Selection Mode is entered<br />
2. Using the Up and Down buttons, select the desired parameter number to view or edit<br />
3. Press the Enter button to change the value of the parameter<br />
4. Using the Up and Down buttons, change the parameter's value as desired<br />
5. Press the Enter button to permanently save the changes (Return to Parameter-Selection Mode)<br />
6. Select parameter zero and press the Enter button to return to Running Mode<br />
Operating the User Interface (The Long Story)<br />
Although the MDP user interface is very versatile, it is also simple to setup and operate. With just<br />
a few button presses, it allows the user to confi gure a number of adjustable parameters. The LED<br />
display has three basic operating modes: Running Mode, Parameter-Selection Mode, and Value Mode.<br />
Each of the three modes have specifi c visual indicators that allow the user to immediately determine<br />
the current state or mode of the user interface. Parameter-Selection Mode and Value Mode can<br />
only be entered if the Program Enable jumper is in the “On” position.<br />
Running Mode is the default display of the unit when power is applied. The MDP will spend the majority<br />
of its time in this mode. In Running Mode, the display shows the target value in the appropriate userdefi<br />
ned format of rate, time, or percentage. The <strong>control</strong> will continuously attempt to drive the motor at<br />
the requested target rate. In this display mode, the Up and Down buttons increase or decrease the<br />
displayed target value until either the display minimum or display maximum limit is reached. Depending<br />
on the alarm confi guration, these buttons may also serve as an alarm-silence or alarm-reset button.<br />
Example displays for rate, time, and follower operating modes are 13.60, 45:30, and 1000.<br />
12<br />
Display Window<br />
Page<br />
ENTER (Select) Button<br />
Item Valu<br />
CONTROLS<br />
Tach<br />
ENTER<br />
Up & Down Buttons
Parameter-Selection Mode can be entered by simply pressing and holding the Enter button down for<br />
three seconds. Once in Parameter-Selection Mode, the far left of the display will be a ‘P’. The right side<br />
of the display will indicate the currently selected parameter number for editing purposes. Pressing the<br />
Up or Down button will increase or decrease the selected parameter number on the display. Although<br />
the parameter numbers are in numerical order, some numbers are skipped. These numbers represent<br />
reserved parameters that are not yet implemented and are not displayed. Once the desired parameter<br />
number is displayed, a press of the Enter button will change the display to the Value Mode. When<br />
in Parameter-Selection Mode, pressing the Enter button with parameter 0 selected will cause<br />
the unit to return to Running Mode. Example displays for Parameter-Selection Mode are P 1, P<br />
13, and P 54. See the Software Parameters for a list of available parameters.<br />
Value Mode is used to modify the value of the selected parameter. When in Value Mode, the two<br />
dots which form the colon, between digits two and three, will alternately fl ash (one, then the other) to<br />
inform the user that a parameter’s value is being edited. Pressing the Up or Down button increases or<br />
decreases the selected parameter’s value. See the Software Parameters for a list of allowable values<br />
and ranges. Value changes take effect immediately. For example, when scrolling through the alarm<br />
output conditions, the relay will activate as the always-active selection is passed. Once the desired<br />
value is showing in the display window, pressing the Enter button again will return to Parameter-<br />
Selection Mode. The new value is not saved in permanent memory until the Enter button is pressed.<br />
Removing power from the unit while in Value Mode may result in the specifi ed new value being lost.<br />
Detailed Confi guration Instructions<br />
Default Confi guration<br />
When shipped from the factory, the following basic settings are in place:<br />
Rate Mode Operation in RPM<br />
S1 and S2 Signal Input Pulses per Revolution: 1<br />
Decimal Point Display: Off<br />
Display Range: 0 - 2400<br />
Speed Range: 0 - 2400 RPM<br />
Accel and Decel: 2500 RPM per second<br />
Signal Input 2 (S2) Mode: Jog @ 1000 RPM when Low<br />
User Input 1 (UIN1) Mode: Emergency Stop when Low<br />
Alarm Output: Disabled<br />
Resetting the Unit to Factory Defaults<br />
The factory-default settings can be easily restored using either of two methods. Both methods require<br />
the Program Enable jumper to be in the “On” position. The fi rst is to apply power to the unit with both<br />
the Enter and Down buttons pressed for 3 seconds. The second is to change the value of parameter<br />
95 to 5.<br />
JP1 (Program Enable Jumper)<br />
The JP1 jumper is located under the dust cover on the back end of the upper board. When the jumper<br />
is set to the "Off" position, all programming features are locked out to the front panel user. When the<br />
jumper is in the "On" position, the programming parameters are open to change. JP1 is shipped from<br />
the factory set in the "On" position.<br />
13
Software Parameters<br />
Value Range<br />
Factory<br />
Parameter Description<br />
(units)<br />
Default<br />
0 Selecting this item exits to Running Mode n/a n/a<br />
Read-Only Parameters<br />
1 Model Number 10 – MD10P Unit<br />
11 – MD3P Unit<br />
13 – MD3E Unit<br />
14<br />
10, 11, or<br />
13<br />
2 Software Build 1 – 9999 n/a<br />
3 Hardware Version 1 – 9999 n/a<br />
4 Serial Number – Major (reserved) n/a n/a<br />
5 Serial Number – Minor (reserved) n/a n/a<br />
10<br />
General Setup<br />
Operating Mode 1 – Rate Mode<br />
2 – Time Mode<br />
3 – Follower Mode<br />
1<br />
11 Display Intensity 0 – 31 (Dim – Bright) 20<br />
13 Decimal Point Position 0 – DP Disabled (XXXX)<br />
1 – X.XXX<br />
2 – XX.XX<br />
3 – XXX.X<br />
4 – XXXX.<br />
0<br />
14 Keypad Mode 1 – Linear, Constant Rate<br />
2 – Non-linear, Accelerating Rate<br />
2<br />
15 Keypad Scroll Delay 0 – 30 (Fast – Slow) 10<br />
16 S1 / S2 Input Edge & Prescaler Configuration 0 – S1 is Rising/1 S2 is Rising/1 0<br />
1 – S1 is Falling/1 S2 is Rising/1<br />
2 – S1 is Falling/4 S2 is Rising/1<br />
3 – S1 is Falling/16 S2 is Rising/1<br />
4 – S1 is Rising/1 S2 is Falling/1<br />
5 – S1 is Falling/1 S2 is Falling/1<br />
6 – S1 is Falling/4 S2 is Falling/1<br />
7 – S1 is Falling/16 S2 is Falling/1<br />
8 – S1 is Rising/1 S2 is Falling/4<br />
9 – S1 is Falling/1 S2 is Falling/4<br />
10 – S1 is Falling/4 S2 is Falling/4<br />
11 – S1 is Falling/16 S2 is Falling/4<br />
12 – S1 is Rising/1 S2 is Falling/16<br />
18 Power-up Mode<br />
13 – S1 is Falling/1 S2 is Falling/16<br />
14 – S1 is Falling/4 S2 is Falling/16<br />
15 – S1 is Falling/16 S2 is Falling/16<br />
1 – Default to Zero Display<br />
2 – Default to Power-up Value<br />
3 – Default to Previous Running Val.<br />
3<br />
19 Power-up Value 0 – 9999 (Display Units) 0<br />
Display & Control Loop Setup<br />
20 Display Minimum 0 – 9998 (Display Units) 0<br />
21 Display Maximum 1 – 9999 (Display Units) 2400<br />
23 Accel Setting 1 – 9999 (Display Units) 2500<br />
24 Decel Setting 1 – 9999 (Display Units) 2500<br />
26 Proportional Gain 0 – 9999 (Not Unit-specific) 0<br />
27 Integral Gain 1 – 9999 (Not Unit-specific) 5000<br />
29 Pulse Accumulation Limit 2 – 5000 (Not Unit-specific) 15<br />
Signal Input #1 (S1) Setup<br />
30 S1 Display Reference 0 – 9999 (Display Units) 2400<br />
31 S1 Reference RPM 0 – 9999 (RPM) 2400<br />
32 S1 Pulses per Revolution 1 – 2048 (PPR) 1<br />
33 S1 Deadband (Follower Mode Only) 0 – 1000 (Seconds) 0<br />
User<br />
Settings
Software Parameters, cont'd<br />
Parameter<br />
Description<br />
Signal Input #2 (S2) Setup<br />
Value Range<br />
(units)<br />
35 S2 Input Configuration 1 – Disabled (Follower Mode)<br />
2 – E-Stop When S2 High<br />
3 – E-Stop When S2 Low<br />
4 – Inhibit When S2 High<br />
5 – Inhibit When S2 Low<br />
6 – Jog When S2 High<br />
7 – Jog When S2 Low<br />
15<br />
Factory<br />
Default<br />
36 S2 Setpoint 1 – 9999 (Display Units) 1000<br />
37 S2 Pulses per Revolution 1 – 2048 (PPR) 1<br />
38 Front Panel DoubleClick Mode<br />
User Input #1 (UIN1) Setup<br />
0 – Hardware Inhibit<br />
1 – DoubleClick Toggles Inhibit<br />
0<br />
40 UIN1 Input Configuration 1 – Disabled<br />
2 – E-Stop When UIN1 High<br />
3 – E-Stop When UIN1 Low<br />
4 – Inhibit When UIN1 High<br />
5 – Inhibit When UIN1 Low<br />
6 – Jog When UIN1 High<br />
7 – Jog When UIN1 Low<br />
3<br />
41 UIN1 Setpoint for Jog 1 – 9999 (Display Units) 1000<br />
50<br />
Alarm Output #1 Configuration<br />
Alarm Activation Conditions 0 – Always Off<br />
1 – Always On<br />
2 – Active when Above upper limit<br />
3 – Active when Below lower limit<br />
4 – Active inside Range<br />
5 – Active outside Range<br />
6 – Active when Target = 0<br />
7 – Active when no Pickup Pulses<br />
detected<br />
8 – Active when at Max. Conduction<br />
0<br />
51 Output Style & Reset Mode 1 – Constant & Auto Reset<br />
2 – Constant & Manual Reset<br />
3 – Pulsed & Auto Reset<br />
4 – Pulsed & Manual Reset<br />
1<br />
52 Reset Configuration 1 – No Sil., Reset on Key<br />
2 – No Sil., Reset on S2 High<br />
3 – No Sil., Reset on S2 Low<br />
4 – Sil., Reset on Key<br />
5 – Sil., Reset on S2 High<br />
6 – Sil., Reset on S2 Low<br />
1<br />
53 Display Flash On Active Alarm 0 – Alarm Flash Disabled<br />
1 – Alarm Flash Enabled<br />
0<br />
54 Pulse on Time 1 – 3600 (seconds) 1<br />
55 Pulse off Time 1 – 3600 (seconds) 1<br />
56 Pulse Count 0 – 9999 (pulses) 0<br />
57 Lower Limit 0 – 9999 (display units) 0<br />
58 Upper Limit 0 – 9999 (display units) 9999<br />
Parameter Memory Commands<br />
95 Restore Settings to Factory<br />
Default<br />
0 – Do Nothing & Exit<br />
5 – Restore Factory Defaults<br />
98 Save to User Default Area 0 – Do Nothing & Exit<br />
5 – Save Setting<br />
99 Restore from User Default Area 0 – Do Nothing & Exit<br />
1 – Restore Settings<br />
7<br />
0<br />
0<br />
0<br />
User<br />
Settings
Parameter Descriptions<br />
Parameter 0 – Exit to Running Mode<br />
When parameter 0 is selected in Parameter-Selection Mode, the unit will return to Running<br />
Mode and display the running value. This should be selected once changes to parameters are<br />
completed.<br />
Parameter 1 – Model Number (Read Only)<br />
This is a number which represents the base model number for the product. The model codes<br />
for the MD10P ,MD3P, and MD3E are 10 ,11, and 13 respectively.<br />
Parameter 2 – Software Build (Read Only)<br />
The software build is a code which identifi es the software version of the unit.<br />
Parameter 3 – Hardware Version (Read Only)<br />
The hardware version is a code which identifi es which hardware was used to build the unit.<br />
Parameter 4 & 5 – Serial Number, Major & Minor (Read Only)<br />
These parameters are reserved for future use as an electronic serial number and are unique<br />
to each manufactured unit.<br />
Parameter 10 – Operating Mode<br />
This parameter defi nes the operating mode for the entire unit. There are two basic modes of<br />
operation, master and follower. In master modes, the unit <strong>control</strong>s the load using either rate<br />
or time units. In follower mode, the unit <strong>control</strong>s the load in percentage of master rate. The<br />
following modes are available for the MDP:<br />
Mode 1 – Master, Rate Mode<br />
In Rate Mode, the MDP displays in user-defi ned rate units such as RPM, Gallons per<br />
Hour, or Feet per Second. See applications for examples.<br />
Mode 2 – Master, Time Mode<br />
In Time Mode, the MDP displays in time units using the format AA:BB. By default AA:BB<br />
represents minutes (AA) and seconds (BB). Optionally, it can be confi gured to represent<br />
hours (AA) and minutes (BB) or other user-defi ned units with a 1:60 relationship. When<br />
setting parameters which are confi gured in display units, the programmed value is the<br />
determined by the formula (AA * 60) + BB. In HH:MM displays, this is the total number<br />
of minutes. In MM:SS displays, this is the total number of seconds. See applications<br />
for examples.<br />
Mode 3 – Follower Mode<br />
In Follower Mode, the MDP displays in percentage units, where 1000 equals 100.0 percent<br />
of the master rate. For example, if the display indicates 985, 98.5, or 9.85, the MDP will<br />
attempt to run at exactly 98.5 percent of the master rate. Display settings are always<br />
entered ignoring the decimal point's position. See applications for more examples.<br />
Parameter 11 – Display Intensity<br />
This parameter adjusts the intensity of the LED display digits in the front panel of the unit. The<br />
values of 0 – 31 correspond to a gradual change from very dim to very bright. This is often useful<br />
when the MDP is used in the same panel as other pieces of equipment with LED displays and<br />
a uniform display brightness is desired. Simply adjust the MDP to match its surroundings.<br />
Parameter 13 – Decimal Point (DP) Position<br />
This selects the format of the display with respect to the decimal point’s position. This parameter<br />
does not effect the value entry for other parameters. For example, if the user desires to display<br />
10.00 at 300RPM, then parameter 30 would be set to 1000, parameter 31 would be set to 300,<br />
and parameter 13 would be set to 2.<br />
Mode 0: Fixed XXXX<br />
Mode 1: Fixed X.XXX<br />
Mode 2: Fixed XX.XX<br />
Mode 3: Fixed XXX.X<br />
Mode 4: Fixed XXXX.<br />
16
Parameter 14 – Keypad Mode<br />
This parameter selects the operating mode of the front-panel push buttons. In some<br />
applications, increasing or decreasing the scroll rate provides the user more <strong>control</strong>lability<br />
when entering settings. Parameters 14 and 15 affect only the Up and Down buttons when<br />
the user interface is in Running Mode. These settings also apply to remote Up / Down<br />
buttons which are attached via the -1 option board.<br />
Mode 1: Linear, Constant Rate<br />
In linear mode, pressing and holding the Up or Down buttons will cause the display to<br />
continuously change value in the requested direction until either the Display Minimum<br />
or Display Maximum is reached. The displayed value will scroll at a constant rate which<br />
is specifi ed using parameter 15.<br />
Mode 2: Non-linear, Accelerating Rate<br />
In non-linear mode, pressing and holding the Up or Down buttons will cause the<br />
display to continuously change value in the requested direction until either the Display<br />
Minimum or Display Maximum is reached. The displayed value will initially scroll at a<br />
slow rate and increase in speed until the maximum scroll rate is achieved. The initial<br />
scroll rate is specifi ed using parameter 15.<br />
Parameter 15 – Keypad Scroll Mode<br />
This parameter sets the scroll speed for the front-panel push buttons. The function of this<br />
parameter varies slightly depending on the Keypad Mode. See parameter 14 for more<br />
details.<br />
Parameter 16 – S1 / S2 Input Edge & Prescaler Confi guration<br />
This parameter determines how the MDP processes the S1 and S2 signal inputs. It specifi es<br />
which signal edge is used for measurements and the value of the internal frequency dividers<br />
or prescalers. Modes with prescalers greater than 1 should only be used if the input pulse<br />
rate on S1 or S2 exceeds the unit's maximum native pulse rate (see specifi cations for details);<br />
otherwise, the <strong>control</strong> loop may become sluggish and unnecessarily inaccurate. Use the<br />
following chart to confi gure this parameter. As an example, assume an application requires<br />
input pulse rates on S1 of 120,000 pulses-per-minute and S2 of 35,000 pulses-per-minute.<br />
According to the electrical specifi cations, the unit can only accept 50,000 pulses-per-minute<br />
on each the S1 and S2 inputs. With this in mind, the S1 and S2 prescalers should be selected<br />
as Falling / 4 and Rising / 1, respectively. In this case, parameter 16 would be set to 2.<br />
Parameter 18 – Power-up Mode<br />
This parameter defi nes the mode which determines the default Running Value when power<br />
is initially applied to the MDP.<br />
Mode 1: Default to Zero<br />
When in this mode, the unit will default to zero (display units).<br />
Mode 2: Default to Power-Up Value<br />
When in this mode, the unit will default to the Power-up Value, parameter 19.<br />
Mode 3: Default to Previously Running Value<br />
When in this mode, the unit will default to the previous running value before power<br />
was removed. A previous running value must have been active for at least 3 seconds<br />
to be recalled after power has been disconnected and reapplied.<br />
17
Parameter 19 – Power-up Value<br />
When Power-up Mode is set to 2, this parameter will designate the default display value at<br />
power-up in display units.<br />
Parameter 20 – Display Minimum<br />
This parameter defi nes the lower end of the display range. This is the value which limits how<br />
low the user is able to scroll the displayed value in Running Mode. In Rate and Time modes,<br />
this value is set in display units. In Follower Mode, this is set in percentage of the master rate.<br />
For example, in Follower Mode, 1250 represents 125.0 percent of the master rate.<br />
Parameter 21 – Display Maximum<br />
This parameter defi nes the upper end of the display range. This is the value which limits how<br />
high the user is able to scroll the displayed value in Running Mode. In Rate and Time modes,<br />
this value is set in display units. In Follower Mode, this is set in percentage of the master rate.<br />
For example, in Follower Mode, 150 represents 15.0 percent of the master rate.<br />
Parameter 23 – Acceleration Setting<br />
This parameter determines how fast the MDP will accelerate toward the displayed target setting.<br />
This parameter is set in display units of change per second such as RPM, GPM, or feet per<br />
second. In Follower Mode, this parameter is set in RPM units.<br />
Parameter 24 – Deceleration Setting<br />
This parameter determines how fast the MDP will decelerate toward the displayed target setting.<br />
This parameter is set in display units of change per second such as RPM, GPM, or feet per<br />
second. In Follower Mode, this parameter is set in RPM units.<br />
Parameter 26 – Proportional (P) Gain<br />
The Proportional Gain is the fi rst of two parameters which defi ne the responsiveness of the<br />
<strong>control</strong> with respect to how fast it responds to changing loads. Because the MDP <strong>control</strong>s<br />
are pulse-accumulation drives, the P Gain responds differently than the same parameter in a<br />
standard velocity-form PID <strong>control</strong>. The higher the P Gain, the more aggressively the unit will<br />
drive the load. See the PI Control Tuning section of the manual for more details.<br />
Parameter 27 – Integral (I) Gain<br />
The Integral Gain is the second of two parameters which defi ne the responsiveness of the<br />
<strong>control</strong> with respect to how fast it responds to changing loads. The higher the I Gain, the more<br />
aggressively the unit will drive the load. When using high PPR pickups or encoders, it will be<br />
necessary to decrease the I Gain to prevent unwanted oscillation and instabilities. See the PI<br />
Control Tuning section of the manual for more details.<br />
Parameter 29 – Pulse Accumulation Limit<br />
This parameter sets the limit for the maximum number of pulses the drive will accumulate prior<br />
to intentionally losing count and therefore long-term accuracy. Because the MDP <strong>control</strong>s are<br />
pulse-accumulation drives, they are able to accurately track a master (in Follower Mode) pulseby-pulse.<br />
That is, they are able to run for days, weeks, or months and remain completely in<br />
sync with a master drive or process; unfortunately, this functionality comes at a small cost.<br />
By default, if the main pickup signal were lost and then reattached, the unit may run at high<br />
speeds for many seconds while attempting to make-up what would have been lost pulses.<br />
Once it catches up, it returns to normal operation. In some applications, this is a nuisance. In<br />
these cases, the Pulse Accumulation Limit, parameter 29, can be lowered to limit the maximum<br />
number of pulses the drive will remember.<br />
This parameter is set from 0 to 9999, where 0 is no accumulation and 9999 is maximum<br />
accumulation. As this value approaches zero, the unit will gradually lose its ability to drive the<br />
motor and eventually stop the motor completely. It may be necessary to increase the value of<br />
this parameter for application which demand higher long-term accuracy.<br />
18
Parameter 30 – Signal Input 1 (S1) Display Reference<br />
This is the number to be displayed when at the user-specifi ed motor Reference RPM. In Rate<br />
Mode, this value represents rate units such as feet, ounces, or revolutions. In Time Mode, this<br />
value represents the reference time measured in seconds or minutes. If the desired display<br />
is HH:MM, then all values should be entered in minutes. If MM:SS is desired, then all values<br />
should be entered in seconds. In Follower Mode, this value is the percentage of the master rate<br />
in 0.1% units. For example, 1000 equates to 100%. See applications for more examples.<br />
Parameter 31 – Signal Input 1 (S1) Reference RPM<br />
This is the reference RPM at which the Display Reference value should be displayed. In Rate<br />
and Time Modes, this value represents the RPM of the encoder to which the Display Reference<br />
corresponds. In Follower Modes, this value is not used. See applications for examples.<br />
Parameter 32 – Signal Input 1 (S1) Pulses per Revolution<br />
This is the number of pulses per revolution for the signal input 1 (S1). The MDP supports pickups<br />
and encoders from 1 to 2048 pulses per revolution.<br />
Parameter 33 – Signal Input 1 (S1) Deadband (Follower Mode Only)<br />
When in Follower Mode, it is often desirable for the follower unit to continue to slowly makeup<br />
the small pickup pulse differential between the master and follower's position. In some<br />
applications, it is not necessary for the follower to continue to slowly seek the master's exact<br />
pulse position when the master rate is at zero. In these cases, the Deadband parameter can<br />
be set above zero to force the MDP to stop driving the motor slowly and cause it to inhibit until<br />
the master starts rotating again. At that point, the follower will automatically make-up the pulse<br />
differential as it starts to rotate. The deadband is disabled by setting it to zero seconds.<br />
Parameter 35 – Signal Input 2 (S2) Input Confi guration<br />
This parameter determines the operating mode of signal input 2 (S2).<br />
Mode 1: Disabled (Follower Mode)<br />
The S2 input is inactive. This is the required setting for Follower Mode.<br />
Mode 2: Emergency Stop When S2 High (Not Wired To Common)<br />
When the S2 input is at an electrically high (+5V) state or allowed to fl oat disconnected,<br />
the MDP will enter emergency-stop mode. While in this mode, the armature output will<br />
immediately be turned off. Once the S2 input returns to an electrically low state or wired<br />
to the unit's common, the output will become active.<br />
Mode 3: Emergency Stop When S2 Low (Wired To Common)<br />
When the S2 input is at an electrically low state or wired to the unit's common, the MDP<br />
will enter emergency-stop mode. While in this mode, the armature output will immediately<br />
be turned off. Once the S2 input returns to an electrically high (+5V) state or allowed to<br />
fl oat disconnected, the output will become active.<br />
Mode 4: Inhibit When S2 High (Not Wired To Common)<br />
When the S2 input is at an electrically high (+5V) state or allowed to fl oat disconnected,<br />
the MDP will enter inhibit mode. While inhibited, the armature output will decrease<br />
according to the decel setting until zero output is reached. Once the S2 input returns to<br />
an electrically low state or is wired to the unit's common, the output will start to accelerate<br />
toward the previous running value.<br />
Mode 5: Inhibit When S2 Low (Wired To Common)<br />
When the S2 input is at an electrically low state or wired to the unit's common, the MDP<br />
will enter inhibit mode. While inhibited, the armature output will decrease according to<br />
the decel setting until zero output is reached. Once the S2 input returns to an electrically<br />
high (+5V) state or allowed to fl oat disconnected, the output will start to accelerate toward<br />
the previous running value.<br />
19
Mode 6: Jog When S2 High (Not Wired To Common)<br />
When the S2 input is at an electrically high (+5V) state or allowed to fl oat disconnected,<br />
the MDP will enter jog mode. While in jog mode, the display will immediately change to<br />
the programmed jog setpoint, parameter 36. The unit will start accelerating or decelerating<br />
toward the jog setting at the confi gured accel and decel rates. Once the S2 input returns to<br />
an electrically low state or is wired to the unit's common, the output will start to accelerate<br />
or decelerate toward the previous running value. In Follower Mode, the unit will operate<br />
as its own master. This allows an application to jog by overriding a stopped master.<br />
Mode 7: Jog When S2 Low (Wired To Common)<br />
When the S2 input is at an electrically low state or wired to the unit's common, the<br />
MDP will enter jog mode. While in jog mode, the display will immediately change to the<br />
programmed jog setpoint, parameter 36. The unit will start accelerating or decelerating<br />
toward the jog setting at the confi gured accel and decel rates. Once the S2 input returns<br />
to an electrically high (+5V) state or allowed to fl oat disconnected, the output will start to<br />
accelerate or decelerate toward the previous running value. In Follower Mode, the unit<br />
will operate as its own master. This allows an application to jog by overriding a stopped<br />
master.<br />
Parameter 36 – Signal Input 2 (S2) Setpoint<br />
When the S2 confi guration, parameter 35, is set to one of the jog modes, this parameter defi nes<br />
the jog setpoint in display units. If the MDP operating mode is set to Follower Mode, then this<br />
parameter is set in RPM units. This allows a follower <strong>control</strong> to be jogged when the master is<br />
stopped.<br />
Parameter 37 – Signal Input 2 (S2) Pulses per Revolution<br />
This is the number of pulses per revolution for the signal input 2 (S2). The MDP supports pickups<br />
and encoders from 1 to 2048 pulses per revolution.<br />
Parameter 38 - Front Panel DoubleClick Mode<br />
When set to a value of 1, the setting of Parameter 35 and/or Parameter 40, particularly Modes<br />
4 and 5 (Inhibit), have no effect; instead, "clicking" the ENTER Button twice in rapid succession<br />
("Double-Clicking") will TOGGLE the MD10P/3P in and out of "Inhibit" mode. When in DoubleClick<br />
mode, the Motor will decelerate to a stop, and the Display will show 4 dashes<br />
"----" DoubleClicking again will cause the motor to accelerate up to the Target speed/time, and<br />
the Display to return to its normal condition. When set to a value of Zero, the Inhibit function<br />
is <strong>control</strong>led exclusively by the signal level on the S2 and/or UIN1 Input(s), and the setting of<br />
Parameters 35 and/or 40, and the "DoubleClick" function will have no effect. Note also that<br />
the DoubleClick Inhibit is only honored in "Run" mode.<br />
Parameter 40 – User Input 1 (UIN1) Confi guration<br />
This parameter determines the operating mode of user input 1 (UIN1).<br />
Mode 1: Disabled<br />
The UIN1 input is inactive.<br />
Mode 2: Emergency Stop When UIN1 High (Not Wired To Common)<br />
When the UIN1 input is at an electrically high (+5V) state or allowed to fl oat disconnected,<br />
the MDP will enter emergency-stop mode. While in this mode, the armature output will<br />
immediately be turned off. Once the UIN1 input returns to an electrically low state or<br />
wired to the unit's common, the output will become active.<br />
Mode 3: Emergency Stop When UIN1 Low (Wired To Common)<br />
When the UIN1 input is at an electrically low state or wired to the unit's common, the MDP<br />
will enter emergency-stop mode. While in this mode, the armature output will immediately<br />
be turned off. Once the UIN1 input returns to an electrically high (+5V) state or allowed<br />
to fl oat disconnected, the output will become active.<br />
20
Mode 4: Inhibit When UIN1 High (Not Wired To Common)<br />
When the UIN1 input is at an electrically high (+5V) state or allowed to fl oat disconnected,<br />
the MDP will enter inhibit mode. While inhibited, the armature output will decrease<br />
according to the decel setting until zero output is reached. Once the UIN1 input returns to<br />
an electrically low state or is wired to the unit's common, the output will start to accelerate<br />
toward the previous running value.<br />
Mode 5: Inhibit When UIN1 Low (Wired To Common)<br />
When the UIN1 input is at an electrically low state or wired to the unit's common, the MDP<br />
will enter inhibit mode. While inhibited, the armature output will decrease according to the<br />
decel setting until zero output is reached. Once the UIN1 input returns to an electrically<br />
high (+5V) state or allowed to fl oat disconnected, the output will start to accelerate toward<br />
the previous running value.<br />
Mode 6: Jog When UIN1 High (Not Wired To Common)<br />
When the UIN1 input is at an electrically high (+5V) state or allowed to fl oat disconnected,<br />
the MDP will enter jog mode. While in jog mode, the display will immediately change to<br />
the programmed jog setpoint, parameter 41. The unit will start accelerating or decelerating<br />
toward the jog setting at the confi gured accel and decel rates. Once the UIN1 input<br />
returns to an electrically low state or is wired to the unit's common, the output will start<br />
to accelerate or decelerate toward the previous running value. In Follower Mode, the unit<br />
will operate as its own master. This allows an application to jog by overriding a stopped<br />
master.<br />
Mode 7: Jog When UIN1 Low (Wired To Common)<br />
When the UIN1 input is at an electrically low state or wired to the unit's common, the<br />
MDP will enter jog mode. While in jog mode, the display will immediately change to the<br />
programmed jog setpoint, parameter 41. The unit will start accelerating or decelerating<br />
toward the jog setting at the confi gured accel and decel rates. Once the UIN1 input<br />
returns to an electrically high (+5V) state or allowed to fl oat disconnected, the output will<br />
start to accelerate or decelerate toward the previous running value. In Follower Mode,<br />
the unit will operate as its own master. This allows an application to jog by overriding a<br />
stopped master.<br />
Parameter 41 – User Input 1 (UIN1) Setpoint<br />
When the UIN1 confi guration, parameter 40, is set to one of the jog modes, this parameter<br />
defi nes the jog setpoint in display units. If the MDP operating mode is set to Follower Mode,<br />
then this parameter is set in RPM units. This allows a follower <strong>control</strong> to be jogged when the<br />
master is stopped.<br />
Parameter 50 – Alarm 1 Conditions<br />
This defi nes which conditions will result in the alarm 1 output being activated.<br />
Mode 0: Always Inactive<br />
The alarm output will remain in an inactive state. In this state, the NC and C contacts<br />
will be internally electrically connected.<br />
Mode 1: Always Active (When Power Is Applied)<br />
The alarm output will become active when the power is applied to the unit. In this state,<br />
the NO and C contacts will be internally electrically connected.<br />
Mode 2: Active When Display Value Above Limit<br />
The alarm output will activate when the displayed value is above the upper limit setting,<br />
parameter 58.<br />
Mode 3: Active When Display Value Below Limit<br />
The alarm output will activate when the displayed value is below the lower limit setting,<br />
parameter 57.<br />
Mode 4: Active When Display Value Inside Range<br />
The alarm output will activate when the displayed value is greater than or equal to lower<br />
limit settings and less than or equal to the upper limit setting.<br />
21
Mode 5: Active When Display Value Outside Range<br />
The alarm output will activate when the displayed value is less than the lower limit setting<br />
or greater than upper limit setting.<br />
Mode 6: Active When Target (Display) = Zero<br />
The alarm output will activate when the displayed value is equal to zero. This allows the<br />
alarm output to be used to drive a mechanical brake to decrease stopping time or to<br />
provide holding torque at zero speed.<br />
Mode 7: Active When Main Pickup Signal (S1) Stalled or stopped<br />
The alarm output will activate when the main pickup signal input (S1) has stalled or<br />
stopped. The alarm lower limit (Parameter 57) is used to specify the stall timeout, in<br />
seconds, under a motor stall condition. When using the lower limit to set the stall timeout,<br />
an inhibit command or zero speed command will not be recognized as a stall condition.<br />
The pickup is considered to have stalled if the timeout passes with no pickup pulses when<br />
the target (displayed) value is greater than zero and the <strong>control</strong> has not been given an<br />
inhibit command. The alarm upper limit (Parameter 58) is used to specify a zero speed or<br />
stopped timeout condition in seconds. When using the upper limit to set a zero speed or<br />
stopped timeout, an inhibit command, a zero speed command or a motor stall condition<br />
will all be recognized as a stopped condition. The pickup is considered to have stopped<br />
after the timeout passes with no pickup pulses.<br />
Note: When using the upper limit to set a stopped timeout the lower limit should<br />
be set to zero.<br />
Mode 8: Active When Driving At Maximum Conduction Angle<br />
The alarm output will activate when the <strong>control</strong> is driving the motor at the maximum<br />
conduction angle. This can be used to determine if the <strong>control</strong> is running away due to a<br />
broken pickup signal wire when stall-detection is not desired.<br />
Parameter 51 – Alarm 1 Output Style & Reset Confi guration<br />
This setting confi gures the output mode and reset method for the alarm output.<br />
Mode 1: Constant & Auto Reset<br />
In this mode, the alarm output will remain active until the alarm condition ceases to exist.<br />
The alarm will automatically reset when the conditions return to normal.<br />
Mode 2: Constant & Manual Reset<br />
In this mode, the alarm output will remain active until the alarm is reset manually. See<br />
parameter 52 for details.<br />
Mode 3: Pulse & Auto Reset<br />
In this mode, the alarm output will pulse on and off until the alarm condition ceases to<br />
exist. The pulsed modes are commonly used for audible alarms where a constant output<br />
would be considered distracting or awkward. The alarm will automatically reset when the<br />
conditions return to normal.<br />
Mode 4: Pulse & Manual Reset<br />
In this mode, the alarm output will pulse on and off until the alarm is reset manually. See<br />
parameter 52 for reset details. The pulsed modes are commonly used for audible alarms<br />
where a constant output would be considered distracting or awkward.<br />
Parameter 52 – Alarm 1 Reset Confi guration<br />
This setting determines which actions will cause an active alarm to be silenced or reset.<br />
Mode 1: No Silencing, Reset On Any Button Press<br />
In this mode, an active alarm cannot be silenced. Once the alarm condition ceases to<br />
exist, however, any user-interface button may be pressed to cause a manual reset.<br />
Mode 2: No Silencing, Reset On S2 Input High (Not Wired To Common)<br />
Similar to Mode 1. Once the alarm condition ceases to exist, setting the S2 input to a<br />
high (+5V) state or allowing it to fl oat disconnected will cause a manual reset.<br />
Mode 3: No Silencing, Reset On S2 Input Low (Wired To Common)<br />
Similar to Mode 1. Once the alarm condition ceases to exist, setting the S2 input to a<br />
low (COM) state or wiring it to common will cause a manual reset.<br />
22
Mode 4: Silencing Enabled, Reset On Any Button Press<br />
When the conditions for an active alarm persist, pressing any user-interface button will<br />
result in the alarm being silenced or deactivated, but not reset. A second attempt to reset<br />
the alarm must be made after the condition cease to exist to clear the alarm.<br />
Mode 5: Silencing Enabled, Reset On S2 Input High (Not Wired To Common)<br />
Similar to Mode 4. Setting the S2 input to a high (+5V) state or allowing it to fl oat<br />
disconnected will cause the alarm to be silenced or reset depending on the current state<br />
of the alarm conditions.<br />
Mode 6: Silencing Enabled, Reset On S2 Input Low (Wired To Common)<br />
Similar to Mode 4. Setting the S2 input to a low (COM) state or wiring it to common<br />
will cause the alarm to be silenced or reset depending on the current state of the alarm<br />
conditions.<br />
Parameter 53 – Alarm 1 Display Flash On Alarm<br />
This will cause the display to fl ash when an alarm condition is active.<br />
Parameter 54 – Alarm 1 Pulse on Time<br />
This parameter defi nes the number of seconds the output should be enabled during the ‘on’<br />
phase of an active pulsing alarm’s output.<br />
Parameter 55 – Alarm 1 Pulse off Time<br />
This parameter defi nes the number of seconds the output should be disabled during the ‘off’<br />
phase of an active pulsing alarm’s output.<br />
Parameter 56 – Alarm 1 Pulse Count<br />
This setting determines how many pulses are output when the alarm is activated and is confi gured<br />
in pulse output style. When 0 is entered, the unit will be set for continuous pulses while the<br />
alarm is active.<br />
Parameter 57 – Alarm 1 Lower Limit<br />
This setting defi nes either the lower limit, the lower end of a range for the alarm region or a stall<br />
timeout. Alarm limits are set in display units without regard to decimal point or colon position.<br />
In Rate and Follower Modes, a limit of 123 could represent a display value of 123, 12.3, 1.23, or<br />
0.123. When in Time Mode, a limit of 123 would represent 1:23 on the display. When the lower<br />
limit is being used to set a stall timeout for parameter 50 mode 7, the setting is in seconds.<br />
Parameter 58 – Alarm 1 Upper Limit<br />
This setting defi nes either the upper limit, the upper end of a range for the alarm region or a stop<br />
timeout. Alarm limits are set in display units without regard to decimal point or colon position.<br />
In Rate and Follower Modes, a limit of 123 could represent a display value of 123, 12.3, 1.23, or<br />
0.123. When in Time Mode, a limit of 123 would represent 1:23 on the display. When the upper<br />
limit is being used to set a stop timeout for parameter 50 mode 7, the setting is in seconds.<br />
Parameter 95 – Factory Default Command<br />
When set to a value of 5, the unit will be reset to factory default settings. This can also be<br />
achieved by applying power to the unit with both the Enter and Down buttons depressed. The<br />
programming jumper must be in the "On" position for this method to function.<br />
Parameter 98 – Save to User Default Area Command<br />
When set to a value of 5, the unit will store all adjustable parameters to the user default area.<br />
The user default area is intended to be a location where an OEM or integrator can store settings<br />
specifi c to their application. Using this, an OEM can easily refresh their custom settings in the<br />
fi eld if an end-user accidentally reconfi gures the unit unsuccessfully. Another common use for<br />
this area is testing and initial setup. The user can store known-good settings here and easily<br />
experiment without the fear of losing the optimal confi guration.<br />
Parameter 99 – Restore from User Default Area Command<br />
When set to a value of 1, the unit will restore the all adjustable parameters from the user default<br />
area. See parameter 98 for additional information.<br />
23
Description:<br />
Application Examples<br />
Pump Controller with Audible and Visual Alarm<br />
A waste pump <strong>control</strong> which displays the pump rate in liters per minute with an audible and<br />
visual alarm output which will warn the operator if the waste fl ow has stopped. The alarm<br />
should not be able to be silenced and should automatically reset when fl ow rates have returned<br />
to normal. The display should indicate in the format "xxx.x" (LPM).<br />
Application Diagram:<br />
Wiring Diagram:<br />
Dart MD10P, MD3P, or MD3E<br />
Motor Control<br />
CONTROLS Page<br />
Ite<br />
m<br />
Valu Tach<br />
153.0<br />
MICRO-DRIVE<br />
DC Motor<br />
ENTER<br />
MD10P<br />
MD3P<br />
or<br />
MD3E<br />
P1-1<br />
P1-2<br />
P1-3<br />
P1-4<br />
P1-5<br />
P1-6<br />
P1-7<br />
P1-8<br />
P1-9<br />
P1-10<br />
P1-11<br />
P1-12<br />
Audible<br />
Annunciator<br />
Pump Specs:<br />
19 Shaft Rotations = 2 Liters<br />
N<br />
L<br />
A-<br />
A+<br />
COM<br />
+5V<br />
S1<br />
S2<br />
NO<br />
C<br />
NC<br />
IN1<br />
24<br />
Pump<br />
NOT USED<br />
NOT USED<br />
NOT USED<br />
Flow Transducer<br />
(73 Pulses per Liter)<br />
*FUSE<br />
Fluid<br />
Inlet<br />
* Size fuse according to unit and application. See<br />
electrical specifications for maximums.<br />
Fluid<br />
Outlet<br />
} AC Line Input 85-265VAC, 50-60 Hz<br />
GND<br />
+V<br />
SIGNAL OUT<br />
MOTOR<br />
FLOW TRANSDUCER<br />
(Frequency Output)<br />
240VAC<br />
Audible<br />
Annunciator
Parameter Confi guration:<br />
Parameter Value Notes<br />
10 1 Master, Rate Mode Setting (LPM is a rate-based unit)<br />
13 3 Decimal point position set to XXX.X on display<br />
30 10 Display should indicate 1.0 LPM (10) when pickup at Reference RPM, parameter 31<br />
31 73 This is the RPM at which the Display Reference, parameter 30, should be displayed<br />
32 1 Pulses per revolution of shaft encoder or pickup is 1 PPR<br />
50 7 Alarm active when pickup stalled<br />
53 1 Flash display when alarm is active<br />
57 10 Lower limit setting for pickup stall timeout. Set for 10 seconds.<br />
Conveyor Oven Controller with Two Preset Process Times<br />
Description:<br />
An oven monitor displaying the “tunnel” time in minutes and seconds. The tunnel time is<br />
defi ned as the time it takes for the heated object on the conveyor to travel from point A to point<br />
B in the application diagram below. An external time-select switch should allow the user to<br />
choose between the displayed process time or a second fi xed process time. The time should<br />
be displayed in MM:SS (minutes:seconds) format. The process time should only be allowed<br />
to be adjusted between 6:30 and 12:15.<br />
Application Diagram:<br />
CONTROLS Page<br />
Heat Source<br />
Tunnel Oven<br />
Ite<br />
m<br />
Valu<br />
Tach<br />
6:30<br />
MICRO-DRIVE<br />
ENTER<br />
Dart MD10P, MD3P, or MD3E<br />
Motor Control<br />
Wiring Diagram:<br />
A B<br />
Connect to<br />
Coupling<br />
Dart PU-2E<br />
or equivalent<br />
Non-Reduced<br />
Shaft<br />
25<br />
Gear Motor<br />
Oven Speed Select Switch<br />
SPEED 1 SPEED 2<br />
Coupling to<br />
Chain Drive<br />
Drive Train Specs:<br />
1380 RPM at non-reduced<br />
motor shaft equates to<br />
6 minutes and 40 seconds<br />
of tunnel time
Parameter Confi guration:<br />
MD10P<br />
MD3P<br />
or<br />
MD3E<br />
P1-1<br />
P1-2<br />
P1-3<br />
P1-4<br />
P1-5<br />
P1-6<br />
P1-7<br />
P1-8<br />
P1-9<br />
P1-10<br />
P1-11<br />
P1-12<br />
N<br />
L<br />
A-<br />
A+<br />
COM<br />
+5V<br />
S1<br />
S2<br />
NO<br />
C<br />
NC<br />
IN1<br />
26<br />
black<br />
red<br />
white<br />
NOT USED<br />
NOT USED<br />
NOT USED<br />
NOT USED<br />
*FUSE<br />
* Size fuse according to unit and application. See<br />
electrical specifications for maximums.<br />
} AC Line Input 85-265VAC, 50-60 Hz<br />
Speed 1 Select<br />
Speed 2 Select<br />
NC<br />
MOTOR<br />
Synchronized Conveyor Controller with Jog Switch<br />
Dart PU-2E or<br />
Equivalent<br />
Encoder<br />
Parameter Value Notes<br />
10 2 Time Mode Setting (MM:SS is a time-based unit)<br />
20 390 Display minimum set to 6:30 (MM:SS)<br />
For example: (6 minutes * 60 seconds-per-minute) + 30 seconds = 390 seconds<br />
21 735 Display maximum set to 12:12 (MM:SS)<br />
For example: (12 minutes * 60 seconds-per-minute) + 15 seconds = 735 seconds<br />
30 400 Display should indicate 6:40 (MM:SS) when motor at Reference RPM, parameter 31<br />
For example: (6 minutes * 60 seconds-per-minute) + 40 seconds = 400 seconds<br />
31 1380 This is the RPM at which the Display Reference, parameter 30, should be displayed<br />
32 1 Pulses per revolution of shaft encoder or pickup is 1 PPR<br />
35 7 Set S2 input mode to jog when low<br />
36 530 Set fixed process time during jog to 8:50 (MM:SS)<br />
For example: (8 minutes * 60-seconds-per-minute) + 50 = 530 seconds<br />
Description:<br />
A synchronized conveyor system comprised of two conveyors with no mechanical linkage<br />
between them. The master conveyor is driven by a basic Dart analog DC motor <strong>control</strong>.<br />
The slave or follower conveyor should follow the master's position with exacting long-term<br />
accuracy. The slave conveyor should be able to be jogged into position when the master<br />
is stopped at a rate of 350 RPM. The slave conveyor may be adjusted from 90.0% to<br />
110.0% of the master conveyor rate using the user interface.
Application Diagram:<br />
Master Side<br />
Follower Side<br />
MD10P<br />
MD3P<br />
or<br />
MD3E<br />
Box A<br />
Conveyor 1<br />
Box B<br />
Conveyor 2<br />
Dart PU-20E<br />
or equivalent<br />
Dart PU-10E<br />
or equivalent<br />
P1-1<br />
P1-2<br />
P1-3<br />
P1-4<br />
P1-5<br />
P1-6<br />
P1-7<br />
P1-8<br />
P1-9<br />
P1-10<br />
P1-11<br />
P1-12<br />
N<br />
L<br />
A-<br />
A+<br />
27<br />
Belt<br />
DC<br />
Gear Motor<br />
Belt<br />
DC<br />
Gear Motor<br />
CONTROL Page<br />
COM<br />
+5V<br />
S1<br />
S2<br />
NO<br />
NOT USED<br />
C<br />
NOT USED<br />
NC<br />
NOT USED<br />
IN1<br />
Jog Switch<br />
Ite<br />
m<br />
Valu<br />
Tach<br />
100.0<br />
MICRO-DRIVE<br />
ENTER<br />
Dart MD10P, MD3P, or MD3E<br />
Motor Control<br />
*FUSE<br />
black<br />
red<br />
white<br />
FOLLOWER<br />
MOTOR<br />
white red black<br />
* Size fuse according to unit and application. See<br />
electrical specifications for maximums.<br />
2<br />
4 6<br />
Motor<br />
0 10<br />
Dart 253G or other Motor Control<br />
8<br />
CONTROLS<br />
Jog Switch<br />
Jog Run<br />
} AC Line Input 85-265VAC, 50-60 Hz<br />
ON<br />
OFF<br />
FOLLOWER PICK-UP<br />
MOUNTED TO<br />
MOTOR SHAFT<br />
Dart PU-10E or<br />
Equivalent<br />
Encoder<br />
MASTER PICK-UP<br />
MOUNTED TO<br />
MOTOR SHAFT<br />
Dart PU-2E or<br />
Equivalent<br />
Encoder
Wiring Diagram:<br />
Parameter Value Notes<br />
10 3 Follower Mode Setting<br />
13 3 Decimal point position set to XXX.X on display<br />
20 900 Display minimum is 90.0% of master rate<br />
21 1100 Display maximum is 110.0% of master rate<br />
32 5 Pulses per revolution of shaft encoder or pickup is 5 PPR<br />
37 10 Pulses per revolution of shaft encoder or pickup is 10 PPR<br />
40 7 UIN1 configured as jog command when low<br />
41 350 UIN1 jog setpoint is 350 RPM<br />
28
Technical Support Options<br />
Troubleshooting<br />
Problem Possible Case Solution<br />
Display is blank Power not applied Using a volt meter, verify that a voltage between 85 and 265VAC is measured between<br />
the L and N terminal block positions.<br />
Defective unit<br />
Display is dim Display intensity<br />
parameter is too low<br />
When power is<br />
applied, “LF-L” is<br />
displayed<br />
When power is<br />
applied, “LF-H” is<br />
displayed<br />
The alarm output<br />
does not seem to<br />
function<br />
AC line supplying<br />
power to unit has too<br />
much noise<br />
AC line supplying<br />
power to unit has an<br />
abnormally low<br />
frequency<br />
AC line supplying<br />
power to unit has too<br />
much noise<br />
AC line supplying<br />
power to unit has an<br />
abnormally high<br />
frequency<br />
Alarm output<br />
parameters not<br />
configured properly<br />
Contact technical support for additional help and instructions.<br />
Editing and increasing the display intensity parameter should cause the display digits to<br />
become brighter.<br />
Review routing of power wires in machine to minimize electrical noise. Look for other<br />
devices which share the same circuit which may be producing unacceptable levels of<br />
line noise. In some applications, such as welding equipment, a careful regiment of<br />
applying an AC line filter, re-routine wires, dividing circuits, using shielded cable, and<br />
properly grounding devices will usually solve the problem.<br />
The unit is designed to operate with AC lines from 48-62 Hertz (cycles per second).<br />
This is typically not a problem because the international standards are 50 and 60 Hertz.<br />
Alarm output parameters not configured properly<br />
Review alarm output parameters. The alarm relay output can be tested by selecting<br />
the “Always On” value for the Activation Condition parameters for the alarm output.<br />
When doing this, the relay click should be audible and the NC (Normally Closed) and C<br />
(Common) terminals should become internally shorted at the terminal block.<br />
• Visit the Dart Controls Web Site at: www.dart<strong>control</strong>s.com<br />
• Email technical support at: techsupport@dart<strong>control</strong>s.com<br />
• Telephone technical support at 317-733-2133 ext. 4<br />
What's Special About www.dart<strong>control</strong>s.com?<br />
• Changes to printed material and product offerings fi rst appear online<br />
• Product manuals and other literature are easily accessible<br />
• All information can be easily displayed or printed as needed<br />
29
REPAIR PROCEDURE<br />
In the event that a Product manufactured by Dart Controls Incorporated (DCI) is in need of<br />
repair service, it should be shipped, freight paid, to: Dart Controls, Inc., 5000 W. 106th Street,<br />
Zionsville, IN. 46077, ATTN: Repair Department.<br />
Those orders received from anyone without an existing account with DCI will need to specify<br />
if they will be paying COD or Credit Card (Master Card or Visa). This information is required<br />
before work can begin. If you have an account with Dart your order will be processed according<br />
to the terms listed on your account.<br />
Completed repairs are returned with a Repair Report that states the problem with the <strong>control</strong><br />
and the possible cause. Repair orders are returned via UPS Ground unless other arrangements<br />
are made. If you have further questions regarding repair procedures, contact Dart Controls,<br />
Inc. at 317-733-2133 Ext.460.<br />
YOUR MOTOR SPEED CONTROL SOLUTIONS PROVIDER<br />
125D SERIES<br />
AC INPUT - VARIABLE DC OUTPUT<br />
1/50 HP through 1.0 HP<br />
700/COMMUTROL SERIES<br />
DC BRUSHLESS<br />
5 & 20 Amp for<br />
12,24,& 36VDC Inputs<br />
Dart Controls, Inc. is a designer,<br />
manufacturer, and<br />
marketer of analog and<br />
digital electronic variable<br />
speed drives, <strong>control</strong>s, and<br />
accessories for AC, DC, and<br />
DC brushless motor applications.<br />
Shown above is just a sampling<br />
of the expanded line of<br />
Dart <strong>control</strong>s that feature the<br />
latest in electronic technology<br />
and engineering. Products are<br />
manufactured in the U.S.A. at<br />
our Zionsville (Indianapolis,<br />
250G SERIES<br />
AC INPUT - VARIABLE DC OUTPUT<br />
1/50 HP through 2.0 HP<br />
MDP SERIES<br />
PROGRAMMABLE<br />
CLOSED LOOP DC<br />
SPEED CONTROL<br />
Indiana) production and headquarters<br />
facility - with over<br />
2,000,000 variable speed units<br />
in the fi eld.<br />
In addition to the standard<br />
off-the-shelf products, you can<br />
select from a wide variety of<br />
options to customize <strong>control</strong>s<br />
for your specifi c application. For<br />
further information and application<br />
assistance, contact your<br />
local Dart sales representative,<br />
stocking distributor, or Dart<br />
Controls, Inc.<br />
www.dart<strong>control</strong>s.com<br />
ISO9001:2000 REGISTERED<br />
65 SERIES<br />
DC INPUT - VARIABLE DC OUTPUT<br />
CURRENT RATINGS OF 20, 40, AND<br />
60 AMPS<br />
DM SERIES<br />
FIELD PROGRAMMABLE<br />
DIGITAL TACHOMETER<br />
Dart Controls, Inc.<br />
Manufacturer of high quality<br />
DC and AC motor speed<br />
<strong>control</strong>s and accessories<br />
since 1963.<br />
P.O. Box 10<br />
5000 W. 106th Street<br />
Zionsville, Indiana 46077<br />
Phone: (317) 733-2133<br />
Fax: (317) 873-1105