Panasonic KX-TCA155 User Guide
Panasonic KX-TCA155 User Guide
Panasonic KX-TCA155 User Guide

You also want an ePaper? Increase the reach of your titles
YUMPU automatically turns print PDFs into web optimized ePapers that Google loves.
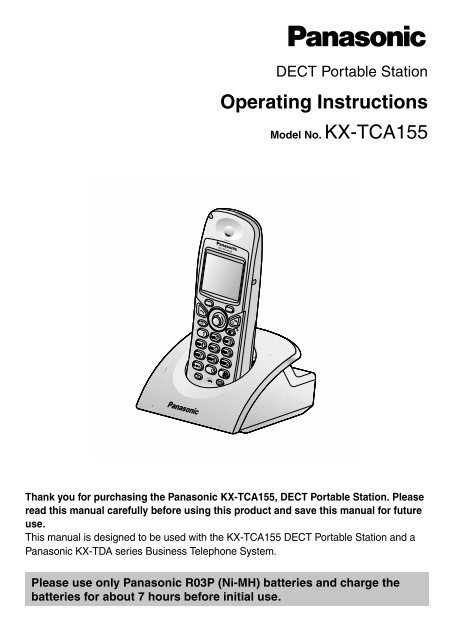
DECT Portable Station<br />
Operating Instructions<br />
Model No. <strong>KX</strong>-<strong>TCA155</strong><br />
1<br />
4<br />
2<br />
5<br />
7 8 9<br />
0<br />
3<br />
6<br />
Thank you for purchasing the <strong>Panasonic</strong> <strong>KX</strong>-<strong>TCA155</strong>, DECT Portable Station. Please<br />
read this manual carefully before using this product and save this manual for future<br />
use.<br />
This manual is designed to be used with the <strong>KX</strong>-<strong>TCA155</strong> DECT Portable Station and a<br />
<strong>Panasonic</strong> <strong>KX</strong>-TDA series Business Telephone System.<br />
Please use only <strong>Panasonic</strong> R03P (Ni-MH) batteries and charge the<br />
batteries for about 7 hours before initial use.
Table of Contents<br />
Before Initial Use............................................................................................ 4<br />
Before Operating the PS................................................................................ 5<br />
Location of Controls .................................................................................... 5<br />
Connection .................................................................................................. 6<br />
Battery Installation....................................................................................... 7<br />
Battery Charge ............................................................................................ 7<br />
Power On/Off .............................................................................................. 8<br />
Display Icons............................................................................................... 8<br />
Operation Outline ........................................................................................ 9<br />
Function Menu Display.............................................................................. 10<br />
PBX Feature Menu.................................................................................... 11<br />
Flexible Key Display.................................................................................. 11<br />
Soft Key Display........................................................................................ 12<br />
Ringer Volume Adjustment ....................................................................... 13<br />
Receiver/Speaker Volume Adjustment ..................................................... 13<br />
Key Lock ................................................................................................... 13<br />
Selecting the Display Language................................................................ 14<br />
Making Calls ................................................................................................. 15<br />
Calling Another Extension......................................................................... 15<br />
Calling an Outside Party ........................................................................... 15<br />
Using the Call Log..................................................................................... 16<br />
Using the Phonebook................................................................................ 17<br />
Hot Key Dial .............................................................................................. 19<br />
Receiving Calls............................................................................................. 20<br />
Intercom Calls/Outside Calls/Group Calls................................................. 20<br />
Temporary Ringer Volume Adjustment ..................................................... 20<br />
Caller ID .................................................................................................... 21<br />
During a Conversation................................................................................. 22<br />
Transferring a Call..................................................................................... 22<br />
Holding ...................................................................................................... 22<br />
Turning the Microphone On/Off................................................................. 23<br />
Using the Phonebook .................................................................................. 24<br />
Handset Phonebook.................................................................................. 24<br />
Hot Key Dial .............................................................................................. 27<br />
Entering Characters .................................................................................. 27<br />
Feature List................................................................................................... 30<br />
Programming................................................................................................ 34<br />
Changing the Initial Settings ..................................................................... 34<br />
Others............................................................................................................ 42<br />
Walkie-Talkie............................................................................................. 42<br />
Using the Belt Clip..................................................................................... 43<br />
2
Table of Contents<br />
Wall Mounting ........................................................................................... 44<br />
Troubleshooting........................................................................................... 45<br />
Troubleshooting ........................................................................................ 45<br />
Important Information.................................................................................. 46<br />
Battery Information.................................................................................... 46<br />
Safety Instructions..................................................................................... 47<br />
3
Before Initial Use<br />
Before Initial Use<br />
Please read “Important Information” on page 46 before use. Read and<br />
understand all instructions.<br />
Registration<br />
Your PS (Portable Station) must be registered in the Business Telephone System and<br />
you have to determine the extension number before initial use.<br />
Accessories (included)<br />
j AC adaptor<br />
For the <strong>KX</strong>-<strong>TCA155</strong>CE users:<br />
PQLV200CE<br />
For the <strong>KX</strong>-<strong>TCA155</strong>E users:<br />
PQLV200E<br />
For the <strong>KX</strong>-<strong>TCA155</strong>AL users:<br />
PQLV200AL<br />
j Charger<br />
j Belt Clip<br />
j Battery Cover<br />
One<br />
One<br />
j Rechargeable Batteries-<br />
AAA size<br />
(HHR-4EPT/BA2)<br />
One<br />
j CD-ROM.................. One<br />
j Quick <strong>Guide</strong>............. One<br />
One<br />
Two<br />
• In this manual, the suffix of each model number is omitted.<br />
Some of the features described in this manual are not available when the PS is used with a<br />
<strong>Panasonic</strong> <strong>KX</strong>-TD816/<strong>KX</strong>-TD1232 Business Telephone System, only the single line<br />
telephone (SLT) features are available.<br />
4
Before Operating the PS<br />
Before Operating the PS<br />
Location of Controls<br />
Ringing/Charge Indicator<br />
Receiver<br />
Headset Jack<br />
–The headset is an<br />
option.<br />
Please use only the<br />
<strong>Panasonic</strong> <strong>KX</strong>-TCA89<br />
headset.<br />
Open the<br />
cover.<br />
Display<br />
Soft Buttons<br />
CANCEL/POWER<br />
TALK<br />
SPEAKERPHONE<br />
1<br />
4<br />
7<br />
2<br />
5<br />
3<br />
6<br />
9 8<br />
0<br />
CLEAR/TRANSFER<br />
Joystick<br />
INTERCOM<br />
Charge Contact<br />
Charge Contact<br />
RECALL<br />
Microphone<br />
Back view<br />
Speaker<br />
5
Before Operating the PS<br />
TALK Button:<br />
Used to make or receive calls.<br />
Joystick:<br />
Used to adjust the ringer/receiver<br />
volume, select the Function<br />
mode and the function displayed<br />
directly above, and move the<br />
cursor to select a desired item.<br />
SPEAKERPHONE Button:<br />
Used for the hands-free<br />
conversation. Press TALK button<br />
to return to the receiver.<br />
RECALL Button:<br />
Used to disconnect the current<br />
call and make another call<br />
without hanging up, or answer<br />
Call Waiting from the telephone<br />
company.<br />
INTERCOM Button:<br />
Used to make or receive intercom<br />
calls.<br />
CLEAR/TRANSFER Button:<br />
Used to clear digits or characters,<br />
or transfer a call to another party.<br />
CANCEL/POWER Button:<br />
Used to end calls, exit the<br />
Phonebook or Function mode, or<br />
turn on/off the PS.<br />
Soft Buttons:<br />
Used to select the function<br />
displayed directly above each<br />
button. Functions displayed<br />
depend on the state of use.<br />
Connection<br />
To AC Outlet<br />
Fasten the AC<br />
adaptor cord to<br />
the cord holder.<br />
AC adaptor<br />
•USEONLY the <strong>Panasonic</strong> AC ADAPTOR.<br />
For the <strong>KX</strong>-<strong>TCA155</strong>CE users: PQLV200CE<br />
For the <strong>KX</strong>-<strong>TCA155</strong>E users: PQLV200E<br />
For the <strong>KX</strong>-<strong>TCA155</strong>AL users: PQLV200AL<br />
6
Before Operating the PS<br />
Battery Installation<br />
Insert the batteries as shown. The negative<br />
Close the cover as indicated by the arrow.<br />
end should be inserted first.<br />
• When you replace the batteries, the positive<br />
end should be removed first.<br />
Battery Charge<br />
At the time of shipment, the batteries are not charged. Please charge the batteries for<br />
about 7 hours before initial use.<br />
• When the battery has been completely charged, the charge indicator will<br />
change from red to green. Refer to “Battery Information” on page 46.<br />
• It is normal for the PS and charger to feel warm while the battery is charging.<br />
• Keep devices sensitive to magnetic fields away from the charger.<br />
7
Before Operating the PS<br />
Power On/Off<br />
Power On<br />
Power Off<br />
Press POWER for about 2 seconds.<br />
Press POWER for about 2 seconds.<br />
The display will go blank.<br />
• When the PS is turned on, it will be in standby mode. Standby mode is the state<br />
of the PS when it is not performing any operations and is awaiting calls.<br />
Display Icons<br />
301:Paul<br />
3.Jul 10:08<br />
Within range of a Cell Station<br />
Out of range, No registration<br />
Intercom Indicator<br />
Off-hook Status<br />
Message Waiting<br />
Phonebook Mode<br />
Battery Strength<br />
Hot Line ON<br />
Ringer Volume OFF<br />
Call Forwarding<br />
Do Not Disturb<br />
8
Operation Outline<br />
Before Operating the PS<br />
Functions of the PS are accessed through the display menu, and selected with the<br />
joystick and soft keys. The guidance display is shown in standby mode for easy operation.<br />
<br />
<strong>Panasonic</strong><br />
99998822<br />
<br />
Anne<br />
103<br />
<br />
01 JUL. 15:03<br />
David Baker<br />
9876543210<br />
<br />
David Baker<br />
9876543210<br />
<br />
02 JUL. 14:59<br />
James Smith<br />
0123456789<br />
<br />
Anne<br />
103<br />
<br />
1 2 3<br />
0<br />
Pause<br />
<br />
Guidance display<br />
<br />
1:Single Line<br />
2:Trunk Group<br />
3:Loop Line<br />
<br />
Caller ID<br />
Normal display<br />
301:Paul<br />
New Calls<br />
3.Jul 10:08<br />
• You cannot toggle the displays while in key lock mode or while the PS is on a<br />
charger.<br />
• You can select whether the guidance display is shown or not. (See page 37.)<br />
9
Before Operating the PS<br />
Function Menu Display<br />
Press the joystick to display the function menu.<br />
Main menu – while in standby mode<br />
Caller ID:<br />
Displays the incoming call log.<br />
Ringer Option:<br />
Accesses to the “Ringer Option”.<br />
Caller ID<br />
New Phonebook:<br />
Stores a new item in the Handset Phonebook.<br />
Setting Handset:<br />
Accesses to the “Setting Handset”.<br />
PBX Program:<br />
Enters the PBX programming mode.<br />
Walkie-Talkie:<br />
Sets or turns on/off the Walkie-Talkie mode.<br />
(See page 42.)<br />
Submenu–while in off-hook/during a conversation<br />
Phone book:<br />
Accesses to the Handset Phonebook.<br />
Caller ID:<br />
Displays the incoming call log.<br />
Phone book<br />
Redial:<br />
Displays the outgoing call log.<br />
Mute:<br />
Turns the microphone on/off.<br />
10
PBX Feature Menu<br />
Functions of the PS can be activated through the display key list.<br />
Move the joystick left to display the key list.<br />
Before Operating the PS<br />
1 2<br />
0<br />
3<br />
1<br />
2<br />
Pause:<br />
Inserts a dialling pause.<br />
FWD/DND:<br />
Sets Call Forwarding or Do Not Disturb.<br />
Pause<br />
3<br />
Message:<br />
Used to leave a message waiting indication or<br />
call back the party who left you a message<br />
waiting indication.<br />
Search Wave:<br />
Searches the strongest radio signal coming<br />
from the Cell Station.<br />
0<br />
PBX Program:<br />
Enters the PBX programming mode.<br />
Flexible Key Display<br />
A flexible key can be used either to seize a line in order to make or receive an outside call<br />
(F-CO key), or used as a function key. Move the Joystick right to display the flexible key list.<br />
The icon shown beside each F-CO key indicates line status similarly to the LED indicators<br />
on a Proprietary Telephone; isthesameasagreenLED; isthesameasaredLED.<br />
Example:<br />
1:Single Line<br />
2:Trunk Group<br />
3:Loop Line<br />
key number<br />
Understanding the icons for the F-CO key*<br />
(on): You are currently using this line.<br />
(flashing rapidly): You have an incoming call on this line.<br />
(flashing slowly): You have a call on hold on this line.<br />
(on): This line is in use by someone else.<br />
(flashing rapidly): There is an incoming call received by an<br />
incoming call distribution group to which<br />
“Ring” is set as the group call distribution<br />
method.<br />
(flashing slowly): Someone has a call on hold on this line.<br />
(no icon): This line is idle.<br />
• * The meanings of these icons vary depending on the status of the CO line.<br />
• For further information, refer to “LED Indication” in the <strong>KX</strong>-TDA series Business<br />
Telephone System Feature <strong>Guide</strong>.<br />
• To select a key, press its key number, or move the Joystick to select the<br />
desired key then press .<br />
• To assign a function to a flexible key, see page 40.<br />
11
Before Operating the PS<br />
Soft Key Display<br />
Icons and information shown on the display will vary depending on the state of use. To<br />
select an item shown on the display, press the corresponding soft buttons.<br />
Opens the Handset Phonebook.<br />
Opens the main menu.<br />
Opens the function menu.<br />
Displays the outgoing call log.<br />
Used to confirm the entry.<br />
Turns the ringer off.<br />
Opens the PBX System<br />
Phonebook.<br />
Opens the PBX Extension<br />
Phonebook.<br />
Opens the incoming call log.<br />
Opens the incoming call log<br />
group.<br />
Displays the next screen.<br />
Clears digits or characters.<br />
Inserts a dialling pause.<br />
Returns to the previous screen.<br />
Used to set the time for memo<br />
alarm.<br />
Used to clear the memo alarm<br />
display setting, or enter an X<br />
when storing the “Line Access<br />
CD”.<br />
Used to select an item when in<br />
setting mode.<br />
Displayed when in<br />
(Alphabetic) character entry<br />
mode.<br />
Displayed when in<br />
(Numeric) character entry mode.<br />
Displayed when in<br />
character entry mode.<br />
(Greek)<br />
Displayed when in<br />
(Extended 1) character entry<br />
mode.<br />
Displayed when in<br />
(Extended 2) character entry<br />
mode.<br />
Displayedwheninkeylock,and<br />
used to unlock the dialling<br />
buttons.<br />
Used to search for an item in the<br />
Phonebook alphabetically.<br />
Used to place a call on hold.<br />
Used to establish a multiple-party<br />
conversation.<br />
12
Before Operating the PS<br />
Ringer Volume Adjustment<br />
Press the<br />
Joystick.<br />
Select “<br />
Option”.<br />
Ringer<br />
Press the<br />
Joystick.<br />
Select “Ringer<br />
Volume”.<br />
Press the<br />
Joystick.<br />
Adjust the volume<br />
level (6 levels/Off).<br />
Press the<br />
Joystick.<br />
Receiver/Speaker Volume Adjustment<br />
During a conversation<br />
Move the Joystick UP or DOWN to adjust the volume.<br />
(Receiver Volume - 3 levels, Speaker Volume - 6 levels)<br />
Key Lock<br />
You can lock the dialling buttons while the PS is in idle status.<br />
<br />
Unlocked<br />
Locked<br />
Press the Joystick for<br />
more than 2 seconds<br />
to lock/unlock.<br />
13
Before Operating the PS<br />
Selecting the Display Language<br />
Press the<br />
Joystick.<br />
Select “ Setting<br />
Handset”.<br />
Press the<br />
Joystick.<br />
Select “Display<br />
Option”.<br />
Press the<br />
Joystick.<br />
Select “Select<br />
Language”.<br />
Press the<br />
Joystick.<br />
Select the<br />
desired language.<br />
Press the<br />
Joystick.<br />
• You can select one of 16 languages:<br />
Deutsch, English, Español, FRANCAIS, Italiano, Dansk, Nederlands, Svenska,<br />
Suomi, E HNIKA, Magyar, Português, Polski, slovensky, ceština,<br />
Hrvatski<br />
• The display language of both the PS and Business Telephone System can be<br />
selected, and both should be set to the same language. Refer to the Business<br />
Telephone System <strong>User</strong> manual for more details.<br />
14
Making Calls<br />
Making Calls<br />
Calling Another Extension<br />
extension no.<br />
Press TALK.<br />
Dial the extension<br />
number.<br />
Talk.<br />
Press CANCEL.<br />
Calling an Outside Party<br />
Using the line access numbers<br />
8<br />
OR<br />
9<br />
0 /<br />
*<br />
CO line<br />
group no.<br />
outside phone phone no. no.<br />
Press<br />
TALK.<br />
Enter the line<br />
access number.<br />
Dial the outside<br />
phone number.<br />
Talk.<br />
Press<br />
CANCEL.<br />
Using Flexible CO keys<br />
X<br />
Press the idle CO<br />
key number (1-3).<br />
OR<br />
outside phone no.<br />
Move the<br />
Joystick<br />
RIGHT.<br />
Select the<br />
idle CO key.<br />
Press the<br />
Joystick.<br />
Dial the outside<br />
phone number.<br />
Talk.<br />
Press<br />
CANCEL.<br />
• * The line access number (default) varies depending upon Country/Area.<br />
Consult your dealer for more details.<br />
• You can confirm a number was dialled correctly before calling (Predialling) by<br />
entering the number, then pressing .<br />
• To clear an entire number while predialling, press and hold .<br />
• If “ ” flashes, move closer to the Cell Station and dial again.<br />
• To cancel dialling, press .<br />
15
Making Calls<br />
Using the Call Log<br />
Feature<br />
Display Icon<br />
Description<br />
Outgoing<br />
Call Log<br />
Incoming<br />
Call Log<br />
Incoming Call<br />
Log Group<br />
You can make a call using the phone<br />
numbers you have dialled previously.<br />
You can make a call using the phone numbers<br />
of calls you have received.<br />
You can make a call using the phone<br />
numbers of calls that incoming call<br />
distribution groups have received.<br />
Using the Outgoing Call Log<br />
Press the Right<br />
Soft Key.<br />
Select the<br />
desired item.<br />
Press<br />
TALK.<br />
OR<br />
Press TALK.<br />
To make a call to the<br />
last dialling number.<br />
Talk.<br />
Press<br />
CANCEL.<br />
Using the Incoming Call Log<br />
Select the<br />
desired item.<br />
Press TALK.<br />
Talk.<br />
Press CANCEL.<br />
16
Making Calls<br />
Using the Incoming Call Log Group<br />
group no.<br />
Press the Right<br />
Soft Key.<br />
Press the Right<br />
Soft Key.<br />
Press the Right<br />
Soft Key.<br />
Enter the desired<br />
incoming call log<br />
group no.<br />
Press the<br />
Joystick.<br />
Select the<br />
desired item.<br />
Press<br />
TALK.<br />
Talk.<br />
Press<br />
CANCEL.<br />
• An outside number stored with a name in the Handset Phonebook will be<br />
displayed by number and name in the call log.<br />
• When a call is made using the PBX System Phonebook, the called party'sname<br />
is not stored in the Outgoing Call Log. To log the name as well as the number,<br />
copy the item into the Handset Phonebook before dialling it. (See page 26.)<br />
Using the Phonebook<br />
Feature<br />
Display Icon<br />
Description<br />
Handset<br />
Phonebook<br />
PBX<br />
System<br />
Phonebook<br />
PBX<br />
Extension<br />
Phonebook<br />
You can make a call using the numbers<br />
stored in the Handset Phonebook.<br />
You can make a call using the numbers<br />
stored in the Business Telephone System.<br />
You can make a call using the extension<br />
numbers stored in the Business Telephone<br />
System.<br />
17
Making Calls<br />
Using the Handset Phonebook<br />
name<br />
Press the<br />
Left Soft Key.<br />
Enter the first<br />
letter of the<br />
desired name.<br />
Select the<br />
desired item.<br />
Press<br />
TALK.<br />
Using the PBX System Phonebook<br />
name<br />
Press the<br />
Left Soft Key.<br />
Press the<br />
Left Soft Key.<br />
Enter the first<br />
letter of the<br />
desired name.<br />
Select the<br />
desired item.<br />
Press<br />
TALK.<br />
Using the PBX Extension Phonebook<br />
name<br />
Press the<br />
Left Soft Key.<br />
Press the<br />
Left Soft Key.<br />
Press the<br />
Left Soft Key.<br />
Enter the first<br />
letter of the<br />
desired name.<br />
Select the<br />
desired item.<br />
Press<br />
TALK.<br />
18
Making Calls<br />
• You can search for an item stored in the Phonebook, as shown below:<br />
<br />
Select<br />
“Index Search”.<br />
<br />
first letter<br />
Select “Category”.<br />
<br />
Select the desired<br />
category number<br />
or All.<br />
first letter<br />
<br />
first letter<br />
• To enter characters, see page 27.<br />
Hot Key Dial<br />
You can make a call by simply pressing the assigned number as hot key.<br />
X<br />
Press and hold the dialling button<br />
assigned as a hot key.<br />
Press TALK.<br />
• To assign a phone number as hot key, see page 27.<br />
19
Receiving Calls<br />
Receiving Calls<br />
Intercom Calls/Outside Calls/Group Calls<br />
While receiving a call<br />
Intercom Calls/Outside Calls/Group Calls<br />
To answer a call when the PS is ringing<br />
Press TALK. Talk. Press CANCEL.<br />
Intercom Calls<br />
To answer a call when the PS is ringing<br />
Press INTERCOM. Talk. Press CANCEL.<br />
Outside Calls<br />
To answer a call on a specific line<br />
X<br />
Press the CO key number (1-3).<br />
(Select a CO line with a flashing icon .)<br />
OR<br />
Move the<br />
Joystick RIGHT.<br />
Select the CO key.<br />
(Select a CO line with a<br />
flashing icon .)<br />
Press the<br />
Joystick.<br />
Talk.<br />
Press<br />
CANCEL.<br />
• You can also answer a call as follows:<br />
– Auto Talk (See page 37.)<br />
– Any Key Answer (See page 38.)<br />
– Auto Answer (See page 38.)<br />
Temporary Ringer Volume Adjustment<br />
While receiving a call<br />
OR<br />
Move the Joystick UP or DOWN<br />
to adjust the volume.<br />
Press the Joystick to<br />
turn the ringer off.<br />
20
Caller ID<br />
Receiving Calls<br />
If an outside call which contains Caller ID information is received, this information will be<br />
logged in the incoming call log.<br />
<br />
Date<br />
Received<br />
<br />
Time<br />
Received<br />
Status of the<br />
call<br />
301:Paul<br />
New Calls<br />
3.Jul 10:08<br />
02 JUL. 14:59<br />
James Smith<br />
0123456789<br />
Old:Answered<br />
James Smith<br />
0123456789<br />
New calls have been<br />
received.<br />
Access to the Incoming Call Log Group<br />
Phone No.<br />
Name<br />
group no.<br />
Press the<br />
Right Soft Key.<br />
Calling back to the caller<br />
Enter the desired<br />
group number.<br />
Press the<br />
Joystick.<br />
Select the<br />
desired item.<br />
Press<br />
TALK.<br />
Talk.<br />
Saving the Caller Information in the Handset Phonebook<br />
Press<br />
CANCEL.<br />
name<br />
phone no.<br />
category no.<br />
Select the<br />
desired item.<br />
Press the<br />
Joystick.<br />
Select “Save<br />
Phonebook”.<br />
Press the<br />
Joystick.<br />
Enter a name, phone<br />
number, and select the<br />
category number or Off.*<br />
Press the<br />
Joystick.<br />
Deleting<br />
Select the<br />
desired item.<br />
Press the<br />
Joystick.<br />
Select<br />
“Delete”.<br />
Press the<br />
Joystick.<br />
Select “Yes”.<br />
Press the<br />
Joystick.<br />
• * Press<br />
to confirm each entries.<br />
21
During a Conversation<br />
During a Conversation<br />
Transferring a Call<br />
Transferring to an extension<br />
During a conversation<br />
extension no.<br />
Press CLEAR/<br />
TRANSFER.<br />
Dial the extension<br />
number.<br />
Talk.<br />
Press<br />
CANCEL.<br />
Transferring to an outside party<br />
During a conversation<br />
8<br />
0 /<br />
*<br />
OR<br />
9<br />
CO line<br />
group no.<br />
outside phone no.<br />
Press CLEAR/<br />
TRANSFER.<br />
Enter the line<br />
access number.<br />
Dial the outside<br />
phone number.<br />
Talk.<br />
Press<br />
CANCEL.<br />
• * The line access number (default) varies depending upon Country/Area.<br />
Consult your dealer for more details.<br />
• To return to the call before the transfer destination answers, press .<br />
Holding<br />
To hold (Regular Hold)<br />
During a conversation<br />
Press the Left Soft Key.<br />
22
To hold (Exclusive CallHold)<br />
During a Conversation<br />
You can hold a call exclusively so that other people cannot retrieve the call.<br />
During a conversation<br />
Press the Left Soft Key.<br />
Press the Left Soft Key again.<br />
• The method used to hold a call depends on the Call Hold mode (Regular Hold/<br />
Exclusive Call Hold). Ask your manager what the current mode is.<br />
• When you hold several outside line calls, you need to assign the CO keys<br />
(Single Line/Group Line/Loop Line/ICD Group) to a flexible key as necessary,<br />
beforehand.<br />
To retrieve acall<br />
Intercom Calls<br />
Press<br />
INTERCOM.<br />
Outside Calls<br />
X<br />
Press the CO key number (1-3).<br />
(Select a CO line with a flashing icon .)<br />
OR<br />
Move the Joystick<br />
RIGHT.<br />
Select the CO key.<br />
(Select a CO line with a<br />
flashing icon .)<br />
Press the<br />
Joystick.<br />
Turning the Microphone On/Off<br />
During a conversation<br />
Press the<br />
Joystick.<br />
Select “ Mute”. Press the<br />
Joystick.<br />
23
Using the Phonebook<br />
Using the Phonebook<br />
Handset Phonebook<br />
You can store up to 200 items with names, phone numbers and category numbers in the<br />
handset for easy access. All directory items are stored in alphabetical order.<br />
Incoming Call Identification<br />
You can organise entries in the Handset Phonebook into one of 9 categories. A call from<br />
someone stored in one of these categories will be indicated by the ringer type, light (LED)<br />
colour pattern assigned to the category.<br />
Item<br />
Storing a new item<br />
Setting<br />
Ringer pattern 15 ringer type (See page 36.)<br />
LED colour pattern 3 patterns (See page 36.)<br />
Press the<br />
Joystick.<br />
Select “ New<br />
Phonebook”.<br />
Press the<br />
Joystick.<br />
Name<br />
name<br />
Enter a name<br />
(max. 16 characters).<br />
Press the<br />
Joystick.<br />
Phone Number<br />
phone no.<br />
Enter the phone number*<br />
(max. 24 digits).<br />
Press the<br />
Joystick.<br />
Private Category<br />
Select the desired<br />
category number or Off.<br />
Press the<br />
Joystick.<br />
Press the<br />
Joystick.<br />
• To enter characters, refer to page 27.<br />
• * The valid digits are “0” through “9”, “ ”, “#”, PAUSE.<br />
• When storing numbers for outside parties, you should store a line access<br />
number with each number.<br />
24
Using the Phonebook<br />
Editing<br />
Press the<br />
Left Soft Key.<br />
Select the<br />
desired item.<br />
Press the<br />
Joystick.<br />
Select<br />
“Edit”.<br />
Press the<br />
Joystick.<br />
Name<br />
name<br />
Edit the name<br />
(max. 16 characters).<br />
Press the<br />
Joystick.<br />
Phone Number<br />
phone no.<br />
Edit the<br />
phone number*<br />
(max. 24 digits).<br />
Press the<br />
Joystick.<br />
Private Category<br />
Select the desired<br />
category number or Off.<br />
Press the<br />
Joystick.<br />
Press the<br />
Joystick.<br />
Deleting<br />
• To enter characters, refer to page 27.<br />
• * The valid digits are “0” through “9”, “ ”, “#”, PAUSE.<br />
• To change a character or digit, press to highlight it, press to delete it,<br />
then enter the new character or digit.<br />
• To clear an entire line, press and hold .<br />
• To move the cursor to the left or right, press or , respectively.<br />
Press the<br />
Left Soft Key.<br />
Select the<br />
desired item.<br />
Press the<br />
Joystick.<br />
Select “Delete”.<br />
Press the<br />
Joystick.<br />
Select “Yes”.<br />
Press the<br />
Joystick.<br />
25
Using the Phonebook<br />
StoringanitemintheHandset Phonebook<br />
Using the Outgoing Call Log<br />
Press the<br />
Right Soft<br />
Key.<br />
Select the<br />
desired item.<br />
Using the Incoming Call Log<br />
Press the<br />
Joystick.<br />
Select “Save<br />
Phonebook”.<br />
name<br />
phone no.<br />
category no.<br />
Enter a name, phone<br />
number, and select the<br />
category number or Off.*<br />
Press the<br />
Joystick.<br />
Select the<br />
desired item.<br />
Press the<br />
Joystick.<br />
Using the Incoming Call Log Group<br />
Select “Save<br />
Phonebook”.<br />
name<br />
phone no.<br />
category no.<br />
Enter a name, phone Press the<br />
number, and select the Joystick.<br />
category number or Off.*<br />
Move the<br />
Joystick<br />
UP or DOWN.<br />
Press the<br />
Joystick.<br />
Press the<br />
Right<br />
Soft Key.<br />
Select “Save<br />
Phonebook”.<br />
Using the PBX System Phonebook<br />
group no.<br />
Enter the<br />
incoming call<br />
log group no.<br />
Press the<br />
Joystick.<br />
name<br />
phone no.<br />
category no.<br />
Enter a name, phone<br />
number, and select the<br />
category number or Off.*<br />
Select the<br />
desired item.<br />
Press the<br />
Joystick.<br />
Press the<br />
Left Soft Key.<br />
Press the<br />
Left Soft Key.<br />
Select the<br />
desired item.<br />
Press the<br />
Joystick.<br />
Select “Save<br />
Phonebook”.<br />
name<br />
phone no.<br />
category no.<br />
Enter a name, phone<br />
number, and select the<br />
category number or Off.*<br />
Press the<br />
Joystick.<br />
• * Press to confirm each entries.<br />
• When storing an outside phone number, the line access number will be stored<br />
automatically. The line access number must be identical to the PS’s “Line<br />
Access CD” setting (Call Option). (See page 37.)<br />
26
Hot Key Dial<br />
Using the Phonebook<br />
The phone numbers stored in the Handset Phonebook can be assigned as hot key.<br />
Press the Left<br />
Soft Key.<br />
Select the<br />
desired item.<br />
Press the<br />
Joystick.<br />
Select “Reg.<br />
to Hot Key”.<br />
Press the<br />
Joystick.<br />
Select a blank<br />
hot key number (1-9).<br />
Press the Joystick.<br />
Press the Joystick.<br />
• A “ ” will be displayed next to hot key numbers which have a phonebook item<br />
registered to them.<br />
Entering Characters<br />
You can enter characters and digits using the dialling buttons.<br />
You can select one of 5 character modes by pressing the Right Soft<br />
Key while entering a name. The function icon above the soft key<br />
displays the current character mode.<br />
See “Character Mode Table” (page 29) for available characters.<br />
A, a<br />
B, bC,<br />
c<br />
2<br />
To change the character mode while editing a name in the phonebook, press<br />
the Right Soft Key.<br />
Normal Numeric Greek Extended 1 Extended 2<br />
27
Using the Phonebook<br />
Example: To enter “Anne” inNormal Mode.<br />
2<br />
6 6<br />
6 6<br />
3<br />
3<br />
• To enter a character located on the same dialling button as the previous character,<br />
move the cursor by moving the Joystick , then enter the desired character.<br />
• If you enter a different character by mistake, move the Joystick to highlight<br />
the character, press to delete it, then enter the correct character.<br />
• To clear an entire line, press and hold .<br />
• To move the cursor, move the Joystick .<br />
28
Using the Phonebook<br />
Character Mode Table<br />
•<br />
•<br />
29
Feature List<br />
Feature List<br />
R.B. Tone: Ringback Tone ICD Group: Incoming Call Distribution Group<br />
PIN: Personal Identification Number<br />
Feature<br />
One-touch<br />
Dialling<br />
To store<br />
2<br />
Select<br />
“ PBX Program”.<br />
desired no.<br />
Making Calls<br />
Operation<br />
Select<br />
a Flexible Key.<br />
To dial<br />
To store<br />
7<br />
Select the key assigned<br />
as a One-touch Dialling<br />
button.<br />
4<br />
0 2<br />
desired<br />
phone no.<br />
Hot Line<br />
To set/cancel<br />
7 4 0<br />
1<br />
0<br />
Set<br />
Cancel<br />
To dial<br />
Operator<br />
Call<br />
System<br />
Speed<br />
Dialling<br />
Doorphone<br />
Call<br />
Automatic<br />
Callback<br />
Busy<br />
To dial<br />
system speed dial no. (3 digits)<br />
To set<br />
While hearing a busy tone<br />
6<br />
9<br />
doorphone no. (2 digits)<br />
To cancel<br />
4 6<br />
To answer from an idle extension To answer from an idle outside line<br />
While hearing a callback ring<br />
While hearing a callback ring<br />
outside phone no.<br />
R.B. Tone<br />
/<br />
3<br />
0<br />
1<br />
30
Feature List<br />
Feature<br />
Operation<br />
During a Conversation<br />
To add another party during a conversation<br />
Multiple<br />
Party<br />
Conversation<br />
desired<br />
phone no.<br />
Talk to the<br />
new party.<br />
Talk with multiple<br />
parties.<br />
To leave a conference<br />
Useful Features<br />
0<br />
All Calls<br />
7<br />
1<br />
1<br />
Outside Calls<br />
2<br />
Intercom Calls<br />
Call<br />
Forwarding<br />
2<br />
3<br />
4<br />
5<br />
All calls<br />
Busy<br />
No answer<br />
Busy/<br />
No answer<br />
extension no.<br />
OR<br />
CO line<br />
access no.<br />
outside<br />
phone no.<br />
0<br />
Cancel<br />
7<br />
8<br />
Follow Me<br />
Cancel<br />
Follow Me<br />
your extension no.<br />
Do Not<br />
Disturb<br />
7<br />
1<br />
0<br />
1<br />
2<br />
All Calls<br />
Outside Calls<br />
Intercom Calls<br />
1<br />
0<br />
Set<br />
Cancel<br />
31
Feature List<br />
Feature<br />
Operation<br />
Useful Features<br />
Call Pickup<br />
Directed<br />
4<br />
Group<br />
4<br />
1<br />
0<br />
extension no.<br />
group no. (2 digits)<br />
Sending a<br />
Call Waiting<br />
Tone<br />
While hearing a busy tone<br />
1 Wait for an answer.<br />
To set/cancel for intercom calls<br />
7<br />
3<br />
1<br />
0<br />
1<br />
No call<br />
Set<br />
Call<br />
Waiting<br />
To set/cancel for outside calls<br />
3<br />
7 2<br />
0<br />
1<br />
No tone<br />
Tone<br />
To talk to the second party<br />
While hearing a call waiting tone<br />
OR<br />
Paging<br />
To page<br />
3 3<br />
Wait for an answer.<br />
paging group no. (2 digits)<br />
Announce.<br />
To answer<br />
4<br />
3<br />
32
Feature List<br />
Feature<br />
Operation<br />
Useful Features<br />
To set<br />
Absent<br />
Message<br />
To cancel<br />
7<br />
5<br />
0<br />
message<br />
no. (1-9)<br />
parameter<br />
(if required)<br />
7<br />
5 0 0<br />
Log-in/<br />
Log-out<br />
7<br />
7<br />
3<br />
3<br />
6<br />
1<br />
6 0<br />
For Log-in<br />
For Log-out<br />
ICD Group<br />
extension no.<br />
Specified<br />
All<br />
Extension<br />
Setting<br />
Clear<br />
Message<br />
Waiting<br />
Caller<br />
7<br />
9<br />
0<br />
To leave a message waiting indication<br />
When the called extension is busy or does not answer<br />
4<br />
OR<br />
Select<br />
“ Message”.<br />
To cancel a message waiting indication<br />
7<br />
0<br />
0<br />
extension<br />
no.<br />
Called<br />
extension<br />
To call back<br />
OR<br />
7<br />
0<br />
2<br />
Select<br />
“ Message”.<br />
To lock<br />
Extension<br />
Lock*<br />
To unlock<br />
7 7<br />
7 7<br />
1<br />
0<br />
extension PIN<br />
(max. 10 digits)<br />
• * If an extension PIN has not been set for the PS, the extension cannot be<br />
locked. (Refer to the Business Telephone System <strong>User</strong> Manual)<br />
• For further information, refer to the Business Telephone System <strong>User</strong> Manual or<br />
consult your dealer.<br />
33
Programming<br />
Programming<br />
Changing the Initial Settings<br />
You can customize the handset by editing the settings found under “Setting Handset”<br />
in the menu list, as follows:<br />
Press the<br />
Joystick.<br />
Select<br />
“ Setting<br />
Handset”.<br />
Press the<br />
Joystick.<br />
Select the<br />
desired<br />
main item.<br />
Press the<br />
Joystick.<br />
setting<br />
Select the<br />
desired<br />
sub item.<br />
Press the<br />
Joystick.<br />
Follow the<br />
setting.<br />
Press the<br />
Joystick.<br />
• To return to the previous menu, press .<br />
• To cancel, press at any time.<br />
• The unit will beep to indicate that the new settings have been saved.<br />
34
Programming<br />
Handset setting menu layout<br />
Setting Handset<br />
Memo Alarm<br />
Ringer Option<br />
Tone Option<br />
Display Option<br />
Call Option<br />
Registration<br />
Select Base<br />
Other Option<br />
Ringer Volume<br />
EXT Ringer Type<br />
INT Ringer Type<br />
Group Ring Type<br />
Private Ring<br />
Charger<br />
Key Tone<br />
Standby Display<br />
Select Language<br />
LED Colour<br />
Private Colour<br />
Category Name<br />
Caller ID Disp<br />
LCD Contrast<br />
Guidance<br />
Hot Line No.<br />
Hot Line Mode<br />
Line Access CD<br />
Register H/set<br />
Cancel Base<br />
Change H/S PIN<br />
Auto Talk<br />
Reset Handset<br />
Any Key Answer<br />
Auto Answer<br />
Auto Ans Delay<br />
Flex Key Edit<br />
35
Programming<br />
Main Item<br />
Sub Item<br />
Description<br />
Setting<br />
Default<br />
Memo Alarm<br />
An alarm will sound at the set time.<br />
A memo can also be displayed.<br />
(See page 39.)<br />
Alarm no.<br />
Alarm mode<br />
(Off/Once /Daily)<br />
Alarm time<br />
Enter memo.<br />
15 Ringer Type<br />
Not Stored<br />
Ringer Option<br />
Ringer Volume<br />
Adjusts the ringer volume.<br />
6 levels/Off<br />
Level 3<br />
EXT Ringer Type<br />
INT Ringer Type<br />
Group Ring Type<br />
Selects the ringer type for<br />
each type of call.<br />
(intercom call, outside call,<br />
group call)<br />
15 Ringer Types<br />
Ringer 1<br />
Private Ring<br />
Selects the ringer type for<br />
calls in each category.<br />
Select a Category.<br />
15 Ringer Types<br />
Charger<br />
Selects whether the PS on<br />
a charger rings or not.<br />
Ringer Setting/<br />
Ringer Off<br />
Ringer Setting<br />
Tone Option<br />
Key Tone<br />
Turns the key tone off or<br />
on.<br />
On/Off<br />
On<br />
Display Option<br />
Standby Display<br />
Select Language<br />
LED Colour<br />
Selects the display in<br />
standby mode.<br />
Selects the display<br />
language. When set to<br />
AUTO, the language<br />
settings of the Business<br />
Telephone System will be<br />
used.<br />
Selects the LED colour for<br />
each type of call.<br />
(intercom call, outside call,<br />
group call)<br />
4 Display Type<br />
(Base Number/<br />
Handset Number/<br />
Handset Name/<br />
Base & H/S No.)/<br />
Off<br />
Auto/16<br />
Languages<br />
Call Type<br />
(Ext Ring/<br />
Int Ring/<br />
Group Ring)<br />
Colour<br />
(Green/Red/<br />
Orange)<br />
Base & H/S No.<br />
English<br />
INT Ring-Green,<br />
EXT Ring-Red<br />
Group Ring-Orange<br />
Private Colour<br />
Selects the LED colour for<br />
calls in each category.<br />
“Private Colour”<br />
setting has priority to<br />
“LED Colour” setting.<br />
Select a Category.<br />
Colour<br />
(Green/Red/<br />
Orange)<br />
Green<br />
Category Name<br />
Edits the category name.<br />
Select a Category.<br />
Category 1-9<br />
36
Programming<br />
Main Item<br />
Sub Item<br />
Description<br />
Setting<br />
Default<br />
Display Option<br />
Caller ID Disp<br />
Selects which caller information<br />
is displayed when a call is<br />
received. Either the Handset<br />
Phonebook information or the<br />
information stored in the<br />
Business Telephone System<br />
can be displayed.<br />
H/S Phonebook/<br />
PBX Setting<br />
PBX Setting<br />
LCD Contrast<br />
Adjusts the LCD contrast.<br />
3 levels<br />
Level 2<br />
Guidance<br />
Selects whether the<br />
guidance display is shown<br />
or not in standby mode.<br />
On/Off<br />
On<br />
Call Option<br />
Hot Line No.<br />
Stores a phone number to<br />
make a call by pressing<br />
TALK.<br />
Enter Phone no.<br />
Not stored<br />
Hot Line Mode<br />
When set to ON, allows<br />
you to make a call to the<br />
stored phone no. in<br />
“Hot Line No.” by<br />
pressing TALK.<br />
On/Off<br />
Off<br />
Line Access CD<br />
Enters the trunk access code<br />
(line access code) that matches<br />
the setting of your Business<br />
Telephone System. Three trunk<br />
access code can be stored.<br />
Select a number.+<br />
Enter the code.<br />
No.1<br />
No.2<br />
No.3<br />
0<br />
8XX*<br />
Not stored<br />
Registration<br />
Register H/set<br />
Registers a handset with<br />
a base unit.<br />
Base no.<br />
Base PIN<br />
[Personal<br />
Identification<br />
Number]<br />
Not stored<br />
Cancel Base<br />
Cancels the registration of<br />
a handset.<br />
H/set PIN<br />
(Default: 0000)<br />
Base no.<br />
Not stored<br />
Select Base<br />
Selects a base unit.<br />
Auto/Base no.<br />
Auto<br />
Other Option<br />
Change H/S PIN<br />
Changes the handset PIN.<br />
Enter Old PIN.+<br />
Enter New PIN.+<br />
Verify New PIN.<br />
0000<br />
Auto Talk<br />
When set to ON, allows you to<br />
answer a call by just lifting up<br />
the handset from the charger.<br />
On/Off<br />
On<br />
• * XX is identical to the CO line group number and 8XX represents any 3-digits<br />
code starting with “8”.<br />
37
Programming<br />
Main Item<br />
Sub Item<br />
Description<br />
Setting<br />
Default<br />
Other Option<br />
Reset Handset<br />
Returns the handset settings<br />
(except Registration) to the<br />
default settings.<br />
Enter H/set<br />
PIN.+Select<br />
“Yes”.<br />
Any Key Answer<br />
When set to ON, allows you<br />
to answer a call by pressing<br />
any dial button.<br />
On/Off<br />
Off<br />
Auto Answer<br />
Selects the type of calls to<br />
be answered by AUTO<br />
ANSWER.<br />
2 Call Types<br />
(Internal Only/<br />
Int&External)/Off<br />
Off<br />
Auto Ans Delay<br />
Selects the number of<br />
seconds before a call is<br />
automatically answered<br />
when Auto Answer is<br />
turned on.<br />
5-20 sec.<br />
6 sec<br />
Flex Key Edit<br />
Allows you to assign a<br />
function to a flexible key, and<br />
use the key as a shortcut key.<br />
See page 40.<br />
38
Programming<br />
Memo alarm setting<br />
Press the<br />
Joystick.<br />
Select<br />
“ Setting<br />
Handset”.<br />
Press the<br />
Joystick.<br />
Select<br />
“Memo<br />
Alarm”.<br />
Press the<br />
Joystick.<br />
Select the<br />
alarm number<br />
(1-3).<br />
Press the<br />
Joystick.<br />
Select the<br />
Alarm mode<br />
(Off/Once/Daily).<br />
Press the<br />
Joystick.<br />
When “Once/Daily” is selected<br />
date/time<br />
memo<br />
Once: Enter date and time.<br />
Daily: Enter time.<br />
Press the<br />
Joystick.<br />
Enter memo.<br />
Press the<br />
Joystick.<br />
Select the<br />
ringer type.<br />
(1-15).<br />
When “Off” is selected<br />
Press the<br />
Joystick.<br />
Press the<br />
Joystick.<br />
Press the<br />
Joystick.<br />
To stop the alarm<br />
Press CANCEL.<br />
• To clear the displayed memo alarm, press and then select “Yes”.<br />
• During a conversation, an alarm will not sound until the call is ended.<br />
39
Programming<br />
Flexible key edit<br />
Press the<br />
Joystick.<br />
Select<br />
“ Setting<br />
Handset”.<br />
Press the<br />
Joystick.<br />
Select<br />
“Other<br />
Option”.<br />
Press the<br />
Joystick.<br />
Select<br />
“Flex Key<br />
Edit”.<br />
OR<br />
Press the<br />
Joystick.<br />
Select the<br />
desired<br />
flexible key.<br />
Press the<br />
Joystick.<br />
Select the<br />
desired item.*<br />
Press the<br />
Joystick.<br />
Press the<br />
Right Soft<br />
Key.<br />
• * Items on page 41 can be assigned, and accessed through the display<br />
operation.<br />
•Toassignanitemotherthan“PBX setting”toaflexiblekeywhichhasalready<br />
been used, first set the key to “Not stored”, as shown below.<br />
Select<br />
“ PBX<br />
Program”.<br />
Select<br />
a Flexible<br />
Key.<br />
2<br />
40
Programming<br />
Main Item<br />
PBX setting<br />
Menu<br />
Dialing<br />
Call log<br />
Caller ID<br />
Ringer Option<br />
New Phonebook<br />
Setting Handset<br />
PBX Program<br />
Walkie-Talkie<br />
H/set Phonebook<br />
PBX Sys Dialing<br />
PBX EXT Dialing<br />
Redial<br />
Incoming Log<br />
Incoming LogGrp<br />
Memo Alarm<br />
Sub-Items<br />
Ringer Volume<br />
EXT Ringer Type<br />
INT Ringer Type<br />
Group Ring Type<br />
Private Ring<br />
Charger<br />
Ringer Option<br />
Tone Option<br />
Display Option<br />
Call Option<br />
Registration<br />
Select Base<br />
Other Option<br />
Ringer Volume<br />
EXT Ringer Type<br />
INT Ringer Type<br />
Group Ring Type<br />
Private Ring<br />
Charger<br />
Key Tone<br />
Standby Display<br />
Select Language<br />
LED Colour<br />
Private Colour<br />
Category Name<br />
Caller ID Disp<br />
LCD Contrast<br />
Guidance<br />
Hot Line No.<br />
Hot Line Mode<br />
Line Access CD<br />
Change H/S PIN<br />
Auto Talk<br />
Reset Handset<br />
Any Key Answer<br />
Auto Answer<br />
Auto Ans Delay<br />
Flex Key Edit<br />
• To access sub-items, press .<br />
41
Others<br />
Others<br />
Walkie-Talkie<br />
Using Walkie-Talkie mode, you can communicate with another handset even when out of<br />
range of a base unit. Only <strong>Panasonic</strong> DECT Portable Station which supports Walkie-<br />
Talkie can be used. Handsets have to be in Walkie-Talkie mode, and have the same<br />
Walkie-Talkie group number. In Walkie-Talkie mode, you cannot make or receive a call<br />
through the PBX.<br />
Turning the Walkie-Talkie mode on<br />
Press the<br />
Joystick.<br />
Select “<br />
Talkie”.<br />
Walkie-<br />
Press the<br />
Joystick.<br />
Select “On”.<br />
Press the<br />
Joystick.<br />
Turning the Walkie-Talkie mode off<br />
Press the<br />
Joystick.<br />
Select “Off”.<br />
Press the<br />
Joystick.<br />
• To exit the operation, press any time.<br />
• When the Walkie-Talkie mode is ON, the handset number is displayed followed<br />
by “Walkie-Talkie”.<br />
42
Others<br />
Setting the Walkie-Talkie mode<br />
Press the<br />
Joystick.<br />
Select<br />
“ Walkie-<br />
Talkie”.<br />
Press the<br />
Joystick.<br />
Select<br />
“Setting”.<br />
Press the<br />
Joystick.<br />
group no.<br />
handset no.<br />
Enter the group Press the<br />
number* (3 digits). Joystick.<br />
Enter the handset<br />
number (1-9).<br />
Press the<br />
Joystick.<br />
Press the<br />
Joystick.<br />
• To exit the operation, press any time.<br />
• * Any combination of three number can be used, make note of your own code.<br />
• Each handset should have its own unique number.<br />
Talking in Walkie-Talkie mode<br />
Calling<br />
Press INTERCOM.<br />
handset no.<br />
Enter the desired<br />
handset number.*<br />
Answering<br />
Press TALK.<br />
• To exit the operation, press any time.<br />
• * A caller can press to call all handsets in the same Walkie-Talkie mode.<br />
Using the Belt Clip<br />
You can hang the handset on your belt.<br />
To remove<br />
the belt clip.<br />
43
Others<br />
Wall Mounting<br />
1 Connect the AC adaptor to the charger. 2 Drive the screws into the wall using the<br />
wall template below.<br />
Charger<br />
Cord holder<br />
28 mm<br />
Screws<br />
AC adaptor<br />
To AC Outlet<br />
3 Mount the charger securely on the screws.<br />
28 mm<br />
44
Troubleshooting<br />
Troubleshooting<br />
Troubleshooting<br />
Problem<br />
The PS does not work.<br />
The PS does not ring.<br />
You cannot make/receive a call.<br />
You cannot dial.<br />
Noise is frequently heard.<br />
“CS BUSY” is displayed.<br />
“PS Not Connected” is<br />
displayed.<br />
The PS stops working during<br />
operation.<br />
Description and Solution<br />
• The battery is drained.<br />
→ Charge the battery fully. (See “Battery Charge” on page 7.)<br />
• The PS has been cancelled or the PS has not been<br />
registered.<br />
→ Consult your dealer.<br />
• The power is OFF.<br />
→ Turn it ON. (See “Power On/Off” on page 8.)<br />
• Ringer volume is set to “Off”.<br />
→ Adjust the ringer volume level. (See “Ringer Volume<br />
Adjustment” on page 13.)<br />
• The PS is out of range or the Cell Station (CS) is busy.<br />
→ Move closer to the CS or try again later.<br />
• The radio channel is busy or a radio communication error<br />
occurred.<br />
→ Try again later.<br />
• The number which you dialled is restricted by the<br />
Business Telephone System.<br />
→ Consult your dealer.<br />
• The key lock mode is ON.<br />
→ To cancel the mode, press the Joystick for about 2<br />
seconds. (See “Key Lock” on page 13.)<br />
• The radio channel is busy or a radio communication error<br />
occurred.<br />
→ Try again later.<br />
→ Set the PS and CS away from other electrical appliances.<br />
→ Move closer to the CS.<br />
• The Cell Station is busy.<br />
→ Try again later.<br />
• The called PS is out of range or the PS is power off.<br />
→ Try again later.<br />
→ Turn the power OFF and ON, then try again. (See “Power<br />
On/Off” on page 8.)<br />
→ Reinsert the batteries and try again. (See “Battery<br />
Installation” on page 7.)<br />
45
Important Information<br />
Important Information<br />
Battery Information<br />
After your <strong>Panasonic</strong> batteries are fully charged [at 25 °C]:<br />
Operation<br />
Operating Time<br />
Whileinuse(TALK)<br />
10hrsapprox.<br />
While not in use (Standby)<br />
120 hrs approx.<br />
• Battery charge may be shortened depending on usage conditions and ambient temperature.<br />
• The batteries cannot be overcharged.<br />
• The batteries will drain even while the unit is “OFF”.<br />
• The PS can receive calls while charging.<br />
• Battery consumption increases when the PS is used out of range. If “ ” flashes, power off<br />
the PS.<br />
• Clean the handset and the charger contacts with a soft, dry cloth once a month. Clean<br />
more often if the unit is subject to grease, dust or high humidity. Otherwise the<br />
batteries may not charge properly.<br />
• Read “Important Notice Concerning the Correct Use and Charging of Ni-MH Batteries.”<br />
Low Battery Warning<br />
The batteries need to be charged when “ ” flashes or the alarm sounds every one<br />
minute.*<br />
* If the low battery warning occurs during a conversation, you can continue the call for<br />
one minute, then the call will be disconnected automatically.<br />
Replacing the Batteries<br />
If “ ” flashes after a few telephone calls even when the batteries have been fully<br />
charged, it is time to replace the batteries with new ones.<br />
Before replacing the batteries, turn the power off to prevent memory loss. Replace the<br />
batteries. Charge the new batteries for at least 7 hours.<br />
If you replace the batteries before the low battery warning appears, the battery strength<br />
icon may display an incorrect reading. In this case, use the PS as normal with the new<br />
batteries installed. When the low battery warning is displayed, charge the batteries for<br />
about 7 hours. The battery strength icon will then display a correct reading.<br />
• Please replace with PANASONIC batteries, part number HHR-4EPT/BA2.<br />
• Replace both batteries and close the cover then charge the handset for about 7 hours.<br />
Please order only <strong>Panasonic</strong> R03P (Ni-MH) batteries, part number HHR-<br />
4EPT/BA2.<br />
Caution<br />
To reduce the risk of fire or injury to persons, read and follow these instructions.<br />
1) Use only the batteries specified.<br />
2) Do not use non-rechargeable batteries.<br />
3) Do not mix old and new batteries.<br />
46
Important Information<br />
4) Do not dispose of the batteries in a fire. They may explode. Check with local waste<br />
management codes for special disposal instructions.<br />
5) Do not open or mutilate the batteries. Released electrolyte is corrosive and may<br />
cause burns or injury to the eyes or skin. The electrolyte may be toxic if swallowed.<br />
6) Exercise care in handling the batteries in order not to short the batteries with<br />
conductive materials such as rings, bracelets, and keys. The batteries and/or<br />
conductor may overheat and cause burns.<br />
7) Charge the batteries provided with or identified for use with this product only in<br />
accordance with the instructions and limitations specified in this manual.<br />
Important Notice Concerning the Correct Use and Charging of Ni-MH<br />
Batteries<br />
Batteries, due to their construction, undergo some wear and tear. The lifetime of a battery<br />
also depends on correct maintenance. Charging and discharging are the most important<br />
factors. You should take notice of the following to maintain the life of the battery as long<br />
as possible.<br />
Ni-MH batteries have a kind of memory, the “memory effect.” If fully charged batteries are<br />
used several times only for 15 minutes in the handset and then recharged, the capacity of<br />
the batteries will be reduced to 15 minutes due to the memory effect. Therefore you<br />
should discharge the batteries completely, i.e. use them in the handset until “ ” on the<br />
display starts flashing. Then recharge them as described in the manual. After the<br />
memory effect has occurred, it is possible to achieve almost complete capacity of the Ni-<br />
MH batteries by charging and discharging several times one after another.<br />
Ni-MH batteries can also self-discharge. This self-discharge depends on the ambient<br />
temperature. At temperatures under 0 °C, the self-discharge will be the lowest. High<br />
humidity and high temperatures support the self-discharge. Also long-term storage will<br />
lead to self-discharge. A dead Ni-MH battery should not be disposed of normally. They<br />
contain toxic heavy metal hydride and therefore should be recycled.<br />
Safety Instructions<br />
Pay special attention to the safety suggestions listed below.<br />
Safety<br />
1) Power source: The AC adaptor should be connected to a power supply only of the<br />
type as marked on the AC adaptor. The AC adaptor is used as the main disconnect<br />
device, ensure that the AC outlet is located/installed near the unit and is easily<br />
accessible.<br />
2) Non use periods: When the PS is not being used, turn the power off. When left<br />
unused for a long period of time, the charger should be unplugged from the AC outlet.<br />
3) Do not place metal items such as coins or rings on the charger. As they become hot,<br />
you might get burned if you touch them.<br />
47
Important Information<br />
Installation<br />
Environment<br />
1) Water and moisture: Do not use the PS and the charger near water — for example,<br />
near a bathtub, washbowl, sink, etc. Damp basements should also be avoided.<br />
2) Heat: The PS and the charger should be kept away from heat sources such as<br />
radiators, kitchen ranges, etc. They also should not be placed in rooms where the<br />
temperature is less than 5 °C or greater than 40 °C.<br />
3) The apparatus is designed to be installed and operated under controlled conditions of<br />
ambient temperature and a relative humidity.<br />
Placement<br />
1) Stacking: Do not place heavy objects on top of the PS and charger.<br />
2) Foreign material: Care should be taken so that objects do not fall onto and liquids are<br />
not spilled into the PS and charger. Do not subject the PS and charger to excessive<br />
smoke, dust, mechanical vibration, or shock.<br />
3) Surface: Place the charger on a flat surface. If the charger is mounted on the wall,<br />
install it straight.<br />
For best performance<br />
Operating Range<br />
1) The range of operation depends on the topography of your office, weather or usage<br />
conditions, because signals are transmitted between the Cell Station (CS) and the PS<br />
by radio waves.<br />
2) Normally, you get greater range outdoors than indoors. If there are obstacles such as<br />
walls, noise may interfere with your telephone calls. In particular, high metal shelves<br />
or reinforced concrete walls will restrict your operating range.<br />
3) A PS may not work when it is too far from the CS depending on the structure of the<br />
building.<br />
Noise<br />
Occasional noise or interference may occur due to electromagnetic radiation from<br />
objects such as refrigerators, microwave ovens, faxes, TVs, radios, or personal<br />
computers. If noise disturbs your telephone calls, keep the PS away from these electrical<br />
appliances.<br />
WARNING:<br />
TO PREVENT FIRE OR SHOCK HAZARD, DO NOT EXPOSE THIS PRODUCT TO<br />
RAIN OR ANY TYPE OF MOISTURE. TO REDUCE THE RISK OF ELECTRIC SHOCK,<br />
DO NOT DISASSEMBLE THIS UNIT. TAKE THE UNIT TO AN AUTHORISED SERVICE<br />
CENTRE WHEN SERVICE IS REQUIRED.<br />
THE HANDSET IS MAGNETISED AND MAYRETAIN SMALL FERROUS OBJECTS.<br />
When a failure occurs which results in the internal parts becoming accessible, disconnect<br />
the AC adapter immediately and return this unit to the place of purchase or service<br />
centre.<br />
48
Important Information<br />
IMPORTANT NOTICE:<br />
Under power failure conditions, this wireless telephone may not operate. Please ensure<br />
that a separate telephone, not dependent on local power, is available for emergency use<br />
in emergencies.<br />
• This apparatus is designed to aid the visually handicapped to locate dial keys and<br />
buttons.<br />
• 999 and 112 can be dialled on the apparatus after accessing the CO line for the<br />
purpose of making outgoing calls to the BT emergency (999) and (112) services.* 1<br />
•Thisequipment shall not be set to make automatic calls to the Telecom ‘111’<br />
Emergency Service.* 2<br />
• The grant of a Telepermit for any item of terminal equipment indicates only that Telecom<br />
has accepted that the item complies with the minimum conditions for connection to its<br />
network. It indicates no endorsement of the product by Telecom, nor does it provide any<br />
sort of warranty. Above all, it provides no assurance that any item will work correctly in<br />
all respects with another item of Telepermitted equipment of a different make or model,<br />
nor does it imply that any product is compatible with all of Telecom's networkservices.* 2<br />
* 1 The regulation applied in the United Kingdom only.<br />
* 2 The regulation applied in New Zealand only.<br />
RF Specifications<br />
Item<br />
Description<br />
Radio Access Method<br />
Multi Carrier TDMA-TDD<br />
Frequency Band<br />
1880MHz-1900MHz<br />
Number of Carriers 10<br />
Carrier Spacing<br />
1728 kHz<br />
Bit Rate<br />
1152 kbps<br />
Carrier Multiplex<br />
TDMA, 24 (T×12, R×12) slots per frame<br />
Frame Length<br />
10 ms<br />
Modulation<br />
GFSK<br />
Voice Coding<br />
32 kbps ADPCM (CCITT G.721)<br />
Transmission Output<br />
Max. 250 mW<br />
• Specifications are subject to change.<br />
• The illustrations used in this manual may slightly differ from the original device.<br />
49
Following declaration is applicable to <strong>KX</strong>-<strong>TCA155</strong>CE/<strong>KX</strong>-<strong>TCA155</strong>E only<br />
0436<br />
This device is a DECT Portable station operating in the frequency band of 1880 MHz to 1900 MHz.<br />
The usage of this device is generally allowed in all the EU countries.<br />
We, <strong>Panasonic</strong> Communications Company (U.K.) Ltd., declare that this equipment is in<br />
compliance with the essential requirements and other relevant provisions of Directive 1999/5/EC.<br />
If you want to get a copy of the original Declaration of Conformity of our products which relates<br />
to the R&TTE, please contact to our web address:<br />
http://doc.panasonic-tc.de<br />
Copyright:<br />
This manual is copyrighted by <strong>Panasonic</strong> Communications Co., Ltd. (PCC). You may print out<br />
this manual solely for internal use with this model. Except above, you may not reproduce this<br />
manual in any form, in whole or part, without the prior written consent of PCC and its licensee.<br />
© 2003 <strong>Panasonic</strong> Communications Co., Ltd. All Rights Reserved.<br />
<strong>Panasonic</strong> Communications Company (U.K.) Ltd.<br />
Pencarn Way, Duffryn, Newport, South Wales, NP10 8YE, United Kingdom<br />
PSQX2983YA KK0703TT1093