IMPRESSA Z5 Instructions for use - Esperanza
IMPRESSA Z5 Instructions for use - Esperanza
IMPRESSA Z5 Instructions for use - Esperanza

You also want an ePaper? Increase the reach of your titles
YUMPU automatically turns print PDFs into web optimized ePapers that Google loves.
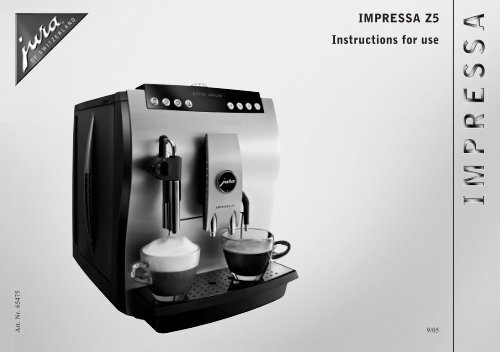
<strong>IMPRESSA</strong> <strong>Z5</strong><br />
<strong>Instructions</strong> <strong>for</strong> <strong>use</strong><br />
Art. Nr. 65475<br />
9/05
= Note = Important = Tip<br />
JURA Elektroapparate AG, CH-4626 Niederbuchsiten,<br />
Internet http://www.jura.com
Fig. 1 Fig. 2 Fig. 3 Fig. 4 Fig. 5<br />
Fig. 6 Fig. 7<br />
Fig. 8 Fig. 9 Fig. 10<br />
b a 1<br />
c<br />
Fig. 11 Fig. 12 Fig. 13<br />
Fig. 14<br />
<br />
Fig. 13:<br />
Correct assembly of the<br />
cappuccino nozzle<br />
Make sure there is always a small gap<br />
between the rear cappuccino nozzle<br />
and the connection piece. This will<br />
guarantee perfect operation of the cappuccino<br />
nozzle.
7<br />
8<br />
6<br />
5<br />
9<br />
10<br />
14<br />
15<br />
4a<br />
11<br />
12<br />
13<br />
2b<br />
16b<br />
16a<br />
A<br />
B<br />
C<br />
4b<br />
3<br />
2a<br />
1<br />
D E F G H I J K L M
Description of the machine<br />
1. Drip tray<br />
2. a) Drip grate<br />
b) Cup plat<strong>for</strong>m<br />
3. Coffee grounds tray and container<br />
4. a) One Touch Cappuccino nozzle* long spout<br />
b) One Touch Cappuccino nozzle* short spout<br />
5. Water tank with handle and level indicator<br />
6. Water tank cover<br />
7. Cover <strong>for</strong> bean tank and coffee powder tank<br />
8. Aroma preservation cover<br />
9. Filler funnel <strong>for</strong> pre-ground coffee<br />
10. Control panel<br />
11. Height-adjustable coffee spout<br />
12. Height-adjustable hot water spout<br />
13. Cup illumination<br />
14. Rotary switch <strong>for</strong> setting the grinding degree<br />
15. Power switch<br />
16. a) Vacuum milk container<br />
b) Stainless steel vacuum milk container<br />
* hereinafter referred to as cappuccino nozzle<br />
A ON / OFF key<br />
B Rotary Switch<br />
C Maintenance key<br />
D Milk key<br />
E Cappuccino key<br />
F Special Coffee key<br />
G Hot Water key<br />
H Text display<br />
I Graphics display<br />
J 1 ESPRESSO key<br />
K 2 ESPRESSOS key<br />
L 1 COFFEE key<br />
M 2 COFFEES key
Contents<br />
1. Safety in<strong>for</strong>mation ..............................................page 7<br />
1.1 Warning..................................................page 7<br />
1.2 Precautions..............................................page 7<br />
2. Preparing the <strong>IMPRESSA</strong> <strong>Z5</strong> ...............................page 7<br />
2.1 Check supply voltage..................................page 7<br />
2.2 Check electrical f<strong>use</strong> ..................................page 8<br />
2.3 Fill water tank .........................................page 8<br />
2.4 Fill coffee beans .......................................page 8<br />
2.5 Adjusting the grinding gear .........................page 8<br />
2.6 Vacuum milk container...............................page 8<br />
2.6.1 Vacuum milk container (16a).......................page 8<br />
2.6.2 Stainless steel vacuum milk container (16b) ....page 9<br />
2.7 Power switch............................................page 9<br />
3. First <strong>use</strong> ...........................................................page 9<br />
3.1 Cup illumination .......................................page 10<br />
4. Adjusting your machine to the water hardness ...........page 10<br />
5. Using the CLARIS plus filter cartridge....................page 11<br />
5.1 Installing the filter ....................................page 11<br />
5.2 Changing the filter ....................................page 12<br />
6. Rinsing the machine ............................................page 13<br />
7. Making coffee (1 espresso, 2 espressos, 1 coffee,<br />
2 coffees)..........................................................page 13<br />
8. Making special coffee ..........................................page 13<br />
9. Cappuccino .......................................................page 14<br />
9.1 Making cappuccino....................................page 14<br />
9.2 Cappuccino rinsing cycle.............................page 14<br />
9.3 Cappuccino cleaning cycle ...........................page 15<br />
9.4 Cleaning the cappuccino nozzle ....................page 16<br />
10. Making hot milk.................................................page 16<br />
11. Making hot water ...............................................page 16<br />
12. Brewing coffee using pre-ground coffee powder .........page 17<br />
13. Switching the <strong>IMPRESSA</strong> off ...............................page 17<br />
14. Settings............................................................page 18<br />
14.1 Setting the amount of water <strong>for</strong> coffee,<br />
espresso (1 or 2 cups) and special coffee ........page 18<br />
14.2 Cappuccino setting ....................................page 18<br />
14.3 Milk setting .............................................page 19<br />
14.4 Setting the amount of hot water ...................page 19<br />
6<br />
15. Programming.....................................................page 20<br />
15.1 Programming the filter...............................page 20<br />
15.2 Programming your machine to the correct<br />
water hardness (only with FILTER NO)..........page 20<br />
15.3 Maintenance ............................................page 20<br />
15.4 Programming the temperature <strong>for</strong> coffee,<br />
espresso, cappuccino and special coffee ..........page 20<br />
15.5 Programming the coffe strength ...................page 21<br />
15.6 Cappuccino programming............................page 22<br />
15.7 Programming the milk ...............................page 22<br />
15.8 Save energy .............................................page 23<br />
15.9 Setting the time........................................page 24<br />
15.10 Programming the automatic switch-on time.....page 25<br />
15.11 Programming the automatic switch-off time ....page 25<br />
15.12 In<strong>for</strong>mation .............................................page 26<br />
15.13 Renaming................................................page 27<br />
15.14 Programming the language..........................page 28<br />
15.15 Programming the display ............................page 28<br />
16. Maintenance......................................................page 29<br />
16.1 Filling the water tank ................................page 29<br />
16.2 Emptying the coffee gronds .........................page 30<br />
16.3 Emptying the drip tray ...............................page 30<br />
16.4 Drip tray missing ......................................page 30<br />
16.5 Grounds container missing...........................page 30<br />
16.6 Filling the bean tank..................................page 31<br />
16.7 Aroma preservation cover missing.................page 31<br />
16.8 Removing stones from the grinding gear.........page 31<br />
16.9 Changing the filter ....................................page 31<br />
16.10 In<strong>for</strong>mation about cleaning cycle ..................page 31<br />
16.11 In<strong>for</strong>mation about decalcify .........................page 32<br />
16.12 Emptying the system..................................page 32<br />
17. Cleaning ...........................................................page 32<br />
18. Decalcifying ......................................................page 33<br />
19. Disposal ...........................................................page 35<br />
20. Tips <strong>for</strong> perfect coffee..........................................page 35<br />
21. Problems ..........................................................page 36<br />
22. Legal in<strong>for</strong>mation ...............................................page 37<br />
23. Technical Data ...................................................page 37
Introduction<br />
Thank you <strong>for</strong> purchasing the <strong>IMPRESSA</strong> <strong>Z5</strong>. To ensure perfect<br />
functioning of your <strong>IMPRESSA</strong>, carefully read this operating<br />
manual and keep it <strong>for</strong> future reference.<br />
Should you need more in<strong>for</strong>mation or if you encounter particular<br />
problems not specified in these operating instructions in sufficient<br />
detail, either contact us directly or contact your local authorized<br />
dealer.<br />
You can download other languages from the JURA website at<br />
www.jura.com<br />
You will also find <strong>use</strong>ful tips on operation and maintenance<br />
of your <strong>IMPRESSA</strong> <strong>Z5</strong> on the website at www.jura.com.<br />
Don’t <strong>for</strong>get to check out the Knowledge Builder our animated<br />
operating instructions. LEO, our assistant, will take<br />
you through all the functions.<br />
If you have chosen the special chrome version of the<br />
<strong>IMPRESSA</strong> <strong>Z5</strong>, your machine is equipped with a stainless<br />
steel vacuum milk container (Fig. 16b) and an elegant cup<br />
plat<strong>for</strong>m (Fig. 2b). Also, the <strong>IMPRESSA</strong> <strong>Z5</strong> Chrome is<br />
delivered with a microfibre cloth <strong>for</strong> cleaning the high-class<br />
chrome front.<br />
We recommend that you wash the microfibre cloth with<br />
items of similar colour.<br />
1. Safety in<strong>for</strong>mation<br />
1.1 Warning<br />
Children do not realize the dangers involved in using electric<br />
appliances, <strong>for</strong> this reason always keep an eye on children when<br />
they <strong>use</strong> electric appliances.<br />
The coffee machine may only be <strong>use</strong>d by instructed persons.<br />
Never <strong>use</strong> a defective coffee machine or a machine with a<br />
defective mains cable.<br />
Never immerse the coffee machine in water.<br />
1.2 Precautions<br />
Never expose the coffee machine to weather (rain, snow, frost),<br />
never touch the machine when your hands are wet.<br />
Place the <strong>IMPRESSA</strong> on a firm, level base that is resistant to<br />
any water that may leak. Never stand on hot or warm surfaces<br />
(oven hobs). Keep out of the reach of children.<br />
If you don’t <strong>use</strong> the machine <strong>for</strong> a longer time (holidays, etc.)<br />
always disconnect the mains cable.<br />
Always disconnect mains cable be<strong>for</strong>e cleaning the machine.<br />
When disconnecting the mains cable never pull on the mains<br />
cable or the machine itself.<br />
Never repair or open the coffee machine yourself. Any repairs<br />
may only be carried out by authorized service shops using original<br />
spare parts and accessories.<br />
The coffee machine is connected to mains supply via a mains<br />
cable. Make sure nobody can trip over the mains cable. Make<br />
sure children and pets cannot reach the machine<br />
Never put the coffee machine or individual parts of it into a<br />
dishwasher.<br />
Make sure to install the machine at a place with sufficient air<br />
circulation, to prevent overheating of the machine.<br />
2. Preparing the <strong>IMPRESSA</strong> <strong>Z5</strong><br />
2.1 Check supply voltage<br />
The <strong>IMPRESSA</strong> <strong>Z5</strong> is preset in the factory to the correct mains<br />
voltage. Check if your local mains supply voltage complies with<br />
the in<strong>for</strong>mation given on the type plate on the underside of the<br />
<strong>IMPRESSA</strong>.<br />
7<br />
E
2.2 Check electrical f<strong>use</strong><br />
The <strong>IMPRESSA</strong> <strong>Z5</strong> is designed <strong>for</strong> an electric current of 10<br />
amperes. Check if the electrical f<strong>use</strong> has sufficient capacity.<br />
2.3 Fill water tank<br />
Only <strong>use</strong> fresh, cold water. Never fill in milk, mineral water<br />
or other liquids.<br />
Remove the water tank and rinse it with cold tap water<br />
thoroughly (Fig. 1).<br />
Then fill the water tank and reinstall it. Make sure to install the<br />
tank properly, it must engage audibly.<br />
2.4 Fill coffee beans<br />
To ensure that your machine will work perfectly <strong>for</strong> a long<br />
time and to avoid damage, please note that the grinding gear<br />
of your JURA coffee machine is not suitable <strong>for</strong> coffee beans<br />
which were treated, during or after roasting, with additives<br />
(e.g. sugar). Such coffee blends may damage the grinding<br />
gear. Any repair costs resulting from the <strong>use</strong> of such blends<br />
are not covered by warranty.<br />
Open the bean tank cover (7) and remove the aroma preservation<br />
cover (8).<br />
Remove any dirt or <strong>for</strong>eign matter from the bean tank.<br />
Fill coffee beans into the bean tank (Fig. 2), replace the aroma<br />
preservation cover (8), make sure the rounded edges are pointing<br />
outwards, and close the lid.<br />
2.5 Adjusting the grinding gear<br />
You can adjust the grinding gear to the roast of your coffee. We<br />
recommend<br />
a fine grinding degree <strong>for</strong> bright roasts<br />
a coarse degree <strong>for</strong> dark roasts<br />
The grinding degree may only be adjusted while the grinding<br />
gear is running.<br />
Open the bean tank cover (7).<br />
To adjust the grinding degree, turn the Rotary Switch (14) to the<br />
required position.<br />
There are two options:<br />
the narrower the bar, the finer the grind<br />
the broader the bar, the coarser the grind<br />
2.6 Vacuum milk container<br />
The vacuum milk container and the lid are NOT dishwasher safe<br />
Wash out the vacuum milk container (16a/16b) thoroughly<br />
be<strong>for</strong>e you <strong>use</strong> it <strong>for</strong> the first time.<br />
Fill the milk container with cool, fresh milk.<br />
Always make sure there is enough milk in the vacuum milk container<br />
be<strong>for</strong>e you froth milk or make cappuccino.<br />
If filled with refrigerated milk, the vacuum milk container will<br />
keep mil cool <strong>for</strong> about 8 hours.<br />
Please do not fill ice cubes into the vacuum milk container since<br />
these could damage its coating.<br />
Keep the vacuum milk container away from hot stove tops etc.<br />
The vacuum milk container may be damaged if dropped.<br />
2.6.1 Vacuum milk container (16a)<br />
Never <strong>use</strong> shapr or pointed objects in the milk container since<br />
these could damage its coating.<br />
8
2.6.2 Stainless steel vacuum milk container (16b)<br />
Always clean the stainless steel vacuum milk container after you<br />
have <strong>use</strong>d it. Rinse it with warm water, and with some detergent<br />
if necessery Remove the riser tube inside the milk container as<br />
well as the hose connection on the outside and give these parts<br />
including the lid a good rinse with clear water. Never <strong>use</strong> scouring<br />
agents, bleach, solvents or abrasive pads <strong>for</strong> cleaning. Leave<br />
the vacuum milk container OPEN if it’s not being <strong>use</strong>d.<br />
The stainless steel vacuum milk container is supplied with a hose<br />
set consisting of a 120 mm hose (fitted on both ends with a connection<br />
nipple) and a 360 mm hose. With the longer hose the<br />
container can be placed further away from the machine. You can<br />
also cut it to make 3 spare hoses each with a length of 120 mm.<br />
Please note that in order to fasten the suction tube on the lid the<br />
(transparent) rubber seal first has to be inserted into the opening<br />
as far as the stop. Then insert the suction tube into the rubber<br />
seal as far as the stop.<br />
Too little milk in the container may ca<strong>use</strong> the milk to squirt<br />
out of the nozzle.<br />
2.7 Power switch<br />
Actuate the power switch (15) on your <strong>IMPRESSA</strong> <strong>Z5</strong> be<strong>for</strong>e<br />
using the machine <strong>for</strong> the first time.<br />
We recommend that you switch off your <strong>IMPRESSA</strong> <strong>Z5</strong><br />
with the power switch (15) if you intend not to <strong>use</strong> the<br />
machine <strong>for</strong> longer periods of time (e.g.during holidays)<br />
3. First <strong>use</strong><br />
Press the power switch (15) at the bottom left of your IMPRES-<br />
SA (Fig. 3)<br />
The ON/OFF key lights up (A) to indicate that the machine<br />
has been switched on with the power switch.<br />
Switch the machine on using the ON/OFF key (A). The light<br />
of the ON/OFF key goes off.<br />
LANGUAGE<br />
ENGLISH<br />
Turn the Rotary Switch (B) until the required language is displayed.<br />
Example:<br />
LANGUAGE<br />
ENGLISH<br />
Confirm the selected language by pressing the Rotary Switch<br />
(B).<br />
CONFIRMED<br />
√<br />
TIME<br />
HOURS<br />
—:—<br />
To set the hours, turn the Rotary Switch (B)<br />
TIME<br />
HOURS<br />
12:00<br />
Press the Rotary Switch (B) to confirm the hours and to activate<br />
the minutes.<br />
TIME<br />
MINUTES<br />
12:00<br />
To set the minutes, turn the Rotary Switch (B).<br />
TIME<br />
MINUTES<br />
12:45<br />
Confirm the minutes by pressing the Rotary Switch (B).<br />
9<br />
E
CONFIRMED<br />
√<br />
PRESS MAINTENANCE<br />
<br />
Maintenance key (C) lights up.<br />
Place a cup each under the height-adjustable coffee spout (12)<br />
and the cappuccino nozzle (4) and press the maintenance key<br />
(C).<br />
SYSTEM FILLS<br />
<br />
The system now fills up automatically. While it is doing so, the<br />
maintenance key flashes. (A little water will leak from the cappuccino<br />
nozzle (4), then from the hot water spout (12).<br />
WELCOME TO<br />
JURA<br />
UNIT IS HEATING<br />
<br />
PRESS MAINTENANCE<br />
<br />
Place a cup under the height-adjustable coffee spout (11).<br />
Press the maintenance key (C).<br />
RINSING<br />
<br />
Now the water lines are flushed with fresh water. A little water<br />
will leak from the coffee spout (11).<br />
COFFEE READY<br />
<br />
You can now make the machine dispense a product of your<br />
choice by pressing the corresponding key.<br />
After putting the <strong>IMPRESSA</strong> into operation <strong>for</strong> the first<br />
time, do not disconnect it from the mains <strong>for</strong> at least 24<br />
hours to ensure it is in perfect operating condition. There<strong>for</strong>e,<br />
do not turn the machine off using the power switch during<br />
this time!<br />
If FILL BEANS appears on the display, press one of the<br />
coffee product keys again. The mill is not yet completely<br />
filled with coffee beans.<br />
For a perfect frothing result, adjust the coffee spout (11) to<br />
the size of your cup (Fig. 4).<br />
3.1 Cup illumination<br />
The cup illumination puts your coffee in a perfect light, making it<br />
a treat <strong>for</strong> the eyes as well.<br />
When you switch on the <strong>IMPRESSA</strong> or press any key, the cup<br />
illumination is activated <strong>for</strong> 1 minute.<br />
4. Adjusting your machine to the water hardness<br />
The <strong>IMPRESSA</strong> heats up water. As a result, calcification<br />
occurs during normal <strong>use</strong>, and it is indicated automatically.<br />
The <strong>IMPRESSA</strong> must there<strong>for</strong>e be adjusted to the hardness<br />
of the water <strong>use</strong>d. Use the supplied test sticks to determine<br />
the water hardness or contact your local waterworks.<br />
1° German hardness is equivalent to 1.79° French hardness.<br />
The water hardness programming step is no longer displayed<br />
if the filter is activated.<br />
The <strong>IMPRESSA</strong> is preset to 16°e. This setting can be changed. To<br />
do so, proceed as follows:<br />
10
COFFEE READY<br />
<br />
Press the Rotary Switch (B) until you hear an acoustic signal.<br />
FILTER<br />
NO<br />
Turn the Rotary Switch (B) until the following message is displayed:<br />
HARDNESS<br />
16°dH<br />
Now press the Rotary Switch (B) to start programming.<br />
HARDNESS<br />
16°dH<br />
Now turn the Rotary Switch until the correct water hardness is<br />
set.<br />
HARDNESS<br />
20°dH (example)<br />
Confirm the selected setting by pressing the Rotary Switch (B).<br />
CONFIRMED<br />
√<br />
HARDNESS<br />
20°dH (example)<br />
Now turn the Rotary Switch (B) until the following message is<br />
displayed:<br />
EXIT<br />
<br />
Now press the Rotary Switch (B) to leave the programming<br />
mode.<br />
COFFEE READY<br />
<br />
5. Using the CLARIS plus filter cartridge<br />
When using the CLARIS plus filter cartridge correctly,<br />
decalcifying your <strong>IMPRESSA</strong> will no longer be necessary.<br />
For more in<strong>for</strong>mation on the CLARIS plus filter cartridge<br />
refer to brochure “CLARIS plus. Hard on limescale. Gentle<br />
on your coffee machine.”<br />
5.1 Installing the filter<br />
Press the Rotary Switch (B) until you hear an acoustic signal.<br />
FILTER<br />
NO<br />
Now press the Rotary Switch (B) to start programming.<br />
Turn the Rotary Switch (B) until the following message is displayed:<br />
FILTER<br />
YES<br />
Confirm your setting by pressing the Rotary Switch (B).<br />
CONFIRMED<br />
√<br />
INSERT FILTER<br />
PRESS BUTTON<br />
Remove the water tank from the <strong>IMPRESSA</strong>. Empty out any<br />
remaining water. Fold up the cartridge holder (Fig.6). Attach the<br />
extension piece (contained in the Welcome Pack) to the top of<br />
the CLARIS plus filter cartridge. Now insert the filter cartridge<br />
in the water tank, applying gentle pressure (Fig. 6)<br />
Close the cartridge holder until it engages audibly.<br />
Fill the water tank with cold, fresh tap water and place it back<br />
into the machine.<br />
E<br />
11
Place a sufficiently large receptacle (min. 0.5 litres) under the<br />
cappuccino nozzle (4). We recommend attaching the short spout<br />
(4b).<br />
Press the maintenance key (C) to start rinsing the filter.<br />
FILTER RINS<br />
<br />
Filter rinsing stops automatically.<br />
UNIT IS HEATING<br />
<br />
COFFEE READY<br />
<br />
You have now activated the filter. The programming step <strong>for</strong><br />
adjusting your machine to the correct water hardness is<br />
there<strong>for</strong>e no longer displayed.<br />
The water might be slightly discoloured (no hazard to<br />
health).<br />
You can interrupt the filter rinsing cycle (e.g. to empty the<br />
receptacle). To do so, press a key of your choice.<br />
5.2 Changing the filter<br />
After drawing off approx. 50 litres, the filter cartridge will be<br />
<strong>use</strong>d up. A message requesting you to replace the filter will<br />
appear on the display. The scale on the cartridge holder in<br />
the water tank will tell you how much longer you can <strong>use</strong> the<br />
CLARIS plus filters.<br />
COFFEE READY<br />
<br />
FILTER-CHANGE<br />
The maintenance key (C) lights up. Press the maintenance<br />
key.<br />
INSERT FILTER<br />
PRESS BUTTON<br />
Remove the water tank from the <strong>IMPRESSA</strong>. Empty out any<br />
remaining water. Fold up the cartridge holder (Fig.6). Attach the<br />
extension piece to the top of the CLARIS plus filter cartridge.<br />
Now insert the filter cartridge in the water tank, applying gentle<br />
pressure (Fig. 6).<br />
Close the cartridge holder until it engages audibly.<br />
Fill the water tank with cold, fresh tap water and place it back<br />
into the machine.<br />
Place a sufficiently large receptacle (min. 0.5 litres) under the<br />
cappuccino nozzle (4). We recommend attaching the short spout<br />
(4b).<br />
Press the maintenance key (C) to start rinsing the filter.<br />
FILTER RINS<br />
<br />
Filter rinsing stops automatically.<br />
UNIT IS HEATING<br />
<br />
COFFEE READY<br />
<br />
You can also trigger a change of filter manually from the<br />
maintenance menu at any point in time (only if the filter has<br />
been activated) – see Chapter 15.3<br />
The water might be slightly discoloured (no hazard to<br />
health).<br />
You can interrupt the filter rinsing cycle (e.g. to empty the<br />
receptacle). To do so, press a key of your choice.<br />
12
6. Rinsing the machine<br />
If the coffee machine is switched off and has cooled down,<br />
you will be prompted to start a rinsing cycle when switching<br />
the machine back on. The machine automatically per<strong>for</strong>ms a<br />
rinsing cycle when you switch it off.<br />
PRESS MAINTENANCE<br />
<br />
Place a cup under the height-adjustable coffee spout (11).<br />
Press the maintenance key (C).<br />
RINSING<br />
<br />
COFFEE READY<br />
<br />
You can also trigger a rinsing cycle manually from the maintenance<br />
menu at any point in time (see Chapter 15.3).<br />
With manually triggered rinsing, all the spouts that were<br />
<strong>use</strong>d are rinsed.<br />
7. Making coffee<br />
(1 espresso, 2 espressos, 1 coffee, 2 coffees)<br />
COFFEE READY<br />
<br />
Place 1 or 2 cups (as required) under the adjustable coffee spout<br />
(11) and press the corresponding symbol , , , . The<br />
pre-brewing process (I.P.B.A.S.) moistens the coffee powder,<br />
briefly interrupts the flow of hot water and then begins with the<br />
actual brewing process.<br />
1 ESPRESSO (example)<br />
STRONG (example)<br />
The coffee brewing process stops automatically as soon as the<br />
set amount of water has run through.<br />
COFFEE READY<br />
<br />
To stop the brewing process prematurely, press any of the<br />
draw-off keys.<br />
You can pre-select the strength of your coffee when the machine<br />
is ready to brew ( PLEASE SELECT) To do<br />
so, turn the Rotary Switch (B) until the display indicates the<br />
desired coffee strength and then press a coffee key of your<br />
choice , , , .<br />
You can change the amount of water to be <strong>use</strong>d while the<br />
machine is brewing coffee. To do so, turn the Rotary Switch<br />
(B) until the display indicates the required amount (ML). The<br />
amount of water can be selected in increments of 5 ML.<br />
The amounts given in ML are approximate values and may<br />
vary from the effective quantity.<br />
8. Making special coffee<br />
COFFEE READY<br />
<br />
Place 1 cup under the cappuccino nozzle (4) and press the<br />
Special Coffee key . The pre-brewing process (I.P.B.A.S.)<br />
moistens the coffee powder, briefly interrupts the flow of hot<br />
water and then begins with the actual brewing process.<br />
SPECIAL CUP<br />
MILD (example)<br />
The coffee brewing process stops automatically as soon as the<br />
set amount of water has run through.<br />
13<br />
E
COFFEE READY<br />
To stop the brewing process prematurely, press any of the<br />
product keys.<br />
You can pre-select the strength of your coffee when the machine<br />
is ready to brew ( PLEASE SELECT). To<br />
do so, turn the Rotary Switch (B) until the display indicates<br />
the desired coffee strength and then press the coffee key of<br />
your choice (key F <strong>for</strong> special coffee).<br />
You can change the amount of water while the machine is<br />
brewing coffee. To do so, turn the Rotary Switch (B) until<br />
the display indicates the required amount (ML). The amount<br />
of water can be selected in increments of 5 ML.<br />
The amounts given in ML are approximate values and may<br />
vary from the effective quantity.<br />
9. Cappuccino<br />
9.1 Making cappuccino<br />
COFFEE READY<br />
<br />
Take the milk hose out of the Welcome Pack. (We recommend<br />
using the short hose with the vacuum milk container and the<br />
long hose with a milk carton). Connect the hose with the suction<br />
pipe projecting from the vacuum milk container. Then attach the<br />
other end of the hose to the cappuccino nozzle (Fig. 8).<br />
Turn the selector switch (1, Fig. 9) to the milk frothing range<br />
(a, Fig. 9).<br />
Place 1 cup under the cappuccino nozzle and press the Cappuccino<br />
key .<br />
CAPPUCCINO<br />
MILK<br />
The machine stops drawing milk automatically as soon as the set<br />
amount of milk (in SEC) has been <strong>use</strong>d.<br />
CAPPUCCINO<br />
NORMAL (example)<br />
The coffee brewing process stops automatically as soon as the<br />
set amount of coffee has been made.<br />
COFFEE READY<br />
<br />
To stop the frothing or the brewing process prematurely,<br />
press the Cappuccino key again.<br />
You can pre-select the strength of your coffee when the machine<br />
is ready to brew ( PLEASE SELECT). To<br />
do so, turn the Rotary Switch (B) until the display indicates<br />
the desired coffee strength and then press the key of your<br />
choice (E <strong>for</strong> cappuccino).<br />
You can change the amount of milk and the amount of water<br />
while the machine is brewing coffee. To do so, turn the<br />
Rotary Switch (B) until the display indicates the required<br />
SEC (during frothing) or ML (during coffee brewing).<br />
The amounts given in ML are approximate values and may<br />
vary from the effective quantity.<br />
9.2 Cappuccino rinsing cycle<br />
<br />
10 min. after having made cappuccino or frothed milk, a<br />
message on the display of your <strong>IMPRESSA</strong> will prompt you<br />
to run a cappuccino rinsing cycle.<br />
COFFEE READY<br />
14
CAPPU RINSE<br />
Place a sufficiently large receptacle (ca. 0.5 litres) under the cappuccino<br />
nozzle (4).<br />
Turn the selector switch (1, Fig. 9) to the steam range (c, Fig. 9).<br />
Press the maintenance key (C) to start the cappuccino rinsing<br />
cycle.<br />
CAPPUCCINO<br />
RINSING<br />
COFFEE READY<br />
<br />
You can also trigger a cappuccino rinsing cycle manually<br />
from the maintenance menu at any point in time (see Chapter<br />
15.3).<br />
9.3 Cappuccino cleaning cycle<br />
We recommend running the cappuccino cleaning cycle daily<br />
if you make cappuccino or frothed milk.<br />
Your <strong>IMPRESSA</strong> will not prompt you to run the cappuccino<br />
cleaning cycle. You need to activate the cappuccino cleaning<br />
cycle manually from the maintenance menu.<br />
Please contact your authorized dealer <strong>for</strong> a JURA cappuccino<br />
cleaner that is suitable specifically <strong>for</strong> the cappuccino cleaning<br />
program of your <strong>IMPRESSA</strong>. Please note that the <strong>use</strong> of<br />
unsuitable cleaning agents may ca<strong>use</strong> damage to your<br />
machine and could leave unfavourable residues in the water.<br />
COFFEE READY<br />
<br />
Press the Rotary Switch (B) until you hear an acoustic signal.<br />
FILTER<br />
NO or YES<br />
Turn the Rotary Switch (B) until the following message is displayed:<br />
MAINTENANCE<br />
<br />
Now press the Rotary Switch (B) to start the maintenance menu.<br />
RINSE UNIT<br />
<br />
Turn the Rotary Switch (B) until the following message is displayed:<br />
CAPPUCCINO CLEANING<br />
<br />
Place a sufficiently large receptacle (ca. 0.5 litres) under the cappuccino<br />
nozzle (4).<br />
Confirm by pressing the Rotary Switch (B).<br />
CLEANER FOR CAPPUCCINO<br />
PRESS BUTTON<br />
Fill a receptacle with approx. 250 ml of fresh water and add 1<br />
capful of cappuccino cleaning agent. Dip the milk hose into the<br />
solution (Fig.10).<br />
Make sure the selector switch (1, Fig. 9) is not set to “Steam” (c,<br />
Fig. 9).<br />
Press the maintenance key (C) to start the cleaning cycle.<br />
MACHINE IS CLEANING<br />
<br />
WATER FOR CAPPUCCINO<br />
PRESS BUTTON<br />
Fill a receptacle with fresh water and dip the milk hose into it<br />
(Fig. 10).<br />
Press the maintenance key (C).<br />
15<br />
E
MACHINE IS CLEANING<br />
<br />
<br />
COFFEE READY<br />
COFFEE READY<br />
To stop the machine dispensing milk prematurely, press any<br />
of the product keys.<br />
9.4 Cleaning the cappuccino nozzle<br />
Despite the cappuccino cleaning cycle, you should regularly<br />
disassemble the cappuccino nozzle and rinse it under running<br />
water.<br />
Remove the cappuccino nozzle from the <strong>IMPRESSA</strong> and take it<br />
apart as shown in Fig. 11.<br />
Thoroughly rinse all the parts of the nozzle under running water.<br />
Re-assemble the cappuccino nozzle and attach it to your<br />
<strong>IMPRESSA</strong>.<br />
10. Making hot milk<br />
COFFEE READY<br />
<br />
Take the milk hose out of the Welcome Pack. (We recommend<br />
using the short hose with the vacuum milk container and the<br />
long hose with a milk carton). Connect the hose with the suction<br />
pipe projecting from the vacuum milk container. Then attach the<br />
other end of the hose to the cappuccino nozzle (Fig. 8).<br />
Turn the selector switch (1, Fig. 9) to “Milk” (b, Fig. 9).<br />
Place 1 cup or 1 glass under the cappuccino nozzle (4) and press<br />
the Milk key .<br />
MILK<br />
20 SEC (example)<br />
The machine stops dispensing milk automatically as soon as the<br />
set amount of milk (in SEC) has been dispensed.<br />
10 min. after having made cappuccino or frothed milk, your<br />
<strong>IMPRESSA</strong> will prompt you to run a cappuccino rinsing<br />
cycle. The prompt appears on the display (see Chapter 9.2<br />
Cappuccino rinsing cycle).<br />
You can change the amount of milk set while the machine is<br />
dispensing milk. To do so, turn the Rotary Switch (B) until<br />
the display indicates the required SEC.<br />
We recommend running the cappuccino cleaning cycle daily<br />
if you make cappuccino or frothed milk (see Chapter 9.3<br />
Cappuccino cleaning cycle).<br />
11. Making hot water<br />
COFFEE READY<br />
<br />
Place 1 cup or 1 glass under the height-adjustable hot water<br />
spout (12) and press the Hot Water key .<br />
HOT WATER<br />
PORTION<br />
The machine stops dispensing water automatically as soon as the<br />
programmed amount of water has been dispensed.<br />
COFFEE READY<br />
<br />
To stop the machine dispensing hot water prematurely, press<br />
any of the product keys.<br />
16
You can change the amount of water set while the machine<br />
is dispensing hot water. To do so, turn the Rotary Switch (B)<br />
until the display indicates the required amount (ML). The<br />
amount of water can be selected in increments of 5 ML.<br />
The amounts given in ML are approximate values and may<br />
vary from the effective quantity.<br />
12. Brewing coffee using pre-ground coffee powder<br />
Never <strong>use</strong> water-soluble instant coffee.<br />
<br />
<br />
COFFEE READY<br />
To stop the brewing process prematurely, press any of the<br />
keys.<br />
We recommend always using powder from fresh coffee<br />
beans or pre-ground, vacuum-packed coffee. Never fill in<br />
more than 2 scoops of powder. The filler funnel is no storage<br />
tank. Make sure the coffee powder you <strong>use</strong> is not too fine.<br />
This may block the system and ca<strong>use</strong> the coffee only to drip<br />
out of the coffee spout.<br />
E<br />
COFFEE READY<br />
<br />
Place 1 or 2 cups (as required) under the height-adjustable coffee<br />
spout (11).<br />
Open the lid of the filler funnel <strong>for</strong> pre-ground coffee (9). It is<br />
under the bean tank cover (7).<br />
PRE-GROUND<br />
FILL POWDER<br />
Fill 1 or 2 level scoops of pre-ground coffee into the filler funnel<br />
<strong>for</strong> pre-ground coffee (9) (Fig. 7) and close the lid.<br />
PRE-GROUND<br />
COFFEE READY<br />
Then press a key of your choice , , , , , . The<br />
machine will brew the coffee with the amount of water preselected<br />
<strong>for</strong> it.<br />
PRE-GROUND<br />
<br />
The coffee brewing process stops automatically as soon as the<br />
set amount of coffee has been made.<br />
If you have <strong>use</strong>d too little powder, the display will indicate<br />
“NOT ENOUGH”. Your <strong>IMPRESSA</strong> will stop the process<br />
and return to “COFFEE READY”.<br />
You can also make special coffee or cappuccino using preground<br />
coffee powder.<br />
You can change the amount of water set while the machine<br />
is brewing coffee. To do so, turn the Rotary Switch (B) until<br />
the display indicates the required amount (ML). The amount<br />
of water can be selected in increments of 5 ML.<br />
The amounts given in ML are approximate values and may<br />
vary from the effective quantity.<br />
13. Switching the <strong>IMPRESSA</strong> off<br />
When you switch the machine off, all the spouts that were <strong>use</strong>d<br />
will be rinsed. There<strong>for</strong>e, please make sure to place suitable receptacles<br />
under the spouts.<br />
<br />
<br />
COFFEE READY<br />
17
Switch the <strong>IMPRESSA</strong> off with the ON / OFF switch<br />
GOODBYE<br />
<br />
The coffee spout is rinsing.<br />
RINSE LEFT SPOUT<br />
PRESS BUTTON<br />
Press the maintenance key (C) to continue rinsing.<br />
GOODBYE<br />
<br />
(A).<br />
When switching the machine off, there may be a hissing<br />
sound. This is due to a normal process being per<strong>for</strong>med by<br />
the system.<br />
It is recommended to switch off the machine with the power<br />
switch if you intend not to <strong>use</strong> your <strong>IMPRESSA</strong> <strong>for</strong> a longer<br />
time.<br />
14. Settings<br />
14.1 Setting the amount of water <strong>for</strong> coffee,<br />
espresso (1 and 2 cups) and special coffee<br />
The system’s basic settings include pre-defined amounts of water<br />
(coffee 130 ml, espresso 60 ml, 2 coffees 260 ml, 2 espressos<br />
120 ml, special coffee 145 ml). However, these can be modified as<br />
required.<br />
COFFEE READY<br />
<br />
Place a cup under the respective coffee spout (17).<br />
Press the product key to be programmed and hold it down until<br />
the following message appears:<br />
1 COFFEE (example)<br />
NORMAL (example)<br />
The coffee will be brewed. Keep on holding the key down until<br />
the following message is displayed:<br />
ENOUGH <br />
PRESS BUTTON<br />
When you have made as much coffee as you wanted, briefly<br />
press the key once more.<br />
CONFIRMED<br />
√<br />
The amount of coffee made has now been programmed <strong>for</strong> the<br />
selected type of coffee.<br />
COFFEE READY<br />
<br />
14.2 Cappuccino setting<br />
The system’s basic settings include pre-defined amounts of water<br />
(100 ml) and milk (15 sec.). However, these amounts can be<br />
modified as required.<br />
COFFEE READY<br />
<br />
Place a cup under the cappuccino nozzle (4).<br />
Press the Cappuccino key and hold it down until the following<br />
message appears:<br />
CAPPUCCINO<br />
NORMAL (example)<br />
The cappuccino will be brewed. Keep on holding the key<br />
down until the following message is displayed:<br />
ENOUGH MILK<br />
PRESS BUTTON<br />
18
When the machine has dispensed as much milk as you wanted,<br />
briefly press the key once more.<br />
CONFIRMED<br />
√<br />
The amount of milk to be dispensed is now programmed.<br />
ENOUGH <br />
PRESS BUTTON<br />
When you have made as much coffee as you wanted, briefly<br />
press the key once more.<br />
CONFIRMED<br />
√<br />
The amount of coffee to be made is now programmed.<br />
You can also make the cappuccino settings in the programming<br />
mode (see Chapter 15.6)<br />
14.3 Milk setting<br />
The system’s basic settings include a pre-defined amount of milk<br />
(20 sec.). However, this amount can be modified as required.<br />
COFFEE READY<br />
<br />
Place a cup under the cappuccino nozzle (4).<br />
Press the Milk key and hold it down until the following message<br />
appears:<br />
MILK<br />
20 SEC (example)<br />
The milk will be dispensed. Keep on holding the key down<br />
until the following message is displayed:<br />
ENOUGH MILK<br />
PRESS BUTTON<br />
When the machine has dispensed as much milk as you wanted,<br />
briefly press the key once more.<br />
CONFIRMED<br />
√<br />
The amount of milk to be <strong>use</strong>d is now programmed.<br />
You can also set the amount of milk in the programming<br />
mode (see Chapter 15.7)<br />
14.4 Setting the amount of hot water<br />
The system’s basic settings include a pre-defined amount of water<br />
(225 ml). However, this amount can be modified as required.<br />
COFFEE READY<br />
<br />
Place a cup under the hot water spout (12).<br />
Press the Hot Water key and hold it down until the following<br />
message appears:<br />
HOT WATER<br />
PORTION<br />
Machine dispenses hot water. Keep on holding the key down<br />
until the following message is displayed:<br />
ENOUGH WATER<br />
PRESS BUTTON<br />
When the machine has dispensed as much hot water as you<br />
wanted, briefly press the key once more.<br />
CONFIRMED<br />
√<br />
The amount of water to be dispensed is now programmed.<br />
E<br />
19
15. Programming<br />
The <strong>IMPRESSA</strong> leaves the factory with a number of default<br />
settings that allow you to make coffee without having to program<br />
the machine first. You can, however, adjust various<br />
parameters to make the coffee suit your personal taste.<br />
The following parameters can be programmed:<br />
Filter<br />
Water hardness<br />
Maintenance<br />
Temperature<br />
Coffee strength<br />
Cappuccino<br />
Milk<br />
Save energy<br />
Time<br />
Automatic switch-on time<br />
Automatic switch-off time<br />
In<strong>for</strong>mation<br />
Rename<br />
Language<br />
Display<br />
15.1 Programming the filter<br />
Please refer to Chapter 5 “Using the CLARIS plus filter cartridge”.<br />
15.2 Programming your machine to the correct<br />
water hardness (only with FILTER NO)<br />
Please refer to Chapter 4 “Adjusting your machine to the water<br />
hardness”.<br />
15.3 Maintenance<br />
You can activate the following maintenance functions from this<br />
program item:<br />
RINSING MACHINE, CLEAN CAPPUCCINO,<br />
CHANGE FILTER, CLEAN UNIT, RINSE CAPPUCCINO,<br />
DECALCIFY MACHINE.<br />
“DECALCIFY MACHINE” is not displayed if you are using a<br />
CLARIS plus filter and the filter is set to “Yes”.<br />
“CHANGE FILTER” is not displayed if you are not using a<br />
CLARIS plus filter and the filter is set to “No”.<br />
COFFEE READY<br />
<br />
Press the Rotary Switch (B) until you hear an acoustic signal.<br />
FILTER<br />
NO or YES<br />
Turn the Rotary Switch (B) until the following message is displayed:<br />
MAINTENANCE<br />
<br />
Press the Rotary Switch (B) to start programming.<br />
RINSE UNIT<br />
<br />
Turn the Rotary Switch (B) until the required maintenance function<br />
(<strong>for</strong> selection see above) is displayed. Press the Rotary<br />
Switch (B) to activate the function.<br />
15.4 Programming the temperature <strong>for</strong> coffee,<br />
espresso, cappuccino and special coffee<br />
You can adjust the temperature <strong>for</strong> each type of coffee separately.<br />
The temperature can be set to 3 different levels<br />
(LOW, NORMAL, HIGH).<br />
20
COFFEE READY<br />
<br />
Press the Rotary Switch (B) until you hear an acoustic signal.<br />
FILTER<br />
NO or YES<br />
Turn the Rotary Switch (B) until the following message is displayed:<br />
TEMPERATURE<br />
<br />
Press the Rotary Switch (B) to start programming.<br />
TEMPERATURE<br />
COFFEE READY<br />
Then press a product key of your choice.<br />
1 ESPRESSO (example)<br />
NORMAL<br />
Turn the Rotary Switch until the required temperature is set.<br />
1 ESPRESSO (example)<br />
HIGH (example)<br />
Confirm the selected setting by pressing the Rotary Switch (B).<br />
CONFIRMED<br />
√<br />
TEMPERATURE<br />
<br />
Turn the Rotary Switch (B) until the following message is displayed:<br />
EXIT<br />
<br />
Now press the Rotary Switch (B) to leave the programming<br />
mode.<br />
<br />
<br />
COFFEE READY<br />
15.5 Programming the coffee strength<br />
You can adjust the strength of each individual coffee product<br />
separately. The coffee strength can be set to 5 different levels<br />
(VERY MILD , MILD , NORMAL ,<br />
STRONG , XSTRONG ).<br />
COFFEE READY<br />
<br />
Press the Rotary Switch (B) until you hear an acoustic signal.<br />
FILTER<br />
NO or YES<br />
Turn the Rotary Switch (B) until the following message is displayed:<br />
AROMA<br />
<br />
Now press the Rotary Switch (B) to start programming.<br />
AROMA<br />
COFFEE READY<br />
Then press a product key of your choice.<br />
1 ESPRESSO (example)<br />
NORMAL<br />
Turn the Rotary Switch (B) until the following message is displayed:<br />
1 ESPRESSO (example)<br />
STRONG (example)<br />
Confirm the selected setting by pressing the Rotary Switch (B).<br />
CONFIRMED<br />
E<br />
21
√<br />
AROMA<br />
<br />
Now turn the Rotary Switch (B) until the following message is<br />
displayed:<br />
EXIT<br />
<br />
Now press the Rotary Switch (B) to leave the programming<br />
mode.<br />
COFFEE READY<br />
<br />
15.6 Cappuccino programming<br />
You can also make the cappuccino settings in the programming<br />
mode or as described in Chapter 14.2 “Cappuccino setting”.<br />
COFFEE READY<br />
<br />
Press the Rotary Switch (B) until you hear an acoustic signal.<br />
FILTER<br />
NO or YES<br />
Turn the Rotary Switch (B) until the following message is displayed:<br />
CAPPUCCINO<br />
MILK 15 SEC (example)<br />
Now press the Rotary Switch (B) to start programming.<br />
CAPPUCCINO<br />
MILK 15 SEC (example)<br />
Now turn the Rotary Switch (B) until the required amount of<br />
milk is set.<br />
CAPPUCCINO<br />
MILK 12 SEC (example)<br />
Confirm the selected setting by pressing the Rotary Switch (B).<br />
CONFIRMED<br />
√<br />
CAPPUCCINO<br />
COFFEE 100 ML (example)<br />
Now turn the Rotary Switch (B) until the required amount of<br />
coffee is set.<br />
CAPPUCCINO<br />
COFFEE 110 ML (example)<br />
Confirm the selected setting by pressing the Rotary Switch (B).<br />
CONFIRMED<br />
√<br />
CAPPUCCINO<br />
MILK 12 SEC (example)<br />
Now turn the Rotary Switch (B) until the following message is<br />
displayed:<br />
EXIT<br />
<br />
Now press the Rotary Switch (B) to leave the programming<br />
mode.<br />
COFFEE READY<br />
<br />
15.7 Programming the milk<br />
You can also set the amount of milk in the programming<br />
mode or as described in Chapter 14.3 “Milk setting”.<br />
<br />
COFFEE READY<br />
22
Press the Rotary Switch (B) until you hear an acoustic signal.<br />
FILTER<br />
NO or YES<br />
Turn the Rotary Switch (B) until the following message is displayed:<br />
MILK<br />
20 SEC (example)<br />
Now press the Rotary Switch (B) to start programming.<br />
MILK<br />
20 SEC (example)<br />
Now turn the Rotary Switch (B) until the required amount of<br />
milk is set.<br />
MILK<br />
28 SEC (example)<br />
Confirm the selected setting by pressing the Rotary Switch (B).<br />
CONFIRMED<br />
√<br />
MILK<br />
28 SEC (example)<br />
Now turn the Rotary Switch (B) until the following message is<br />
displayed:<br />
EXIT<br />
<br />
Now press the Rotary Switch (B) to leave the programming<br />
mode.<br />
COFFEE READY<br />
<br />
15.8 Save energy<br />
You can set your machine to various power saving modes.<br />
COFFEE READY<br />
<br />
Press the Rotary Switch (B) until you hear an acoustic signal.<br />
FILTER<br />
NO or YES<br />
Turn the Rotary Switch (B) until the following message is displayed:<br />
ENERGY<br />
SAVE NO<br />
Now press the Rotary Switch (B) to start programming.<br />
ENERGY<br />
SAVE NO<br />
Now turn the Rotary Switch (B) until the required power saving<br />
mode is displayed.<br />
ENERGY<br />
SAVE LEVEL 2 (example)<br />
Confirm the selected setting by pressing the Rotary Switch (B).<br />
CONFIRMED<br />
√<br />
ENERGY<br />
SAVE LEVEL 2 (example)<br />
Now turn the Rotary Switch (B) until the following message is<br />
displayed:<br />
EXIT<br />
<br />
E<br />
23
Now press the Rotary Switch (B) to leave the programming<br />
mode.<br />
COFFEE READY<br />
<br />
Save energy: No<br />
Selecting this level puts the <strong>IMPRESSA</strong> in constant stand-by<br />
mode.<br />
This setting allows you to make coffee or frothed milk without<br />
having to wait <strong>for</strong> the machine to heat up.<br />
This setting is <strong>use</strong>ful if you make a lot of coffee and milk<br />
products and want your machine to be in stand-by all the<br />
time.<br />
Save energy: Level 1<br />
Selecting this level puts the <strong>IMPRESSA</strong> in constant stand-by mode<br />
<strong>for</strong> making coffee. The machine is heated up separately to make<br />
frothed milk.<br />
This setting is <strong>use</strong>ful if you mostly make black coffees and<br />
are prepared to wait <strong>for</strong> 1 minute be<strong>for</strong>e being able to froth<br />
milk.<br />
Save energy: Level 2<br />
Selecting this level does not put the <strong>IMPRESSA</strong> in stand-by mode<br />
(economy temperature). The machine heats up separately each time<br />
you make coffee or frothed milk.<br />
The machine switches to economy temperature 5 minutes after you<br />
last <strong>use</strong>d it.<br />
This setting is <strong>use</strong>ful if you make very few coffees (with or<br />
without milk) and are prepared to wait 30 seconds <strong>for</strong> the<br />
machine to get ready.<br />
15.9 Setting the time<br />
You already set the time when you <strong>use</strong>d the <strong>IMPRESSA</strong> <strong>for</strong><br />
the first time. This programming option allows you to<br />
modify that setting.<br />
COFFEE READY<br />
<br />
Press the Rotary Switch (B) until you hear an acoustic signal.<br />
FILTER<br />
NO or YES<br />
Turn the Rotary Switch (B) until the following message is displayed:<br />
TIME<br />
12:45 (example)<br />
Now press the Rotary Switch (B) to start programming.<br />
TIME<br />
HOURS 12:45<br />
Turn the Rotary Switch (B) to set the hours.<br />
TIME<br />
HOURS 13:45 (example)<br />
Press the Rotary Switch (B) to confirm the hours and to activate<br />
the minutes.<br />
TIME<br />
MINUTES 13:45<br />
Turn the Rotary Switch (B) to set the minutes.<br />
TIME<br />
13:50 (example)<br />
Confirm the minutes by pressing the Rotary Switch (B).<br />
CONFIRMED<br />
√<br />
24
TIME<br />
13:50<br />
Now turn the Rotary Switch (B) until the following message is<br />
displayed:<br />
EXIT<br />
<br />
Now press the Rotary Switch (B) to leave the programming<br />
mode.<br />
COFFEE READY<br />
<br />
15.10 Programming the automatic switch-on time<br />
COFFEE READY<br />
<br />
Press the Rotary Switch (B) until you hear an acoustic signal.<br />
FILTER<br />
NO or YES<br />
Turn the Rotary Switch (B) until the following message is displayed:<br />
UNIT ON<br />
—:—<br />
Now press the Rotary Switch (B) to start programming.<br />
UNIT ON<br />
HOURS 00:00<br />
Turn the Rotary Switch (B) to set the hours.<br />
UNIT ON<br />
HOURS 07:00 (example)<br />
Press the Rotary Switch (B) to confirm the hours and to activate<br />
the minutes.<br />
UNIT ON<br />
MINUTES 07:00<br />
Turn the Rotary Switch (B) to set the minutes.<br />
UNIT ON<br />
07:30 (example)<br />
Confirm the minutes by pressing the Rotary Switch (B).<br />
CONFIRMED<br />
√<br />
UNIT ON<br />
07:30<br />
Now turn the Rotary Switch (B) until the following message is<br />
displayed:<br />
EXIT<br />
<br />
Now press the Rotary Switch (B) to leave the programming<br />
mode.<br />
COFFEE READY<br />
<br />
To deactivate the automatic switch-on time, set the time to<br />
—:—.<br />
15.11 Programming the automatic switch-off time<br />
COFFEE READY<br />
<br />
Press the Rotary Switch (B) until you hear an acoustic signal.<br />
FILTER<br />
NO or YES<br />
Turn the Rotary Switch (B) until the following message is displayed:<br />
E<br />
25
OFF AFTER<br />
5 HRS<br />
Now press the Rotary Switch (B) to start programming.<br />
OFF AFTER<br />
5 HRS<br />
Turn the Rotary Switch (B) to set the switch-off time.<br />
OFF AFTER<br />
4 HRS (example)<br />
Confirm the automatic switch-off time by pressing the Rotary<br />
Switch (B).<br />
CONFIRMED<br />
√<br />
OFF AFTER<br />
4 HRS<br />
Now turn the Rotary Switch (B) until the following message is<br />
displayed:<br />
EXIT<br />
<br />
Now press the Rotary Switch (B) to leave the programming<br />
mode.<br />
COFFEE READY<br />
<br />
15.12 In<strong>for</strong>mation<br />
This program item enables you to check the number of coffees<br />
or frothed milk you made, i.e. how often you selected a<br />
certain function, and the values that are programmed.<br />
<br />
<br />
COFFEE READY<br />
Press the Rotary Switch (B) until you hear an acoustic signal.<br />
FILTER<br />
NO or YES<br />
Turn the Rotary Switch (B) until the following message is displayed:<br />
INFORMATION<br />
<br />
Now press the Rotary Switch (B) to access the in<strong>for</strong>mation<br />
menu.<br />
1 ESPRESSO<br />
1000 COUNT (example)<br />
Turn the Rotary Switch (B) to display how often you made 2<br />
espressos, 1 coffee, 2 coffees, cappuccino, special coffee, frothed<br />
milk and hot water.<br />
Then the water and milk quantities are displayed.<br />
1 ESPRESSO (example)<br />
AMOUNT 50 ML (example)<br />
Turn the Rotary Switch (B) to display any further water and milk<br />
quantities.<br />
Finally, the number of decalcifying and cleaning cycles and filter<br />
changes are displayed.<br />
To exit the in<strong>for</strong>mation program, press the Rotary Switch (B).<br />
INFORMATION<br />
<br />
Now turn the Rotary Switch (B) until the following message is<br />
displayed:<br />
EXIT<br />
<br />
Now press the Rotary Switch (B) to leave the programming<br />
mode.<br />
26
COFFEE READY<br />
15.13 Renaming<br />
This function allows you to rename the different products as<br />
well as change the welcome and end text.<br />
COFFEE READY<br />
<br />
Press the Rotary Switch (B) until you hear an acoustic signal.<br />
FILTER<br />
NO or YES<br />
Turn the Rotary Switch (B) until the following message is displayed:<br />
RENAME<br />
<br />
Now press the Rotary Switch (B) to start programming.<br />
RENAME<br />
PRODUCT NAME<br />
Turn the Rotary Switch further to select WELCOME MESSAGE<br />
or END MESSAGE.<br />
Press the Rotary Switch (B).<br />
PRODUCT NAME (example)<br />
CHANGE<br />
Press the Rotary Switch (B).<br />
PRODUCT NAME<br />
COFFEE READY<br />
Press a key of your choice (only required <strong>for</strong> PRODUCT<br />
NAME).<br />
_<br />
ABCDEFG...√<br />
Enter a text of your choice by selecting letters (highlighted in<br />
red) with the Rotary Switch (B) and confirming by pressing the<br />
Rotary Switch (B).<br />
To confirm your text, select √ which you will find at the end of<br />
the alphabet (after the arrow).<br />
MY COFFEE (example)<br />
ABCDEFG.....<br />
Confirm by pressing the Rotary Switch (B).<br />
CONFIRMED<br />
√<br />
RENAME<br />
<br />
Now turn the Rotary Switch (B) until the following message is<br />
displayed:<br />
EXIT<br />
<br />
Now press the Rotary Switch (B) to leave the programming<br />
mode.<br />
COFFEE READY<br />
<br />
<br />
<br />
<br />
<br />
To reset to the original product name, select the following<br />
display and confirm.<br />
PRODUCT NAME<br />
RESET<br />
You can also reset all the product names to their original<br />
names in one step. Select the following display and confirm.<br />
PRODUCT NAME<br />
RESET ALL<br />
E<br />
27
15.14 Programming the language<br />
COFFEE READY<br />
<br />
Press the Rotary Switch (B) until you hear an acoustic signal.<br />
FILTER<br />
NO or YES<br />
Turn the Rotary Switch (B) until the following message is displayed:<br />
LANGUAGE<br />
ENGLISH<br />
Now press the Rotary Switch (B) to start programming.<br />
LANGUAGE<br />
ENGLISH<br />
Turn the Rotary Switch (B) to set the language.<br />
LANGUAGE<br />
ENGLISH (example)<br />
Confirm the selected language by pressing the Rotary Switch<br />
(B).<br />
CONFIRMED<br />
√<br />
LANGUAGE<br />
ENGLISH<br />
Now turn the Rotary Switch (B) until the following message is<br />
displayed:<br />
EXIT<br />
<br />
Now press the Rotary Switch (B) to leave the programming<br />
mode.<br />
COFFEE READY<br />
<br />
15.15 Programming the display<br />
This program item allows you to change the time <strong>for</strong>mat<br />
from 24 hrs. to AM/PM and the units from ml (millilitres) to<br />
oz (ounces).<br />
Changing the units<br />
COFFEE READY<br />
<br />
Press the Rotary Switch (B) until you hear an acoustic signal.<br />
FILTER<br />
NO or YES<br />
Turn the Rotary Switch (B) until the following message is displayed:<br />
SETTINGS<br />
<br />
Now press the Rotary Switch (B) to start programming.<br />
SETTINGS<br />
UNIT<br />
Now press the Rotary Switch (B).<br />
SETTINGS<br />
UNIT ML<br />
Turn the Rotary Switch (B) to change the units.<br />
SETTINGS<br />
UNIT OZ<br />
Confirm your selection by pressing the Rotary Switch (B).<br />
CONFIRMED<br />
√<br />
SETTINGS<br />
<br />
28
Now turn the Rotary Switch (B) until the following message is<br />
displayed:<br />
EXIT<br />
<br />
Now press the Rotary Switch (B) to leave the programming<br />
mode.<br />
COFFEE READY<br />
<br />
Changing the time <strong>for</strong>mat<br />
COFFEE READY<br />
<br />
Press the Rotary Switch (B) until you hear an acoustic signal.<br />
FILTER<br />
NO or YES<br />
Turn the Rotary Switch (B) until the following message is displayed:<br />
SETTINGS<br />
<br />
Now press the Rotary Switch (B) to start programming.<br />
SETTINGS<br />
UNIT<br />
Turn the Rotary Switch (B).<br />
SETTINGS<br />
TIME FORMAT<br />
Press the Rotary Switch (B).<br />
SETTINGS<br />
FORMAT 24 HRS<br />
Turn the Rotary Switch (B) to change the <strong>for</strong>mat.<br />
SETTINGS<br />
FORMAT AM/PM<br />
Confirm your selection by pressing the Rotary Switch (B).<br />
CONFIRMED<br />
√<br />
SETTINGS<br />
<br />
Now turn the Rotary Switch (B) until the following message is<br />
displayed:<br />
EXIT<br />
<br />
Now press the Rotary Switch (B) to leave the programming<br />
mode.<br />
COFFEE READY<br />
<br />
16. Maintenance<br />
16.1 Filling the water tank<br />
WATER TANK<br />
FILL<br />
<br />
<br />
If this in<strong>for</strong>mation is displayed, the machine will no longer<br />
produce coffee, hot water or milk. Refill water as described<br />
in Chapter 2.3.<br />
COFFEE READY<br />
The water tank should be rinsed out and filled with fresh<br />
water daily. Always <strong>use</strong> fresh, cold water. Never fill the<br />
water tank with milk, mineral water or other liquids.<br />
E<br />
29
16.2 Emptying the coffee grounds<br />
<br />
<br />
GROUNDS<br />
EMPTY<br />
If this in<strong>for</strong>mation is displayed, the machine will no longer<br />
make coffee. The machine will still make hot water and<br />
frothed milk, however. Empty the coffee grounds container<br />
(3).<br />
On the <strong>IMPRESSA</strong> <strong>Z5</strong> Chrome we recommend that the cup<br />
plat<strong>for</strong>m (2b) is removed first followed by the drip tray and<br />
the coffee grounds tray with bin.<br />
Carefully take out the drip tray (1) – which contains water – and<br />
the coffee grounds tray with the container (3).<br />
TRAY<br />
MISSING<br />
Place the empty, clean drip tray (1) and the coffee grounds tray<br />
with the container (3) back into the <strong>IMPRESSA</strong>. (The coffee<br />
grounds tray must be outside the machine <strong>for</strong> at least 10 seconds).<br />
COFFEE READY<br />
<br />
16.3 Emptying the drip tray<br />
On the <strong>IMPRESSA</strong> <strong>Z5</strong> Chrome we recommend that the cup<br />
plat<strong>for</strong>m (2b) is removed first followed by the drip tray and<br />
the coffee grounds tray with bin.<br />
Carefully take out the drip tray (1) – which contains water – and<br />
the coffee grounds tray with the container (3).<br />
TRAY<br />
MISSING<br />
Place the empty, clean drip tray (1) and the coffee grounds tray<br />
with the container (3) back into the <strong>IMPRESSA</strong>.<br />
COFFEE READY<br />
<br />
16.4 Drip tray missing<br />
TRAY<br />
MISSING<br />
If this in<strong>for</strong>mation is displayed, the machine will no longer<br />
make coffee, hot water or frothed milk. The drip tray (1) has<br />
not been installed or not been installed properly.<br />
Insert the drip tray (1).<br />
COFFEE READY<br />
<br />
<br />
<br />
TRAY<br />
EMPTY<br />
If this in<strong>for</strong>mation is displayed, the machine will no longer<br />
make coffee, hot water or frothed milk, and the coffee<br />
grounds container must be emptied.<br />
16.5 Grounds container missing<br />
COFFEE BIN<br />
MISSING<br />
If this in<strong>for</strong>mation is displayed, the machine will no longer<br />
make coffee, hot water or frothed milk. The drip tray (3) has<br />
not been installed or not been installed properly.<br />
30
Insert the drip tray (3).<br />
COFFEE READY<br />
<br />
16.6 Filling the bean tank<br />
COFFEE READY<br />
FILL BEANS<br />
<br />
<br />
If this in<strong>for</strong>mation is displayed, the machine will no longer<br />
make coffee. The machine will still make hot water and<br />
frothed milk, however. Refill beans as described in Chapter<br />
2.4.<br />
COFFEE READY<br />
16.7 Aroma preservation cover missing<br />
BEANCOVER<br />
MISSING<br />
If this in<strong>for</strong>mation is displayed, the machine will no longer<br />
make coffee. The machine will still make hot water and<br />
frothed milk, however. The aroma preservation cover (8) has<br />
not been installed or not been installed properly.<br />
Install the aroma preservation cover (8).<br />
COFFEE READY<br />
<br />
16.8 Removing stones from the grinding gear<br />
Switch the machine off using the ON / OFF key (A).<br />
Turn the power switch (15) off.<br />
Open the cover of the bean tank (7) and remove the aroma<br />
preservation cover (8).<br />
Remove any beans with a vacuum cleaner.<br />
Insert the key (Fig. 12).<br />
Now turn the key conter-clockwise until the jammed stone is<br />
released.<br />
Remove any remaining powder with a vacuum cleaner.<br />
Fill up with fresh beans.<br />
16.9 Changing the filter<br />
After having <strong>use</strong>d 50 litres of water or after two months, the<br />
filter cartridge will be <strong>use</strong>d up. The display will prompt you<br />
to change the filter.<br />
Refer to Chapter 5.2 “Changing the filter”.<br />
16.10 In<strong>for</strong>mation about cleaning cycle<br />
After having dispensed 220 products or after 160 rinsing cycles,<br />
the <strong>IMPRESSA</strong> must be cleaned. You will be in<strong>for</strong>med of this by a<br />
message on the display. The machine will still make coffee, hot<br />
water and frothed milk. However, we recommend that you should<br />
run the cleaning cycle (Chapter 17) within the next few days.<br />
COFFEE READY<br />
CLEAN<br />
After the machine has dispensed another 30 products, the display<br />
begins to flash. You should run the cleaning cycle now (Chapter<br />
17).<br />
COFFEE READY<br />
CLEAN (flashing)<br />
31<br />
E
After another 10 products, the display will change. Please run the<br />
cleaning cycle immediately (see Chapter 17).<br />
CLEAN NOW<br />
CLEAN (flashing)<br />
16.11 In<strong>for</strong>mation about decalcify<br />
Lime scale builds up in the <strong>IMPRESSA</strong> as a result of normal <strong>use</strong>.<br />
The degree of calcification depends on the hardness of the water<br />
you <strong>use</strong>. The <strong>IMPRESSA</strong> <strong>Z5</strong> recognizes when you should run a decalcifying<br />
cycle. The machine will still make coffee, hot water and<br />
frothed milk. However, we recommend that you should decalcify<br />
the machine (Chapter 18) within the next few days.<br />
COFFEE READY<br />
DESCALE<br />
After a while the display will begin to flash. You should run the<br />
decalcifying cycle now Chapter 18).<br />
COFFEE READY<br />
DESCALE (flashing)<br />
After a while the display will change if you have still not decalcified<br />
the machine. Please run the decalcifying cycle immediately<br />
(see Chapter 18).<br />
DECALCIFY NOW<br />
DESCALE (flashing)<br />
16.12 Emptying the system<br />
Requirements: The <strong>IMPRESSA</strong> has been switched off with the<br />
ON / OFF key (A), but the power switch is still turned on.<br />
This is necessary to protect the machine against damage<br />
occurring during transport as a result of frost.<br />
Place a receptacle each under the height-adjustable hot water<br />
spout (12) and under the cappuccino nozzle (4).<br />
Take out the water tank (Fig. 1).<br />
Press the maintenance key (C) until the following message<br />
appears:<br />
SYS EMPTY<br />
<br />
When the process has been completed, the <strong>IMPRESSA</strong> <strong>Z5</strong><br />
switches itself off.<br />
Next time you switch on the machine, the display will read PRESS<br />
MAINT., meaning that the system needs to be filled with water.<br />
Please refer to Chapter 3 “First <strong>use</strong>”.<br />
17. Cleaning<br />
The <strong>IMPRESSA</strong> features an integrated cleaning program. The<br />
process takes approx.15 minutes.<br />
Please contact your authorized dealer <strong>for</strong> JURA cleaning<br />
tablets that are suitable specifically <strong>for</strong> the cleaning program<br />
of your <strong>IMPRESSA</strong>. Please note that the <strong>use</strong> of unsuitable<br />
cleaning agents may ca<strong>use</strong> damage to your machine and<br />
could leave unfavourable residues in the water.<br />
Once started, the cleaning process must not be interrupted.<br />
When the cleaning program has finished, take out the removable<br />
coffee powder tank (9) and briefly rinse it under<br />
running water.<br />
COFFEE READY<br />
CLEAN<br />
Press the maintenance key (C).<br />
32
TRAY / GROUNDS<br />
EMPTY<br />
Empty the drip tray (1) and the coffee grounds tray with the container<br />
(3).<br />
TRAY<br />
MISSING<br />
Place the empty, clean drip tray (1) and the coffee grounds tray<br />
with the container (3) back into the <strong>IMPRESSA</strong>.<br />
<br />
PRESS BUTTON<br />
Place a sufficiently large receptacle (ca. 0.5 litres) each under the<br />
height-adjustable coffee spout (11) and under the cappuccino<br />
nozzle (4).<br />
Press the maintenance key (C).<br />
MACHINE IS CLEANING<br />
<br />
You will hear an acoustic signal.<br />
ADD TABLET<br />
<br />
Open the lid of the filler funnel <strong>for</strong> pre-ground coffee (9). It is<br />
under the bean tank cover (7).<br />
Drop a cleaning tablet inside (Fig. 5) and close the lid.<br />
<br />
PRESS BUTTON<br />
Press the maintenance key (C).<br />
MACHINE IS CLEANING<br />
<br />
You will hear an acoustic signal.<br />
TRAY / GROUNDS<br />
EMPTY<br />
Empty the drip tray (1) and the coffee grounds tray with the<br />
container (3).<br />
TRAY<br />
MISSING<br />
Place the empty, clean drip tray (1) and the coffee grounds tray<br />
with the container (3) back into the <strong>IMPRESSA</strong>.<br />
COFFEE READY<br />
<br />
You can also trigger a cleaning cycle manually from the<br />
maintenance menu at any point in time (see Chapter 15.3).<br />
18. Decalcifying<br />
The <strong>IMPRESSA</strong> features an integrated decalcifying program. The<br />
process takes approx.50 minutes.<br />
Lime scale builds up in the <strong>IMPRESSA</strong> as a result of normal<br />
<strong>use</strong>. The degree of calcification depends on the hardness of<br />
the water you <strong>use</strong>. The <strong>IMPRESSA</strong> recognizes when you<br />
should run a decalcifying cycle. The machine will still make<br />
coffee, frothed milk and hot water. However, we recommend<br />
that you should decalcify the machine within a few<br />
days after the message was displayed.<br />
Please contact your authorized dealer <strong>for</strong> JURA decalcifying<br />
tablets that are suitable specifically <strong>for</strong> the decalcifying program<br />
of your <strong>IMPRESSA</strong>. Please note that the <strong>use</strong> of unsuitable<br />
decalcifying agents may ca<strong>use</strong> damage to your machine<br />
and could leave unfavourable residues in the water.<br />
Remove any splashes or drops of the decalcifying agent from<br />
sensitive surfaces, in particular surfaces made of natural<br />
stone or wood, or take appropriate preventive measures.<br />
E<br />
33
Once started, the decalcifying program must not be interrupted.<br />
Always wait until the decalcifying agent has been <strong>use</strong>d up<br />
and the tank is empty. Never fill in additional descaling<br />
agent.<br />
COFFEE READY<br />
DESCALE<br />
Press the maintenance key (C).<br />
TRAY / GROUNDS<br />
EMPTY<br />
Empty the drip tray (1) and the coffee grounds tray with the<br />
container (3).<br />
TRAY<br />
MISSING<br />
Place the empty, clean drip tray (1) and the coffee grounds tray<br />
with the container (3) back into the <strong>IMPRESSA</strong> <strong>Z5</strong>.<br />
SOLVENT IN TANK<br />
PRESS BUTTON<br />
Remove the water tank from the machine. Empty out any<br />
remaining water.<br />
Completely dissolve the content of one blister (3 tablets) in a<br />
receptacle containing 0.6 litres of water, and pour the mixture into<br />
the water tank. Place the water tank back into the machine.<br />
<br />
<br />
SOLVENT IN TANK<br />
PRESS BUTTON<br />
Remove the cappuccino nozzle (4) from the machine (Fig. 14).<br />
Place a receptacle each under the height-adjustable hot water<br />
spout (12) and under the connecting parts of the nozzle (<strong>use</strong> tall<br />
receptacle). Press the maintenance key (C).<br />
MACHINE IS DECALCIFYING<br />
<br />
You will hear an acoustic signal.<br />
TRAY / GROUNDS<br />
EMPTY<br />
Empty the drip tray (1) and the coffee grounds tray with the container<br />
(3).<br />
TRAY<br />
MISSING<br />
Place the empty, clean drip tray (1) and the coffee grounds tray<br />
with the container (3) back into the <strong>IMPRESSA</strong>.<br />
WATER TANK<br />
FILL<br />
Thouroughly rinse out the water tank and fill it with fresh<br />
cold tap water. Then place it back into the <strong>IMPRESSA</strong>.<br />
<br />
PRESS BUTTON<br />
Re-assemble the cappuccino nozzle.<br />
Place a cup each under the height-adjustable hot water spout (12)<br />
and the cappuccino nozzle (4), and press the maintenance key<br />
(C).<br />
MACHINE IS DECALCIFYING<br />
<br />
UNIT IS HEATING<br />
<br />
After the machine has heated up, it will automatically per<strong>for</strong>m a<br />
rinsing cycle.<br />
RINSING<br />
<br />
34
You will hear an acoustic signal.<br />
TRAY / GROUNDS<br />
EMPTY<br />
Empty the drip tray (1) and the coffee grounds tray with the<br />
container (3).<br />
TRAY<br />
MISSING<br />
Place the empty, clean drip tray (1) and the coffee grounds tray<br />
with the container (3) back into the <strong>IMPRESSA</strong>.<br />
COFFEE READY<br />
<br />
You can also trigger a decalcifying cycle manually from the<br />
maintenance menu at any point in time (see Chapter 15.3).<br />
19. Disposal<br />
Please return the <strong>IMPRESSA</strong> to your local dealer, the service shop<br />
or to JURA <strong>for</strong> proper disposal.<br />
20. Tips <strong>for</strong> perfect coffee<br />
Height-adjustable coffee spout (11)<br />
You can adjust the height of the coffee spout to the size of your<br />
cups.<br />
Grinding degree<br />
Refer to Chapter 2.5 “Adjusting the grinding gear”.<br />
Preheating cups<br />
You can preheat the cups with hot water. The smaller the quantity<br />
of coffee you make, the more important preheating is.<br />
Sugar and cream<br />
Stirring coffee/tea will result in heat being released. Adding refrigerated<br />
cream or milk will reduce the temperature of the coffee significantly.<br />
E<br />
35
21. Problems<br />
Problem Ca<strong>use</strong> Remedy<br />
Very loud noise coming from the grinding Foreign body in grinding gear Please refer to Chapter 16.8<br />
gear<br />
Frothing spout squirts Milk hose not properly attached Make sure the milk hose is properly<br />
attached<br />
Too little froth when frothing milk Cappuccino nozzle clogged Clean nozzle (Chapter 9.4)<br />
Coffee only drips from the coffee spout Grinding degree too fine Adjust grinding gear to coarser grind<br />
Pre-ground coffee too fine<br />
Use a coarser type of pre-ground<br />
coffee<br />
Message: Display constantly indicates Soiled metal contacts at rear of drip tray Clean metal contacts<br />
‘Empty tray’<br />
‘Fill beans’ not displayed despite empty Bean monitoring system soiled Clean bean tank (dry)<br />
bean tank<br />
36
22. Legal in<strong>for</strong>mation<br />
23. Technical data<br />
These operating instructions contain all the in<strong>for</strong>mation required<br />
<strong>for</strong> using, operating and maintaining the machine properly.<br />
Knowledge of and compliance with the specifications contained in<br />
these operating instructions is required <strong>for</strong> using the machine safely<br />
as well as <strong>for</strong> operational safety and safety during maintenance.<br />
These operating instructions cannot cover any conceivable application.<br />
The machine was designed <strong>for</strong> private ho<strong>use</strong>hold <strong>use</strong>.<br />
Additionally we point out that the content of these operating<br />
instructions does not <strong>for</strong>m part of any previous or existing agreement,<br />
consent or al legal relationship nor does it constitute a<br />
change of such an agreement, consent or legal relationship. Any<br />
obligations to be fulfilled by JURA Elektroapparate AG are stipulated<br />
in the corresponding purchase contract, which also contains<br />
the full and solely applicable warranty stipulations. These contractual<br />
warranty stipulations are neither extended nor limited by<br />
the specifications contained in these operating instructions.<br />
The operating instructions contain in<strong>for</strong>mation, protected by Copyright.<br />
Photocopying or translations into other languages shall not be<br />
permissible without JURA Elektroapparate AG’s written approval.<br />
Voltage:<br />
Power:<br />
F<strong>use</strong>:<br />
Safety check:<br />
Energy consumption level no:<br />
Energy consumption level 1:<br />
Energy consumption level 2:<br />
Pump pressure:<br />
Water tank:<br />
Bean tank capacity:<br />
Coffee grounds container capacity:<br />
Milk container capacity:<br />
Length of cable:<br />
230V AC<br />
1350 W<br />
10 A<br />
23 Wh<br />
16 Wh<br />
14 Wh<br />
static, max. 15 bar<br />
2.8 liter<br />
280 gr.<br />
max. 20 portions<br />
1 liter<br />
approx. 1.1 m<br />
E<br />
Weight:<br />
13.3 kg/13.8 kg<br />
(<strong>IMPRESSA</strong> <strong>Z5</strong> Chrome)<br />
Size (WxHxD):<br />
31 x 37 x 43.5 cm<br />
The machine complies with the following EU directives:<br />
73/23/EWG dated 19/02/1973 "Low Voltage Directive" including<br />
Modification Directive 93/336/EWG<br />
89/336/EWG dated 03/05/1989 "EMC Directive" including<br />
Modification Directive 92/31/EWG<br />
37