Manual USDT Revsion 8 - Thermomax Technologies
Manual USDT Revsion 8 - Thermomax Technologies
Manual USDT Revsion 8 - Thermomax Technologies

You also want an ePaper? Increase the reach of your titles
YUMPU automatically turns print PDFs into web optimized ePapers that Google loves.
Revision<br />
8<br />
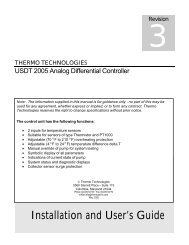
THERMO TECHNOLOGIES<br />
<strong>USDT</strong> 2001 Differential Controller<br />
Installation and<br />
User’s Guide
<strong>USDT</strong> 2001 DIFFERENTIAL CONTROLLER<br />
Installation and User’s Guide<br />
Table of Contents<br />
Introduction<br />
General Information 1<br />
Installation 3<br />
Collector Sensor 4<br />
Tank Sensor 4<br />
Control Box 6<br />
Power Connection 7<br />
Sensor Connection 7<br />
Operation<br />
Control Mode 8<br />
Advanced Mode 9<br />
Diagnostics 10<br />
Characteristics Curves of Sensors 11<br />
© Thermo <strong>Technologies</strong><br />
5560 Sterrett Place • Suite 115<br />
Phone 410.997.0778 • Fax 410.997.0779<br />
e-Mail info@thermotechs.com<br />
June, 2003
<strong>USDT</strong> 2001 INTRODUCTION<br />
Introduction<br />
Note: The information supplied in this manual is for guidance only - no<br />
part of this may be used for any agreement, whether express or implied,<br />
or to form any contract. Thermo <strong>Technologies</strong> reserves the right to<br />
change specifications without prior notice.<br />
T<br />
he <strong>USDT</strong> 2001 unit is designed to control a simple solar water<br />
heating system. By using microprocessor technology it ensures<br />
that the collected energy from the sun is transferred efficiently<br />
and harnessed under optimum conditions. It monitors collector<br />
temperature (T C ) and return temperature (T T , bottom of the storage<br />
tank). The solar loop circulation pump runs while the collector<br />
temperature exceeds the return temperature by a programmable<br />
temperature difference T. To avoid overheating, the circulation pump<br />
stops if the tank (T T ) temperature reaches the programmable high limit<br />
(T MAX ) temperature. To prevent freezing, the controller activates the<br />
pump and circulates water through the solar loop when frost conditions<br />
exist. The temperature hysteresis (a lagging in the set-point) may override<br />
T and can be modified in advanced operation mode to avoid pump<br />
cycling.<br />
The control unit has the following functions:<br />
• 2 inputs for temperature sensors<br />
• Suitable for sensors of type Thermistor and PT1000<br />
• All hysteresises are adjustable and depend on temperature<br />
• Adjustable (0 o F - 50 o F) frost protection<br />
• Adjustable (32 o F - 200 o F) overheating protection<br />
• Adjustable (1 o F – 50 o F) temperature difference T<br />
• <strong>Manual</strong> override of pump for system testing<br />
• Digital display of collector, tank, T, and maximum tank<br />
temperature<br />
• Indications of current state of pump<br />
• Surge protection at collector sensor<br />
1<br />
Thermo <strong>Technologies</strong>
<strong>USDT</strong> 2001 INSTALLATION<br />
General Information:<br />
<strong>USDT</strong> 2001 is suitable for Closed and Open Loop systems. Closed<br />
Loop Solar Heating Systems are the preferred option for extremely<br />
cold areas and areas with questionable water quality. Following<br />
arrangement shows an application example in a closed loop system.<br />
1. Collector 7. Check Valve 13. Pressure Gauge<br />
2. Collector Sensor 8. Hose Bibs for Filling and Flushing 14. Collector Supply<br />
3. <strong>Manual</strong> Air Valve 9. Expansion Tank 15. Heat Exchange Coil<br />
4. Hot Water to Taps 10. Air Purge and Air Vent 16. Solar Hot Water Tank<br />
5. Tempering Valve 11. Circulating Pump with flanges or couplings 17. Immersion Heater<br />
6. Collector Return 12. Pressure Relief Valve 18. <strong>USDT</strong> 2001 Controller<br />
Operation:<br />
<strong>USDT</strong> Controller (18) will switch on the pump (11) when the<br />
temperature at the collector sensor T C is higher than the return<br />
temperature T R by at least the pre-selected amount T. The pump<br />
circulates a heat transfer fluid around the loop. Heat from the<br />
collector is transferred to the storage tank through the heat<br />
exchange coil. With the pump running, if T is less than preset<br />
value, the pump will switch off. When a preset tank temperature is<br />
reached at T MAX , the controller can switch off the pump. The check<br />
valve (non-return valve) prevents heat from the tank rising towards<br />
the collector should the tank be warmer (e.g. at night).<br />
2<br />
Thermo <strong>Technologies</strong>
<strong>USDT</strong> 2001 INSTALLATION<br />
INSTALLATION<br />
Note: This installation procedure is for guidance only, and the installer<br />
should verify its suitability. Make sure that the solar system is physically<br />
installed, manually tested, and is ready for controlled operation.<br />
T he following safety precautions are strongly recommended:<br />
1. Before attempting to install and operate the unit read this instruction<br />
manual carefully.<br />
2. Suitably qualified personnel should only carry out installation and<br />
any maintenance required.<br />
3. It is recommended that the unit be connected to the power supply<br />
via a suitably 6 amps isolating switch.<br />
4. WARNING: When the unit is connected to the 115-volt power<br />
supply and the cover is opened, high voltage circuits will be<br />
exposed. Therefore, when installing the unit (115-volt model)<br />
ensure all required connections are made and the cover is attached<br />
to the controller box before turning the power on. Ensure that all the<br />
connections made are secure. If any maintenance work is required<br />
ensure that the unit is isolated from the power supply before<br />
removing the cover. Never leave the unit unattended if the cover<br />
has been removed and the power supply is connected.<br />
5. Do not exceed unit ratings of 2.15 amps (1/6 HP or 245 Watts<br />
pump).<br />
6. It is advisable to route power cables away from sensor cables.<br />
3<br />
Thermo <strong>Technologies</strong>
<strong>USDT</strong> 2001 INSTALLATION<br />
S ensor installation: For the system to function correctly, it is very<br />
important that sensors are located and installed properly. Make<br />
absolutely sure that they are completely pushed into the optional sensor<br />
pockets (not supplied). Sensors must be well insulated in order to<br />
prevent them from being influenced by the ambient temperature.<br />
When used outdoors, no water should be allowed to get into the<br />
immersion sleeves (lasting impedance change). Generally, sensors<br />
should not be exposed to moisture (e.g. condensation) as this can<br />
diffuse through the cast resin and damage the sensor. Heating at<br />
approx. 195 °F for one hour may possibly save the sensor .<br />
When sensors are used in open loops or swimming pools, make<br />
absolutely sure that immersion sleeves are corrosion-resistant.<br />
• Collector sensor (red cable): Either push into a sensor well<br />
(sensor pocket) which is soldered or riveted directly to the manifold<br />
(vacuum tubes) or absorber (flat plat collectors) that projects from the<br />
collector housing, or place a T-piece on the collector return outlet of the<br />
outer collector, insert an immersion sleeve (sensor well) into this<br />
together with cable connection cover (for moisture protection) and push<br />
into the sensor. For vacuum tube collectors, use of PT1000 sensors<br />
(480 °F max. temperature) is recommended.<br />
• Hot water tank sensor (white cable): In the case of external heat<br />
exchangers, the tank sensor should be installed with an immersion<br />
sleeve in return leg (cold side) of the heat exchanger. In tanks with<br />
integrated heat exchangers, the sensor pocket should be fitted at the<br />
exchanger's return outlet so that the immersion sleeve goes into the<br />
exchanger tube.<br />
• Clip-on installation: Best secured to the appropriate line with pipe<br />
clamps, clips, etc. whereby you must make sure that the material is<br />
suitable (non-corrosive, heat-proof, etc.). It is advisable to insulate the<br />
sensor well in order to measure pipe temperature accurately and to<br />
prevent any influence from ambient temperature.<br />
• Storage tank installation: The sensor required for the solar water<br />
heating system is installed in the lower part of the storage tank. As a<br />
reference sensor for heating hydraulics, it is advisable to push the<br />
sensor beneath the insulation - keeping close to the inner tank wall.<br />
4<br />
Thermo <strong>Technologies</strong>
<strong>USDT</strong> 2001 INSTALLATION<br />
• Pool sensor installation: Place a heat conductive T-piece on the<br />
suction line directly at the pool outlet and screw in the sensor with an<br />
immersion sleeve (check corrosion resistance of the material used).<br />
Another possibility would be to attach the sensor at the same place by<br />
means of clips or adhesive tape, using appropriate thermal insulation<br />
against environmental influences.<br />
Sensor cables can be extended up to 150 ft. A connection between<br />
sensor and extension can be established as follows:<br />
Cut supplied heat shrinkable tubing to desired length (about ½”). Slide<br />
tubing over one end of wire to be sliced after removing enough outer<br />
insulation to accept the tubing. Then splice wire and slide tubing over<br />
splice. Heat gently all around until tubing shrinks tight.<br />
Slide larger tubing (about 3/4 “) over the entire completed splice. Heat<br />
gently all around until tubing shrinks tight. This connection can then be<br />
drawn easily into the pipe work.<br />
Caution: Do not overheat tubing! Remove heat as soon as tubing<br />
shrinks tight, as material will continue to shrink. With flame source, use<br />
even back and forth motion all around tubing. A heat gun may be used,<br />
if available. Let tubing cool for maximum strength.<br />
Sensor extension cable: Use 22/4 AWG telephone cable to extend<br />
collector sensor from collector to control unit. You need only two wires<br />
for sensor cable and the other two wires is considered as spare wires.<br />
5<br />
Thermo <strong>Technologies</strong>
<strong>USDT</strong> 2001 INSTALLATION<br />
C ontroller unit installation: For viewing comfort, the controller<br />
unit should be positioned at eye level. It is always good practice<br />
to keep electronic equipment away from cold, and heat, as extremes of<br />
temperature may reduce the lifetime of the device. It is also good<br />
practice to keep electronic equipment away from heavy electrical loads,<br />
switches or contactors as these may cause electrical and<br />
electromagnetic interference when switched on or off.<br />
Undo the four screws at corners of the housing. The control electronics<br />
are mounted on the enclosure cover. Using proper fixing, the controller<br />
enclosure can be screwed to the wall with cable entry grommets<br />
downwards.<br />
Caution: Controller wiring should only be done when the unit is not<br />
energized. It is possible to damage the control unit if it is assembled<br />
under voltage.<br />
6<br />
Thermo <strong>Technologies</strong>
<strong>USDT</strong> 2001 INSTALLATION<br />
P ower Connections and Wiring Diagram<br />
NOTE 1: Always disconnect the controller from power supply<br />
before opening the housing.<br />
NOTE 2: The controller should be properly grounded. Flexible wires,<br />
18/3 (gauge/conductor) simplify connection to the terminals. All<br />
connections should be secure and adequately tightened, as loose<br />
power connections will over-heat, and may cause fire. It is important<br />
that the specified output loads (245 Watts) are not exceeded. Where<br />
these loads expect to exceed, external relays must be used. It is good<br />
practice to install a 3 amps in-line fuse to protect controller and pump.<br />
Always keep power cables away from sensor cables and other low<br />
voltage signal cables.<br />
NOTE 3: To protect against lightning damage, the system must be<br />
grounded according local regulation. Sensor failures due to the weather<br />
or electrostatic are mostly due to poor grounding.<br />
NOTE 4: If step-down transformer is not mounted on the circuit board,<br />
the unit should be powered by a 24 VDC. A step-down transformer can<br />
be used also instead of DC power source, however, the open circuit<br />
voltage of AC source must be below 24 VAC. T C terminal should be<br />
connected to the Collector Sensor; T T should be connected to the Tank<br />
Sensor. The middle terminal is shared between both sensors.<br />
NOTE 5: The power supply is 115 V if step-down transformer is<br />
mounted on the circuit board. A load of maximum 3 A should be<br />
connected to the load terminals (pump) as shown in both above<br />
diagram and circuit board.<br />
7<br />
Thermo <strong>Technologies</strong>
<strong>USDT</strong> 2001 OPERATION<br />
OPERATION<br />
Y our controller displays requested information one at a time.<br />
Selection indicator and its value blinks interchanged on unit’s<br />
display window. Push selection key (yellow) once to move to the next<br />
selection. Change set value by pressing the Set-Up (blue) key.<br />
NOTE: Holding selection key for two seconds brings the controller in<br />
advance programming mode.<br />
Collector temperature display<br />
Tank temperature display<br />
Press Set-Up key to increase T<br />
Factory Setting è 9.0 o F<br />
Range è 1 o F to 50 o F<br />
(Set Hysteresis value H1X, in advance mode, to<br />
H11 for smaller T values)<br />
Press Set-Up key for pump operation<br />
mode<br />
Aut è Automatic Mode<br />
On è Pump manually actvated<br />
OFF è Pump manually in off position<br />
Press Set-Up key to increase tank over<br />
heating protection temperature. Pump<br />
stops when tank temperature exceeds<br />
this value.<br />
Factory setting è 160 o F<br />
Range è 32 o F to 200 o F<br />
8<br />
Thermo <strong>Technologies</strong>
<strong>USDT</strong> 2001 OPERATION<br />
ADVANCED MODE<br />
S etting mode – Press the selection key (yellow) for approximately two<br />
seconds to switch into the programming/setting mode. Software for<br />
solar water heating systems is stored in file P0. P1, P2, and P3 are program<br />
files for other applications. This manual covers only the solar water-heating<br />
program.<br />
Advancing – Press the selection key briefly to advance from one setting<br />
value to the next.<br />
Changing – Press Set-Up key once to increase the value. Hold it down to<br />
roll back to the lowest value after reaching the maximum value.<br />
Normal mode – To return to normal operating mode, press the selection<br />
key for two seconds while displaying P0. The system also returns to normal<br />
mode within one minute if no key is pressed.<br />
Software version number sequence<br />
Hysteresis curve for temperature differential control.<br />
H1x is for temperature difference and H2x is for maximum tank<br />
temperature curves with “x” as a corresponding value. Hysteresis<br />
curves (a lagging in the set-point) are variable and are a function of<br />
temperature. For example H14 (actual factory setting) means that the<br />
hysteresis of the maximum temperature is 4 o F at 64 o F (pump is on at<br />
60 o F and off at 64 o F) or 8 o F at 128 o F.<br />
9<br />
Thermo <strong>Technologies</strong>
<strong>USDT</strong> 2001 OPERATION<br />
Hysteresis curves for tank temperature.<br />
Collector sensor selector - P refers to P1000 sensor<br />
Tank sensor selector – H refers to thermistor sensor<br />
Frost protection display. This value can be set from 0 to<br />
50 Fahrenheit. The factory setting is 0 Fahrenheit. Zero (0) disables the<br />
frost protection.<br />
Important: It is possible to change the software and its setting in advanced<br />
mode. All above values have been set in the factory. They generally do not<br />
have to be changed. Unauthorized changes may damage the properties of<br />
the control system entirely. Only experts should operate the unit in<br />
advanced mode.<br />
DIAGNOSTICS:<br />
Sensor failure; connection to sensor is lose. Open circuit<br />
conditions or wrong sensor attached.<br />
Sensor failure; sensor is short-circuited.<br />
10<br />
Thermo <strong>Technologies</strong>
<strong>USDT</strong> 2001 Sensor Resistance vs. Temperature Table<br />
Temperature Tank Sensor PT 1000 Temperature Tank Sensor PT 1000<br />
[C] [Ohm] [Ohm] [F] [Ohm] [Ohm]<br />
0 1630 1000 32 1630 1000<br />
10 1772 1039 50 1772 1039<br />
20 1922 1078 68 1922 1078<br />
25 2000 1097 77 2000 1097<br />
30 2080 1118 86 2080 1118<br />
40 2245 1155 104 2245 1155<br />
50 2417 1194 122 2417 1194<br />
60 2597 1232 140 2597 1232<br />
70 2785 1271 158 2785 1271<br />
80 2980 1309 176 2980 1309<br />
90 3182 1347 194 3182 1347<br />
100 3392 1385 212 3392 1385<br />
11