Chase Mobile Checkout User Guide - Chase Paymentech
Chase Mobile Checkout User Guide - Chase Paymentech
Chase Mobile Checkout User Guide - Chase Paymentech

Create successful ePaper yourself
Turn your PDF publications into a flip-book with our unique Google optimized e-Paper software.
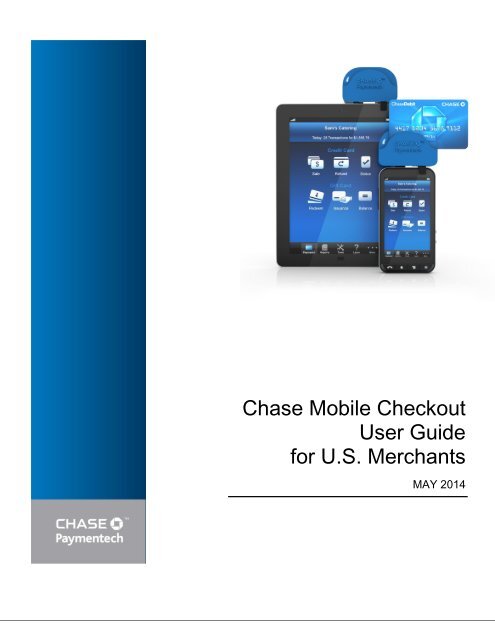
<strong>Chase</strong> <strong>Mobile</strong> <strong>Checkout</strong><br />
<strong>User</strong> <strong>Guide</strong><br />
for U.S. Merchants<br />
MAY 2014
<strong>Chase</strong> <strong>Mobile</strong> <strong>Checkout</strong> <strong>User</strong> <strong>Guide</strong> – U.S.<br />
CHASE PAYMENTECH MAKES NO WARRANTY OF ANY<br />
KIND, EITHER EXPRESSED OR IMPLIED, WITH<br />
REGARD TO THIS MATERIAL, INCLUDING, BUT NOT<br />
LIMITED TO, THE IMPLIED WARRANTIES OF<br />
MERCHANTABILITY AND FITNESS FOR ANY<br />
PARTICULAR PURPOSE.<br />
<strong>Chase</strong> <strong>Paymentech</strong> shall not be liable for errors contained<br />
herein nor for incidental or consequential damages in<br />
connection with the furnishing, performance, or use of this<br />
material. The information contained in this document is<br />
subject to change without notice.<br />
Unless specifically noted, all company and/or product<br />
names, street addresses, telephone numbers, and persons<br />
referred to within this document, either as a whole or in part,<br />
are completely fictional and are designed solely as<br />
examples to illustrate the text.<br />
This document contains proprietary information, which is<br />
protected by copyright. All rights are reserved. No part of<br />
this document may be photocopied, reproduced, or<br />
translated to another language without the prior written<br />
consent of <strong>Chase</strong> <strong>Paymentech</strong>.<br />
Copyright © 2001-2014, <strong>Paymentech</strong>, LLC, and <strong>Chase</strong><br />
<strong>Paymentech</strong> Solutions, LLC (collectively “<strong>Chase</strong><br />
<strong>Paymentech</strong>”)<br />
<strong>Chase</strong> <strong>Paymentech</strong><br />
14221 Dallas Parkway, Building Two<br />
Dallas, Texas 75254<br />
(800) 824-4313<br />
DISCLAIMER STATEMENT<br />
The information described in this document is believed to be<br />
accurate and reliable. Much care has been taken in its<br />
preparation, however, no responsibility, financial or<br />
otherwise, is accepted for any consequences arising out of<br />
the use or misuse of this material.<br />
05/2014 <strong>Chase</strong> <strong>Mobile</strong> <strong>Checkout</strong> <strong>User</strong> <strong>Guide</strong><br />
©2014, <strong>Chase</strong> <strong>Paymentech</strong>. All rights reserved.<br />
2 of 19
<strong>Chase</strong> <strong>Mobile</strong> <strong>Checkout</strong> <strong>User</strong> <strong>Guide</strong> – U.S.<br />
Table of Contents<br />
1. INTRODUCTION .................................................................................................................................................4<br />
Overview .................................................................................................................................................................4<br />
Get Additional Assistance .......................................................................................................................................4<br />
2. GETTING STARTED ..........................................................................................................................................5<br />
Set Up Your Account ..............................................................................................................................................5<br />
Activate Your Account .............................................................................................................................................5<br />
3. USING A TABLET ..............................................................................................................................................6<br />
Run a Credit Card Quick Sale .................................................................................................................................6<br />
View Your Account on the Dashboard ....................................................................................................................8<br />
Manage Your Product Catalog ................................................................................................................................9<br />
Process a Refund................................................................................................................................................. 10<br />
4. USING A SMARTPHONE ................................................................................................................................ 13<br />
Run a Credit Card Sale ........................................................................................................................................ 13<br />
Process a Refund................................................................................................................................................. 14<br />
Re-Send a Receipt ............................................................................................................................................... 15<br />
View Transactions ................................................................................................................................................ 15<br />
Sales Overview .................................................................................................................................................... 16<br />
Settlement Reporting ........................................................................................................................................... 16<br />
Funding Reports................................................................................................................................................... 17<br />
5. USING THE CREDIT CARD READER ............................................................................................................ 18<br />
Battery Status ....................................................................................................................................................... 18<br />
Transaction Status ............................................................................................................................................... 18<br />
6. TROUBLESHOOTING ..................................................................................................................................... 19<br />
05/2014 <strong>Chase</strong> <strong>Mobile</strong> <strong>Checkout</strong> <strong>User</strong> <strong>Guide</strong><br />
©2014, <strong>Chase</strong> <strong>Paymentech</strong>. All rights reserved.<br />
3 of 19
<strong>Chase</strong> <strong>Mobile</strong> <strong>Checkout</strong> <strong>User</strong> <strong>Guide</strong> – U.S.<br />
1. INTRODUCTION<br />
OVERVIEW<br />
<strong>Chase</strong> <strong>Mobile</strong> <strong>Checkout</strong> can help you grow your businesses by allowing you to<br />
process card payments when you are away from your countertop payment card<br />
terminal. In addition, you can manage your account on the go, with value-added<br />
features.<br />
KEY FEATURES<br />
• Securely process credit, signature debit and <strong>Chase</strong> <strong>Paymentech</strong> Gift Card with<br />
Safetech Encryption<br />
• Process and record transactions such as voids and refunds<br />
• Allow customers to add tips to sales, either manually or by selecting a<br />
suggested flat amount or percentage<br />
• Customize a selection of tax amounts for automatic calculation<br />
• Manually add a per-order discount, to accommodate special promotions or<br />
employee pricing<br />
• Send digital receipts to customers via email or text message<br />
• View historical account activity, for both transactions and settlements<br />
• Search for transactions<br />
SUPPORTED PLATFORMS AND DEVICES<br />
Click here to review the <strong>Chase</strong> <strong>Mobile</strong> <strong>Checkout</strong> Supported Device List, available on<br />
http://www.chasepaymentech.com/.<br />
GET ADDITIONAL ASSISTANCE<br />
For how-to videos, reference guides and frequently asked questions, go to<br />
http://www.chasepaymentech.com/iservice/mobile_checkout_how_tos.html<br />
For additional support, please call 866.428.4967.<br />
05/2014 <strong>Chase</strong> <strong>Mobile</strong> <strong>Checkout</strong> <strong>User</strong> <strong>Guide</strong><br />
4 of 19<br />
©2014, <strong>Chase</strong> <strong>Paymentech</strong>. All rights reserved.
<strong>Chase</strong> <strong>Mobile</strong> <strong>Checkout</strong> <strong>User</strong> <strong>Guide</strong> – U.S.<br />
2. GETTING STARTED<br />
SET UP YOUR ACCOUNT<br />
To activate <strong>Chase</strong> <strong>Mobile</strong> <strong>Checkout</strong>, you need to do three things:<br />
1) Contact the <strong>Chase</strong> <strong>Paymentech</strong> Merchant Team to establish a merchant<br />
account. All merchants are required to complete a detailed application, and<br />
agree to terms and conditions, at the time of enrollment. All merchants are<br />
subject to credit approval. Once approved, you will receive two emails: one with<br />
your user name and one with your password.<br />
2) Download the <strong>Chase</strong> <strong>Mobile</strong> <strong>Checkout</strong> application from your device’s<br />
marketplace, the Google Play Store or the Apple ® App Store SM . There will be<br />
a separate version for tablets.<br />
3) Once you receive the credit card reader from <strong>Chase</strong> <strong>Paymentech</strong>, you need to<br />
connect the device and log on.<br />
ACTIVATE YOUR ACCOUNT<br />
1) Log on with your user name and the system-generated, single-use password.<br />
2) You will be prompted to create a new password.<br />
3) Next, since this is the first time you have logged in from this device, you will be<br />
prompted to receive an identification code via your mobile number or email<br />
address on file. Enter the identification code on the Log On screen and tap the<br />
Log On button.<br />
4) Once validated, you will be taken to the Payments home page.<br />
Your account is now activated and you may start accepting credit card payments!<br />
05/2014 <strong>Chase</strong> <strong>Mobile</strong> <strong>Checkout</strong> <strong>User</strong> <strong>Guide</strong><br />
5 of 19<br />
©2014, <strong>Chase</strong> <strong>Paymentech</strong>. All rights reserved.
<strong>Chase</strong> <strong>Mobile</strong> <strong>Checkout</strong> <strong>User</strong> <strong>Guide</strong> – U.S.<br />
3. USING A TABLET<br />
There are different versions of <strong>Chase</strong> <strong>Mobile</strong> <strong>Checkout</strong> based on region, operating<br />
system and hardware. While the capabilities of the app are very similar for both<br />
smartphones and tablets, there are differences due to the changes in screen size.<br />
As a result, this guide includes two separate sections, with different images, to<br />
accommodate both smartphone users and tablet users.<br />
RUN A CREDIT CARD QUICK SALE<br />
1) On the Sale screen, tap the Enter Sale Amount field and use the keypad to<br />
enter the amount of the sale. Tap Done to close the keypad. Tap <strong>Checkout</strong> or<br />
Continue, depending on your device.<br />
Note: Catalog Sale<br />
If you’re selling the same items<br />
frequently, you may benefit from<br />
creating a product catalog for<br />
your device, and tapping the<br />
Product Catalog Sale icon in<br />
the top-right corner.<br />
2) You can either swipe the card through the card reader or enter the card<br />
information using the keypad. Remember to swipe slowly and firmly, with the<br />
magnetic stripe down. When successfully swiped, the card detail populates<br />
the fields on the tablet.<br />
3) Key any additional fields as configured in your app’s Preferences. Tap<br />
Continue.<br />
Note: Optional Fields<br />
Complete any optional fields that<br />
may be enabled, such as<br />
Discount or Tax. You can toggle<br />
these features on or off in your<br />
app’s Preferences section.<br />
05/2014 <strong>Chase</strong> <strong>Mobile</strong> <strong>Checkout</strong> <strong>User</strong> <strong>Guide</strong><br />
©2014, <strong>Chase</strong> <strong>Paymentech</strong>. All rights reserved.<br />
6 of 19
<strong>Chase</strong> <strong>Mobile</strong> <strong>Checkout</strong> <strong>User</strong> <strong>Guide</strong> – U.S.<br />
5) Present the tablet to the customer. If the Tip feature is enabled, an Add Tip field<br />
displays. The customer can select a predefined tip percentage or key in any<br />
amount.<br />
6) The customer can enter his email address or mobile phone number, to receive a<br />
digital receipt.<br />
7) A signature box is located under the Send Customer Receipt area. The<br />
cardholder can use a stylus or his finger to sign for the transaction.<br />
8) When the customer has completed signing and gives you back the tablet, tap<br />
Authorize.<br />
9) Once the transaction is complete, a confirmation screen displays.<br />
10) Tap New Sale to begin another transaction, tap Schedule Follow-up to add an<br />
entry to your device’s calendar or tap Home to navigate to the device’s default<br />
home screen for the app, based on the setting in <strong>User</strong> Preferences.<br />
05/2014 <strong>Chase</strong> <strong>Mobile</strong> <strong>Checkout</strong> <strong>User</strong> <strong>Guide</strong><br />
7 of 19<br />
©2014, <strong>Chase</strong> <strong>Paymentech</strong>. All rights reserved.
<strong>Chase</strong> <strong>Mobile</strong> <strong>Checkout</strong> <strong>User</strong> <strong>Guide</strong> – U.S.<br />
VIEW YOUR ACCOUNT ON THE DASHBOARD<br />
To view your payment processing account data, select the Reports Dashboard icon<br />
in the left menu bar. Each Dashboard widget shows a high-level list, graph or wheel.<br />
Tap the widget’s header to view additional detail, and then tap the Dashboard<br />
button in the top-left corner to return to the Dashboard.<br />
• In the top-right corner, you can tap the Customize Dashboard icon to show,<br />
hide or rearrange your widgets by dragging them around. Tap Save when you’re<br />
finished.<br />
• You can also tap the Share icon to send an image of your Dashboard in an<br />
email.<br />
• Today’s Transactions lists the time, payment brand and amount of the most<br />
recent transactions you submitted today. Tap the widget to view the<br />
Transaction Summary screen, where you can search for specific transactions<br />
and view detail.<br />
• The Sales Trends widget features a bar graph of your sales totals for each day,<br />
across a week. Tap it to access the Sales Overview screen, where you can<br />
look at summaries and details of your sales, and progress toward your sales<br />
goal.<br />
• Settlement Overview displays closed batch figures as a total and broken out in<br />
a circular wheel format. Each color on the wheel represents a different payment<br />
brand or type. You can use your finger to rotate the wheel or tap the arrows, to<br />
change the subtotal that displays.<br />
• The Funding Overview widget displays funding events and account fees as a<br />
total and broken out in a circular wheel format. You can use your finger to rotate<br />
the wheel or tap the arrows, to change the subtotal that displays.<br />
• The Chargebacks widget lists the total amount for chargebacks currently in<br />
process. Tap it to view the chargebacks in summary format and in detail.<br />
• Fees displays a total of all fees assessed to your account over the past month.<br />
Note: Permissions<br />
To request changes to user<br />
access, your merchant account<br />
administrator must call Support,<br />
using the telephone number<br />
located in the Contact Us panel.<br />
05/2014 <strong>Chase</strong> <strong>Mobile</strong> <strong>Checkout</strong> <strong>User</strong> <strong>Guide</strong><br />
©2014, <strong>Chase</strong> <strong>Paymentech</strong>. All rights reserved.<br />
8 of 19
<strong>Chase</strong> <strong>Mobile</strong> <strong>Checkout</strong> <strong>User</strong> <strong>Guide</strong> – U.S.<br />
MANAGE YOUR PRODUCT CATALOG<br />
The product catalog lets you create listings for popular items, to make it easier to<br />
ring up recurring sales by tapping the images.<br />
• To access your product catalog, tap the Shopping Cart icon in the top-right<br />
corner of the Sale screen.<br />
• Tap the Edit button in the lower left-hand corner to exit the sales interface and<br />
manage the catalog.<br />
• To add an item to the catalog, tap the Plus Sign (+) button, located in the lower<br />
left-hand corner.<br />
• In the Create Item panel, you can enter a name for your item, a price, some<br />
additional details and a description.<br />
• Tap the Star icon to identify this item as a favorite (a popular item you sell<br />
frequently).<br />
• Tap the Category field to create and assign a category to your item. This<br />
makes it easier to group your items if you have a larger inventory.<br />
• Tap the Camera icon to select whether to take a picture of your item or to select<br />
an image from your mobile device’s photo library.<br />
• Tap Save when you’re finished, and the item will be available in your product<br />
catalog.<br />
• Icons across the top of the catalog make it easier for you to search through your<br />
listings, filtering by category or favorites, changing the way the items display or<br />
searching by keyword.<br />
• Tap and hold your finger on an image to bring up the Brochure View. Your<br />
customer can look closely at each catalog item and swipe from side to side to<br />
flip through the listings. Tap the X in the corner of the item panel to return to the<br />
catalog.<br />
• If you ever need to change a listing, just tap it to open and either make an edit or<br />
tap Delete Item to remove it entirely.<br />
• Tap the Back button in the top left-hand corner to exit the Edit Catalog<br />
interface.<br />
05/2014 <strong>Chase</strong> <strong>Mobile</strong> <strong>Checkout</strong> <strong>User</strong> <strong>Guide</strong><br />
9 of 19<br />
©2014, <strong>Chase</strong> <strong>Paymentech</strong>. All rights reserved.
<strong>Chase</strong> <strong>Mobile</strong> <strong>Checkout</strong> <strong>User</strong> <strong>Guide</strong> – U.S.<br />
PROCESS A REFUND<br />
There are two ways to process a refund in <strong>Chase</strong> <strong>Mobile</strong> <strong>Checkout</strong>. If the card is<br />
present, you can process the refund through the Refund option under Payments in<br />
the left navigation menu. If the card is not present, you can locate the transaction<br />
from the Transaction Summary screen on the Reporting Dashboard.<br />
TO PROCESS THE REFUND FROM THE PAYMENTS MENU<br />
1) Tap the arrow to expand the left navigation menu.<br />
2) Under Payments, tap Refund.<br />
3) Tap the Enter Refund Amount field, enter the amount to be refunded using the<br />
keypad and tap Done to close the keypad. Tap Refund to move forward.<br />
4) Swipe or enter the card details, and tap <strong>Checkout</strong>.<br />
5) Present the tablet to the customer for his signature and digital receipt<br />
information.<br />
6) After the customer has given you back the tablet, tap Authorize and a<br />
confirmation message appears.<br />
7) Tap Home to return to the device’s default home screen for the app, based on<br />
the setting in <strong>User</strong> Preferences.<br />
05/2014 <strong>Chase</strong> <strong>Mobile</strong> <strong>Checkout</strong> <strong>User</strong> <strong>Guide</strong><br />
10 of 19<br />
©2014, <strong>Chase</strong> <strong>Paymentech</strong>. All rights reserved.
<strong>Chase</strong> <strong>Mobile</strong> <strong>Checkout</strong> <strong>User</strong> <strong>Guide</strong> – U.S.<br />
TO PROCESS THE REFUND FROM THE REPORTING DASHBOARD<br />
1) On the left navigation menu, tap the Chart icon to open your Reporting<br />
Dashboard.<br />
2) Tap the Today’s Transactions widget to open the Transaction Summary<br />
screen.<br />
Note: Void Options<br />
If the transaction has not been<br />
submitted for settlement, and is<br />
still in your open batch, the<br />
Refund option may be a Void<br />
option instead.<br />
3) Select the appropriate item in the Transactions list. If you don’t see it, tap the<br />
Magnifying Glass icon to open the Transaction Search screen.<br />
4) You can select a date range, or search using other criteria.<br />
5) Tap the Search button, and a new list of transactions displays to the right. Tap<br />
the listing to view the Transaction Detail.<br />
6) If the transaction is in your open batch, tap Void to prevent the transaction from<br />
being submitted for payment.<br />
7) For transactions that have already been submitted for payment, tap Refund to<br />
issue a credit to the cardholder.<br />
8) A pop-up window automatically displays the total transaction amount, which you<br />
can modify to remit a partial refund. Tap Refund when you’re finished.<br />
9) Present the tablet to the customer for a signature and digital receipt information.<br />
10) After the customer has given you back the tablet, tap Authorize.<br />
11) Once the transaction is complete, a confirmation message appears.<br />
12) Tap Home to return to the device’s default home screen.<br />
Note: Calendar Feature<br />
When using the Calendar to<br />
select a Start Date and End<br />
Date, make sure you tap the<br />
Done button in the top-right<br />
corner of the Calendar, or the<br />
dates will revert.<br />
05/2014 <strong>Chase</strong> <strong>Mobile</strong> <strong>Checkout</strong> <strong>User</strong> <strong>Guide</strong><br />
11 of 19<br />
©2014, <strong>Chase</strong> <strong>Paymentech</strong>. All rights reserved.
<strong>Chase</strong> <strong>Mobile</strong> <strong>Checkout</strong> <strong>User</strong> <strong>Guide</strong> – U.S.<br />
RE-SEND A RECEIPT<br />
1) To re-send a digital receipt to a customer, go to the Reporting Dashboard.<br />
2) Tap the Today’s Transactions widget header.<br />
3) Find the transaction in the list or search using the Magnifying Glass icon.<br />
4) Tap the transaction.<br />
5) Confirm or edit the customer’s email address or mobile phone number.<br />
6) Tap Resend Receipt. This will also send you a copy of the receipt.<br />
05/2014 <strong>Chase</strong> <strong>Mobile</strong> <strong>Checkout</strong> <strong>User</strong> <strong>Guide</strong><br />
12 of 19<br />
©2014, <strong>Chase</strong> <strong>Paymentech</strong>. All rights reserved.
<strong>Chase</strong> <strong>Mobile</strong> <strong>Checkout</strong> <strong>User</strong> <strong>Guide</strong> – U.S.<br />
4. USING A SMARTPHONE<br />
You can use <strong>Chase</strong> <strong>Mobile</strong> <strong>Checkout</strong> on both a smartphone and a tablet – but be<br />
aware that due to the change in screen size, there may be slight differences in the<br />
instructions and screen elements.<br />
RUN A CREDIT CARD SALE<br />
1) Tap Sale on the Payments home screen, and add items from the Product<br />
Catalog or enter the amount of the sale. Tap Continue.<br />
2) You can either swipe the card on the card reader or enter the credit card<br />
information through the smartphone keypad. Key any additional fields as<br />
configured in <strong>User</strong> Preferences. Tap Continue.<br />
3) The card information will be recognized and will populate the card fields on the<br />
smartphone.<br />
4) Present the smartphone to the customer. Only when tips are enabled will the<br />
Add Tip screen appear. The customer can select a predefined tip percentage<br />
or key in any amount. After the customer taps Sign, he can use a stylus or his<br />
finger to sign for the transaction.<br />
5) When the customer has completed signing and gives you back the smartphone,<br />
tap Authorize.<br />
6) Once the transaction is complete, a confirmation screen appears. Enter the<br />
customer’s email address and/or mobile phone number for the digital receipt,<br />
and tap Done.<br />
7) After the receipt has been sent, the final confirmation screen appears.<br />
8) Tap Home to return to the Payments home screen to continue processing<br />
additional transactions.<br />
Note: Card Swiping<br />
When swiping the card,<br />
remember you can swipe in any<br />
direction, though the magnetic<br />
stripe should pass over the<br />
indicator light and be in direct<br />
contact with the silver tab inside<br />
the reader.<br />
05/2014 <strong>Chase</strong> <strong>Mobile</strong> <strong>Checkout</strong> <strong>User</strong> <strong>Guide</strong><br />
13 of 19<br />
©2014, <strong>Chase</strong> <strong>Paymentech</strong>. All rights reserved.
<strong>Chase</strong> <strong>Mobile</strong> <strong>Checkout</strong> <strong>User</strong> <strong>Guide</strong> – U.S.<br />
PROCESS A REFUND<br />
There are two ways to process a refund in <strong>Chase</strong> <strong>Mobile</strong> <strong>Checkout</strong>. If the card is present, you can process the<br />
refund through going to the Refund option on the Payments home screen. If the card is not present, you can<br />
locate the transaction from the Transaction Summary screen on the Reports home screen.<br />
TO PROCESS THE REFUND FROM THE PAYMENTS HOME SCREEN<br />
1) Tap Refund on the Payments home screen.<br />
2) Either swipe or enter the card information.<br />
3) Enter the reference number if required, the amount of the refund, and tap<br />
Continue.<br />
4) Present the smartphone to the customer. The customer can use a stylus or their<br />
finger to sign for the refund.<br />
5) After the customer has given you back the smartphone, tap Authorize when<br />
completed.<br />
6) Once the transaction is complete, a confirmation message appears.<br />
7) Enter the customer’s email address and/or mobile phone number to send a<br />
digital receipt of the refund.<br />
8) Tap Done.<br />
9) Tap Home to return to the Payments home screen.<br />
TO PROCESS THE REFUND FROM THE TRANSACTION SUMMARY SCREEN<br />
1) Tap Reports.<br />
2) Under Transaction Reports, tap Transaction Summary.<br />
3) Locate the transaction in the listing, and tap to select. You may also tap the<br />
Calendar icon and select a date range for the transaction.<br />
4) From this screen, you can tap to either void or refund the transaction.<br />
5) Present the smartphone to the customer. The customer can use a stylus or their<br />
finger to sign for the refund.<br />
6) After the customer has given you back the smartphone, tap Authorize.<br />
7) Once the transaction is complete, a confirmation message appears.<br />
8) Enter the customer’s email and/or mobile phone number to send a digital receipt<br />
of the refund.<br />
9) Tap Done.<br />
10) Tap Home to return to the Payments home screen.<br />
Note: Void Options<br />
If the transaction has not been<br />
submitted for settlement, and is<br />
still in your open batch, the<br />
Refund option may be a Void<br />
option instead.<br />
05/2014 <strong>Chase</strong> <strong>Mobile</strong> <strong>Checkout</strong> <strong>User</strong> <strong>Guide</strong><br />
14 of 19<br />
©2014, <strong>Chase</strong> <strong>Paymentech</strong>. All rights reserved.
<strong>Chase</strong> <strong>Mobile</strong> <strong>Checkout</strong> <strong>User</strong> <strong>Guide</strong> – U.S.<br />
RE-SEND A RECEIPT<br />
1) To re-send a digital receipt to a customer, go to the Reports home screen.<br />
Tap Transaction Summary under Transaction Reports.<br />
2) Find the transaction in the list or search using the Magnifying Glass or<br />
Calendar icons.<br />
3) Tap the transaction.<br />
4) Confirm or edit the customer’s email address or mobile phone number.<br />
5) Tap Resend Receipt. This will also send you a copy of the receipt.<br />
VIEW TRANSACTIONS<br />
One of the additional benefits of <strong>Chase</strong> <strong>Mobile</strong> <strong>Checkout</strong> is that it allows you to review your account details on<br />
your smartphone. While reviewing these details, you can pull up various transaction reports. The Transaction<br />
Summary screen offers a glance into transaction details for the current and historical transaction data.<br />
1) Tap Reports.<br />
2) Under Transaction Reports, you will be able to select Transaction Summary<br />
or Sales Overview. The current transactions in your open batch are listed with<br />
most recent transaction at the top. You can see historical transactions by<br />
tapping the Calendar icon and selecting a start and end date.<br />
3) You can select a specific transaction by tapping it in the listing.<br />
4) Other useful information while viewing reports:<br />
• A Hierarchy icon will appear if your business has access to more than one<br />
account.<br />
• The Graph view can be toggled between bar and line graphs.<br />
• Graphs are scrollable horizontally.<br />
• Tapping on a specific data point will overlay the sales amount for that day.<br />
05/2014 <strong>Chase</strong> <strong>Mobile</strong> <strong>Checkout</strong> <strong>User</strong> <strong>Guide</strong><br />
15 of 19<br />
©2014, <strong>Chase</strong> <strong>Paymentech</strong>. All rights reserved.
<strong>Chase</strong> <strong>Mobile</strong> <strong>Checkout</strong> <strong>User</strong> <strong>Guide</strong> – U.S.<br />
SALES OVERVIEW<br />
You may also view sales information reports on your smartphone through <strong>Chase</strong><br />
<strong>Mobile</strong> <strong>Checkout</strong>. The Sales Overview screen offers a glance into a day-to-day<br />
sales summary.<br />
1) From the Reports home screen, tap Sales Overview under Transaction<br />
Reports.<br />
2) The current sales for the specified time period are listed with most recent<br />
transaction at the top. You can see historical sales per day by tapping the<br />
Calendar icon and selecting a start and end date.<br />
3) You can select a specific sale by tapping it in the listing.<br />
4) To view the information in a graph, tap the Graph icon.<br />
SETTLEMENT REPORTING<br />
Settlement reports can help you in understanding the overall activity of your account<br />
by keeping track of all batches in your merchants services account. These are<br />
similar to batch reports.<br />
1) Go to the Reports home screen.<br />
2) Tap Settlement under Settlement Reports.<br />
3) This view provides you the most recent settlement data. You will now be able to<br />
select the dates that you want to include in the report or tap on a settlement in<br />
the listing to see all the transactions in that settlement.<br />
05/2014 <strong>Chase</strong> <strong>Mobile</strong> <strong>Checkout</strong> <strong>User</strong> <strong>Guide</strong><br />
16 of 19<br />
©2014, <strong>Chase</strong> <strong>Paymentech</strong>. All rights reserved.
<strong>Chase</strong> <strong>Mobile</strong> <strong>Checkout</strong> <strong>User</strong> <strong>Guide</strong> – U.S.<br />
FUNDING REPORTS<br />
Funding reports can help you see a complete listing of all the funding events and<br />
fees associated with your merchant account.<br />
1) On the Reports home screen, tap Funding under Settlement Reports.<br />
2) This view provides you the most recent funding data. You will now be able to<br />
select the dates that you want to include in the report or tap on a funding<br />
instance in the listing to see that account funding transaction.<br />
3) To view the information in a graph, tap the Graph icon.<br />
4) To change the date range, click on the Calendar icon.<br />
05/2014 <strong>Chase</strong> <strong>Mobile</strong> <strong>Checkout</strong> <strong>User</strong> <strong>Guide</strong><br />
17 of 19<br />
©2014, <strong>Chase</strong> <strong>Paymentech</strong>. All rights reserved.
<strong>Chase</strong> <strong>Mobile</strong> <strong>Checkout</strong> <strong>User</strong> <strong>Guide</strong> – U.S.<br />
5. USING THE CREDIT CARD READER<br />
There are two tables below to assist in determining the status of the <strong>Chase</strong> <strong>Mobile</strong><br />
<strong>Checkout</strong> card reader. Although the reader only has one indicator light, it can be<br />
used to indicate two different functions. The light can indicate the status of the<br />
battery or the status of the transaction.<br />
BATTERY STATUS<br />
LIGHT STATUS<br />
Off<br />
Steady Green<br />
Alternating Green and Amber<br />
Steady Red (for 2 seconds)<br />
BATTERY STATUS<br />
Off<br />
Fully charged<br />
Recharging<br />
After powering on, low battery<br />
TRANSACTION STATUS<br />
LIGHT STATUS<br />
TRANSACTION STATUS<br />
Off<br />
Processing<br />
Steady Green<br />
Ready to swipe<br />
Steady Green (for 2 seconds)<br />
Good card read<br />
Steady Red (for 2 seconds)<br />
Bad card read<br />
Flashing Red Card is missing track 1, 2, or 3<br />
Note: Best Practices<br />
To protect the reader, fold the<br />
audio jack on the credit card<br />
reader when you are not using it.<br />
Charge the credit card reader<br />
when not in use.<br />
05/2014 <strong>Chase</strong> <strong>Mobile</strong> <strong>Checkout</strong> <strong>User</strong> <strong>Guide</strong><br />
©2014, <strong>Chase</strong> <strong>Paymentech</strong>. All rights reserved.<br />
18 of 19
<strong>Chase</strong> <strong>Mobile</strong> <strong>Checkout</strong> <strong>User</strong> <strong>Guide</strong> – U.S.<br />
6. TROUBLESHOOTING<br />
ISSUE<br />
SUGGESTION<br />
Getting Started<br />
I cannot log in to the application.<br />
I forgot my password.<br />
My password doesn’t work.<br />
Ensure that you are connected to a network and that the device is not<br />
in airplane mode.<br />
Reset your password by tapping Forgot Password on the home<br />
screen.<br />
Ensure you are spelling it correctly.<br />
Ensure you enter the case correctly.<br />
Credit Card Reader<br />
The reader doesn’t seem to be<br />
working.<br />
Ensure the reader is fully charged.<br />
Ensure the reader’s plug is completely inserted into the mobile<br />
device’s audio jack.<br />
Disconnect and reconnect the reader.<br />
Ensure headset volume is turned up to the highest setting.<br />
Try turning off your device and starting over.<br />
Application<br />
The application closes<br />
unexpectedly.<br />
Close all other open applications on your device.<br />
Ensure you are connected to a network.<br />
Ensure your device is not in airplane mode.<br />
Try turning off your device and starting over.<br />
Transaction Processing<br />
I cannot process transactions.<br />
Ensure you are connected to a network.<br />
Ensure your device is not in airplane mode.<br />
Ensure you are in the United States and not close to a border.<br />
Ensure your GPS and location services features are not disabled.<br />
Try turning off your device and starting over.<br />
Ensure headset volume is turned up to the highest setting.<br />
Close any other applications on your device.<br />
05/2014 <strong>Chase</strong> <strong>Mobile</strong> <strong>Checkout</strong> <strong>User</strong> <strong>Guide</strong><br />
©2014, <strong>Chase</strong> <strong>Paymentech</strong>. All rights reserved.<br />
19 of 19