MLD-S Tech-FB Library Description - Bosch Rexroth
MLD-S Tech-FB Library Description - Bosch Rexroth
MLD-S Tech-FB Library Description - Bosch Rexroth

Create successful ePaper yourself
Turn your PDF publications into a flip-book with our unique Google optimized e-Paper software.
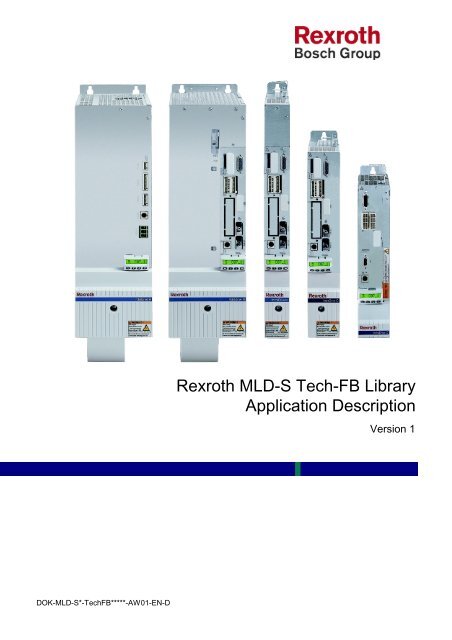
<strong>Rexroth</strong> <strong>MLD</strong>-S <strong>Tech</strong>-<strong>FB</strong> <strong>Library</strong><br />
Application <strong>Description</strong><br />
Version 1<br />
DOK-<strong>MLD</strong>-S*-<strong>Tech</strong><strong>FB</strong>*****-AW01-EN-D
About this Documentation<br />
<strong>Rexroth</strong> <strong>MLD</strong>-S <strong>Tech</strong>-<strong>FB</strong> <strong>Library</strong><br />
Title<br />
Type of Documentation<br />
<strong>Rexroth</strong> <strong>MLD</strong>-S <strong>Tech</strong>-<strong>FB</strong> <strong>Library</strong><br />
Version 1<br />
Application Manual<br />
Document Typecode<br />
DOK-<strong>MLD</strong>-S*-<strong>Tech</strong><strong>FB</strong>*****-AW01-EN-D<br />
Internal File Reference<br />
Purpose of Documentation<br />
This documentation contains the description of<br />
• Blocks<br />
• Functions<br />
• Data types<br />
of the <strong>MLD</strong>-S <strong>Tech</strong>-<strong>FB</strong> <strong>Library</strong><br />
Record of Revisions<br />
<strong>Description</strong><br />
Release<br />
Date<br />
Notes<br />
First release 11.05 Version 01<br />
Copyright<br />
© 2005 <strong>Bosch</strong> <strong>Rexroth</strong> AG<br />
Copying this document, giving it to others and the use or communication<br />
of the contents thereof without express authority, are forbidden. Offenders<br />
are liable for the payment of damages. All rights are reserved in the event<br />
of the grant of a patent or the registration of a utility model or design<br />
(DIN 34-1).<br />
Validity<br />
The specified data is for product description purposes only and may not<br />
be deemed to be guaranteed unless expressly confirmed in the contract.<br />
All rights are reserved with respect to the content of this documentation<br />
and the availability of the product.<br />
Published by<br />
<strong>Bosch</strong> <strong>Rexroth</strong> AG<br />
Bgm.-Dr.-Nebel-Str. 2 • D-97816 Lohr a. Main<br />
Telephone +49 (0)93 52/40-0 • Tx 68 94 21 • Fax +49 (0)93 52/40-48 85<br />
http://www.boschrexroth.com/<br />
Note<br />
This document has been printed on chlorine-free bleached paper.<br />
DOK-<strong>MLD</strong>-S*-<strong>Tech</strong><strong>FB</strong>*****-AW01-EN-D
<strong>Rexroth</strong> <strong>MLD</strong>-S <strong>Tech</strong>-<strong>FB</strong> <strong>Library</strong><br />
Contents I<br />
Contents<br />
1 <strong>MLD</strong>-S <strong>Tech</strong>nology <strong>Library</strong> 1-1<br />
1.1 Introduction and Overview............................................................................................................ 1-1<br />
1.2 Common Definitions ..................................................................................................................... 1-1<br />
1.3 Further Documentation ................................................................................................................. 1-2<br />
1.4 Requirements ............................................................................................................................... 1-3<br />
1.5 Flying Shear Function Block......................................................................................................... 1-3<br />
Introduction and Overview....................................................................................................... 1-3<br />
ML_FlyingShear....................................................................................................................... 1-3<br />
1.6 Touch Probe Function Blocks..................................................................................................... 1-13<br />
Introduction and Overview..................................................................................................... 1-13<br />
MC_TouchProbe.................................................................................................................... 1-15<br />
MC_AbortTrigger ................................................................................................................... 1-17<br />
1.7 Crosscutter Function Block......................................................................................................... 1-19<br />
Introduction and Overview..................................................................................................... 1-19<br />
MX_Crosscutter..................................................................................................................... 1-19<br />
1.8 Register-Controller Function Block............................................................................................. 1-35<br />
Introduction and Overview..................................................................................................... 1-35<br />
MB_RegisterControllerType1 ................................................................................................ 1-35<br />
1.9 Adjustment Function Blocks ....................................................................................................... 1-44<br />
Introduction and Overview..................................................................................................... 1-44<br />
MX_ContinuousAdjustType01............................................................................................... 1-46<br />
MX_ContinuousAdjustType02............................................................................................... 1-49<br />
MX_IncrementalAdjustType01 .............................................................................................. 1-51<br />
1.10 Measuring Wheel Function Blocks ............................................................................................. 1-54<br />
Introduction and Overview..................................................................................................... 1-54<br />
MX_MeasuringWheel ............................................................................................................ 1-55<br />
2 Service & Support 2-1<br />
2.1 Helpdesk....................................................................................................................................... 2-1<br />
2.2 Service-Hotline ............................................................................................................................. 2-1<br />
2.3 Internet.......................................................................................................................................... 2-1<br />
2.4 Vor der Kontaktaufnahme... - Before contacting us... .................................................................. 2-1<br />
2.5 Kundenbetreuungsstellen - Sales & Service Facilities ................................................................. 2-2<br />
3 Index 3-1<br />
DOK-<strong>MLD</strong>-S*-<strong>Tech</strong><strong>FB</strong>*****-AW01-EN-D
<strong>Rexroth</strong> <strong>MLD</strong>-S <strong>Tech</strong>-<strong>FB</strong> <strong>Library</strong> <strong>MLD</strong>-S <strong>Tech</strong>nology <strong>Library</strong> 1-1<br />
1 <strong>MLD</strong>-S <strong>Tech</strong>nology <strong>Library</strong><br />
1.1 Introduction and Overview<br />
1.2 Common Definitions<br />
<strong>Tech</strong>nology Function Blocks (<strong>Tech</strong>-<strong>FB</strong>’s) enhance the basic functionality<br />
of <strong>MLD</strong> / MLC and provide application specific functionality such as Flying<br />
Shear, Cross Cutter, Register-Controller.<br />
<strong>Tech</strong>nology Function Blocks are provided by an internal IEC library (e.g.<br />
“MX_<strong>Tech</strong>nology.lib” for <strong>MLD</strong> or "ML_<strong>Tech</strong>nology.lib" for MLC).<br />
This documentation describes the functionality as well as in- and output<br />
description of the provided <strong>Tech</strong>nology Function Blocks.<br />
Every function and function block provides a common error structure and<br />
defined behavior of the most common in- and outputs.<br />
All function blocks with "Execute" input and "Done" output have the same<br />
edge-oriented runtime behavior. The rising edge on the "Execute" input of<br />
a function block triggers the execution.<br />
When the result is available, "Done" is set to TRUE. When an error is<br />
present, "Error" is set to TRUE and "ErrorID" to an error identifier. Unless<br />
"Execute" is reseted, "Done" or "Error" remain at their values. When<br />
"Execute" is reset, "Done", "Error" and "ErrorID" are reset.<br />
If "Execute" is already FALSE when the command completes, the outputs<br />
"Done" or "Error" and "ErrorID" remain active for exactly one cycle.<br />
Function blocks with an "Enable" input are working in a level-oriented<br />
way. The "Enable" input normally is transmitted to the corresponding<br />
functionality (example: MC_Power).<br />
The following figure shows typical timing diagrams of Execute, Done and<br />
Error:<br />
Fig. 1-1: Timing diagrams of Enable, Active, Done and Error<br />
DOK-<strong>MLD</strong>-S*-<strong>Tech</strong><strong>FB</strong>*****-AW01-EN-D
1-2 <strong>MLD</strong>-S <strong>Tech</strong>nology <strong>Library</strong> <strong>Rexroth</strong> <strong>MLD</strong>-S <strong>Tech</strong>-<strong>FB</strong> <strong>Library</strong><br />
Fig. 1-2: Timing diagrams of Execute, Active, Done and Error<br />
1.3 Further Documentation<br />
The following table shows the available documentation of IndraDrive hardand<br />
firmware as well as <strong>MLD</strong>-S documentation.<br />
Title Type of documentation Document typecode Part number<br />
<strong>Rexroth</strong> IndraDrive M<br />
Drive Controllers<br />
Power Section<br />
<strong>Rexroth</strong> IndraDrive<br />
Drive Controllers<br />
Control Section<br />
Electromagnetic<br />
Compatibility (EMC) in<br />
Drive and Systems<br />
<strong>Rexroth</strong> IndraDrive<br />
Drive Controllers<br />
<strong>Rexroth</strong> IndraDrive<br />
Drive Controllers<br />
PLC Programming with<br />
<strong>Rexroth</strong> IndraLogic 1.0<br />
<strong>Rexroth</strong> SIS Serial<br />
Interface<br />
<strong>Rexroth</strong> IndraDrive<br />
<strong>Rexroth</strong> Indramotion <strong>MLD</strong>-<br />
S<br />
Project Planning Manual DOK-INDRV*-HMS+HMD****-PR01-EN-P R911295014<br />
Project Planning Manual DOK-INDRV*-CSH********-PR01-EN-P R911295012<br />
Project Planning Manual DOK-GENERL-EMV********-PR02-EN-P R911259814<br />
Parameter <strong>Description</strong> DOK-INDRV*-GEN-**VRS**-PA01-EN-P R911297317<br />
Troubleshooting Guide DOK-INDRV*-GEN-**VRS**-WA01-EN-P R911297319<br />
Operating and<br />
Programming Guide<br />
DOK-CONTRL-IL**PRO*V01-AW01-EN-P<br />
DOK-GENERL-SIS-DEFINIT-IF02-EN-P<br />
R911305036<br />
R911289718<br />
Application Manual DOK-INDRV*-<strong>MLD</strong>-**VRS**-AW01-EN- R911306084<br />
Fig. 1-3:<br />
Further Documentation<br />
DOK-<strong>MLD</strong>-S*-<strong>Tech</strong><strong>FB</strong>*****-AW01-EN-D
<strong>Rexroth</strong> <strong>MLD</strong>-S <strong>Tech</strong>-<strong>FB</strong> <strong>Library</strong> <strong>MLD</strong>-S <strong>Tech</strong>nology <strong>Library</strong> 1-3<br />
1.4 Requirements<br />
1.5 Flying Shear Function Block<br />
Introduction and Overview<br />
<strong>Tech</strong>nology Function Blocks are using the functionality of <strong>MLD</strong>-S and<br />
MPH03 drive firmware. Please refer chapter 1 of “DOK-INDRV*-<strong>MLD</strong>-<br />
**VRS**-AW01-EN-P“, Mat. Number: R911306084 for details about the<br />
required components. Specific requirements related to special<br />
<strong>Tech</strong>nology Function Blocks are documented in the chapter of every<br />
<strong>Tech</strong>nology Function Block (see next chapters).<br />
In a typical Flying Shear system, material (sheet metal, plastic, foil etc.) is<br />
fed continuously to a cutoff carriage. The carriage contains the cutting<br />
device (shear, saw etc.) and is driven by a servomotor.<br />
When performing a cut, it is usually not acceptable to stop the material.<br />
Consequently, the cutoff carriage has to accelerate to the synchronous<br />
velocity and to execute a cut. At the point when the carriage is<br />
synchronized to the material position, it is possible to perform the cut.<br />
After the cut is complete and the Minimum Stroke was reached, the cutoff<br />
carriage returns to the Start Position and will then synchronize to the next<br />
cut position.<br />
A measuring wheel rides on the material and determines the position and<br />
velocity of the material. The measuring wheel is connected to an<br />
incremental or absolute encoder. This encoder is connected to the<br />
second encoder input of the IndraDrive. The Flying Shear carriage will be<br />
synchronized using this encoder or using a virtual master signal for test<br />
purposes.<br />
ML_FlyingShear<br />
Short <strong>Description</strong><br />
MX(L)_FlyingShear provides basic functionality of Flying Shear<br />
applications and performs the following steps once “Start” is true:<br />
• Move slave axis to “ReturnPos” and wait until axis is in position<br />
• Synchronize slave axis to the master axis with a Lock On Cam profile<br />
• Set output “InSync” once the slave axis is synchronized to the material<br />
• Position slave axis to the starting position when triggered by the<br />
„MoveReturn“ input.<br />
DOK-<strong>MLD</strong>-S*-<strong>Tech</strong><strong>FB</strong>*****-AW01-EN-D
1-4 <strong>MLD</strong>-S <strong>Tech</strong>nology <strong>Library</strong> <strong>Rexroth</strong> <strong>MLD</strong>-S <strong>Tech</strong>-<strong>FB</strong> <strong>Library</strong><br />
Interface <strong>Description</strong><br />
*1: VirtualMaster input signal is only available at MX(L)_FlyingShear<br />
function block<br />
*2: Master In/Output signal is only available at MX(L)_FlyingShear<br />
function block (MLC) as the master axis is already defined by <strong>MLD</strong>-S<br />
Fig. 1-4: <strong>FB</strong> MX(L)_FlyingShear<br />
Name Type Comment<br />
VAR_IN_OUT Master AXIS_REF MLC only: Reference to master axis. 360° modulo scaling is<br />
required for the master axis.<br />
Slave AXIS_REF Reference to slave axis<br />
FSRetain<br />
MB_FS_RET<br />
AIN_DATA* 1<br />
Reference to the required retain data of this <strong>FB</strong><br />
VAR_INPUT Start BOOL Starts FlyingShear function. The axis move to ReturnPos and<br />
synchronizes with the next cut.<br />
VirtualMaster BOOL <strong>MLD</strong>-S only:<br />
FALSE - real master is used,<br />
TRUE - virtual master (MX_MasterSimulator is used.)<br />
CropCut BOOL On a rising edge, the slave axis starts synchronization after the<br />
cutlength is passed on the machine.<br />
The CropCut will run in the next cut cycle if a cut cycle is<br />
already running (InCycle=TRUE).<br />
ImmediateCut BOOL If „Start“ = TRUE:<br />
The slave axis starts synchronization immediately, once a<br />
positive edge of ImmediateCut was detected. The function will<br />
run in the next cut cycle if a cut cycle is already running<br />
(InCycle=TRUE). This function is intended for moving material.<br />
If („Start“ = FALSE) & (Material is in Standstill v < 20PRM):<br />
The slave axis stays in standstill and the “InSync” bit is set<br />
immediately in order to command a cut once the material is not<br />
moving.<br />
MoveReturn BOOL Decouples the slave axis from the material and commands it to<br />
the “ReturnPos”.<br />
ResetCutCounter BOOL Positive edge resets Cut Counter.<br />
CutLength REAL Cut length of the material* 2*3<br />
MWFeedconst REAL Feed constant of the measuring wheel * 2 * 3<br />
SyncDist REAL Travel distance of the slave after it is synchronized to the<br />
material* 2 * 3<br />
ReturnPos REAL The slave moves to the ReturnPos as soon the slave is<br />
synchronized and MoveReturn is TRUE* 2 * 3<br />
DOK-<strong>MLD</strong>-S*-<strong>Tech</strong><strong>FB</strong>*****-AW01-EN-D
<strong>Rexroth</strong> <strong>MLD</strong>-S <strong>Tech</strong>-<strong>FB</strong> <strong>Library</strong> <strong>MLD</strong>-S <strong>Tech</strong>nology <strong>Library</strong> 1-5<br />
ReturnVel REAL The slave axis moves to the ReturnPos with ReturnVel* 2 * 3<br />
ReturnAcc REAL The slave axis moves to the ReturnPos with ReturnAcc* 2 * 3<br />
PreSyncPos REAL The output "PreSyncSignal" becomes TRUE "PreSyncPos"<br />
ahead from synchronization* 2<br />
PreSyncTime TIME Time duration of "PreSyncSignal"<br />
VAR_OUTPUT InSync BOOL The Flying Shear is synchronized with the material.<br />
InCycle BOOL Flying Shear axis is currently performing a cut cycle.<br />
CropCutDone BOOL Crop cut is done.<br />
ImmediateCutDone BOOL Immediate cut is done.<br />
PreSyncSignal BOOL TRUE "PreSyncPos" ahead of synchronization.<br />
ShortPrdWarning BOOL Not enough time to reach home position. reduce material<br />
velocity, increase cut length, return velocity or acceleration.<br />
MaterialMoving BOOL The material-encoder is moving more then 20RPM.<br />
Reserve DINT Reserve of the Lock On mechanism in Increments (only for<br />
diagnostics). It’s not possible to Lock On, if Reserve ≤ 0 -> The<br />
<strong>FB</strong> will issue an error in this case.<br />
CycleState UINT Current cut cycle state:<br />
0: Standstill & WaitPhase; 1: Acceleration Phase;<br />
2: Synchronization Phase; 3: Return Phase.<br />
CutCounter UINT Every cut increments the cut counter. (Start = FALSE) or pos.<br />
edge on "ResetCutCounter" reset this counter.<br />
Error BOOL Indicates an error. Clearedwith “Start” = FALSE<br />
ErrorID INT (Enum) ERROR_CODE: Short error description.<br />
ErrorIdent<br />
ERROR_STR<br />
UCT<br />
Detailed error description<br />
Fig. 1-5: Interface of MX(L)_FlyingShear<br />
Timing Diagram<br />
* 1 : MB_FS_RETAIN_DATA* 1 : STRUCT (bCutNotCompleted: BOOL,<br />
diMasterSyncPosition: DINT, iRevCounter:INT)<br />
* 2 : Units according to drive scaling in engineering units (mm)<br />
* 3 : New values become active in the transition synchronization -><br />
return phase<br />
The following diagram shows the Immediate Cut with standstill of material<br />
(Start = FALSE).<br />
Fig. 1-6: Timing Diagram: Immediate Cut with Standstill of Material<br />
The following diagram shows the complete sequence of the FlyingShear<br />
function block with moving material and immediate cut:<br />
DOK-<strong>MLD</strong>-S*-<strong>Tech</strong><strong>FB</strong>*****-AW01-EN-D
1-6 <strong>MLD</strong>-S <strong>Tech</strong>nology <strong>Library</strong> <strong>Rexroth</strong> <strong>MLD</strong>-S <strong>Tech</strong>-<strong>FB</strong> <strong>Library</strong><br />
Fig. 1-7: Sequence of the Flying Shear function block with Immediate Cut<br />
Errorhandling<br />
The Flying Shear function block generates the following error messages<br />
in Additional1/Additional2 for the "F_RELATED_TABLE", 16#0170.<br />
ErrorID Additional1 Additional2 <strong>Description</strong><br />
RESOURCE_ERROR (16#0003) 16#0001 16#0000 Drive is not enabled or drive error<br />
ACCESS_ERROR (16#0004) 16#0003 16#0000 <strong>FB</strong> was aborted from another <strong>FB</strong><br />
ACCESS_ERROR (16#0004) 16#0004 16#0000 Not supported drive firmware<br />
RESOURCE_ERROR (16#0003) 16#0009 16#0000 Selected Axis (Axis_Ref) was changed while <strong>FB</strong> is in<br />
operation<br />
INPUT_RANGE_ERROR (16#0006) 16#0201 16#0001 CutLenght
<strong>Rexroth</strong> <strong>MLD</strong>-S <strong>Tech</strong>-<strong>FB</strong> <strong>Library</strong> <strong>MLD</strong>-S <strong>Tech</strong>nology <strong>Library</strong> 1-7<br />
ACCESS_ERROR (16#0004) 16#0203 16#0002 P-0-0054 is not configured in the cyclic channel<br />
(MDT)<br />
Fig. 1-8: Flying Shear Error Codes<br />
Note:<br />
If software limit switches of the drive are activated, the<br />
reaction must be configured as „error“. The setting "Warning"<br />
may lead to a synchronization after standstill of the drive<br />
again.<br />
Required Components and<br />
Parameterization<br />
Required Hardware<br />
• IndraDrive C or IndraDrive M with advanced performance is required.<br />
The following control unit is supported:<br />
• ADVANCED (type code: CSH01.1C-...)<br />
• Additional second encoder interface card required for measuring<br />
wheel<br />
• Additional second encoder (according to drive project planning<br />
manual)<br />
Hinweis:<br />
High resolution second encoder must be used in case of large<br />
feedconstants (>400mm) of the measuring wheel. Resolution<br />
of min. 4096 Increments/Rev and sinewave signal are<br />
recommended. Low resolution encoder cause low cut<br />
accuracy and noise of the Flying Shear axis.<br />
Required Firmware<br />
• Drive firmware MPH03V10 or higher<br />
• The following functional packages are required<br />
• Closed Loop<br />
• Synchronization<br />
• Drive PLC<br />
Required Software<br />
• IndraWorks Drives or DriveTop16V09 or higher<br />
• IndraLogic 1.2 or higher<br />
Required Parameterization<br />
The following drive parameterization is required in order to run the<br />
FlyingShear function block. Please download the file<br />
‘FlyingShearSettings.par’ *1 to the drive or setup the drive according to the<br />
following instructions:<br />
• Download Lock On Cam (Cam#1) *1<br />
• DriveTop →File →Load →select file “LockOnCamPolynom.par”<br />
and send this file to the drive<br />
• Download Run Cam (Cam#2) *1<br />
• DriveTop →File →Load →select file “RunCam.par” and send this<br />
file to the drive<br />
• Setup primary and 1 st secondary operation mode of the drive<br />
• DriveTop → Drive Functions → Operation mode selection → Select<br />
Primary operation mode = “Cam shaft lagless, encoder1, real<br />
master drive” mode and Secondary operation mode 1 = “Cam shaft<br />
lagless, encoder1, virt. master drive”<br />
• Setup “NC Cycle Time ‘S-0-0001’ = PLC Task Cycle Time<br />
DOK-<strong>MLD</strong>-S*-<strong>Tech</strong><strong>FB</strong>*****-AW01-EN-D
1-8 <strong>MLD</strong>-S <strong>Tech</strong>nology <strong>Library</strong> <strong>Rexroth</strong> <strong>MLD</strong>-S <strong>Tech</strong>-<strong>FB</strong> <strong>Library</strong><br />
• DriveTop → Right mouse button → Single parameter → S-0-0001<br />
= cycle time of the PLC task in [us] where function block<br />
MX_MasterSimulator is running in<br />
• Setup “Modulo factor measuring encoder ‘P-0-0765’ = 0”<br />
• DriveTop → Right mouse button → Single parameter → send P-0-<br />
0765 = 0 to the drive<br />
• Setup “Master axis rev. per master axis cycle ‘P-0-0750’ = 0”<br />
• DriveTop → Right mouse button → Single parameter → send P-0-<br />
0750 = 0 to the drive<br />
• Setup Flying Shear Axis<br />
• Setup mechanical settings of the Flying Shear axis (Linear axis, No<br />
Modulo, travel range, limits...) according to the application<br />
• Setup additional second encoder / measuring encoder<br />
• DriveTop → Drive Functions → Special/optional drive functions →<br />
Measuring Encoder → setup measuring encoder<br />
• Make sure the second encoder moves in positive direction since the<br />
Lock On mechanism works for positive direction only<br />
• DriveTop → Right mouse click → Single parameter → watch P-0-<br />
0052 and move measuring wheel in material direction → the value<br />
in P-0-0052 should increase (drive must be in bb/Ab/AH/AF)<br />
*1<br />
The files are located in the “ Parameter files” folder on the <strong>MLD</strong>-S<br />
<strong>Tech</strong>nology CD.<br />
Parameter IDN Parameter Name <strong>Description</strong><br />
P-0-0750 Master axis revolutions per master axis Specifies the modulo range of the Master axis. Always<br />
cycle<br />
use P-0-0750 = 0<br />
P-0-0765 Modulo factor measuring encoder Specifies the modulo range of the measuring encoder.<br />
Always use P-0-0765 = 0<br />
P-0-0329<br />
Parameter Overview and<br />
<strong>Description</strong><br />
Smoothing of actual position value 3 of<br />
measuring encoder<br />
This is the filter time constant of the measuring encoder<br />
filter. This filter reduces noise of the FlyingShear axis if it<br />
is synchronized with the material.<br />
P-0-0142 Synchronization acceleration This ramp is used once separation (using S-0-0048) is<br />
performed or the sync operation mode is enabled. It is<br />
recommended to select a high value in order to perform<br />
fast separation and provide a dynamic synchronization<br />
to the material.<br />
P-0-0143 Synchronization velocity This max. velocity is used once separation (using S-0-<br />
0048) is performed and the sync operation mode is<br />
enabled. It is recommended to select a high value in<br />
order to perform fast separation and provide a dynamic<br />
synchronization to the material.<br />
S-0-0228 Position synchronization window The FlyingShear function block issues the output<br />
"InSync=TRUE" once the synchronization distance<br />
(SyncDist) is passed and the axis feedback position is in<br />
the synchronization window. A small synchronization<br />
window is recommended in order to provide high cut<br />
accuracy.<br />
S-0-0048 Additive position command value This parameter provides an additive position offset and<br />
is usable in order to separate the pieces after the cut<br />
was performed. Increase of S-0-0048 with the<br />
separation distance while the axis is in synchronization<br />
(InSync=TRUE) cause the separation movement using<br />
the ramp P-0-0142 and P-0-0143. The FlyingShear<br />
function block resets S-0-0048 to the ReturnPosition<br />
once the axis reaches ReturnPos.<br />
P-0-0694 Gear ratio fine adjust, process loop This gear fine adjust cause a higher velocity of the<br />
DOK-<strong>MLD</strong>-S*-<strong>Tech</strong><strong>FB</strong>*****-AW01-EN-D
<strong>Rexroth</strong> <strong>MLD</strong>-S <strong>Tech</strong>-<strong>FB</strong> <strong>Library</strong> <strong>MLD</strong>-S <strong>Tech</strong>nology <strong>Library</strong> 1-9<br />
FlyingShear axis in reference to the material velocity in<br />
case P-0-0694 > 0%. This gear fine adjust cause a<br />
lower velocity of the FlyingShear axis in reference to the<br />
material velocity in case P-0-0694 < 0%. A value 0%<br />
cause additional cut inaccuracy.<br />
S-0-0193 Positioning Jerk This parameter limits the change of the acceleration<br />
(jerk) in the return movement. S-0-0193=0 disable the<br />
jerk limiting<br />
Fig. 1-9:<br />
Parameter Overview and <strong>Description</strong><br />
Required IndraLogic Steps<br />
• Include the library MX_<strong>Tech</strong>nology.lib in your IndraLogic project<br />
• Call the provided <strong>FB</strong> in your IndraLogic project. The <strong>FB</strong>’s should run in<br />
a high priority cyclic task with a cycle time ≤ 4ms<br />
Example Project<br />
• Enable drive first (MX_Power) and start the FlyingShear <strong>FB</strong> once the<br />
drive is enabled<br />
Functionality Overview<br />
A ready-made IndraLogic project using the Flying Shear function block is<br />
available and should reduce and simplify the development of Flying Shear<br />
application programs. Some application require just a change in the Tool<br />
program of the provided PLC project. The FlyingShear example project<br />
provides the following functionality:<br />
• Manual Mode<br />
• Jogging<br />
• Homing<br />
• Immediate Cut at material standstill<br />
• Automatic Mode<br />
• Continuous production of cuts<br />
• Immediate Cut at material movement<br />
• Material simulation<br />
• Example IndraLogic HMI<br />
• Example Tool program with implementation of minimal cut position,<br />
minimal stroke and separation<br />
• Program to simulate the handshake with the knife for test purpose<br />
without physical I/O’s<br />
Program / Task Structure<br />
The Flying Shear example project is subdivided in different programs in<br />
order to provide independent code sections and optimize the runtime<br />
behavior. The following table shows an overview about the provided<br />
programs and their function:<br />
Program Associated Task <strong>Description</strong><br />
PrgFlyingShear_ Cyclic Task 2ms Contains time critical, high priority<br />
HighPrio<br />
motion functionality of the Flying<br />
Shear project. This program is<br />
controlled by<br />
PrgFlyingShear_LowPrio<br />
PrgFlyingShear_ Freewheeling This program contains the low<br />
LowPrio<br />
priority state machine of the<br />
FlyingShear application with<br />
Manual, Automatic and Error state<br />
and controls the program<br />
PrgFlyingShear_HighPrio<br />
DOK-<strong>MLD</strong>-S*-<strong>Tech</strong><strong>FB</strong>*****-AW01-EN-D
1-10 <strong>MLD</strong>-S <strong>Tech</strong>nology <strong>Library</strong> <strong>Rexroth</strong> <strong>MLD</strong>-S <strong>Tech</strong>-<strong>FB</strong> <strong>Library</strong><br />
PrgFlyingShear_<br />
ToolProgram<br />
PrgFlyingShear_<br />
KnifeSimulation<br />
PrgFlyingShear_<br />
HMI<br />
Freewheeling<br />
Freewheeling<br />
Freewheeling<br />
Controls the tools of the<br />
FlyingShear once it is in<br />
synchronization with the material.<br />
The tool program commands the<br />
different tools of the Flying Shear<br />
and send the carriage back to the<br />
return position once the cut<br />
procedure is completed. The<br />
program can be modified in order<br />
to address individual applications<br />
Simulates the signals required by<br />
PrgFlyingShear_ToolProgram in<br />
order to provide a handshake<br />
without physical IO’s (only for<br />
demonstration or test purpose)<br />
Calculates data viewed by the HMI<br />
Fig. 1-10:<br />
Program / Task Overview<br />
In/Output <strong>Description</strong><br />
The FlyingShear project is controllable using the following global<br />
variables.<br />
Program Inputs<br />
Variable Type <strong>Description</strong><br />
PowerOn BOOL Enables power of the drive Ab -> AH/AF/AU<br />
ManualMode BOOL Commands program in manual mode<br />
AutoMode BOOL Commands program in automatic mode<br />
JogPlus BOOL Jog axis in positive direction -> works only in manual mode<br />
JogMinus BOOL Jog axis in negative direction -> works only in manual mode<br />
Homing BOOL Homes the axis -> works only in manual mode<br />
Reset BOOL Positive edge reset program and drive error<br />
ImmediateCut BOOL Commands an immediate cut in Manual and Automatic Mode:<br />
ManualMode: Immediate cut intended for material standstill, Flying<br />
Shear axis stays in standstill and cut is performed immediately<br />
AutomaticMode: Immediate cut intended for moving material,<br />
FlyingShear axis is started to get into synchronization as soon the<br />
carriage reaches the return position<br />
SimulationMode BOOL Flying Shear runs in simulation mode with a virtual master. Transition to<br />
and from Simulation Mode possible if Manual and Automatic Mode is<br />
not active<br />
MoveReturn BOOL Uncouple Flying Shear from material and command it to the Return<br />
Position<br />
ResetCutCounter BOOL Resets the current cut counter<br />
KnifeStatus1 BOOL 1 st status bit of the knife/saw used by PrgFlyingShear_ToolProgram<br />
KnifeStatus2 BOOL 2 nd status bit of the knife/saw used by PrgFlyingShear_ToolProgram<br />
KnifeStatus3 BOOL 3 rd status bit of the knife/saw used by PrgFlyingShear_ToolProgram<br />
JogSpeed REAL Jogging Velocity *1<br />
JogAccel REAL Jogging Acceleration *1<br />
MWFeedconst REAL Feedconstant of the measuring wheel *1<br />
DOK-<strong>MLD</strong>-S*-<strong>Tech</strong><strong>FB</strong>*****-AW01-EN-D
<strong>Rexroth</strong> <strong>MLD</strong>-S <strong>Tech</strong>-<strong>FB</strong> <strong>Library</strong> <strong>MLD</strong>-S <strong>Tech</strong>nology <strong>Library</strong> 1-11<br />
SyncDist REAL Synchronization distance *1<br />
MinStroke REAL The Flying Shear will move in synchronization with the material until<br />
MinimumStroke *1 is reached (absolute position)<br />
MinCutPos REAL This is the earliest cut position *1 (absolute)<br />
SeperationDist REAL Separation distance *1 used in the tool program<br />
ReturnPos REAL The Flying Shear axis move to the Return Position *1 once it is in<br />
synchronization and MoveReturn is true<br />
ReturnVel REAL The Flying Shear axis move to the Return Position using the Return<br />
Velocity *1<br />
ReturnAcc REAL The Flying Shear axis move to the Return Position using the Return<br />
Acceleration *1<br />
PreSyncPos REAL Position *1 of the Pre-Sync Signal relative to the material position where<br />
Lock On synchronization start<br />
PreSyncTime REAL Time duration of the Pre-Sync Signal<br />
Cutlenght REAL Commanded Cutlenght *1<br />
SimulationVel REAL Commanded velocity of the "virtual master" used in test mode, units<br />
[RPM]<br />
Fig. 1-11:<br />
Program Inputs of the FlyingShear Project<br />
*1: In engineering units according to drive scaling<br />
Program Outputs<br />
Variable Type <strong>Description</strong><br />
PowerOk BOOL Power of the drive is enabled<br />
ManualModeActive BOOL Manual Mode is active<br />
AutomaticModeActive BOOL Automatic Mode is active<br />
JogPlusActive BOOL Axis is jogging in positive direction<br />
JogMinusActive BOOL Axis is jogging in negative direction<br />
HomingDone BOOL Homing is successful completed<br />
HomingActive BOOL Homing command is currently active<br />
Error BOOL Indicates error<br />
PreSyncSignal BOOL Turns on before synchronization start<br />
InSync BOOL FlyingShear axis is in synchronization with the material<br />
ImmediateCutDone BOOL Immediate Cut is completed<br />
SimulationRunning BOOL Simulation (Virtual Master) is running<br />
KnifeControl1 BOOL 1 st output to control the knife/saw controlled by<br />
PrgFlyingShear_ToolProgram<br />
KnifeControl2 BOOL 2 nd output to control the knife/saw controlled by<br />
PrgFlyingShear_ToolProgram<br />
KnifeControl3 BOOL 3 rd output to control the knife/saw controlled by<br />
PrgFlyingShear_ToolProgram<br />
CutCounter UINT Cut Counter of the FlyingShear<br />
diMasterPos DINT Current Master Position in increments<br />
rActVel REAL Current velocity of the slave axis<br />
rActPos REAL Current position of the slave axis<br />
DOK-<strong>MLD</strong>-S*-<strong>Tech</strong><strong>FB</strong>*****-AW01-EN-D
1-12 <strong>MLD</strong>-S <strong>Tech</strong>nology <strong>Library</strong> <strong>Rexroth</strong> <strong>MLD</strong>-S <strong>Tech</strong>-<strong>FB</strong> <strong>Library</strong><br />
rActMaterialPos REAL Current material position<br />
rActOffset REAL Current offset of the master in ° / P-0-0054<br />
rActMaterialVel REAL Current material velocity<br />
rPhaseMW REAL Phase of the measuring wheel in ° for HMI only<br />
rReserve REAL Reserve of the Cam-Lock-On mechanism<br />
ErrorString STRING Error identification<br />
ErrorID<br />
ErrorIdent<br />
ERROR_<br />
CODE<br />
ERROR_<br />
STRUCT<br />
Error identification -> see error ID’s of MX_FlyingShear<br />
Error identification -> see error idents of MX_FlyingShear<br />
ErrorState STRING Additional Error identification<br />
Fig. 1-12:<br />
Program Outputs of the FlyingShear Project<br />
First Steps to get the Program to work<br />
The example program should run after the following steps:<br />
• The example program expects the same parameter settings as well as<br />
hard-, firm- and software like MX_FlyingShear. Please setup the drive<br />
accordingly or download the parameter file “FlyingShearExample.par”<br />
(available in the "Application example" folder of the <strong>MLD</strong>-S <strong>Tech</strong>nology<br />
CD) in the drive.<br />
• Open the FlyingShear demo project “FlyingShearExample1.pro”<br />
(available in the "Application example" folder of the <strong>MLD</strong>-S <strong>Tech</strong>nology<br />
CD), download the project to the drive and start the program.<br />
• Make sure drive is in phase 4 and has no error (bb, Ab in the drive<br />
display)<br />
• Open the “FLYING_SHEAR1” visualization in IndraLogic (HMI)<br />
• Press the button “Power ON”, which enables the dive (drive shows AH<br />
or AU)<br />
• Press the button “Manual” and home (with the “Home” button) the<br />
axis in case it’s not an absolute encoder. Wait until the homing is<br />
completed indicated by the green color in the home status light<br />
• You can also jog the axis in positive or negative direction with the<br />
“Jog” buttons in manual mode. (make sure you reset “Home” once<br />
you start the jog command or the jog command will be blocked)<br />
• Reset the Manual Mode button.<br />
• Press the simulation button -> the simulation of the material should<br />
start (indicated by the green light “Sim. Running”)<br />
• Press the button “Imm Cut” and “Automatic” -> The Flying Shear axis<br />
performs an immediate cut first of all. Secondly, the FlyingShear<br />
starts with continuous production of cuts with the commanded cut<br />
length.<br />
• You can also run the demo program without simulation and a real<br />
encoder with the same sequence like above. Transitions to and from<br />
simulation mode are accepted if automatic and manual mode are not<br />
active.<br />
Changes of the Tool Program<br />
The tool program contains the complete logic to perform different task,<br />
once the FlyingShear is synchronized to the material. Furthermore, the<br />
tool program commands the FlyingShear back to its return position, once<br />
the cut process is completed. The following figure shows the example tool<br />
program of the example project. This tool program contains the following<br />
parts:<br />
DOK-<strong>MLD</strong>-S*-<strong>Tech</strong><strong>FB</strong>*****-AW01-EN-D
<strong>Rexroth</strong> <strong>MLD</strong>-S <strong>Tech</strong>-<strong>FB</strong> <strong>Library</strong> <strong>MLD</strong>-S <strong>Tech</strong>nology <strong>Library</strong> 1-13<br />
• Wait until FlyingShear is synchronized (InSync-Bit) and reached the<br />
Minimal Cut Position<br />
• Control knife #1<br />
• Wait for status of knife #1<br />
• Handshake with Knife 2 and 3<br />
• Execute separation using drive parameter S-0-0048<br />
• Wait until separation is completed (using P-0-0089 Bit 8 = TRUE)<br />
• Command FlyingShear back to ReturnPosition using the signal<br />
MoveReturn= TRUE<br />
Step 1. and 7. are always required at the start and end of the tool<br />
program. All steps between can be modified depending on the<br />
application.<br />
Fig. 1-13:<br />
Sequence of the PrgFlyingShear_ToolProgram<br />
1.6 Touch Probe Function Blocks<br />
Introduction and Overview<br />
The function blocks MC_TouchProbe and Required Components and<br />
Parametrization<br />
Required Hardware<br />
• IndraDrive C or IndraDrive M with advanced or basic performance is<br />
required. The following control units are supported:<br />
• ADVANCED (type code: CSH01.1C-...)<br />
DOK-<strong>MLD</strong>-S*-<strong>Tech</strong><strong>FB</strong>*****-AW01-EN-D
1-14 <strong>MLD</strong>-S <strong>Tech</strong>nology <strong>Library</strong> <strong>Rexroth</strong> <strong>MLD</strong>-S <strong>Tech</strong>-<strong>FB</strong> <strong>Library</strong><br />
• BASIC SERCOS (single-axis; type code: CSB01.1N-SE-...)<br />
• BASIC PROFIBUS (single-axis; type code: CSB01.1N-PB-...)<br />
• BASIC UNIVERSAL (single-axis; type code: CSB01.1C-...)<br />
Required Firmware<br />
• Drive firmware MPH03 or MPB03, Release 10 or higher<br />
• The following functional packages are required<br />
• Servo or Synchronization<br />
• Drive PLC<br />
Required Software<br />
• IndraWorks Drives or DriveTop16V09 or higher<br />
• IndraLogic 1.2 or higher<br />
Required Parameterization<br />
Setup the drive probe feature using IndraWorks D or DriveTop using the<br />
following dialog:<br />
Fig. 1-17<br />
Touch probe Configuration Dialog<br />
Note: Continuous measurement is not supported by<br />
MC_TouchProbe<br />
Required IndraLogic Steps<br />
• Include the library MX_<strong>Tech</strong>nology.lib in your IndraLogic project<br />
• Call the provided <strong>FB</strong>'s in your IndraLogic project<br />
MC_AbortTrigger control and administrate the drive "Touch Probe"<br />
functionality.<br />
The function block MC_TouchProbe activates the selected touch probe,<br />
evaluates the status and provides the measuring values once the trigger<br />
event arrives.<br />
The function block MC_AbortTrigger aborts an active measurement of the<br />
MC_TouchProbe.<br />
DOK-<strong>MLD</strong>-S*-<strong>Tech</strong><strong>FB</strong>*****-AW01-EN-D
Interface <strong>Description</strong><br />
<strong>Rexroth</strong> <strong>MLD</strong>-S <strong>Tech</strong>-<strong>FB</strong> <strong>Library</strong> <strong>MLD</strong>-S <strong>Tech</strong>nology <strong>Library</strong> 1-15<br />
MC_TouchProbe<br />
Short <strong>Description</strong><br />
The touch probe function block is used to record an axis position, master<br />
position or probe time at a trigger event using the drive probe feature.<br />
Note:<br />
Probing cycle procedure command (S-0-0170) must be<br />
activated before execution of MC_TouchProbe. Consequently,<br />
the write request S-0-0170=3 is necessary before<br />
MC_TouchProbe execution.<br />
Interface <strong>Description</strong><br />
Fig. 1-14: <strong>FB</strong> MC_TouchProbe<br />
Name Type Comment<br />
VAR_IN_OUT Axis AXIS_REF Reference to the axis<br />
VAR_INPUT Execute BOOL Positive edge starts the probe function<br />
ProbeType PROBE_DATA_FORMAT Specify the data format of the measured probe signal.<br />
AXIS_POS = 0: Position of the axis (e.g. S-0-0051)<br />
PROBE_TIME = 1: Probe time in us;<br />
MASTER_POS = 2: Master position (e.g. P-0-0053)<br />
ProbeSelect PROBE_NUMBER Specify the selected probe. PROBE1 = 1: Probe 1 is<br />
selected; PROBE2 = 2: Probe 2 is selected<br />
PosEdge BOOL Positive edge of the selected probe will be evaluated<br />
NegEdge BOOL Negative edge of the selected probe will be evaluated<br />
VAR_OUTPUT Done BOOL Selected probe events are recorded<br />
Active BOOL <strong>FB</strong> is active<br />
PosEdgeDetected BOOL Positive edge of the selected probe was detected<br />
NegEdgeDetected BOOL Negative edge of the selected probe was detected<br />
RecordedPosition REAL Axis position where positive edge occurred (in<br />
technical units according drive scaling). This output is<br />
used in case ProbeType = AXIS_POS<br />
RecordedPositionNe<br />
g<br />
REAL<br />
Axis position where negative edge occurred (in<br />
technical units according drive scaling). This output is<br />
used in case ProbeType = AXIS_POS<br />
RecordedValue DINT Master position (in Increments) or probe time (in us)<br />
where positive edge occurred. This output is used in<br />
case ProbeType = PROBE_TIME or ProbeType =<br />
MASTER_POS<br />
RecordedValueNeg DINT Master position (in Increments) or probe time (in us)<br />
where neagtive edge occurred. This output is used in<br />
case ProbeType = PROBE_TIME or ProbeType =<br />
MASTER_POS<br />
DOK-<strong>MLD</strong>-S*-<strong>Tech</strong><strong>FB</strong>*****-AW01-EN-D
1-16 <strong>MLD</strong>-S <strong>Tech</strong>nology <strong>Library</strong> <strong>Rexroth</strong> <strong>MLD</strong>-S <strong>Tech</strong>-<strong>FB</strong> <strong>Library</strong><br />
CommandAborted BOOL Command was aborted by MC_AbortTrigger<br />
Error BOOL Indicates an error. Clear error with “Execute” = FALSE<br />
ErrorID ERROR_CODE Short error description<br />
ErrorIdent<br />
Timing Diagram<br />
ERROR_<br />
STRUCT<br />
Fig. 1-15: Interface of MC_TouchProbe<br />
Detailed error description<br />
Timing diagram according to PLCOpen specification. (Common<br />
Definitions).<br />
Errorhandling<br />
The function block generates the following error messages<br />
Additional1/Additional2 for the "F_RELATED_TABLE", 16#0170:<br />
in<br />
ErrorID Additional1 Additional2 <strong>Description</strong><br />
RESOURCE_ERROR<br />
(16#0003)<br />
RESOURCE_ERROR<br />
(16#0003)<br />
RESOURCE_ERROR<br />
(16#0003)<br />
RESOURCE_ERROR<br />
(16#0003)<br />
RESOURCE_ERROR<br />
(16#0003)<br />
RESOURCE_ERROR<br />
(16#0003)<br />
RESOURCE_ERROR<br />
(16#0003)<br />
RESOURCE_ERROR<br />
(16#0003)<br />
RESOURCE_ERROR<br />
(16#0003)<br />
RESOURCE_ERROR<br />
(16#0003)<br />
RESOURCE_ERROR<br />
(16#0003)<br />
RESOURCE_ERROR<br />
(16#0003)<br />
RESOURCE_ERROR<br />
(16#0003)<br />
INPUT_RANGE_ER<br />
ROR (16#0006)<br />
INPUT_RANGE_ER<br />
ROR (16#0006)<br />
16#0004 16#0000 Drive-Firmware not supported -> MPH03 or MPB03, release 10<br />
or higher required<br />
16#0401 16#0000 Configuration of S-0-0169 does not match <strong>FB</strong> inputs -> Check<br />
probe configuration S-0-0169<br />
16#0402 16#0000 Probe command (S-0-0170) is not running -> Start probe<br />
command with a parameter write request S-0-0170=3<br />
16#0403 16#0001 Required probe control bit (S-0-0405, Bit 0) is not configured in<br />
signal control word<br />
16#0403 16#0002 Required probe control bit (S-0-0406, Bit 0) is not configured in<br />
signal control word<br />
16#0403 16#0003 Required probe status bit (S-0-0409, Bit 0) is not configured in<br />
signal status word<br />
16#0403 16#0004 Required probe status bit (S-0-0410, Bit 0) is not configured in<br />
signal status word<br />
16#0403 16#0005 Required probe status bit (S-0-0411, Bit 0) is not configured in<br />
signal status word<br />
16#0403 16#0006 Required probe status bit (S-0-0412, Bit 0) is not configured in<br />
signal status word<br />
16#0403 16#0007 Required probe value S-0-0130 is not cyclic configured in the AT<br />
16#0403 16#0008 Required probe value S-0-0131 is not cyclic configured in the AT<br />
16#0403 16#0009 Required probe value S-0-0132 is not cyclic configured in the AT<br />
16#0403 16#000A Required probe value S-0-0133 is not cyclic configured in the AT<br />
16#0404 16#0001 <strong>FB</strong> Input "ProbeSelect" is outside valid range<br />
16#0404 16#0002 <strong>FB</strong> Input "ProbeType" is outside valid range<br />
Fig. 1-16 MC_TouchProbe Error Codes<br />
Required Components and<br />
Parametrization<br />
Required Hardware<br />
• IndraDrive C or IndraDrive M with advanced or basic performance is<br />
required. The following control units are supported:<br />
• ADVANCED (type code: CSH01.1C-...)<br />
• BASIC SERCOS (single-axis; type code: CSB01.1N-SE-...)<br />
• BASIC PROFIBUS (single-axis; type code: CSB01.1N-PB-...)<br />
• BASIC UNIVERSAL (single-axis; type code: CSB01.1C-...)<br />
DOK-<strong>MLD</strong>-S*-<strong>Tech</strong><strong>FB</strong>*****-AW01-EN-D
<strong>Rexroth</strong> <strong>MLD</strong>-S <strong>Tech</strong>-<strong>FB</strong> <strong>Library</strong> <strong>MLD</strong>-S <strong>Tech</strong>nology <strong>Library</strong> 1-17<br />
Required Firmware<br />
• Drive firmware MPH03 or MPB03, Release 10 or higher<br />
• The following functional packages are required<br />
• Servo or Synchronization<br />
• Drive PLC<br />
Required Software<br />
• IndraWorks Drives or DriveTop16V09 or higher<br />
• IndraLogic 1.2 or higher<br />
Required Parameterization<br />
Setup the drive probe feature using IndraWorks D or DriveTop using the<br />
following dialog:<br />
Fig. 1-17<br />
Touch probe Configuration Dialog<br />
Note: Continuous measurement is not supported by<br />
MC_TouchProbe<br />
Required IndraLogic Steps<br />
• Include the library MX_<strong>Tech</strong>nology.lib in your IndraLogic project<br />
• Call the provided <strong>FB</strong>'s in your IndraLogic project<br />
MC_AbortTrigger<br />
Short <strong>Description</strong><br />
Interface <strong>Description</strong><br />
The function block MC_AbortTrigger is used to abort an active measuring<br />
of MC_TouchProbe.<br />
Fig. 1-18: <strong>FB</strong> MC_AbortTrigger<br />
DOK-<strong>MLD</strong>-S*-<strong>Tech</strong><strong>FB</strong>*****-AW01-EN-D
1-18 <strong>MLD</strong>-S <strong>Tech</strong>nology <strong>Library</strong> <strong>Rexroth</strong> <strong>MLD</strong>-S <strong>Tech</strong>-<strong>FB</strong> <strong>Library</strong><br />
Name Type Comment<br />
VAR_IN_OUT Axis AXIS_REF Reference to the axis<br />
VAR_INPUT Execute BOOL Positive edge aborts the trigger<br />
ProbeSelect PROBE_NUMBER Specify the selected probe.<br />
PROBE1 = 1: Probe 1 is selected;<br />
PROBE2 = 2: Probe 2 is selected<br />
VAR_OUTPUT Done BOOL Selected probe events are aborted<br />
Error BOOL Indicates an error<br />
ErrorID ERROR_CODE Short error description<br />
ErrorIdent ERROR_STRUCT Detailed error description<br />
Fig. 1-19: Interface of <strong>FB</strong> MC_AbortTrigger<br />
Timing Diagram<br />
Timing diagram according to PLCOpen specification (Common<br />
Definitions).<br />
Errorhandling<br />
The function block generates the following error messages<br />
Additional1/Additional2 for the "F_RELATED_TABLE", 16#0170:<br />
in<br />
ErrorID Additional1 Additional2 <strong>Description</strong><br />
RESOURCE_ERROR<br />
(16#0003)<br />
RESOURCE_ERROR<br />
(16#0003)<br />
RESOURCE_ERROR<br />
(16#0003)<br />
INPUT_RANGE_ERROR<br />
(16#0006)<br />
16#0004 16#0000 Drive-Firmware not supported -> MPH03 or MPB03,<br />
release 10 or higher required<br />
16#0403 16#0001 Required probe control bit (S-0-0405, Bit 0) is not<br />
configured in signal control word<br />
16#0403 16#0002 Required probe control bit (S-0-0406, Bit 0) is not<br />
configured in signal control word<br />
16#0404 16#0001 <strong>FB</strong> Input "ProbeSelect" is outside valid range<br />
Fig. 1-20:<br />
MC_AbortTrigger Errorcodes<br />
Required Components and<br />
Parametrization<br />
Required Hardware<br />
Required hardware see MC_TouchProbe.<br />
Required Firmware<br />
Required firmware see MC_TouchProbe.<br />
Required Software<br />
Required software see MC_TouchProbe.<br />
Required Parameterization<br />
Required parameterization see MC_TouchProbe.<br />
Required IndraLogic Steps<br />
• Include the library MX_<strong>Tech</strong>nology.lib in your IndraLogic project<br />
• Call the provided <strong>FB</strong>'s in your IndraLogic project<br />
DOK-<strong>MLD</strong>-S*-<strong>Tech</strong><strong>FB</strong>*****-AW01-EN-D
<strong>Rexroth</strong> <strong>MLD</strong>-S <strong>Tech</strong>-<strong>FB</strong> <strong>Library</strong> <strong>MLD</strong>-S <strong>Tech</strong>nology <strong>Library</strong> 1-19<br />
1.7 Crosscutter Function Block<br />
Introduction and Overview<br />
A rotating knife system is used to cut webs of paper, plastic or metal to a<br />
given length. The web moves independently and the knife is synchronized<br />
so the blade moves at the same linear speed as the web during the cut<br />
interval. When the cutting is completed, the knife is advanced in a manner<br />
that produces the required cut length.<br />
Fig. 1-21: Crosscutter Construction<br />
For this purpose the Function block has been developed.<br />
MX_Crosscutter<br />
Short <strong>Description</strong><br />
The Crosscutter provides basic functionality for a Crosscutter application<br />
(without any print marks) and performs the following steps:<br />
• Synchronizes the slave axis to the master axis with a CAM profile and<br />
then cuts continuously<br />
• Format switch on the fly<br />
• Stops the slave axis immediately at a defined position<br />
Additional a function block "MX_MasterSimulator” is available, in order to<br />
simulate a master axis<br />
Interface <strong>Description</strong><br />
*1: VirtualMaster input signal is only available at MX_FlyingShear <strong>FB</strong><br />
*2: Master In/Out signal is only available at ML_FlyingShear <strong>FB</strong> (MLC)<br />
Fig. 1-22: <strong>FB</strong> ML(X)_CrossCutter<br />
DOK-<strong>MLD</strong>-S*-<strong>Tech</strong><strong>FB</strong>*****-AW01-EN-D
1-20 <strong>MLD</strong>-S <strong>Tech</strong>nology <strong>Library</strong> <strong>Rexroth</strong> <strong>MLD</strong>-S <strong>Tech</strong>-<strong>FB</strong> <strong>Library</strong><br />
Name Type Comment<br />
VAR_IN_OUT Master AXIS_REF Reference to the Master Axis<br />
Slave AXIS_REF Reference to the Slave Axis<br />
VAR_INPUT Enable BOOL Enables the Crosscutter functions<br />
CutExecute BOOL Positive edge activates the "Synchronization phase" and<br />
afterwards the "Cutting State"<br />
StopExecute BOOL Positive Edge stops the "Cutting State" and commands the<br />
slave to the "StopPos"<br />
VirtualMaster BOOL This input is used for <strong>MLD</strong>-S only.<br />
FALSE: Real master is used -> Main Operation mode is used.<br />
TRUE: Virtual master is used -> First secondary operation<br />
mode is used<br />
FormatLength REAL Cut-format, length of sheet<br />
NumberOfKnifes UINT number of knives, CURRENTLY ONLY 1 KNIFE<br />
Pos REAL The slave moves to the "StopPos" with a positive edge on the<br />
"StopExecute" Input. *1*2<br />
Vel REAL The slave axis moves to the "StopPos" with max. "Vel" (in case<br />
of positive edge of "StopExecute"-Input) *1*2<br />
Acc_Dec REAL The slave axis moves to the "StopPos" with max. "Acc_Dec" *1*2<br />
CamRelValues<br />
MB_CC_CAM_<br />
REL_VALUES<br />
CAM related values<br />
ResetCutCounter BOOL Positive edge (or "Enable= FALSE”) resets the cut counter<br />
VAR_OUTPUT InSync BOOL The cut drum is in synchronization with the material<br />
State UINT Current cut cycle state:<br />
0: Standstill & Wait state<br />
1: Synchronisation phase<br />
2: Cutting state<br />
3: Stop phase<br />
4: Error state<br />
Error BOOL Indicates an error, Reset with "Enable= FALSE"<br />
ErrorID ERROR_CODE Short error description<br />
ErrorIdent<br />
ERROR_STRU<br />
CT<br />
Error indentification<br />
CutCounter UINT Every cut increments the cut counter. "Enable= FALSE" or a<br />
positive edge on "ResetCutCounter" reset this counter<br />
Fig. 1-23: Interface of ML(X)_CrossCutter<br />
Timing Diagram<br />
* 1 : Units according to drive scaling in engineering units like mm<br />
* 2 : New values become active in the standstill and wait state<br />
(CycleState =0)<br />
The following diagram shows a crosscutter cycle beginning with the start<br />
of the crosscutter and ending with the stop of the cutter drum. Usually the<br />
cut drum is only stopped in an emergency case (in this way the cut drum<br />
will lose synchronization with the master axis). A regular stop of the cut<br />
process should be done by the master axis.<br />
DOK-<strong>MLD</strong>-S*-<strong>Tech</strong><strong>FB</strong>*****-AW01-EN-D
<strong>Rexroth</strong> <strong>MLD</strong>-S <strong>Tech</strong>-<strong>FB</strong> <strong>Library</strong> <strong>MLD</strong>-S <strong>Tech</strong>nology <strong>Library</strong> 1-21<br />
Fig. 1-24: Crosscutter Time Diagram<br />
Functional <strong>Description</strong><br />
A measuring wheel rides on the material and determines the position and<br />
velocity of the material.<br />
The crosscutter is placed at the end of a (corrugated) paper production<br />
line, for example. The end product of such machines are stacked sheets<br />
with various lengths. A wide range of formats must be covered which<br />
requires running the cut cylinder in electronic cam mode.<br />
Fig. 1-25: Process: Cut-off single sheets from blank material<br />
The basic issue in such applications is a job change without stopping the<br />
machine. The next figure shows an example for a job change from format<br />
A to a shorter format B.<br />
Fig. 1-26: On-the-fly format change at constant web speed<br />
DOK-<strong>MLD</strong>-S*-<strong>Tech</strong><strong>FB</strong>*****-AW01-EN-D
1-22 <strong>MLD</strong>-S <strong>Tech</strong>nology <strong>Library</strong> <strong>Rexroth</strong> <strong>MLD</strong>-S <strong>Tech</strong>-<strong>FB</strong> <strong>Library</strong><br />
Format Length<br />
Fig. 1-27: Format length<br />
Sync Format<br />
The sync format (sync length) corresponds with the cut cylinder<br />
circumference.<br />
Fig. 1-28: Sync format<br />
Format Ratio<br />
The format ratio defines the relation between the cut cylinder<br />
circumference and the format length.<br />
Fig. 1-29: Format ratio<br />
Format Ranges<br />
The solution described in this manual is based on the idea to define 4<br />
fixed format ranges.<br />
Each format range is covered by 1 cam profile<br />
Fig. 1-30: Cam profiles for 4 format ranges<br />
Cut Angle<br />
The cut angle is the area of synchronous speed around the cut position.<br />
The size depends on the mechanical construction of the knife.<br />
DOK-<strong>MLD</strong>-S*-<strong>Tech</strong><strong>FB</strong>*****-AW01-EN-D
<strong>Rexroth</strong> <strong>MLD</strong>-S <strong>Tech</strong>-<strong>FB</strong> <strong>Library</strong> <strong>MLD</strong>-S <strong>Tech</strong>nology <strong>Library</strong> 1-23<br />
Fig. 1-31: Cut angle<br />
Real Master Axis<br />
The cut cylinder follows a master axis, which represents the web speed.<br />
The web speed is measured with a measuring wheel.<br />
The master axis must be configured such that the transported web length<br />
in one master revolution corresponds with the circumference of the cut<br />
cylinder. With a linear cam the knife would cut the "synchronous format".<br />
For other formats the cut cycle must be reduced or extended. The cut<br />
cycle - and thus the cut length - is defined by the electronic gear.<br />
Fig. 1-32: The importance of the master axis to the cut process<br />
Adjusting the knife position<br />
The cam profile always has a fixed reference to the master axis. The<br />
initial profile generated with the CamBuilder or a PLC function block starts<br />
at 0°. The cut position in the synchronous part of the profile is defined as<br />
180°.<br />
While the knife is in contact with the material, the cut cylinder must pass<br />
the synchronous part of the profile (the cut angle). Depending on the<br />
mechanical 0° position the cylinder needs an adjustment to meet this rule.<br />
DOK-<strong>MLD</strong>-S*-<strong>Tech</strong><strong>FB</strong>*****-AW01-EN-D
1-24 <strong>MLD</strong>-S <strong>Tech</strong>nology <strong>Library</strong> <strong>Rexroth</strong> <strong>MLD</strong>-S <strong>Tech</strong>-<strong>FB</strong> <strong>Library</strong><br />
Fig. 1-33: Knife position adjustment<br />
Cam Profile Calculation<br />
The PC program CamBuilder is an offline tool to design cam profiles. It<br />
can be used to download profiles for first tests or to design the initial cam<br />
table for applications which are covered with fixed profiles.<br />
A special wizard is available to calculate cam profiles for crosscutter<br />
applications. Based on the input parameters for format length, cut cylinder<br />
diameter and cut angle the wizard generates a profile as shown below.<br />
DOK-<strong>MLD</strong>-S*-<strong>Tech</strong><strong>FB</strong>*****-AW01-EN-D
<strong>Rexroth</strong> <strong>MLD</strong>-S <strong>Tech</strong>-<strong>FB</strong> <strong>Library</strong> <strong>MLD</strong>-S <strong>Tech</strong>nology <strong>Library</strong> 1-25<br />
Fig. 1-34:<br />
Note:<br />
Crosscutter wizard: work area<br />
Always disable option "Use Velocity Limit".<br />
Using the CamBuilder Version 01Vxx you have always to<br />
disable the Option "Allow reverse movement".<br />
Output value "synchronous area gradient" is the ∆TW parameter for the<br />
hub factor calculation.<br />
DOK-<strong>MLD</strong>-S*-<strong>Tech</strong><strong>FB</strong>*****-AW01-EN-D
1-26 <strong>MLD</strong>-S <strong>Tech</strong>nology <strong>Library</strong> <strong>Rexroth</strong> <strong>MLD</strong>-S <strong>Tech</strong>-<strong>FB</strong> <strong>Library</strong><br />
Cam Table Download<br />
Cam tables can be downloaded to the drive using IndraWorks /<br />
CamBuilder.<br />
Fig. 1-35: Cam table download<br />
Cam Table Export<br />
Error Handling<br />
Fig. 1-36: Cam table export<br />
The function block generates the following error messages<br />
Additional1/Additional2 of the table "F_RELATED_TABLE", 16#0170:<br />
in<br />
ErrorID Additional1 Additional2 <strong>Description</strong><br />
RESOURCE_ERROR (16#0003) 16#0003 16#0000 <strong>FB</strong> was aborted from another <strong>FB</strong><br />
RESOURCE_ERROR (16#0003) 16#0004 16#0000 Drive firmware version is not supported<br />
INPUT_RANGE_ERROR<br />
(16#0006)<br />
INPUT_RANGE_ERROR<br />
(16#0006)<br />
INPUT_RANGE_ERROR<br />
(16#0006)<br />
INPUT_RANGE_ERROR<br />
(16#0006)<br />
16#0601 16#0601 Inputs are outside of valid range:<br />
Format length is out of range: valid range is<br />
FormatLength < 0.5*SyncFormat OR FormatLength<br />
> 8.0*SyncFormat<br />
16#0601 16#0602 Inputs are outside of valid range: Velocity is out of<br />
range<br />
16#0601 16#0603 Inputs are outside of valid range: Acceleration is out of<br />
range<br />
16#0601 16#0604 Inputs are outside of valid range: Position is out of<br />
range<br />
DOK-<strong>MLD</strong>-S*-<strong>Tech</strong><strong>FB</strong>*****-AW01-EN-D
<strong>Rexroth</strong> <strong>MLD</strong>-S <strong>Tech</strong>-<strong>FB</strong> <strong>Library</strong> <strong>MLD</strong>-S <strong>Tech</strong>nology <strong>Library</strong> 1-27<br />
INPUT_RANGE_ERROR<br />
(16#0006)<br />
16#0601 16#0605 Inputs are outside of valid range: CAM related values<br />
are not initialized correctly<br />
ACCESS_ERROR (16#0004) 16#0602 16#0000 S-0-0051 is not configured in the P-0-0131<br />
ACCESS_ERROR (16#0004) 16#0603 16#0000 P-0-0755 could not be initialized<br />
ACCESS_ERROR (16#0004) 16#0604 16#0000 P-0-0088, Bit 4 is not set<br />
ACCESS_ERROR (16#0004) 16#0605 16#0000 P-0-0135, Bit 0 is not set in the AT<br />
Fig. 1-37:<br />
CrossCutter Error Codes<br />
Required Components and<br />
Parametrization<br />
Required Hardware<br />
• IndraDrive C or IndraDrive M<br />
• Additional second encoder interface card required for measuring<br />
wheel<br />
• Additional second encoder (according to drive project planning<br />
manual)<br />
Required Firmware<br />
• Drive firmware MPH03V10 or higher<br />
• The following functional packages are required<br />
• Closed Loop<br />
• Synchronization<br />
• Drive PLC<br />
Required Software<br />
• IndraWorks Drives or DriveTop16V09 or higher<br />
• IndraLogic 1.2 or higher<br />
• For CAM generation a CAM-builder tool (e.g. “CAMbuilder 01Vxx” or<br />
higher)<br />
Required Parameterization<br />
The following drive parameterization is required in order to run the<br />
CrossCutter function block. Please do the following steps before you run<br />
the Crosscutter function block.<br />
• The drive has to be referenced before (absolute feedback preferred)<br />
• The drive has to be set into Modulo format (set S-0-0076, Bit 7 = 1)<br />
• The PLC is able to control the motion (set P-0-1367.4 = 1)<br />
• Download one after another the matched set of the 4 different CAMs<br />
of your crosscutter construction *1 :<br />
• Either use the CAM Builder:<br />
You can create your own CAMs byself using the “CAMbuilder”. Build 4<br />
different CAMs with (see example in next figure, in order to get further<br />
instructions see „CAMbuiler“ description)<br />
• Format length = 0.5 * synchron format<br />
• Format length = 2.0 * synchron format<br />
• Format length = 4.0 * synchron format<br />
• Format length = 6.0 * synchron format<br />
DOK-<strong>MLD</strong>-S*-<strong>Tech</strong><strong>FB</strong>*****-AW01-EN-D
1-28 <strong>MLD</strong>-S <strong>Tech</strong>nology <strong>Library</strong> <strong>Rexroth</strong> <strong>MLD</strong>-S <strong>Tech</strong>-<strong>FB</strong> <strong>Library</strong><br />
L: Total format range: ( 0.5...8 ) x sync format = 250...4000 mm<br />
Fig. 1-38: Crosscutter example format range<br />
Wizard inputs<br />
Values and parameters<br />
Format range 1<br />
min. format length = 0.5 x 500 mm = 250 mm<br />
PLC constant for hub factor calculation:<br />
rDeltaTW_05to20 = 0.048828<br />
Download:<br />
Cam table 1 → P-0-0072<br />
Format range 2<br />
min. format length = 2.0 x 500 mm = 1000 mm<br />
PLC constant for hub factor calculation:<br />
rDeltaTW_20to40 = 0.195313<br />
Download:<br />
Cam table 2 → P-0-0092<br />
Format range 3<br />
min. format length = 4.0 x 500 mm = 2000 mm<br />
PLC constant for hub factor calculation:<br />
rDeltaTW_40to60 = 0.390625<br />
Download:<br />
Cam table 3 → P-0-0780<br />
DOK-<strong>MLD</strong>-S*-<strong>Tech</strong><strong>FB</strong>*****-AW01-EN-D
<strong>Rexroth</strong> <strong>MLD</strong>-S <strong>Tech</strong>-<strong>FB</strong> <strong>Library</strong> <strong>MLD</strong>-S <strong>Tech</strong>nology <strong>Library</strong> 1-29<br />
Format range 4<br />
min. format length = 6.0 x 500 mm = 3000 mm<br />
PLC constant for hub factor calculation:<br />
rDeltaTW_60to80 = 0.585938<br />
Download:<br />
Cam table 4 → P-0-0781<br />
You must use the 4 different rDeltaTW-values in your PLC project,<br />
‘CrossCutter_GlobalConstants’ !<br />
Fig. 1-39: Example: cam profile calculation<br />
• Or download a set of prepared, matched CAM-parameter files<br />
using DriveTop:<br />
• → DriveTop → File → Load→ select file „CC_SF*_CA*_*.par “ 1)<br />
and send this file to the drive. Repeat this procedure with the 3<br />
other files (see Fig 4-19):<br />
• Load CC_SF75_CA20_05TO20.par to the drive<br />
• Load CC_SF75_CA20_20TO40.par to the drive<br />
• Load CC_SF75_CA20_40TO60.par to the drive<br />
• Load CC_SF75_CA20_60TO80.par to the drive<br />
Fig. 1-40:<br />
example CAM parameter file download with DriveTop<br />
• Setup primary and 3rd secondary operation mode of the drive<br />
• → DriveTop → Drive Functions → Operation mode selection → Select<br />
Primary operation mode = “Cam shaft lagless, encoder1, virt. master<br />
drive” mode and Secondary operation mode 3 = “Cam shaft lagless,<br />
encoder1, real master drive (see Fig 4-20)<br />
DOK-<strong>MLD</strong>-S*-<strong>Tech</strong><strong>FB</strong>*****-AW01-EN-D
1-30 <strong>MLD</strong>-S <strong>Tech</strong>nology <strong>Library</strong> <strong>Rexroth</strong> <strong>MLD</strong>-S <strong>Tech</strong>-<strong>FB</strong> <strong>Library</strong><br />
Fig. 1-41:<br />
Operation mode selection with DriveTop<br />
• Setup “NC Cycle Time ‘S-0-0001’ = PLC Task Cycle Time<br />
In case of using RTC variables in the <strong>MLD</strong>-S project (see also <strong>MLD</strong>-S<br />
documentation) the NC-cycle time (parameter S-0-0001) has to be the<br />
same one as the cycle task time of the PLC project. The <strong>FB</strong><br />
“MX_MasterSimulator” uses RTC-variables. So in case of using the<br />
“MX-MasterSimulator” use this in a cyclic task using the same task<br />
time as the NC cycle time (S-0-0001). (see Fig. 4-21)<br />
L: →DriveTop → Right mouse button → Single parameter → S-0-0001<br />
Fig. 1-42: DriveTop, set the NC cyclic time<br />
DOK-<strong>MLD</strong>-S*-<strong>Tech</strong><strong>FB</strong>*****-AW01-EN-D
<strong>Rexroth</strong> <strong>MLD</strong>-S <strong>Tech</strong>-<strong>FB</strong> <strong>Library</strong> <strong>MLD</strong>-S <strong>Tech</strong>nology <strong>Library</strong> 1-31<br />
Fig. 1-43:<br />
IndraLogic, cyclic task time<br />
• Setup cycle time of the PLC task in [us] where function block<br />
MX_MasterSimulator is running in<br />
• Setup cut drum axis<br />
• Setup the mechanical settings of the cut drum axis (travel ranges,<br />
limits)<br />
• In order to switch the format between the CAM and the CAM shaft<br />
distance on the fly you have to set (see Fig 4-23):<br />
• Reduction (P-0-0755) to “1”<br />
• P-0-0094 (CAM shaft switch angle) usually to 180 deg<br />
• P-0-0144 (CAM shaft distance switch angle) the same as P-0-0094<br />
• P-0-0088, Bit 4 = 1 (change gear switching at the same time as the<br />
cam shaft distance switching<br />
• P-0-0755 = 1 (Reduction)<br />
DOK-<strong>MLD</strong>-S*-<strong>Tech</strong><strong>FB</strong>*****-AW01-EN-D
1-32 <strong>MLD</strong>-S <strong>Tech</strong>nology <strong>Library</strong> <strong>Rexroth</strong> <strong>MLD</strong>-S <strong>Tech</strong>-<strong>FB</strong> <strong>Library</strong><br />
Reduction / P-0-0755:<br />
One cut cylinder could carry more than 1 knife, currently only “1”<br />
Gear switch on distance switch / P-0-0088, Bit4=1<br />
This value defines, that new gear settings become active with a new<br />
hub factor or a cam table switching.<br />
CAM shaft switch angle<br />
This option defines, when a CAM is activated. A new CAM becomes<br />
valid as soon as the cam passes the "cam switch angle" (P-0-0094).<br />
In crosscutter applications the "cam shaft distance switch angle"<br />
must be 180,0000deg.<br />
CAM shaft distance switch angle<br />
This option defines, when a new value for the hub factor ("cam shaft<br />
distance") is activated. A new hub factor becomes valid as soon as<br />
the cam passes the "cam shaft distance switch angle" (P-0-0144). In<br />
crosscutter applications the "cam shaft distance switch angle" must<br />
be 180,0000deg.<br />
Fig. 1-44: parameter setting with DriveTop<br />
• Set the synchronisation acceleration (P-0-0142) and the<br />
synchronisation velocity (P-0-0143) of the cut drum axis<br />
• →DriveTop → Right mouse button → Single parameter → P-0-0142<br />
(and P-0-0142)<br />
• Depending on the master drive polarity (P-0-0108) set the<br />
synchronization direction (P-0-0154), the synchronization mode (P-0-<br />
0155) and the command value mode (S-0-0393) of the cut drum axis<br />
• →DriveTop → Right mouse button → Single parameter → P-0-0154<br />
(and P-0-0155, and S-0-0393)<br />
• In order to count your cuts you have to define a certain range inside of<br />
the cutangle. The “CutCounter” <strong>FB</strong>-output will increase once by<br />
passing this area. This range size depends on the web velocity and the<br />
task cycle time of the “MX_CrossCutter” functionblock. The range has<br />
to be at least 5deg (max. v web =400U/min, T cyc =2ms of the “MX-<br />
Crosscutter” functionblock ).With this set the following parameter: (Fig.<br />
4-24)<br />
• P-0-0131 to S-0-0051<br />
• The first element of P-0-0132 to 180deg.<br />
• The first element of P-0-0133 to 185deg<br />
DOK-<strong>MLD</strong>-S*-<strong>Tech</strong><strong>FB</strong>*****-AW01-EN-D
<strong>Rexroth</strong> <strong>MLD</strong>-S <strong>Tech</strong>-<strong>FB</strong> <strong>Library</strong> <strong>MLD</strong>-S <strong>Tech</strong>nology <strong>Library</strong> 1-33<br />
Fig. 1-45:<br />
DriveTop, set cut counting angle<br />
The cut position in the synchronous part of the profile is usually defined as<br />
180deg. For shifting the cut cylinder into the right position related to the<br />
master axis you have to set S-0-0048 to the right value (usually 180deg if<br />
the 0-Position of the knife is the same one as the cut-position)<br />
Required IndraLogic Steps<br />
• Include the library MX_<strong>Tech</strong>nology.lib in your IndraLogic project:<br />
→ Window → <strong>Library</strong> Manager → Right mouse button Additional<br />
library (see next figure)<br />
DOK-<strong>MLD</strong>-S*-<strong>Tech</strong><strong>FB</strong>*****-AW01-EN-D
1-34 <strong>MLD</strong>-S <strong>Tech</strong>nology <strong>Library</strong> <strong>Rexroth</strong> <strong>MLD</strong>-S <strong>Tech</strong>-<strong>FB</strong> <strong>Library</strong><br />
Fig. 1-46:<br />
IndraLogic, insert TECH-<strong>FB</strong> library<br />
• The value of the synchronous format and the matched "deltaTW"-<br />
Values (results of the CAM Builder) have to be entered to the<br />
"CamRelValues" Input of the "MX_CrossCutter" Functionblock (see<br />
next figure)<br />
Fig. 1-47:<br />
Indralogic, implementation of the CAM related values of the<br />
“MX_CrossCutter”-<strong>FB</strong> based on the CAM calculation<br />
Note: You will find this values in the CamBuilder application wizard.<br />
• Call the provided <strong>FB</strong> in your IndraLogic project. The <strong>FB</strong>’s should run<br />
in a high priority Motion Task with a cycle time ≤ 4ms.<br />
Note:<br />
Enable drive first (MX_Power) and start the Crosscutter <strong>FB</strong><br />
once the drive is enabled.<br />
DOK-<strong>MLD</strong>-S*-<strong>Tech</strong><strong>FB</strong>*****-AW01-EN-D
<strong>Rexroth</strong> <strong>MLD</strong>-S <strong>Tech</strong>-<strong>FB</strong> <strong>Library</strong> <strong>MLD</strong>-S <strong>Tech</strong>nology <strong>Library</strong> 1-35<br />
1.8 Register-Controller Function Block<br />
Introduction and Overview<br />
MB_RegisterControllerType1<br />
Short <strong>Description</strong><br />
The Register Controller function block is intended for paper, printing,<br />
packaging and film applications, which use synchronized drives (e.g.<br />
Phase-, Cam-Synchronization) that feed material through a machine.<br />
Variations in the characteristics of the material, material slippage and the<br />
production process disturb the accuracy of the material position. The<br />
register controller function block determines the current position of marks,<br />
mounted or printed on the material and the deviation to the setpoint value.<br />
In addition, it calculates the required correction value using a P- or PI<br />
control loop. Using this method, the marks stay precisely on their setpoint<br />
and do not drift away.<br />
The provided Register Controller function block<br />
"MB_RegisterControllerType1" provides the following functionality:<br />
• Start and monitor the drive probe feature<br />
• Calculate a correction value based on both measured and setpoint<br />
value using a P or PI control loop (similar to indirect control algorithm<br />
of SYNAX)<br />
• Dead-time compensation of the measured signal caused by the used<br />
sensor<br />
• Preset feature<br />
• Pause feature<br />
• Min/Max limiting of the calculated control value<br />
• Expectation window of the measured signal<br />
Interface <strong>Description</strong><br />
Fig. 1-48:<br />
<strong>FB</strong> MB_RegisterControllerType01<br />
DOK-<strong>MLD</strong>-S*-<strong>Tech</strong><strong>FB</strong>*****-AW01-EN-D
1-36 <strong>MLD</strong>-S <strong>Tech</strong>nology <strong>Library</strong> <strong>Rexroth</strong> <strong>MLD</strong>-S <strong>Tech</strong>-<strong>FB</strong> <strong>Library</strong><br />
Name Type Comment<br />
VAR_IN_OUT ControlledAxis AXIS_REF Reference to the controlled axis.<br />
MeasuredAxis AXIS_REF Reference to the measured axis (used only for MLC).<br />
<strong>MLD</strong>-S provides only one axis, consequently the<br />
MeasuredAxis is equal with the Controlled axis.<br />
VAR_INPUT Enable BOOL Enables the Register Controller<br />
Pause BOOL The input "Pause" will only be evaluated while the<br />
"Enable" input is active. Pause is intended to keep the<br />
"ControlValue" constant in a steady state. In this case, the<br />
"Deviation" = Setpoint-ActualValue will be set to 0 causing<br />
the "ControlValue" to be fixed. Probe events are still<br />
monitored and the controlled parameter will still be<br />
affected.<br />
Preset BOOL The input Preset will only be evaluated while "Enable"<br />
AND "Pause" is TRUE. A positive edge of this input forces<br />
the I-fraction of the control loop to "PresetVal". In addition,<br />
this function sets the controlled parameter to the absolute<br />
value "PresetVal"<br />
Polarity BOOL The polarity of the control value is inverse as long this<br />
input is TRUE<br />
ProbeSelect PROBE_NUMBER Specify the selected probe input used for signal<br />
measurement:<br />
PROBE1 = 1: Probe 1 is selected,<br />
PROBE2 = 2: Probe 2 is selected<br />
ProbeEdge PROBE_EDGE Specify the selected probe edge for signal measurement:<br />
POS_EDGE = 1: Positive Edge is used<br />
NEG_EDGE = 2: Negative Edge is used<br />
ControlledValueIDN DINT Sercos-IDN of the controlled parameter. The following<br />
IDN's are supported: P-0-0691, P-0-0694, P-0-0695, S-0-<br />
0048, P-0-0061<br />
Setpoint REAL Desired value<br />
PControl REAL Proportional gain of the PI controller. If 0, the proportional<br />
part of the controller is disabled and the proportional gain<br />
is set internally to 1 in order to work as an I-Controller..<br />
IControl REAL Integral time Tn of the PI controller. If set to 0, the integral<br />
part of the PI-controller is disabled. Units [10 -2 ], like Synax<br />
parameter A-0-0092.<br />
SensorDeadTime REAL Dead time of the sensor in [us] used for dead time<br />
compensation of the measured signal<br />
HighLimit REAL This is the maximum value that ControlValue can have<br />
LowLimit REAL This is the minimum value that ControlValue can have<br />
PresetVal REAL This is the value fed to the system when the Preset<br />
function becomes active<br />
VAR_OUTPUT InOperation BOOL Registration controller is running<br />
Error BOOL Indicates an error. Clear error with “Enable” = FALSE<br />
ErrorID INT (Enum) ERROR_CODE: Short error description<br />
ErrorIdent ERROR_STRUCT Detailed error description<br />
PresetDone BOOL Preset function is done<br />
HighLimitAck BOOL High limit is active. ControlValue would be higher, but is<br />
limited to HighLimit<br />
LowLimitAck BOOL Low limit is active. ControlValue would be lower, but is<br />
limited to LowLimit<br />
Counter UINT Counter increases if probe was detected<br />
DOK-<strong>MLD</strong>-S*-<strong>Tech</strong><strong>FB</strong>*****-AW01-EN-D
<strong>Rexroth</strong> <strong>MLD</strong>-S <strong>Tech</strong>-<strong>FB</strong> <strong>Library</strong> <strong>MLD</strong>-S <strong>Tech</strong>nology <strong>Library</strong> 1-37<br />
MissingMarks UINT Missing mark counter<br />
ControlValue REAL Control value calculated by the registration controller<br />
ActualValue REAL Actual value used in the register controller<br />
Deviation REAL Difference = "Setpoint - ActualValue" of the register<br />
controller<br />
ParameterControl<br />
Value<br />
REAL<br />
Fig. 1-49:<br />
Calculated control parameter which is send to the drive<br />
Interface of MB_RegisterControllerType1<br />
Timing Diagram<br />
The following diagram shows the signal timing of<br />
MB_RegisterControllerType1 including Pause- and Preset Function.<br />
Fig. 1-50:<br />
Timing Diagram of MB_RegisterControllerType1 with Pause- and<br />
Preset Function<br />
Functional <strong>Description</strong><br />
A sensor detects marks, perforations, cuts or pasted joints on the material<br />
and provides this (binary) signal to the drive.<br />
The probe feature of the drive determines the edge of the sensor signal<br />
and latches the following position, depending on the signal selection of<br />
the probe.<br />
• Drive feedback position (Parameter: S-0-00051, S-0-0053)<br />
• Master axis position (Parameter: P-0-0052, P-0-0227, P-0-0753, P-0-<br />
0775, P-0-0776, P-0-0778)<br />
The probe function records positional data with a resolution of 0,5µs. The<br />
sensor must provide a 24V signal with a rise time in the µs range. The<br />
sensor-specific delay time can be compensated using the input<br />
"SensorDeadTime" of the provided function block.<br />
The register controller calculates the control deviation between the<br />
measured and setpoint positions and determines the required correction<br />
value once a new edge of the sensor signal is detected.<br />
Changes of the correction value become active via trapezoidal profile,<br />
velocity ramp, PT1-filter or instantaneously, depending on the selected<br />
control parameter ("ControlledValueIDN" input of the function block). The<br />
following table shows the available control parameters<br />
("ControlledValueIDN") as well the resulting motion profile of all available<br />
drive operation modes with synchronization.<br />
DOK-<strong>MLD</strong>-S*-<strong>Tech</strong><strong>FB</strong>*****-AW01-EN-D
1-38 <strong>MLD</strong>-S <strong>Tech</strong>nology <strong>Library</strong> <strong>Rexroth</strong> <strong>MLD</strong>-S <strong>Tech</strong>-<strong>FB</strong> <strong>Library</strong><br />
Fig. 1-51:<br />
Available control parameter and behavior<br />
Block Diagram<br />
The following diagram shows the internal block diagram of the Register<br />
Controller.<br />
Fig. 1-52:<br />
Register Controller1 Block Diagram<br />
DOK-<strong>MLD</strong>-S*-<strong>Tech</strong><strong>FB</strong>*****-AW01-EN-D
<strong>Rexroth</strong> <strong>MLD</strong>-S <strong>Tech</strong>-<strong>FB</strong> <strong>Library</strong> <strong>MLD</strong>-S <strong>Tech</strong>nology <strong>Library</strong> 1-39<br />
Fig. 1-53:<br />
Internal PI-Controller Block Diagram<br />
Errorhandling<br />
The function block generates the following error messages<br />
Additional1/Additional2 using the "F_RELATED_TABLE", 16#0170:<br />
in<br />
ErrorID Additional1 Additional2 <strong>Description</strong><br />
INPUT_RANGE_ERROR<br />
(16#0006)<br />
INPUT_RANGE_ERROR<br />
(16#0006)<br />
INPUT_RANGE_ERROR<br />
(16#0006)<br />
INPUT_RANGE_ERROR<br />
(16#0006)<br />
INPUT_RANGE_ERROR<br />
(16#0006)<br />
RESOURCE_ERROR<br />
(16#0003)<br />
RESOURCE_ERROR<br />
(16#0003)<br />
RESOURCE_ERROR<br />
(16#0003)<br />
ACCESS_ERROR<br />
(16#0003)<br />
ACCESS_ERROR<br />
(16#0003)<br />
ACCESS_ERROR<br />
(16#0003)<br />
ACCESS_ERROR<br />
(16#0003)<br />
ACCESS_ERROR<br />
(16#0003)<br />
ACCESS_ERROR<br />
(16#0003)<br />
ACCESS_ERROR<br />
(16#0003)<br />
ACCESS_ERROR<br />
(16#0003)<br />
ACCESS_ERROR<br />
(16#0003)<br />
ACCESS_ERROR<br />
(16#0003)<br />
16#0801 16#0001 Selected "ControlledValueIDN" is not supported<br />
16#0801 16#0002 HighLimit < LowLimit<br />
16#0801 16#0003 Input-variable PControl < 0<br />
16#0801 16#0004 Input-variable IControl < 0<br />
16#0801 16#0005 SensorDeadTime < 0<br />
16#0802 16#0000 Selected probe number and edge does not correspond to<br />
the probe configuration (S-0-0169)<br />
16#0803 16#0000 Continuous measurement not active (S-0-0169)<br />
16#0804 16#0000 Probe signal is not configured, or selected probe signal is<br />
not supported<br />
16#0805 16#0001 Required probe value S-0-0130 is not configured in the<br />
optional cyclic AT data of the measured axis<br />
16#0805 16#0002 Required probe value S-0-0131 is not configured in the<br />
optional cyclic AT data of the measured axis<br />
16#0805 16#0003 Required probe value S-0-0132 is not configured in the<br />
optional cyclic AT data of the measured axis<br />
16#0805 16#0004 Required probe value S-0-0133 is not configured in the<br />
optional cyclic AT data of the measured axis<br />
16#0805 16#0005 Required probe value S-0-0409 is not configured in the<br />
optional cyclic AT data of the measured axis<br />
16#0805 16#0006 Required probe value S-0-0410 is not configured in the<br />
optional cyclic AT data of the measured axis<br />
16#0805 16#0007 Required probe value S-0-0411 is not configured in the<br />
optional cyclic AT data of the measured axis<br />
16#0805 16#0008 Required probe value S-0-0412 is not configured in the<br />
optional cyclic AT data of the measured axis<br />
16#0805 16#0009 Required probe value S-0-0405 Bit 0 is not configured in<br />
the signal control word of the measured axis<br />
16#0805 16#000A Required probe value S-0-0406 Bit 0 is not configured in<br />
the signal control word of the measured axis<br />
ACCESS_ERROR 16#0805 16#000B Required parameter S-0-0048 is not configured in the<br />
DOK-<strong>MLD</strong>-S*-<strong>Tech</strong><strong>FB</strong>*****-AW01-EN-D
1-40 <strong>MLD</strong>-S <strong>Tech</strong>nology <strong>Library</strong> <strong>Rexroth</strong> <strong>MLD</strong>-S <strong>Tech</strong>-<strong>FB</strong> <strong>Library</strong><br />
(16#0003) optional cyclic MDT data of the controlled axis<br />
ACCESS_ERROR<br />
(16#0003)<br />
ACCESS_ERROR<br />
(16#0003)<br />
ACCESS_ERROR<br />
(16#0003)<br />
ACCESS_ERROR<br />
(16#0003)<br />
ACCESS_ERROR<br />
(16#0003)<br />
ACCESS_ERROR<br />
(16#0003)<br />
ACCESS_ERROR<br />
(16#0003)<br />
ACCESS_ERROR<br />
(16#0003)<br />
ACCESS_ERROR<br />
(16#0003)<br />
ACCESS_ERROR<br />
(16#0003)<br />
ACCESS_ERROR<br />
(16#0003)<br />
16#0805 16#000C Required parameter P-0-0691 is not configured in the<br />
optional cyclic MDT data of the controlled axis<br />
16#0805 16#000D Required parameter P-0-0061 is not configured in the<br />
optional cyclic MDT data of the controlled axis<br />
16#0805 16#000E Required parameter P-0-0695 is not configured in the<br />
optional cyclic MDT data of the controlled axis<br />
16#0805 16#000F Required parameter P-0-0694 is not configured in the<br />
optional cyclic MDT data of the controlled axis<br />
16#0805 16#0010 Required parameter P-0-0224 is not configured in the<br />
optional cyclic AT data of the measured axis<br />
16#0805 16#0011 Required parameter P-0-0225 is not configured in the<br />
optional cyclic AT data of the measured axis<br />
16#0805 16#0012 Required parameter P-0-0332 is not configured in the<br />
optional cyclic AT data of the measured axis<br />
16#0805 16#0013 Required parameter P-0-0776 is not configured in the<br />
optional cyclic AT data of the measured axis<br />
16#0805 16#0014 Required parameter P-0-0764 is not configured in the<br />
optional cyclic AT data of the measured axis<br />
16#0805 16#0015 Required parameter P-0-0777 is not configured in the<br />
optional cyclic AT data of the measured axis<br />
16#0805 16#0016 Required parameter P-0-0779 is not configured in the<br />
optional cyclic AT data of the measured axis<br />
Fig. 1-54:<br />
Register Controller1 Errorcodes<br />
Required Components and<br />
Parametrization<br />
Required Hardware<br />
• IndraDrive C or IndraDrive M with advanced or basic performance is<br />
required. The following control units are supported<br />
• ADVANCED (type code: CSH01.1C-...)<br />
• BASIC SERCOS (single-axis; type code: CSB01.1N-SE-...)<br />
• BASIC UNIVERSAL (single-axis; type code: CSB01.1C-...)<br />
Required Firmware<br />
• Drive firmware MPH03V10 or higher<br />
• The following functional packages are required<br />
• Closed Loop<br />
• Synchronization<br />
• Drive PLC<br />
Required Software<br />
• IndraWorks Drives or DriveTop16V09 or higher<br />
• IndraLogic 1.2 or higher<br />
Required Parameterization<br />
Setup the used probe and edge using the following IndraWorks /<br />
DriveTop dialog.<br />
DOK-<strong>MLD</strong>-S*-<strong>Tech</strong><strong>FB</strong>*****-AW01-EN-D
<strong>Rexroth</strong> <strong>MLD</strong>-S <strong>Tech</strong>-<strong>FB</strong> <strong>Library</strong> <strong>MLD</strong>-S <strong>Tech</strong>nology <strong>Library</strong> 1-41<br />
Fig. 1-55:<br />
Required Probe Setup<br />
Note: The RegisterControllerType01 function-block expects<br />
"Continuous Measurement" of the probe function. In addition,<br />
"Marker Failure Monitoring" is required in case the expectation<br />
window is used.<br />
Required IndraLogic Steps<br />
• Include the library MX_<strong>Tech</strong>nology.lib in your IndraLogic project<br />
• Call the provided <strong>FB</strong> in your IndraLogic project. The <strong>FB</strong>’s should run in<br />
a high priority cyclic task<br />
Note:<br />
The response time between probe event and calculation of a<br />
new correction value is one task cycle. Consequently, the task<br />
cycle time should be as short as possible in order to get a fast<br />
response.<br />
Application Examples<br />
Die Cutting in Label Printing<br />
The following example shows a cutter on a label printing machine.<br />
Fig. 1-56:<br />
Register control of a die cutter<br />
Labels are printed on a composite material comprising a backing foil and<br />
a self-adhesive top layer. The unprinted grid is stamped and re-wound.<br />
The task of the register controller is to adjust the die cutting cylinder to the<br />
printed web.<br />
DOK-<strong>MLD</strong>-S*-<strong>Tech</strong><strong>FB</strong>*****-AW01-EN-D
1-42 <strong>MLD</strong>-S <strong>Tech</strong>nology <strong>Library</strong> <strong>Rexroth</strong> <strong>MLD</strong>-S <strong>Tech</strong>-<strong>FB</strong> <strong>Library</strong><br />
The die cutting cylinder operates in phase synchronization mode. The<br />
alignment on the printed web is provided by way of an adjustment of the<br />
phase offset. The sensor is connected to the drive control unit for the die<br />
cutting cylinder. The angle position (the position actual value) of the die<br />
cutting cylinder is recorded with the sensor signal.<br />
The position command for the register controller corresponds to the<br />
cylinder position in which it is correctly aligned onto the product. The<br />
correction value is calculated on the basis of the difference between<br />
reference and actual value and added to the current phase offset.<br />
The key settings of the probe function, register controller and drive<br />
operation mode of this application are:<br />
• Measured Value (Probe Function) = Position feedback 1 value (S-0-<br />
0051)<br />
• Controlled Value (ControlledValueIDN) = Additive position command<br />
value (S-0-0048 or P-0-0691)<br />
• Drive operation mode = Phase synchronization<br />
Insetter Control<br />
The following figure shows an insetter control in an infeed application.<br />
Fig. 1-57:<br />
Insetter control on the infeed<br />
The infeed unit transports pre-printed material to a printing machine. After<br />
pre-printing and drying, the web is shrunk; the format length differs from<br />
the nominal format. The web must be elongated for further processing to<br />
include the register.<br />
The task of the register controller is to adjust the speed of the infeed<br />
rollers in such a way that the pre-printed web is extended to the nominal<br />
format. This assumes that one format is transported for each master axis<br />
revolution.<br />
The position command of the register controller relates to the master axis.<br />
The infeed roller operates in velocity synchronization mode. The velocity<br />
of the infeed roller is adapted via the gear ratio - fine adjust. The web<br />
elongation is correct if the print mark always passes beneath the mark<br />
reader at the same master axis position. The master position is recorded<br />
via the sensor signal. The mark reader is connected to the probe input of<br />
the infeed roller drive.<br />
The key settings of the probe function, register controller and drive<br />
operation mode of this application are:<br />
• Measured Value (Probe Function) = Resulting master axis position (P-<br />
0-0775)<br />
• Controlled Value (ControlledValueIDN) = Gear ratio fine adjust (P-0-<br />
0694)<br />
• Drive operation mode = Velocity synchronization<br />
DOK-<strong>MLD</strong>-S*-<strong>Tech</strong><strong>FB</strong>*****-AW01-EN-D
<strong>Rexroth</strong> <strong>MLD</strong>-S <strong>Tech</strong>-<strong>FB</strong> <strong>Library</strong> <strong>MLD</strong>-S <strong>Tech</strong>nology <strong>Library</strong> 1-43<br />
Flow Wrapper<br />
The following figure shows a sideseal axis (foil infeed axis) used by flow<br />
wrapper applications.<br />
Fig. 1-58:<br />
Sideseal axis in a flow wrapper application<br />
In this application products are fed into the packaging machine with an<br />
infeed belt. The sideseal axis will infeed the foil in a corresponding<br />
position to the product. The correct relationship between the foil and the<br />
product with a reproducible product length is required.<br />
Slippage between the material and the crimp rollers as well as<br />
inaccuracies in the material can result in position errors between the<br />
servomotor and the foil. Therefore registration marks are printed on the<br />
material to correct for these position errors.<br />
Prints, pictures and dirtiness on the product could result in noise signals<br />
on the registration input. Therefore an expectation window for registration<br />
signals is required. Only in the expectation window is the drive’s probe<br />
function active to measure the registration mark position. It is also<br />
necessary to detect missing marks in the expectation window.<br />
The correction movement is proportional to the difference between the<br />
measured and the setpoint value. It is required to limit the correction<br />
movement to a user defined value because of mechanical limits.<br />
The register controller has to adjust the sideseal axis to the printed foil in<br />
order to align the foil to the product.<br />
The sideseal axis operates in phase synchronization mode. The register<br />
controller calculates an additive position command value of the sideseal<br />
axis in order to align the foil.<br />
The key settings of the probe function, register controller and drive<br />
operation mode of this application are:<br />
• Measured Value (Probe Function) = Resulting master axis position (P-<br />
0-0775)<br />
• Controlled Value (ControlledValueIDN) = Additive position command<br />
value (S-0-0048 or P-0-0691)<br />
• Drive operation mode = Phase synchronization<br />
DOK-<strong>MLD</strong>-S*-<strong>Tech</strong><strong>FB</strong>*****-AW01-EN-D
1-44 <strong>MLD</strong>-S <strong>Tech</strong>nology <strong>Library</strong> <strong>Rexroth</strong> <strong>MLD</strong>-S <strong>Tech</strong>-<strong>FB</strong> <strong>Library</strong><br />
1.9 Adjustment Function Blocks<br />
Introduction and Overview<br />
Basic Principle<br />
⎡ Degree⎤<br />
AlterationVelocity<br />
⎢ ⎥<br />
= Increments<br />
⎣ s ⎦<br />
With the function blocks:<br />
• MX_ContinuousAdjustType01<br />
• MX_ContinuousAdjustType02<br />
• MX_IncrementalAdjustType01<br />
PLC-Variables can be changed (jogged) continuously or incrementally via<br />
binary inputs.<br />
• The operation must be stopped via a binary input (Enable).<br />
• The selected variable can be changed continuously with the function<br />
blocks MX_ContinuousAdjustType01 or MX_ContinuousAdjustType02<br />
(similar to long jog in SYNAX).<br />
• The affected variable can be changed incrementally with the function<br />
MX_IncrementalAdjustType01 (similar to short jog in SYNAX).<br />
• The selected variable can be incremented and decremented within the<br />
limit values.<br />
• When reaching a limit value (HighLimitAck= TRUE or LowLimitAck=<br />
TRUE), the continuous adjustment deactivates, i.e. the function block<br />
no longer adjusts the variable. In this case, the corresponding limit<br />
value, secified with the „HighLimit“ and „LowLimit“ inputs, is output.<br />
• When the limits, „HighLimit“ and „LowLimit“, have the same value as<br />
the specified modulo value, „LowLimit“ is set to zero and „HighLimit“ is<br />
set equal to the modulo value. Thus adjusting is possible over the full<br />
modulo value range.<br />
The alteration velocity characterizes the rate of change of the adjusted<br />
variable. The rate of change depends on the increments and the number<br />
of increments per second. When changing a position, the alteration<br />
velocity is calculated by:<br />
1<br />
⎢<br />
⎣s<br />
⎡ ⎤<br />
[ Degree] * Increments per Second<br />
⎥ ⎦<br />
If, for example, the revolution speed of the virtual master axis is altered,<br />
the alteration velocity is calculated by:<br />
⎡r.<br />
p.<br />
m.<br />
⎤<br />
AlterationVelocity<br />
⎢ ⎥<br />
= Increments<br />
⎣ s ⎦<br />
1<br />
⎢<br />
⎣s<br />
⎡ ⎤<br />
[ r.<br />
p.<br />
m.<br />
]*<br />
Increments per Second<br />
⎥ ⎦<br />
Adjustment Limits<br />
Basic Rules<br />
While the adjustment signal is active, the influenced variable is adjusted<br />
with the defined velocity.<br />
The adjustment can only occur via the corresponding inputs if they are<br />
within the specified limits.<br />
Exception: If the start value of the influenced variable is outside the<br />
specified limits, the influenced variable can only be modified in the<br />
direction of the valid range. If a modulo value is specified, the influenced<br />
variable can be modified in both directions. After reaching the valid range,<br />
it is impossible to move the variable outside this range.<br />
• When both adjustment signals (Inc/Dec) = TRUE simultaneously, both<br />
signals are evaluated as FALSE.<br />
• An adjustment signal with that changes polarity causes an immediate<br />
inversion of the direction. Also, the current adjustment is not finished.<br />
DOK-<strong>MLD</strong>-S*-<strong>Tech</strong><strong>FB</strong>*****-AW01-EN-D
<strong>Rexroth</strong> <strong>MLD</strong>-S <strong>Tech</strong>-<strong>FB</strong> <strong>Library</strong> <strong>MLD</strong>-S <strong>Tech</strong>nology <strong>Library</strong> 1-45<br />
• The function blocks MX_ContinuousAdjustType01,<br />
MX_ContinuousAdjustType02 and MX_IncrementalAdjustType01 have<br />
different behaiors when the adjustment velocity changes.With<br />
MX_ContinuousAdjustType01 and MX_ContinuousAdjustType02 the<br />
alteration is immediately active. But with<br />
MX_IncrementalAdjustType01, the movement is finished before the<br />
new incremental velocity is used. A following adjustment procedure<br />
executes the altered factors.<br />
The following rules apply for function MX_IncrementalAdjustType01:<br />
• The inputs „Inc“ and „Dec“ are edge triggered. A rising edge triggers<br />
an adjustment by the specified increment („StepWidth“).<br />
• A new adjustment triggered with a rising edge during a movement of<br />
the same direction, will trigger a new adjustment once the current<br />
move completes.<br />
Fig. 1-59: Comparison of the behavior of Continuous and<br />
IncrementalAdjustment<br />
Independent of the inputs, the Function blocks<br />
MX_ContinuousAdjustType01, MX_ContinuousAdjustType02 and<br />
MB_Incremental-Adjust initialize the variables that determine the cycle<br />
time at the first activation („Enable“ = true). In the second cycle, the<br />
function block calculates the correct cycle time to calculate the correct<br />
adjustment velocity. Subsequently the cycle time is continuously updated.<br />
By specifying a modulo value, the function block supplies an output factor<br />
between zero and the specified modulo value. When the modulo value is<br />
exceeded, only the output factor is set to zero but the adjustment<br />
procedure continues. The valid range is between zero and the modulo<br />
value. Specify the range so that it can be adjusted around zero.<br />
Additionally the function block MX_ContinuousAdjustType01 and<br />
MX_ContinuousAdjustType02 offers the possibility to modify the alteration<br />
velocity, time-dependently, by specifying weighting factors and time<br />
intervals.<br />
DOK-<strong>MLD</strong>-S*-<strong>Tech</strong><strong>FB</strong>*****-AW01-EN-D
1-46 <strong>MLD</strong>-S <strong>Tech</strong>nology <strong>Library</strong> <strong>Rexroth</strong> <strong>MLD</strong>-S <strong>Tech</strong>-<strong>FB</strong> <strong>Library</strong><br />
MX_ContinuousAdjustType01<br />
Short <strong>Description</strong><br />
Interface <strong>Description</strong><br />
Fig. 1-60: Possible assignment of a valid range with a modulo value of 360°<br />
The function allows the continuous adjustment of an influenced REAL-<br />
Variable via binary inputs.<br />
Fig. 1-61:<br />
<strong>FB</strong> MX_ContiniuousAdjustType01<br />
Name Type Comment<br />
VAR_INPUT Enable BOOL Enable the function block (cyclical, state-triggered)<br />
Inc BOOL Increment the influenced variable<br />
Dec BOOL Decrement the influenced variable<br />
Preset BOOL Set the Preset-Value (PresetValue)<br />
PresetValue REAL Specified value for Preset<br />
ModuloValue REAL Modulo value (if 0, then absolute processing)<br />
HighLimit REAL Maximum output value of the influenced variable<br />
LowLimit REAL Minimum output value of the influenced variable<br />
StepWidth REAL Increments<br />
StepsPerSecond REAL Number of increments per second<br />
AdjTimeIntervals ARRAY [1..4] OF<br />
REAL<br />
Time intervals (in seconds) for weighting of the alteration<br />
velocity<br />
AdjWeightFactors<br />
ARRAY [1..5] OF<br />
REAL<br />
Weighting factors of the alteration velocity<br />
DOK-<strong>MLD</strong>-S*-<strong>Tech</strong><strong>FB</strong>*****-AW01-EN-D
<strong>Rexroth</strong> <strong>MLD</strong>-S <strong>Tech</strong>-<strong>FB</strong> <strong>Library</strong> <strong>MLD</strong>-S <strong>Tech</strong>nology <strong>Library</strong> 1-47<br />
VAR_OUTPUT InOperation BOOL No calculations active. Ouputs HighLimitAck and<br />
LowLimitAck are valid.<br />
Error BOOL Calculation of the influenced variable "Value" completed<br />
with error, output variable ErrorIdent is valid<br />
ErrorID ERROR_CODE Short error description<br />
ErrorIdent ERROR_STRUCT Detailed description of the diagnostics in case of an error<br />
Changing BOOL Calculation of the influenced variable takes place.<br />
Influenced variable "Value" is valid<br />
HighLimitAck BOOL Maximum output value of the influenced variable<br />
reached<br />
LowLimitAck BOOL Minimum output value of the influenced variable reached<br />
VAR_IN_OUT Value REAL Influenced variable<br />
Fig. 1-62: Interface of <strong>FB</strong> MX_ContinuousAdjustType01<br />
Signal-Time Diagram<br />
Fig. 1-63: Continuous Parameter Adjustment<br />
Functional <strong>Description</strong><br />
The adjustment of the influenced variable, „Value“ may take place in<br />
positive or negative direction. The limits set a valid range for adjusting the<br />
variable. Specifying a modulo value allows the adjustment to be withing<br />
an axis‘ frame for reference. Predefining increments and increments per<br />
second determines the alteration velocity of the influenced variable. It is<br />
possible to write a given value („PresetValue“), inside the valid operating<br />
range, directly to the influenced variable.<br />
After activation, with „Enable“, the influenced variable can be changed via<br />
inputs „Inc“ (positive direction) and „Dec“ (negative direction). While input<br />
„Inc“or Dec is set, the influenced variable is continuously increased (or<br />
decreased) with the given velocity. (StepsPerSecond * StepWidth).<br />
At initialization, ensure the inputs „ModuloValue“, „HighLimit“ and<br />
„LowLimit“, contain valid values.<br />
By determining weighting factors („AdjWeightFactors[]“) and the<br />
corresponding time intervals („AdjTimeIntervals[]“) it is possible to make<br />
time-dependent velocity modifications. The weighting factors and time<br />
intervals must also be set on the inputs „StepsPerSecond“ and<br />
„StepWidth“. Depending on the actual time interval, the alteration velocity<br />
is then multilpied with the appropriate weighting factor. The figure below<br />
shows the behavior of the block with an example configuration: The input<br />
factors of „AdjTimeIntervals“ ([T1; T2; T3; T4]) are specified in seconds.<br />
T5 specifies the period after completion of time interval T4 when the<br />
adjustment procedure aborts. The input factors of „AdjWeightFactors“<br />
([0,5; 1; 1,5; 2; 4]) determine the weighting of the alteration velocity. The<br />
last value of „AdjWeightFactors [5]“ is assigned to time interval T5.<br />
DOK-<strong>MLD</strong>-S*-<strong>Tech</strong><strong>FB</strong>*****-AW01-EN-D
1-48 <strong>MLD</strong>-S <strong>Tech</strong>nology <strong>Library</strong> <strong>Rexroth</strong> <strong>MLD</strong>-S <strong>Tech</strong>-<strong>FB</strong> <strong>Library</strong><br />
Fig. 1-64: WeightedAdjustment<br />
Note:<br />
When a time interval = 0, so the next weighting factor is used<br />
until the adjustment process aborts. Example: If<br />
AdjTimeIntervals[2] = 0, then the weighting factor of<br />
AdjWeightFactors[3] is used until abortion.<br />
To determine the correct time interval of the weighting factors, the expired<br />
time is reset with each new starting adjustment process. If inputs<br />
„AdjWeightFactors“ and „AdjTimeIntervals“ are not set, a continuous<br />
adjustment with the given alteration velocity specified with<br />
„StepsPerSecond“ and „StepWidth“ occurs.<br />
Note:<br />
Values in “AdjTimeIntervals“ must only contain positive values.<br />
Weighting factors can be positive or negative.<br />
The influenced variable can only be set to the specified preset<br />
value if it is within the valid range between „HighLimit“ and<br />
„LowLimit“.<br />
Output „InOperation“ signals that the block is in use, but an adjustment is<br />
not active. " Changing" indicates an error-free adjustment and the value of<br />
the adjusted variable „Value“ is valid.<br />
“Error“ indicates that an error occurred during the adjustment process.<br />
Details are indicated in the „ErrorIdent“ structure.<br />
Errorhandling<br />
The function block generates the following error messages<br />
Additional1/Additional2 of the table "F_RELATED_TABLE", 16#0170:<br />
in<br />
ErrorID Additional1 Additional2 <strong>Description</strong><br />
INPUT_RANGE_ERROR<br />
(16#0006)<br />
16#0002 16#0000 Inputs are outside permitted range<br />
RESOURCE_ERROR (16#0003) 16#0004 16#0000 Drive firmware not supported.<br />
STATE_MACHINE_ERROR<br />
(16#0005)<br />
16#0006 16#0000 Invalid status of the function block<br />
Fig. 1-65 Error numbers, caused by MX_ContinuousAdjustType01<br />
Required Hardware<br />
Required Software<br />
Required Parameterization<br />
Required IndraLogic Steps<br />
• IndraDrive C or M (MPx03 Firmware)<br />
• IndraWorks Drive with IndraLogic<br />
• No special parameterization required<br />
• Include library ML(X)_<strong>Tech</strong>nology.lib in the IndraLogic-Project<br />
DOK-<strong>MLD</strong>-S*-<strong>Tech</strong><strong>FB</strong>*****-AW01-EN-D
<strong>Rexroth</strong> <strong>MLD</strong>-S <strong>Tech</strong>-<strong>FB</strong> <strong>Library</strong> <strong>MLD</strong>-S <strong>Tech</strong>nology <strong>Library</strong> 1-49<br />
MX_ContinuousAdjustType02<br />
Short <strong>Description</strong><br />
Interface <strong>Description</strong><br />
The function block enables the continuous adjustment of an influenced<br />
DINT-Variable using binary inputs.<br />
Fig. 1-66: <strong>FB</strong> MX_ContinuousAdjustType02<br />
Name Type Comment<br />
VAR_INPUT Enable BOOL Enables the function block (cyclical, state-controlled)<br />
Inc BOOL Increment the influenced variable<br />
Dec BOOL Decrement the influenced variable<br />
Preset BOOL Set the Preset-Value (PresetValue)<br />
PresetValue DINT Specified value for Preset<br />
ModuloValue DINT Modulo value (if 0, then absolute processing)<br />
HighLimit DINT Maximum output value of the influenced variable<br />
LowLimit DINT Minimum output value of the influenced variable<br />
StepWidth REAL Increments<br />
StepsPerSec<br />
ond<br />
REAL<br />
Increments per second<br />
AdjTimeInterv<br />
als<br />
AdjWeightFa<br />
ctors<br />
ARRAY [1..4] OF<br />
REAL<br />
ARRAY [1..5] OF<br />
REAL<br />
Time intervals in seconds for weighting the alteration velocity<br />
Weighting factors of the alteration velocity<br />
VAR_OUTPUT InOperation BOOL No calculation active. Ouputs HighLimitAck and LowLimitAck<br />
are valid.<br />
Error BOOL Calculation of the influenced variable "Value" completed with<br />
error, output variable ErrorIdent is valid<br />
ErrorID ERROR_CODE Error short description<br />
ErrorIdent ERROR_STRUCT Detailed description of the diagnostics in case of an error<br />
Changing BOOL Calculation of the influenced variable takes place. Influenced<br />
variable "Value" is valid<br />
HighLimitAck BOOL Maximum output value of the influenced variable reached<br />
LowLimitAck BOOL Minimum output value of the influenced variable reached<br />
VAR_IN_OUT Value DINT Influenced variable<br />
Fig. 1-67: Interface of <strong>FB</strong> MX_ContinuousAdjustType02<br />
DOK-<strong>MLD</strong>-S*-<strong>Tech</strong><strong>FB</strong>*****-AW01-EN-D
1-50 <strong>MLD</strong>-S <strong>Tech</strong>nology <strong>Library</strong> <strong>Rexroth</strong> <strong>MLD</strong>-S <strong>Tech</strong>-<strong>FB</strong> <strong>Library</strong><br />
Fig. 1-68: Continuous Parameter Adjustment<br />
Functional <strong>Description</strong><br />
The adjustment of the influenced variable, „Value“ may take place in<br />
positive or negative direction. The limits set a valid range for adjusting the<br />
variable. Specifying a modulo value allows the adjustment to be withing<br />
an axis‘ frame fo reference. Predefining increments and increments per<br />
second determines the alteration velocity of the influenced variable. It is<br />
possible to write a given value („PresetValue“), inside the valid operating<br />
range, directly to the influenced variable.<br />
After activation, with „Enable“, the influenced variable can be changed via<br />
inputs „Inc“ (positive direction) and „Dec“ (negative direction). While input<br />
„Inc“or Dec is set, the influenced variable is continuously increased (or<br />
decreased) with the given velocity. (StepsPerSecond * StepWidth).<br />
At initialization, ensure the inputs „ModuloValue“, „HighLimit“ and<br />
„LowLimit“, contain valid values.<br />
By determining weighting factors („AdjWeightFactors[]“) and the<br />
corresponding time intervals („AdjTimeIntervals[]“) it is possible to make<br />
time-dependent velocity modifications. The weighting factors and time<br />
intervals must also be set on the inputs „StepsPerSecond“ and<br />
„StepWidth“. Depending on the actual time interval, the alteration velocity<br />
is then multilpied with the appropriate weighting factor. The figure below<br />
shows the behavior of the block with an example configuration: The input<br />
factors of „AdjTimeIntervals“ ([T1; T2; T3; T4]) are specified in seconds.<br />
T5 specifies the period after completion of time interval T4 when the<br />
adjustment procedure aborts. The input factors of „AdjWeightFactors“<br />
([0,5; 1; 1,5; 2; 4]) determine the weighting of the alteration velocity. The<br />
last value of „AdjWeightFactors [5]“ is assigned to time interval T5.<br />
Fig. 1-69: WeightedAdjustment<br />
Note:<br />
When a time interval = 0, so the next weighting factor is used<br />
until the adjustment process aborts. Example: If<br />
DOK-<strong>MLD</strong>-S*-<strong>Tech</strong><strong>FB</strong>*****-AW01-EN-D
<strong>Rexroth</strong> <strong>MLD</strong>-S <strong>Tech</strong>-<strong>FB</strong> <strong>Library</strong> <strong>MLD</strong>-S <strong>Tech</strong>nology <strong>Library</strong> 1-51<br />
AdjTimeIntervals[2] = 0, then the weighting factor of<br />
AdjWeightFactors[3] is used until abortion.<br />
To determine the correct time interval of the weighting factors, the expired<br />
time is reset with each new starting adjustment process. If inputs<br />
„AdjWeightFactors“ and „AdjTimeIntervals“ are not set, a continuous<br />
adjustment with the given alteration velocity specified with<br />
„StepsPerSecond“ and „StepWidth“ occurs.<br />
Note:<br />
Values in“AdjTimeIntervals“ must only contain positive values.<br />
Weighting factors can be positive or negative.<br />
The influenced variable can only be set to the specified preset<br />
value if it is within the valid range between „HighLimit“ and<br />
„LowLimit“.<br />
Output „InOperation“ signals that the block is in use, but an adjustment is<br />
not active. "Changing" indicates an error-free adjustment and the value of<br />
the adjusted variable „Value“ is valid.<br />
“Error“ indicates that an error occurred during the adjustment process.<br />
Details are indicated in the „ErrorIdent“ structure.<br />
The function block generates the following error messages<br />
Additional1/Additional2 of the table "F_RELATED_TABLE", 16#0170:<br />
ErrorID Additional1 Additional2 <strong>Description</strong><br />
INPUT_RANGE_ERROR<br />
(16#0006)<br />
Errorhandling<br />
16#0002 16#0000 Inputs are outside permitted range<br />
RESOURCE_ERROR (16#0003) 16#0004 16#0000 Drive firmware not supported<br />
STATE_MACHINE_ERROR<br />
(16#0005)<br />
16#0006 16#0000 Invalid status of the function block<br />
Fig. 1-70 Error numbers, caused by MX_ContinuousAdjustType02<br />
in<br />
Required Hardware<br />
Required Software<br />
Required Parameterization<br />
Required IndraLogic Steps<br />
• IndraDrive C or M (MPx03 Firmware)<br />
• IndraWorks Drive with IndraLogic<br />
• No special parameterization required<br />
• Include library ML(X)_<strong>Tech</strong>nology.lib in the IndraLogic-Project<br />
MX_IncrementalAdjustType01<br />
Short <strong>Description</strong><br />
Interface <strong>Description</strong><br />
The function block enables incremental adjustment of an influenced<br />
REAL-Variable using binary inputs.<br />
Fig. 1-71:<br />
<strong>FB</strong> MX_IncrementalAdjustType01<br />
DOK-<strong>MLD</strong>-S*-<strong>Tech</strong><strong>FB</strong>*****-AW01-EN-D
1-52 <strong>MLD</strong>-S <strong>Tech</strong>nology <strong>Library</strong> <strong>Rexroth</strong> <strong>MLD</strong>-S <strong>Tech</strong>-<strong>FB</strong> <strong>Library</strong><br />
Name Type Comment<br />
VAR_INPUT Enable BOOL Enable the function block (cyclical, state-controlled)<br />
Inc BOOL Increment the influenced variable<br />
Dec BOOL Decrement the influenced variable<br />
Preset BOOL Set the Preset-Value (PresetValue)<br />
PresetValue REAL Specified value for Preset<br />
ModuloValue REAL Modulo value for rotatory calculation<br />
HighLimit REAL Maximum output value of the influenced variable<br />
LowLimit REAL Minimum output value of the influenced variable<br />
StepWidth REAL Step Width<br />
StepsPerSec<br />
ond<br />
REAL<br />
Increments per second<br />
VAR_OUTPUT Done BOOL Calculation of the influenced variable completed. The output<br />
variables "Value", „HighLimitAck“ and „LowLimitAck“ are valid.<br />
Active BOOL Calculation of the influenced variable not yet completed. The<br />
influenced variable "Value" is still in process. The outputs<br />
„HighLimitAck“ and „LowLimitAck“ are valid.<br />
Error BOOL Calculation of the influenced variable "Value" completed with<br />
error, output variable „ErrorIdent“ is valid<br />
ErrorID ERROR_CODE Short error description<br />
ErrorIdent ERROR_STRUCT Detailed description of the diagnostics in case of an error<br />
HighLimitAck BOOL Maximum output value of the influenced variable reached<br />
LowLimitAck BOOL Minimum output value of the influenced variable reached<br />
VAR_IN_OUT Value REAL Influenced variable<br />
Fig. 1-72: Interface of <strong>FB</strong> MX_IncrementalAdjustType01<br />
DOK-<strong>MLD</strong>-S*-<strong>Tech</strong><strong>FB</strong>*****-AW01-EN-D
<strong>Rexroth</strong> <strong>MLD</strong>-S <strong>Tech</strong>-<strong>FB</strong> <strong>Library</strong> <strong>MLD</strong>-S <strong>Tech</strong>nology <strong>Library</strong> 1-53<br />
Signal-Timing Diagram<br />
Fig. 1-73: Incremental Parameter Adjust<br />
Functional <strong>Description</strong><br />
The adjustment of the influenced variable, „Value“ may take place in<br />
positive or negative direction. The limits set a valid range for adjusting the<br />
variable. Specifying a modulo value allows the adjustment to be withing<br />
an axis‘ frame for reference. Predefining increments and increments per<br />
second determines the alteration velocity of the influenced variable. It is<br />
possible to write a given value („PresetValue“), inside the valid operating<br />
range, directly to the influenced variable.<br />
After activation, with „Enable“, the influenced variable can be changed via<br />
inputs „Inc“ (positive direction) and „Dec“ (negative direction). While input<br />
„Inc“or Dec is set, the influenced variable is continuously increased (or<br />
decreased) with the given velocity. (StepsPerSecond * StepWidth).<br />
Note:<br />
The influenced variable can only be set to the specified preset<br />
value when it is within the valid range between „HighLimit“ and<br />
„LowLimit“.<br />
Errorhandling<br />
„Active“ signals that the adjustment procedure is not yet completed.<br />
“Done = TRUE signals the adjustment completed without error. If an error<br />
occurs during processing of the function block, it is indicated with „Error“ =<br />
TRUE, with the details in the output structure „ErrorIdent“.<br />
The function block generates the following error messages in<br />
Additional1/Additional2 of the table "F_RELATED_TABLE", 16#0170:<br />
ErrorID Additional1 Additional2 <strong>Description</strong><br />
INPUT_RANGE_ERROR<br />
(16#0006)<br />
16#0002 16#0000 Inputs are outside permitted range<br />
RESOURCE_ERROR (16#0003) 16#0004 16#0000 Drive firmware not supported<br />
STATE_MACHINE_ERROR<br />
(16#0005)<br />
16#0006 16#0000 Invalid status of the function block<br />
Fig. 1-74 Error numbers, caused by MX_IncrementalAdjustType01<br />
Required Hardware<br />
Required Software<br />
Required Parameterization<br />
Required IndraLogic Steps<br />
• IndraDrive C or M (MPx03 Firmware)<br />
• IndraWorks Drive with IndraLogic<br />
• No special parameterization required<br />
• Include library ML(X)_<strong>Tech</strong>nology.lib in the IndraLogic-Project<br />
DOK-<strong>MLD</strong>-S*-<strong>Tech</strong><strong>FB</strong>*****-AW01-EN-D
1-54 <strong>MLD</strong>-S <strong>Tech</strong>nology <strong>Library</strong> <strong>Rexroth</strong> <strong>MLD</strong>-S <strong>Tech</strong>-<strong>FB</strong> <strong>Library</strong><br />
1.10 Measuring Wheel Function Blocks<br />
Introduction and Overview<br />
The Measuring Wheel <strong>Tech</strong>nology Function Block (<strong>Tech</strong>-<strong>FB</strong>’s) enhance<br />
the basic functionality of <strong>MLD</strong>-S by provide a prepackaged application<br />
specific functionality that has been pre-tested and reduces the learning<br />
curve for the user.<br />
The Measuring wheel is the most common device used in a closed loop<br />
servo system to compensate for material slippage in a feeder application.<br />
For example as the material is fed into at machine/process slippage may<br />
occur between the feed rolls and material due to an oily film or<br />
containments on the material or fluctuations in back tension on the web or<br />
in the case of a corrugated feeder where the rolls are serpentine and the<br />
point of contact (pitch diameter) varies, these as well as many other<br />
mechanical constraints can cause slippage to occur. BRC based systems<br />
will overcome this by using the drive based measuring wheel operation<br />
mode, this is a specialized drive positioning mode that compensates for<br />
slippage or stretch by placing a measurement device directly on the<br />
moving material, it is connected to the drives optional encoder port. This<br />
signal is used to close the position loop to the drive so the actual length of<br />
the commanded move profile can be monitored to assure the required<br />
accuracy is maintained. The measuring wheel utilizes frictional forces<br />
between the wheel and the material surface for engagement, it must be in<br />
100% contact before the position control loop is closed via the measuring<br />
wheel encoder, if not the system can oscillate or run away. Most feeder<br />
system need to switch back between motor and measuring wheel<br />
encoder to accommodate special operations like initial material threading,<br />
run-out or roll-lift. To provide as means to easily switch between the two<br />
feedback devices the MX_MeasuringWheel <strong>FB</strong> will be supplied.<br />
Fig. 1-75:<br />
Measuring Wheel Application<br />
DOK-<strong>MLD</strong>-S*-<strong>Tech</strong><strong>FB</strong>*****-AW01-EN-D
<strong>Rexroth</strong> <strong>MLD</strong>-S <strong>Tech</strong>-<strong>FB</strong> <strong>Library</strong> <strong>MLD</strong>-S <strong>Tech</strong>nology <strong>Library</strong> 1-55<br />
MX_MeasuringWheel<br />
Short <strong>Description</strong><br />
The function block MX_MeasuringWheel can enable and disable the<br />
measuring wheel command in the drive.<br />
Interface <strong>Description</strong><br />
Fig. 1-76:<br />
MX_MeasuringWheel<br />
Name Type Comment<br />
VAR_IN_OUT Axis AXIS_REF Reference to the axis<br />
VAR_INPUT Enable BOOL Start the command for MW operation<br />
VAR_OUTPUT Active BOOL Function Block is active -> MW is active<br />
Error BOOL Signals that error has occurred<br />
ErrorID<br />
ERROR_C<br />
ODE<br />
Short error description<br />
ErrorIdent<br />
ERROR_S<br />
TRUCT<br />
Fig. 1-77:<br />
Detail error description<br />
Interface of MX_MeasuringWheel<br />
Timing Diagram<br />
The following diagram shows the reaction of the Enable bit of the<br />
MX_MeasuringWheel <strong>FB</strong> if it has been configured properly.<br />
Fig. 1-78:<br />
Timing of MX_MasterSimulator<br />
ErrorID Table Additional1 Additional2 <strong>Description</strong><br />
RESOURCE_ERR<br />
OR<br />
SYSTEM_ERROR<br />
Errorhandling<br />
F_RELATED<br />
_TABLE<br />
F_RELATED<br />
_TABLE<br />
16#00000001 16#00000000 Drive is not enabled or drive error<br />
16#00000004 16#00000000 Drive-Firmware not supported -> MPH03 or<br />
MPB03, release >= 10 required<br />
Fig. 1-79:<br />
MX_MeasuringWheel Error Codes<br />
Required Components and<br />
Parametrization<br />
Required Hardware<br />
• IndraDrive C or M<br />
• Additional second encoder interface card required for measuring<br />
wheel<br />
• Additional second encoder (according to drive project planning<br />
manual)<br />
Required Firmware<br />
• Drive firmware MPH03V10 or higher<br />
DOK-<strong>MLD</strong>-S*-<strong>Tech</strong><strong>FB</strong>*****-AW01-EN-D
1-56 <strong>MLD</strong>-S <strong>Tech</strong>nology <strong>Library</strong> <strong>Rexroth</strong> <strong>MLD</strong>-S <strong>Tech</strong>-<strong>FB</strong> <strong>Library</strong><br />
• The following functional packages are required<br />
• Closed Loop<br />
• Synchronization<br />
• Drive PLC<br />
Required Software<br />
• IndraWorks Drives or DriveTop16V09 or higher<br />
• IndraLogic 1.2 or higher<br />
Required Parameterization<br />
Prior to using measuring wheel operation the drive must be properly<br />
configured using DriveTop. The following diagram shows the pertinent<br />
drive parameters for MW operation. The values that will be entered for<br />
setup are based on the actual machine design. After determining the<br />
actual mechanical configuration use DriveTop to set the values.<br />
Fig. 1-80:<br />
Drive Parametrization<br />
• Set-up Measuring Wheel Encoder Parameters: DriveTop →Drive<br />
Functions → Encoder Systems →Optional Encoder… and the<br />
following screen will open. Enter the correct values based on the<br />
encoder type, drive interface options and measuring wheels<br />
mechanical configuration on the machine. The effective feed constant<br />
of the servo driven feed-rolls and the MW must be equal or the feed<br />
length will not be accurate.<br />
DOK-<strong>MLD</strong>-S*-<strong>Tech</strong><strong>FB</strong>*****-AW01-EN-D
<strong>Rexroth</strong> <strong>MLD</strong>-S <strong>Tech</strong>-<strong>FB</strong> <strong>Library</strong> <strong>MLD</strong>-S <strong>Tech</strong>nology <strong>Library</strong> 1-57<br />
Fig. 1-81:<br />
Measuring Wheel Encoder Parameters Dialog<br />
Required IndraLogic Steps<br />
• Include the library MX_<strong>Tech</strong>nology.lib in your IndraLogic project<br />
• Call the provided <strong>FB</strong> in your IndraLogic project. The <strong>FB</strong>’s should run in<br />
a high priority cyclic task with a cycle time ≤ 4ms<br />
• Enable drive first (MX_Power) before execution of the Measuring<br />
Wheel <strong>FB</strong>.<br />
• When the Measuring Wheel <strong>FB</strong> is enabled in the IndraLogic project it<br />
will switch the drive from encoder-1 to encoder-2, but this switch also<br />
causes the drives reference bit (Homed) to be canceled. It is not<br />
possible issue a Move Absolute without having the drive referenced or<br />
you will get an error in the PLC program. This means that you can not<br />
use the MX_MoveAbsolute <strong>FB</strong> in conjunction with MW operation, all<br />
moves must be relative.<br />
DOK-<strong>MLD</strong>-S*-<strong>Tech</strong><strong>FB</strong>*****-AW01-EN-D
<strong>Rexroth</strong> <strong>MLD</strong>-S <strong>Tech</strong>-<strong>FB</strong> <strong>Library</strong> Service & Support 2-1<br />
2 Service & Support<br />
2.1 Helpdesk<br />
Unser Kundendienst-Helpdesk im Hauptwerk Lohr<br />
am Main steht Ihnen mit Rat und Tat zur Seite.<br />
Sie erreichen uns<br />
Our service helpdesk at our headquarters in Lohr am<br />
Main, Germany can assist you in all kinds of inquiries.<br />
Contact us<br />
- telefonisch - by phone: +49 (0) 9352 40 50 60<br />
über Service Call Entry Center Mo-Fr 07:00-18:00<br />
- via Service Call Entry Center Mo-Fr 7:00 am - 6:00 pm<br />
- per Fax - by fax: +49 (0) 9352 40 49 41<br />
- per e-Mail - by e-mail: service.svc@boschrexroth.de<br />
2.2 Service-Hotline<br />
Außerhalb der Helpdesk-Zeiten ist der Service<br />
direkt ansprechbar unter<br />
After helpdesk hours, contact our service<br />
department directly at<br />
+49 (0) 171 333 88 26<br />
oder - or +49 (0) 172 660 04 06<br />
2.3 Internet<br />
Unter www.boschrexroth.com finden Sie<br />
ergänzende Hinweise zu Service, Reparatur und<br />
Training sowie die aktuellen Adressen *) unserer<br />
auf den folgenden Seiten aufgeführten Vertriebsund<br />
Servicebüros.<br />
Verkaufsniederlassungen<br />
Niederlassungen mit Kundendienst<br />
Außerhalb Deutschlands nehmen Sie bitte zuerst Kontakt mit<br />
unserem für Sie nächstgelegenen Ansprechpartner auf.<br />
*) Die Angaben in der vorliegenden Dokumentation können<br />
seit Drucklegung überholt sein.<br />
At www.boschrexroth.com you may find<br />
additional notes about service, repairs and training<br />
in the Internet, as well as the actual addresses *) of<br />
our sales- and service facilities figuring on the<br />
following pages.<br />
sales agencies<br />
offices providing service<br />
Please contact our sales / service office in your area first.<br />
*) Data in the present documentation may have become<br />
obsolete since printing.<br />
2.4 Vor der Kontaktaufnahme... - Before contacting us...<br />
Wir können Ihnen schnell und effizient helfen wenn<br />
Sie folgende Informationen bereithalten:<br />
1. detaillierte Beschreibung der Störung und der<br />
Umstände.<br />
2. Angaben auf dem Typenschild der betreffenden<br />
Produkte, insbesondere Typenschlüssel und<br />
Seriennummern.<br />
3. Tel.-/Faxnummern und e-Mail-Adresse, unter<br />
denen Sie für Rückfragen zu erreichen sind.<br />
For quick and efficient help, please have the<br />
following information ready:<br />
1. Detailed description of the failure and<br />
circumstances.<br />
2. Information on the type plate of the affected<br />
products, especially type codes and serial<br />
numbers.<br />
3. Your phone/fax numbers and e-mail address,<br />
so we can contact you in case of questions.<br />
DOK-<strong>MLD</strong>-S*-<strong>Tech</strong><strong>FB</strong>*****-AW01-EN-D
2-2 Service & Support <strong>Rexroth</strong> <strong>MLD</strong>-S <strong>Tech</strong>-<strong>FB</strong> <strong>Library</strong><br />
2.5 Kundenbetreuungsstellen - Sales & Service Facilities<br />
Deutschland – Germany vom Ausland: (0) nach Landeskennziffer weglassen!<br />
from abroad: don’t dial (0) after country code!<br />
Vertriebsgebiet Mitte<br />
Germany Centre<br />
SERVICE AUTOMATION<br />
SERVICE AUTOMATION<br />
SERVICE AUTOMATION<br />
<strong>Rexroth</strong> Indramat GmbH<br />
Bgm.-Dr.-Nebel-Str. 2 / Postf. 1357<br />
97816 Lohr am Main / 97803 Lohr<br />
Kompetenz-Zentrum Europa<br />
Tel.: +49 (0)9352 40-0<br />
Fax: +49 (0)9352 40-4885<br />
CALL ENTRY CENTER<br />
H e l p d e s k<br />
MO – FR<br />
von 07:00 - 18:00 Uhr<br />
from 7 am – 6 pm<br />
Tel. +49 (0) 9352 40 50 60<br />
Fax +49 (0) 9352 40 49 41<br />
service.svc@boschrexroth.de<br />
HOTLINE 24 / 7 / 365<br />
außerhalb der Helpdesk-Zeit<br />
out of helpdesk hours<br />
Tel.: +49 (0)172 660 04 06<br />
oder / or<br />
Tel.: +49 (0)171 333 88 26<br />
ERSATZTEILE / SPARES<br />
verlängerte Ansprechzeit<br />
- extended office time -<br />
♦ nur an Werktagen<br />
- only on working days -<br />
♦ von 07:00 - 18:00 Uhr<br />
- from 7 am - 6 pm -<br />
Tel. +49 (0) 9352 40 42 22<br />
Vertriebsgebiet Süd<br />
Germany South<br />
Vertriebsgebiet West<br />
Germany West<br />
Gebiet Südwest<br />
Germany South-West<br />
<strong>Bosch</strong> <strong>Rexroth</strong> AG<br />
Landshuter Allee 8-10<br />
80637 München<br />
Tel.: +49 (0)89 127 14-0<br />
Fax: +49 (0)89 127 14-490<br />
<strong>Bosch</strong> <strong>Rexroth</strong> AG<br />
Regionalzentrum West<br />
Borsigstrasse 15<br />
40880 Ratingen<br />
Tel.: +49 (0)2102 409-0<br />
Fax: +49 (0)2102 409-406<br />
+49 (0)2102 409-430<br />
<strong>Bosch</strong> <strong>Rexroth</strong> AG<br />
Service-Regionalzentrum Süd-West<br />
Siemensstr.1<br />
70736 Fellbach<br />
Tel.: +49 (0)711 51046–0<br />
Fax: +49 (0)711 51046–248<br />
Vertriebsgebiet Nord<br />
Germany North<br />
Vertriebsgebiet Mitte<br />
Germany Centre<br />
Vertriebsgebiet Ost<br />
Germany East<br />
Vertriebsgebiet Ost<br />
Germany East<br />
<strong>Bosch</strong> <strong>Rexroth</strong> AG<br />
Walsroder Str. 93<br />
30853 Langenhagen<br />
Tel.: +49 (0) 511 72 66 57-0<br />
Service: +49 (0) 511 72 66 57-256<br />
Fax: +49 (0) 511 72 66 57-93<br />
Service: +49 (0) 511 72 66 57-783<br />
<strong>Bosch</strong> <strong>Rexroth</strong> AG<br />
Regionalzentrum Mitte<br />
Waldecker Straße 13<br />
64546 Mörfelden-Walldorf<br />
Tel.: +49 (0) 61 05 702-3<br />
Fax: +49 (0) 61 05 702-444<br />
<strong>Bosch</strong> <strong>Rexroth</strong> AG<br />
Beckerstraße 31<br />
09120 Chemnitz<br />
Tel.: +49 (0)371 35 55-0<br />
Fax: +49 (0)371 35 55-333<br />
<strong>Bosch</strong> <strong>Rexroth</strong> AG<br />
Regionalzentrum Ost<br />
Walter-Köhn-Str. 4d<br />
04356 Leipzig<br />
Tel.: +49 (0)341 25 61-0<br />
Fax: +49 (0)341 25 61-111<br />
DOK-<strong>MLD</strong>-S*-<strong>Tech</strong><strong>FB</strong>*****-AW01-EN-D
<strong>Rexroth</strong> <strong>MLD</strong>-S <strong>Tech</strong>-<strong>FB</strong> <strong>Library</strong> Service & Support 2-3<br />
Europa (West) - Europe (West)<br />
vom Ausland: (0) nach Landeskennziffer weglassen, Italien: 0 nach Landeskennziffer mitwählen<br />
from abroad: don’t dial (0) after country code, Italy: dial 0 after country code<br />
Austria - Österreich<br />
Austria – Österreich<br />
Belgium - Belgien<br />
Denmark - Dänemark<br />
<strong>Bosch</strong> <strong>Rexroth</strong> GmbH<br />
Electric Drives & Controls<br />
Stachegasse 13<br />
1120 Wien<br />
Tel.: +43 (0)1 985 25 40<br />
Fax: +43 (0)1 985 25 40-93<br />
<strong>Bosch</strong> <strong>Rexroth</strong> GmbH<br />
Electric Drives & Controls<br />
Industriepark 18<br />
4061 Pasching<br />
Tel.: +43 (0)7221 605-0<br />
Fax: +43 (0)7221 605-21<br />
<strong>Bosch</strong> <strong>Rexroth</strong> NV/SA<br />
Henri Genessestraat 1<br />
1070 Bruxelles<br />
Tel: +32 (0) 2 451 26 08<br />
Fax: +32 (0) 2 451 27 90<br />
info@boschrexroth.be<br />
service@boschrexroth.be<br />
BEC A/S<br />
Zinkvej 6<br />
8900 Randers<br />
Tel.: +45 (0)87 11 90 60<br />
Fax: +45 (0)87 11 90 61<br />
Great Britain – Großbritannien<br />
Finland - Finnland<br />
France - Frankreich<br />
France - Frankreich<br />
<strong>Bosch</strong> <strong>Rexroth</strong> Ltd.<br />
Electric Drives & Controls<br />
Broadway Lane, South Cerney<br />
Cirencester, Glos GL7 5UH<br />
Tel.: +44 (0)1285 863000<br />
Fax: +44 (0)1285 863030<br />
sales@boschrexroth.co.uk<br />
service@boschrexroth.co.uk<br />
<strong>Bosch</strong> <strong>Rexroth</strong> Oy<br />
Electric Drives & Controls<br />
Ansatie 6<br />
017 40 Vantaa<br />
Tel.: +358 (0)9 84 91-11<br />
Fax: +358 (0)9 84 91-13 60<br />
<strong>Bosch</strong> <strong>Rexroth</strong> SAS<br />
Electric Drives & Controls<br />
Avenue de la Trentaine<br />
(BP. 74)<br />
77503 Chelles Cedex<br />
Tel.: +33 (0)164 72-63 22<br />
Fax: +33 (0)164 72-63 20<br />
Hotline: +33 (0)608 33 43 28<br />
<strong>Bosch</strong> <strong>Rexroth</strong> SAS<br />
Electric Drives & Controls<br />
ZI de Thibaud, 20 bd. Thibaud<br />
(BP. 1751)<br />
31084 Toulouse<br />
Tel.: +33 (0)5 61 43 61 87<br />
Fax: +33 (0)5 61 43 94 12<br />
France – Frankreich<br />
Italy - Italien<br />
Italy - Italien<br />
Italy - Italien<br />
<strong>Bosch</strong> <strong>Rexroth</strong> SAS<br />
Electric Drives & Controls<br />
91, Bd. Irène Joliot-Curie<br />
69634 Vénissieux – Cedex<br />
Tel.: +33 (0)4 78 78 53 65<br />
Fax: +33 (0)4 78 78 53 62<br />
<strong>Bosch</strong> <strong>Rexroth</strong> S.p.A.<br />
Via G. Di Vittorio, 1<br />
20063 Cernusco S/N.MI<br />
Hotline: +39 02 92 365 563<br />
Tel.: +39 02 92 365 1<br />
Service: +39 02 92 365 300<br />
Fax: +39 02 92 365 500<br />
Service: +39 02 92 365 516<br />
<strong>Bosch</strong> <strong>Rexroth</strong> S.p.A.<br />
Via Paolo Veronesi, 250<br />
10148 Torino<br />
Tel.: +39 011 224 88 11<br />
Fax: +39 011 224 88 30<br />
<strong>Bosch</strong> <strong>Rexroth</strong> S.p.A.<br />
Via Mascia, 1<br />
80053 Castellamare di Stabia NA<br />
Tel.: +39 081 8 71 57 00<br />
Fax: +39 081 8 71 68 85<br />
Italy - Italien<br />
Italy - Italien<br />
Netherlands - Niederlande/Holland<br />
Netherlands – Niederlande/Holland<br />
<strong>Bosch</strong> <strong>Rexroth</strong> S.p.A.<br />
Via del Progresso, 16 (Zona Ind.)<br />
35020 Padova<br />
Tel.: +39 049 8 70 13 70<br />
Fax: +39 049 8 70 13 77<br />
<strong>Bosch</strong> <strong>Rexroth</strong> S.p.A.<br />
Via Isonzo, 61<br />
40033 Casalecchio di Reno (Bo)<br />
Tel.: +39 051 29 86 430<br />
Fax: +39 051 29 86 490<br />
<strong>Bosch</strong> <strong>Rexroth</strong> Services B.V.<br />
<strong>Tech</strong>nical Services<br />
Kruisbroeksestraat 1<br />
(P.O. Box 32)<br />
5281 RV Boxtel<br />
Tel.: +31 (0) 411 65 16 40<br />
+31 (0) 411 65 17 27<br />
Fax: +31 (0) 411 67 78 14<br />
+31 (0) 411 68 28 60<br />
services@boschrexroth.nl<br />
<strong>Bosch</strong> <strong>Rexroth</strong> B.V.<br />
Kruisbroeksestraat 1<br />
(P.O. Box 32)<br />
5281 RV Boxtel<br />
Tel.: +31 (0) 411 65 19 51<br />
Fax: +31 (0) 411 65 14 83<br />
www.boschrexroth.nl<br />
Norway - Norwegen<br />
Spain - Spanien<br />
Spain – Spanien<br />
Sweden - Schweden<br />
<strong>Bosch</strong> <strong>Rexroth</strong> AS<br />
Electric Drives & Controls<br />
Berghagan 1 or: Box 3007<br />
1405 Ski-Langhus 1402 Ski<br />
Tel.: +47 (0) 64 86 41 00<br />
Fax: +47 (0) 64 86 90 62<br />
Hotline: +47 (0)64 86 94 82<br />
jul.ruud@rexroth.no<br />
<strong>Bosch</strong> <strong>Rexroth</strong> S.A.<br />
Electric Drives & Controls<br />
Centro Industrial Santiga<br />
Obradors s/n<br />
08130 Santa Perpetua de Mogoda<br />
Barcelona<br />
Tel.: +34 9 37 47 94 00<br />
Fax: +34 9 37 47 94 01<br />
Goimendi S.A.<br />
Electric Drives & Controls<br />
Parque Empresarial Zuatzu<br />
C/ Francisco Grandmontagne no.2<br />
20018 San Sebastian<br />
Tel.: +34 9 43 31 84 21<br />
- service: +34 9 43 31 84 56<br />
Fax: +34 9 43 31 84 27<br />
- service: +34 9 43 31 84 60<br />
sat.indramat@goimendi.es<br />
<strong>Bosch</strong> <strong>Rexroth</strong> AB<br />
Electric Drives & Controls<br />
- Varuvägen 7<br />
(Service: Konsumentvägen 4, Älfsjö)<br />
125 81 Stockholm<br />
Tel.: +46 (0)8 727 92 00<br />
Fax: +46 (0)8 647 32 77<br />
Sweden - Schweden<br />
Switzerland East - Schweiz Ost<br />
Switzerland West - Schweiz West<br />
<strong>Bosch</strong> <strong>Rexroth</strong> AB<br />
Electric Drives & Controls<br />
Ekvändan 7<br />
254 67 Helsingborg<br />
Tel.: +46 (0) 42 38 88 -50<br />
Fax: +46 (0) 42 38 88 -74<br />
<strong>Bosch</strong> <strong>Rexroth</strong> Schweiz AG<br />
Electric Drives & Controls<br />
Hemrietstrasse 2<br />
8863 Buttikon<br />
Tel. +41 (0) 55 46 46 111<br />
Fax +41 (0) 55 46 46 222<br />
<strong>Bosch</strong> <strong>Rexroth</strong> Suisse SA<br />
Av. Général Guisan 26<br />
1800 Vevey 1<br />
Tel.: +41 (0)21 632 84 20<br />
Fax: +41 (0)21 632 84 21<br />
DOK-<strong>MLD</strong>-S*-<strong>Tech</strong><strong>FB</strong>*****-AW01-EN-D
2-4 Service & Support <strong>Rexroth</strong> <strong>MLD</strong>-S <strong>Tech</strong>-<strong>FB</strong> <strong>Library</strong><br />
Europa (Ost) - Europe (East)<br />
vom Ausland: (0) nach Landeskennziffer weglassen<br />
from abroad: don’t dial (0) after country code<br />
Czech Republic - Tschechien<br />
Czech Republic - Tschechien<br />
Hungary - Ungarn<br />
Poland – Polen<br />
<strong>Bosch</strong> -<strong>Rexroth</strong>, spol.s.r.o.<br />
Hviezdoslavova 5<br />
627 00 Brno<br />
Tel.: +420 (0)5 48 126 358<br />
Fax: +420 (0)5 48 126 112<br />
DEL a.s.<br />
Strojírenská 38<br />
591 01 Zdar nad Sázavou<br />
Tel.: +420 566 64 3144<br />
Fax: +420 566 62 1657<br />
<strong>Bosch</strong> <strong>Rexroth</strong> Kft.<br />
Angol utca 34<br />
1149 Budapest<br />
Tel.: +36 (1) 422 3200<br />
Fax: +36 (1) 422 3201<br />
<strong>Bosch</strong> <strong>Rexroth</strong> Sp.zo.o.<br />
ul. Staszica 1<br />
05-800 Pruszków<br />
Tel.: +48 22 738 18 00<br />
– service: +48 22 738 18 46<br />
Fax: +48 22 758 87 35<br />
– service: +48 22 738 18 42<br />
Poland – Polen<br />
Romania - Rumänien<br />
Romania - Rumänien<br />
Russia - Russland<br />
<strong>Bosch</strong> <strong>Rexroth</strong> Sp.zo.o.<br />
Biuro Poznan<br />
ul. Dabrowskiego 81/85<br />
60-529 Poznan<br />
Tel.: +48 061 847 64 62 /-63<br />
Fax: +48 061 847 64 02<br />
East Electric S.R.L.<br />
Bdul Basarabia no.250, sector 3<br />
73429 Bucuresti<br />
Tel./Fax:: +40 (0)21 255 35 07<br />
+40 (0)21 255 77 13<br />
Fax: +40 (0)21 725 61 21<br />
eastel@rdsnet.ro<br />
<strong>Bosch</strong> <strong>Rexroth</strong> Sp.zo.o.<br />
Str. Drobety nr. 4-10, app. 14<br />
70258 Bucuresti, Sector 2<br />
Tel.: +40 (0)1 210 48 25<br />
+40 (0)1 210 29 50<br />
Fax: +40 (0)1 210 29 52<br />
<strong>Bosch</strong> <strong>Rexroth</strong> OOO<br />
Wjatskaja ul. 27/15<br />
127015 Moskau<br />
Tel.: +7-095-785 74 78<br />
+7-095 785 74 79<br />
Fax: +7 095 785 74 77<br />
laura.kanina@boschrexroth.ru<br />
Russia Belarus - Weissrussland<br />
Turkey - Türkei<br />
Turkey - Türkei<br />
Slowenia - Slowenien<br />
ELMIS<br />
10, Internationalnaya<br />
246640 Gomel, Belarus<br />
Tel.: +375/ 232 53 42 70<br />
+375/ 232 53 21 69<br />
Fax: +375/ 232 53 37 69<br />
elmis_ltd@yahoo.com<br />
<strong>Bosch</strong> <strong>Rexroth</strong> Otomasyon<br />
San & Tic. A..S.<br />
Fevzi Cakmak Cad No. 3<br />
34630 Sefaköy Istanbul<br />
Tel.: +90 212 413 34 00<br />
Fax: +90 212 413 34 17<br />
www.boschrexroth.com.tr<br />
Servo Kontrol Ltd. Sti.<br />
Perpa Ticaret Merkezi B Blok<br />
Kat: 11 No: 1609<br />
80270 Okmeydani-Istanbul<br />
Tel: +90 212 320 30 80<br />
Fax: +90 212 320 30 81<br />
remzi.sali@servokontrol.com<br />
www.servokontrol.com<br />
DOMEL<br />
Otoki 21<br />
64 228 Zelezniki<br />
Tel.: +386 5 5117 152<br />
Fax: +386 5 5117 225<br />
brane.ozebek@domel.si<br />
DOK-<strong>MLD</strong>-S*-<strong>Tech</strong><strong>FB</strong>*****-AW01-EN-D
<strong>Rexroth</strong> <strong>MLD</strong>-S <strong>Tech</strong>-<strong>FB</strong> <strong>Library</strong> Service & Support 2-5<br />
Africa, Asia, Australia – incl. Pacific Rim<br />
Australia - Australien<br />
Australia - Australien<br />
China<br />
China<br />
AIMS - Australian Industrial<br />
Machinery Services Pty. Ltd.<br />
28 Westside Drive<br />
Laverton North Vic 3026<br />
Melbourne<br />
Tel.: +61 3 93 14 3321<br />
Fax: +61 3 93 14 3329<br />
Hotlines: +61 3 93 14 3321<br />
+61 4 19 369 195<br />
enquires@aimservices.com.au<br />
<strong>Bosch</strong> <strong>Rexroth</strong> Pty. Ltd.<br />
No. 7, Endeavour Way<br />
Braeside Victoria, 31 95<br />
Melbourne<br />
Tel.: +61 3 95 80 39 33<br />
Fax: +61 3 95 80 17 33<br />
mel@rexroth.com.au<br />
Shanghai <strong>Bosch</strong> <strong>Rexroth</strong><br />
Hydraulics & Automation Ltd.<br />
Waigaoqiao, Free Trade Zone<br />
No.122, Fu Te Dong Yi Road<br />
Shanghai 200131 - P.R.China<br />
Tel.: +86 21 58 66 30 30<br />
Fax: +86 21 58 66 55 23<br />
richard.yang_sh@boschrexroth.com.cn<br />
gf.zhu_sh@boschrexroth.com.cn<br />
Shanghai <strong>Bosch</strong> <strong>Rexroth</strong><br />
Hydraulics & Automation Ltd.<br />
4/f, Marine Tower<br />
No.1, Pudong Avenue<br />
Shanghai 200120 - P.R.China<br />
Tel: +86 21 68 86 15 88<br />
Fax: +86 21 58 40 65 77<br />
China<br />
China<br />
China<br />
China<br />
<strong>Bosch</strong> <strong>Rexroth</strong> China Ltd.<br />
15/F China World Trade Center<br />
1, Jianguomenwai Avenue<br />
Beijing 100004, P.R.China<br />
Tel.: +86 10 65 05 03 80<br />
Fax: +86 10 65 05 03 79<br />
<strong>Bosch</strong> <strong>Rexroth</strong> China Ltd.<br />
Guangzhou Repres. Office<br />
Room 1014-1016, Metro Plaza,<br />
Tian He District, 183 Tian He Bei Rd<br />
Guangzhou 510075, P.R.China<br />
Tel.: +86 20 8755-0030<br />
+86 20 8755-0011<br />
Fax: +86 20 8755-2387<br />
<strong>Bosch</strong> <strong>Rexroth</strong> (China) Ltd.<br />
A-5F., 123 Lian Shan Street<br />
Sha He Kou District<br />
Dalian 116 023, P.R.China<br />
Tel.: +86 411 46 78 930<br />
Fax: +86 411 46 78 932<br />
Melchers GmbH<br />
BRC-SE, Tightening & Press-fit<br />
13 Floor Est Ocean Centre<br />
No.588 Yanan Rd. East<br />
65 Yanan Rd. West<br />
Shanghai 200001<br />
Tel.: +86 21 6352 8848<br />
Fax: +86 21 6351 3138<br />
Hongkong<br />
India - Indien<br />
India - Indien<br />
India - Indien<br />
<strong>Bosch</strong> <strong>Rexroth</strong> (China) Ltd.<br />
6 th Floor,<br />
Yeung Yiu Chung No.6 Ind Bldg.<br />
19 Cheung Shun Street<br />
Cheung Sha Wan,<br />
Kowloon, Hongkong<br />
Tel.: +852 22 62 51 00<br />
Fax: +852 27 41 33 44<br />
alexis.siu@boschrexroth.com.hk<br />
<strong>Bosch</strong> <strong>Rexroth</strong> (India) Ltd.<br />
Electric Drives & Controls<br />
Plot. No.96, Phase III<br />
Peenya Industrial Area<br />
Bangalore – 560058<br />
Tel.: +91 80 51 17 0-211...-218<br />
Fax: +91 80 83 94 345<br />
+91 80 83 97 374<br />
mohanvelu.t@boschrexroth.co.in<br />
<strong>Bosch</strong> <strong>Rexroth</strong> (India) Ltd.<br />
Electric Drives & Controls<br />
Advance House, II Floor<br />
Ark Industrial Compound<br />
Narol Naka, Makwana Road<br />
Andheri (East), Mumbai - 400 059<br />
Tel.: +91 22 28 56 32 90<br />
+91 22 28 56 33 18<br />
Fax: +91 22 28 56 32 93<br />
singh.op@boschrexroth.co.in<br />
<strong>Bosch</strong> <strong>Rexroth</strong> (India) Ltd.<br />
S-10, Green Park Extension<br />
New Delhi – 110016<br />
Tel.: +91 11 26 56 65 25<br />
+91 11 26 56 65 27<br />
Fax: +91 11 26 56 68 87<br />
koul.rp@boschrexroth.co.in<br />
Indonesia - Indonesien<br />
Japan<br />
Japan<br />
Korea<br />
PT. <strong>Bosch</strong> <strong>Rexroth</strong><br />
Building # 202, Cilandak<br />
Commercial Estate<br />
Jl. Cilandak KKO, Jakarta 12560<br />
Tel.: +62 21 7891169 (5 lines)<br />
Fax: +62 21 7891170 - 71<br />
rudy.karimun@boschrexroth.co.id<br />
<strong>Bosch</strong> <strong>Rexroth</strong> Automation Corp.<br />
Service Center Japan<br />
Yutakagaoka 1810, Meito-ku,<br />
NAGOYA 465-0035, Japan<br />
Tel.: +81 52 777 88 41<br />
+81 52 777 88 53<br />
+81 52 777 88 79<br />
Fax: +81 52 777 89 01<br />
<strong>Bosch</strong> <strong>Rexroth</strong> Automation Corp.<br />
Electric Drives & Controls<br />
2F, I.R. Building<br />
Nakamachidai 4-26-44, Tsuzuki-ku<br />
YOKOHAMA 224-0041, Japan<br />
Tel.: +81 45 942 72 10<br />
Fax: +81 45 942 03 41<br />
<strong>Bosch</strong> <strong>Rexroth</strong>-Korea Ltd.<br />
Electric Drives and Controls<br />
Bongwoo Bldg. 7FL, 31-7, 1Ga<br />
Jangchoong-dong, Jung-gu<br />
Seoul, 100-391<br />
Tel.: +82 234 061 813<br />
Fax: +82 222 641 295<br />
Korea<br />
<strong>Bosch</strong> <strong>Rexroth</strong>-Korea Ltd.<br />
1515-14 Dadae-Dong, Saha-gu<br />
Electric Drives & Controls<br />
Pusan Metropolitan City, 604-050<br />
Tel.: +82 51 26 00 741<br />
Fax: +82 51 26 00 747<br />
eunkyong.kim@boschrexroth.co.kr<br />
Malaysia<br />
<strong>Bosch</strong> <strong>Rexroth</strong> Sdn.Bhd.<br />
11, Jalan U8/82, Seksyen U8<br />
40150 Shah Alam<br />
Selangor, Malaysia<br />
Tel.: +60 3 78 44 80 00<br />
Fax: +60 3 78 45 48 00<br />
hockhwa@hotmail.com<br />
rexroth1@tm.net.my<br />
Singapore - Singapur<br />
<strong>Bosch</strong> <strong>Rexroth</strong> Pte Ltd<br />
15D Tuas Road<br />
Singapore 638520<br />
Tel.: +65 68 61 87 33<br />
Fax: +65 68 61 18 25<br />
sanjay.nemade<br />
@boschrexroth.com.sg<br />
South Africa - Südafrika<br />
TECTRA Automation (Pty) Ltd.<br />
71 Watt Street, Meadowdale<br />
Edenvale 1609<br />
Tel.: +27 11 971 94 00<br />
Fax: +27 11 971 94 40<br />
Hotline: +27 82 903 29 23<br />
georgv@tectra.co.za<br />
Taiwan<br />
<strong>Bosch</strong> <strong>Rexroth</strong> Co., Ltd.<br />
Taichung Industrial Area<br />
No.19, 38 Road<br />
Taichung, Taiwan 407, R.O.C.<br />
Tel : +886 - 4 -235 08 383<br />
Fax: +886 - 4 -235 08 586<br />
jim.lin@boschrexroth.com.tw<br />
david.lai@boschrexroth.com.tw<br />
Taiwan<br />
<strong>Bosch</strong> <strong>Rexroth</strong> Co., Ltd.<br />
Tainan Branch<br />
No. 17, Alley 24, Lane 737<br />
Chung Cheng N.Rd. Yungkang<br />
Tainan Hsien, Taiwan, R.O.C.<br />
Tel : +886 - 6 –253 6565<br />
Fax: +886 - 6 –253 4754<br />
charlie.chen@boschrexroth.com.tw<br />
Thailand<br />
NC Advance <strong>Tech</strong>nology Co. Ltd.<br />
59/76 Moo 9<br />
Ramintra road 34<br />
Tharang, Bangkhen,<br />
Bangkok 10230<br />
Tel.: +66 2 943 70 62<br />
+66 2 943 71 21<br />
Fax: +66 2 509 23 62<br />
Hotline +66 1 984 61 52<br />
sonkawin@hotmail.com<br />
DOK-<strong>MLD</strong>-S*-<strong>Tech</strong><strong>FB</strong>*****-AW01-EN-D
2-6 Service & Support <strong>Rexroth</strong> <strong>MLD</strong>-S <strong>Tech</strong>-<strong>FB</strong> <strong>Library</strong><br />
Nordamerika – North America<br />
USA<br />
Headquarters - Hauptniederlassung<br />
<strong>Bosch</strong> <strong>Rexroth</strong> Corporation<br />
Electric Drives & Controls<br />
5150 Prairie Stone Parkway<br />
Hoffman Estates, IL 60192-3707<br />
Tel.: +1 847 6 45 36 00<br />
Fax: +1 847 6 45 62 01<br />
servicebrc@boschrexroth-us.com<br />
repairbrc@boschrexroth-us.com<br />
USA Central Region - Mitte<br />
<strong>Bosch</strong> <strong>Rexroth</strong> Corporation<br />
Electric Drives & Controls<br />
Central Region <strong>Tech</strong>nical Center<br />
1701 Harmon Road<br />
Auburn Hills, MI 48326<br />
Tel.: +1 248 3 93 33 30<br />
Fax: +1 248 3 93 29 06<br />
USA Southeast Region - Südwest<br />
<strong>Bosch</strong> <strong>Rexroth</strong> Corporation<br />
Electric Drives & Controls<br />
Southeastern <strong>Tech</strong>nical Center<br />
3625 Swiftwater Park Drive<br />
Suwanee, Georgia 30124<br />
Tel.: +1 770 9 32 32 00<br />
Fax: +1 770 9 32 19 03<br />
USA SERVICE-HOTLINE<br />
- 7 days x 24hrs -<br />
+1-800-REX-ROTH<br />
+1 800 739 7684<br />
USA East Region – Ost<br />
USA Northeast Region – Nordost<br />
USA West Region – West<br />
<strong>Bosch</strong> <strong>Rexroth</strong> Corporation<br />
Electric Drives & Controls<br />
Charlotte Regional Sales Office<br />
14001 South Lakes Drive<br />
Charlotte, North Carolina 28273<br />
Tel.: +1 704 5 83 97 62<br />
+1 704 5 83 14 86<br />
<strong>Bosch</strong> <strong>Rexroth</strong> Corporation<br />
Electric Drives & Controls<br />
Northeastern <strong>Tech</strong>nical Center<br />
99 Rainbow Road<br />
East Granby, Connecticut 06026<br />
Tel.: +1 860 8 44 83 77<br />
Fax: +1 860 8 44 85 95<br />
<strong>Bosch</strong> <strong>Rexroth</strong> Corporation<br />
7901 Stoneridge Drive, Suite 220<br />
Pleasant Hill, California 94588<br />
Tel.: +1 925 227 10 84<br />
Fax: +1 925 227 10 81<br />
Canada East - Kanada Ost<br />
Canada West - Kanada West<br />
Mexico<br />
Mexico<br />
<strong>Bosch</strong> <strong>Rexroth</strong> Canada Corporation<br />
Burlington Division<br />
3426 Mainway Drive<br />
Burlington, Ontario<br />
Canada L7M 1A8<br />
<strong>Bosch</strong> <strong>Rexroth</strong> Canada Corporation<br />
5345 Goring St.<br />
Burnaby, British Columbia<br />
Canada V7J 1R1<br />
<strong>Bosch</strong> <strong>Rexroth</strong> Mexico S.A. de C.V.<br />
Calle Neptuno 72<br />
Unidad Ind. Vallejo<br />
07700 Mexico, D.F.<br />
<strong>Bosch</strong> <strong>Rexroth</strong> S.A. de C.V.<br />
Calle Argentina No 3913<br />
Fracc. las Torres<br />
64930 Monterrey, N.L.<br />
Tel.: +1 905 335 5511<br />
Fax: +1 905 335 4184<br />
Hotline: +1 905 335 5511<br />
michael.moro@boschrexroth.ca<br />
Tel. +1 604 205 5777<br />
Fax +1 604 205 6944<br />
Hotline: +1 604 205 5777<br />
david.gunby@boschrexroth.ca<br />
Tel.: +52 55 57 54 17 11<br />
Fax: +52 55 57 54 50 73<br />
mariofelipe.hernandez@boschrexroth.com.m<br />
x<br />
Tel.: +52 81 83 65 22 53<br />
+52 81 83 65 89 11<br />
+52 81 83 49 80 91<br />
Fax: +52 81 83 65 52 80<br />
mario.quiroga@boschrexroth.com.mx<br />
Südamerika – South America<br />
Argentina - Argentinien<br />
Argentina - Argentinien<br />
Brazil - Brasilien<br />
Brazil - Brasilien<br />
<strong>Bosch</strong> <strong>Rexroth</strong> S.A.I.C.<br />
"The Drive & Control Company"<br />
Rosario 2302<br />
B1606DLD Carapachay<br />
Provincia de Buenos Aires<br />
Tel.: +54 11 4756 01 40<br />
+54 11 4756 02 40<br />
+54 11 4756 03 40<br />
+54 11 4756 04 40<br />
Fax: +54 11 4756 01 36<br />
+54 11 4721 91 53<br />
victor.jabif@boschrexroth.com.ar<br />
NAKASE<br />
Servicio Tecnico CNC<br />
Calle 49, No. 5764/66<br />
B1653AOX Villa Balester<br />
Provincia de Buenos Aires<br />
Tel.: +54 11 4768 36 43<br />
Fax: +54 11 4768 24 13<br />
Hotline: +54 11 155 307 6781<br />
nakase@usa.net<br />
nakase@nakase.com<br />
gerencia@nakase.com (Service)<br />
<strong>Bosch</strong> <strong>Rexroth</strong> Ltda.<br />
Av. Tégula, 888<br />
Ponte Alta, Atibaia SP<br />
CEP 12942-440<br />
Tel.: +55 11 4414 56 92<br />
+55 11 4414 56 84<br />
Fax sales: +55 11 4414 57 07<br />
Fax serv.: +55 11 4414 56 86<br />
alexandre.wittwer@rexroth.com.br<br />
<strong>Bosch</strong> <strong>Rexroth</strong> Ltda.<br />
R. Dr.Humberto Pinheiro Vieira, 100<br />
Distrito Industrial [Caixa Postal 1273]<br />
89220-390 Joinville - SC<br />
Tel./Fax: +55 47 473 58 33<br />
Mobil: +55 47 9974 6645<br />
prochnow@zaz.com.br<br />
Columbia - Kolumbien<br />
Reflutec de Colombia Ltda.<br />
Calle 37 No. 22-31<br />
Santafé de Bogotá, D.C.<br />
Colombia<br />
Tel.: +57 1 368 82 67<br />
+57 1 368 02 59<br />
Fax: +57 1 268 97 37<br />
reflutec@etb.net.co<br />
DOK-<strong>MLD</strong>-S*-<strong>Tech</strong><strong>FB</strong>*****-AW01-EN-D
<strong>Rexroth</strong> <strong>MLD</strong>-S <strong>Tech</strong>-<strong>FB</strong> <strong>Library</strong> Index 3-1<br />
3 Index<br />
A<br />
Adjustment Function Blocks 1-44<br />
C<br />
Crosscutter Function Blocks 1-19<br />
F<br />
Flying Shear Function Block 1-3<br />
M<br />
MB_RegisterControllerType1 1-35<br />
MC_AbortTrigger 1-17<br />
MC_TouchProbe 1-15<br />
ML(X)_Crosscutter 1-19<br />
MLC <strong>Tech</strong>nology <strong>Library</strong> 1-1<br />
MX(L)_FlyingShear 1-3<br />
MX_ContinuousAdjustType01 1-46<br />
MX_ContinuousAdjustType02 1-49<br />
MX_IncrementalAdjustType01 1-51<br />
R<br />
Register-Controller Function Blocks 1-35<br />
T<br />
Touch Probe Function Blocks 1-13<br />
DOK-<strong>MLD</strong>-S*-<strong>Tech</strong><strong>FB</strong>*****-AW01-EN-D
Printed in Germany