HDL-64E S2 manual_Rev A - Velodyne Lidar
HDL-64E S2 manual_Rev A - Velodyne Lidar
HDL-64E S2 manual_Rev A - Velodyne Lidar

You also want an ePaper? Increase the reach of your titles
YUMPU automatically turns print PDFs into web optimized ePapers that Google loves.
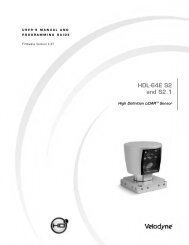
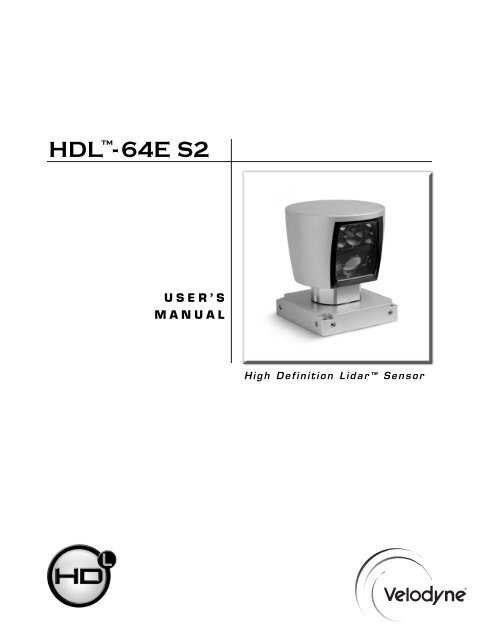
<strong>HDL</strong> - <strong>64E</strong> <strong>S2</strong><br />
USER’S<br />
MANUAL<br />
High Definition <strong>Lidar</strong><br />
Sensor
Caution<br />
INVISIBLE LASER RADIATION<br />
DO NOT VIEW DIRECTLY WITH<br />
OPTICAL INSTRUMENTS<br />
CLASS 1M LASER PRODUCT<br />
.w ww.velodyne.com/lidar <strong>HDL</strong>-<strong>64E</strong> <strong>S2</strong> User’s Manual<br />
i
Table of Contents<br />
Introduction . . . . . . . . . . . . . . . . . . . . . . . . . . . . . . . . . . . . . . . . . . . . . . . . . . . . . . .1<br />
Principles of Operation . . . . . . . . . . . . . . . . . . . . . . . . . . . . . . . . . . . . . . . . . . . . . . .2<br />
Installation Overview . . . . . . . . . . . . . . . . . . . . . . . . . . . . . . . . . . . . . . . . . . . . . . . . .3<br />
- Mounting . . . . . . . . . . . . . . . . . . . . . . . . . . . . . . . . . . . . . . . . . . . . . . . . . . . . .3<br />
- Wiring . . . . . . . . . . . . . . . . . . . . . . . . . . . . . . . . . . . . . . . . . . . . . . . . . . . . . . .6<br />
Usage . . . . . . . . . . . . . . . . . . . . . . . . . . . . . . . . . . . . . . . . . . . . . . . . . . . . . . . . . .6<br />
- Data Packet Construction . . . . . . . . . . . . . . . . . . . . . . . . . . . . . . . . . . . . . . . . . .6<br />
- Correction Angles . . . . . . . . . . . . . . . . . . . . . . . . . . . . . . . . . . . . . . . . . . . . . . . .7<br />
- Controlling the Spin Rate . . . . . . . . . . . . . . . . . . . . . . . . . . . . . . . . . . . . . . . . . . .8<br />
Firmware Update . . . . . . . . . . . . . . . . . . . . . . . . . . . . . . . . . . . . . . . . . . . . . . . . . . .8<br />
Troubleshooting . . . . . . . . . . . . . . . . . . . . . . . . . . . . . . . . . . . . . . . . . . . . . . . . . . . .9<br />
Service and Maintenance . . . . . . . . . . . . . . . . . . . . . . . . . . . . . . . . . . . . . . . . . . . . .9<br />
Specifications . . . . . . . . . . . . . . . . . . . . . . . . . . . . . . . . . . . . . . . . . . . . . . . . . . . .10<br />
Appendix A — Connector Wiring Diagram . . . . . . . . . . . . . . . . . . . . . . . . . . . . . . . . .11<br />
Appendix B — Angular Resolution . . . . . . . . . . . . . . . . . . . . . . . . . . . . . . . . . . . . . . .12<br />
Appendix C — Digital Sensor Recorder (DSR) . . . . . . . . . . . . . . . . . . . . . . . . . . . . . . .13<br />
Appendix D — Ethernet Timing Table . . . . . . . . . . . . . . . . . . . . . . . . . . . . . . . . . . . .18<br />
.w ww.velodyne.com/lidar <strong>HDL</strong>-<strong>64E</strong> <strong>S2</strong> User’s Manual<br />
ii
Introduction<br />
Congratulations on your purchase of a <strong>Velodyne</strong> <strong>HDL</strong>-<strong>64E</strong> <strong>S2</strong> High Definition <strong>Lidar</strong> Sensor. This<br />
product represents a breakthrough in sensing technology by providing exponentially more<br />
information about the surrounding environment than previously possible.<br />
This guide first covers installation and wiring, then addresses output packet construction and<br />
interpretation, and finally discusses the serial interface to the unit and software updates.<br />
This <strong>manual</strong> is undergoing constant revision and improvement – check<br />
www.velodyne.com/lidar for updates.<br />
Each shipment contains:<br />
• <strong>HDL</strong>-<strong>64E</strong> <strong>S2</strong> sensor<br />
• Wiring harness<br />
• CD with user <strong>manual</strong>, calibration file (db.XML) and DSR viewer<br />
NOTE: The <strong>HDL</strong>-<strong>64E</strong> <strong>S2</strong> is shipped in a wooden crate, however it can be transported in a<br />
wheeled case, such as Pelican Model 1560. To order, contact Pelican directly at<br />
www.pelican.com.<br />
.w ww.velodyne.com/lidar <strong>HDL</strong>-<strong>64E</strong> <strong>S2</strong> User’s Manual<br />
1
Principles of Operation<br />
The <strong>HDL</strong>-<strong>64E</strong> <strong>S2</strong> operates on a rather simple premise: instead of a single laser firing through<br />
a rotating mirror, 64 lasers are mounted on upper and lower blocks of 32 lasers each and the<br />
entire unit spins. This design allows for 64 separate lasers to each fire thousands of times per<br />
second, providing exponentially more data points per second and a much richer point cloud than<br />
conventional designs. The unit inherently delivers a 360-degree horizontal field of view (FOV) and<br />
a 26.8 degree vertical FOV.<br />
Additionally, state-of-the-art signal processing and waveform analysis are employed to provide<br />
high accuracy, extended distance sensing and intensity data. The <strong>HDL</strong>-<strong>64E</strong> <strong>S2</strong> is rated to<br />
provide usable returns up to 120 meters.<br />
Laser<br />
Emitters<br />
(Groups of 16)<br />
Laser<br />
Receivers<br />
(Groups of 32)<br />
Housing<br />
(Entire unit spins<br />
at 5-15 Hz)<br />
Motor<br />
Housing<br />
Figure 1. <strong>HDL</strong>-<strong>64E</strong> <strong>S2</strong> design overview.<br />
The <strong>HDL</strong>-<strong>64E</strong> <strong>S2</strong> employs a direct drive motor system — there are no belts or chains in the<br />
drive train.<br />
.w ww.velodyne.com/lidar <strong>HDL</strong>-<strong>64E</strong> <strong>S2</strong> User’s Manual<br />
2
Installation Overview<br />
Front/Back Mounting<br />
The <strong>HDL</strong>-<strong>64E</strong> <strong>S2</strong> base provides two mounting options: side mount and top mount. See<br />
Figure 2 for front/back mounting options, Figure 3 for side/side mounting, and Figure 4 for<br />
top mounting instructions. The sensor can be mounted at any angle from 0 to 90 degrees with<br />
respect to the base of the sensor.<br />
Two M8-1.25 x 12mm<br />
deep mounting points.<br />
(Four per side, for a<br />
total of 8.)<br />
Mounting<br />
Base<br />
Figure 2. Front and back <strong>HDL</strong> mounting illustration.<br />
See Figure 2. This figure shows the <strong>HDL</strong>-<strong>64E</strong> <strong>S2</strong>’s base plate screw locations with threaded<br />
inserts for standard M8 hardware.<br />
.w ww.velodyne.com/lidar <strong>HDL</strong>-<strong>64E</strong> <strong>S2</strong> User’s Manual<br />
3
Side Mounting<br />
Mounting<br />
Base<br />
Figure 3. Side/side <strong>HDL</strong> mounting illustration.<br />
.w ww.velodyne.com/lidar <strong>HDL</strong>-<strong>64E</strong> <strong>S2</strong> User’s Manual<br />
4
Top Mounting<br />
Four .406” through<br />
holes for top mount<br />
option to secure the<br />
<strong>HDL</strong> to the vehicle.<br />
Figure 4. <strong>HDL</strong> top mounting illustration.<br />
Figure 4 shows the location of four .406” thru holes for top mounting.<br />
For all mounting options, be sure the <strong>HDL</strong>-<strong>64E</strong> <strong>S2</strong> is mounted securely to withstand vibration<br />
and shock without risk of detachment. The unit need not be shock proofed — it is designed to<br />
withstand standard automotive G-forces.<br />
The <strong>HDL</strong>-<strong>64E</strong> <strong>S2</strong> is weatherproofed to withstand wind, rain, and other adverse weather<br />
conditions. The spinning nature of the <strong>HDL</strong>-<strong>64E</strong> <strong>S2</strong> helps the unit shed excess water from the<br />
front window that could hamper performance.<br />
.w ww.velodyne.com/lidar <strong>HDL</strong>-<strong>64E</strong> <strong>S2</strong> User’s Manual<br />
5
Wiring<br />
The <strong>HDL</strong>-<strong>64E</strong> <strong>S2</strong> comes with a pre-wired connector, wired with power, DB9 serial, and standard<br />
RJ-45 Ethernet connectors.The connector wires are approximately 10’ in length.<br />
Power. Connect the red and black wires to vehicle power. Be sure red is positive polarity. THE<br />
<strong>HDL</strong>-<strong>64E</strong> <strong>S2</strong> IS RATED ONLY FOR 12 VOLTS. Any voltage applied over 16 volts could damage<br />
the unit. Expect the unit to draw 4-6 amps during normal usage.<br />
NOTE: The <strong>HDL</strong>-<strong>64E</strong> <strong>S2</strong> does not have a power switch. It spins whenever power is applied.<br />
The <strong>HDL</strong>-<strong>64E</strong> <strong>S2</strong> has a lockout circuit that prevents its lasers from firing at low RPMs.<br />
Ethernet. This standard Ethernet connector is designed to connect to a standard PC. See the<br />
next section on usage for UDP packet formats.<br />
Serial Interface. The connector also features an RS-232 DB9 serial connector. This connector<br />
allows for a firmware update to be applied to the <strong>HDL</strong>-<strong>64E</strong> <strong>S2</strong> (<strong>Velodyne</strong> may release firmware<br />
updates from time to time). It also accepts commands to change the RPM of the unit.<br />
Cable Diagram. If you wish to wire your own connector, refer to Appendix A for a layout of the<br />
wiring pins.<br />
Usage<br />
Data Packet Construction<br />
The <strong>HDL</strong>-<strong>64E</strong> <strong>S2</strong> outputs UDP Ethernet packets. Each packet contains a data payload of 1206<br />
bytes that consists of 12 blocks of 100-byte firing data followed by six bytes at the end of each<br />
packet that contains a spin counter and firmware version information. Each packet can be for<br />
either the upper or lower laser banks (called “laser blocks”) - each bank contains 32 lasers.<br />
The packet format is as follows:<br />
2 bytes of header info. This header indicates whether the packet is for the upper block or<br />
the lower block. The upper block will have a header of 0xEEFF and the lower block will have<br />
a header of 0xDDFF.<br />
2 bytes of rotational info. This is an integer between 0 and 35999. Divide this number<br />
by 100 to get degrees from 0.<br />
32 laser returns broken into 3 bytes each. Each return contains two bytes of distance<br />
information in .2 centimeter increments, and one byte of intensity information (0 – 255, with<br />
255 being the most intense return). A zero return indicates no return up to 65 meters.<br />
Six status bytes that alternate between packets. The end of the packet will show either:<br />
- A reading showing the internal temperature of the unit. You will see a " DegC " ASCII<br />
string as the last four bytes of the packet. The two bytes before this string are the<br />
thermistor's reading in C in hex 8.8 format. This is in " big endian format" - i.e. the byte<br />
immediately preceding the DegC text is the whole degrees, and the byte preceding that<br />
is the fraction of a degree in 1/256 increments. So if you see c0 1a, the temperature<br />
of the thermistor is 26.75 degrees C.<br />
- Or, the version number of the firmware in ASCII character format " Vxxx" where “xxx” is<br />
the version number, e.g. "25b” which represents version 2.5b (the most current<br />
software version as of this writing).<br />
.w ww.velodyne.com/lidar <strong>HDL</strong>-<strong>64E</strong> <strong>S2</strong> User’s Manual<br />
6
The <strong>HDL</strong>-<strong>64E</strong> <strong>S2</strong> data is presented as distances and intensities only. <strong>Velodyne</strong> includes a packet<br />
viewer called DSR, whose installer files are on the CD that came with the unit. DSR reads in<br />
the packets from the <strong>HDL</strong>-<strong>64E</strong> <strong>S2</strong> unit, performs the necessary calculations to plot the points<br />
presented in 3-D space, and plots the points on the viewer screen.<br />
Note: The <strong>HDL</strong>-<strong>64E</strong> <strong>S2</strong> will output three upper block packets for every one lower block packet.<br />
This provides more resolution when identifying objects at greater distances.<br />
The minimum return distance for the <strong>HDL</strong>-<strong>64E</strong> <strong>S2</strong> is approximately three feet. Returns closer<br />
than this should be ignored.<br />
Correction Angles<br />
Each <strong>HDL</strong>-<strong>64E</strong> <strong>S2</strong> laser is fixed with respect to vertical angle and offset to the rotational index<br />
data provided in each packet. For each data point issued by the <strong>HDL</strong>-<strong>64E</strong> <strong>S2</strong>, rotational and<br />
horizontal correction factors must be applied to determine the point’s location in 3-D space<br />
referred to by the return. Each <strong>HDL</strong>-<strong>64E</strong> <strong>S2</strong> unit comes with its own unique .XML file, called<br />
db.XML, that was generated as a result of the calibration performed at <strong>Velodyne</strong>’s factory. DSR<br />
uses this XML file to display points accurately. The .XML file also holds the key to interpreting<br />
the packet data for users that wish to create their own software applications.<br />
db.XML contains 64 instances of the following five values used to interpret the packet data:<br />
rotCorrection: This parameter is the rotational correction angle for each laser, as<br />
viewed from the back of the unit. Positive factors rotate to the left, and negative<br />
values rotate to the right.<br />
vertCorrection: This parameter is the vertical correction angle for each laser, as<br />
viewed from the back of the unit. Positive values have the laser pointing up, and<br />
negative values have the laser pointing down.<br />
distCorrection: Each laser has its own unique distance due to minor variations in the<br />
parts used to construct the laser. This correction factor, in centimeters, accounts<br />
for this variance. This number should be directly added to the distance value read in<br />
the packet.<br />
vertoffsetCorrection: This value represents the height of each laser as measured<br />
from the bottom of the base. It is a fixed value for all upper block lasers and a<br />
different fixed value for all lower block lasers.<br />
horizOffsetCorrection: This value represents the horizontal offset of each laser as<br />
viewed from the back of the laser. It is a constant positive or negative value for<br />
all lasers.<br />
Use the above values from the .XML file to calculate each point’s position in 3-D space. Use the<br />
first 32 points for the upper block and the second 32 points for the lower block. The rotational<br />
info found in the header is used to determine the packets position with respect to the 360<br />
degree horizontal field of view.<br />
Note: There is a file on the CD called “<strong>HDL</strong> Source Example” that shows the calculations using<br />
the above correction factors.<br />
.w ww.velodyne.com/lidar <strong>HDL</strong>-<strong>64E</strong> <strong>S2</strong> User’s Manual<br />
7
Controlling the Spin Rate<br />
The <strong>HDL</strong>-<strong>64E</strong> <strong>S2</strong> can spin at rates ranging from 300 RPM (5 Hz) to 900 RPM (15 Hz). The<br />
default is 600 RPM (10 Hz). Note that changing the spin rate does not change the data rate<br />
– the unit will send out the same number of packets (at a rate of one million data points per<br />
second) regardless of spin rate. The image resolution will increase or decrease depending on<br />
rotation speed. See Appendix B for angular resolution figures for various spin rates.<br />
To control the <strong>HDL</strong>'s spin rate, connect the serial cable to an available RS-232 COM port and<br />
issue a serial command of the format #<strong>HDL</strong>RPMnnn$ where nnn is an integer between 300<br />
and 900. The characters are case sensitive and must be CAPS. The <strong>HDL</strong>-<strong>64E</strong> <strong>S2</strong> will adopt<br />
the new spin rate. Use the following serial parameters: Baud 9600, Parity: None, Data bits:<br />
8, Stop bits: 1. The <strong>HDL</strong>-<strong>64E</strong> <strong>S2</strong> has no echo back feature, so no serial data will be returned<br />
from the <strong>HDL</strong>-<strong>64E</strong> <strong>S2</strong>.<br />
Firmware Update<br />
<strong>Velodyne</strong> may issue firmware updates from time to time. To apply the update, connect the<br />
DB9 RS-232 cable to a standard Windows-compatible PC’s serial port. The <strong>HDL</strong>-<strong>64E</strong> <strong>S2</strong> must<br />
be powered up and spinning during the update.<br />
Execute the file supplied by <strong>Velodyne</strong> – all the software and firmware is included to update the<br />
unit. Once the file is executed, the following screen will appear:<br />
Figure 5. <strong>HDL</strong> software update<br />
screen capture.<br />
Press update and the unit will update. If the update was successful, the unit will begin to spin<br />
down for a few seconds then power back up with the new firmware running. If the first update<br />
is not successful, it is recommended to try the update again several times before seeking<br />
assistance from <strong>Velodyne</strong>.<br />
NOTE: The entire new firmware is uploaded and checksummed before being applied to the flash<br />
memory inside the <strong>HDL</strong>-<strong>64E</strong> <strong>S2</strong>. If the checksum is corrupted, no software update occurs. This<br />
protects the unit in the event of power or data loss during the firmware update.<br />
.w ww.velodyne.com/lidar <strong>HDL</strong>-<strong>64E</strong> <strong>S2</strong> User’s Manual<br />
8
Troubleshooting<br />
Use this chart to troubleshoot common problems with the <strong>HDL</strong>-<strong>64E</strong> <strong>S2</strong>.<br />
Problem<br />
Unit doesn’t spin<br />
Resolution<br />
Verify power connection and polarity.<br />
Verify proper voltage – should be 12 volts<br />
drawing about 3-4 amps.<br />
Remove bottom cover and check inline fuse.<br />
Replace if necessary.<br />
Unit spins but no data<br />
Verify Ethernet wiring.<br />
Verify packet output from another source<br />
(e.g. Ethereal/Wireshark).<br />
No serial communication<br />
Verify RS-232 cable connection.<br />
Unit must be active and spinning for<br />
RS-232 update.<br />
It may take several tries for the update<br />
to be effective.<br />
Service and Maintenance<br />
There are no user service or maintenance requirements or procedures for the<br />
<strong>Velodyne</strong> <strong>HDL</strong>-<strong>64E</strong> <strong>S2</strong>.<br />
For service or maintenance, please contact <strong>Velodyne</strong> at (408) 465-2800, or log on to our<br />
website at www.velodyne.com/lidar.<br />
.w ww.velodyne.com/lidar <strong>HDL</strong>-<strong>64E</strong> <strong>S2</strong> User’s Manual<br />
9
Specifications<br />
Sensor:<br />
Laser:<br />
Mechanical:<br />
Output:<br />
Dimensions<br />
(H/W/D):<br />
Shipping Weight:<br />
(approx.)<br />
• 64 lasers/detectors<br />
• 360 degree field of view (azimuth)<br />
• 0.09 degree angular resolution (azimuth)<br />
• 26.8 degree vertical field of view (elevation) -+2° up to -24.8° down<br />
with 64 equally spaced angular subdivisions (approximately 0.4°)<br />
• 1.333 M points per second<br />
•
Appendix A - Connector Wiring Diagram<br />
User Interface Harness<br />
.w ww.velodyne.com/lidar <strong>HDL</strong>-<strong>64E</strong> <strong>S2</strong> User’s Manual<br />
11
Appendix B - Angular Resolution<br />
Lower Block<br />
RPM RPS Points Per Points Per <strong>Rev</strong>olution Angular Resolution<br />
(Hz) <strong>Rev</strong>olution Per Laser (degrees)<br />
300 5 50000 1562.5 0.2304<br />
600 10 25000 781.25 0.4608<br />
900 15 16667 521 0.6912<br />
Upper Block<br />
RPM RPS Points Per Points Per <strong>Rev</strong>olution Angular Resolution Post-Lower-Block<br />
(Hz) <strong>Rev</strong>olution Per Laser (degrees) Angular Resolution<br />
(degrees)<br />
300 5 200000 6250 0.0576 0.1152<br />
600 10 100000 3125 0.1152 0.2304<br />
900 15 66667 2083 0.1728 0.3456<br />
Notes:<br />
The <strong>HDL</strong>-<strong>64E</strong> <strong>S2</strong> generates greater than 1.3 million points per second.<br />
.w ww.velodyne.com/lidar <strong>HDL</strong>-<strong>64E</strong> <strong>S2</strong> User’s Manual<br />
12
Appendix C - Digital Sensor Recorder (DSR)<br />
Digital Sensor Recorder (DSR)<br />
DSR is a 3-dimensional point cloud visualization software program designed for use with the<br />
<strong>HDL</strong>-<strong>64E</strong> <strong>S2</strong>. It can be located on the CD provided with each <strong>HDL</strong>-<strong>64E</strong> <strong>S2</strong> sensor. <strong>Velodyne</strong><br />
offers this software as an “out of the box” tool for the rendering and recording of point cloud<br />
data from the <strong>HDL</strong>-<strong>64E</strong> <strong>S2</strong> sensor.<br />
DSR is intended as a reference platform from which the user can develop their own adaptation<br />
and visualization software packages.<br />
Note: A code snippet is provided on the same CD to aid in understanding the methods at which<br />
DSR parses the data points generated by the <strong>HDL</strong>-<strong>64E</strong> <strong>S2</strong> sensor.<br />
Installing DSR<br />
Locate the DSR executable program on the provided CD. Double click on “DSR-1.1-2-install<br />
3.exe” to begin the installation onto the host computer. Use of the default settings during the<br />
installation is highly recommended.<br />
When the installation is complete, follow the “Utilizing the db.xml calibration data file in DSR”<br />
instructions in the next section to calibrate the DSR viewer to your new sensor.<br />
Note: failure to use the calibration db.xml file supplied with your sensor will result in an<br />
inaccurate point cloud rendering in DSR.<br />
Using DSR<br />
DSR gives the user the ability to view point cloud data in real time or to create a recording of<br />
such data for future reference and playback. The recorded data will be stored in a standard<br />
pcap file format.<br />
Note: These files can become quite large so the user should be mindful of recording duration<br />
when created.<br />
Live Playback:<br />
For live playback, first secure and power up the <strong>HDL</strong>-<strong>64E</strong> <strong>S2</strong> sensor so that it is spinning.<br />
Connect the RJ45 Ethernet connector to your host computer’s network connection. You may<br />
wish to utilize auto DNS settings for your computers network configuration.<br />
DSR desktop icon =<br />
Open DSR from your desktop icon created during the installation. Pull down the “Options”<br />
menu and select the proper input device. Go to “Options” again and deselect the “Show Ground<br />
Plane” option. (Leave this feature off for the time being or until the ground plane has been<br />
properly adjusted).<br />
.w ww.velodyne.com/lidar <strong>HDL</strong>-<strong>64E</strong> <strong>S2</strong> User’s Manual<br />
13
You can now go to “Options/Properties” to change the individual settings for each LASER<br />
channel if so desired.<br />
REFRESH button =<br />
Provided that your computer is now receiving data packets, click on the Refresh button to start<br />
live viewing of a point cloud. The initial image is of a directly overhead perspective. See page 17<br />
for mouse and key commands used to manipulate the 3D image within the viewer.<br />
Note: The image can be manipulated in all directions and become disorienting. If you lose<br />
perspective, simply press F1 to return to the original view.<br />
Recording Data:<br />
RECORD button =<br />
Once the input of streaming data has been confirmed through the live playback feature, click on<br />
the Record button and the program will request the name and location for the pcap file to be<br />
created. Recording will begin immediately once the file information has been entered. Click on<br />
the Record button again to discontinue the capture. One can string multiple recordings together<br />
on the same file by performing the Record function repeatedly. A new file name will not be<br />
requested until after the session has been aborted.<br />
Note: An Ethernet capture utility such as Wireshark ® can also be used as a pcap capture utility.<br />
Playback of Recorded files:<br />
Use the File ➝ Open command to open a previously captured pcap file for playback. The DSR<br />
playback controls are similar to any DVD/VCR control features.<br />
PLAY button = PAUSE button =<br />
Press the Play button to render the file. The Play button will alternate to Pause when in<br />
playback mode.<br />
FORWARD button = REVERSE button =<br />
Use the Forward and <strong>Rev</strong>erse buttons to change the direction of playback.<br />
Note: The X, Y, Z and distance figures at the bottom of the image represent the distance of<br />
the x,y,z crosshairs with respect to the origin point indicated by the small white circle. The<br />
concentric gray circles and grid lines represent 10 meter increments from the sensor.<br />
.w ww.velodyne.com/lidar <strong>HDL</strong>-<strong>64E</strong> <strong>S2</strong> User’s Manual<br />
14
Utilizing the db.XML calibration data file in DSR<br />
The db.XML file provided with your <strong>Velodyne</strong> <strong>HDL</strong>-<strong>64E</strong> <strong>S2</strong> contains all of the necessary data for<br />
the proper alignment of the point cloud information gathered by the <strong>HDL</strong> sensor for each laser.<br />
{vertical correction (deg), rotational correction (deg), distance correction (cm), vertical offset<br />
(cm), horizontal offset (cm), minimum and maximum intensity (0-255)}.<br />
When implemented properly, the image viewable from the Digital Sensor Recorder (DSR) will be<br />
properly calibrated to provide an accurate visual representation of the environment in which the<br />
sensor is being applied.<br />
This data should also be used in any other program using the data generated by the <strong>HDL</strong>-<strong>64E</strong> <strong>S2</strong>.<br />
To integrate the db.XML file into the DSR program,<br />
— follow these steps.<br />
1. Provided that DSR has been installed on the host computer using the default settings,<br />
follow this path: c:\program files\Digital Sensor Recorder<br />
2. Cut and paste the existing db.XML file to another location and rename as the<br />
default_db.XML<br />
3. Copy and paste the db.XML file provided on the CD to the DSR program folder<br />
previously opened<br />
4. Close out the windows and the program is ready to run<br />
5. Open the DSR program<br />
6. Click options\properties<br />
7. Check that the new values are present and that they reflect the values in the<br />
example screen captures provided on the CD [Fig.6]<br />
8. Your DSR viewer is now calibrated to your sensor<br />
.w ww.velodyne.com/lidar <strong>HDL</strong>-<strong>64E</strong> <strong>S2</strong> User’s Manual<br />
15
Figure 6. Calibration values as seen in DSR/File/Properties<br />
.w ww.velodyne.com/lidar <strong>HDL</strong>-<strong>64E</strong> <strong>S2</strong> User’s Manual<br />
16
DSR Key Controls<br />
Zoom:<br />
Z = Zoom in<br />
Shift, Z = Zoom out<br />
Z axis rotation:<br />
Y = Rotate CW<br />
Shift, Y = Rotate CCW<br />
X axis rotation:<br />
P = Rotate CW<br />
Shift, P = Rotate CCW<br />
Y axis rotation:<br />
R = Rotate CW<br />
Shift, R = Rotate CCW<br />
Z Shift:<br />
F = Forward<br />
B = Back<br />
X Shift:<br />
L = Left<br />
H = Right<br />
Y Shift:<br />
U = Up<br />
D = Down<br />
Aux. Functions:<br />
Ctrl, (Z,Y,P,R,F,B,L,H,U,D) Direction = Fine Movement<br />
Alt, (Z,Y,P,R,F,B,L,H,U,D) Direction= Very Fine Movement<br />
DSR Mouse Controls<br />
Rotational:<br />
Left Button/Move<br />
Slide:<br />
Right Button/Move<br />
Zoom:<br />
Scroll forward = Zoom In<br />
Scroll backward = Zoom Out<br />
.w ww.velodyne.com/lidar <strong>HDL</strong>-<strong>64E</strong> <strong>S2</strong> User’s Manual<br />
17
Appendix D - Ethernet Timing Table<br />
<strong>HDL</strong>-<strong>64E</strong> <strong>S2</strong> Ethernet Timing Table Overview<br />
The <strong>HDL</strong>-<strong>64E</strong> <strong>S2</strong> Ethernet Timing Table is designed to answer the question of how much time<br />
elapses between the actual capturing of a distance point and when that point is output from the<br />
device. By registering the event of the Ethernet data capture, <strong>HDL</strong>-<strong>64E</strong> <strong>S2</strong> users can then<br />
trace back in time the exact point in time at which any particular distance point was captured<br />
by the <strong>HDL</strong>-<strong>64E</strong> <strong>S2</strong>.<br />
In the <strong>HDL</strong>-<strong>64E</strong> <strong>S2</strong>, the upper block and lower block collect distance points simultaneously, with<br />
each block issuing single laser pulses at a time. That is, each upper block laser fires in<br />
sequence and in unison to a corresponding laser from the lower block. For example, laser 32<br />
fires simultaneously with laser 0, laser 33 fires with laser 1, and so on. Unlike the <strong>HDL</strong>-<strong>64E</strong>,<br />
which issued three upper block returns for every lower block return, the <strong>HDL</strong>-<strong>64E</strong> <strong>S2</strong> has an<br />
equal number of upper and lower block returns. This is why when interpreting the delay table<br />
each sequential pair of data blocks will represent the upper and lower block respectively,<br />
and each upper and lower block pair of data blocks in the Ethernet packet will have the same<br />
delay values.<br />
Ethernet packets are assembled until the entire 1200 bytes have been collected, representing<br />
six upper block sequences and six lower block sequences. The packet is then transmitted via<br />
a UDP packet over Ethernet, starting from the last byte acquired. See a sample of the packet<br />
layout on page 20.<br />
.w ww.velodyne.com/lidar <strong>HDL</strong>-<strong>64E</strong> <strong>S2</strong> User’s Manual<br />
18
<strong>HDL</strong>-<strong>64E</strong> <strong>S2</strong> Ethernet Transmit Timing Table<br />
Data Laser<br />
Laser Numbers Lower, Upper<br />
Block Block 0,32 1,33 2,34 3,35 4,36 5,37 6,38 7,39 8,40 9,41 10,42 11,43 12,44 13,45 14,46 15,47 16,48<br />
1 Upper 419.3 418.6 417.8 417.1 416.4 415.7 414.9 414.2 413.5 412.7 412.0 411.3 410.6 409.8 409.1 408.4 407.7<br />
2 Lower 419.3 418.6 417.8 417.1 416.4 415.7 414.9 414.2 413.5 412.7 412.0 411.3 410.6 409.8 409.1 408.4 407.7<br />
3 Upper 396.0 395.3 394.5 393.8 393.1 392.4 391.6 390.9 390.2 389.5 388.7 388.0 387.3 386.5 385.8 385.1 384.4<br />
4 Lower 396.0 395.3 394.5 393.8 393.1 392.4 391.6 390.9 390.2 389.5 388.7 388.0 387.3 386.5 385.8 385.1 384.4<br />
5 Upper 372.7 372.0 371.3 370.5 369.8 369.1 368.3 367.6 366.9 366.2 365.4 364.7 364.0 363.2 362.5 361.8 361.1<br />
6 Lower 372.7 372.0 371.3 370.5 369.8 369.1 368.3 367.6 366.9 366.2 365.4 364.7 364.0 363.2 362.5 361.8 361.1<br />
7 Upper 349.4 348.7 348.0 347.2 346.5 345.8 345.0 344.3 343.6 342.9 342.1 341.4 340.7 339.9 339.2 338.5 337.8<br />
8 Lower 349.4 348.7 348.0 347.2 346.5 345.8 345.0 344.3 343.6 342.9 342.1 341.4 340.7 339.9 339.2 338.5 337.8<br />
9 Upper 326.1 325.4 324.7 323.9 323.2 322.5 321.7 321.0 320.3 319.6 318.8 318.1 317.4 316.7 315.9 315.2 314.5<br />
10 Lower 326.1 325.4 324.7 323.9 323.2 322.5 321.7 321.0 320.3 319.6 318.8 318.1 317.4 316.7 315.9 315.2 314.5<br />
11 Upper 302.8 302.1 301.4 300.6 299.9 299.2 298.5 297.7 297.0 296.3 295.5 294.8 294.1 293.4 292.6 291.9 291.2<br />
12 Lower 302.8 302.1 301.4 300.6 299.9 299.2 298.5 297.7 297.0 296.3 295.5 294.8 294.1 293.4 292.6 291.9 291.2<br />
Data Laser<br />
Block Block<br />
1 Upper<br />
2 Lower<br />
3 Upper<br />
4 Lower<br />
5 Upper<br />
6 Lower<br />
7 Upper<br />
8 Lower<br />
9 Upper<br />
10 Lower<br />
11 Upper<br />
12 Lower<br />
17,49<br />
406.9<br />
406.9<br />
383.6<br />
383.6<br />
360.3<br />
360.3<br />
337.0<br />
337.0<br />
313.7<br />
313.7<br />
290.4<br />
290.4<br />
Laser Numbers Lower, Upper<br />
18,50 19,51 20,52 21,53 22,54 23,55 24,56 25,57 26,58 27,59 28,60 29,61 30,62 31,63<br />
406.2 405.5 404.7 404.0 403.3 402.6 401.8 401.1 400.4 399.6 398.9 398.2 397.5 396.7<br />
406.2 405.5 404.7 404.0 403.3 402.6 401.8 401.1 400.4 399.6 398.9 398.2 397.5 396.7<br />
382.9 382.2 381.4 380.7 380.0 379.3 378.5 377.8 377.1 376.3 375.6 374.9 374.2 373.4<br />
382.9 382.2 381.4 380.7 380.0 379.3 378.5 377.8 377.1 376.3 375.6 374.9 374.2 373.4<br />
359.6 358.9 358.1 357.4 356.7 356.0 355.2 354.5 353.8 353.1 352.3 351.6 350.9 350.1<br />
359.6 358.9 358.1 357.4 356.7 356.0 355.2 354.5 353.8 353.1 352.3 351.6 350.9 350.1<br />
336.3 335.6 334.9 334.1 333.4 332.7 331.9 331.2 330.5 329.8 329.0 328.3 327.6 326.8<br />
336.3 335.6 334.9 334.1 333.4 332.7 331.9 331.2 330.5 329.8 329.0 328.3 327.6 326.8<br />
313.0 312.3 311.6 310.8 310.1 309.4 308.6 307.9 307.2 306.5 305.7 305.0 304.3 303.5<br />
313.0 312.3 311.6 310.8 310.1 309.4 308.6 307.9 307.2 306.5 305.7 305.0 304.3 303.5<br />
289.7 289.0 288.3 287.5 286.8 286.1 285.3 284.6 283.9 283.2 282.4 281.7 281.0 280.3<br />
289.7 289.0 288.3 287.5 286.8 286.1 285.3 284.6 283.9 283.2 282.4 281.7 281.0 280.3<br />
First Trans Trigger to Ethernet Trans Enable 419.3 us<br />
Ethernet Output Duration 100 us<br />
Total Packet Bytes 1248<br />
Header Bytes 42<br />
Data Bytes 1200<br />
Footer Bytes 6<br />
Byte per microsecond 12.48<br />
Microseconds per Byte 0.080128<br />
How to use this table<br />
The table above represents an <strong>HDL</strong>-<strong>64E</strong> <strong>S2</strong> data packet. The laser returns will come out in the order listed above.<br />
Simply subtract from the timestamp of the output event of the packet each data value to arrive at the actual time the distance point was captured inside the <strong>HDL</strong>-<strong>64E</strong> <strong>S2</strong>.<br />
.w ww.velodyne.com/lidar <strong>HDL</strong>-<strong>64E</strong> <strong>S2</strong> User’s Manual<br />
19
<strong>HDL</strong>-<strong>64E</strong> <strong>S2</strong> Sample Data Packet<br />
No. Time Source Destination Protocol Info<br />
5 0.001121 192.168.3.43 192.168.3.255 UDP Source port: https Destination port: 2368<br />
Frame 5 (1248 bytes on wire, 1248 bytes captured)<br />
Ethernet II, Src: 00:00:00_00:00:00 (00:00:00:00:00:00), Dst: Broadcast (ff:ff:ff:ff:ff:ff)<br />
Internet Protocol, Src: 192.168.3.43 (192.168.3.43), Dst: 192.168.3.255 (192.168.3.255)<br />
User Datagram Protocol, Src Port: https (443), Dst Port: 2368 (2368)<br />
Data (1206 bytes)<br />
0000 ff ee c2 01 73 05 3d 51 05 36 a9 05 3f c1 05 34 ....s.=Q.6....4<br />
0010 a1 05 3f c0 05 3e 6c 05 37 74 05 41 6e 05 39 72 ....>l.7t.An.9r<br />
0020 05 37 75 05 3a 5b 05 3c 72 05 3e 6d 05 39 68 05 .7u.:[.m.9h.<br />
0030 3a 7c 05 3a 79 05 40 5a 05 37 44 05 38 70 05 42 :|.:y.@Z.7D.8p.B<br />
0040 a1 05 3c e2 05 37 61 05 37 6d 05 3a 93 05 3d c2 ....6..9..7..=..<br />
0060 39 c0 05 39 ff dd c2 01 01 05 1e 15 05 3d 1c 06 9..9.........=..<br />
0070 76 cf 04 3b 03 05 23 92 05 20 37 04 39 9a 04 3d v..;..#.. 7.9..=<br />
0080 0b 05 9d 0c 05 39 92 04 3f 0b 05 20 17 06 1f 19 .....9.... ....<br />
0090 06 3e ea 04 43 d0 05 39 20 06 26 48 06 53 c4 05 .>..C..9 .&H.S..<br />
00a0 23 00 06 29 cd 04 89 d1 04 3b 97 05 42 06 05 39 #..).....;..B..9<br />
00b0 46 05 3e 20 05 5c 9f 04 33 20 06 96 59 05 8d 7e F.> .\..3 ..Y..~<br />
00c0 05 71 06 06 4e 17 06 59 ff ee c2 01 67 05 3b 55 .q..N..Y....g.;U<br />
00d0 05 36 a6 05 40 c3 05 33 a4 05 3e b4 05 3b 69 05 .6..@..3..>..;i.<br />
00e0 38 72 05 40 6a 05 38 70 05 37 70 05 3b 5c 05 3c 8r.@j.8p.7p.;\.<<br />
00f0 72 05 3f 74 05 39 6b 05 3a 76 05 3a 76 05 3f 50 r.t.9k.:v.:v.P<br />
0100 05 39 48 05 3a 75 05 40 9c 05 3d db 05 37 5e 05 .9H.:u.@..=..7^.<br />
0110 37 72 05 3a 97 05 3d c5 05 3d 81 05 36 ba 05 38 7r.:..=..=..6..8<br />
0120 bb 05 37 ba 05 3b 8b 05 3b b3 05 3c ff dd c2 01 ..7..;..;....x..=..".<br />
0140 05 1f 3b 04 3b 8e 04 3b 0d 05 9b 0d 05 39 8b 04 ..;.;..;.....9..<br />
0150 3c 0c 05 20 22 06 1f 1a 06 3e ea 04 41 dd 05 39 ..A..7-.&M.S..<br />
0230 23 09 06 29 c8 04 88 d3 04 3b 98 05 40 0e 05 3d #..).....;..@..=<br />
0240 3a 05 3d 20 05 5e a1 04 34 21 06 8f 5e 05 8d 79 :.= .^..4!..^..y<br />
0250 05 69 0b 06 50 1b 06 58 ff ee c2 01 6e 05 3c 4f .i..P..X....n.
02e0 3c 12 05 1f 11 06 1f 1b 06 3f e2 04 41 cf 05 39 k.8r.@j.9u<br />
0340 05 35 77 05 3b 5b 05 3d 77 05 3f 71 05 39 68 05 .5w.;[.=w.q.9h.<br />
0350 39 7f 05 3c 73 05 40 57 05 39 43 05 39 72 05 3f 9...<br />
0370 05 3f 8b 05 35 b7 05 39 b7 05 37 c2 05 3b 88 05 ...5..9..7..;..<br />
0380 39 b1 05 38 ff dd c2 01 04 05 1e 0b 05 3f 1d 06 9..8...........<br />
0390 79 d1 04 3e 08 05 23 7c 05 1f 31 04 3a 94 04 3b y..>..#|..1.:..;<br />
03a0 0d 05 9c 0c 05 39 8f 04 3e 09 05 20 11 06 1f 18 .....9..>.. ....<br />
03b0 06 3e e7 04 42 d5 05 3a 35 06 26 49 06 52 c9 05 .>..B..:5.&I.R..<br />
03c0 22 0c 06 2a cc 04 86 d4 04 3a 9b 05 42 0b 05 40 "..*.....:..B..@<br />
03d0 3d 05 3d 22 05 59 a5 04 34 21 06 93 5c 05 8c 82 =.=".Y..4!..\...<br />
03e0 05 75 08 06 50 1b 06 59 ff ee c2 01 71 05 3d 54 .u..P..Y....q.=T<br />
03f0 05 39 aa 05 3f c3 05 33 a2 05 40 bd 05 3d 71 05 .9....3..@..=q.<br />
0400 36 6b 05 3f 67 05 39 75 05 36 6f 05 3c 5c 05 3c 6k.g.9u.6o.
<strong>Velodyne</strong> <strong>Lidar</strong>, Inc.<br />
345 Digital Drive<br />
Morgan Hill, CA 95037<br />
408.465.2800 voice<br />
408.779.9227 fax<br />
408.779.9208 service fax<br />
www.velodyne.com<br />
Service E-mail: service@velodyne.com<br />
Product E-mail: help@velodyne.com<br />
Technical E-mail: techhelp@velodyne.com<br />
Sales E-mail: lidar@velodyne.com<br />
63-<strong>HDL</strong><strong>64E</strong> <strong>S2</strong> <strong>Rev</strong> A JUN08<br />
Trademarks are property of their respective owners.<br />
.w ww.velodyne.com/lidar <strong>HDL</strong>-<strong>64E</strong> <strong>S2</strong> User’s Manual<br />
22