A-dec 500 12 O'Clock System
A-dec 500 12 O'Clock System
A-dec 500 12 O'Clock System
- No tags were found...

Create successful ePaper yourself
Turn your PDF publications into a flip-book with our unique Google optimized e-Paper software.
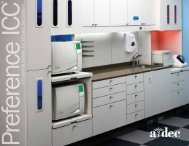
A-<strong>dec</strong> <strong>500</strong> <strong>12</strong> O’Clock <strong>System</strong> Installation Guide<br />
6. Insert the second set of worksurface<br />
screws. Tighten until the worksurface is<br />
secure.<br />
NOTE Do not overtighten the<br />
second set of worksurface screws,<br />
or the level may change.<br />
Attach Hub Mount Cover and Water<br />
Control Knobs<br />
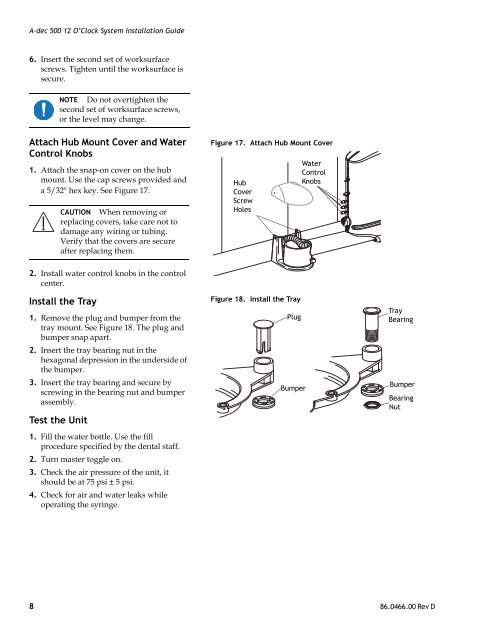
1. Attach the snap-on cover on the hub<br />
mount. Use the cap screws provided and<br />
a 5/32" hex key. See Figure 17.<br />
CAUTION When removing or<br />
replacing covers, take care not to<br />
damage any wiring or tubing.<br />
Verify that the covers are secure<br />
after replacing them.<br />
Figure 17. Attach Hub Mount Cover<br />
Hub<br />
Cover<br />
Screw<br />
Holes<br />
Water<br />
Control<br />
Knobs<br />
2. Install water control knobs in the control<br />
center.<br />
Install the Tray<br />
1. Remove the plug and bumper from the<br />
tray mount. See Figure 18. The plug and<br />
bumper snap apart.<br />
2. Insert the tray bearing nut in the<br />
hexagonal depression in the underside of<br />
the bumper.<br />
3. Insert the tray bearing and secure by<br />
screwing in the bearing nut and bumper<br />
assembly.<br />
Test the Unit<br />
1. Fill the water bottle. Use the fill<br />
procedure specified by the dental staff.<br />
2. Turn master toggle on.<br />
3. Check the air pressure of the unit, it<br />
should be at 75 psi ± 5 psi.<br />
4. Check for air and water leaks while<br />
operating the syringe.<br />
Figure 18. Install the Tray<br />
Plug<br />
Bumper<br />
Tray<br />
Bearing<br />
Bumper<br />
Bearing<br />
Nut<br />
8 86.0466.00 Rev D