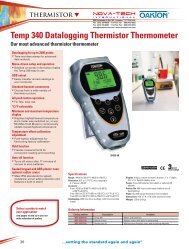
Conductivity Meter
Conductivity Meter
Conductivity Meter

You also want an ePaper? Increase the reach of your titles
YUMPU automatically turns print PDFs into web optimized ePapers that Google loves.
5.2<br />
Manual Temperature Compensation<br />
IMPORTANT: For manual compensation, you must deactivate the temperature<br />
probe.<br />
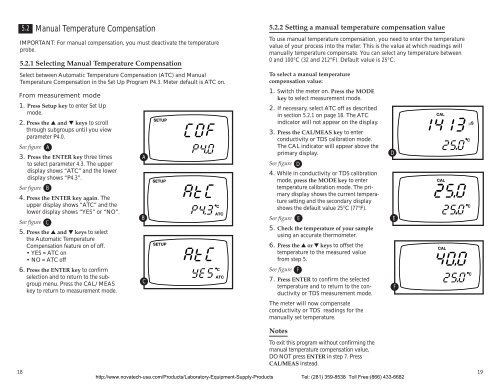
5.2.1 Selecting Manual Temperature Compensation<br />
Select between Automatic Temperature Compensation (ATC) and Manual<br />
Temperature Compensation in the Set Up Program P4.3. <strong>Meter</strong> default is ATC on.<br />
From measurement mode<br />
1. Press Setup key to enter Set Up<br />
mode.<br />
2. Press the ▲ and ▼ keys to scroll<br />
through subgroups until you view<br />
parameter P4.0.<br />
See figure A<br />
3. Press the ENTER key three times<br />
to select parameter 4.3. The upper<br />
display shows “ATC” and the lower<br />
display shows “P4.3”.<br />
See figure B<br />
4. Press the ENTER key again. The<br />
upper display shows “ATC” and the<br />
lower display shows “YES” or “NO”.<br />
See figure C<br />
5. Press the ▲ and ▼ keys to select<br />
the Automatic Temperature<br />
Compensation feature on of off.<br />
• YES = ATC on<br />
• NO = ATC off<br />
6. Press the ENTER key to confirm<br />
selection and to return to the subgroup<br />
menu. Press the CAL/MEAS<br />
key to return to measurement mode.<br />
A<br />
B<br />
C<br />
SETUP<br />
SETUP<br />
SETUP<br />
C<br />
ATC<br />
C<br />
ATC<br />
5.2.2 Setting a manual temperature compensation value<br />
To use manual temperature compensation, you need to enter the temperature<br />
value of your process into the meter. This is the value at which readings will<br />
manually temperature compensate. You can select any temperature between<br />
0 and 100°C (32 and 212°F). Default value is 25°C.<br />
To select a manual temperature<br />
compensation value:<br />
1. Switch the meter on. Press the MODE<br />
key to select measurement mode.<br />
2. If necessary, select ATC off as described<br />
in section 5.2.1 on page 18. The ATC<br />
indicator will not appear on the display.<br />
3. Press the CAL/MEAS key to enter<br />
conductivity or TDS calibration mode.<br />
The CAL indicator will appear above the<br />
primary display.<br />
See figure D<br />
4. While in conductivity or TDS calibration<br />
mode, press the MODE key to enter<br />
temperature calibration mode. The primary<br />
display shows the current temperature<br />
setting and the secondary display<br />
shows the default value 25°C (77°F).<br />
See figure E<br />
5. Check the temperature of your sample<br />
using an accurate thermometer.<br />
6. Press the ▲ or ▼ keys to offset the<br />
temperature to the measured value<br />
from step 5.<br />
See figure F<br />
7. Press ENTER to confirm the selected<br />
temperature and to return to the conductivity<br />
or TDS measurement mode.<br />
The meter will now compensate<br />
conductivity or TDS readings for the<br />
manually set temperature.<br />
D<br />
E<br />
F<br />
CAL<br />
CAL<br />
CAL<br />
C<br />
µS<br />
C<br />
C<br />
18<br />
Notes<br />
To exit this program without confirming the<br />
manual temperature compensation value,<br />
DO NOT press ENTER in step 7. Press<br />
CAL/MEAS instead.<br />
http://www.novatech-usa.com/Products/Laboratory-Equipment-Supply-Products Tel: (281) 359-8538 Toll Free:(866) 433-6682<br />
19