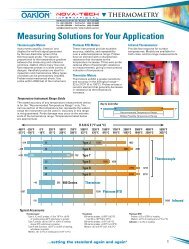
Conductivity Meter
Conductivity Meter
Conductivity Meter

Create successful ePaper yourself
Turn your PDF publications into a flip-book with our unique Google optimized e-Paper software.
7.4<br />
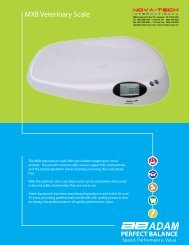
From measurement mode:<br />
1. Press the Set up key to enter Set Up<br />
mode.<br />
See figure A<br />
2. Press the ▲ and ▼ keys to scroll<br />
through subgroups until you view<br />
parameter P3.0.<br />
3. Press the ENTER key repeatedly to<br />
view the effective cell constant for each<br />
range.<br />
See figure B<br />
4. When you have scrolled through all<br />
probe data, you will automatically<br />
return to the subgroup menu. Press<br />
the CAL/MEAS key to return to<br />
measurement mode.<br />
Notes<br />
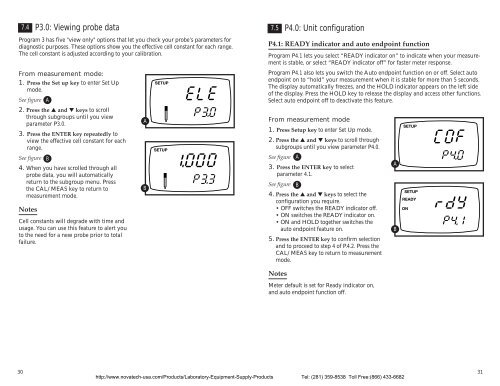
P3.0: Viewing probe data<br />
Program 3 has five "view only" options that let you check your probe’s parameters for<br />
diagnostic purposes. These options show you the effective cell constant for each range.<br />
The cell constant is adjusted according to your calibration.<br />
Cell constants will degrade with time and<br />
usage. You can use this feature to alert you<br />
to the need for a new probe prior to total<br />
failure.<br />
A<br />
B<br />
SETUP<br />
SETUP<br />
7.5<br />
P4.0: Unit configuration<br />
P4.1: READY indicator and auto endpoint function<br />
Program P4.1 lets you select “READY indicator on” to indicate when your measurement<br />
is stable, or select “READY indicator off” for faster meter response.<br />
Program P4.1 also lets you switch the Auto endpoint function on or off. Select auto<br />
endpoint on to “hold” your measurement when it is stable for more than 5 seconds.<br />
The display automatically freezes, and the HOLD indicator appears on the left side<br />
of the display. Press the HOLD key to release the display and access other functions.<br />
Select auto endpoint off to deactivate this feature.<br />
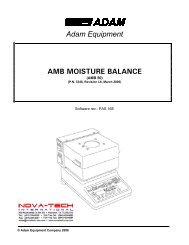
From measurement mode<br />
1. Press Setup key to enter Set Up mode.<br />
2. Press the ▲ and ▼ keys to scroll through<br />
subgroups until you view parameter P4.0.<br />
See figure A<br />
3. Press the ENTER key to select<br />
parameter 4.1.<br />
See figure B<br />
4. Press the ▲ and ▼ keys to select the<br />
configuration you require.<br />
• OFF switches the READY indicator off.<br />
• ON switches the READY indicator on.<br />
• ON and HOLD together switches the<br />
auto endpoint feature on.<br />
5. Press the ENTER key to confirm selection<br />
and to proceed to step 4 of P.4.2. Press the<br />
CAL/MEAS key to return to measurement<br />
mode.<br />
A<br />
B<br />
SETUP<br />
SETUP<br />
READY<br />
ON<br />
Notes<br />
<strong>Meter</strong> default is set for Ready indicator on,<br />
and auto endpoint function off.<br />
30<br />
http://www.novatech-usa.com/Products/Laboratory-Equipment-Supply-Products Tel: (281) 359-8538 Toll Free:(866) 433-6682<br />
31