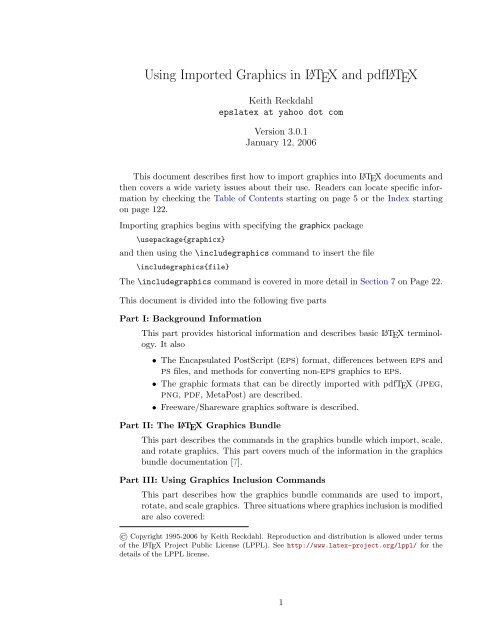
Using Imported Graphics in LaTeX and pdfLaTeX - Mirror
Using Imported Graphics in LaTeX and pdfLaTeX - Mirror
Using Imported Graphics in LaTeX and pdfLaTeX - Mirror

Create successful ePaper yourself
Turn your PDF publications into a flip-book with our unique Google optimized e-Paper software.
<strong>Us<strong>in</strong>g</strong> <strong>Imported</strong> <strong>Graphics</strong> <strong>in</strong> L A TEX <strong>and</strong> pdfL A TEX<br />
Keith Reckdahl<br />
epslatex at yahoo dot com<br />
Version 3.0.1<br />
January 12, 2006<br />
This document describes first how to import graphics <strong>in</strong>to L A TEX documents <strong>and</strong><br />
then covers a wide variety issues about their use. Readers can locate specific <strong>in</strong>formation<br />
by check<strong>in</strong>g the Table of Contents start<strong>in</strong>g on page 5 or the Index start<strong>in</strong>g<br />
on page 122.<br />
Import<strong>in</strong>g graphics beg<strong>in</strong>s with specify<strong>in</strong>g the graphicx package<br />
\usepackage{graphicx}<br />
<strong>and</strong> then us<strong>in</strong>g the \<strong>in</strong>cludegraphics comm<strong>and</strong> to <strong>in</strong>sert the file<br />
\<strong>in</strong>cludegraphics{file}<br />
The \<strong>in</strong>cludegraphics comm<strong>and</strong> is covered <strong>in</strong> more detail <strong>in</strong> Section 7 on Page 22.<br />
This document is divided <strong>in</strong>to the follow<strong>in</strong>g five parts<br />
Part I: Background Information<br />
This part provides historical <strong>in</strong>formation <strong>and</strong> describes basic L A TEX term<strong>in</strong>ology.<br />
It also<br />
• The Encapsulated PostScript (eps) format, differences between eps <strong>and</strong><br />
ps files, <strong>and</strong> methods for convert<strong>in</strong>g non-eps graphics to eps.<br />
• The graphic formats that can be directly imported with pdfTEX (jpeg,<br />
png, pdf, MetaPost) are described.<br />
• Freeware/Shareware graphics software is described.<br />
Part II: The L A TEX <strong>Graphics</strong> Bundle<br />
This part describes the comm<strong>and</strong>s <strong>in</strong> the graphics bundle which import, scale,<br />
<strong>and</strong> rotate graphics. This part covers much of the <strong>in</strong>formation <strong>in</strong> the graphics<br />
bundle documentation [7].<br />
Part III: <strong>Us<strong>in</strong>g</strong> <strong>Graphics</strong> Inclusion Comm<strong>and</strong>s<br />
This part describes how the graphics bundle comm<strong>and</strong>s are used to import,<br />
rotate, <strong>and</strong> scale graphics. Three situations where graphics <strong>in</strong>clusion is modified<br />
are also covered:<br />
© Copyright 1995-2006 by Keith Reckdahl. Reproduction <strong>and</strong> distribution is allowed under terms<br />
of the L A TEX Project Public License (LPPL). See http://www.latex-project.org/lppl/ for the<br />
details of the LPPL license.<br />
1
• Compressed eps files <strong>and</strong> non-eps graphic formats (tiff, gif, jpeg,<br />
pict, etc.) can also be <strong>in</strong>serted on-the-fly when dvips is used with an<br />
operat<strong>in</strong>g system which supports pipes (such as Unix). When us<strong>in</strong>g other<br />
operat<strong>in</strong>g systems, the non-eps graphics must be converted to eps beforeh<strong>and</strong>.<br />
S<strong>in</strong>ce neither L A TEX nor dvips has any built-<strong>in</strong> decompression or graphicsconversion<br />
capabilities, that software must be provided by the user.<br />
• S<strong>in</strong>ce many graphics applications support only ascii text, the psfrag<br />
system allows text <strong>in</strong> eps files to be replaced with L A TEX symbols or<br />
mathematical expressions.<br />
• When an eps graphic is <strong>in</strong>serted multiple times (such as a logo beh<strong>in</strong>d the<br />
text or <strong>in</strong> the page header) the f<strong>in</strong>al PostScript <strong>in</strong>cludes multiple copies<br />
of the graphics. When the graphics are not bitmapped, a smaller f<strong>in</strong>al<br />
PostScript file can be obta<strong>in</strong>ed by def<strong>in</strong><strong>in</strong>g a PostScript comm<strong>and</strong> for the<br />
graphics.<br />
Part IV: The figure Environment<br />
There are several advantages to plac<strong>in</strong>g graphics <strong>in</strong> figure environments. Figure<br />
environments automatically number graphics, allow<strong>in</strong>g them to be referenced<br />
or <strong>in</strong>cluded <strong>in</strong> a table of contents. S<strong>in</strong>ce the figures can float to avoid poor<br />
page breaks, it is much easier to produce a professional-look<strong>in</strong>g document.<br />
In addition to general <strong>in</strong>formation about the figure environment, this section<br />
describes the follow<strong>in</strong>g figure-related topics:<br />
• How to customize the figure environment, such as adjust<strong>in</strong>g figure placement,<br />
figure spac<strong>in</strong>g, caption spac<strong>in</strong>g, <strong>and</strong> add<strong>in</strong>g horizontal l<strong>in</strong>e between<br />
the figure <strong>and</strong> the text. Caption formatt<strong>in</strong>g can also be customized, allow<strong>in</strong>g<br />
users to modify the style, width, <strong>and</strong> font of captions.<br />
• How to create marg<strong>in</strong>al figures <strong>and</strong> wide figures which extend <strong>in</strong>to the<br />
marg<strong>in</strong>s.<br />
• How to produce figures with l<strong>and</strong>scape orientation <strong>in</strong> a portrait document.<br />
• How to place captions beside the figure <strong>in</strong>stead of below or above the<br />
figure.<br />
• For two-sided documents, how to ensure that a figure appears on an odd<br />
or even page. Also, how to ensure that two figures appear on fac<strong>in</strong>g pages.<br />
• How to create boxed figures.<br />
Part V: Complex Figures<br />
This part describes how to construct complex figures that conta<strong>in</strong> multiple<br />
graphics.<br />
• How to form side-by-side graphics, side-by-side figures, <strong>and</strong> side-by-side<br />
subfigures.<br />
• How to place a table next to a figure <strong>in</strong> the same float.<br />
• How to stack multiple rows of figures.<br />
• How to construct cont<strong>in</strong>ued figures which can span multiple pages.<br />
2
Where to Get this Document<br />
This document is available <strong>in</strong> pdf <strong>and</strong> PostScript form as<br />
CTAN/<strong>in</strong>fo/epslatex/english/epslatex.ps<br />
CTAN/<strong>in</strong>fo/epslatex/english/epslatex.pdf<br />
where CTAN can be replaced by any of the follow<strong>in</strong>g ctan (Comprehensive TEX<br />
Archive Network) sites <strong>and</strong> mirrors<br />
Engl<strong>and</strong><br />
Germany<br />
Denmark<br />
France<br />
Russia<br />
Vermont, USA<br />
Florida, USA<br />
Utah, USA<br />
Korea<br />
Japan<br />
Hong Kong<br />
S<strong>in</strong>gapore<br />
New Zeal<strong>and</strong><br />
Australia<br />
India<br />
South Africa<br />
Brazil<br />
ftp://ftp.tex.ac.uk/tex-archive/<br />
ftp://ftp.dante.de/tex-archive/<br />
ftp://tug.org/tex-archive<br />
ftp://ftp.loria.fr/pub/ctan<br />
ftp://ftp.chg.ru/pub/TeX/CTAN<br />
ftp://ctan.tug.org/tex-archive/<br />
ftp://ftp.cise.ufl.edu/pub/mirrors/tex-archive/<br />
ftp://ctan.math.utah.edu/tex-archive/<br />
ftp://ftp.ktug.or.kr/tex-archive/<br />
ftp://ftp.riken.go.jp/pub/tex-archive/<br />
ftp://ftp.comp.hkbu.edu.hk/pub/TeX/CTAN/<br />
ftp://ftp.nus.edu.sg/pub/docs/TeX/<br />
ftp://elena.aut.ac.nz/pub/CTAN<br />
ftp://ctan.unsw.edu.au/tex-archive/<br />
http://mirror.gnowledge.org/ctan/<br />
ftp://ftp.sun.ac.za/CTAN/<br />
ftp://ftp.das.ufsc.br/pub/ctan/<br />
A complete list of ctan mirrors can be obta<strong>in</strong>ed from the CTAN.sites file at any<br />
ctan site.<br />
Jean-Pierre Drucbert’s French translation of Version 2.0 of this document is available<br />
<strong>in</strong> pdf <strong>and</strong> PostScript as<br />
CTAN/<strong>in</strong>fo/epslatex/french/fepslatex.pdf<br />
CTAN/<strong>in</strong>fo/epslatex/french/fepslatex.ps<br />
Acknowledgments<br />
I would like to thank David Carlisle for provid<strong>in</strong>g a great deal of assistance with<br />
this document. Donald Arseneau, Rob<strong>in</strong> Fairbairns, Jim Hafner, Piet van Oostrum,<br />
Rolf Niepraschk, Axel Sommerfeldt, <strong>and</strong> other contributors to the comp.text.tex<br />
newsgroup provided much of the <strong>in</strong>formation for this document. Thanks to Jean-<br />
Pierre Drucbert for translat<strong>in</strong>g this document <strong>in</strong>to French.<br />
Thanks also goes to the many other people who provided me with valuable suggestions<br />
<strong>and</strong> bug reports for this document.<br />
3
To my charm<strong>in</strong>g wife Becky,<br />
<strong>and</strong> to Elise <strong>and</strong> Eric,<br />
two wonderful kids who have disrupted <strong>and</strong> enriched my life<br />
more than I ever could have imag<strong>in</strong>ed.<br />
4
Contents<br />
I Background Information 9<br />
1 Introduction 9<br />
2 L A TEX Term<strong>in</strong>ology 10<br />
3 Encapsulated PostScript 11<br />
3.1 Forbidden PostScript Operators . . . . . . . . . . . . . . . . . . . . . . 12<br />
3.2 The EPS Bound<strong>in</strong>gBox . . . . . . . . . . . . . . . . . . . . . . . . . . 12<br />
3.3 Convert<strong>in</strong>g PS files to EPS . . . . . . . . . . . . . . . . . . . . . . . . 13<br />
3.4 Fix<strong>in</strong>g Non-st<strong>and</strong>ard EPS files . . . . . . . . . . . . . . . . . . . . . . 14<br />
4 How EPS Files are Used by L A TEX 14<br />
4.1 L<strong>in</strong>e Buffer Overflow . . . . . . . . . . . . . . . . . . . . . . . . . . . . 14<br />
5 PDF <strong>Graphics</strong> 15<br />
5.1 JPEG . . . . . . . . . . . . . . . . . . . . . . . . . . . . . . . . . . . . 15<br />
5.2 PNG . . . . . . . . . . . . . . . . . . . . . . . . . . . . . . . . . . . . . 16<br />
5.3 PDF . . . . . . . . . . . . . . . . . . . . . . . . . . . . . . . . . . . . . 16<br />
5.4 MetaPost . . . . . . . . . . . . . . . . . . . . . . . . . . . . . . . . . . 16<br />
5.5 PurifyEPS . . . . . . . . . . . . . . . . . . . . . . . . . . . . . . . . . . 17<br />
6 <strong>Graphics</strong> Software 17<br />
6.1 Ghostscript . . . . . . . . . . . . . . . . . . . . . . . . . . . . . . . . . 17<br />
6.2 <strong>Graphics</strong>-Conversion Programs . . . . . . . . . . . . . . . . . . . . . . 17<br />
6.3 Level 2 EPS Wrappers . . . . . . . . . . . . . . . . . . . . . . . . . . . 20<br />
6.4 Edit<strong>in</strong>g PostScript . . . . . . . . . . . . . . . . . . . . . . . . . . . . . 21<br />
II The L A TEX <strong>Graphics</strong> Bundle 22<br />
7 <strong>Graphics</strong> Inclusion 22<br />
7.1 <strong>Graphics</strong> Driver . . . . . . . . . . . . . . . . . . . . . . . . . . . . . . . 22<br />
7.2 <strong>Graphics</strong> Inclusion for DVIPS-style Documents . . . . . . . . . . . . . 22<br />
7.3 <strong>Graphics</strong> Inclusion for pdfL A TEX Documents . . . . . . . . . . . . . . . 23<br />
7.4 Documents to be Processed by both L A TEX <strong>and</strong> pdfL A TEX . . . . . . . 23<br />
7.5 Specify<strong>in</strong>g Width, Height, or Angle . . . . . . . . . . . . . . . . . . . . 24<br />
8 Rotat<strong>in</strong>g <strong>and</strong> Scal<strong>in</strong>g Objects 27<br />
8.1 The scalebox Comm<strong>and</strong> . . . . . . . . . . . . . . . . . . . . . . . . . . 27<br />
8.2 The resizebox Comm<strong>and</strong>s . . . . . . . . . . . . . . . . . . . . . . . . . 27<br />
8.3 The rotatebox Comm<strong>and</strong> . . . . . . . . . . . . . . . . . . . . . . . . . 28<br />
9 Advanced <strong>Graphics</strong>-Inclusion Comm<strong>and</strong>s 29<br />
9.1 The Declare<strong>Graphics</strong>Extensions Comm<strong>and</strong> . . . . . . . . . . . . . . . 29<br />
9.2 The Declare<strong>Graphics</strong>Rule Comm<strong>and</strong> . . . . . . . . . . . . . . . . . . . 30<br />
5
III <strong>Us<strong>in</strong>g</strong> <strong>Graphics</strong>-Inclusion Comm<strong>and</strong>s 32<br />
10 Horizontal Spac<strong>in</strong>g <strong>and</strong> Center<strong>in</strong>g 32<br />
10.1 Horizontal Center<strong>in</strong>g . . . . . . . . . . . . . . . . . . . . . . . . . . . . 32<br />
10.2 Horizontal Spac<strong>in</strong>g . . . . . . . . . . . . . . . . . . . . . . . . . . . . . 32<br />
11 Rotation, Scal<strong>in</strong>g, <strong>and</strong> Alignment 33<br />
11.1 Difference Between Height <strong>and</strong> Totalheight . . . . . . . . . . . . . . . 33<br />
11.2 Scal<strong>in</strong>g of Rotated <strong>Graphics</strong> . . . . . . . . . . . . . . . . . . . . . . . . 33<br />
11.3 Alignment of Rotated <strong>Graphics</strong> . . . . . . . . . . . . . . . . . . . . . . 34<br />
11.4 M<strong>in</strong>ipage Vertical Alignment . . . . . . . . . . . . . . . . . . . . . . . 36<br />
12 Overlay<strong>in</strong>g Two <strong>Imported</strong> <strong>Graphics</strong> 38<br />
12.1 Overpic Package . . . . . . . . . . . . . . . . . . . . . . . . . . . . . . 39<br />
13 <strong>Us<strong>in</strong>g</strong> Subdirectories 39<br />
13.1 TEX Search Path . . . . . . . . . . . . . . . . . . . . . . . . . . . . . . 39<br />
13.2 Temporarily Chang<strong>in</strong>g the TEX Search Path . . . . . . . . . . . . . . . 40<br />
13.3 <strong>Graphics</strong> Search Path . . . . . . . . . . . . . . . . . . . . . . . . . . . 40<br />
13.4 Conserv<strong>in</strong>g Pool Space . . . . . . . . . . . . . . . . . . . . . . . . . . . 41<br />
14 Compressed <strong>and</strong> Non-EPS <strong>Graphics</strong> Files <strong>in</strong> dvips 42<br />
14.1 Compressed EPS Example . . . . . . . . . . . . . . . . . . . . . . . . . 43<br />
14.2 Non-EPS Graphic Files . . . . . . . . . . . . . . . . . . . . . . . . . . 43<br />
14.3 GIF Example . . . . . . . . . . . . . . . . . . . . . . . . . . . . . . . . 44<br />
14.4 TEX Search Path <strong>and</strong> dvips . . . . . . . . . . . . . . . . . . . . . . . . 44<br />
15 The PSfrag Package 45<br />
15.1 PSfrag Example #1 . . . . . . . . . . . . . . . . . . . . . . . . . . . . 46<br />
15.2 PSfrag Example #2 . . . . . . . . . . . . . . . . . . . . . . . . . . . . 47<br />
15.3 L A TEX Text <strong>in</strong> EPS File . . . . . . . . . . . . . . . . . . . . . . . . . . 48<br />
15.4 Figure <strong>and</strong> Text Scal<strong>in</strong>g with PSfrag . . . . . . . . . . . . . . . . . . . 48<br />
15.5 PSfrag <strong>and</strong> PDFTEX . . . . . . . . . . . . . . . . . . . . . . . . . . . . 48<br />
16 Includ<strong>in</strong>g An EPS File Multiple Times 49<br />
16.1 Def<strong>in</strong><strong>in</strong>g a PostScript Comm<strong>and</strong> . . . . . . . . . . . . . . . . . . . . . 50<br />
16.2 <strong>Graphics</strong> <strong>in</strong> Page Header or Footer . . . . . . . . . . . . . . . . . . . . 52<br />
16.3 Watermark <strong>Graphics</strong> <strong>in</strong> Background . . . . . . . . . . . . . . . . . . . 53<br />
IV The Figure Environment 55<br />
17 The Figure Environment 55<br />
17.1 Creat<strong>in</strong>g Float<strong>in</strong>g Figures . . . . . . . . . . . . . . . . . . . . . . . . . 56<br />
17.2 Figure Placement . . . . . . . . . . . . . . . . . . . . . . . . . . . . . . 58<br />
17.3 Clear<strong>in</strong>g Unprocessed Floats . . . . . . . . . . . . . . . . . . . . . . . . 59<br />
17.4 Too Many Unprocessed Floats . . . . . . . . . . . . . . . . . . . . . . 60<br />
18 Customiz<strong>in</strong>g Float Placement 61<br />
18.1 Float Placement Counters . . . . . . . . . . . . . . . . . . . . . . . . . 61<br />
18.2 Figure Fractions . . . . . . . . . . . . . . . . . . . . . . . . . . . . . . 61<br />
18.3 Suppress<strong>in</strong>g Floats . . . . . . . . . . . . . . . . . . . . . . . . . . . . . 63<br />
6
19 Customiz<strong>in</strong>g the figure Environment 64<br />
19.1 Figure Spac<strong>in</strong>g . . . . . . . . . . . . . . . . . . . . . . . . . . . . . . . 64<br />
19.2 Horizontal L<strong>in</strong>es Above/Below Figure . . . . . . . . . . . . . . . . . . 65<br />
19.3 Caption Vertical Spac<strong>in</strong>g . . . . . . . . . . . . . . . . . . . . . . . . . . 66<br />
19.4 Caption Label . . . . . . . . . . . . . . . . . . . . . . . . . . . . . . . . 67<br />
19.5 Caption Number<strong>in</strong>g . . . . . . . . . . . . . . . . . . . . . . . . . . . . 67<br />
19.6 Mov<strong>in</strong>g Figures to End of Document . . . . . . . . . . . . . . . . . . . 68<br />
19.7 Adjust<strong>in</strong>g Caption L<strong>in</strong>espac<strong>in</strong>g . . . . . . . . . . . . . . . . . . . . . . 68<br />
20 Customiz<strong>in</strong>g Captions with caption package 69<br />
20.1 Caption Package Overview . . . . . . . . . . . . . . . . . . . . . . . . . 69<br />
20.2 Caption Comm<strong>and</strong>s . . . . . . . . . . . . . . . . . . . . . . . . . . . . 70<br />
20.3 Customiz<strong>in</strong>g Captions with Caption Comm<strong>and</strong> . . . . . . . . . . . . . 70<br />
20.4 Caption Package Examples . . . . . . . . . . . . . . . . . . . . . . . . 76<br />
20.5 Further Customization . . . . . . . . . . . . . . . . . . . . . . . . . . . 84<br />
21 Non-Float<strong>in</strong>g Figures 87<br />
21.1 Non-float<strong>in</strong>g Figures without the caption package . . . . . . . . . . . . 88<br />
21.2 The float Package’s [H] Placement Option . . . . . . . . . . . . . . . . 88<br />
22 Marg<strong>in</strong>al Figures 89<br />
23 Wide Figures 90<br />
23.1 Wide Figures <strong>in</strong> One-sided Documents . . . . . . . . . . . . . . . . . . 90<br />
23.2 Wide Figures <strong>in</strong> Two-sided Documents . . . . . . . . . . . . . . . . . . 91<br />
24 L<strong>and</strong>scape Figures 91<br />
24.1 L<strong>and</strong>scape Environment . . . . . . . . . . . . . . . . . . . . . . . . . . 92<br />
24.2 Sidewaysfigure Environment . . . . . . . . . . . . . . . . . . . . . . . . 92<br />
24.3 Rotcaption Comm<strong>and</strong> . . . . . . . . . . . . . . . . . . . . . . . . . . . 94<br />
25 Captions Beside Figures 94<br />
25.1 The Sidecap Package . . . . . . . . . . . . . . . . . . . . . . . . . . . . 95<br />
25.2 Side Captions without Sidecap . . . . . . . . . . . . . . . . . . . . . . 96<br />
26 Figures on Even or Odd Pages 97<br />
26.1 Figures on Fac<strong>in</strong>g Pages . . . . . . . . . . . . . . . . . . . . . . . . . . 98<br />
27 Boxed Figures 99<br />
27.1 Box Around Graphic . . . . . . . . . . . . . . . . . . . . . . . . . . . . 99<br />
27.2 Box Around Figure <strong>and</strong> Caption . . . . . . . . . . . . . . . . . . . . . 99<br />
27.3 Customiz<strong>in</strong>g fbox Parameters . . . . . . . . . . . . . . . . . . . . . . . 101<br />
27.4 The Fancybox Package . . . . . . . . . . . . . . . . . . . . . . . . . . . 101<br />
V Complex Figures 104<br />
28 Side-by-Side <strong>Graphics</strong> 104<br />
28.1 Side-by-Side <strong>Graphics</strong> <strong>in</strong> a S<strong>in</strong>gle Figure . . . . . . . . . . . . . . . . . 104<br />
28.2 Side-by-Side Figures . . . . . . . . . . . . . . . . . . . . . . . . . . . . 105<br />
28.3 Side-by-Side Subfigures . . . . . . . . . . . . . . . . . . . . . . . . . . 106<br />
7
29 Separate M<strong>in</strong>ipages for Captions 108<br />
30 Plac<strong>in</strong>g a Table Beside a Figure 109<br />
31 Stacked Figures <strong>and</strong> Subfigures 110<br />
31.1 Stacked Figures . . . . . . . . . . . . . . . . . . . . . . . . . . . . . . . 110<br />
31.2 Stacked Subfigures . . . . . . . . . . . . . . . . . . . . . . . . . . . . . 111<br />
32 The subfig package 113<br />
32.1 The Subfloat Comm<strong>and</strong> . . . . . . . . . . . . . . . . . . . . . . . . . . 113<br />
32.2 Customiz<strong>in</strong>g subfig with captionsetup Comm<strong>and</strong> . . . . . . . . . . . . 113<br />
32.3 The Cont<strong>in</strong>uedFloat Comm<strong>and</strong> . . . . . . . . . . . . . . . . . . . . . . 114<br />
33 Cont<strong>in</strong>ued Figures <strong>and</strong> Subfigures 116<br />
33.1 Cont<strong>in</strong>ued Figures . . . . . . . . . . . . . . . . . . . . . . . . . . . . . 116<br />
33.2 Cont<strong>in</strong>ued Subfigures . . . . . . . . . . . . . . . . . . . . . . . . . . . . 116<br />
References 120<br />
Index 122<br />
8
Part I<br />
Background Information<br />
1 Introduction<br />
History<br />
L A TEX<br />
<strong>Graphics</strong><br />
Bundle<br />
When TEX was written, PostScript/eps, jpeg, gif, <strong>and</strong> other graphic formats did<br />
not exist. As a result, Knuth’s dvi format does not have direct support for imported<br />
graphics. However, TEX allows dvi files to conta<strong>in</strong> \special comm<strong>and</strong>s which pass<br />
comm<strong>and</strong>s to programs which use dvi files. This allowed TEX <strong>and</strong> L A TEX to import<br />
any graphic format which is supported by the dvi program be<strong>in</strong>g used.<br />
For many years, dvi files were usually converted to PostScript <strong>and</strong> the st<strong>and</strong>ard<br />
imported-graphic format was Encapsulated PostScript (eps), which is a subset of<br />
the PostScript language. Insert<strong>in</strong>g eps graphics <strong>in</strong> L A TEX orig<strong>in</strong>ally required the<br />
low-level \special comm<strong>and</strong>. To make graphic-<strong>in</strong>sertion easier <strong>and</strong> more portable,<br />
two higher-level packages epsf <strong>and</strong> psfig were written for L A TEX2.09. In epsf, the<br />
graphics <strong>in</strong>sertion was done by the \epsfbox comm<strong>and</strong>, while three other comm<strong>and</strong>s<br />
controlled graphic scal<strong>in</strong>g. In psfig, the \psfig comm<strong>and</strong> not only <strong>in</strong>serted graphics,<br />
it also scaled <strong>and</strong> rotated them. While the psfig syntax was popular, its code was not<br />
as robust as epsf. As a result, the epsfig package was created as a hybrid of the two<br />
graphics packages, with its \epsfig comm<strong>and</strong> us<strong>in</strong>g the \psfig syntax <strong>and</strong> much<br />
of the more-robust \epsfbox code. Unfortunately, \epsfig still used some of the<br />
less-robust \psfig code.<br />
With the release of L A TEX 2ε <strong>in</strong> 1994, the L A TEX3 team addressed the general<br />
problem of <strong>in</strong>sert<strong>in</strong>g graphics <strong>in</strong> L A TEX. Their efforts produced the “L A TEX graphics<br />
bundle 1 which conta<strong>in</strong>s totally re-written comm<strong>and</strong>s that are more efficient, more<br />
robust, <strong>and</strong> more portable than other graphics-<strong>in</strong>sertion comm<strong>and</strong>s.<br />
The graphics bundle conta<strong>in</strong>s the “st<strong>and</strong>ard” graphics package <strong>and</strong> the “extended”<br />
graphicx package. While both packages conta<strong>in</strong> an \<strong>in</strong>cludegraphics comm<strong>and</strong>,<br />
the packages conta<strong>in</strong> different versions of \<strong>in</strong>cludegraphics. The graphicx version<br />
uses “named arguments” (similar to the \psfig syntax) which, although convenient,<br />
violate the L A TEX syntax guidel<strong>in</strong>es which require that optional arguments be positional.<br />
As a compromise, two versions of \<strong>in</strong>cludegraphics were written, with<br />
the graphics package follow<strong>in</strong>g the L A TEX syntax guidel<strong>in</strong>es <strong>and</strong> the graphicx package<br />
us<strong>in</strong>g the more-convenient named arguments. The graphicx \<strong>in</strong>cludegraphics supports<br />
scal<strong>in</strong>g <strong>and</strong> rotat<strong>in</strong>g, but the graphics \<strong>in</strong>cludegraphics comm<strong>and</strong> must be<br />
nested <strong>in</strong>side \rotatebox or \scalebox comm<strong>and</strong>s to produce rotat<strong>in</strong>g or scal<strong>in</strong>g.<br />
This document uses the graphicx package because its syntax is more convenient<br />
than the graphics syntax. S<strong>in</strong>ce both packages have the same capabilities, the examples<br />
<strong>in</strong> this document can also be performed with the graphics package, although the<br />
result<strong>in</strong>g syntax may be more cumbersome <strong>and</strong> slightly less efficient. For a moredetailed<br />
description of the packages, see the graphics bundle documentation [7].<br />
For backward-compatibility, the graphics bundle also <strong>in</strong>cludes the epsfig package<br />
which replaces the orig<strong>in</strong>al L A TEX 2ε epsfig package. The new epsfig package def<strong>in</strong>es<br />
the \epsfbox, \psfig, <strong>and</strong> \epsfig comm<strong>and</strong>s as wrappers which simply call<br />
the \<strong>in</strong>cludegraphics comm<strong>and</strong>. S<strong>in</strong>ce these wrappers are less efficient than the<br />
straight \<strong>in</strong>cludegraphics comm<strong>and</strong>, the wrapped packaged should be used only<br />
1 Note that there is a pla<strong>in</strong> TEX version of the L A TEX graphics bundle. See the files <strong>in</strong> the directory<br />
CTAN/macros/pla<strong>in</strong>/graphics/<br />
9
Non-EPS<br />
<strong>Graphics</strong><br />
pdfTEX<br />
pdfTEX <strong>and</strong><br />
<strong>Graphics</strong><br />
for old documents, with \<strong>in</strong>cludegraphics used for all new documents.<br />
In addition to improv<strong>in</strong>g eps graphics-<strong>in</strong>clusion, the L A TEX graphics bundle also<br />
addressed the problem of <strong>in</strong>clud<strong>in</strong>g non-eps graphic formats such as jpeg <strong>and</strong> gif.<br />
S<strong>in</strong>ce dvi-to-ps converters generally did not support direct <strong>in</strong>clusion of most non-eps<br />
formats, <strong>in</strong>sert<strong>in</strong>g these graphics <strong>in</strong>to PostScript documents required the graphics to<br />
be converted <strong>in</strong>to eps ahead of time. While this ahead-of-time conversion is usually<br />
still the best approach, the graphics bundle provided another option: on-the-fly<br />
graphics conversion by the dvi-to-ps converter. Section 6.2 on Page 17 describes<br />
graphics-conversion programs while Section 14 on Page 42 describes how to use noneps<br />
graphics with dvi-to-ps converters.<br />
When PostScript was the conventional f<strong>in</strong>al format for L A TEX documents, the<br />
process was a two-step procedure: (1) L A TEX was used to create a dvi file, <strong>and</strong> (2) a<br />
dvi-to-ps processor (such as dvips) was used to create a PostScript file. The advent<br />
<strong>and</strong> subsequent popularity of Adobe’s pdf format <strong>in</strong>itially added a third step to the<br />
conventional process: (3) a tool such as Ghostscript 2 , Adobe Acrobat 3 , or PStill 4<br />
was used to convert the PostScript file to pdf.<br />
However, not only was this three-step L A TEX-dvips-ghostscript process cumbersome,<br />
it made certa<strong>in</strong> pdf features such as hyperl<strong>in</strong>ks difficult to implement. To<br />
correct this, Hàn Thê´ Thành wrote a tool called TEX2pdf which modified the TEX<br />
eng<strong>in</strong>e to produce pdf files directly from TEX. TEX2pdf was eventually renamed<br />
pdfTEX <strong>and</strong>, with the help of many volunteers (<strong>and</strong> the bless<strong>in</strong>g of Donald Knuth),<br />
was extended to implement the full typesett<strong>in</strong>g capabilities of TEX. While pdfTEX<br />
nom<strong>in</strong>ally outputs pdf, it also has the capability of outputt<strong>in</strong>g the same dvi that<br />
would be produced by TEX.<br />
Just as the latex comm<strong>and</strong> uses TEX to process L A TEX documents <strong>in</strong>to dvi files,<br />
the comm<strong>and</strong> pdflatex uses pdfTEX to process L A TEX documents directly <strong>in</strong>to pdf<br />
files.<br />
An important aspect of pdfTEX is its native <strong>in</strong>clusion of a variety of graphics<br />
formats: jpeg, png, pdf, MetaPost. Although older versions of pdfTEX supported<br />
native <strong>in</strong>clusion of tiff files, the current version of pdfTEX does not support tiff.<br />
Also note that pdfTEX cannot not directly import eps files 5 , which requires users<br />
with eps files to use a program like epstopdf which converts eps files to pdf format,<br />
although this prevents the direct use of psfrag (see Section 15 on Page 45).<br />
2 L A TEX Term<strong>in</strong>ology<br />
A box is any L A TEX object (characters, graphics, etc.) that is treated as a unit (see<br />
[1, page 103]). Each box has a reference po<strong>in</strong>t on its left side. The box’s basel<strong>in</strong>e<br />
is a horizontal l<strong>in</strong>e which passes through the reference po<strong>in</strong>t (see Figure 1). When<br />
L A TEX forms l<strong>in</strong>es of text, characters are placed left-to-right with their reference<br />
po<strong>in</strong>ts aligned on a horizontal l<strong>in</strong>e called the current basel<strong>in</strong>e, align<strong>in</strong>g the characters’<br />
basel<strong>in</strong>es with the current basel<strong>in</strong>e. L A TEX follows the same process for typesett<strong>in</strong>g<br />
graphics or other objects; the reference po<strong>in</strong>t of each object is placed on the current<br />
basel<strong>in</strong>e.<br />
2 Free software, see Section 6.1 on Page 17.<br />
3 Commercial software, see www.adobe.com<br />
4 Shareware, see www.pstill.com<br />
5 pdfTEX can directly import eps files processed by PurifyEPS, see Section 5.5 on Page 17.<br />
10
width<br />
totalheight<br />
height<br />
Reference<br />
Po<strong>in</strong>t<br />
depth<br />
Basel<strong>in</strong>e<br />
Figure 1: Sample L A TEX Box<br />
The size of each box is described by three lengths: height, depth, width. The<br />
height is the distance from the reference po<strong>in</strong>t to the top of the box. The depth is<br />
the distance from the reference po<strong>in</strong>t to the bottom of the box. The width is the<br />
width of the box. The totalheight is def<strong>in</strong>ed as the distance from the bottom of the<br />
box to the top of the box, or totalheight=height+depth.<br />
The reference po<strong>in</strong>t of a non-rotated eps graphic is its lower-left corner (see left<br />
box <strong>in</strong> Figure 2), giv<strong>in</strong>g it zero depth <strong>and</strong> mak<strong>in</strong>g its totalheight equal its height.<br />
The middle box <strong>in</strong> Figure 2 shows a rotated graphic where the height is not equal to<br />
the totalheight. The right box <strong>in</strong> Figure 2 shows a rotated graphic where the height<br />
is zero.<br />
width<br />
width<br />
height<br />
<strong>Graphics</strong><br />
height<br />
width<br />
<strong>Graphics</strong><br />
Reference<br />
Po<strong>in</strong>t<br />
depth<br />
depth<br />
<strong>Graphics</strong><br />
Figure 2: Rotated L A TEX Boxes<br />
3 Encapsulated PostScript<br />
The PostScript language describes both graphics <strong>and</strong> text. The PostScript language<br />
is used <strong>in</strong> conventional PostScript (ps) files to describe multiple-page documents<br />
<strong>and</strong> also <strong>in</strong> Encapsulated PostScript (eps) files to describe graphics for <strong>in</strong>sertion<br />
<strong>in</strong>to documents. There are two ma<strong>in</strong> differences between ps <strong>and</strong> eps files<br />
• eps files can conta<strong>in</strong> only certa<strong>in</strong> PostScript operators.<br />
11
• eps files must conta<strong>in</strong> a Bound<strong>in</strong>gBox l<strong>in</strong>e which specifies the size of the eps<br />
graphic.<br />
3.1 Forbidden PostScript Operators<br />
S<strong>in</strong>ce eps graphics must share the page with other objects, the comm<strong>and</strong>s <strong>in</strong> an eps<br />
file cannot perform page operations such as select<strong>in</strong>g a page size (such as letter or<br />
a4) or eras<strong>in</strong>g the entire page with erasepage. The follow<strong>in</strong>g PostScript operators<br />
are not allowed <strong>in</strong> eps files:<br />
a3 a4 a5 b<strong>and</strong>device clear<br />
cleardictstack copypage erasepage exitserver framedevice<br />
grestoreall <strong>in</strong>itclip <strong>in</strong>itgraphics <strong>in</strong>itmatrix letter<br />
legal note prenderb<strong>and</strong>s quit renderb<strong>and</strong>s<br />
setdevice setglobal setpagedevice setpageparams setsccbatch<br />
setshared startjob stop<br />
Although the follow<strong>in</strong>g PostScript operators can be used <strong>in</strong> eps files, they may cause<br />
problems if not used properly.<br />
nulldevice setcolortransfer setgstate sethalftone<br />
setmatrix setscreen settransfer undef<strong>in</strong>edfont<br />
Some of the above operators may cause the dvi-to-ps process to fail, while others<br />
may cause strange problems such as graphics which are misplaced, <strong>in</strong>visible, or flash<br />
on the screen. S<strong>in</strong>ce many of these operators do not affect the PostScript stack,<br />
such problems can often be elim<strong>in</strong>ated by simply delet<strong>in</strong>g the offend<strong>in</strong>g PostScript<br />
operator. Other cases may require complicated hack<strong>in</strong>g of the PostScript code.<br />
3.2 The EPS Bound<strong>in</strong>gBox<br />
By convention, the first l<strong>in</strong>e of a PostScript file specifies the type of PostScript<br />
<strong>and</strong> is then followed by a series of comments called the header or preamble. (Like<br />
L A TEX, PostScript’s comment character is %). One of these comments specifies the<br />
Bound<strong>in</strong>gBox. The Bound<strong>in</strong>gBox l<strong>in</strong>e conta<strong>in</strong>s four <strong>in</strong>tegers<br />
1. The x-coord<strong>in</strong>ate of the lower-left corner of the Bound<strong>in</strong>gBox.<br />
2. The y-coord<strong>in</strong>ate of the lower-left corner of the Bound<strong>in</strong>gBox.<br />
3. The x-coord<strong>in</strong>ate of the upper-right corner of the Bound<strong>in</strong>gBox.<br />
4. The y-coord<strong>in</strong>ate of the upper-right corner of the Bound<strong>in</strong>gBox.<br />
For example, the first 5 l<strong>in</strong>es of an eps file created by gnuplot are<br />
%!PS-Adobe-2.0 EPSF-2.0<br />
%%Creator: gnuplot<br />
%%DocumentFonts: Times-Roman<br />
%%Bound<strong>in</strong>gBox: 50 50 410 302<br />
%%EndComments<br />
Thus the gnuplot eps graphic has a lower-left corner with coord<strong>in</strong>ates (50, 50) <strong>and</strong><br />
an upper-right corner with coord<strong>in</strong>ates (410, 302). The Bound<strong>in</strong>gBox parameters<br />
have units of PostScript po<strong>in</strong>ts which are 1 / 72 of an <strong>in</strong>ch, mak<strong>in</strong>g the above graphic’s<br />
natural width 5 <strong>in</strong>ches <strong>and</strong> its natural height 3.5 <strong>in</strong>ches. Note that a PostScript po<strong>in</strong>t<br />
is is slightly larger than a TEX po<strong>in</strong>t, which is 1 / 72.27 of an <strong>in</strong>ch. In TEX <strong>and</strong> L A TEX,<br />
PostScript po<strong>in</strong>ts are called “big po<strong>in</strong>ts” <strong>and</strong> abbreviated bp while TEX po<strong>in</strong>ts are<br />
called “po<strong>in</strong>ts” <strong>and</strong> abbreviated pt.<br />
12
3.3 Convert<strong>in</strong>g PS files to EPS<br />
S<strong>in</strong>gle-page PostScript files without any improper comm<strong>and</strong>s can be converted to<br />
eps by us<strong>in</strong>g one of the follow<strong>in</strong>g methods for add<strong>in</strong>g a Bound<strong>in</strong>gBox l<strong>in</strong>e. S<strong>in</strong>ce<br />
these methods do not check for illegal PostScript operators, they do not<br />
produce usable EPS files unless the PS files are free of forbidden operators.<br />
1. The most convenient option is to use the ps2epsi utility distributed with<br />
Ghostscript (see Section 6.1 on Page 17), which reads the PostScript file, calculates<br />
the Bound<strong>in</strong>gBox parameters, <strong>and</strong> creates an eps file (complete with<br />
a Bound<strong>in</strong>gBox) which conta<strong>in</strong>s the PostScript graphics.<br />
The result<strong>in</strong>g file eps file is <strong>in</strong> epsi format, which means it conta<strong>in</strong>s an Interchange<br />
(low-resolution bitmapped) preview at the beg<strong>in</strong>n<strong>in</strong>g of the file. S<strong>in</strong>ce<br />
this preview is ascii-encoded, it does not cause the Section 4.1 bufsize errors.<br />
However, this epsi preview <strong>in</strong>creases the file size.<br />
2. Another method of hav<strong>in</strong>g ghostscript calculate the Bound<strong>in</strong>gBox parameters<br />
is to use the epstool utility, available for Unix, dos, W<strong>in</strong>dows, <strong>and</strong> OS/2 from<br />
http://www.cs.wisc.edu/~ghost/gsview/epstool.htm<br />
For example, the comm<strong>and</strong><br />
epstool --copy --bbox file1.eps file2.eps<br />
analyzes the contents of file1.eps to determ<strong>in</strong>e the correct Bound<strong>in</strong>gBox <strong>and</strong><br />
then copies the contents of file1.eps with the calculated Bound<strong>in</strong>gBox <strong>in</strong>to<br />
file2.eps.<br />
The epstool utility can also be used to add tiff, wmf, epsi bitmap previews<br />
to an eps file, or extract bitmap previews from an eps file.<br />
3. Alternatively, the Bound<strong>in</strong>gBox parameters can be calculated <strong>and</strong> manually<br />
<strong>in</strong>serted <strong>in</strong> the PostScript file’s Bound<strong>in</strong>gBox l<strong>in</strong>e or specified <strong>in</strong> the graphics<strong>in</strong>sertion<br />
comm<strong>and</strong> (e.g., the \<strong>in</strong>cludegraphics comm<strong>and</strong>’s bb option). There<br />
are several ways to calculate the Bound<strong>in</strong>gBox parameters<br />
(a) Use Ghostview/GSview to display the PostScript graphic. As the po<strong>in</strong>ter<br />
is moved around the graphic, the po<strong>in</strong>ter’s coord<strong>in</strong>ates (with respect to<br />
the lower-left corner of the page) are displayed. To determ<strong>in</strong>e the Bound<strong>in</strong>gBox<br />
parameters, record the po<strong>in</strong>ter coord<strong>in</strong>ates at the lower-left corner<br />
of the graphic <strong>and</strong> the upper-right corner of the graphic.<br />
(b) Pr<strong>in</strong>t out a copy of the PostScript graphics <strong>and</strong> measure the horizontal<br />
<strong>and</strong> vertical distances (<strong>in</strong> <strong>in</strong>ches) from the lower-left corner of the paper<br />
to the lower-left corner of the graphics. Multiply these measurements by<br />
72 to get the Bound<strong>in</strong>gBox’s lower-left coord<strong>in</strong>ates. Likewise, measure the<br />
distances from the lower-left corner of the paper to the upper-right corner<br />
of the graphics to get the Bound<strong>in</strong>gBox’s upper-right coord<strong>in</strong>ates.<br />
(c) The bbfig script uses a PostScript pr<strong>in</strong>ter to calculate the Bound<strong>in</strong>gBox.<br />
bbfig adds some PostScript comm<strong>and</strong>s to the beg<strong>in</strong>n<strong>in</strong>g of the PostScript<br />
file <strong>and</strong> sends it to the pr<strong>in</strong>ter. At the pr<strong>in</strong>ter, the added PostScript comm<strong>and</strong>s<br />
calculate the Bound<strong>in</strong>gBox of the orig<strong>in</strong>al PostScript file, pr<strong>in</strong>t<strong>in</strong>g<br />
the Bound<strong>in</strong>gBox coord<strong>in</strong>ates superimposed on the PostScript graphic.<br />
The bbfig script is available from<br />
CTAN/support/bbfig/<br />
13
3.4 Fix<strong>in</strong>g Non-st<strong>and</strong>ard EPS files<br />
Some applications (such as Mathematica <strong>and</strong> FrameMaker) produce non-st<strong>and</strong>ard<br />
eps files which cannot be used <strong>in</strong> other programs such as L A TEX. Some of these applications<br />
have developed their own “improved” flavor of PostScript with additional<br />
features, while other applications use poor PostScript programm<strong>in</strong>g. Often these<br />
non-st<strong>and</strong>ard eps can be easily fixed by scripts provided by either the software companies<br />
themselves or by PostScript-savvy users. Check the software manufacturer’s<br />
web page or search USENET groups associated with the software.<br />
4 How EPS Files are Used by L A TEX<br />
When process<strong>in</strong>g a dvips-style document, the eps files are used by both L A TEX <strong>and</strong><br />
the dvi-to-ps converter.<br />
1. L A TEX scans the eps file for the Bound<strong>in</strong>gBox l<strong>in</strong>e, which tells L A TEX how much<br />
space to reserve for the graphic.<br />
2. The dvi-to-ps converter then reads the eps file <strong>and</strong> <strong>in</strong>serts the graphics <strong>in</strong> the<br />
ps file.<br />
This has the follow<strong>in</strong>g ramifications<br />
• If the Bound<strong>in</strong>gBox parameters are specified <strong>in</strong> the graphics-<strong>in</strong>sertion comm<strong>and</strong><br />
(e.g., the bb option of \<strong>in</strong>cludegraphics is used) then L A TEX never even reads<br />
the eps file. In fact, the eps file does not even need to exist when L A TEX is<br />
run.<br />
• S<strong>in</strong>ce TEX cannot read non-ascii files <strong>and</strong> cannot spawn other programs, L A TEX<br />
cannot read the Bound<strong>in</strong>gBox <strong>in</strong>formation from compressed or non-eps graphics<br />
files. In these cases, the Bound<strong>in</strong>gBox parameters must be specified <strong>in</strong> the<br />
graphics-<strong>in</strong>sertion comm<strong>and</strong> (e.g., <strong>in</strong> the bb option of the \<strong>in</strong>cludegraphics<br />
comm<strong>and</strong>) or stored <strong>in</strong> a non-compressed text file (see Section 14 on Page 42).<br />
• The eps graphics are not <strong>in</strong>cluded <strong>in</strong> the dvi file. S<strong>in</strong>ce the eps files must<br />
be present when the dvi file is converted to ps, the eps files must accompany<br />
dvi files whenever they are moved.<br />
• The eps graphics may not appear <strong>in</strong> some dvi viewers. To help the user with<br />
placement of the graphics, these dvi viewers generally display the Bound<strong>in</strong>gBox<br />
<strong>in</strong> which the graphics will be <strong>in</strong>serted.<br />
4.1 L<strong>in</strong>e Buffer Overflow<br />
TEX reads ascii files one l<strong>in</strong>e at a time, putt<strong>in</strong>g each l<strong>in</strong>e <strong>in</strong> its l<strong>in</strong>e buffer, which<br />
is often about 3000 characters long. If any of the l<strong>in</strong>es of the eps file is longer than<br />
the l<strong>in</strong>e buffer, the follow<strong>in</strong>g error is displayed<br />
Unable to read an entire l<strong>in</strong>e--bufsize=3000.<br />
Please ask a wizard to enlarge me.<br />
S<strong>in</strong>ce eps rarely have l<strong>in</strong>es longer than 3000 characters, there are two possible causes<br />
of such an error<br />
1. The EPS file conta<strong>in</strong>s a long b<strong>in</strong>ary preview.<br />
Some applications place a b<strong>in</strong>ary preview of the graphics at the beg<strong>in</strong>n<strong>in</strong>g of<br />
the eps file. This allows applications (such as dvi viewers) to display the<br />
14
graphics even though the application cannot <strong>in</strong>terpret PostScript. Currently,<br />
relatively few TEX-related applications use such previews.<br />
If the b<strong>in</strong>ary preview is smaller than the l<strong>in</strong>e buffer, the \<strong>in</strong>cludegraphics<br />
comm<strong>and</strong> skips over the preview 6 . However, the overfull bufsize error occurs<br />
if the b<strong>in</strong>ary preview is larger than the l<strong>in</strong>e buffer. There are a couple workarounds<br />
for this problem<br />
(a) If the preview won’t be used, the problem can be avoided by either delet<strong>in</strong>g<br />
it with a text editor or by prevent<strong>in</strong>g the orig<strong>in</strong>al graphics application from<br />
creat<strong>in</strong>g the preview.<br />
(b) S<strong>in</strong>ce L A TEX reads the eps file to only obta<strong>in</strong> the Bound<strong>in</strong>gBox parameters,<br />
L A TEX does not read the eps file if the Bound<strong>in</strong>gBox parameters<br />
are provided by the graphics-<strong>in</strong>sertion comm<strong>and</strong> (e.g., the bb option to<br />
\<strong>in</strong>cludegraphics)<br />
2. The file’s end-of-l<strong>in</strong>e characters are corrupted by an improper transfer.<br />
The follow<strong>in</strong>g problem does not occur with most recent TEX distributions whose<br />
versions of TEX are smart enough to identify all end-of-l<strong>in</strong>e characters.<br />
Different platforms use different end-of-l<strong>in</strong>e characters: Unix uses a l<strong>in</strong>e feed<br />
character (^J), Mac<strong>in</strong>tosh uses a carriage return (^M), while dos/W<strong>in</strong>dows<br />
uses a carriage return <strong>and</strong> l<strong>in</strong>e feed pair (^M^J). For example, if an eps file is<br />
transferred <strong>in</strong> b<strong>in</strong>ary mode from a Mac<strong>in</strong>tosh to a Unix mach<strong>in</strong>e, the Unix TEX<br />
doesn’t see any ^J end-of-l<strong>in</strong>e characters <strong>and</strong> thus th<strong>in</strong>ks the entire file is one<br />
big l<strong>in</strong>e, overfill<strong>in</strong>g the l<strong>in</strong>e buffer.<br />
If the eps file has no b<strong>in</strong>ary sections (e.g., no b<strong>in</strong>ary preview <strong>and</strong> no embedded<br />
graphics) this problem can be avoided by transferr<strong>in</strong>g the eps file <strong>in</strong> text<br />
mode. However, eps files with b<strong>in</strong>ary sections must be transferred with b<strong>in</strong>ary<br />
mode, s<strong>in</strong>ce the text mode transfer may corrupt the b<strong>in</strong>ary section. S<strong>in</strong>ce this<br />
b<strong>in</strong>ary transfer does not translate the end-of-l<strong>in</strong>e characters, the Bound<strong>in</strong>gBox<br />
<strong>in</strong>formation must be provided by the graphics-<strong>in</strong>sertion comm<strong>and</strong> (e.g., the bb<br />
option to \<strong>in</strong>cludegraphics).<br />
5 PDF <strong>Graphics</strong><br />
As mentioned earlier, pdfTEX can directly import the pdf, png, jpeg, <strong>and</strong> Meta-<br />
Post graphic formats. This section provides a short description of these formats.<br />
The comm<strong>and</strong>s for <strong>in</strong>sert<strong>in</strong>g these graphics <strong>in</strong>to pdfL A TEX are described <strong>in</strong> Section 7<br />
on Page 22.<br />
5.1 JPEG<br />
jpeg is a compression st<strong>and</strong>ard authored by Jo<strong>in</strong>t Photographic Experts Group<br />
(jpeg) Committee<br />
http://www.jpeg.org/<br />
6 Note that \psfig <strong>and</strong> other obsolete graphics comm<strong>and</strong>s did not have the ability to skip over<br />
b<strong>in</strong>ary previews<br />
15
The jpeg format is a compression st<strong>and</strong>ard for bitmap graphics which uses a lossy 7<br />
compression scheme. In particular, its compression does not preserve l<strong>in</strong>es <strong>and</strong> sharp<br />
edges, mak<strong>in</strong>g it poorly suited for l<strong>in</strong>e draw<strong>in</strong>gs <strong>and</strong> or graphics with sharp features.<br />
5.2 PNG<br />
For many years the gif format was the st<strong>and</strong>ard for compressed bitmaps for icons<br />
<strong>and</strong> other l<strong>in</strong>e draw<strong>in</strong>gs, s<strong>in</strong>ce its lossless lzw compression does not distort sharp<br />
edges. Unisys’s enforcement of its lzw patent coupled with some gif technical<br />
limitations (such a limit of 256 colors) spurred the development of the Portable<br />
Network <strong>Graphics</strong> (PNG) format by a group eventually called the png Development<br />
Group<br />
http://www.libpng.org/pub/png/<br />
Like GIF, PNG uses lossless compression which is suitable for l<strong>in</strong>e draw<strong>in</strong>gs. While<br />
png can be used on any bitmap, jpeg’s lossy compression is often better than<br />
png for photographs <strong>and</strong> other bitmaps without sharp edges (where “better” means<br />
produc<strong>in</strong>g smaller files without distortion noticeable by the naked eye).<br />
5.3 PDF<br />
Adobe’s Portable Document Format (pdf) shares many similarities to its Adobe<br />
sibl<strong>in</strong>g PostScript. Like PostScript, pdf can conta<strong>in</strong> text, vector draw<strong>in</strong>gs, <strong>and</strong><br />
bitmap draw<strong>in</strong>gs. A pdf file can conta<strong>in</strong> an entire document or just a s<strong>in</strong>gle draw<strong>in</strong>g<br />
(similar to eps).<br />
pdf is not only the primary output format of pdfTEX, but pdf also is the most<br />
common method for import<strong>in</strong>g vector graphics <strong>in</strong>to pdfTEX. Many graphics programs<br />
allow their graphics output to be directly saved <strong>in</strong> pdf format. Programs<br />
without direct pdf output can <strong>in</strong>stead output eps vector graphics which can be easily<br />
converted to pdf vector graphics by the epstopdf conversion program available<br />
from ctan as a W<strong>in</strong>dows executable or as a perl script for use on other platforms<br />
such as Unix/L<strong>in</strong>ux or MacOS X<br />
5.4 MetaPost<br />
CTAN/support/epstopdf/<br />
MetaPost is a graphics language written by John Hobby that is based on Donald<br />
Knuth’s metafont, but with the added capability of outputt<strong>in</strong>g PostScript. Information<br />
about MetaPost is available from<br />
http://www.tug.org/metapost.html<br />
http://cm.bell-labs.com/who/hobby/MetaPost.html<br />
<strong>and</strong> is documented <strong>in</strong> [25].<br />
MetaPost can be used <strong>in</strong>n dvips-style L A TEX documents <strong>and</strong> also can be used<br />
directly 8 by pdfL A TEX documents.<br />
7 Lossy compression means that the compression process loses data. That is, decompresss<strong>in</strong>g a<br />
lossy-compressed bitmap does not produce the orig<strong>in</strong>al bitmap. Conversely, no data is lost dur<strong>in</strong>g a<br />
lossless compression, so decompress<strong>in</strong>g a lossless-compressed bitmap produces the orig<strong>in</strong>al bitmap.<br />
8 pdfL A TEX actually uses ConTeXt code by Hans Hagen to convert MetaPost graphics <strong>in</strong>to pdf<br />
on-the-fly, however this is transparent to users.<br />
16
The follow<strong>in</strong>g procedure uses the pstoedit utility along with MetaPost (mpost)<br />
to convert an eps file named graphic.eps <strong>in</strong>to a MetaPost file name graphic.mps<br />
pstoedit -f mpost graphic.eps graphic.mp<br />
mpost graphic.mp<br />
rename graphic.1 graphic.mps<br />
5.5 PurifyEPS<br />
Scott Pak<strong>in</strong>’s purifyeps utility is able to convert many (but not all) eps to a<br />
“purified” version that can be read by both L A TEX <strong>and</strong> pdfL A TEX.<br />
You need all of the follow<strong>in</strong>g <strong>in</strong> order to run purifyeps:<br />
PurifyEPS Available from CTAN/support/purifyeps/ where CTAN/ should be replaced<br />
by any of the ctan sites listed on page 3.<br />
Perl Available from http://www.cpan.org<br />
pstoedit Available from http://www.pstoedit.net/pstoedit<br />
mpost from a L A TEX distribution that <strong>in</strong>cludes MetaPost.<br />
6 <strong>Graphics</strong> Software<br />
6.1 Ghostscript<br />
Ghostscript is a PostScript/pdf <strong>in</strong>terpreter which runs on most platforms <strong>and</strong> is<br />
distributed for free 9 . This allows PostScript, eps, <strong>and</strong> pdf files to be displayed<br />
on the screen <strong>and</strong> pr<strong>in</strong>ted to both Postscript <strong>and</strong> non-PostScript pr<strong>in</strong>ters. AFPL<br />
Ghostscript is available from the Ghostscript home page<br />
http://www.cs.wisc.edu/~ghost/<br />
These sites conta<strong>in</strong>s pre-compiled W<strong>in</strong>dows/dos/OS/2 <strong>and</strong> Mac<strong>in</strong>tosh executables,<br />
along with ready-to-compile source code for Unix/vms. Also available are graphical<br />
<strong>in</strong>terfaces (such as GSview, Ghostview, GV, etc) for Ghostscript which makes the<br />
view<strong>in</strong>g of PostScript much easier.<br />
6.2 <strong>Graphics</strong>-Conversion Programs<br />
The follow<strong>in</strong>g freeware <strong>and</strong> shareware programs convert between graphics format.<br />
In dvips-style documents, these programs can convert non-eps graphics to eps. In<br />
pdfL A TEX documents, these program can convert graphics to one of the supported<br />
formats (pdf, png, jpeg). Some of the programs allow comm<strong>and</strong>-l<strong>in</strong>e conversion<br />
which makes it possible to convert the graphics on-the-fly (see Section 14.2 on<br />
Page 43).<br />
9 Although AFPL Ghostscript (formerly known as Aladd<strong>in</strong> Ghostscript) is distributed for free,<br />
it is not <strong>in</strong> the public doma<strong>in</strong>. It is copyrighted <strong>and</strong> comes with certa<strong>in</strong> limitations such as no<br />
commercial distribution. When versions of Aladd<strong>in</strong> Ghostscript become approximately one year<br />
old, Aladd<strong>in</strong> releases them as “GNU Ghostscript” whose use is governed by the less-restrictive GNU<br />
Public License.<br />
17
ImageMagick<br />
ImageMagick is a free open-source software suite to create, edit, <strong>and</strong> compose<br />
bitmap images. It can read, convert <strong>and</strong> write images <strong>in</strong> a large variety of<br />
formats. Images can be cropped, colors can be changed, various effects can be<br />
applied, images can be rotated <strong>and</strong> comb<strong>in</strong>ed, <strong>and</strong> text, l<strong>in</strong>es, polygons, ellipses<br />
<strong>and</strong> Bezier curves can be added to images <strong>and</strong> stretched <strong>and</strong> rotated.<br />
For example, when ImageMagick’s convert is on the operat<strong>in</strong>g system path,<br />
the follow<strong>in</strong>g comm<strong>and</strong><br />
convert file.jpg file.eps<br />
stores an eps version of file.jpg <strong>in</strong> file.eps.<br />
Multiple files can be converted with the wildcard<br />
convert *.gif images.png<br />
creates png versions of all the gif files <strong>in</strong> the current directory <strong>and</strong> stores<br />
them as<br />
images-0.png<br />
images-1.png<br />
...<br />
Sav<strong>in</strong>g the result<strong>in</strong>g png files with the same base filename as the orig<strong>in</strong>al gif<br />
files is more <strong>in</strong>volved s<strong>in</strong>ce it requires writ<strong>in</strong>g a shell script or W<strong>in</strong>dows batch<br />
file.<br />
ImageMagick runs on all major operat<strong>in</strong>g systems <strong>and</strong> B<strong>in</strong>aries <strong>and</strong> <strong>in</strong>formation<br />
can be downloaded from<br />
<strong>Graphics</strong>Magick<br />
http://www.imagemagick.org/<br />
The ImageMagick <strong>in</strong>terface periodically changes, caus<strong>in</strong>g <strong>in</strong>compatibility with<br />
code that uses ImageMagick. As a result, the <strong>Graphics</strong>Magick project was<br />
started <strong>in</strong> November 2002 as a fork from ImageMagick 5.5.2, with the goal of<br />
provid<strong>in</strong>g a set of graphics-conversion utilities with a stable <strong>in</strong>terface <strong>and</strong> an<br />
emphasis on fix<strong>in</strong>g bugs over add<strong>in</strong>g new features.<br />
NetPBM<br />
<strong>Graphics</strong>Magick runs on Unix/L<strong>in</strong>ux, Cygw<strong>in</strong>, MacOS X, <strong>and</strong> W<strong>in</strong>dows. B<strong>in</strong>aries<br />
<strong>and</strong> source code can be downloaded from<br />
http://www.graphicsmagick.org/<br />
NetPBM is a free open-source version of the now-unsupported PBMPLUS package.<br />
NetPBM is a toolkit for manipulation of graphic images, <strong>in</strong>clud<strong>in</strong>g conversion of<br />
images between a variety of different formats. There are over 220 separate tools<br />
<strong>in</strong> the package <strong>in</strong>clud<strong>in</strong>g converters for about 100 graphics formats. NetPBM uses<br />
the comm<strong>and</strong>l<strong>in</strong>e <strong>and</strong> doesn’t have a graphical <strong>in</strong>terface.<br />
Most L<strong>in</strong>ux distributions <strong>and</strong> the Cygw<strong>in</strong> Project <strong>in</strong>clude NetPBM packages.<br />
B<strong>in</strong>ary distributions of NetPBM for W<strong>in</strong>dows, MacOS X, <strong>and</strong> other operat<strong>in</strong>g<br />
systems can be downloaded from<br />
18
Irfanview<br />
http://netpbm.sourceforge.net/<br />
Irfanview is an excellent, easy-to-<strong>in</strong>stall graphic viewer for W<strong>in</strong>dows that is<br />
compact <strong>and</strong> fast. Irfanview supports view<strong>in</strong>g <strong>and</strong> convert<strong>in</strong>g between a wide<br />
variety of file formats, <strong>and</strong> provides basic image edit<strong>in</strong>g (such as cropp<strong>in</strong>g,<br />
resampl<strong>in</strong>g, color/brightness adjustments, etc). Irfanview supports both GUI<br />
<strong>and</strong> comm<strong>and</strong>l<strong>in</strong>e operation, <strong>in</strong>clud<strong>in</strong>g batch mode.<br />
For example, when Irfanview’s executable i view32.exe is on the W<strong>in</strong>dows<br />
path, the follow<strong>in</strong>g comm<strong>and</strong><br />
i_view32 *.gif /convert=*.png<br />
creates png versions of all the gif files <strong>in</strong> the current directory, stor<strong>in</strong>g them<br />
<strong>in</strong> files with .png extensions <strong>and</strong> the same base name as the orig<strong>in</strong>al gif files.<br />
Irfanview can be downloaded from<br />
http://www.irfanview.com/<br />
Irfanview is freeware for personal, academic, <strong>and</strong> non-profit users. Commercial<br />
users are asked to donate a $12 registration fee.<br />
Graphic Converter<br />
Graphic Converter is $30 shareware for Mac<strong>in</strong>tosh which reads about 190<br />
graphic formats <strong>and</strong> exports about 75 formats. For <strong>in</strong>formation, see<br />
WMF2EPS<br />
KVEC<br />
http://www.lemkesoft.de/<br />
WMF2EPS is a $20 shareware wmf-to-eps conversion program which runs on<br />
W<strong>in</strong>dows. It is available from<br />
CTAN/nonfree/support/wmf2eps/<br />
where CTAN/ should be replaced by any of the ctan sites listed on page 3.<br />
The software can also be downloaded from the WMF2EPS homepage<br />
http://www.wmf2eps.de.vu/<br />
The homepage also <strong>in</strong>cludes other <strong>in</strong>formation, <strong>in</strong>clud<strong>in</strong>g l<strong>in</strong>ks to Adobe-compatible<br />
pr<strong>in</strong>ter drivers (which is required for WMF2EPS).<br />
kvec is shareware ($25 for non-commercial use, $50 for commercial use) which<br />
converts bitmap graphics (bmp, gif, tiff, etc) <strong>in</strong>to PostScript <strong>and</strong> other<br />
vector formats. kvec is available for W<strong>in</strong>dows, OS/2, L<strong>in</strong>ux, Unix, Mac<strong>in</strong>tosh,<br />
<strong>and</strong> BeOS. More <strong>in</strong>formation is available at<br />
http://www.kvec.de<br />
19
xv<br />
xv is an <strong>in</strong>teractive image manipulation program for the X W<strong>in</strong>dow System.<br />
While it has graphics-conversion capability, xv was designed for image manipulation<br />
program <strong>and</strong> thus is not tailored for graphics conversion (for example,<br />
it does not provide comm<strong>and</strong>-l<strong>in</strong>e capabilities so graphics must be one-by-one.<br />
xv is $25 shareware for non-commercial use, with the $25 registration m<strong>and</strong>atory<br />
for commercial use. More <strong>in</strong>formation is available from<br />
GIMP<br />
http://www.trilon.com/xv/xv.html<br />
gimp (gnu Image Manipulation Program) is a freely available image manipulation<br />
program which duplicates much of the functionality of PhotoShop.<br />
gimp is available for Unix/L<strong>in</strong>ux, W<strong>in</strong>dows, <strong>and</strong> MacOS X. More <strong>in</strong>formation<br />
is available at<br />
6.3 Level 2 EPS Wrappers<br />
http://www.gimp.org/<br />
Level 2 PostScript supports several compression schemes, <strong>in</strong>clud<strong>in</strong>g DCT (used <strong>in</strong><br />
jpeg files) <strong>and</strong> lzw (used <strong>in</strong> many tiff files). Additionally, this b<strong>in</strong>ary data can<br />
be ascii-encoded as ascii85 or asciiHex (which produces ascii files which are<br />
125% <strong>and</strong> 200%, respectively, of the orig<strong>in</strong>al b<strong>in</strong>ary size). The fact that Level-2 eps<br />
supports these compression schemes allows a Level-2 eps file to be constructed as a<br />
wrapper around a jpeg file or tiff file. This produces better quality <strong>and</strong> smaller<br />
files than convert<strong>in</strong>g the graphics to conventional eps. If one has a Level 2 PostScript<br />
pr<strong>in</strong>ter, it is better to use the follow<strong>in</strong>g wrapper programs <strong>in</strong>stead of the conversion<br />
programs listed above. S<strong>in</strong>ce the result<strong>in</strong>g PostScript files can only be pr<strong>in</strong>ted on<br />
Level 2 pr<strong>in</strong>ters, the documents are less portable.<br />
Note that, by default, dvips strips the comment l<strong>in</strong>es (those l<strong>in</strong>es which beg<strong>in</strong><br />
with %%) from any <strong>in</strong>cluded eps graphics. S<strong>in</strong>ce ascii85-encoded level-2 graphics can<br />
have l<strong>in</strong>es beg<strong>in</strong>n<strong>in</strong>g with %%, users <strong>in</strong>clud<strong>in</strong>g ascii85-encoded level-2 eps files must<br />
use the dvips -K0 (K followed by a zero) option to prevent dvips from stripp<strong>in</strong>g<br />
comment l<strong>in</strong>es. Note asciiHex level-2 encod<strong>in</strong>g does not have this problem.<br />
jpeg2ps<br />
A jpeg graphic can be converted to level 2 PostScript by the C program<br />
jpeg2ps, which can be compiled Unix, dos, <strong>and</strong> other systems. jpeg2ps is<br />
available from<br />
CTAN/nonfree/support/jpeg2ps/<br />
http://www.pdflib.com/products/more/jpeg2ps.html<br />
http://gnuw<strong>in</strong>32.sourceforge.net/packages/jpeg2ps.htm<br />
where CTAN/ should be replaced by any of the ctan sites listed on page 3.<br />
jpeg2ps supports three types of level-2 encod<strong>in</strong>g: ascii85 (default), 8-bit<br />
b<strong>in</strong>ary (us<strong>in</strong>g jpeg2ps -b), or 7-bit asciiHex (us<strong>in</strong>g jpeg2ps -h).<br />
20
tiff2ps<br />
A tiff graphic can be converted to lzw-encoded Level-2 PostScript by us<strong>in</strong>g<br />
tiff2ps, which can be compiled on Unix, dos, Mac, <strong>and</strong> vms platforms. The<br />
source code for tiff2ps is available from the follow<strong>in</strong>g three sites<br />
http://www-mipl.jpl.nasa.gov/~ndr/tiff/html/tools.html<br />
ftp://ftp.sgi.com/graphics/tiff/<br />
ImageMagick’s level-2 EPS Capability<br />
As described <strong>in</strong> Section 6.2 on Page 17, ImageMagick can convert between a<br />
large number of graphics formats. S<strong>in</strong>ce one of these formats is level-2 eps,<br />
ImageMagick has the same functionality as the level-2 wrappers listed above.<br />
For example,<br />
convert file.jpeg file.eps2<br />
creates a level-2 eps version of file.jpeg <strong>and</strong> stores it <strong>in</strong> file.eps2.<br />
6.4 Edit<strong>in</strong>g PostScript<br />
While the graphics <strong>in</strong> an eps file can be modified by edit<strong>in</strong>g the file’s PostScript<br />
comm<strong>and</strong>s, this is difficult for most people. Instead, it is easier to use the follow<strong>in</strong>g<br />
programs to edit eps graphics<br />
pstoedit<br />
pstoedit is a free program for Unix/L<strong>in</strong>ux <strong>and</strong> W<strong>in</strong>dows which converts Post-<br />
Script <strong>and</strong> PDF graphics <strong>in</strong>to vector formats (such as Xfig’s .fig format).<br />
More <strong>in</strong>formation is available at<br />
Mayura Draw<br />
http://www.pstoedit.com/<br />
Mayura Draw (formerly known as PageDraw) is $39 shareware for W<strong>in</strong>dows<br />
3.1/95/NT which is available from<br />
http://www.mayura.com/<br />
When used with ghostscript, Mayura Draw can edit PostScript files.<br />
xfig<br />
Xfig is a free draw<strong>in</strong>g program for Unix/Xw<strong>in</strong>dow available from<br />
http://www.xfig.org/<br />
Xfig can import eps draw<strong>in</strong>gs <strong>and</strong> add annotations, but currently cannot<br />
modify the orig<strong>in</strong>al eps graphics.<br />
21
Part II<br />
The L A TEX <strong>Graphics</strong> Bundle<br />
This part provides an overview of The L A TEX <strong>Graphics</strong> Bundle. More detail can be<br />
found <strong>in</strong> the graphics bundle documentation [7] or the L A TEX <strong>Graphics</strong> Companion<br />
[4].<br />
7 <strong>Graphics</strong> Inclusion<br />
<strong>Graphics</strong> are imported us<strong>in</strong>g the graphicx package’s \<strong>in</strong>cludegraphics comm<strong>and</strong><br />
Syntax: \<strong>in</strong>cludegraphics[options]{filename}<br />
where the options are listed <strong>in</strong> Tables 1, 2, <strong>and</strong> 3. S<strong>in</strong>ce \<strong>in</strong>cludegraphics does not<br />
end the current paragraph, it can place graphics with<strong>in</strong> text such as or .<br />
7.1 <strong>Graphics</strong> Driver<br />
Specify<strong>in</strong>g<br />
A Driver<br />
The user must specify a graphics driver which tells the graphics package how to<br />
process the imported graphic. The graphics bundle currently supports 18 different<br />
drivers, but this document only covers the two most common drivers: the dvips<br />
driver for dvips-style documents 10 <strong>and</strong> the pdftex driver for for pdfL A TEX documents.<br />
If the user wants to use either of these drivers, the driver usually does not<br />
need to be explicitly specified, as the graphics.cfg <strong>in</strong> most L A TEX distributions is<br />
smart enough to specify the correct driver 11 .<br />
If the user needs to specify a driver, it can be specified <strong>in</strong> one of three ways<br />
1. The default can be specified <strong>in</strong> the graphics.cfg file.<br />
2. Any driver specified as a \documentclass option overrides the driver specified<br />
<strong>in</strong> graphics.cfg.<br />
3. Any driver specified as an option <strong>in</strong> \usepackage{graphics} overrides the<br />
drivers specified <strong>in</strong> the previous two manners.<br />
7.2 <strong>Graphics</strong> Inclusion for DVIPS-style Documents<br />
The best-supported graphics format for dvips-style documents is eps. When the<br />
document is processed with latex, the follow<strong>in</strong>g comm<strong>and</strong><br />
\<strong>in</strong>cludegraphics{file.eps}<br />
<strong>in</strong>cludes the graphics from the eps file file.eps at its natural size.<br />
specified filename has no extension<br />
\<strong>in</strong>cludegraphics{file}<br />
When the<br />
then \<strong>in</strong>cludegraphics appends the extensions <strong>in</strong> the \Declare<strong>Graphics</strong>Extensions<br />
extension list (See Section 9.1 on Page 29).<br />
10 Where latex processes the L A TEX file <strong>in</strong>to a dvi file, which then is subsequently processed <strong>in</strong>to<br />
PostScript form by dvips.<br />
11 The graphics.cfg file detects whether the document is be<strong>in</strong>g processed by latex or pdflatex<br />
<strong>and</strong> specifies a dvips option when for latex <strong>and</strong> a pdftex option for pdflatex.<br />
22
7.3 <strong>Graphics</strong> Inclusion for pdfL A TEX Documents<br />
pdfTEX supports the direct import<strong>in</strong>g of pdf, png, jpeg, <strong>and</strong> MetaPost graphics.<br />
When the document is processed with pdflatex, the follow<strong>in</strong>g comm<strong>and</strong>s<br />
\<strong>in</strong>cludegraphics{file.pdf}<br />
\<strong>in</strong>cludegraphics{file.png}<br />
\<strong>in</strong>cludegraphics{file.jpg}<br />
\<strong>in</strong>cludegraphics{file.mps}<br />
<strong>in</strong>clude the graphics from the pdf file file.pdf, the png file file.png, <strong>and</strong> the<br />
jpeg file file.jpg, <strong>and</strong> the MetaPost file file.mps at their natural size. When the<br />
specified filename has no extension<br />
\<strong>in</strong>cludegraphics{file}<br />
then \<strong>in</strong>cludegraphics appends the extensions <strong>in</strong> the \Declare<strong>Graphics</strong>Extensions<br />
extension list (See Section 9.1 on Page 29).<br />
7.4 Documents to be Processed by both L A TEX <strong>and</strong> pdfL A TEX<br />
It is often desired to allow a document to be processed by either L A TEX or pdfL A TEX,<br />
with L A TEX <strong>and</strong> dvips used when PostScript output is needed <strong>and</strong> pdfL A TEX to be<br />
used when pdf output is needed. Two th<strong>in</strong>gs change when switch<strong>in</strong>g between L A TEX<br />
<strong>and</strong> pdfL A TEX:<br />
• The appropriate graphicx driver changes.<br />
• The graphic types that can be directly imported change.<br />
The follow<strong>in</strong>g steps adjust these th<strong>in</strong>gs, allow<strong>in</strong>g a document to be processed by<br />
either L A TEX or pdfL A TEX:<br />
1. Create two copies 12 of each graphic to be imported:<br />
(a) An eps version which is imported when latex processes the document.<br />
(b) A png, pdf, jpeg, or MetaPost version which is imported when pdflatex<br />
processes the document.<br />
2. Do not specify dvips or pdftex as an option <strong>in</strong> the \documentclass or the<br />
\usepackage{graphicx} comm<strong>and</strong>s. Instead, the graphic.cfg comm<strong>and</strong> should<br />
automatically pass the appropriate option to the graphicx package.<br />
3. When us<strong>in</strong>g the \<strong>in</strong>cludegraphics comm<strong>and</strong> to <strong>in</strong>sert the graphics, do not<br />
specify any extension. For example:<br />
\<strong>in</strong>cludegraphics{graphic}<br />
The default extension list def<strong>in</strong>ed <strong>in</strong> dvips.def causes L A TEX to import the eps<br />
version of the graphics while the default extension list def<strong>in</strong>ed <strong>in</strong> pdftex.def<br />
causes pdfL A TEX to import the png, pdf, jpeg, or MetaPost version of the<br />
graphics (see Section 9.1 on Page 29).<br />
4. Do not directly use psfrag. If psfrag substitution is needed, use the method<br />
described <strong>in</strong> Section 15.5 on Page 48.<br />
12 Sometimes PurifyEPS (see Section 5.5 on Page 17) can be used to create a s<strong>in</strong>gle file that can<br />
be used by both L A TEX <strong>and</strong> pdfL A TEX.<br />
23
7.4.1 Conditional Code with the ifpdf Package<br />
The ifpdf package’s \ifpdf comm<strong>and</strong> detects 13 whether the document is be<strong>in</strong>g<br />
processed by latex or pdflatex, allow<strong>in</strong>g the document to have conditional code.<br />
For example, s<strong>in</strong>ce it may be advisable to m<strong>in</strong>imize the length of the extension list<br />
(as described <strong>in</strong> Section 9.1) the \ifpdf comm<strong>and</strong> can be used to customize the<br />
extension list<br />
\usepackage{ifpdf}<br />
...<br />
\ifpdf<br />
\Declare<strong>Graphics</strong>Extensions{.pdf,.png,.jpg,.mps}<br />
\else<br />
\Declare<strong>Graphics</strong>Extensions{.eps}<br />
\fi<br />
If the user wants the conditional code to use different \documentclass options, the<br />
follow code allows the \ifpdf comm<strong>and</strong> to be def<strong>in</strong>ed before the \documentclass<br />
comm<strong>and</strong><br />
\RequirePackage{ifpdf}<br />
\ifpdf<br />
\documentclass[pdftex]{article}<br />
\else<br />
\documentclass[dvips]{article}<br />
\fi<br />
This code passes the [pdftex] option if the document is be<strong>in</strong>g processed by pdflatex<br />
<strong>and</strong> passes the [dvips] option if the document is be<strong>in</strong>g processed by latex. As<br />
described <strong>in</strong> Section 7.1 on Page 22, this code is generally not needed s<strong>in</strong>ce most<br />
distributions automatically do this <strong>in</strong> their graphics.cfg file.<br />
Specify<strong>in</strong>g<br />
Width<br />
Specify<strong>in</strong>g<br />
Height<br />
7.5 Specify<strong>in</strong>g Width, Height, or Angle<br />
The comm<strong>and</strong><br />
\<strong>in</strong>cludegraphics[width=3<strong>in</strong>]{file}<br />
<strong>in</strong>cludes the graphics from the specified file such that its width is 3 <strong>in</strong>ches. Instead of<br />
specify<strong>in</strong>g a fixed width (such as 3 <strong>in</strong>ches) specify<strong>in</strong>g the width <strong>in</strong> terms of scalable<br />
lengths 14 makes the graphic layout more robust. For example, the comm<strong>and</strong><br />
\<strong>in</strong>cludegraphics[width=\l<strong>in</strong>ewidth]{graphic}<br />
scales the <strong>in</strong>cluded graphic to be as wide as the current text. The comm<strong>and</strong><br />
\<strong>in</strong>cludegraphics[width=0.80\l<strong>in</strong>ewidth]{graphic}<br />
makes the <strong>in</strong>cluded graphic 80% as wide as the current text. When the calc package<br />
is used, the follow<strong>in</strong>g comm<strong>and</strong> causes the graphics to be 2 <strong>in</strong>ches more narrow than<br />
the current text<br />
\<strong>in</strong>cludegraphics[width=\l<strong>in</strong>ewidth-2.0<strong>in</strong>]{graphic}<br />
Similarly, the comm<strong>and</strong><br />
13 Historically, one method for do<strong>in</strong>g this detection was to use the fact that \pdfoutput was<br />
def<strong>in</strong>ed only if pdfL A TEX was process<strong>in</strong>g the document. However, many TEX distributions now have<br />
their latex comm<strong>and</strong> actually execute pdfL A TEX <strong>in</strong> dvi mode, caus<strong>in</strong>g \pdfoutput to be def<strong>in</strong>ed<br />
when both latex <strong>and</strong> pdflatex are executed. The ifpdf package solves this problem by provid<strong>in</strong>g<br />
a conditional comm<strong>and</strong> that robustly determ<strong>in</strong>es whether the document is be<strong>in</strong>g processed directly<br />
<strong>in</strong>to a pdf file.<br />
14 The predef<strong>in</strong>ed scalable lengths are:<br />
\textwidth is the width of the document’s normal text.<br />
\l<strong>in</strong>ewidth is the width of l<strong>in</strong>es for the current environment.<br />
em is the width of a capital M for the current font.<br />
ex is the height of a lowercase x for the current font.<br />
24
Table 1: <strong>in</strong>cludegraphics Options<br />
height<br />
totalheight<br />
width<br />
scale<br />
angle<br />
orig<strong>in</strong><br />
bb<br />
The height of the graphics (<strong>in</strong> any of the accepted TEX units).<br />
The totalheight of the graphics (<strong>in</strong> any of the accepted TEX units).<br />
The width of the graphics (<strong>in</strong> any of the accepted TEX units).<br />
Scale factor for the graphic. Specify<strong>in</strong>g scale=2 makes the graphic twice as large<br />
as its natural size.<br />
Specifies the angle of rotation, <strong>in</strong> degrees, with a counter-clockwise (anti-clockwise)<br />
rotation be<strong>in</strong>g positive.<br />
The orig<strong>in</strong> comm<strong>and</strong> specifies what po<strong>in</strong>t to use for the rotation orig<strong>in</strong>. By default,<br />
the object is rotated about its reference po<strong>in</strong>t.<br />
The possible orig<strong>in</strong> po<strong>in</strong>ts are the same as those for the \rotatebox comm<strong>and</strong> <strong>in</strong><br />
Section 8.3 on Page 28. For example, orig<strong>in</strong>=c rotates the graphic about its center.<br />
Specifies Bound<strong>in</strong>gBox parameters. For example bb=10 20 100 200 specifies that<br />
the Bound<strong>in</strong>gBox has its lower-left corner at (10,20) <strong>and</strong> its upper-right corner at<br />
(100,200).<br />
S<strong>in</strong>ce \<strong>in</strong>cludegraphics automatically reads the Bound<strong>in</strong>gBox parameters from<br />
the eps file, the bb option is usually not specified. It is useful if the Bound<strong>in</strong>gBox<br />
parameters <strong>in</strong> the eps file are miss<strong>in</strong>g or <strong>in</strong>correct.<br />
Table 2: <strong>in</strong>cludegraphics Cropp<strong>in</strong>g Options<br />
viewport<br />
trim<br />
Specifies what portion of the graphic to view. Like a Bound<strong>in</strong>gBox, the area is<br />
specified by four numbers which are the coord<strong>in</strong>ates of the lower-left corner <strong>and</strong><br />
upper-right corner. The coord<strong>in</strong>ates are relative to lower-left corner of the Bound<strong>in</strong>gBox.<br />
For example, if the graphic’s Bound<strong>in</strong>gBox parameters are 50 50 410 302,<br />
viewport=50 50 122 122 displays the 1-<strong>in</strong>ch square from the lower left of the<br />
graphic, <strong>and</strong> viewport=338 230 410 302 displays the 1-<strong>in</strong>ch square from the upper<br />
right of the graphic.<br />
The clip option (see Table 3) must be used to prevent the portion of the graphic<br />
outside the viewport from be<strong>in</strong>g displayed.<br />
An alternate method for specify<strong>in</strong>g what portion of the graphic to view. The four<br />
numbers specify the amount to remove from the left, bottom, right, <strong>and</strong> top side,<br />
respectively. Positive numbers trim from a side, negative numbers add to a side.<br />
For example, trim=1 2 3 4 trims the graphic by 1 bp on the left, 2 bp on the<br />
bottom, 3 bp on the right, 4 bp on the top.<br />
The clip option (see Table 3) must be used to prevent the trimmed portion from<br />
be<strong>in</strong>g displayed.<br />
25
Table 3: <strong>in</strong>cludegraphics Boolean Options<br />
clip<br />
draft<br />
keepaspectratio<br />
Specify<strong>in</strong>g clip=false the entire graphic appears, even if portions appear<br />
outside the view<strong>in</strong>g area. (default)<br />
When clip or clip=true is specified, any graphics outside of the view<strong>in</strong>g area<br />
are clipped <strong>and</strong> do not appear.<br />
Specify<strong>in</strong>g draft or draft=true prevents the graphic from be<strong>in</strong>g <strong>in</strong>cluded <strong>in</strong><br />
the document. The graphic’s Bound<strong>in</strong>gBox <strong>and</strong> filename are displayed <strong>in</strong> place<br />
of the graphic, mak<strong>in</strong>g it faster to display <strong>and</strong> pr<strong>in</strong>t the document.<br />
Specify<strong>in</strong>g draft=false causes the EPS graphic to be <strong>in</strong>serted.<br />
When keepaspectratio is not specified, specify<strong>in</strong>g both the width <strong>and</strong> either<br />
height or totalheight causes the graphic to be scaled anamorphically to fit<br />
both the specified height <strong>and</strong> width.<br />
When keepaspectratio is specified, specify<strong>in</strong>g both the width <strong>and</strong> either<br />
height or totalheight makes the graphic as large as possible such that its<br />
aspect ratio rema<strong>in</strong>s the same <strong>and</strong> the graphic exceeds neither the specified<br />
height nor width.<br />
\<strong>in</strong>cludegraphics[height=2cm]{file}<br />
<strong>in</strong>cludes the graphics from the specified file scaled such that its height is 2 cm. The<br />
\<strong>in</strong>cludegraphics comm<strong>and</strong> also <strong>in</strong>cludes a totalheight option for specify<strong>in</strong>g a<br />
graphic’s totalheight. (See Section 2 on Page 10 for the def<strong>in</strong>ition of height <strong>and</strong><br />
totalheight).<br />
Specify<strong>in</strong>g<br />
Angle<br />
The \<strong>in</strong>cludegraphics comm<strong>and</strong>’s angle option specifies the angle of the <strong>in</strong>cluded<br />
graphic<br />
\beg<strong>in</strong>{center}<br />
\<strong>in</strong>cludegraphics[angle=45]{graphic}<br />
\end{center}<br />
<strong>in</strong>cludes the graphic at its natural size <strong>and</strong> then rotates it by 45 degrees counterclockwise<br />
(anti-clockwise).<br />
7.5.1 Specify<strong>in</strong>g Angle <strong>and</strong> Height or Width<br />
S<strong>in</strong>ce the \<strong>in</strong>cludegraphics options are <strong>in</strong>terpreted from left to right, the order <strong>in</strong><br />
which the angle <strong>and</strong> size are specified makes a difference. For example<br />
\beg<strong>in</strong>{center}<br />
\<strong>in</strong>cludegraphics[angle=90,totalheight=1cm]{graphic}<br />
\<strong>in</strong>cludegraphics[totalheight=1cm,angle=90]{graphic}<br />
\end{center}<br />
produces<br />
Graphic<br />
Graphic<br />
26
The first box is rotated 90 degrees <strong>and</strong> then scaled such that its height is one centimeter.<br />
The second box is scaled such that its height is one centimeter <strong>and</strong> then it<br />
is rotated 90 degrees.<br />
Note that the two graphics <strong>in</strong> the above figure are separated by an <strong>in</strong>terword<br />
space because the first \<strong>in</strong>cludegraphics l<strong>in</strong>e did not end with a %.<br />
8 Rotat<strong>in</strong>g <strong>and</strong> Scal<strong>in</strong>g Objects<br />
In addition to the \<strong>in</strong>cludegraphics comm<strong>and</strong>, the graphicx package <strong>in</strong>cludes 4<br />
other comm<strong>and</strong>s which rotate <strong>and</strong> scale any L A TEX object: text, eps graphic, etc.<br />
\scalebox{h-scale}[v-scale]{argument}<br />
\resizebox{width}{height}{argument}<br />
\resizebox*{width}{totalheight}{argument}<br />
\rotatebox[options]{angle}{argument}<br />
S<strong>in</strong>ce the graphicx \<strong>in</strong>cludegraphics comm<strong>and</strong> supports rotat<strong>in</strong>g <strong>and</strong> scal<strong>in</strong>g options<br />
such as angle <strong>and</strong> width, the comm<strong>and</strong>s <strong>in</strong> this section rarely need to be used<br />
with eps graphics. For example,<br />
\<strong>in</strong>cludegraphics[scale=2]{file}<br />
\<strong>in</strong>cludegraphics[width=4<strong>in</strong>]{file}<br />
\<strong>in</strong>cludegraphics[angle=45]{file}<br />
produce the same three graphics as<br />
\scalebox{2}{\<strong>in</strong>cludegraphics{file}}<br />
\resizebox{4<strong>in</strong>}{!}{\<strong>in</strong>cludegraphics{file}}<br />
\rotatebox{45}{\<strong>in</strong>cludegraphics{file}}<br />
However, the first syntax is preferred because it is faster <strong>and</strong> produces more efficient<br />
PostScript/pdf.<br />
8.1 The scalebox Comm<strong>and</strong><br />
Syntax:<br />
\scalebox{h-scale}[v-scale]{argument}<br />
The \scalebox comm<strong>and</strong> scales an object, mak<strong>in</strong>g its width be h-scale times its<br />
orig<strong>in</strong>al width <strong>and</strong> mak<strong>in</strong>g the object’s height be v-scale times its orig<strong>in</strong>al height.<br />
If v-scale is omitted, it defaults to h-scale, keep<strong>in</strong>g the aspect ratio constant.<br />
Negative values reflect the object.<br />
8.2 The resizebox Comm<strong>and</strong>s<br />
Syntax:<br />
\resizebox{width}{height}{argument}<br />
\resizebox*{width}{totalheight}{argument}<br />
The \resizebox comm<strong>and</strong> resizes an object to a specified size. Specify<strong>in</strong>g ! as either<br />
height or width makes that length be such that the aspect ratio rema<strong>in</strong>s constant.<br />
For example,<br />
\resizebox{2<strong>in</strong>}{!}{argument}<br />
scales the argument to be 2 <strong>in</strong>ches wide while keep<strong>in</strong>g its aspect ratio constant.<br />
The st<strong>and</strong>ard L A TEX arguments \height, \width, \totalheight, \depth can be<br />
used to refer to the orig<strong>in</strong>al size of argument. For example,<br />
\resizebox{2<strong>in</strong>}{\height}{argument}<br />
27
sizes argument to a width of 2 <strong>in</strong>ches while keep<strong>in</strong>g its same height.<br />
The \resizebox* comm<strong>and</strong> is identical to \resizebox, except the second argument<br />
specifies the totalheight of the object. (See Section 2 on Page 10 for the<br />
def<strong>in</strong>ition of height <strong>and</strong> totalheight, <strong>and</strong> see Section 11.1 on Page 33 for a comparison<br />
of height <strong>and</strong> totalheight options.)<br />
8.3 The rotatebox Comm<strong>and</strong><br />
Syntax:<br />
\rotatebox[options]{angle}{argument}<br />
The \rotatebox comm<strong>and</strong> rotates an object by an angle given <strong>in</strong> degrees, with a<br />
counter-clockwise rotation be<strong>in</strong>g positive. By default, the object is rotated about its<br />
reference po<strong>in</strong>t. The \rotatebox options allow the po<strong>in</strong>t of rotation to be specified.<br />
1. Specify<strong>in</strong>g the [x=xdim,y=ydim], the object is rotated about the po<strong>in</strong>t whose<br />
coord<strong>in</strong>ates relative to the reference po<strong>in</strong>t are (xdim,ydim).<br />
2. The orig<strong>in</strong> option specifies one of 12 special po<strong>in</strong>ts shown <strong>in</strong> <strong>in</strong> Figure 3.<br />
[lt]<br />
[ct]<br />
[rt]<br />
Centerl<strong>in</strong>es<br />
[c]<br />
Reference<br />
Po<strong>in</strong>t<br />
[lc]<br />
[rc]<br />
[lB]<br />
Basel<strong>in</strong>e<br />
[cB]<br />
[rB]<br />
[lb]<br />
[cb]<br />
[rb]<br />
Figure 3: Available Orig<strong>in</strong> Po<strong>in</strong>ts<br />
The horizontal position of the orig<strong>in</strong> po<strong>in</strong>ts is specified by one of three letters:<br />
l,c,r (which st<strong>and</strong> for left, center, right, respectively), while the vertical position<br />
is specified by one of four letters: t,c,B,b (which st<strong>and</strong> for top, center,<br />
Basel<strong>in</strong>e, bottom, respectively). For example<br />
[rb] specifies the bottom-right corner<br />
[lt] specifies the top-left corner<br />
[cB] specifies the center of the graphic’s Basel<strong>in</strong>e<br />
Note that<br />
• The order of the letters is not important, mak<strong>in</strong>g [br] equivalent to [rb].<br />
• c represents either the horizontal center or vertical center depend<strong>in</strong>g what<br />
letter is used with it.<br />
• If only one letter is specified, the other is assumed to be c, mak<strong>in</strong>g [c]<br />
equivalent to [cc], [l] equivalent to [lc], [t] equivalent to [tc], etc.<br />
28
9 Advanced <strong>Graphics</strong>-Inclusion Comm<strong>and</strong>s<br />
This section describes advanced graphics-<strong>in</strong>clusion comm<strong>and</strong>s which are needed <strong>in</strong><br />
the follow<strong>in</strong>g situations<br />
1. When the specified filename has no extension. For example<br />
\<strong>in</strong>cludegraphics{file}<br />
2. When compressed eps graphics are used (also see Section 14.1 on Page 43).<br />
3. When non-EPS graphics are used (also see Section 14.2 on Page 43).<br />
In these situations, the \Declare<strong>Graphics</strong>Rule <strong>and</strong> \Declare<strong>Graphics</strong>Extensions<br />
comm<strong>and</strong>s are needed to control how L A TEX h<strong>and</strong>les files specified <strong>in</strong> \<strong>in</strong>cludegraphics.<br />
• The \Declare<strong>Graphics</strong>Extensions comm<strong>and</strong> specifies the extensions to attempt<br />
(e.g., .eps, .ps, .eps.gz, etc.) when the specified filename does not<br />
have an extension.<br />
• The \Declare<strong>Graphics</strong>Rule specifies a comm<strong>and</strong> which operates on the file.<br />
The execution of this comm<strong>and</strong> requires an operat<strong>in</strong>g system which support<br />
pipes. For example, Unix supports pipes while dos does not.<br />
Mak<strong>in</strong>g this comm<strong>and</strong> a decompression comm<strong>and</strong> allows compressed eps graphics<br />
to be used. Mak<strong>in</strong>g this comm<strong>and</strong> a graphics-conversion comm<strong>and</strong> allows<br />
non-eps graphics to be used.<br />
9.1 The Declare<strong>Graphics</strong>Extensions Comm<strong>and</strong><br />
The \Declare<strong>Graphics</strong>Extensions comm<strong>and</strong> tells L A TEX which extensions to try if<br />
a file with no extension is specified <strong>in</strong> the \<strong>in</strong>cludegraphics comm<strong>and</strong>.<br />
For convenience, a default set of extensions is pre-def<strong>in</strong>ed depend<strong>in</strong>g on which<br />
graphics driver is selected. For example if the graphicx package uses the dvips driver,<br />
the follow<strong>in</strong>g graphic extensions (def<strong>in</strong>ed <strong>in</strong> dvips.def) are used by default<br />
\Declare<strong>Graphics</strong>Extensions{.eps,.ps,.eps.gz,.ps.gz,.eps.Z}<br />
If the graphicx package uses the pdftex driver, the follow<strong>in</strong>g graphic extensions<br />
(def<strong>in</strong>ed <strong>in</strong> pdftex.def) are used by default<br />
\Declare<strong>Graphics</strong>Extensions{.png,.pdf,.jpg,.mps}<br />
With the dvips graphics extension list, \<strong>in</strong>cludegraphics{file} first looks for<br />
file.eps, then file.ps, then file.eps.gz, etc. until a file is found. This allows<br />
the graphics to be specified with<br />
<strong>in</strong>stead of<br />
\<strong>in</strong>cludegraphics{file}<br />
\<strong>in</strong>cludegraphics{file.eps}<br />
The first syntax has the advantage that if you later decide to compress file.eps,<br />
you need not edit the L A TEX file. The extensionless syntax also allows the document<br />
to be processed by either L A TEX or pdfL A TEX as described <strong>in</strong> Section 7.4 on Page 23.<br />
However, the extensionless syntax can aggravate pool space problems as described<br />
<strong>in</strong> Section 9.1.2 below.<br />
29
9.1.1 Filenames Without Extensions<br />
Note that<br />
\<strong>in</strong>cludegraphics{file}<br />
does not attempt to open file unless the null extension {} is <strong>in</strong>cluded <strong>in</strong> the extension<br />
list. For example,<br />
\Declare<strong>Graphics</strong>Extensions{.eps,.eps.gz,{}}<br />
causes file to be attempted if file.eps <strong>and</strong> file.eps.gz are not found.<br />
S<strong>in</strong>ce the default extension list does not <strong>in</strong>clude the null extension, users want<strong>in</strong>g<br />
to use extensionless files must use the \Declare<strong>Graphics</strong>Extensions comm<strong>and</strong> to<br />
def<strong>in</strong>e an extension list that <strong>in</strong>cludes the null extension.<br />
9.1.2 Pool Space Problems<br />
Specify<strong>in</strong>g no file extension <strong>and</strong> rely<strong>in</strong>g on L A TEX to choose the correct extension from<br />
the \Declare<strong>Graphics</strong>Extensions extension list can aggravate pool space problems<br />
(see Section 13.4 on Page 41). If pool space is a concern, comm<strong>and</strong>s without an<br />
extension such as<br />
\<strong>in</strong>cludegraphics{file}<br />
should only be used when a \Declare<strong>Graphics</strong>Extensions comm<strong>and</strong> has specified<br />
a m<strong>in</strong>imal number of extensions, such as<br />
\Declare<strong>Graphics</strong>Extensions{.eps,.eps.gz}<br />
9.2 The Declare<strong>Graphics</strong>Rule Comm<strong>and</strong><br />
The \Declare<strong>Graphics</strong>Rule comm<strong>and</strong> specifies how \<strong>in</strong>cludegraphics should treats<br />
file, depend<strong>in</strong>g on their extensions.<br />
Syntax:<br />
\Declare<strong>Graphics</strong>Rule{ext}{type}{sizefile}{comm<strong>and</strong>}<br />
For example, the comm<strong>and</strong><br />
\Declare<strong>Graphics</strong>Rule{.eps.gz}{eps}{.eps.bb}{‘gunzip -c #1}<br />
specifies that any file with a .eps.gz extension is treated as compressed eps file, with<br />
the the Bound<strong>in</strong>gBox <strong>in</strong>formation stored <strong>in</strong> the file with a .eps.bb extension, <strong>and</strong> the<br />
gunzip -c comm<strong>and</strong> uncompresses the file. (S<strong>in</strong>ce L A TEX cannot read Bound<strong>in</strong>gBox<br />
<strong>in</strong>formation from a compressed file, the Bound<strong>in</strong>gBox l<strong>in</strong>e must be stored <strong>in</strong> an<br />
uncompressed file.)<br />
The \Declare<strong>Graphics</strong>Rule allows * to signify any unknown extension. For<br />
example,<br />
Table 4: Declare<strong>Graphics</strong>Rule Arguments<br />
ext<br />
type<br />
sizefile<br />
comm<strong>and</strong><br />
The file extension.<br />
The graphics type for that extension.<br />
The extension of the file which conta<strong>in</strong>s the Bound<strong>in</strong>gBox <strong>in</strong>formation for the graphics.<br />
If this option is blank, then the size <strong>in</strong>formation must be specified by the<br />
\<strong>in</strong>cludegraphics comm<strong>and</strong>’s bb option.<br />
The comm<strong>and</strong> to be applied to the file. (often left blank). The comm<strong>and</strong> must be<br />
preceded by a s<strong>in</strong>gle backward quote (not to be confused with the more common<br />
s<strong>in</strong>gle forward quote.) Currently, only dvips allows execution of such a comm<strong>and</strong>.<br />
See Section 14 on Page 42 for examples of us<strong>in</strong>g this comm<strong>and</strong> for use with compressed<br />
<strong>and</strong> non-eps graphics.<br />
30
Periods In<br />
Filenames<br />
Pre-def<strong>in</strong>ed<br />
Comm<strong>and</strong>s<br />
\Declare<strong>Graphics</strong>Rule{*}{eps}{*}{}<br />
causes any unknown extension to be treated as an eps file. For example, this causes<br />
file.EPS) to be treated as an eps file.<br />
The extension is def<strong>in</strong>ed as the portion of the filename after the first period,<br />
which makes it possible for files end<strong>in</strong>g <strong>in</strong> eps.gz to be identified as compressed<br />
eps files. To avoid confusion, the base portion of the filename should not conta<strong>in</strong> a<br />
period. For example, specify<strong>in</strong>g file.name.eps.gz makes \<strong>in</strong>cludegraphics look<br />
for a graphics rule associated with the extension name.eps.gz. S<strong>in</strong>ce such a graphics<br />
rule probably does not exist, the graphics rule for the unknown extension is used.<br />
(Filenames with multiple periods work if their type happens to be the default type.<br />
For example, when files with unknown extensions are treated as eps, the filename<br />
file.name.eps is co<strong>in</strong>cidently treated correctly.)<br />
For convenience, a default set of graphics rules is pre-def<strong>in</strong>ed depend<strong>in</strong>g on which<br />
graphics driver is selected. For example if the dvips driver is used, the follow<strong>in</strong>g<br />
graphic rules (def<strong>in</strong>ed <strong>in</strong> dvips.def) 15 are used by default<br />
\Declare<strong>Graphics</strong>Rule{.eps}{eps}{.eps}{}<br />
\Declare<strong>Graphics</strong>Rule{.ps}{eps}{.ps}{}<br />
\Declare<strong>Graphics</strong>Rule{.pz}{eps}{.bb}{‘gunzip -c #1}<br />
\Declare<strong>Graphics</strong>Rule{.eps.Z}{eps}{.eps.bb}{‘gunzip -c #1}<br />
\Declare<strong>Graphics</strong>Rule{.ps.Z}{eps}{.ps.bb}{‘gunzip -c #1}<br />
\Declare<strong>Graphics</strong>Rule{.eps.gz}{eps}{.eps.bb}{‘gunzip -c #1}<br />
\Declare<strong>Graphics</strong>Rule{.ps.gz}{eps}{.ps.bb}{‘gunzip -c #1}<br />
\Declare<strong>Graphics</strong>Rule{.pcx}{bmp}{}{}<br />
\Declare<strong>Graphics</strong>Rule{.bmp}{bmp}{}{}<br />
\Declare<strong>Graphics</strong>Rule{.msp}{bmp}{}{}<br />
\Declare<strong>Graphics</strong>Rule{*}{eps}{*}{}<br />
The first two comm<strong>and</strong>s def<strong>in</strong>e the .eps <strong>and</strong> .ps extensions as eps files. The next<br />
five comm<strong>and</strong>s def<strong>in</strong>e extensions for compressed eps files. The next three comm<strong>and</strong>s<br />
def<strong>in</strong>e extensions for pcx, bmp, msp bitmaps. The last comm<strong>and</strong> causes filenames<br />
with unknown extensions to be treated as an eps file.<br />
If the pdfTEX driver is used, the follow<strong>in</strong>g graphic rules 16 (def<strong>in</strong>ed <strong>in</strong> pdftex.def)<br />
are used by default<br />
\Declare<strong>Graphics</strong>Rule{.png}{png}{.png}{}<br />
\Declare<strong>Graphics</strong>Rule{.pdf}{pdf}{.pdf}{}<br />
\Declare<strong>Graphics</strong>Rule{.jpg}{jpg}{.jpg}{}<br />
\Declare<strong>Graphics</strong>Rule{.mps}{mps}{.mps}{}<br />
which specify the behavior for pdfTEX’s supported graphic formats.<br />
15 The code <strong>in</strong> dvips.def actually does not use \Declare<strong>Graphics</strong>Rule but the effect is the same.<br />
16 The pdftex.def file actually checks the pdfTEX version <strong>and</strong> <strong>in</strong>cludes logic to def<strong>in</strong>e only the<br />
graphics rules which that version can h<strong>and</strong>le<br />
31
Part III<br />
<strong>Us<strong>in</strong>g</strong> <strong>Graphics</strong>-Inclusion Comm<strong>and</strong>s<br />
10 Horizontal Spac<strong>in</strong>g <strong>and</strong> Center<strong>in</strong>g<br />
Obsolete<br />
Syntax<br />
10.1 Horizontal Center<strong>in</strong>g<br />
The placement of the graphic is controlled by the current text justification. To center<br />
the graphic, put it <strong>in</strong>side a center environment<br />
\beg<strong>in</strong>{center}<br />
\<strong>in</strong>cludegraphics[width=2<strong>in</strong>]{graphic}<br />
\end{center}<br />
If the \<strong>in</strong>cludegraphics comm<strong>and</strong> is <strong>in</strong>side an environment (such as m<strong>in</strong>ipage or<br />
figure), the \center<strong>in</strong>g declaration centers the rema<strong>in</strong><strong>in</strong>g output of the environment.<br />
For example<br />
\beg<strong>in</strong>{figure}<br />
\center<strong>in</strong>g<br />
\<strong>in</strong>cludegraphics[width=2<strong>in</strong>]{graphic}<br />
\end{figure}<br />
is similar to<br />
\beg<strong>in</strong>{figure}<br />
\beg<strong>in</strong>{center}<br />
\<strong>in</strong>cludegraphics[width=2<strong>in</strong>]{graphic}<br />
\end{center}<br />
\end{figure}<br />
The \center<strong>in</strong>g syntax is preferred because the \beg<strong>in</strong>{center} syntax produces<br />
double vertical space above <strong>and</strong> below the figure due to the space produced by<br />
the figure environment <strong>and</strong> by the center environment. If extra vertical space is<br />
desired, the comm<strong>and</strong>s <strong>in</strong> Section 19.1 on Page 64 should be used.<br />
Bugs <strong>in</strong> the \psfig <strong>and</strong> \epsfbox comm<strong>and</strong>s made it difficult to produce horizontallycentered<br />
graphics. The TEX comm<strong>and</strong>s \centerl<strong>in</strong>e <strong>and</strong> \leavevmode were used<br />
as work-arounds for bugs <strong>in</strong> \psfig <strong>and</strong> \epsfbox.<br />
S<strong>in</strong>ce the \<strong>in</strong>cludegraphics comm<strong>and</strong> is written correctly, the \centerl<strong>in</strong>e<br />
<strong>and</strong> \leavevmode comm<strong>and</strong>s are no longer needed, allow<strong>in</strong>g graphics to be centered<br />
with the \center<strong>in</strong>g comm<strong>and</strong> or the center environment.<br />
10.2 Horizontal Spac<strong>in</strong>g<br />
It is important to realize that L A TEX arranges graphics the same way it formats other<br />
objects such as letters. For example, an <strong>in</strong>terword space is <strong>in</strong>troduced between L A TEX<br />
<strong>in</strong>put l<strong>in</strong>es unless the l<strong>in</strong>e ends with a %. For example, just as<br />
Hello<br />
World<br />
put an <strong>in</strong>terword space between “Hello” <strong>and</strong> “World”<br />
\<strong>in</strong>cludegraphics{file}<br />
\<strong>in</strong>cludegraphics{file}<br />
puts an <strong>in</strong>terword space between the graphics. End<strong>in</strong>g the first l<strong>in</strong>e with a comment<br />
character<br />
\<strong>in</strong>cludegraphics{file}%<br />
\<strong>in</strong>cludegraphics{file}<br />
32
Other<br />
Spac<strong>in</strong>g<br />
Comm<strong>and</strong>s<br />
puts no space between the graphics. When horizontal spac<strong>in</strong>g is desired between<br />
graphics, the \hspace comm<strong>and</strong> <strong>in</strong>serts a specific amount of space 17 while \hfill<br />
<strong>in</strong>serts a rubber length which provides which exp<strong>and</strong>s to fill the available space. For<br />
example,<br />
\<strong>in</strong>cludegraphics{file}\hfill\<strong>in</strong>cludegraphics{file}<br />
pushes the graphics to the left <strong>and</strong> right marg<strong>in</strong>s, while<br />
\hfill\<strong>in</strong>cludegraphics{file}%<br />
\hfill\<strong>in</strong>cludegraphics{file}\hspace*{\fill}<br />
puts equal spac<strong>in</strong>g before, between, <strong>and</strong> after the graphics. S<strong>in</strong>ce \hfill comm<strong>and</strong>s<br />
which occur before a l<strong>in</strong>ebreak are ignored, the \hspace*{\fill} was needed to<br />
supply the trail<strong>in</strong>g space.<br />
In addition to the \hspace <strong>and</strong> \hfill comm<strong>and</strong>s, the \quad comm<strong>and</strong> <strong>in</strong>serts<br />
horizontal space equal to the current font size (for example, when us<strong>in</strong>g 10 pt font,<br />
\quad <strong>in</strong>serts 10 pt of horizontal space). The comm<strong>and</strong> \qquad <strong>in</strong>serts twice as much<br />
horizontal space as \quad.<br />
11 Rotation, Scal<strong>in</strong>g, <strong>and</strong> Alignment<br />
11.1 Difference Between Height <strong>and</strong> Totalheight<br />
Care must be taken with the height option, as users often mean the overall height<br />
which is set by the totalheight option (see Figure 1 on Page 11). When the object<br />
has zero depth, the totalheight is the same as the height <strong>and</strong> specify<strong>in</strong>g height<br />
works f<strong>in</strong>e. When the object has a non-zero depth, specify<strong>in</strong>g height <strong>in</strong>stead of<br />
totalheight causes either an <strong>in</strong>correctly-sized graphic or a divide-by-zero error.<br />
For import<strong>in</strong>g eps files, the dist<strong>in</strong>ction between height <strong>and</strong> totalheight is most<br />
important when rotat<strong>in</strong>g <strong>and</strong> then scal<strong>in</strong>g a graphic. For example,<br />
\<strong>in</strong>cludegraphics[angle=-45,totalheight=1<strong>in</strong>]{file}<br />
\<strong>in</strong>cludegraphics[angle=-45,height=1<strong>in</strong>]{file}<br />
The first comm<strong>and</strong> scales the rotated graphic such that its total height is 1 <strong>in</strong>ch.<br />
The second comm<strong>and</strong> scales the rotated graphics such that the portion above its<br />
reference po<strong>in</strong>t is 1 <strong>in</strong>ch tall.<br />
11.2 Scal<strong>in</strong>g of Rotated <strong>Graphics</strong><br />
When the height or width of a graphic is specified, the specified size is not the size of<br />
the graphic but rather of its Bound<strong>in</strong>gBox. This dist<strong>in</strong>ction is especially important<br />
<strong>in</strong> the scal<strong>in</strong>g of rotated graphics. For example<br />
produces<br />
\beg<strong>in</strong>{center}<br />
\<strong>in</strong>cludegraphics[totalheight=1<strong>in</strong>]{rosette}<br />
\<strong>in</strong>cludegraphics[angle=45,totalheight=1<strong>in</strong>]{rosette}<br />
\<strong>in</strong>cludegraphics[angle=90,totalheight=1<strong>in</strong>]{rosette}<br />
\end{center}<br />
17 Instead of mak<strong>in</strong>g the \hspace amount a fixed length such as 1 <strong>in</strong>ch, mak<strong>in</strong>g the \hspace amount<br />
a function of \l<strong>in</strong>ewidth or \em <strong>in</strong>creases a document’s portability.<br />
33
Although it may seem strange that the graphics have different sizes, it should make<br />
sense after view<strong>in</strong>g the Bound<strong>in</strong>gBoxes<br />
Each graphic is scaled such that its rotated Bound<strong>in</strong>gBox is 1 <strong>in</strong>ch tall. The scal<strong>in</strong>g<br />
scales the size of the Bound<strong>in</strong>gBox not the size of visible graphics.<br />
11.3 Alignment of Rotated <strong>Graphics</strong><br />
11.3.1 Example #1<br />
When graphics are rotated, the objects may not align properly. For example<br />
\beg<strong>in</strong>{center}<br />
\<strong>in</strong>cludegraphics[totalheight=1<strong>in</strong>]{rosette}<br />
\<strong>in</strong>cludegraphics[totalheight=1<strong>in</strong>,angle=-45]{rosette}<br />
\<strong>in</strong>cludegraphics[totalheight=1<strong>in</strong>,angle=-90]{rosette}<br />
\end{center}<br />
produces<br />
Aga<strong>in</strong>, this is better illustrated by the Bound<strong>in</strong>gBoxes<br />
34
In this case, the objects’ reference po<strong>in</strong>ts (orig<strong>in</strong>al lower-left corners) are aligned on a<br />
horizontal l<strong>in</strong>e. If it is desired to <strong>in</strong>stead have the centers aligned, the orig<strong>in</strong> option<br />
of \<strong>in</strong>cludegraphics can be used<br />
\beg<strong>in</strong>{center}<br />
\<strong>in</strong>cludegraphics[totalheight=1<strong>in</strong>]{rosette}<br />
\<strong>in</strong>cludegraphics[totalheight=1<strong>in</strong>,orig<strong>in</strong>=c,angle=-45]{rosette}<br />
\<strong>in</strong>cludegraphics[totalheight=1<strong>in</strong>,orig<strong>in</strong>=c,angle=-90]{rosette}<br />
\end{center}<br />
This aligns the centers of the graphics<br />
11.3.2 Example #2<br />
Similarly, the comm<strong>and</strong>s<br />
\beg<strong>in</strong>{center}<br />
\<strong>in</strong>cludegraphics[width=1<strong>in</strong>]{graphic}<br />
\hspace{1<strong>in</strong>}<br />
\<strong>in</strong>cludegraphics[width=1<strong>in</strong>,angle=-90]{graphic}<br />
\end{center}<br />
rotate the right-h<strong>and</strong> graphic around its lower-left corner, produc<strong>in</strong>g<br />
Graphic<br />
Graphic<br />
To align the bottoms of the graphics, use the follow<strong>in</strong>g comm<strong>and</strong>s<br />
\beg<strong>in</strong>{center}<br />
\<strong>in</strong>cludegraphics[width=1<strong>in</strong>]{graphic}<br />
\hspace{1<strong>in</strong>}<br />
\<strong>in</strong>cludegraphics[width=1<strong>in</strong>,orig<strong>in</strong>=br,angle=-90]{graphic}<br />
\end{center}<br />
which rotate the right graphic about its lower-right corner, produc<strong>in</strong>g<br />
Graphic<br />
Graphic<br />
35
11.4 M<strong>in</strong>ipage Vertical Alignment<br />
It is often useful to place graphics <strong>in</strong>side of m<strong>in</strong>ipage environments (for example, see<br />
Section 28 on Page 104). When m<strong>in</strong>ipages are placed side-by-side, L A TEX places them<br />
such that their reference po<strong>in</strong>ts are vertically aligned. By default, the m<strong>in</strong>ipage’s<br />
reference po<strong>in</strong>t is vertically centered on its left edge. An optional argument modifies<br />
the location of a m<strong>in</strong>ipage’s reference po<strong>in</strong>t.<br />
[b] causes the m<strong>in</strong>ipage’s reference po<strong>in</strong>t to be vertically aligned with the reference<br />
po<strong>in</strong>t of the bottom l<strong>in</strong>e <strong>in</strong> the m<strong>in</strong>ipage.<br />
[t] causes the m<strong>in</strong>ipage’s reference po<strong>in</strong>t to be vertically aligned with the reference<br />
po<strong>in</strong>t of the top l<strong>in</strong>e <strong>in</strong> the m<strong>in</strong>ipage.<br />
Note the [b] does not put the reference po<strong>in</strong>t at the bottom of the m<strong>in</strong>ipage. Likewise,<br />
the [t] does not put the reference po<strong>in</strong>t at the top of the m<strong>in</strong>ipage.<br />
When the m<strong>in</strong>ipage conta<strong>in</strong>s only one l<strong>in</strong>e, the [b] <strong>and</strong> [t] options produce the<br />
same results. For example, both<br />
\beg<strong>in</strong>{center}<br />
\beg<strong>in</strong>{m<strong>in</strong>ipage}[b]{.25\l<strong>in</strong>ewidth}<br />
\center<strong>in</strong>g<br />
\<strong>in</strong>cludegraphics[width=1<strong>in</strong>]{graphic}<br />
\end{m<strong>in</strong>ipage}%<br />
\beg<strong>in</strong>{m<strong>in</strong>ipage}[b]{.25\l<strong>in</strong>ewidth}<br />
\center<strong>in</strong>g<br />
\<strong>in</strong>cludegraphics[width=1<strong>in</strong>,angle=-45]{graphic}<br />
\end{m<strong>in</strong>ipage}<br />
\end{center}<br />
<strong>and</strong><br />
\beg<strong>in</strong>{center}<br />
\beg<strong>in</strong>{m<strong>in</strong>ipage}[t]{.25\l<strong>in</strong>ewidth}<br />
\center<strong>in</strong>g<br />
\<strong>in</strong>cludegraphics[width=1<strong>in</strong>]{graphic}<br />
\end{m<strong>in</strong>ipage}%<br />
\beg<strong>in</strong>{m<strong>in</strong>ipage}[t]{.25\l<strong>in</strong>ewidth}<br />
\center<strong>in</strong>g<br />
\<strong>in</strong>cludegraphics[width=1<strong>in</strong>,angle=-45]{graphic}<br />
\end{m<strong>in</strong>ipage}<br />
\end{center}<br />
produce Figure 4. In both of these cases, reference po<strong>in</strong>t of the m<strong>in</strong>ipage is the<br />
reference po<strong>in</strong>t (orig<strong>in</strong>al lower-left corner) of the eps graphic.<br />
Graphic<br />
Graphic<br />
Figure 4: m<strong>in</strong>ipages with [b] or [t] options<br />
11.4.1 Align<strong>in</strong>g the Bottoms of M<strong>in</strong>ipages<br />
One method for align<strong>in</strong>g the bottoms of m<strong>in</strong>ipages is to force the m<strong>in</strong>ipage basel<strong>in</strong>e<br />
be the bottom of the m<strong>in</strong>ipage. Recall that the m<strong>in</strong>ipage [b] option makes the<br />
m<strong>in</strong>ipage basel<strong>in</strong>e be the basel<strong>in</strong>e of the m<strong>in</strong>ipage’s bottom l<strong>in</strong>e.<br />
36
If the bottom l<strong>in</strong>e of the m<strong>in</strong>ipage happens to have zero depth, then the last<br />
l<strong>in</strong>e’s reference po<strong>in</strong>t is the bottom of the l<strong>in</strong>e <strong>and</strong> then the m<strong>in</strong>ipage [b] option<br />
would make the m<strong>in</strong>ipage basel<strong>in</strong>e be the bottom of the m<strong>in</strong>ipage. Similarly, if a l<strong>in</strong>e<br />
with zero height <strong>and</strong> zero depth is added just before \end{m<strong>in</strong>ipage}, then the [b]<br />
option makes the m<strong>in</strong>ipage’s basel<strong>in</strong>e be the bottom of the m<strong>in</strong>ipage.<br />
The comm<strong>and</strong> \par\vspace{0pt} creates such a zero-height, zero-depth l<strong>in</strong>e.<br />
S<strong>in</strong>ce the basel<strong>in</strong>e of this zero-depth l<strong>in</strong>e is the bottom of the m<strong>in</strong>ipage, the [b]<br />
option now aligns the bottom of the m<strong>in</strong>ipage. For example<br />
\beg<strong>in</strong>{center}<br />
\beg<strong>in</strong>{m<strong>in</strong>ipage}[b]{.25\l<strong>in</strong>ewidth}<br />
\center<strong>in</strong>g<br />
\<strong>in</strong>cludegraphics[width=1<strong>in</strong>]{graphic}<br />
\par\vspace{0pt}<br />
\end{m<strong>in</strong>ipage}%<br />
\beg<strong>in</strong>{m<strong>in</strong>ipage}[b]{.25\l<strong>in</strong>ewidth}<br />
\center<strong>in</strong>g<br />
\<strong>in</strong>cludegraphics[width=1<strong>in</strong>,angle=-45]{graphic}<br />
\par\vspace{0pt}<br />
\end{m<strong>in</strong>ipage}<br />
\end{center}<br />
produces Figure 5.<br />
Graphic<br />
Graphic<br />
Figure 5: M<strong>in</strong>ipages with Bottoms Aligned<br />
11.4.2 Align<strong>in</strong>g the Tops of M<strong>in</strong>ipages<br />
When a zero-height, zero-depth l<strong>in</strong>e is added to the top of the m<strong>in</strong>ipage, the [t]<br />
option makes the m<strong>in</strong>ipage basel<strong>in</strong>e be the top of the m<strong>in</strong>ipage. When this is done<br />
with multiple side-by-side m<strong>in</strong>ipages, the tops of the m<strong>in</strong>ipages are aligned.<br />
The comm<strong>and</strong> \vspace{0pt} <strong>in</strong>serts a zero-height, zero-depth l<strong>in</strong>e at the top of<br />
the m<strong>in</strong>ipage. S<strong>in</strong>ce the basel<strong>in</strong>e of this zero-height l<strong>in</strong>e is the top of the m<strong>in</strong>ipage,<br />
the [t] option now aligns the top of the m<strong>in</strong>ipage. For example<br />
\beg<strong>in</strong>{center}<br />
\beg<strong>in</strong>{m<strong>in</strong>ipage}[t]{.25\l<strong>in</strong>ewidth}<br />
\vspace{0pt}<br />
\center<strong>in</strong>g<br />
\<strong>in</strong>cludegraphics[width=1<strong>in</strong>]{graphic}<br />
\end{m<strong>in</strong>ipage}%<br />
\beg<strong>in</strong>{m<strong>in</strong>ipage}[t]{.25\l<strong>in</strong>ewidth}<br />
\vspace{0pt}<br />
\center<strong>in</strong>g<br />
\<strong>in</strong>cludegraphics[width=1<strong>in</strong>,angle=-45]{graphic}<br />
\end{m<strong>in</strong>ipage}<br />
\end{center}<br />
produces Figure 6.<br />
This aligns the tops of the m<strong>in</strong>ipages with the current basel<strong>in</strong>e. If it is <strong>in</strong>stead desired<br />
to align the tops of the m<strong>in</strong>ipages with the top of the current l<strong>in</strong>e of text, replace<br />
\vspace{0pt} with \vspace{-\basel<strong>in</strong>eskip}. This topic is mentioned <strong>in</strong> [3, pages<br />
863-865].<br />
37
Graphic<br />
Graphic<br />
Figure 6: M<strong>in</strong>ipages with Tops Aligned<br />
12 Overlay<strong>in</strong>g Two <strong>Imported</strong> <strong>Graphics</strong><br />
This section describes how to overlay two graphics. Note that there is no guarantee<br />
that the top graphic is transparent; it may have been created with an opaque<br />
background that hides the bottom graphic.<br />
For example 18 , the files left.eps <strong>and</strong> right.eps conta<strong>in</strong> the graphics shown <strong>in</strong><br />
Figure 7, then the comm<strong>and</strong>s<br />
\makebox[0pt][l]{\<strong>in</strong>cludegraphics{left.eps}}%<br />
\<strong>in</strong>cludegraphics{right.eps}<br />
overlay the two graphics, as shown <strong>in</strong> Figure 8. The graphics are overlaid with their<br />
reference (lower-left) po<strong>in</strong>ts co<strong>in</strong>cident. In this particular example, the graphics had<br />
identical natural sizes so they overlaid perfectly without any scal<strong>in</strong>g. Other pairs of<br />
graphics may require scal<strong>in</strong>g (by \<strong>in</strong>cludegraphics, \scalebox, or \resizebox) to<br />
achieve the desired overlay<strong>in</strong>g.<br />
This overlay<strong>in</strong>g code may seem mysterious unless one underst<strong>and</strong>s the \makebox<br />
comm<strong>and</strong>. The \makebox[0pt][l]{...} creates a zero-width box <strong>in</strong> which its argument<br />
is placed. When a width is specified (0 pt <strong>in</strong> this case), the typesett<strong>in</strong>g<br />
algorithms allocate this much horizontal space regardless of the actual width of the<br />
contents. Thus, a left-justified zero-width box causes the L A TEX objects follow<strong>in</strong>g the<br />
box to be typeset on top of the contents of the box.<br />
Left<br />
Right<br />
(a) Contents of left.eps<br />
(b) Contents of right.eps<br />
Figure 7: Contents of <strong>Graphics</strong> Files<br />
Left<br />
Right<br />
Figure 8: Two overlaid graphics<br />
18 Although this example overlays two eps files, similar code can be used for overlay<strong>in</strong>g other<br />
graphic formats.<br />
38
12.1 Overpic Package<br />
Another method for overlay<strong>in</strong>g graphics is the overpic package, which def<strong>in</strong>es a picture<br />
environment which is the size of the <strong>in</strong>cluded graphic. See the overpic package<br />
documentation [27] for details.<br />
13 <strong>Us<strong>in</strong>g</strong> Subdirectories<br />
When import<strong>in</strong>g a large number of graphics files, it may be desirable to store the<br />
graphics files <strong>in</strong> a subdirectory. For example, when the subdirectory is named sub,<br />
one may be tempted to then <strong>in</strong>clude the file file.eps with the follow<strong>in</strong>g comm<strong>and</strong><br />
\<strong>in</strong>cludegraphics{sub/file.eps}<br />
While this syntax works for most Unix <strong>and</strong> dos TEX distributions, there are problems<br />
with such usage<br />
Inefficiency<br />
Whenever TEX opens a file, the filename is saved <strong>in</strong> TEX memory. When<br />
open<strong>in</strong>g a large number of files, this lost memory may cause a poolsize error (see<br />
Section 13.4 on Page 41). S<strong>in</strong>ce explicitly specify<strong>in</strong>g subdirectories <strong>in</strong>creases<br />
the filename length, it aggravates this pool space problem.<br />
Unportability<br />
One of L A TEX’s advantages is that its files can be used on any platform. However,<br />
embedd<strong>in</strong>g the subdirectory <strong>in</strong> the filename results <strong>in</strong> the file becom<strong>in</strong>g<br />
operat<strong>in</strong>g-system dependent. The file now cannot be used on vms or Mac<strong>in</strong>tosh<br />
computers without significant modification.<br />
Instead of embedd<strong>in</strong>g the subdirectory <strong>in</strong> the filename, there are two other options<br />
1. The best method is to modify the TEX search path (see Section 13.1 on Page 39).<br />
2. Another method is to specify sub/ <strong>in</strong> a \graphicspath comm<strong>and</strong> (see Section<br />
13.3 on Page 40). However, this is much less efficient than modify<strong>in</strong>g the<br />
TEX search path.<br />
Both of these options caus<strong>in</strong>g \<strong>in</strong>cludegraphics to automatically search the graphics<br />
subdirectory, allow<strong>in</strong>g<br />
\<strong>in</strong>cludegraphics{sub/file.eps}<br />
to be replaced with<br />
\<strong>in</strong>cludegraphics{file.eps}<br />
13.1 TEX Search Path<br />
S<strong>in</strong>ce the method for chang<strong>in</strong>g the directories <strong>in</strong> which TEX looks depends on the<br />
TEX distribution, it becomes very complicated to provide a general description. As<br />
an example, this section describe the strategy used by the web2c/teTeX Unix distributions.<br />
Although the method for chang<strong>in</strong>g the search path differs for other TEX<br />
distributions, most employ similar strategies.<br />
For web2c/teTeX Unix distributions, the TEX search path can be modified by<br />
sett<strong>in</strong>g the TEXINPUTS environment variable. When us<strong>in</strong>g csh shells,<br />
setenv TEXINPUTS /dir1:/dir2:<br />
causes /dir1 <strong>and</strong> /dir2 to be searched before the default directories. Without the<br />
trail<strong>in</strong>g colon, the default directories are not be searched. Sett<strong>in</strong>g TEXINPUTS with<br />
39
setenv TEXINPUTS :/dir1:/dir2<br />
causes /dir1 <strong>and</strong> /dir2 to be searched after the default directories, while<br />
setenv TEXINPUTS /dir1::/dir2<br />
causes /dir1 to be searched before the default directories <strong>and</strong> /dir2 to be searched<br />
after the default directories.<br />
Putt<strong>in</strong>g // after a directory causes all of its subdirectories to be searched. For<br />
example,<br />
setenv TEXINPUTS /dir1//:/dir2:<br />
causes all the subdirectories (<strong>and</strong> sub-subdirectories) of /dir1 to be searched. Be<br />
careful <strong>in</strong> us<strong>in</strong>g // as it may slow down the search<strong>in</strong>g if the directory conta<strong>in</strong>s many<br />
files.<br />
These examples also work for sh shells, although the syntax should be changed to<br />
TEXINPUTS="/dir1:/dir2:"; export TEXINPUTS<br />
When L A TEX f<strong>in</strong>ds files on the TEX path, it does not <strong>in</strong>clude the entire filename <strong>in</strong><br />
the dvi file. As a result, old versions of dvips or xdvi which do not search the TEX<br />
path cannot f<strong>in</strong>d the file (see Section 14.4 on Page 44).<br />
13.2 Temporarily Chang<strong>in</strong>g the TEX Search Path<br />
This section describes how a Unix shell script can temporarily change the TEX Search<br />
Path <strong>in</strong> order to f<strong>in</strong>d project-specific graphics files. Users can then construct a separate<br />
shell script for each of their projects, with each script specify<strong>in</strong>g the directories<br />
that are unique to those projects.<br />
For example, suppose a user is writ<strong>in</strong>g a journal paper <strong>and</strong> wants to create a<br />
unix shell script latex paper that replaces the latex comm<strong>and</strong>. Create a file named<br />
latex paper on the Unix search path conta<strong>in</strong><strong>in</strong>g<br />
#!/b<strong>in</strong>/sh<br />
TEXINPUTS= ~/PAPER/SUB1/:~/PAPER/SUB2/:$TEXINPUTS latex $@<br />
Make the file executable with<br />
chmod u+x latex_paper<br />
Once this is done, typ<strong>in</strong>g<br />
latex_paper file.tex<br />
adds ~/PAPER/SUB1/:~/PAPER/SUB2/ to the beg<strong>in</strong>n<strong>in</strong>g of TEXINPUTS before latex<br />
file.tex is run, allow<strong>in</strong>g L A TEX to f<strong>in</strong>d any graphics stored <strong>in</strong> the ~/PAPER/SUB1/<br />
or ~/PAPER/SUB2/ subdirectories.<br />
A similar script called dvips paper would also need to be written <strong>in</strong> order for<br />
dvips to f<strong>in</strong>d the graphics dur<strong>in</strong>g dvi-to-ps conversion.<br />
13.3 <strong>Graphics</strong> Search Path<br />
By default, L A TEX looks for graphics files <strong>in</strong> any directory on the TEX search path.<br />
In addition to these directories, L A TEX also looks <strong>in</strong> any directories specified <strong>in</strong> the<br />
\graphicspath comm<strong>and</strong>. For example,<br />
\graphicspath{{dir1/}{dir2/}}<br />
tells L A TEX to also look for graphics files <strong>in</strong> dir1/ <strong>and</strong> dir2/. For Mac<strong>in</strong>tosh, this<br />
becomes<br />
\graphicspath{{dir1:}{dir2:}}<br />
40
It is important to note that the file-search<strong>in</strong>g associated with \graphicspath directories<br />
is much slower than that associated with TEXINPUTS directories. Furthermore,<br />
each file search done <strong>in</strong> a \graphicspath directory consumes additional pool space<br />
(see Section 13.4 on Page 41).<br />
Due to these <strong>in</strong>efficiencies, use of \graphicspath is generally discouraged. Instead,<br />
it is usually better to specify subdirectories by modify<strong>in</strong>g the TEX search path<br />
(see Section 13.1 on Page 39).<br />
13.4 Conserv<strong>in</strong>g Pool Space<br />
TEX reserves a portion of its memory called pool space for its <strong>in</strong>ternal pass<strong>in</strong>g of<br />
str<strong>in</strong>gs. Whenever TEX opens a file (or tries to open a file), some pool space is<br />
permanently used. When open<strong>in</strong>g a large number of files, this lost memory may<br />
cause TEX to run out of pool space, caus<strong>in</strong>g an error similar to<br />
! TeX capacity exceeded, sorry [poolsize=72288]<br />
S<strong>in</strong>ce the amount of lost pool space is a function of the length of the filename,<br />
specify<strong>in</strong>g subdirectories aggravates this pool space problem.<br />
With the exception of the latest web2c version <strong>and</strong> some commercial distributions,<br />
the only way to <strong>in</strong>crease the pool size is to recompile TEX. Fortunately, the follow<strong>in</strong>g<br />
pool-conservation rules usually solve the problem.<br />
• Avoid excessively-long file names.<br />
• Don’t <strong>in</strong>clude the subdirectory names<br />
\<strong>in</strong>cludegraphics{sub/file.eps}<br />
Instead, change the TEX search path or move the files out of the subdirectory.<br />
• Don’t use the \graphicspath comm<strong>and</strong>.<br />
\graphicspath{{dir1/}{dir2/}}<br />
...<br />
\<strong>in</strong>cludegraphics{file.eps}<br />
causes \<strong>in</strong>cludegraphics to try to open the follow<strong>in</strong>g files<br />
file.eps<br />
dir1/file.eps<br />
dir2/file.eps<br />
Each of these attempts consumes pool space. Instead of us<strong>in</strong>g \graphicspath,<br />
modify the TEX search path.<br />
• Specify the entire filename, do not omit the files extension/suffix (e.g., .eps).<br />
With the default \Declare<strong>Graphics</strong>Extensions (see Section 9.1 on Page 29),<br />
the comm<strong>and</strong><br />
\<strong>in</strong>cludegraphics{file}<br />
causes \<strong>in</strong>cludegraphics to try to open the follow<strong>in</strong>g files<br />
file.eps<br />
file.ps<br />
file.eps.gz<br />
file.ps.gz<br />
file.eps.Z<br />
This is especially <strong>in</strong>efficient when used <strong>in</strong> conjunction with \graphicspath.<br />
Issu<strong>in</strong>g a \Declare<strong>Graphics</strong>Extensions comm<strong>and</strong> with a m<strong>in</strong>imal number of<br />
extensions m<strong>in</strong>imizes the <strong>in</strong>efficiency of omitt<strong>in</strong>g the extension.<br />
41
Note that \<strong>in</strong>cludegraphics only consumes pool space when it opens or attempts to<br />
open a file. S<strong>in</strong>ce \<strong>in</strong>cludegraphics opens files to determ<strong>in</strong>e the graphic’s Bound<strong>in</strong>gBox,<br />
an effective but <strong>in</strong>convenient method of prevent<strong>in</strong>g pool space consumption<br />
is to specify the Bound<strong>in</strong>gBox parameters with the \<strong>in</strong>cludegraphics comm<strong>and</strong>’s<br />
bb option (see Table 1 on Page 25).<br />
14 Compressed <strong>and</strong> Non-EPS <strong>Graphics</strong> Files <strong>in</strong> dvips<br />
As described <strong>in</strong> Section 1, for dvips-style documents, L A TEX shifts the graphics<strong>in</strong>sertion<br />
burden onto the dvi programs. This means that a L A TEX document can<br />
use any graphic format which is supported by the dvi program.<br />
While virtually all dvi-to-ps converters support <strong>in</strong>sertion of eps graphics, few<br />
converters support non-eps graphics. This means the us<strong>in</strong>g non-EPS graphics with<br />
a dvips-style document generally requires convert<strong>in</strong>g the non-eps graphics <strong>in</strong>to eps<br />
form. This can be done <strong>in</strong> two ways:<br />
Convert the ahead of time Before dvi-to-ps conversion, use a graphics-conversion<br />
program to convert the non-eps graphic <strong>in</strong>to eps format. This converted eps<br />
file is stored <strong>and</strong> subsequently used by the dvi-to-ps converter.<br />
Convert on-the-fly Dur<strong>in</strong>g the dvi-to-ps conversion, the dvi-to-ps converter calls<br />
a graphics-conversion program, with the graphics-conversion output be<strong>in</strong>g piped<br />
back <strong>in</strong>to dvi-to-ps converter <strong>and</strong> <strong>in</strong>serted <strong>in</strong>to the f<strong>in</strong>al ps file.<br />
The disadvantage of convert<strong>in</strong>g ahead of time is that it requires storage of a second<br />
version of the graphics file. Although the “Convert on-the-fly” procedure does<br />
not require the additional storage, the same graphics-conversion computations are<br />
repeated at every dvi-to-ps execution. This is a storage-vs-speed tradeoff, but most<br />
users prefer the speed of the “Convert ahead of time”.<br />
Rather than directly <strong>in</strong>corporat<strong>in</strong>g graphics-conversion rout<strong>in</strong>es, dvips provides<br />
a mechanism for call<strong>in</strong>g external conversion programs 19 . This mechanism can be<br />
accessed from L A TEX by use comm<strong>and</strong> argument of \Declare<strong>Graphics</strong>Rule. This is<br />
more flexible than direct support because it keeps the graphics-conversion uncoupled<br />
from the dvi-to-ps conversion, allow<strong>in</strong>g users to use the graphics-conversion program<br />
of their choice.<br />
When us<strong>in</strong>g dvips <strong>and</strong> an operat<strong>in</strong>g system which supports pipes 20 one can<br />
use \Declare<strong>Graphics</strong>Rule (see Section 9.2 on Page 30) to specify an operation to<br />
be performed on the file. Mak<strong>in</strong>g this operation a decompression comm<strong>and</strong> allows<br />
compressed graphics files to be used. Mak<strong>in</strong>g this operation a graphics-conversion<br />
comm<strong>and</strong> allows non-eps graphics files can be used.<br />
S<strong>in</strong>ce dvips is currently the only dvi-to-ps converter with this capability, everyth<strong>in</strong>g<br />
<strong>in</strong> this section requires dvips. Users need to pass the dvips option to the<br />
graphicx package. This can be done by either specify<strong>in</strong>g the dvips global option <strong>in</strong><br />
the \documentclass comm<strong>and</strong><br />
\documentclass[dvips,11pt]{article}<br />
or by specify<strong>in</strong>g the dvips option <strong>in</strong> the \usepackage comm<strong>and</strong><br />
\usepackage[dvips]{graphicx}<br />
Specify<strong>in</strong>g the dvips option <strong>in</strong> \documentclass it is preferred because it passes the<br />
dvips option to all packages.<br />
19 This requires an operat<strong>in</strong>g system which supports pipes. For example, Unix supports pipes<br />
while dos does not.<br />
20 For example, Unix supports pipes while dos does not.<br />
42
14.1 Compressed EPS Example<br />
The steps for us<strong>in</strong>g compressed eps files are<br />
1. Create an eps file (file1.eps for example)<br />
2. Store the Bound<strong>in</strong>gBox l<strong>in</strong>e <strong>in</strong> another file (file1.eps.bb)<br />
3. Compress the eps file. For example, on many platforms, the comm<strong>and</strong><br />
gzip -9 file1.eps<br />
creates the compressed file file1.eps.gz. The -9 (or -best) option specifies<br />
maximum compression.<br />
4. Include the proper \Declare<strong>Graphics</strong>Rule comm<strong>and</strong> before the \<strong>in</strong>cludegraphics<br />
comm<strong>and</strong> <strong>in</strong> the L A TEX file. The \Declare<strong>Graphics</strong>Rule comm<strong>and</strong> <strong>in</strong>forms<br />
L A TEX how to treat the particular suffix (see Section 9.2 on Page 30). For<br />
example<br />
\documentclass[dvips]{article}<br />
\usepackage{graphicx}<br />
\beg<strong>in</strong>{document}<br />
\Declare<strong>Graphics</strong>Rule{.eps.gz}{eps}{.eps.bb}{‘gunzip -c #1}<br />
\beg<strong>in</strong>{figure}<br />
\center<strong>in</strong>g<br />
\<strong>in</strong>cludegraphics[width=3<strong>in</strong>]{file1.eps.gz}<br />
\caption{Compressed EPS Graphic}<br />
\label{fig:compressed:eps}<br />
\end{figure}<br />
\end{document}<br />
In this particular case, the \Declare<strong>Graphics</strong>Rule comm<strong>and</strong> is actually not necessary<br />
because it happens to be one of the graphics rules pre-def<strong>in</strong>ed <strong>in</strong> dvips.def.<br />
If another compression program or suffixes were used, the \Declare<strong>Graphics</strong>Rule<br />
comm<strong>and</strong> would be m<strong>and</strong>atory. For example, if the Bound<strong>in</strong>gBox file had been stored<br />
<strong>in</strong> file1.bb, the correspond<strong>in</strong>g \Declare<strong>Graphics</strong>Rule would be<br />
\Declare<strong>Graphics</strong>Rule{.eps.gz}{eps}{.bb}{‘gunzip -c #1}<br />
14.2 Non-EPS Graphic Files<br />
While it is easy to <strong>in</strong>sert eps graphics <strong>in</strong>to L A TEX documents, it is not as straightforward<br />
to <strong>in</strong>sert non-eps graphics (gif, tiff, jpeg, pict, etc.). A simple solution<br />
is to determ<strong>in</strong>e whether the application which generated the non-eps graphic also<br />
generates eps output. If not, a graphics-conversion program (see Section 6.2 on<br />
Page 17) must be used to convert the graphics to PostScript.<br />
S<strong>in</strong>ce a non-eps graphics file may be smaller than the correspond<strong>in</strong>g eps file,<br />
it may be desirable to keep the graphics <strong>in</strong> a non-eps format <strong>and</strong> convert them to<br />
PostScript when the dvi file is converted to PostScript. If dvips is used, this on-thefly<br />
conversion can be specified by the comm<strong>and</strong> option <strong>in</strong> \Declare<strong>Graphics</strong>Rule.<br />
For example, us<strong>in</strong>g on-the-fly conversion to <strong>in</strong>sert file2.gif <strong>in</strong>to a L A TEX document<br />
requires the follow<strong>in</strong>g steps<br />
1. F<strong>in</strong>d a gif-to-eps conversion program (assume it’s called gif2eps)<br />
2. One needs to create a Bound<strong>in</strong>gBox file which specifies the natural size of the<br />
file2.gif graphics. To do this, convert file2.gif to PostScript <strong>and</strong><br />
(a) If the PostScript file conta<strong>in</strong>s a Bound<strong>in</strong>gBox l<strong>in</strong>e, save the Bound<strong>in</strong>gBox<br />
l<strong>in</strong>e <strong>in</strong> file2.gif.bb<br />
43
(b) If the PostScript file conta<strong>in</strong>s no Bound<strong>in</strong>gBox l<strong>in</strong>e, determ<strong>in</strong>e the appropriate<br />
Bound<strong>in</strong>gBox (see Section 3.2 on Page 12) <strong>and</strong> place those numbers<br />
<strong>in</strong> a %%Bound<strong>in</strong>gBox: l<strong>in</strong>e <strong>in</strong> file2.gif.bb<br />
3. Keep file2.gif <strong>and</strong> file2.gif.bb <strong>and</strong> delete the PostScript file.<br />
4. Include \Declare<strong>Graphics</strong>Rule{.gif}{eps}{.gif.bb}{‘gif2eps #1}<br />
before the \<strong>in</strong>cludegraphics comm<strong>and</strong> <strong>in</strong> the L A TEX file.<br />
When \<strong>in</strong>cludegraphics{file.gif} is issued, L A TEX reads the Bound<strong>in</strong>gBox from<br />
file.gif.bb <strong>and</strong> tells dvips to use gif2eps to convert file.gif to eps.<br />
14.3 GIF Example<br />
While the comm<strong>and</strong>s necessary for <strong>in</strong>clud<strong>in</strong>g non-eps graphics are dependent on<br />
the operat<strong>in</strong>g system <strong>and</strong> the graphics conversion program, this section provides<br />
examples for two common Unix conversion programs. The comm<strong>and</strong>s<br />
\Declare<strong>Graphics</strong>Rule{.gif}{eps}{.gif.bb}{‘convert #1 ’eps:-’ }<br />
\beg<strong>in</strong>{figure}<br />
\center<strong>in</strong>g<br />
\<strong>in</strong>cludegraphics[width=3<strong>in</strong>]{file2.gif}<br />
\caption{GIF Graphic}<br />
\end{figure}<br />
use the convert program (part of the ImageMagick package) package to translate<br />
the gif file <strong>in</strong>to eps. The comm<strong>and</strong><br />
convert file2.gif ’eps:-’<br />
translates file2.gif <strong>in</strong>to eps format (specified by the “eps:” option), send<strong>in</strong>g the<br />
result to st<strong>and</strong>ard output (specified by the “-” specification).<br />
Alternatively, one can use the ppm utilities <strong>in</strong> which giftoppm, ppmtopgm, <strong>and</strong><br />
pgmtops convert the gif file to eps via the ppm <strong>and</strong> grayscale pgm formats. In Unix,<br />
the pip<strong>in</strong>g between these programs is specified by the follow<strong>in</strong>g \Declare<strong>Graphics</strong>Rule<br />
comm<strong>and</strong><br />
\Declare<strong>Graphics</strong>Rule{.gif}{eps}{.gif.bb}{‘giftoppm #1 | ppmtopgm | pgmtops}<br />
14.4 TEX Search Path <strong>and</strong> dvips<br />
When L A TEX encounters an \<strong>in</strong>cludegraphics comm<strong>and</strong>, it looks <strong>in</strong> the current<br />
directory for the file. If it does not f<strong>in</strong>d the file <strong>in</strong> the current directory, it searches<br />
through the TEX path for the file. When the dvi file is converted to PostScript,<br />
dvips performs the same search rout<strong>in</strong>e <strong>and</strong> everyth<strong>in</strong>g works well. However, when<br />
an on-the-fly comm<strong>and</strong> is specified <strong>in</strong> the \Declare<strong>Graphics</strong>Rule comm<strong>and</strong>, the<br />
on-the-fly comm<strong>and</strong> prevents dvips from properly search<strong>in</strong>g the TEX path.<br />
For example, the rule<br />
\Declare<strong>Graphics</strong>Rule{.eps.gz}{eps}{.eps.bb}{‘gunzip -c #1}<br />
specifies that the gunzip -c comm<strong>and</strong> be used on files hav<strong>in</strong>g a .eps.gz suffix.<br />
Suppose the follow<strong>in</strong>g comm<strong>and</strong> is used<br />
\<strong>in</strong>cludegraphics{file.eps.gz}<br />
If file.eps.gz <strong>and</strong> file.eps.bb are <strong>in</strong> the current directory, the path-search<strong>in</strong>g is<br />
not needed <strong>and</strong> everyth<strong>in</strong>g works well. L A TEX uses file.eps.bb <strong>and</strong> dvips executes<br />
gunzip -c file.eps.gz to uncompress the file.<br />
However, th<strong>in</strong>gs don’t work if file.eps.gz <strong>and</strong> file.eps.bb are not <strong>in</strong> the current<br />
directory. If they are <strong>in</strong>stead <strong>in</strong> the directory /a/b/c/ (on the TEX path), L A TEX<br />
searches the path to f<strong>in</strong>d /a/b/c/file.eps.bb. However, problems occur when<br />
44
dvips executes ‘gunzip -c file.eps.gz because gunzip cannot f<strong>in</strong>d file.eps.gz.<br />
If the TEX distribution uses a recent kpathsea library (as does the teTeX distribution),<br />
this problem can be solved by the follow<strong>in</strong>g graphics rule<br />
\Declare<strong>Graphics</strong>Rule{.eps.gz}{eps}{.eps.bb}%<br />
{‘gunzip -c ‘kpsewhich -n latex tex #1‘}<br />
which uses kpsewhich to f<strong>in</strong>d the file for gunzip. The<br />
‘kpsewhich -n latex tex #1<br />
comm<strong>and</strong> causes dvips look for the compressed file on the TEX search path. The<br />
full filename (<strong>in</strong>clud<strong>in</strong>g subdirectories) is then appended to the gunzip -c comm<strong>and</strong>,<br />
allow<strong>in</strong>g gunzip to f<strong>in</strong>d the file even though it is not <strong>in</strong> the current directory.<br />
While this new \Declare<strong>Graphics</strong>Rule comm<strong>and</strong> can be placed at the beg<strong>in</strong>n<strong>in</strong>g<br />
of every document, it may be more convenient to add the follow<strong>in</strong>g to the<br />
graphics.cfg file<br />
\AtEndOfPackage{%<br />
\Declare<strong>Graphics</strong>Rule{.eps.gz}{eps}{.eps.bb}%<br />
{‘gunzip -c ‘kpsewhich -n latex tex #1‘}}<br />
<strong>and</strong> leav<strong>in</strong>g the exist<strong>in</strong>g \ExecuteOptions{dvips} l<strong>in</strong>e.<br />
15 The PSfrag Package<br />
While there are many draw<strong>in</strong>g <strong>and</strong> analysis packages which produce eps files, most<br />
do not support symbols <strong>and</strong> equations as well as L A TEX. The psfrag package allows<br />
L A TEX users to replace text str<strong>in</strong>gs <strong>in</strong> eps files with L A TEX text or equations.<br />
Table 5: PSfrag Options<br />
PStext<br />
posn<br />
PSposn<br />
scale<br />
rot<br />
text<br />
Text <strong>in</strong> eps file to be replaced.<br />
(Optional, Defaults to [Bl].) Position of placement po<strong>in</strong>t relative to new L A TEX<br />
text.<br />
(Optional, Defaults to [Bl].) Position of placement po<strong>in</strong>t relative to exist<strong>in</strong>g eps<br />
text.<br />
(Optional, defaults to 1.) Scal<strong>in</strong>g factor for the text. For best results, avoid us<strong>in</strong>g<br />
the scal<strong>in</strong>g factor <strong>and</strong> <strong>in</strong>stead use L A TEX type-size comm<strong>and</strong>s such as \small <strong>and</strong><br />
\large<br />
(Optional, defaults to zero.) When an angle is specified, it is the angle of rotation<br />
of the new text relative to the exist<strong>in</strong>g text. The angle is <strong>in</strong> degrees with a counterclockwise<br />
rotation be<strong>in</strong>g positive.<br />
This option is especially useful when deal<strong>in</strong>g with applications which only allow<br />
horizontal text <strong>in</strong> their eps files.<br />
The L A TEX text to <strong>in</strong>sert <strong>in</strong>to the eps graphic.<br />
Like regular L A TEX text, math formulas must be enclosed by dollar signs (e.g.,<br />
$\frac{1}{2}$ or $x^2$).<br />
psfrag 3.0 was totally re-written <strong>and</strong> released <strong>in</strong> November 1996. Previous versions<br />
of psfrag required runn<strong>in</strong>g a preprocessor (such as ps2frag or ps2psfrag) to<br />
identify <strong>and</strong> tag all the text <strong>in</strong> the eps file. S<strong>in</strong>ce psfrag 3.0 requires no preprocess<strong>in</strong>g,<br />
it does not require any external programs such as perl or ghostscript. psfrag<br />
3.0 only requires a recent L A TEX <strong>and</strong> the graphics bundle distributed with L A TEX.<br />
Reference [29] provides complete documentation on psfrag 3.0.<br />
45
An additional benefit of psfrag rewrite is that it now supports compressed eps<br />
graphics. However, the \tex comm<strong>and</strong> (described <strong>in</strong> Section 15.3 on Page 48) cannot<br />
be used to embed L A TEX text <strong>in</strong> compressed graphics.<br />
Problems<br />
with Kern<strong>in</strong>g<br />
To use psfrag, create an eps file <strong>and</strong> then perform the follow<strong>in</strong>g steps<br />
1. Include \usepackage{psfrag} <strong>in</strong> the preamble of the L A TEX document.<br />
2. In the document, use the \psfrag comm<strong>and</strong> to specify the eps text to replace<br />
<strong>and</strong> the L A TEX str<strong>in</strong>g to replace it. This makes the specified substitution occur<br />
<strong>in</strong> any subsequent \<strong>in</strong>cludegraphics comm<strong>and</strong> issued <strong>in</strong> the same environment.<br />
3. Use the \<strong>in</strong>cludegraphics comm<strong>and</strong> as usual.<br />
The L A TEX \psfrag comm<strong>and</strong> has the follow<strong>in</strong>g syntax<br />
\psfrag{PStext}[posn][PSposn][scale][rot]{text}<br />
with its arguments described <strong>in</strong> Table 5.<br />
The posn <strong>and</strong> PSposn options are one of the 12 po<strong>in</strong>ts (such as [tl], [br], [cc])<br />
shown <strong>in</strong> Figure 3 on Page 28. If the optional arguments are not issued, the po<strong>in</strong>t<br />
defaults to [Bl]. Any miss<strong>in</strong>g letters default to c (e.g., [ ] <strong>and</strong> [c] are equivalent<br />
to [cc], [l] is equivalent to [lc]). See [29] for examples of various comb<strong>in</strong>ations of<br />
placement po<strong>in</strong>ts.<br />
Note that \psfrag matches entire text str<strong>in</strong>gs. Thus the comm<strong>and</strong><br />
\psfrag{pi}{$\pi$}<br />
replaces the str<strong>in</strong>g pi with π, but does not affect the str<strong>in</strong>gs pi/2 or 2pi. Separate<br />
\psfrag comm<strong>and</strong>s must entered for these str<strong>in</strong>gs.<br />
psfrag cannot perform the replacement unless the entire eps str<strong>in</strong>g is constructed<br />
with a s<strong>in</strong>gle PostScript comm<strong>and</strong>. Some programs break str<strong>in</strong>g up <strong>in</strong>to sub-str<strong>in</strong>gs<br />
or <strong>in</strong>dividual letters <strong>in</strong> order to perform kern<strong>in</strong>g. For example, Corel Draw produced<br />
the follow<strong>in</strong>g eps code to place the str<strong>in</strong>g “Hello World”<br />
0 0 (Hello W) @t<br />
1080 0 (orld) @t<br />
S<strong>in</strong>ce psfrag sees this as two unrelated str<strong>in</strong>gs “Hello W” <strong>and</strong> “orld”, it cannot<br />
perform any replacement of “Hello World”. If the kern<strong>in</strong>g cannot be manually turned<br />
off, us<strong>in</strong>g Courier or other monospaced fonts often prevents the kern<strong>in</strong>g 21 . If the<br />
kern<strong>in</strong>g cannot be avoided, only s<strong>in</strong>gle-character replacement str<strong>in</strong>gs can be used.<br />
15.1 PSfrag Example #1<br />
The comm<strong>and</strong>s<br />
\<strong>in</strong>cludegraphics{pend.eps}<br />
<strong>in</strong>clude the graphic without any psfrag replacement, produc<strong>in</strong>g Figure 9. The comm<strong>and</strong>s<br />
\psfrag{q1}{$\theta_1$}<br />
\psfrag{q2}{$\theta_2$}<br />
\psfrag{L1}{$L_1$}<br />
\psfrag{L2}{$L_2$}<br />
\psfrag{P1}[][]{$P_1$}<br />
\psfrag{P2}[][]{\large $P_2$}<br />
\<strong>in</strong>cludegraphics{pend.eps}<br />
21 In order to avoid kern<strong>in</strong>g, the font may need to be set to Courier before the text is created.<br />
That is, creat<strong>in</strong>g the text <strong>and</strong> then convert<strong>in</strong>g it to Courier may still result <strong>in</strong> kern<strong>in</strong>g.<br />
46
<strong>in</strong>clude the graphic with psfrag replacement, produc<strong>in</strong>g Figure 10. The first four<br />
\psfrag comm<strong>and</strong>s position the new L A TEX text such that its left basel<strong>in</strong>e po<strong>in</strong>t corresponds<br />
to the left basel<strong>in</strong>e po<strong>in</strong>t of the eps text. The last two \psfrag comm<strong>and</strong>s<br />
use the [][] options to position the L A TEX text such that its center corresponds<br />
to the center of the eps text. Note that the N tag <strong>in</strong> Figure 10 is left unchanged,<br />
show<strong>in</strong>g that not all eps text has to be replaced.<br />
q1<br />
L1<br />
P1<br />
N<br />
P2<br />
L N 1<br />
θ 1 P 1<br />
P 2<br />
L 2<br />
θ 2<br />
q2<br />
L2<br />
Figure 9: Without PSfrag Replacement<br />
Figure 10: With PSfrag Replacement<br />
15.2 PSfrag Example #2<br />
This example demonstrates how the \shortstack, \colorbox, <strong>and</strong> \fcolorbox comm<strong>and</strong>s<br />
can be used with \psfrag.<br />
shortstack The \shortstack comm<strong>and</strong> allows text to be stacked vertically, which<br />
can be used to substitute multiple l<strong>in</strong>es of text for a s<strong>in</strong>gle l<strong>in</strong>e of text. The<br />
l<strong>in</strong>es of text are separated by the \\ comm<strong>and</strong>.<br />
colorbox The \colorbox comm<strong>and</strong> (part of the color package, which is distributed<br />
with L A TEX) places a rectangular color background beh<strong>in</strong>d an object. The<br />
distance that the background extends beyond the object is controlled by the<br />
\fboxsep length. For example,<br />
\colorbox{white}{text}<br />
places a rectangular white background beh<strong>in</strong>d text. See the graphics bundle<br />
documentation [7] for details on \colorbox.<br />
With psfrag, \colorbox is useful for plac<strong>in</strong>g text at a location where l<strong>in</strong>es or<br />
shad<strong>in</strong>g would make it difficult to view the text. Plac<strong>in</strong>g a white background<br />
beh<strong>in</strong>d the text prevents the draw<strong>in</strong>g from obstruct<strong>in</strong>g the text.<br />
fcolorbox The \fcolorbox comm<strong>and</strong> (also part of the color package) is similar to<br />
the \colorbox comm<strong>and</strong>, except that a frame is drawn around the background.<br />
The comm<strong>and</strong> \fcolorbox{black}{white}{text} puts a white background<br />
with a rectangular black frame beh<strong>in</strong>d text.<br />
The thickness of the frame is controlled by the length \fboxrule <strong>and</strong> the<br />
spac<strong>in</strong>g between the frame <strong>and</strong> the text/object is controlled by the length<br />
\fboxsep.<br />
Figure 11 shows the graphic without psfrag substitution. The comm<strong>and</strong>s<br />
\psfrag{q1}[][]{\colorbox{white}{$q_1$}}<br />
\psfrag{base}{\fcolorbox{black}{white}{Base}}<br />
\psfrag{Actuator}[l][l]{\shortstack{Hydraulic\\ Actuator}}<br />
\<strong>in</strong>cludegraphics{mass.eps}<br />
use psfrag to produce the graphics <strong>in</strong> Figure 12.<br />
47
q1<br />
Actuator<br />
Hydraulic<br />
Actuator<br />
q 1<br />
Base<br />
base<br />
Without PSfrag Replace-<br />
Figure 11:<br />
ment<br />
Figure 12: With PSfrag Replacement<br />
15.3 L A TEX Text <strong>in</strong> EPS File<br />
The recommended <strong>and</strong> most popular method for us<strong>in</strong>g psfrag is the \psfrag comm<strong>and</strong><br />
described <strong>in</strong> the previous section. An alternative, less efficient, method for<br />
us<strong>in</strong>g psfrag is the \tex comm<strong>and</strong>, which embeds the L A TEX text directly <strong>in</strong> the eps<br />
file. See [29] for more <strong>in</strong>formation.<br />
15.4 Figure <strong>and</strong> Text Scal<strong>in</strong>g with PSfrag<br />
If a graphic us<strong>in</strong>g psfrag is scaled, the psfrag text is scaled along with the graphic.<br />
As a result, a subtlety of the graphicx package affects the size of the text.<br />
• When the width, height, or totalheight options are used to size the graphic<br />
\<strong>in</strong>cludegraphics[width=3<strong>in</strong>]{file.eps}<br />
the psfrag text is <strong>in</strong>serted after the scal<strong>in</strong>g. Conversely,<br />
\resizebox{3<strong>in</strong>}{!}{\<strong>in</strong>cludegraphics{file.eps}}<br />
Includes the graphic at its natural size, <strong>in</strong>serts the psfrag text, <strong>and</strong> then scales<br />
both the graphics <strong>and</strong> the text.<br />
• Similarly, when scal<strong>in</strong>g options are specified before rotation<br />
\<strong>in</strong>cludegraphics[width=3<strong>in</strong>,angle=30]{file.eps}<br />
the scal<strong>in</strong>g is implicitly h<strong>and</strong>led by the graphics <strong>in</strong>clusion function. However,<br />
when scal<strong>in</strong>g options are specified after rotation<br />
\<strong>in</strong>cludegraphics[angle=30,width=3<strong>in</strong>]{file.eps}<br />
the graphic is first <strong>in</strong>cluded at its natural size, then rotated, <strong>and</strong> then scaled.<br />
S<strong>in</strong>ce psfrag replaces the new text dur<strong>in</strong>g the graphics <strong>in</strong>clusion, the second<br />
comm<strong>and</strong> scales the new psfrag text while the first comm<strong>and</strong> does not. When<br />
the <strong>in</strong>cluded size of the eps graphic greatly differs from its natural size, the<br />
two comm<strong>and</strong>s produce very different results.<br />
See [29] for more <strong>in</strong>formation on the scal<strong>in</strong>g of psfrag text.<br />
15.5 PSfrag <strong>and</strong> PDFTEX<br />
psfrag cannot be used with pdfTEX. If psfrag substitution is needed, one option is<br />
to use the L A TEX-to-dvi-to-PostScript-to-pdf route that was used before pdfTEX.<br />
While this allows psfrag substitution, users lose the advantages that pdfTEX provides.<br />
A better (although more laborious) method is to use psfrag <strong>in</strong>directly with<br />
pdfTEX. This allows psfrag substitution while also keep<strong>in</strong>g the advantages of pdfTEX.<br />
48
1. For each graphic that uses psfrag, create a separate L A TEX file conta<strong>in</strong><strong>in</strong>g<br />
the psfrag comm<strong>and</strong>s <strong>and</strong> the \<strong>in</strong>cludegraphics comm<strong>and</strong>. You must use<br />
\pagestyle{empty} to prevent page numbers from be<strong>in</strong>g placed on the page.<br />
Assume these psfrag L A TEX files are named<br />
GraphicFrag00.tex<br />
GraphicFrag01.tex<br />
...<br />
2. At the operat<strong>in</strong>g system comm<strong>and</strong> l<strong>in</strong>e, perform the follow<strong>in</strong>g steps<br />
latex GraphicFrag00.tex<br />
dvips -E GraphicFrag00<br />
epstool --copy --bbox GraphicFrag00.ps GraphicFrag00.eps<br />
epstopdf GraphicFrag00.eps<br />
The first comm<strong>and</strong> creates GraphicFrag00.dvi. The second comm<strong>and</strong> creates<br />
GraphicFrag00.ps. The third comm<strong>and</strong> calculates the Bound<strong>in</strong>gBox for<br />
GraphicFrag00.ps <strong>and</strong> <strong>in</strong>serts the Bound<strong>in</strong>gBox <strong>and</strong> contents of GraphicFrag00.ps<br />
<strong>in</strong>to GraphicFrag00.eps. The last comm<strong>and</strong> converts GraphicFrag00.eps <strong>in</strong>to<br />
pdf format.<br />
3. Repeat step 2 for GraphicFrag01.tex, . . .<br />
4. Use \<strong>in</strong>cludegraphics to <strong>in</strong>clude the result<strong>in</strong>g pdf files<br />
GraphicFrag00.pdf<br />
GraphicFrag01.pdf<br />
...<br />
<strong>in</strong>to the orig<strong>in</strong>al L A TEX file.<br />
5. Process the L A TEX file with pdflatex.<br />
16 Includ<strong>in</strong>g An EPS File Multiple Times<br />
When the same eps graphic is <strong>in</strong>serted multiple times, its eps code appears multiple<br />
times <strong>in</strong> the f<strong>in</strong>al ps file. In particular, this often happens when a logo or other<br />
graphics are <strong>in</strong>serted <strong>in</strong>to a document’s header or footer. This section describes<br />
improved methods for <strong>in</strong>sert<strong>in</strong>g a graphic multiple times 22 .<br />
There are four common methods for <strong>in</strong>clud<strong>in</strong>g the same eps graphics many times<br />
1. Use \<strong>in</strong>cludegraphics{file.eps} wherever you want the graphic. This has<br />
two problems<br />
(a) L A TEX must f<strong>in</strong>d <strong>and</strong> read the file every time \<strong>in</strong>cludegraphics is used.<br />
(b) The eps graphics comm<strong>and</strong>s are repeated <strong>in</strong> the f<strong>in</strong>al ps file, produc<strong>in</strong>g<br />
a large file.<br />
2. Save the graphics <strong>in</strong> a L A TEX box <strong>and</strong> use the box wherever you want the<br />
graphic. This saves L A TEX time s<strong>in</strong>ce it must only f<strong>in</strong>d <strong>and</strong> read the file once.<br />
However, it does not reduce the size of the f<strong>in</strong>al PostScript file.<br />
At the beg<strong>in</strong>n<strong>in</strong>g of the file, <strong>in</strong>clude the follow<strong>in</strong>g comm<strong>and</strong>s<br />
\newsavebox{\mygraphic}<br />
\sbox{\mygraphic}{\<strong>in</strong>cludegraphics{file.eps}}<br />
22 Although this document does not yet document it, users are encouraged to consider the<br />
graphicx-psm<strong>in</strong> package[20], which provides a way to <strong>in</strong>clude a repeated PostScript graphic only<br />
once <strong>in</strong> a PostScript document. This package only works when the dvi file is post-processed with<br />
dvips version 5.95b or later.<br />
49
Then use the comm<strong>and</strong> \usebox{\mygraphic} wherever you want the graphic.<br />
(The graphics can be scaled by plac<strong>in</strong>g the \usebox comm<strong>and</strong> <strong>in</strong>side a \scalebox<br />
or \resizebox comm<strong>and</strong>.)<br />
3. When the eps file conta<strong>in</strong>s vector graphics (as opposed to bitmapped graphics),<br />
it is possible to write a PostScript comm<strong>and</strong> which draws the graphics 23 . The<br />
graphic can then be <strong>in</strong>cluded by issu<strong>in</strong>g the PostScript comm<strong>and</strong> wherever the<br />
graphic is needed. Section 16.1 on Page 50 describes this procedure.<br />
S<strong>in</strong>ce the f<strong>in</strong>al PostScript file <strong>in</strong>cludes the graphics comm<strong>and</strong>s only once, the<br />
f<strong>in</strong>al PostScript file is much smaller. Note that s<strong>in</strong>ce the graphics comm<strong>and</strong>s<br />
are stored <strong>in</strong> pr<strong>in</strong>ter memory while the f<strong>in</strong>al PostScript file is be<strong>in</strong>g pr<strong>in</strong>ted,<br />
this method may cause the pr<strong>in</strong>ter to run out of memory <strong>and</strong> not pr<strong>in</strong>t the<br />
document.<br />
Although this method results <strong>in</strong> a small f<strong>in</strong>al PostScript file, it still requires<br />
L A TEX to f<strong>in</strong>d <strong>and</strong> read the file conta<strong>in</strong><strong>in</strong>g the PostScript comm<strong>and</strong>s.<br />
4. Like the previous method, def<strong>in</strong>e a PostScript comm<strong>and</strong> which draws the graphics,<br />
but <strong>in</strong>clude this comm<strong>and</strong> <strong>in</strong> a L A TEX box. This results <strong>in</strong> a small f<strong>in</strong>al<br />
PostScript file <strong>and</strong> only requires L A TEX to f<strong>in</strong>d <strong>and</strong> read the file once.<br />
16.1 Def<strong>in</strong><strong>in</strong>g a PostScript Comm<strong>and</strong><br />
This section describes how to created a PostScript comm<strong>and</strong> which draws the graphics<br />
from an eps file conta<strong>in</strong><strong>in</strong>g vector graphics. This procedure does not work if the<br />
eps file conta<strong>in</strong>s bitmapped graphics.<br />
To convert the eps graphics <strong>in</strong>to a PostScript comm<strong>and</strong>, the eps file must be<br />
broken <strong>in</strong>to two files, one which def<strong>in</strong>es the PostScript dictionary <strong>and</strong> the graphics<br />
comm<strong>and</strong>s, <strong>and</strong> another which <strong>in</strong>cludes the header <strong>in</strong>formation <strong>and</strong> the uses the<br />
previously-def<strong>in</strong>ed PostScript comm<strong>and</strong>. For example, an eps file created by Xfig<br />
has the form<br />
%!PS-Adobe-2.0 EPSF-2.0<br />
%%Title: /tmp/xfig-fig017255<br />
%%Creator: fig2dev Version 2.1.8 Patchlevel 0<br />
%%CreationDate: Sun Sep 3 15:36:01 1995<br />
%%Orientation: Portrait<br />
%%Bound<strong>in</strong>gBox: 0 0 369 255<br />
%%Pages: 0<br />
%%EndComments<br />
/$F2psDict 200 dict def<br />
$F2psDict beg<strong>in</strong><br />
...<br />
%%EndProlog<br />
$F2psBeg<strong>in</strong><br />
...<br />
$F2psEnd<br />
23 While it is possible to construct a PostScript comm<strong>and</strong> which draws vector graphics, it turns out<br />
to be a “feature” of eps that is impossible to construct such a comm<strong>and</strong> for bitmapped graphics.<br />
Bitmapped graphics are usually converted to eps by hav<strong>in</strong>g the image (or colorimage) PostScript<br />
operators read the current file as data. It is not possible to put such constructs <strong>in</strong>to a PostScript<br />
procedure. It is possible to change the eps file so that it passes the image data as PostScript str<strong>in</strong>gs<br />
rather than read<strong>in</strong>g the file, but this is difficult to automate <strong>and</strong> generally requires a fair amount of<br />
h<strong>and</strong> edit<strong>in</strong>g of the PostScript.<br />
S<strong>in</strong>ce most people are not PostScript experts, h<strong>and</strong>-edit<strong>in</strong>g the PostScript is generally not an<br />
option. If the graphic can be described by PostScript vector primitives, it may be possible to use<br />
the kvec program (see page 19) to successfully convert the graphic to vector format.<br />
50
Where ... <strong>in</strong>dicates unlisted comm<strong>and</strong>s. The eps file generally conta<strong>in</strong>s three parts<br />
1. The header comm<strong>and</strong>s which beg<strong>in</strong> with %<br />
2. The Prolog section which starts with<br />
/$F2psDict 200 dict def<br />
<strong>and</strong> ends with<br />
%%EndProlog<br />
The Prolog def<strong>in</strong>es the comm<strong>and</strong>s <strong>in</strong> the PostScript dictionary used by the eps<br />
file. In this example, the dictionary is named $F2psDict although other names<br />
can be used.<br />
3. The last part conta<strong>in</strong>s the comm<strong>and</strong>s used to draw the graphics.<br />
Suppose the above eps file is named file.eps. Create the files file.h <strong>and</strong> file.ps<br />
where file.h conta<strong>in</strong>s<br />
/$F2psDict 200 dict def<br />
$F2psDict beg<strong>in</strong><br />
...<br />
%%EndProlog<br />
/MyFigure {<br />
$F2psBeg<strong>in</strong><br />
...<br />
$F2psEnd<br />
} def<br />
<strong>and</strong> file.ps conta<strong>in</strong>s<br />
%!PS-Adobe-2.0 EPSF-2.0<br />
%%Title: /tmp/xfig-fig017255<br />
%%Creator: fig2dev Version 2.1.8 Patchlevel 0<br />
%%CreationDate: Sun Sep 3 15:36:01 1995<br />
%%Orientation: Portrait<br />
%%Bound<strong>in</strong>gBox: 0 0 369 255<br />
%%Pages: 0<br />
%%EndComments<br />
$F2psDict beg<strong>in</strong> MyFigure end<br />
file.h def<strong>in</strong>es the dictionary <strong>and</strong> def<strong>in</strong>es the PostScript comm<strong>and</strong> /MyFigure, while<br />
file.ps conta<strong>in</strong>s the header <strong>in</strong>formation <strong>and</strong> uses the PostScript comm<strong>and</strong> def<strong>in</strong>ed<br />
<strong>in</strong> file.h. In particular, it is important that the file.ps header <strong>in</strong>cludes the<br />
%!PS... l<strong>in</strong>e <strong>and</strong> the Bound<strong>in</strong>gBox l<strong>in</strong>e. The graphics can then be used <strong>in</strong> the L A TEX<br />
document as<br />
\documentclass{article}<br />
\usepackage{graphicx}<br />
\special{header=file.h}<br />
\beg<strong>in</strong>{document}<br />
...<br />
\<strong>in</strong>cludegraphics[width=2<strong>in</strong>]{file.ps}<br />
...<br />
\<strong>in</strong>cludegraphics[totalheight=1<strong>in</strong>]{file.ps}<br />
...<br />
\end{document}<br />
Note that the orig<strong>in</strong>al file file.eps is not used. S<strong>in</strong>ce the graphics comm<strong>and</strong>s <strong>in</strong><br />
file.h are only <strong>in</strong>cluded once, the f<strong>in</strong>al PostScript file rema<strong>in</strong>s small. However,<br />
this still requires L A TEX to f<strong>in</strong>d <strong>and</strong> read file.ps whenever the graphics are used.<br />
The follow<strong>in</strong>g comm<strong>and</strong>s save the graphics <strong>in</strong> a L A TEX box to produce a small f<strong>in</strong>al<br />
PostScript file while read<strong>in</strong>g file.ps only once.<br />
\documentclass{article}<br />
\usepackage{graphicx}<br />
\special{header=file.h}<br />
51
\newsavebox{\mygraphic}<br />
\sbox{\mygraphic}{\<strong>in</strong>cludegraphics[width=2<strong>in</strong>]{file.ps}}<br />
\beg<strong>in</strong>{document}<br />
...<br />
\usebox{\mygraphic}<br />
...<br />
\resizebox*{1<strong>in</strong>}{!}{\usebox{\mygraphic}}<br />
...<br />
\end{document}<br />
Like the previous example, these comm<strong>and</strong>s produce a 2-<strong>in</strong>ch wide graphic <strong>and</strong> another<br />
graphic whose totalheight is 1 <strong>in</strong>ch.<br />
<strong>Graphics</strong> <strong>in</strong><br />
Page<br />
Header/Footer<br />
16.2 <strong>Graphics</strong> <strong>in</strong> Page Header or Footer<br />
An easy method of <strong>in</strong>clud<strong>in</strong>g graphics <strong>in</strong> the head<strong>in</strong>g is to use the fancyhdr package<br />
(an improved version of the old fancyhead<strong>in</strong>gs package) which is documented by [17].<br />
The header consists of three parts: its left field, its center field, <strong>and</strong> its right field.<br />
The \fancyhead comm<strong>and</strong> specifies the contents of the header fields, with the L,C,R<br />
options specify<strong>in</strong>g which field(s) the comm<strong>and</strong> modifies. For example<br />
\pagestyle{fancy}<br />
\fancyhead[C]{My Paper}<br />
causes the center header field to be “My Paper”, while<br />
\pagestyle{fancy}<br />
\fancyhead[L,R]{\textbf{Confidential}}<br />
causes both the left <strong>and</strong> right header fields to be “Confidential”. If no L,C,R option<br />
is specified, it applies to all three header fields. Thus \fancyhead{} is used to clear<br />
all the header fields. The \fancyfoot comm<strong>and</strong> similarly specifies the left, center,<br />
<strong>and</strong> right footer fields.<br />
The comm<strong>and</strong>s <strong>in</strong> the fancyhdr package can <strong>in</strong>sert graphics <strong>in</strong> the headers <strong>and</strong><br />
footers. For example, after splitt<strong>in</strong>g the eps file file.eps <strong>in</strong>to the two file file.h<br />
<strong>and</strong> file.ps as described <strong>in</strong> Section 16.1 on Page 50, the comm<strong>and</strong>s<br />
\documentclass{article}<br />
\usepackage{fancyhdr,graphicx}<br />
\renewcomm<strong>and</strong>{\headheight}{0.6<strong>in</strong>}<br />
\renewcomm<strong>and</strong>{\textheight}{7.5<strong>in</strong>}<br />
%% must be large enough for graphic<br />
% Def<strong>in</strong>e PostScript graphics comm<strong>and</strong><br />
\special{header=file.h}<br />
% Save graphics <strong>in</strong> <strong>LaTeX</strong> box<br />
\newsavebox{\mygraphic}<br />
\sbox{\mygraphic}{\<strong>in</strong>cludegraphics[totalheight=0.5<strong>in</strong>]{file.ps}}<br />
\pagestyle{fancy}<br />
\fancyhead{} % clear all header fields<br />
\fancyhead[L]{\usebox{\mygraphic}}<br />
\fancyfoot{} % clear all footer fields<br />
\fancyfoot[C]{\thepage}<br />
\renewcomm<strong>and</strong>{\headrulewidth}{0.5pt}<br />
\renewcomm<strong>and</strong>{\footrulewidth}{0pt}<br />
\beg<strong>in</strong>{document}<br />
...<br />
\end{document}<br />
52
places the graphics at the top left of each “fancy” page with a 0.5 pt horizontal l<strong>in</strong>e<br />
drawn under the header. Additionally, the page number is placed at the bottom<br />
center of each page, with no horizontal l<strong>in</strong>e drawn above the footer. Note that this<br />
does not affect “pla<strong>in</strong>” pages.<br />
Odd/Even<br />
Head<strong>in</strong>gs<br />
Modify<strong>in</strong>g<br />
Pla<strong>in</strong> Pages<br />
When the [twoside] documentclass option is used, one may want to <strong>in</strong>dividually<br />
specify the odd <strong>and</strong> even page headers/footers. The E,O \fancyhead options specify<br />
the even <strong>and</strong> odd page headers, respectively. If the E,O options are not specified, the<br />
comm<strong>and</strong> applies to both even <strong>and</strong> odd pages. Likewise the E,O \fancyfoot options<br />
specify the even <strong>and</strong> odd page footers. For example,<br />
\pagestyle{fancy}<br />
\fancyhead[LE]{My Paper}<br />
\fancyhead[RO]{My Name}<br />
\fancyfoot[C]{\thepage}<br />
places “My Paper” <strong>in</strong> the upper left of even fancy pages, “My Name” <strong>in</strong> the upper<br />
right of odd fancy pages, <strong>and</strong> the page number <strong>in</strong> the bottom center of all fancy<br />
pages. Replac<strong>in</strong>g the<br />
\fancyhead[L]{\usebox{\mygraphic}}<br />
comm<strong>and</strong> <strong>in</strong> the above example with<br />
\fancyhead[LE,RO]{\usebox{\mygraphic}}<br />
places the graphic at the top outside (the left side of even pages, right side of odd<br />
pages) of all fancy pages.<br />
The \fancyhead comm<strong>and</strong>s only apply to pages whose style are “fancy”. Even<br />
though \pagestyle{fancy} causes the document to have a fancy page style, some<br />
pages (title pages, table of contents pages, the first page of chapters, etc.) are still<br />
given a pla<strong>in</strong> pagestyle by default.<br />
The \fancypagestyle comm<strong>and</strong> can be used to modify the pla<strong>in</strong> pagestyle. For<br />
example, add<strong>in</strong>g the follow<strong>in</strong>g code to the above example causes the graphic to also<br />
be placed at the upper left of pla<strong>in</strong> pages.<br />
\fancypagestyle{pla<strong>in</strong>}{%<br />
\fancyhead{} % clear all header fields<br />
\fancyhead[L]{\usebox{\mygraphic}}<br />
\fancyfoot{} % clear all footer fields<br />
\fancyfoot[C]{\thepage}<br />
\renewcomm<strong>and</strong>{\headrulewidth}{0.5pt}<br />
\renewcomm<strong>and</strong>{\footrulewidth}{0pt}}<br />
When the twoside documentclass option is used, replac<strong>in</strong>g both of the<br />
\fancyhead[L]{\usebox{\mygraphic}}<br />
comm<strong>and</strong>s with<br />
\fancyhead[LE,RO]{\usebox{\mygraphic}}<br />
places the graphic at the top outside of every page (both pla<strong>in</strong> <strong>and</strong> fancy).<br />
16.3 Watermark <strong>Graphics</strong> <strong>in</strong> Background<br />
In addition to add<strong>in</strong>g graphics to the headers <strong>and</strong> footers, the fancyhdr package<br />
can place graphics beh<strong>in</strong>d <strong>in</strong> the text, which is useful for creat<strong>in</strong>g a logo or seal<br />
watermark.<br />
The follow<strong>in</strong>g example places the graphics <strong>in</strong> file.eps on every page (both fancy<br />
<strong>and</strong> pla<strong>in</strong>).<br />
53
\documentclass{article}<br />
\usepackage{graphicx,fancyhdr}<br />
%%% store graphics <strong>in</strong> a box<br />
\newsavebox{\mygraphic}<br />
\sbox{\mygraphic}{\<strong>in</strong>cludegraphics[keepaspectratio,<br />
height=0.8\textheight,<br />
width=0.8\l<strong>in</strong>ewidth]{file.eps}}<br />
\pagestyle{fancy}<br />
\fancyhead{}<br />
\fancyhead[C]{\setlength{\unitlength}{1<strong>in</strong>}<br />
\beg<strong>in</strong>{picture}(0,0)<br />
\put(-2.2,-6){\usebox{\mygraphic}}<br />
\end{picture}}<br />
\fancypagestyle{pla<strong>in</strong>}{%<br />
\fancyhead{}%<br />
\fancyhead[C]{\setlength{\unitlength}{1<strong>in</strong>}<br />
\beg<strong>in</strong>{picture}(0,0)<br />
\put(-2.2,-6){\usebox{\mygraphic}}<br />
\end{picture}}}<br />
\beg<strong>in</strong>{document}<br />
...<br />
\end{document}<br />
The above example places the graphics such that their lower left corner is 2.2 <strong>in</strong>ches<br />
to the left <strong>and</strong> 6 <strong>in</strong>ches below the center of the header. The graphic position can be<br />
adjusted by chang<strong>in</strong>g these two numbers.<br />
S<strong>in</strong>ce the header is typeset before the text, this example causes the text to appear<br />
on top of the graphics. S<strong>in</strong>ce the footer is typeset after the text, putt<strong>in</strong>g the graphics<br />
<strong>in</strong> the footer causes the graphics to appear on top of the text.<br />
If the contents of file.eps conta<strong>in</strong> vector (not bitmapped) graphics, a much<br />
smaller f<strong>in</strong>al PostScript file can be obta<strong>in</strong>ed by us<strong>in</strong>g the procedure described <strong>in</strong><br />
Section 16.1 on Page 50.<br />
16.3.1 eso-pic Package<br />
Another method for add<strong>in</strong>g L A TEX object on every page is the eso-pic package which<br />
def<strong>in</strong>es a zero-length picture environment with basepo<strong>in</strong>t at the lower left corner of<br />
the page. See the eso-pic package documentation [15] for details.<br />
54
Part IV<br />
The Figure Environment<br />
17 The Figure Environment<br />
When us<strong>in</strong>g a word processor, figures appear exactly where the user places them 24 .<br />
S<strong>in</strong>ce these figures cannot be split, they often lead to poor page breaks that leave<br />
large chunks of blank space at the bottom of pages. To achieve a professionallook<strong>in</strong>g<br />
document, the author must manually rearrange the figures to avoid these<br />
poor page breaks. This figure-shuffl<strong>in</strong>g becomes quite tedious, especially s<strong>in</strong>ce it<br />
must be repeated whenever the document is modified.<br />
L A TEX provides float<strong>in</strong>g figures which automatically move to esthetically-pleas<strong>in</strong>g<br />
locations, produc<strong>in</strong>g professional-look<strong>in</strong>g documents without all of the figure-mov<strong>in</strong>g<br />
drudgery. However, these float<strong>in</strong>g figures often bother new users who are accustomed<br />
to manual figure placement. Tak<strong>in</strong>g advantage of L A TEX’s float<strong>in</strong>g figures requires<br />
the follow<strong>in</strong>g<br />
Don’t compose text which is dependent on figure placement.<br />
Relax.<br />
<strong>Us<strong>in</strong>g</strong> the phrase “This figure...” or “The follow<strong>in</strong>g figure...” requires the figure<br />
to be <strong>in</strong> a certa<strong>in</strong> location. <strong>Us<strong>in</strong>g</strong> the phrase “Figure 14...” allows the figure<br />
to be positioned anywhere.<br />
Some users get quite worried when a figure isn’t placed exactly where they want<br />
it. Figure placement is L A TEX’s job; users generally should not worry about it.<br />
Summary<br />
of Advice<br />
The follow<strong>in</strong>g pages describe how the L A TEX determ<strong>in</strong>es float locations which obey<br />
typesett<strong>in</strong>g rules for a professional-look<strong>in</strong>g document. For convenience, the solutions<br />
to the most-common float-placement problems are listed below.<br />
1. Don’t h<strong>and</strong>cuff L A TEX. The more float placement options are given to L A TEX,<br />
the better it h<strong>and</strong>les float placement. In particular, the [htbp] <strong>and</strong> [tbp]<br />
options work well. See Section 17.2 on Page 58.<br />
2. Many people f<strong>in</strong>d the default float parameters are too restrictive. The follow<strong>in</strong>g<br />
comm<strong>and</strong>s<br />
\setcounter{topnumber}{4}<br />
\setcounter{bottomnumber}{4}<br />
\setcounter{totalnumber}{10}<br />
\renewcomm<strong>and</strong>{\textfraction}{0.15}<br />
\renewcomm<strong>and</strong>{\topfraction}{0.85}<br />
\renewcomm<strong>and</strong>{\bottomfraction}{0.70}<br />
\renewcomm<strong>and</strong>{\floatpagefraction}{0.66}<br />
set the float parameters to more-permissive values. See Section 18 on Page 61.<br />
3. L A TEX allows figures to float to the top of the current page, thus appear<strong>in</strong>g<br />
before the reference <strong>in</strong> the text. Users who do not like this behavior should<br />
use the flafter package [18]. Include \usepackage{flafter} at the beg<strong>in</strong>n<strong>in</strong>g<br />
of the document; no other comm<strong>and</strong>s are necessary.<br />
24 Although many word processors do allow figures to move around text (or vice-versa), the vast<br />
majority of the users do not use such capability because of either poor implementation by the<br />
software author <strong>and</strong>/or ignorance/<strong>in</strong>difference by the document author.<br />
55
4. To guarantee that a figure does not float past a certa<strong>in</strong> po<strong>in</strong>t, use the place<strong>in</strong>s<br />
package <strong>and</strong> issue a \FloatBarrier comm<strong>and</strong>. See Section 17.3 on Page 59.<br />
Warn<strong>in</strong>g, overuse of \FloatBarrier <strong>in</strong>dicates that either the float-placement<br />
is be<strong>in</strong>g micro-managed or the float parameters are set <strong>in</strong>correctly, neither of<br />
which are good.<br />
17.1 Creat<strong>in</strong>g Float<strong>in</strong>g Figures<br />
Float<strong>in</strong>g figures are created by putt<strong>in</strong>g comm<strong>and</strong>s <strong>in</strong> a figure environment. The<br />
contents of the figure environment always rema<strong>in</strong> <strong>in</strong> one chunk, float<strong>in</strong>g to produce<br />
good page breaks. The float<strong>in</strong>g figures can be automatically numbered by us<strong>in</strong>g the<br />
\caption comm<strong>and</strong>. For example, the follow<strong>in</strong>g comm<strong>and</strong>s put the graphic from<br />
graph.eps <strong>in</strong>side a float<strong>in</strong>g figure<br />
\beg<strong>in</strong>{figure}<br />
\center<strong>in</strong>g<br />
\<strong>in</strong>cludegraphics[totalheight=2<strong>in</strong>]{graph.eps}<br />
\caption{This is an <strong>in</strong>serted EPS graphic}<br />
\label{fig:graph}<br />
\end{figure}<br />
The graph <strong>in</strong> Figure~\ref{fig:graph} on Page~\pageref{fig:graph}...<br />
Notes about figures<br />
• The optional \label comm<strong>and</strong>, can be used with the \ref, <strong>and</strong> \pageref comm<strong>and</strong>s<br />
to reference the caption. See Section 17.1.1 for additional <strong>in</strong>formation<br />
on references. The \label comm<strong>and</strong> must be placed immediately after the<br />
\caption comm<strong>and</strong>. Putt<strong>in</strong>g the \label before the \caption causes the \ref<br />
comm<strong>and</strong> to reference the last reference-able object (which often is the section<br />
or previous figure).<br />
• If the figure environment conta<strong>in</strong>s no \caption comm<strong>and</strong>s, it produces an<br />
unnumbered float<strong>in</strong>g figure.<br />
• If the figure environment conta<strong>in</strong>s multiple \caption comm<strong>and</strong>s, it produces<br />
multiple figures which float together. This is useful <strong>in</strong> construct<strong>in</strong>g side-byside<br />
graphics (see Section 28 on Page 104) or complex arrangements such as <strong>in</strong><br />
Section 31 on Page 110.<br />
• By default, the caption text is used as the caption <strong>and</strong> also <strong>in</strong> the list of figures.<br />
The caption has an optional argument which specifies the list-of-figure entry.<br />
For example,<br />
\caption[List Text]{Caption Text}<br />
causes “Caption Text” to appear <strong>in</strong> the caption, but “List Text” to appear <strong>in</strong><br />
the list of figures. This is useful when long, descriptive captions are used.<br />
• The figure environment can only be used <strong>in</strong> outer paragraph mode, prevent<strong>in</strong>g<br />
it from be<strong>in</strong>g used <strong>in</strong>side any box (such as parbox or m<strong>in</strong>ipage).<br />
• Figure environments <strong>in</strong>side of paragraphs<br />
....text text text text text text<br />
\beg<strong>in</strong>{figure}<br />
....<br />
\end{figure}<br />
text text text text text text...<br />
are not processed until the end of the paragraph.<br />
56
17.1.1 Def<strong>in</strong><strong>in</strong>g a Reference Comm<strong>and</strong><br />
Instead of typ<strong>in</strong>g<br />
Figure~\ref{fig:graph} on Page~\pageref{fig:graph}<br />
it is more convenient to def<strong>in</strong>e the follow<strong>in</strong>g comm<strong>and</strong> <strong>in</strong> the document preamble<br />
\newcomm<strong>and</strong>\Figpage[1]{Figure~\ref*{#1} on Page~\pageref*{#1}}<br />
which allows the reference code to shortened to<br />
\Figpage{fig:graph}<br />
Conditional References<br />
The above \Figpage def<strong>in</strong>ition always pr<strong>in</strong>ts both the Figure’s number <strong>and</strong> page<br />
number. In cases where the figure appears on the same page as the reference, it may<br />
be desirable to omit the page number. This can achieved by the follow<strong>in</strong>g code<br />
\newcomm<strong>and</strong>\FigDiff[1]{Figure~\ref*{#1} on Page~\pageref*{#1}}<br />
\newcomm<strong>and</strong>\FigSame[1]{Figure~\ref*{#1}}<br />
\newcomm<strong>and</strong>\Figref[1]{\ifthenelse{\value{page}=\pageref{#1}}<br />
{\FigSame{#1}}{\FigDiff{#1}}}<br />
If the reference <strong>and</strong> figure are on the same page, the \Figref comm<strong>and</strong> calls the<br />
\FigSame comm<strong>and</strong> which displays “Figure 17”. If the reference <strong>and</strong> figure are on<br />
different pages, the \Figref comm<strong>and</strong> calls the \FigDiff comm<strong>and</strong> which displays<br />
“Figure 17 on Page 25”.<br />
The varioref package [34] provides addition comm<strong>and</strong>s like this for referenc<strong>in</strong>g<br />
Figures, Tables, Section, etc.<br />
17.1.2 hyperref Package<br />
The hyperref package allows users to construct hyperl<strong>in</strong>ks with<strong>in</strong> L A TEX documents,<br />
most commonly <strong>in</strong> conjunction with pdflatex.<br />
One feature of hyperref is that it redef<strong>in</strong>es the \ref <strong>and</strong> \cite comm<strong>and</strong>s to be<br />
typeset as hyperl<strong>in</strong>ks to the reference. The \ref* <strong>and</strong> \cite* comm<strong>and</strong>s are def<strong>in</strong>ed<br />
for references <strong>and</strong> cites without hyperl<strong>in</strong>ks.<br />
Because the hyperref package redef<strong>in</strong>es many L A TEX comm<strong>and</strong>s, users should order<br />
their \usepackage to make hyperref be the last package loaded.<br />
For more <strong>in</strong>formation, see the Hypertext Manual [21].<br />
Hypertext References<br />
When us<strong>in</strong>g the hyperref package, the \ref comm<strong>and</strong> typesets the figure number<br />
with a hyperl<strong>in</strong>k to the figure. S<strong>in</strong>ce the figure number is relatively small, it may<br />
be difficult for readers to click on the actual figure number. To make click<strong>in</strong>g the<br />
hyperl<strong>in</strong>k easier, the follow<strong>in</strong>g code<br />
\newcomm<strong>and</strong>\Figl<strong>in</strong>k[1]{\hyperref[#1]{Figure~\ref*{#1}} on Page~\pageref*{#1}}<br />
def<strong>in</strong>es a \Figl<strong>in</strong>k comm<strong>and</strong> which turns the entire “Figure 17” reference <strong>in</strong>to a<br />
s<strong>in</strong>gle hyperl<strong>in</strong>k.<br />
57
17.2 Figure Placement<br />
Also see<br />
Reference<br />
[1, pg 198].<br />
The figure environment has an optional argument which allows users to specify<br />
possible figure locations. The optional argument can conta<strong>in</strong> any comb<strong>in</strong>ation of the<br />
follow<strong>in</strong>g letters<br />
h Here: Place the figure <strong>in</strong> the text where the figure comm<strong>and</strong> is located. This<br />
option cannot be executed if there is not enough room rema<strong>in</strong><strong>in</strong>g on the page.<br />
t Top: Place the figure at the top of a page.<br />
b Bottom: Place the figure at the bottom of a page 25 .<br />
p Float Page: Place the figure on a conta<strong>in</strong><strong>in</strong>g only floats.<br />
Notes on figure placement:<br />
• If no optional arguments are listed, the placement options default to [tbp].<br />
The default arguments can be customized by redef<strong>in</strong><strong>in</strong>g the <strong>in</strong>ternal comm<strong>and</strong><br />
\fps@figure. For example, the follow<strong>in</strong>g code<br />
\makeatletter<br />
\def\fps@figure{htbp}<br />
\makeatother<br />
causes the placement options to default to [htbp].<br />
• The order <strong>in</strong> which the placement options are specified does not make any<br />
difference, as the placement options are always attempted <strong>in</strong> the order h-t-b-p.<br />
Thus [hb] <strong>and</strong> [bh] are both attempted as h-b.<br />
• The more float placement options are given to L A TEX, the better it h<strong>and</strong>les<br />
float placement. In particular, the [htbp], [tbp], [htp], [tp] options usually<br />
work well.<br />
• S<strong>in</strong>gle-location options [t], [b], [p] [h] are problematic 26 . If the figure<br />
doesn’t fit <strong>in</strong> the specified location, the figure becomes stuck, block<strong>in</strong>g the<br />
subsequent figures. A “Too Many Unprocessed Floats” error occurs if this logjam<br />
of figures exceeds L A TEX’s limit of 18 unprocessed floats (see Section 17.4<br />
on Page 60).<br />
When L A TEX “tries” to place a figure, it obeys the follow<strong>in</strong>g rules<br />
1. A figure can only be placed <strong>in</strong> the locations specified by its placement options.<br />
2. The figure cannot cause the page to be overfull.<br />
3. The float must be placed on the page where it occurs <strong>in</strong> the text, or on a later<br />
page 27 . Thus figures can “float later” but cannot “float earlier”<br />
4. Figures must appear <strong>in</strong> order. Thus a figure cannot be placed until all previous<br />
figures are placed. Two ramifications of this rule are<br />
• A figure can never be placed “here” if there are any unprocessed figures.<br />
25 When a figure is placed at the bottom of a page, it is placed below any footnotes on the page.<br />
Although this may be objectionable, there currently is no way to change this arrangement.<br />
26 In fact, the [h] option should never be used. It is so bad that recent versions of L A TEX automatically<br />
change it to [ht].<br />
27 S<strong>in</strong>ce a float can appear at the top of the page where it occurs <strong>in</strong> the text, it can appear before<br />
its occurrence <strong>in</strong> the text. If this is objectionable, the flafter package can be used to prevent this.<br />
No comm<strong>and</strong> is necessary to activate flafter; just <strong>in</strong>clude it <strong>in</strong> a \usepackage comm<strong>and</strong>.<br />
58
• One “impossible-to-place” figure prevents any subsequent figure from be<strong>in</strong>g<br />
placed until the end of the document or until L A TEX’s float limit is<br />
reached. See Section 17.4 on Page 60.<br />
Similarly, a table cannot be placed until all previous tables are placed. However,<br />
tables can leapfrog figures <strong>and</strong> vice-versa.<br />
5. The aesthetic rules <strong>in</strong> Section 18 must be followed. For example, the number<br />
of floats on a page cannot exceed totalnumber. Specify<strong>in</strong>g an exclamation<br />
po<strong>in</strong>t <strong>in</strong> the placement options (e.g., \beg<strong>in</strong>{figure}[!ht]) makes L A TEX “try<br />
really hard” by ignor<strong>in</strong>g the aesthetic rules which apply to text pages (! does<br />
not affect the aesthetic rules which apply to float pages).<br />
17.3 Clear<strong>in</strong>g Unprocessed Floats<br />
A big advantage for us<strong>in</strong>g floats is that L A TEX is not required to place them immediately<br />
<strong>in</strong> the text. Instead, L A TEX can hold the float until it can place it at a better<br />
location. When a float has been read by L A TEX but not yet placed on the page, it is<br />
called a “unprocessed float.” While the float-plac<strong>in</strong>g algorithm works well, sometimes<br />
it is necessary to force L A TEX to process any unprocessed floats.<br />
Below are three methods for clear<strong>in</strong>g processed floats. These comm<strong>and</strong>s should<br />
be used spar<strong>in</strong>gly; their overuse is either a sign you are micro-manag<strong>in</strong>g your float<br />
placement or your float placement parameters have bad values (see Section 18 on<br />
Page 61).<br />
clearpage<br />
The most basic method for clear<strong>in</strong>g the unprocessed figures backlog is to issue<br />
a \clearpage comm<strong>and</strong>, which places all unprocessed floats <strong>and</strong> starts a<br />
new page. While this is effective, it is undesirable as it generally produces a<br />
partially-filled page.<br />
FloatBarrier<br />
For most situations, the best method for forc<strong>in</strong>g float placement is the \FloatBarrier<br />
comm<strong>and</strong> provided by the place<strong>in</strong>s package. There are three ways of us<strong>in</strong>g<br />
place<strong>in</strong>s<br />
1. The \FloatBarrier comm<strong>and</strong> causes all unprocessed floats to be processed<br />
immediately. Unlike \clearpage, it does not start a new page.<br />
2. S<strong>in</strong>ce it is often desirable to keep floats <strong>in</strong> the section <strong>in</strong> which they were<br />
issued, the section option<br />
\usepackage[section]{place<strong>in</strong>s}<br />
redef<strong>in</strong>es the \section comm<strong>and</strong>, <strong>in</strong>sert<strong>in</strong>g a \FloatBarrier comm<strong>and</strong><br />
before each section.<br />
Note that this option is very strict. For example, if a new section start<br />
<strong>in</strong> the middle of a page, the section option does not allow a float from<br />
the old section to appear at the bottom of the page, s<strong>in</strong>ce that is after the<br />
start of the new section.<br />
3. The below option<br />
\usepackage[below]{place<strong>in</strong>s}<br />
is a less-restrictive version of the section option. It allows floats to be<br />
placed after the beg<strong>in</strong>n<strong>in</strong>g of a new section, provided that some of the old<br />
section appears on the page.<br />
59
The place<strong>in</strong>s package does not change the floats’ float-placement options. For<br />
example, s<strong>in</strong>ce \FloatBarrier can only place a [t] float at the top of a page,<br />
the \FloatBarrier comm<strong>and</strong> processes a [t] float by fill<strong>in</strong>g the rema<strong>in</strong><strong>in</strong>g<br />
portion of the current page with whitespace <strong>and</strong> then plac<strong>in</strong>g the [t] float at<br />
the top of the next page. Similarly, s<strong>in</strong>ce \FloatBarrier cannot place a [b]<br />
float “here”, text is prevented from appear<strong>in</strong>g below it.<br />
Both of these examples once aga<strong>in</strong> demonstrate that L A TEX float placement is<br />
most effective when multiple float-placement options (such as [tbp] or [htbp])<br />
are specified.<br />
afterpage/clearpage<br />
The afterpage package provides the \afterpage comm<strong>and</strong> which executes a<br />
comm<strong>and</strong> at the next naturally-occurr<strong>in</strong>g page break. Therefore, us<strong>in</strong>g<br />
\afterpage{\clearpage}<br />
causes all unprocessed floats to be cleared at the next page break.<br />
<strong>Us<strong>in</strong>g</strong> \afterpage{\clearpage} comm<strong>and</strong> may not always solve float limit<br />
problems (see Section 17.4 on Page 60). S<strong>in</strong>ce it puts does not execute the<br />
\clearpage until the end of the page, additional unprocessed floats may accumulate<br />
before the page break.<br />
\afterpage{\clearpage} is especially useful when produc<strong>in</strong>g small floatpage<br />
figures. The \floatpagefraction (see Section 18.2 on Page 61) prevents<br />
floatpage floats which are “too small” from be<strong>in</strong>g placed on a float page.<br />
Furthermore, s<strong>in</strong>ce the ! float-placement modifier does not apply to float<br />
pages, [!p] does not override the \floatpagefraction restriction. <strong>Us<strong>in</strong>g</strong><br />
\afterpage{\clearpage} is an easy method to override the \floatpagefraction<br />
restriction without caus<strong>in</strong>g a partially-filled text page.<br />
17.4 Too Many Unprocessed Floats<br />
If a float cannot be processed immediately, it is placed on the unprocessed float queue<br />
until it can be processed. S<strong>in</strong>ce, L A TEX only has room for 18 floats on this queue,<br />
hav<strong>in</strong>g more than 18 unprocessed floats produces a “Too Many Unprocessed Floats”<br />
error. There are four possible causes for this error:<br />
1. The most common problem is that the float placement options are <strong>in</strong>compatible<br />
with the float placement parameters. For example, a [t] figure whose height<br />
is larger than \topfraction becomes stuck. S<strong>in</strong>ce the other s<strong>in</strong>gle-position<br />
options have similar problems, specify as many float placement options as possible.<br />
2. Incompatible float fraction values may make it impossible to place certa<strong>in</strong><br />
floats. To avoid this, make sure any float fraction values satisfy the Section 18.2<br />
guidel<strong>in</strong>es.<br />
3. In rare situations, users with many floats <strong>and</strong> many \marg<strong>in</strong>par notes (which<br />
use the same queue), may need a larger unprocessed float queue. <strong>Us<strong>in</strong>g</strong> the<br />
morefloats package <strong>in</strong>creases the size of the unprocessed float queue from 18 to<br />
36.<br />
4. L A TEX’s float placement queue is exceeded if more than 18 figures are specified<br />
without any text between them. Possible solutions <strong>in</strong>clude<br />
60
(a) Scatter the figures <strong>in</strong> the text. This allows enough text to accumulate to<br />
force natural pagebreaks, mak<strong>in</strong>g it easier for L A TEX to process the floats.<br />
(b) Put \clearpage between some figures. This is <strong>in</strong>convenient because it<br />
requires some iterations to avoid partially-full pages. Note that<br />
\afterpage{\clearpage}<br />
(which causes a \clearpage at the next naturally-occurr<strong>in</strong>g pagebreak)<br />
does not help <strong>in</strong> this situation because the float queue limit is reached<br />
before enough text is accumulated <strong>in</strong> order to trigger a pagebreak.<br />
(c) S<strong>in</strong>ce there is no text, the figures don’t need to float. Therefore, the best<br />
solution is probably to use the Section 21 procedure for construct<strong>in</strong>g nonfloat<strong>in</strong>g<br />
figures, separated by \vspace or \vfill comm<strong>and</strong>s to provide<br />
vertical spac<strong>in</strong>g.<br />
18 Customiz<strong>in</strong>g Float Placement<br />
The follow<strong>in</strong>g style parameters are used by L A TEX to prevent awkward-look<strong>in</strong>g pages<br />
which conta<strong>in</strong> too many floats or badly-placed floats. If these style parameters are<br />
changed anywhere <strong>in</strong> the document, they do not apply until the next page. However,<br />
if the parameters are changed <strong>in</strong> the document’s preamble, they apply at the<br />
beg<strong>in</strong>n<strong>in</strong>g of the document.<br />
18.1 Float Placement Counters<br />
The three counters <strong>in</strong> Table 6 prevent L A TEX from plac<strong>in</strong>g too many floats on a text<br />
page. These counters do not affect float pages. Specify<strong>in</strong>g a ! <strong>in</strong> the float placement<br />
options causes L A TEX to ignore theses parameters. The values of these counters are<br />
set with the \setcounter comm<strong>and</strong>. For example,<br />
\setcounter{totalnumber}{2}<br />
prevents more than two floats from be<strong>in</strong>g placed on any text page. Many peopler<br />
feel the default float placement counters are too restrictive <strong>and</strong> prefer larger values<br />
such as<br />
\setcounter{topnumber}{4}<br />
\setcounter{bottomnumber}{4}<br />
\setcounter{totalnumber}{10}<br />
Table 6: Float Placement Counters<br />
topnumber<br />
bottomnumber<br />
totalnumber<br />
The maximum number of floats allowed at the top of a text page<br />
(the default is 2).<br />
The maximum number of floats allowed at the bottom of a text<br />
page (the default is 1).<br />
The maximum number of floats allowed on any one text page<br />
(the default is 3).<br />
18.2 Figure Fractions<br />
The comm<strong>and</strong>s <strong>in</strong> Table 7 control what fraction of a page can be covered by floats<br />
(where “fraction” refers to the height of the floats divided by \textheight). The<br />
first three comm<strong>and</strong>s perta<strong>in</strong> only to text pages, while the last comm<strong>and</strong> perta<strong>in</strong>s<br />
only to float pages. Specify<strong>in</strong>g a ! <strong>in</strong> the float placement options causes L A TEX<br />
to ignore the first three parameters, but \floatpagefraction is always used. The<br />
value of these fractions are set by \renewcomm<strong>and</strong>. For example,<br />
61
\renewcomm<strong>and</strong>{\textfraction}{0.3}<br />
lets floats cover no more than 70% of a text page.<br />
Table 7: Figure Placement Fractions<br />
\textfraction<br />
\topfraction<br />
\bottomfraction<br />
\floatpagefraction<br />
The m<strong>in</strong>imum fraction of a text page which must be occupied<br />
by text. The default is 0.2, which prevents floats<br />
from cover<strong>in</strong>g more than 80% of a text page.<br />
The maximum fraction of a text page which can be occupied<br />
by floats at the top of the page. The default is 0.7,<br />
which prevents any float whose height is greater than 70%<br />
of \textheight from be<strong>in</strong>g placed at the top of a page.<br />
Similarly, if the comb<strong>in</strong>ed height of multiple t floats is<br />
greater than 70% of \textheight, they all will not be<br />
placed at the top of a page, even if they number less than<br />
topnumber.<br />
The maximum fraction of a text page which can be occupied<br />
by floats at the bottom of the page. The default is<br />
0.3, which prevents any float whose height is greater than<br />
30% of \textheight from be<strong>in</strong>g placed at the bottom of<br />
a text page.<br />
The m<strong>in</strong>imum fraction of a float page that must be occupied<br />
by floats. Thus the fraction of blank space on a float<br />
page cannot be more than 1-\floatpagefraction. The<br />
default is 0.5.<br />
Placement<br />
Fraction<br />
Guidel<strong>in</strong>es<br />
The default placement fraction values prevent many <strong>and</strong>/or large floats from<br />
dom<strong>in</strong>at<strong>in</strong>g text pages <strong>and</strong> also prevent small figures from be<strong>in</strong>g placed <strong>in</strong> a sea of<br />
whitespace on a float page. While the default values generally work well, sometimes<br />
they may be a bit too restrictive, result<strong>in</strong>g <strong>in</strong> figures float<strong>in</strong>g too far from where they<br />
are issued. In these cases it may be desirable to set the placement fractions to more<br />
permissive values such as<br />
\renewcomm<strong>and</strong>{\textfraction}{0.15}<br />
\renewcomm<strong>and</strong>{\topfraction}{0.85}<br />
\renewcomm<strong>and</strong>{\bottomfraction}{0.70}<br />
\renewcomm<strong>and</strong>{\floatpagefraction}{0.66}<br />
One must take care when adjust<strong>in</strong>g placement fraction values, as unreasonable values<br />
can lead to poor formatt<strong>in</strong>g <strong>and</strong>/or “stuck” floats. To avoid such problems, the<br />
follow<strong>in</strong>g guidel<strong>in</strong>es should be used:<br />
\textfraction<br />
Sett<strong>in</strong>g \textfraction smaller than 0.15 is discouraged as it produces hardto-read<br />
pages. If a figure’s height is more than 85% of \textheight, it almost<br />
certa<strong>in</strong>ly looks better by itself on a float page than squeezed on a text page<br />
with a couple of l<strong>in</strong>es of text below it.<br />
Furthermore, never set \textfraction to zero as permits a text page to have<br />
no text, which confuses L A TEX <strong>and</strong> leads to badly-formatted pages.<br />
\topfraction<br />
Never set \topfraction larger than 1 - \textfraction, as that causes contradictions<br />
<strong>in</strong> the float-plac<strong>in</strong>g algorithm.<br />
62
\bottomfraction<br />
S<strong>in</strong>ce “good typesett<strong>in</strong>g style” discourages large bottom figures, \bottomfraction<br />
is generally smaller than \topfraction. Never set \bottomfraction larger<br />
than 1 - \textfraction, as that causes contradictions <strong>in</strong> the float-plac<strong>in</strong>g algorithm.<br />
\floatpagefraction<br />
If \floatpagefraction is set very small, every float page conta<strong>in</strong>s exactly one<br />
float, result<strong>in</strong>g <strong>in</strong> excessive whitespace around small p figures.<br />
If \floatpagefraction is larger than \topfraction , [tp] figures may become<br />
“stuck.” For example, suppose the height of a [tp] figure is larger than<br />
\topfraction but smaller than \floatpagefraction, it becomes “stuck” because<br />
it is too large to be placed on a text page <strong>and</strong> too small to be placed<br />
on a float page. To prevent such stuck figures, \floatpagefraction <strong>and</strong><br />
\topfraction should satisfy the follow<strong>in</strong>g <strong>in</strong>equality:<br />
\floatpagefraction ≤ \topfraction − 0.05<br />
The 0.05 term is due to the difference <strong>in</strong> the account<strong>in</strong>g of vertical space for<br />
text pages <strong>and</strong> float pages 28 . Likewise, if [bp] or [hbp] figures are used,<br />
\floatpagefraction <strong>and</strong> \bottomfraction should also satisfy<br />
\floatpagefraction ≤ \bottomfraction − 0.05<br />
Note that the default values do not satisfy the second <strong>in</strong>equality, which may<br />
occasionally cause problems with [bp] <strong>and</strong> [hbp] figures.<br />
18.3 Suppress<strong>in</strong>g Floats<br />
The \suppressfloats prevents additional floats from appear<strong>in</strong>g at the top or the<br />
bottom of the current page. They do not affect figures with “here” placement or<br />
those with ! <strong>in</strong> the placement options.<br />
Putt<strong>in</strong>g \suppressfloats[t] immediately before a figure, prevents that float<br />
from appear<strong>in</strong>g above the place where it appears <strong>in</strong> the text. The flafter package<br />
redef<strong>in</strong>es L A TEX’s float algorithm to prevent this for the entire document.<br />
Table 8: Suppressfloats Options<br />
\suppressfloats[t]<br />
\suppressfloats[b]<br />
\suppressfloats<br />
Prevents additional figures from appear<strong>in</strong>g at the top of<br />
the current page.<br />
Prevents additional figures from appear<strong>in</strong>g at the bottom<br />
of the current page.<br />
Prevents additional figures from appear<strong>in</strong>g at either the<br />
bottom or the top of the current page.<br />
28 Specifically, \textfloatsep <strong>and</strong> the other text-page float spac<strong>in</strong>g is counted when compar<strong>in</strong>g a<br />
figure with \topfraction, but the float page spac<strong>in</strong>gs are not counted <strong>in</strong> test<strong>in</strong>g if a figure exceeds<br />
\floatpagefraction. As a result, \textfloatsep divided by \textheight (which is ≈ 0.05) should<br />
be subtracted from \topfraction. See Section 19.1 on Page 64 for <strong>in</strong>formation on figure spac<strong>in</strong>g.<br />
63
19 Customiz<strong>in</strong>g the figure Environment<br />
19.1 Figure Spac<strong>in</strong>g<br />
The lengths <strong>in</strong> Table 9 control how much vertical spac<strong>in</strong>g is added between two<br />
figures or between a figure <strong>and</strong> text. Unlike most other L A TEX lengths, these three<br />
are rubber lengths, which provides spac<strong>in</strong>g which can shr<strong>in</strong>k or exp<strong>and</strong> to provide<br />
better page formatt<strong>in</strong>g. These lengths are set with the \setlength comm<strong>and</strong>. For<br />
example,<br />
\setlength{\floatsep}{10pt plus 3pt m<strong>in</strong>us 2pt}<br />
sets the “nom<strong>in</strong>al” value of \floatsep to be 10 po<strong>in</strong>ts. To improve page formatt<strong>in</strong>g,<br />
the float separation can be as small as 8 po<strong>in</strong>ts or as large as 13 po<strong>in</strong>ts.<br />
S<strong>in</strong>ce L A TEX places \<strong>in</strong>textsep above <strong>and</strong> below each “here” float, two consecutive<br />
“here” floats are separated by two \<strong>in</strong>textsep spaces. This extra spac<strong>in</strong>g can be<br />
avoid<strong>in</strong>g by comb<strong>in</strong><strong>in</strong>g the two floats <strong>in</strong>to a s<strong>in</strong>gle float, although this may result <strong>in</strong><br />
a less-attractive layout s<strong>in</strong>ce it prevents the float-placement algorithm from plac<strong>in</strong>g<br />
the two floats separately.<br />
The lengths listed <strong>in</strong> Table 9 do not affect the spac<strong>in</strong>g of floats on float pages.<br />
The float-page spac<strong>in</strong>g is controlled by the lengths listed <strong>in</strong> Table 10. The floatpage<br />
spac<strong>in</strong>gs often use the fil unit to provide <strong>in</strong>f<strong>in</strong>ite stretchability, similar to the<br />
vertical space produced by \vfill. When multiple fil spaces appear <strong>in</strong> the same<br />
space, they exp<strong>and</strong> proportionally to fill the space. For example, the default floatpage<br />
parameters cause the space between float-page floats to be double the space<br />
above the top float or below the bottom float.<br />
The @ <strong>in</strong> the names of the Table 10 lengths mean they are <strong>in</strong>ternal comm<strong>and</strong>s 29 .<br />
As a result, any \setlength comm<strong>and</strong> which modifies the lengths must be surrounded<br />
by \makeatletter <strong>and</strong> \makeatother. For example,<br />
29 Any user code which accesses or redef<strong>in</strong>es <strong>in</strong>ternal comm<strong>and</strong>s must be surrounded by<br />
\makeatletter <strong>and</strong> \makeatother.<br />
Table 9: Figure Spac<strong>in</strong>g for Text Pages<br />
\floatsep<br />
\textfloatsep<br />
\<strong>in</strong>textsep<br />
For floats at the top or bottom of a page, this is the vertical<br />
spac<strong>in</strong>g between floats. The default is 12pt plus 2pt m<strong>in</strong>us<br />
2pt<br />
For floats at the top or bottom of a page, this is the vertical<br />
spac<strong>in</strong>g between the float <strong>and</strong> the text. The default is 20pt<br />
plus 2pt m<strong>in</strong>us 4pt<br />
For floats placed <strong>in</strong> the middle of a text page (i.e., with the h<br />
placement option), this is the vertical spac<strong>in</strong>g above <strong>and</strong> below<br />
the float. The default is 12pt plus 2pt m<strong>in</strong>us 2pt<br />
Table 10: Figure Spac<strong>in</strong>g for Floatpages<br />
\@fptop This is the vertical spac<strong>in</strong>g above the top floatpage float. The default<br />
is 0pt plus 1.0fil<br />
\@fpsep This is the vertical spac<strong>in</strong>g between floatpage floats. The default is 8pt<br />
plus 2.0fil<br />
\@fpbot This is the vertical spac<strong>in</strong>g below the bottom floatpage float. The<br />
default is 0pt plus 1.0fil<br />
64
\makeatletter<br />
\addtolength{\@fpsep}{4pt}<br />
\makeatother<br />
<strong>in</strong>creases the space between floatpage floats by 4 po<strong>in</strong>ts.<br />
19.2 Horizontal L<strong>in</strong>es Above/Below Figure<br />
Horizontal l<strong>in</strong>es can be automatically drawn between the text <strong>and</strong> figures which<br />
appear at the top/bottom of the page by redef<strong>in</strong><strong>in</strong>g the<br />
\topfigurerule<br />
\bottomfigurerule<br />
comm<strong>and</strong>s. Although \topfigrule <strong>and</strong> \bottomfigrule are already def<strong>in</strong>ed as<br />
L A TEX comm<strong>and</strong>s, the strange way <strong>in</strong> which they are def<strong>in</strong>ed requires them to be<br />
redef<strong>in</strong>ed with \newcomm<strong>and</strong> <strong>in</strong>stead of \renewcomm<strong>and</strong>.<br />
To avoid disrupt<strong>in</strong>g the page formatt<strong>in</strong>g, these comm<strong>and</strong>s must have a zero<br />
height. Thus draw<strong>in</strong>g 0.4 po<strong>in</strong>t l<strong>in</strong>e must be accompanied by a 0.4 po<strong>in</strong>t vertical<br />
backspace. For example,<br />
\newcomm<strong>and</strong>{\topfigrule}{\hrule\vspace{-0.4pt}}<br />
S<strong>in</strong>ce \topfigrule is executed before the \textfloatsep spac<strong>in</strong>g, the above comm<strong>and</strong><br />
provides no spac<strong>in</strong>g between the figure <strong>and</strong> the l<strong>in</strong>e. The follow<strong>in</strong>g comm<strong>and</strong>s<br />
provide 5 po<strong>in</strong>ts of space between the figure <strong>and</strong> the l<strong>in</strong>e.<br />
\newcomm<strong>and</strong>{\topfigrule}{%<br />
\vspace*{5pt}\hrule\vspace{-5.4pt}}<br />
\newcomm<strong>and</strong>{\botfigrule}{%<br />
\vspace*{-5.4pt}\hrule\vspace{5pt}}<br />
The \topfigrule def<strong>in</strong>ition first moves 5 po<strong>in</strong>ts down (<strong>in</strong>to the \textfloatsep<br />
spac<strong>in</strong>g) to provide space between the figure <strong>and</strong> the l<strong>in</strong>e. It then draws a 0.4<br />
po<strong>in</strong>t horizontal l<strong>in</strong>e <strong>and</strong> moves back up 5.4 po<strong>in</strong>ts to compensate for the previous<br />
downward motion. Likewise, the \botfigrule comm<strong>and</strong> draws a 0.4 po<strong>in</strong>t l<strong>in</strong>e with<br />
5 po<strong>in</strong>ts of spac<strong>in</strong>g between the figure <strong>and</strong> the rule.<br />
S<strong>in</strong>ce these comm<strong>and</strong>s place 5 po<strong>in</strong>ts of space between the l<strong>in</strong>e <strong>and</strong> figure, the<br />
spac<strong>in</strong>g between the l<strong>in</strong>e <strong>and</strong> the text is \textfloatsep - 5pt (see Section 19.1 on<br />
Page 64).<br />
The l<strong>in</strong>e thickness can be changed from the 0.4 po<strong>in</strong>t default by us<strong>in</strong>g the \hrule<br />
comm<strong>and</strong>’s height option<br />
\newcomm<strong>and</strong>{\topfigrule}{%<br />
\vspace*{5pt}{\hrule height0.8pt}\vspace{-5.8pt}}<br />
\newcomm<strong>and</strong>{\botfigrule}{%<br />
\vspace*{-5.8pt}{\hrule height0.8pt}\vspace{5pt}}<br />
Notes on figure rules:<br />
• The \topfigrule <strong>and</strong> \bottomfigrule affect neither floatpage figures nor<br />
“here” figures (i.e., us<strong>in</strong>g the h option). If a “here” figure happens to be<br />
placed at the top or the bottom of the page, no l<strong>in</strong>e is drawn.<br />
To implement its comm<strong>and</strong>s, L A TEX uses many <strong>in</strong>ternal comm<strong>and</strong>s which users generally do not<br />
need to access. To prevent these <strong>in</strong>ternal comm<strong>and</strong> names from accidentally conflict<strong>in</strong>g with userdef<strong>in</strong>ed<br />
names, L A TEX <strong>in</strong>cludes a @ <strong>in</strong> these <strong>in</strong>ternal comm<strong>and</strong> names. S<strong>in</strong>ce L A TEX comm<strong>and</strong> names<br />
can conta<strong>in</strong> only letters, def<strong>in</strong><strong>in</strong>g a comm<strong>and</strong> whose name conta<strong>in</strong>s @ are normally not possible.<br />
However, when it is necessary for users to change the <strong>in</strong>ternal comm<strong>and</strong>s, the \makeatletter comm<strong>and</strong><br />
causes L A TEX to treat @ as a letter, thus allow<strong>in</strong>g users to use @ <strong>in</strong> comm<strong>and</strong> names. The<br />
\makeatother comm<strong>and</strong> causes L A TEX to revert to the normal behavior of treat<strong>in</strong>g @ as a non-letter.<br />
65
Table 11: Figure Rule Comm<strong>and</strong>s<br />
\topfigrule<br />
\bottomfigrule<br />
This comm<strong>and</strong> is executed after the last float at the top of a<br />
page, but before the \textfloatsep spac<strong>in</strong>g (see Section 19.1<br />
on Page 64).<br />
This comm<strong>and</strong> is executed before the first float at the bottom<br />
of a page, but after the \textfloatsep spac<strong>in</strong>g.<br />
• The horizontal rules are as wide as the text, even if wider figures (see Section 23<br />
on Page 90) are used.<br />
• The TEX \hrule comm<strong>and</strong> was used <strong>in</strong>stead of L A TEX \rule comm<strong>and</strong> because<br />
the \rule would generate additional space when \parskip is not zero.<br />
19.3 Caption Vertical Spac<strong>in</strong>g<br />
L A TEX assumes that captions are placed below the graphic, plac<strong>in</strong>g more vertical<br />
spac<strong>in</strong>g above the caption than below it. As a result, the comm<strong>and</strong>s<br />
\beg<strong>in</strong>{figure}<br />
\center<strong>in</strong>g<br />
\caption{Caption Above Graphic}<br />
\<strong>in</strong>cludegraphics[width=1<strong>in</strong>]{graphic}<br />
\end{figure}<br />
produce Figure 13, whose caption is placed quite close to the graphic.<br />
Figure 13: Caption Above Graphic<br />
Graphic<br />
The caption spac<strong>in</strong>g is controlled by the lengths \abovecaptionskip (which is<br />
10pt by default) <strong>and</strong> \belowcaptionskip (which is zero by default). The st<strong>and</strong>ard<br />
L A TEX comm<strong>and</strong>s \setlength <strong>and</strong> \addtolength are used to modify these lengths.<br />
For example, the comm<strong>and</strong>s<br />
\beg<strong>in</strong>{figure}<br />
\setlength{\abovecaptionskip}{0pt}<br />
\setlength{\belowcaptionskip}{10pt}<br />
\center<strong>in</strong>g<br />
\caption{Caption Above Graphic}<br />
\<strong>in</strong>cludegraphics[width=1<strong>in</strong>]{graphic}<br />
\end{figure}<br />
produce Figure 14, which has has no extra space above the caption <strong>and</strong> 10 po<strong>in</strong>ts of<br />
space between the caption <strong>and</strong> the graphic.<br />
Figure 14: Caption Above Graphic<br />
Graphic<br />
If a document has all its captions at the top of its floats, the comm<strong>and</strong>s<br />
\setlength{\abovecaptionskip}{0pt}<br />
\setlength{\belowcaptionskip}{10pt}<br />
can be issued <strong>in</strong> the document’s preamble to affect the caption spac<strong>in</strong>g for all the<br />
document’s captions (figures <strong>and</strong> tables). If a document conta<strong>in</strong>s captions at the top<br />
of some floats <strong>and</strong> at the bottom of other floats, it may be desirable to def<strong>in</strong>e the<br />
follow<strong>in</strong>g comm<strong>and</strong><br />
66
\newcomm<strong>and</strong>{\topcaption}{%<br />
\setlength{\abovecaptionskip}{0pt}%<br />
\setlength{\belowcaptionskip}{10pt}%<br />
\caption}<br />
Then \topcaption{caption text} produces a caption which is properly spaced for<br />
the top of a float.<br />
Two other methods for produc<strong>in</strong>g properly-spaced top captions are<br />
• The caption package’s position=top option <strong>in</strong> Table 16 on Page 74 swaps the<br />
mean<strong>in</strong>g of \abovecaptionskip <strong>and</strong> \belowcaptionskip<br />
• The topcapt package [33], def<strong>in</strong>es a \topcaption comm<strong>and</strong> which produces a<br />
caption with the \abovecaptionskip <strong>and</strong> \belowcaptionskip lengths <strong>in</strong>terchanged.<br />
19.4 Caption Label<br />
By default, L A TEX <strong>in</strong>serts a caption label such as “Figure 13: ” at the beg<strong>in</strong>n<strong>in</strong>g of the<br />
the caption. The “Figure” portion can be changed by redef<strong>in</strong><strong>in</strong>g the \figurename<br />
comm<strong>and</strong>. For example, the comm<strong>and</strong>s<br />
\beg<strong>in</strong>{figure}<br />
\center<strong>in</strong>g<br />
\<strong>in</strong>cludegraphics[width=1<strong>in</strong>]{graphic}<br />
\renewcomm<strong>and</strong>{\figurename}{Fig.}<br />
\caption{This is the Caption}<br />
\end{figure}<br />
produce Figure 15. The caption font, the “:” delimiter, <strong>and</strong> other caption characteristics<br />
can be customized with the caption package (see Section 20 on Page 69).<br />
Graphic<br />
Fig. 15: This is the Caption<br />
19.5 Caption Number<strong>in</strong>g<br />
The default method for number<strong>in</strong>g the figures is Arabic (1, 2, 3, 4,. . .). This can be<br />
changed by redef<strong>in</strong><strong>in</strong>g the \thefigure comm<strong>and</strong>.<br />
The number of the current figure is stored <strong>in</strong> the figure counter. The \thefigure<br />
comm<strong>and</strong> specifies which of the counter number<strong>in</strong>g comm<strong>and</strong>s (\arabic, \roman,<br />
\Roman, \alph, \Alph) is used to pr<strong>in</strong>t the counter value. For example,<br />
\renewcomm<strong>and</strong>{\thefigure}{\Roman{figure}}<br />
causes the figures to be numbered with uppercase Roman numerals (I, II, III, IV,. . .).<br />
Notes on figure number<strong>in</strong>g:<br />
• There must be 26 or fewer figures to use the \alph or \Alph comm<strong>and</strong>s.<br />
• S<strong>in</strong>ce Roman number<strong>in</strong>g produces longer figure numbers (e.g., XVIII vs. 18),<br />
us<strong>in</strong>g \Roman or \roman may cause spac<strong>in</strong>g problems <strong>in</strong> the Table of Figures.<br />
67
19.6 Mov<strong>in</strong>g Figures to End of Document<br />
Some journals require that tables <strong>and</strong> figures be separated from the text. The endfloat<br />
package moves all the figures <strong>and</strong> table to the end of the document. Simply <strong>in</strong>clud<strong>in</strong>g<br />
the package<br />
\usepackage{endfloat}<br />
activates the package. The package supports many options which can be <strong>in</strong>cluded <strong>in</strong><br />
the \usepackage comm<strong>and</strong>, <strong>in</strong>clud<strong>in</strong>g<br />
• Notes such as “[Figure 4 about here.]” are placed <strong>in</strong> approximately where the<br />
floats would have appeared <strong>in</strong> the text. Such notes can be turned off with the<br />
nomarkers package option<br />
\usepackage[nomarkers]{endfloat}<br />
The text of these notes can be changed by redef<strong>in</strong><strong>in</strong>g the \figureplace <strong>and</strong><br />
\tableplace comm<strong>and</strong>s. For example,<br />
\renewcomm<strong>and</strong>{\figureplace}{%<br />
\beg<strong>in</strong>{center}%<br />
[\figurename~\thepostfig\ would appear here.]%<br />
\end{center}}<br />
changes the \figureplace text.<br />
• A list of figures is <strong>in</strong>cluded before the figures <strong>and</strong> a list of tables is <strong>in</strong>cluded<br />
before the tables. The nofiglist <strong>and</strong> notablist package options suppress<br />
these lists.<br />
• The fighead <strong>and</strong> tabhead package options create section headers for the figures<br />
<strong>and</strong> tables, respectively.<br />
• The figures appear before the tables. The tablesfirst package option reverses<br />
this order.<br />
• A \clearpage comm<strong>and</strong> is executed after each figure <strong>and</strong> table, caus<strong>in</strong>g each<br />
float to appear on a page by itself. This can be changed by modify<strong>in</strong>g the<br />
\efloatseparator comm<strong>and</strong>. For example,<br />
\renewcomm<strong>and</strong>{\efloatseparator}{\mbox{}}<br />
places an empty \mbox after each float.<br />
19.7 Adjust<strong>in</strong>g Caption L<strong>in</strong>espac<strong>in</strong>g<br />
To doublespace a document, <strong>in</strong>clude either<br />
\l<strong>in</strong>espread{1.6}<br />
or equivalently<br />
\renewcomm<strong>and</strong>{\basel<strong>in</strong>estretch}{1.6}<br />
<strong>in</strong> the preamble 30 . In addition to doublespaced text, this also produces doublespaced<br />
captions <strong>and</strong> footnotes. To produce doublespaced text <strong>and</strong> s<strong>in</strong>glespaced captions <strong>and</strong><br />
footnotes, use the setspace package 31 .<br />
\usepackage{setspace}<br />
\l<strong>in</strong>estretch{1.5}<br />
A 1.0 l<strong>in</strong>estretch causes s<strong>in</strong>gle-spaced text, a 1.25 l<strong>in</strong>estretch causes space-<strong>and</strong>-a-half<br />
spaced text, <strong>and</strong> a 1.6 l<strong>in</strong>estretch causes doublespaced text.<br />
30 Although it is generally considered poor style, these comm<strong>and</strong>s can also be used with<strong>in</strong> a document<br />
to change the <strong>in</strong>terl<strong>in</strong>e spac<strong>in</strong>g. When these comm<strong>and</strong>s are used with<strong>in</strong> a document, a fontsize<br />
comm<strong>and</strong> such as \normalsize must issued after the l<strong>in</strong>e-spac<strong>in</strong>g comm<strong>and</strong> to put the new spac<strong>in</strong>g<br />
<strong>in</strong>to effect.<br />
31 Although the doublespace package also sets l<strong>in</strong>e spac<strong>in</strong>g, it has not been properly updated to<br />
L A TEX 2ε, caus<strong>in</strong>g it to <strong>in</strong>teract with many packages. As a result, setspace should be used <strong>in</strong>stead.<br />
68
20 Customiz<strong>in</strong>g Captions with caption package<br />
Section 19.4 on Page 67 describes how to customize the caption label while Section<br />
19.3 on Page 66 describes how to customize the caption vertical spac<strong>in</strong>g. The<br />
caption package 32 provides comm<strong>and</strong>s for customiz<strong>in</strong>g other caption characteristics.<br />
This section provides an overview of the caption package. Further details are found<br />
<strong>in</strong> the caption package documentation [12].<br />
The caption package can be used with many types of floats as it officially supports<br />
the float, list<strong>in</strong>gs, longtable, rotat<strong>in</strong>g, sidecap, supertabular, <strong>and</strong> subfig packages. It also<br />
works with the floatfig, subfloat, <strong>and</strong> wrapfig packages.<br />
ccaption Although it is not described <strong>in</strong> this document, the ccaption (note the double-c) pack-<br />
package age also provides comm<strong>and</strong>s for customiz<strong>in</strong>g captions. It is described <strong>in</strong> [13].<br />
20.1 Caption Package Overview<br />
There are two aspects to the caption package<br />
• The new variants of the \caption comm<strong>and</strong> which produce the captions are<br />
described <strong>in</strong> Section 20.2 <strong>and</strong> listed <strong>in</strong> Table 12.<br />
• Section 20.3 on Page 70 describes the two methods for specify<strong>in</strong>g captioncustomiz<strong>in</strong>g<br />
options. There are four types of options:<br />
Font Options customize the caption font 33 . These options are listed <strong>in</strong> Table<br />
14 <strong>and</strong> Table 15 on Page 73 with examples provided <strong>in</strong> Section 20.4.1<br />
on Page 76.<br />
Caption Spac<strong>in</strong>g Options customize the caption vertical spac<strong>in</strong>g. These<br />
options are listed <strong>in</strong> Table 16 on Page 74 with examples provided <strong>in</strong> Section<br />
20.4.2 on Page 77.<br />
Caption Label Options customize the caption label <strong>and</strong> separator. These<br />
options are listed <strong>in</strong> Table 17 on Page 74 with examples provided <strong>in</strong> Section<br />
20.4.3 on Page 79.<br />
Caption Formatt<strong>in</strong>g Options customize the caption formatt<strong>in</strong>g. These options<br />
are listed <strong>in</strong> Table 18 on Page 75 with examples provided <strong>in</strong> Section<br />
20.4.4 on Page 80.<br />
Note that the tables list<strong>in</strong>g the caption-package options (Tables 13 - 18) are<br />
grouped together on pages 73-75 to facilitate convenient reference. The examples<br />
are grouped together <strong>in</strong> Section 20.4 on Page 76.<br />
• Users can def<strong>in</strong>e a collection of caption options, called caption styles. The entire<br />
collection of options can be specified with the style= option. See Section 20.5.1<br />
on Page 84.<br />
• Instead of just us<strong>in</strong>g the built-<strong>in</strong> option values, users can def<strong>in</strong>e their own option<br />
values as described <strong>in</strong> Section 20.5.2.<br />
32 Version 3 of the caption package replaces previous caption versions as well as the caption2 package.<br />
33 Although caption package provides comm<strong>and</strong>s to customize a caption’s font, not every comb<strong>in</strong>ation<br />
of font attributes necessarily exists <strong>in</strong> the font be<strong>in</strong>g used. For example, suppose the user<br />
specifies a font with roman family, small caps shape, <strong>and</strong> bold series. If that comb<strong>in</strong>ation is not<br />
supported by the current font, then L A TEX may <strong>in</strong>stead substitute a font with roman family, upright<br />
shape, <strong>and</strong> bold series.<br />
69
20.2 Caption Comm<strong>and</strong>s<br />
Section 17.1 on Page 56 describes the \caption comm<strong>and</strong> <strong>and</strong> some customization is<br />
described <strong>in</strong> <strong>and</strong> Section 19. The caption package provides many more customization<br />
options.<br />
The caption package slightly changes this \caption comm<strong>and</strong> <strong>and</strong> also <strong>in</strong>troduces<br />
new variants as described <strong>in</strong> Table 12. The highlights <strong>in</strong>clude:<br />
• The caption package changes the \caption comm<strong>and</strong> such that if the optional<br />
argument is specified but empty<br />
\caption[]{caption text}<br />
then no entry is made <strong>in</strong> the list of figures/tables for that caption.<br />
• The new \caption* comm<strong>and</strong> displays the caption without a caption label <strong>and</strong><br />
without entry <strong>in</strong> the list of tables.<br />
• The new \captionof comm<strong>and</strong> allows a particular type of caption to be used<br />
anywhere: figure environment, table environment, or elsewhere <strong>in</strong> a document.<br />
For example<br />
\beg<strong>in</strong>{figure}<br />
....<br />
\captionof{table}[List of Tables Text]{Table Caption}<br />
\end{figure}<br />
produces a Table caption <strong>in</strong>side a figure environment. This is useful for<br />
1. Plac<strong>in</strong>g a table <strong>and</strong> figure side-by-side as described <strong>in</strong> Section 30 on<br />
Page 109).<br />
2. Construct<strong>in</strong>g marg<strong>in</strong>al figures (see Section 22 on Page 89).<br />
3. Construct<strong>in</strong>g non-float<strong>in</strong>g figures (see Section 21 on Page 87).<br />
Note that the \captionof should always be used <strong>in</strong>side some type of environment<br />
(such as m<strong>in</strong>ipage) to avoid page breaks occurr<strong>in</strong>g between the caption<br />
<strong>and</strong> the float contents.<br />
20.3 Customiz<strong>in</strong>g Captions with Caption Comm<strong>and</strong><br />
As mentioned earlier <strong>in</strong> Section 20.1 on Page 69, the caption package allows the user<br />
to customize the caption font, spac<strong>in</strong>g, label, <strong>and</strong> format. The options (listed <strong>in</strong><br />
Tables 13 - 18) can be specified <strong>in</strong> either of two ways:<br />
usepackage options<br />
\usepackage[options]{caption} where [options] are any comb<strong>in</strong>ation of<br />
options specified <strong>in</strong> Table 13. For example<br />
\usepackage[marg<strong>in</strong>=10pt,font=small,labelfont=bf]{caption}<br />
causes all caption marg<strong>in</strong>s to be <strong>in</strong>dented by an additional 10pt on both left<br />
<strong>and</strong> right sides, with the entire caption (label <strong>and</strong> text) hav<strong>in</strong>g a small font<br />
size <strong>and</strong> the label hav<strong>in</strong>g a bold font series.<br />
captionsetup comm<strong>and</strong><br />
The comm<strong>and</strong> \captionsetup{options} causes specified options to be <strong>in</strong> effect<br />
for the rema<strong>in</strong><strong>in</strong>g environment. (A \captionsetup comm<strong>and</strong> <strong>in</strong> a document’s<br />
preamble effects the entire document.) For example<br />
\captionsetup{marg<strong>in</strong>=10pt,font=small,labelfont=bf}<br />
70
Table 12: caption package caption Comm<strong>and</strong>s<br />
Comm<strong>and</strong> Description<br />
\caption{〈caption text〉} Uses 〈caption text〉 for both figure/table caption <strong>and</strong> for List of Figures/Tables.<br />
(Same behavior as without caption package).<br />
\caption[〈list entry〉]{〈caption text〉} Uses 〈caption text〉 for figure/table caption <strong>and</strong> 〈list text〉 for entry <strong>in</strong> List of<br />
Figures/Tables. (Same behavior as without caption package).<br />
\caption[ ]{〈caption text〉} Uses 〈caption text〉 for figure/table caption <strong>and</strong> creates no entry <strong>in</strong> List of Figures/Tables.<br />
\caption*{〈caption text〉} Uses 〈caption text〉 for figure/table caption but does not <strong>in</strong>clude caption label or<br />
separator (see Figure 16). No entry is generated for the List of Figures/Tables.<br />
\captionof{〈float type〉}[〈list entry〉]{〈caption text〉} If 〈float type〉 is figure then Figure caption <strong>and</strong> entry <strong>in</strong> List of Figures is generated,<br />
even if the \captionof comm<strong>and</strong> is located outside of a figure environment.<br />
Likewise, if 〈float type〉 is table then Figure caption <strong>and</strong> entry <strong>in</strong> List of Table is<br />
generated, even if the \captionof comm<strong>and</strong> is located outside of a table environment.<br />
\captionof*{〈float type〉}{〈caption text〉} Similar to \captionof comm<strong>and</strong>, the 〈float type〉 species whether a figure or table<br />
caption is generated. Similar to \caption* comm<strong>and</strong>, \captionof* comm<strong>and</strong><br />
uses 〈caption text〉 for figure/table caption but does not <strong>in</strong>clude caption label or<br />
separator (see Figure 16). No entry is generated for the List of Figures/Tables.<br />
\Cont<strong>in</strong>uedFloat Allows multiple \caption comm<strong>and</strong> to share same figure number. See Section 32.3<br />
on Page 114 <strong>and</strong> Section 33 on Page 116.<br />
71
causes all subsequent caption <strong>in</strong> the current environment to be <strong>in</strong>dented by an<br />
additional 10pt on both left <strong>and</strong> right sides, with the entire caption (label <strong>and</strong><br />
text) hav<strong>in</strong>g a small font size <strong>and</strong> the label hav<strong>in</strong>g a bold font series.<br />
Table 13 describes the \captionsetup <strong>and</strong> \clearcaptionsetup comm<strong>and</strong>s.<br />
The \captionsetup comm<strong>and</strong> has two advantages over specify<strong>in</strong>g options <strong>in</strong> the<br />
\usepackage comm<strong>and</strong><br />
• The \captionsetup comm<strong>and</strong> has optional arguments that cause the options<br />
to apply to just figures or just tables.<br />
• The \captionsetup can change the sett<strong>in</strong>gs for an <strong>in</strong>dividual figure or table.<br />
For example:<br />
\beg<strong>in</strong>{figure}<br />
...<br />
\captionsetup{justification=center<strong>in</strong>g}<br />
\caption{This is the Caption Text}<br />
\end{figure}<br />
causes the captions to be centered for this figure only but does not affect any<br />
other figure.<br />
While the \captionsetup can be used to customize a s<strong>in</strong>gle caption, this is generally<br />
considered bad style. In general, a user should issue \captionsetup comm<strong>and</strong>s the<br />
preamble <strong>and</strong> avoid us<strong>in</strong>g \captionsetup with<strong>in</strong> the document.<br />
72
Comm<strong>and</strong><br />
Table 13: Caption Setup Comm<strong>and</strong>s from Caption Package<br />
Description<br />
\captionsetup[〈float type〉]{〈options〉}<br />
Set caption attributes<br />
Examples \captionsetup{〈options〉} options apply to all captions<br />
\captionsetup[figure]{〈options〉} options apply only to figure captions<br />
\captionsetup[table]{〈options〉} options apply only to table captions<br />
\clearcaptionsetup{〈float type〉}<br />
changes caption attributes to defaults<br />
Examples \clearcaptionsetup{figure} resets figure captions to have default options<br />
\clearcaptionsetup{table} resets table captions to have default options<br />
Table 14: Font Options<br />
Option<br />
font=<br />
labelfont=<br />
textfont=<br />
Affected portion<br />
Affects entire caption (caption label, separator,<br />
<strong>and</strong> caption text).<br />
Affects only caption label <strong>and</strong> separator<br />
Affects only caption text<br />
Table 15: Possible Font Option Values<br />
Action Option Value Description<br />
Use all font defaults default Changes font family, shape, series, <strong>and</strong><br />
size to defaults<br />
Specify font family rm roman font family (default)<br />
sf<br />
san sarif font family<br />
tt<br />
typewriter font family<br />
Specify font shape up upright font shape (default)<br />
it<br />
italic font shape<br />
sl<br />
slanted font shape<br />
sc<br />
small caps font shape<br />
Specify font series md medium font series (default)<br />
bf<br />
bold font series<br />
Specify font size scriptsize scriptsize font size<br />
footnotesize footnotesize font size<br />
small<br />
small font size<br />
normalsize normal font size (default)<br />
large large font size<br />
Large<br />
Large font size<br />
73
Keyword Value Description<br />
Table 16: captionsetup Vertical Space Options<br />
aboveskip= (default is 10pt) Sets the vertical spac<strong>in</strong>g between the caption<br />
<strong>and</strong> the figure/table contents. Normally, this space is<br />
placed above the caption, but when position=top then the<br />
aboveskip= spac<strong>in</strong>g is placed below the caption.<br />
belowskip= (default is 0pt) Sets the vertical spac<strong>in</strong>g <strong>in</strong> the direction away<br />
from the figure/table contents. Normally, this space is placed<br />
below the caption, but when position=top then belowskip=<br />
spac<strong>in</strong>g is placed above the caption.<br />
position= bottom (default) Places the aboveskip= spac<strong>in</strong>g above the caption<br />
<strong>and</strong> the belowskip= spac<strong>in</strong>g below the caption.<br />
top<br />
This caption reverses the aboveskip= <strong>and</strong> belowskip= spac<strong>in</strong>gs<br />
(to accommodate captions at the top of floats).<br />
parskip= (default is 0pt) The amount of vertical space <strong>in</strong>serted between<br />
a caption’s paragraphs. (This option has no effect on captions<br />
with only one paragraph).<br />
Keyword Value Description<br />
Table 17: captionsetup Label <strong>and</strong> Separator Options<br />
labelformat= default (default) Caption label is typeset as specified <strong>in</strong> the document<br />
class.<br />
simple The caption label is typeset as a name <strong>and</strong> a number. For<br />
example “Figure 9”.<br />
parens The number is typeset <strong>in</strong>side parentheses. For example, “(9)”.<br />
empty<br />
The caption label is empty (no “Figure”, no number). This is<br />
usually used with labelsep=none to also elim<strong>in</strong>ate the caption<br />
separator.<br />
labelsep= colon (default) The caption separator is a colon <strong>and</strong> a space<br />
period The caption separator is a period <strong>and</strong> a space<br />
space<br />
The caption separator is a s<strong>in</strong>gle space<br />
quad<br />
The caption separator is a \quad<br />
newl<strong>in</strong>e The caption separator is a \newl<strong>in</strong>e<br />
none No caption separator. Usually used only with<br />
labelformat=empty<br />
74
Keyword Value Description<br />
Table 18: captionsetup Formatt<strong>in</strong>g Options<br />
format= pla<strong>in</strong> (default) Captions are typeset as normal paragraphs.<br />
hang<br />
The caption’s 2nd <strong>and</strong> subsequent l<strong>in</strong>es are <strong>in</strong>dented. It generally<br />
causes the first character of the 2nd l<strong>in</strong>e to be horizontally<br />
aligned with the first character of the caption text on the first<br />
l<strong>in</strong>e.<br />
justification= justified (default) Caption is typeset as a regular paragraph.<br />
centerlast Last l<strong>in</strong>e of caption is horizontally centered.<br />
centerfirst First l<strong>in</strong>e of caption is horizontally centered.<br />
center<strong>in</strong>g Each l<strong>in</strong>e of caption is horizontally centered.<br />
Center<strong>in</strong>g Same as center<strong>in</strong>g except the TEX word-break<strong>in</strong>g algorithm<br />
is used.<br />
raggedright Each l<strong>in</strong>e is left-justified, leav<strong>in</strong>g a ragged right marg<strong>in</strong>.<br />
RaggedRight Same as raggedright except the TEX word-break<strong>in</strong>g algorithm<br />
is used.<br />
raggedleft Each l<strong>in</strong>e is right-justified, leav<strong>in</strong>g a ragged left marg<strong>in</strong>.<br />
RaggedLeft Same as raggedleft except the TEX word-break<strong>in</strong>g algorithm<br />
is used.<br />
<strong>in</strong>dentation= (default is 0pt) Amount of additional <strong>in</strong>dentation for the caption’s<br />
2nd <strong>and</strong> subsequent l<strong>in</strong>es.<br />
hang<strong>in</strong>dent= (default is 0pt) Amount of additional <strong>in</strong>dentation for the<br />
2nd <strong>and</strong> subsequent l<strong>in</strong>es of each paragraph <strong>in</strong> a caption.<br />
Note hang<strong>in</strong>dent= does not apply to the first l<strong>in</strong>e of each<br />
paragraph. (If a caption conta<strong>in</strong>s only one paragraph, then<br />
hang<strong>in</strong>dent= <strong>and</strong> <strong>in</strong>dentation= are equivalent.)<br />
marg<strong>in</strong>= (default is 0pt) Both left <strong>and</strong> right marg<strong>in</strong>s are brought <strong>in</strong> by<br />
specified amount.<br />
width= Sets caption width (left <strong>and</strong> right marg<strong>in</strong>s are brought <strong>in</strong> equal<br />
amounts). If both marg<strong>in</strong>= <strong>and</strong> width= values are specified,<br />
the last option specified applies.<br />
s<strong>in</strong>glel<strong>in</strong>echeck= true (default) If the caption fits on a s<strong>in</strong>gle l<strong>in</strong>e, then the caption<br />
is centered regardless of justification= value.<br />
false<br />
Format of justification= is applied to s<strong>in</strong>gle l<strong>in</strong>e captions.<br />
75
20.4 Caption Package Examples<br />
20.4.1 Caption Package Font Options<br />
Table 14 shows the three options the caption package provides for customiz<strong>in</strong>g a<br />
caption’s fonts, where “label”, “separator”, “caption text” are def<strong>in</strong>ed <strong>in</strong> Figure 16<br />
on Page 76. These three options can change any comb<strong>in</strong>ation of font family, shape,<br />
series, <strong>and</strong> size, as shown <strong>in</strong> Table 15.<br />
Figure 14<br />
} {{ }<br />
Caption<br />
Label<br />
:<br />
}{{} } {{ }<br />
Separator<br />
Plot of Temperature vs. Time<br />
Caption<br />
Text<br />
Figure 16: Def<strong>in</strong>ition of Caption Label, Separator, Text<br />
Font Example #1<br />
The comm<strong>and</strong><br />
\captionsetup{font={default,Large,bf}}<br />
\caption{This is Caption Font Example \#1}<br />
sets all caption font characteristics to their defaults, then gives entire figure caption<br />
(label, separator, <strong>and</strong> caption text) Large font size <strong>and</strong> bold font series, as shown <strong>in</strong><br />
Figure 17. The font family <strong>and</strong> shape rema<strong>in</strong> set to their defaults.<br />
Graphic<br />
Figure 17: This is Caption Font Example #1<br />
Note that the above example affects both figure <strong>and</strong> table captions.<br />
[figures] optional argument to the \captionsetup comm<strong>and</strong><br />
\captionsetup[figures]{font={default,Large,bf}}<br />
causes only the figure captions to be modified.<br />
Add<strong>in</strong>g a<br />
Font Example #2<br />
The comm<strong>and</strong><br />
\captionsetup{font=default, textfont={scriptsize,sf}}<br />
\caption{This is Caption Font Example \#2}<br />
76
sets all figure-caption font characteristics to their defaults, then gives the caption<br />
text scriptsize font size <strong>and</strong> san serif font family, as shown <strong>in</strong> Figure 18.<br />
Graphic<br />
Figure 18: This is Caption Font Example #2<br />
Font Example #3<br />
The comm<strong>and</strong><br />
\captionsetup{font={default,Large}, labelfont=bf, textfont=sl}<br />
\caption{This is Caption Font Example \#3}<br />
sets all figure-caption font characteristics to their defaults, then gives the entire caption<br />
(label, separator, <strong>and</strong> caption text) Large font size, gives only the caption label<br />
<strong>and</strong> separator bold font series, <strong>and</strong> gives only the caption text slanted font shape, as<br />
shown <strong>in</strong> Figure 19.<br />
Graphic<br />
Figure 19: This is Caption Font Example #3<br />
20.4.2 Caption Vertical Package Spac<strong>in</strong>g Options<br />
As their names suggest, the space above the caption is specified by the aboveskip<br />
option while the space below the caption is specified by the belowskip option. However,<br />
this is only the case when the default position=bottom option is used. The<br />
position=top option reverses the mean<strong>in</strong>gs of the aboveskip <strong>and</strong> belowskip options.<br />
It can get confus<strong>in</strong>g if the user has customized aboveskip <strong>and</strong> belowskip for<br />
a top-caption <strong>and</strong> then wants a bottom caption, <strong>in</strong> which case the position=top<br />
option would have to be used to produce a bottom caption.<br />
To avoid confusion, the follow<strong>in</strong>g procedure should be used<br />
1. Th<strong>in</strong>k of aboveskip= option as the caption/float spac<strong>in</strong>g. That is, the space between<br />
the caption <strong>and</strong> the float contents should be specified <strong>in</strong> the aboveskip=<br />
option.<br />
2. Th<strong>in</strong>k of belowskip= option as the caption/text spac<strong>in</strong>g. That is, the space between<br />
the caption <strong>and</strong> the surround<strong>in</strong>g text should be specified <strong>in</strong> the belowskip=<br />
option.<br />
3. Use position=bottom for captions at the bottom of floats. Use position=top<br />
for captions at the top of floats.<br />
Caption Vertical Spac<strong>in</strong>g Example #1<br />
The aboveskip= option modifies the spac<strong>in</strong>g above a caption (the default spac<strong>in</strong>g is<br />
10pt). The follow<strong>in</strong>g code<br />
77
\captionsetup{aboveskip=1cm}<br />
\caption{Vertical Spac<strong>in</strong>g Example \#1}<br />
causes produces a 1cm spac<strong>in</strong>g above the caption as shown <strong>in</strong> Figure 20.<br />
Graphic<br />
Figure 20: Vertical Spac<strong>in</strong>g Example #1<br />
Caption Vertical Spac<strong>in</strong>g Example #2<br />
The previous example showed how the aboveskip= option modifies the spac<strong>in</strong>g above<br />
a caption. This example shows how the position=top reverses the mean<strong>in</strong>g of<br />
aboveskip <strong>and</strong> belowskip.<br />
The follow<strong>in</strong>g code<br />
\captionsetup{aboveskip=1cm,position=top}<br />
\caption{Vertical Spac<strong>in</strong>g Example \#2}<br />
causes produces a 1cm spac<strong>in</strong>g below the caption as shown <strong>in</strong> Table 19<br />
Table 19: Vertical Spac<strong>in</strong>g Example #2<br />
a<br />
c<br />
b<br />
d<br />
Caption Vertical Spac<strong>in</strong>g Example #3<br />
The previous example showed the position=top reverses the mean<strong>in</strong>g of aboveskip<br />
<strong>and</strong> belowskip for use <strong>in</strong> plac<strong>in</strong>g a caption above tables.<br />
If table captions will be placed above the table while most figure captions will<br />
be placed below the figure, it is convenient to make the top position the default for<br />
table captions<br />
\captionsetup{aboveskip=1cm,belowskip=0pt}<br />
\captionsetup[figure]{position=bottom}<br />
\captionsetup[table]{position=top}<br />
...<br />
\caption{Table for Vertical Spac<strong>in</strong>g Example \#3}<br />
\caption{Figure for Vertical Spac<strong>in</strong>g Example \#3}<br />
causes produces a 1cm spac<strong>in</strong>g below table captions (as shown <strong>in</strong> Table 20) <strong>and</strong> a<br />
1cm spac<strong>in</strong>g above figure captions (as shown <strong>in</strong> Figure 21).<br />
78
Table 20: Table for Vertical Spac<strong>in</strong>g Example #3<br />
a<br />
c<br />
b<br />
d<br />
Graphic<br />
Figure 21: Figure for Vertical Spac<strong>in</strong>g Example #3<br />
20.4.3 Caption Package Label Options<br />
Caption Label Example #1<br />
The follow<strong>in</strong>g code<br />
\captionsetup{labelformat=simple}<br />
\caption{This is Caption Label Example \#1}<br />
def<strong>in</strong>e the label format to be simple, as shown <strong>in</strong> Figure 22. The simple format is<br />
usually the same as the default, although the document class could def<strong>in</strong>e default<br />
differently.<br />
Graphic<br />
Figure 22: This is Caption Label Example #1<br />
Caption Label Example #2<br />
The follow<strong>in</strong>g code<br />
\captionsetup{labelformat=parens}<br />
\caption{This is Caption Label Example \#2}<br />
def<strong>in</strong>e the label format to be parens, as shown <strong>in</strong> Figure 23. This format has no<br />
Figure name, <strong>and</strong> <strong>in</strong>stead just has the figure number surrounded by parentheses.<br />
Graphic<br />
Figure (23): This is Caption Label Example #2<br />
79
Caption Label Example #3<br />
The follow<strong>in</strong>g code<br />
\captionsetup{labelformat=empty, labelsep=none}<br />
\caption{This is Caption Label Example \#3}<br />
def<strong>in</strong>e the label format to be empty, as shown <strong>in</strong> Figure 23. S<strong>in</strong>ce no figure number<br />
is displayed, it is difficult to determ<strong>in</strong>e that it is Figure 23.<br />
Graphic<br />
This is Caption Label Example #3<br />
Caption Label Example #4<br />
The follow<strong>in</strong>g code<br />
\captionsetup{labelformat=default, labelsep=period}<br />
\caption{This is Caption Label Example \#4}<br />
changes the caption separator from the default colon to a period, as shown <strong>in</strong> Figure<br />
25.<br />
Graphic<br />
Figure 25. This is Caption Label Example #4<br />
Caption Label Example #5<br />
The follow<strong>in</strong>g code<br />
\captionsetup{labelformat=default, labelsep=newl<strong>in</strong>e}<br />
\caption{This is Caption Label Example \#5}<br />
changes the caption separator to a newl<strong>in</strong>e, as shown <strong>in</strong> Figure 25.<br />
Graphic<br />
Figure 26<br />
This is Caption Label Example #5<br />
20.4.4 Caption Package Formatt<strong>in</strong>g Options<br />
Formatt<strong>in</strong>g Example #1: Caption Width<br />
The follow<strong>in</strong>g code<br />
\captionsetup{width=3<strong>in</strong>}<br />
\caption{This is an example of customiz<strong>in</strong>g the caption width}<br />
80
causes the caption to be typeset <strong>in</strong> a 3-<strong>in</strong>ch wide column, as shown <strong>in</strong> Figure 27.<br />
Graphic<br />
Figure 27: This is an example of customiz<strong>in</strong>g<br />
the caption width<br />
Formatt<strong>in</strong>g Example #2: Default Format<br />
Figure 28 - Figure 36 on Page 82 show examples of the seven possible justification=<br />
values used with format=default. These figures are produced by the follow<strong>in</strong>g code<br />
\captionsetup{format=default,justification=justified}<br />
\caption{Caption with default format <strong>and</strong> justified justification.<br />
Caption with default format <strong>and</strong> justified justification.<br />
Caption with default format <strong>and</strong> justified justification.}<br />
...<br />
\captionsetup{format=default,justification=center<strong>in</strong>g}<br />
\caption{Caption with default format <strong>and</strong> center<strong>in</strong>g justification.<br />
Caption with default format <strong>and</strong> center<strong>in</strong>g justification.<br />
Caption with default format <strong>and</strong> center<strong>in</strong>g justification.}<br />
...<br />
\captionsetup{format=default,justification=centerlast}<br />
\caption{Caption with default format <strong>and</strong> centerlast justification.<br />
Caption with default format <strong>and</strong> centerlast justification.<br />
Caption with default format <strong>and</strong> centerlast justification.}<br />
...<br />
\captionsetup{format=default,justification=centerfirst}<br />
\caption{Caption with default format <strong>and</strong> centerfirst justification.<br />
Caption with default format <strong>and</strong> centerfirst justification.<br />
Caption with default format <strong>and</strong> centerfirst justification.}<br />
...<br />
\captionsetup{format=default,justification=raggedright}<br />
\caption{Caption with default format <strong>and</strong> raggedright justification.<br />
Caption with default format <strong>and</strong> raggedright justification.<br />
Caption with default format <strong>and</strong> raggedright justification.}<br />
...<br />
\captionsetup{format=default,justification=RaggedRight}<br />
\caption{Caption with default format <strong>and</strong> RaggedRight justification.<br />
Caption with default format <strong>and</strong> RaggedRight justification.<br />
Caption with default format <strong>and</strong> RaggedRight justification.}<br />
...<br />
\captionsetup{format=default,justification=raggedleft}<br />
\caption{Caption with default format <strong>and</strong> raggedleft justification.<br />
Caption with default format <strong>and</strong> raggedleft justification.<br />
Caption with default format <strong>and</strong> raggedleft justification.}<br />
As can be seen <strong>in</strong> Figure 28 - Figure 36, the above code causes the first l<strong>in</strong>e of the<br />
caption to be formatted the same as all of the other l<strong>in</strong>es.<br />
Formatt<strong>in</strong>g Example #3: Hang Format<br />
The previous example used the format=default option. This previous example<br />
creates Figure 37 - Figure 45, show<strong>in</strong>g the seven possible justification= values<br />
used with format=hang. These figures are produced by the follow<strong>in</strong>g code<br />
81
Graphic<br />
Figure 28: Caption with default format <strong>and</strong> justified<br />
justification. Caption with default format<br />
<strong>and</strong> justified justification. Caption with default<br />
format <strong>and</strong> justified justification.<br />
Graphic<br />
Figure 29: Caption with default format <strong>and</strong> centerlast<br />
justification. Caption with default format<br />
<strong>and</strong> centerlast justification. Caption with<br />
default format <strong>and</strong> centerlast justification.<br />
Graphic<br />
Figure 30: Caption with default format <strong>and</strong><br />
centerfirst justification. Caption with default<br />
format <strong>and</strong> centerfirst justification. Caption<br />
with default format <strong>and</strong> centerfirst justification.<br />
Graphic<br />
Figure 31: Caption with default format <strong>and</strong><br />
center<strong>in</strong>g justification. Caption with default<br />
format <strong>and</strong> center<strong>in</strong>g justification. Caption<br />
with default format <strong>and</strong> center<strong>in</strong>g justification.<br />
Graphic<br />
Figure 32: Caption with default format<br />
<strong>and</strong> Center<strong>in</strong>g justification. Caption<br />
with default format <strong>and</strong> Center<strong>in</strong>g<br />
justification. Caption with default<br />
format <strong>and</strong> Center<strong>in</strong>g justification.<br />
Graphic<br />
Figure 33: Caption with default format <strong>and</strong><br />
raggedright justification. Caption with default<br />
format <strong>and</strong> raggedright justification. Caption<br />
with default format <strong>and</strong> raggedright<br />
justification.<br />
Graphic<br />
Figure 34: Caption with default format <strong>and</strong><br />
RaggedRight justification. Caption with default<br />
format <strong>and</strong> RaggedRight justification.<br />
Caption with default format <strong>and</strong> RaggedRight<br />
justification.<br />
Graphic<br />
Figure 35: Caption with default format <strong>and</strong><br />
raggedleft justification. Caption with default<br />
format <strong>and</strong> raggedleft justification. Caption<br />
with default format <strong>and</strong> raggedleft<br />
justification.<br />
Graphic<br />
Figure 36: Caption with default format<br />
<strong>and</strong> RaggedLeft justification. Caption<br />
with default format <strong>and</strong> RaggedLeft<br />
justification. Caption with default<br />
format <strong>and</strong> RaggedLeft justification.<br />
82
Graphic<br />
Figure 37: Caption with hang format <strong>and</strong> justified<br />
justification. Caption with<br />
hang format <strong>and</strong> justified justification.<br />
Caption with hang format <strong>and</strong><br />
justified justification.<br />
Graphic<br />
Figure 38: Caption with hang format <strong>and</strong> centerlast<br />
justification. Caption with<br />
hang format <strong>and</strong> centerlast justification.<br />
Caption with hang format <strong>and</strong><br />
centerlast justification.<br />
Graphic<br />
Figure 40: Caption with hang format <strong>and</strong><br />
center<strong>in</strong>g justification. Caption<br />
with hang format <strong>and</strong> center<strong>in</strong>g<br />
justification. Caption with hang<br />
format <strong>and</strong> center<strong>in</strong>g justification.<br />
Graphic<br />
Figure 42: Caption with hang format <strong>and</strong><br />
raggedright justification. Caption<br />
with hang format <strong>and</strong> raggedright<br />
justification. Caption with hang<br />
format <strong>and</strong> raggedright<br />
justification.<br />
Graphic<br />
Figure 44: Caption with hang format <strong>and</strong><br />
raggedleft justification. Caption<br />
with hang format <strong>and</strong> raggedleft<br />
justification. Caption with hang<br />
format <strong>and</strong> raggedleft justification.<br />
Graphic<br />
Figure 39: Caption with hang format<br />
<strong>and</strong> centerfirst justification. Caption<br />
with hang format <strong>and</strong> centerfirst<br />
justification. Caption with hang<br />
format <strong>and</strong> centerfirst justification.<br />
Graphic<br />
Figure 41: Caption with hang format <strong>and</strong><br />
Center<strong>in</strong>g justification. Caption<br />
with hang format <strong>and</strong> Center<strong>in</strong>g<br />
justification. Caption with hang<br />
format <strong>and</strong> Center<strong>in</strong>g justification.<br />
Graphic<br />
Figure 43: Caption with hang format <strong>and</strong><br />
RaggedRight justification. Caption<br />
with hang format <strong>and</strong> RaggedRight<br />
justification. Caption with hang<br />
format <strong>and</strong> RaggedRight justification.<br />
Graphic<br />
Figure 45: Caption with hang format<br />
<strong>and</strong> RaggedLeft justification.<br />
Caption with hang format<br />
<strong>and</strong> RaggedLeft justification.<br />
Caption with hang format<br />
<strong>and</strong> RaggedLeft justification.<br />
83
\captionsetup{format=hang,<strong>in</strong>dention=0pt,justification=justified}<br />
\caption{Caption with hang format <strong>and</strong> justified justification.<br />
Caption with hang format <strong>and</strong> justified justification.<br />
Caption with hang format <strong>and</strong> justified justification.}<br />
...<br />
\captionsetup{format=hang,<strong>in</strong>dention=0pt,justification=center<strong>in</strong>g}<br />
\caption{Caption with hang format <strong>and</strong> center<strong>in</strong>g justification.<br />
Caption with hang format <strong>and</strong> center<strong>in</strong>g justification.<br />
Caption with hang format <strong>and</strong> center<strong>in</strong>g justification.}<br />
...<br />
\captionsetup{format=hang,<strong>in</strong>dention=0pt,justification=centerlast}<br />
\caption{Caption with hang format <strong>and</strong> centerlast justification.<br />
Caption with hang format <strong>and</strong> centerlast justification.<br />
Caption with hang format <strong>and</strong> centerlast justification.}<br />
...<br />
\captionsetup{format=hang,<strong>in</strong>dention=0pt,justification=centerfirst}<br />
\caption{Caption with hang format <strong>and</strong> centerfirst justification.<br />
Caption with hang format <strong>and</strong> centerfirst justification.<br />
Caption with hang format <strong>and</strong> centerfirst justification.}<br />
...<br />
\captionsetup{format=hang,<strong>in</strong>dention=0pt,justification=raggedright}<br />
\caption{Caption with hang format <strong>and</strong> raggedright justification.<br />
Caption with hang format <strong>and</strong> raggedright justification.<br />
Caption with hang format <strong>and</strong> raggedright justification.}<br />
...<br />
\captionsetup{format=hang,<strong>in</strong>dention=0pt,justification=RaggedRight}<br />
\caption{Caption with hang format <strong>and</strong> RaggedRight justification.<br />
Caption with hang format <strong>and</strong> RaggedRight justification.<br />
Caption with hang format <strong>and</strong> RaggedRight justification.}<br />
...<br />
\captionsetup{format=hang,<strong>in</strong>dention=0pt,justification=raggedleft}<br />
\caption{Caption with hang format <strong>and</strong> raggedleft justification.<br />
Caption with hang format <strong>and</strong> raggedleft justification.<br />
Caption with hang format <strong>and</strong> raggedleft justification.}<br />
As can be seen <strong>in</strong> Figure 37 - Figure 45, the format=hang option <strong>in</strong> the above code<br />
causes the second <strong>and</strong> subsequent l<strong>in</strong>es to have additional <strong>in</strong>dentation.<br />
20.5 Further Customization<br />
The caption has additional feature for users who want additional customization. This<br />
section provides a brief description, with detailed <strong>in</strong>struction available <strong>in</strong> [12].<br />
20.5.1 Caption Styles<br />
Users can def<strong>in</strong>e a collection of caption options, called caption styles. The entire<br />
collection of options can be specified with a s<strong>in</strong>gle option. For example, the caption<br />
package automatically def<strong>in</strong>es a style named default such that<br />
\captionsetup{style=default}<br />
is equivalent to<br />
\captionsetup{font=default, labelfont=default,<br />
textfont=default, parskip=0pt,<br />
labelformat=simple, labelsep=colon,<br />
format=default, <strong>in</strong>dentation=0pt,<br />
hang<strong>in</strong>dent=0pt, marg<strong>in</strong>=0pt,<br />
par<strong>in</strong>ident=0pt, justification=justified,<br />
s<strong>in</strong>glel<strong>in</strong>echeck=true}<br />
84
The \DeclareCaptionStyle can be used <strong>in</strong> the document preamble to def<strong>in</strong>e other<br />
caption styles. These styles can either explicitly def<strong>in</strong>e all of the parameters or start<br />
with the default style <strong>and</strong> modify only the unique option values.<br />
For example, the follow<strong>in</strong>g \DeclareCaptionStyle comm<strong>and</strong> <strong>in</strong> the document’s<br />
preamble<br />
\DeclareCaptionStyle{BigLeft}{style=default, labelsep=period,<br />
font=Large, labelfont=bold,<br />
justification=RaggedRight,<br />
s<strong>in</strong>glel<strong>in</strong>echeck=false}<br />
allows the BigLeft style to be referenced by<br />
\captionsetup{style=BigLeft}<br />
\caption{This Caption uses BigLeft Style}<br />
as shown <strong>in</strong> Figure 46.<br />
Graphic<br />
Figure 46<br />
This Caption uses BigLeft Style<br />
20.5.2 Additional Option Values<br />
The caption package provides comm<strong>and</strong>s such as<br />
\DeclareCaptionFont<br />
\DeclareCaptionLabelSeparator<br />
\DeclareCaptionLabelFormat<br />
\DeclareCaptionFormat<br />
\DeclareCaptionLabelJustification<br />
to provide additional option values.<br />
document’s preamble.<br />
These comm<strong>and</strong>s can only be issued <strong>in</strong> the<br />
Option Def<strong>in</strong>ition Example #1<br />
Table 15 on Page 73 def<strong>in</strong>es the possible font options that can be used by the<br />
font=, labelfont=, <strong>and</strong> textfont= options. The \DeclareCaptionFont allows the<br />
user to def<strong>in</strong>e additional values that can be used by these options. For example, the<br />
follow<strong>in</strong>g comm<strong>and</strong> <strong>in</strong> the document’s preamble<br />
\DeclareCaptionFont{BigAndBold}{\Large\bfseries}<br />
def<strong>in</strong>es a BigAndBold font such that the follow<strong>in</strong>g code<br />
\captionsetup{font=BigAndBold}<br />
\caption{This Caption uses a Custom Font}<br />
produces the caption <strong>in</strong> Figure 47<br />
Graphic<br />
Figure 47: This Caption uses a Custom Font<br />
85
Option Def<strong>in</strong>ition Example #2<br />
Table 17 on Page 74 describes how the labelformat= option controls how the “Figure<br />
33” portion of the caption is displayed. The \DeclareCaptionLabelFormat allows<br />
the user to def<strong>in</strong>e additional labelformat= options. The symbols #1 <strong>and</strong> #2 are used<br />
<strong>in</strong> the def<strong>in</strong>ition to specify where the “Figure” <strong>and</strong> Figure Number are <strong>in</strong>serted. For<br />
example the follow<strong>in</strong>g comm<strong>and</strong> <strong>in</strong> the document’s preamble<br />
\DeclareCaptionLabelFormat{hash}{#1 {\#}#2}<br />
def<strong>in</strong>es a hash formatt<strong>in</strong>g option such that a hash mark # is placed between just<br />
before the figure number. However, this def<strong>in</strong>ition has a flaw <strong>in</strong> that the space<br />
<strong>in</strong> the def<strong>in</strong>ition after #1 is not desired should #1 be empty. The \bothIfFirst<br />
comm<strong>and</strong> typesets both of its arguments if the first argument exists, otherwise neither<br />
argument is typeset. Similarly, the \bothIfSecond comm<strong>and</strong> typesets both of its<br />
arguments if the second argument exists, otherwise neither argument is typeset. The<br />
new def<strong>in</strong>ition us<strong>in</strong>g \bothIfFirst is<br />
\DeclareCaptionLabelFormat{hash}{\bothIfFirst{#1}{ }{\#}#2}<br />
This def<strong>in</strong>ition, when placed <strong>in</strong> the document’s preamble allows the follow<strong>in</strong>g code<br />
\captionsetup{labelformat=hash}<br />
\caption{This Caption has a Custom Label Format}<br />
to produce the caption <strong>in</strong> Figure 48.<br />
Graphic<br />
Figure #48: This Caption has a Custom Label Format<br />
Option Def<strong>in</strong>ition Example #3<br />
Table 17 on Page 74 def<strong>in</strong>es the possible values for the labelset= option. The<br />
\DeclareCaptionLabelSeparator comm<strong>and</strong> allows users to def<strong>in</strong>e additional values<br />
for the labelset= option. For example, the follow<strong>in</strong>g comm<strong>and</strong> <strong>in</strong> the document’s<br />
preamble<br />
\DeclareCaptionLabelSeparator{arrow}{\quad\ensuremath{\Rightarrow}\quad}<br />
def<strong>in</strong>es an arrow label separator such that the follow<strong>in</strong>g code<br />
\captionsetup{labelsep=arrow}<br />
\caption{This Caption has a Custom Label Separator}<br />
produce the caption <strong>in</strong> Figure 49.<br />
Graphic<br />
Figure 49 ⇒ This Caption has a Custom Label Separator<br />
86
Option Def<strong>in</strong>ition Example #4<br />
Table 18 on Page 75 specifies the values that can be used by the format= option.<br />
The \DeclareCaptionFormat comm<strong>and</strong> allows users to def<strong>in</strong>e additional values for<br />
the format= option.<br />
The symbols #1, #2, #3 are used <strong>in</strong> the def<strong>in</strong>ition to specify where the various<br />
build<strong>in</strong>g blocks appear, where #1 represent the caption label, #2 represents the caption<br />
separator, <strong>and</strong> #3 represents the caption text (where these terms are def<strong>in</strong>ed<br />
<strong>in</strong> Figure 16 on Page 76). For example, the follow<strong>in</strong>g comm<strong>and</strong> <strong>in</strong> the document’s<br />
preamble<br />
\DeclareCaptionFormat{reverse}{#3#2\ensuremath{\ll}#1\ensuremath{\gg}}<br />
def<strong>in</strong>es the reverse format with the caption text appear<strong>in</strong>g first, followed by the<br />
separator, <strong>and</strong> then the caption label surrounded by double angle brackets \ll <strong>and</strong><br />
\gg. The follow<strong>in</strong>g code<br />
\captionsetup{format=reverse,labelsep=empty}<br />
\caption{This Caption has a Custom Format}<br />
produces the caption <strong>in</strong> Figure 50.<br />
Graphic<br />
This Caption has a Custom Format<br />
≪Figure 50≫<br />
21 Non-Float<strong>in</strong>g Figures<br />
S<strong>in</strong>ce non-float<strong>in</strong>g figures can produce large sections of vertical whitespace, nonfloat<strong>in</strong>g<br />
figures are generally considered poor typesett<strong>in</strong>g style. Instead, users are<br />
strongly encouraged to use the figure environment’s [!ht] optional argument which<br />
moves the figure only if there is not enough room for it on the current page.<br />
As described <strong>in</strong> Section 17, L A TEX allows figures <strong>and</strong> tables to “float” to improve<br />
the document’s formatt<strong>in</strong>g. Occasionally, it is desirable to have a figure appear<br />
exactly where it appears <strong>in</strong> the L A TEX source. Although the \caption comm<strong>and</strong><br />
can only be used figure <strong>and</strong> table environments, the caption package def<strong>in</strong>es the<br />
\captionof comm<strong>and</strong> which takes two arguments: the type of caption (table, figure,<br />
etc) <strong>and</strong> the caption text, allow<strong>in</strong>g the \captionof comm<strong>and</strong> can be used outside of<br />
figure <strong>and</strong> table environments. <strong>Us<strong>in</strong>g</strong><br />
\captionof{figure}{caption text}<br />
creates a figure caption, regardless of whether it appears <strong>in</strong> a figure environment.<br />
Likewise,<br />
\captionof{table}{caption text}<br />
creates a table caption, regardless of its location. The follow<strong>in</strong>g comm<strong>and</strong>s<br />
This is the text before the figure.<br />
\\[\<strong>in</strong>textsep]<br />
\beg<strong>in</strong>{m<strong>in</strong>ipage}{\l<strong>in</strong>ewidth}<br />
\center<strong>in</strong>g<br />
\<strong>in</strong>cludegraphics[width=2<strong>in</strong>]{graphic}%<br />
\captionof{figure}{This is a non-float<strong>in</strong>g figure}<br />
\label{fig:non:float}<br />
\end{m<strong>in</strong>ipage}<br />
\\[\<strong>in</strong>textsep]<br />
This is the text after the figure.<br />
87
create a non-float<strong>in</strong>g figure. Notes on non-float<strong>in</strong>g figures:<br />
• The m<strong>in</strong>ipage environment is needed to prevent a page break with<strong>in</strong> the figure.<br />
• The \\[\<strong>in</strong>textsep] comm<strong>and</strong>s start new l<strong>in</strong>es <strong>and</strong> add vertical space before<br />
<strong>and</strong> after the figure. Any amount of space can be used, \<strong>in</strong>textsep (see<br />
Section 19.1 on Page 64) was used to make the non-float<strong>in</strong>g figure spac<strong>in</strong>g<br />
consistent with float<strong>in</strong>g figure spac<strong>in</strong>g.<br />
• Normally, figures are placed on the page <strong>in</strong> the same order they were submitted<br />
to the figure queue. However, non-float<strong>in</strong>g figures are placed immediately,<br />
leapfrogg<strong>in</strong>g any unprocessed figures sitt<strong>in</strong>g <strong>in</strong> the figure queue. If this happens,<br />
the figures do not appear <strong>in</strong> numerical order 34 . To avoid these out-of-order<br />
figures, force all float<strong>in</strong>g figures to be processed by issu<strong>in</strong>g a \clearpage or<br />
\FloatBarrier comm<strong>and</strong> before the non-float<strong>in</strong>g figure (see Section 17.3 on<br />
Page 59).<br />
• The \captionof comm<strong>and</strong> is also useful for creat<strong>in</strong>g marg<strong>in</strong>al figures (Section<br />
22 on Page 89), <strong>and</strong> creat<strong>in</strong>g a table beside a figure (Section 30 on<br />
Page 109).<br />
21.1 Non-float<strong>in</strong>g Figures without the caption package<br />
As described above, the caption package’s \captionof comm<strong>and</strong> creates captions<br />
outside of figure/table environments. This section describes how to do this without<br />
us<strong>in</strong>g the caption package.<br />
The \caption comm<strong>and</strong> can be used <strong>in</strong> figure <strong>and</strong> table environments because<br />
these environments def<strong>in</strong>e the <strong>in</strong>ternal comm<strong>and</strong> \@captype to “figure” <strong>and</strong> “table”,<br />
respectively. By def<strong>in</strong><strong>in</strong>g \@captype, the \caption comm<strong>and</strong> can be used outside of<br />
figure <strong>and</strong> table environments. A \makeatletter–\makeatother pair must enclose<br />
\@captype to allow @ to be used <strong>in</strong> a comm<strong>and</strong> name. While this can be done<br />
manually each time by<br />
\<strong>in</strong>cludegraphics{file}<br />
\makeatletter\def\@captype{figure}\makeatother<br />
\caption{This is the caption}<br />
it is easier to def<strong>in</strong>e a comm<strong>and</strong> to do this. Includ<strong>in</strong>g the follow<strong>in</strong>g comm<strong>and</strong>s <strong>in</strong> the<br />
document’s preamble<br />
\makeatletter<br />
\newcomm<strong>and</strong>\figcaption{\def\@captype{figure}\caption}<br />
\newcomm<strong>and</strong>\tabcaption{\def\@captype{table}\caption}<br />
\makeatother<br />
def<strong>in</strong>es the \figcaption <strong>and</strong> \tabcaption comm<strong>and</strong>s. <strong>Us<strong>in</strong>g</strong> \figcaption creates<br />
figure captions, regardless of whether it appears <strong>in</strong> a figure environment. Likewise,<br />
\tabcaption creates table caption, regardless of it location.<br />
21.2 The float Package’s [H] Placement Option<br />
The float package 35 adds an [H] option to the figure environment which produces a<br />
non-float<strong>in</strong>g figure. The follow<strong>in</strong>g code<br />
34 In these situations, the Table of Figures lists the figures <strong>in</strong> order of appearance, not <strong>in</strong> numerical<br />
order.<br />
35 The float package allows users to def<strong>in</strong>e new types of floats, such as “Program” or “Algorithm.”<br />
It also def<strong>in</strong>es optional boxed <strong>and</strong> ruled float styles. These optional float styles redef<strong>in</strong>e the \caption<br />
comm<strong>and</strong> such that the caption is always typeset at a particular location, regardless of where the<br />
\caption comm<strong>and</strong> is located, prevent<strong>in</strong>g construction of side-by-side <strong>and</strong> other complex figures.<br />
88
\usepackage{float}<br />
...<br />
\beg<strong>in</strong>{figure}[H]<br />
.....<br />
\end{figure}<br />
produces a non-float<strong>in</strong>g figure.<br />
When the [H] figure does not fit on a page, the figure is moved to the top of the<br />
next page. If there were any footnotes on the first page, they appear immediately<br />
after the text <strong>in</strong>stead of at the bottom of the page. If this behavior is undesirable,<br />
then the \captionof comm<strong>and</strong> described <strong>in</strong> Section 21 on Page 87 can be used<br />
<strong>in</strong>stead of the float package’s [H] placement option.<br />
22 Marg<strong>in</strong>al Figures<br />
Graphic<br />
Figure 51: This<br />
is a Marg<strong>in</strong>al<br />
Figure<br />
The \marg<strong>in</strong>par comm<strong>and</strong> places notes <strong>in</strong> the marg<strong>in</strong> of the document. The marg<strong>in</strong>al<br />
notes are placed <strong>in</strong> the right marg<strong>in</strong> (or the outside marg<strong>in</strong> for twoside documents)<br />
unless the \reversemarg<strong>in</strong>par comm<strong>and</strong> is used (as it is <strong>in</strong> this document). The<br />
width of the marg<strong>in</strong>al column is controlled by the \marg<strong>in</strong>parwidth length, while<br />
the horizontal spac<strong>in</strong>g between the text <strong>and</strong> the marg<strong>in</strong>al notes is controlled by the<br />
\marg<strong>in</strong>parsep length.<br />
Marg<strong>in</strong>al notes are placed such that the basel<strong>in</strong>e of their first l<strong>in</strong>e is vertically<br />
aligned with the basel<strong>in</strong>e of the text which conta<strong>in</strong>s the \marg<strong>in</strong>par comm<strong>and</strong>.<br />
Marg<strong>in</strong>al notes are never broken across a page; if a marg<strong>in</strong>al note starts near the<br />
bottom of the page, it cont<strong>in</strong>ues <strong>in</strong>to the bottom marg<strong>in</strong>. If the previous marg<strong>in</strong>al<br />
note would <strong>in</strong>terfere with a marg<strong>in</strong>al note, L A TEX “bumps” the latter marg<strong>in</strong>al note<br />
downward. Marg<strong>in</strong>al notes cannot be bumped to the next page; they are <strong>in</strong>stead<br />
bumped <strong>in</strong>to the bottom marg<strong>in</strong>. As a result, the position of the marg<strong>in</strong>al notes<br />
may have to be adjusted before the f<strong>in</strong>al pr<strong>in</strong>t<strong>in</strong>g to avoid marg<strong>in</strong>al notes near page<br />
breaks.<br />
S<strong>in</strong>ce the figure environment cannot be used <strong>in</strong> a marg<strong>in</strong>al note, float<strong>in</strong>g marg<strong>in</strong>al<br />
figures are not possible. However, the \captionof comm<strong>and</strong> def<strong>in</strong>ed <strong>in</strong> Section<br />
21 on Page 87 can be used to construct a non-float<strong>in</strong>g marg<strong>in</strong>al figure. For<br />
example, Figure 51 was produced by<br />
...to construct a non-float<strong>in</strong>g marg<strong>in</strong>al figure.<br />
\marg<strong>in</strong>par{\center<strong>in</strong>g<br />
\<strong>in</strong>cludegraphics[width=\marg<strong>in</strong>parwidth]{graphic}%<br />
\captionof{figure}{This is a Marg<strong>in</strong>al Figure}<br />
\label{fig:marg<strong>in</strong>al:fig} }<br />
For example, \Figref{fig:marg<strong>in</strong>al:fig} was...<br />
The bottom of the graphic <strong>in</strong> Figure 51 is aligned with the text basel<strong>in</strong>e where the<br />
\marg<strong>in</strong>par comm<strong>and</strong> is located. Notes on marg<strong>in</strong>al figures:<br />
• S<strong>in</strong>ce captions for marg<strong>in</strong>al figures generally are narrow, us<strong>in</strong>g either of the<br />
caption package comm<strong>and</strong>s<br />
\captionstyle{justification=raggedright}<br />
\captionstyle{justification=raggedleft}<br />
before the \caption comm<strong>and</strong> may provide better caption formatt<strong>in</strong>g. Additionally,<br />
the caption package comm<strong>and</strong><br />
\captionsetup{font=small}<br />
can be used to decrease the size of the caption font. See Section 20 on Page 69<br />
for caption <strong>in</strong>formation.<br />
89
• Like the non-float<strong>in</strong>g figures <strong>in</strong> Section 21 on Page 87, the marg<strong>in</strong>al figures are<br />
placed ahead of any unprocessed floats. Thus, a \clearpage or \FloatBarrier<br />
comm<strong>and</strong> must be issued before the marg<strong>in</strong>al note if one wants to keep the<br />
figures <strong>in</strong> order.<br />
• Marg<strong>in</strong>al notes are placed by the rout<strong>in</strong>e which also places figures <strong>and</strong> tables.<br />
If many figures, tables, <strong>and</strong> marg<strong>in</strong>al notes are be<strong>in</strong>g used, it is possible to<br />
exceed the number of unprocessed floats permitted by L A TEX. The morefloats<br />
package can mitigate these problems (see Section 17.4 on Page 60).<br />
23 Wide Figures<br />
Typesett<strong>in</strong>g readability rules limit the number of characters <strong>in</strong> a l<strong>in</strong>e of text. Unless<br />
a large font or two columns are used, these readability rules result <strong>in</strong> wide marg<strong>in</strong>s<br />
(especially when us<strong>in</strong>g 8.5 x 11 <strong>in</strong>ch letter paper). Section 22 demonstrated how<br />
these wide marg<strong>in</strong>s can be used for marg<strong>in</strong>al figures. Another option is to construct<br />
a regular float<strong>in</strong>g figure which extends <strong>in</strong>to one or both marg<strong>in</strong>s. This is done by<br />
plac<strong>in</strong>g a wide list environment <strong>in</strong>side the figure. For example, a narrow environment<br />
can be def<strong>in</strong>ed by <strong>in</strong>clud<strong>in</strong>g the follow<strong>in</strong>g code <strong>in</strong> the preamble of your document<br />
\newenvironment{narrow}[2]{%<br />
\beg<strong>in</strong>{list}{}{%<br />
\setlength{\topsep}{0pt}%<br />
\setlength{\leftmarg<strong>in</strong>}{#1}%<br />
\setlength{\rightmarg<strong>in</strong>}{#2}%<br />
\setlength{\listpar<strong>in</strong>dent}{\par<strong>in</strong>dent}%<br />
\setlength{\item<strong>in</strong>dent}{\par<strong>in</strong>dent}%<br />
\setlength{\parsep}{\parskip}}%<br />
\item[]}{\end{list}}<br />
For example, any text which occurs between \beg<strong>in</strong>{narrow}{1<strong>in</strong>}{2<strong>in</strong>} is <strong>in</strong>dented<br />
by 1 <strong>in</strong>ch on the left side <strong>and</strong> 2 <strong>in</strong>ches on the right side. When negative lengths are<br />
used, the contents extend beyond the marg<strong>in</strong>s.<br />
23.1 Wide Figures <strong>in</strong> One-sided Documents<br />
The follow<strong>in</strong>g code uses this narrow environment to make the figure extend 1 <strong>in</strong>ch<br />
<strong>in</strong>to the left marg<strong>in</strong>, produc<strong>in</strong>g Figure 52.<br />
\beg<strong>in</strong>{figure}<br />
\beg<strong>in</strong>{narrow}{-1<strong>in</strong>}{0<strong>in</strong>}<br />
\<strong>in</strong>cludegraphics[width=\l<strong>in</strong>ewidth]{wide}<br />
\caption{This is a wide figure}<br />
\end{narrow}<br />
\end{figure}<br />
A Very, Very Wide Graphic<br />
Figure 52: This is a wide figure<br />
When marg<strong>in</strong>al notes are used, it may be desired to make the wide figure extend<br />
exactly to the edge of the marg<strong>in</strong>al notes (mak<strong>in</strong>g the figure width be \l<strong>in</strong>ewidth<br />
90
+ \marg<strong>in</strong>parwidth + \marg<strong>in</strong>parsep). This can be done by def<strong>in</strong><strong>in</strong>g a new length<br />
\marg<strong>in</strong>width <strong>and</strong> sett<strong>in</strong>g it to be \marg<strong>in</strong>parwidth + \marg<strong>in</strong>parsep. For example,<br />
\newlength{\marg<strong>in</strong>width}<br />
\setlength{\marg<strong>in</strong>width}{\marg<strong>in</strong>parwidth}<br />
\addtolength{\marg<strong>in</strong>width}{\marg<strong>in</strong>parsep}<br />
then use {-\marg<strong>in</strong>width} <strong>in</strong> the \beg<strong>in</strong>{narrow} argument.<br />
23.2 Wide Figures <strong>in</strong> Two-sided Documents<br />
For two-sided documents, it may be desired to extend the wide figures <strong>in</strong>to the<br />
b<strong>in</strong>d<strong>in</strong>g-side marg<strong>in</strong> (i.e., the left marg<strong>in</strong> for odd pages <strong>and</strong> the right marg<strong>in</strong> for even<br />
pages). In these cases, the ifthen package’s \ifthenelse comm<strong>and</strong> can be used to<br />
choose between odd-page code <strong>and</strong> even-page code. For example,<br />
\usepackage{ifthen}<br />
...<br />
\beg<strong>in</strong>{figure}<br />
\ifthenelse{\isodd{\pageref{fig:wide}}}%<br />
{% BEGIN ODD-PAGE FIGURE<br />
\beg<strong>in</strong>{narrow}{0<strong>in</strong>}{-1<strong>in</strong>}<br />
\<strong>in</strong>cludegraphics[width=\l<strong>in</strong>ewidth]{file}<br />
\caption{Figure Caption}<br />
\label{fig:wide}<br />
\end{narrow}<br />
}% END ODD-PAGE FIGURE<br />
{% BEGIN EVEN-PAGE FIGURE<br />
\beg<strong>in</strong>{narrow}{-1<strong>in</strong>}{0<strong>in</strong>}<br />
\<strong>in</strong>cludegraphics[width=\l<strong>in</strong>ewidth]{file}<br />
\caption{Figure Caption}<br />
\label{fig:wide}<br />
\end{narrow}<br />
}% END EVEN-PAGE FIGURE<br />
\end{figure}<br />
S<strong>in</strong>ce the \pageref comm<strong>and</strong> is used as <strong>in</strong>put to \ifthenelse, the figure may not<br />
be properly typeset until L A TEX is run enough times to cause the cross-references to<br />
converge.<br />
24 L<strong>and</strong>scape Figures<br />
In a document with portrait orientation, there are three methods for produc<strong>in</strong>g<br />
figures with l<strong>and</strong>scape orientation.<br />
1. The lscape package provides a l<strong>and</strong>scape environment, which treats the left<br />
edge of the paper as the top of the page, caus<strong>in</strong>g any text, tables, or figures <strong>in</strong><br />
the l<strong>and</strong>scape environment to have l<strong>and</strong>scape orientation.<br />
2. The rotat<strong>in</strong>g package provides a sidewaysfigure environment which is similar<br />
to the figure environment except that the figures have l<strong>and</strong>scape orientation.<br />
3. The rotat<strong>in</strong>g package provides a \rotcaption comm<strong>and</strong> which is similar to the<br />
\caption comm<strong>and</strong> except that caption has l<strong>and</strong>scape orientation.<br />
Differences between methods<br />
• Both options 1 <strong>and</strong> 2 place the l<strong>and</strong>scape figure on a separate page. Option 3<br />
produces an <strong>in</strong>dividual float which need not be on its own page.<br />
91
• While Option 2 produces only rotated figures, the l<strong>and</strong>scape environment<br />
<strong>in</strong> Option 1 is a general-purpose environment, which can produce l<strong>and</strong>scape<br />
pages conta<strong>in</strong><strong>in</strong>g any comb<strong>in</strong>ation of text, tables, <strong>and</strong> figures. The l<strong>and</strong>scape<br />
environment can page-break<strong>in</strong>g capability, so multiple l<strong>and</strong>scape pages can be<br />
produced 36 .<br />
• The full-page figure produced by Option 2 floats to provide better document<br />
formatt<strong>in</strong>g, while the figure produced by Option 1 cannot float 37 .<br />
• S<strong>in</strong>ce Options 1 <strong>and</strong> 3 use the figure environment, they can be used <strong>in</strong> conjunction<br />
with the endfloat package (see Section 19.6 on Page 68).<br />
• Options 1 <strong>and</strong> 2 are best suited for side-by-side l<strong>and</strong>scape graphics (for sideby-side<br />
methods see Section 28 on Page 104).<br />
24.1 L<strong>and</strong>scape Environment<br />
The lscape package (which is part of the st<strong>and</strong>ard “graphics bundle” distributed<br />
with L A TEX) def<strong>in</strong>es the l<strong>and</strong>scape environment, which provides a method of plac<strong>in</strong>g<br />
l<strong>and</strong>scape pages <strong>in</strong> a portrait document. The l<strong>and</strong>scape pages are rotated such that<br />
the left edge of the portrait page is the top edge of the l<strong>and</strong>scape page.<br />
Enter<strong>in</strong>g \beg<strong>in</strong>{l<strong>and</strong>scape} pr<strong>in</strong>ts all unprocessed portrait floats <strong>and</strong> then<br />
switches to l<strong>and</strong>scape orientation. Likewise, \end{l<strong>and</strong>scape} pr<strong>in</strong>ts all unprocessed<br />
l<strong>and</strong>scape floats <strong>and</strong> then switches back to portrait orientation.<br />
The entire contents of the l<strong>and</strong>scape environment is typeset with l<strong>and</strong>scape orientation.<br />
This may <strong>in</strong>clude any mixture of text, figures, <strong>and</strong> tables. If the l<strong>and</strong>scape<br />
environment conta<strong>in</strong>s only a figure environment<br />
\beg<strong>in</strong>{l<strong>and</strong>scape}<br />
\beg<strong>in</strong>{figure}<br />
\center<strong>in</strong>g<br />
\<strong>in</strong>cludegraphics[width=4<strong>in</strong>]{graphic}<br />
\caption{L<strong>and</strong>scape Figure}<br />
\end{figure}<br />
\end{l<strong>and</strong>scape}<br />
the l<strong>and</strong>scape environment produces a l<strong>and</strong>scape figure. Note that s<strong>in</strong>ce the l<strong>and</strong>scape<br />
environment starts a new page, it may result <strong>in</strong> a partially-blank page.<br />
24.2 Sidewaysfigure Environment<br />
The rotat<strong>in</strong>g package provides the sidewaysfigure environment which produces figures<br />
with l<strong>and</strong>scape orientation 38 . For example<br />
\beg<strong>in</strong>{sidewaysfigure}<br />
\center<strong>in</strong>g<br />
\<strong>in</strong>cludegraphics[width=4<strong>in</strong>]{graphic}<br />
\caption{Sidewaysfigure Figure}<br />
\end{sidewaysfigure}<br />
produces Figure 53.<br />
36 The l<strong>and</strong>scape environment works very well with the longtable package to produce multiple-page<br />
l<strong>and</strong>scape tables.<br />
37 Figures issued <strong>in</strong> the l<strong>and</strong>scape environment can float with<strong>in</strong> the l<strong>and</strong>scape pages<br />
38 The rotat<strong>in</strong>g package also provides a sidewaystable environment for produc<strong>in</strong>g tables with<br />
l<strong>and</strong>scape orientation.<br />
92
Graphic<br />
Figure 53: Sidewaysfigure Figure<br />
93
Unlike the l<strong>and</strong>scape environment, the figure produced by sidewaysfigure can<br />
float with<strong>in</strong> the portrait pages to avoid the partially-blank page that the l<strong>and</strong>scape<br />
environment may produce. Note that the l<strong>and</strong>scape environment is much more<br />
flexible, allow<strong>in</strong>g the l<strong>and</strong>scape pages to consist of a mixture of text, tables, <strong>and</strong><br />
figures.<br />
The default orientation of the figures produced by sidewaysfigure depends on<br />
whether the document is processed with the oneside or twoside documentclass<br />
option<br />
• When the oneside option is chosen, the bottom of graphic is towards the right<br />
edge of the portrait page.<br />
• When the twoside option is chosen, the bottom of graphic is towards the<br />
outside edge of the portrait page.<br />
This default behavior can be overridden by options to the \usepackage{rotat<strong>in</strong>g}<br />
comm<strong>and</strong>.<br />
\usepackage[figuresleft]{rotat<strong>in</strong>g}<br />
causes the bottom of the sidewaysfigure graphics to be towards the left edge of<br />
the portrait page (regardless of oneside or twoside options). Similarly,<br />
\usepackage[figuresright]{rotat<strong>in</strong>g}<br />
causes the bottom of the sidewaysfigure graphics to be towards the right edge of<br />
the portrait page.<br />
24.3 Rotcaption Comm<strong>and</strong><br />
The methods <strong>in</strong> Sections 24.1 <strong>and</strong> 24.2 both produce full-page l<strong>and</strong>scape figures,<br />
which may not be necessary for smaller l<strong>and</strong>scape figures. The rotat<strong>in</strong>g package’s<br />
\rotcaption comm<strong>and</strong> can be used to construct smaller l<strong>and</strong>scape figures. For<br />
example<br />
\beg<strong>in</strong>{figure}<br />
\center<strong>in</strong>g<br />
\beg<strong>in</strong>{m<strong>in</strong>ipage}[c]{1<strong>in</strong>}<br />
\hfill\<strong>in</strong>cludegraphics[width=2<strong>in</strong>,angle=90]{graphic}<br />
\end{m<strong>in</strong>ipage}%<br />
\hspace{0.2<strong>in</strong>}%<br />
\beg<strong>in</strong>{m<strong>in</strong>ipage}[c]{0.5<strong>in</strong>}<br />
\captionsetup{width=2<strong>in</strong>}<br />
\rotcaption{This is a caption created by the Rotcaption comm<strong>and</strong>}<br />
\label{fig:rotcaption}<br />
\end{m<strong>in</strong>ipage}<br />
\end{figure}<br />
produces Figure 54.<br />
The caption produced by \rotcaption is always rotated such that its bottom<br />
is towards the right edge of the paper. Unlike the methods <strong>in</strong> Sections 24.1<br />
<strong>and</strong> 24.2, the \rotcaption comm<strong>and</strong> does not rotate the graphics. Therefore, the<br />
\<strong>in</strong>cludegraphics comm<strong>and</strong> <strong>in</strong> the above example requires the angle=90 option.<br />
25 Captions Beside Figures<br />
Although the caption of a figure is generally placed above or below the graphic, this<br />
section describes how to place the caption beside the graphic 39 .<br />
39 S<strong>in</strong>ce the figure environment def<strong>in</strong>ed by the float package places the caption below the body,<br />
captions beside figures cannot be produced with the float package’s figure environment. Other<br />
94
Graphic<br />
Figure 54: This is a caption created by the<br />
Rotcaption comm<strong>and</strong><br />
25.1 The Sidecap Package<br />
The easiest way of construct<strong>in</strong>g side captions is to use the sidecap package. When<br />
a \caption comm<strong>and</strong> is used <strong>in</strong> the SCfigure <strong>and</strong> SCtable environments def<strong>in</strong>ed by<br />
the sidecap package, the captions are automatically placed to the side of the contents<br />
of the environment. For example,<br />
\usepackage{sidecap}<br />
...<br />
\beg<strong>in</strong>{SCfigure}<br />
\<strong>in</strong>cludegraphics[width=3<strong>in</strong>]{graphic}<br />
\caption{This is a SCfigure}<br />
\end{SCfigure}<br />
produces Figure 55.<br />
Graphic<br />
Figure 55: This is a SCfigure<br />
The follow<strong>in</strong>g four options can be specified <strong>in</strong> the \usepackage comm<strong>and</strong><br />
outercaption This option places the caption to the left for left (even) pages <strong>and</strong><br />
on the right for right (odd) pages. (This is the default)<br />
<strong>in</strong>nercaption This option places the caption to the right for left (even) pages <strong>and</strong><br />
on the left for right (odd) pages.<br />
leftcaption This option places the caption on the left.<br />
rightcaption This option places the caption on the right.<br />
The SCfigure environment <strong>in</strong>cludes two optional arguments<br />
aspects of the float package can be used as long as the \restylefloat comm<strong>and</strong> is not issued.<br />
95
• The first optional argument specifies the relative width of caption compared to<br />
the figure. A large value (e.g., 100) reserves the maximum possible width. The<br />
default is 1.<br />
• The second optional argument specifies the float position parameter (e.g. [htp]<br />
or [!ht] (see Section 17.2 on Page 58).<br />
25.2 Side Captions without Sidecap<br />
If the sidecap package does not provide sufficient flexibility, users can produce side<br />
captions with the methods <strong>in</strong> this section. Section 25.2.1 shows how to place the<br />
caption to the left of the graphic. Plac<strong>in</strong>g the caption to the right of the graphic<br />
proceeds similarly. For twoside documents, Section 25.2.2 shows how to place the<br />
caption to the <strong>in</strong>side of the graphic (to the left of the graphic for odd pages <strong>and</strong> to<br />
the right of the graphic for even pages).<br />
25.2.1 Caption to Left of Figure<br />
The \caption comm<strong>and</strong> places the caption under the figure or table. M<strong>in</strong>ipage<br />
environments can be used to trick the caption comm<strong>and</strong> <strong>in</strong>to plac<strong>in</strong>g the caption<br />
beside the figure. For example, the comm<strong>and</strong>s<br />
\beg<strong>in</strong>{figure}<br />
\center<strong>in</strong>g<br />
\beg<strong>in</strong>{m<strong>in</strong>ipage}[c]{.45\l<strong>in</strong>ewidth}<br />
\center<strong>in</strong>g<br />
\caption{Caption on the Side}<br />
\label{fig:side:caption}<br />
\end{m<strong>in</strong>ipage}%<br />
\beg<strong>in</strong>{m<strong>in</strong>ipage}[c]{.45\l<strong>in</strong>ewidth}<br />
\center<strong>in</strong>g<br />
\<strong>in</strong>cludegraphics[width=\l<strong>in</strong>ewidth]{graphic}<br />
\end{m<strong>in</strong>ipage}<br />
\end{figure}<br />
produces Figure 56. It may be desirable to place a horizontal spac<strong>in</strong>g comm<strong>and</strong> such<br />
as \hfill or \hspace{.05\l<strong>in</strong>ewidth} between the m<strong>in</strong>ipages.<br />
Figure 56: Caption on the Side<br />
Graphic<br />
The caption <strong>and</strong> graphic <strong>in</strong> Figure 56 are centered vertically. If it is <strong>in</strong>stead<br />
desired to align the bottoms or tops of graphics <strong>and</strong> caption, see Section 11.4 on<br />
Page 36.<br />
25.2.2 Caption on B<strong>in</strong>d<strong>in</strong>g Side of Graphic<br />
The above code for Figure 56 places the caption to the left of the graphic. For twosided<br />
documents, it may be desired to place the caption on the b<strong>in</strong>d<strong>in</strong>g side of the<br />
graphics. In these cases, the ifthen package’s \ifthenelse comm<strong>and</strong> can be used to<br />
choose between odd-page code <strong>and</strong> even-page code. For example,<br />
\usepackage{ifthen}<br />
...<br />
\beg<strong>in</strong>{figure}<br />
\center<strong>in</strong>g<br />
96
\ifthenelse{\isodd{\pageref{fig:side:caption}}}<br />
{% BEGIN ODD-PAGE FIGURE<br />
\beg<strong>in</strong>{m<strong>in</strong>ipage}[c]{.45\l<strong>in</strong>ewidth}<br />
\center<strong>in</strong>g<br />
\caption{Caption on the Side}<br />
\label{fig:side:caption}<br />
\end{m<strong>in</strong>ipage}%<br />
\hspace{0.05\l<strong>in</strong>ewidth}%<br />
\beg<strong>in</strong>{m<strong>in</strong>ipage}[c]{.45\l<strong>in</strong>ewidth}<br />
\<strong>in</strong>cludegraphics[width=\l<strong>in</strong>ewidth]{graphic}<br />
\end{m<strong>in</strong>ipage}%<br />
}% END ODD-PAGE FIGURE<br />
{% BEGIN EVEN-PAGE FIGURE<br />
\beg<strong>in</strong>{m<strong>in</strong>ipage}[c]{.45\l<strong>in</strong>ewidth}<br />
\<strong>in</strong>cludegraphics[width=\l<strong>in</strong>ewidth]{graphic}<br />
\end{m<strong>in</strong>ipage}%<br />
\hspace{0.05\l<strong>in</strong>ewidth}%<br />
\beg<strong>in</strong>{m<strong>in</strong>ipage}[c]{.45\l<strong>in</strong>ewidth}<br />
\center<strong>in</strong>g<br />
\caption{Caption on the Side}<br />
\label{fig:side:caption}<br />
\end{m<strong>in</strong>ipage}%<br />
}% END EVEN-PAGE FIGURE<br />
\end{figure}<br />
produces a figure where the caption always appear on the b<strong>in</strong>d<strong>in</strong>g side of the graphic.<br />
26 Figures on Even or Odd Pages<br />
The figure environment float-placement algorithm does not control whether a figure<br />
appears on an even or odd page. This section describes how to use the \afterpage<br />
comm<strong>and</strong> (part of the afterpage package) <strong>and</strong> the \ifthenelse comm<strong>and</strong> (part of<br />
the ifthen package) to place a figure onto an odd or even page.<br />
The conventional method for creat<strong>in</strong>g figures is to put the graphics <strong>in</strong> a figure<br />
environment. However, s<strong>in</strong>ce figure environments can float, there is no guarantee<br />
that a figure desired for an even-page won’t end up on an odd page (or vice versa).<br />
Instead, the \captionof comm<strong>and</strong> described <strong>in</strong> Section 21 can be used to create<br />
a figure without us<strong>in</strong>g a figure environment. The \ifthenelse comm<strong>and</strong> is then<br />
used to place the first graphic on the next even page. This requires repeat<strong>in</strong>g the<br />
graphics comm<strong>and</strong>s twice, once for the case of the next page be<strong>in</strong>g odd <strong>and</strong> once for<br />
the case of the next page be<strong>in</strong>g even. To simplify the result<strong>in</strong>g code, a \leftfig<br />
comm<strong>and</strong> is def<strong>in</strong>ed<br />
\newcomm<strong>and</strong>\leftfig{%<br />
\vspace*{\fill}%<br />
\center<strong>in</strong>g<br />
\<strong>in</strong>cludegraphics{graphic}<br />
\captionof{figure}{This is on the left (even) page.}<br />
\vspace*{\fill}\newpage}<br />
The left-page figures are then created us<strong>in</strong>g this newly-def<strong>in</strong>ed \leftfig comm<strong>and</strong><br />
along with the \afterpage <strong>and</strong> \ifthenelse comm<strong>and</strong>s<br />
\afterpage{\clearpage%<br />
\ifthenelse{\isodd{\value{page}}}%<br />
{\afterpage{\leftfig}}%<br />
{\leftfig}}<br />
Notes about odd/even page placement:<br />
97
• To force the figure to a right-h<strong>and</strong> (odd) page, reverse the order of the \ifthenelse<br />
arguments.<br />
\afterpage{\clearpage%<br />
\ifthenelse{\isodd{\value{page}}}%<br />
{\leftfig}}%<br />
{\afterpage{\leftfig}}<br />
• Because these are non-float<strong>in</strong>g figures, the \value{page} comm<strong>and</strong> can be<br />
used to determ<strong>in</strong>e the current page. (This is not useful for float<strong>in</strong>g figures s<strong>in</strong>ce<br />
\value{page} is the current page when the figure environment is processed,<br />
not where it is placed.) Thus us<strong>in</strong>g \value{page} is better than \pageref<br />
s<strong>in</strong>ce \pageref is only correct once the L A TEX references have converged).<br />
• When us<strong>in</strong>g large figures, it is possible for a pagebreak to occur with<strong>in</strong> the<br />
figure (e.g., between the graphic <strong>and</strong> the caption). The figure can be forced to<br />
stay together by enclos<strong>in</strong>g it <strong>in</strong> a m<strong>in</strong>ipage environment<br />
\newcomm<strong>and</strong>\leftfig{%<br />
\vspace*{\fill}%<br />
\beg<strong>in</strong>{m<strong>in</strong>ipage}{\l<strong>in</strong>ewidth}<br />
\center<strong>in</strong>g<br />
\<strong>in</strong>cludegraphics{graphic}<br />
\captionof{figure}{This is on the left (even) page.}<br />
\end{m<strong>in</strong>ipage}<br />
\vspace*{\fill}\newpage}<br />
• The \afterpage comm<strong>and</strong> can sometimes be flaky, <strong>in</strong> rare cases caus<strong>in</strong>g a “lost<br />
float” error. Remov<strong>in</strong>g the \clearpage before the \ifthenelse may help this<br />
situation.<br />
\afterpage{\ifthenelse{\isodd{\value{page}}}%<br />
{\afterpage{\leftfig}}%<br />
{\leftfig}}<br />
• In the above example, the figure uses the entire even page. To place the figure at<br />
the top of the even page, modify or remove the \vspace*{\fill} <strong>and</strong> \newpage<br />
comm<strong>and</strong>s<br />
\newcomm<strong>and</strong>\leftfig{%<br />
\center<strong>in</strong>g<br />
\<strong>in</strong>cludegraphics{graphic}<br />
\captionof{figure}{This is at the top of the left (even) page.}<br />
\vspace{\floatsep}}<br />
26.1 Figures on Fac<strong>in</strong>g Pages<br />
To ease the comparison of two figures <strong>in</strong> a twoside document, it may be desirable to<br />
position the figures on fac<strong>in</strong>g pages. To do this, a procedure similar to the previous<br />
section’s even/odd page-placement must be used. To simplify the result<strong>in</strong>g code, a<br />
\fac<strong>in</strong>gfigures comm<strong>and</strong> is def<strong>in</strong>ed as<br />
\newcomm<strong>and</strong>\fac<strong>in</strong>gfigures{%<br />
\vspace*{\fill}%<br />
\center<strong>in</strong>g<br />
\<strong>in</strong>cludegraphics{left}<br />
\captionof{figure}{This is on the left (even) page.}<br />
\vspace*{\fill}\newpage\vspace*{\fill}%<br />
\center<strong>in</strong>g<br />
\<strong>in</strong>cludegraphics{right}<br />
\captionof{figure}{This is on the right (odd) page.}<br />
\vspace*{\fill}\newpage}<br />
98
The fac<strong>in</strong>g figures are then created us<strong>in</strong>g this \fac<strong>in</strong>gfigures comm<strong>and</strong> along with<br />
the \afterpage <strong>and</strong> \ifthenelse comm<strong>and</strong>s<br />
\afterpage{\clearpage%<br />
\ifthenelse{\isodd{\value{page}}}%<br />
{\afterpage{\fac<strong>in</strong>gfigures}}%<br />
{\fac<strong>in</strong>gfigures}}<br />
27 Boxed Figures<br />
The term Boxed Figure usually refers to one of two situations<br />
• A box surrounds the figure’s graphic but not the figure’s caption.<br />
• A box surrounds the figure’s graphic <strong>and</strong> its caption.<br />
The basic method for box<strong>in</strong>g an item is to simply place the item <strong>in</strong>side an \fbox<br />
comm<strong>and</strong>, which surrounds the object with a rectangular box. The fancybox package<br />
provides boxes of different styles.<br />
27.1 Box Around Graphic<br />
Plac<strong>in</strong>g an \fbox comm<strong>and</strong> around the \<strong>in</strong>cludegraphics comm<strong>and</strong> produces a<br />
box around the <strong>in</strong>cluded graphic. For example, the comm<strong>and</strong>s<br />
\beg<strong>in</strong>{figure}<br />
\center<strong>in</strong>g<br />
\fbox{\<strong>in</strong>cludegraphics[totalheight=2<strong>in</strong>]{file}}<br />
\caption{Box Around Graphic, But Not Around Caption}<br />
\label{fig:boxed_graphic}<br />
\end{figure}<br />
place a box around the <strong>in</strong>cluded figure, as shown <strong>in</strong> Figure 57.<br />
q1<br />
L1<br />
P1<br />
N<br />
P2<br />
q2<br />
L2<br />
Figure 57: Box Around Graphic, But Not Around Caption<br />
27.2 Box Around Figure <strong>and</strong> Caption<br />
To <strong>in</strong>clude both the figure’s graphic <strong>and</strong> its caption, one may be tempted to move<br />
the \caption comm<strong>and</strong> <strong>in</strong>side the \fbox comm<strong>and</strong>. However, this does not work<br />
because \caption can only be used <strong>in</strong> paragraph mode, while the contents of an<br />
\fbox comm<strong>and</strong> are processed <strong>in</strong> LR mode 40 .<br />
40 L A TEX uses three modes: LR mode, paragraph mode, <strong>and</strong> math mode. See [1, pages 36,103-5].<br />
99
S<strong>in</strong>ce the contents of m<strong>in</strong>ipage environments <strong>and</strong> \parbox comm<strong>and</strong>s are processed<br />
<strong>in</strong> paragraph mode, the \caption comm<strong>and</strong> can be <strong>in</strong>cluded <strong>in</strong> the \fbox by enclos<strong>in</strong>g<br />
the \fbox contents <strong>in</strong>side a m<strong>in</strong>ipage environment or a \parbox comm<strong>and</strong>. S<strong>in</strong>ce<br />
both m<strong>in</strong>ipages <strong>and</strong> parboxes require a width specification, there is no direct way to<br />
make the \fbox exactly as wide the graphic <strong>and</strong> caption.<br />
For example, the comm<strong>and</strong>s<br />
\beg<strong>in</strong>{figure}<br />
\center<strong>in</strong>g<br />
\fbox{ \beg<strong>in</strong>{m<strong>in</strong>ipage}{4 <strong>in</strong>}<br />
\center<strong>in</strong>g<br />
\<strong>in</strong>cludegraphics[totalheight=2<strong>in</strong>]{pend}<br />
\caption{Box Around Figure Graphic <strong>and</strong> Caption}<br />
\label{fig:boxed_figure}<br />
\end{m<strong>in</strong>ipage} }<br />
\end{figure}<br />
place a box around the figure’s graphic <strong>and</strong> caption, as shown <strong>in</strong> Figure 58<br />
q1<br />
L1<br />
P1<br />
N<br />
P2<br />
q2<br />
L2<br />
Figure 58: Box Around Figure Graphic <strong>and</strong> Caption<br />
It is usually a trial-<strong>and</strong>-error process to determ<strong>in</strong>e a m<strong>in</strong>ipage width which causes<br />
the box to have a snug fit around the caption <strong>and</strong> graphic. This trial-<strong>and</strong>-error can<br />
be avoided by the follow<strong>in</strong>g approaches.<br />
1. Choose an arbitrary m<strong>in</strong>ipage width <strong>and</strong> force the graphic to be as wide as the<br />
m<strong>in</strong>ipage<br />
\<strong>in</strong>cludegraphics[width=\l<strong>in</strong>ewidth]{pend}<br />
2. When it is desired to specify the graphic height, the proper m<strong>in</strong>ipage width<br />
can be calculated by plac<strong>in</strong>g the graphic <strong>in</strong> a box <strong>and</strong> measur<strong>in</strong>g the height of<br />
the box.<br />
\newsavebox{\mybox}<br />
\newlength{\mylength}<br />
\sbox{\mybox}{\<strong>in</strong>cludegraphics[height=3<strong>in</strong>]{file}}<br />
\settowidth{\mylength}{\usebox{\mybox}}<br />
\beg<strong>in</strong>{figure}<br />
\center<strong>in</strong>g<br />
\fbox{ \beg<strong>in</strong>{m<strong>in</strong>ipage}{\mylength}<br />
\center<strong>in</strong>g<br />
\usebox{\mybox}<br />
\caption{Box Around Figure Graphic <strong>and</strong> Caption}<br />
\label{fig:boxed_figure}<br />
100
\end{m<strong>in</strong>ipage} }<br />
\end{figure}<br />
3. To ensure a one-l<strong>in</strong>e caption, the m<strong>in</strong>ipage can be made as wide as the caption<br />
by estimat<strong>in</strong>g the caption width with a \settowidth comm<strong>and</strong><br />
\newlength{\mylength}<br />
\settowidth{\mylength}{Figure XX: Box Around Figure Graphic <strong>and</strong> Caption}<br />
\fbox{ \beg<strong>in</strong>{m<strong>in</strong>ipage}{\mylength}<br />
...<br />
27.3 Customiz<strong>in</strong>g fbox Parameters<br />
In Figures 57 <strong>and</strong> 58, the box is constructed of 0.4 pt thick l<strong>in</strong>es with a 3 pt space<br />
between the box <strong>and</strong> the graphic. These two dimensions can be customized by<br />
sett<strong>in</strong>g the L A TEX length variables \fboxrule <strong>and</strong> \fboxsep, respectively, with the<br />
\setlength comm<strong>and</strong>. For example, the comm<strong>and</strong>s<br />
\beg<strong>in</strong>{figure}<br />
\center<strong>in</strong>g<br />
\setlength{\fboxrule}{3pt}<br />
\setlength{\fboxsep}{1cm}<br />
\fbox{\<strong>in</strong>cludegraphics[totalheight=2<strong>in</strong>]{pend}}<br />
\caption{Graphic with Customized Box}<br />
\label{fig:boxed_custom}<br />
\end{figure}<br />
place a box with 3 pt thick l<strong>in</strong>es which is separated from the graphic by 1 centimeter,<br />
as shown <strong>in</strong> Figure 59<br />
q1<br />
L1<br />
P1<br />
N<br />
P2<br />
q2<br />
L2<br />
Figure 59: Graphic with Customized Box<br />
27.4 The Fancybox Package<br />
In Figures 57, 58, <strong>and</strong> 59, the \fbox comm<strong>and</strong> was used to place st<strong>and</strong>ard rectangular<br />
boxes around the figures. The fancybox package provides four comm<strong>and</strong>s<br />
\shadowbox, \doublebox, \ovalbox, <strong>and</strong> \Ovalbox which produce other types of<br />
boxes as shown <strong>in</strong> Table 21.<br />
Like \fbox, the separation between these boxes <strong>and</strong> their contents is controlled<br />
by the L A TEX length \fboxsep. The length \shadowsize is set with the \setlength<br />
101
Table 21: FancyBox Comm<strong>and</strong>s<br />
Comm<strong>and</strong><br />
\shadowbox{Example}<br />
Example<br />
Parameters<br />
• The frame thickness is \fboxrule.<br />
• The shadow thickness is \shadowsize (which defaults to 4 pt).<br />
\doublebox{Example}<br />
Example<br />
• The <strong>in</strong>ner frame thickness is .75\fboxrule<br />
• The outer frame thickness is 1.5\fboxrule<br />
• The spac<strong>in</strong>g between the frames is 1.5\fboxrule + 0.5pt.<br />
\ovalbox{Example}<br />
✞<br />
☎<br />
Example<br />
✝<br />
✆<br />
• The frame thickness is \th<strong>in</strong>l<strong>in</strong>es<br />
• Enter<strong>in</strong>g \cornersize{x} the diameter of the corners x times the<br />
m<strong>in</strong>imum of the width <strong>and</strong> the height. The default is 0.5.<br />
• The \cornersize* comm<strong>and</strong> directly sets the corner diameter. For<br />
example, \cornersize*{1cm} makes the corner diameters 1 cm.<br />
\Ovalbox{Example}<br />
✞<br />
☎<br />
Example<br />
✝<br />
✆<br />
\Ovalbox is the same as \ovalbox except that the l<strong>in</strong>e thickness is<br />
controlled by \thickl<strong>in</strong>es.<br />
comm<strong>and</strong>, as was done for \fboxrule <strong>and</strong> \fboxsep <strong>in</strong> Section 27.3 on Page 101.<br />
The l<strong>in</strong>es for \ovalbox <strong>and</strong> \Ovalbox have thicknesses correspond<strong>in</strong>g to the picture<br />
environment’s \thickl<strong>in</strong>es <strong>and</strong> \th<strong>in</strong>l<strong>in</strong>es, which are not lengths <strong>and</strong> thus cannot<br />
be changed with the \setlength comm<strong>and</strong>. The values of \thickl<strong>in</strong>es <strong>and</strong><br />
\th<strong>in</strong>l<strong>in</strong>es depend on the size <strong>and</strong> style of the current font. Typical values are<br />
0.8 pt for \thickl<strong>in</strong>es <strong>and</strong> 0.4 pt for \th<strong>in</strong>l<strong>in</strong>es. For example, the comm<strong>and</strong>s<br />
\beg<strong>in</strong>{figure}<br />
\center<strong>in</strong>g<br />
\shadowbox{ \beg<strong>in</strong>{m<strong>in</strong>ipage}{3.5 <strong>in</strong>}<br />
\center<strong>in</strong>g<br />
\<strong>in</strong>cludegraphics[totalheight=2<strong>in</strong>]{pend}<br />
\caption{Shadowbox Around Entire Figure}<br />
\label{fig:boxed_fancy}<br />
\end{m<strong>in</strong>ipage} }<br />
\end{figure}<br />
place a shadow box around the figure’s graphic <strong>and</strong> caption, as shown <strong>in</strong> Figure 60.<br />
102
q1<br />
L1<br />
P1<br />
N<br />
P2<br />
q2<br />
L2<br />
Figure 60: Shadowbox Around Entire Figure<br />
103
Part V<br />
Complex Figures<br />
28 Side-by-Side <strong>Graphics</strong><br />
The comm<strong>and</strong>s necessary for side-by-side graphics depend on how the user wants<br />
the graphics organized. This section covers three common group<strong>in</strong>gs of side-by-side<br />
graphics<br />
1. The side-by-side graphics are comb<strong>in</strong>ed <strong>in</strong>to a s<strong>in</strong>gle figure.<br />
2. The side-by-side graphics each form their own figure (e.g., Figure 63 <strong>and</strong> Figure<br />
64).<br />
3. The side-by-side graphics each form a subfigure (e.g., Subfigure 65a <strong>and</strong> Subfigure<br />
65b) which are part of a s<strong>in</strong>gle figure (Figure 65).<br />
This section describes the follow<strong>in</strong>g two methods for construct<strong>in</strong>g the three types of<br />
group<strong>in</strong>gs<br />
a) Successive \<strong>in</strong>cludegraphics comm<strong>and</strong>s.<br />
b) Side-by-side m<strong>in</strong>ipages, each of which conta<strong>in</strong>s an \<strong>in</strong>cludegraphics comm<strong>and</strong>.<br />
It is very important to underst<strong>and</strong> the material <strong>in</strong> Section 2 on Page 10 when construct<strong>in</strong>g<br />
side-by-side figures. Side-by-side figures are created by plac<strong>in</strong>g boxes (either<br />
\<strong>in</strong>cludegraphics or m<strong>in</strong>ipages) beside each other on a l<strong>in</strong>e.<br />
28.1 Side-by-Side <strong>Graphics</strong> <strong>in</strong> a S<strong>in</strong>gle Figure<br />
The easiest method for creat<strong>in</strong>g side-by-side graphics <strong>in</strong> a s<strong>in</strong>gle figure is successive<br />
\<strong>in</strong>cludegraphics comm<strong>and</strong>s, although us<strong>in</strong>g side-by-side m<strong>in</strong>ipages makes it easier<br />
to vertically align the graphics.<br />
28.1.1 <strong>Us<strong>in</strong>g</strong> Side-by-Side <strong>in</strong>cludegraphics Comm<strong>and</strong>s<br />
The follow<strong>in</strong>g code<br />
\beg<strong>in</strong>{figure}<br />
\center<strong>in</strong>g<br />
\<strong>in</strong>cludegraphics[width=1<strong>in</strong>]{graphic}%<br />
\hspace{1<strong>in</strong>}%<br />
\<strong>in</strong>cludegraphics[width=2<strong>in</strong>]{graphic}<br />
\caption{Two <strong>Graphics</strong> <strong>in</strong> One Figure}<br />
\end{figure}<br />
produces Figure 61 which is 4 <strong>in</strong>ches wide (1 <strong>in</strong>ch for the first graphic, 1 <strong>in</strong>ch for<br />
the \hspace, <strong>and</strong> 2 <strong>in</strong>ches for the second graphic) which is centered on the page.<br />
The \hspace comm<strong>and</strong> can be omitted or replaced with \hfill, which pushes the<br />
graphics to the marg<strong>in</strong>s (see Section 10.2 on Page 32).<br />
28.1.2 <strong>Us<strong>in</strong>g</strong> Side-by-Side M<strong>in</strong>ipages<br />
Plac<strong>in</strong>g the \<strong>in</strong>cludegraphics comm<strong>and</strong>s <strong>in</strong>side m<strong>in</strong>ipage environments provides<br />
the user more control over the graphics’ vertical placement. For example<br />
104
Graphic<br />
Graphic<br />
Figure 61: Two <strong>Graphics</strong> <strong>in</strong> One Figure<br />
\beg<strong>in</strong>{figure}<br />
\center<strong>in</strong>g<br />
\beg<strong>in</strong>{m<strong>in</strong>ipage}[c]{0.5\l<strong>in</strong>ewidth}<br />
\center<strong>in</strong>g \<strong>in</strong>cludegraphics[width=1<strong>in</strong>]{graphic}<br />
\end{m<strong>in</strong>ipage}%<br />
\beg<strong>in</strong>{m<strong>in</strong>ipage}[c]{0.5\l<strong>in</strong>ewidth}<br />
\center<strong>in</strong>g \<strong>in</strong>cludegraphics[width=2<strong>in</strong>]{graphic}<br />
\end{m<strong>in</strong>ipage}<br />
\caption{Centers Aligned Vertically}<br />
\end{figure}<br />
produces Figure 62, which has vertically-centered graphics.<br />
Graphic<br />
Graphic<br />
Figure 62: Centers Aligned Vertically<br />
Notes on this example:<br />
• Like any other L A TEX object, m<strong>in</strong>ipages are positioned such that their reference<br />
po<strong>in</strong>t is aligned with the current basel<strong>in</strong>e. By default, m<strong>in</strong>ipages use the [c]<br />
option which places the reference po<strong>in</strong>t at the vertical center of the m<strong>in</strong>ipage,<br />
the [t] option places the reference po<strong>in</strong>t at the basel<strong>in</strong>e of the m<strong>in</strong>ipage’s<br />
top l<strong>in</strong>e <strong>and</strong> the [b] option places the reference po<strong>in</strong>t at the basel<strong>in</strong>e of the<br />
m<strong>in</strong>ipage’s bottom l<strong>in</strong>e (see Section 11.4 on Page 36).<br />
• The % after the first \end{m<strong>in</strong>ipage} comm<strong>and</strong> prevents an <strong>in</strong>terword space<br />
from be<strong>in</strong>g <strong>in</strong>serted between the m<strong>in</strong>ipage boxes (see Section 10.2 on Page 32).<br />
• When the widths of the m<strong>in</strong>ipages do not add to 1.0\l<strong>in</strong>ewidth, the \hspace<br />
or \hfill comm<strong>and</strong>s can be used to specify horizontal spac<strong>in</strong>g (see Section 10.2<br />
on Page 32).<br />
28.2 Side-by-Side Figures<br />
In the previous section, multiple m<strong>in</strong>ipage environments were used <strong>in</strong>side a figure<br />
environment to produce a s<strong>in</strong>gle figure consist<strong>in</strong>g of multiple graphics. Plac<strong>in</strong>g<br />
\caption statements <strong>in</strong>side the m<strong>in</strong>ipages makes the m<strong>in</strong>ipages themselves become<br />
figures. For example<br />
\beg<strong>in</strong>{figure}<br />
\center<strong>in</strong>g<br />
%%----start of first figure----<br />
\beg<strong>in</strong>{m<strong>in</strong>ipage}[t]{0.4\l<strong>in</strong>ewidth}<br />
\center<strong>in</strong>g<br />
\<strong>in</strong>cludegraphics[width=1<strong>in</strong>]{graphic}<br />
105
\caption{Small Box} \label{fig:side:a}<br />
\end{m<strong>in</strong>ipage}%<br />
\hspace{1cm}%<br />
%%----start of second figure----<br />
\beg<strong>in</strong>{m<strong>in</strong>ipage}[t]{0.4\l<strong>in</strong>ewidth}<br />
\center<strong>in</strong>g<br />
\<strong>in</strong>cludegraphics[width=1.5<strong>in</strong>]{graphic}<br />
\caption{Big Box}<br />
\end{m<strong>in</strong>ipage}<br />
\end{figure}<br />
produces Figures 63 <strong>and</strong> 64.<br />
\label{fig:side:b}<br />
Graphic<br />
Graphic<br />
Figure 63: Small Box<br />
Figure 64: Big Box<br />
Notes about this example:<br />
• Although the above comm<strong>and</strong>s <strong>in</strong>clude one figure environment, the comm<strong>and</strong>s<br />
produce two figures because two \caption comm<strong>and</strong>s are used.<br />
• The figures are put <strong>in</strong>side two m<strong>in</strong>ipages whose widths are 40% of the width of<br />
the figure environment that are separated by 1cm of horizontal space. (Note<br />
that comment characters after \end{m<strong>in</strong>ipage} <strong>and</strong> \hspace{1cm} ensure that<br />
the spac<strong>in</strong>g is exactly 1cm by prevent<strong>in</strong>g <strong>in</strong>terword spaces between the m<strong>in</strong>ipages<br />
<strong>and</strong> the horizontal space.)<br />
By default, the figure captions are typeset to the entire width of the m<strong>in</strong>ipage.<br />
The 1cm of horizontal space was used to ensure horizontal spac<strong>in</strong>g between the<br />
captions (for longer captions <strong>and</strong>/or wider graphics).<br />
Alternatively, the caption widths could be limited by the caption package’s<br />
marg<strong>in</strong> or width keywords (see Table 18 on Page 75).<br />
• The \center<strong>in</strong>g comm<strong>and</strong> immediately after \beg<strong>in</strong>{figure} causes the group<br />
of two m<strong>in</strong>ipages <strong>and</strong> spac<strong>in</strong>g to be centered <strong>in</strong> the figure environment.<br />
• The \center<strong>in</strong>g comm<strong>and</strong> <strong>in</strong>side the m<strong>in</strong>ipage causes the graphics to be centered<br />
with<strong>in</strong> the m<strong>in</strong>ipage.<br />
28.3 Side-by-Side Subfigures<br />
It may be desirable to refer to side-by-side graphics both <strong>in</strong>dividually <strong>and</strong> as a<br />
group. The \subfloat comm<strong>and</strong> (from the subfig package, described <strong>in</strong> Section 32<br />
on Page 113) allows a group of graphics to be <strong>in</strong>dividually def<strong>in</strong>ed as subfigures that<br />
are def<strong>in</strong>ed to be part of a s<strong>in</strong>gle figure. For example<br />
\usepackage{subfig}<br />
...<br />
\beg<strong>in</strong>{figure}<br />
\center<strong>in</strong>g<br />
%%----start of first subfigure----<br />
\subfloat[Small Box with a Long Caption]{<br />
\label{fig:subfig:a}<br />
%% label for first subfigure<br />
\<strong>in</strong>cludegraphics[width=1.0<strong>in</strong>]{graphic}}<br />
\hspace{1<strong>in</strong>}<br />
%%----start of second subfigure----<br />
\subfloat[Big Box]{<br />
106
\label{fig:subfig:b}<br />
%% label for second subfigure<br />
\<strong>in</strong>cludegraphics[width=1.5<strong>in</strong>]{graphic}}<br />
\caption{Two Subfigures}<br />
\label{fig:subfig}<br />
%% label for entire figure<br />
\end{figure}<br />
produces Figure 65. The comm<strong>and</strong>s used to <strong>in</strong>dividually <strong>and</strong> collectively reference<br />
the parts of Figure 65 are shown <strong>in</strong> Table 22.<br />
Graphic<br />
(a) Small Box with<br />
a Long Caption<br />
Graphic<br />
(b) Big Box<br />
Figure 65: Two Subfigures<br />
Table 22: Subfigure Reference Comm<strong>and</strong>s <strong>and</strong> Their Output for Figure 65 Example<br />
Reference Comm<strong>and</strong> Output<br />
\subref{fig:subfig:a} (a)<br />
\subref*{fig:subfig:a} a<br />
\ref{fig:subfig:a} 65a<br />
\subref{fig:subfig:b} (b)<br />
\subref*{fig:subfig:b} b<br />
\ref{fig:subfig:b} 65b<br />
\ref{fig:subfig} 65<br />
28.3.1 M<strong>in</strong>ipage Environments Inside Subfigures<br />
S<strong>in</strong>ce Subfigure 65a consists of only the \<strong>in</strong>cludegraphics comm<strong>and</strong>, the caption<br />
<strong>in</strong> subfigure 65a is only as wide as the <strong>in</strong>cluded graphic. If the subfigure <strong>in</strong>stead<br />
consists of the entire m<strong>in</strong>ipage, the caption is made as wide as the m<strong>in</strong>ipage. For<br />
example<br />
\beg<strong>in</strong>{figure}<br />
\subfloat[Small Box with a Long Caption]{<br />
\label{fig:m<strong>in</strong>i:subfig:a} %% label for first subfigure<br />
\beg<strong>in</strong>{m<strong>in</strong>ipage}[b]{0.45\l<strong>in</strong>ewidth}<br />
\center<strong>in</strong>g \<strong>in</strong>cludegraphics[width=1<strong>in</strong>]{graphic}<br />
\end{m<strong>in</strong>ipage}}%<br />
\hfill<br />
\subfloat[Big Box]{<br />
\label{fig:m<strong>in</strong>i:subfig:b} %% label for second subfigure<br />
\beg<strong>in</strong>{m<strong>in</strong>ipage}[b]{0.45\l<strong>in</strong>ewidth}<br />
\center<strong>in</strong>g \<strong>in</strong>cludegraphics[width=1.5<strong>in</strong>]{graphic}<br />
\end{m<strong>in</strong>ipage}}<br />
\caption{M<strong>in</strong>ipages Inside Subfigures}<br />
\label{fig:m<strong>in</strong>i:subfig} %% label for entire figure<br />
\end{figure}<br />
produces Figure 66, which conta<strong>in</strong>s subfigures 66a <strong>and</strong> 66b.<br />
S<strong>in</strong>ce subfigure captions are (by default) as wide as the subfigure, the subfigure<br />
captions <strong>in</strong> Figure 66 are wider than those <strong>in</strong> Figure 65. This is because the Figure 65<br />
subfigures conta<strong>in</strong> only the graphics while the Figure 66 subfigures conta<strong>in</strong> m<strong>in</strong>ipages<br />
of width 0.5\l<strong>in</strong>ewidth.<br />
107
Graphic<br />
(a) Small Box with a Long Caption<br />
Graphic<br />
(b) Big Box<br />
Figure 66: M<strong>in</strong>ipages Inside Subfigures<br />
29 Separate M<strong>in</strong>ipages for Captions<br />
Section 28.2 on Page 105 described how to construct side-by-side figures by plac<strong>in</strong>g<br />
the graphics comm<strong>and</strong> <strong>and</strong> \caption comm<strong>and</strong> together <strong>in</strong>side a m<strong>in</strong>ipage environment.<br />
This section describes how plac<strong>in</strong>g the graphics comm<strong>and</strong> <strong>and</strong> \caption<br />
comm<strong>and</strong> <strong>in</strong> separate m<strong>in</strong>ipage environments can provide better vertical alignment.<br />
The [t] options for the side-by-side m<strong>in</strong>ipages <strong>in</strong> Figures 63 <strong>and</strong> 64 cause the<br />
graphic basel<strong>in</strong>es to be aligned (see Section 11.4 on Page 36). This works well for<br />
non-rotated graphics as it causes the tops of the captions to be aligned. However,<br />
this does not work well when the graphics bottoms are not aligned. For example,<br />
\beg<strong>in</strong>{figure}<br />
\center<strong>in</strong>g<br />
%%----start of first figure----<br />
\beg<strong>in</strong>{m<strong>in</strong>ipage}[t]{.4\l<strong>in</strong>ewidth}<br />
\center<strong>in</strong>g<br />
\<strong>in</strong>cludegraphics[width=2cm]{graphic}<br />
\caption{Box with a Long Caption}<br />
\end{m<strong>in</strong>ipage}%<br />
\hspace{1cm}%<br />
%%----start of second figure----<br />
\beg<strong>in</strong>{m<strong>in</strong>ipage}[t]{.4\l<strong>in</strong>ewidth}<br />
\center<strong>in</strong>g<br />
\<strong>in</strong>cludegraphics[width=2cm,angle=-30]{graphic}<br />
\caption{Rotated Box}<br />
\end{m<strong>in</strong>ipage}%<br />
\end{figure}<br />
produces Figures 67 <strong>and</strong> 68 which do not have their captions aligned. The [b]<br />
m<strong>in</strong>ipage options would not completely solve the problem, as it causes the bottom<br />
l<strong>in</strong>es of the caption to be aligned.<br />
Graphic<br />
Figure 67: Box with a Long Caption<br />
Graphic<br />
Figure 68: Rotated Box<br />
The alignment of the graphics <strong>and</strong> the captions can be done separately by creat<strong>in</strong>g<br />
two rows of m<strong>in</strong>ipages: the first row conta<strong>in</strong><strong>in</strong>g the figures <strong>and</strong> the second row<br />
conta<strong>in</strong><strong>in</strong>g the captions. For example<br />
\beg<strong>in</strong>{figure}<br />
\center<strong>in</strong>g<br />
%%----start of first figure graphics----<br />
\beg<strong>in</strong>{m<strong>in</strong>ipage}[b]{.4\l<strong>in</strong>ewidth}<br />
\center<strong>in</strong>g<br />
\<strong>in</strong>cludegraphics[width=2cm]{graphic}<br />
\end{m<strong>in</strong>ipage}%<br />
\hspace{1cm}%<br />
108
%%----start of second figure graphics----<br />
\beg<strong>in</strong>{m<strong>in</strong>ipage}[b]{.4\l<strong>in</strong>ewidth}<br />
\center<strong>in</strong>g<br />
\<strong>in</strong>cludegraphics[width=2cm,angle=-30]{graphic}<br />
\end{m<strong>in</strong>ipage}\\[-10pt]<br />
%%----start of first figure caption----<br />
\beg<strong>in</strong>{m<strong>in</strong>ipage}[t]{.4\l<strong>in</strong>ewidth}<br />
\caption{Box with a Long Caption}<br />
\end{m<strong>in</strong>ipage}%<br />
\hspace{1cm}%<br />
%%----start of second figure caption----<br />
\beg<strong>in</strong>{m<strong>in</strong>ipage}[t]{.4\l<strong>in</strong>ewidth}<br />
\caption{Rotated Box}<br />
\end{m<strong>in</strong>ipage}%<br />
\end{figure}<br />
produces Figures 69 <strong>and</strong> 70, which have the graphic basel<strong>in</strong>es aligned <strong>and</strong> the caption<br />
top l<strong>in</strong>es aligned.<br />
Graphic<br />
Graphic<br />
Figure 69: Box with a Long Caption<br />
Figure 70: Rotated Box<br />
Notes on this example<br />
• The \\ breaks the l<strong>in</strong>e after the last figure. The \\ optional argument [-10pt]<br />
moves the captions closer to the graphics by remov<strong>in</strong>g 10 po<strong>in</strong>ts of vertical space<br />
at the l<strong>in</strong>ebreak. This length should be changed as the user see fit.<br />
• The graphic m<strong>in</strong>ipages have a [b] option to make their reference po<strong>in</strong>ts be the<br />
basel<strong>in</strong>e of the m<strong>in</strong>ipage’s bottom l<strong>in</strong>e.<br />
• The caption m<strong>in</strong>ipages have a [t] option to make their reference po<strong>in</strong>ts be the<br />
basel<strong>in</strong>e of the m<strong>in</strong>ipage’s top l<strong>in</strong>e (to vertically-align the captions’ top l<strong>in</strong>es).<br />
• Any \label comm<strong>and</strong>s must be issued <strong>in</strong> the same m<strong>in</strong>ipage as the correspond<strong>in</strong>g<br />
\caption comm<strong>and</strong>.<br />
30 Plac<strong>in</strong>g a Table Beside a Figure<br />
In Section 28 on Page 104, side-by-side figures are constructed by us<strong>in</strong>g multiple<br />
\caption comm<strong>and</strong>s <strong>in</strong> a s<strong>in</strong>gle figure environment. Likewise, side-by-side tables are<br />
created by us<strong>in</strong>g multiple \caption comm<strong>and</strong>s <strong>in</strong> a s<strong>in</strong>gle table environment.<br />
The \captionof comm<strong>and</strong>s described <strong>in</strong> Section 21 on Page 87 make it possible<br />
to put a table beside a figure. For example, the follow<strong>in</strong>g comm<strong>and</strong>s<br />
\beg<strong>in</strong>{figure}[htb]<br />
\beg<strong>in</strong>{m<strong>in</strong>ipage}[b]{0.5\l<strong>in</strong>ewidth}<br />
\center<strong>in</strong>g<br />
\<strong>in</strong>cludegraphics[width=0.8\l<strong>in</strong>ewidth]{graphic}<br />
\caption{This is a Figure by a Table}<br />
\label{fig:by:table}<br />
\end{m<strong>in</strong>ipage}%<br />
\beg<strong>in</strong>{m<strong>in</strong>ipage}[b]{0.5\l<strong>in</strong>ewidth}<br />
\center<strong>in</strong>g<br />
\beg<strong>in</strong>{tabular}{|c|c|} \hl<strong>in</strong>e<br />
109
Day & Data \\ \hl<strong>in</strong>e\hl<strong>in</strong>e<br />
Monday & 14.6 \\<br />
Tuesday & 14.3 \\<br />
Wednesday & 14.2 \\<br />
Thursday & 14.5 \\<br />
Friday & 14.9 \\ \hl<strong>in</strong>e<br />
\end{tabular}<br />
\captionof{table}{This is a Table by a Figure}<br />
\label{table:by:fig}<br />
\end{m<strong>in</strong>ipage}<br />
\end{figure}<br />
use a figure environment to create Figure 71 <strong>and</strong> Table 23.<br />
Graphic<br />
Figure 71: This is a Figure by a Table<br />
Day<br />
Data<br />
Monday 14.6<br />
Tuesday 14.3<br />
Wednesday 14.2<br />
Thursday 14.5<br />
Friday 14.9<br />
Table 23: This is a Table by a Figure<br />
S<strong>in</strong>ce L A TEX allows figure floats to leapfrog table floats, us<strong>in</strong>g<br />
\captionof{table}{...}<br />
<strong>in</strong> a figure environment may place the table ahead of unprocessed tables. Likewise,<br />
us<strong>in</strong>g<br />
\captionof{figure}{...}<br />
<strong>in</strong> a table environment may place the figure ahead of unprocessed figures. If this<br />
is objectionable, it can be prevented by putt<strong>in</strong>g a \FloatBarrier or \clearpage<br />
comm<strong>and</strong> before the figure environment (see Section 17.3 on Page 59).<br />
31 Stacked Figures <strong>and</strong> Subfigures<br />
Side-by-side figures are created <strong>in</strong> Section 28 on Page 104 by a variety methods, all of<br />
which <strong>in</strong>volve plac<strong>in</strong>g objects (graphics, m<strong>in</strong>ipages, subfloats) next to each other on a<br />
s<strong>in</strong>gle l<strong>in</strong>e. The same procedure produces stacked graphics when the \\ comm<strong>and</strong> is<br />
used to explicitly add a l<strong>in</strong>ebreak. The \\ comm<strong>and</strong>’s optional argument can specify<br />
additional vertical space, such as \\[20pt].<br />
31.1 Stacked Figures<br />
Section 28 expla<strong>in</strong>ed how to construct side-by-side figures. This section shows that<br />
add<strong>in</strong>g a l<strong>in</strong>ebreak produces multiple rows of figures. For example, the follow<strong>in</strong>g code<br />
\beg<strong>in</strong>{figure}[htbp]<br />
\center<strong>in</strong>g<br />
%%----start of first figure----<br />
\beg<strong>in</strong>{m<strong>in</strong>ipage}[t]{0.25\l<strong>in</strong>ewidth}<br />
\center<strong>in</strong>g<br />
\<strong>in</strong>cludegraphics[width=\l<strong>in</strong>ewidth]{graphic}<br />
\caption{First Stacked Figure}<br />
\label{fig:stacked:first}<br />
\end{m<strong>in</strong>ipage}%<br />
110
\hspace{1cm}%<br />
%%----start of second figure----<br />
\beg<strong>in</strong>{m<strong>in</strong>ipage}[t]{0.25\l<strong>in</strong>ewidth}<br />
\center<strong>in</strong>g<br />
\<strong>in</strong>cludegraphics[width=\l<strong>in</strong>ewidth]{graphic}<br />
\caption{Second Stacked Figure}<br />
\label{fig:stacked:second}<br />
\end{m<strong>in</strong>ipage}\\[20pt]<br />
%%----start of third figure----<br />
\beg<strong>in</strong>{m<strong>in</strong>ipage}[t]{0.25\l<strong>in</strong>ewidth}<br />
\center<strong>in</strong>g<br />
\<strong>in</strong>cludegraphics[width=\l<strong>in</strong>ewidth]{graphic}<br />
\caption{Third Stacked Figure}<br />
\label{fig:stacked:third}<br />
\end{m<strong>in</strong>ipage}%<br />
\hspace{1cm}%<br />
%%----start of fourth figure----<br />
\beg<strong>in</strong>{m<strong>in</strong>ipage}[t]{0.25\l<strong>in</strong>ewidth}<br />
\center<strong>in</strong>g<br />
\<strong>in</strong>cludegraphics[width=\l<strong>in</strong>ewidth]{graphic}<br />
\caption{Fourth Stacked Figure}<br />
\label{fig:stacked:fourth}<br />
\end{m<strong>in</strong>ipage}%<br />
\hspace{1cm}%<br />
%%----start of fifth figure----<br />
\beg<strong>in</strong>{m<strong>in</strong>ipage}[t]{0.25\l<strong>in</strong>ewidth}<br />
\center<strong>in</strong>g<br />
\<strong>in</strong>cludegraphics[width=\l<strong>in</strong>ewidth]{graphic}<br />
\caption{Fifth Stacked Figure}<br />
\label{fig:stacked:fifth}<br />
\end{m<strong>in</strong>ipage}%<br />
\end{figure}<br />
produces Figures 72-76.<br />
Graphic<br />
Figure 72: First<br />
Stacked Figure<br />
Graphic<br />
Figure 73: Second<br />
Stacked Figure<br />
Graphic<br />
Graphic<br />
Graphic<br />
Figure 74: Third<br />
Stacked Figure<br />
Figure 75: Fourth<br />
Stacked Figure<br />
Figure 76: Fifth<br />
Stacked Figure<br />
31.2 Stacked Subfigures<br />
Section 28.3 on Page 106 expla<strong>in</strong>ed how to construct side-by-side subfigures. This<br />
section shows how add<strong>in</strong>g a l<strong>in</strong>ebreak produces rows of subfigures. For example, the<br />
follow<strong>in</strong>g code<br />
\beg<strong>in</strong>{figure}<br />
\center<strong>in</strong>g<br />
%%----start of first subfigure----<br />
\subfloat[First Subfigure]{<br />
111
\label{fig:stacksub:a} %% label for first subfigure<br />
\<strong>in</strong>cludegraphics[width=0.25\l<strong>in</strong>ewidth]{graphic}}<br />
\hspace{0.1\l<strong>in</strong>ewidth}<br />
%%----start of second subfigure----<br />
\subfloat[Second Subfigure]{<br />
\label{fig:stacksub:b} %% label for second subfigure<br />
\<strong>in</strong>cludegraphics[width=0.25\l<strong>in</strong>ewidth]{graphic}}\\[20pt]<br />
%%----start of third subfigure----<br />
\subfloat[Third Subfigure]{<br />
\label{fig:stacksub:c} %% label for third subfigure<br />
\<strong>in</strong>cludegraphics[width=0.25\l<strong>in</strong>ewidth]{graphic}}<br />
\hspace{0.1\l<strong>in</strong>ewidth}<br />
%%----start of fourth subfigure----<br />
\subfloat[Fourth Subfigure]{<br />
\label{fig:stacksub:d} %% label for fourth subfigure<br />
\<strong>in</strong>cludegraphics[width=0.25\l<strong>in</strong>ewidth]{graphic}}<br />
\hspace{0.1\l<strong>in</strong>ewidth}<br />
%%----start of fifth subfigure----<br />
\subfloat[Fifth Subfigure]{<br />
\label{fig:stacksub:e} %% label for fifth subfigure<br />
\<strong>in</strong>cludegraphics[width=0.25\l<strong>in</strong>ewidth]{graphic}}<br />
\caption{Five Subfigures}<br />
\label{fig:stacksub}<br />
%% label for entire figure<br />
\end{figure}<br />
produces Figure 77.<br />
Graphic<br />
(a) First Subfigure<br />
Graphic<br />
(b) Second Subfigure<br />
Graphic<br />
(c) Third Subfigure<br />
Graphic<br />
(d) Fourth Subfigure<br />
Figure 77: Five Subfigures<br />
Graphic<br />
(e) Fifth Subfigure<br />
112
32 The subfig package<br />
This section provides an overview of the subfig package. Readers are encouraged to<br />
read Steven Douglas Cochran’s subfig documentation [32] for the full details 41 .<br />
Section 28.3 provided an example that used the subfig package’s \subfloat comm<strong>and</strong><br />
to create subfigures. The example also used the \label comm<strong>and</strong> to def<strong>in</strong>e<br />
labels for the figure <strong>and</strong> the <strong>in</strong>dividual subfigures. This labels can be referenced us<strong>in</strong>g<br />
the \ref comm<strong>and</strong> <strong>and</strong> the subfig package’s \subref <strong>and</strong> \subref* comm<strong>and</strong>s, with<br />
referenc<strong>in</strong>g examples described Table 22.<br />
32.1 The Subfloat Comm<strong>and</strong><br />
The \subfloat comm<strong>and</strong> has one m<strong>and</strong>atory argument <strong>and</strong> two optional arguments.<br />
The m<strong>and</strong>atory argument conta<strong>in</strong>s the comm<strong>and</strong>s (such as \<strong>in</strong>cludegraphics) that<br />
generate the subfigure contents. The two optional arguments affect the subfigure’s<br />
caption:<br />
• If no optional arguments are specified then the subfigure has no subcaption<br />
• If one optional argument is specified, its contents provide the subfigure’s subcaption<br />
<strong>and</strong> its list-of-figures text.<br />
• If two optional arguments are specified, the first (left) optional argument provides<br />
the subfigure’s list-of-figure text while the second (right) optional argument<br />
provides its subcaption.<br />
More detail on on the \subfloat comm<strong>and</strong> options are given <strong>in</strong> Table 24.<br />
32.2 Customiz<strong>in</strong>g subfig with captionsetup Comm<strong>and</strong><br />
Section 20.1 on Page 69 describes how Figure caption can be customized us<strong>in</strong>g the optional<br />
caption package. The same customization can be applied to subfigure captions<br />
created by the subfig package 42 .<br />
The \captionsetup comm<strong>and</strong> has an optional argument which specifies whether<br />
the customization applies to figures, subfigures, tables, subtables, or some comb<strong>in</strong>ation.<br />
Table 25 shows the possible \captionsetup optional arguments <strong>and</strong> their<br />
effects.<br />
41 S<strong>in</strong>ce the subfig package requires the caption package, some of subfig package’s capability comes<br />
from the caption code. Fortunately, the subfig documentation describes the full subfig capability,<br />
regardless of where the correspond<strong>in</strong>g code resides.<br />
42 S<strong>in</strong>ce the subfig package automatically <strong>in</strong>cludes the caption package, the subfig always has all of<br />
the caption package’s customization capabilities.<br />
Table 24: \subfloat call<strong>in</strong>g arguments<br />
Comm<strong>and</strong> List-of-Figures Caption Sub-float caption<br />
\subfloat{body}<br />
\subfloat[ ]{body} (b) (b)<br />
\subfloat[caption text]{body} (c) caption text (c) caption text<br />
\subfloat[ ][caption text]{body}<br />
(d) caption text<br />
\subfloat[ ][ ]{body}<br />
(e)<br />
\subfloat[list text][caption text]{body} (f) list text (f) caption text<br />
\subfloat[list text][ ]{body} (g) list text (g)<br />
113
Table 25: subfig package’s \captionsetup options<br />
Comm<strong>and</strong><br />
\captionsetup{〈options〉}<br />
\captionsetup[figure]{〈options〉}<br />
\captionsetup[table]{〈options〉}<br />
\captionsetup[subfloat]{〈options〉}<br />
\captionsetup[subfigure]{〈options〉}<br />
\captionsetup[subtable]{〈options〉}<br />
Description<br />
options apply to all captions<br />
options apply only to figures <strong>and</strong> subfigure captions<br />
options apply only to table <strong>and</strong> subtable captions<br />
options apply only to all subfloats (subfigures <strong>and</strong> subtables)<br />
options apply to subfigures<br />
options apply to subtables<br />
In addition to the \captionsetup comm<strong>and</strong>’s options listed on Page 73 - 75, there<br />
are some \captionsetup options which apply only to the subfig package, as shown<br />
<strong>in</strong> Table 26.<br />
32.3 The Cont<strong>in</strong>uedFloat Comm<strong>and</strong><br />
The subfig package also provides the \Cont<strong>in</strong>uedFloat comm<strong>and</strong> which allows subfigures<br />
to be split between multiple figure environments (<strong>and</strong> thus multiple pages).<br />
This is useful when<br />
• a figure has too many subfigures to fit on a s<strong>in</strong>gle page<br />
• or when an author wishes to relate multiple full-page graphics by hav<strong>in</strong>g them<br />
numbered (17a, 17b, 17c) <strong>in</strong>stead (18, 19, 20)<br />
Examples of the \Cont<strong>in</strong>uedFloat are provided <strong>in</strong> Section 33.<br />
114
Table 26: subfig captionsetup Options<br />
Keyword Values Default Description<br />
config= subfig.cfg The filename from which to load subfig configuration.<br />
lofdepth= 1 If lofdepth=1, then only Figures are <strong>in</strong>cluded <strong>in</strong><br />
the List of Figures. If lofdepth=2, then both<br />
Figures <strong>and</strong> Subfigures are <strong>in</strong>cluded <strong>in</strong> the List<br />
of Figures.<br />
lotdepth= 1 If lotdepth=1, then only Tables are <strong>in</strong>cluded <strong>in</strong><br />
the List of Tables. If lotdepth=2, then both<br />
Tables <strong>and</strong> Subtables are <strong>in</strong>cluded <strong>in</strong> the List of<br />
Tables.<br />
listof<strong>in</strong>dent= 3.8em Sets the total <strong>in</strong>dentation from the left marg<strong>in</strong><br />
for List of Floats l<strong>in</strong>e for subfloats.<br />
listofnumwidth= 2.5em Sets the width of box for the label number for<br />
List of Floats l<strong>in</strong>e for subfloats.<br />
farskip= 10pt Vertical space on the “far side” of the subfloat<br />
(on the side away from the ma<strong>in</strong> caption).<br />
nearskip= 0pt Vertical space on the “near side” of the subfloat<br />
(on the side towards the ma<strong>in</strong> caption).<br />
captionskip= 4pt Vertical space between the subfloat <strong>and</strong> its subcaption<br />
topadjust= 0pt Extra vertical space added to captionskip when<br />
subcaption is above subfloat.<br />
listofformat= (see<br />
subparens Specifies format of entries <strong>in</strong> List of Figures<br />
Table 27)<br />
<strong>and</strong> List of Tables. Must be specified before<br />
\listoffigures<br />
subrefformat=<br />
(see<br />
Table 27)<br />
subsimple<br />
Specifies format of \subref* output. Format of<br />
\subref* output depends on the subrefformat=<br />
value when the subfloat is formed, regardless of<br />
the subrefformat= value when the \subref*<br />
comm<strong>and</strong> is entered.<br />
Table 27: subfig captionsetup Options for listofformat= <strong>and</strong> subrefformat=<br />
Values Example Description<br />
subsimple b Only output subfigure letter.<br />
subparens (b) Output subfigure letter surrounded by parens.<br />
empty<br />
Don’t output anyth<strong>in</strong>g.<br />
simple 17b Output figure number <strong>and</strong> subfigure letter.<br />
parens 17(b) Output figure number followed by subfigure<br />
letter surrounded by parens.<br />
115
33 Cont<strong>in</strong>ued Figures <strong>and</strong> Subfigures<br />
When two successive figures conta<strong>in</strong> closely-related material, it may be desirable to<br />
label the figures with the same figure number. S<strong>in</strong>ce the figure counter conta<strong>in</strong>s the<br />
number of the next figure, two figures can be given the same number by decrement<strong>in</strong>g<br />
the figure counter before the figure environment. For example,<br />
\beg<strong>in</strong>{figure}<br />
....<br />
\end{figure}<br />
\addtocounter{figure}{-1}<br />
\beg<strong>in</strong>{figure}<br />
....<br />
\end{figure}<br />
However, the <strong>in</strong>ability to dist<strong>in</strong>guish between these identically-numbered figures<br />
causes confusion.<br />
33.1 Cont<strong>in</strong>ued Figures<br />
The best way of construct<strong>in</strong>g a cont<strong>in</strong>ued figure is to use the subfig package to create<br />
multiple Figures, each of which conta<strong>in</strong>s a s<strong>in</strong>gle subfigure. This allows the cont<strong>in</strong>ued<br />
figures to be referenced <strong>in</strong>dividually as “Figure 12(a)” or collectively “Figure 12”.<br />
For example, the follow<strong>in</strong>g code<br />
\usepackage{subfig,graphicx}<br />
...<br />
\beg<strong>in</strong>{figure}[tbp]<br />
\center<strong>in</strong>g<br />
\subfloat[Subcaption for First Part]{<br />
\label{subfig:cont<strong>in</strong>ued:first} %% label for first subfigure<br />
\<strong>in</strong>cludegraphics[height=6<strong>in</strong>]{tux}}<br />
\caption{Example of Cont<strong>in</strong>ued Figure}<br />
\label{fig:cont<strong>in</strong>ued:first} %% label for first figure<br />
\end{figure}<br />
\beg<strong>in</strong>{figure}[tbp]<br />
\Cont<strong>in</strong>uedFloat<br />
\center<strong>in</strong>g<br />
\subfloat[Subcaption for Second Part]{<br />
\label{subfig:cont<strong>in</strong>ued:second} %% label for second subfigure<br />
\<strong>in</strong>cludegraphics[height=6<strong>in</strong>]{tux}}<br />
\caption{Example of Cont<strong>in</strong>ued Figure (cont’d)}<br />
\label{fig:cont<strong>in</strong>ued:second} %% label for second figure<br />
\end{figure}<br />
Produces Figure 78, which conta<strong>in</strong>s Figure 78a on Page 117 <strong>and</strong> Figure 78b on<br />
Page 118.<br />
33.2 Cont<strong>in</strong>ued Subfigures<br />
When group<strong>in</strong>g subfigures together <strong>in</strong> a figure, there often is not enough room to<br />
place all of the subfigures on a s<strong>in</strong>gle page. Instead of break<strong>in</strong>g them <strong>in</strong>to two<br />
differently-numbered Figures, the \Cont<strong>in</strong>uedFloat comm<strong>and</strong> allows the two sets of<br />
subfigures to have the same Figure number. For example, the follow<strong>in</strong>g code<br />
\usepackage{subfig,graphicx}<br />
...<br />
\beg<strong>in</strong>{figure}<br />
\center<strong>in</strong>g<br />
%%----start of first subfigure----<br />
116
(a) Subcaption for First Part<br />
Figure 78: Example of Cont<strong>in</strong>ued Figure<br />
117
(b) Subcaption for Second Part<br />
Figure 78: Example of Cont<strong>in</strong>ued Figure (cont’d)<br />
118
Graphic<br />
(a) First Subfigure<br />
Graphic<br />
(b) Second Subfigure<br />
Figure 79: Two Subfigures<br />
\subfloat[First Subfigure]{<br />
\label{fig:contfig:subone} %% label for first subfigure<br />
\<strong>in</strong>cludegraphics[width=3cm]{graphic}}<br />
\hspace{1cm}<br />
%%----start of second subfigure----<br />
\subfloat[Second Subfigure]{<br />
\label{fig:contfig:subtwo} %% label for second subfigure<br />
\<strong>in</strong>cludegraphics[width=3cm]{graphic}}<br />
\caption{Two Subfigures}<br />
\label{fig:contfig:one}<br />
%% label for first part<br />
\end{figure}<br />
\beg<strong>in</strong>{figure}<br />
\Cont<strong>in</strong>uedFloat<br />
\center<strong>in</strong>g<br />
%%----start of third subfigure----<br />
\subfloat[Third Subfigure]{<br />
\label{fig:contfig:subthree} %% label for third subfigure<br />
\<strong>in</strong>cludegraphics[width=3cm]{graphic}}<br />
\hspace{1cm}<br />
%%----start of fourth subfigure----<br />
\subfloat[Fourth Subfigure]{<br />
\label{fig:contfig:subfour} %% label for fourth subfigure<br />
\<strong>in</strong>cludegraphics[width=3cm]{graphic}}<br />
\caption{Two Additional Subfigures}<br />
\label{fig:contfig:two}<br />
%% label for second part<br />
\end{figure}<br />
Creates one float that conta<strong>in</strong>s Figures 79a <strong>and</strong> 79b <strong>and</strong> another float that conta<strong>in</strong>s<br />
Figures 79c <strong>and</strong> 79d. Note that the \Cont<strong>in</strong>uedFloat comm<strong>and</strong> not only gives<br />
the floats the same Figure number, it also ensures that the second float’s subfigure<br />
letter<strong>in</strong>g does not reset to (a).<br />
The two captions have different labels ({fig:contfig:one} <strong>and</strong> {fig:contfig:two})<br />
which both produce the same \ref value but may produce different \pageref values<br />
s<strong>in</strong>ce they can be on different pages.<br />
S<strong>in</strong>ce four subfigures could easily fit <strong>in</strong> one float, this example obviously does<br />
not require the \Cont<strong>in</strong>uedFloat comm<strong>and</strong>. But this example is meant to show the<br />
procedure for larger collections of subfigures.<br />
Graphic<br />
(c) Third Subfigure<br />
Graphic<br />
(d) Fourth Subfigure<br />
Figure 79: Two Additional Subfigures<br />
119
References<br />
[1] Leslie Lamport, L A TEX: A Document Preparation System, Second Edition,<br />
Addison-Wesley, Read<strong>in</strong>g, Massachusetts, 1994, ISBN 0-201-52983-1<br />
[2] Helmut Kopka <strong>and</strong> Patrick Daly, A Guide to L A TEX, Fourth Edition,<br />
Addison-Wesley, Read<strong>in</strong>g, Massachusetts, 2004, ISBN 0-321-17385-6<br />
[3] Frank Mittelbach <strong>and</strong> Michel Goossens, with Johannes Braams, David Carlisle,<br />
<strong>and</strong> Chris Rowley, The L A TEX Companion, Second Edition, Addison-Wesley<br />
Pearson Education, Boston, Massachusetts, 2004, ISBN 0-201-36299-6<br />
[4] Michel Goossens, Sebastian Rahtz, <strong>and</strong> Frank Mittelbach, The L A TEX <strong>Graphics</strong><br />
Companion, Addison-Wesley, Read<strong>in</strong>g, Massachusetts, 1997,<br />
ISBN 0-201-85469-4<br />
[5] Michel Goossens, Sebastian Rahtz, <strong>and</strong> Frank Mittelbach, The L A TEX Web<br />
Companion, Addison-Wesley, Read<strong>in</strong>g, Massachusetts, 1999,<br />
ISBN 0-201-43311-7<br />
[6] Hàn Thê´ Thành, Sebastian Rahtz, Hans Hagen, Hartmut Henkel, Pawel<br />
Jackowski, The pdfTEX user manual, Available as<br />
CTAN/systems/pdftex/manual/pdftex-l.pdf<br />
[7] D. P. Carlisle, Packages <strong>in</strong> the ‘graphics’ bundle (Documents the graphics,<br />
graphicx, lscape, color packages), Available as<br />
CTAN/macros/latex/required/graphics/grfguide.ps<br />
[8] Tobias Oetiker, The Not So Short Introduction to L A TEX 2ε Available at<br />
CTAN/<strong>in</strong>fo/lshort/english/lshort.pdf <strong>and</strong><br />
CTAN/<strong>in</strong>fo/lshort/english/lshort.ps<br />
[9] Harvey Greenberg, A Simplified Introduction to L A TEX Available at<br />
CTAN/<strong>in</strong>fo/simplified-latex/simplified-<strong>in</strong>tro.ps<br />
[10] David Carlisle, The afterpage package, Available as<br />
CTAN/macros/latex/required/tools/afterpage.dtx<br />
[11] L A TEX3 Project Team, The calc package, Available as<br />
CTAN/macros/latex/required/tools/calc.dtx<br />
[12] Axel Sommerfeldt, Typesett<strong>in</strong>g captions with the caption package, Available as<br />
CTAN/macros/latex/contrib/caption/caption.pdf<br />
[13] Peter R. Wilson, The ccaption package, Available as<br />
CTAN/macros/latex/contrib/ccaption/ccaption.pdf<br />
[14] James Darrell McCauley <strong>and</strong> Jeff Goldberg, The endfloat Package, Available<br />
as CTAN/macros/latex/contrib/endfloat/endfloat.pdf<br />
[15] Rolf Niepraschk The eso-pic package, Available as<br />
CTAN/macros/latex/contrib/eso-pic/eso-pic.pdf<br />
[16] Timothy Van Z<strong>and</strong>t, Documentation for fancybox.sty, Available as<br />
CTAN/macros/latex/contrib/fancybox/fancybox.doc<br />
120
[17] Piet van Oostrum, Page layout <strong>in</strong> L A TEX, Available as<br />
CTAN/macros/latex/contrib/fancyhdr/fancyhdr.pdf<br />
[18] The flafter package, Available as CTAN/macros/latex/unpacked/flafter.sty<br />
[19] Anselm L<strong>in</strong>gnau, An Improved Environment for Floats, Available as<br />
CTAN/macros/latex/contrib/float/float.dtx<br />
[20] Hendri Adriaens The graphicx-psm<strong>in</strong> package, Available as<br />
CTAN/macros/latex/contrib/graphicx-psm<strong>in</strong>/graphicx-psm<strong>in</strong>.pdf<br />
[21] Sebastian Rahtz <strong>and</strong> Heiko Oberdiek Hypertext marks <strong>in</strong> L A TEX: a manual for<br />
hyperref, Available as<br />
CTAN/macros/latex/contrib/hyperref/doc/manual.pdf<br />
[22] Heiko Oberdiek The ifpdf package, Available as<br />
CTAN/macros/latex/contrib/oberdiek/ifpdf.sty<br />
[23] David Carlisle, The ifthen package, Available as<br />
CTAN/macros/latex/base/ifthen.dtx<br />
[24] D. P. Carlisle, The lscape package, Available as<br />
CTAN/macros/latex/required/graphics/lscape.dtx<br />
[25] John D. Hobby A User’s manual for MetaPost, AT&T Bell Laboratories<br />
Comput<strong>in</strong>g Science Technical Report 162, 1992. Available as<br />
http://cm.bell-labs.com/who/hobby/cstr_162.pdf<br />
[26] Don Hosek, The morefloats package, Available as<br />
CTAN/macros/latex/contrib/misc/morefloats.sty<br />
[27] Rolf Niepraschk The overpic package, Available as<br />
CTAN/macros/latex/contrib/overpic/overpic.sty<br />
[28] Donald Arseneau, The place<strong>in</strong>s package, Available as<br />
CTAN/macros/latex/contrib/place<strong>in</strong>s/place<strong>in</strong>s.sty<br />
[29] Michael C. Grant <strong>and</strong> David Carlisle, The psfrag system, version 3, Available<br />
as CTAN/macros/latex/contrib/psfrag/pfgguide.pdf<br />
[30] Sebastian Rahtz <strong>and</strong> Leonor Barroca, The rotat<strong>in</strong>g package, Available as<br />
CTAN/macros/latex/contrib/rotat<strong>in</strong>g/rotat<strong>in</strong>g.dtx<br />
[31] Rolf Niepraschk <strong>and</strong> Hubert Gäßle<strong>in</strong> The sidecap package, Available as<br />
CTAN/macros/latex/contrib/sidecap/sidecap.pdf<br />
[32] Steven Douglas Cochran, The subfig package, Available as<br />
CTAN/macros/latex/contrib/subfig/subfig.pdf<br />
[33] Rob<strong>in</strong> Fairbairns The topcapt package, Available as<br />
CTAN/macros/latex/contrib/misc/topcapt.sty<br />
[34] Frank Mittelbach The varioref package, Available as<br />
CTAN/macros/latex/required/tools/varioref.dtx<br />
[35] David Carlisle, The xr package, Available as<br />
CTAN/macros/latex/required/tools/xr.dtx<br />
121
Index<br />
\abovecaptionskip length, 66<br />
\afterpage comm<strong>and</strong>, 60, 97<br />
\Alph counter comm<strong>and</strong>, 67<br />
\alph counter comm<strong>and</strong>, 67<br />
\Arabic counter comm<strong>and</strong>, 67<br />
\arabic counter comm<strong>and</strong>, 67<br />
basel<strong>in</strong>e, 10<br />
\basel<strong>in</strong>estretch comm<strong>and</strong>, 68<br />
bb, \<strong>in</strong>cludegraphics option, 25<br />
bbfig, 13<br />
\belowcaptionskip length, 66<br />
\bottomfigrule comm<strong>and</strong>, 65<br />
\bottomfraction comm<strong>and</strong>, 61<br />
bottomnumber float placement counter, 61<br />
Bound<strong>in</strong>gBox, 12<br />
boxed figures, 99<br />
bufsize, 14<br />
calc package, 24<br />
\caption comm<strong>and</strong>, 56, 88<br />
caption package, 69, 89<br />
comm<strong>and</strong>s, 71, 73–75<br />
\@captype comm<strong>and</strong>, 88<br />
\center<strong>in</strong>g comm<strong>and</strong>, 32<br />
difference from center environment,<br />
32<br />
\centerl<strong>in</strong>e TEX comm<strong>and</strong>, 32<br />
\clearpage comm<strong>and</strong>, 59, 60<br />
clip, \<strong>in</strong>cludegraphics option, 26<br />
color package, 47<br />
\colorbox comm<strong>and</strong>, 47<br />
compressed graphics, 42, 43<br />
convert<strong>in</strong>g graphics to EPS, 17<br />
convert<strong>in</strong>g ps files to eps, 13<br />
CTAN (Comprehensive TEX Archive Network),<br />
3<br />
current basel<strong>in</strong>e, 10<br />
\Declare<strong>Graphics</strong>Extensions comm<strong>and</strong>,<br />
29<br />
\Declare<strong>Graphics</strong>Rule comm<strong>and</strong>, 29, 30,<br />
43, 44<br />
depth, 11<br />
\doublebox comm<strong>and</strong>, 101<br />
draft, \<strong>in</strong>cludegraphics option, 26<br />
endfloat package, 68, 92<br />
eps Bound<strong>in</strong>gBox, 12<br />
122<br />
epsf package, 9<br />
\epsfbox comm<strong>and</strong>, 9, 32<br />
\epsfig comm<strong>and</strong>, 9<br />
eso-pic package, 54<br />
fac<strong>in</strong>g-page figures, 98<br />
fancybox package, 99, 101<br />
\fancyfoot comm<strong>and</strong>, 52<br />
fancyhdr package, 52, 53<br />
\fancyhead comm<strong>and</strong>, 52<br />
fancyhead<strong>in</strong>gs package, 52<br />
\fancypagestyle comm<strong>and</strong>, 53<br />
\fbox comm<strong>and</strong>, 99<br />
\fboxrule length, 47, 101<br />
\fboxsep length, 47, 101<br />
\fcolorbox comm<strong>and</strong>, 47<br />
\figcaption comm<strong>and</strong>, 88<br />
figure references, <strong>in</strong>correct, 56<br />
\figurename comm<strong>and</strong>, 67<br />
figures<br />
figure environment, 55<br />
l<strong>and</strong>scape, 91<br />
marg<strong>in</strong>al, 89<br />
non-float<strong>in</strong>g, 87<br />
placed on fac<strong>in</strong>g pages, 98<br />
wide, 90<br />
fil unit of length, 64<br />
\fill length, 33<br />
flafter package, 55, 58, 63<br />
float package, 88, 94<br />
float page, 58<br />
\FloatBarrier comm<strong>and</strong>, 56<br />
\FloatBarrier comm<strong>and</strong>, 59<br />
\floatpagefraction comm<strong>and</strong>, 60, 61<br />
\floatsep length, 64<br />
\@fpbot length, 64<br />
\@fpsep length, 64<br />
\@fptop length, 64<br />
ghostscript, 17<br />
ghostview, 17<br />
gif graphics<br />
convert<strong>in</strong>g to eps, 17<br />
us<strong>in</strong>g <strong>in</strong> L A TEX, 42, 43<br />
GIMP, 20<br />
Graphic Converter, 19<br />
graphics bundle, 9<br />
graphics conversion programs, 17
graphics package, 9<br />
graphics.cfg file, 45<br />
<strong>Graphics</strong>Magick, 18<br />
\graphicspath comm<strong>and</strong>, 39, 40<br />
graphicx package, 9<br />
GSview, 17<br />
header, graphics <strong>in</strong>, 52<br />
height, 11<br />
\<strong>in</strong>cludegraphics option, 25, 26, 33<br />
\hfill comm<strong>and</strong>, 33<br />
\hspace comm<strong>and</strong>, 33<br />
ifpdf package, 24<br />
ifthen package, 91, 96, 97<br />
\ifthenelse comm<strong>and</strong>, 91, 96, 97<br />
ImageMagick, 18<br />
\<strong>in</strong>cludegraphics comm<strong>and</strong>, 9, 22<br />
boolean options, 26<br />
cropp<strong>in</strong>g options, 25<br />
options, 25<br />
<strong>in</strong>ternal comm<strong>and</strong>s, 64, 88<br />
\<strong>in</strong>textsep length, 64, 88<br />
Irfanview, 19<br />
jpeg graphics<br />
convert<strong>in</strong>g to eps, 17<br />
convert<strong>in</strong>g to level 2 eps, 20<br />
us<strong>in</strong>g <strong>in</strong> L A TEX, 42, 43<br />
jpeg2ps, 20<br />
keepaspectratio<br />
\<strong>in</strong>cludegraphics option, 26<br />
kpsewhich, TEX path-search<strong>in</strong>g program,<br />
45<br />
kvec, 19<br />
\label comm<strong>and</strong>, 56<br />
l<strong>and</strong>scape environment, 91, 92<br />
l<strong>and</strong>scape figures, 91<br />
\leavevmode TEX comm<strong>and</strong>, 32<br />
level 2 PostScript, 20<br />
\l<strong>in</strong>espread comm<strong>and</strong>, 68<br />
lscape package, 91, 92<br />
\makeatletter comm<strong>and</strong>, 64, 88<br />
\makeatother comm<strong>and</strong>, 64, 88<br />
marg<strong>in</strong>al figures, 89<br />
\marg<strong>in</strong>par comm<strong>and</strong>, 60<br />
m<strong>in</strong>ipage<br />
align<strong>in</strong>g bottoms, 36<br />
align<strong>in</strong>g tops, 37<br />
vertical alignment, 36<br />
morefloats package, 60, 90<br />
named arguments, 9<br />
natural size, 12<br />
NetPBM, 18<br />
non-eps graphics<br />
convert<strong>in</strong>g to eps, 17<br />
convert<strong>in</strong>g to level 2 eps, 20<br />
us<strong>in</strong>g <strong>in</strong> L A TEX, 42, 43<br />
non-float<strong>in</strong>g figure, 87<br />
orig<strong>in</strong>, \<strong>in</strong>cludegraphics option, 25<br />
\Ovalbox comm<strong>and</strong>, 101<br />
\ovalbox comm<strong>and</strong>, 101<br />
overpic package, 39<br />
\pageref comm<strong>and</strong>, 56<br />
PBMPLUS, 18<br />
pict graphics<br />
convert<strong>in</strong>g to eps, 17<br />
us<strong>in</strong>g <strong>in</strong> L A TEX, 43<br />
place<strong>in</strong>s package, 56, 59<br />
Please ask a wizard, 14<br />
PostScript<br />
Level 2 Wrappers, 20<br />
\psfig comm<strong>and</strong>, 9, 32<br />
psfrag, 45<br />
\ref comm<strong>and</strong>, 56<br />
\ref comm<strong>and</strong>, strange output, 56<br />
reference po<strong>in</strong>t, 10, 11<br />
\resizebox comm<strong>and</strong>, 27<br />
\Roman counter comm<strong>and</strong>, 67<br />
\roman counter comm<strong>and</strong>, 67<br />
\rotatebox comm<strong>and</strong>, 28<br />
rotat<strong>in</strong>g package, 91, 92, 94<br />
\rotcaption comm<strong>and</strong>, 91, 94<br />
rubber length, 33, 64<br />
scale, \<strong>in</strong>cludegraphics option, 25<br />
\scalebox comm<strong>and</strong>, 27<br />
SCfigure environment, 95<br />
\shadowbox comm<strong>and</strong>, 101, 102<br />
\shadowsize length, 102<br />
\shortstack comm<strong>and</strong>, 47<br />
sidecap package, 95<br />
sidewaysfigure environment, 91, 92<br />
sidewaystable environment, 92<br />
\special comm<strong>and</strong>, 9<br />
\subfloat comm<strong>and</strong>, 106<br />
\suppressfloats comm<strong>and</strong>, 63<br />
123
\tabcaption comm<strong>and</strong>, 88<br />
TeX capacity exceeded, 41<br />
TEX search path, 39<br />
TEXINPUTS (TEX search path), 39<br />
\textfloatsep length, 63, 64<br />
\textfraction comm<strong>and</strong>, 61<br />
\thefigure comm<strong>and</strong>, 67<br />
\thickl<strong>in</strong>es l<strong>in</strong>e width, 102<br />
\th<strong>in</strong>l<strong>in</strong>es l<strong>in</strong>e width, 102<br />
tiff graphics<br />
convert<strong>in</strong>g to eps, 17<br />
convert<strong>in</strong>g to level 2 eps, 20<br />
us<strong>in</strong>g <strong>in</strong> L A TEX, 42, 43<br />
tiff2ps, 21<br />
Too Many Unprocessed Floats, 58, 60<br />
topcapt package, 67<br />
\topfigrule comm<strong>and</strong>, 65<br />
\topfraction comm<strong>and</strong>, 60, 61<br />
topnumber float placement counter, 61<br />
totalheight, 11<br />
\<strong>in</strong>cludegraphics option, 25, 33<br />
totalnumber float placement counter, 61<br />
trim, \<strong>in</strong>cludegraphics option, 25<br />
Unable to read an entire l<strong>in</strong>e, 14<br />
Unprocessed Floats, Too Many, 58, 60<br />
viewport, \<strong>in</strong>cludegraphics option, 25<br />
wide figures, 90<br />
width, 11<br />
\<strong>in</strong>cludegraphics option, 24, 25<br />
wizard, Please ask a wizard, 14<br />
WMF2EPS, 19<br />
xv, 20<br />
124