
Create successful ePaper yourself
Turn your PDF publications into a flip-book with our unique Google optimized e-Paper software.
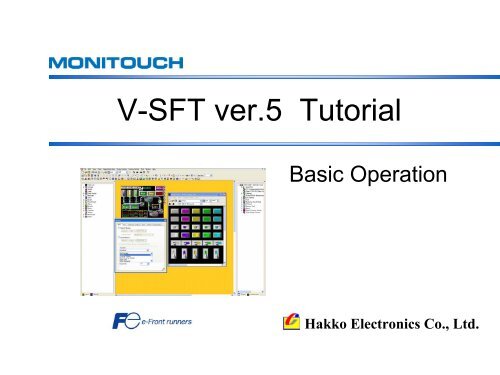
V-<strong>SFT</strong> <strong>ver.5</strong> <strong>Tutorial</strong><br />
Basic Operation<br />
Hakko Electronics Co., Ltd.
Contents<br />
1. Preparation<br />
2. How can I place lamps and switches?<br />
3. How can I display the value in PLC memory in graph?<br />
4. How can I display the value in PLC memory<br />
numerically?<br />
5. How can I change the value in PLC memory from<br />
MONITOUCH?<br />
6 How can I display the message?<br />
7 How can I display errors in their priority order?<br />
8 How can I display the error history?<br />
9 How can I display the sampled data in line graph?<br />
10. How can I display, move and transform the graphic?<br />
11.Appendix-1<br />
12. Appendix-2
• V-<strong>SFT</strong> <strong>ver.5</strong><br />
The materials used<br />
in this <strong>Tutorial</strong> are:<br />
• MONITOUCH V806 color type (QVGA)<br />
• : General Modbus RTU driver
1. Preparation<br />
1. Starting V-<strong>SFT</strong><br />
“Edit Model Selection” to “Comm. Parameter” setting<br />
2. Outlook of Ver.5 screen<br />
Outlook of Ver.5 and customizing<br />
3. Drawing lines and rectangles<br />
4. Placing “Text”<br />
5. Saving screen data<br />
6. Transferring screen data to MONITOUCH<br />
1-1
1. Starting V-<strong>SFT</strong> “Edit Model Selection” to “Comm. Parameter” setting<br />
1) Start V-<strong>SFT</strong><br />
3) PLC select<br />
(a)<br />
(b)<br />
(c)<br />
Go to [File] > [New] OR Click [New] icon<br />
2) Edit Model Selection<br />
(a) Device Connected PLC<br />
(b) MakerOthers<br />
(c) Series Modbus RTU<br />
> Click [OK]<br />
Select [V806T/C] > Click [OK]<br />
1-2
4) Device connection setting [PLC1]<br />
(a)Signal Level<br />
(b)Baudrate<br />
(c)Data Length<br />
(d)Stop Bit<br />
(e)Parity<br />
(a)<br />
(b)<br />
(c)<br />
(d)<br />
(e)<br />
1-3
5) Read/Write Area<br />
1-4
2. Outlook of <strong>ver.5</strong> screen Outlook of <strong>ver.5</strong> and customizing<br />
(a)<br />
(c)<br />
(d)<br />
(b)<br />
(a) Project View<br />
(b) Item View<br />
1-5<br />
(c) Parts List<br />
(d) Catalog View
1) Move View 2) Fix View<br />
Double-click<br />
Drag<br />
Double-click the top of the view<br />
OR [Ctrl]+ drag<br />
1-6<br />
Double-click the top of the view<br />
OR drag
3) How to display “Toolbar”<br />
4) Customizing “Toolbar”<br />
(a)<br />
(c)<br />
(b)<br />
(d)<br />
[View] > [Toolbar] > Select items to display<br />
[Tool] > [Customize]<br />
(a)<br />
(b)<br />
(c)<br />
(d)<br />
(a) Standard<br />
(b) Edit<br />
(c) Draw<br />
(d) Parts Mini<br />
1-7
3. Drawing lines and rectangles<br />
1) Select line color<br />
3) Drawing a line<br />
Click the arrow next to “Pen” icon > Select line color<br />
2) Select line type<br />
Click [Straight Line] icon > Drag the cursor<br />
4) Cancel the drawing mode<br />
Click the arrow next to “Line” icon > Select line type<br />
Right-click OR Click anywhere on the screen<br />
1-8
3. Drawing lines and rectangles<br />
1) Select frame type<br />
3) Select paint color<br />
Click the arrow next to [Frame Type] icon<br />
> Select frame type<br />
2) Select line color and line type<br />
Click the arrow next to [Paint] icon<br />
> Select paint color<br />
4) Drawing a rectangle<br />
Select line color and line type<br />
1-9<br />
Click [Rectangle] icon > Select “Rectangle”<br />
Drag the cursor from the start-point to the<br />
end-point
4. Placing “Text”<br />
1) Property Setting 3) Making text area<br />
(a)<br />
(b)<br />
a) Color<br />
b) Paint / Background color<br />
Select the color for text and background<br />
2) Select [Text]<br />
Drag from the start-point<br />
to the end-point<br />
4) Edit text<br />
Blinking cursor<br />
appears<br />
Screen 1<br />
Click [Text] icon > Select [Text]<br />
Edit the text in text area<br />
1-10
5. Saving screen data<br />
1-1) Save<br />
2) Naming file and selecting “Save in”<br />
1-2) Save As…<br />
3) Created files and their extension<br />
1-11
6. Transferring screen data<br />
1) Necessary tools<br />
3) COM port setting<br />
Cable: V-CP<br />
(Dsub9M-RJ45)<br />
2) Connection 4) Transfer<br />
1-12
2. How can Iplace lamps and switches?<br />
Completed screen<br />
Lamp lights up and off according to bit<br />
memory’s ON/OFF status.<br />
Lamp lights up<br />
Bit ON<br />
Switch controls PLC bit to ON/OFF.<br />
Also, wide variety of switch functions<br />
such as displaying pop-up window,<br />
switching the screens are available.<br />
Function used : Lampby Wizard<br />
Switch (by Wizard<br />
2-1<br />
Bit ON
1) Start “Wizard”<br />
3) [Style Setting]<br />
[Catalog View] > [Wizard]tab > [Lamp]<br />
2) [Select Part]<br />
Click [Next]<br />
4) [Memory Setting]<br />
Select parts list > Select part > Click [Next]<br />
Set lamp memory > Click [Next]<br />
2-2
5)[Input Text]<br />
7) Multi-copy<br />
(a)<br />
(a)<br />
(b)<br />
(b)<br />
Enter text on lamp > Click [Place]<br />
6) Placing a lamp 8) Placing multiple lamps<br />
Place a lamp by dragging it<br />
Multi-copy completed<br />
2-3
1) Start “Wizard” 3) [Style Setting]<br />
[Catalog View] > [Wizard]tab > [Switch]<br />
2) [Select Part]<br />
Click [Next]<br />
4) [Function Select]<br />
Select parts list > Select part > Click [Next]<br />
Select [Standard Switch] > Click [Next]<br />
2-4
5) [Memory Setting] 7) Multi-copy<br />
Set switch memory > Click [Next]<br />
Placing 4 switches by multi-copy and copy<br />
6) [Input Text]<br />
8) Setting for Output Action<br />
(a)<br />
(b)<br />
Enter text on switch > Click [Place]<br />
2-5
Operation Check<br />
Check the function of each switch with different output action.<br />
2-6
3. How can Idisplay the value in PLC register<br />
in graph?<br />
Completed Screen<br />
Visualizing numeric data in PLC register<br />
in graph format.<br />
Graph can improve the visibility even<br />
more by using “Alarm” function to<br />
change the color of graph.<br />
Function used: Bar Graph (by Wizard)<br />
Panel Meter (by Wizard)<br />
Statistic Pie Graph (by Wizard)<br />
3-1<br />
In this chapter, we will place a bar graph,<br />
a panel meter and a statistic pie graph.
1) Start “Wizard”<br />
3) [Memory Setting]<br />
[Catalog View] > [Wizard] tab> [Graph] > [Bar Graph]<br />
2) [Select Part]<br />
Set graph memory > Click [Next]<br />
4) [Color Setting]<br />
Select parts list > Select part > Click [Next]<br />
Click [Next]<br />
3-2
5) [Alarm Setting]<br />
7) Separate Color Display<br />
(a)<br />
(b)<br />
(c)<br />
Set alarm > Click [Place]<br />
(a) Upper Limit: 70 (Red)<br />
(b) Lower Limit: 30 (Yellow)<br />
6) Copy bar graph<br />
Copying the graph by copy & paste<br />
3-3
1) Start “Wizard”<br />
3) [Memory Setting]<br />
[Catalog View] > [Wizard] tab > [Graph] > [Panel Meter]<br />
2) [Select Part]<br />
Set panel meter memory > Click [Next]<br />
4) [Color Setting]<br />
Select parts list > select part > Click [Next]<br />
Change color for “Indicator” > Click [Next]<br />
3-4
5) [Alarm Setting]<br />
(a)<br />
(b)<br />
(c)<br />
Use Alarm > Click [Place]<br />
6) Placing a panel meter<br />
3-5
1) Start “Wizard”<br />
3) [Memory Setting]<br />
[Catalog View] > [Wizard] tab > [Graph]<br />
> [Statistic Pie Graph]<br />
2) [Select Part]<br />
Set the top address of statistic pie graph memory<br />
> Click [Next]<br />
4) [Image]<br />
Select parts list > Select part > Click [Next]<br />
Place % display > Click [Place]<br />
3-6
5) Placing a statistic pie graph 7) % display<br />
6) Link Cancel<br />
8) Placing % displays<br />
Right-click on graph > Select [Link Cancel]<br />
3-7
Operation Check<br />
Check how each graph displays by entering the value in PLC memory.<br />
3-8
4. How can I display the value in PLC<br />
me m ory numerically?<br />
Completed screen<br />
Displaying the value in PLC memory<br />
as numerical display on MONITOUCH.<br />
Alarm setting enables the display in<br />
different color, e.g. when exceeding a<br />
normal range.<br />
Function used: Numerical Display (by Wizard)<br />
4-1
1) Start “Wizard”<br />
3) [Function Select]<br />
[Catalog View] > [Wizard] tab > [Data Display]<br />
> [Num. Display]<br />
Select “Num. Display” > Click [Next]<br />
2) [Select part] 4) [Mem./Dis. Setting]<br />
Select part > [ Place Multiple Parts] > Click [Next]<br />
[Set the Memory] > Click [Next]<br />
4-2
5) [Char. Prof. Setting] 7) [Place Multiple Parts]<br />
Click [Next]<br />
Set [Quantity] and [Inc. Memory] > Click [OK]<br />
6) [Detail Setting]<br />
8) Num. Display and text placing<br />
[ Use Alarm] > [Max]/[Min] setting > Click [Place]<br />
4-3<br />
Place part > Place text
Operation Check<br />
Check the dipaly on MONITOUCH by changing the value in PLC memory 4 00300 to 4 00304.<br />
4 00300<br />
4 00301<br />
4 00302<br />
4 00303<br />
4 00304<br />
4-4
5. How can Ichange the value in PLC me m ory<br />
from MONITOUCH?<br />
Completed screen<br />
Entering the value directly to the PLC<br />
memory by using keypad on<br />
MONITOUCH.<br />
Pop-up<br />
Keypad<br />
appears<br />
4 00400<br />
4 00401<br />
4 00402<br />
Function used: Entry Mode (by Wizard)<br />
5-1
1) Start “Wizard”<br />
3) [Function Select]<br />
[Catalog View] > [Wizard] tab > [Data Display]<br />
> [Num. Display]<br />
Select “Entry Target” > Click [Next]<br />
2) [Select part]<br />
Select part > [ Place Multiple Parts] > Click [Next]<br />
5-2
4-1) [Input Setting] 5) [Mem./Dis. Setting]<br />
“Display only when Necessary” > “Register”<br />
Set the Memory > Click [Next]<br />
4-2) [Input Setting] (“Select” button)<br />
6) [Char. Prop. Setting]<br />
Click “Select” button > Select keypad part<br />
> Click [Next]<br />
5-3<br />
Click [Next]
7) [ Detail Setting ]<br />
9) Place parts<br />
[ Use Alarm] > [Max]/[Min] setting > Click [Place]<br />
Place parts on the screen<br />
10) Position adjustment and text placement<br />
(a)<br />
(a) Quantity X: 1<br />
Quantity Y: 5<br />
(b)<br />
(b) Numerical<br />
Data Memory : 1<br />
Set [Quantity] > [OK]<br />
5-4<br />
Adjust the parts position > Place texts
Operation Check<br />
Let’s try to enter the value using a keypad.<br />
4 00400<br />
4 00401<br />
4 00402<br />
4 00403<br />
4 00404<br />
5-5
6. How can I display the message?<br />
Completed screen<br />
Creating this part<br />
Registering the messages beforehand<br />
and display them according to the<br />
value in PLC memory.<br />
1) Linking the message and<br />
PLC memory beforehand…<br />
When 4 00500=0 When 4 00500=3<br />
Function used: Comment Display<br />
6-1<br />
2) Enter the value to PLC memory and the<br />
corresponding message is prompted.
1) Project View<br />
2) Selecting “Group No.”<br />
Group “0”> Click [OK]<br />
3) Open [Comment Edit] dialog<br />
[Project View] > [Screen] tab > [Comment]<br />
> [New]<br />
6-2<br />
[Comment Edit] dialog is prompted.
4) Edit Comment 4-1) Editing “Comment” as follows:<br />
(a)<br />
Comment 1: V712iSD Comment 3 V706MD<br />
SVGA 800x600<br />
QVGA 320x240<br />
32k Color<br />
MONO<br />
CF Card<br />
CF Card (Option)<br />
SRAM 64kbyte<br />
SRAM 128kbyte<br />
Video/Sound<br />
Ethernet (Option)<br />
Ethernet<br />
CE/UL/cUL<br />
CE/UL/cUL Comment 4: V606eM20<br />
Comment 2: V710CD<br />
QVGA 320x240<br />
VGA 640x480<br />
MONO<br />
128 Color SRAM 128kbyte<br />
CF Card<br />
CE/UL/cUL<br />
SRAM 64kbyte Comment 5: V606eM10<br />
CE/UL/cUL<br />
QVGA 320x240<br />
MONO<br />
CE/UL/cUL<br />
4-2) [Font] setting (Click (a))<br />
(b) Color<br />
(b)<br />
(c) Bold<br />
(d) Italic<br />
Edit “Comment”<br />
> Click [X] button to close the dialog<br />
6-3<br />
(c) (d) (e)<br />
(e) Transparent
5) Place “Comment Display”<br />
7) “Display Area” dialog<br />
[Catalog View] > [Message] > [Comment Display]<br />
> Drag<br />
Double-click “Display Area”<br />
> [Display Area] dialog prompted.<br />
6) “Comment Display” setting<br />
Double-click the icon<br />
> [Comment Display]<br />
dialog prompted<br />
Select [Word Designation]<br />
> Set [Command Memory]<br />
Command Memory : 4 00500<br />
6-4<br />
Change [Color]
8) Change “Grid”<br />
9) Adjust “Display Area” size<br />
Right-click > [Grid]> [Grid Setting]> [OK]<br />
Adjust the area to include 8 lines<br />
(a)<br />
(b)<br />
(a)<br />
(b)<br />
ON Grid<br />
Grid Type: 1-Byte<br />
6-5
Operation Check<br />
Check if the corresponding message is displayed by changing the value in<br />
PLC memory 4 00500.<br />
6-6
7. How can Idisplay errors in their<br />
priority order?<br />
Completed screen<br />
Displaying the error message in their priority<br />
order, not in chronological order.<br />
When an alarm bit is set ON, corresponding<br />
error message is displayed from the top of the<br />
display area. Error message which has more<br />
priority comes to the top of the display area.<br />
When an error is corrected(alarm bit OFF), the<br />
corresponding error message disappears.<br />
Function used : Bit Order Alarming<br />
Alarm Sub Display<br />
This chapter explains how to create the screen<br />
to display error messages in the upper half and<br />
sub display for error messages in the lower half<br />
of the screen.<br />
7-1
1) Select from [Catalog View] 2) Placing “Bit Order Alarming” parts<br />
[Bit Order Alarming] > Click and drag it to the screen<br />
[Catalog View] > [Parts]tab > [Alarm]<br />
> [Bit Order Alarming]<br />
7-2
3) Link Cancel<br />
5) Adjust “Display Area” size<br />
Right-click > [Change Part]> [Link Cancel]<br />
Handle display > Cancel handle display by a click<br />
4) Changing “Grid”<br />
Adjust the area to include four lines<br />
6) Detail setting<br />
(a)<br />
(b)<br />
Right-click > [Grid]> [Grid Setting]> [OK]<br />
(a) ON Grid<br />
(b) Grid Type: 1-Byte 7-3<br />
Double-click the icon on the top left of the<br />
area<br />
> [Bit Order Alarming] dialog opens
7) [Main] tab setting 8) Message Edit<br />
(a)<br />
(b)<br />
(c)<br />
(d)<br />
(e)<br />
(a) Memory: PLC 1 00100<br />
(b) Start Message: G. No. 0, No.0<br />
(c) Executing Relays: 5<br />
(d) No. of Lines per Relay: 1<br />
(e) Action Area: Display Area<br />
After completing, click [Open…]<br />
> [Message] dialog appears<br />
Edit 5 messages starting from 00000<br />
> Click after completion<br />
--- Message to edit ---<br />
00000 : Error 1<br />
00001 : Error 2<br />
00002 : Error 3<br />
00003 : Error 4<br />
00004 : Error 5<br />
7-4
9) [Sub-action] tab setting 11) Display “Preview”<br />
(a) Type: Sub-Display<br />
10) [Style] tab setting<br />
(a) Enlarge: X – 1, Y – 2<br />
After completing setting, click<br />
[View]> [Display Environment]<br />
> [Display Message]<br />
> [OK]<br />
7-5
12) Place “Alarm Sub Display” parts 13) Link Cancel<br />
Right-click > [Change Part]> [Link Cancel]<br />
Handle display > Cancel handle display by a click<br />
14) Adjust “Display Area” size<br />
[Alarm] > [Alarm Sub Display]<br />
> Click and drag it to the screen<br />
7-6<br />
Adjust the area size to include four lines
15) Detail setting 17-1) Page Block Edit1. Register messages<br />
Double-click the icon on the top left of “Display Area”<br />
16) [Main]tab setting<br />
(a)<br />
(b)<br />
(c)<br />
Set “1” to [Message Group] in the right dialog<br />
> Click “Edit”<br />
> Register 5 multi-line messages in Group 1<br />
(a) Link ID: 0<br />
(b) Block: Page Block<br />
(c) Block No.: 0<br />
00256: a<br />
00257: aa<br />
00258: aaa<br />
00259: aaaa<br />
00269: aaaaa<br />
00276: e<br />
00277: ee<br />
00278: eee<br />
00279: eeee<br />
00280: eeeee<br />
After completing setting, click [Open…]<br />
> “Page Block Edit” dialog appears 7-7<br />
> Click [Registration Complete] and after<br />
editing messages<br />
> Back to “Page Block Edit”
17-2) Page Block Edit 2. Creating “Page Block”<br />
Block<br />
0<br />
Block 1<br />
Block 2<br />
Block 3<br />
Page Block setting are;<br />
Block 0: Message G1: Line 0 - 4<br />
Block 1: Message G1: Line 5 - 9<br />
Block 2: Message G1: Line 10 - 14<br />
Block 3: Message G1: Line 15 - 19<br />
Block 4: Message G1: Line 20 - 24<br />
Block 4<br />
Make sure “0” is selected for [Block No.] on the left<br />
hand side<br />
> Select the start message and end message to<br />
include in Block 0 (Click the start message and the<br />
end message with “Shift” key held down<br />
> Click [Register] button in the middle<br />
> Change [Block No.] from “0” to “1”<br />
> Select the start message and end message to<br />
include in Block 1<br />
> Create 5 Blocks (to No. 4) in the same way as<br />
above<br />
After completing, click<br />
at the top right corner<br />
7-8<br />
18) Completed screen
Operation Check<br />
Check if the corresponding message is displayed by setting error bits<br />
(starting from 1 00100.<br />
Error message by<br />
Bit Order Alarming<br />
Sub-display by Alarm<br />
Sub-display with Page<br />
Block<br />
7-9
8. How can I display the error history?<br />
Completed screen<br />
Sampling error messages and time stamps<br />
according to bit action and display on the<br />
screen as error history.<br />
In this chapter, four error bits are monitored.<br />
ON<br />
OFF<br />
Function used Alarm Tracking<br />
by Wizard<br />
1 00017<br />
1 00018<br />
1 00019<br />
Log and display error<br />
history<br />
Monitor alarm bit status<br />
8-1
1) Start “Wizard”<br />
3) [Style Setting]<br />
[Catalog View] > [Wizard] tab > [Alarm] ><br />
[Alarm Tracking]<br />
2) [Select Part]<br />
[Set the character property] > [Next]<br />
4) [Select Part to Append]<br />
[#6[3D 320*240]] > [Next]<br />
[Select a switch] > [Next]<br />
8-2
5) [Buffering Area Select]<br />
[Item List] > Select [0] > [Next]<br />
6) [Buffering Area Setting]<br />
(b)<br />
(a)<br />
(a) [Specify Top Memory] 1 00017<br />
(b) [Word Count] : 1 word<br />
[Specify Top Memory] > [Word Count] > [Next]<br />
8-3
7) [Storing Target Setting]<br />
(a) [No. of Saved Data] : 1000<br />
(b) [Specify the storing target] : SRAM<br />
(b)<br />
(a)<br />
8-4
8) [Resister Messages] 9) [Error Display Setting]<br />
(a)<br />
[G No.]> Double click “Message” column.<br />
(b)<br />
(c)<br />
[Select the history display] > [Select the display<br />
format for date and time] > [Next]<br />
Edir Message [2]<br />
8-5<br />
[Place]
11) Place “Alarm Tracking” parts<br />
12) Place a format switch<br />
8-6
Preparation for Operation Check<br />
Initial format of SRAM area<br />
SRAM <br />
8-7
Operation Check<br />
Set error bits and see how the error history is displayed.<br />
8-8
9. How can I display the sampled data<br />
in line graph?<br />
Completed screen<br />
Display the periodically sampled numeric data<br />
in line graph format. The sampled data is<br />
stored in the area called “Buffering Area” in<br />
MONITOUCH, so you can see the data<br />
history as well.<br />
In this chapter, we will monitor 2 words of<br />
PLC memory addresses(4 00600 and 4<br />
00601) then display the history in line graph.<br />
Function used : Trend Sampling (by Wizard)<br />
Monitor PLC<br />
memory<br />
Display in line graph<br />
Store the data<br />
9-1
1) Start “Wizard”<br />
2) [Select Part]<br />
[Catalog View] > [Wizard]tab<br />
> [Trend Graph] > [Trend Sampling]<br />
Select “#3 [3D 320*240 Metal]” > [Next]<br />
9-2
3) [Select Part to Append]<br />
5) [Buffering Area Setting]<br />
(d)<br />
(a)<br />
(c)<br />
(b)<br />
Click [Next]<br />
4) [Buffering Area Select] [Buffering Area Setting] details<br />
a) [Specify a sampling method]: Constant Sampling<br />
b) [ Specify Top Memory]: PLC memory 4 00600<br />
c) [Word Count]: 2 (Word)<br />
d) [Monitoring Time]: 5 (sec)<br />
e) Start Bit<br />
> [Next]<br />
Select “1” for “Item List” > Click [Next]<br />
9-3
6) [Storage Target Setting] 8) [CSV Output Format (Attribute setting)]<br />
(b)<br />
(a)<br />
9) [CSV Format]<br />
(a) [No. of Saved Data] : 1000<br />
(b) [Specifying the storing target] : SRAM > [Next]<br />
7) [Buffering Area Function]<br />
10) [a graph image]<br />
Use a Calculation Operation<br />
Use Start Bit<br />
9-4<br />
[X Axis Data Points]: 10 > [Next]
11) [Display Type Setting] [Graph No.1]<br />
(a)<br />
(b)<br />
(c)<br />
[Graph No.0] and [Graph No.1] setting<br />
> [Next]<br />
[Graph No.0]<br />
[Graph No.0] and [Graph No.1] details<br />
(a)<br />
(b)<br />
(c)<br />
(a) [Sampling Buffer Word No.] :<br />
graph No.0 0<br />
graph No.1 1<br />
(b) [Graph Min. (Max.) Value] :<br />
graph No.0 Min. 0<br />
Max. 100<br />
graph No.1 Min. 0<br />
Max. 500<br />
(c) [Line Graph] color : any<br />
> [OK]<br />
9-5
12) [Reference Line Setting]<br />
(b)<br />
(a)<br />
[Reference Line Setting] details<br />
(a) [Set a scale] :<br />
Graph Max.: 10<br />
Graph Min.: 0<br />
(b) [Define the area] : Tick all<br />
Reference Line1 : 9<br />
Reference Line2 : 6<br />
Reference Line3 : 4<br />
Reference Line4 : 1<br />
> [Place]<br />
9-6
Preparation for Operation Check<br />
Initial format of SRAM area<br />
SRAM <br />
9-7
Operation Check<br />
Check how the changing values of PLC memory addresses are displayed<br />
with each line graph.<br />
(b)<br />
(a)<br />
9-8
10. How can Idisplay, move and<br />
transform the graphic?<br />
Completed screen<br />
Display<br />
Move and Transform<br />
Bit OFF Set a bit ON Give value to Parameter<br />
Move and transform<br />
the graphic by giving<br />
value to Parameter<br />
Function used : Graphic Relay Mode<br />
10-1
1) Select from [Catalog View] 3) Enlarge the part<br />
[Catalog view] > [Parts] tab > [Graphic]<br />
> [Graphic Relay]<br />
2) Place “Graphic Relay” part<br />
Select the part and enlarge by dragging outward<br />
[Graphic Relay] > Click and drag it to the screen<br />
10-2
4) “Graphic Relay” setting 5) [Main] tab setting<br />
(a)<br />
(c)<br />
(b)<br />
(d)<br />
(e)<br />
Double-click the icon on the top left corner<br />
[Main] tab setting<br />
(a) [Memory]:4 00700-00<br />
(b) [Start Graphic]: G No 0 No 0<br />
(c) [No. of Relays]:1<br />
(d) [No. of Parameter Words]:3<br />
(e) [Type]:1-Graphic<br />
Click after completion<br />
10-3
6) Open [Graphic Library] 8) Draw a circle in [Graphic Library00]<br />
[Project view] > [Screen]tab > [Graphic Library]<br />
> [New]<br />
Click “Circle” icon on “Draw” toolbar and draw<br />
7) Select [Graphic Library00] 9) Place a circle<br />
Select “0” to each [Group No.] and [No]<br />
> Click [OK] 10-4
10) Open [Parameter] dialog<br />
11) [Parameter Setting] tab setting<br />
(a)<br />
(b)<br />
(c)<br />
(d)<br />
Select the circle > click “Parameter” icon<br />
[Parameter Setting] tab setting<br />
(a) [Action]: Animation<br />
(b) [Center X]: Increment + 1<br />
(c) [Center Y]: Increment + 2<br />
(d) [Radius]: Increment + 3<br />
Click after completion<br />
10-5
12) Close [Graphic Library] screen<br />
Close [Graphic Library00]<br />
10-6
Operation Check<br />
Display, move and transform the graphic.<br />
(1)<br />
(3)<br />
Bit 0 of 4 00700: OFF<br />
Bit 0 of 4 00700 : ON, 4 00701(X axis) : 150,<br />
4 00702 (Y axis) : 40<br />
(2) (4)<br />
Bit 0 of 4 00700 : ON<br />
10-8<br />
Bit 0 of 4 00700 : ON, 4 00701(X axis) : 150,<br />
4 00702 (Y axis) : 40, 4 00703 (Radius) : 40
Appendix-1. How can Ichange the screen to be<br />
displayed by using a switch?<br />
Screen 0<br />
Completed screen<br />
Screen 1<br />
Click the switch.<br />
Screen 1 displayed.<br />
Function usedSwitch<br />
Appendix 1-1
1) Select from [Catalog View]<br />
3) Placement of Switch<br />
Drag<br />
[Catalog view] > [Parts] tab > [Parts List]<br />
Select Switch > Place by dragging<br />
2) Select from [Parts List]<br />
Click<br />
to close [Parts List]<br />
(a)<br />
(b)<br />
Select Switch from [Parts List]<br />
(a) Switch<br />
(b) #15 [3D-I 2Pattern]<br />
Appendix 1-2
4) Open [Item view]<br />
6) [Text] tab setting<br />
Click the switch that was placed<br />
5) [Main] tab setting<br />
Input the text to display on Switch<br />
> Click of Item view to close<br />
7) [Text] Placement<br />
Set up under Main tab<br />
(a)<br />
(b)<br />
(a) Standard<br />
(b) Screen<br />
(c) Screen No.: 1<br />
(c)<br />
Set the function of Switch under [Main] tab<br />
Place [Text] on the screen<br />
Appendix 1-3
Operation Check<br />
Let’s shift the display from Screen 0 to Screen 1 by pressing the switch.<br />
<br />
<br />
Appendix 1-4
Appendix-2. How can I debug on PC?<br />
Screen 0<br />
Screen 1<br />
Check the operation by clicking the switch on PC<br />
Check the operation by entering some value in PLC memory<br />
Functions usedEmulator and Simulator<br />
Appendix 2-1
1) Start [Emulator] 3) Press switch<br />
[File] > [Start Emulator]<br />
Click the switch to light the lamp up<br />
2) Operation check of Switch and Lamp 4) Move to Screen 1<br />
Set a mouse by a Switch on [Emulator]<br />
Appendix 2-2<br />
Move to Screen 1 with a Switch
5) Start [Simulator] 6) Enter the value to 4 00200<br />
Enter “75”> Click [OK]<br />
[Simulator] automatically starts up when [Emulator] runs<br />
7) Operation Check<br />
(a) (b) (c)<br />
Confiuration of [Simulator]<br />
(a) Address: Memory list currently used on the Screen No1<br />
(b) Value: Present value of the memory<br />
(c) Item: Name of the item, which the memory is used<br />
Double-click (b)<br />
Appendix 2-3
8-1) Memory Counter Setting 8-3) Memory Counter Setting<br />
Double-click “Value” of 4 00201<br />
Set Memory Counter in 4 00202, 4 00203 and 4 00204<br />
8-2) Memory Counter Setting<br />
(a)<br />
(b)<br />
(c)<br />
Click OK after setting<br />
4 00201 Write into Memory Setting<br />
(a)<br />
Use Memory Counter<br />
(b) Increment : 10<br />
(c) Interval Timer : 10<br />
4 00202 Write into Memory Setting<br />
(a) Use Memory Counter<br />
(b) Increment : 15<br />
(c) Interval Timer : 10<br />
4 00203 Write into Memory Setting<br />
(a)<br />
Use Memory Counter<br />
(b) Increment : 20<br />
(c) Interval Timer : 10<br />
4 00204 Write into Memory Setting<br />
(a)<br />
Use Memory Counter<br />
(b) Increment : 25<br />
(c) Interval Timer : 10<br />
Appendix 2-4
9) Start Memory Counter<br />
Click on mark > Hourglass will be shown<br />
10) Operation Check<br />
4 00204<br />
4 00201<br />
4 00203<br />
4 00202<br />
Appendix 2-5
Reference: How to use “Simulator”<br />
Simulator enables you to debug your program on V8 without connecting PLC.<br />
On V-<strong>SFT</strong>-5<br />
1) [File] >[Transfer]<br />
3) Set COM port<br />
2) Check [Use Simulator]<br />
4) Transfer screen program and special<br />
driver<br />
Appendix 2-6
On V8 unit<br />
1) [Main Menu] > [Simulator]<br />
3) Press [Setting Finished]<br />
You will see [Simulator] button only when you<br />
check [Use Simulator] and download special<br />
driver to V8.<br />
2) Press [Simulator] to talk to Simulator<br />
Appendix 2-7
Debugging using Simulator<br />
Click [SIM] icon.<br />
Run Simulator and test your<br />
program.<br />
Appendix 2-7