EWP-1000 User Guide - Advanced Wireless Communications
EWP-1000 User Guide - Advanced Wireless Communications
EWP-1000 User Guide - Advanced Wireless Communications

Create successful ePaper yourself
Turn your PDF publications into a flip-book with our unique Google optimized e-Paper software.
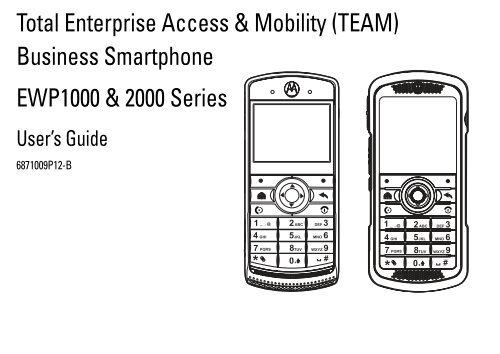
Total Enterprise Access & Mobility (TEAM)<br />
Business Smartphone<br />
<strong>EWP</strong><strong>1000</strong> & 2000 Series<br />
<strong>User</strong>’s <strong>Guide</strong><br />
6871009P12-B<br />
1 _ , @ 2ABC<br />
DEF3<br />
4 GHI 5JKL<br />
MNO 6<br />
7 PQRS 8TUV<br />
WXYZ 9<br />
* 0 #<br />
+<br />
1 _ , @ 2 ABC DEF3<br />
4 GHI 5JKL<br />
MNO 6<br />
7 PQRS 8TUV<br />
WXYZ 9<br />
*<br />
0+<br />
#
Contents<br />
about this guide . . . . . . . . . . . . . . . . . . . . . . . . . . . 1<br />
general description . . . . . . . . . . . . . . . . . . . . . . . . 2<br />
basic smartphone features . . . . . . . . . . . . . . . . . . 3<br />
<strong>EWP</strong><strong>1000</strong> front and left sides . . . . . . . . . . . . . . . . . . 3<br />
<strong>EWP</strong><strong>1000</strong> back and right sides . . . . . . . . . . . . . . . . . 4<br />
<strong>EWP</strong>2000 front and left sides . . . . . . . . . . . . . . . . . . 5<br />
<strong>EWP</strong>2000 back and right sides . . . . . . . . . . . . . . . . . 6<br />
main screens . . . . . . . . . . . . . . . . . . . . . . . . . . . . . . . 7<br />
the programs screen . . . . . . . . . . . . . . . . . . . . . . . . . 8<br />
approved accessories . . . . . . . . . . . . . . . . . . . . . 11<br />
safety and general information . . . . . . . . . . . . . . 13<br />
grant of equipment authorization . . . . . . . . . . . . 15<br />
use and care. . . . . . . . . . . . . . . . . . . . . . . . . . . . . 18<br />
caring for the environment by recycling . . . . . . . 19<br />
disposal of your smartphone and accessories . . 20<br />
essentials. . . . . . . . . . . . . . . . . . . . . . . . . . . . . . . 21<br />
battery . . . . . . . . . . . . . . . . . . . . . . . . . . . . . . . . . . 21<br />
battery installation 21<br />
<strong>EWP</strong>2000 series battery removal 22<br />
<strong>EWP</strong><strong>1000</strong> series battery removal 22<br />
battery charging 23<br />
battery life conservation 24<br />
battery tips 24<br />
storage card . . . . . . . . . . . . . . . . . . . . . . . . . . . . . . 26<br />
basics. . . . . . . . . . . . . . . . . . . . . . . . . . . . . . . . . . 27<br />
turn handset on & off. . . . . . . . . . . . . . . . . . . . . . . 27<br />
username and passwords . . . . . . . . . . . . . . . . . . . 27<br />
display . . . . . . . . . . . . . . . . . . . . . . . . . . . . . . . . . . 27<br />
to find a menu feature . . . . . . . . . . . . . . . . . . . . . . 29<br />
status indicators. . . . . . . . . . . . . . . . . . . . . . . . . . . 30<br />
text entry . . . . . . . . . . . . . . . . . . . . . . . . . . . . . . . . 31<br />
volume control . . . . . . . . . . . . . . . . . . . . . . . . . . . . 34<br />
speakerphone controls. . . . . . . . . . . . . . . . . . . . . . 34<br />
lock & unlock smartphone . . . . . . . . . . . . . . . . . . . 35<br />
calling . . . . . . . . . . . . . . . . . . . . . . . . . . . . . . . . . 37<br />
Contents<br />
i
make a phone call . . . . . . . . . . . . . . . . . . . . . . . . . . 37<br />
answer a call. . . . . . . . . . . . . . . . . . . . . . . . . . . . . . 38<br />
make a PTT call (Push-to-Talk) . . . . . . . . . . . . . . . . 38<br />
receive a PTT call . . . . . . . . . . . . . . . . . . . . . . . . . . 39<br />
PTT call request . . . . . . . . . . . . . . . . . . . . . . . . . . . 39<br />
send a PTT call request 40<br />
respond to PTT call request 40<br />
PTT group call . . . . . . . . . . . . . . . . . . . . . . . . . . . . . 40<br />
receive a PTT group call 41<br />
join an active PTT group 41<br />
store a phone number . . . . . . . . . . . . . . . . . . . . . . . 42<br />
conference call . . . . . . . . . . . . . . . . . . . . . . . . . . . . 44<br />
customize . . . . . . . . . . . . . . . . . . . . . . . . . . . . . . 45<br />
profiles. . . . . . . . . . . . . . . . . . . . . . . . . . . . . . . . . . . 45<br />
sound. . . . . . . . . . . . . . . . . . . . . . . . . . . . . . . . . . . . 45<br />
download a sound file 46<br />
deleting ring tones 46<br />
time & date . . . . . . . . . . . . . . . . . . . . . . . . . . . . . . . 47<br />
phone. . . . . . . . . . . . . . . . . . . . . . . . . . . . . . . . . . . . 47<br />
active PTT group 47<br />
auto answer 48<br />
call forwarding 48<br />
call options 48<br />
caller ID 48<br />
channels 49<br />
DTMF 49<br />
fixed dialing 49<br />
display . . . . . . . . . . . . . . . . . . . . . . . . . . . . . . . . . . . 49<br />
change background image 50<br />
backlight. . . . . . . . . . . . . . . . . . . . . . . . . . . . . . . . . . 51<br />
answer options . . . . . . . . . . . . . . . . . . . . . . . . . . . . 52<br />
third-party applications . . . . . . . . . . . . . . . . . . . . . . 52<br />
task manager . . . . . . . . . . . . . . . . . . . . . . . . . . . . . . 52<br />
managing calls . . . . . . . . . . . . . . . . . . . . . . . . . . 53<br />
turn off ringer. . . . . . . . . . . . . . . . . . . . . . . . . . . . . . 53<br />
recent calls. . . . . . . . . . . . . . . . . . . . . . . . . . . . . . . . 53<br />
redial . . . . . . . . . . . . . . . . . . . . . . . . . . . . . . . . . . . . 55<br />
view missed calls. . . . . . . . . . . . . . . . . . . . . . . . . . . 55<br />
caller ID . . . . . . . . . . . . . . . . . . . . . . . . . . . . . . . . . . 55<br />
speed dial. . . . . . . . . . . . . . . . . . . . . . . . . . . . . . . . . 55<br />
access speed dial entries 56<br />
set speed dial numbers 56<br />
set menu shortcuts to speed dial 56<br />
delete a shortcut. 57<br />
voicemail . . . . . . . . . . . . . . . . . . . . . . . . . . . . . . . . . 57<br />
transfer a call. . . . . . . . . . . . . . . . . . . . . . . . . . . . . . 57<br />
in-call notifications . . . . . . . . . . . . . . . . . . . . . . . . . 58<br />
ii<br />
Contents
e-mail & messages . . . . . . . . . . . . . . . . . . . . . . . 60<br />
receive & read messages . . . . . . . . . . . . . . . . . . . . 60<br />
message attachments 60<br />
message options 61<br />
send a message. . . . . . . . . . . . . . . . . . . . . . . . . . . . 62<br />
global address look up . . . . . . . . . . . . . . . . . . . . . . 62<br />
messaging quick reference . . . . . . . . . . . . . . . . . . . 64<br />
connections . . . . . . . . . . . . . . . . . . . . . . . . . . . . . 69<br />
PTT & stereo headsets . . . . . . . . . . . . . . . . . . . . . . 69<br />
Bluetooth headset . . . . . . . . . . . . . . . . . . . . . . . . 69<br />
turn Bluetooth power on or off 69<br />
pair with a headset or handsfree device 70<br />
send objects to another device 71<br />
advanced Bluetooth features 71<br />
synchronize . . . . . . . . . . . . . . . . . . . . . . . . . . . . . . . 72<br />
sync over the air 72<br />
sync with a computer 73<br />
installing & setting up ActiveSync 73<br />
sync with a cable connection 74<br />
sync with Bluetooth connection 74<br />
entertainment . . . . . . . . . . . . . . . . . . . . . . . . . . . 76<br />
web browser . . . . . . . . . . . . . . . . . . . . . . . . . . . . . . 76<br />
view stored pictures and video . . . . . . . . . . . . . . . . 77<br />
play a video clip 78<br />
video playback options 78<br />
other features . . . . . . . . . . . . . . . . . . . . . . . . . . . 80<br />
quick access key. . . . . . . . . . . . . . . . . . . . . . . . . . . 80<br />
programmable key 80<br />
TTY calls 80<br />
advanced calling . . . . . . . . . . . . . . . . . . . . . . . . . . 80<br />
call forwarding 80<br />
voice dial 81<br />
contacts . . . . . . . . . . . . . . . . . . . . . . . . . . . . . . . . . 81<br />
search for contact 81<br />
call a phone number in a message 81<br />
edit contact 82<br />
set ringer ID for a contact 82<br />
set picture ID for contact 82<br />
send contact to another device 83<br />
personalizing . . . . . . . . . . . . . . . . . . . . . . . . . . . . . 83<br />
language 83<br />
accessibility 84<br />
ring volume 84<br />
call times . . . . . . . . . . . . . . . . . . . . . . . . . . . . . . . . 86<br />
network connections . . . . . . . . . . . . . . . . . . . . . . . 87<br />
calendar . . . . . . . . . . . . . . . . . . . . . . . . . . . . . . . . . 87<br />
Contents<br />
iii
calculator. . . . . . . . . . . . . . . . . . . . . . . . . . . . . . . . . 89<br />
internet security . . . . . . . . . . . . . . . . . . . . . . . . . . . 90<br />
smartphone information . . . . . . . . . . . . . . . . . . . . . 90<br />
smartphone administration data. . . . . . . . . . . . . . . 91<br />
fun & games . . . . . . . . . . . . . . . . . . . . . . . . . . . . . . 92<br />
troubleshooting . . . . . . . . . . . . . . . . . . . . . . . . . . 93<br />
service & repair. . . . . . . . . . . . . . . . . . . . . . . . . . 96<br />
specifications . . . . . . . . . . . . . . . . . . . . . . . . . . . 10<br />
iv<br />
Contents
about this guide<br />
This guide introduces you to the operation and features of your new smartphone. It is divided into<br />
ten main sections:<br />
• Section 1: “essentials”<br />
• Section 2: “basics”<br />
• Section 3: “calling”<br />
• Section 4: “customize”<br />
• Section 5: “managing calls”<br />
• Section 6: “e-mail & messages”<br />
• Section 7: “connections”<br />
• Section 8: “entertainment”<br />
• Section 9: “other features”<br />
• Section 10: “troubleshooting”<br />
Throughout this guide, you will find tips that highlight special shortcuts and timely reminders to<br />
help you make the most of your new phone and service. The Table of Contents and Index also<br />
help you quickly locate specific information. You will get the most out of your smartphone if you<br />
read each section. To find a specific feature, simply locate that section in the Table of Contents<br />
and go directly to that page. Follow the instructions in that section and you will swiftly be ready to<br />
use your smartphone.<br />
about this guide<br />
1
general description<br />
The TEAM smartphone solution provides mobile voice and data communications over wireless<br />
network to users inside the enterprise. The smartphone virtually joins your desk phone extension,<br />
associated messaging features and adds Push-To-Talk (PTT) communication to a smartphone,<br />
delivering critical communications capabilities to workers that conduct business inside the<br />
enterprise.<br />
Your smartphone includes: smartphone with voice recognition for hands-free dialing,<br />
Walkie-talkie call button for dispatch and PTT calls (including private talkgroups), Two way SMS<br />
and Instant Text Messaging, Email, Contacts, Calendar, Tasks etc., including viewing mail<br />
attachments and many other built-in tools to help you manage your busy work style.<br />
Enterprise WiFi Phone also includes access to your enterprise applications, standard mobile<br />
internet browser, and the ability to pair with Bluetooth headsets and other Bluetooth devices<br />
such as personal computers. The Enterprise WiFi smartphone is available in two models, the<br />
durable (<strong>EWP</strong>2000 series) and the office model (<strong>EWP</strong><strong>1000</strong> series). Both models have identical<br />
functional and operation features and differ by ruggedness and design. The smartphone is<br />
designed to work only within the wireless network coverage of your enterprise environment. This<br />
manual covers the basic and advanced operations of your smartphone. Refer to the Microsoft®<br />
Windows® Mobile 6.1 documentation and on-screen help for more understanding and information<br />
on the Windows applications.<br />
2 general description
asic smartphone features<br />
<strong>EWP</strong><strong>1000</strong> front and left sides<br />
1 Speaker/Voice recognition key<br />
2 Volume up/down<br />
3 PTT button<br />
4 Programmable key<br />
5 Rapid Travel Charger<br />
jack/USB cable port<br />
6 Keypad illumination Sensor<br />
7 Navigation key<br />
8 Select key<br />
9 Left soft key<br />
10 Home key<br />
11 Call/Answer key<br />
12 Lower microphone<br />
13 Earpiece<br />
14 Upper microphone<br />
15 Right soft key<br />
16 Back key<br />
17 Power/End key<br />
18 Speakerphone<br />
2<br />
3<br />
4<br />
5<br />
1<br />
6<br />
7<br />
8<br />
13<br />
14<br />
9<br />
15<br />
10<br />
16<br />
11<br />
17<br />
1 2 3<br />
_ , @<br />
ABC DEF<br />
4 5 6<br />
GHI<br />
JKL MNO<br />
7 8TUV<br />
9<br />
PQRS<br />
WXYZ<br />
* 0 #<br />
+<br />
12 18<br />
basic smartphone features<br />
3
<strong>EWP</strong><strong>1000</strong> back and right sides<br />
19 ID label window<br />
20 Battery door release<br />
21 Holster latches<br />
22 Lanyard point<br />
23 Headset Jack (supports PTT)<br />
Note: To avoid damaging your<br />
smartphone, carry it in an<br />
approved holster or case rather<br />
than a pocket, purse, or bag. See<br />
“approved accessories” for<br />
approved list of compatible<br />
“Motorola Original” accessories.<br />
19<br />
21<br />
22<br />
23<br />
20<br />
4 basic smartphone features
<strong>EWP</strong>2000 front and left sides<br />
1 Speaker/Voice recognition key<br />
2 Volume up/down<br />
3 PTT button<br />
4 Programmable key<br />
5 Rapid Travel Charger<br />
jack/USB cable port<br />
6 Desktop charger contact<br />
7 Earpiece/Upper microphone<br />
8 Navigation key<br />
9 Select key<br />
10 Left soft key<br />
11 Home key<br />
12 Call/Answer key<br />
13 Speakerphone/Lower<br />
microphone<br />
14 Right soft key<br />
15 Back key<br />
16 Power/End key<br />
1<br />
2<br />
3<br />
4<br />
5<br />
6<br />
7<br />
8<br />
9<br />
10<br />
11<br />
12<br />
13<br />
14<br />
15<br />
16<br />
basic smartphone features<br />
5
<strong>EWP</strong>2000 back and right sides<br />
17 Battery door release<br />
18 ID label window<br />
19 Holster latches<br />
20 Lanyard point<br />
21 Headset Jack (supports PTT)<br />
22 Desktop charger contact<br />
17<br />
18<br />
19<br />
20<br />
21<br />
Note: To avoid damaging your<br />
smartphone, carry it in an<br />
approved holster or case rather<br />
than a pocket, purse, or bag. See<br />
“approved accessories” for<br />
approved list of compatible<br />
“Motorola Original” accessories.<br />
22<br />
6 basic smartphone features
main screens<br />
Home Screen<br />
Programs Screen<br />
1. Press and hold the<br />
Power/End key O to<br />
turn on your<br />
smartphone.<br />
2. Press the<br />
Navigation key - up,<br />
down, left, or right<br />
(S) to highlight a<br />
menu feature.<br />
9:00 AM<br />
Full Service<br />
8/30/2008<br />
No tasks<br />
No upcoming appointments<br />
Voicemail: 0 | Text: 0 | E-mail: 0<br />
Start<br />
Contacts<br />
4. Use the Navigation<br />
key (S) to explore<br />
Home screen, your<br />
recently used programs<br />
and the incoming calls<br />
history.<br />
Recent Programs<br />
1 Calendar<br />
Call History<br />
IE<br />
Calendar<br />
Media Center<br />
All Programs<br />
5. Press the left /right<br />
soft keys to open the<br />
screen menus. The<br />
menu label of the soft<br />
3. Press the Select<br />
key is displayed at the<br />
key s to select the<br />
bottom of the screen.<br />
highlighted feature. 1 _ , @ 2ABC<br />
DEF3<br />
1 _ , @ 2ABC<br />
DEF3<br />
4 GHI 5JKL<br />
MNO 6<br />
4 GHI 5JKL<br />
MNO 6<br />
Tip: Press 7 PQRS the Back 8key TUV WXYZ to 9go back one screen. Press the Power/End key O to exit any menu or view<br />
7 PQRS 8TUV<br />
WXYZ9<br />
without saving changes. At any time,<br />
* 0 # press the Home key X to return to the Home screen.<br />
+<br />
* 0 #<br />
Note: The main screens above show standard layouts. Your smartphone’s layouts may look different.<br />
Messaging<br />
ActiveSync<br />
Contacts<br />
Menu<br />
basic smartphone features<br />
7
the programs screen<br />
From the home screen, press Start (the<br />
left soft key) to view your recently used<br />
programs. To see all programs, press All<br />
Programs.<br />
Note: The following icons are the default<br />
Programs screen icons. Icons may show or<br />
remove as new programs are installed or<br />
removed.<br />
g Internet Explorer<br />
$ Tasks<br />
c Windows Media<br />
% Calendar<br />
# Call History<br />
& Messaging<br />
( Contacts<br />
A ActiveSync<br />
2 Games<br />
• Text Messages<br />
• Outlook E-mail<br />
• MMS<br />
• Setup E-mail<br />
8 basic smartphone features<br />
) Settings<br />
• Phone<br />
• Sounds<br />
• Profiles<br />
• Text Input Settings<br />
• Display<br />
• Clock & Alarm<br />
• Connections<br />
• Security<br />
• Remove Programs<br />
• Power Management<br />
• Phone Accessibility<br />
• Accessibility<br />
• Regional Settings<br />
• Owner Information<br />
• Phone Information<br />
• Packet Data<br />
• Error Reporting<br />
• About<br />
• Customer Feedback<br />
• Managed Programs<br />
• Setup E-mail<br />
• Device Name<br />
Voice Notes<br />
+ Pictures & Videos<br />
y Accessories<br />
• O Task manager<br />
• F Calculator<br />
Clock & Alarm<br />
M<br />
DSA _GUI<br />
F C<br />
/ File Manager<br />
Getting Started<br />
z Java Apps<br />
r Media Center<br />
W Windows Live Messenger<br />
3 Speed Dial<br />
<strong>User</strong> Login<br />
\ Voice Recognition<br />
VPN (Virtual Private Networking)<br />
7 Windows Live<br />
] Bluetooth Manager<br />
y<br />
Debug Apps<br />
Documents To Go<br />
9 System Tools<br />
To select menu items, use your<br />
navigation key up, down, left, or right and<br />
press the center key.
Patents<br />
This product may be covered by one or more<br />
U.S. and foreign Patents. For patent<br />
information go to:<br />
www.motorola.com/enterprisemobility/patents.<br />
Warranty<br />
For the complete Symbol hardware product<br />
warranty statement, go<br />
to:www.motorola.com/enterprisemobility/warranty.<br />
Service Information<br />
If you have a problem using the equipment,<br />
contact your facility’s Technical or Systems<br />
Support. If there is a problem with the<br />
equipment, they will contact the Motorola<br />
Enterprise Mobility Support at:<br />
www.motorola.com/enterprisemobility/support.<br />
For the latest version of this guide go to:<br />
www.motorola.com/enterprisemobility/manuals.<br />
Certain smartphone features are dependent on the capabilities and<br />
settings of your organization network. Additionally, certain<br />
features may not be activated by your organization, and/or the<br />
organization's network settings may limit the feature’s<br />
functionality. Always contact your network management about<br />
feature availability and functionality. All features, functionality,<br />
and other product specifications, as well as the information<br />
contained in this user's guide are based upon the latest available<br />
information and are believed to be accurate at the time of printing.<br />
Motorola reserves the right to change or modify any information or<br />
specifications without notice or obligation.<br />
MOTOROLA and the Stylized M Logo are registered in the US<br />
Patent & Trademark Office. All other product or service names are<br />
the property of their respective owners. The Bluetooth trademarks<br />
are owned by their proprietor and used by Motorola, Inc. under<br />
license. Java and all other Java-based marks are trademarks or<br />
registered trademarks of Sun Microsystems, Inc. in the U.S. and<br />
other countries. Microsoft, Windows and Windows Me are<br />
registered trademarks of Microsoft Corporation; and Windows XP<br />
is a trademark of Microsoft Corporation.<br />
© Motorola, Inc., 2009.<br />
Caution: Changes or modifications made in the radio phone, not<br />
expressly approved by Motorola, will void the user’s authority to<br />
operate the equipment.<br />
Software Copyright Notice<br />
The Motorola products described in this manual may include<br />
copyrighted Motorola and third-party software stored in<br />
basic smartphone features<br />
9
semiconductor memories or other media.<br />
Laws in the United States and other<br />
countries preserve for Motorola and<br />
third-party software providers certain<br />
exclusive rights for copyrighted software,<br />
such as the exclusive rights to distribute<br />
or reproduce the copyrighted software.<br />
Accordingly, any copyrighted software<br />
contained in the Motorola products may<br />
not be modified, reverse-engineered,<br />
distributed, or reproduced in any manner<br />
to the extent allowed by law.<br />
Furthermore, the purchase of the<br />
Motorola products shall not be deemed to<br />
grant either directly or by implication,<br />
estoppel, or otherwise, any license under<br />
the copyrights, patents, or patent<br />
applications of Motorola or any<br />
third-party software provider, except for<br />
the normal, non-exclusive, royalty-free<br />
license to use that arises by operation of<br />
law in the sale of a product.<br />
Manual Number: 6871009P12-B<br />
10 basic smartphone features
approved accessories<br />
Stay fully mobile while you work, walk and<br />
talk.<br />
Get Motorola approved accessories for your<br />
smartphone.<br />
Batteries<br />
• SNN5754A Standard Battery 1480 mAh (12 hours typical<br />
operation)<br />
• SNN5793A Extra Capacity Battery 1750 mAh (14.5 hours<br />
typical operation)<br />
Rapid Travel Chargers<br />
• SPN5202C Rapid Travel Charger. Power adapters:<br />
(SPN7455A - UK, Malaysia / SPN7456A - France,<br />
Germany, Italy, Spain, Sweden, Netherlands, Belgium,<br />
Singapore, Vietnam, Chile / SPN8127B - Australia, New<br />
Zealand)<br />
• SPN5460A Rapid Travel Charger (South Korea)<br />
• SPN5275C Rapid Travel Charger (Japan)<br />
• SPN5199C Rapid Travel Charger (Hong Kong)<br />
• SPN5270C Rapid Travel Charger (Taiwan)<br />
• SKN6253A Rapid Travel Charger (China, USB data cable<br />
included)<br />
• SPN5197C Rapid Travel Charger (Argentina)<br />
• SPN5200C Rapid Travel Charger (Mexico)<br />
• SPN5522A Rapid Travel Charger (Brazil)<br />
Desktop Chargers<br />
• DCH6000 Multi-Unit Desktop Charger - US<br />
• DCH6001 Multi-Unit Desktop Charger - EU<br />
• DCH6002 Multi-Unit Desktop Charger - APAC<br />
• DCH6003 Multi-Unit Desktop Charger - China<br />
• DCH6004 Multi-Unit Desktop Charger - LATAM<br />
• DCH<strong>1000</strong> Single Unit Desktop Charger<br />
USB Data Cable<br />
• SYN6371C Mini USB Data Cable<br />
Audio & Connectivity<br />
• NNTN5211B Surveillance + PTT<br />
approved accessories<br />
11
• NNTN5774C Stereo + PTT<br />
• NNTN5330B Ear bud + PTT<br />
Personalization<br />
• SYN2682A <strong>EWP</strong><strong>1000</strong> Series Carry Case with Clip<br />
• SYN2685A <strong>EWP</strong>2000 Series Carry Case with Clip<br />
• SYN2679A Universal Pouch<br />
To order accessories outside of your<br />
organization, log on to our Web site at:<br />
www.motorola.com/store/ide or contact a<br />
Motorola Authorized Retailer.<br />
12 approved accessories
safety and general information<br />
Batteries and Chargers<br />
If jewelry, keys, beaded chains, or other conductive<br />
materials touch exposed battery terminals, this<br />
could complete an electrical circuit (short circuit),<br />
become very hot, and could cause damage or injury.<br />
Be careful when handling a charged battery,<br />
particularly when placing it inside a pocket, purse, or other<br />
container with metal objects. Use only Motorola Original<br />
batteries and chargers (see“approved accessories”).<br />
Caution: Risk of explosion when battery is replaced by an incorrect<br />
type.<br />
Caution: To avoid risk of personal injury, do not dispose of your<br />
battery in a fire.<br />
Note: In Switzerland, Annex 2.15 of SR 814.81 applies to batteries.<br />
Your battery, charger, or smartphone may contain symbols, defined<br />
as follows:<br />
Symbol<br />
032374o<br />
032376o<br />
032375o<br />
Li Ion BATT<br />
032378o<br />
Definition<br />
Important safety information follows.<br />
Do not dispose of your battery or<br />
smartphone in a fire.<br />
Your battery or smartphone may require<br />
recycling in accordance with local laws.<br />
Contact your local regulatory authorities<br />
for more information.<br />
Do not throw your battery or smartphone<br />
in the trash.<br />
Your smartphone contains an internal<br />
lithium ion battery.<br />
Do not let your battery, charger, or<br />
smartphone get wet.<br />
Listening at full volume to music or voice<br />
through a headset may damage your<br />
hearing.<br />
safety and general information<br />
13
Choking Hazards<br />
Your smartphone or its accessories may include detachable parts,<br />
which may present a choking hazard to small children. Keep your<br />
smartphone and its accessories away from small children.<br />
Glass Parts<br />
Some parts of your smartphone may be made of glass. This glass<br />
could break if the product is dropped on a hard surface or receives<br />
a substantial impact. If glass breaks, do not touch or attempt to<br />
remove. Stop using your smartphone until the glass is replaced by<br />
a qualified service center.<br />
Seizures/Blackouts<br />
Some people may be susceptible to epileptic seizures or blackouts<br />
when exposed to flashing lights, such as when playing video<br />
games. These may occur even if a person has never had a previous<br />
seizure or blackout.<br />
When you have experienced seizures or blackouts, or if you have a<br />
family history of such occurrences, please consult with your<br />
physician before playing video games or enabling a flashing-lights<br />
feature (if available) on your smartphone.<br />
Discontinue use and consult a physician when any of the following<br />
symptoms occur: convulsion, eye or muscle twitching, loss of<br />
awareness, involuntary movements, or disorientation. It is always<br />
a good idea to hold the screen away from your eyes, leave the<br />
lights on in the room, take a 15-minute break every hour, and stop<br />
use if you are very tired.<br />
Repetitive Motion<br />
When you repetitively perform actions such as pressing keys or<br />
entering finger-written characters, you may experience occasional<br />
discomfort in your hands, arms, shoulders, neck, or other parts of<br />
your body. When you continue to have discomfort during or after<br />
such use, stop use and see a physician.<br />
Product Safety and RF Exposure<br />
Before using this smartphone, read the product<br />
032374o<br />
safety and RF exposure leaflet, Motorola<br />
publication Number 6802983C16 included with this<br />
smartphone. The leaflet contains important<br />
operating instructions for safe usage and RF energy<br />
awareness and control information for compliance with RF energy<br />
exposure limits in applicable national and international standards.<br />
14 safety and general information
grant of equipment authorization<br />
BEFORE USING THIS smartphone, READ the product<br />
Regulatory <strong>Guide</strong> LEAFLET, Motorola publication Number<br />
6802985C71 included with this smartphone.<br />
Country Approvals<br />
Regulatory markings are applied to the device signifying the<br />
radio(s) are approved for use in the following countries: United<br />
States, Canada, Australia and Europe (see below: 1, 2).<br />
Please refer to the Symbol Declaration of Conformity (DoC) for<br />
details of other country markings. This is available at:<br />
www.motorola.com/enterprisemobility/doc.<br />
1. For 2.4GHz Products: Europe includes, Austria, Belgium, Czech<br />
Republic, Cyprus, Denmark, Estonia, Finland, France, Germany,<br />
Greece, Hungary, Iceland, Ireland, Italy, Latvia, Liechtenstein,<br />
Lithuania, Luxembourg, Malta, Netherlands, Norway, Poland,<br />
Portugal, Slovak Republic, Slovenia, Spain, Sweden, Switzerland<br />
and the United Kingdom.<br />
2. The use of 5GHz RLAN's has varying restrictions of use; please<br />
refer to the Symbol Declaration of Conformity (DoC) for details.<br />
032374o Operation of the device without regulatory approval is<br />
illegal.<br />
FCC Grant of Equipment Authorization<br />
Model<br />
<strong>EWP</strong><strong>1000</strong><br />
<strong>EWP</strong>2000<br />
FCC ID<br />
AZ489FT7031<br />
AZ489FT7032<br />
Radio Network Freq Band Rated Power<br />
802.11a WLAN 5.15-5.25 GHz<br />
5.25-5.35 GHz<br />
5.47-5.725 GHz<br />
5.725-5.825 GHz<br />
15.8mW at 54Mbps<br />
802.11b WLAN 2412-2462MHz<br />
2412-2472 MHz<br />
802.11g WLAN 2412-2462MHz<br />
2412-2472 MHz<br />
Bluetooth WPAN 2402-2480MHz 1mW<br />
63mW at 11Mbps<br />
31.62mW at 11Mbps<br />
17.8mW at 54 Mbps<br />
IMPORTANT: RF interference between Bluetooth and WLAN<br />
radios may occur in rare, unique situations.<br />
IMPORTANT: Unauthorized repairs or modifications could result<br />
in permanent damage to the equipment and void your warranty<br />
and your authority to operate this device under Part 15 of the FCC<br />
Rules.<br />
grant of equipment authorization<br />
15
FCC INTERFERENCE<br />
This equipment has been tested and found to comply with the<br />
limits for a Class B digital device, pursuant to Part 15 of the FCC<br />
Rules. These limits are designed to provide reasonable protection<br />
against harmful interference in a residential installation. This<br />
equipment generates, uses and can radiate radio frequency energy<br />
and, if not installed and used in accordance with the instructions,<br />
may cause harmful interference to radio communications.<br />
However, there is no guarantee that interference will not occur in a<br />
particular installation. If this equipment does cause harmful<br />
interference to radio or television reception, which can be<br />
determined by turning the equipment off and on, the user is<br />
encouraged to try to correct the interference by one or more of the<br />
following measures:<br />
• Reorient or relocate the receiving antenna.<br />
• Increase the separation between the equipment and receiver.<br />
• Connect the equipment into an outlet on a circuit different from<br />
that to which the receiver is connected.<br />
• Consult the dealer or an experienced radio/TV technician for<br />
help.<br />
Industry Canada Grant of Equipment Authorization<br />
This Class B digital apparatus complies with Canadian ICES-003<br />
Model ID<br />
<strong>EWP</strong><strong>1000</strong><br />
109U-89FT7031<br />
<strong>EWP</strong>2000<br />
109U-89FT7032<br />
This device complies with Part 15 of the FCC Rules. Operation is<br />
subject to the following two conditions:<br />
(1) This device may not cause harmful interference.<br />
(2) This device must accept any interference received, including<br />
interference that may cause undesired operation.<br />
IMPORTANT: In the band 5150- 5250 MHz, the device may only<br />
be used indoors to reduce potential for harmful interference to cochannel<br />
mobile satellite systems.<br />
032374o Changes or modifications made in the smartphone, not<br />
expressly approved by Motorola, will void the user's<br />
authority to operate the equipment.<br />
Wi-Fi Certification<br />
This product is a certified: IEEE 802.11a, IEEE 802.11b and IEEE<br />
802.11g, IEEE 802.11e, WPA, WPA2, TKIP, WMM, X.509.<br />
Marking and European Economic Area (EEA)<br />
Frequency of Operation<br />
The use of 2.4 GHz RLAN's, for use through the EEA,<br />
have the following restrictions:<br />
• Maximum radiated transmit power of 100 mW EIRP in the<br />
frequency range 2.400 - 2.4835 GHz<br />
16 grant of equipment authorization
• France, outside usage is restricted to 2.4 - 2.454 GHz.<br />
• Italy requires a user license for outside usage.<br />
The use of 5GHz RLAN’s, for use through the EEA, have the<br />
following restrictions:<br />
• The 5150-5250 MHz band is restricted to Indoor Use Only; any<br />
other use will make the operation of this device illegal.<br />
Bluetooth® <strong>Wireless</strong> Technology for use through the EEA<br />
has the following restrictions:<br />
• Maximum radiated transmit power of 100mW EIRP in the<br />
frequency range 2.400 -2.4835 GHz<br />
• France, outside usage is restricted to 10mW EIRP<br />
• Italy requires a user license for outside usage<br />
Statement of Compliance<br />
Motorola, Inc., hereby, declares that this device is in compliance<br />
with the essential requirements and other relevant provisions of<br />
Directive 1999/5/EC. A Declaration of Conformity may be obtained<br />
from www.motorola.com/enterprisemobility/doc.<br />
grant of equipment authorization<br />
17
use and care<br />
use and care<br />
To care for your smartphone, please keep it away from the following:<br />
liquids of any kind<br />
Do not expose your smartphone to water, rain,<br />
extreme humidity, sweat, or other moisture.<br />
dust and dirt<br />
Do not expose your smartphone to dust, dirt,<br />
sand, food, or other inappropriate materials.<br />
extreme heat or cold<br />
Avoid temperatures below 0°C/32°F or<br />
above 45°C/113°F.<br />
Charging temperature: 0°C/32°F to<br />
+40°C/104°F<br />
microwaves<br />
Do not try to dry your smartphone in a<br />
microwave oven.<br />
cleaning solutions<br />
Use a dry soft cloth to clean your smartphone.<br />
Do not use alcohol or other cleaning solutions.<br />
ground<br />
Do not drop your smartphone.<br />
18 use and care
caring for the environment by recycling<br />
cycling Information<br />
This symbol on a Motorola product means the product<br />
should not be disposed of with household waste.<br />
Contact your organization or local recycling center for<br />
proper battery disposal.<br />
For EU Customers: All products at the end of their life must be<br />
returned to Motorola for recycling. For information on how to<br />
return product, please go to:<br />
www.motorola.com/recycling/weee.<br />
caring for the environment by recycling<br />
19
disposal of your smartphone and accessories<br />
Do not dispose of smartphones or electrical accessories, such as<br />
chargers or headsets, with your household waste. In some<br />
countries or regions, collection systems have been set up to handle<br />
waste electrical and electronic items. Please contact your regional<br />
authorities for more details. When no suitable scheme exists, you<br />
may return unwanted smartphones and electrical accessories to<br />
any Motorola Approved Service Centre in your region.<br />
20 disposal of your smartphone and accessories
essentials<br />
battery<br />
battery installation<br />
1 Press the battery door release.<br />
2 Slide and remove the battery door.<br />
Note: Use this opportunity to place the ID label of your<br />
smartphone inside the window of the battery door (see<br />
“owner information” on page 85).<br />
3 Insert the battery into the battery compartment and<br />
press down to secure it.<br />
Note: When installing the battery inside the <strong>EWP</strong>2000<br />
series, make sure that the battery removal strip is routed<br />
under the battery and the edge of the strip remains out<br />
of the compartment.<br />
4 Place back the battery door and slide to lock.<br />
1<br />
2<br />
3<br />
4<br />
ID Label<br />
Battery removal strip<br />
(<strong>EWP</strong>2000 series only)<br />
essentials<br />
21
<strong>EWP</strong>2000 series battery removal<br />
1 With the smartphone powered off, press the battery<br />
door release.<br />
2 Slide and<br />
remove the<br />
battery door.<br />
3 Pull the battery<br />
removal strip to<br />
lift out the<br />
battery.<br />
1<br />
2<br />
Battery removal strip<br />
<strong>EWP</strong><strong>1000</strong> series battery removal<br />
1 With the smartphone powered off, press the battery<br />
door release.<br />
2 Slide and remove<br />
the battery door.<br />
3 Remove the<br />
battery from the<br />
1<br />
battery<br />
compartment by<br />
pressing the<br />
battery from the 2<br />
side and lifting it<br />
out.<br />
Press from side Lift<br />
3<br />
3<br />
22 essentials
attery charging<br />
New batteries are<br />
not fully charged.<br />
Plug the Rapid<br />
Travel Charger<br />
into your<br />
smartphone and<br />
an electrical outlet,<br />
your display<br />
shows the<br />
charging indicator<br />
O. Your smartphone might take several<br />
seconds to start charging the battery. When<br />
finished, your display shows a charged battery<br />
icon ^.<br />
Tip: . The smartphone prevents battery overcharging. It<br />
will perform best after you fully charge and discharge it a<br />
few times.<br />
You can also charge your battery with a USB<br />
cable plugged into a computer.<br />
a<br />
Plug the cable into a powered USB port or<br />
hub, since some USB devices (such as<br />
keyboards) might not supply enough power<br />
for charging.<br />
R<br />
Note: Charging the smartphone with a USB cable<br />
requires more time than the using the Rapid Travel<br />
Charger.<br />
Important: When using a USB cable to charge or work<br />
with the smartphone, make sure using Motorola<br />
approved mini USB cable.<br />
essentials<br />
23
attery life conservation<br />
Modifying the smartphone display time out<br />
and backlight conserves the battery life.<br />
To set how long your smartphone waits before<br />
the display turns off, perform the following:<br />
1 Press: Start > All Programs > Settings ><br />
Power Management > Display time out and<br />
set the time out. When the time is out, the display<br />
turns off.<br />
To set how long your smartphone waits before<br />
the backlight turns off, perform the following:<br />
2 Press: Start > All Programs > Settings ><br />
Power Management > Backlight time out on<br />
battery or Smart Backlight and set the time out.<br />
When the backlight is off, the display is visible but<br />
dim.<br />
3 Close unused programs, from the home screen,<br />
press: Start > All Programs > Accessories ><br />
Task Manager. Select the program and press:<br />
End Task.<br />
Note: The End Task operation is an ungraceful<br />
shutdown of a program that may cause information<br />
to be lost.<br />
battery tips<br />
Battery life depends on the network, signal<br />
strength, temperature, features, and<br />
accessories you use.<br />
Warning: Before handling batteries, please<br />
note the following:<br />
• Always use Motorola Original<br />
batteries and chargers. The warranty does not<br />
cover damage caused by non-Motorola<br />
batteries and/or chargers.<br />
• New batteries or batteries stored for a long time<br />
may take more time to charge.<br />
• Charging your battery in room temperature.<br />
24 essentials
• Store your battery uncharged in a cool, dark, dry<br />
place.<br />
• Never expose batteries to temperatures below<br />
-10°C (14°F) or above 60°C (140°F).<br />
• It is normal for batteries to gradually wear down<br />
and require longer charging times. When you<br />
notice a change in your battery life, it is probably<br />
time to purchase a new battery.<br />
Contact your organization or local<br />
032375o<br />
recycling center for proper battery<br />
disposal.<br />
Warning: Never dispose of batteries in a fire because<br />
they may explode.<br />
Before using your smartphone, read the<br />
battery safety information in the “safety and<br />
general information” section included in this<br />
guide.<br />
essentials<br />
25
storage card<br />
Your smartphone allows you to use an<br />
optional microSD TM storage card to expand<br />
the available memory space. This secure<br />
digital card stores your mail attachments,<br />
images, music, text messages, etc. You can<br />
transfer files from your smartphone or<br />
microSD storage card to your PC by using a<br />
USB cable or over Bluetooth communication<br />
(see “connections” on page 69).<br />
To install a microSD storage card:<br />
1 When the smartphone is powered off, press the<br />
battery door release.<br />
2 Slide and remove the battery door.<br />
3 Lift up the rubber latch (A) and insert the microSD<br />
storage card (B) into the card compartment.<br />
4 Place back the battery door and slide to lock.<br />
26 essentials<br />
Caution: Do not bend or scratch your memory card.<br />
Keep it away from static electricity, water, and dirt.<br />
1<br />
2<br />
3<br />
4<br />
B<br />
A<br />
microSD<br />
storage card
asics<br />
turn handset on & off<br />
1 To turn on your smartphone,<br />
perform the following: Press<br />
and release O. Allow few<br />
seconds for Home screen to<br />
1 _ , @ 2 ABC DEF3<br />
appear. Wait until “Full<br />
4 GHI 5 6<br />
Service” shows on the screen.<br />
JKL<br />
MNO<br />
7 PQRS 8 TUV WXYZ9<br />
If prompted, enter your unlock<br />
0 #<br />
+<br />
*<br />
code.<br />
Tip: If your smartphone does not turn on, charge your<br />
battery (see “battery charging” on page 23) and try<br />
again.<br />
2 To turn off your smartphone, perform the<br />
following: Press and hold O for 3 seconds, then<br />
release it. You can also press and hold X to open<br />
the quick options menu, then select Power off.<br />
username and passwords<br />
When turning on your smartphone for the first<br />
time, you may need to set your username and<br />
password to access the network. Ask your<br />
system administrator for assistance. See also<br />
“smartphone administration data” on page 91.<br />
display<br />
The home screen appears when you turn on<br />
the smartphone. You can also access the<br />
Home screen, any time, by pressing X.<br />
On the Home screen, you can glance a<br />
summary of Today’s information including:<br />
date, time, last/missed calls, incoming<br />
messages, upcoming appointments, tasks<br />
basics<br />
27
and profiles. You can also quickly switch to<br />
recently used programs.<br />
Tip: To change the smartphone’s profile, press and hold<br />
X to open the Quick List menu, then scroll to select a<br />
profile (such as Silent, Vibrate, Outdoor, or Automatic).<br />
The on-screen soft key labels show the<br />
current soft key functions. Press the left and<br />
right soft keys to open the current available<br />
menu or selecting an option.<br />
Press the navigation key S up, down, left, or<br />
right to scroll to a menu item or text and press<br />
the center key s to select.<br />
Note: Your home screen can look different than this one.<br />
Recently<br />
used<br />
programs<br />
Left soft key<br />
X<br />
Home key<br />
9:00 AM<br />
Full Service<br />
8/30/2008<br />
No tasks<br />
No upcoming appointments<br />
Voicemail: 0 | Text: 0 | E-mail: 0<br />
Start<br />
Contacts<br />
Status<br />
indicators<br />
On-screen<br />
Soft key labels<br />
Right soft key<br />
Back key<br />
(S)<br />
1 2 3<br />
Navigation key<br />
_ , @<br />
4 GHI<br />
NCall/Answer key<br />
ABC DEF<br />
5JKL<br />
MNO<br />
sSelect key 6OPower/End key<br />
7 PQRS 8TUV<br />
WXYZ9<br />
* 0+<br />
#<br />
28 basics
to find a menu feature<br />
To navigate to a menu feature on you<br />
smartphone, look for the “Find it” instruction in<br />
the guide. The following example instruct you<br />
how to look for a received call:<br />
Find it: Press: Start > Call History > (received call)<br />
Note: Pressing Start displays the eight recently used<br />
programs. To show all programs press All Programs.<br />
This “Find it” means that, from the home<br />
screen perform the following steps:<br />
1 Press the left soft key to open the Start menu.<br />
2 Press the navigation key S to scroll to<br />
# Call History.<br />
3 Press the center key s to select Call History.<br />
basics<br />
29
status indicators<br />
The status indicators row appear at the top of<br />
the home screen..<br />
Recent Programs<br />
1 Calendar<br />
Status indicators<br />
<strong>Wireless</strong> connection to access point<br />
in-process.<br />
Connected to wireless access point.<br />
No connection to wireless access point.<br />
Voice call.<br />
X<br />
E Missed Call.<br />
S One or more phone calls are on hold.<br />
% Interconnect call speakerphone<br />
PTT Speakerphone on<br />
Q Ring profile set to silent.<br />
< Ring profile set to vibrate.<br />
w New Voicemail.<br />
New unread email or text message(s).<br />
J Battery charge level.<br />
Recharge the battery when the phone<br />
shows one or two bars.<br />
O Battery charge in progress.<br />
P Battery is removed.<br />
0 Indication of connection quality to system.<br />
5 No system connection<br />
6 <strong>Wireless</strong> radio is disabled.<br />
E<br />
To enable the radio, press: Start ><br />
Settings > Connections > <strong>Wireless</strong><br />
Manager and check the Enable Wi-Fi box.<br />
Bluetooth® radio is powered on.<br />
30 basics
text entry<br />
You can enter text into your smartphone using<br />
the traditional method of pressing a key<br />
several times for each character.<br />
You can also press a key once for each letter<br />
while words likely to be the one you want are<br />
chosen from a database.<br />
You can also enter symbols and numbers into<br />
a text field.<br />
When you select a field that requires text or<br />
numbers, the smartphone automatically<br />
selects the appropriate entry mode. An<br />
indicator at the top right of the display shows<br />
the entry mode you are currently using (see<br />
the following figure).<br />
Entry modes indicator display switching of the letters,<br />
word completion, numbers, capitalization, etc.<br />
(see“Letter, word completion and numeric” on page 32)<br />
Flashing cursor shows the insertion Press Menu to<br />
point. for typing a character.<br />
see more<br />
A newly typed letter is marked by an options.<br />
underline to enable change within 2<br />
seconds. Once the character is no more<br />
underlined, the character is accepted<br />
and the flashing cursor moves to the<br />
next position.<br />
basics<br />
31
Letter, word completion and numeric<br />
Letters is the default mode. Repeatedly, press<br />
and hold * for 2 seconds and release to<br />
switch between Letters Á, word completion<br />
Á and numbers 123.<br />
Uppercase, lowercase and caps lock<br />
Press and hold 0+ and repeatedly press<br />
*. The status indicator switches between<br />
á, Á and Â.<br />
Special character<br />
In Letters mode, repeatedly press 1 to<br />
switch between the following characters . , ? !<br />
-_’ @ :<br />
Enter symbols<br />
To enter a symbol (such as ! ):<br />
1 Press and hold # for 2 seconds.<br />
2 Select a symbol or a special character. When done,<br />
the smartphone returns to previous text mode.<br />
Enter space - Swiftly press #.<br />
Delete text - Press . Hold to keep<br />
deleting.<br />
Start a new line - Press the Select key s.<br />
Text setup<br />
(Language, Word completion, Clear content)<br />
Press and hold # for 2 seconds for Setup.<br />
Word completion<br />
As you enter letters, your smartphone might<br />
try to predict the word to enable fast writing.<br />
For instance, it might predict “program” when<br />
you enter “prog”.<br />
1 Switch to word completion.<br />
2 Swiftly press * to switch between Á, á<br />
and Â.<br />
To enable prediction, hold # , select Setup<br />
and use S and check Word Completion. To<br />
turn off text prediction, press: Start > Settings<br />
32 basics
Text Input Settings and uncheck Word<br />
Completion.<br />
Change language<br />
To change the language, hold # , select<br />
Setup and use S to select Language<br />
Dictionary, or select Clear Contents to clear the<br />
memory of the words you have used.<br />
basics<br />
33
volume control<br />
When you are using a program that plays<br />
sound, press the Volume up/down keys to<br />
adjust the volume level.<br />
Note: Volume can be changed when running a game.<br />
When you are<br />
on a phone call,<br />
press volume<br />
up/down keys to<br />
adjust the<br />
earpiece<br />
volume.<br />
Volume<br />
up/down<br />
keys<br />
Earpiece Volume<br />
Tip: Need to change profiles on the fly? On the<br />
home screen, scroll to and select Profile:. Choose<br />
from Normal, Silent, Vibrate, outdoor or<br />
Automatic.<br />
Want to change sound? Press: Start > Settings<br />
> Sounds. Highlight the desired item and select<br />
the sound you want to associate with that item.<br />
You can eliminate the ringer volume instantly when<br />
an incoming call comes in-just press the Volume<br />
up/down keys to turn the ringer off.<br />
speakerphone controls<br />
Turning on speakerphone makes incoming<br />
sound come out of the phone’s speaker<br />
instead of the earpiece. Speakerphone is<br />
available whenever you are on an active<br />
phone call.<br />
Warning: The speakerphone generates high volume<br />
levels. do not place the smartphone near your ear when<br />
using the speakerphone.<br />
Activate the speakerphone during a call by<br />
pressing: Menu > Speakerphone.<br />
34 basics
You can also activate<br />
the speakerphone<br />
during a call by<br />
briefly pressing the<br />
Speaker/Voice<br />
recognition key to<br />
turn On/Off the<br />
speakerphone. The<br />
display indicates that<br />
the speaker is On or<br />
Off.<br />
Speaker/Voice<br />
recognition key a<br />
PTT Speaker:<br />
In PTT mode, the<br />
screen displays the<br />
PTT speaker state. To turn it off, press the<br />
Speaker/Voice recognition key a again or<br />
end the call.<br />
Note: Speakerphone is not available when your<br />
smartphone is connected to a headset.<br />
On<br />
lock & unlock smartphone<br />
You can manually lock your smartphone to<br />
prevent accidental keypresses.<br />
To lock your smartphone, press and hold<br />
X until the Quick List opens. Then, select<br />
Lock. Your left soft key becomes Unlock.<br />
To unlock your smartphone, press Unlock<br />
and enter your password. Your smartphone<br />
uses * if you have not set a password.<br />
To keep others from using your<br />
smartphone, change your password:<br />
Find it: From the home screen, press: Start<br />
> Settings > Security > Device Lock<br />
1 Check the Prompt if device unused for<br />
checkbox, and select the amount of time for the<br />
smartphone to be inactive before automatically<br />
locking.<br />
2 Choose a password type that is either simple<br />
basics<br />
35
(4-digit number) or strong alphanumeric.<br />
Note: A hard-to-guess password consists of at<br />
least 7 characters, including uppercase and<br />
lowercase letters, numerals, and punctuation.<br />
3 Enter and confirm your password.<br />
4 Press Done.<br />
To unlock the smartphone, press Unlock.<br />
When you see the unlock prompt, enter your<br />
password and press Done.<br />
Tip: Choose a password you will remember. Without<br />
your password, you can reset your smartphone, but it<br />
will result in the loss of your personalized settings and<br />
all content stored in smartphone memory. To perform a<br />
hard reset, hold down the center key s for 5 seconds<br />
while turning the smartphone on.<br />
Note: A locked smartphone still rings or vibrates for<br />
incoming calls, but you do not need to unlock it to<br />
answer.<br />
36 basics
calling<br />
make a phone call<br />
To place a phone call from<br />
the home screen, enter a<br />
phone number and press N.<br />
To place a phone call from<br />
_ , @<br />
your Contacts list:<br />
GHI<br />
PQRS<br />
1 From the Home screen, press<br />
the right soft key to open the Contacts screen.<br />
2 Use the<br />
navigation key<br />
S to scroll to a<br />
contact name and<br />
press the center<br />
key s to select.<br />
Note: a contact name may have several listed<br />
phone numbers (such as: cell mobile, home or work,<br />
1 2 ABC 3<br />
4 5 JKL 6<br />
7 8 TUV 9<br />
* 0 #<br />
+<br />
see “contacts” on page 81).<br />
3 Press N to call.<br />
To place a phone call from company directory:<br />
1 From the Home screen, press the rightsoftkey to<br />
DEF open Contacts.<br />
MNO<br />
2 Press Menu > View by > Company.<br />
WXYZ<br />
Note: In order to have a company phone list, phone<br />
numbers should be entered to the smartphone by<br />
you or your organization. See “store a phone<br />
number” on page 42.<br />
3 Use the navigation key S to scroll to a contact<br />
and press the center key s to select.<br />
Note: a contact name may have several listed phone<br />
numbers (such as: cell mobile, home or work).<br />
4 Press N to call.<br />
calling<br />
37
answer a call<br />
When your smartphone rings and/or vibrates,<br />
press N to answer. To “hang up,” press O.<br />
• When you are busy when a call comes in, select<br />
Ignore to send the call directly to voicemail.<br />
• To put a call on hold, press Menu > Hold.<br />
To return to the call, press the left soft key that<br />
displays Resume.<br />
If you are on a call and another call comes in,<br />
you may select one of the following:<br />
• To answer, press the left soft key Answer.<br />
• When you are busy when a call comes in, select<br />
Ignore to send the new call directly to<br />
voicemail.<br />
• To put the current call on hold and answer the<br />
incoming call, press N. All calls are listed on<br />
the screen. To move between calls: scroll to a<br />
call on hold and press the left soft key that<br />
displays Resume.<br />
make a PTT call (Push-to-Talk)<br />
With PTT call, you use your smartphone as a<br />
fast and direct connect, walkie-talkie style,<br />
inside your enterprise.<br />
Note: The PTT call defaults through your<br />
speakerphone. To toggle to earpiece, press the<br />
Speaker/Voice recognition key a.<br />
To place a PTT call from the home screen<br />
1 Enter the phone<br />
number you want to<br />
call as you would<br />
when making a phone<br />
call.<br />
PTT<br />
button<br />
PTT Call Connec<br />
John slle<br />
6095<br />
38 calling
2 Press and hold the PTT button on the left side of<br />
your smartphone.<br />
3 Begin talking after your smartphone emits a<br />
chirping sound.<br />
4 Release the PTT button to listen.<br />
To place a PTT call from your contacts list:<br />
1 From the Home screen, press the rightsoftkey to<br />
open the Contacts screen.<br />
2 Press the navigation key S to scroll to a contact<br />
name.<br />
Note: a contact name may have several listed<br />
phone numbers - select the PTT number<br />
3 Press and hold the PTT button on the left side of<br />
your smartphone.<br />
4 Begin talking after your smartphone emits a<br />
chirping sound.<br />
5 Release the PTT button to listen.<br />
Note: Your PTT call automatically ends if not<br />
responded to within six seconds.<br />
receive a PTT call<br />
When you receive a PTT call, your<br />
smartphone emits a ring sound or vibrates.<br />
1 Wait for the caller to finish speaking.<br />
2 Press and hold the PTT button on the left side of<br />
your smartphone.<br />
3 Begin talking after your smartphone emits a<br />
chirping sound.<br />
4 Release the PTT button to listen.<br />
PTT call request<br />
PTT call request let the recipient know you<br />
want to talk on a PTT call.<br />
calling<br />
39
When you send a request, the recipient’s<br />
smartphone rings, or vibrates and displays<br />
your name or number.<br />
The recipient can select one of the following<br />
options:<br />
• Answer - respond by pressing the PTT button<br />
• Answer later - respond later. Access the PTT<br />
call request from Call History<br />
• Dismiss - clear and delete the request<br />
send a PTT call request<br />
1 Enter the number you want to call or select the<br />
number as you would when making a phone call.<br />
2 Select Menu > Request PTT Call. The PTT<br />
Alert Sent appears on the display.<br />
3 Press: Done.<br />
Note: When you do not get response for your PTT call<br />
request, this means that the person you are trying to<br />
reach is on a call or has the smartphone turned off. If the<br />
person is on a call, a request PTT call indication shows<br />
on his screen.<br />
respond to PTT call request<br />
When you receive a PTT call request, you can<br />
either answer, ignore or clear the call.<br />
• Answer a PTT call request by pressing the PTT<br />
button to receive a PTT call from the sender.<br />
• Clear a PTT call request by pressing Dismiss.<br />
Note: Call History list stores PTT call requests that you<br />
have received. The requests appear as Missed PTT Call<br />
requests and remain in the Call History list until you<br />
return a PTT call to the caller or delete them.<br />
PTT group call<br />
A PTT group call is similar to a PTT call, but is<br />
made to all members of a talkgroup at once.<br />
40 calling
Note: When you initiate a PTT group call to anther PTT<br />
group, that group becomes your active PTT group.<br />
To call PTT group from the home screen:<br />
1 Dial # and a number between 1 and 255.<br />
2 Press and hold the PTT button.<br />
3 Begin talking after your smartphone emits a<br />
chirping sound.<br />
4 Release the PTT button to listen.<br />
To call PTT group from Contacts list:<br />
1 From the Home screen, press: Contacts.<br />
2 Scroll to the talkgroup you want to call.<br />
3 Press and hold the PTT button. "PTT Group Call<br />
Connected".<br />
4 Begin talking after your smartphone emits a<br />
chirping sound.<br />
5 Release the PTT button to listen.<br />
Note: the name or number of the person that is<br />
currently talking is displayed on the screen.<br />
receive a PTT group call<br />
To answer a PTT group call, proceed as if<br />
receiving a PTT call (See page 39). Only one<br />
person at a time may speak on a group call.<br />
The number or name of the person who is<br />
speaking will appear on the display below the<br />
PTT group number.<br />
join an active PTT group<br />
To join a PTT group from Contacts list:<br />
1 From the Home screen, press: Contacts.<br />
2 Scroll to the Talkgroup you want to join.<br />
3 Press the center key s to select.<br />
4 Press: Menu > Join PTT Group.<br />
calling<br />
41
5 Press and hold the PTT button.<br />
6 Begin talking after your smartphone emits a<br />
chirping sound.<br />
7 Release the PTT button to listen.<br />
Note: When you initiate a PTT group call to another PTT<br />
group, that PTT group becomes the default active PTT<br />
group.<br />
To join a PTT group that is not on your<br />
Contacts list:<br />
1 Press N to open the dialer screen.<br />
2 Dial the talkgroup number (dial # and a number<br />
between 1 and 255).<br />
3 Press: Menu > Join PTT Group.<br />
4 Press and hold the PTT button.<br />
5 Begin talking after your smartphone emits a<br />
chirping sound.<br />
6 Release the PTT button to listen.<br />
store a phone number<br />
You can store a number for future calls by<br />
saving it to Contacts.<br />
Find it: From the Home screen, press: Contacts.<br />
1 Press: New.<br />
2 Choose whether the contact stores as an<br />
Outlook Contact or Talk Group Contact.<br />
3 Enter information for the contact.<br />
Note: While you are entering the number, you can<br />
program your smartphone to pause and then dial<br />
more digits (such as a voicemail password or PIN).<br />
Program your smartphone to pause and then dial<br />
more digits by doing one of the following:<br />
• Press: Menu > Insert Pause to insert a<br />
2-second pause (shows as a p)<br />
• Press: Menu > Insert Wait to instruct your<br />
smartphone to prompt before dialing the<br />
42 calling
emaining digits (shows as a w). Insert Wait<br />
does not work for contacts stored on your<br />
smartphone.<br />
Tip: When you get a call or a text message from<br />
someone who is not in your list of contacts, you can<br />
create a contact from the Home screen by pressing:<br />
Start > Call History > Save or from the message by<br />
pressing Menu > Save to Contacts.<br />
Note: When you stored more than one number for a<br />
contact, scroll to the contact and use the left and/or right<br />
navigation keys to select a number. Press center key<br />
s to view the numbers and N to dial.<br />
calling<br />
43
conference call<br />
Conference calling enables you talk with up to<br />
six people at the same time.<br />
While connected to a call perform the<br />
following:<br />
1 Select Menu > Conference with > Phone<br />
number (or Contact or Recent call).<br />
Note: The list of participants shows on the screen.<br />
The list displays the last participant on top of the<br />
list.<br />
2 After selecting or entering a number, press N or<br />
press: Call.<br />
3 When you have more than one caller connected,<br />
scroll and press the left soft key Join to switch<br />
between them.<br />
If you receive a second call while you are<br />
already on a call:<br />
1 To answer the second call, scroll to the second call<br />
displayed on the screen and press N. The first<br />
call switches to hold.<br />
2 Scroll between the desired calls and press the left<br />
soft key Join to switch between the calls.<br />
3 Press: Menu > Conference with to combine the<br />
calls.<br />
Note: To send an incoming call to your voicemail,<br />
press Ignore.<br />
During an active call, you receive call.<br />
1 Press the Send key N to answer the incoming<br />
call.<br />
2 Press: Menu > Conference with > “caller<br />
name” (or contact, recent call, phone number) and<br />
press the center key s<br />
Note: Conference call may include up to six people.<br />
At any time during the conference call, press the<br />
center key s to see who is on the call.<br />
44 calling
customize<br />
profiles<br />
Each profile uses a different set of sounds,<br />
ring styles, earpiece volume settings, or<br />
vibrations for incoming calls and other events.<br />
For example, the Outdoor profile volume is<br />
much louder than the Normal profile.<br />
Here are the profiles you can choose:<br />
Normal Vibrate Automatic<br />
Silent Outdoor<br />
Indicators can appear at the top of your home<br />
screen for the Silent (Q) and Vibrate ( profile style name<br />
sound<br />
You can change the ring tones for incoming<br />
calls and other events.<br />
Find it: Press: Start > Settings > Sounds<br />
1 Scroll and highlight the sound you want to change,<br />
then press the navigation key S right or left to<br />
change it. To play the sound, press: Menu > Play.<br />
customize<br />
45
2 Press Done to save the sound setting.<br />
Note: Here are the sounds you can<br />
change:<br />
Ring tone, Reminders, New e-mail, New text<br />
message, New voice message, New instant<br />
message, Alarm clock, PTT Call Request,<br />
Exclamation, Question, Warnings, Keypad<br />
control.<br />
Note: Changes made to the alert settings will have no<br />
effect when using the Silent profile.<br />
download a sound file<br />
When you download a sound file for a ring<br />
tone, it does not automatically save in the<br />
Sounds location. To move your sound file<br />
perform the following:<br />
Find it: Start > File Manager > My Documents.<br />
1 Highlight the sound file you want to copy to the<br />
Sound location<br />
2 Press: Menu > File > Copy to and select<br />
Application Data > Sounds.<br />
Note: If the sound file is not located in the My<br />
Documents folder, go to the folder where the sound<br />
file is stored and copy it to the Sounds folder.<br />
deleting ring tones<br />
To delete a custom ring tone, perform the<br />
following:<br />
1 Scroll and highlight the sound you want to delete,<br />
then press the navigation key S right or left to<br />
delete.<br />
2 Press Menu > Delete Sounds.<br />
Note: When you delete a custom ring tone from your<br />
smartphone, you will have to download it again.<br />
46 customize
time & date<br />
Your system administrator usually sets the<br />
time and date on your smartphone. To change<br />
it manually:<br />
Find it: Press: Start > Settings > Clock & Alarm<br />
> Date and Time<br />
1 In Time Zone, use the navigation key S to<br />
select your time zone.<br />
Note: Update your time zone when you travel, to<br />
make sure your smartphone’s calendar events<br />
appear at the right time.<br />
2 In Date, edit the month, day, or year.<br />
3 In Time, edit the hour, minute, and second.<br />
Note: To change between AM/PM display, use the<br />
navigation key S to highlight the AM/PM and<br />
press the 2 key.<br />
4 Press Done to save the time and date settings.<br />
You can specify the time and date style by<br />
changing the regional settings. Press: Start<br />
> Settings > Regional Settings.<br />
phone<br />
active PTT group<br />
Find it: Press: Start > Settings > Phone > Active<br />
PTT Group.<br />
Your system administrator may affiliate<br />
(provision) you to call one or more talkgroups.<br />
However, you can receive and monitor calls<br />
from only one PTT group set as your active<br />
talkgroup.<br />
When you initiate a PTT group call to another<br />
talkgroup, that group automatically becomes<br />
your active talkgroup.<br />
To select your active PTT Group: Use the<br />
navigation key S to select a group and<br />
press: Done.<br />
customize<br />
47
auto answer<br />
Find it: Press: Start > Settings > Phone > Auto<br />
answer.<br />
Auto-answer allows your incoming calls to be<br />
answered automatically without a press of a<br />
key. This feature is operates only when using<br />
a hands-free device such as a headset.<br />
Auto-answer is not available when your<br />
smartphone is in silent mode.<br />
call forwarding<br />
Find it: Press: Start > Settings > Phone > Call<br />
Forwarding.<br />
Call forwarding sends your incoming calls to<br />
voicemail or a custom phone number you<br />
specify. You can set your smartphone to<br />
forward missed calls when your smartphone<br />
does not reply, busy, unavailable or always<br />
upon an incoming call (unconditionally).<br />
call options<br />
Find it: Press: Start > Settings > Phone > Call<br />
options.<br />
Any key answer: Answer an incoming call by<br />
pressing any dial key on the smartphone<br />
keypad.<br />
Voicemail number, Text messages service<br />
center, County code and Area code numbers<br />
are preset by your system administration. If<br />
not, you can manually enter the numbers<br />
obtained from your system administration.<br />
caller ID<br />
Find it: Press: Start > Settings > Phone > Caller<br />
ID.<br />
This option displays your phone number or<br />
name on the called party screen during the<br />
ringing signal. Your number or name may also<br />
show on the called party during the call or<br />
48 customize
logged as an incoming call when your call is<br />
not answered.<br />
channels<br />
Find it: Press: Start > Settings > Phone ><br />
Channels.<br />
This option allows to set a channel for Short<br />
Message Service (SMS) messages. This<br />
option is preset by your system<br />
administration. If not, you can manually enter<br />
the numbers obtained from your system<br />
administration.<br />
DTMF<br />
Find it: Press: Start > Settings > Phone > DTMF.<br />
Dual-tone multi-frequency (DTMF) is used for<br />
tone dialing and signaling telephone<br />
networks.<br />
Normally the duration of DTMF tones should<br />
be set to Long. Some networks and<br />
applications use Short tones.<br />
fixed dialing<br />
Find it: Press: Start > Settings > Phone > Fixed<br />
Dialing.<br />
A service feature allows you to restrict your<br />
outgoing calls and messages to selected<br />
phone number.<br />
display<br />
Set a photo or picture as a wallpaper<br />
(background) image or change your layout<br />
and color scheme on your home screen.<br />
customize<br />
49
Find it: Press: Start > Settings > Display<br />
options<br />
Home screen layout<br />
Color scheme<br />
Home screen image<br />
Time out<br />
System font size<br />
Select a layout for the<br />
home screen.<br />
Select a color<br />
scheme for the<br />
display.<br />
Select a picture for<br />
your wallpaper<br />
image, or Default for<br />
default wallpaper.<br />
Select the time<br />
interval before the<br />
display returns to the<br />
home screen, or<br />
Never.<br />
Change the font size<br />
for better readability<br />
change background image<br />
Want to copy an image from your PC to your<br />
smartphone to use as a background image?<br />
Note: Your PC must have<br />
Microsoft® Windows® Mobile Device Center (on a PC<br />
running Windows Vista) or you must install<br />
Microsoft ActiveSync on your PC.<br />
1 Connect the smartphone to your PC.<br />
2 On your PC, copy the image file you want. The file<br />
format must be: .gif, .jpg, or .bmp.<br />
3 In ActiveSync on your PC, select Explore and<br />
double-click My Windows® Mobile device.<br />
4 Double click My Documents, then double click<br />
My Pictures and paste the image into that folder.<br />
When you download a picture file for a<br />
wallpaper, it might not automatically save in<br />
the My Pictures folder. To move your picture<br />
file perform the following:<br />
50 customize
1 Press: Start > File Manager<br />
> My Documents.<br />
2 Highlight the picture file you want to copy to the My<br />
Pictures location, press: Menu > File > Copy to<br />
and press: My Documents > My Pictures.<br />
Note: If the picture file is not located in the<br />
My Documents folder, go to the folder where the<br />
picture file is stored and copy it to the<br />
My Pictures folder.<br />
backlight<br />
Your smartphone automatically adjusts the<br />
display brightness when you move between<br />
bright and dark environments. To save battery<br />
life, your display backlight turns off when you<br />
are not using your smartphone. The backlight<br />
turns back on when you press a key. To set<br />
how long your smartphone waits before the<br />
backlight turns off:<br />
Find it: Press: Start > Settings<br />
> Power Management.<br />
• Main battery: the remaining battery powers<br />
shown as bar.<br />
• Backlight time out on battery: Select the time<br />
that the display backlight stays on when you do<br />
not use the phone.<br />
• Backlight time out on AC: Select the time that<br />
the display backlight stays on while charging.<br />
• Display time out: select the time that the display<br />
stays on before the smartphone enters standby.<br />
During standby, very little power is being<br />
consumed.<br />
• Smart Backlight: enable to automatically<br />
increase the display illumination in daylight<br />
conditions.<br />
Press the Done when you are finished.<br />
customize<br />
51
answer options<br />
Use answer options to set any key to answer<br />
an incoming call.<br />
Find it: Press: Start > Settings > Phone<br />
> Call Options > Any key answer.<br />
third-party applications<br />
Third-party applications, or add-on programs,<br />
can include e-mail, security, mobile office, and<br />
productivity software. These products can<br />
typically be downloaded and installed<br />
immediately. Compatible commercial and free<br />
applications are available on the Internet. For<br />
more information, see the downloads catalog<br />
on the Motorola Support Web site at:<br />
www.hellomoto.com, or see your system<br />
administrator.<br />
Note: Applications written for previously released<br />
devices or older versions of Windows Mobile may not<br />
function reliably on this smartphone. Contact the<br />
application provider to check compatibility before<br />
installing the application on this smartphone.<br />
task manager<br />
To see what programs are running (active) on<br />
your smartphone or stop a specific program<br />
from running, use the Task Manager.<br />
Find it: On the home screen, press: Start<br />
> Accessories > Task Manager.<br />
Tip: Need to stop running a program? In Task<br />
Manager, select the program and press: End Task.<br />
You can completely remove a program from<br />
your smartphone.<br />
Find it: Press: Start > Settings > Remove<br />
Programs.<br />
52 customize
managing calls<br />
To make and answer calls, see page 37.<br />
turn off ringer<br />
You can use the up/down volume keys to turn<br />
off the ringer before answering the call.<br />
recent calls<br />
Your smartphone keeps a list of incoming and<br />
outgoing calls, even for calls that did not<br />
connect. The most recent calls are listed first.<br />
The oldest calls are deleted as new calls are<br />
added.<br />
Find it: Press: Start > Call History<br />
Highlight a call, then:<br />
• To call the number, press N.<br />
• To see call details (like time and date), press the<br />
center key s.<br />
• To see Menu Options, select Menu from the<br />
Call History view. This menu include the<br />
following options:<br />
options<br />
PTT Call Request<br />
Find Contact<br />
Send Text<br />
Message<br />
PTT call request to<br />
this phone number.<br />
Find this phone<br />
number in your<br />
Contacts.<br />
Send a text message<br />
to this phone number.<br />
managing calls<br />
53
options<br />
options<br />
E-mail<br />
Delete<br />
Delete List<br />
Save to Contacts<br />
Send an e-mail<br />
message to this<br />
contact (if you already<br />
have the contact’s<br />
e-mail address).<br />
Delete this call from<br />
the Call History.<br />
Delete all calls from<br />
the Call History.<br />
Save this number to a<br />
contact.<br />
Filter<br />
View Timers<br />
Filter by: Missed calls,<br />
Incoming calls,<br />
Outgoing calls.<br />
For example, When<br />
you filter the list for all<br />
Missed Calls, it will<br />
only show the<br />
incoming phone calls<br />
that you did not<br />
answer.<br />
View the call times of<br />
calls.<br />
54 managing calls
edial<br />
1 From the home screen, press N to see a list of<br />
recent calls.<br />
2 Highlight the entry you want to call, then press N<br />
or press the PTT button for a PTT call.<br />
When you hear a busy signal and you see<br />
Call Failed, Number Busy, press N to redial<br />
the number. When the call goes through, your<br />
smartphone rings or vibrates once, shows<br />
Redial Successful, and connects the call.<br />
view missed calls<br />
Your smartphone keeps a record of your<br />
unanswered calls.<br />
1 Press: Start > Call History.<br />
2 Press: Menu > Filter> Missed Calls.<br />
caller ID<br />
Calling line identification (caller ID) shows the<br />
name or phone number of the caller for an<br />
incoming call on your home screen.<br />
Your smartphone shows the caller’s name and<br />
picture when they are stored in your contacts<br />
or Incoming Only when caller ID information is<br />
not available.<br />
You can set your smartphone to play a<br />
distinctive ringer ID for specific entries stored<br />
in your contacts(See page 81).<br />
speed dial<br />
You can use speed dialing in two ways: quick<br />
access for up to 98 phone numbers and<br />
shortcuts to features found in the Start menu<br />
including email, calendar, and<br />
Bluetooth Manager.<br />
managing calls<br />
55
access speed dial entries<br />
To access speed dial entries, press and hold<br />
the single-digit speed dial number for one<br />
second. If the speed dial is two digits, press<br />
the first digit, then press and hold the second<br />
digit. The smartphone dials the phone<br />
number, opens a new email message, or goes<br />
to the Web page.<br />
To view a list of assigned speed dial numbers:<br />
press, Start > Speed dial.<br />
set speed dial numbers<br />
You can set the speed dial to call the entries in<br />
your smartphone’s contact list:<br />
1 Press: Contacts.<br />
2 Scroll to the desired contact and press the<br />
center key s.<br />
3 When few numbers are listed for the same contact,<br />
select the phone number for which to create the<br />
speed dial.<br />
4 Press: Menu > Add to Speed Dial.<br />
5 In the Keypad Assignment, select the speed dial<br />
number.<br />
Note: Speed dial 1 is reserved for calling your<br />
voicemail.<br />
6 Press Done.<br />
You can delete a speed dial entry.<br />
Find it: Press: Start > Speed dial, scroll to the entry,<br />
then press: Menu > Delete.<br />
set menu shortcuts to speed dial<br />
You can set a shortcut to open an application<br />
on your smartphone:<br />
1 Press Start.<br />
56 managing calls
2 Scroll to the icon of the application you want a<br />
shortcut for and press: Menu > Add Speed Dial.<br />
3 In the Keypad Assignment, select the shortcut<br />
number.<br />
4 Press Done.<br />
delete a shortcut.<br />
Find it: Press: Start > Speed Dial, scroll to the<br />
shortcut, then press: > Menu > Delete.<br />
Note: Your organization may add a Voicemail shortcut<br />
you cannot delete.<br />
voicemail<br />
Your network stores the voicemail messages<br />
you receive.<br />
When you receive a voicemail message, your<br />
smartphone shows the voicemail message<br />
indicator B.<br />
To check voicemail messages: Press and<br />
hold 1.<br />
Note: You can not store a pause (p) or wait (w)<br />
character in your voicemail number. When you want to<br />
store a voicemail number with these characters, create<br />
a contact for your voicemail number and use the contact<br />
to call your voicemail. Your organization may include<br />
additional information about using this feature.<br />
transfer a call<br />
During an active call:<br />
1 Press: Menu > Transfer to.<br />
2 Scroll to select the desired a contact, recent call or<br />
phone number and press the center key s. The<br />
smartphone displays “Would you like to speak to<br />
(contact number) before transferring the call?”.<br />
3 To speak to your contact before transferring the<br />
call, press Yes. For direct transfer press No.<br />
managing calls<br />
57
4 To complete the transfer after speaking to the<br />
contact, press: Transfer.<br />
5 Press Done.<br />
in-call notifications<br />
When you receive a message during a phone<br />
or PTT call, your smartphone notifies you with<br />
pop-up text on the display and a notification<br />
tone or vibration. You can access the<br />
message or dismiss the notification.<br />
When you dismiss the notification, the<br />
message is not deleted. Notification can be<br />
accessed through the main screen.<br />
Find it: press: Start > Settings > Phone > In-call<br />
Notifications.<br />
Use the check boxes to select the event of<br />
notification while you are on a phone or PTT<br />
call. Use the navigation key S to select a common<br />
alert sound level to all notifications.<br />
During an active call, a new notification<br />
appears as follows:<br />
• A pop-up notification is displayed on the screen.<br />
• A notification tune is played<br />
In-call notifications may include:<br />
• New Voicemail(s)<br />
• New Text Message<br />
• Missed PTT Call<br />
• PTT Call Request<br />
• Ended Phone/ PTT/ PTT group calls<br />
During an active call, you receive a pop-up<br />
notification of a Text Message:<br />
1 Scroll to the incoming notification and press the<br />
center key s.<br />
2 Press the back key or Done.<br />
58 managing calls
During an active call, you receive a PTT<br />
notification:<br />
1 Scroll to the incoming notification<br />
2 Press the center key s.<br />
3 Press the PTT button to answer (the active call is<br />
placed on hold).<br />
4 Press Resume to resume the call on hold.<br />
managing calls<br />
59
e-mail & messages<br />
To set up e-mail on your smartphone refer<br />
to your system administrator at your<br />
organization.<br />
receive & read messages<br />
When you receive a message your<br />
smartphone plays an alert and shows<br />
New Message with the message indicator<br />
on the home screen.<br />
Find it: On the home screen, press: Start<br />
> Messaging > (Outlook E-mail).<br />
If you do not see a list of messages, press:<br />
Menu > Folders > Inbox.<br />
To return to the folder list, press:<br />
Menu > Folders.<br />
To read a message: Press the<br />
navigation key S to scroll to the message<br />
and press the center key s to open it.<br />
When you have a message open, press the<br />
navigation key S right to open the next<br />
message, or left to open the previous<br />
message.<br />
message attachments<br />
When an e-mail has Microsoft® Word, Excel,<br />
or PowerPoint files attached, you can open<br />
and edit them using Documents To Go. You<br />
can also view .pdf file attachments, or<br />
extract.zip file attachments.<br />
Download the attachment, then select the file<br />
and follow the prompts to open it. When the<br />
60 e-mail & messages
document opens, you can move around the<br />
page using the navigation key S.<br />
• Excel spreadsheets: Select cells and enter<br />
numbers or text. Press Menu for the following<br />
options: save, cut, copy, paste, find, delete, etc.<br />
• PowerPoint slide shows: Press the left softkey<br />
to switch between notes, outline and slide<br />
views. Press Menu for the following options:<br />
save, cut, copy, paste, find, delete, etc.<br />
• Word documents: Type numbers or text into the<br />
document. Press Menu for the following options:<br />
save, cut, copy, paste, find, delete, etc.<br />
• PDF documents: Press the Zoom key to change<br />
the zoom level. Press the Menu key to save a<br />
copy of the file, switch pages or other functions.<br />
To transfer attachments to your computer for<br />
editing, use Microsoft® ActiveSync or<br />
Windows® Mobile Device Center.<br />
message options<br />
To delete, save, reply, or forward the<br />
messages, use these quick steps from the<br />
Inbox with a message selected or when<br />
viewing a message:<br />
• To delete, press Delete.<br />
• To reply, press: Menu > Reply or Reply All.<br />
Enter the message and press Send.<br />
• To forward, press: Menu > Reply > Forward.<br />
Enter the message and press Send.<br />
• To create a contact card for the sender, highlight<br />
the sender and press the<br />
center key s > Save.<br />
Tip: Need to check your e-mail right now? Press: Start<br />
> Messaging. Select the account to send and receive<br />
messages and press: Menu > Send/Receive. The<br />
smartphone connects to your Internet e-mail server and<br />
sends and receives your messages. To stop this<br />
process, press: Menu > Stop Send/Receive.<br />
e-mail & messages<br />
61
send a message<br />
You can send two types of messages: text<br />
messages or email messages.<br />
Find it: Press: Start > Messaging<br />
> Text Messages or (e-mail account)<br />
To send a message:<br />
1 Press: Menu > New.<br />
2 For e-mail, in To, Cc, and/or Bcc, enter e-mail<br />
addresses. Insert a semicolon (;) between multiple<br />
numbers or addresses.<br />
For text messages, enter the contact telephone<br />
number.<br />
Tip: You can quickly enter phone numbers or e-mail<br />
addresses from your contact cards. In To, press<br />
s and select a recipient from the list. Then select<br />
the recipient's phone number or e-mail address.<br />
3 Use the keypad to compose a message.<br />
4 Press Send.<br />
Tip: In an e-mail message, you can insert a<br />
picture, voice note or file in the message. On the<br />
message area, press: Menu > Insert > Picture or<br />
Voice Note or File.<br />
Note: If you select to insert a voice note into the<br />
message, you will also need to record it. Press Record<br />
and start speaking into the smartphone's microphone.<br />
When finished speaking, press Stop and then Done.<br />
To set the priority for an e-mail message,<br />
press: Menu > Message Options.<br />
To cancel a message, press: Menu<br />
> Cancel Message.<br />
global address look up<br />
From your smartphone, you can search the<br />
global address list (GAL) stored on your<br />
company's Exchange Server. This means that<br />
you can find a contact’s phone number or<br />
62 e-mail & messages
e-mail without having to store the information<br />
directly to your smartphone.<br />
Note: GAL information is an option enabled by your<br />
organization. When GAL is enabled, it can only be<br />
viewed during a data transfer session. The entire GAL<br />
cannot be stored for viewing offline.<br />
GAL Lookup can be found from Contacts and<br />
Company Directory. Company Directory is<br />
found in Messaging, Phone, Calendar and<br />
Speed Dial. Here is how to use GAL to search<br />
for a contact:<br />
1 Press: Start > Contacts.<br />
2 In the contact list, press: Menu<br />
> Company Directory.<br />
3 Enter search criteria and press Search.<br />
4 Scroll through the list of entries that appears. When<br />
you locate your contact, press N to make a call.<br />
Note: Although the entire GAL cannot be stored on<br />
your smartphone, once the contact is found, you can<br />
add the single contact to your contact list.<br />
Tip: You can also choose to send a message, SMS or<br />
e-mail to a contact found using GAL. In a new message<br />
or e-mail, press: Menu > Company Directory. When<br />
you locate the contact to send a message, highlight and<br />
select it. The e-mail information is populated into the<br />
To: field.<br />
e-mail & messages<br />
63
messaging quick reference<br />
Note: Some features might not work if you set up your<br />
e-mail account manually (without the e-mail setup<br />
wizard).<br />
features<br />
send text message<br />
Press: Start > Messaging > Menu ><br />
Text Messages, and press New<br />
features<br />
create and send e-mail<br />
Press: Start > Messaging > Menu<br />
(e-mail account), and press New<br />
To add a picture, voice note, or file to an<br />
e-mail message, open the message area<br />
and press: Menu > Insert<br />
> Picture, Voice Note, or File.<br />
Tip: You can save a draft of a message that you are<br />
composing to finish and send later. Press: Menu<br />
> Save to Drafts. A draft of the message is stored<br />
in the Drafts folder of the account you are in.<br />
64 e-mail & messages
features<br />
create and add an e-mail signature<br />
Press: Start > Messaging<br />
> (e-mail account), and press Menu > Tools<br />
> Options > Signatures<br />
Scroll to the account for which you are<br />
creating the signature.<br />
Select Use signature with this account.<br />
Select the Signature box, enter your<br />
signature, and press Done.<br />
Tip: To insert a signature in every message you send,<br />
select Include when replying and forwarding.<br />
Otherwise, a signature is inserted only in new<br />
messages.<br />
read new messages<br />
To quickly view new messages, select the<br />
message notification area on the home<br />
screen.<br />
features<br />
view attachment<br />
While viewing the message, use the<br />
center key s to select the attachment.<br />
Note: You can view attachments only for file types<br />
that are supported by the smartphone.<br />
read old messages<br />
Press: Start > Messaging > (e-mail account)<br />
Icons next to each message show if it is<br />
unread J, read H, urgent K, or has an<br />
attachment R.<br />
reply, reply all or forward messages<br />
From your Inbox or an open message,<br />
press: Menu > Reply, Reply All, or Forward<br />
e-mail & messages<br />
65
features<br />
download message objects<br />
When an e-mail message includes an<br />
attachment, open the message and the<br />
name of the attachment will appear<br />
highlighted. To download the attachment,<br />
select the highlighted attachment name.<br />
The attachment is downloaded the next<br />
time you synchronize or connect to your<br />
e-mail server.<br />
Note: When there are multiple attachments in the<br />
message, only the selected attachments are<br />
downloaded.<br />
insert a media object in an e-mail<br />
To add a picture, voice note, or file in an<br />
e-mail message in the composing message<br />
area press: Menu > Insert > Picture,<br />
Voice Note or File.<br />
features<br />
download complete e-mail messages<br />
Press: Start > Messaging<br />
> (e-mail account). Scroll to the message<br />
and press: Menu > Download Message.<br />
The complete message is retrieved the next<br />
time you synchronize or connect to your<br />
e-mail server and send and receive e-mail.<br />
66 e-mail & messages
features<br />
mark a folder for synchronization<br />
When you synchronize your e-mail account<br />
with your PC, the same Inbox folders that<br />
are in Outlook on your PC are created on<br />
your smartphone.<br />
Press: Start > Messaging<br />
> (e-mail account), and press: Menu<br />
> Folders > Menu > Show all Folders, and<br />
press: Menu > Manage Folders<br />
Highlight each folder you want to<br />
synchronize and press Sync.<br />
Once all folders have been selected, press<br />
Done. This opens the Manage Folders view,<br />
where the marked folders will be<br />
synchronized during the next sync session.<br />
Note: Only e-mail folders stored on the server are<br />
available for sync.<br />
features<br />
view status of sent e-mail<br />
Press: Start > Messaging > (e-mail account)<br />
Menu > Folders > Outbox.<br />
Messages in the Outbox have not been<br />
sent. To send a message, scroll to it and<br />
press: Menu > Send/Receive.<br />
receive e-mail or text message<br />
Your smartphone is set up to automatically<br />
check for new messages, your smartphone<br />
will show e when a new message arrives.<br />
Select the Programs tab and select the<br />
e-mail or text message application to open<br />
the inbox.<br />
delete e-mail<br />
From the Inbox or an open e-mail message,<br />
press: Menu > Delete.<br />
e-mail & messages<br />
67
features<br />
manually send and receive e-mail<br />
Press: Start > Messaging<br />
> (e-mail account), and press: Menu<br />
> Send/Receive.<br />
call a phone number in e-mail<br />
Highlight a phone number in a message<br />
and press N.<br />
move e-mail to personal folder<br />
After you are done reading the e-mail,<br />
press: Menu > Move > (folder).<br />
delete a mail account<br />
Press: Start > Messaging, scroll to the<br />
e-mail account and press: Menu > Delete.<br />
Note: You cannot delete your Text Messages,<br />
MMS, or Exchange server e-mail accounts.<br />
features<br />
empty deleted items folder<br />
Press: Start > Messaging<br />
> (e-mail account), press: Menu > Folders,<br />
scroll to Deleted items and press: Menu<br />
> Delete All.<br />
68 e-mail & messages
connections<br />
PTT & stereo headsets<br />
Use your Audio/PTT<br />
jack to plug in an<br />
optional hands-free<br />
PTT headset. For<br />
purchasing<br />
headsets, refer to<br />
“approved<br />
accessories” on<br />
page 11.<br />
Warning: When using a headset, you may not hear the<br />
surrounding sounds. Do not use a headset where it can<br />
endanger your safety.<br />
Bluetooth headset<br />
Your smartphone supports Bluetooth wireless<br />
pairing (also called linking or bonding). You<br />
can pair your smartphone with a<br />
Bluetooth headset to perform hands-free calls<br />
and playing audio.<br />
turn Bluetooth power on or off<br />
If Bluetooth Power is on, your smartphone can<br />
automatically pair with the handsfree device<br />
you have used before. Turn on the device or<br />
move it near the smartphone.<br />
To turn Bluetooth on perform the following:<br />
Press: Start > Settings > Connections ><br />
<strong>Wireless</strong> Manager, then check the Enable<br />
Bluetooth box.<br />
connections<br />
69
The Bluetooth indicator O appears in the<br />
home screen.<br />
Note: To extend battery life, use the previous procedure<br />
to turn off Bluetooth when not in use. Your smartphone<br />
will not pair with devices until you set Bluetooth power<br />
back on and pair your smartphone with the devices<br />
again.<br />
pair with a headset or handsfree<br />
device<br />
First time connection of Bluetooth headset.<br />
The headset must be charged prior to starting<br />
Bluetooth smartphone must be turned Off.<br />
To turn on Bluetooth: press Start > Settings ><br />
Connections > <strong>Wireless</strong> Manager and check<br />
the Enable Bluetooth box.<br />
From the Home screen, press: Start > All<br />
Programs > Bluetooth > Bluetooth Manager ><br />
Hands-free. Press Yes to turn on Bluetooth.<br />
Place the headset in pairing mode (Refer to<br />
the Bluetooth Pairing Instructions included<br />
with the headset.). When using Motorola<br />
headset, press and hold the Call button of the<br />
headset for 5 seconds. The indicator light<br />
turns on and remains steady. If the indicator<br />
light is flashing or does not remain steadily lit,<br />
turn off the headset and repeat this step.<br />
Press: Add. The smartphone prompts you to<br />
verify your device is ready.<br />
Press: Search.<br />
Select the headset from the list.<br />
When prompted, enter the device passkey<br />
provided with your headset (such as 0000)<br />
and press Accept.<br />
When your headset successfully pairs, the<br />
indicator light changes from steady to flashing<br />
blue.<br />
70 connections
After you have successfully paired your phone<br />
and headset, you do not need to repeat these<br />
steps. To pair the headset again, verify that<br />
your smartphone’s Bluetooth is enabled (See<br />
step 1.) and turn on the headset.<br />
Tip: For specific information about the Bluetooth device<br />
you are using with your smartphone, refer to the<br />
instructions that came with it.<br />
send objects to another device<br />
You can use Bluetooth pairing to send e-mail,<br />
contacts, tasks, calendar items, audio, ring<br />
tones, pictures, video, and voice notes from<br />
your smartphone to a computer or other<br />
device.<br />
1 Press: Start > Bluetooth > BT Send Object.<br />
2 Select the object type and object you want to send.<br />
Tip: To select an item, press the center key s.<br />
3 Press Send.<br />
4 Select the name of the device to send the file.<br />
5 To cancel sending an item, press: Menu<br />
> Cancel.<br />
advanced Bluetooth features<br />
features<br />
make smartphone visible to other device<br />
Allow a Bluetooth device to discover your<br />
smartphone:<br />
Press: Start > Bluetooth<br />
> Bluetooth Manager > Settings, and check<br />
Allow other Bluetooth devices to see this<br />
phone<br />
connect to recognized device<br />
Connect to a recognized handsfree device:<br />
Press: Start > Bluetooth<br />
> Bluetooth Manager > Hands-free<br />
> device name<br />
connections<br />
71
features<br />
drop pairing with device<br />
Press: Start > Bluetooth<br />
> Bluetooth Manager > Hands-free<br />
> device name > Disconnect<br />
send object to device<br />
Send an object to another device:<br />
Press: Start > Bluetooth > BT Send Object<br />
edit device properties / change device<br />
name<br />
Edit the properties of a recognized device:<br />
Press: Start > Bluetooth > > Bluetooth<br />
Manager > Hands-free > device name, then<br />
press: Menu > Properties > Nickname.<br />
Tip: To change the Bluetooth name of your<br />
smartphone, press: Start > Bluetooth<br />
> Bluetooth Manager > Settings and enter the<br />
name in My Bluetooth name.<br />
synchronize<br />
You can synchronize the information on your<br />
smartphone in two ways, over the air (OTA) or<br />
using a cable and your computer.<br />
sync over the air<br />
Once you enter your organization,<br />
smartphone sync’s over the air (OTA) directly<br />
with your company’s wireless network. The<br />
network compares your smartphone’s contact<br />
information, calendar appointments,<br />
messages, and media files to those on your<br />
computer and then updates to the most recent<br />
information.<br />
When update that does not happen, contact<br />
your system administrator to set up this<br />
synchronization.<br />
Note: When you are out of network coverage, and your<br />
smartphone tries to sync 3 times without finding a<br />
72 connections
network, you will receive a notification. For more<br />
information, select View Status. Synchronization will<br />
resume when there is network coverage.<br />
sync with a computer<br />
You can use Microsoft® ActiveSync<br />
version 4.5 or above, or Windows® Mobile<br />
Device Center to synchronize information<br />
between your smartphone and a computer. In<br />
addition to all the activities performed over the<br />
air, ActiveSync enables to view the content of<br />
your smartphone on your computer. You can<br />
move files between your computer and<br />
smartphone, download and install applications<br />
and service your smartphone.<br />
installing & setting up ActiveSync<br />
To synchronize information on your<br />
smartphone with a PC, you must use<br />
Windows® Mobile Device Center (on a PC<br />
running Windows Vista) or install<br />
Microsoft ActiveSync (on a PC running<br />
Windows XP or earlier).<br />
Note: Synchronization software is installed on your<br />
smartphone. Before installing the synchronization<br />
software, on your computer, verify that your computer<br />
and operating system meet the minimum<br />
requirements stated on the CD-ROM sleeve of the<br />
synchronization software or Microsoft Windows® Mobile<br />
Web site: http://www.microsoft.com/windowsmobile.<br />
This Web site also lets you download the latest<br />
software for ActiveSync.<br />
1 Install Microsoft ActiveSync (for Windows® XP or<br />
earlier) or Windows Mobile Device Center (for<br />
Windows Vista) on your PC.<br />
2 After setup completes, connect your smartphone to<br />
the PC. The smartphone drivers install on your<br />
computer and then the Sync Setup Wizard<br />
automatically starts.<br />
connections<br />
73
3 Follow the instructions on the screen to complete<br />
the wizard.<br />
The wizard prompts you for the Exchange Server’s<br />
name, your user name, your password, and the<br />
domain name. If you do not have this information,<br />
contact your system administrator.<br />
Note: For information about connections (Bluetooth,<br />
VPN, and Web browser), (See page 69).<br />
When you finish the wizard, ActiveSync starts<br />
to synchronize automatically with your<br />
smartphone.<br />
Note: Once synchronization completes, you can<br />
disconnect your smartphone from your PC, and restart<br />
your PC.<br />
sync with a cable connection<br />
Once Microsoft® ActiveSync or Windows®<br />
Mobile Device Center is installed on your PC,<br />
you can connect it to your smartphone and<br />
sync.<br />
74 connections<br />
1 Turn on the smartphone.<br />
2 Connect your smartphone to your PC using a USB<br />
cable.<br />
R<br />
Note: For more detailed information, see “Connecting a<br />
mobile device to a PC” in ActiveSync Help on your PC or<br />
the Microsoft Web Site for ActiveSync.<br />
sync with Bluetooth connection<br />
Once Microsoft® ActiveSync or<br />
Windows® Mobile Device Center is installed
on your PC, you can connect it to your<br />
smartphone and sync with a<br />
Bluetooth connection.<br />
Ensure that the smartphone and PC are within<br />
close range (within 30 feet). If this is the first<br />
time you have connected to this PC using<br />
Bluetooth wireless, you must complete the<br />
Bluetooth wizard on the smartphone and set<br />
up a Bluetooth partnership with the PC before<br />
synchronizing.<br />
Note: to use this feature, your PC must be equipped<br />
with Bluetooth wireless or a Bluetooth PC adaptor<br />
accessory.<br />
Follow the instructions in ActiveSync Help for<br />
configuring Bluetooth connections on your PC<br />
to support ActiveSync.<br />
1 Turn on the smartphone.<br />
2 On your smartphone, verify that Bluetooth wireless<br />
is turned on. Press: Start > Settings<br />
> Connections > <strong>Wireless</strong> Manager.<br />
3 Check the Enable Bluetooth box.<br />
4 Press: Done.<br />
5 Press: Start > ActiveSync.<br />
6 Select Menu > Connect via Bluetooth.<br />
7 Select Add.<br />
8 Press: Search.<br />
9 Press: Select to connect the headset.<br />
10 7. When prompted, enter the device passkey<br />
provided with your PC (such as 0000) and press<br />
Accept.<br />
11 When finished, Press: Start > Settings<br />
> Connections > <strong>Wireless</strong> Manager. Uncheck<br />
the Enable Bluetooth box to conserve battery<br />
power on your smartphone, turn off<br />
Bluetooth power.<br />
connections<br />
75
entertainment<br />
web browser<br />
Note: Web access is an option enabled by your<br />
organization.<br />
You can use the browser to search and view<br />
the Web.<br />
Find it: Press: Start > Internet Explorer - Your<br />
browser home page appears<br />
Address bar<br />
Press Zoom out to fit the<br />
content to the screen<br />
76 entertainment<br />
Press Menu to change<br />
browser settings and<br />
other options<br />
Note: Not all Web file formats are supported.<br />
• To go to a new web page, Enter the address in<br />
the address bar and press the center key s.<br />
• To go to a link in a Web page: use the<br />
navigation key S to highlight the link and then<br />
press the center key s.<br />
• To go back to the previous Web address: Press<br />
.<br />
• To change: open the new web page and press:<br />
Menu > Tools > Options > Home Page ><br />
Use Current.<br />
• To add a Web address to your Favorites: Menu<br />
> Favorites > Menu > Add Favorite.<br />
• To show/hide pictures: press: Menu > View<br />
> Show Pictures.
view stored pictures and video<br />
To view stored pictures in your smartphone,<br />
perform the following:<br />
1 Press: Start > Pictures & Videos.<br />
2 In the picture viewfinder press: Menu > Options<br />
3 The Options screen includes the following<br />
options:<br />
> Folders, and then select the folder that contains the<br />
stored videos.<br />
Note: General and Slideshow options are also<br />
available for video, however these settings are specific<br />
to picture files only.<br />
option<br />
General<br />
Slide<br />
Show<br />
Determine default picture sizes<br />
for e-mail and rotating picture<br />
settings.<br />
Select default slide show<br />
settings.<br />
Tip: To view videos located in a folder other than the<br />
default video folder, including a storage card, press:<br />
Start > Pictures & Videos, then press: Menu<br />
entertainment<br />
77
play a video clip<br />
Find it: Press: Start > Pictures & Videos > video clip<br />
> Play<br />
The video clip plays in the Windows Media<br />
Player.<br />
Note: For optimal playback, video files should have<br />
screen resolution of 320 x 240. Playing files with other<br />
resolution may hinder performance. Supported video<br />
formats are: H.263, GSM-AMR, AAC and WMV.<br />
Tip: To play video in<br />
full screen mode,<br />
press: Menu > Full<br />
Screen. Videos<br />
recorded in a low<br />
resolution may not<br />
play in full screen<br />
mode.<br />
If a call comes in while watching a video, the<br />
video pauses and a PTT Call Request<br />
appears. You can choose to answer the call or<br />
ignore it. To continue watching the movie,<br />
select the Play button.<br />
video playback options<br />
In the video playback window press: Menu<br />
> Options to open the Video Playback Menu.<br />
This menu can include the following options:<br />
option<br />
Playback<br />
Video<br />
Network<br />
Determines how the time counter<br />
appears, whether to pause<br />
playback while using another<br />
program, and whether to resume<br />
playback after a phone call.<br />
Options for showing in full screen<br />
and when to scale to fit window.<br />
Selects default network settings<br />
for streaming media.<br />
78 entertainment
option<br />
Library<br />
Skins<br />
Buttons<br />
Determines if the player starts on<br />
the Library view.<br />
Determine Windows® Media<br />
Player skin theme.<br />
Set playback button mapping.<br />
entertainment<br />
79
other features<br />
quick access key<br />
features<br />
programmable key<br />
Briefly press the<br />
programmable<br />
key to go back to<br />
your previous<br />
screen.<br />
Press and hold<br />
the key to set the<br />
earpiece volume.<br />
Programmable<br />
key<br />
John slle<br />
6095<br />
The programmable key is a future feature<br />
that will be used to access an application by<br />
a press of a button. For example, you set<br />
the key as a shortcut for viewing your call<br />
history, opening your web browser, etc.<br />
TTY calls<br />
features<br />
Set up your phone for use with an optional<br />
TTY device:<br />
Connect TTY device to the phone’s<br />
Headset Jack and press Start > Settings ><br />
Phone Accessibility > TTY<br />
Note: A teletypewriter (TTY) is a<br />
communication device used by people who<br />
are hard of hearing or have a speech<br />
impairment.<br />
advanced calling<br />
features<br />
call forwarding<br />
Set up or cancel call forwarding:<br />
Press: Start > Settings > Phone<br />
> Call Forwarding<br />
80 other features
features<br />
voice dial<br />
To voice dial, press<br />
and hold the<br />
Speaker/Voice<br />
recognition key a<br />
for two seconds.<br />
Speaker/Voice<br />
recognition key a<br />
When prompted, say<br />
“Call,” followed by a<br />
number or contact<br />
name. You may also<br />
say “Send text”<br />
followed by a contact name or number to<br />
send a text message or “Look up” and then<br />
the name or number in your contacts list<br />
that you want to look up.<br />
Use “Open” and then the name of a<br />
program you want to go to.<br />
Note: Not all main menu programs can be accessed<br />
using voice recognition.<br />
PTT Speaker<br />
On<br />
features<br />
call a phone number in a<br />
message<br />
E-mail or text messages can contain phone<br />
numbers that have an underline, like a Web<br />
site hyperlink. To dial one of these numbers,<br />
scroll to it and press N.<br />
contacts<br />
features<br />
search for contact<br />
Press: Start > Contacts > Menu, and scroll to<br />
View By > Name or Company.<br />
Enter the first few letters of the contact's<br />
name or company. The smartphone<br />
searches through the contact list and shows<br />
the name.<br />
other features<br />
81
features<br />
edit contact<br />
Press: Start > Contacts, scroll to a contact,<br />
then press: Menu > Edit<br />
set ringer ID for a contact<br />
To easily identify who is calling you by the<br />
ring tone, you can assign a custom ring tone<br />
to each contact.<br />
Press: Start > Contacts, scroll to a contact<br />
and press: Menu > Edit > Custom Ring Tone<br />
features<br />
set picture ID for contact<br />
Assign a photo or picture to appear when<br />
you receive a call from an entry:<br />
Press: Start > Contacts, scroll to a contact,<br />
and press: Menu > Edit > Picture and Select<br />
a picture.<br />
Tip: Want to remove a picture ID? Press: Start<br />
> Contacts, scroll to a contact, press: Menu > Edit,<br />
then press: Menu > Remove Picture<br />
set category for contact<br />
Press: Start > Contacts, scroll to a contact<br />
and press: Menu > Edit > Categories<br />
set category view<br />
Press: Start > Contacts and<br />
press: Menu > Filter<br />
82 other features
features<br />
send contact to another device<br />
Use a Bluetooth connection to send a<br />
contact to another smartphone, computer,<br />
or device:<br />
Press: Start > Contacts, scroll to a contact,<br />
and press: Menu > Send via Bluetooth<br />
When necessary, your smartphone asks<br />
you to turn on Bluetooth power. Your<br />
smartphone searches for<br />
Bluetooth devices. Select the one you want<br />
and press the center key s. Your<br />
smartphone tells you when the transfer is<br />
complete.<br />
For more about Bluetooth connections, see<br />
page 73.<br />
personalizing<br />
features<br />
language<br />
Set menu language:<br />
Press: Start > Settings > Regional Settings<br />
Note: You must turn your smartphone off and on<br />
again for the changes to take effect.<br />
Tip: While you enter text (such as in a text message),<br />
your smartphone suggests words. To change the<br />
language for these suggestions, press: Menu<br />
> Languages in the text entry screen to know your<br />
language options.<br />
other features<br />
83
features<br />
accessibility<br />
You can set system font size, multipress<br />
time-out, confirmation time-out, and PTT<br />
Call Requests:<br />
Press: Start > Settings > Accessibility and<br />
select an option.<br />
features<br />
ring volume<br />
Press: Start > Settings > Profiles<br />
Highlight the desired profile and press:<br />
Menu > Edit<br />
Under Ring Volume, press: the<br />
navigation key S left or right to adjust the<br />
volume for that profile.<br />
Tip: In the home screen, press and hold the Volume<br />
up/down key on the left side of the smartphone (See<br />
page 34) to show the ring volume, then press the<br />
Volume up/down keys to adjust it.<br />
Tip: To eliminate the ringer volume instantly when an<br />
incoming call comes in, press the volume up/down<br />
keys.<br />
84 other features
features<br />
sounds<br />
To change the default sounds for ring tone,<br />
reminders, new messages, alarm clock, or<br />
keypad controls:<br />
Press: Start > Settings > Sounds and<br />
select an option.<br />
Note: Changes made to the alert settings will have no<br />
effect when using the Silent profile.<br />
alarm<br />
You can set two personal alarms (Alarm 1<br />
and Alarm 2).<br />
Press: Start > Settings > Clock & Alarm<br />
>Alarm<br />
features<br />
owner information<br />
It is recommended to enter and check your<br />
owner information. It lets someone return<br />
the smartphone to you if you lose it:<br />
Press: Start > Settings > Owner Information<br />
You can also<br />
print a label<br />
with your<br />
name,<br />
department or<br />
smartphone ID<br />
and place it inside the Label ID Window<br />
located on the battery door.<br />
device name<br />
Your device uses this information to identify<br />
itself to other computers. Enter a name that<br />
starts with a letter and contains the<br />
characters: A-Z, 0-9 and _<br />
other features<br />
85
features<br />
master clear<br />
Master clear erases all information you<br />
have entered (including contacts and<br />
calendar events) and content you have<br />
downloaded (including photos and sounds)<br />
stored in your smartphone’s memory.<br />
Note: After you erase information, the erased<br />
information is unrecoverable.<br />
For master clear, perform the following:<br />
Press: Start > System Tools > Master Clear<br />
call times<br />
Network connection time is the elapsed time<br />
from the moment you connect to your service<br />
provider's network to the moment you end the<br />
call by pressing O. This time includes busy<br />
signals and ringing.<br />
The amount of network connection time you<br />
track on your resettable timer may not equal<br />
the amount of time for which you are billed by<br />
your service provider. For billing information,<br />
contact your service provider.<br />
features<br />
see call timers<br />
Show call timers:<br />
Press: Start > Call History, then press:<br />
Menu > View Timers<br />
reset call timers<br />
To reset all call timers to zero (0), except for<br />
the Lifetime calls timer:<br />
Press: Start > Call History, and<br />
press: Menu > View Timers, and<br />
press: Menu > Reset Timers<br />
86 other features
network connections<br />
features<br />
create proxy, Virtual Private Network<br />
(VPN), or dial-up network<br />
A Virtual Private Network allows you to<br />
connect securely to your enterprise through<br />
IPsec. This connection requires a policy<br />
definition from your system administration.<br />
Your system department can send you the<br />
policy in a file or give you the policy to enter<br />
manually. Once you receive the policy file or<br />
information perform the following:<br />
Press: Start > Virtual Private Network<br />
Select a policy to open a connection or<br />
enter a new policy definition:<br />
Press: Menu > New.<br />
To close the secure connection,<br />
press: Logoff.<br />
calendar<br />
features<br />
add new calendar event<br />
Press: Start > Calendar, and press:<br />
Menu > New Appointment<br />
Note: To schedule an all-day event, select the<br />
All day event check box under End time. All-day<br />
events do not occupy blocks of time in the calendar;<br />
instead, all-day events appear in banners at the top of<br />
the calendar.<br />
other features<br />
87
features<br />
view calendar event<br />
Press: Start > Calendar to open the<br />
calendar for today.<br />
• To see days before or after today, press the<br />
navigation key S left or right.<br />
• To quickly see a specific date, press:<br />
Menu > Go to Date.<br />
• To see your whole week’s events,<br />
press: Week view.<br />
Shortcut: Today’s events appear on your home<br />
screen. To see event details, scroll to it and press the<br />
center key s.<br />
features<br />
calendar event reminder<br />
The default reminder time for tasks and<br />
calendar items is 15 minutes. To change<br />
this default perform the following:<br />
Press: Start > Calendar, then press:<br />
Menu > Tools > Options > Set Reminders<br />
88 other features
features<br />
send calendar event to another device<br />
Use a Bluetooth connection to send a<br />
calendar event to another smartphone,<br />
computer, or device:<br />
Turn on Bluetooth: press Start > Settings ><br />
Connections > <strong>Wireless</strong> Manager and check<br />
the Enable Bluetooth box.<br />
From the calendar item, press: Menu<br />
> Send via Bluetooth.<br />
Select the device to which you want to send<br />
the item.<br />
For more about Bluetooth connections, see<br />
page 73.<br />
features<br />
respond to a meeting request<br />
You can receive and respond to meeting<br />
requests on your smartphone in a similar<br />
manner as you do in Outlook on your PC.<br />
Press: Start > Messaging > (Outlook E-mail)<br />
> meeting request<br />
Press: Accept or Menu > Decline or<br />
Tentative<br />
calculator<br />
features<br />
calculator<br />
Press: Start > Accessories > Calculator<br />
other features<br />
89
internet security<br />
features<br />
manage certificates<br />
Enable or disable Internet access<br />
certificates stored on your smartphone:<br />
Press: Start > Settings > Security<br />
> Certificates<br />
Certificates are used to verify the identity<br />
and security of Web sites when you<br />
download files or share information.<br />
smartphone information<br />
features<br />
software version<br />
To view your smartphone software version:<br />
Press: Start > Settings > Phone Information<br />
90 other features
smartphone administration data<br />
features<br />
phone information<br />
Your system administrator might ask you to<br />
access administration data on your phone<br />
for troubleshooting purposes.<br />
Find it: Press: Start > Settings > Phone<br />
Information<br />
wireless system configuration<br />
Your system administrator might ask you to<br />
access, set or configure your smartphone to<br />
connect with the wireless system of your<br />
organization.<br />
Find it: Press: Start > Settings > Connections.<br />
Warning: Your device may be restarted following this<br />
operation. Back-up data before continuing.<br />
features<br />
To configure the your smartphone to work<br />
with the wireless system of your<br />
organization:<br />
Press: Start > Settings > Connections ><br />
Domain Enroll.<br />
Note: To enroll you will need the enrolment password<br />
provided by your administrator.<br />
Your system administrator may provide you<br />
with following information: E-mail address,<br />
Server name, <strong>User</strong> Name, Password,<br />
Domain Name, Authentication type and<br />
Encryption type.<br />
Your system administrator may ask you to<br />
turn on/off the wireless radios in the<br />
smartphone:<br />
Press: Start > Settings > Connections ><br />
<strong>Wireless</strong> Manager.<br />
other features<br />
91
fun & games<br />
features<br />
access pictures<br />
Press: Start > Pictures & Videos<br />
access sounds<br />
Manage ring tones and music that you have<br />
downloaded or composed:<br />
Press: Start > Media Center<br />
For more information about Windows®<br />
Media, see Windows Mobile 6.1<br />
documentation.<br />
access video clips<br />
Press: Start > Media Center<br />
For more information about Windows®<br />
Media, see Windows Mobile 6.1<br />
documentation.<br />
features<br />
play games on your smartphone<br />
Press: Start > Games<br />
start Web browser<br />
Press: Start > Internet Explorer<br />
For more information about Internet<br />
Explorer Mobile, see page 85.<br />
download objects from Web page<br />
To download a picture, sound, or phone<br />
theme from a Web page: Highlight the file,<br />
press: the center key s, then press Save.<br />
manage media files<br />
To view, copy, delete, rename, or move files<br />
and folders on your smartphone or storage<br />
card:<br />
Press: Start > File Manager<br />
92 other features
troubleshooting<br />
Review the following problems and<br />
descriptions to assist in troubleshooting your<br />
smartphone.<br />
Problem<br />
The bars next to 6 do<br />
not show<br />
Solution<br />
• This sign shows when the smartphone turns on. Wait for 1 to 2 minutes, until<br />
the smartphone connects to the network and “Full Service” shows on the<br />
screen.<br />
• If you are out of the coverage area of your enterprise, the smartphone may<br />
not be able to communicate with the system properly. Restart your<br />
smartphone.<br />
troubleshooting<br />
93
The smartphone does<br />
not dial.<br />
Poor audio quality<br />
during a call<br />
• Make sure to press N after entering the phone number<br />
• Verify that the antenna indicator appears at the top of your home screen. The<br />
indicator shows that your smartphone is within the coverage area of your<br />
wireless network<br />
• Make sure that the phone radio of your smartphone is turned on - press:<br />
Start > Settings > Connections > <strong>Wireless</strong> Manager<br />
• Check the setting of your Call Barring option - press:<br />
Start > Settings > Phone > Call Barring<br />
• Adjust volume by pressing the Volume up/down keys<br />
• Verify that the signal strength indicator 0 shown on the display indicates<br />
proper signal strength (more bars indicate better signal).<br />
94 troubleshooting
Not enough memory to<br />
perform operation. The<br />
smartphone requires to<br />
delete memory.<br />
The smartphone does<br />
not turn on<br />
The battery operation<br />
time is shorter than<br />
expected<br />
The battery does not<br />
charge<br />
To view the remaining space in the smartphone memory.<br />
Press: Start > System tools > Memory Manager. Press: Menu > Clear<br />
Temporary files to free some memory. You can also clear all your<br />
history files if you press Menu > Clear Memory.<br />
If you want to clear the memory selectively, use ActiveSync to view<br />
the memory content of the smartphone on your desktop computer.<br />
Caution: the Clear Memory option deletes all your, Call History, Voice notes and<br />
Messages.<br />
• Charge the smartphone.<br />
• Remove the battery and then place it back again. PressO to turn on the<br />
smartphone. If the problem persists, contact your system administration.<br />
• The battery operation time depends on the way you use the smartphone.The<br />
operation time may reduce if the talk time is increased.<br />
• Batteries are subject to degradation and the standby time may become<br />
shorter as time passes. If standby time becomes shorter, replace your<br />
battery with a new charged battery.<br />
• Make sure that your charger is plugged to an active power outlet.<br />
troubleshooting<br />
95
service & repair<br />
Tip: Software updates are continuously downloaded<br />
during your daily work by your system administration.<br />
These updates are designed to make your smartphone<br />
performance and security better and update your<br />
smartphone with new software patches. However, if you<br />
encounter a problem, contact your system<br />
administration to make sure you have the latest<br />
available software updates.<br />
My smartphone number is:<br />
My system administration contact is:<br />
96 service & repair
Motorola Limited Warranty for the United States and<br />
Canada<br />
Commercial Warranty<br />
MOTOROLA COMMUNICATION PRODUCTS<br />
I. What This Warranty Covers And For How Long<br />
MOTOROLA INC. (“MOTOROLA”) warrants the MOTOROLA<br />
manufactured Communication Products listed below (“Product”)<br />
against defects in material and workmanship under normal use<br />
and service for a period of time from the date of purchase as<br />
scheduled below:<br />
smartphone - One (1) Year<br />
Product Accessories - One (1) Year<br />
Motorola, at its option, will at no charge either repair the Product<br />
(with new or reconditioned parts), replace it (with a new or<br />
reconditioned Product), or refund the purchase price of the Product<br />
during the warranty period provided it is returned in accordance<br />
with the terms of this warranty. Replaced parts or boards are<br />
warranted for the balance of the original applicable warranty<br />
period. All replaced parts of Product shall become the property of<br />
MOTOROLA.<br />
This express limited warranty is extended by MOTOROLA to the<br />
original end user purchaser only and is not assignable or<br />
transferable to any other party. This is the complete warranty for<br />
the Product manufactured by MOTOROLA. MOTOROLA assumes<br />
no obligations or liability for additions or modifications to this<br />
warranty unless made in writing and signed by an officer of<br />
MOTOROLA. Unless made in a separate agreement between<br />
MOTOROLA and the original end user purchaser, MOTOROLA does<br />
not warrant the installation, maintenance or service of the Product.<br />
MOTOROLA cannot be responsible in any way for any ancillary<br />
equipment not furnished by MOTOROLA which is attached to or<br />
used in connection with the Product, or for operation of the Product<br />
with any ancillary equipment, and all such equipment is expressly<br />
excluded from this warranty. Because each system which may use<br />
the Product is unique, MOTOROLA disclaims liability for range,<br />
coverage, or operation of the system as a whole under this<br />
warranty.<br />
service & repair<br />
97
II. General Provisions<br />
This warranty sets forth the full extent of MOTOROLA’s<br />
responsibilities regarding the Product. Repair, replacement or<br />
refund of the purchase price, at MOTOROLA’s option, is the<br />
exclusive remedy. THIS WARRANTY IS GIVEN IN LIEU OF ALL<br />
OTHER EXPRESS WARRANTIES. IMPLIED WARRANTIES,<br />
INCLUDING WITHOUT LIMITATION, IMPLIED WARRANTIES OF<br />
MERCHANTABILITY AND FITNESS FOR A PARTICULAR PURPOSE,<br />
ARE LIMITED TO THE DURATION OF THIS LIMITED WARRANTY. IN<br />
NO EVENT SHALL MOTOROLA BE LIABLE FOR DAMAGES IN<br />
EXCESS OF THE PURCHASE PRICE OF THE PRODUCT, FOR ANY<br />
LOSS OF USE, LOSS OF TIME, INCONVENIENCE, COMMERCIAL<br />
LOSS, LOST PROFITS OR SAVINGS OR OTHER INCIDENTAL,<br />
SPECIAL OR CONSEQUENTIAL DAMAGES ARISING OUT OF THE<br />
USE OR INABILITY TO USE SUCH PRODUCT, TO THE FULL EXTENT<br />
SUCH MAY BE DISCLAIMED BY LAW.<br />
III. State Law Rights<br />
SOME STATES DO NOT ALLOW THE EXCLUSION OR LIMITATION<br />
OF INCIDENTAL OR CONSEQUENTIAL DAMAGES OR LIMITATION<br />
ON HOW LONG AN IMPLIED WARRANTY LASTS, SO THE ABOVE<br />
LIMITATION OR EXCLUSIONS MAY NOT APPLY.<br />
This warranty gives specific legal rights, and there may be other<br />
rights which may vary from state to state.<br />
IV. How To Get Warranty Service<br />
You must provide proof of purchase (bearing the date of purchase<br />
and Product item serial number) in order to receive warranty<br />
service and, also, deliver or send the Product item, transportation<br />
and insurance prepaid, to an authorized warranty service location.<br />
Warranty service will be provided by Motorola through one of its<br />
authorized warranty service locations. If you first contact the<br />
company which sold you the Product, it can facilitate your<br />
obtaining warranty service. You can also call Motorola at<br />
1-888-567-7347 US/Canada.<br />
V. What This Warranty Does Not Cover<br />
A. Defects or damage resulting from use of the Product in other<br />
than its normal and customary manner.<br />
B. Defects or damage from misuse, accident, water, or neglect.<br />
C. Defects or damage from improper testing, operation,<br />
maintenance, installation, alteration, modification, or adjustment.<br />
D. Breakage or damage to antennas unless caused directly by<br />
defects in material workmanship.<br />
E. A Product subjected to unauthorized Product modifications,<br />
disassemblies or repairs (including, without limitation, the addition<br />
to the Product of non-Motorola supplied equipment) which<br />
adversely affect performance of the Product or interfere with<br />
Motorola's normal warranty inspection and testing of the Product<br />
to verify any warranty claim.<br />
F. Product which has had the serial number removed or made<br />
illegible.<br />
98 service & repair
G. Rechargeable batteries if:<br />
any of the seals on the battery enclosure of cells are broken or<br />
show evidence of tampering.<br />
the damage or defect is caused by charging or using the battery in<br />
equipment or service other than the Product for which it is<br />
specified.<br />
H. Freight costs to the repair depot.<br />
I. A Product which, due to illegal or unauthorized alteration of the<br />
software/firmware in the Product, does not function in accordance<br />
with MOTOROLA’s published specifications or the FCC type<br />
acceptance labeling in effect for the Product at the time the<br />
Product was initially distributed from MOTOROLA.<br />
J. Scratches or other cosmetic damage to Product surfaces that<br />
does not affect the operation of the Product.<br />
K. Normal and customary wear and tear.<br />
VI. Patent And Software Provisions<br />
MOTOROLA will defend, at its own expense, any suit brought<br />
against the end user purchaser to the extent that it is based on a<br />
claim that the Product or parts infringe a United States patent, and<br />
MOTOROLA will pay those costs and damages finally awarded<br />
against the end user purchaser in any such suit which are<br />
attributable to any such claim, but such defense and payments are<br />
conditioned on the following:<br />
A. that MOTOROLA will be notified promptly in writing by such<br />
purchaser of any notice of such claim;<br />
B. that MOTOROLA will have sole control of the defense of such<br />
suit and all negotiations for its settlement or compromise; and<br />
C. should the Product or parts become, or in MOTOROLA’s opinion<br />
be likely to become, the subject of a claim of infringement of a<br />
United States patent, that such purchaser will permit MOTOROLA,<br />
at its option and expense, either to procure for such purchaser the<br />
right to continue using the Product or parts or to replace or modify<br />
the same so that it becomes noninfringing or to grant such<br />
purchaser a credit for the Product or parts as depreciated and<br />
accept its return. The depreciation will be an equal amount per<br />
year over the lifetime of the Product or parts as established by<br />
MOTOROLA.<br />
MOTOROLA will have no liability with respect to any claim of<br />
patent infringement which is based upon the combination of the<br />
Product or parts furnished hereunder with software, apparatus or<br />
devices not furnished by MOTOROLA, nor will MOTOROLA have<br />
any liability for the use of ancillary equipment or software not<br />
furnished by MOTOROLA which is attached to or used in<br />
connection with the Product. The foregoing states the entire<br />
liability of MOTOROLA with respect to infringement of patents by<br />
the Product or any parts thereof.<br />
Laws in the United States and other countries preserve for<br />
MOTOROLA certain exclusive rights for copyrighted MOTOROLA<br />
software such as the exclusive rights to reproduce in copies and<br />
distribute copies of such Motorola software. MOTOROLA software<br />
service & repair<br />
99
may be used in only the Product in which the software was<br />
originally embodied and such software in such Product may not be<br />
replaced, copied, distributed, modified in any way, or used to<br />
produce any derivative thereof. No other use including, without<br />
limitation, alteration, modification, reproduction, distribution, or<br />
reverse engineering of such MOTOROLA software or exercise of<br />
rights in such MOTOROLA software is permitted. No license is<br />
granted by implication, estoppel or otherwise under MOTOROLA<br />
patent rights or copyrights.<br />
VII. Governing Law<br />
This Warranty is governed by the laws of the State of Illinois, USA.<br />
EPS – 48759 – O<br />
100 service & repair
Microsoft End <strong>User</strong> License Agreement<br />
Microsoft License<br />
You have acquired a device ("DEVICE") that includes software<br />
licensed by Motorola, Inc. ("Motorola") from one or more<br />
third-party licensors ("Licensor"), for use in connection with<br />
wireless network services provided under separate agreement<br />
between you and a wireless telecommunications provider ("Mobile<br />
Operator"). Those installed software products provided by Licensor,<br />
as well as associated media, printed materials, and "online" or<br />
electronic documentation ("SOFTWARE") are protected by<br />
international intellectual property laws and treaties. SOFTWARE<br />
includes software already installed on the DEVICE ("DEVICE<br />
Software") and Licensor software contained on any CD-ROM disk<br />
accompanying the DEVICE ("Desktop Software").<br />
The SOFTWARE is licensed, not sold. All rights reserved.<br />
IF YOU DO NOT AGREE TO THIS END USER LICENSE AGREEMENT<br />
("EULA"), DO NOT USE THE DEVICE OR COPY THE SOFTWARE.<br />
INSTEAD, PROMPTLY CONTACT MOTOROLA FOR INSTRUCTIONS<br />
ON RETURN OF THE UNUSED DEVICE(S) FOR A REFUND. ANY USE<br />
OF THE SOFTWARE, INCLUDING BUT NOT LIMITED TO USE ON<br />
THE DEVICE, WILL CONSTITUTE YOUR AGREEMENT TO THIS EULA<br />
(OR RATIFICATION OF ANY PREVIOUS CONSENT).<br />
1. GRANT OF SOFTWARE LICENSE. This EULA grants you the<br />
following license:<br />
1.1. DEVICE Software. You may use the DEVICE Software as<br />
installed on the DEVICE (including as installed on removable media<br />
installed in the DEVICE). All or certain portions of the DEVICE<br />
Software may be inoperable if a proper account is not established<br />
or maintained with an appropriate Mobile Operator, or if the<br />
Mobile Operator's network facilities are not operating or<br />
configured to operate with the DEVICE software.<br />
1.2. Desktop Software. If Desktop Software is included with your<br />
DEVICE, you may install and use the Desktop Software on one (1)<br />
or more computers to exchange information with one (1) or more<br />
computing devices that contain a compatible version of the DEVICE<br />
Software. For other software component(s) contained in the<br />
Desktop Software, you may install and use such components only<br />
in accordance with the terms of the printed or online end user<br />
license agreement(s) provided with such component(s). In the<br />
absence of an end user license agreement for particular<br />
component(s) of the Desktop Software, you may install and use<br />
only one (1) copy of such component(s) on the DEVICE or a single<br />
computer with which you use the DEVICE.<br />
1.3. Back-up Copy. If Motorola has not included a back-up copy of<br />
the DEVICE Software with the DEVICE, you may make a single<br />
back-up copy of the DEVICE Software. You may use the back-up<br />
copy solely for archival purposes.<br />
service & repair<br />
101
1.4. Microsoft Windows® 2003. If Microsoft Outlook® 2002 is<br />
included with your Device, the following terms apply to your use of<br />
Microsoft Outlook® 2002: (i) regardless of the information<br />
contained in "Software Installation and Use" section of the online<br />
EULA you may install one (1) copy of Microsoft Outlook® 2002 on<br />
one (1) computer to use, exchange data, share data, access and<br />
interact with the DEVICE, and (ii) the EULA for Microsoft Outlook®<br />
2002 is between Motorola and the end user - not between the PC<br />
manufacturer and end user.<br />
2. Speech/Handwriting Recognition. If the Software includes<br />
speech and or handwriting recognition component(s), you should<br />
understand that speech and handwriting recognition are inherently<br />
statistical processes; that recognition errors are inherent in the<br />
processes; that it is your responsibility to provide for handling such<br />
errors and to monitor the recognition processes and correct any<br />
errors. Motorola, its affiliates, subsidiaries, or suppliers shall not<br />
be liable for any damages arising out of errors in the speech and<br />
handwriting recognition processes.<br />
3. Limitations on Reverse Engineering, Decompilation and<br />
Disassembly. You may not reverse engineer, decompile, or<br />
disassemble the SOFTWARE, except and only to the extent that<br />
such activity is expressly permitted by applicable law<br />
notwithstanding this limitation.<br />
4. Single DEVICE. The Device Software is licensed with the DEVICE<br />
as a single integrated product. The DEVICE Software may only be<br />
used as part of the DEVICE, notwithstanding any installation of the<br />
DEVICE Software on removable media.<br />
5. Single EULA. The package for the DEVICE may contain multiple<br />
versions of this EULA, such as multiple translations and/or<br />
multiple media versions (e.g., in the user documentation and in the<br />
software). Even if you receive multiple versions of the EULA, you<br />
are licensed to use only one (1) copy of the DEVICE Software.<br />
6. Rental. You may not rent or lease the SOFTWARE.<br />
7. Software Transfer. You may not permanently transfer any of your<br />
rights under this EULA with regard to the DEVICE Software or<br />
Desktop Software, except as permitted by the applicable Mobile<br />
Operator. In the event that the Mobile Operator permits such<br />
transfer, you may permanently transfer all of your rights under this<br />
EULA only as part of a sale or transfer of the DEVICE, provided you<br />
retain no copies, you transfer all of the SOFTWARE (including all<br />
component parts, the media and printed materials, any upgrades<br />
or backup copies, this EULA and, if applicable, the Certificate(s) of<br />
Authenticity), and the recipient agrees to the terms of this EULA. If<br />
the Software is an upgrade, any transfer must include all prior<br />
versions of the SOFTWARE.<br />
8. Termination. Without prejudice to any other rights, Motorola,<br />
Licensor and their affiliates and subsidiaries may terminate this<br />
EULA if you fail to comply with the terms and conditions of this<br />
EULA. In such event, you must destroy all copies of the SOFTWARE<br />
and all of its component parts.<br />
9. Security Updates. The SOFTWARE may include digital rights<br />
management technology. If SOFTWARE does contain digital rights<br />
management technology, content providers are using the digital<br />
rights management technology ("Licensor DRM") contained in the<br />
102 service & repair
SOFTWARE to protect the integrity of their content ("Secure<br />
Content") so that their intellectual property, including copyright, in<br />
such content is not misappropriated. Owners of such Secure<br />
Content ("Secure Content Owners") may, from time to time, request<br />
Licensor, or its subsidiaries or affiliates to provide security related<br />
updates to the Licensor DRM components of the SOFTWARE<br />
("Security Updates") that may affect your ability to copy, display<br />
and/or play Secure Content through Licensor software or third<br />
party applications that utilize Licesnor DRM. You therefore agree<br />
that, if you elect to download a license from the Internet which<br />
enables your use of Secure Content, Licensor, its subsidiaries or<br />
affiliates may, in conjunction with such license, also download<br />
onto your DEVICE such Security Updates that a Secure Content<br />
Owner has requested that Licensor, its subsidiaries or affiliates, to<br />
distribute. Licensor, its subsidiaries or affiliates will not retrieve<br />
any personally identifiable information, or any other information,<br />
from your DEVICE by downloading such Security Updates.<br />
10. Consent to Use of Data. You agree that Licensor, its<br />
subsidiaries and affiliates may collect and use technical<br />
information gathered in any manner as part of product support<br />
services related to the SOFTWARE.. Licensor, its subsidiaries and<br />
affiliates may use this information solely to improve their products<br />
or to provide customized services or technologies to you. Licensor,<br />
its affiliates and subsidiaries may disclose this information to<br />
others, but not in a form that personally identifies you.<br />
11. Internet Gaming/Update Features. If the SOFTWARE provides,<br />
and you choose to utilize, the Internet gaming or update features<br />
within the SOFTWARE, it is necessary to use certain computer<br />
system, hardware, and software information to implement the<br />
features. By using these features, you explicitly authorize Licensor,<br />
its subsidiaries and affiliates, and/or their designated agent to use<br />
this information solely to improve their products or to provide<br />
customized services or technologies to you. Licensor, its<br />
subsidiaries and affiliates may disclose this information to others,<br />
but not in a form that personally identifies you.<br />
12. Internet-Based Services Components. The SOFTWARE may<br />
contain components that enable and facilitate the use of certain<br />
Internet-based services. You acknowledge and agree that Licensor,<br />
its affiliates and subsidiaries may automatically check the version<br />
of the SOFTWARE and/or its components that you are utilizing and<br />
my provide upgrades or supplements to the SOFTWARE that may<br />
be automatically downloaded to your Device.<br />
13. Links to Third Party Sites. The SOFTWARE may provide you<br />
with the ability to link to third party sites through the use of the<br />
SOFTWARE. The third party sites are NOT under the control of<br />
Motorola, Licensor, or their affiliates or subsidiaries. Neither<br />
Motorola, Licensor, nor their affiliates or subsidiaries are<br />
responsible for (i) the contents of any third party sites, any links<br />
contained in third sites, or any changes or updates to third party<br />
sites, or (ii) webcasting or any other form of transmission received<br />
from any third party sites. If the SOFTWARE provides links to third<br />
party sites, those links are provided to you only as a convenience,<br />
and the inclusion of any link does not imply an endorsement of the<br />
third party site by Motorola, Licensor, or their affiliates or<br />
subsidiaries.<br />
service & repair<br />
103
14. Additional Software/Services. The SOFTWARE may permit<br />
Motorola, Licensor, their affiliates or subsidiaries to provide or<br />
make available to you SOFTWARE updates, supplements, add-on<br />
components, or Internet-based services components of the<br />
SOFTWARE after the date you obtain your initial copy of the<br />
SOFTWARE ("Supplemental Components").<br />
14.1. If Motorola, or its subsidiaries or affiliates, provides or<br />
makes available to you Supplemental Components and no other<br />
EULA terms are provided along with the Supplemental<br />
Components, then the terms of this EULA shall apply.<br />
14.2. If Licensor, or its affiliates or subsidiaries, make available<br />
Supplemental Components, and no other EULA terms are provided,<br />
then the terms of this EULA shall apply, except that the Licensor, or<br />
its affiliates or subsidiaries providing the Supplemental<br />
Component(s) shall be the licensor of the Supplemental<br />
Component(s).<br />
14.3. Motorola, Licensor, and their affiliates and subsidiaries<br />
reserve the right to discontinue any Internet-based services<br />
provided to you or made available to you through the use of the<br />
SOFTWARE.<br />
15. UPGRADES AND RECOVERY MEDIA.<br />
15.1. DEVICE Software. If the DEVICE Software is provided by<br />
Motorola, its subsidiaries or affiliates, separate from the DEVICE<br />
on media such as a ROM chip, CD ROM disk(s) or via web<br />
download or other means, and is labeled "For Upgrade Purposes<br />
Only" or "For Recovery Purposes Only", you may install one copy of<br />
such DEVICE Software on the DEVICE as a replacement copy for<br />
104 service & repair<br />
the existing DEVICE Software and use it in accordance with the<br />
Grant of Software License section of this EULA.<br />
15.2. Desktop Software. If any Desktop Software component(s) is<br />
provided by Motorola, its subsidiaries or affiliates, separate from<br />
the DEVICE on CD ROM disk(s) or via web download or other<br />
means, and labeled "For Upgrade Purposes Only" or "For Recovery<br />
Purposes Only", you may (i) install and use one copy of such<br />
component(s) on the computer(s) you use to exchange data with<br />
the DEVICE as a replacement copy for the existing Desktop<br />
Software component(s).<br />
16. COPYRIGHT. All title and intellectual property rights in and to<br />
the SOFTWARE (including but not limited to any images,<br />
photographs, animations, video, audio, music, text and "applets",<br />
incorporated into the SOFTWARE), the accompanying printed<br />
materials, and any copies of the SOFTWARE, are owned by<br />
Motorola, Licensor, and/or their affiliates, subsidiaries, or<br />
suppliers. You may not copy the printed materials accompanying<br />
the SOFTWARE. All title and intellectual property rights in and to<br />
the content which may be accessed through use of the SOFTWARE<br />
is the property of the respective content owner and may be<br />
protected by applicable copyright or other intellectual property<br />
laws and treaties. This EULA grants you no rights to use such<br />
content. All rights not specifically granted under this EULA are<br />
reserved by Motorola, Licensor, their affiliates, subsidiaries, and<br />
suppliers.<br />
17. EXPORT RESTRICTIONS. You acknowledge that SOFTWARE is<br />
subject to U.S. export jurisdiction. You agree to comply with all<br />
applicable international and national laws that apply to the
SOFTWARE, including the U.S. Export Administration Regulations,<br />
as well as end-user, end-use and destination restrictions issued by<br />
U.S. and other governments.<br />
18. PRODUCT SUPPORT. Product support for the SOFTWARE is NOT<br />
provided by Licensor, its parent corporation, or their affiliates or<br />
subsidiaries.<br />
19. NO LIABILITY FOR CERTAIN DAMAGES. EXCEPT AS<br />
PROHIBITED BY LAW, MOTOROLA, LICENSOR, AND THEIR<br />
AFFILIATES AND SUBSIDIARIES, SHALL HAVE NO LIABILITY FOR<br />
ANY INDIRECT, SPECIAL, CONSEQUENTIAL OR INCIDENTAL<br />
DAMAGES ARISING FROM OR IN CONNECTION WITH THE USE<br />
OR PERFORMANCE OF THE SOFTWARE. THIS LIMITATION SHALL<br />
APPLY EVEN IF ANY REMEDY FAILS OF ITS ESSENTIAL PURPOSE.<br />
20. FOR APPLICABLE LIMITED WARRANTIES AND SPECIAL<br />
PROVISIONS PERTAINING TO YOUR PARTICULAR JURISDICTION,<br />
PLEASE REFER TO YOUR WARRANTY BOOKLET INCLUDED WITH<br />
THIS PACKAGE OR PROVIDED WITH THE SOFTWARE PRINTED<br />
MATERIALS.<br />
service & repair<br />
105
106 service & repair
specifications<br />
Product Features<br />
Physical Characteristics<br />
Size:<br />
Weight:<br />
Display:<br />
Backlight<br />
<strong>EWP</strong><strong>1000</strong>: 120mm (L) x 52mm (W) x 17.2mm (D)<br />
<strong>EWP</strong>1100: 120mm (L) x 52mm (W) x 19.5mm (D)<br />
<strong>EWP</strong>2000: 120.5mm (L) x 54mm (W) x 18.7mm (D)<br />
<strong>EWP</strong>2100: 120.5mm (L) x 54mm (W) x 20.6mm (D)<br />
<strong>EWP</strong><strong>1000</strong>: 145gr<br />
<strong>EWP</strong>1100: 155gr<br />
<strong>EWP</strong>2000: 152gr<br />
<strong>EWP</strong>2100: 162gr<br />
2.0" Transmissive + Micro-reflective (TMR) 256K colors, 320 W x 240 L (QVGA size) with backlight<br />
brightness control (light sensor).<br />
White LED backlight<br />
specifications<br />
107
Main Battery<br />
Expansion Slot<br />
Notification<br />
Keypad<br />
Audio<br />
Rechargeable Lithium Ion.<br />
Standard Battery: 1480 mAh<br />
Ext. Cap. Battery: 1780 mAh<br />
<strong>User</strong> accessible micro SD SDIO slot.<br />
Vibrator<br />
Alpha Numeric<br />
High Audio Speaker, receiver, microphone, 2.5mm stereo headset jack w/PTT.<br />
108 specifications
Environmental<br />
Operational temperature: 14°F to 122°F (-10°C to +50°C)<br />
Storage temperature:<br />
Charging temperature:<br />
-40°F to 185°F (-40°C to +85°C)<br />
32°F to 104°F (0°C to +40°C)<br />
Performance<br />
CPU:<br />
TI OMAP TM 325 MHz processor<br />
Operating System: Microsoft® Windows TM Mobile 6.1<br />
Memory:<br />
128MB SDRAM/256MB Flash<br />
Interfaces<br />
Connectors:<br />
USB 2.0, Headset Audio Jack<br />
<strong>Wireless</strong> LAN Data and Voice <strong>Communications</strong><br />
Transmitters:<br />
Wi-Fi 802.11a/b/g and Bluetooth<br />
Bands: Bluetooth and 802.11b/g: 2.4000 - 2.4835<br />
802.11a: 5.15 - 5.25 GHz , 5.25 - 5.35 GHz 5.47 - 5.725 GHz, 5.725 - 5.825 GHz<br />
specifications<br />
109
Max Data Rate:<br />
Antenna Type:<br />
WLAN Radio:<br />
Operating Channels:<br />
Security:<br />
Bluetooth - 3 Mbps, 11a/b/g - 54 Mbps<br />
Two Omni-directional antennas, Bluetooth and Wi-Fi<br />
Tri-mode IEEE® 802.11a/b/g Data Rates 1, 2, 5.5, 6, 9, 11, 12, 18, 24, 36, 48, and 54 Mbps<br />
USA and Canada: Channels 1-11 (2412-2462 MHz), EU: Channels 1-13 (2412-2472MHz).<br />
Actual operating channels/frequencies depend on regulatory rules and certification agency.<br />
WPA, WPA2, EAP-TLS / 802.1x authentication.<br />
Voice Features<br />
Voice<br />
Languages supported:<br />
Integrated Voice-over-IP (P2P, PBX, Communication: PTT), Wi-Fi-certified, IEEE 802.11a/b/g direct<br />
sequence wireless LAN<br />
US English, French Canadian, Spanish<br />
110 specifications
index<br />
A<br />
access 92<br />
accessibility 84<br />
accessories 86<br />
ActiveSync 73<br />
alarm 85<br />
alert<br />
set 45<br />
turn off 53, 76<br />
animation 91, 92<br />
answer a call 38, 52<br />
attachments 65<br />
auto-lock<br />
phone 35<br />
B<br />
background 49<br />
backlight 51<br />
battery 21, 23<br />
extending battery life 24<br />
battery life, extending 51, 70<br />
Bluetooth connection 83, 89<br />
Bluetooth wireless 69<br />
bonding (See Bluetooth<br />
wireless)<br />
browser 92<br />
disconnect 92<br />
C<br />
calculator 89<br />
calendar 87, 88<br />
call<br />
answer 38, 52<br />
forwarding 80<br />
make 37<br />
call timers 86<br />
caller ID 55, 82<br />
cancel message 62<br />
car kit 86<br />
certificate management 90<br />
codes 35<br />
conference calls 44<br />
contacts 55, 81<br />
copy files 71<br />
D<br />
delete program 52<br />
dial a phone number 37<br />
dialed calls 53<br />
display 27, 51<br />
download e-mail messages 66<br />
index 1
download message objects 66<br />
E<br />
e-mail 60, 64, 65<br />
attachment 65<br />
signature 65<br />
F<br />
file manager 92<br />
forward 65<br />
forward calls 80<br />
G<br />
games 92<br />
global access look up 62<br />
H<br />
handsfree 86<br />
handsfree speaker 34<br />
headset 86<br />
2 index<br />
home screen 27, 49<br />
hyperlink<br />
phone number 81<br />
I<br />
ID label window 21<br />
Incoming Call message 55<br />
ISP 64<br />
L<br />
language 83<br />
linking (See Bluetooth wireless)<br />
lock<br />
phone 35<br />
M<br />
make a call 37<br />
make call 81<br />
manage files 92<br />
master clear 86<br />
media player 85<br />
menu icons 28<br />
menu indicator 28<br />
menu shortcuts 56<br />
message 64, 65<br />
message indicator 30<br />
message reminders 85<br />
messages 60, 64<br />
e-mail 60<br />
text 60<br />
missed call 55<br />
Missed Calls message 55<br />
multimedia message 60, 65<br />
music 92<br />
N<br />
network settings 87<br />
O<br />
object exchange 71<br />
open
program 29<br />
open program 29<br />
over the air (OTA) 72<br />
owner information 85, 86<br />
P<br />
pairing (See Bluetooth wireless)<br />
personalize 83<br />
phone 35<br />
phone number 43<br />
photo 91, 92<br />
picture 91, 92<br />
picture ID 55, 82<br />
power key 27<br />
priority 62<br />
profile 45<br />
program<br />
open 29<br />
R<br />
received calls 53<br />
recent calls 53<br />
redial 55<br />
reminders 85<br />
remove program 52<br />
reply 65<br />
return a call 55<br />
ring style, setting 45<br />
ring tone 92<br />
ringer ID 55, 82<br />
ringer volume 84<br />
S<br />
safety information 13<br />
security<br />
lock 35<br />
send and receive messages 60<br />
send key 37<br />
shortcuts 56<br />
signature 65<br />
SIM card 26<br />
soft keys 28<br />
sounds 85, 92<br />
speakerphone 86<br />
speed dial 55<br />
Start menu 29<br />
store your number 43<br />
sync (cable) 74<br />
synch (Bluetooth) 74<br />
synchronize 72<br />
synchronizing with computer<br />
73<br />
T<br />
task manager 52<br />
text entry 31<br />
text message 64, 65<br />
third party applications 52<br />
three way calling 44<br />
timers 54, 86<br />
turn on/off 27<br />
index 3
U<br />
unlock<br />
phone 35<br />
unlock code 35<br />
Y<br />
your phone number 43<br />
V<br />
video 92<br />
video clips 92<br />
voicemail 57<br />
voicemail message indicator 57<br />
volume 34, 84<br />
W<br />
wallpaper 49<br />
warranty 97<br />
web 92<br />
phone number 81<br />
web browser 92<br />
disconnet 92<br />
web page 92<br />
4 index
General Information<br />
To obtain additional information, contact<br />
Motorola at:<br />
North America:1-800-653-5350<br />
International: +1-631-738-6213<br />
http://www.motorola.com/<br />
Motorola’s Enterprise Mobility Support Center<br />
If you have a problem with your equipment,<br />
contact Enterprise Mobility support for your<br />
region. Contact information is available by<br />
visiting<br />
http://www.motorola.com/customersupport<br />
and after selecting your region, click on the<br />
appropriate link under Support for Business.<br />
When contacting Enterprise Mobility support,<br />
please provide the following information:<br />
• Serial number of the unit<br />
• Model number or product name<br />
• Software type and version number<br />
Motorola responds to calls by email,<br />
telephone or fax within the time limits set forth<br />
in support agreements. If you purchased your<br />
Enterprise Mobility business product from a<br />
Motorola business partner, contact that<br />
business partner for support.<br />
Customer Support Web Site<br />
Motorola's Support Central Web site,<br />
accessed via the Symbol-branded products<br />
link under Support for Business, provides<br />
information and online assistance including<br />
developer tools, software downloads, product<br />
manuals and online repair requests.<br />
MOTOROLA and the Stylized M Logo are<br />
registered in the US Patent & Trademark Office. All<br />
other product or service names are the property of<br />
their respective owners. Windows, Windows Mobile<br />
and the Windows Flag logo are trademarks or<br />
registered trademarks of Microsoft Corporation in<br />
the United States and/or other countries.<br />
© Motorola, Inc. 2009.