GENERATOR

Create successful ePaper yourself
Turn your PDF publications into a flip-book with our unique Google optimized e-Paper software.
Portable Generator Familiarization & Troubleshooting Guide<br />
Section 4 • Generator Assemblies<br />
• Continue tapping all the flanges on the housing until it<br />
comes free from the engine adapter.<br />
• Carefully remove the stator housing.<br />
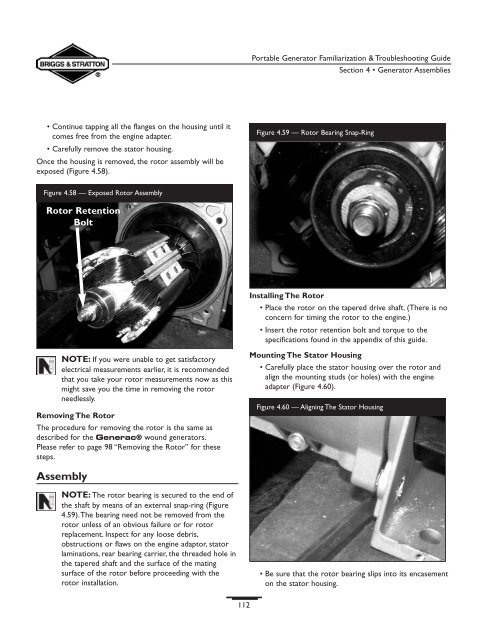
Once the housing is removed, the rotor assembly will be<br />
exposed (Figure 4.58).<br />
Figure 4.59 — Rotor Bearing Snap-Ring<br />
Figure 4.58 — Exposed Rotor Assembly<br />
Rotor Retention<br />
Bolt<br />
Installing The Rotor<br />
• Place the rotor on the tapered drive shaft. (There is no<br />
concern for timing the rotor to the engine.)<br />
• Insert the rotor retention bolt and torque to the<br />
specifications found in the appendix of this guide.<br />
NOTE: If you were unable to get satisfactory<br />
electrical measurements earlier, it is recommended<br />
that you take your rotor measurements now as this<br />
might save you the time in removing the rotor<br />
needlessly.<br />
Removing The Rotor<br />
The procedure for removing the rotor is the same as<br />
described for the Generac® wound generators.<br />
Please refer to page 98 “Removing the Rotor” for these<br />
steps.<br />
Mounting The Stator Housing<br />
• Carefully place the stator housing over the rotor and<br />
align the mounting studs (or holes) with the engine<br />
adapter (Figure 4.60).<br />
Figure 4.60 — Aligning The Stator Housing<br />
Assembly<br />
NOTE: The rotor bearing is secured to the end of<br />
the shaft by means of an external snap-ring (Figure<br />
4.59).The bearing need not be removed from the<br />
rotor unless of an obvious failure or for rotor<br />
replacement. Inspect for any loose debris,<br />
obstructions or flaws on the engine adaptor, stator<br />
laminations, rear bearing carrier, the threaded hole in<br />
the tapered shaft and the surface of the mating<br />
surface of the rotor before proceeding with the<br />
rotor installation.<br />
• Be sure that the rotor bearing slips into its encasement<br />
on the stator housing.<br />
112